Index a Local Moonbeam Development Node with SQD (formerly Subsquid)
by Erin Shaben and Kevin Neilson
Introduction
When developing a dApp, it's beneficial to develop smart contracts using a local development environment as opposed to a live network, such as a TestNet or MainNet. Local development removes some of the hassles involved with developing on a live network, like having to fund development accounts and waiting for blocks to be produced. On Moonbeam, developers can spin up their own local Moonbeam development node to quickly and easily build and test applications.
But what about dApps that rely on indexers to index blockchain data? How can developers of these applications streamline the development process? Thanks to SQD, a data network for retrieving data from 100+ chains, it is now possible to index blocks in a local development environment, such as your Moonbeam development node!
This tutorial will walk you through the process of indexing data on a local Moonbeam development node using SQD. We'll create an ERC-20 contract and use SQD to index transfers of our ERC-20.
Check Prerequisites
To follow along with this tutorial, you'll need to have:
- Docker installed
- Docker Compose installed
- An empty Hardhat project. For step-by-step instructions, please refer to the Creating a Hardhat Project section of our Hardhat documentation page
- An ERC-20 token deployed to your local development node, unless you plan on indexing Moonbase Alpha and using an existing ERC-20
We'll configure our Hardhat project and create our SQD project later on in the tutorial.
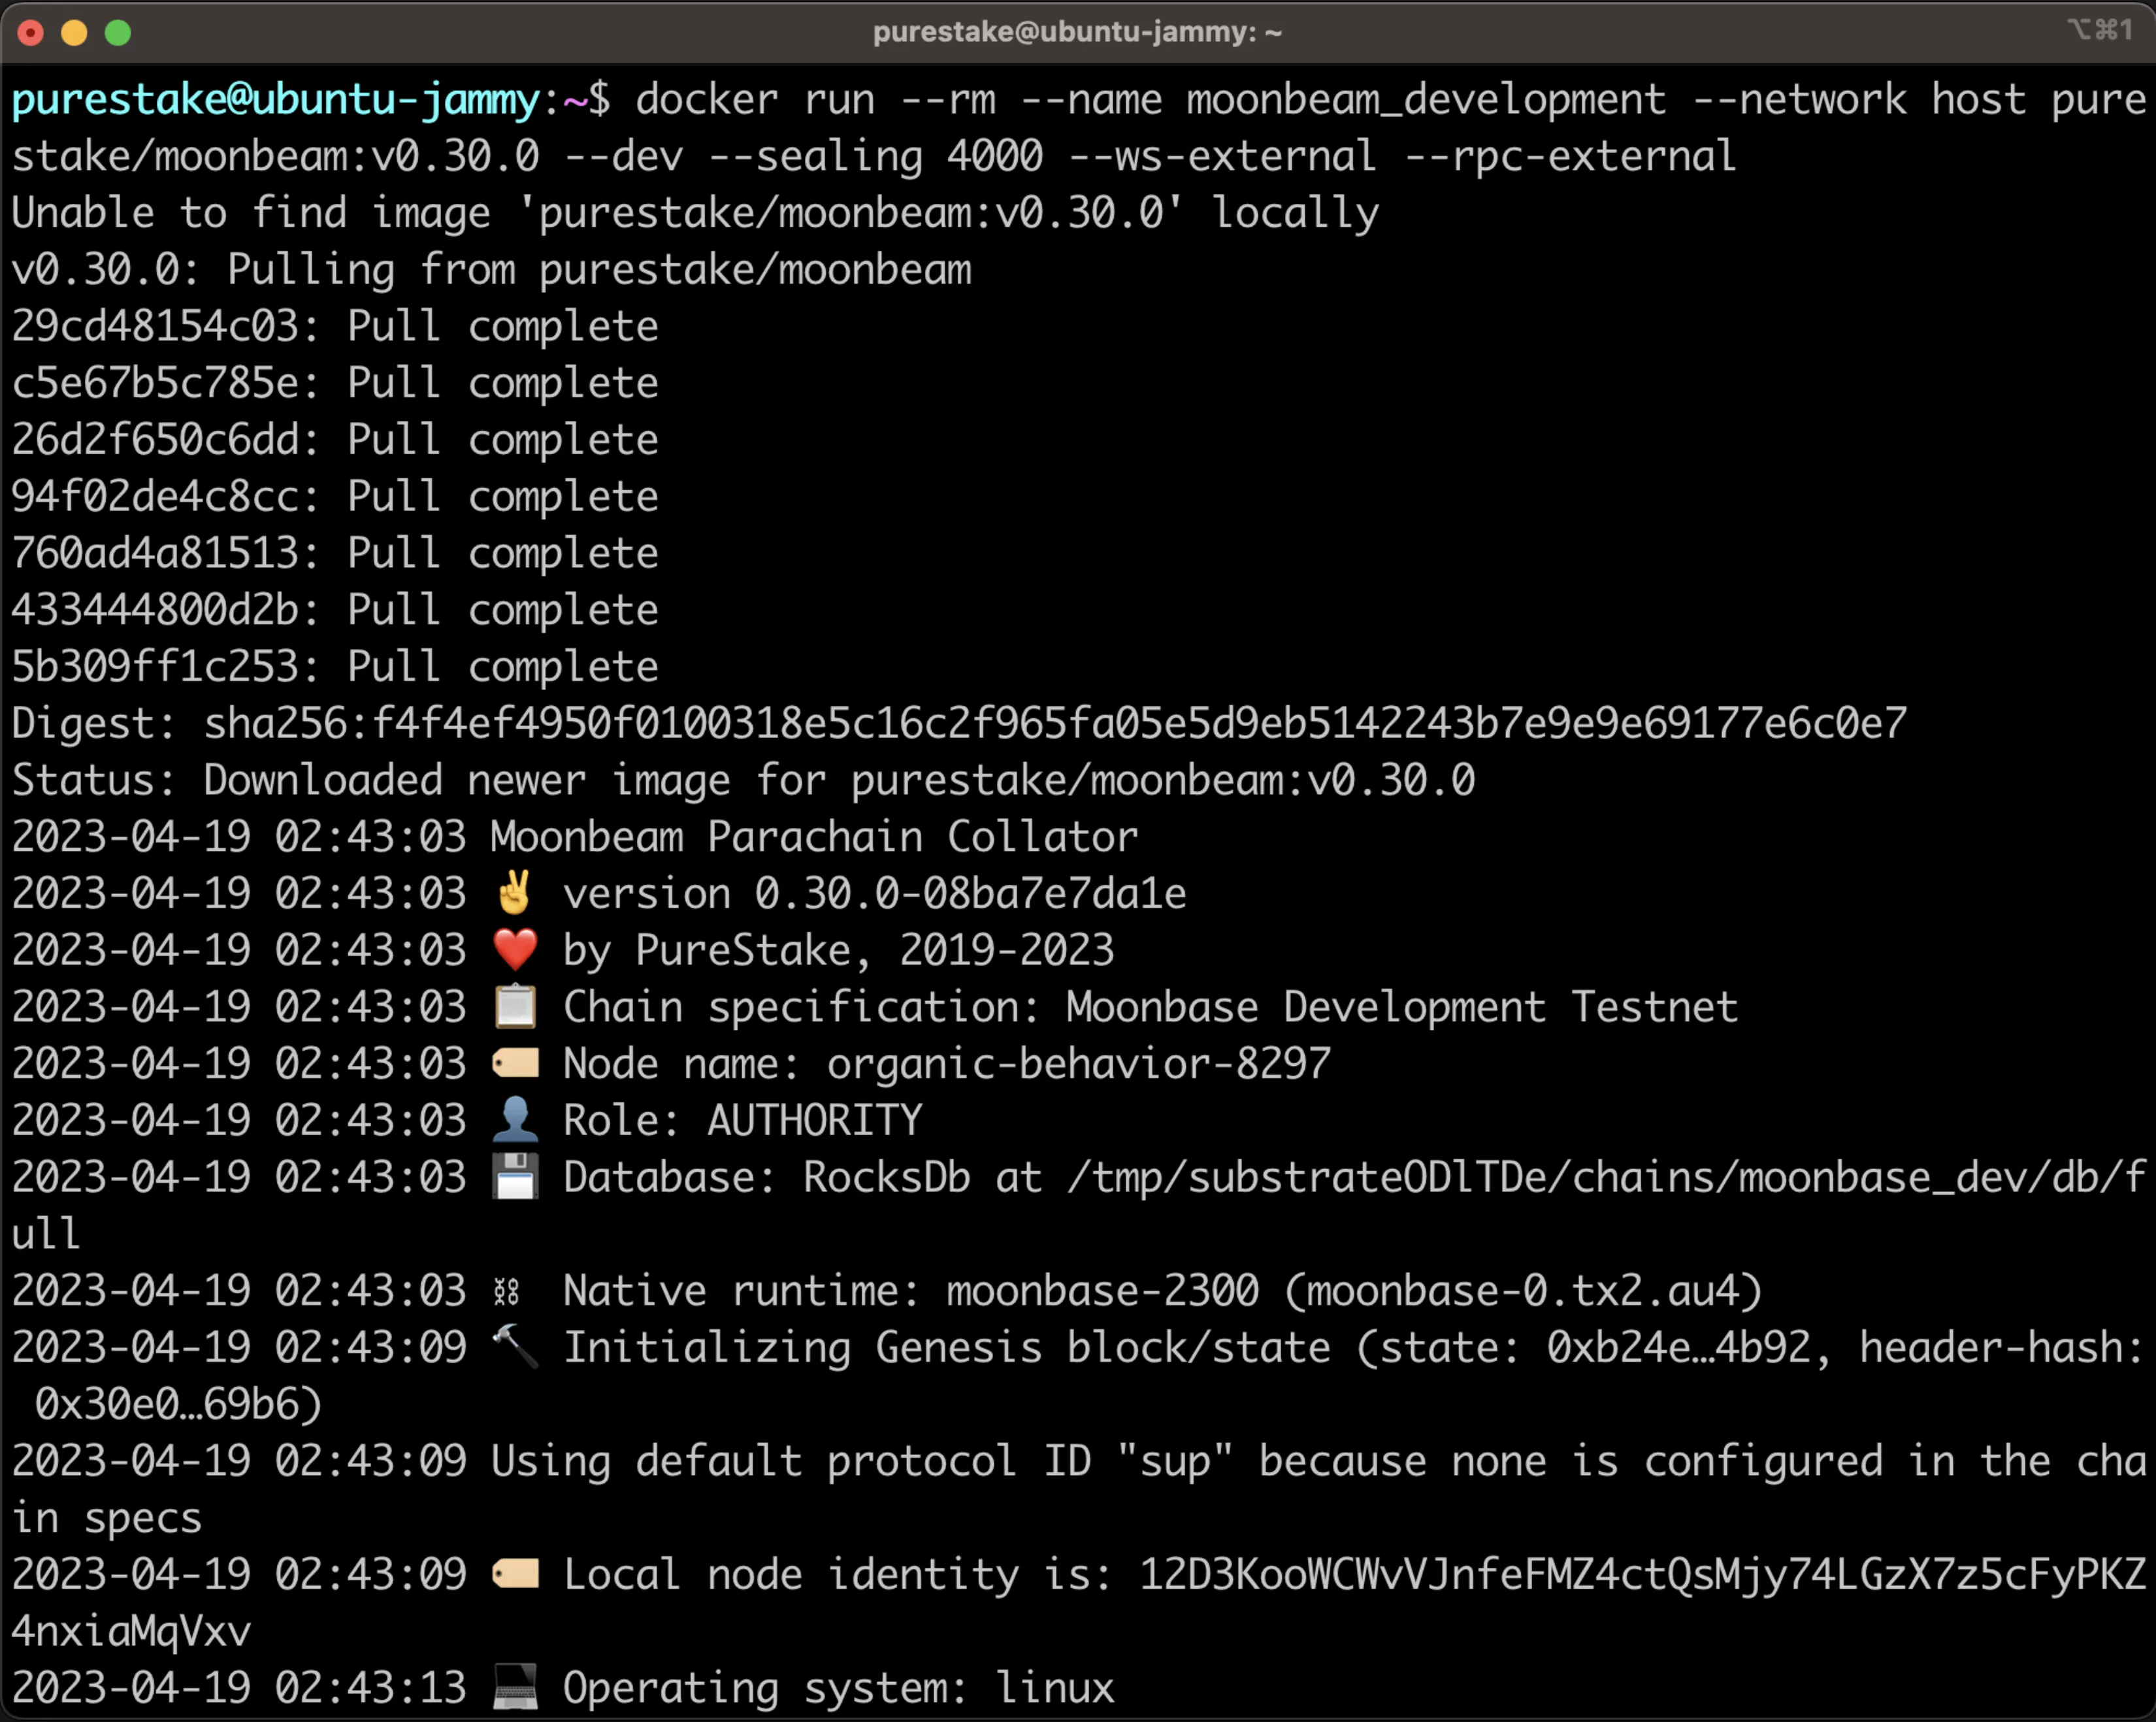
Spin up a Local Development Node
To get started, we're going to spin up a local Moonbeam development node using Docker. For the purposes of this tutorial, we're going to configure our development node to produce (seal) blocks every four seconds. This will ease the debugging process. However, you can feel free to increase or decrease this time or configure your node to instantly seal blocks. When using instant seal, a block will be created when a transaction is received.
We'll use the following commands when starting up our node:
--dev- specifies to use a development chain--sealing 4000- seals a block every four seconds (4000 milliseconds)--rpc-external- listen to all HTTP and WebSocket interfaces
To spin up a development node, which will pull the latest Docker image for Moonbeam, you can run the following command:
docker run --rm --name moonbeam_development --network host \
moonbeamfoundation/moonbeam:v0.46.0 \
--dev --sealing 4000 --rpc-external
docker run --rm --name moonbeam_development -p 9944:9944 \
moonbeamfoundation/moonbeam:v0.46.0 \
--dev --sealing 4000 --rpc-external
docker run --rm --name moonbeam_development -p 9944:9944 ^
moonbeamfoundation/moonbeam:v0.46.0 ^
--dev --sealing 4000 --rpc-external
This will start up our development node, which can be accessed on port 9944. Note that you do not have to use Docker; you can also run a local node by compiling the Moonbeam binary.
Our development node comes with 10 prefunded accounts.
Development account addresses and private keys
-
Alith:
- Public Address:
0xf24FF3a9CF04c71Dbc94D0b566f7A27B94566cac - Private Key:
0x5fb92d6e98884f76de468fa3f6278f8807c48bebc13595d45af5bdc4da702133
- Public Address:
-
Baltathar:
- Public Address:
0x3Cd0A705a2DC65e5b1E1205896BaA2be8A07c6e0 - Private Key:
0x8075991ce870b93a8870eca0c0f91913d12f47948ca0fd25b49c6fa7cdbeee8b
- Public Address:
-
Charleth:
- Public Address:
0x798d4Ba9baf0064Ec19eB4F0a1a45785ae9D6DFc - Private Key:
0x0b6e18cafb6ed99687ec547bd28139cafdd2bffe70e6b688025de6b445aa5c5b
- Public Address:
-
Dorothy:
- Public Address:
0x773539d4Ac0e786233D90A233654ccEE26a613D9 - Private Key:
0x39539ab1876910bbf3a223d84a29e28f1cb4e2e456503e7e91ed39b2e7223d68
- Public Address:
-
Ethan:
- Public Address:
0xFf64d3F6efE2317EE2807d223a0Bdc4c0c49dfDB - Private Key:
0x7dce9bc8babb68fec1409be38c8e1a52650206a7ed90ff956ae8a6d15eeaaef4
- Public Address:
-
Faith:
- Public Address:
0xC0F0f4ab324C46e55D02D0033343B4Be8A55532d - Private Key:
0xb9d2ea9a615f3165812e8d44de0d24da9bbd164b65c4f0573e1ce2c8dbd9c8df
- Public Address:
-
Goliath:
- Public Address:
0x7BF369283338E12C90514468aa3868A551AB2929 - Private Key:
0x96b8a38e12e1a31dee1eab2fffdf9d9990045f5b37e44d8cc27766ef294acf18
- Public Address:
-
Heath:
- Public Address:
0x931f3600a299fd9B24cEfB3BfF79388D19804BeA - Private Key:
0x0d6dcaaef49272a5411896be8ad16c01c35d6f8c18873387b71fbc734759b0ab
- Public Address:
-
Ida:
- Public Address:
0xC41C5F1123ECCd5ce233578B2e7ebd5693869d73 - Private Key:
0x4c42532034540267bf568198ccec4cb822a025da542861fcb146a5fab6433ff8
- Public Address:
-
Judith:
- Public Address:
0x2898FE7a42Be376C8BC7AF536A940F7Fd5aDd423 - Private Key:
0x94c49300a58d576011096bcb006aa06f5a91b34b4383891e8029c21dc39fbb8b
- Public Address:
For more information on running a Moonbeam development node, please refer to the Getting Started with a Moonbeam Development Node guide.
Deploy an ERC-20 with Hardhat
You should have already created an empty Hardhat project, but if you haven't done so, you can find instructions in the Creating a Hardhat Project section of our Hardhat documentation page.
In this section, we'll configure our Hardhat project for a local Moonbeam development node, create an ERC-20 contract, and write scripts to deploy and interact with our contract.
Before we dive into creating our project, let's install a couple of dependencies that we'll need: the Hardhat Ethers plugin and OpenZeppelin contracts. The Hardhat Ethers plugin provides a convenient way to use the Ethers library to interact with the network. We'll use OpenZeppelin's base ERC-20 implementation to create an ERC-20. To install both of these dependencies, you can run:
npm install @nomicfoundation/hardhat-ethers ethers@6 @openzeppelin/contracts
yarn add @nomicfoundation/hardhat-ethers ethers@6 @openzeppelin/contracts
Configure Hardhat for a Local Development Node
Before we update the configuration file, we'll need to get the private key of one of our development accounts, which will be used to deploy our contract and send transactions. For this example, we'll use Alith's private key:
0x5fb92d6e98884f76de468fa3f6278f8807c48bebc13595d45af5bdc4da702133
Remember
You should never store your private keys in a JavaScript or Python file.
The private keys for the development accounts are public knowledge because the accounts exist within your own development environment. However, when you move on to indexing a live network such as Moonbase Alpha or Moonbeam (which is out of scope for this tutorial), you should manage your private keys with a designated secret manager or similar service.
Now we can edit hardhat.config.js to include the following network and account configurations for our Moonbeam development node:
hardhat.config.js
// Import the Ethers plugin required to interact with the contract
require('@nomicfoundation/hardhat-ethers');

/** @type import('hardhat/config').HardhatUserConfig */
module.exports = {
  // Specify the Solidity version
  solidity: '0.8.20',
  networks: {
    dev: {
      url: 'http://127.0.0.1:9944',
      chainId: 1281, // (hex: 0x501),
      accounts: [
        '0x5fb92d6e98884f76de468fa3f6278f8807c48bebc13595d45af5bdc4da702133',
      ], // Alith's private key
    },
  },
};
Create an ERC-20 Contract
For the purposes of this tutorial, we'll be creating a simple ERC-20 contract. We'll rely on OpenZeppelin's ERC-20 base implementation. We'll start by creating a file for the contract and naming it MyTok.sol:
mkdir -p contracts && touch contracts/MyTok.sol
Now we can edit the MyTok.sol file to include the following contract, which will mint an initial supply of MYTOKs and allow only the owner of the contract to mint additional tokens:
MyTok.sol
// SPDX-License-Identifier: MIT
pragma solidity ^0.8.20;

import "@openzeppelin/contracts/token/ERC20/ERC20.sol";
import "@openzeppelin/contracts/access/Ownable.sol";

contract MyTok is ERC20, Ownable {
    constructor() ERC20("MyToken", "MTK") Ownable(msg.sender) {
        _mint(msg.sender, 50000 * 10 ** decimals());
    }

    function mint(address to, uint256 amount) public onlyOwner {
        _mint(to, amount);
    }
}
Deploy an ERC-20 Contract
Now that we have our contract set up, we can compile and deploy our contract.
To compile the contract, you can run:
npx hardhat compile
This command will compile our contract and generate an artifacts directory containing the ABI of the contract. To deploy our contract, we'll need to create a deployment script that deploys our ERC-20 contract and mints an initial supply of MYTOKs. We'll use Alith's account to deploy the contract, and we'll specify the initial supply to be 1000 MYTOK. The initial supply will be minted and sent to the contract owner, which is Alith.
Let's take the following steps to deploy our contract:
-
Create a directory and file for our script:
mkdir -p scripts && touch scripts/deploy.js -
In the
deploy.jsfile, go ahead and add the following script:deploy.js
// scripts/deploy.js const hre = require('hardhat'); require('@nomicfoundation/hardhat-ethers'); async function main() { // Get ERC-20 contract const MyTok = await hre.ethers.getContractFactory('MyTok'); // Deploy the contract const myTok = await MyTok.deploy(); // Wait for the deployment await myTok.waitForDeployment(); console.log(`Contract deployed to ${myTok.target}`); } main().catch((error) => { console.error(error); process.exitCode = 1; }); -
Run the script using the
devnetwork configurations we set up in thehardhat.config.jsfile:npx hardhat run scripts/deploy.js --network dev
The address of the deployed contract should be printed to the terminal. Save the address, as we'll need it to interact with the contract in the following section.
Transfer ERC-20s
Since we'll be indexing Transfer events for our ERC-20, we'll need to send a few transactions that transfer some tokens from Alith's account to our other test accounts. We'll do this by creating a simple script that transfers 10 MYTOKs to Baltathar, Charleth, Dorothy, and Ethan. We'll take the following steps:
-
Create a new file script to send transactions:
touch scripts/transactions.js -
In the
transactions.jsfile, add the following script and insert the contract address of your deployed MyTok contract (output in the console in the prior step):transactions.js
// We require the Hardhat Runtime Environment explicitly here. This is optional // but useful for running the script in a standalone fashion through `node <script>`. // // You can also run a script with `npx hardhat run <script>`. If you do that, Hardhat // will compile your contracts, add the Hardhat Runtime Environment's members to the // global scope, and execute the script. const hre = require('hardhat'); async function main() { // Get contract ABI const MyTok = await hre.ethers.getContractFactory('MyTok'); // Plug ABI to address const myTok = await MyTok.attach( '0xc01Ee7f10EA4aF4673cFff62710E1D7792aBa8f3' ); const value = 10000000000000000000n; let tx; // Transfer to Baltathar tx = await myTok.transfer( '0x3Cd0A705a2DC65e5b1E1205896BaA2be8A07c6e0', value ); await tx.wait(); console.log(`Transfer to Baltathar with TxHash ${tx.hash}`); // Transfer to Charleth tx = await myTok.transfer( '0x798d4Ba9baf0064Ec19eB4F0a1a45785ae9D6DFc', value ); await tx.wait(); console.log(`Transfer to Charleth with TxHash ${tx.hash}`); // Transfer to Dorothy tx = await myTok.transfer( '0x773539d4Ac0e786233D90A233654ccEE26a613D9', value ); await tx.wait(); console.log(`Transfer to Dorothy with TxHash ${tx.hash}`); // Transfer to Ethan tx = await myTok.transfer( '0xFf64d3F6efE2317EE2807d223a0Bdc4c0c49dfDB', value ); await tx.wait(); console.log(`Transfer to Ethan with TxHash ${tx.hash}`); } // We recommend this pattern to be able to use async/await everywhere // and properly handle errors. main().catch((error) => { console.error(error); process.exitCode = 1; }); -
Run the script to send the transactions:
npx hardhat run scripts/transactions.js --network dev
As each transaction is sent, you'll see a log printed to the terminal.
Now we can move on to creating our Squid to index the data on our local development node.
Create a SQD Project
Now we're going to create our Subquid project. First, we'll need to install the SQD CLI:
npm i -g @subsquid/cli@latest
To verify successful installation, you can run:
sqd --version
Now we'll be able to use the sqd command to interact with our Squid project. To create our project, we're going to use the --template (-t) flag, which will create a project from a template. We'll be using the EVM Squid template, which is a starter project for indexing EVM chains.
You can run the following command to create an EVM Squid named local-squid:
sqd init local-squid --template evm
This will create a Squid with all of the necessary dependencies. You can go ahead and install the dependencies:
cd local-squid && npm ci
Now that we have a starting point for our project, we'll need to configure our project to index ERC-20 Transfer events from our local development node.
Set Up the Indexer for ERC-20 Transfers
In order to index ERC-20 transfers, we'll need to take a series of actions:
- Update the database schema and generate models for the data
- Use the
ERC20contract's ABI to generate TypeScript interface classes that will be used by our Squid to indexTransferevents - Configure the processor to process
Transferevents for theERC20contract - Add logic to process the
Transferevents and save the processed transfer data
As mentioned, we'll first need to define the database schema for the transfer data. To do so, we'll edit the schema.graphql file, which is located in the root directory, and create a Transfer entity and Account entity. You can copy and paste the below schema, ensuring that any existing schema is first removed.
schema.graphql
type Account @entity {
  "Account address"
  id: ID!
  transfersFrom: [Transfer!] @derivedFrom(field: "from")
  transfersTo: [Transfer!] @derivedFrom(field: "to")
}

type Transfer @entity {
  id: ID!
  blockNumber: Int!
  timestamp: DateTime!
  txHash: String!
  from: Account!
  to: Account!
  amount: BigInt!
}
Now we can generate the entity classes from the schema, which we'll use when we process the transfer data. This will create new classes for each entity in the src/model/generated directory.
sqd codegen
In the next step, we'll use the ERC-20 ABI to automatically generate TypeScript interface classes. Below is a generic ERC-20 standard ABI. Copy and paste it into a file named erc20.json in the abi folder at the root level of the project.
ERC-20 ABI
[
  {
    "constant": true,
    "inputs": [],
    "name": "name",
    "outputs": [
      {
        "name": "",
        "type": "string"
      }
    ],
    "payable": false,
    "stateMutability": "view",
    "type": "function"
  },
  {
    "constant": false,
    "inputs": [
      {
        "name": "_spender",
        "type": "address"
      },
      {
        "name": "_value",
        "type": "uint256"
      }
    ],
    "name": "approve",
    "outputs": [
      {
        "name": "",
        "type": "bool"
      }
    ],
    "payable": false,
    "stateMutability": "nonpayable",
    "type": "function"
  },
  {
    "constant": true,
    "inputs": [],
    "name": "totalSupply",
    "outputs": [
      {
        "name": "",
        "type": "uint256"
      }
    ],
    "payable": false,
    "stateMutability": "view",
    "type": "function"
  },
  {
    "constant": false,
    "inputs": [
      {
        "name": "_from",
        "type": "address"
      },
      {
        "name": "_to",
        "type": "address"
      },
      {
        "name": "_value",
        "type": "uint256"
      }
    ],
    "name": "transferFrom",
    "outputs": [
      {
        "name": "",
        "type": "bool"
      }
    ],
    "payable": false,
    "stateMutability": "nonpayable",
    "type": "function"
  },
  {
    "constant": true,
    "inputs": [],
    "name": "decimals",
    "outputs": [
      {
        "name": "",
        "type": "uint8"
      }
    ],
    "payable": false,
    "stateMutability": "view",
    "type": "function"
  },
  {
    "constant": true,
    "inputs": [
      {
        "name": "_owner",
        "type": "address"
      }
    ],
    "name": "balanceOf",
    "outputs": [
      {
        "name": "balance",
        "type": "uint256"
      }
    ],
    "payable": false,
    "stateMutability": "view",
    "type": "function"
  },
  {
    "constant": true,
    "inputs": [],
    "name": "symbol",
    "outputs": [
      {
        "name": "",
        "type": "string"
      }
    ],
    "payable": false,
    "stateMutability": "view",
    "type": "function"
  },
  {
    "constant": false,
    "inputs": [
      {
        "name": "_to",
        "type": "address"
      },
      {
        "name": "_value",
        "type": "uint256"
      }
    ],
    "name": "transfer",
    "outputs": [
      {
        "name": "",
        "type": "bool"
      }
    ],
    "payable": false,
    "stateMutability": "nonpayable",
    "type": "function"
  },
  {
    "constant": true,
    "inputs": [
      {
        "name": "_owner",
        "type": "address"
      },
      {
        "name": "_spender",
        "type": "address"
      }
    ],
    "name": "allowance",
    "outputs": [
      {
        "name": "",
        "type": "uint256"
      }
    ],
    "payable": false,
    "stateMutability": "view",
    "type": "function"
  },
  {
    "payable": true,
    "stateMutability": "payable",
    "type": "fallback"
  },
  {
    "anonymous": false,
    "inputs": [
      {
        "indexed": true,
        "name": "owner",
        "type": "address"
      },
      {
        "indexed": true,
        "name": "spender",
        "type": "address"
      },
      {
        "indexed": false,
        "name": "value",
        "type": "uint256"
      }
    ],
    "name": "Approval",
    "type": "event"
  },
  {
    "anonymous": false,
    "inputs": [
      {
        "indexed": true,
        "name": "from",
        "type": "address"
      },
      {
        "indexed": true,
        "name": "to",
        "type": "address"
      },
      {
        "indexed": false,
        "name": "value",
        "type": "uint256"
      }
    ],
    "name": "Transfer",
    "type": "event"
  }
]
Next, we can use our contract's ABI to generate TypeScript interface classes. We can do this by running:
sqd typegen
This will generate the related TypeScript interface classes in the src/abi/erc20.ts file. For this tutorial, we'll be accessing the events specifically.
Configure the Processor
The processor.ts file tells SQD exactly what data you'd like to ingest. Transforming that data into the exact desired format will take place at a later step. In processor.ts, we'll need to indicate a data source, a contract address, the event(s) to index, and a block range.
Open up the src folder and head to the processor.ts file.
To get started, you can import the ERC-20 ABI, which will be used to define the ERC-20 data to be indexed:
import * as erc20 from './abi/erc20';
Next, we need to tell the SQD processor which contract we're interested in. Create a constant for the address in the following manner:
export const contractAddress = 'INSERT_CONTRACT_ADDRESS'.toLowerCase();
The .toLowerCase() is critical because the SQD processor is case-sensitive, and some block explorers format contract addresses with capitalization. Next, you'll see the line export const processor = new EvmBatchProcessor(), followed by .setDataSource. We'll need to make a few changes here. SQD has available archives for many chains, including Moonbeam, Moonriver, and Moonbase Alpha that can speed up the data retrieval process. For indexing a local development node, there's no archive necessary so the exclusive data source will be the RPC URL of our local node. Go ahead and comment out or delete the archive line. Once done, your code should look similar to the below:
.setDataSource({
  chain: {
    url: assertNotNull('http://127.0.0.1:9944'),
    rateLimit: 300,
  },
})
The Squid template comes with a variable for your RPC URL defined in your .env file. You can replace that with the RPC URL for your local development node. For demonstration purposes, the RPC URL for a local development node is hardcoded directly, as shown above. If you're setting the RPC URL in your .env, the respective line will look like this:
RPC_ENDPOINT=http://127.0.0.1:9944
Now, let's define the event that we want to index by adding the following:
.addLog({
  address: [contractAddress],
  topic0: [erc20.events.Transfer.topic],
  transaction: true,
})
The Transfer event is defined in erc20.ts, which was auto-generated when sqd typegen was run. The import import * as erc20 from './abi/erc20' is already included as part of the Squid EVM template.
Block range is an important value to modify to narrow the scope of the blocks you're indexing. For example, if you launched your ERC-20 at block 1200000 on Moonbeam, there is no need to query the chain before that block for Transfer events. Since we're indexing a local node, this field can be excluded or set to 0. Setting an accurate block range will improve the performance of your indexer. You can set the earliest block to begin indexing in the following manner:
.setBlockRange({
  from: 0, // Note the lack of quotes here
});
The chosen start block here is 0 since we're indexing a local development node, but if you were indexing data on another Moonbeam network, you should change it to a starting block relevant to what you're indexing.
Change the setFields section to specify the following data for our processor to ingest:
.setFields({
  log: {
    topics: true,
    data: true,
  },
  transaction: {
    hash: true,
  },
})
Once you've completed the prior steps, your processor.ts file should look similar to this:
processor.ts
import { assertNotNull } from '@subsquid/util-internal';
import {
  BlockHeader,
  EvmBatchProcessor,
  EvmBatchProcessorFields,
  Log as _Log,
  Transaction as _Transaction,
} from '@subsquid/evm-processor';
import * as erc20 from './abi/erc20';

// Here you'll need to import the contract
export const contractAddress =
  '0xc01Ee7f10EA4aF4673cFff62710E1D7792aBa8f3'.toLowerCase();

export const processor = new EvmBatchProcessor()
  .setDataSource({
    chain: {
      url: assertNotNull('http://127.0.0.1:9944'),
      rateLimit: 300,
    },
  })
  .setFinalityConfirmation(10)
  .setFields({
    log: {
      topics: true,
      data: true,
    },
    transaction: {
      hash: true,
    },
  })
  .addLog({
    address: [contractAddress],
    topic0: [erc20.events.Transfer.topic],
    transaction: true,
  })
  .setBlockRange({
    from: 0, // Note the lack of quotes here
  });

export type Fields = EvmBatchProcessorFields<typeof processor>;
export type Block = BlockHeader<Fields>;
export type Log = _Log<Fields>;
export type Transaction = _Transaction<Fields>;
Transform and Save the Data
While processor.ts determines the data being consumed, main.ts determines the bulk of actions related to processing and transforming that data. In the simplest terms, we are processing the data that was ingested via the SQD processor and inserting the desired pieces into a TypeORM database. For more detailed information on how SQD works, be sure to check out the SQD docs on Developing a Squid
Our main.ts file is going to scan through each processed block for the Transfer event and decode the transfer details, including the sender, receiver, and amount. The script also fetches account details for involved addresses and creates transfer objects with the extracted data. The script then inserts these records into a TypeORM database enabling them to be easily queried.
Let's break down the code that comprises main.ts in order:
- In
processor.run, the processor will iterate through all of the selected blocks and look forTransferevent logs. Whenever it finds aTransferevent, it's going to store it in an array ofTransferevents where it awaits further processing - The
TransferEventinterface is the type of structure that stores the data extracted from the event logs getTransferis a helper function that extracts and decodes ERC-20Transferevent data from a log entry. It constructs and returns aTransferEventobject, which includes details such as the transaction ID, block number, sender and receiver addresses, and the amount transferred.getTransferis called at the time of storing the relevantTransferevents into the array of transfersprocessTransfersenriches the transfer data and then inserts these records into a TypeORM database using thectx.storemethods. The account model, while not strictly necessary, allows us to introduce another entity in the schema to demonstrate working with multiple entities in your SquidgetAccountis a helper function that manages the retrieval and creation of account objects. Given an account ID and a map of existing accounts, it returns the corresponding account object. If the account doesn't exist in the map, it creates a new one, adds it to the map, and then returns it
We'll demo a sample query in a later section. You can copy and paste the below code into your main.ts file:
main.ts
import { In } from 'typeorm';
import { assertNotNull } from '@subsquid/evm-processor';
import { TypeormDatabase } from '@subsquid/typeorm-store';
import * as erc20 from './abi/erc20';
import { Account, Transfer } from './model';
import {
  Block,
  contractAddress,
  Log,
  Transaction,
  processor,
} from './processor';

// 1. Iterate through all selected blocks and look for transfer events,
// storing the relevant events in an array of transfer events
processor.run(new TypeormDatabase({ supportHotBlocks: true }), async (ctx) => {
  let transfers: TransferEvent[] = [];

  for (let block of ctx.blocks) {
    for (let log of block.logs) {
      if (
        log.address === contractAddress &&
        log.topics[0] === erc20.events.Transfer.topic
      ) {
        transfers.push(getTransfer(ctx, log));
      }
    }
  }

  await processTransfers(ctx, transfers);
});

// 2. Define an interface to hold the data from the transfer events
interface TransferEvent {
  id: string;
  block: Block;
  transaction: Transaction;
  from: string;
  to: string;
  amount: bigint;
}

// 3. Extract and decode ERC-20 transfer event data from a log entry
function getTransfer(ctx: any, log: Log): TransferEvent {
  let event = erc20.events.Transfer.decode(log);

  let from = event.from.toLowerCase();
  let to = event.to.toLowerCase();
  let amount = event.value;

  let transaction = assertNotNull(log.transaction, `Missing transaction`);

  return {
    id: log.id,
    block: log.block,
    transaction,
    from,
    to,
    amount,
  };
}

// 4. Enrich and insert data into TypeORM database
async function processTransfers(ctx: any, transfersData: TransferEvent[]) {
  let accountIds = new Set<string>();
  for (let t of transfersData) {
    accountIds.add(t.from);
    accountIds.add(t.to);
  }

  let accounts = await ctx.store
    .findBy(Account, { id: In([...accountIds]) })
    .then((q: any[]) => new Map(q.map((i: any) => [i.id, i])));

  let transfers: Transfer[] = [];

  for (let t of transfersData) {
    let { id, block, transaction, amount } = t;

    let from = getAccount(accounts, t.from);
    let to = getAccount(accounts, t.to);

    transfers.push(
      new Transfer({
        id,
        blockNumber: block.height,
        timestamp: new Date(block.timestamp),
        txHash: transaction.hash,
        from,
        to,
        amount,
      })
    );
  }

  await ctx.store.upsert(Array.from(accounts.values()));
  await ctx.store.insert(transfers);
}

// 5. Helper function to get account object
function getAccount(m: Map<string, Account>, id: string): Account {
  let acc = m.get(id);
  if (acc == null) {
    acc = new Account();
    acc.id = id;
    m.set(id, acc);
  }
  return acc;
}
Now we've taken all of the steps necessary and are ready to run our indexer!
Run the Indexer
To run our indexer, we're going to run a series of sqd commands, as follows:
-
Build our project
sqd build -
Launch the database:
sqd up -
Run the following two commands sequentially:
sqd migration:generate sqd migration:apply -
Launch the processor:
sqd process
Note
You can review the commands.json file to see what each sqd command does under the hood.
In your terminal, you should see your indexer starting to process blocks!
If your Squid isn't indexing blocks properly, make sure that your development node is running with the --sealing flag. For this example, you should have set the flag as --sealing 4000, so that a block is produced every four seconds. You can feel free to edit the sealing interval as needed. Before you try to spin up your Squid again, run the following commands to restart your Squid:
-
Shut down your Squid
sqd down -
Start your Squid back up:
sqd up -
Start indexing again:
sqd process
Now your indexer should be indexing your development node without any problems!
Query your Squid
To query your squid, open up a new terminal window within your project and run the following command:
sqd serve
And that's it! You can now run queries against your Squid on the GraphQL playground at http://localhost:4350/graphql. Try crafting your own GraphQL query, or use the below one:
Sample query
query {
  accounts {
    id
    transfersFrom {
      id
      blockNumber
      timestamp
      txHash
      to {
        id
      }
      amount
    }
    transfersTo {
      id
      blockNumber
      timestamp
      txHash
      from {
        id
      }
      amount
    }
  }
}
All of the transfers will be returned, including the transfer of the initial supply to Alith's account and the transfers from Alith to Baltathar, Charleth, Dorothy, and Ethan.
And that's it! You've successfully used SQD to index data on a local Moonbeam development node! You can view the entire project on GitHub.
Debug Your Squid
It may seem tricky at first to debug errors when building your Squid, but fortunately, there are several techniques you can use to streamline this process. First and foremost, if you're facing errors with your Squid, you should enable debug mode in your .env file by uncommenting the debug mode line. This will trigger much more verbose logging and will help you locate the source of the error.
# Uncommenting the below line enables debug mode
SQD_DEBUG=*
You can also add logging statements directly to your main.ts file to indicate specific parameters like block height and more. For example, see this version of main.ts which has been enhanced with detailed logging:
main.ts
import { In } from 'typeorm';
import { assertNotNull } from '@subsquid/evm-processor';
import { TypeormDatabase } from '@subsquid/typeorm-store';
import * as erc20 from './abi/erc20';
import { Account, Transfer } from './model';
import {
  Block,
  contractAddress,
  Log,
  Transaction,
  processor,
} from './processor';

processor.run(new TypeormDatabase({ supportHotBlocks: true }), async (ctx) => {
  ctx.log.info('Processor started');
  let transfers: TransferEvent[] = [];

  ctx.log.info(`Processing ${ctx.blocks.length} blocks`);
  for (let block of ctx.blocks) {
    ctx.log.debug(`Processing block number ${block.header.height}`);
    for (let log of block.logs) {
      ctx.log.debug(`Processing log with address ${log.address}`);
      if (
        log.address === contractAddress &&
        log.topics[0] === erc20.events.Transfer.topic
      ) {
        ctx.log.info(`Transfer event found in block ${block.header.height}`);
        transfers.push(getTransfer(ctx, log));
      }
    }
  }

  ctx.log.info(`Found ${transfers.length} transfers, processing...`);
  await processTransfers(ctx, transfers);
  ctx.log.info('Processor finished');
});

interface TransferEvent {
  id: string;
  block: Block;
  transaction: Transaction;
  from: string;
  to: string;
  amount: bigint;
}

function getTransfer(ctx: any, log: Log): TransferEvent {
  let event = erc20.events.Transfer.decode(log);

  let from = event.from.toLowerCase();
  let to = event.to.toLowerCase();
  let amount = event.value;

  let transaction = assertNotNull(log.transaction, `Missing transaction`);

  ctx.log.debug(
    `Decoded transfer event: from ${from} to ${to} amount ${amount.toString()}`
  );
  return {
    id: log.id,
    block: log.block,
    transaction,
    from,
    to,
    amount,
  };
}

async function processTransfers(ctx: any, transfersData: TransferEvent[]) {
  ctx.log.info('Starting to process transfer data');
  let accountIds = new Set<string>();
  for (let t of transfersData) {
    accountIds.add(t.from);
    accountIds.add(t.to);
  }

  ctx.log.debug(`Fetching accounts for ${accountIds.size} addresses`);
  let accounts = await ctx.store
    .findBy(Account, { id: In([...accountIds]) })
    .then((q: any[]) => new Map(q.map((i: any) => [i.id, i])));
  ctx.log.info(
    `Accounts fetched, processing ${transfersData.length} transfers`
  );

  let transfers: Transfer[] = [];

  for (let t of transfersData) {
    let { id, block, transaction, amount } = t;

    let from = getAccount(accounts, t.from);
    let to = getAccount(accounts, t.to);

    transfers.push(
      new Transfer({
        id,
        blockNumber: block.height,
        timestamp: new Date(block.timestamp),
        txHash: transaction.hash,
        from,
        to,
        amount,
      })
    );
  }

  ctx.log.debug(`Upserting ${accounts.size} accounts`);
  await ctx.store.upsert(Array.from(accounts.values()));
  ctx.log.debug(`Inserting ${transfers.length} transfers`);
  await ctx.store.insert(transfers);
  ctx.log.info('Transfer data processing completed');
}

function getAccount(m: Map<string, Account>, id: string): Account {
  let acc = m.get(id);
  if (acc == null) {
    acc = new Account();
    acc.id = id;
    m.set(id, acc);
  }
  return acc;
}
See the SQD guide to logging for more information on debug mode.
Common Errors
Below are some common errors you may face when building a project and how you can solve them.
FATAL sqd:processor RpcError: Expect block number from id: BlockId::Number(15316)
This error indicates that your indexer is trying to process blocks that don't exist on your local node. You can resolve this by setting a relevant to block limit in your processor as follows:
.setBlockRange({from: 0, to: 100})
Another common error can occur when you're experimenting with multiple instances of SQD on your machine.
Error response from daemon: driver failed programming external connectivity on endpoint my-awesome-squid-db-1
(49df671a7b0531abbb5dc5d2a4a3f5dc7e7505af89bf0ad1e5480bd1cdc61052):
Bind for 0.0.0.0:23798 failed: port is already allocated
This error indicates that you have another instance of SQD running somewhere else. You can stop that gracefully with the command sqd down or by pressing the Stop button next to the container in Docker Desktop.
Error: connect ECONNREFUSED 127.0.0.1:23798
     at createConnectionError (node:net:1634:14)
     at afterConnectMultiple (node:net:1664:40) {
     errno: -61,code: 'ECONNREFUSED',syscall: 'connect',
     address: '127.0.0.1',port: 23798}]}
To resolve this, run sqd up before you run sqd migration:generate.
Is your Squid error-free, yet you aren't seeing any transfers detected? Make sure your log events are consistent and identical to the ones your processor is looking for. Your contract address also needs to be lowercase, which you can be assured of by defining it as follows:
export const contractAddress = '0x37822de108AFFdd5cDCFDaAa2E32756Da284DB85'.toLowerCase();
| Created: April 19, 2023