Using Tenderly to Simulate and Debug Transactions
by Kevin Neilson
Introduction
Tenderly is an all-in-one development platform for EVM networks that enables Web3 developers to build, test, monitor, and operate their smart contracts. Tenderly has a full suite of product offerings to help you as a developer throughout the lifecycle of a smart contract, from the earliest stages of development to maintenance and alerting on a live production dApp.
Most services offered by Tenderly are free to use, but you'll need to subscribe to a paid plan for advanced features like real-time alerting and war room functionality. Tenderly supports Moonbeam and Moonriver but does not support Moonbase Alpha at this time. For more information about Tenderly's product offerings, be sure to familiarize yourself with the Introduction to Tenderly.
In this tutorial, we're going to explore two of Tenderly's most powerful features, the debugger and the simulator.
Checking Prerequisites
To get started, you will need the following:
- Have a free Tenderly Account. You do not need a paid plan to complete this tutorial
Create a Tenderly Project
Although not strictly required, it's a good idea to create a Tenderly project to keep things organized and access more of Tenderly's available features. Underneath the Select Project dropdown, you can press Create Project or head directly to the Create Project page of the dashboard.
Give your project a name, and then press Create Project. Although you can change your project name at a later point, the URL will remain the original one you created.
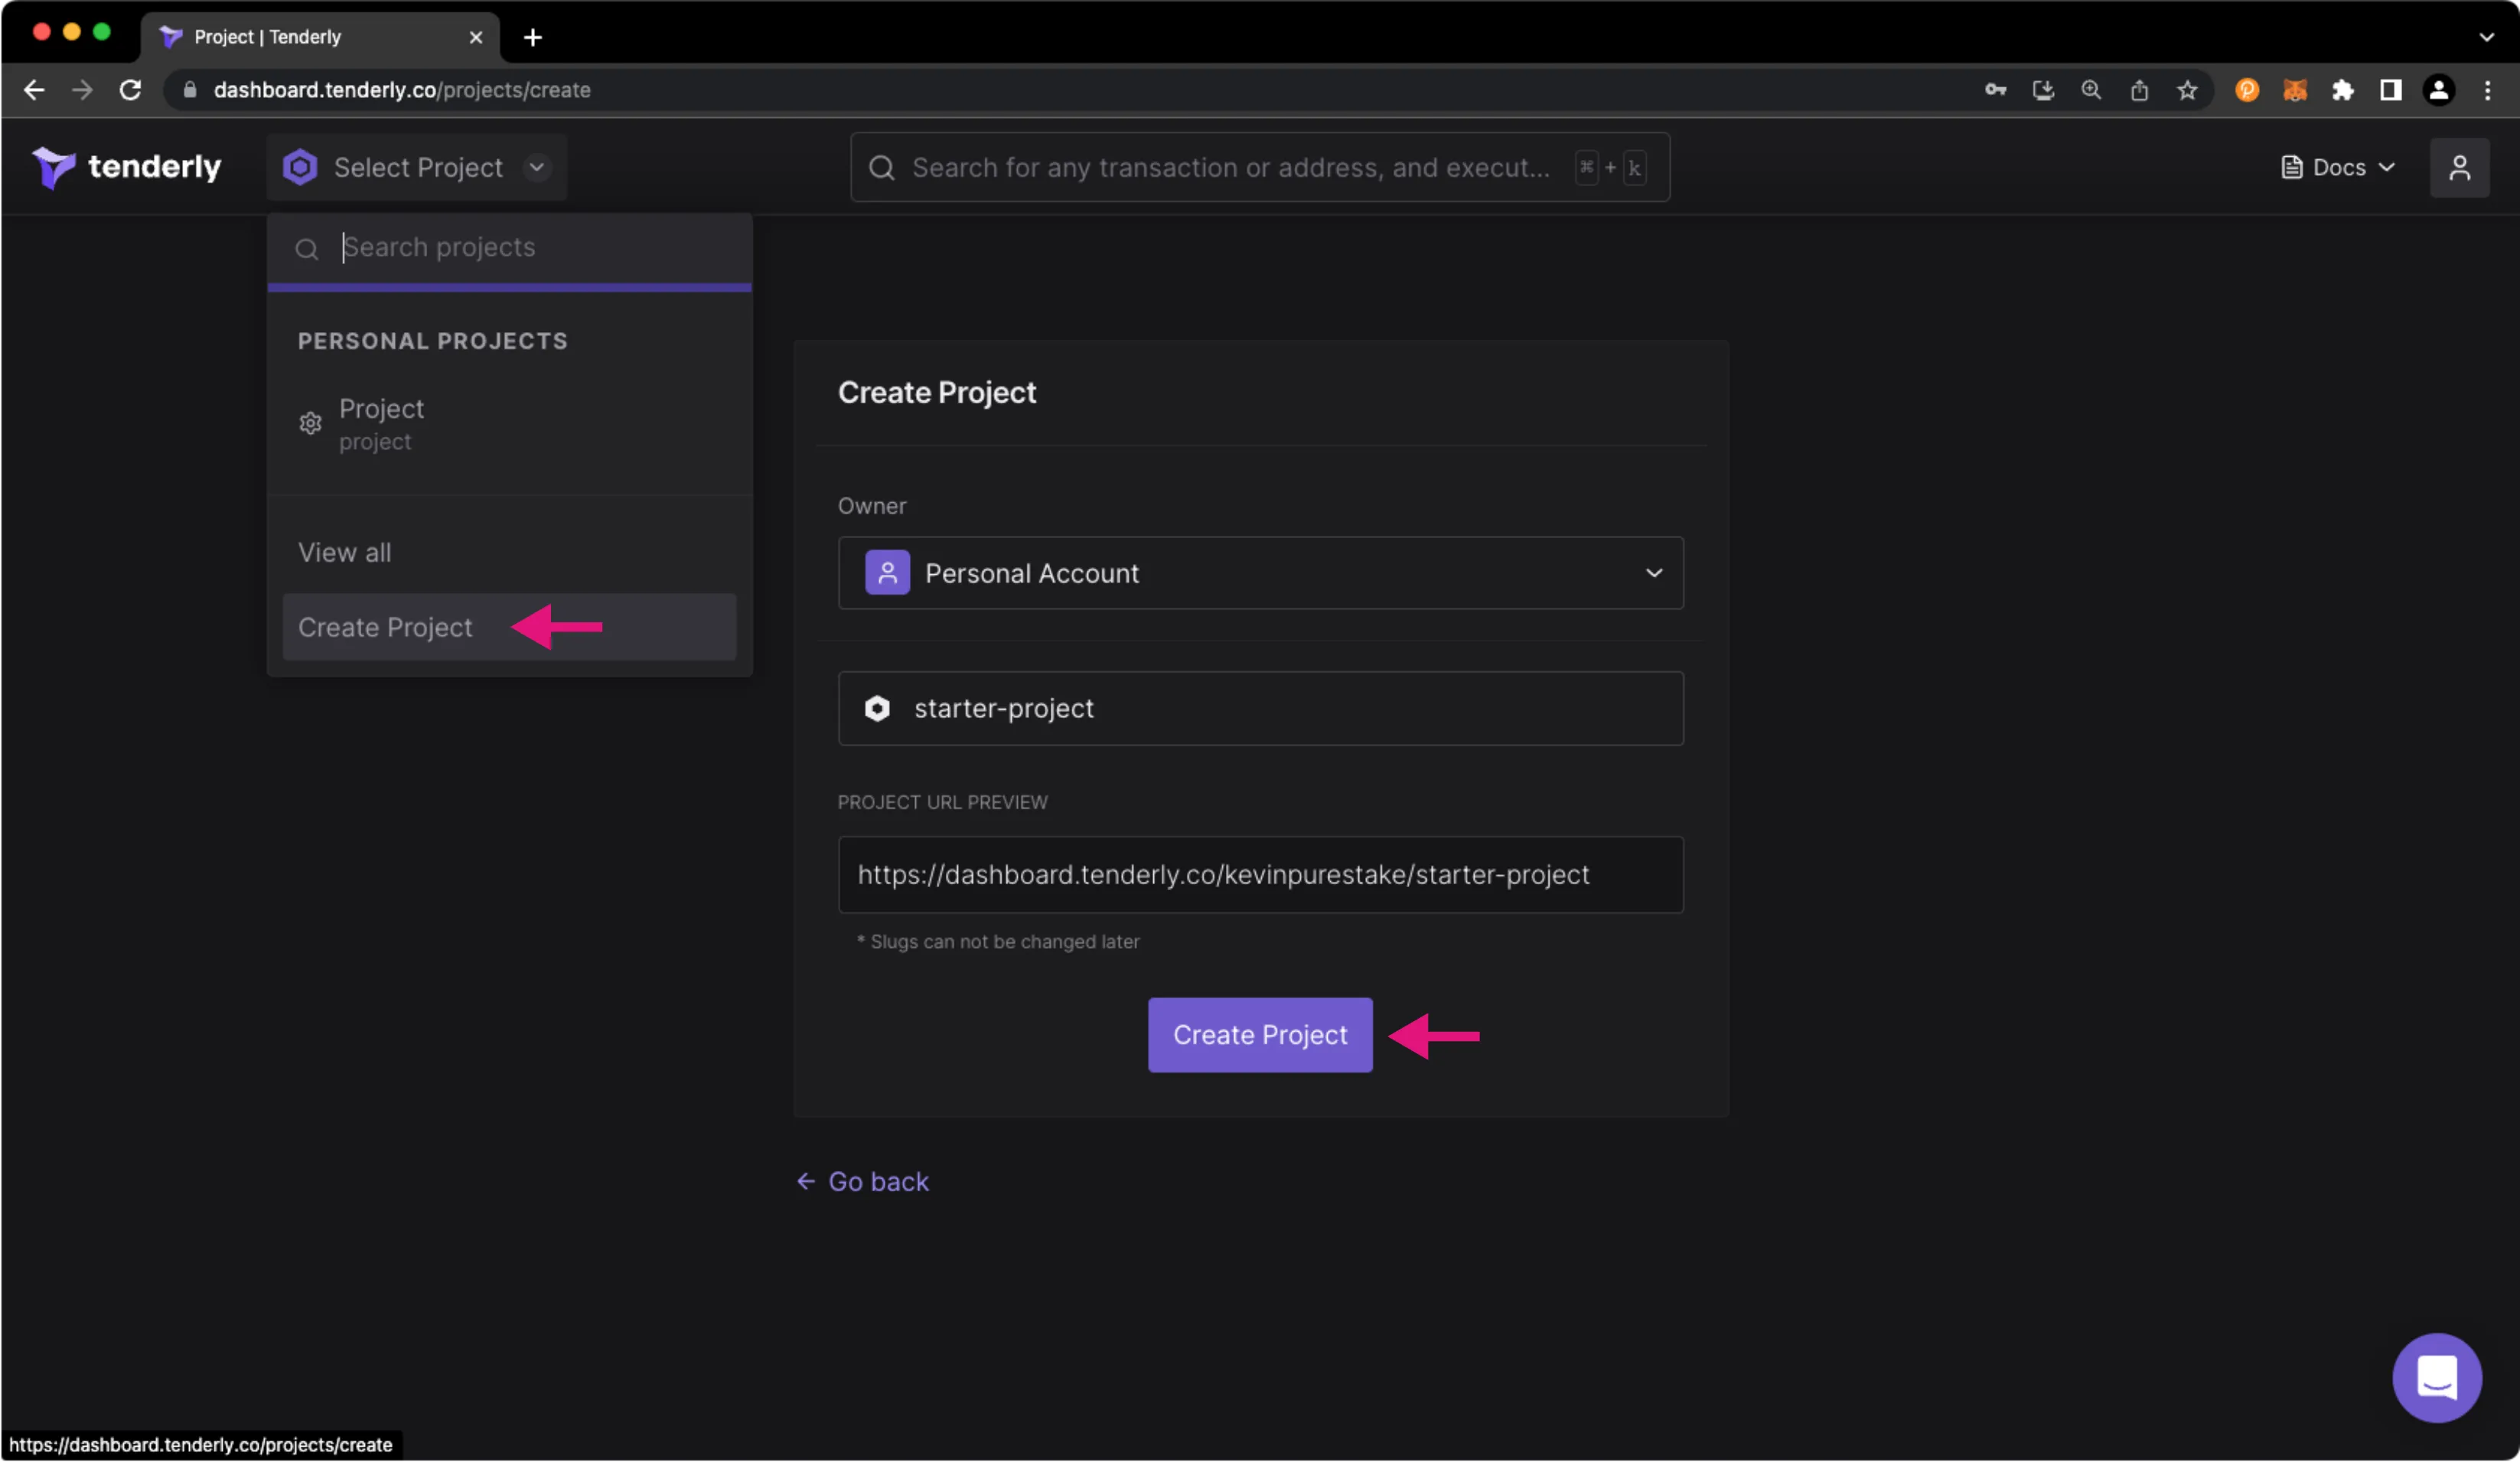
There is a limit of one project with a free account; however, you can have multiple smart contracts under the purview of a single project.
Add Smart Contracts
Adding a smart contract to your Tenderly project is akin to bookmarking it. While not required, adding a contract will unlock additional Tenderly features over simply searching for the contract on the Tenderly platform.
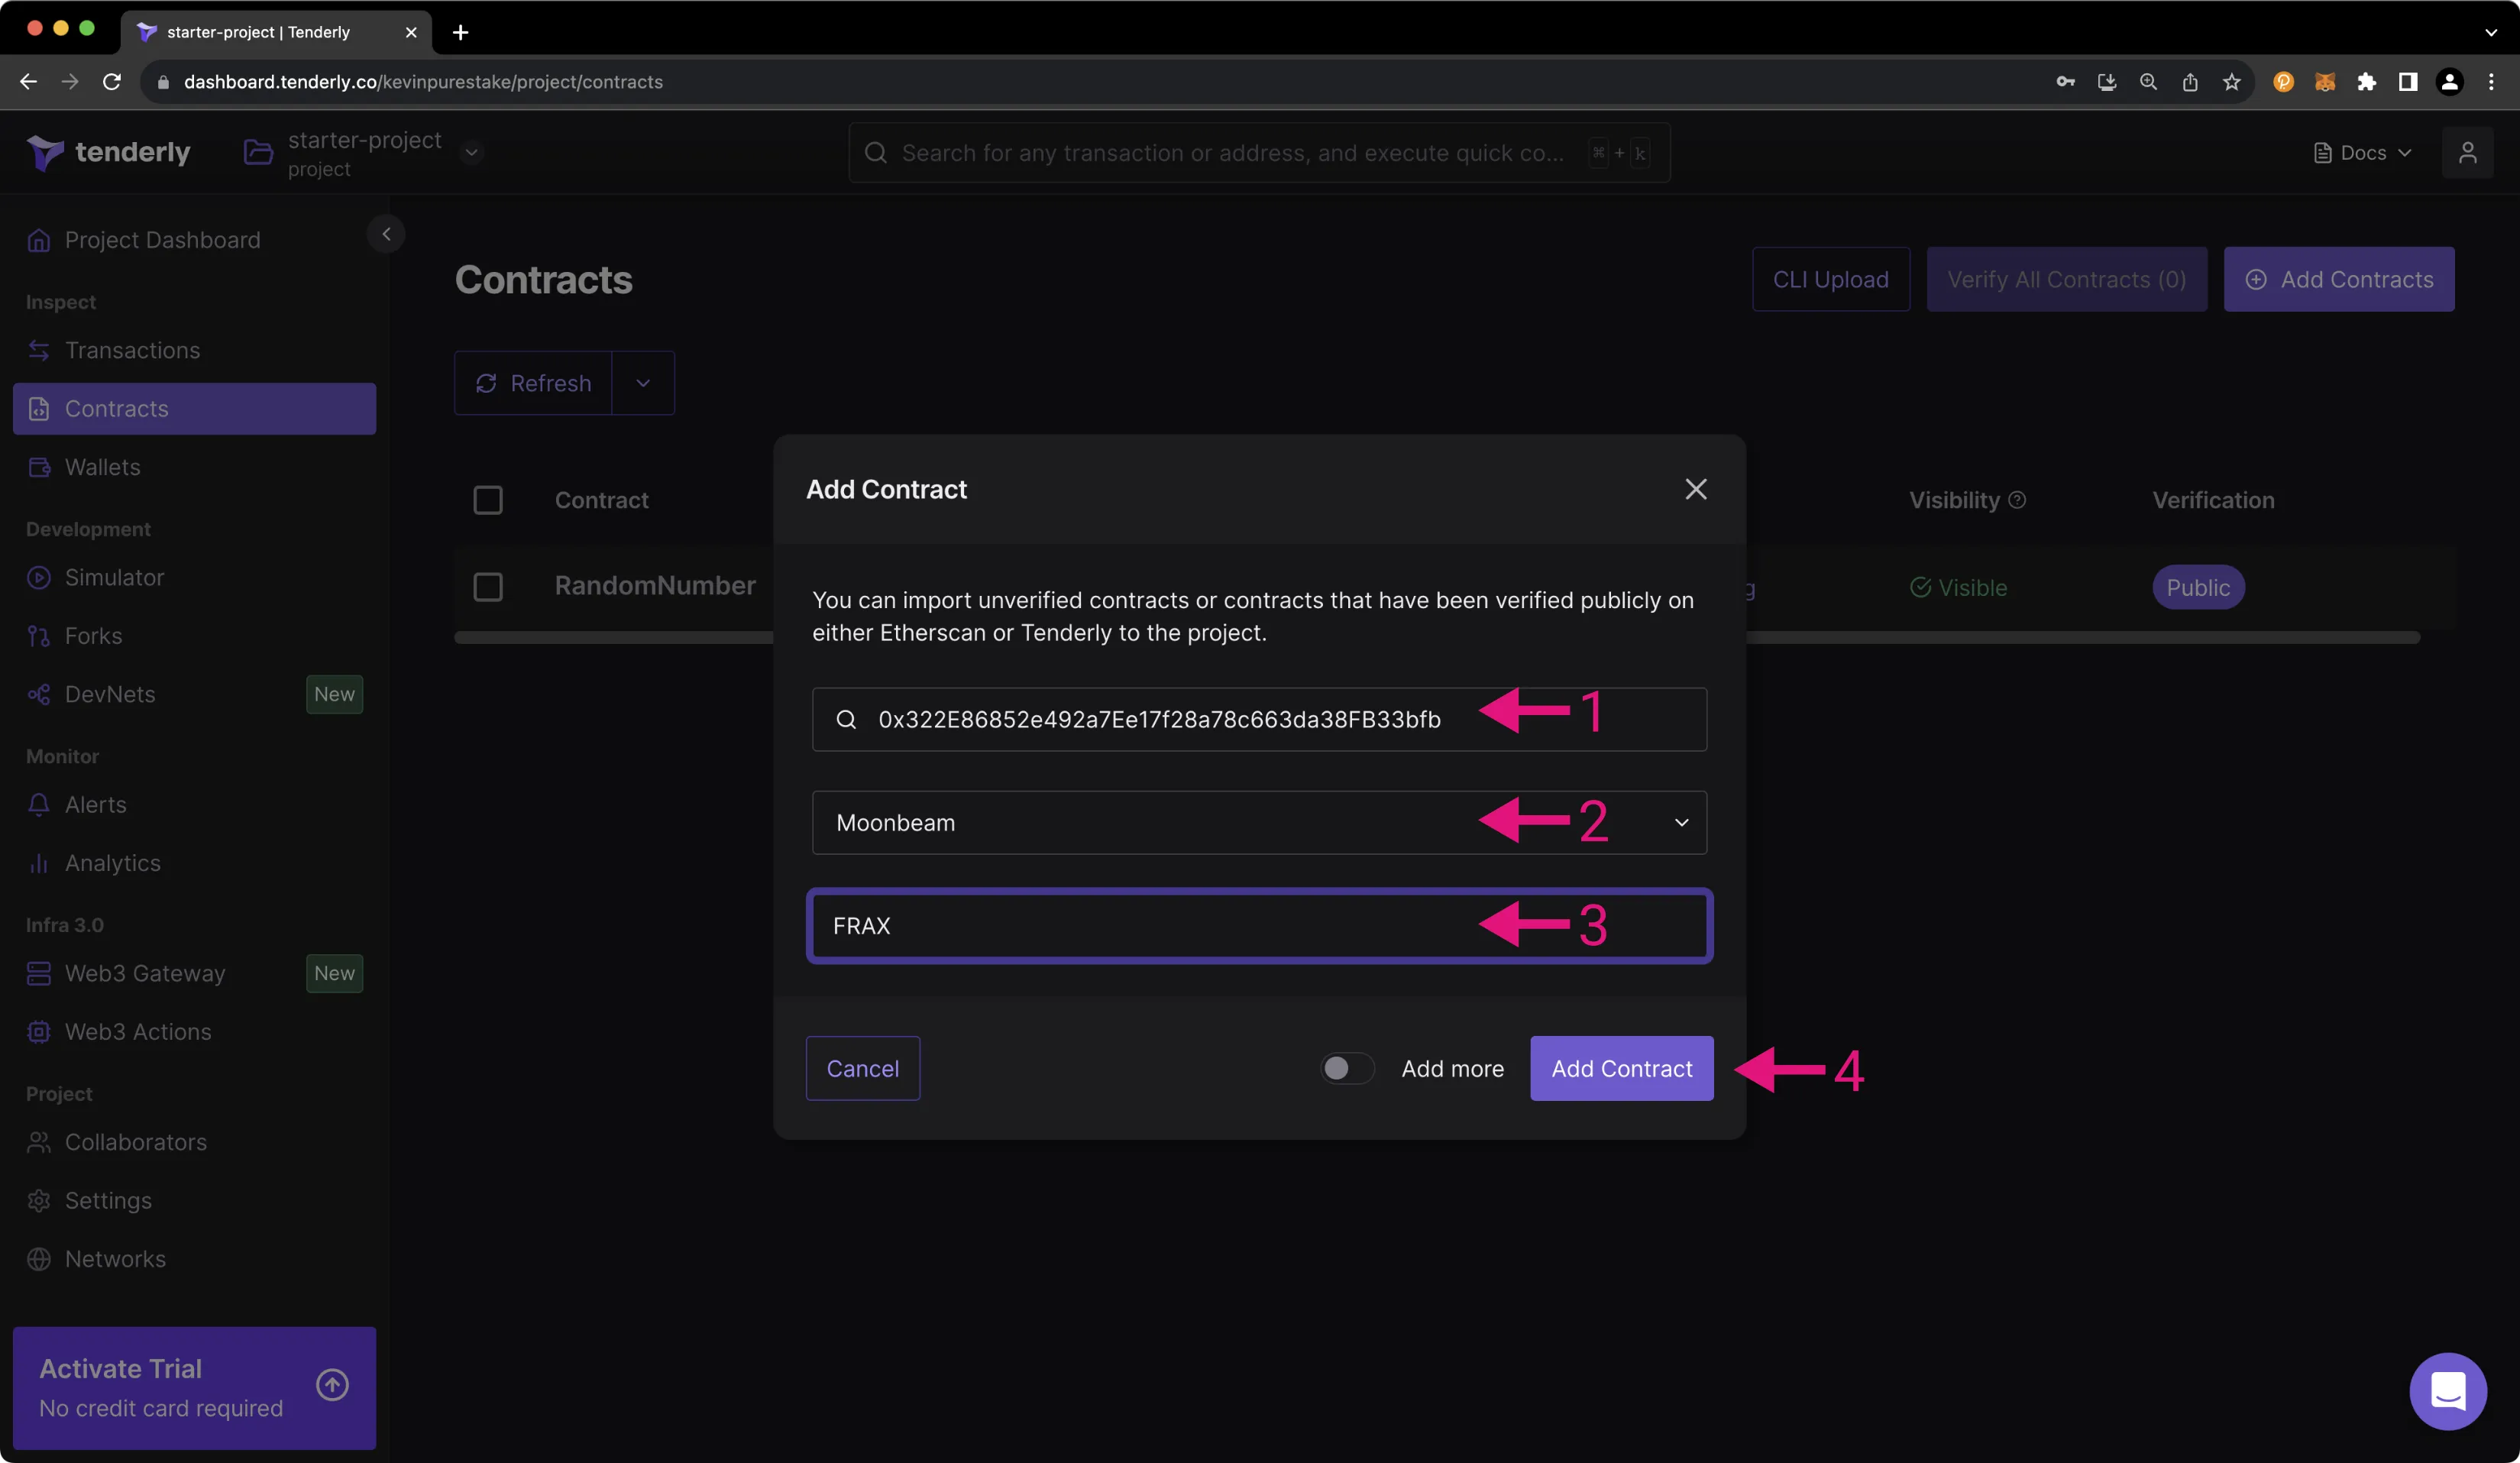
To add a smart contract to your Tenderly project, click on the Contracts tab under the Inspect heading, then click Add Contracts. Then, take the following steps:
- Enter the address of the contract. For this tutorial, we'll be using the FRAX stablecoin contract
0x322E86852e492a7Ee17f28a78c663da38FB33bfb - Select the network the contract is deployed to. We'll select Moonbeam in this case
- Give the contract a name to help you recognize it on the dashboard
- Press Add Contract
Simulate a Transaction
Simulations allow you to see how a transaction will execute without actually sending it on the blockchain. You can simulate a transaction against any point in time or simply the latest block.
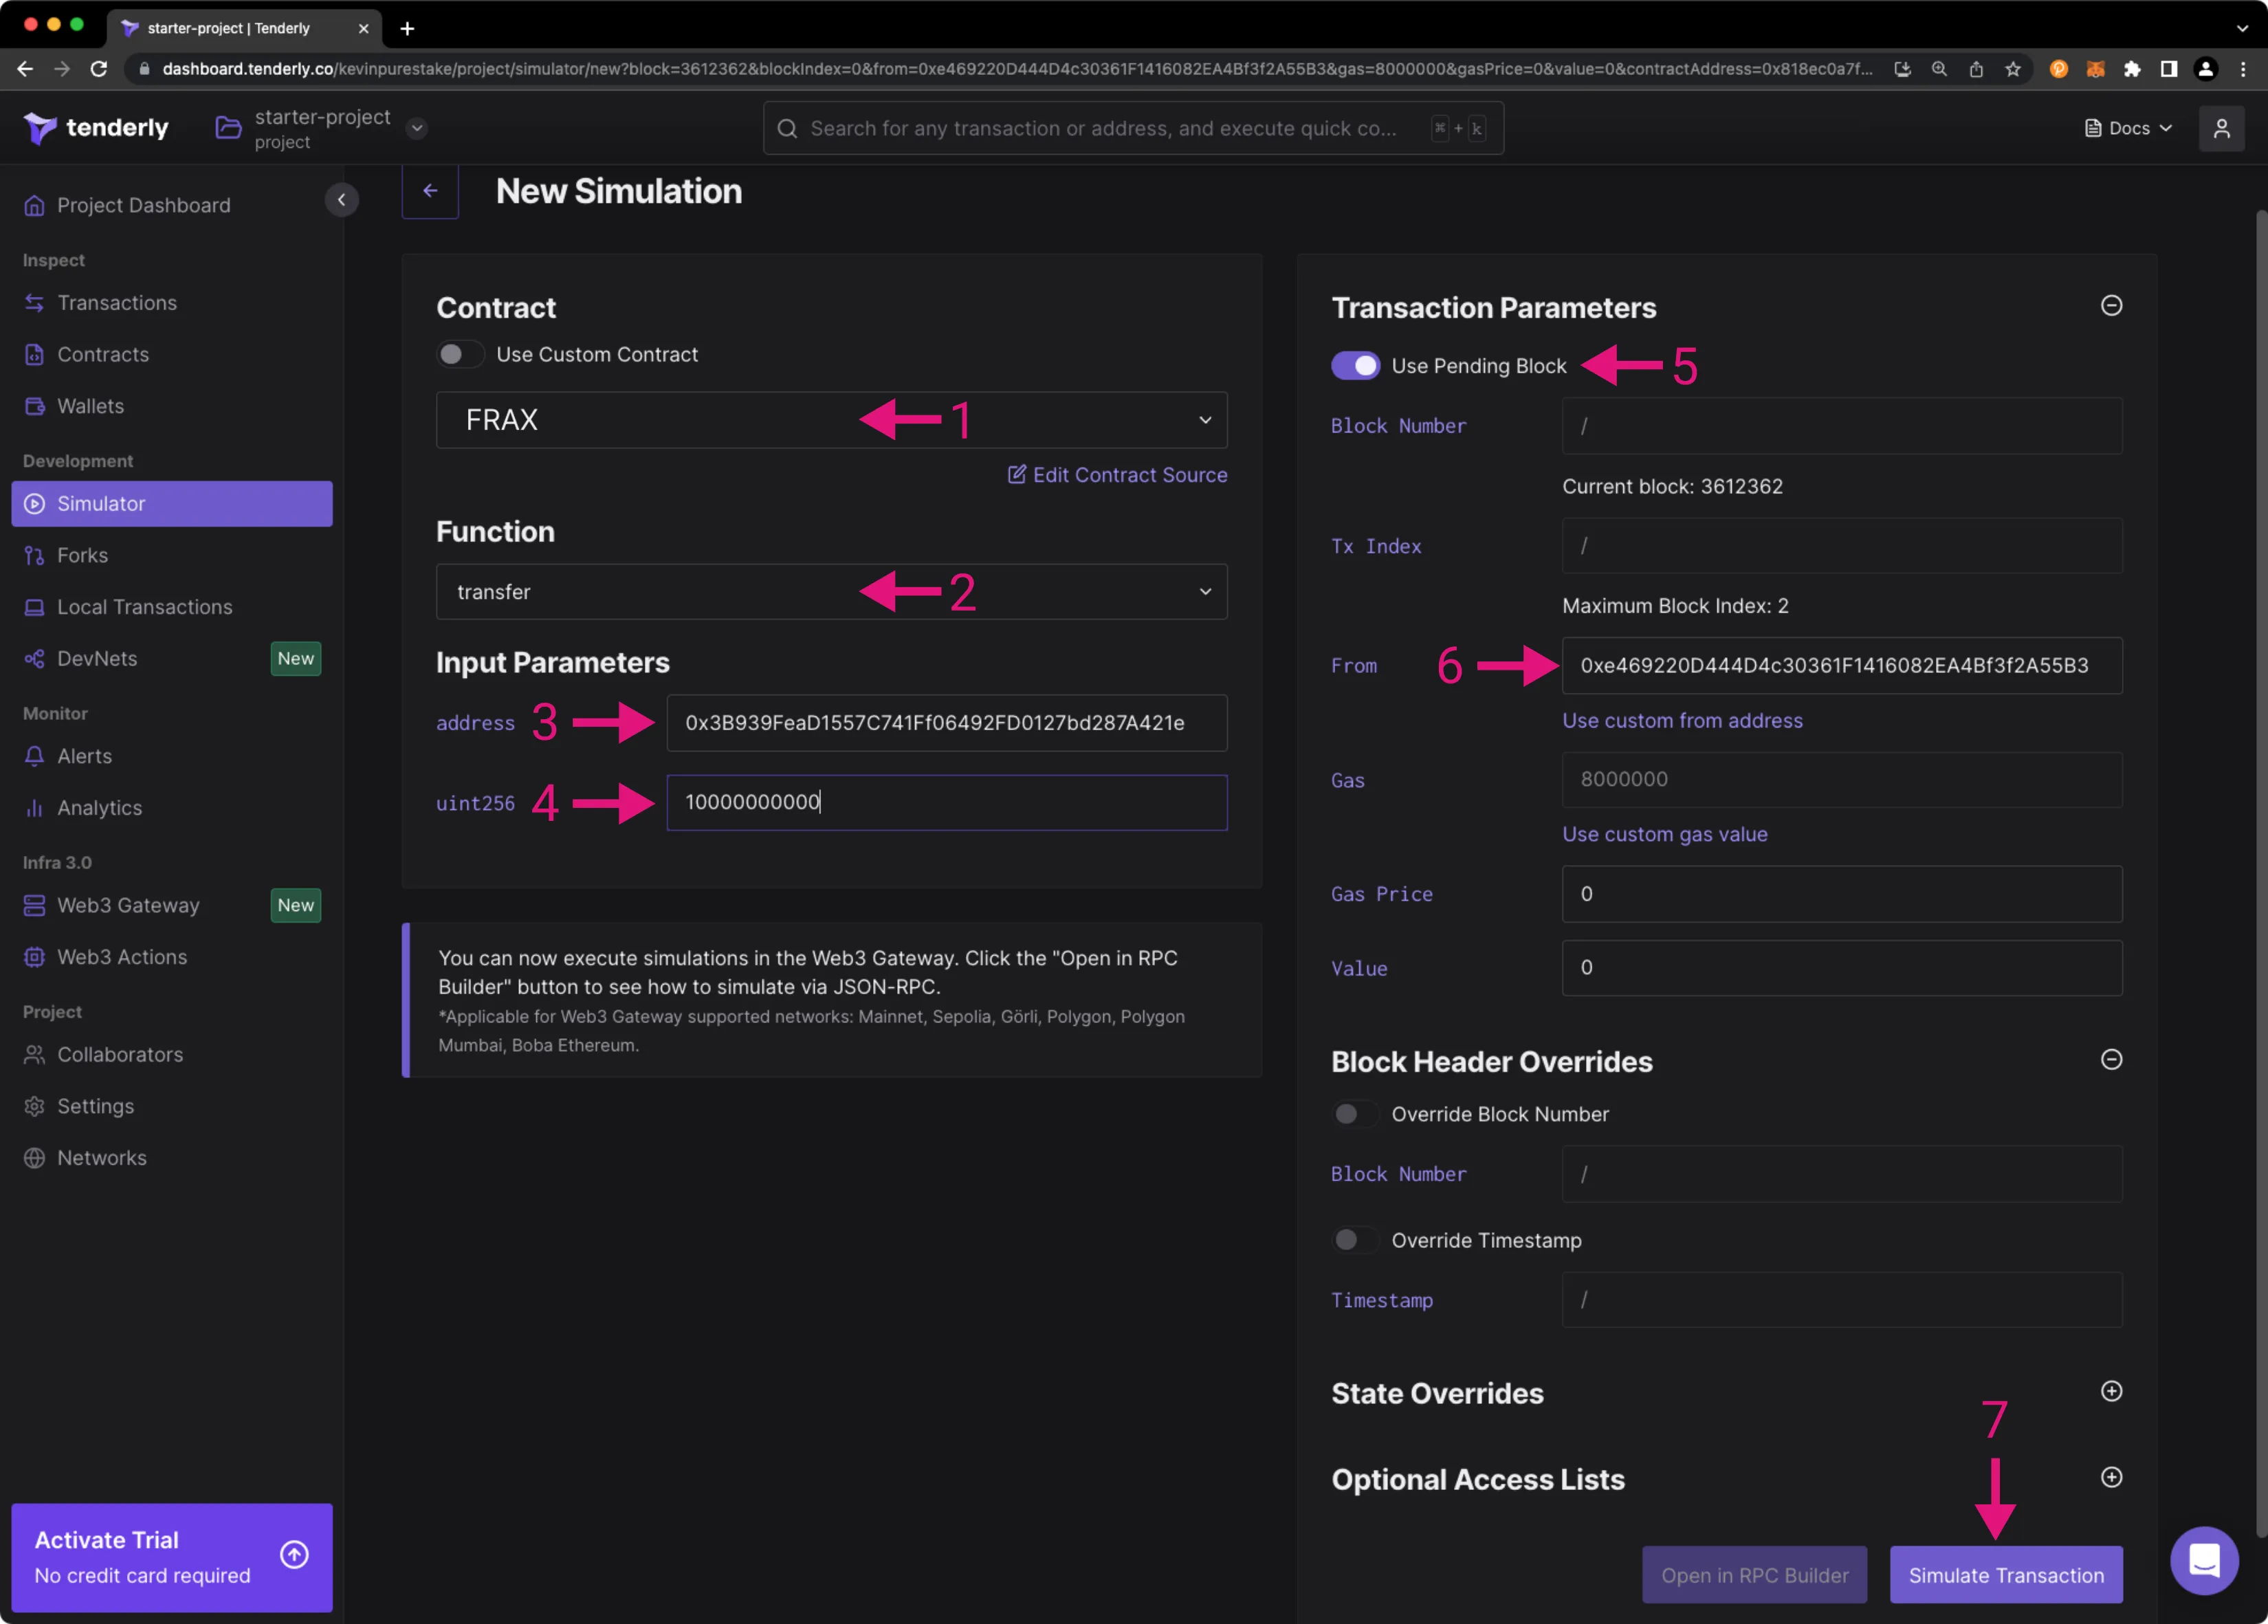
Head over to the Simulator tab, and let's craft a transaction to simulate against the Moonbeam network by taking the following steps:
- Select the contract that you'd like to interact with. The name displayed here is the nickname that you gave the contract when adding it to your Tenderly workspace
- Select the contract function you'd like to call.
Transferis selected for demonstration purposes - Next, we'll input the relevant function parameters. For destination address, you can input any address, such as Alith's address:
0xf24FF3a9CF04c71Dbc94D0b566f7A27B94566cac - For amount, you can also specify any amount, such as
10000000000 - Select Pending Block to run the simulation against the latest Moonbeam block produced
- Specify the from address as Baltathar:
0x3Cd0A705a2DC65e5b1E1205896BaA2be8A07c6e0or another address of your choice - Press Simulate Transaction
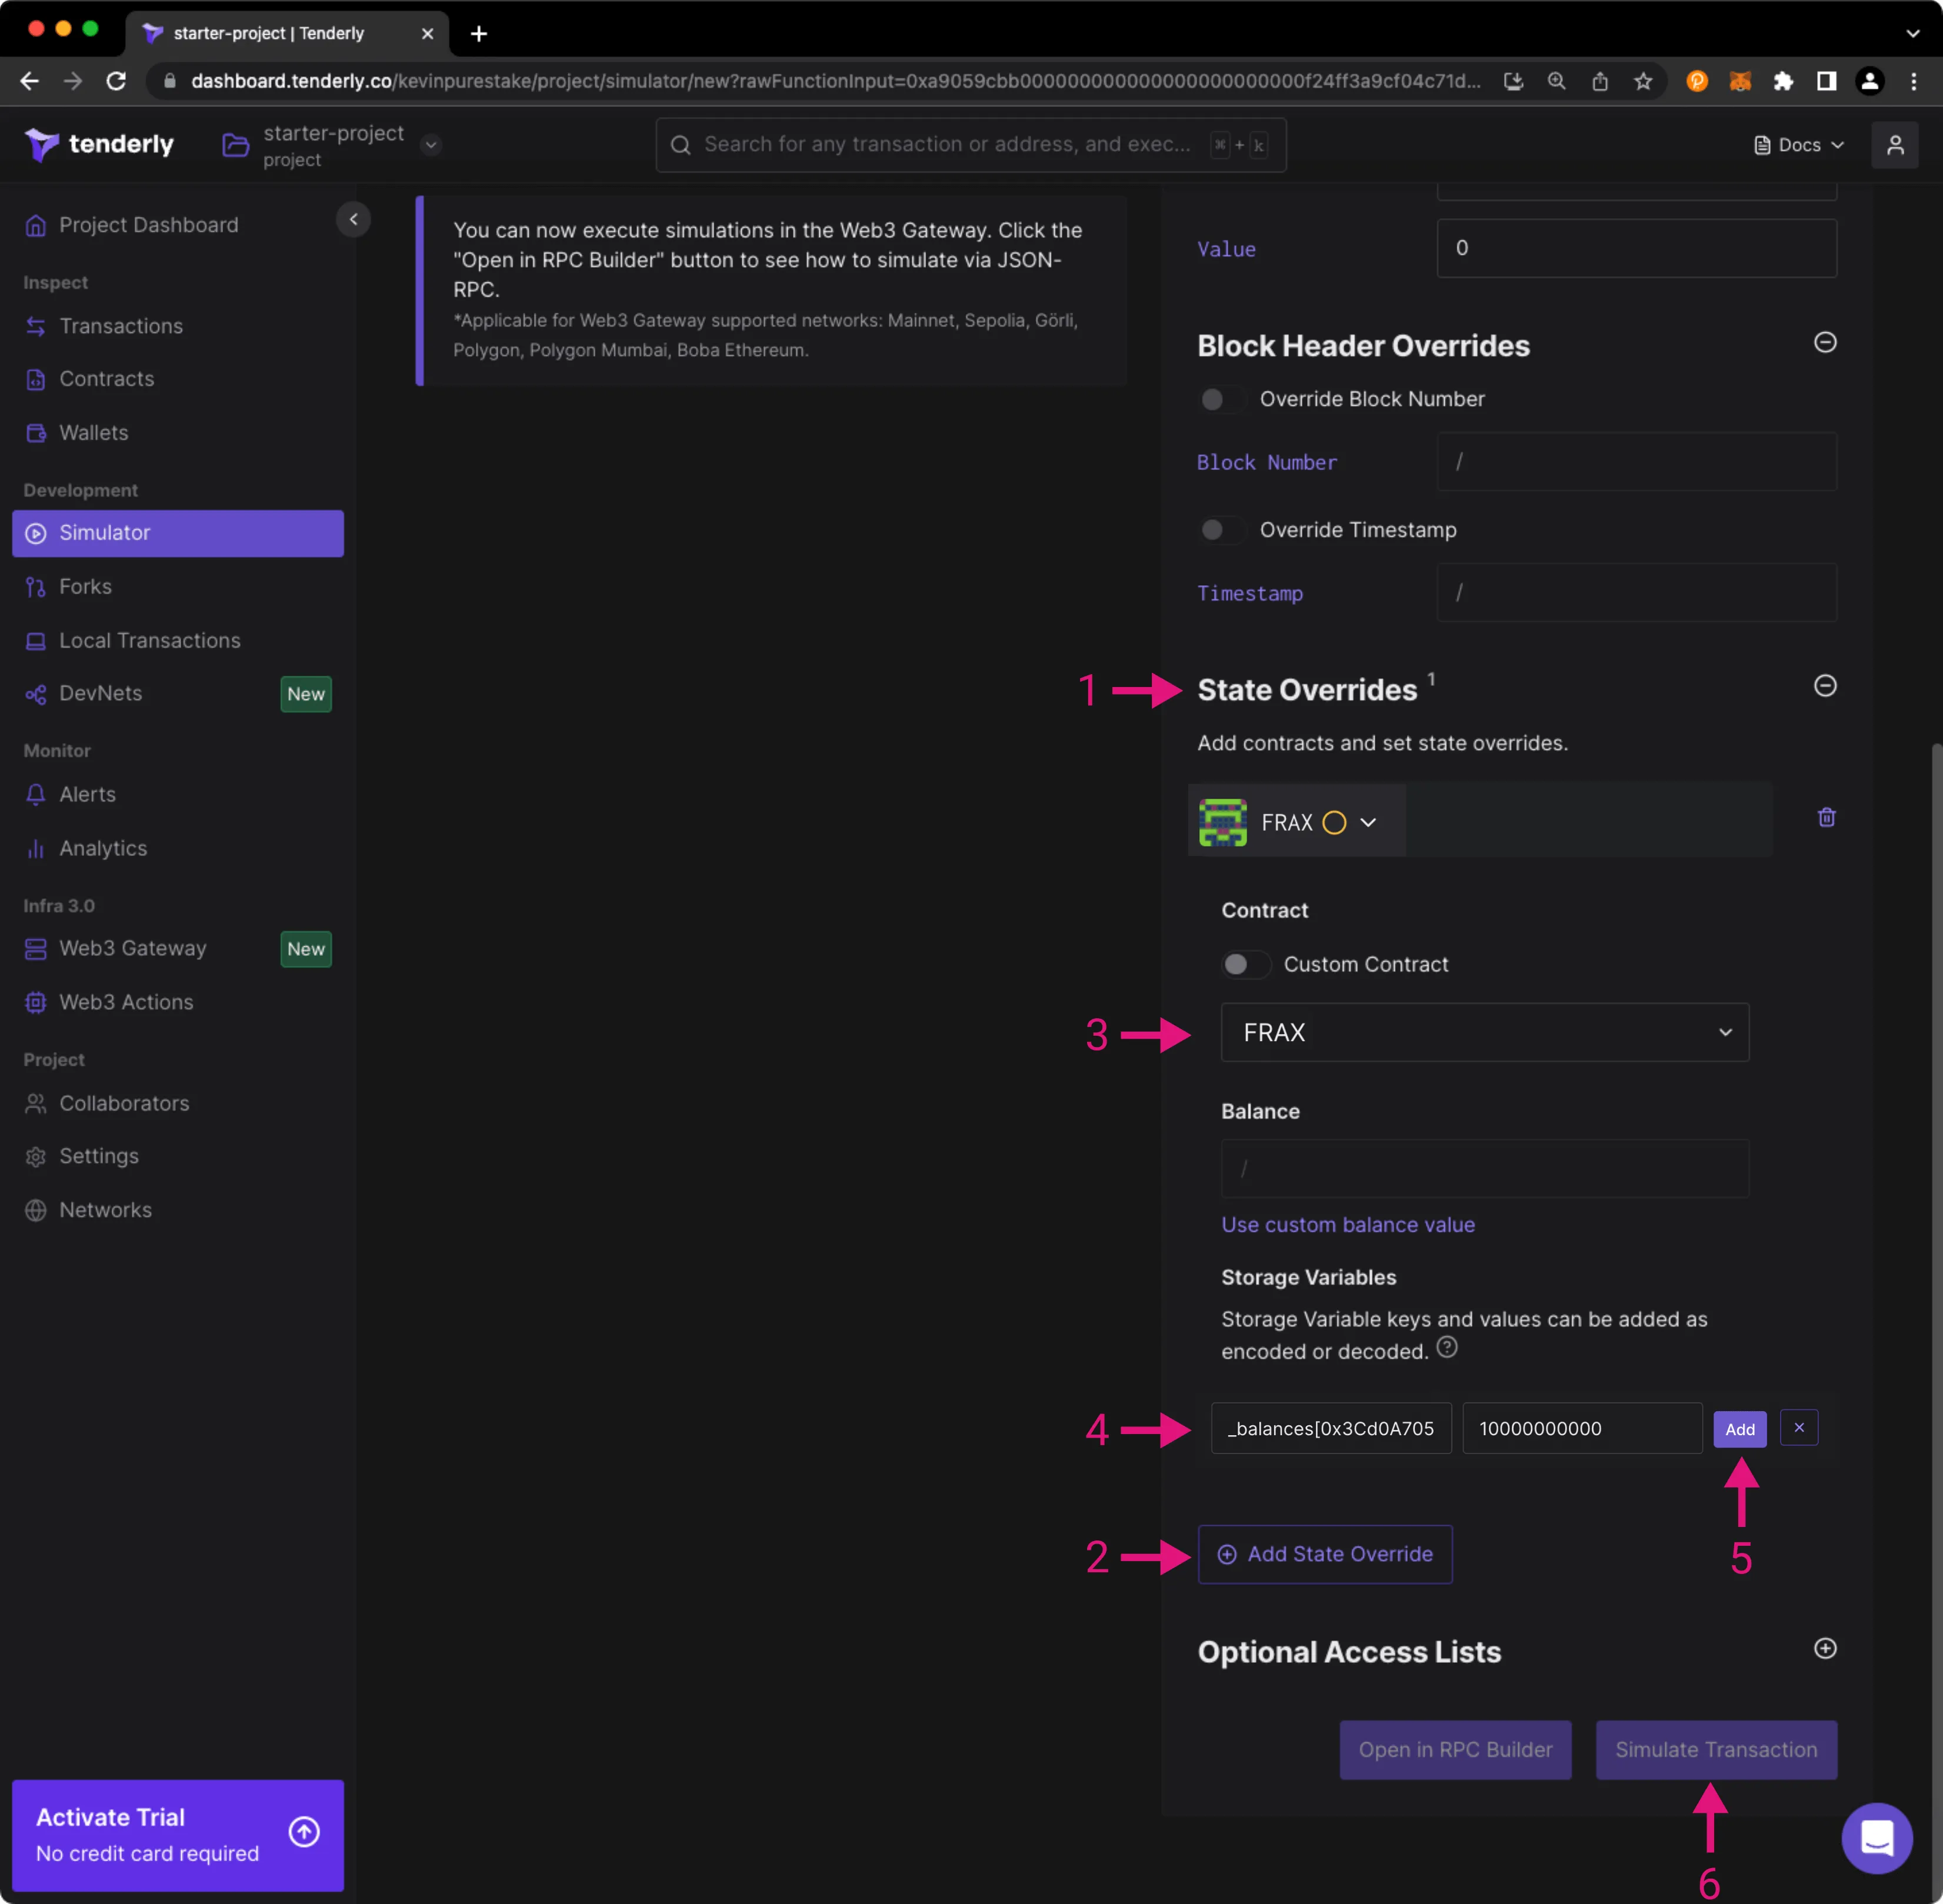
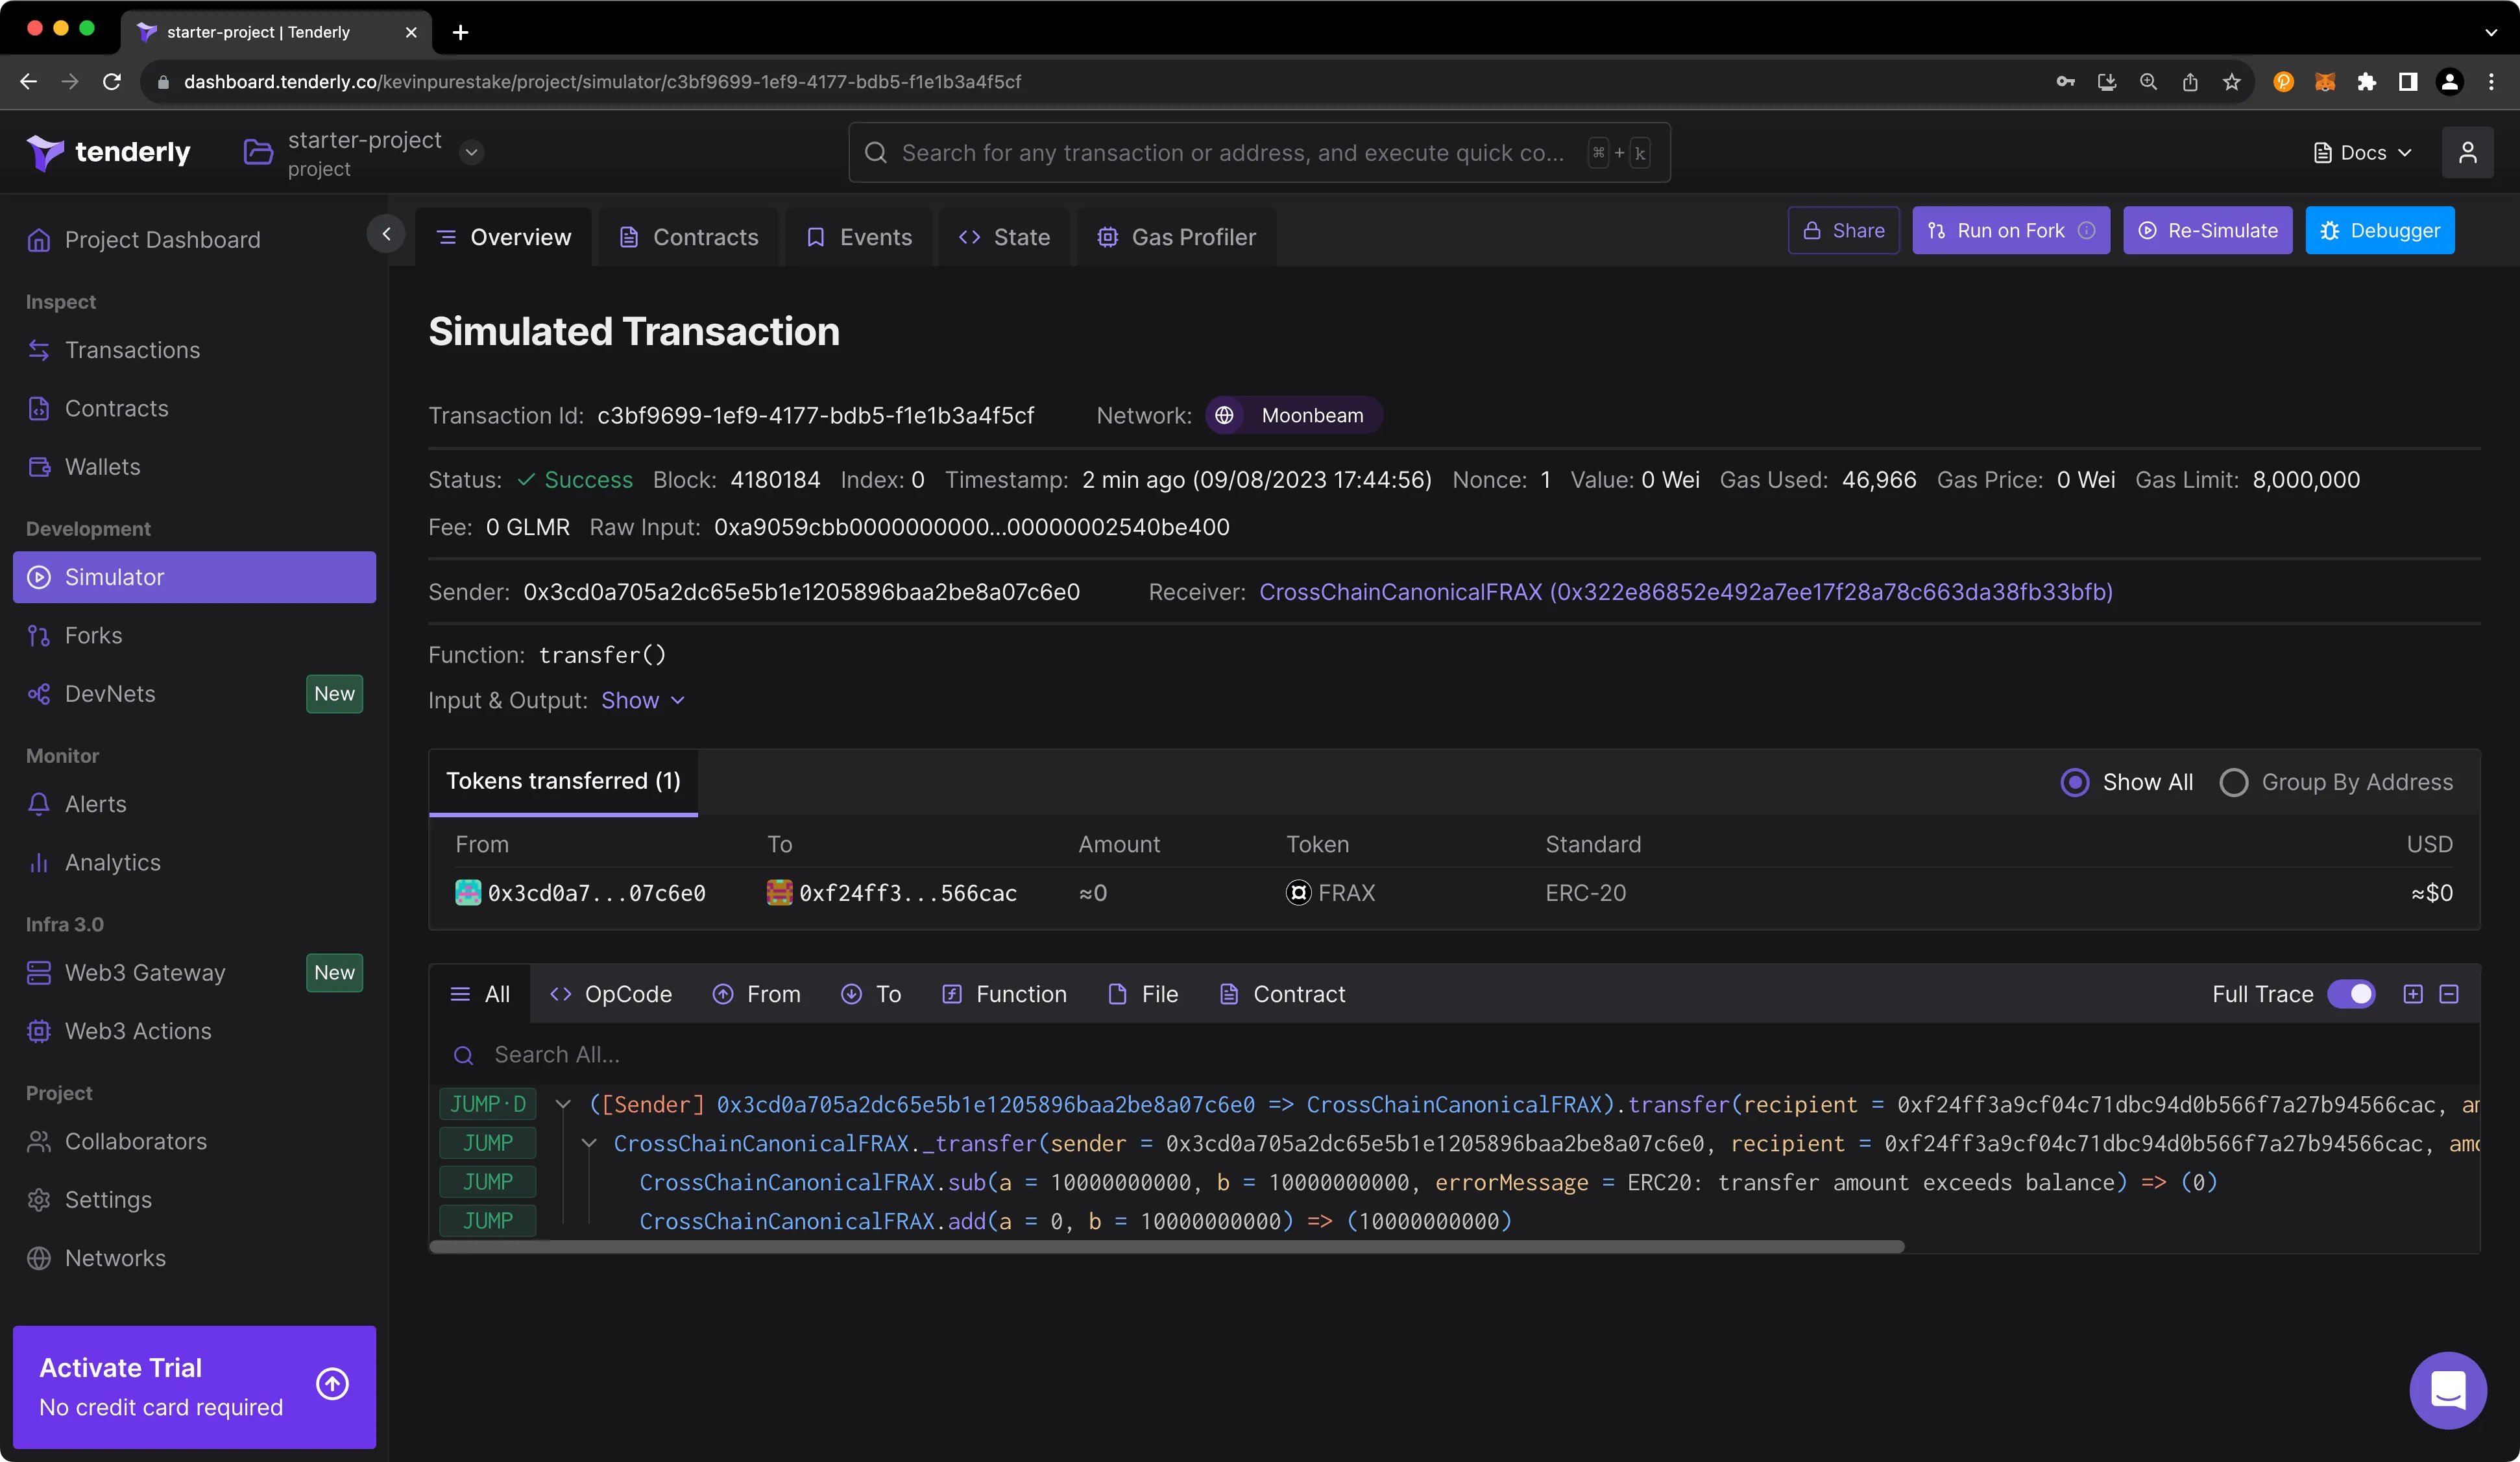
Clearly, this simulated transaction is going to fail because we're trying to send 10,000 FRAX that we don't have. But, with the Tenderly Simulator, we can tinker with the blockchain state and run simulations that assume different conditions. For example, let's run the simulation assuming that Baltathar actually holds a balance of 10,000 FRAX. Press Re-Simulate in the upper right corner, then take the following steps:
- Expand the State Overrides section
- Press Add State Override
- Select the relevant contract, in this case the FRAX one
- Under the Storage Variables section, we're going to override the mapping that holds the balance of Baltathar by specifying the key as:
balanceOf[0x3Cd0A705a2DC65e5b1E1205896BaA2be8A07c6e0]and the value as:10000000000. Pay careful attention that you are performing this step in the Storage Variables section and not the Balance section - Press Add to confirm adding the state override
- Press Simulate Transaction
Note
Remember that the Alith and Baltathar accounts are part of the list of public developer accounts with known private keys. You will lose any funds sent to these addresses.
If you correctly added the state override, you should now see a transaction simulation success screen upon running the simulation. If you get an error, you can press Re-Simulate and verify that you have configured the state override correctly.
You can also access Tenderly's transaction simulator via the Simulations API.
Fork the Chain
Create a Fork
Simulations are great for one-off tests, but what if you want to test a series of interdependent transactions? A fork is a better option in this case because forks are stateful. Additionally, Tenderly forks are a terrific option when you want to interact with contracts in a private environment without redeploying existing smart contract logic on-chain.
Note
There are some limitations to be aware of when using Tenderly's forking feature. You cannot interact with any of the Moonbeam precompiled contracts or their functions. Precompiles are a part of the Substrate implementation and therefore cannot be replicated in the simulated EVM environment. This prohibits you from interacting with cross-chain assets on Moonbeam and Substrate-based functionality such as staking and governance.
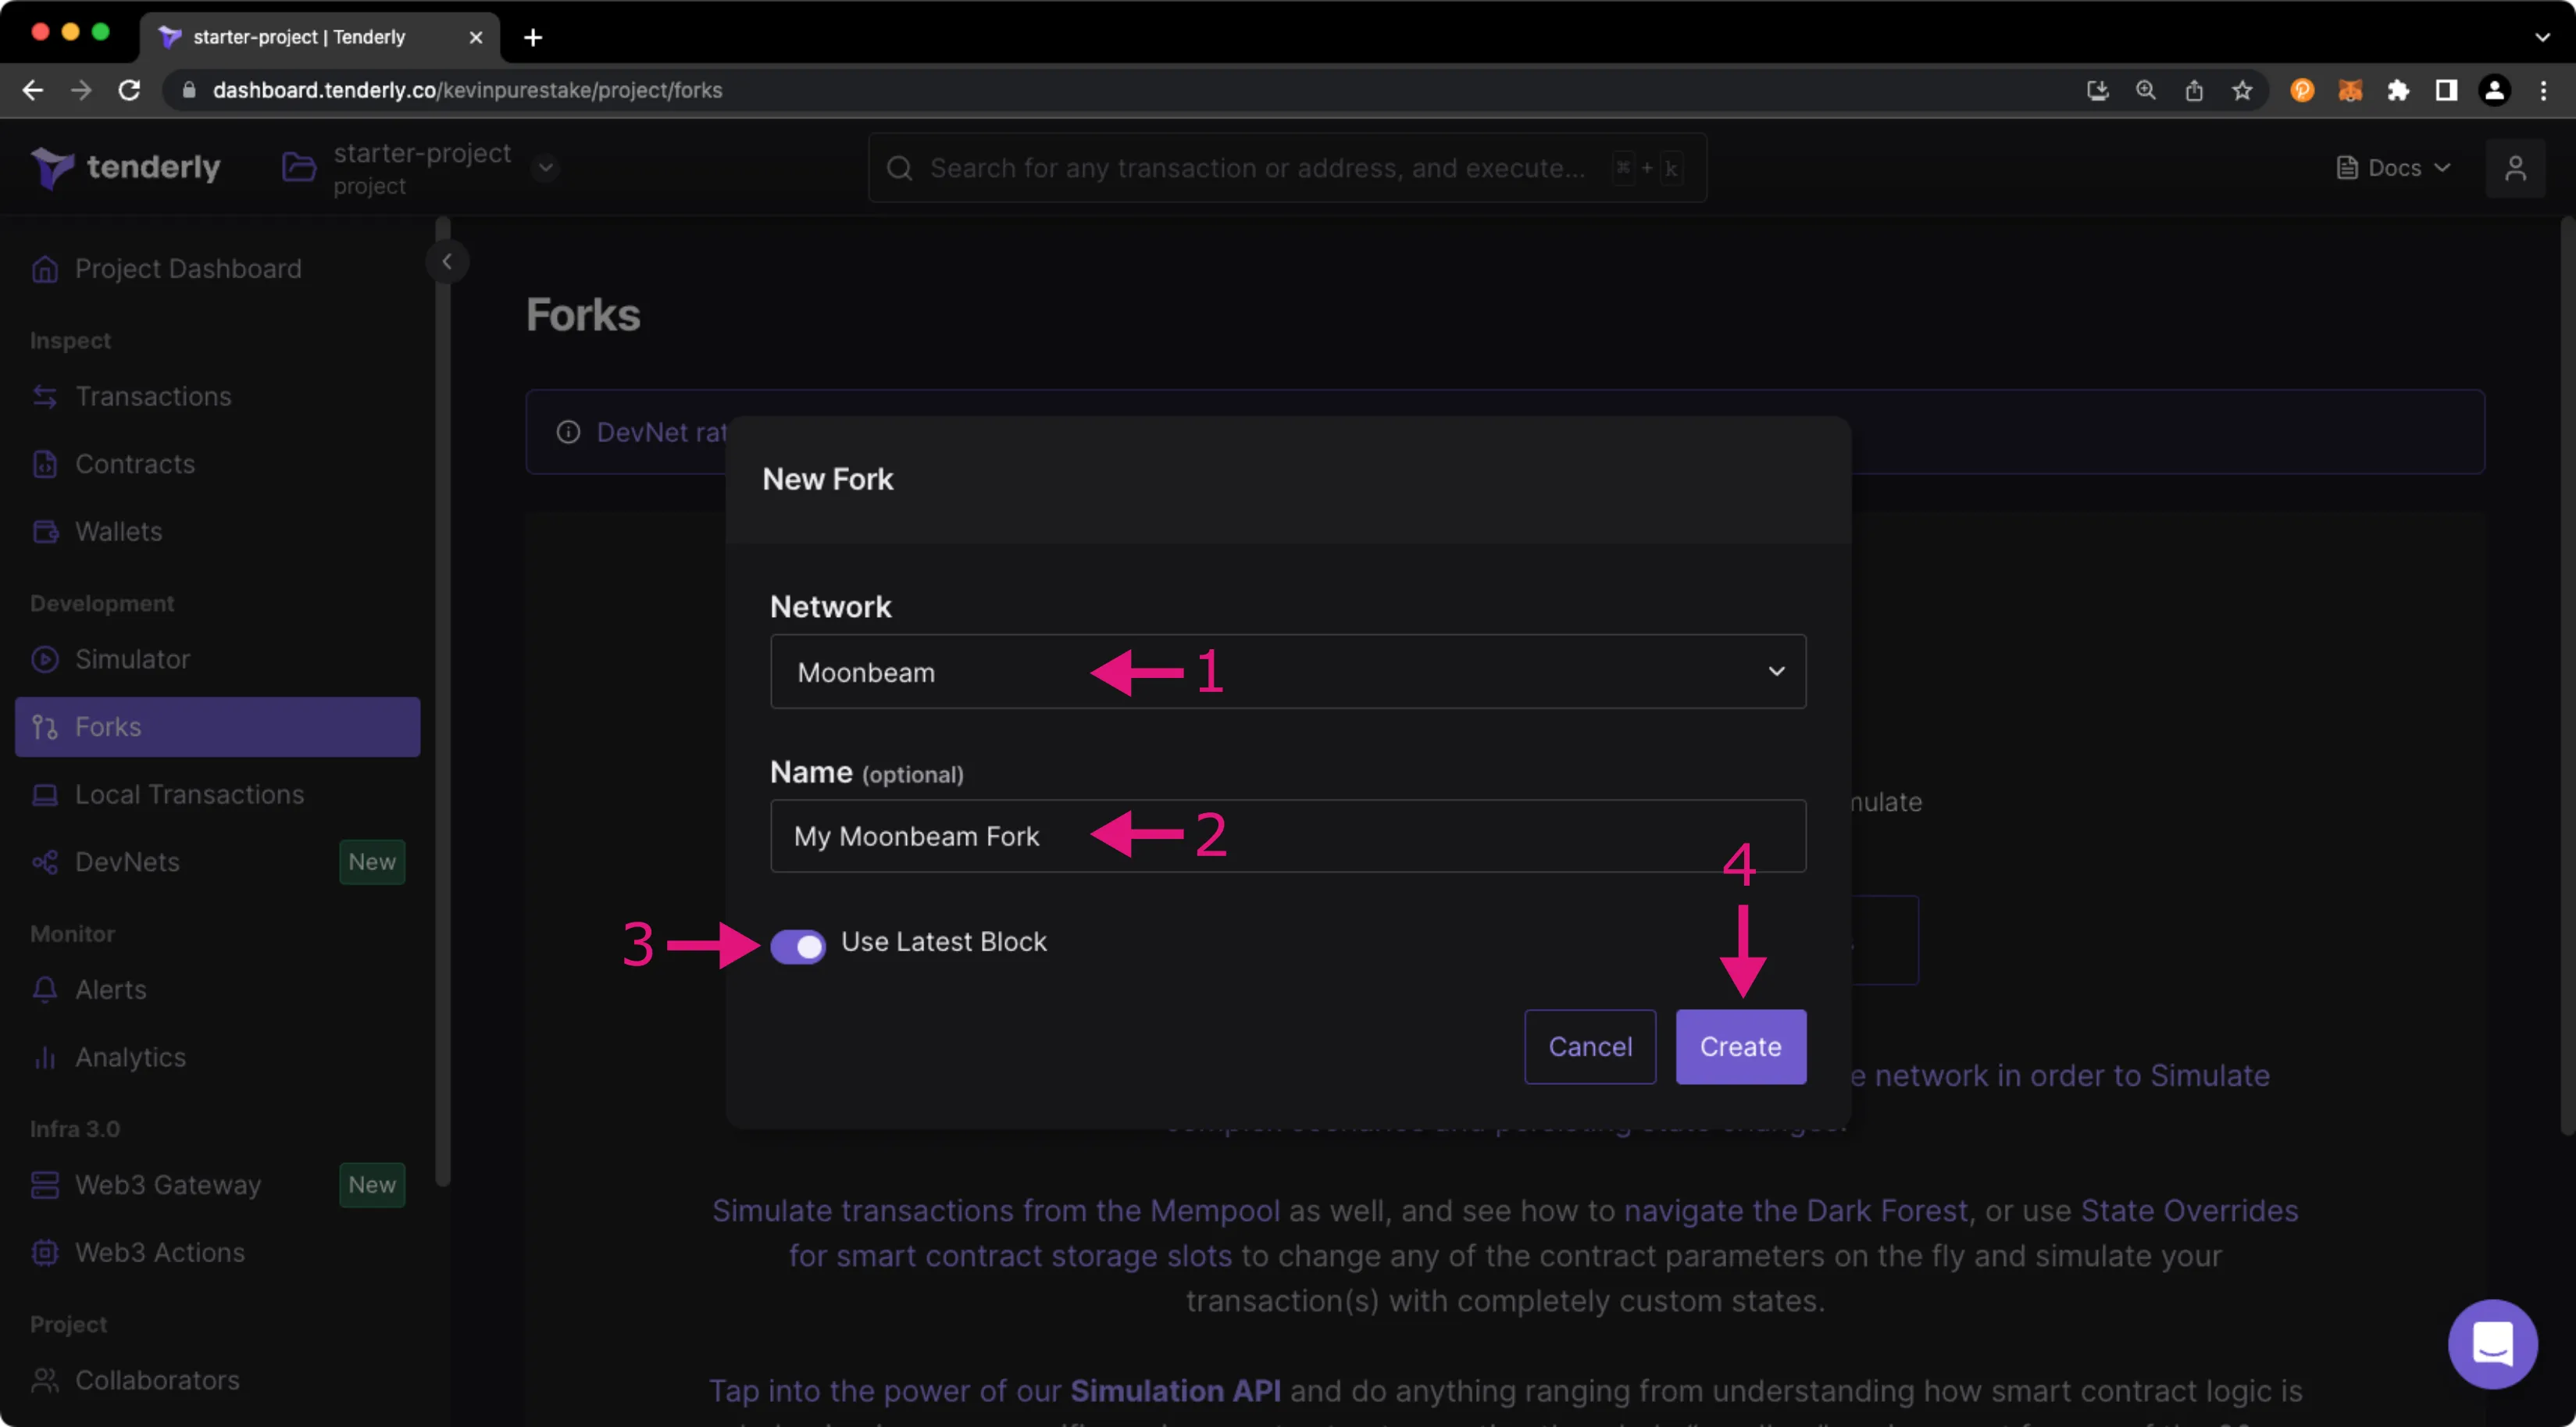
It's easy to create a fork with Tenderly. To do so, head to the Forks tab and take the following steps:
- Select Moonbeam or Moonriver from the Network dropdown
- (Optional) Give your fork a name
- If you only need data up until a specific block, you can toggle the Use Latest Block slider to off and specify the block number. Otherwise, you can leave the slider as is to include all blocks up until the latest block
- Click Create
Interacting with the Fork
In the next part, we'll be demonstrating the statefulness of forks and how they can help you with testing scenarios beyond a single simulation. With the fork you just created, try calling the transfer function to send some FRAX from Baltathar to Alice like you did previously in the simulation section but without the state override. Unsurprisingly, this will fail because Baltathar has no balance of FRAX. But let's change that by minting some FRAX for Baltathar in our forked environment. To do so, take the following steps:
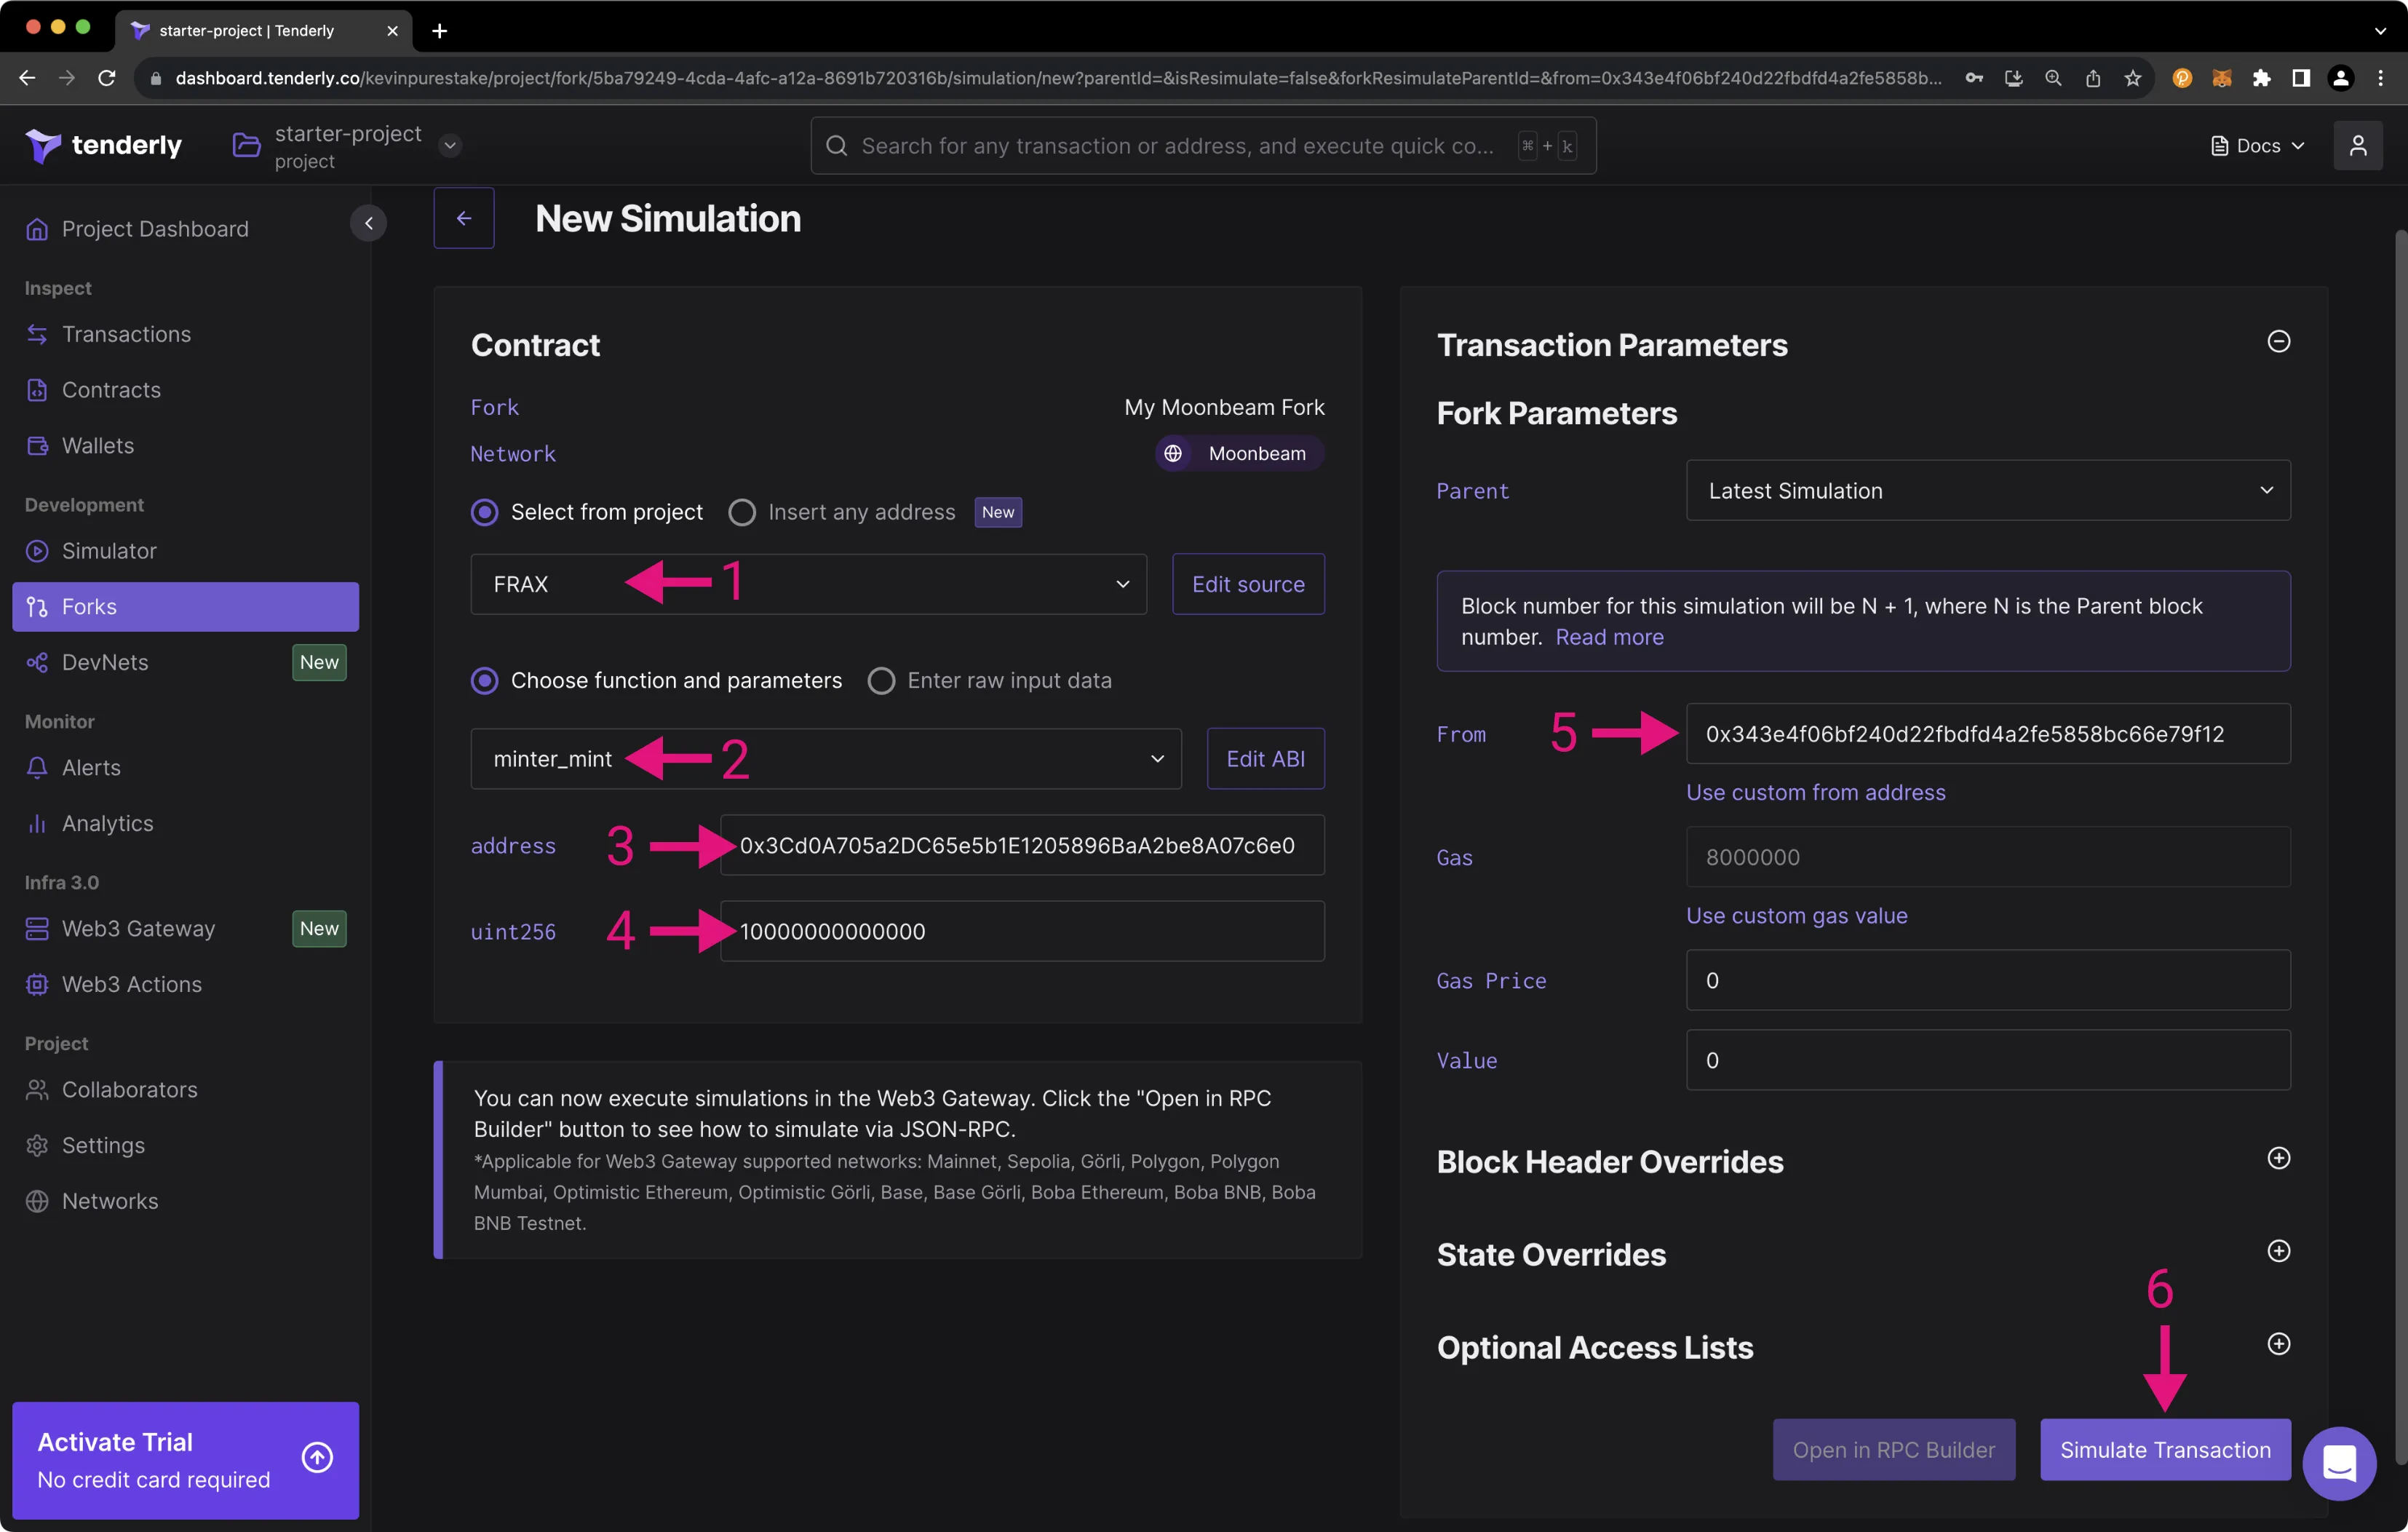
- Select the desired contract to interact with.
- Select the contract function you'd like to call. We'll choose
minter_mintin this case. - Enter Baltathar's address:
0x3Cd0A705a2DC65e5b1E1205896BaA2be8A07c6e0 - Enter the amount to mint, such as
10000000000000 - Minting is a privileged role in the FRAX contract. We need to specify the sender of this transaction in our fork as an authorized minter of the FRAX contract, which is
0x343e4f06bf240d22fbdfd4a2fe5858bc66e79f12 - Press Simulate Transaction
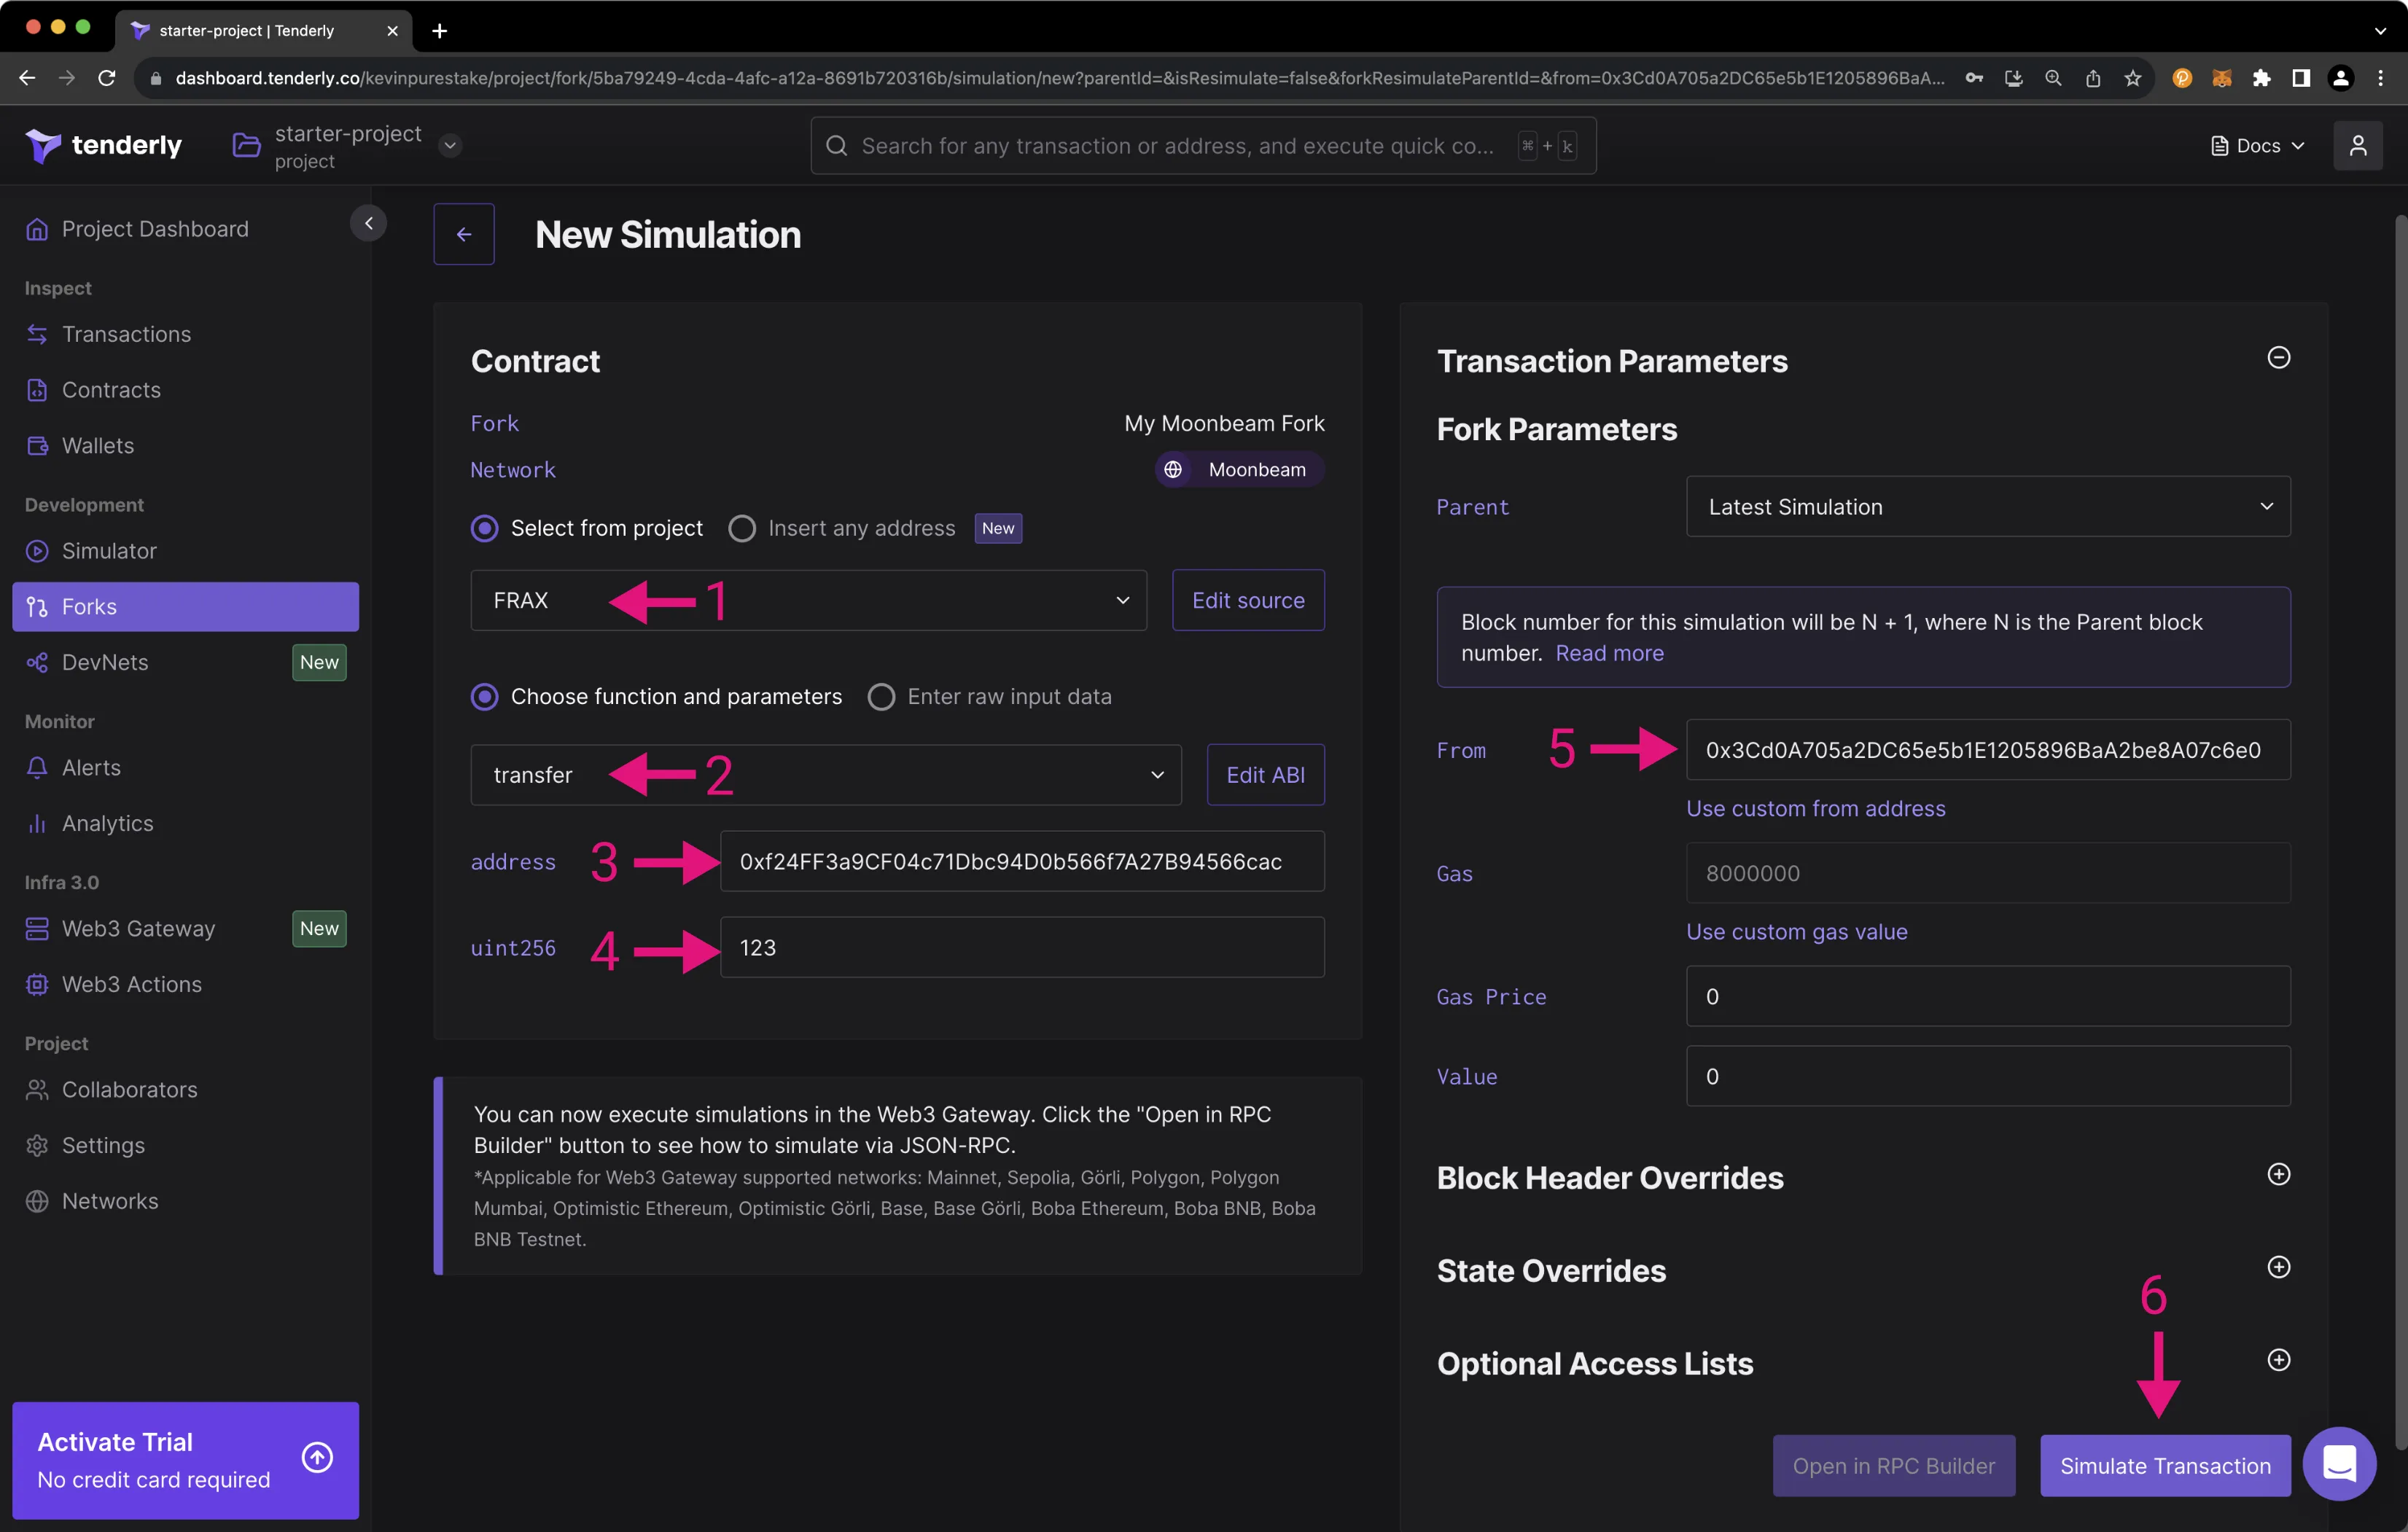
Great! Now let's go ahead and try to perform the transfer from Baltathar now that Baltathar has plenty of FRAX. To do so, press New Simulation, then take the following steps:
- Select the
FRAXcontract from the dropdown - Select the contract function you'd like to call. We'll select
transferin this case - Next, we'll input the relevant function parameters. Input Alith's address as the destination:
0xf24FF3a9CF04c71Dbc94D0b566f7A27B94566cac - For amount, you can also specify any nonzero amount, such as
123 - Specify the from address as Baltathar
0x3Cd0A705a2DC65e5b1E1205896BaA2be8A07c6e0 - Press Simulate Transaction
Note in the upper right corner under Fork Parameters that the parent block is the Previous Simulation. This indicates that the simulation we're submitting now will build upon any state changes made in the prior one. If you notice an error indicating that the balance is insufficient, this could be a result of accidentally overriding the block number to use the same block number as the original minter_mint transaction.
Tenderly also generates a custom RPC url for your fork, which looks something like https://rpc.tenderly.co/fork/YOUR_UNIQUE_FORK_IDENTIFIER. You can use this RPC url to submit transactions to your fork from Hardhat, Foundry, or another preferred development environment.
Debugging
The Debugger is one of the most powerful and acclaimed features of Tenderly. It's also quite fast and requires minimal setup. In fact, if the contract you're investigating is already verified on chain, firing up the debugger is as easy as searching for the transaction hash on Tenderly. Let's try it out.
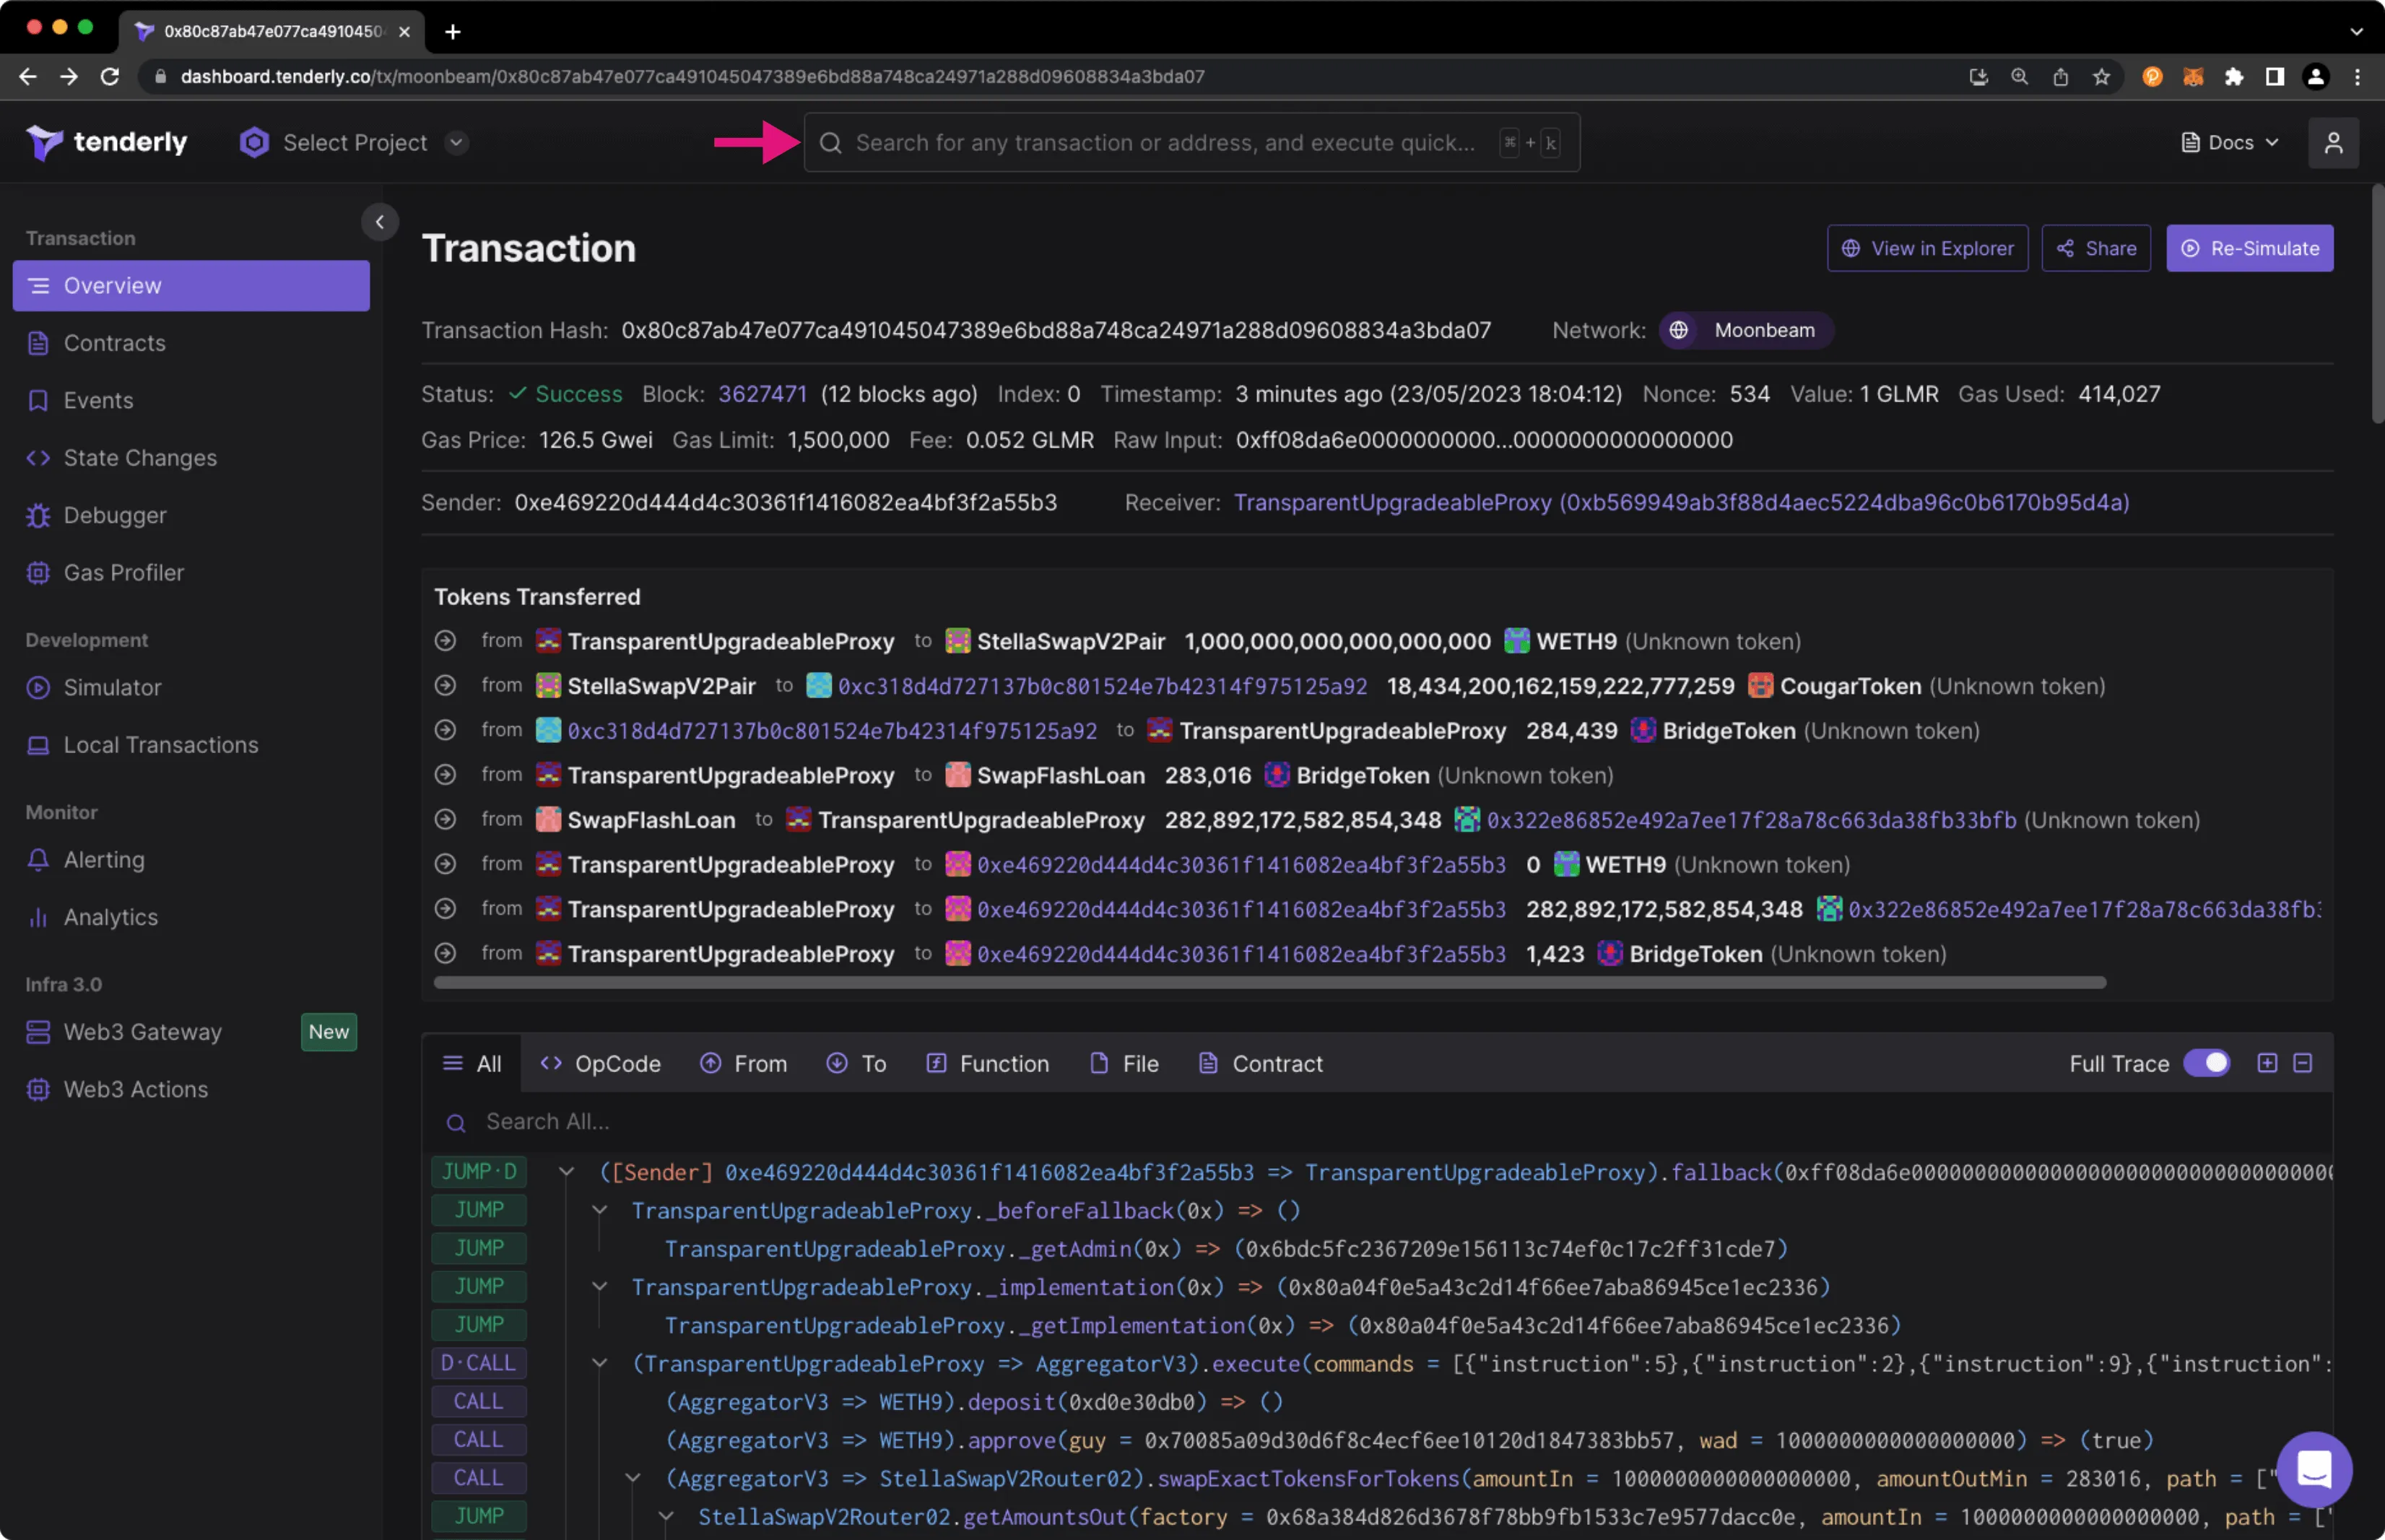
In the upper search bar, you can paste a contract address or a transaction hash. Recall that Tenderly supports Moonbeam and Moonriver but does not currently support Moonbase Alpha. Here's an example transaction hash of a GLMR / FRAX swap on StellaSwap:
0x80c87ab47e077ca491045047389e6bd88a748ca24971a288d09608834a3bda07
After finding the transaction hash, you're greeted at the top with all of the typical statistics about the transaction, such as status, gas price, gas used, etc. Following that, you'll see a breakdown of the tokens transferred. And at the bottom you'll see a long list of every function call. Given that a swap is a relatively complex interaction, and given that StellaSwap uses upgradable proxy contracts, you'll see quite a long list in this example.
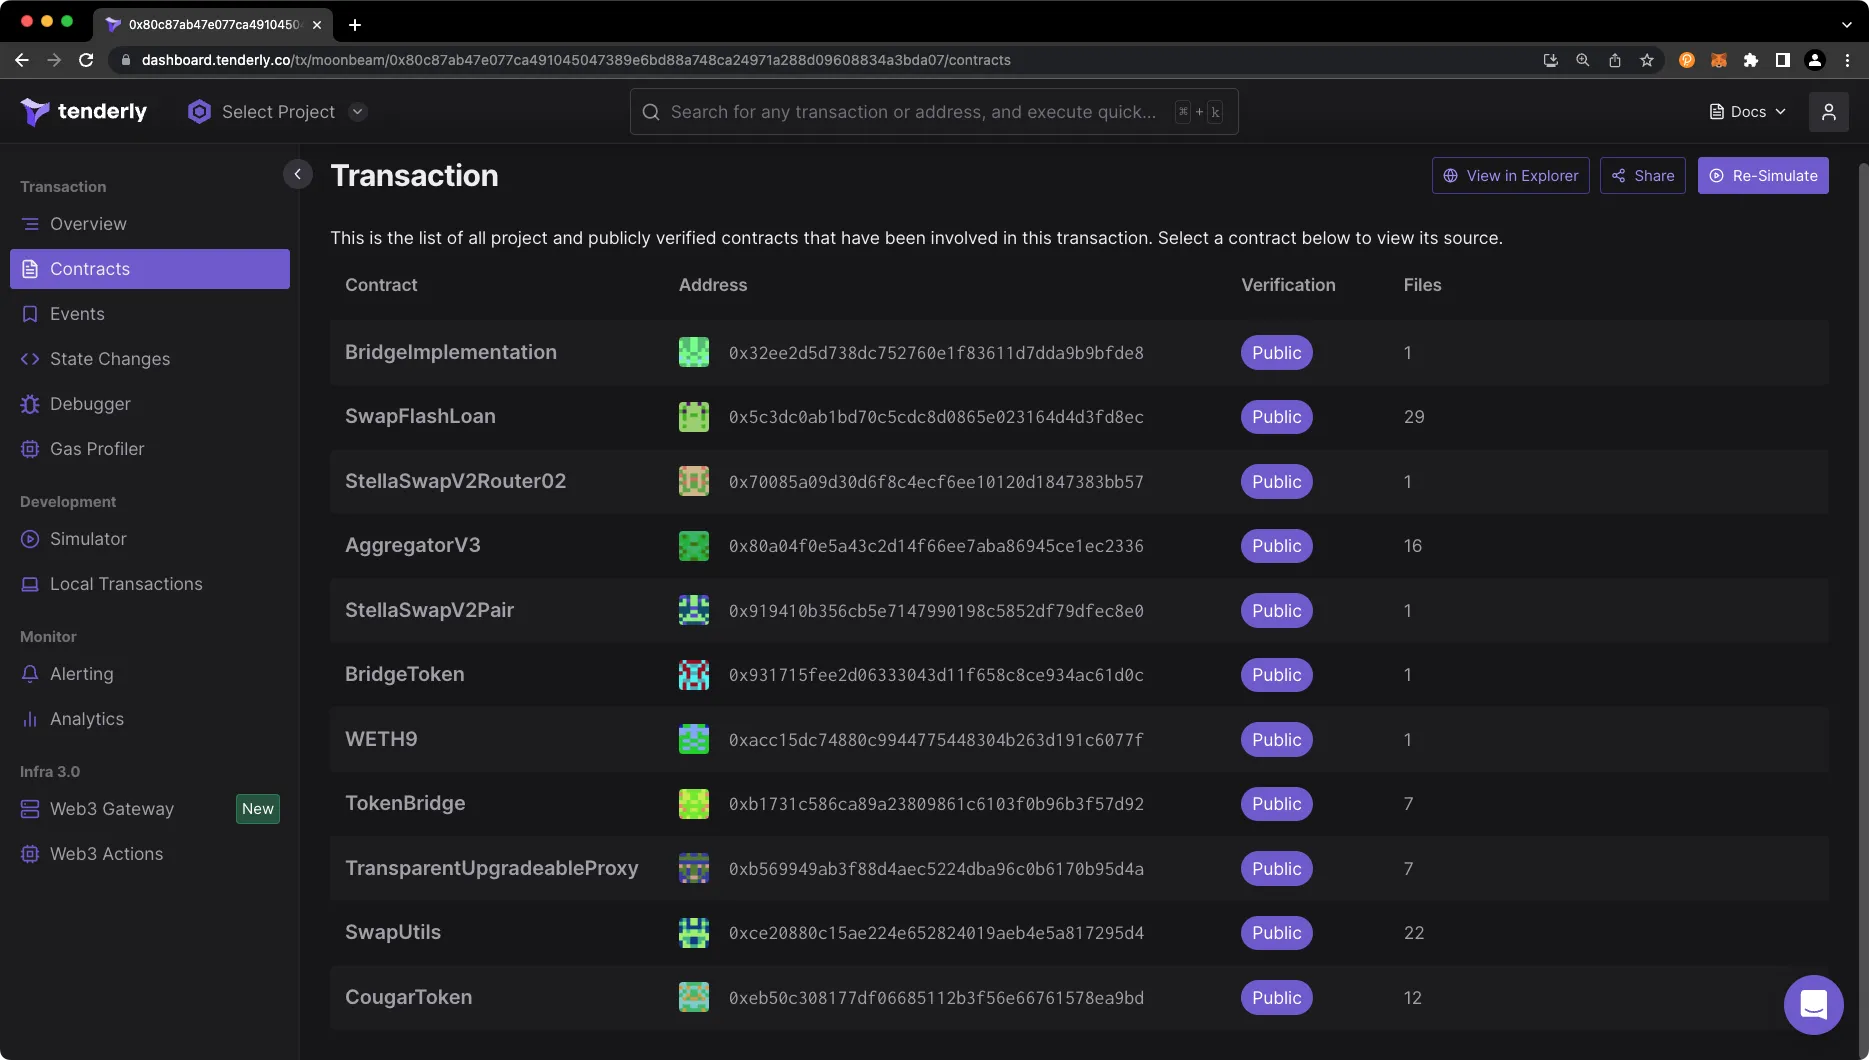
If you click on Contracts on the left-hand navigation bar, you'll see a list of every contract the transaction interacted with. You can click on a contract to see more details and view the entire source code if the contract is verified.
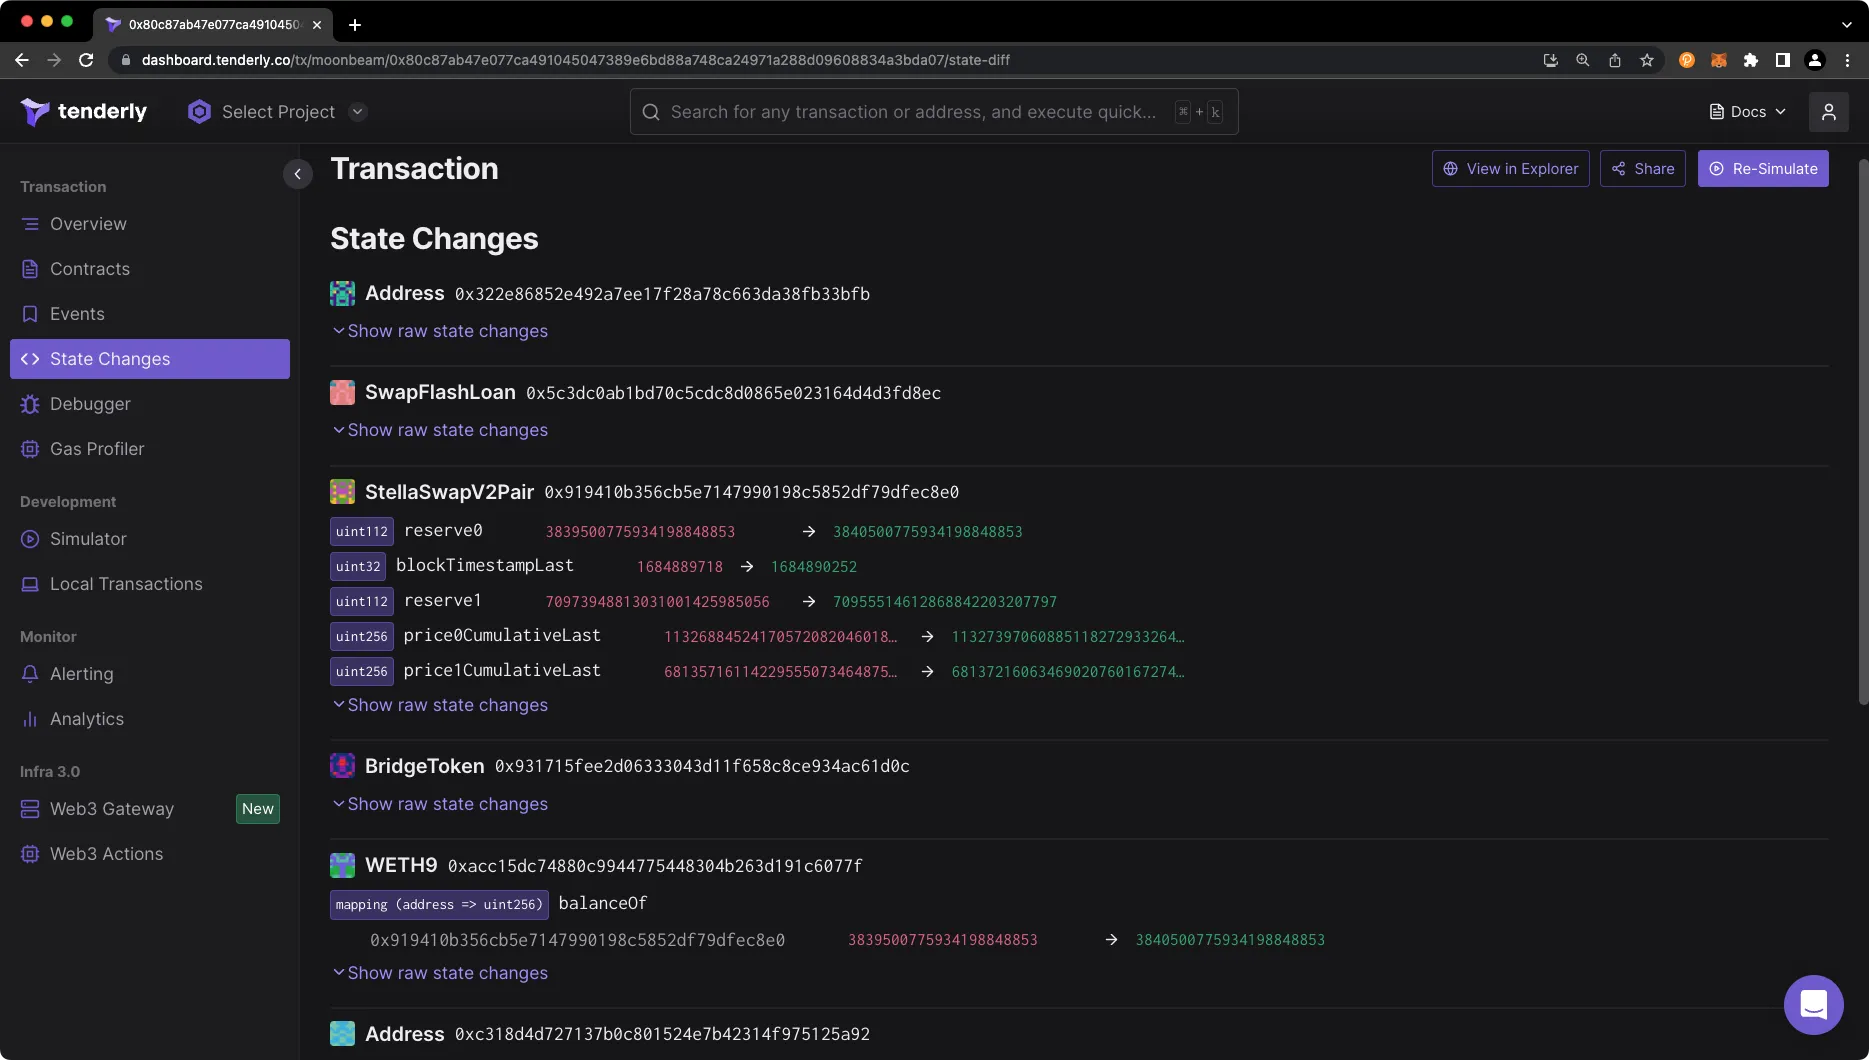
Heading down the left-hand navigation bar, you'll see an Events tab followed by a State Changes tab, which shows a visual representation of each change to the chain state that occurred as a result of this transaction.
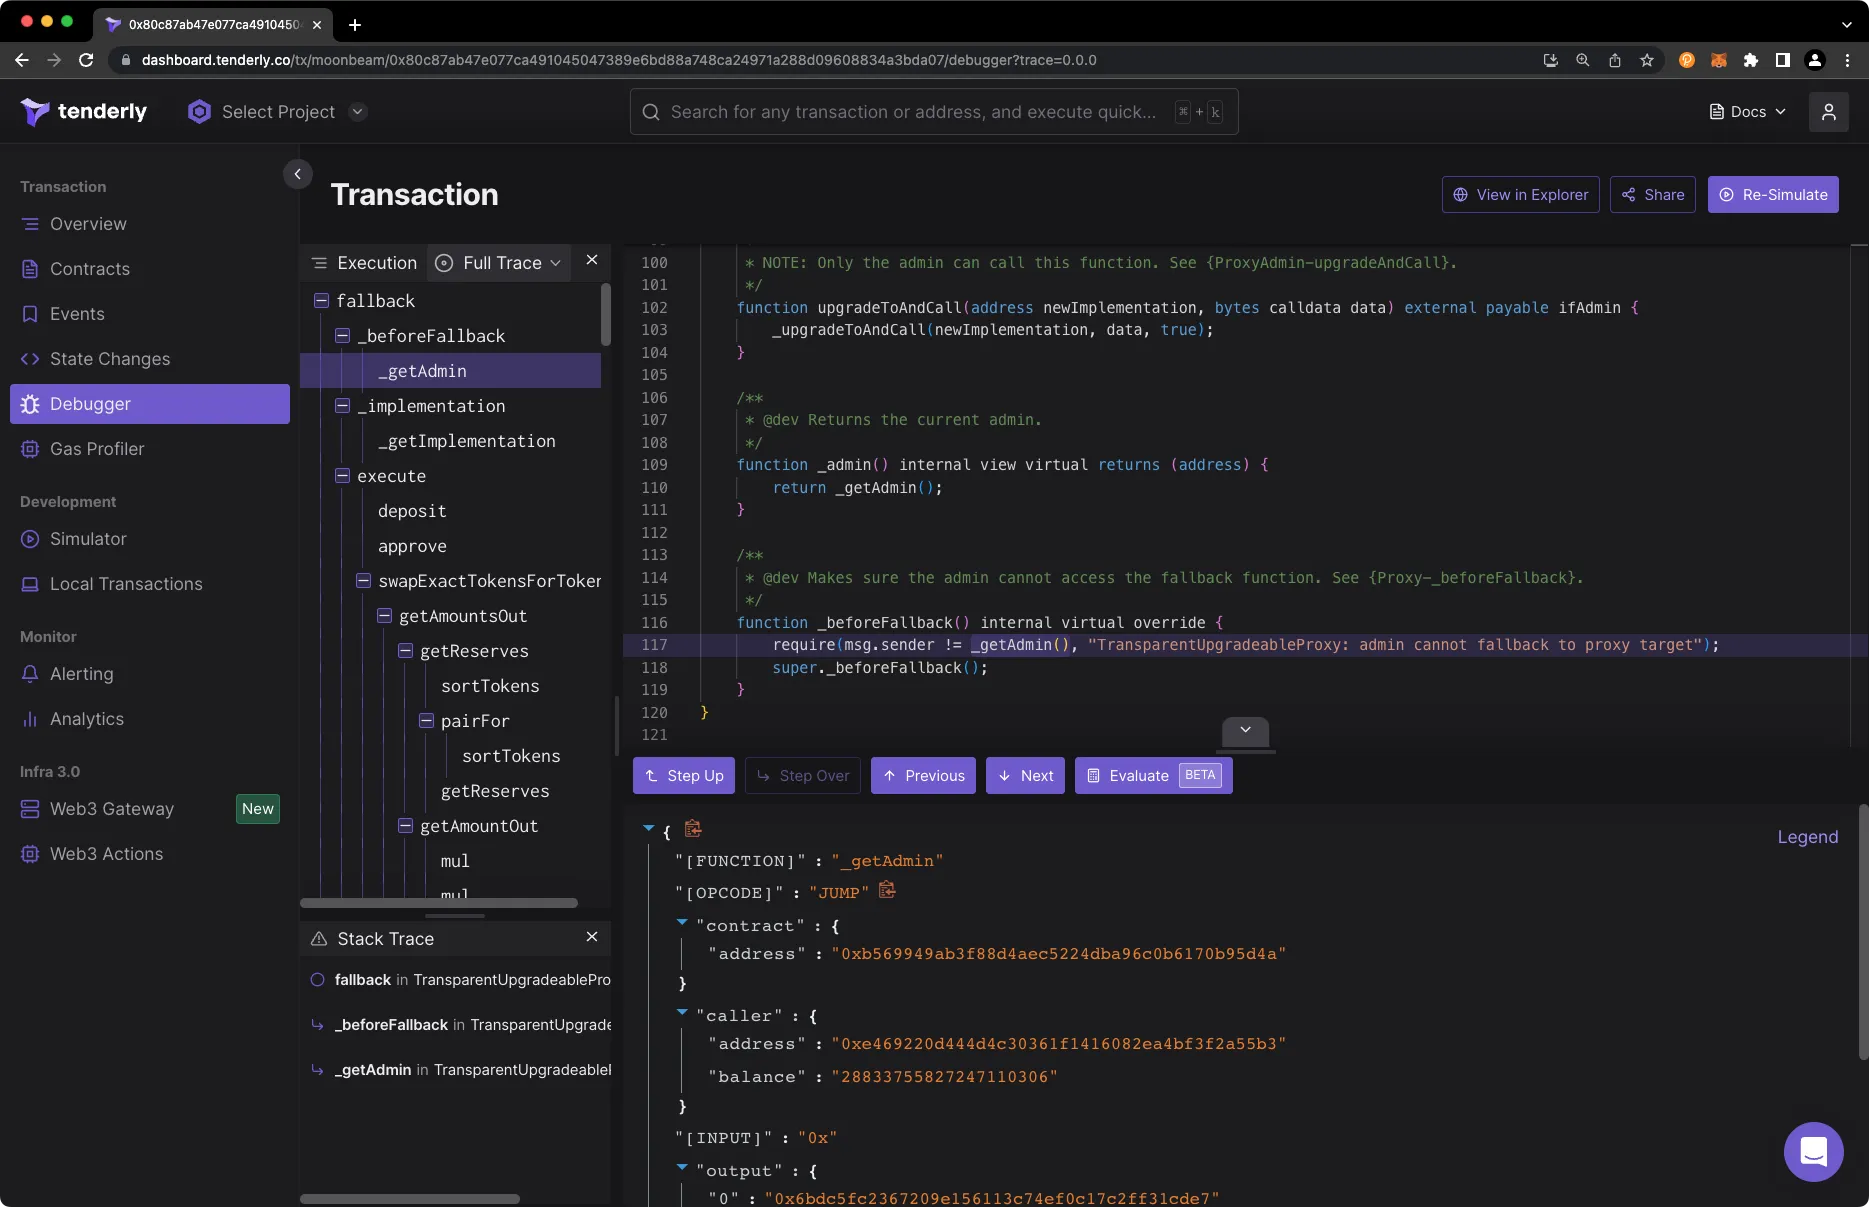
If you scroll down to the Debugger tab, you'll be able to step through the contracts line by line and see key state information at the bottom, allowing you to pinpoint the source of any error.
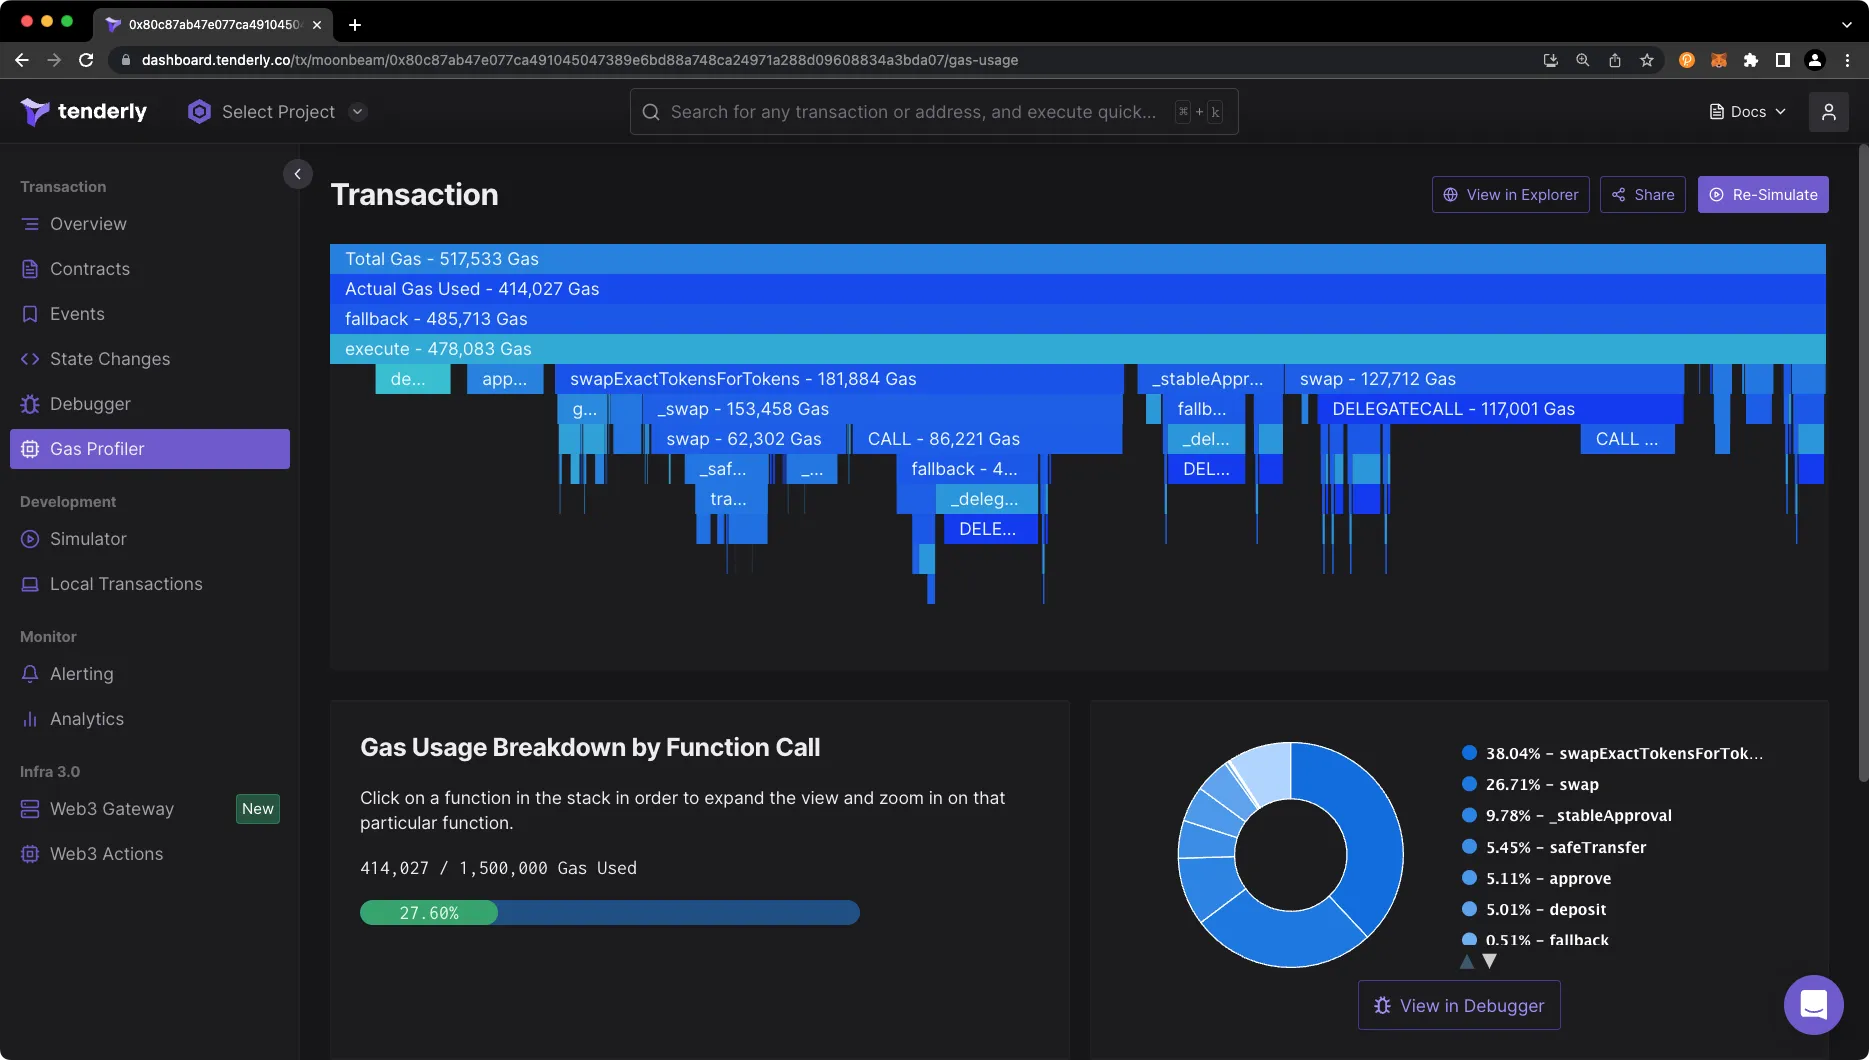
Finally, you'll see a Gas Profiler, which will give you a visual representation of where and how the gas was spent throughout the course of the transaction. You can click on any of the function calls (represented by the blue rectangles) to see how much gas was spent in each call.
For a more detailed look, be sure to check out the How to Use Tenderly Debugger guide. And that's it! You're well on your way to mastering Tenderly, which is sure to save you time and simplify your development experience building dApps on Moonbeam.
| Created: May 24, 2023