Interacting with Moonbeam Using Trezor Hardware Wallet
Introduction
Hardware wallets provide a safer way to store crypto funds because the private key (used for signing transactions) is stored offline. Trezor offers two hardware wallet solutions at the time of writing: Trezor One and Trezor Model T.
Because Moonbeam is fully Ethereum compatible, you can use your Trezor device to sign transactions on Moonbeam!
This tutorial shows you how to get started with your Trezor hardware wallet on Moonbase Alpha. The guide only illustrates the steps for a Trezor Model T device, but you can follow along with a Trezor One as well.
Please note that your Trezor device will sign transactions in whichever MetaMask network is connected to.
Checking Prerequisites
Before you get started, update Trezor Suite to the latest version available. Also, make sure you've your Trezor hardware wallet device running the latest firmware. The Trezor wiki offers tutorials on how to update the firmware of both Trezor One and Trezor Model T devices.
At the time of writing, the following versions were used:
- Trezor Suite 21.5.1
- Trezor One firmware v1.10.0
- Trezor Model T firmware v2.4.0
In addition, you'll need MetaMask as an intermediary between your Trezor device and Moonbase Alpha. Make sure that your MetaMask is connected to Moonbase Alpha. Please note that your Trezor device will sign transactions in whichever MetaMask network is connected to.
Importing your Trezor Account to MetaMask
To get started, you need to have set up a wallet (either standard or a hidden wallet). Once you've connected your Trezor device, unlocked it, and get a wallet setup in Trezor Suite. Next, to import your Trezor Ethereum account to MetaMask, take the following steps:
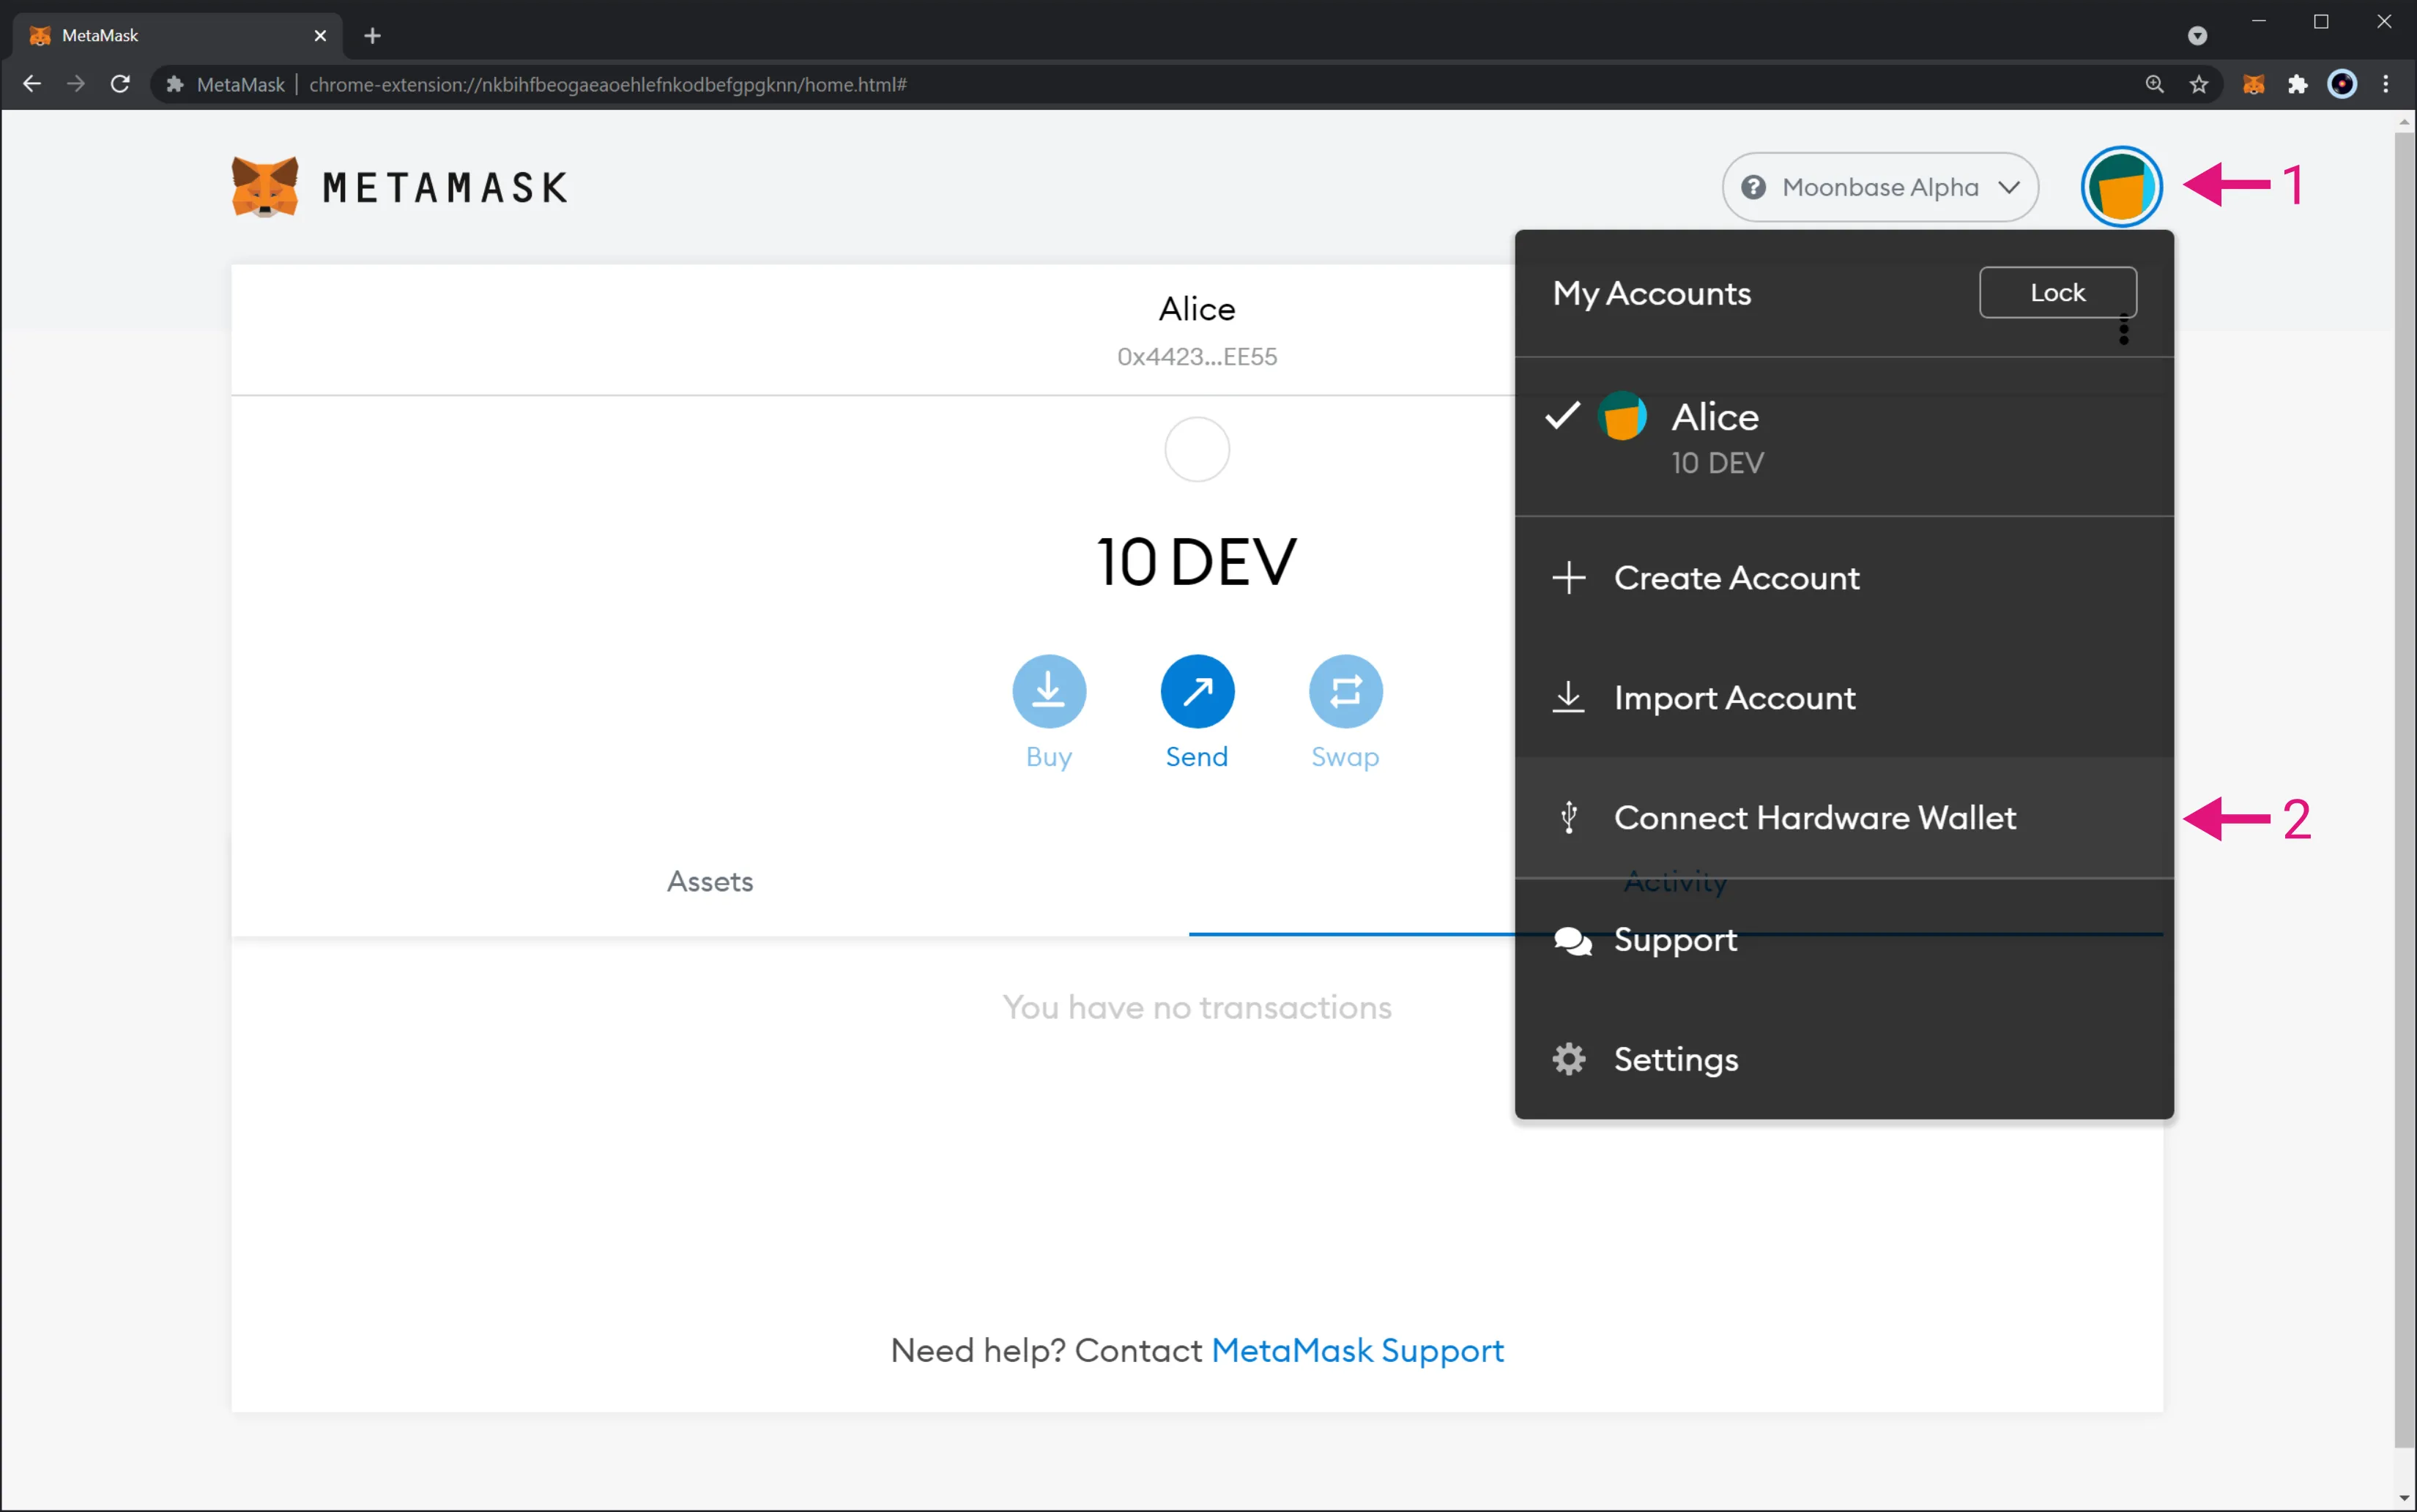
- Click on the top-right logo to expand the menu
- Select Connect Hardware Wallet
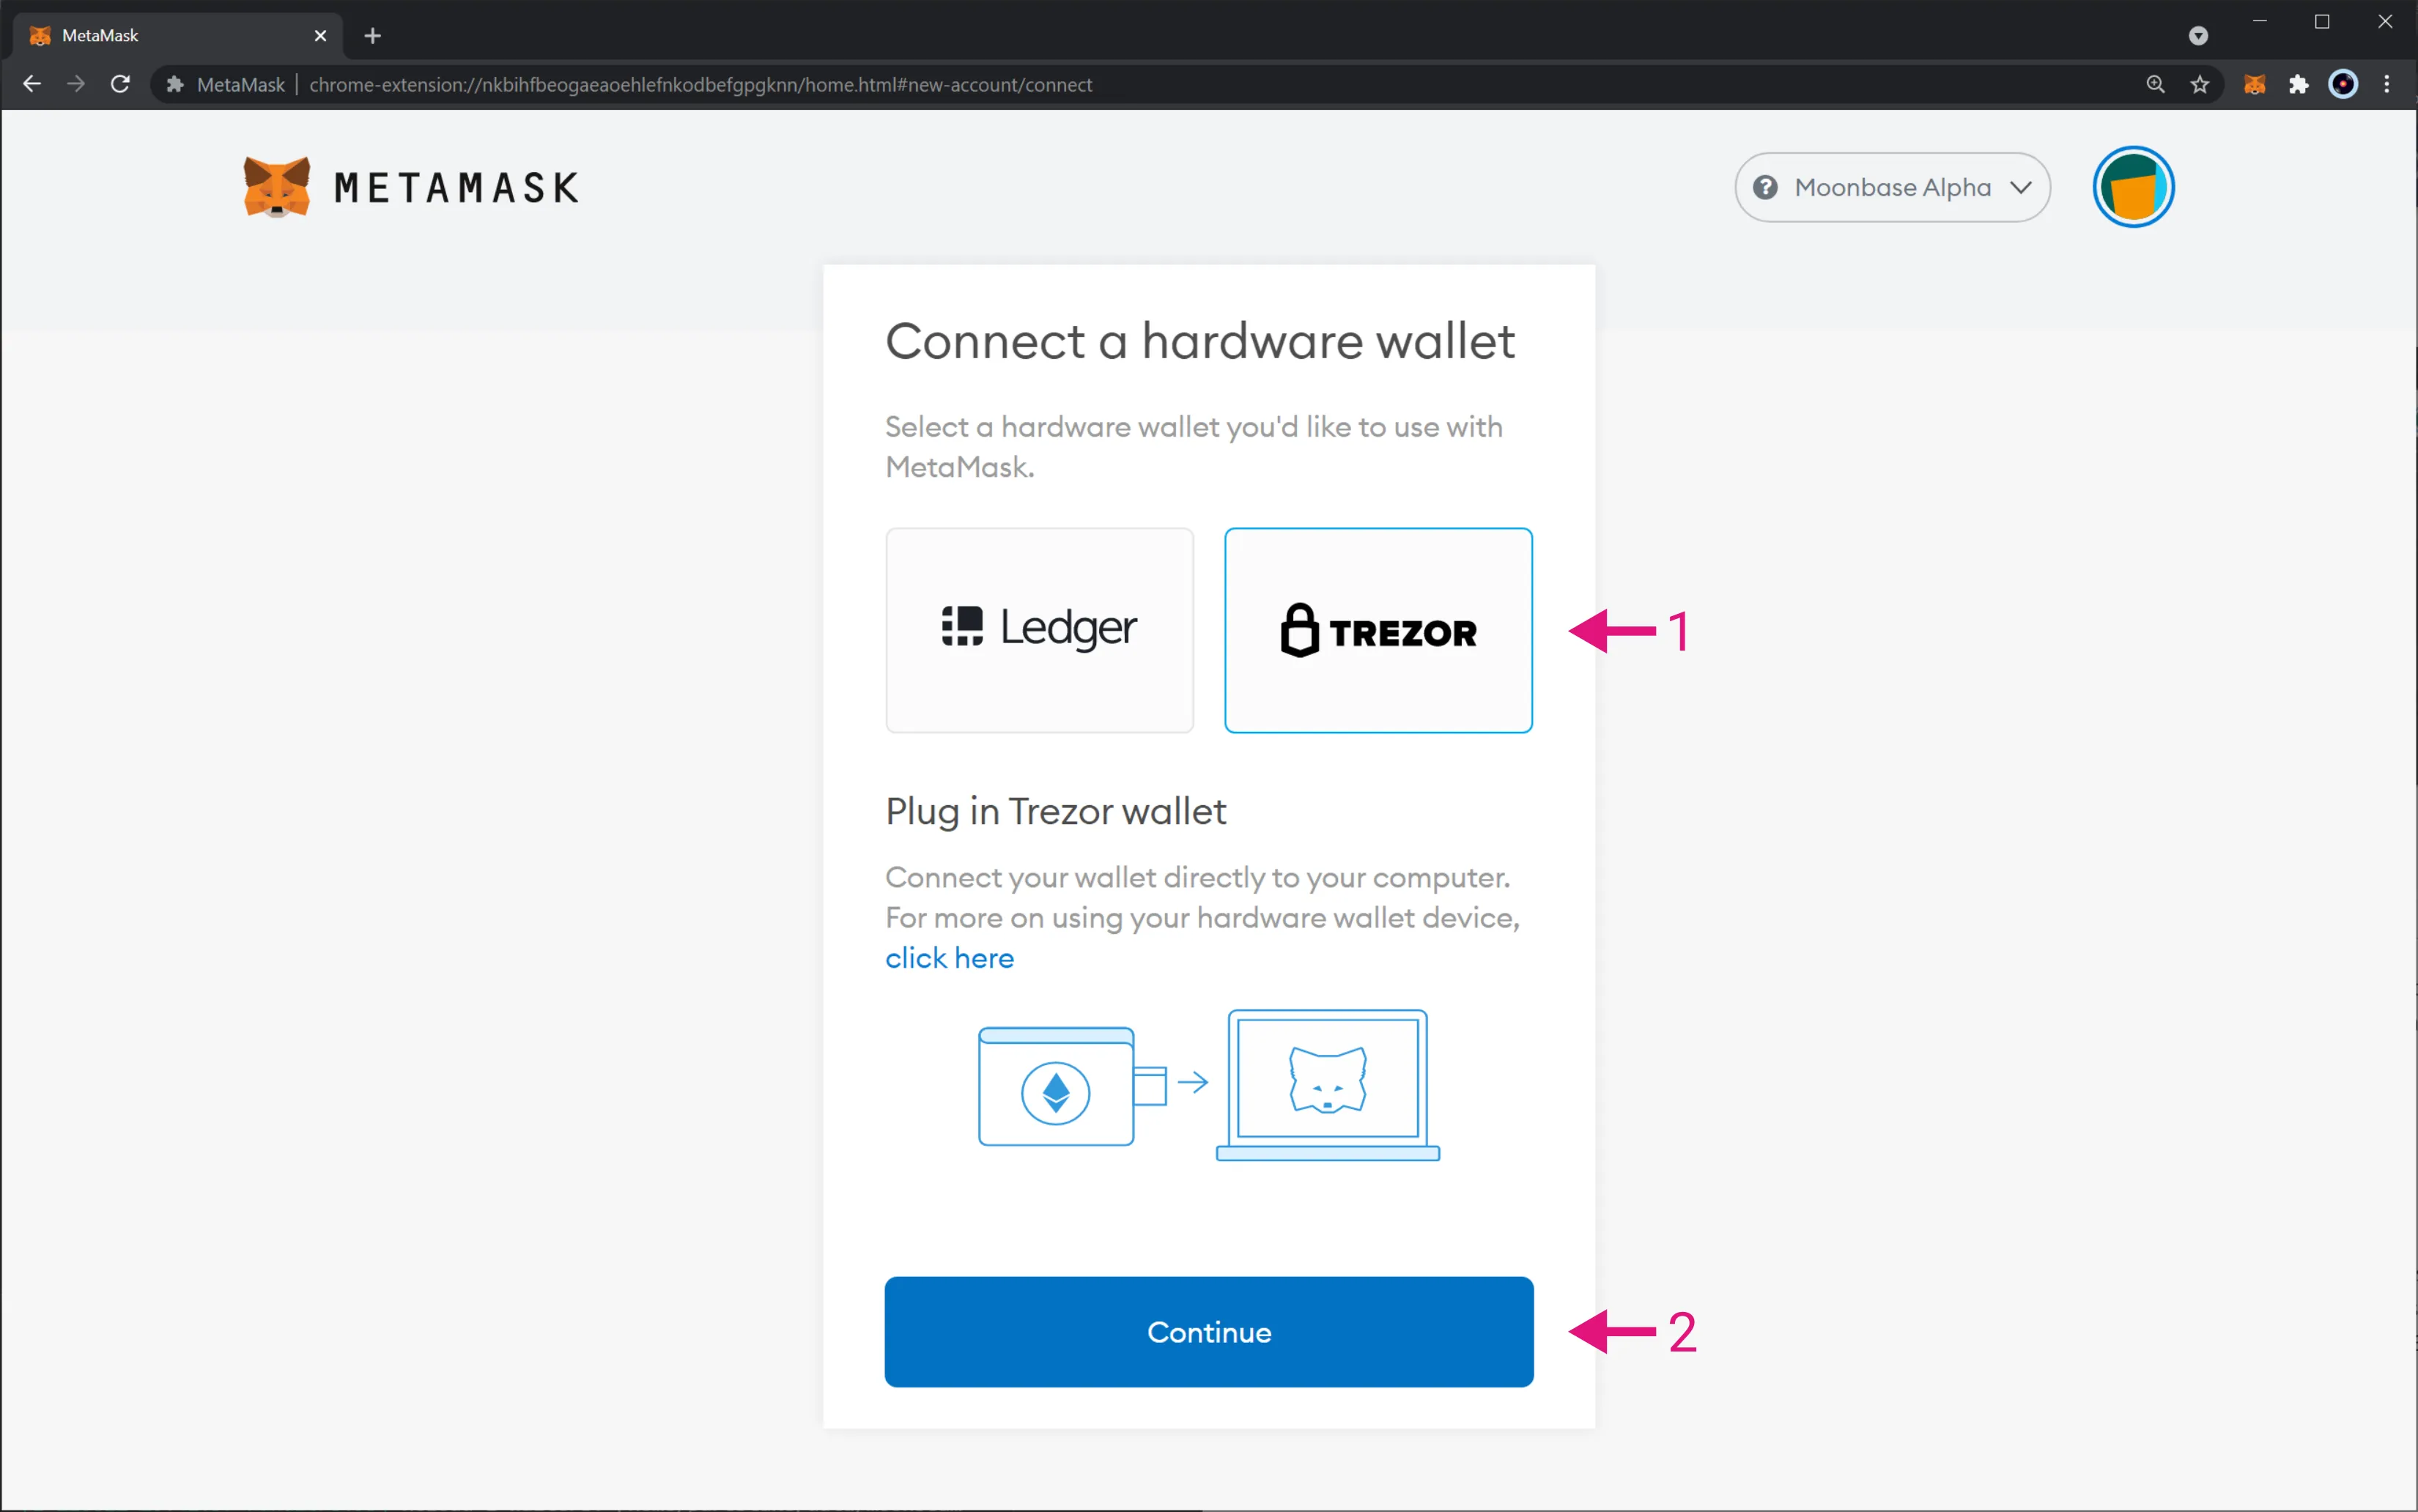
Right after, you are prompted to select which hardware wallet you'll like to use in MetaMask. At the moment of writing, only Ledger and Trezor hardware wallets are supported. If you have your Trezor device ready to go, take the following steps:
- Select the Trezor logo
- Click on Continue
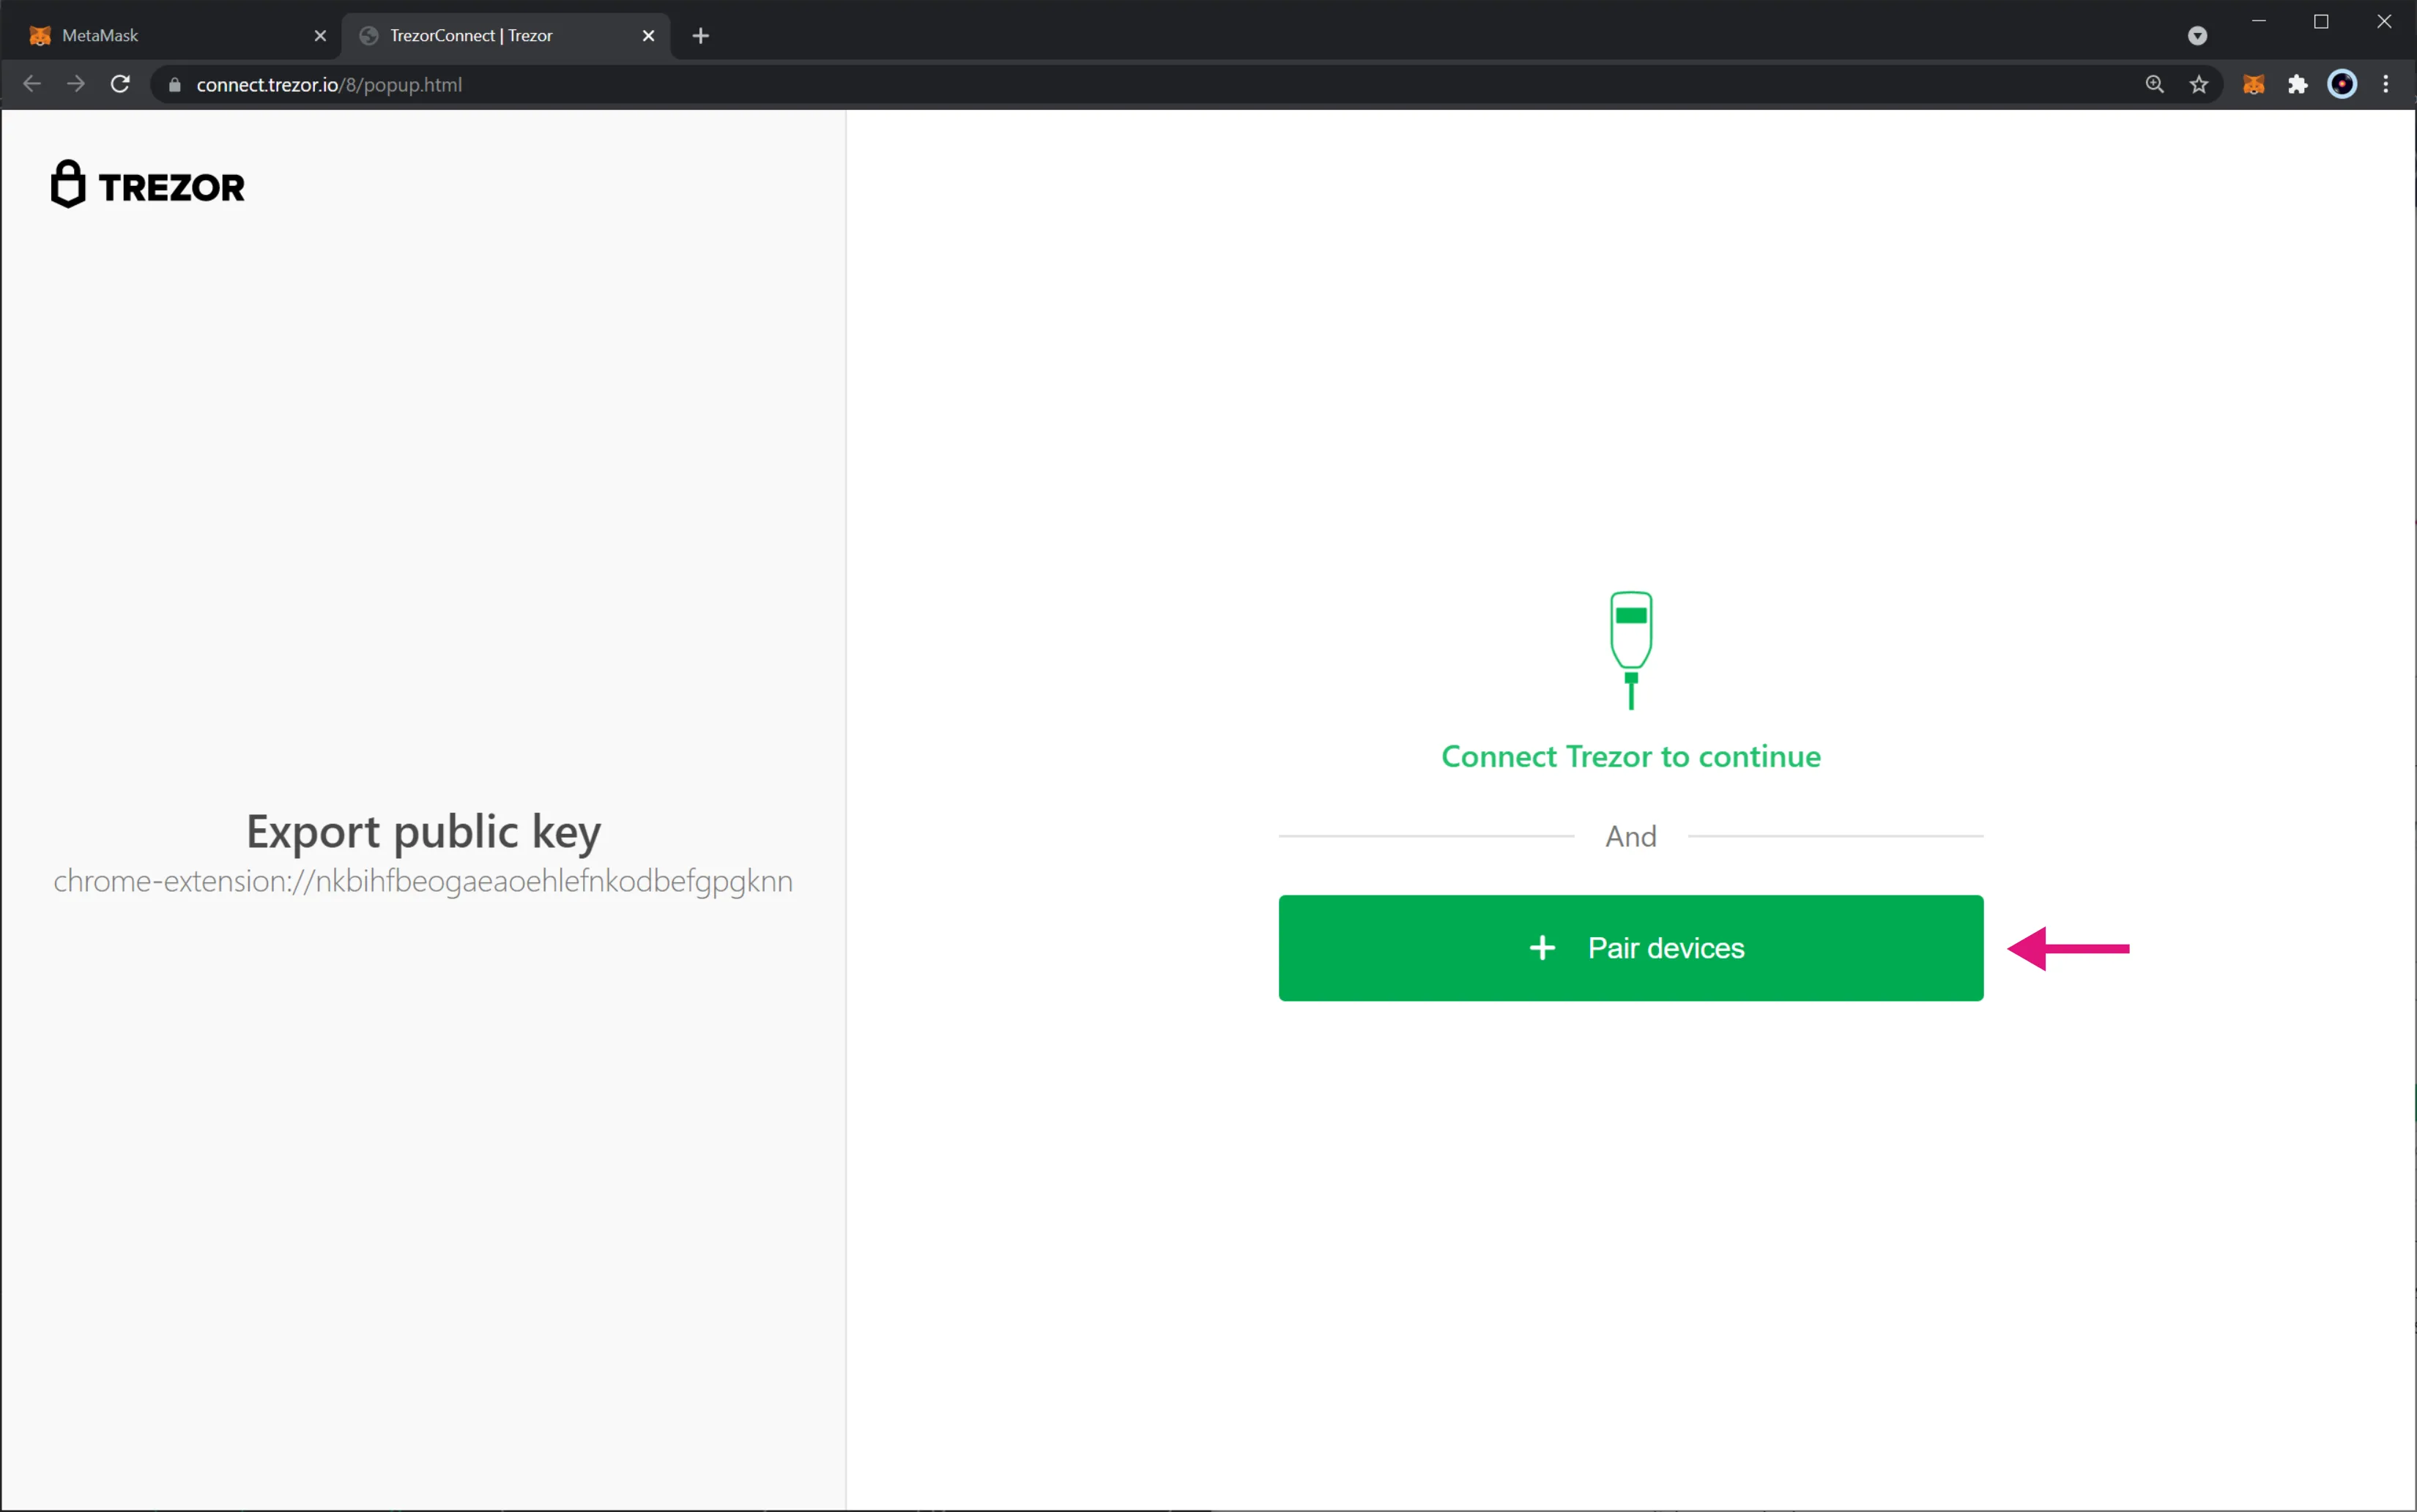
After clicking the button, a new tab named TrezorConnect should show up, where you'll need to pair your device. This is not required if you've Trezor Suite opened and your device is connected. Here, click on Pair devices.
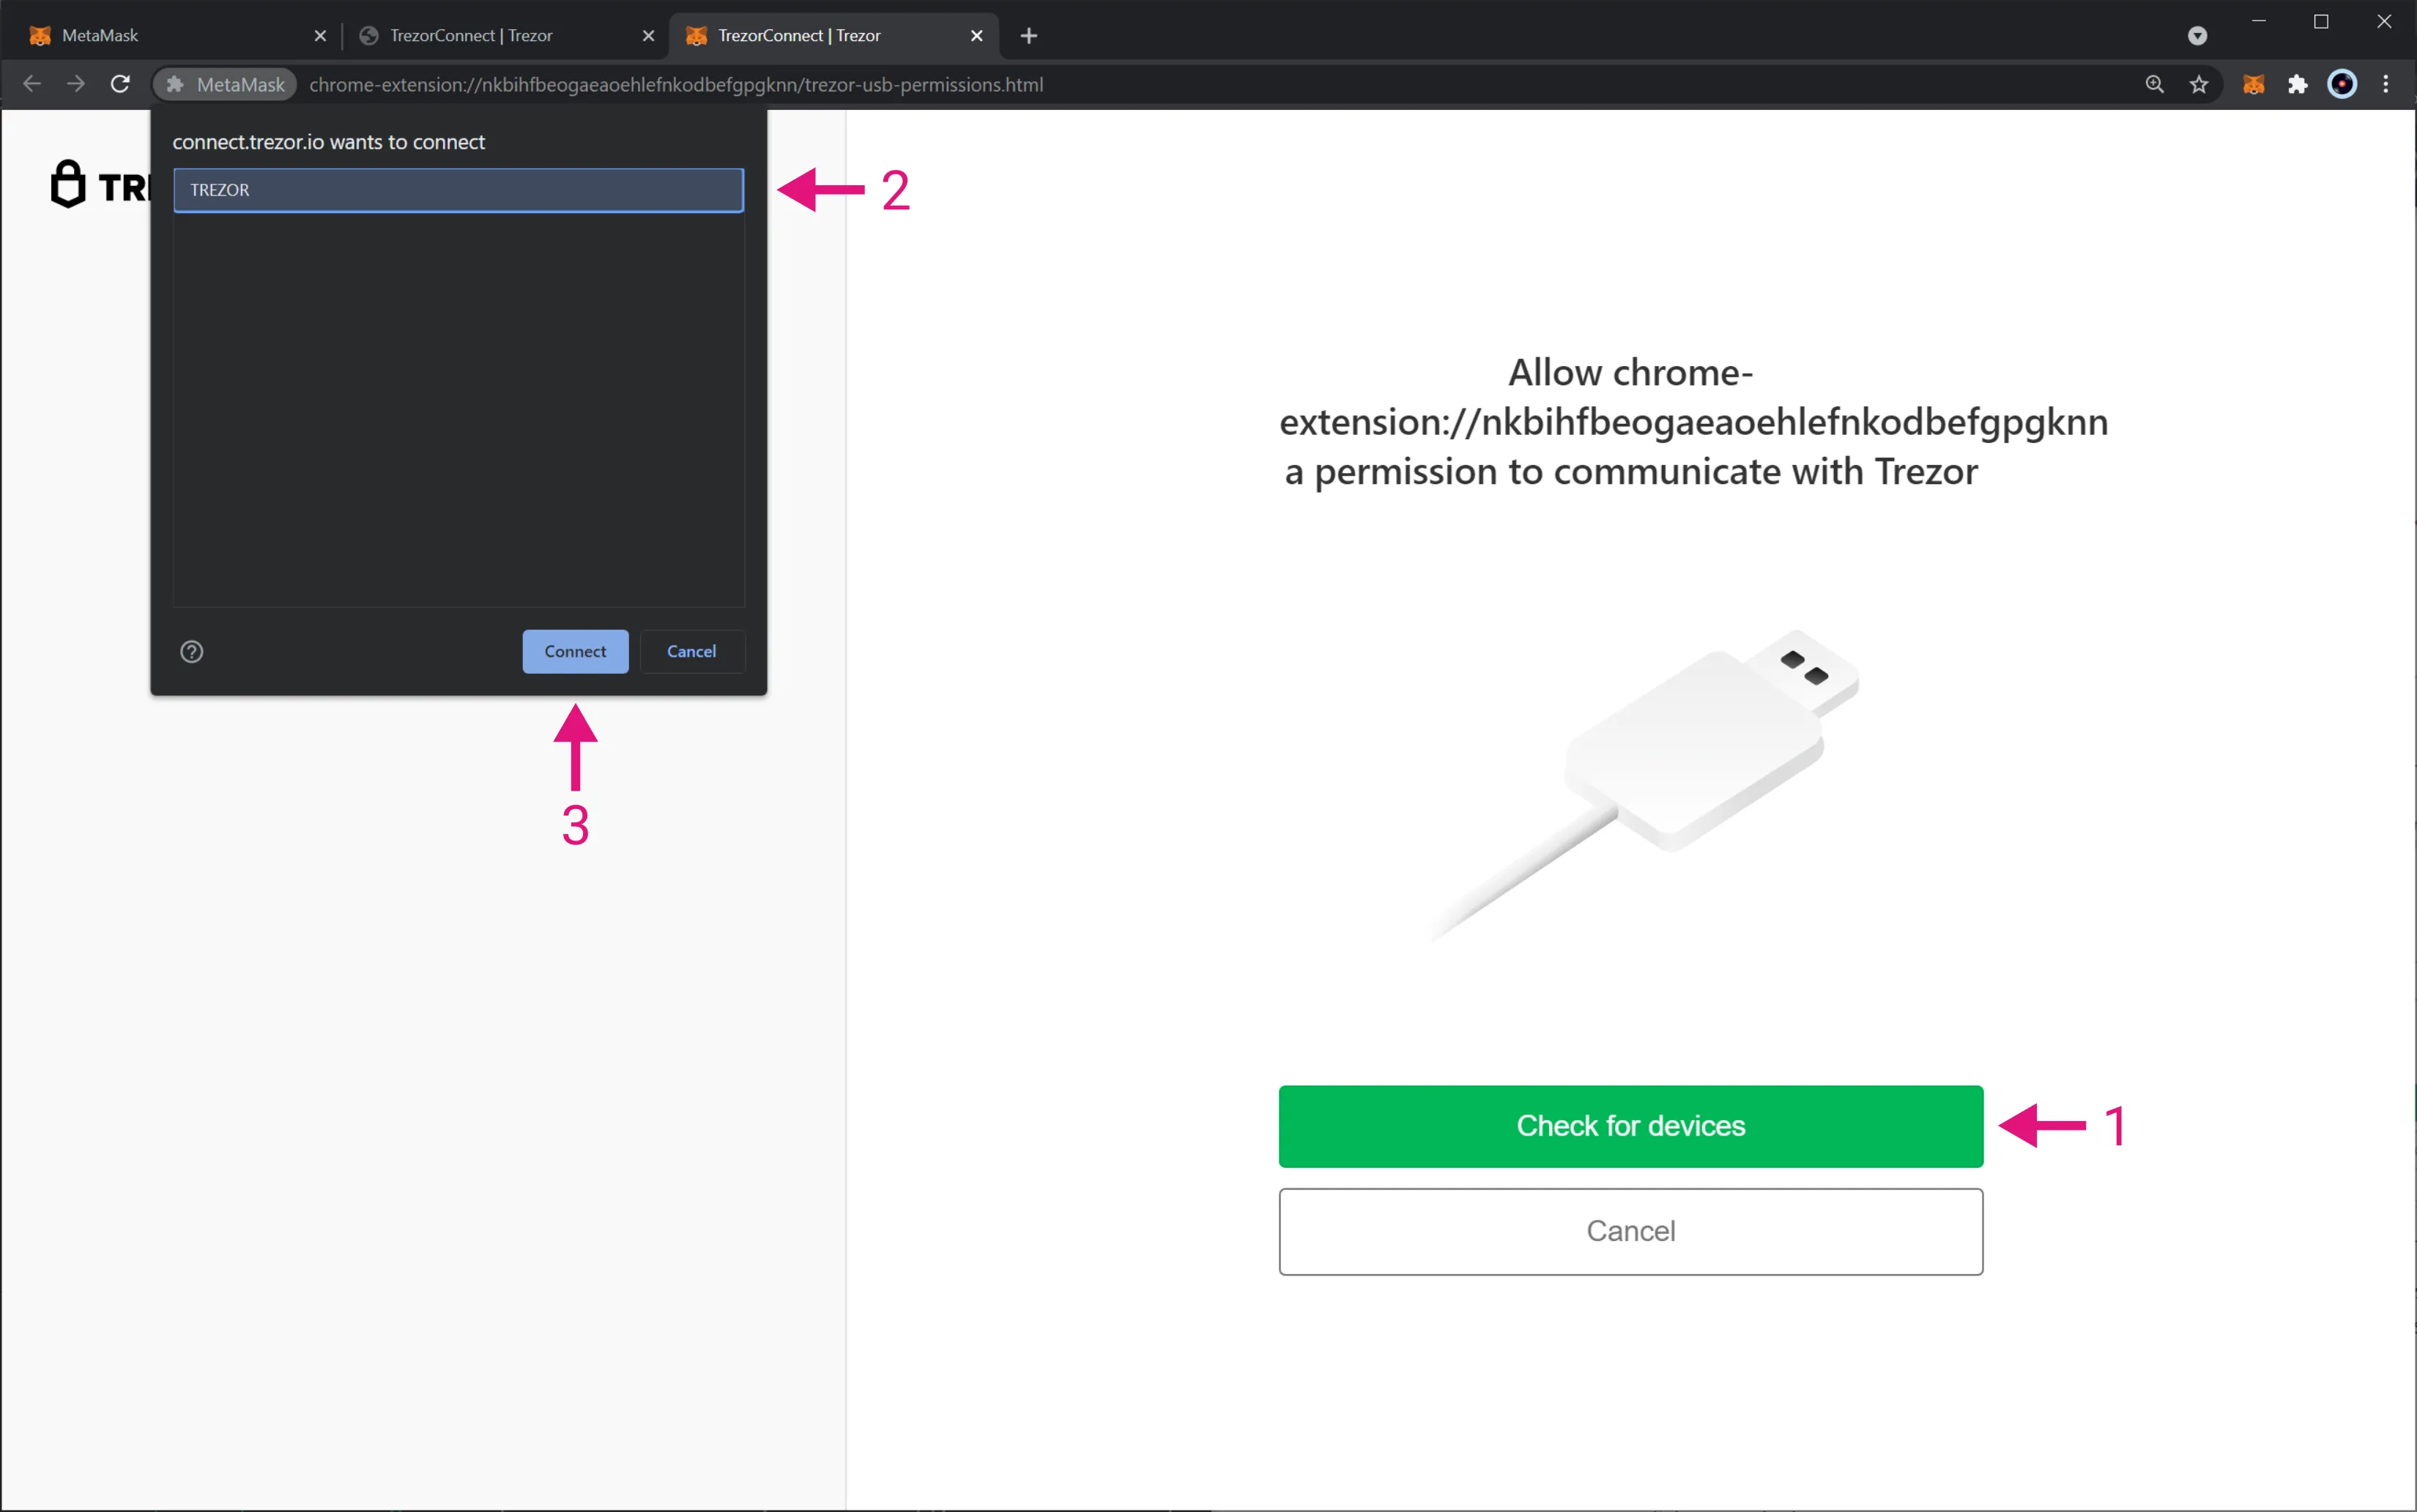
On the next screen, take the following steps:
- Click on Check for devices. This will open a menu showing which Trezor device (if available) you want to connect to
- Select the Trezor device you want to use
- Click on Connect
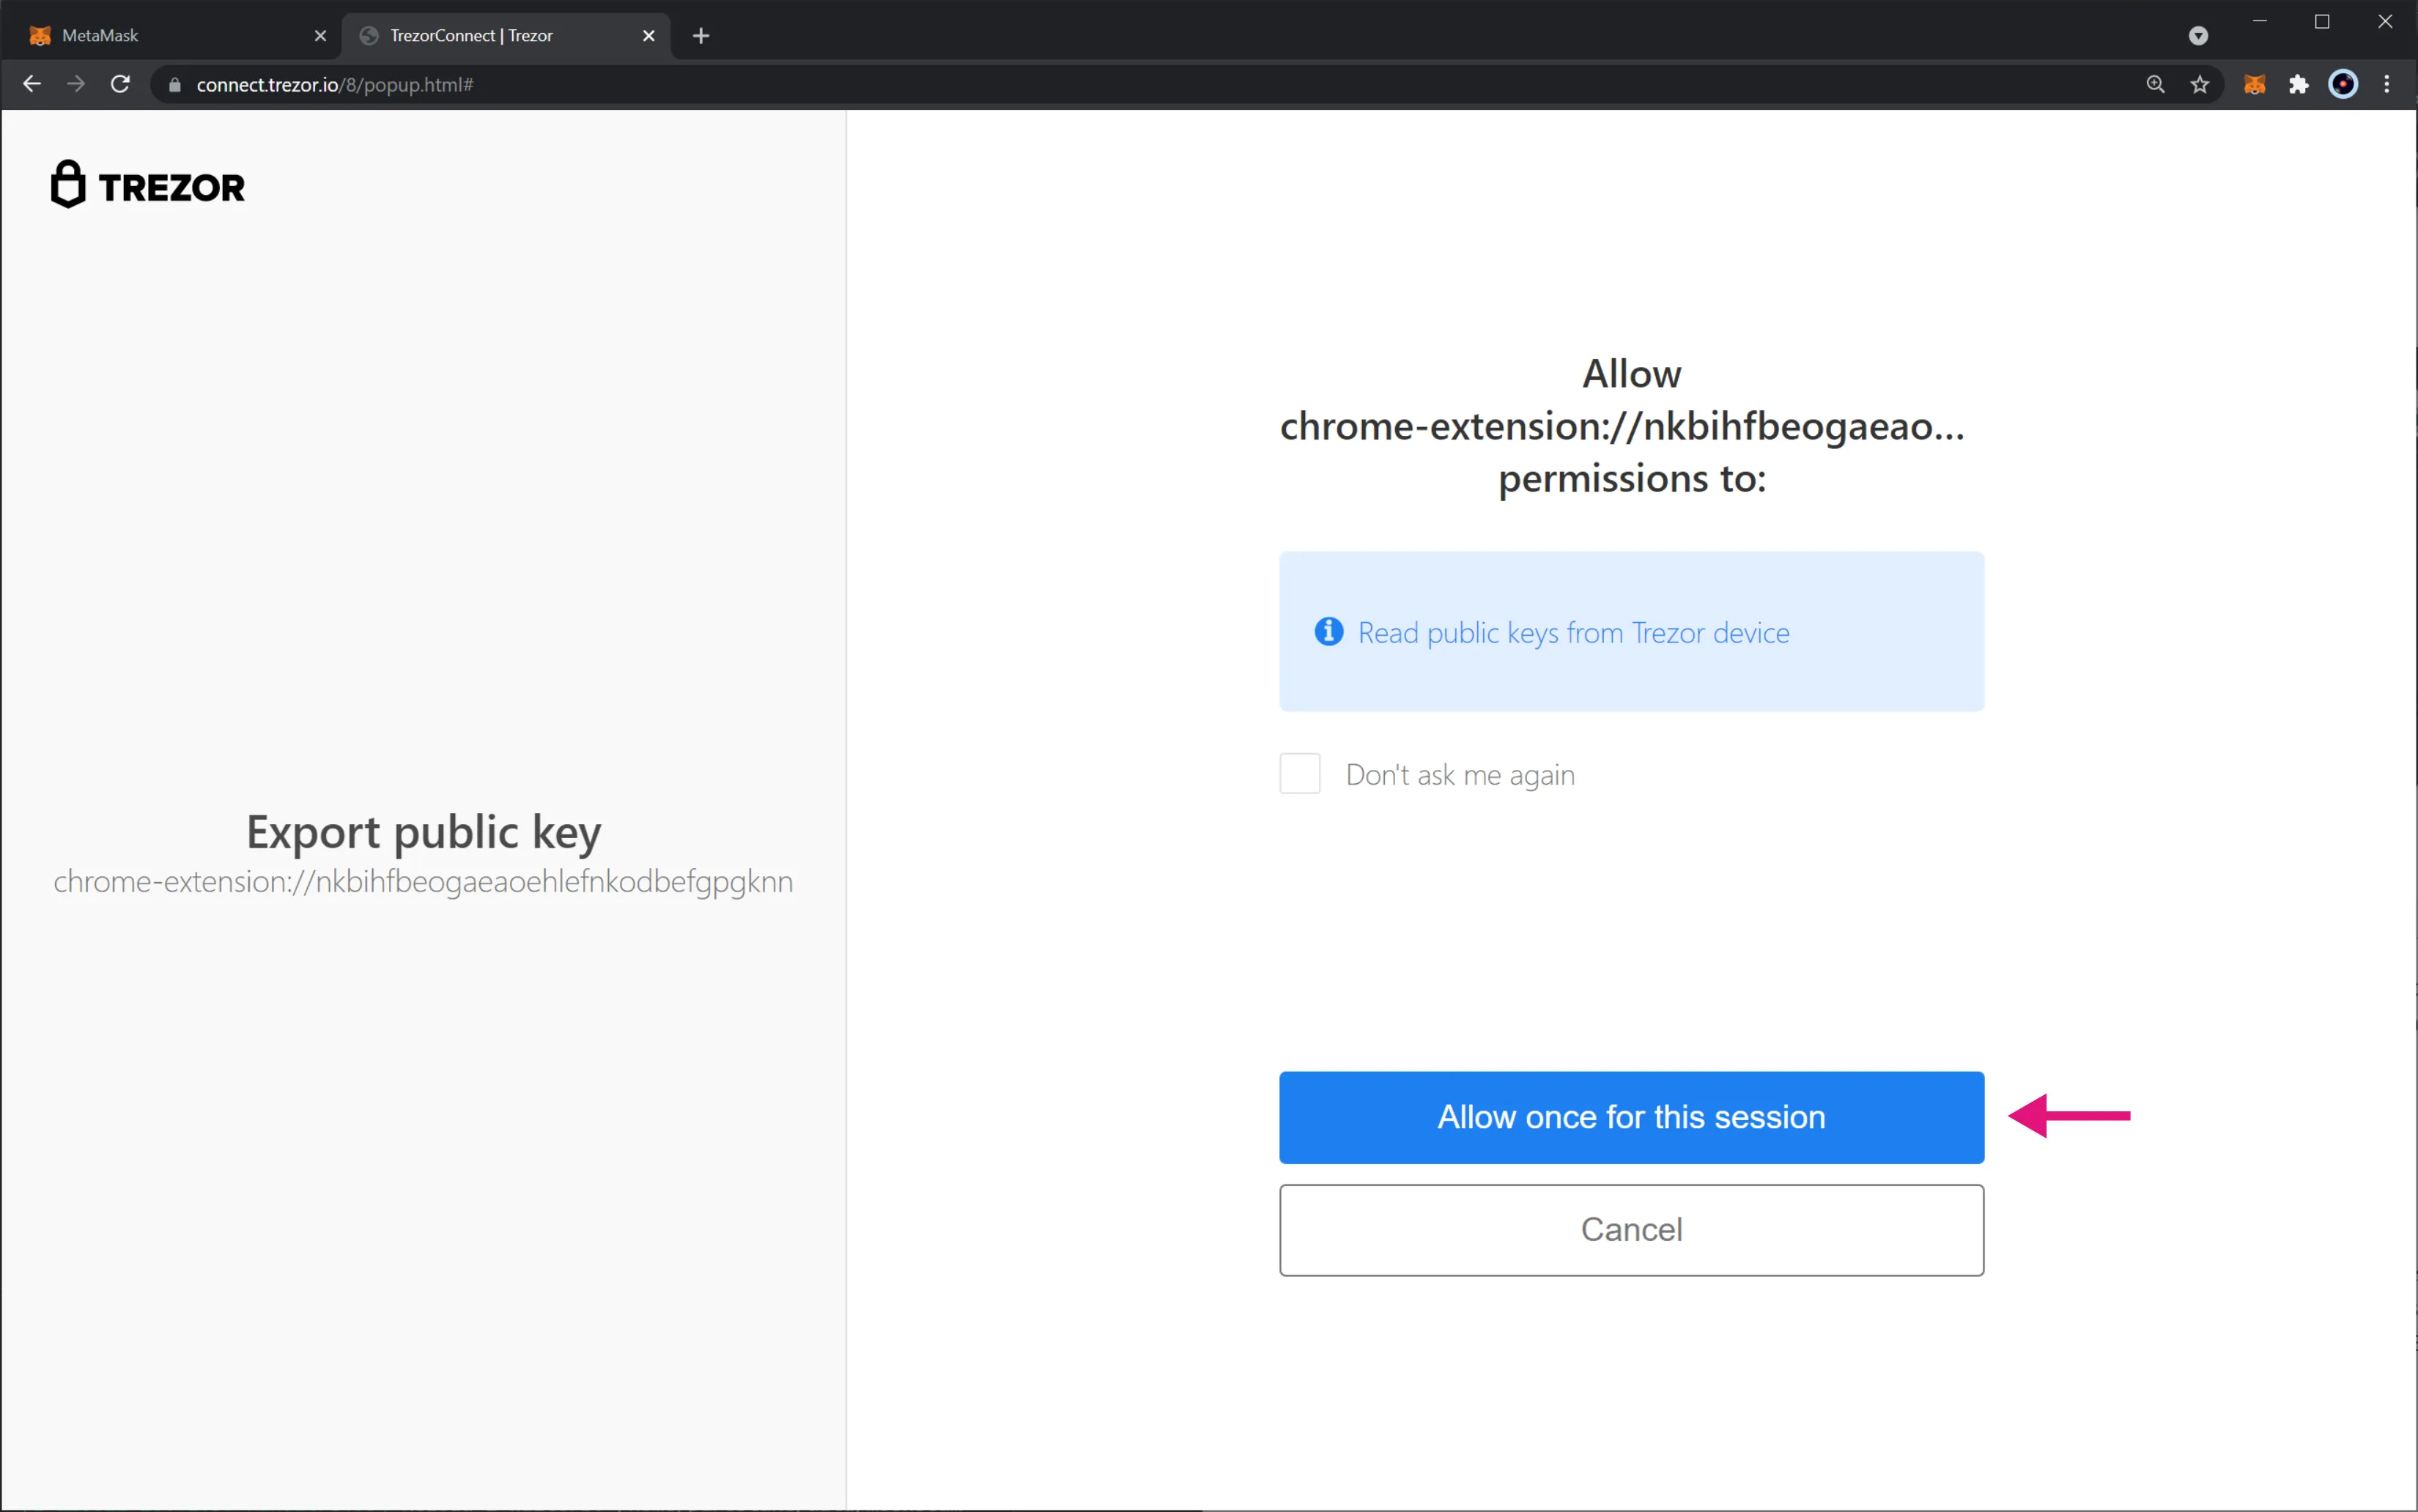
Once you've your device connected, you need to allow MetaMask to read its public keys. Therefore, click on Allow once for this session. Optionally, you can also check the Don't ask me again box.
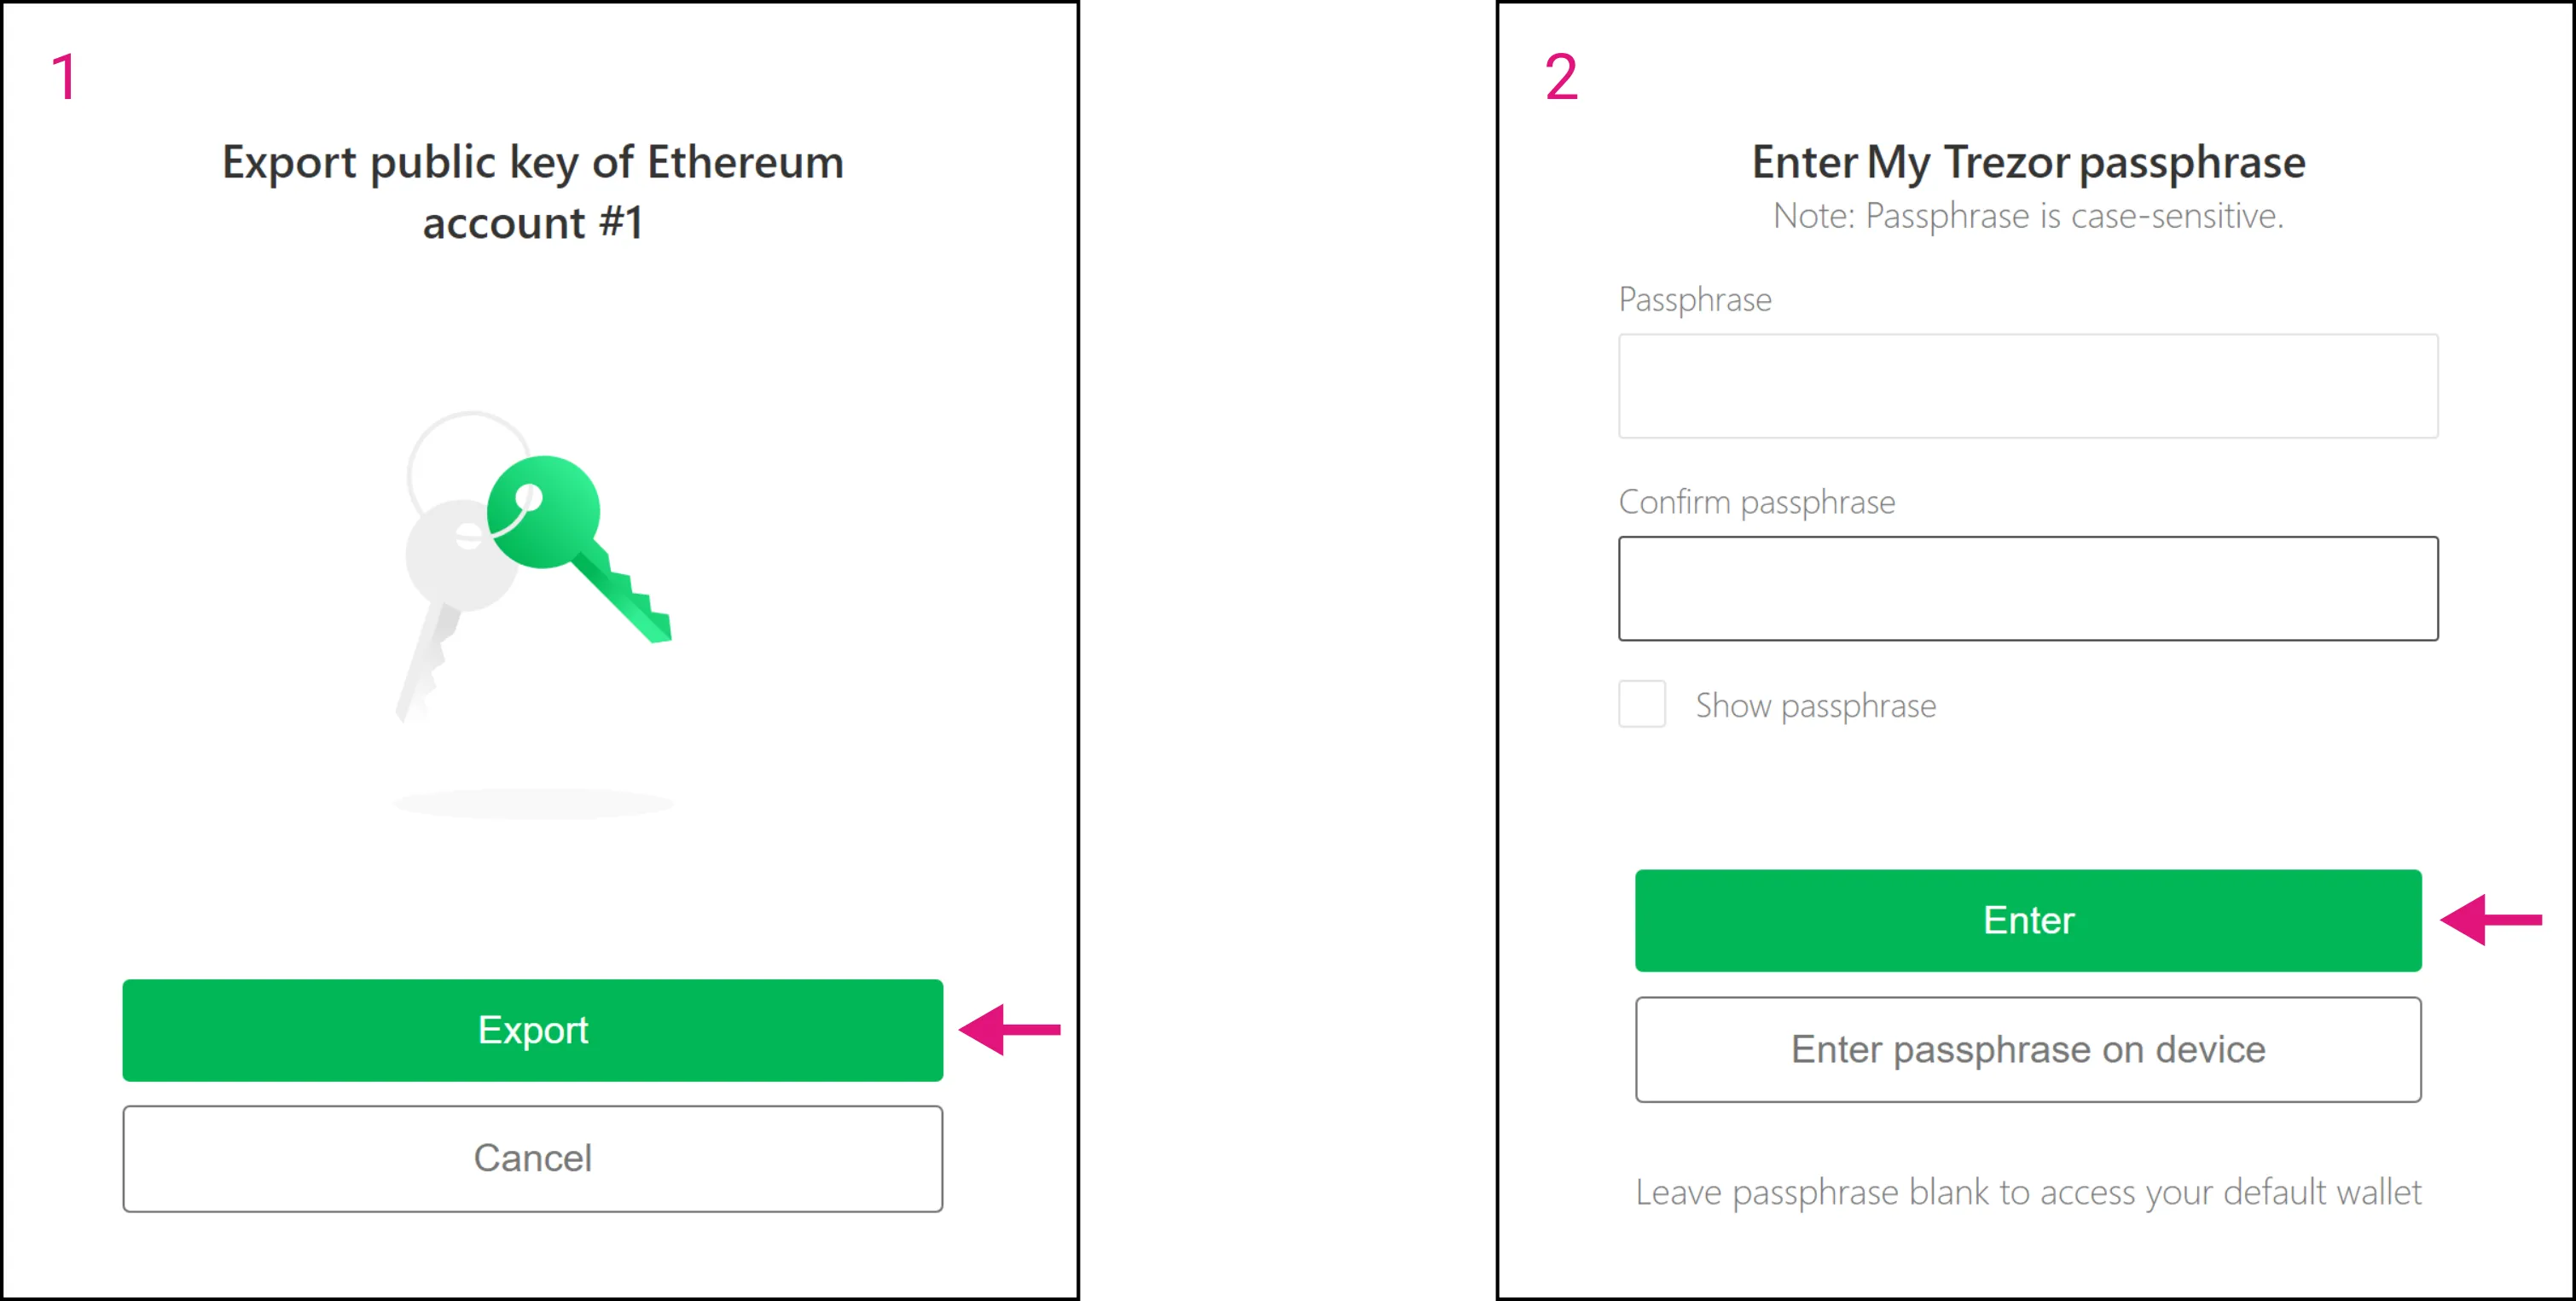
Next, you are asked if you want to export the public key of your Ethereum account (tab was cropped and labeled as 1 in the following image). Right after, you are prompted with an option to use [Trezor's passphrase option (tab cropped and labeled as 2 in the image). If you want to use the default wallet, just click on Enter. If not, please follow Trezor's wiki article for passphrase wallets.
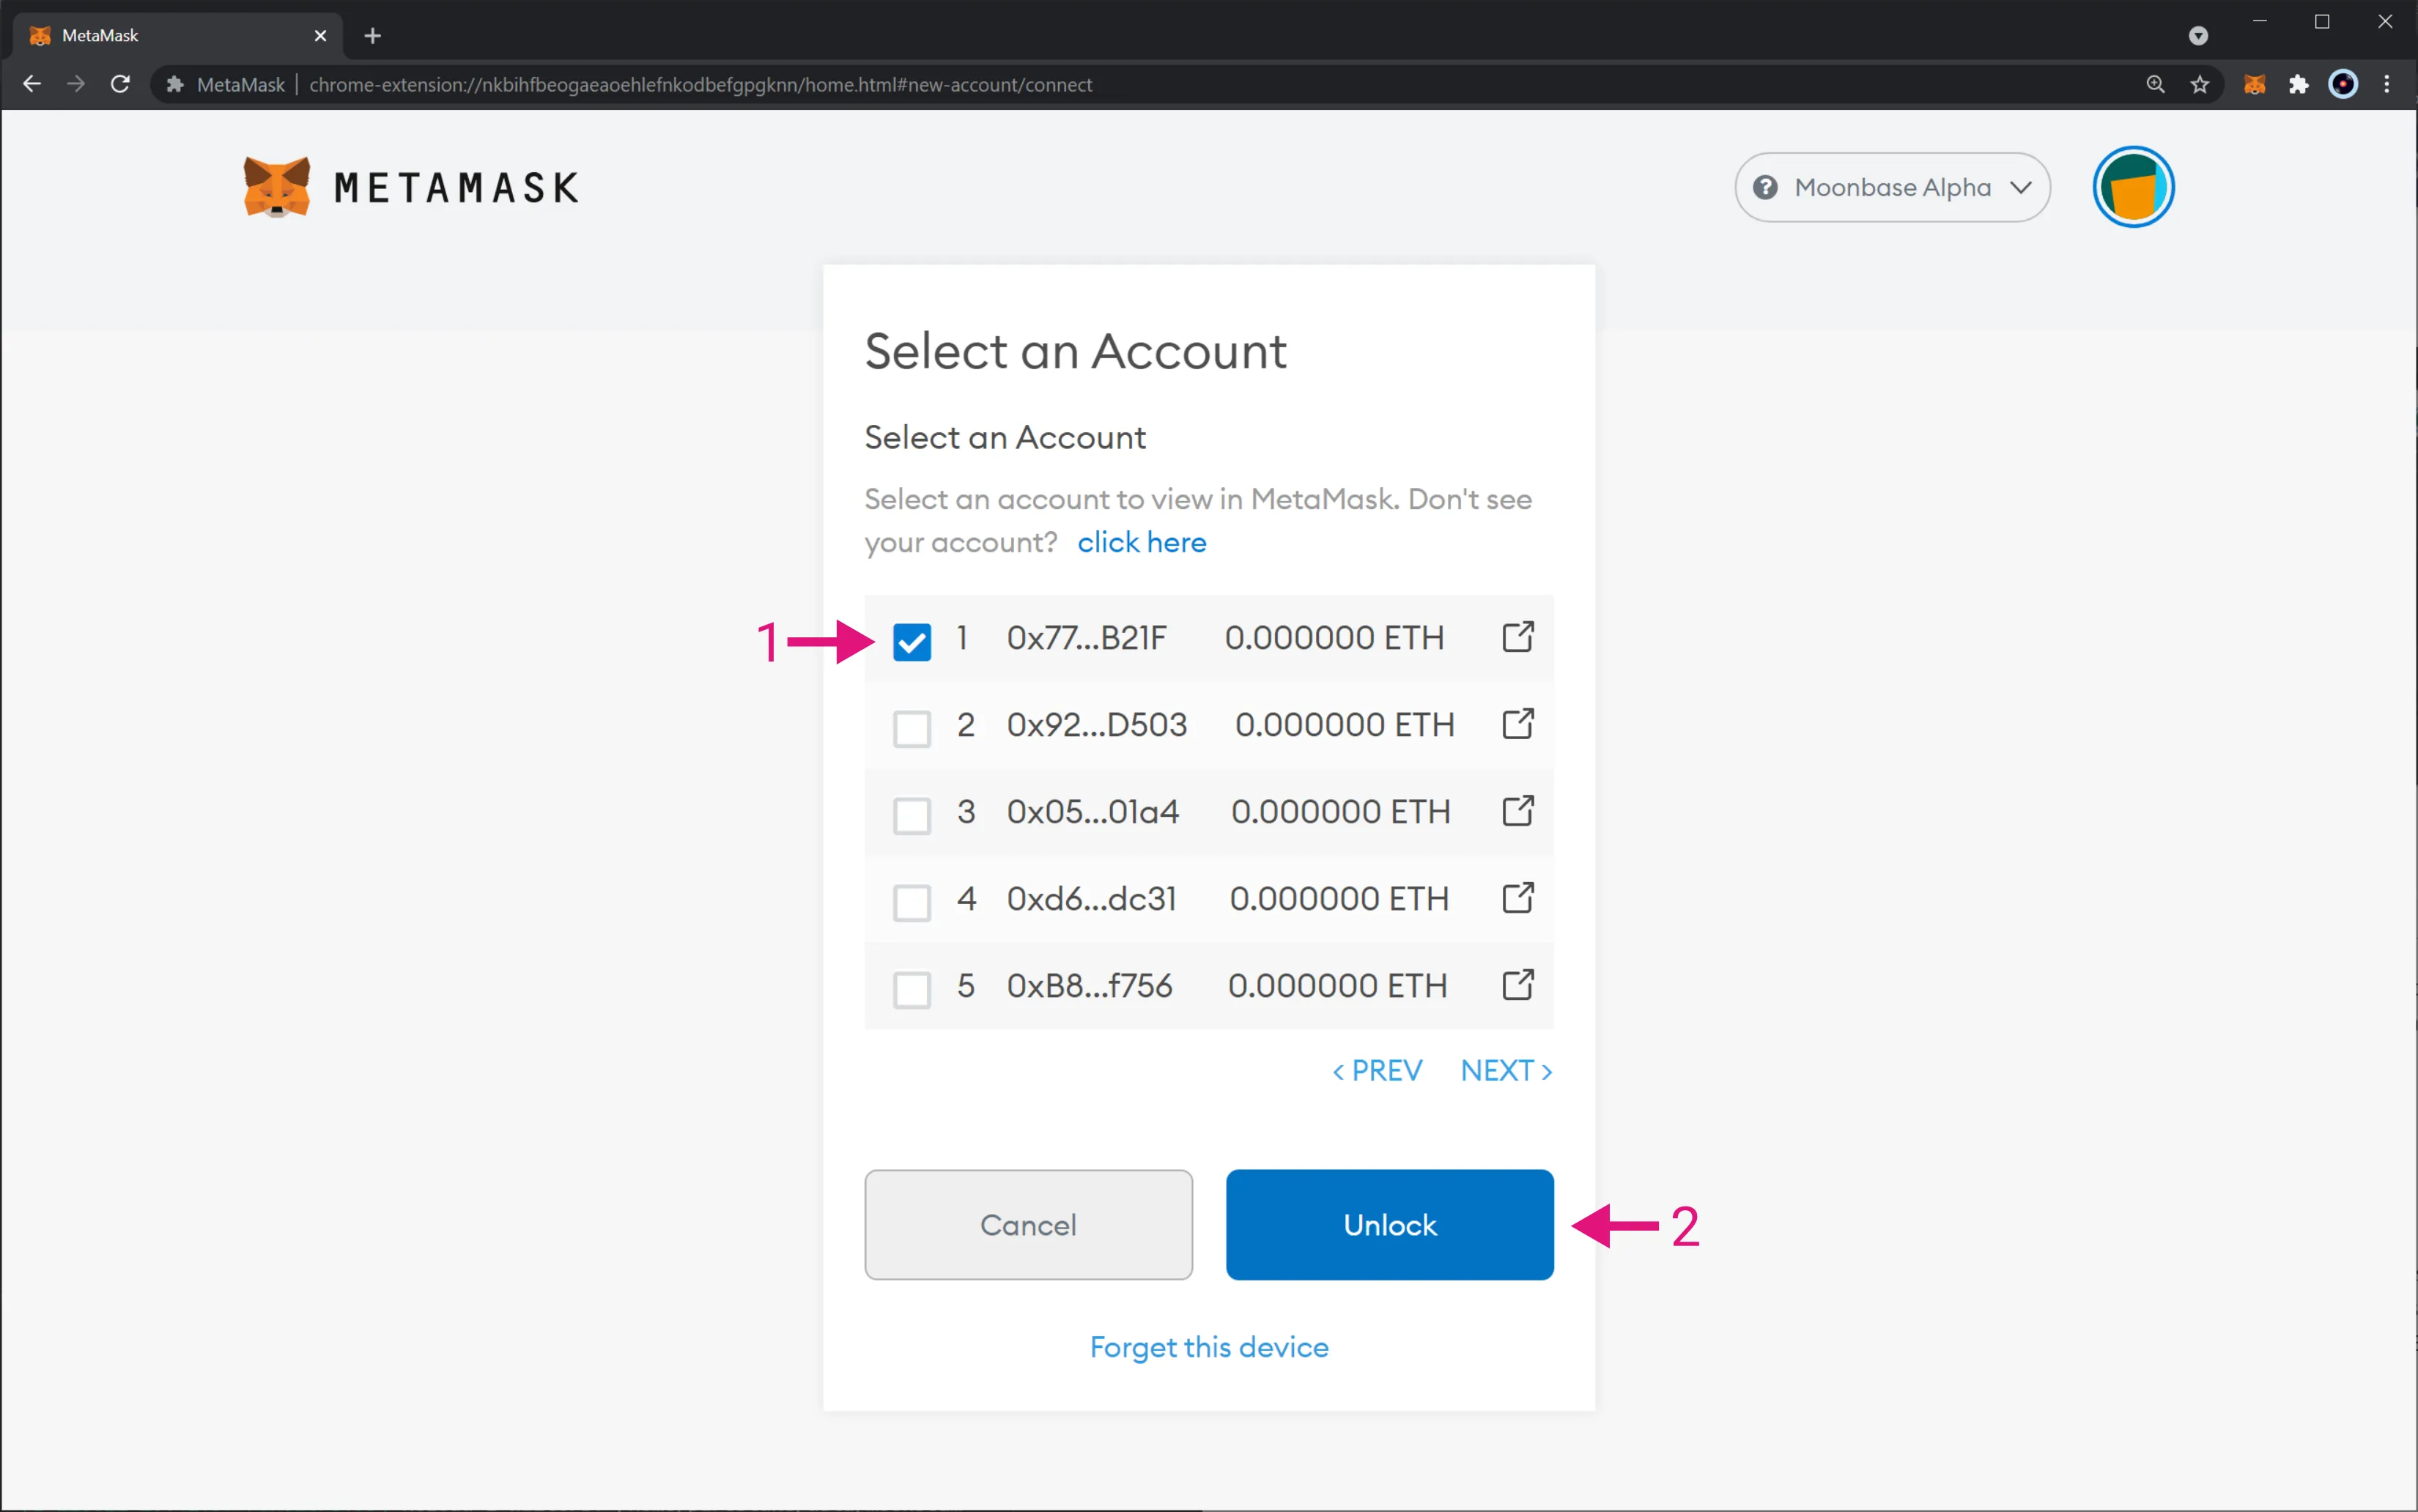
If MetaMask was able to connect successfully to your Trezor device, you should see a list of five Ethereum-styled accounts. If not, please double-check that you've properly connected your Trezor device to the computer and it is unlocked. You can also repeat the process with the Trezor Suite app opened.
From this list of five Ethereum accounts, take the following steps:
- Select the accounts you would like to import from your Trezor device
- Click on Unlock
If you've imported your Trezor Ethereum-styled account successfully, you should see it displayed in the main MetaMask screen like shown in the following image:
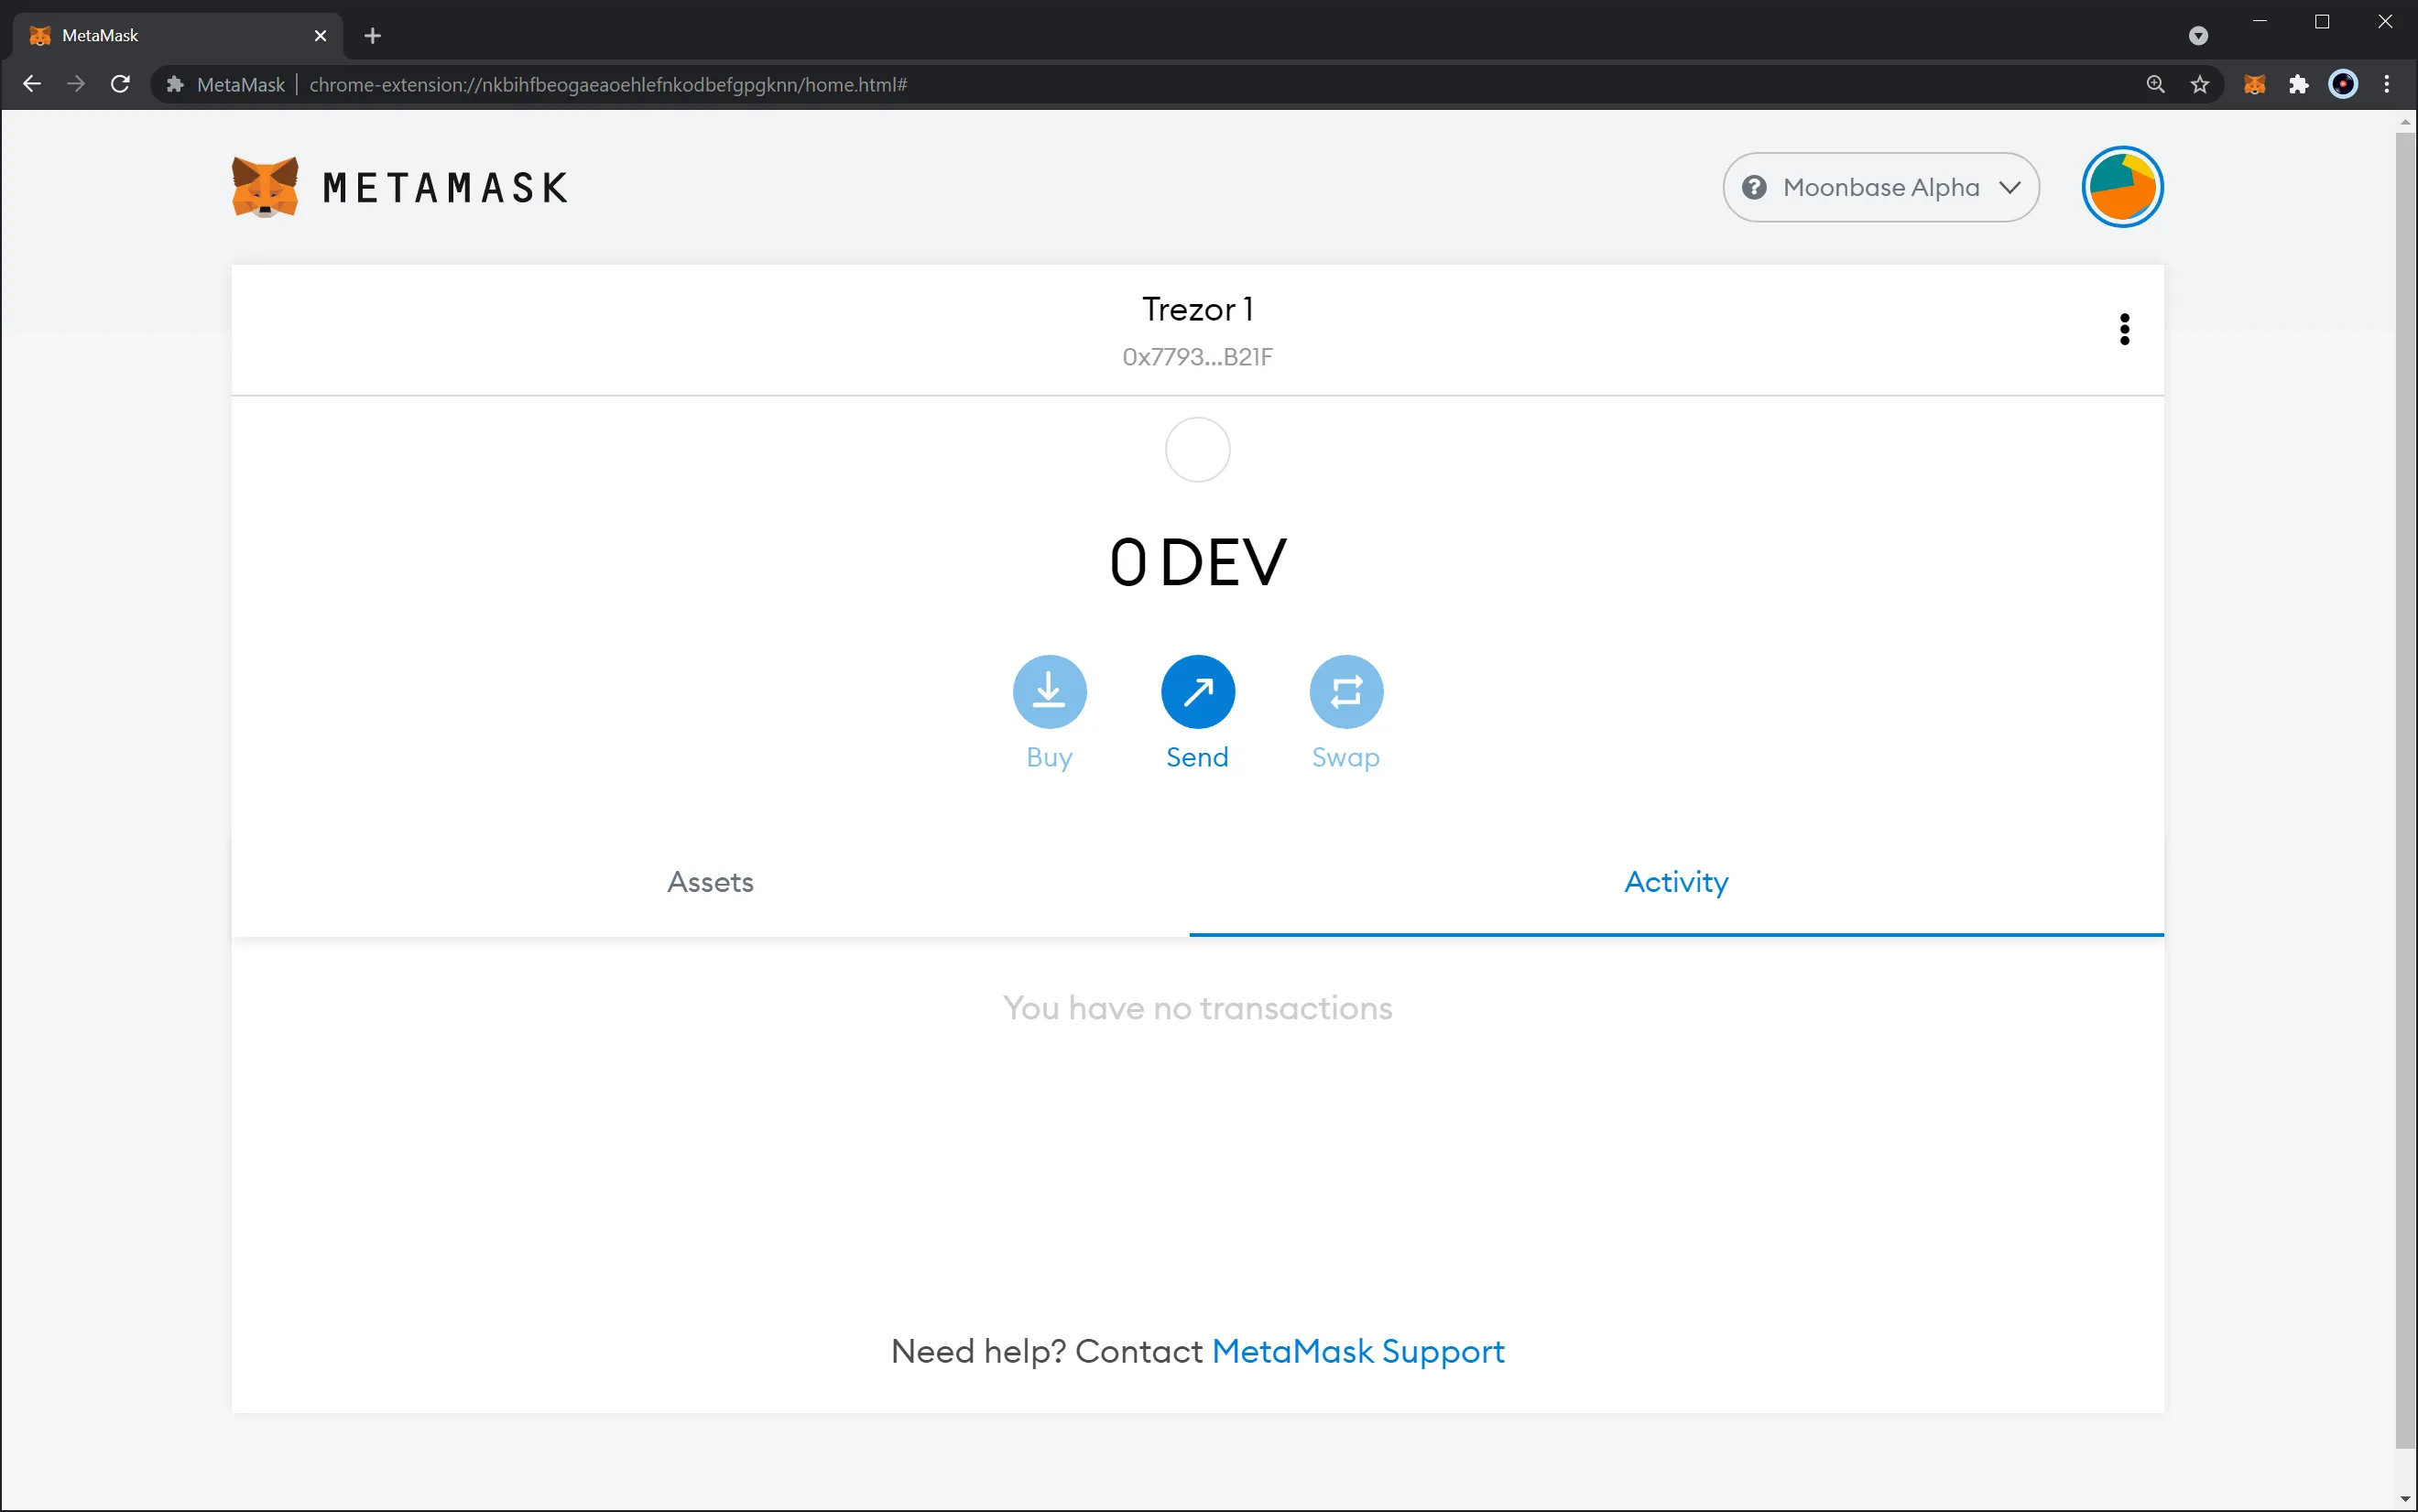
You've now successfully imported a Moonbeam compatible account from your Trezor device and are now ready to start signing transactions using your hardware wallet.
Signing a Transaction Using your Trezor
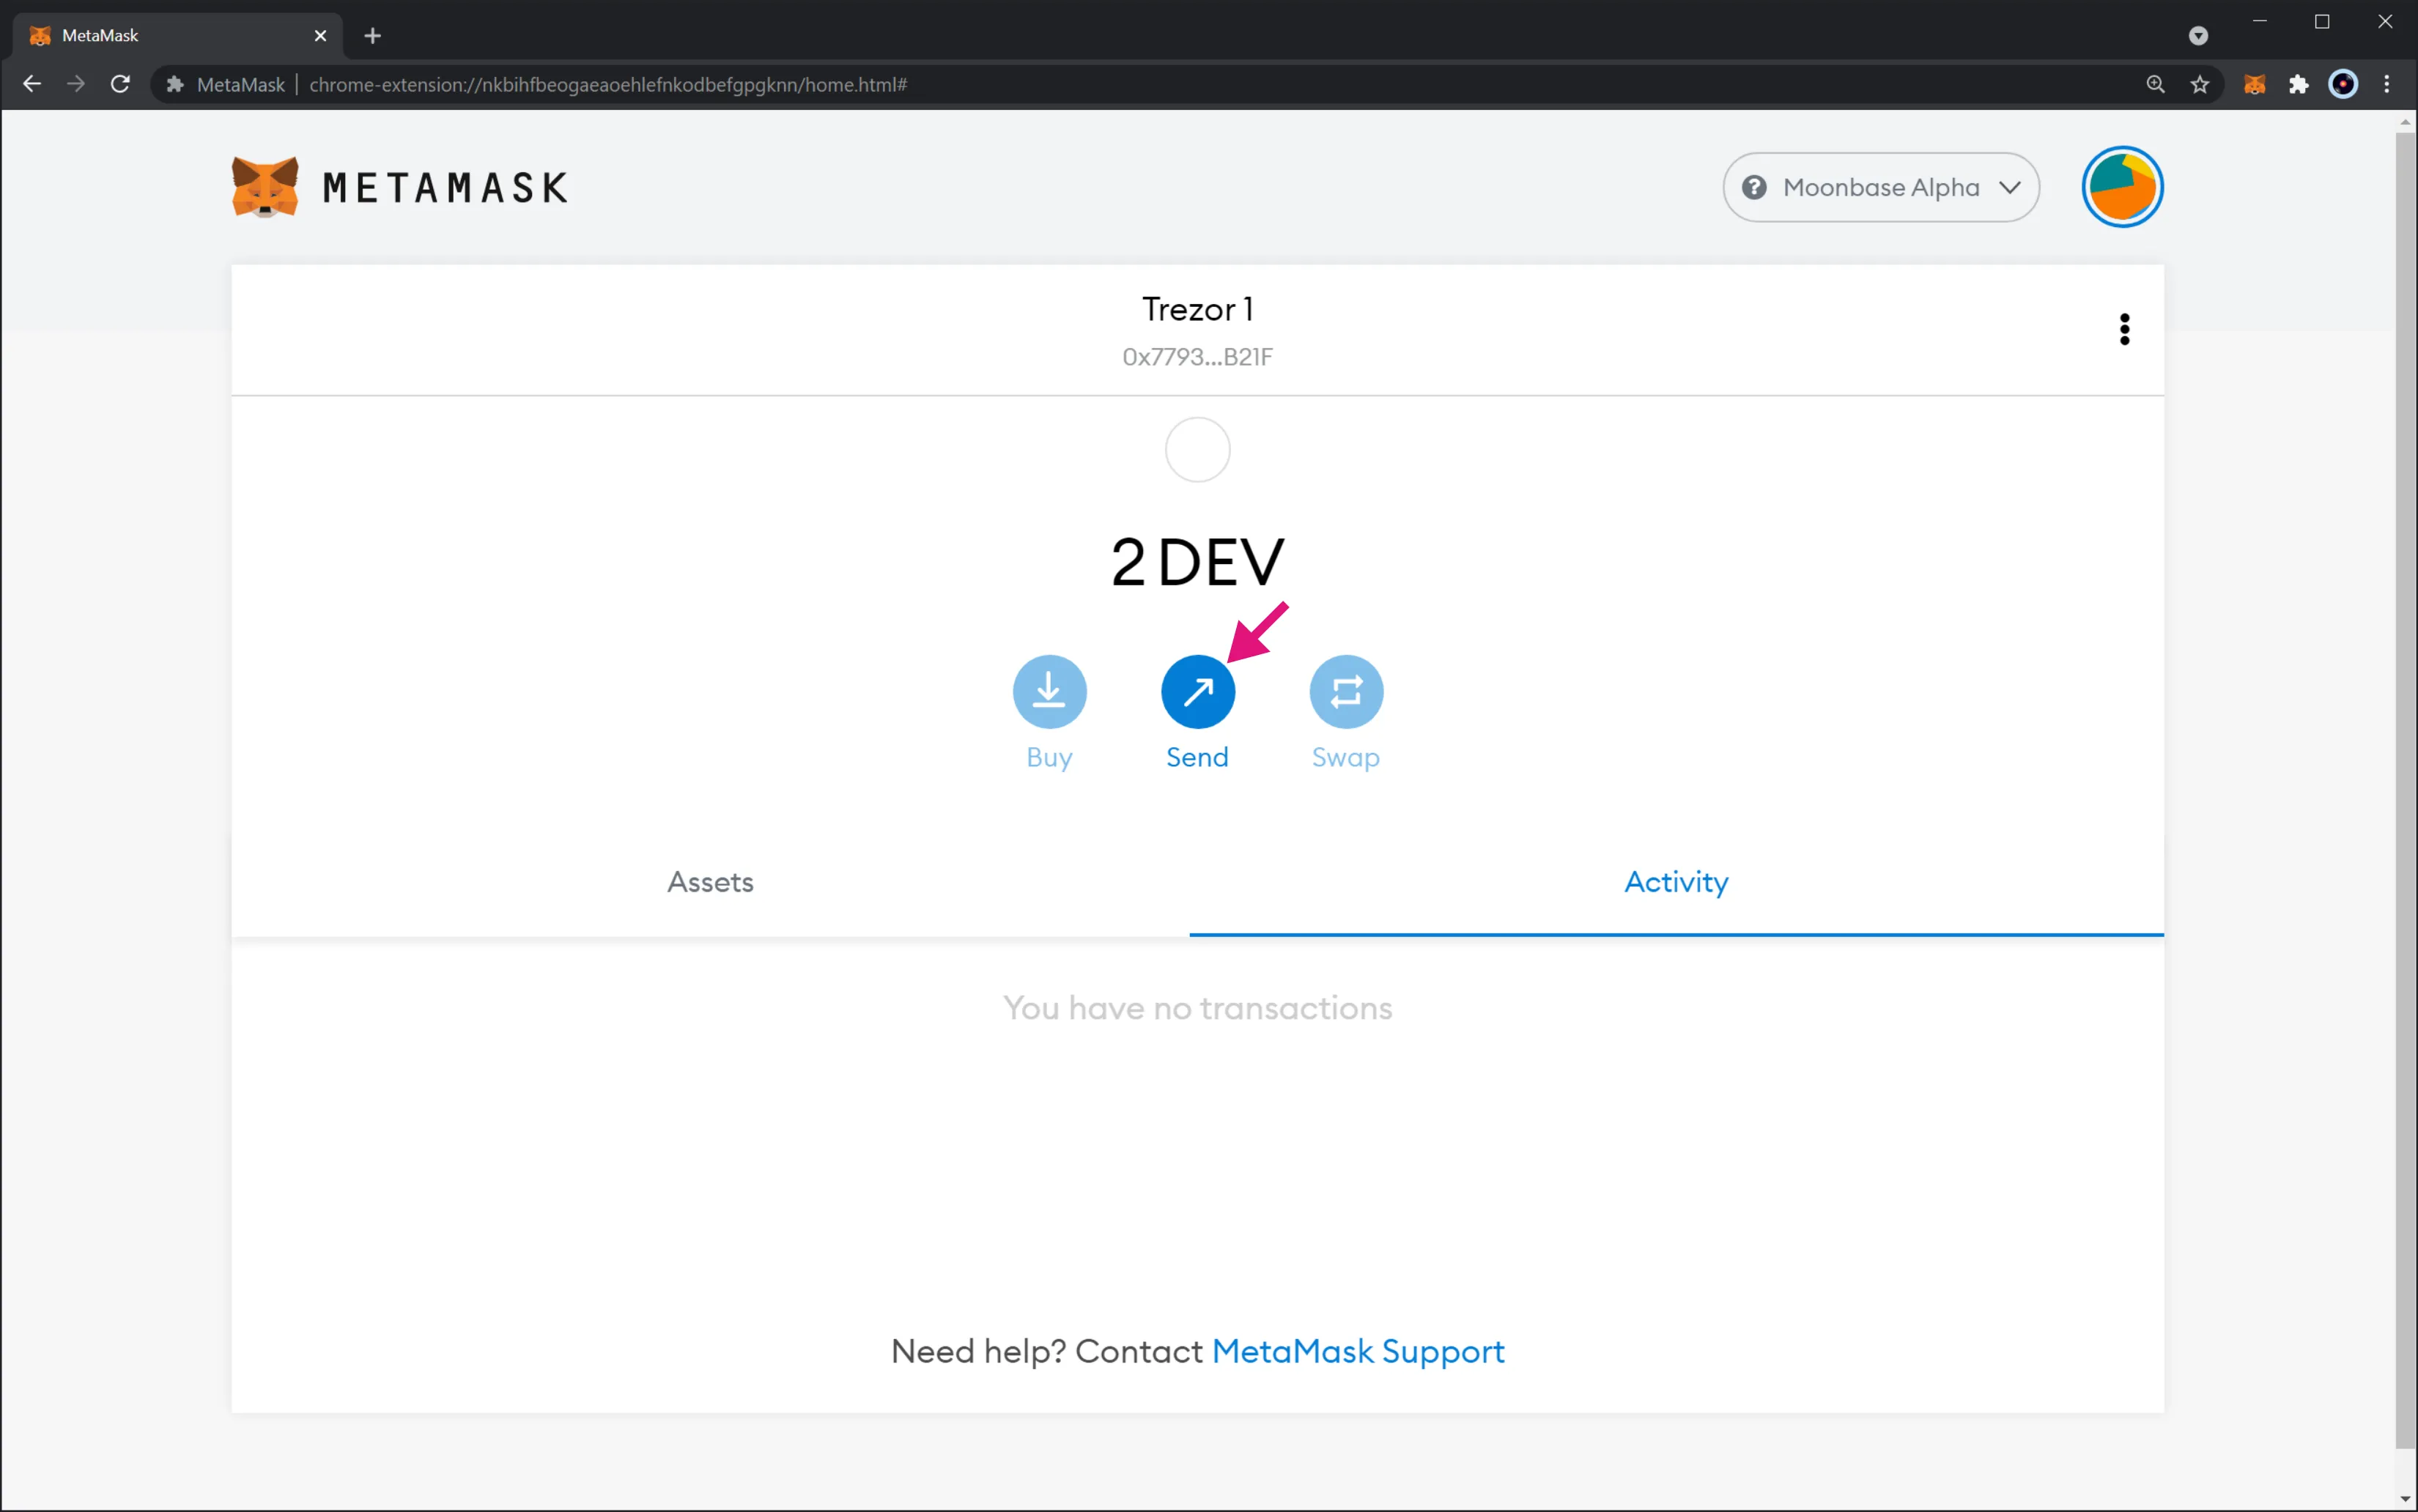
If you've successfully imported your Trezor account to MetaMask, you are ready to sign transactions on Moonbeam using your Trezor device. This tutorial will show you how to send a simple transaction on the Moonbase Alpha TestNet, but it applies to other Moonbeam ecosystem networks.
First, make sure your Trezor account is funded with DEV tokens. Next, click on the Send button.
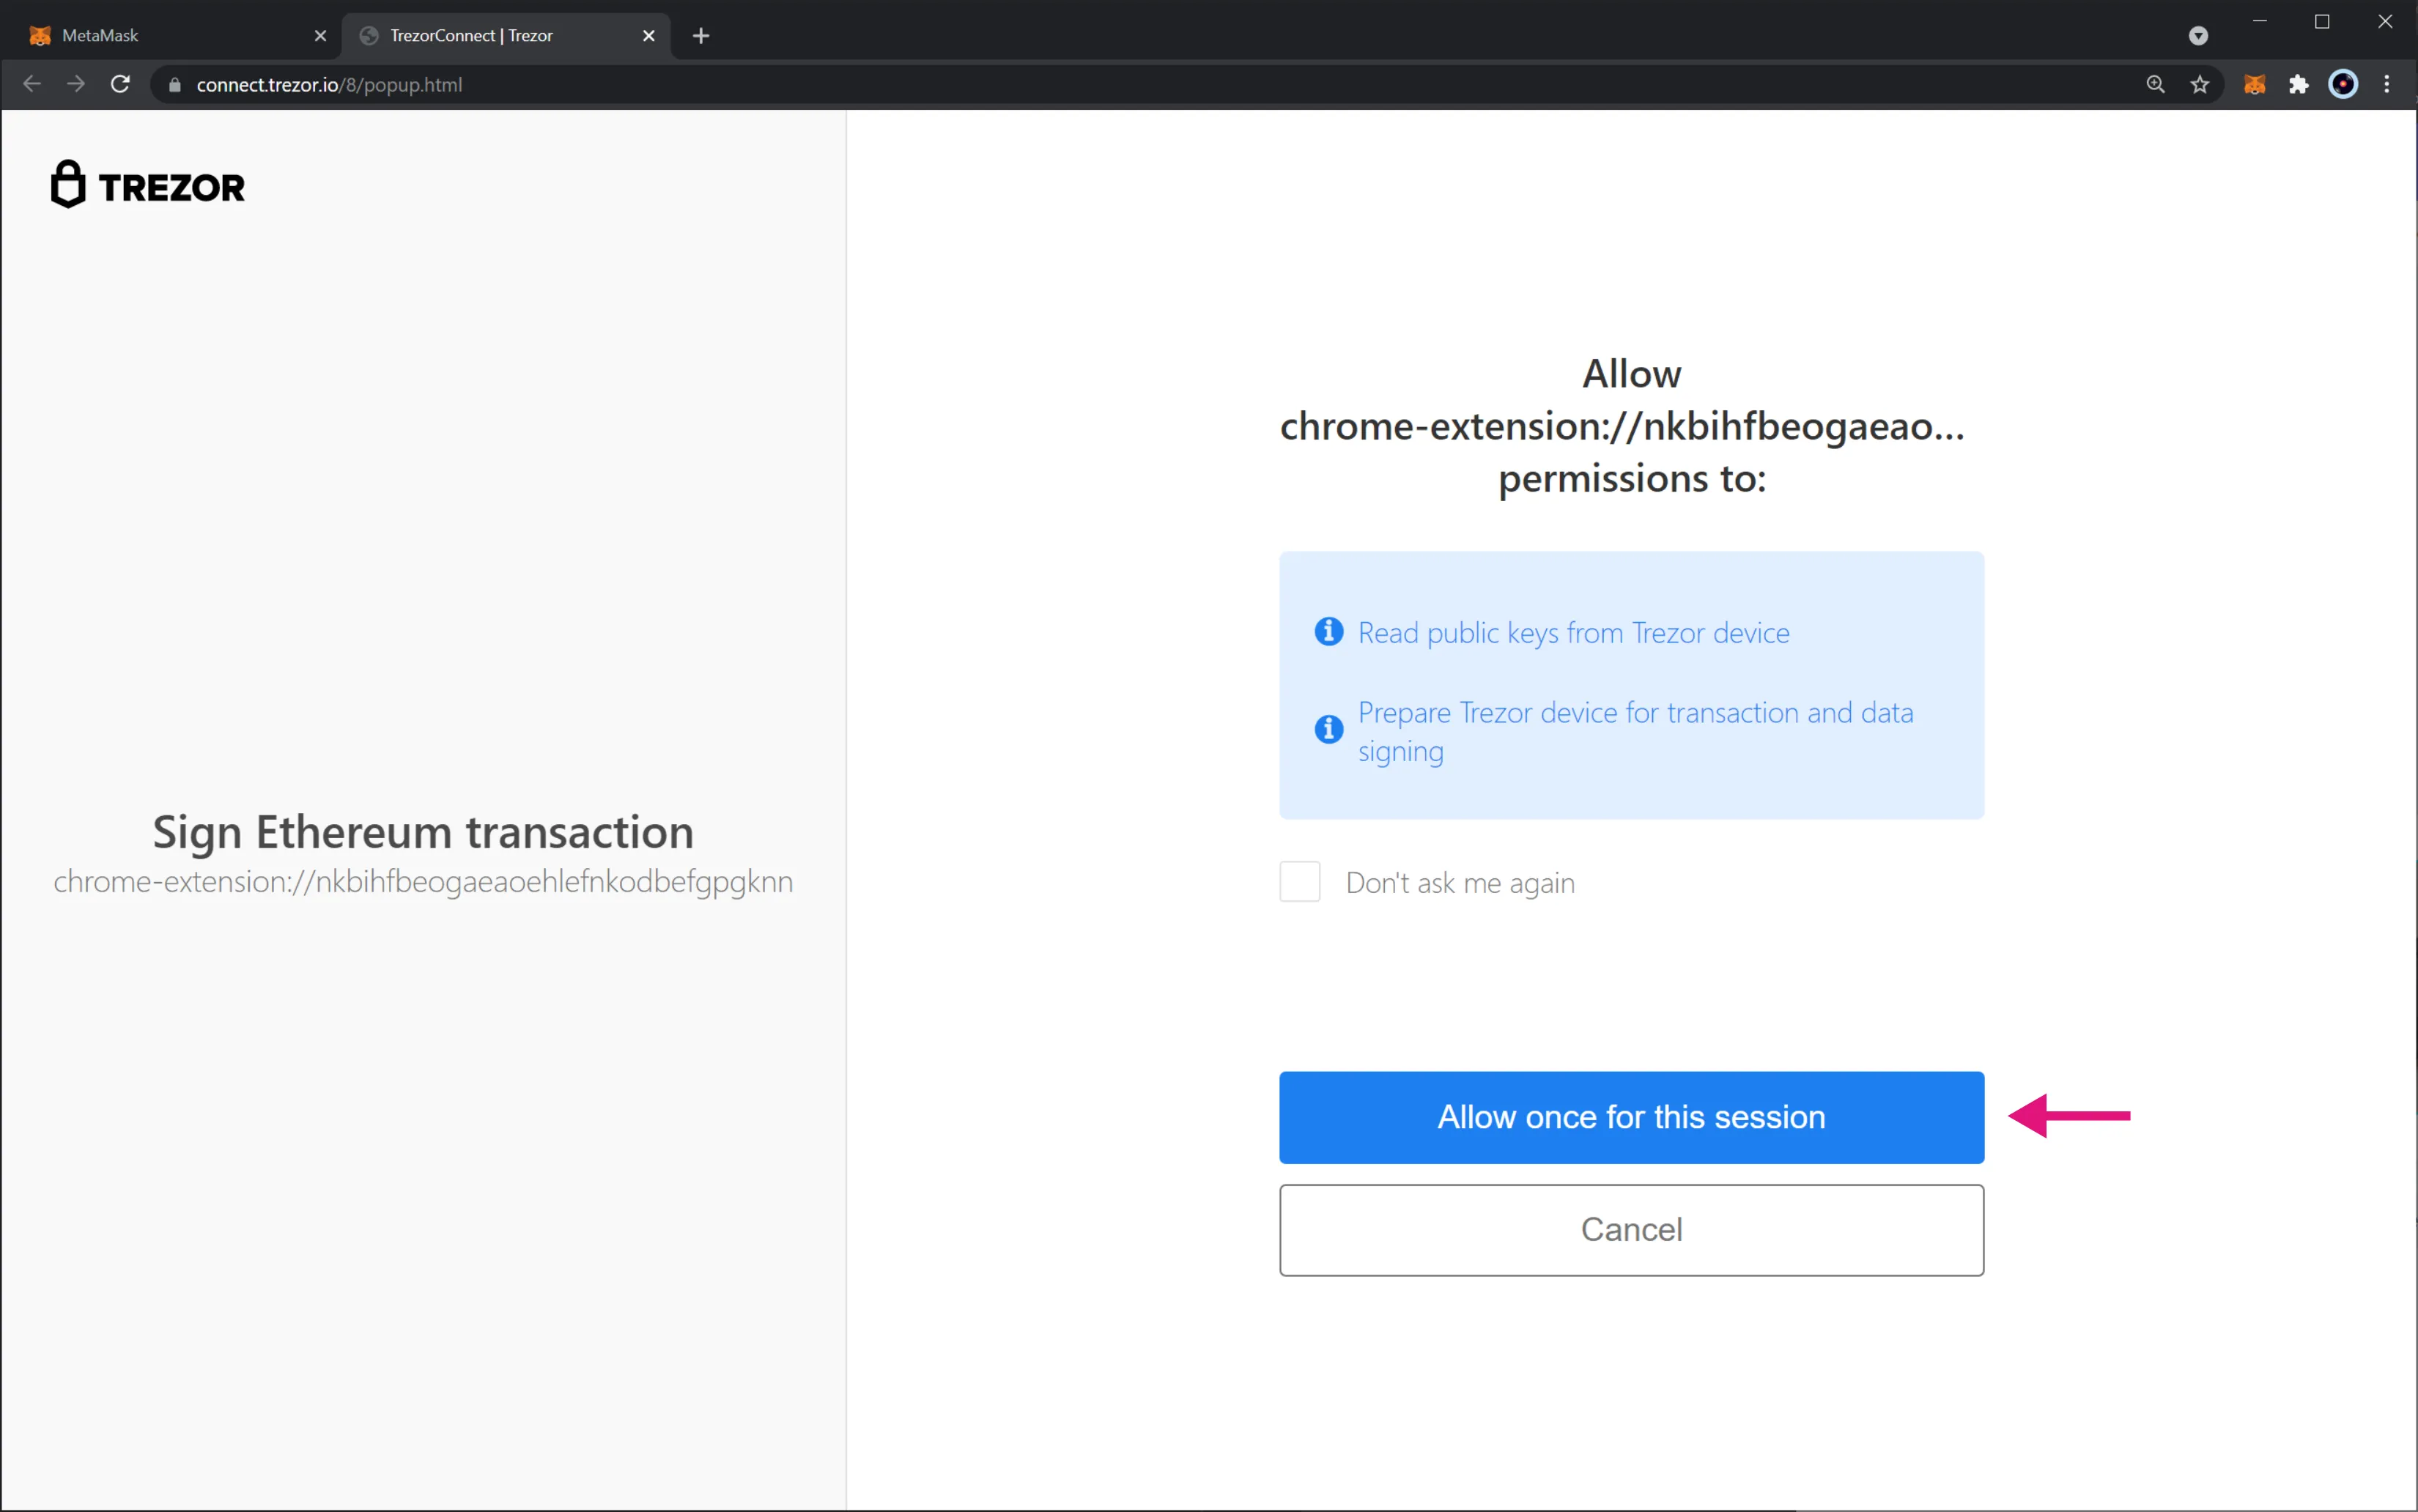
A TrezorConnect tab should pop up, asking permission to read public keys from your device and prepare your Trezor for transaction and data signing. Once you are ready, click on Allow once for this session. Optionally, you can also check the Don't ask me again box.
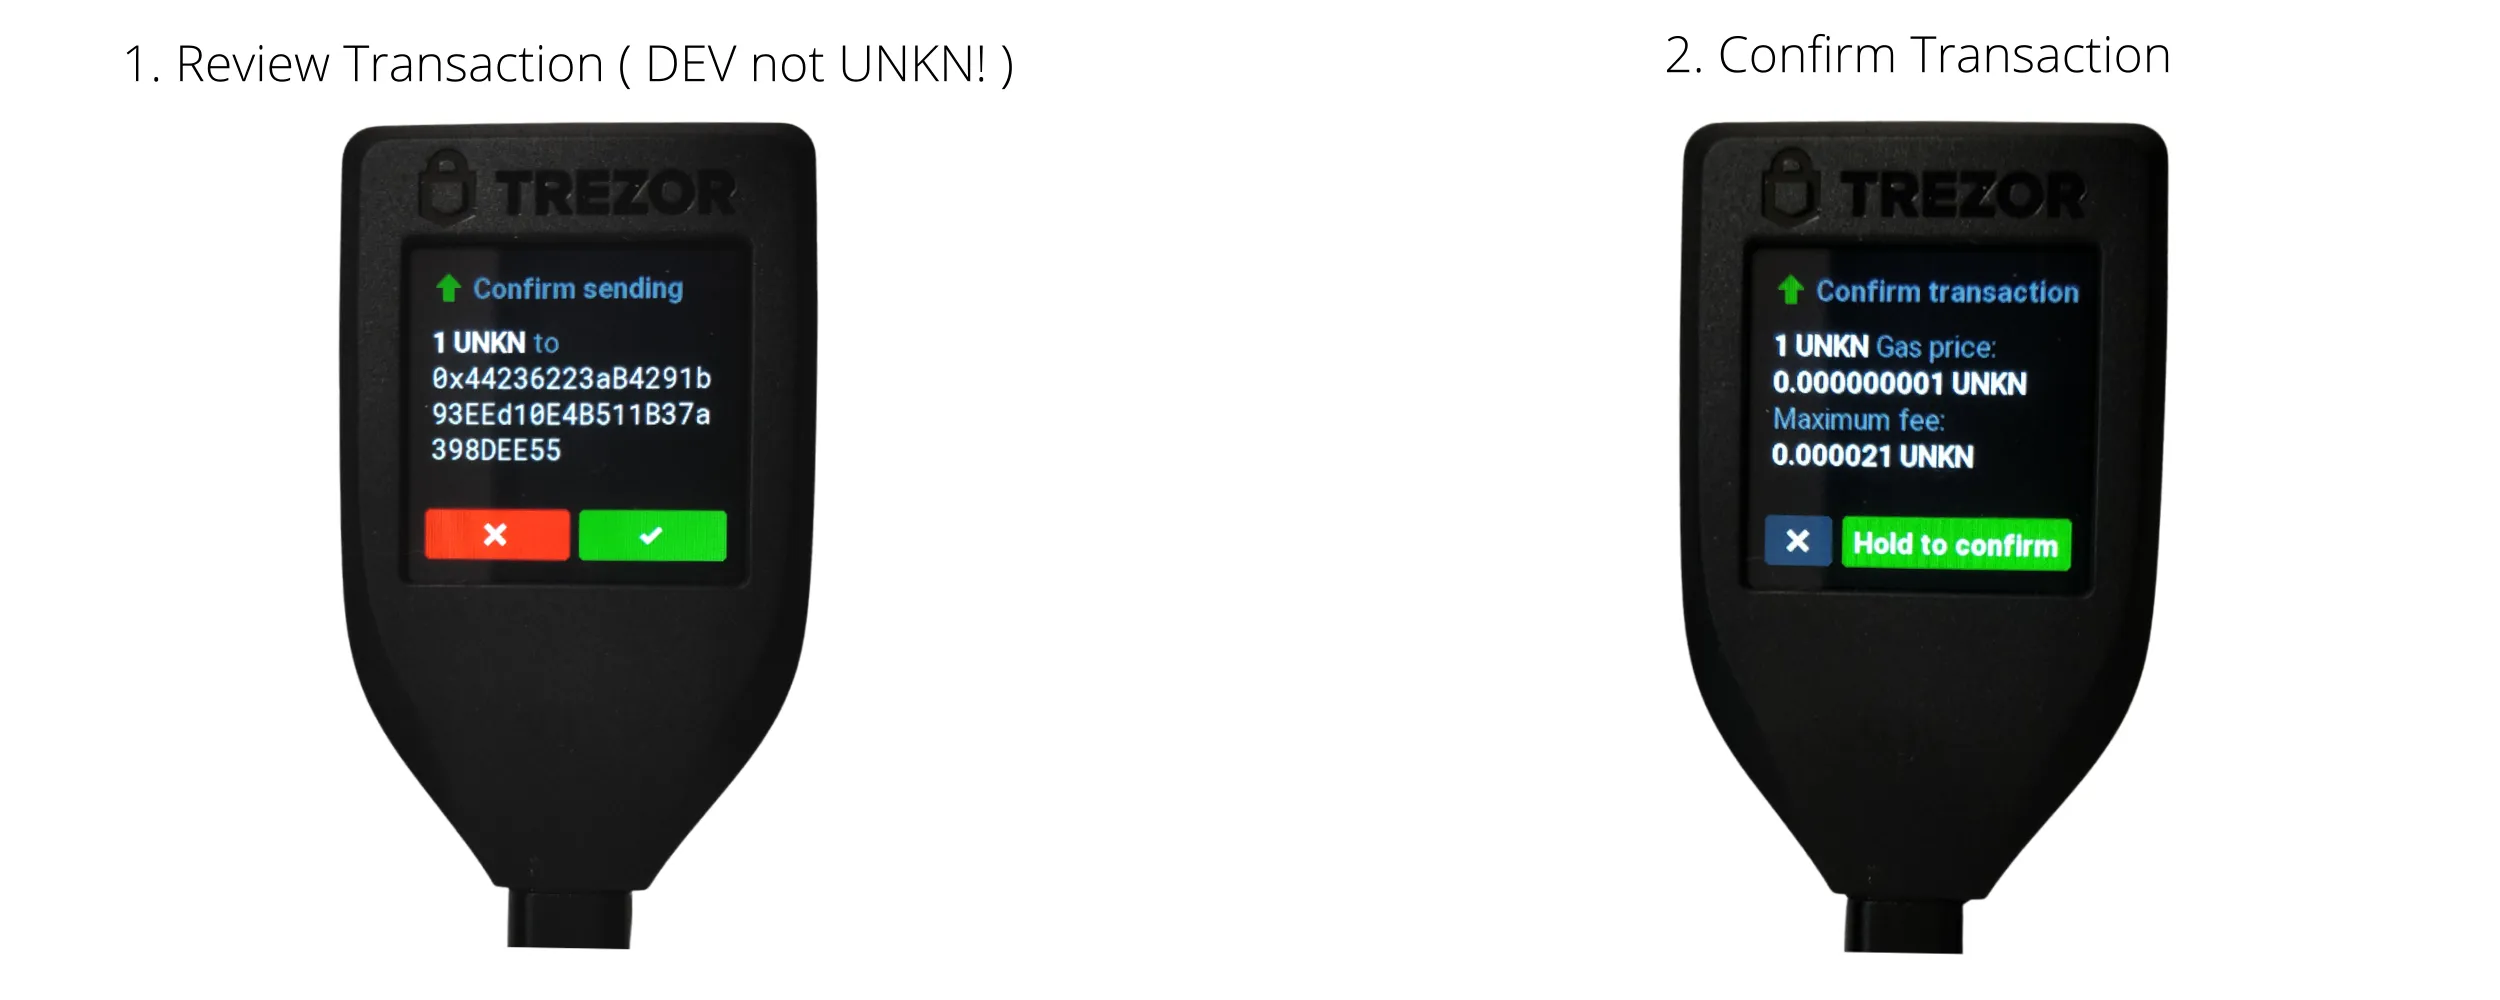
As you would in a standard transaction, set the recipient address, enter the number of tokens to send, review transaction details and confirm it. This will initiate the transaction signature wizard in your Trezor device. Here, take the following steps:
- Review all transaction details. Please note that the token corresponds to the network MetaMask is connected to. In this case, it is DEV tokens and not UNKN!
- Once all details have been checked, hold the button to confirm
Note
At the time of writing, the token name for all Moonbeam-related networks is always shown as UNKN. Please note that the token being handled is the one corresponding to the network MetaMask is connected to.
Right after you've approved the transaction, MetaMask sends it to the network. Once the transaction is confirmed, it will be displayed as Send on MetaMask's main screen.
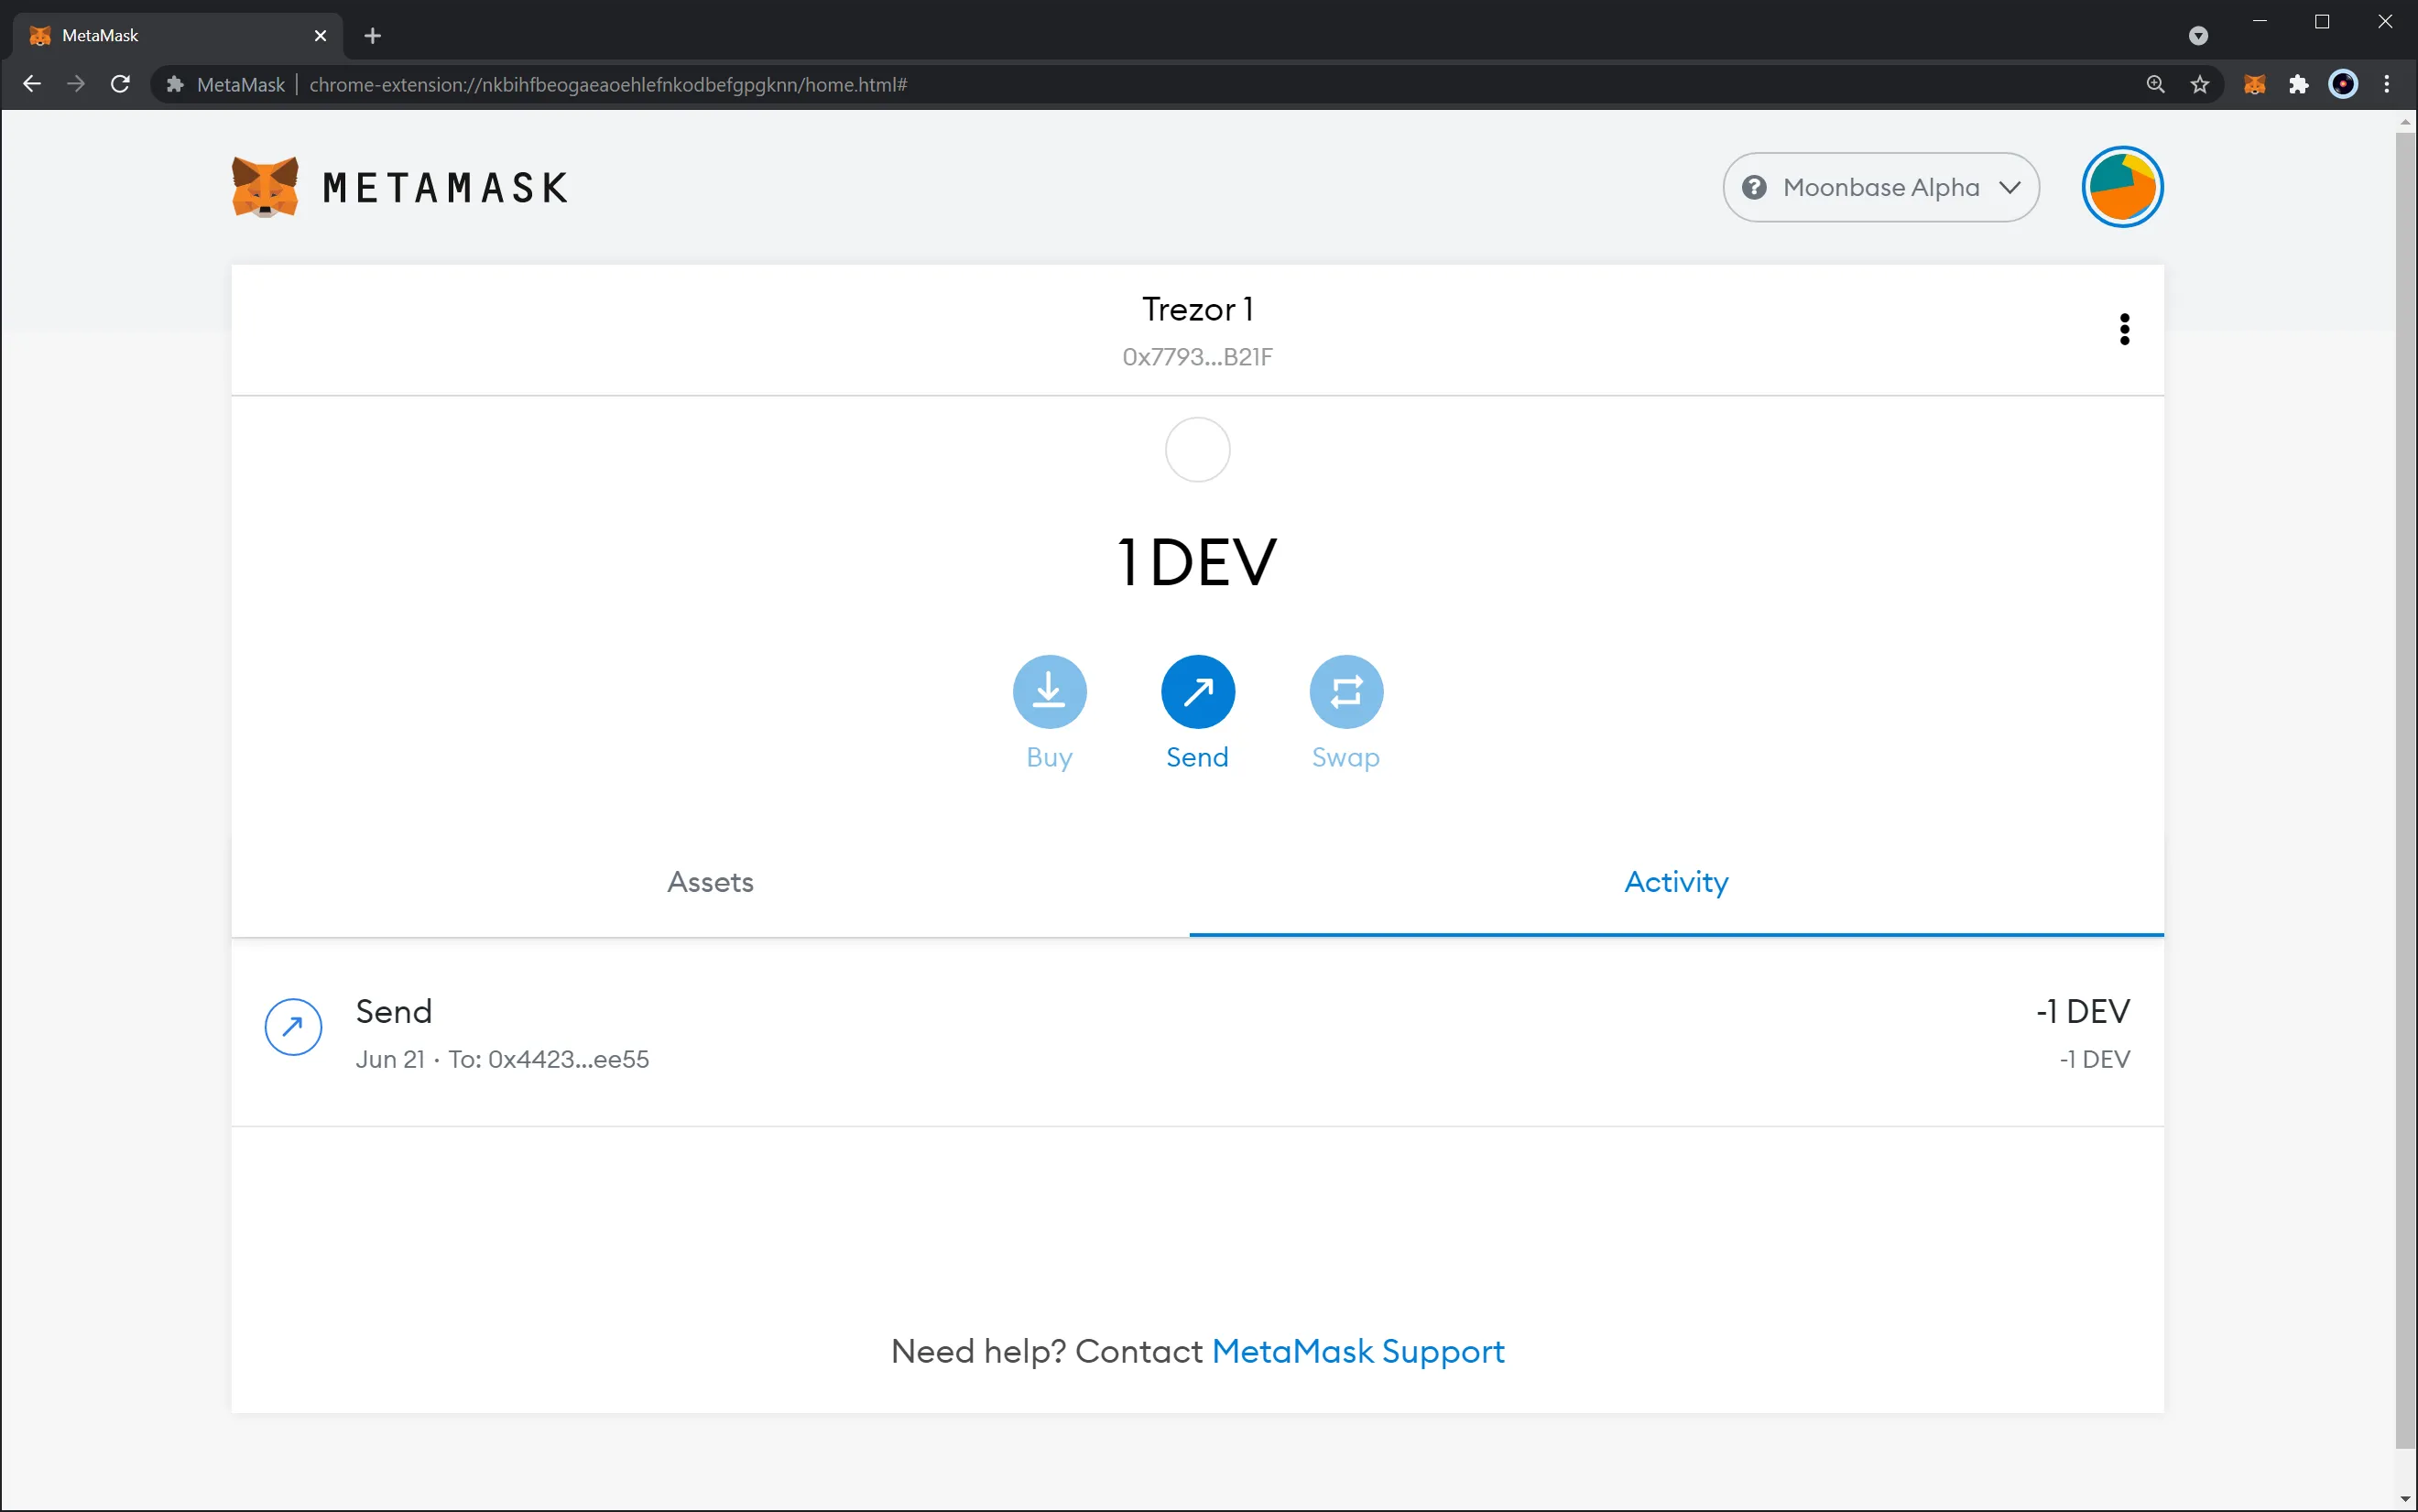
And that is it! You've signed a transaction on Moonbase Alpha using your Trezor hardware wallet.
The process of interacting with smart contracts using your Trezor device is similar. Make sure to double-check the data being signed on your Trezor device before confirming the transaction.
| Created: June 22, 2021