Interacting with Moonbeam Using SubWallet
Introduction
Developers and users of Moonbeam have a variety of options when it comes to wallets. Thanks to Moonbeam's seamless Ethereum compatibility, Moonbeam supports a great variety of popular wallets, including SubWallet.
SubWallet is a comprehensive Web3 wallet that natively supports Substrate and Ethereum accounts. Although Moonbeam is a Substrate-based blockchain, it has a unified account system that replaces the default Substrate-style accounts and keys with Ethereum-style accounts and keys. Since SubWallet supports Ethereum-style accounts, you can interact with your Moonbeam account using SubWallet.
This guide takes you through all the necessary steps, from installing SubWallet to setting up a wallet, connecting it to Moonbeam, and sending funds.
Install SubWallet
There are several ways you can interact with SubWallet: they have a browser extension, a mobile app, and a web-accessible dashboard.
You can get started by heading to SubWallet's download page and downloading SubWallet for the platform of your choice.
If you choose to use the web-accessible dashboard, you won't need to download anything. You can access the dashboard at web.subwallet.app.
The interfaces for the mobile app, browser extension, and web dashboard are quite similar, so you can adapt the following instructions, which focus on the browser extension, for the mobile app and web dashboard.
Setup a Wallet
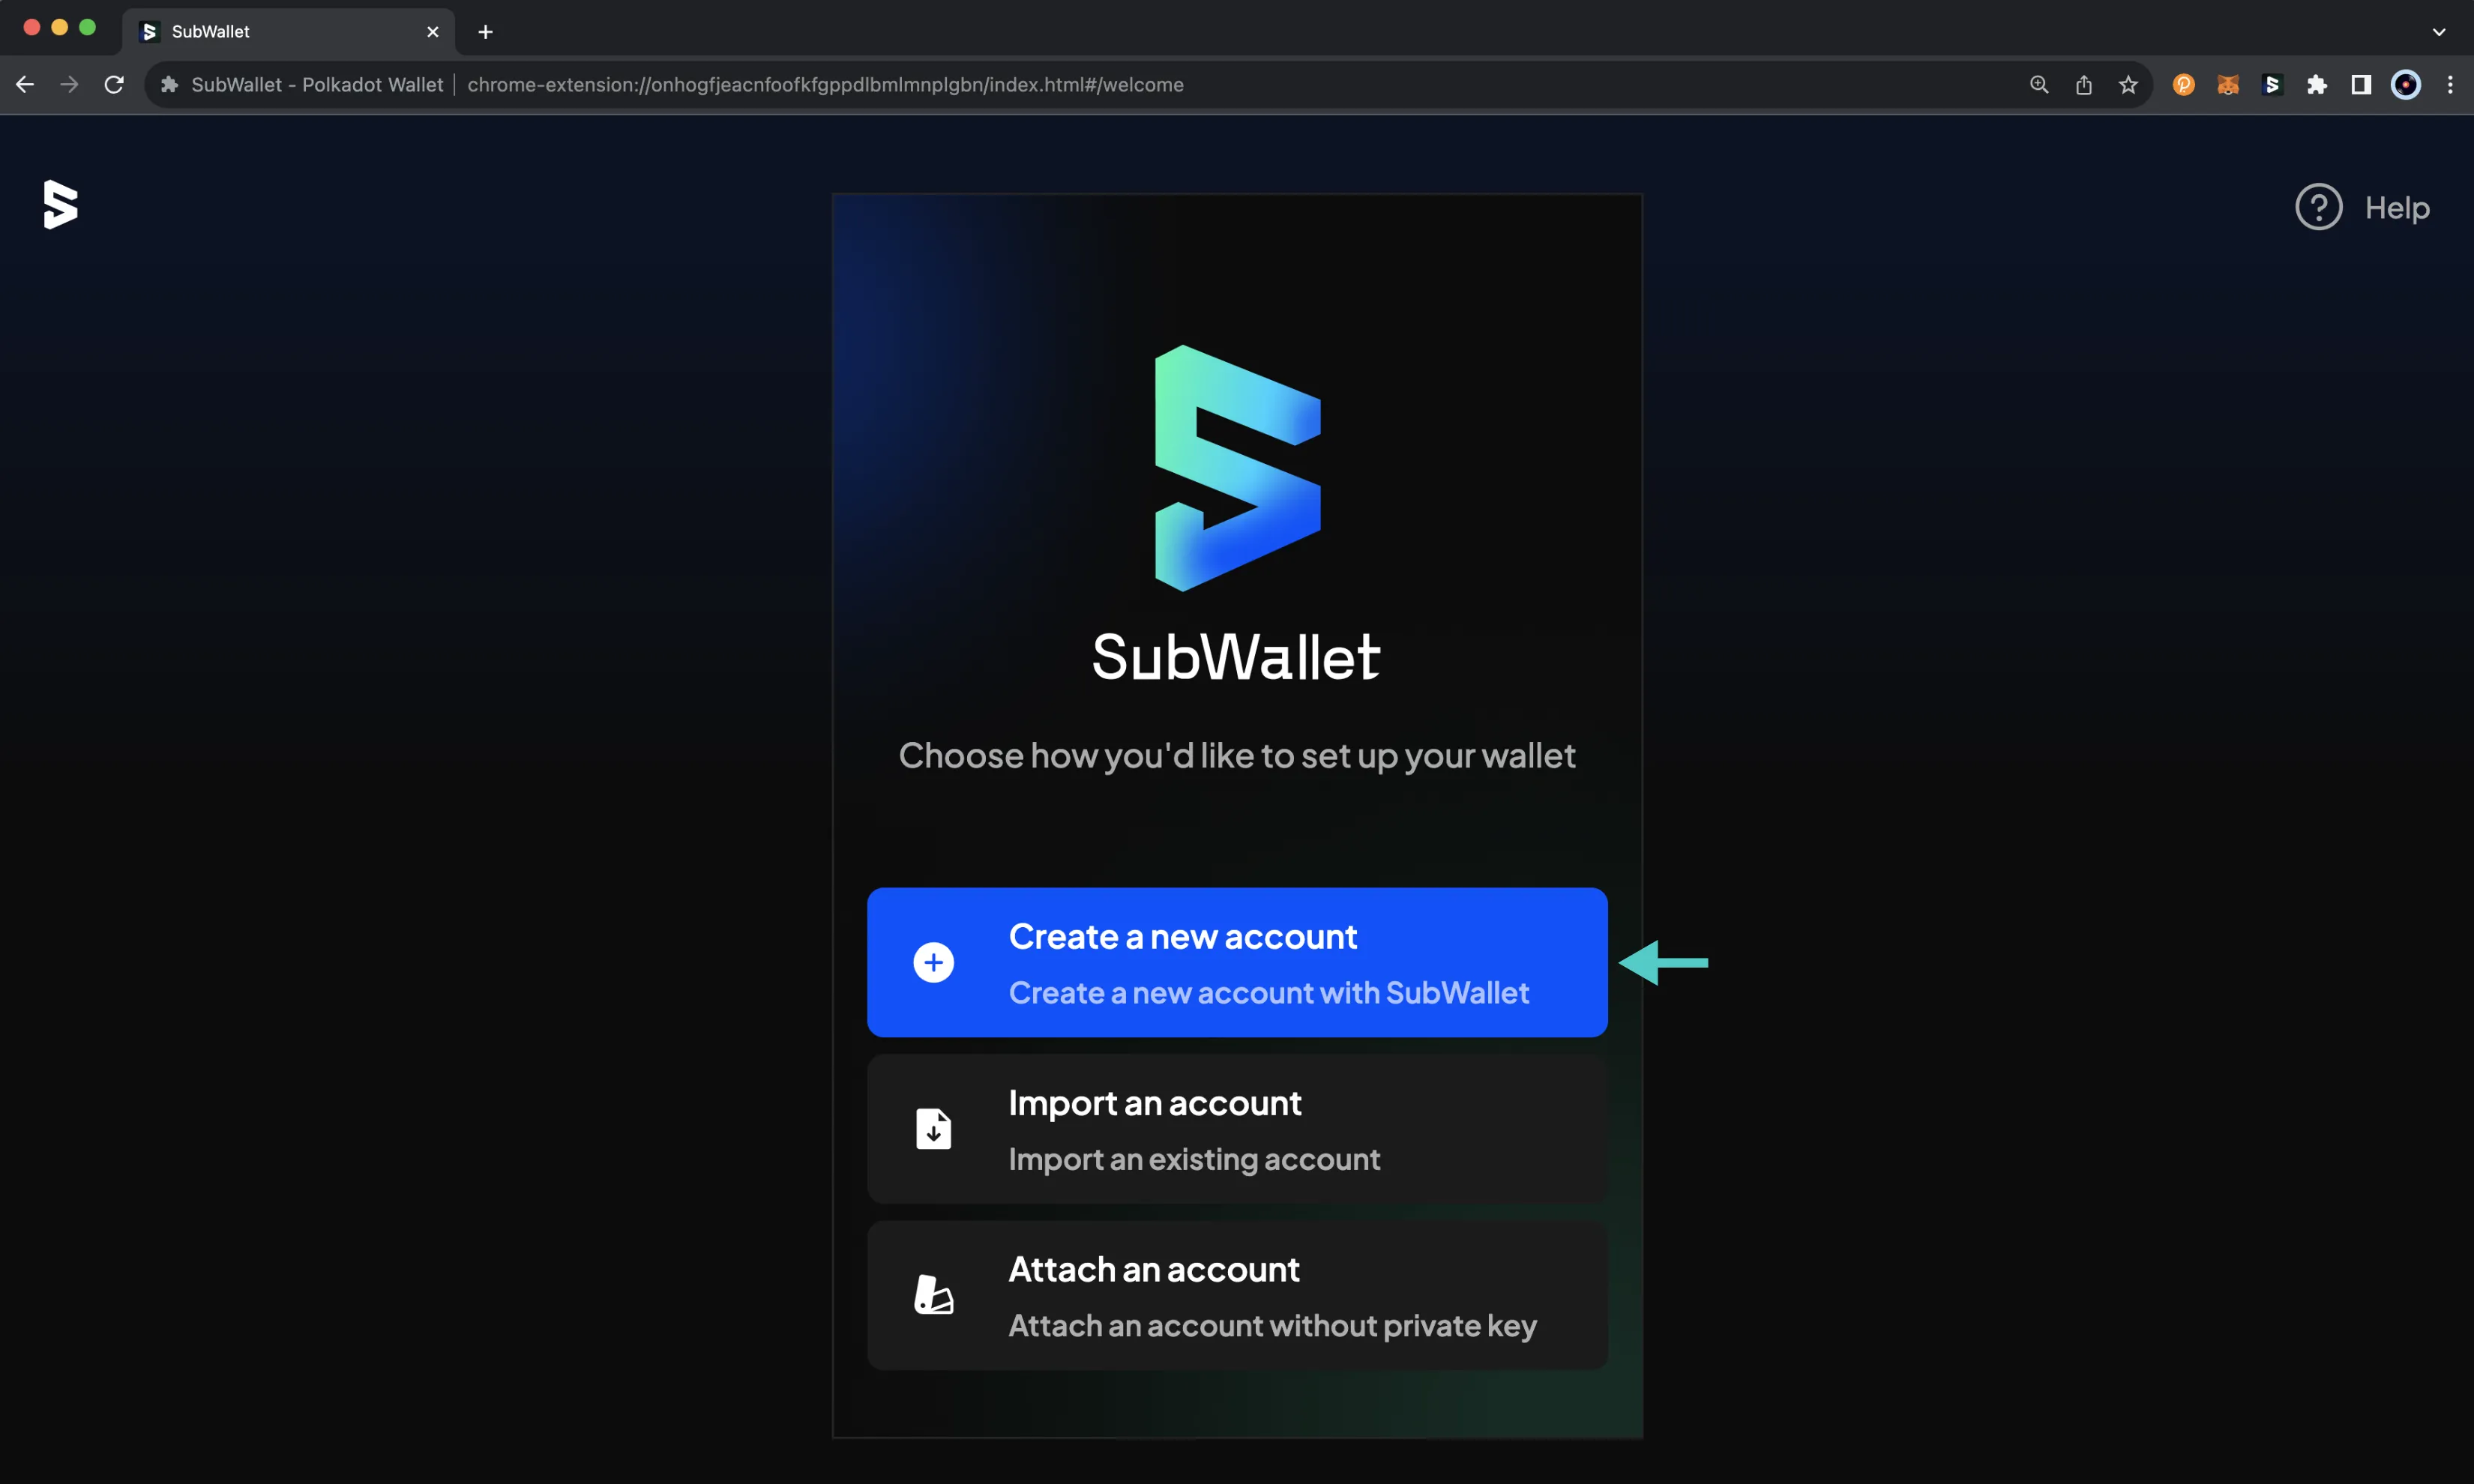
Once you've downloaded the SubWallet Browser Extension, you'll be prompted to set up your wallet. You'll be able to choose from the following options:
- Create a new account - allows you to create an entirely new account by creating a password and generating a seed phrase
- Import an account - allows you to import an existing account using the seed phrase, JSON file, private key, or by QR code
-
Attach an account - allows you to connect to an account without the private key. You can use this method to connect to a cold storage wallet, like Keystone, or a watch-only account. With a watch-only account, you will not be able to transfer funds or interact with your account; you'll only be able to view account balances
Note
Ledger is supported on the browser extension but is not yet available on the mobile app. Support for Ledger on the mobile app is coming soon!
-
Connect wallet - only available on the web dashboard - allows you to connect to a browser extension wallet. You can use this method to easily connect to an account you've created using the SubWallet browser extension or another wallet, such as MetaMask
The following sections will provide step-by-step instructions for creating a new account and importing an existing account with SubWallet.
If you're attaching an account, you can find step-by-step instructions on SubWallet's Account management documentation. Similarly, if you're connecting a wallet on the web dashboard, you can find instructions on SubWallet's Connect extension documentation.
Create a New Account
Creating a new account will generate a seed phrase that can derive multiple Ethereum and Substrate accounts. By default, SubWallet will generate a single Ethereum and a single Substrate account, but you can easily derive more from the same seed phrase. To interact with Moonbeam, you will need to use an Ethereum account. Click Create a new account to get started.
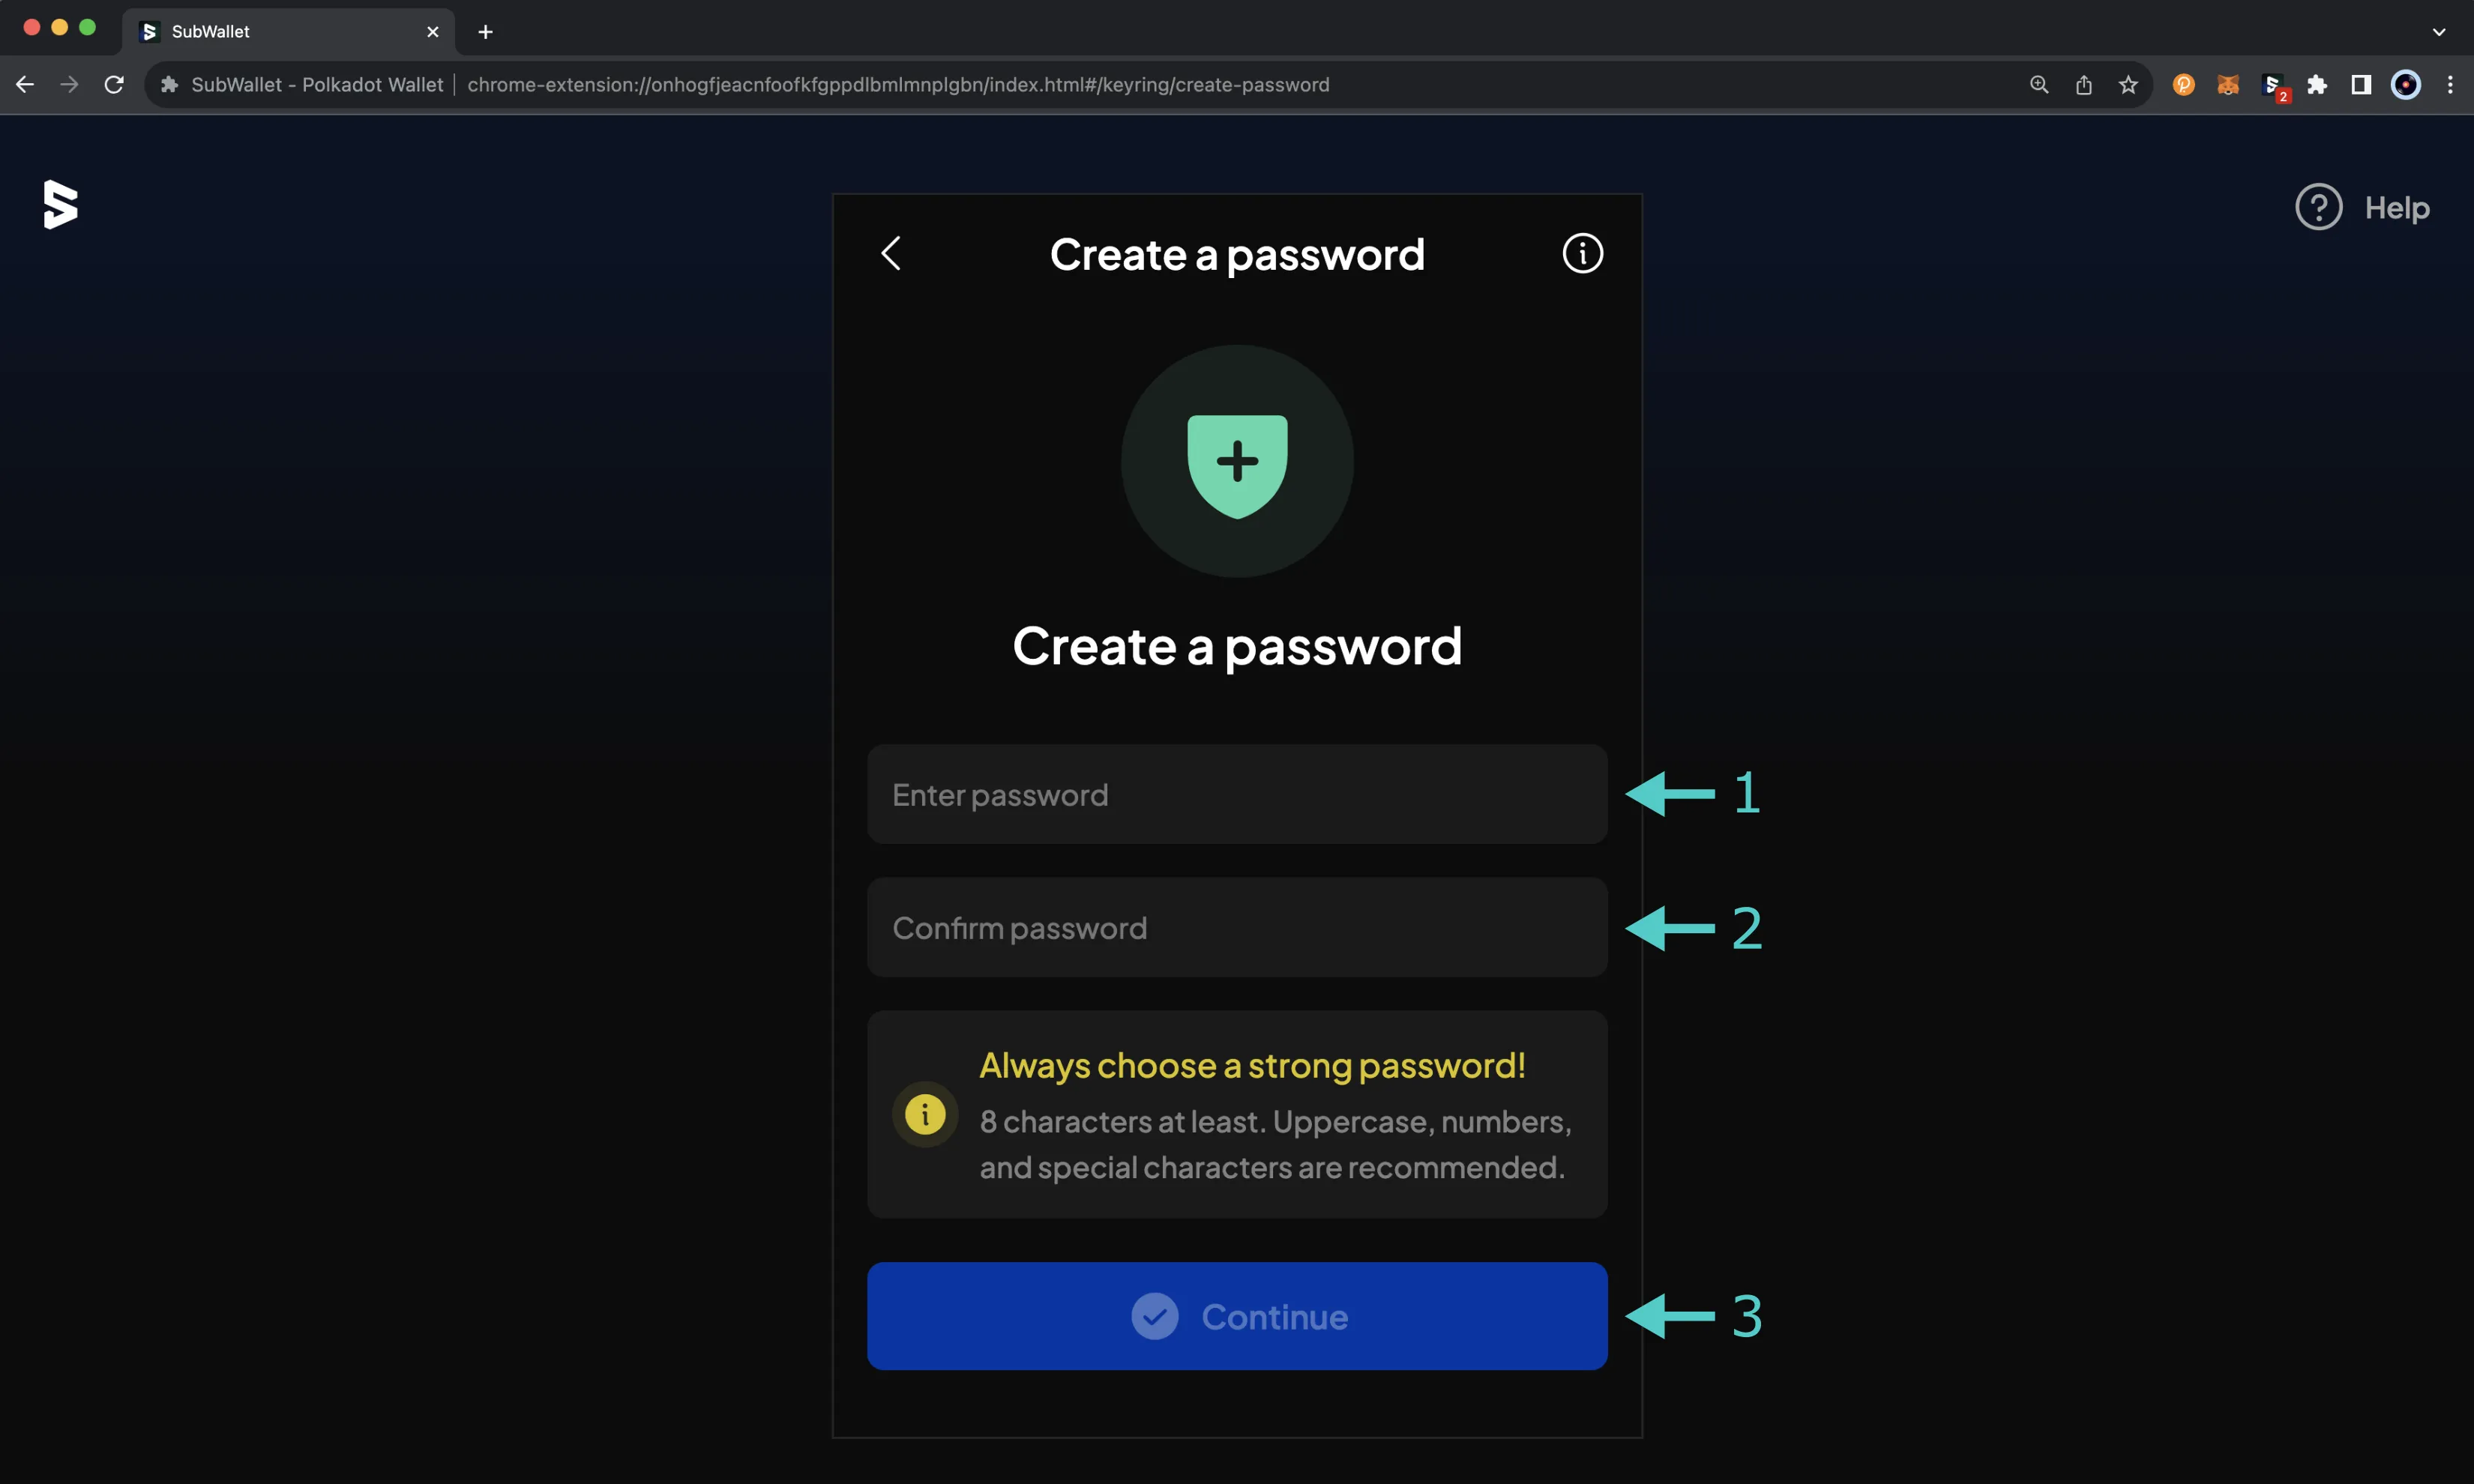
On the following screen, you'll be prompted to create a password to secure your new wallet:
- Enter a password that has at least 8 characters
- Confirm the password by entering it again
- Click Continue
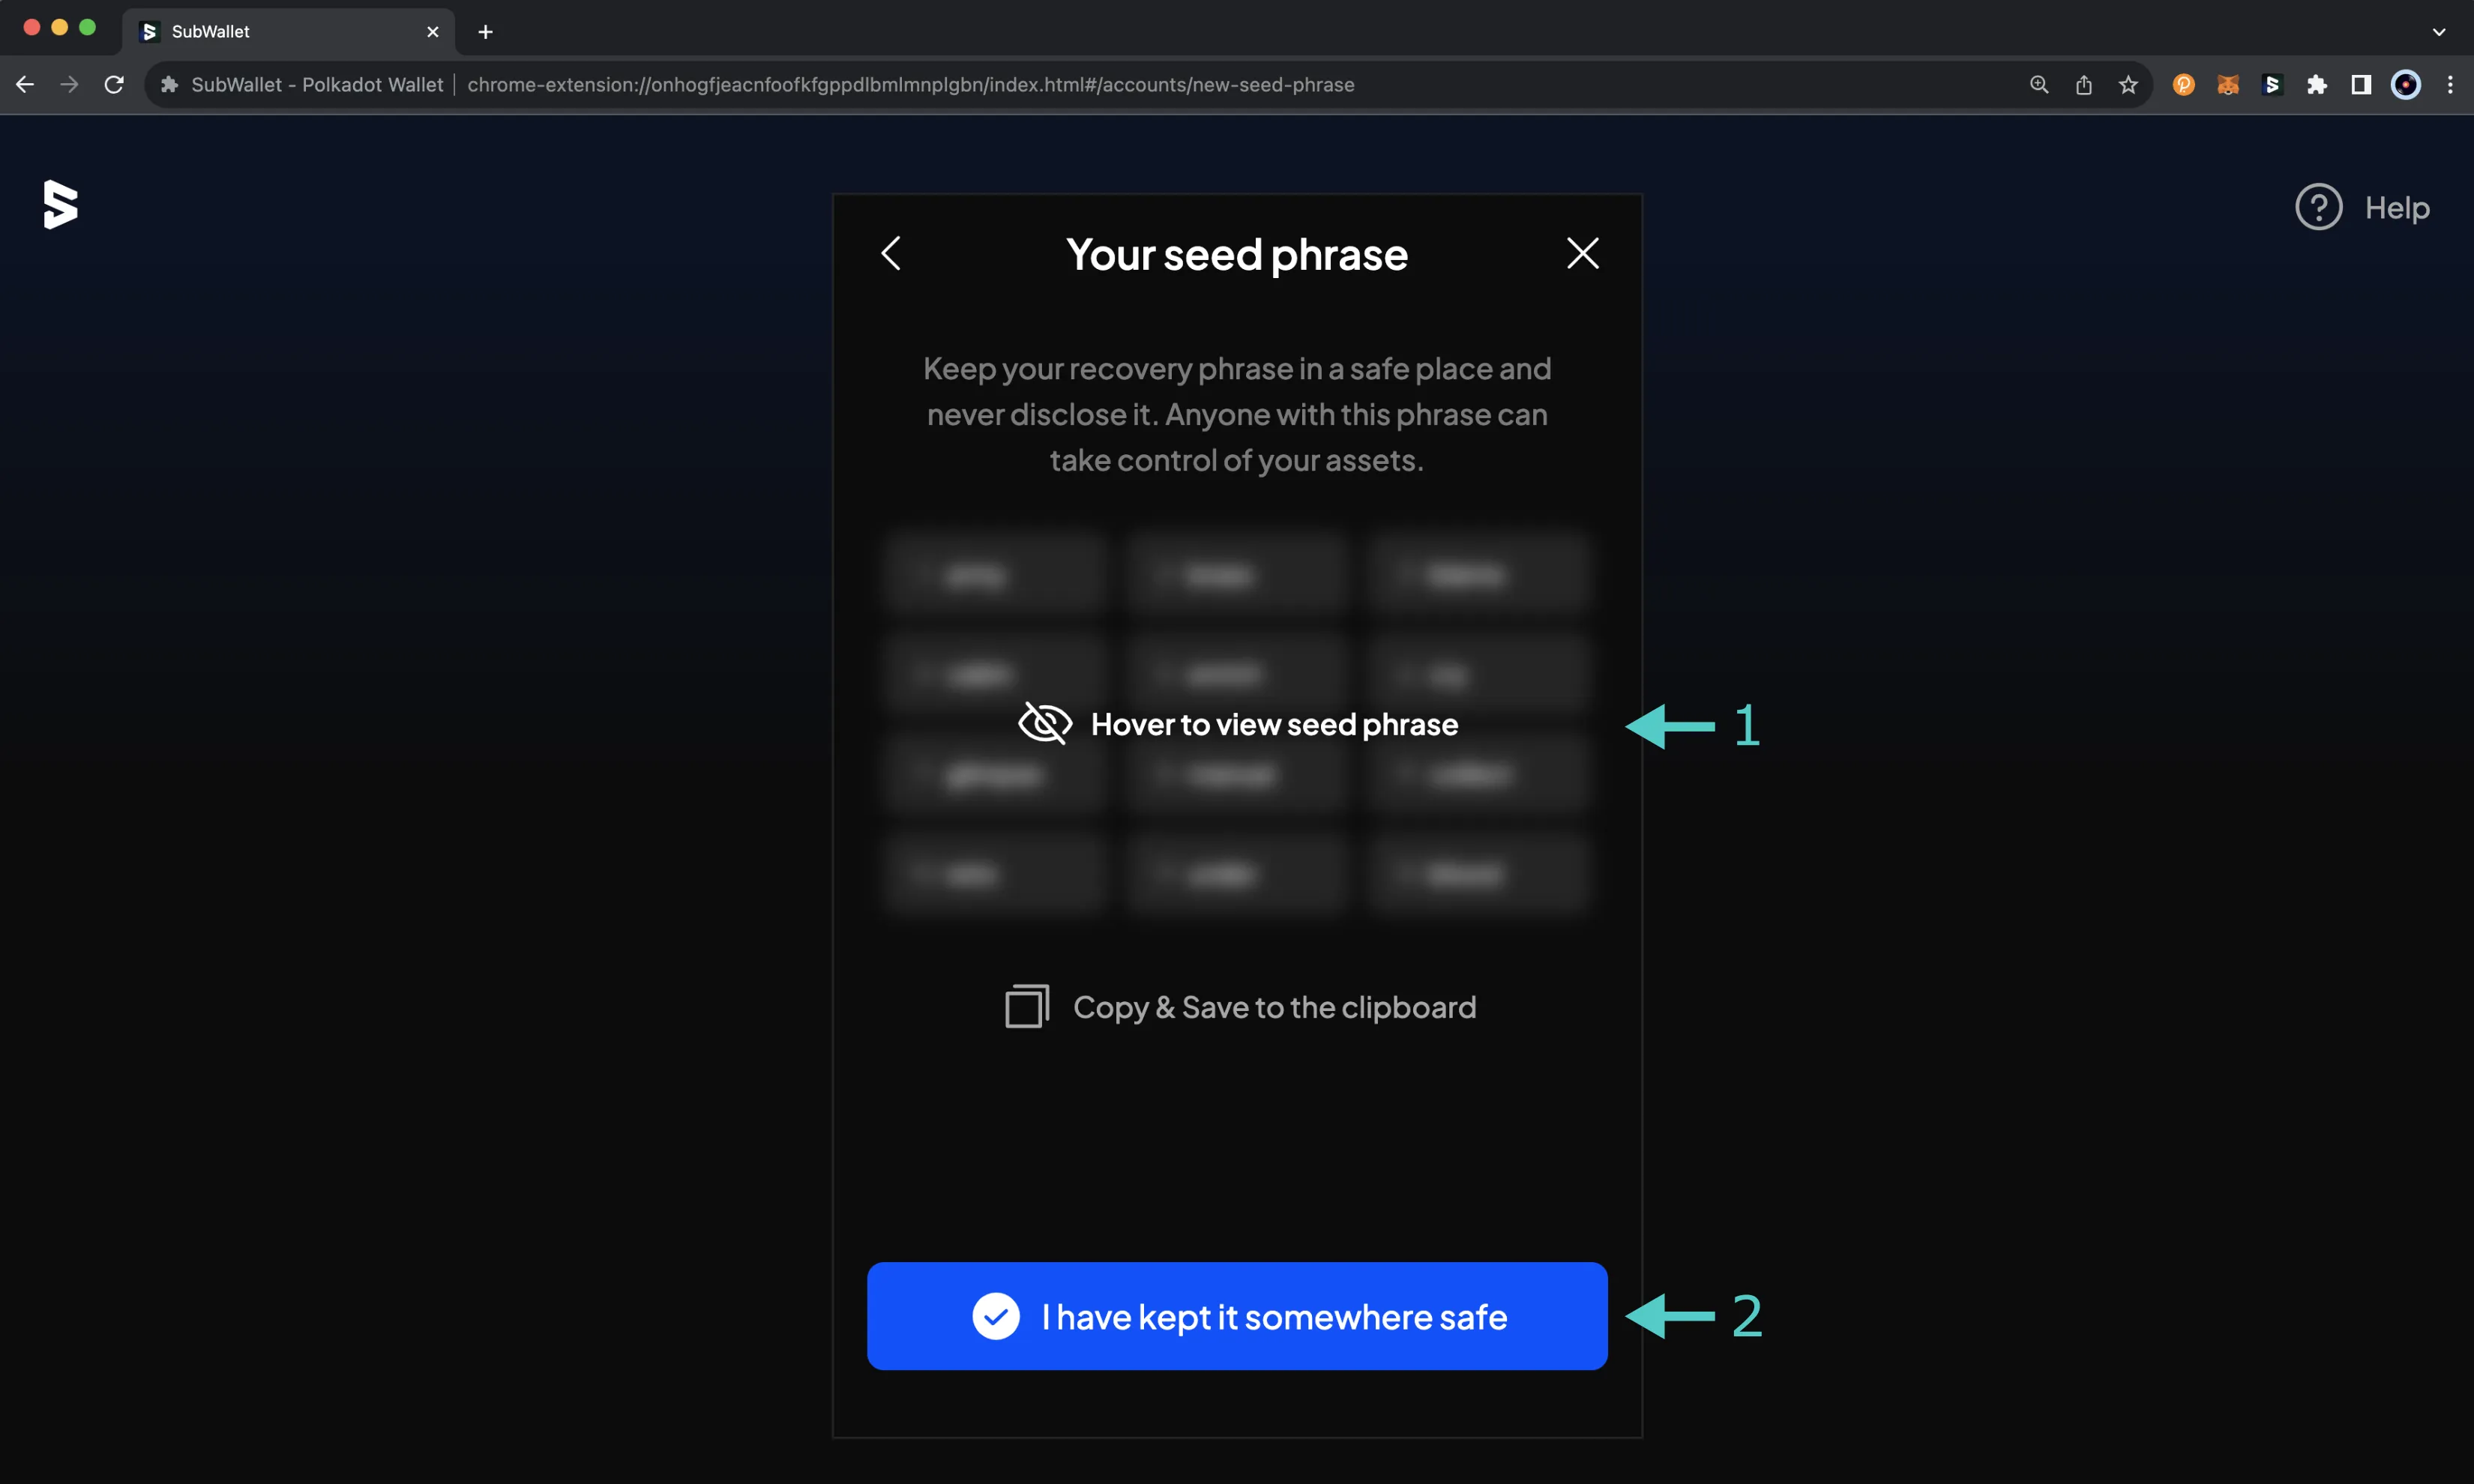
You'll then be prompted to back up your seed phrase. This is an important step, especially because you have the option to later derive additional accounts from this seed phrase.
-
View your seed phrase and save it in a safe place
Remember
You should never share your seed phrase (mnemonic) or private key with anyone. This gives them direct access to your funds. This guide is for educational purposes only.
-
Once you've safely stored your seed phrase, click I have kept it somewhere safe
Note
If you're creating a new account on the mobile app, you'll have to re-enter your seed phrase to verify that you have stored it. The words have to be entered in the correct order.
After you've created a password and saved your seed phrase, you'll be connected to your account. You can add additional accounts at any time.
Import an Account
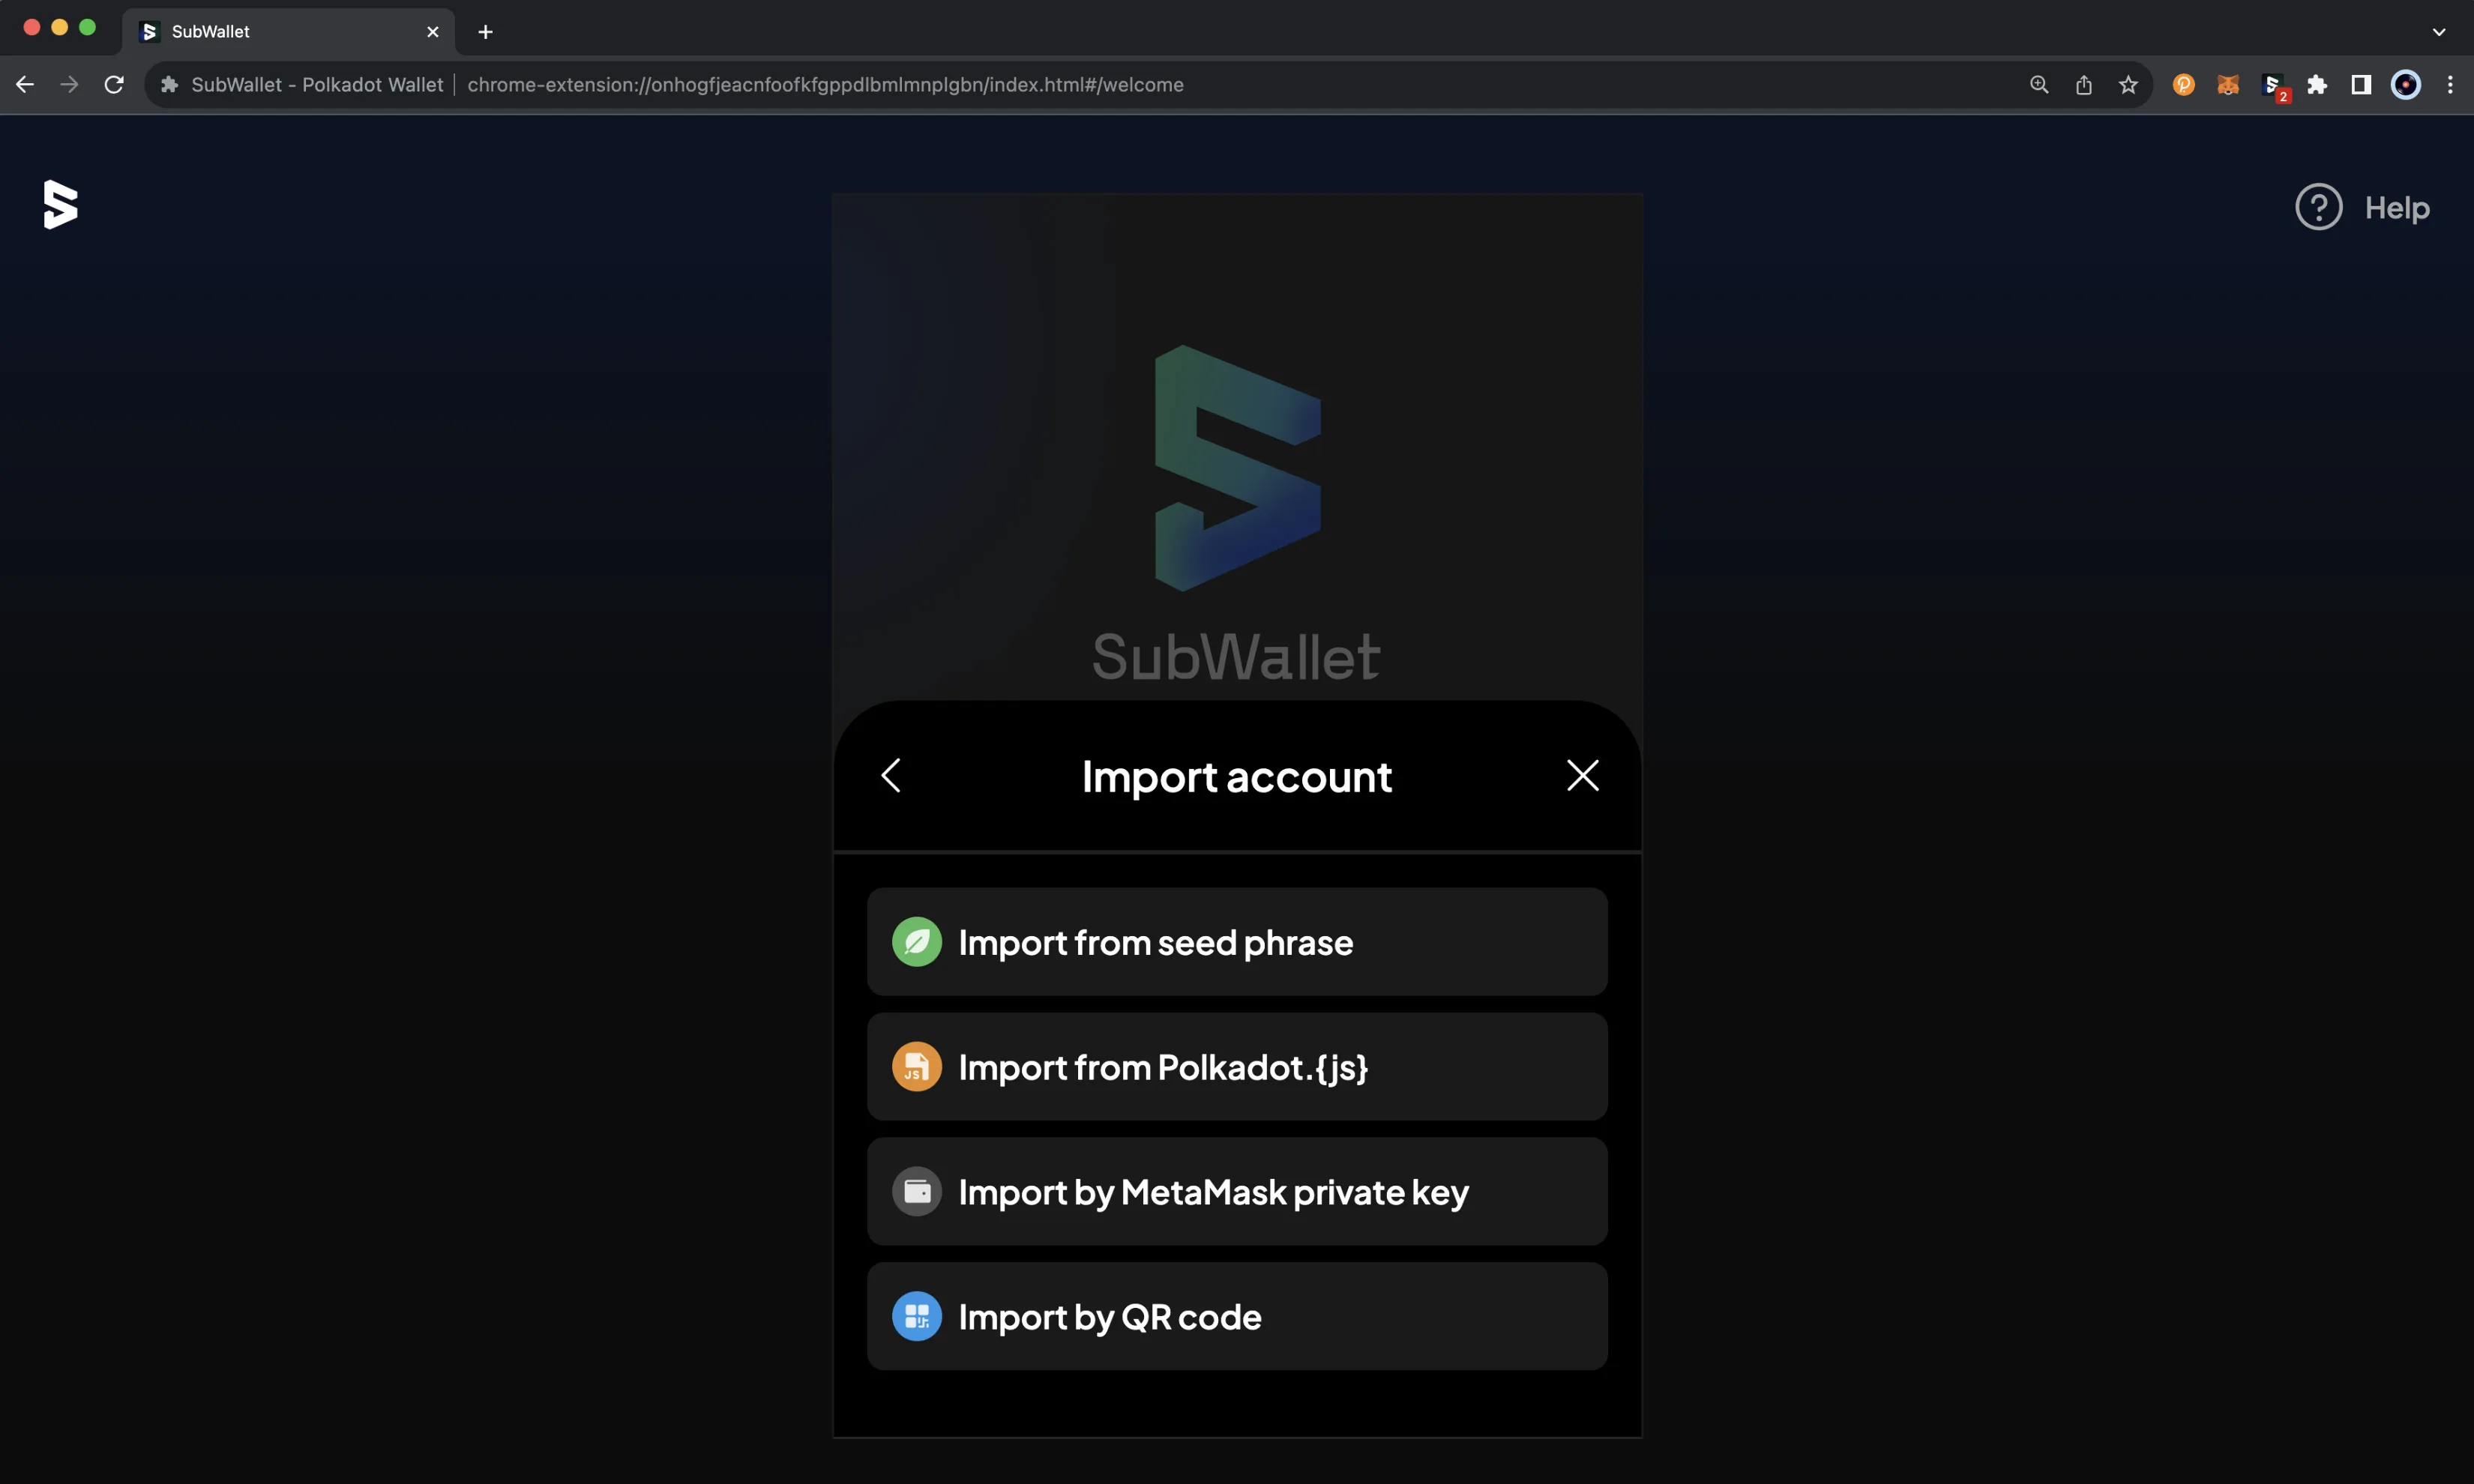
To import an existing account into SubWallet, you can select Import an account.
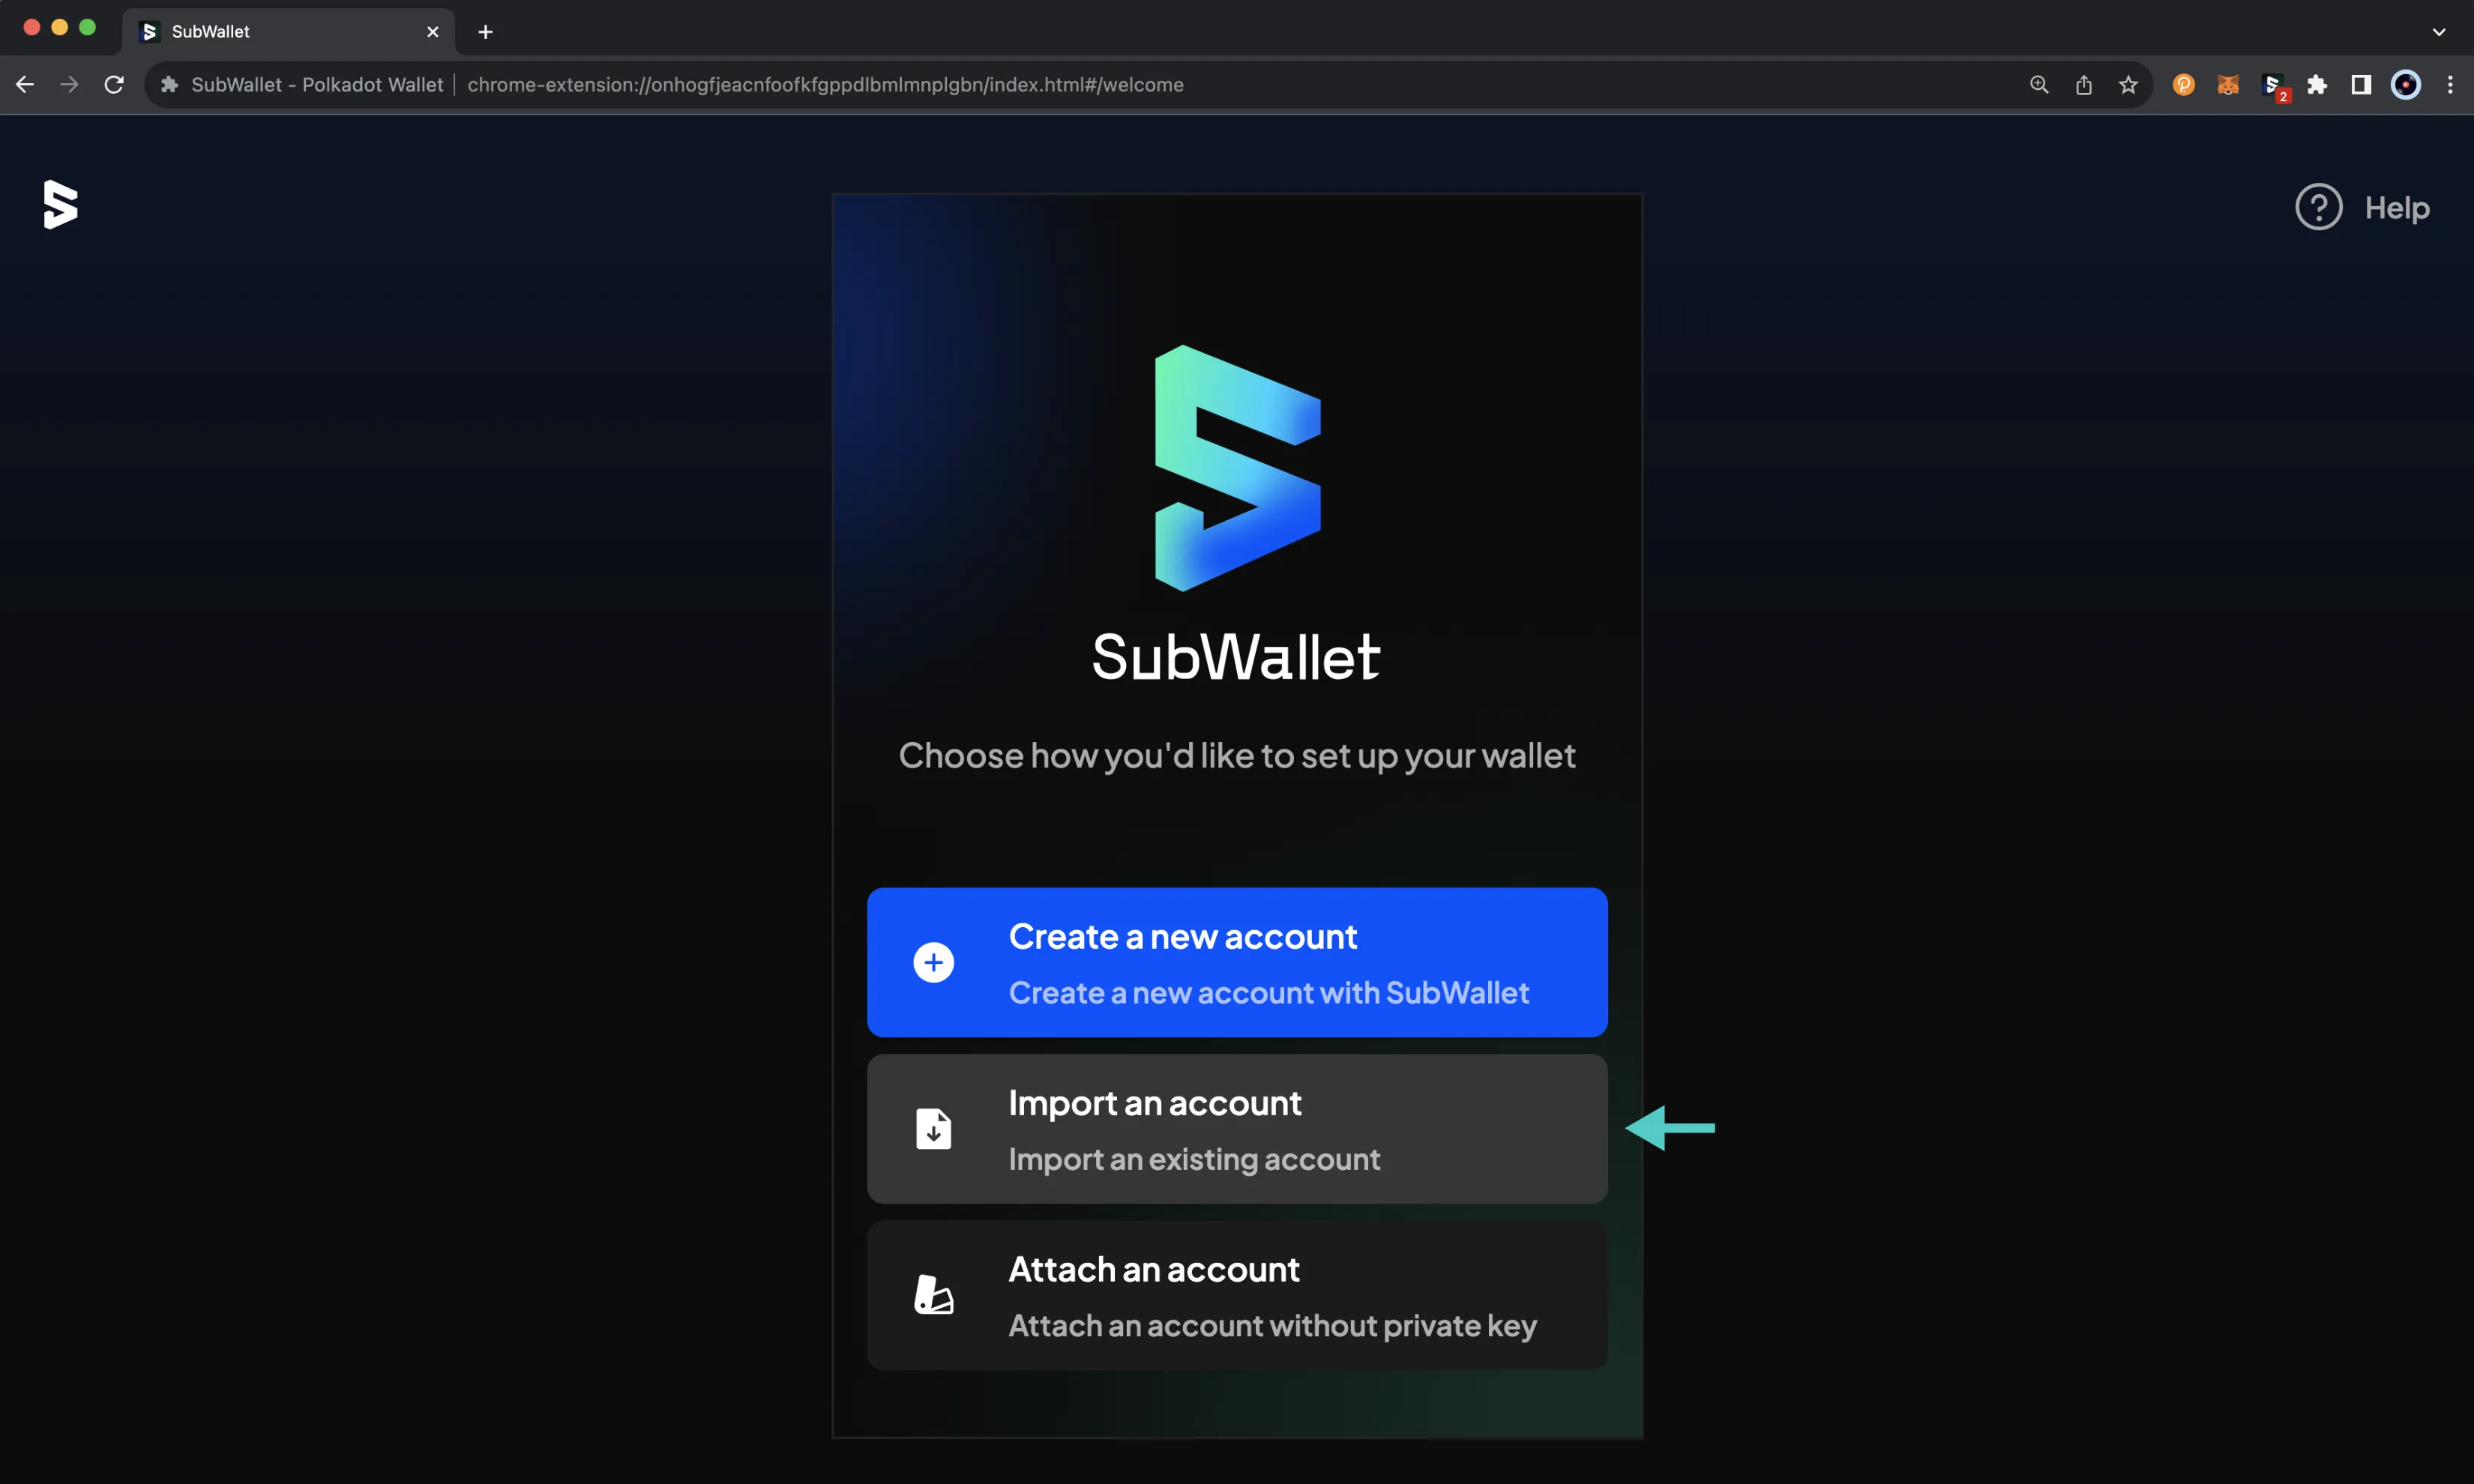
On the following screen, select the method by which you would like to import the existing account. You can choose from Import from seed phrase, Import from Polkadot.{js}, Import by MetaMask private key, and Import by QR code.
If you select Import from seed phrase, there are some incompatibility issues that can arise when importing an account from seed phrase. For example, Trust Wallet and SafePal are among the wallets not compatible with SubWallet. If you run into incompatibility issues, SubWallet recommends creating a new wallet.
If you select Import from Polkadot.{js}, you'll need to make sure that the account was created in Polkadot.js via private key. If it was created with a seed phrase and you attempt to import it to SubWallet, a different public address will be used. This is because Polkadot.js uses BIP39, whereas Ethereum uses BIP32 or BIP44.
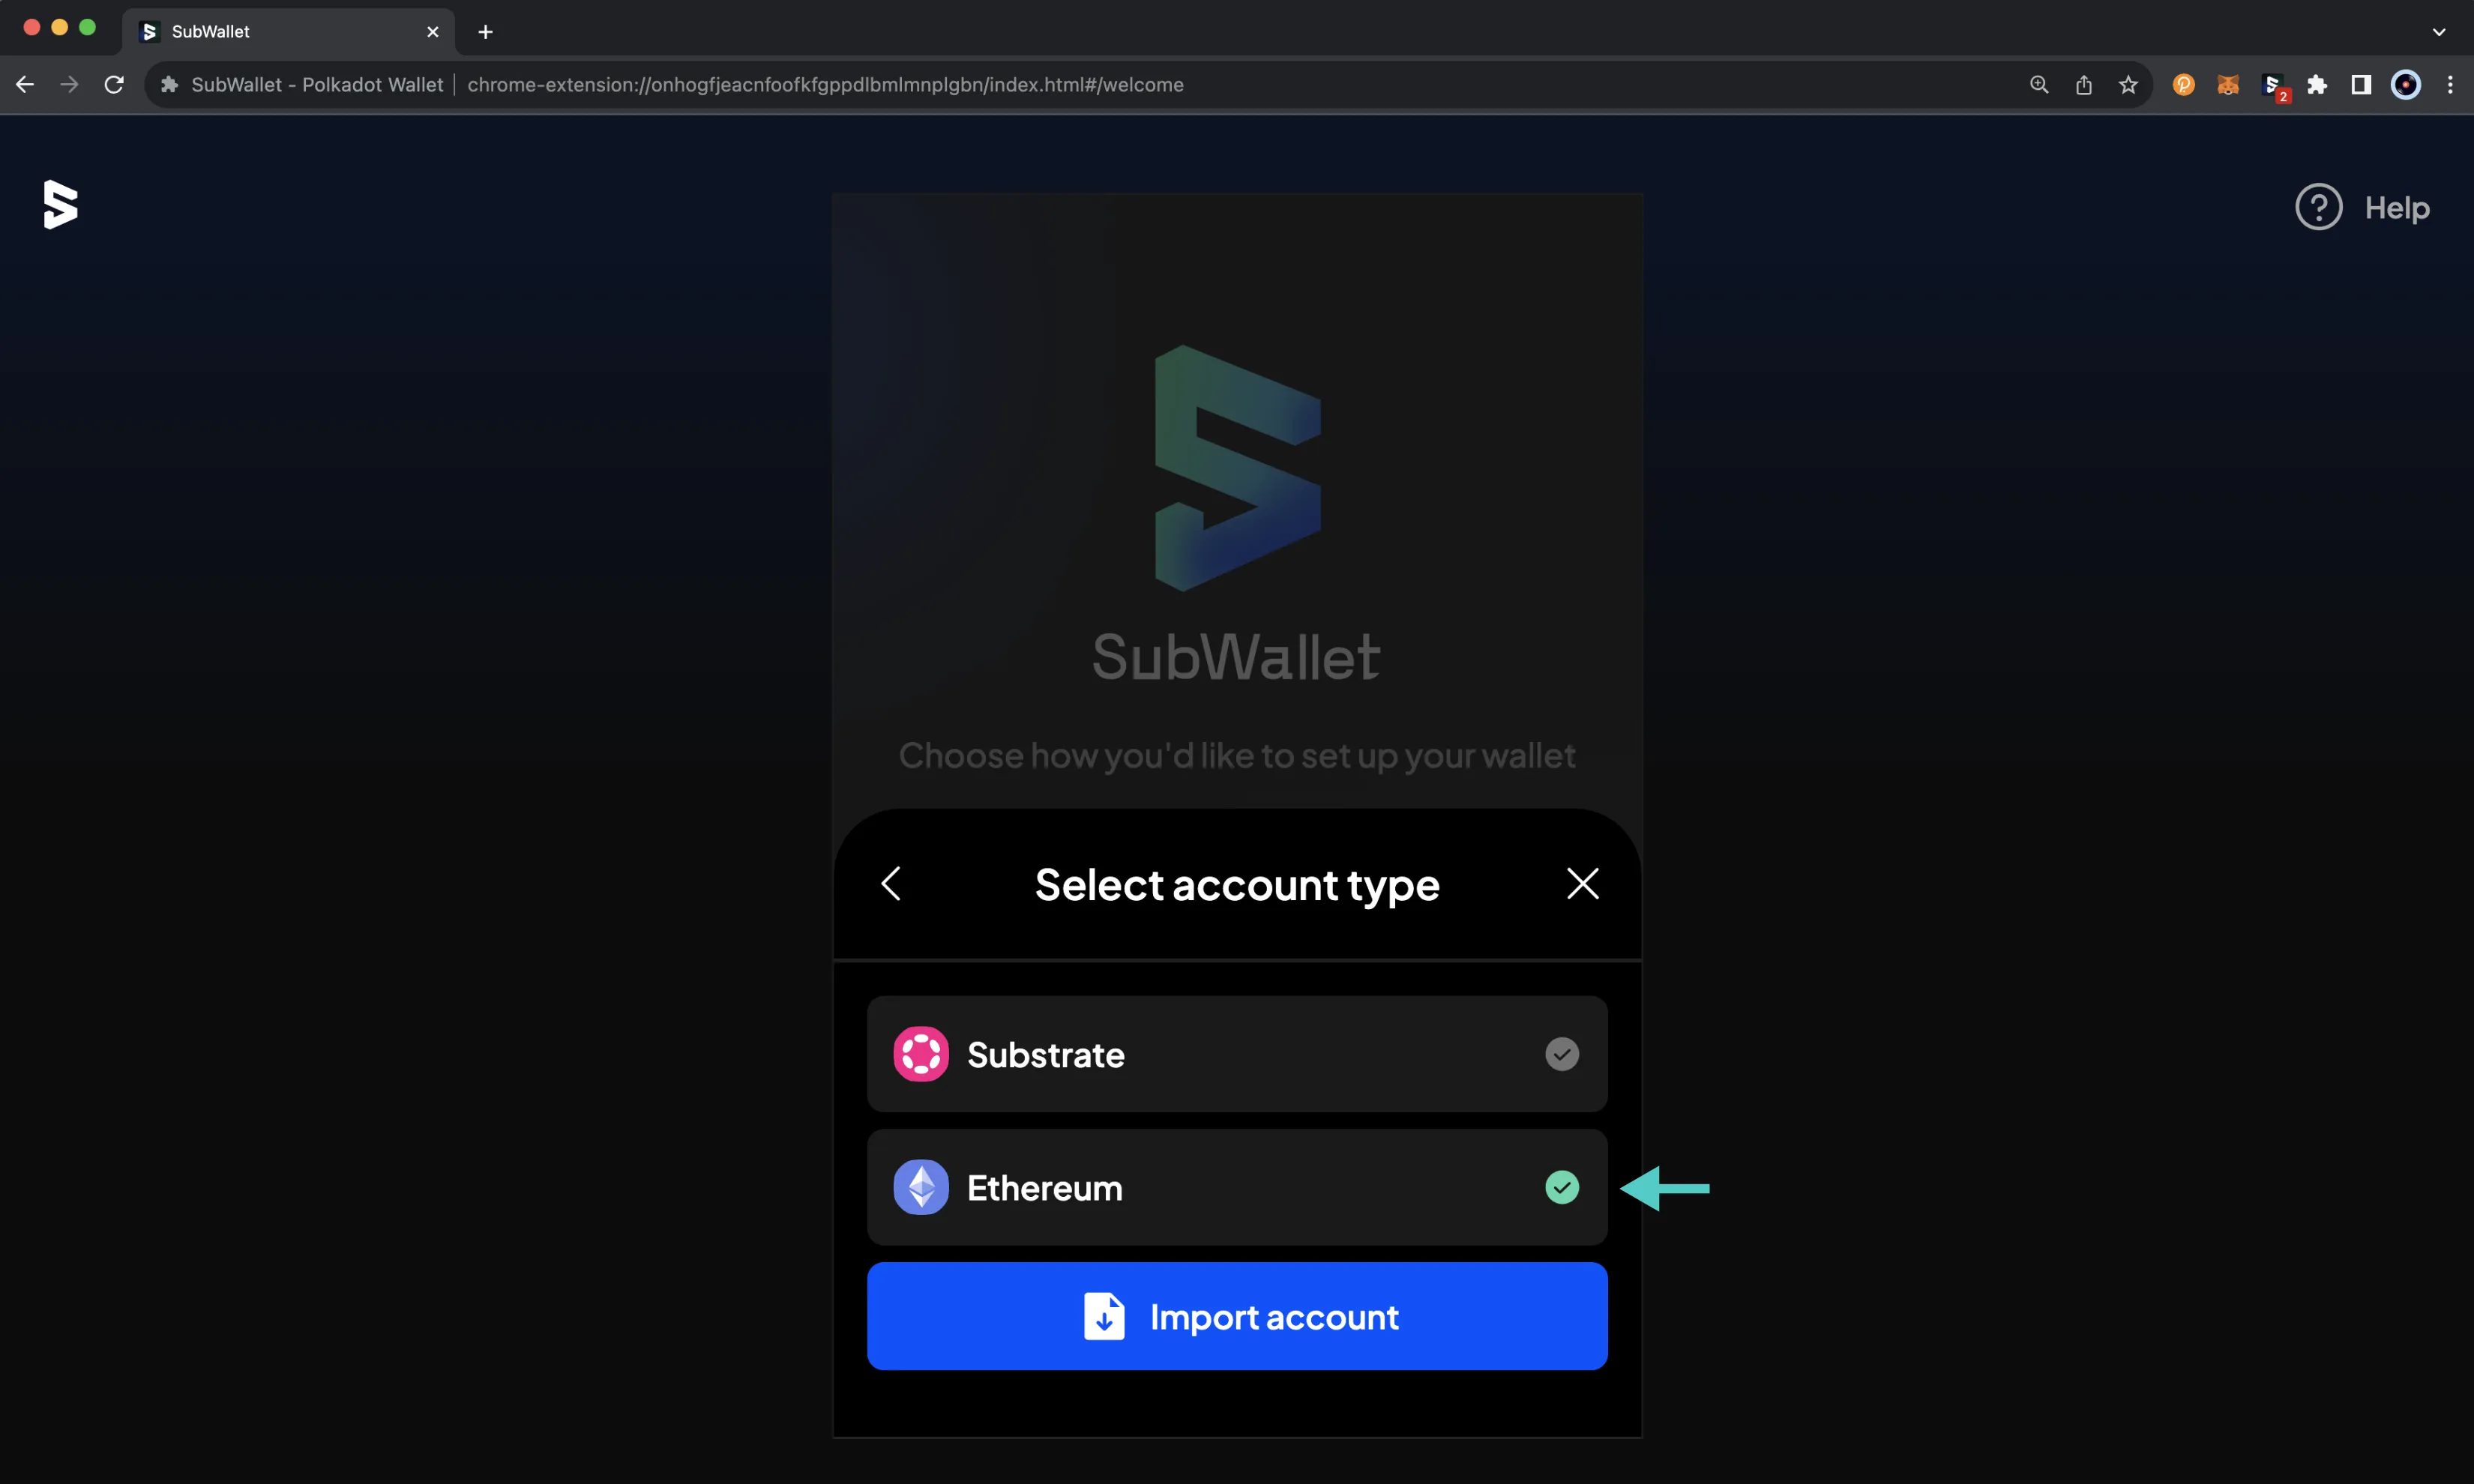
If you import your account via seed phrase, you can select your account type as either Substrate (Polkadot) or EVM (Ethereum), or both. Moonbeam uses Ethereum-style accounts, so you'll need to select Ethereum to import an account for Moonbeam-based networks.
Once you've completed the import process, you'll be prompted to enter a password to secure your new wallet:
- Enter a password that has at least 8 characters
- Confirm the password by entering it again
- Click Continue

Next, you'll be able to provide the relevant seed phrase, private key, JSON file, or QR code, and you can begin using your new account right away. You can add additional accounts at any time.
Add Additional Accounts
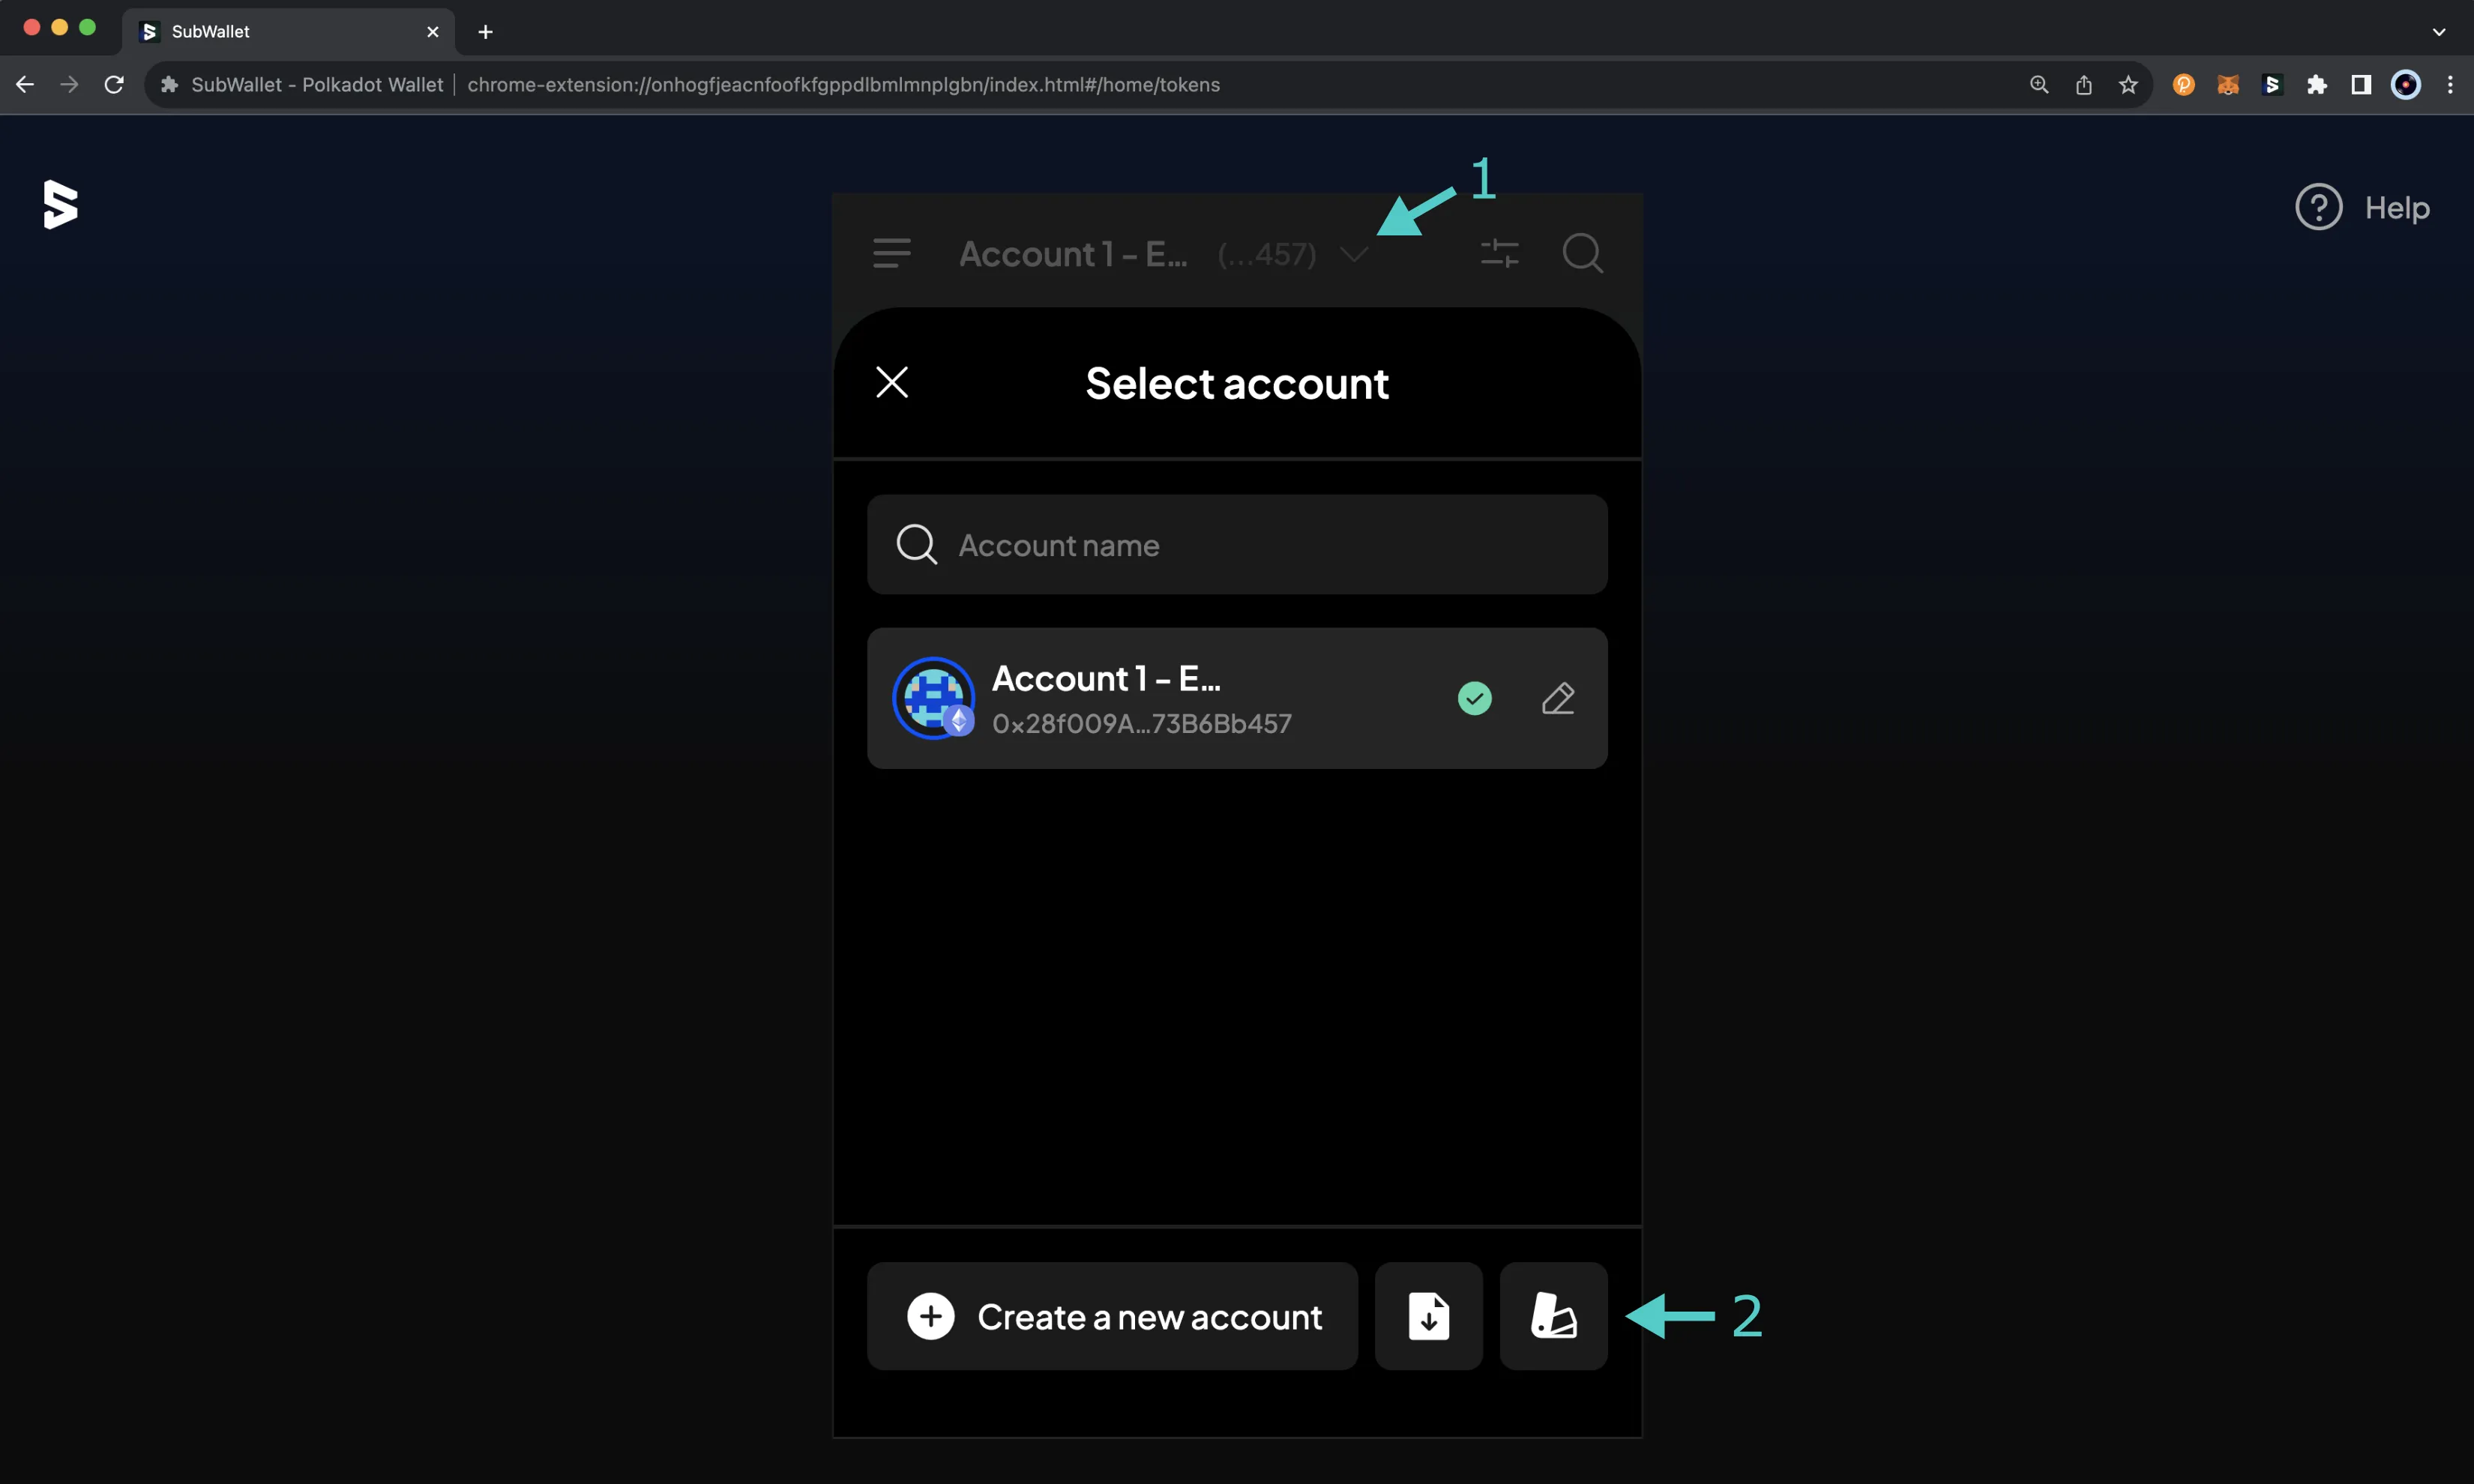
After you have created a new account or imported an existing account to SubWallet, you can add additional accounts by taking the following steps:
- Click on the account dropdown
- Select one of the options from the bottom of the screen. You can click Create a new account, the import button to import an existing account, or the attach button to attach to an existing cold storage wallet or watch-only account
If you're creating a new account, you can then choose Create with new seed phrase or Derive from an existing account. If you're creating a new account with a new seed phrase, you'll need to select the account type and back up the account, similar to the instructions in the Create a New Account section. If you choose to derive a new account, you'll be prompted to select the existing account that you want to derive the account from.
If you're importing a new account, you'll need to choose whether to import using a seed phrase, JSON file, MetaMask private key or QR code, then repeat the process outlined in the Import an Account section.
If you're attaching an account, you can find out step-by-step instructions on SubWallet's Account management documentation.
Connect SubWallet to Moonbeam
To configure SubWallet for Moonbeam, select the Customize your asset display icon next to the Search a token icon.

To add Moonbeam, you can:
- Search for "Moon" to view all Moonbeam-based networks, or search for a specific network
- Toggle the switch to connect to the network

If you're trying to connect to a local Moonbeam development node, you can select the hamburger menu from the top left corner, which will take you to the settings page.
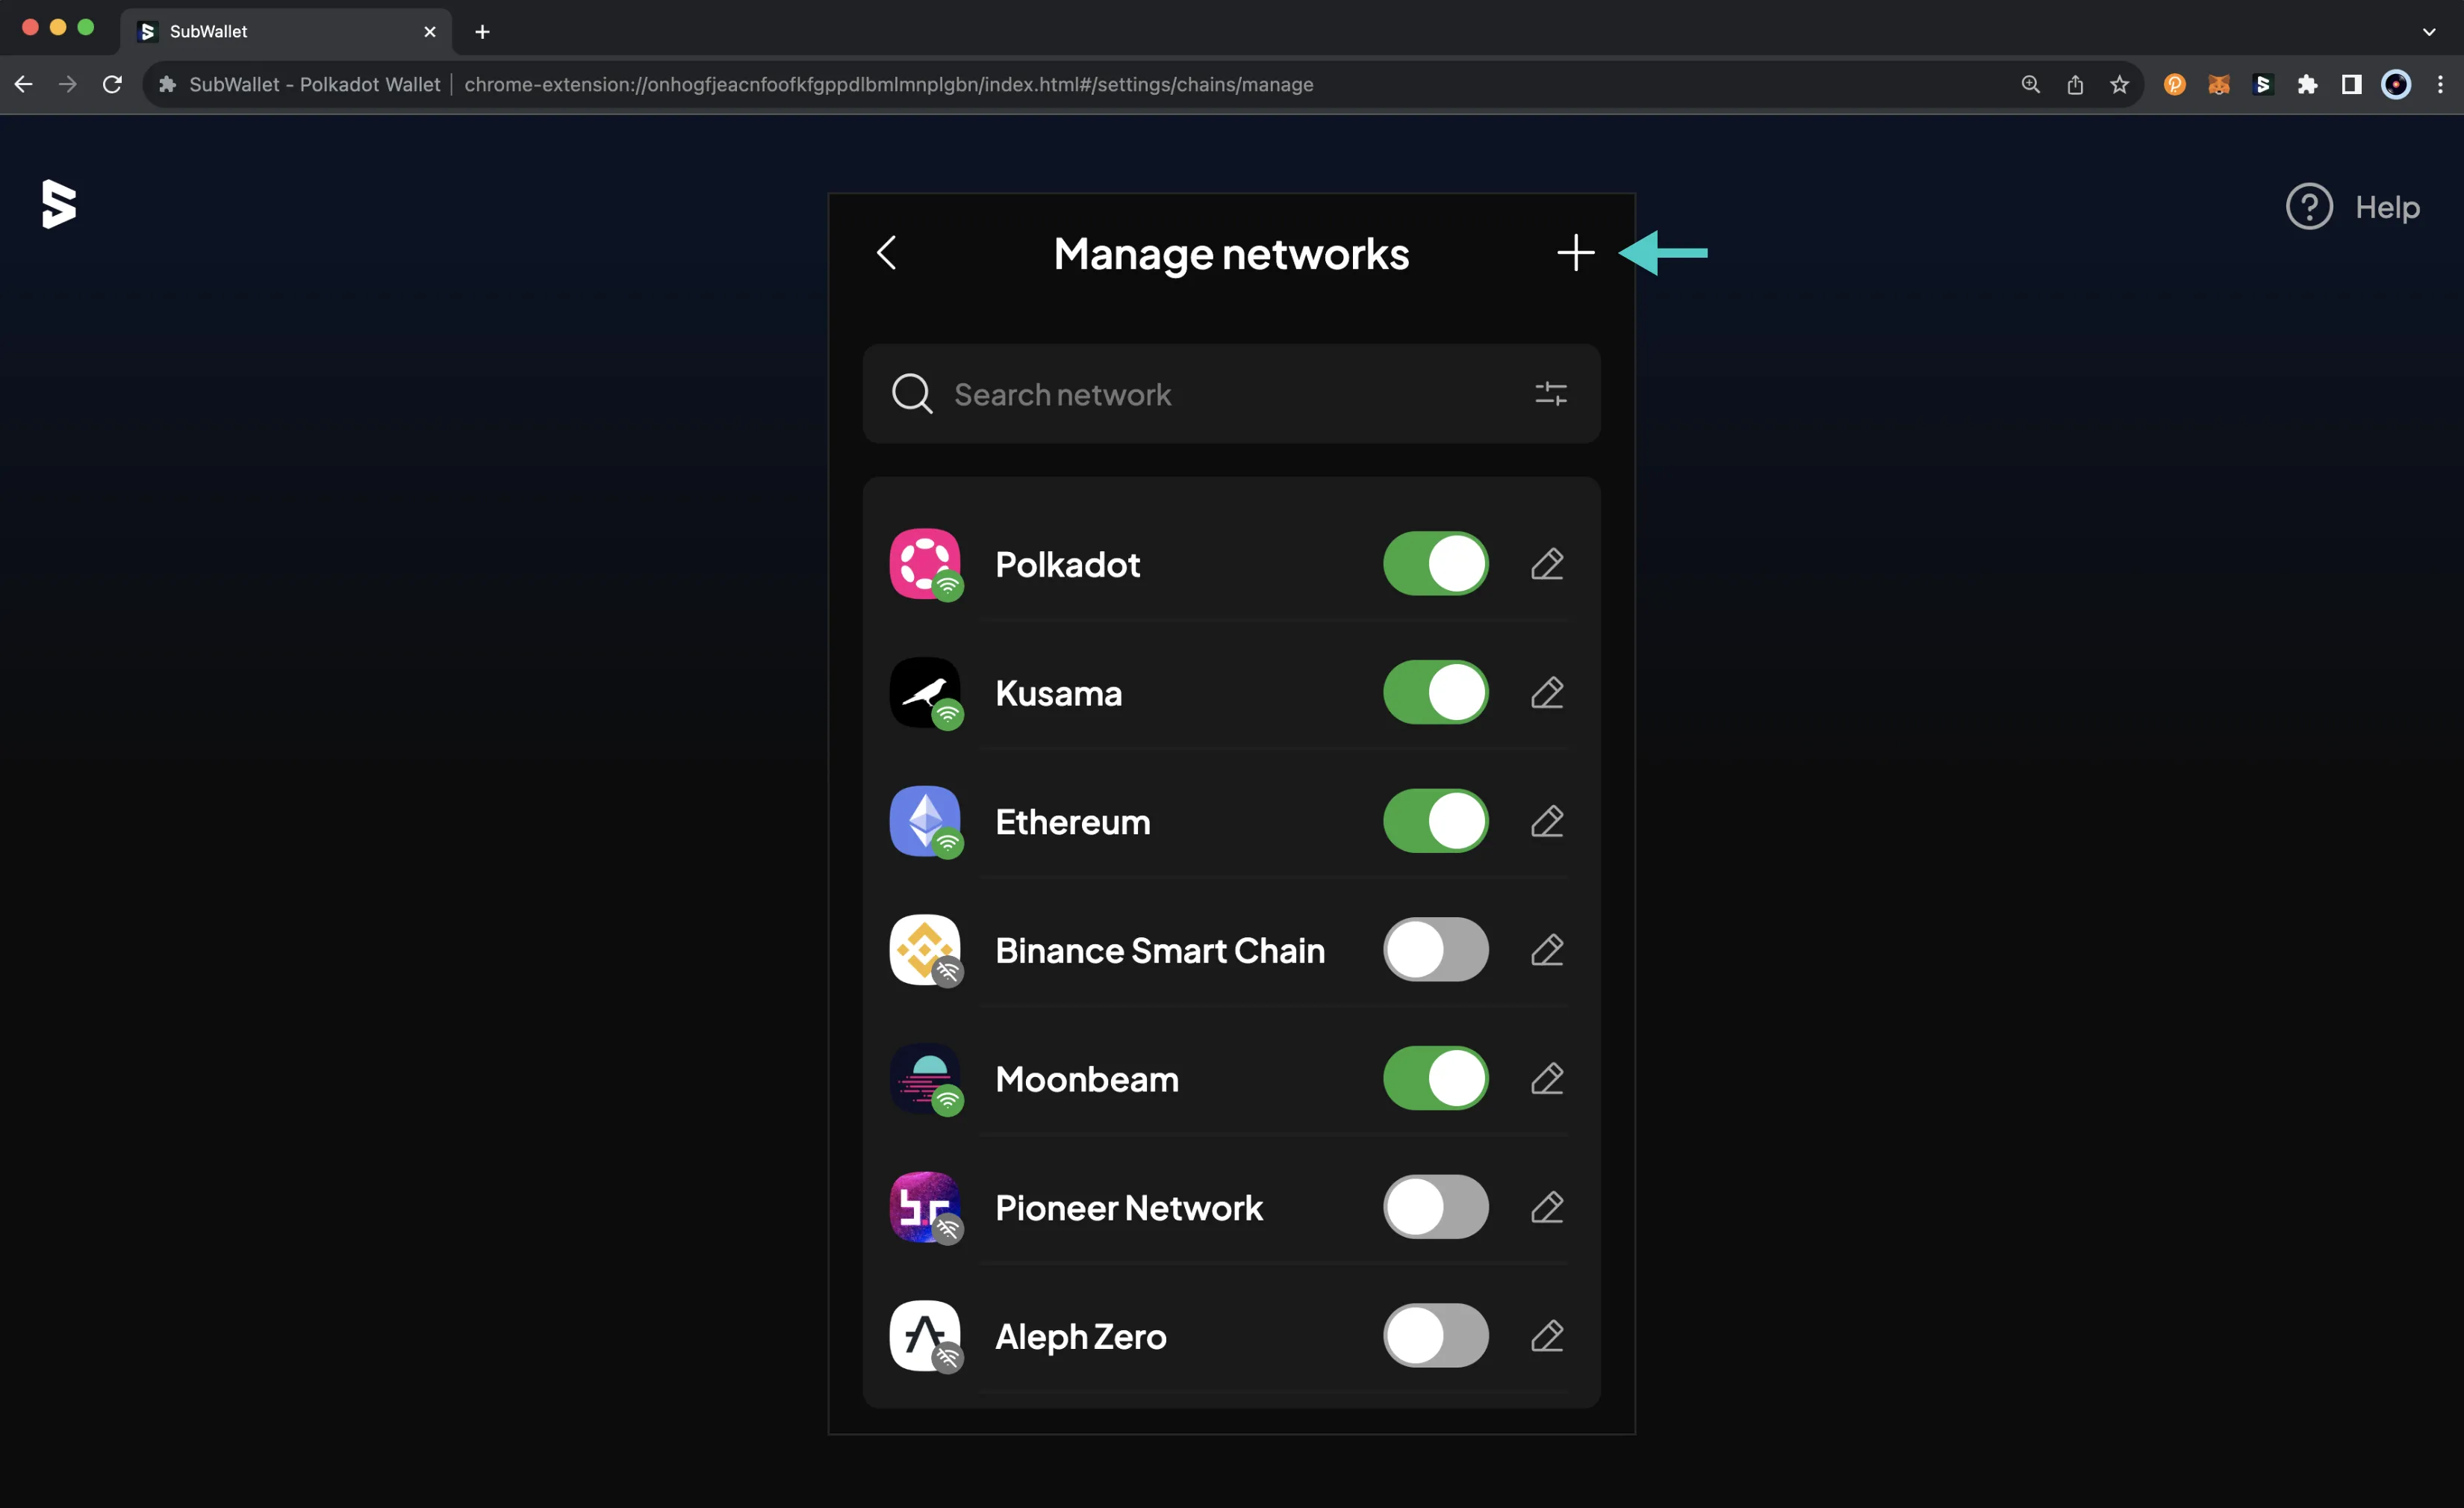
From the settings menu, click Manage networks.

Click the + icon in the top right corner and enter in the network configurations. You can also manage and connect to other networks from this menu.
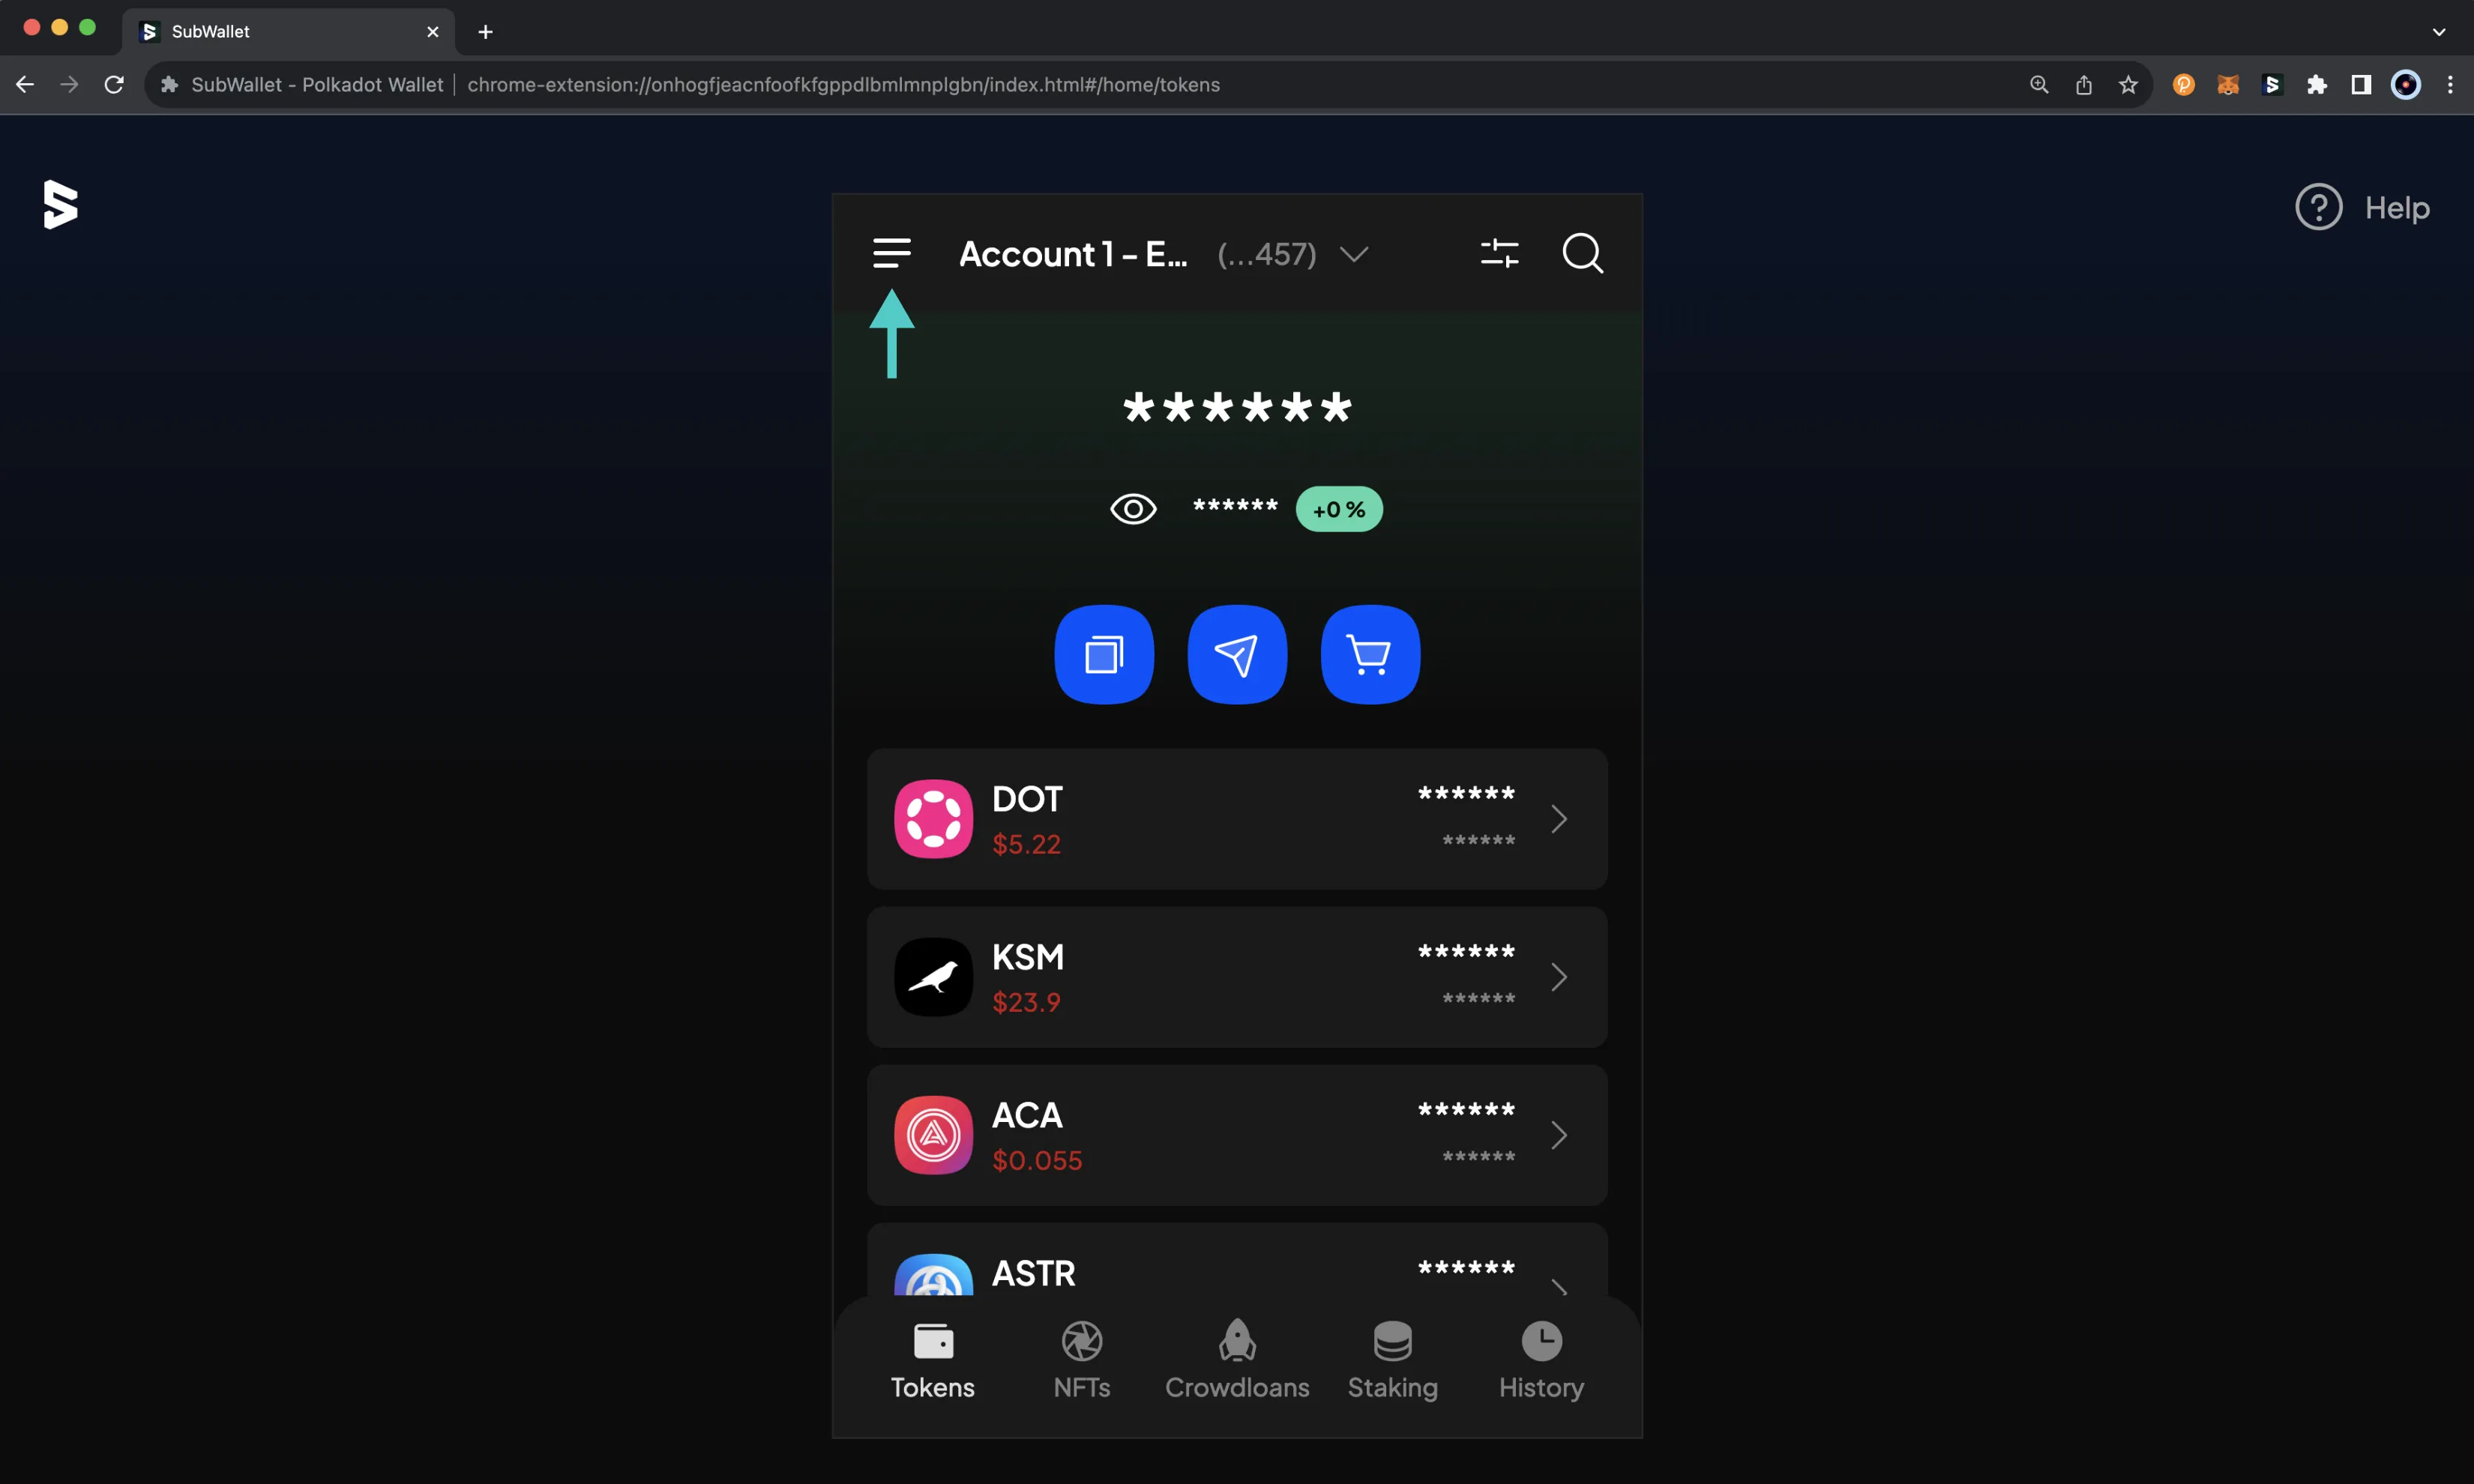
By default, all balances are hidden in SubWallet, but if you press the Show balance icon, you can toggle balance visibility.

Interact with the Network
Once you've connected SubWallet to any Moonbeam-based network, you can start using your wallet by:
- Receiving a token from another address
- Sending a token to another address
- Adding tokens to SubWallet and interacting with them
Receive a Token
To receive a token from another account, you would need to show your wallet address to your counterparty, and they can send their assets to such address.
To copy your address, click on the Get address icon.

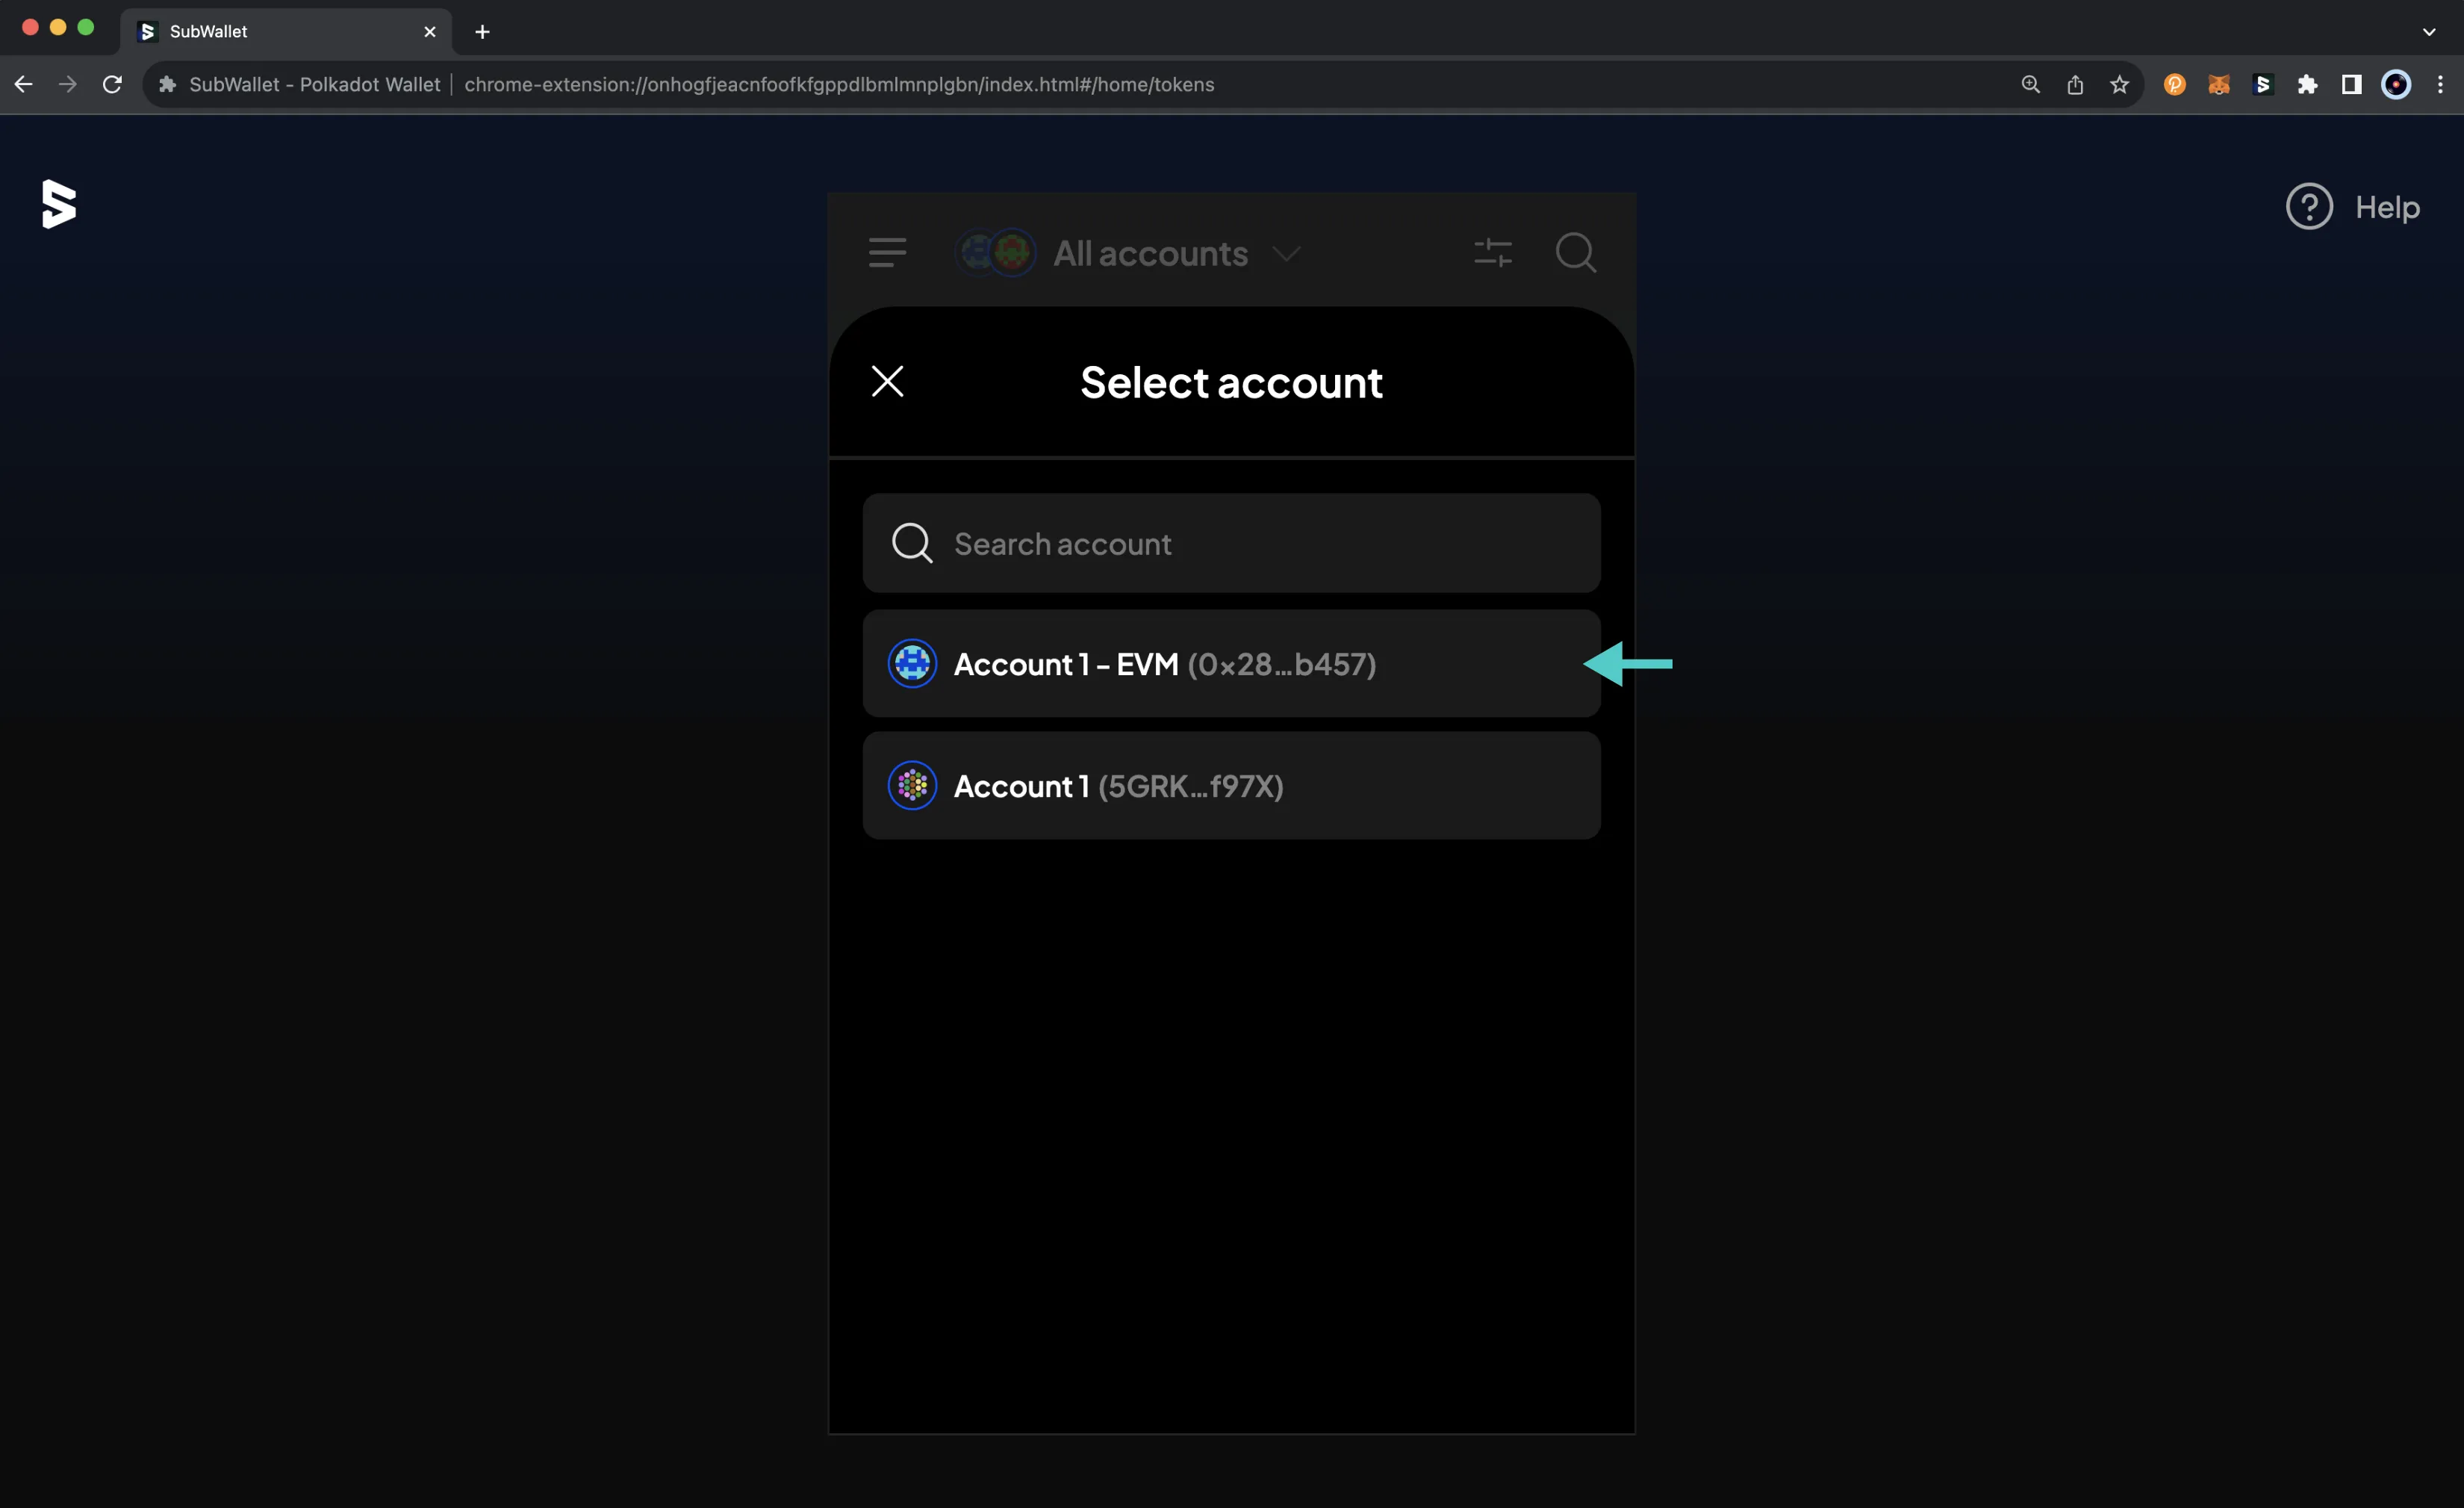
If you have multiple accounts and have selected All accounts from the account dropdown menu, you'll need to select the receiving account you want to send the assets to. Otherwise, make sure that the account you're connected to (which is displayed at the top of the screen) is the account you want to send the assets to. This should be your Moonbeam account, which is an Ethereum-style address.
Next, you can search for and choose the token that you would like to receive. For this example, DEV is chosen.
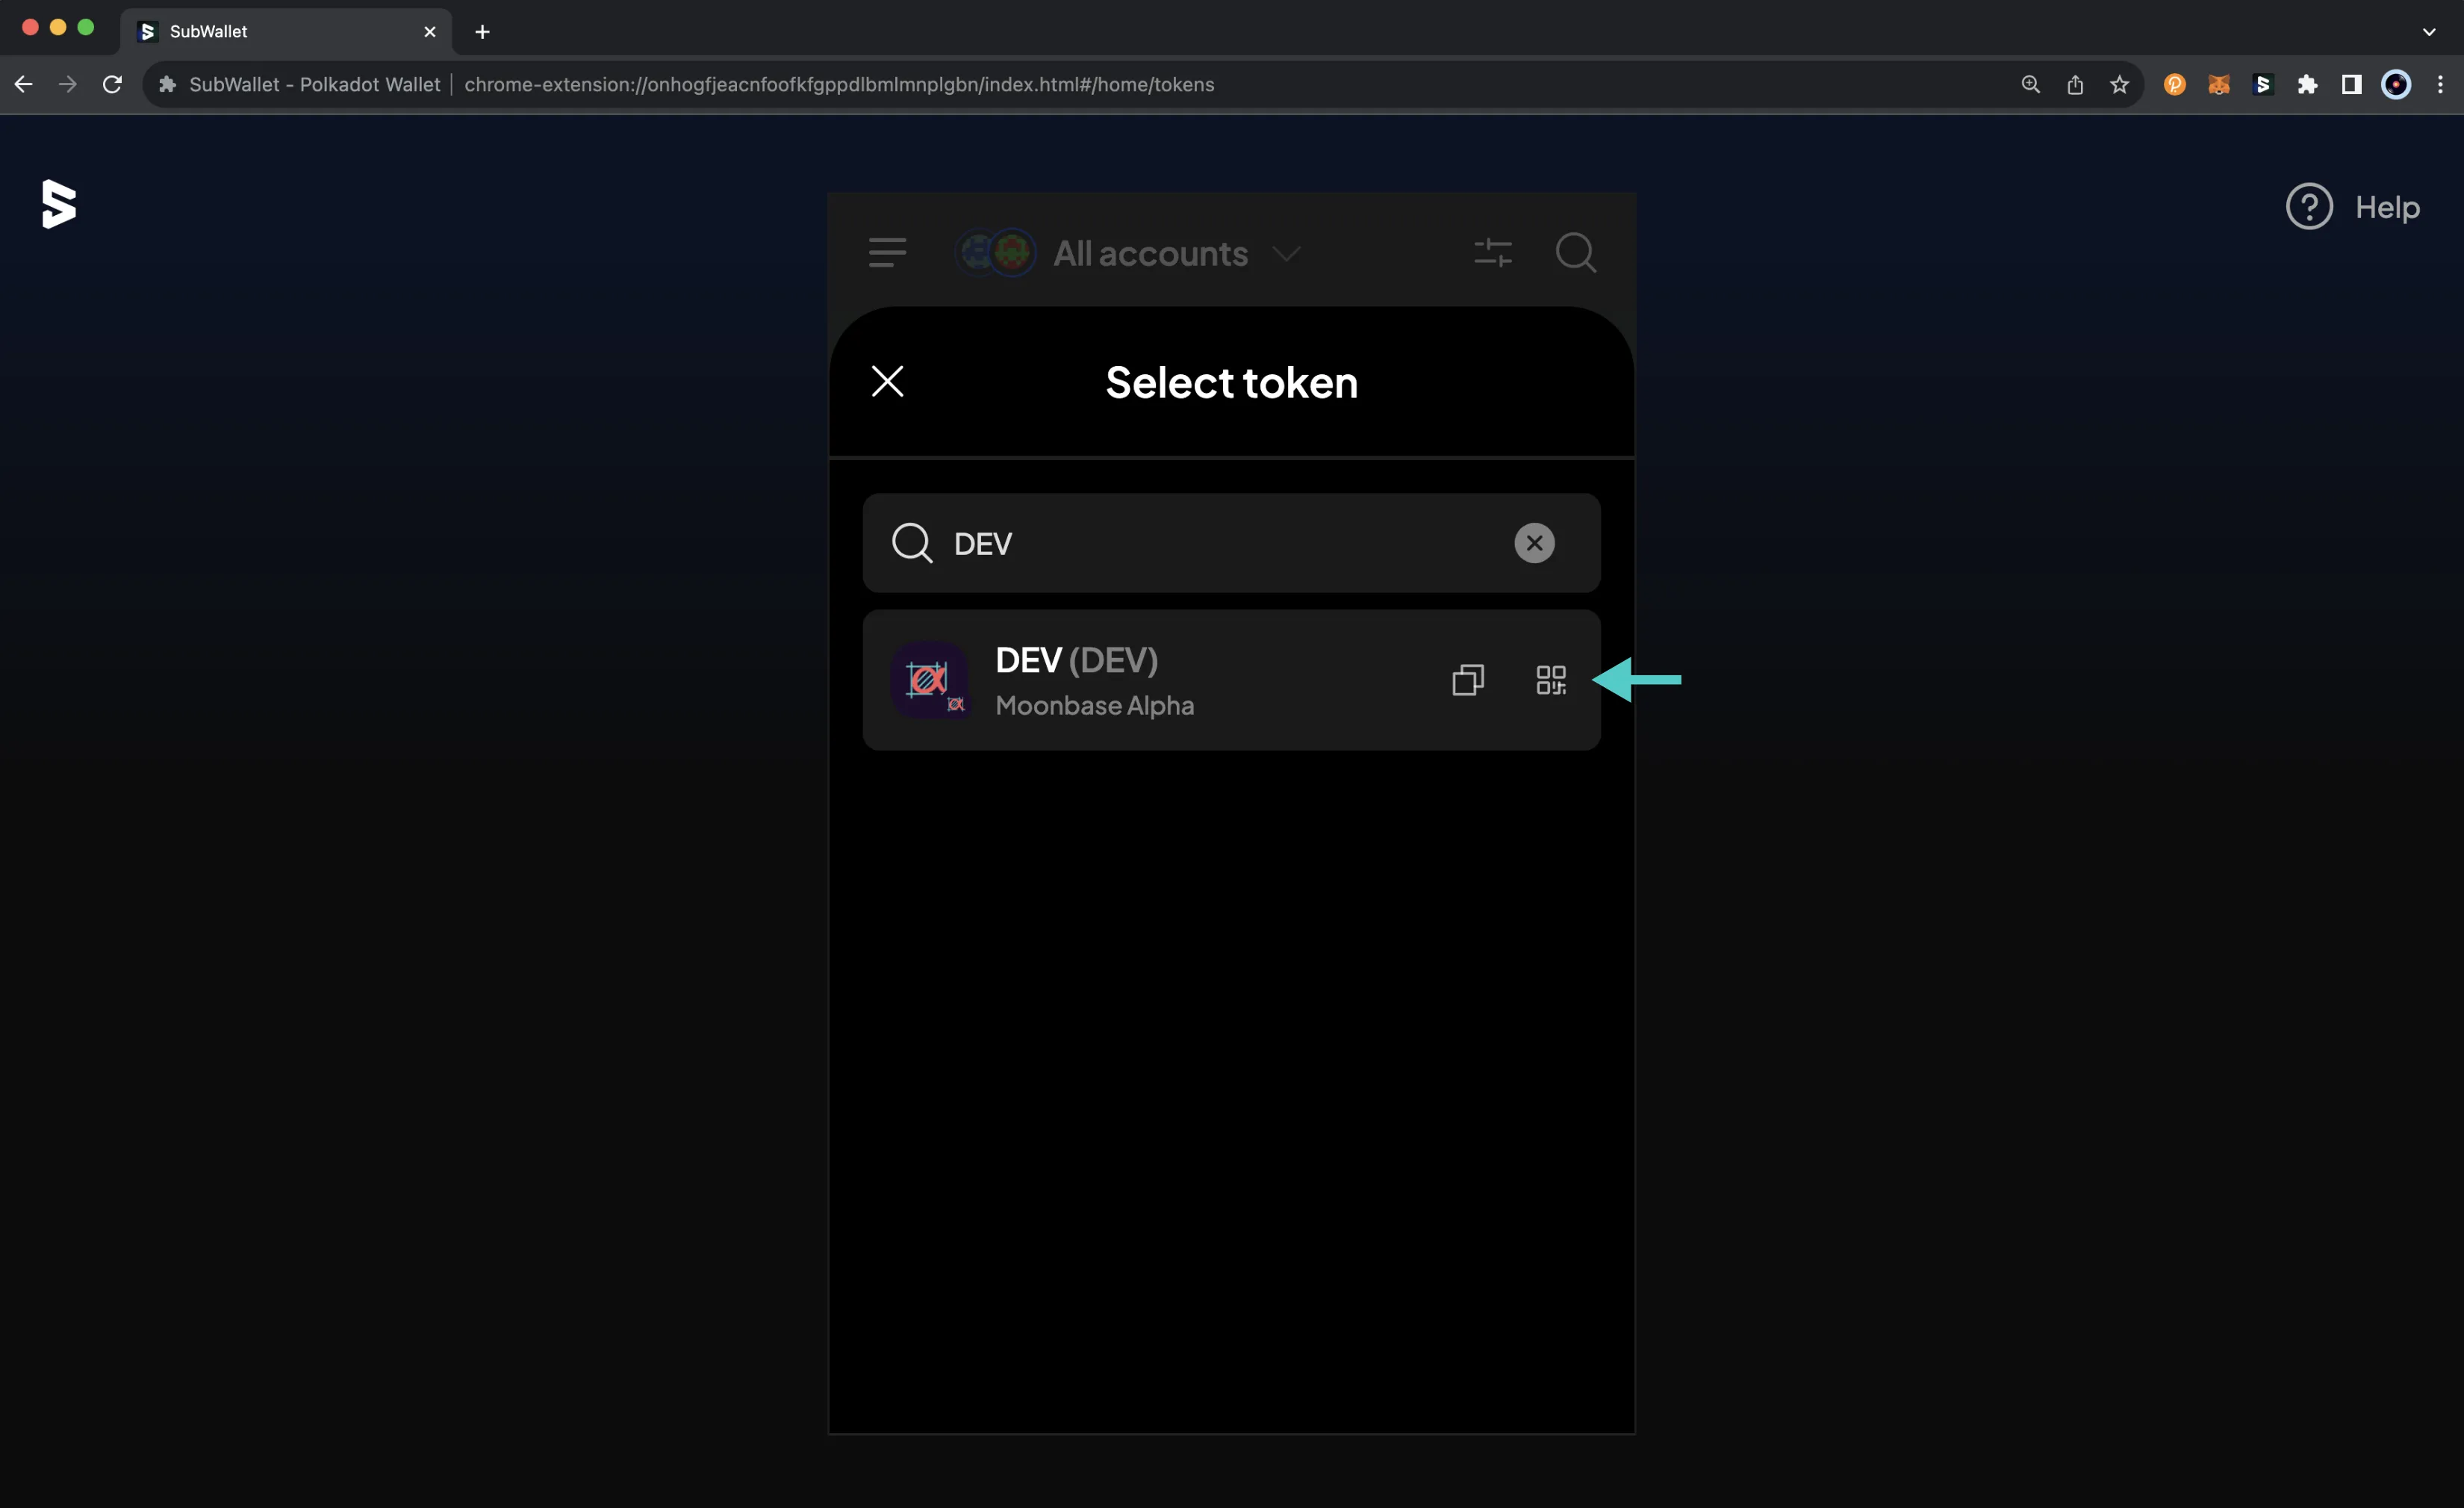
Note
SubWallet supports receiving cross-chain tokens, so please be sure to check that the chain logo under the token name matches your desired chain.
You will be shown the QR code and the address linked to your account. Double-check that the address shown is an Ethereum-style account.
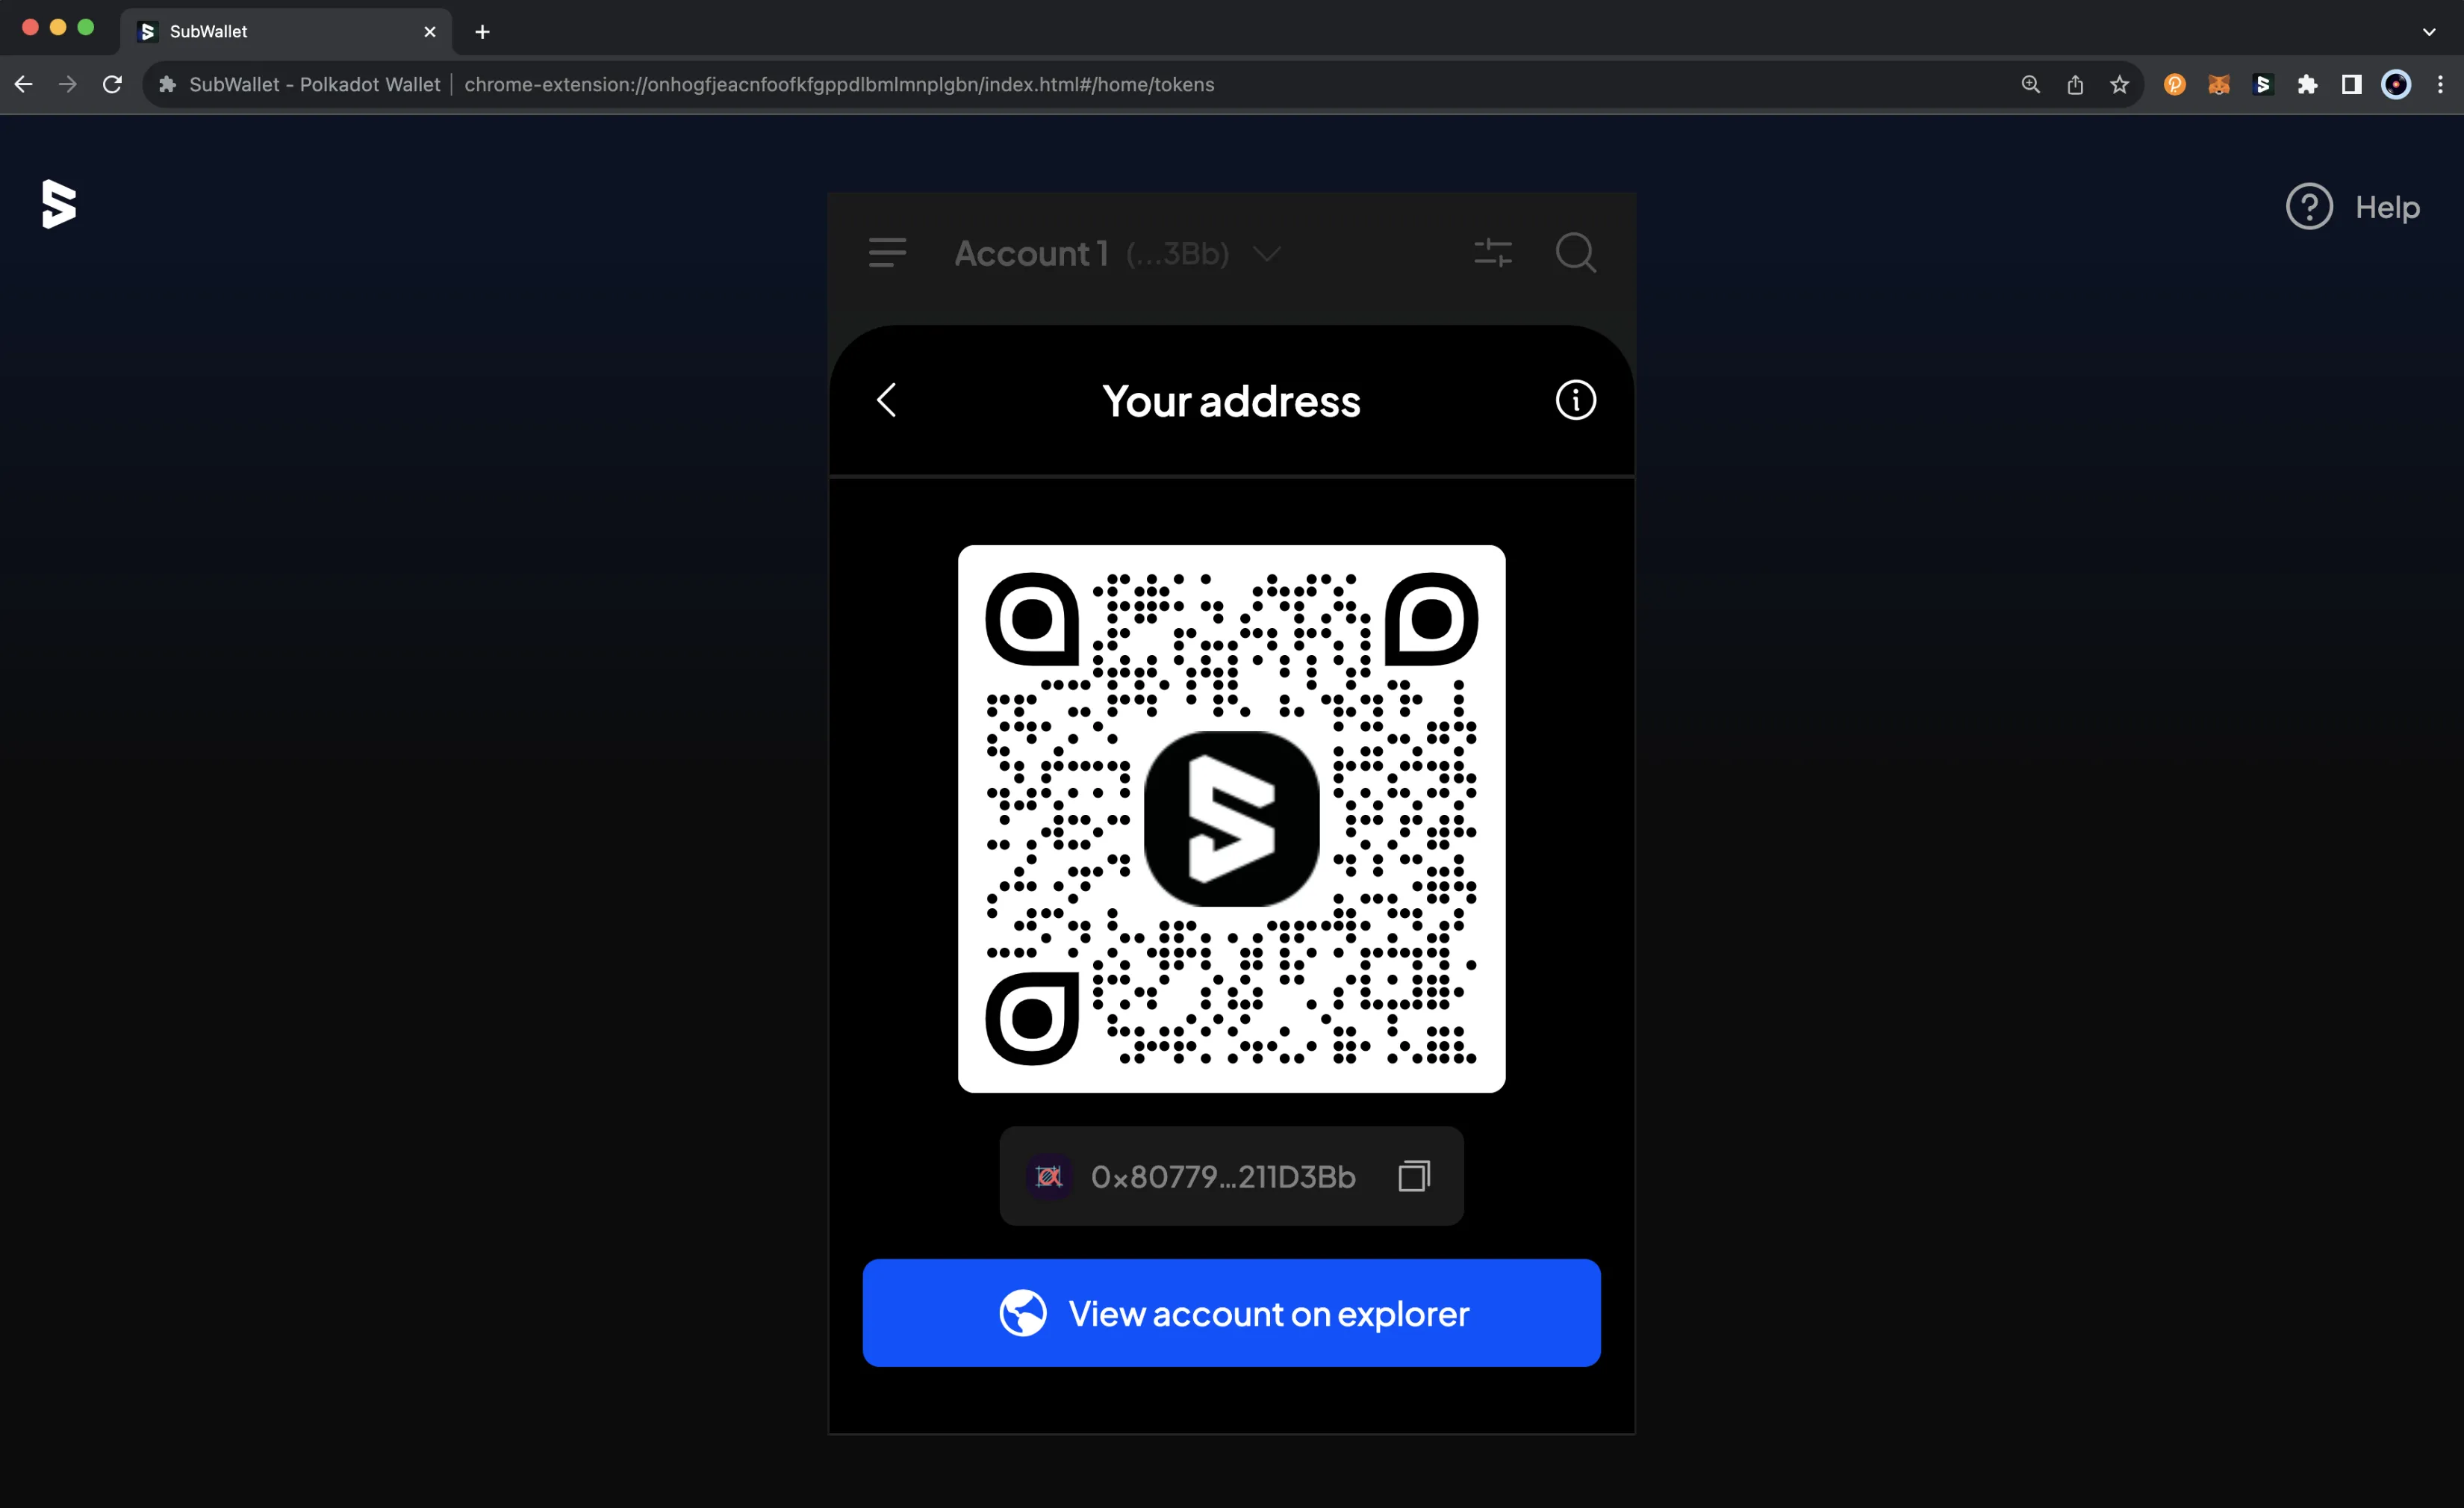
Now you just need to show the QR code or address to the sender.
Send a Transaction
To get started with a simple token transfer to another address on Moonbeam, you can click the Send icon.
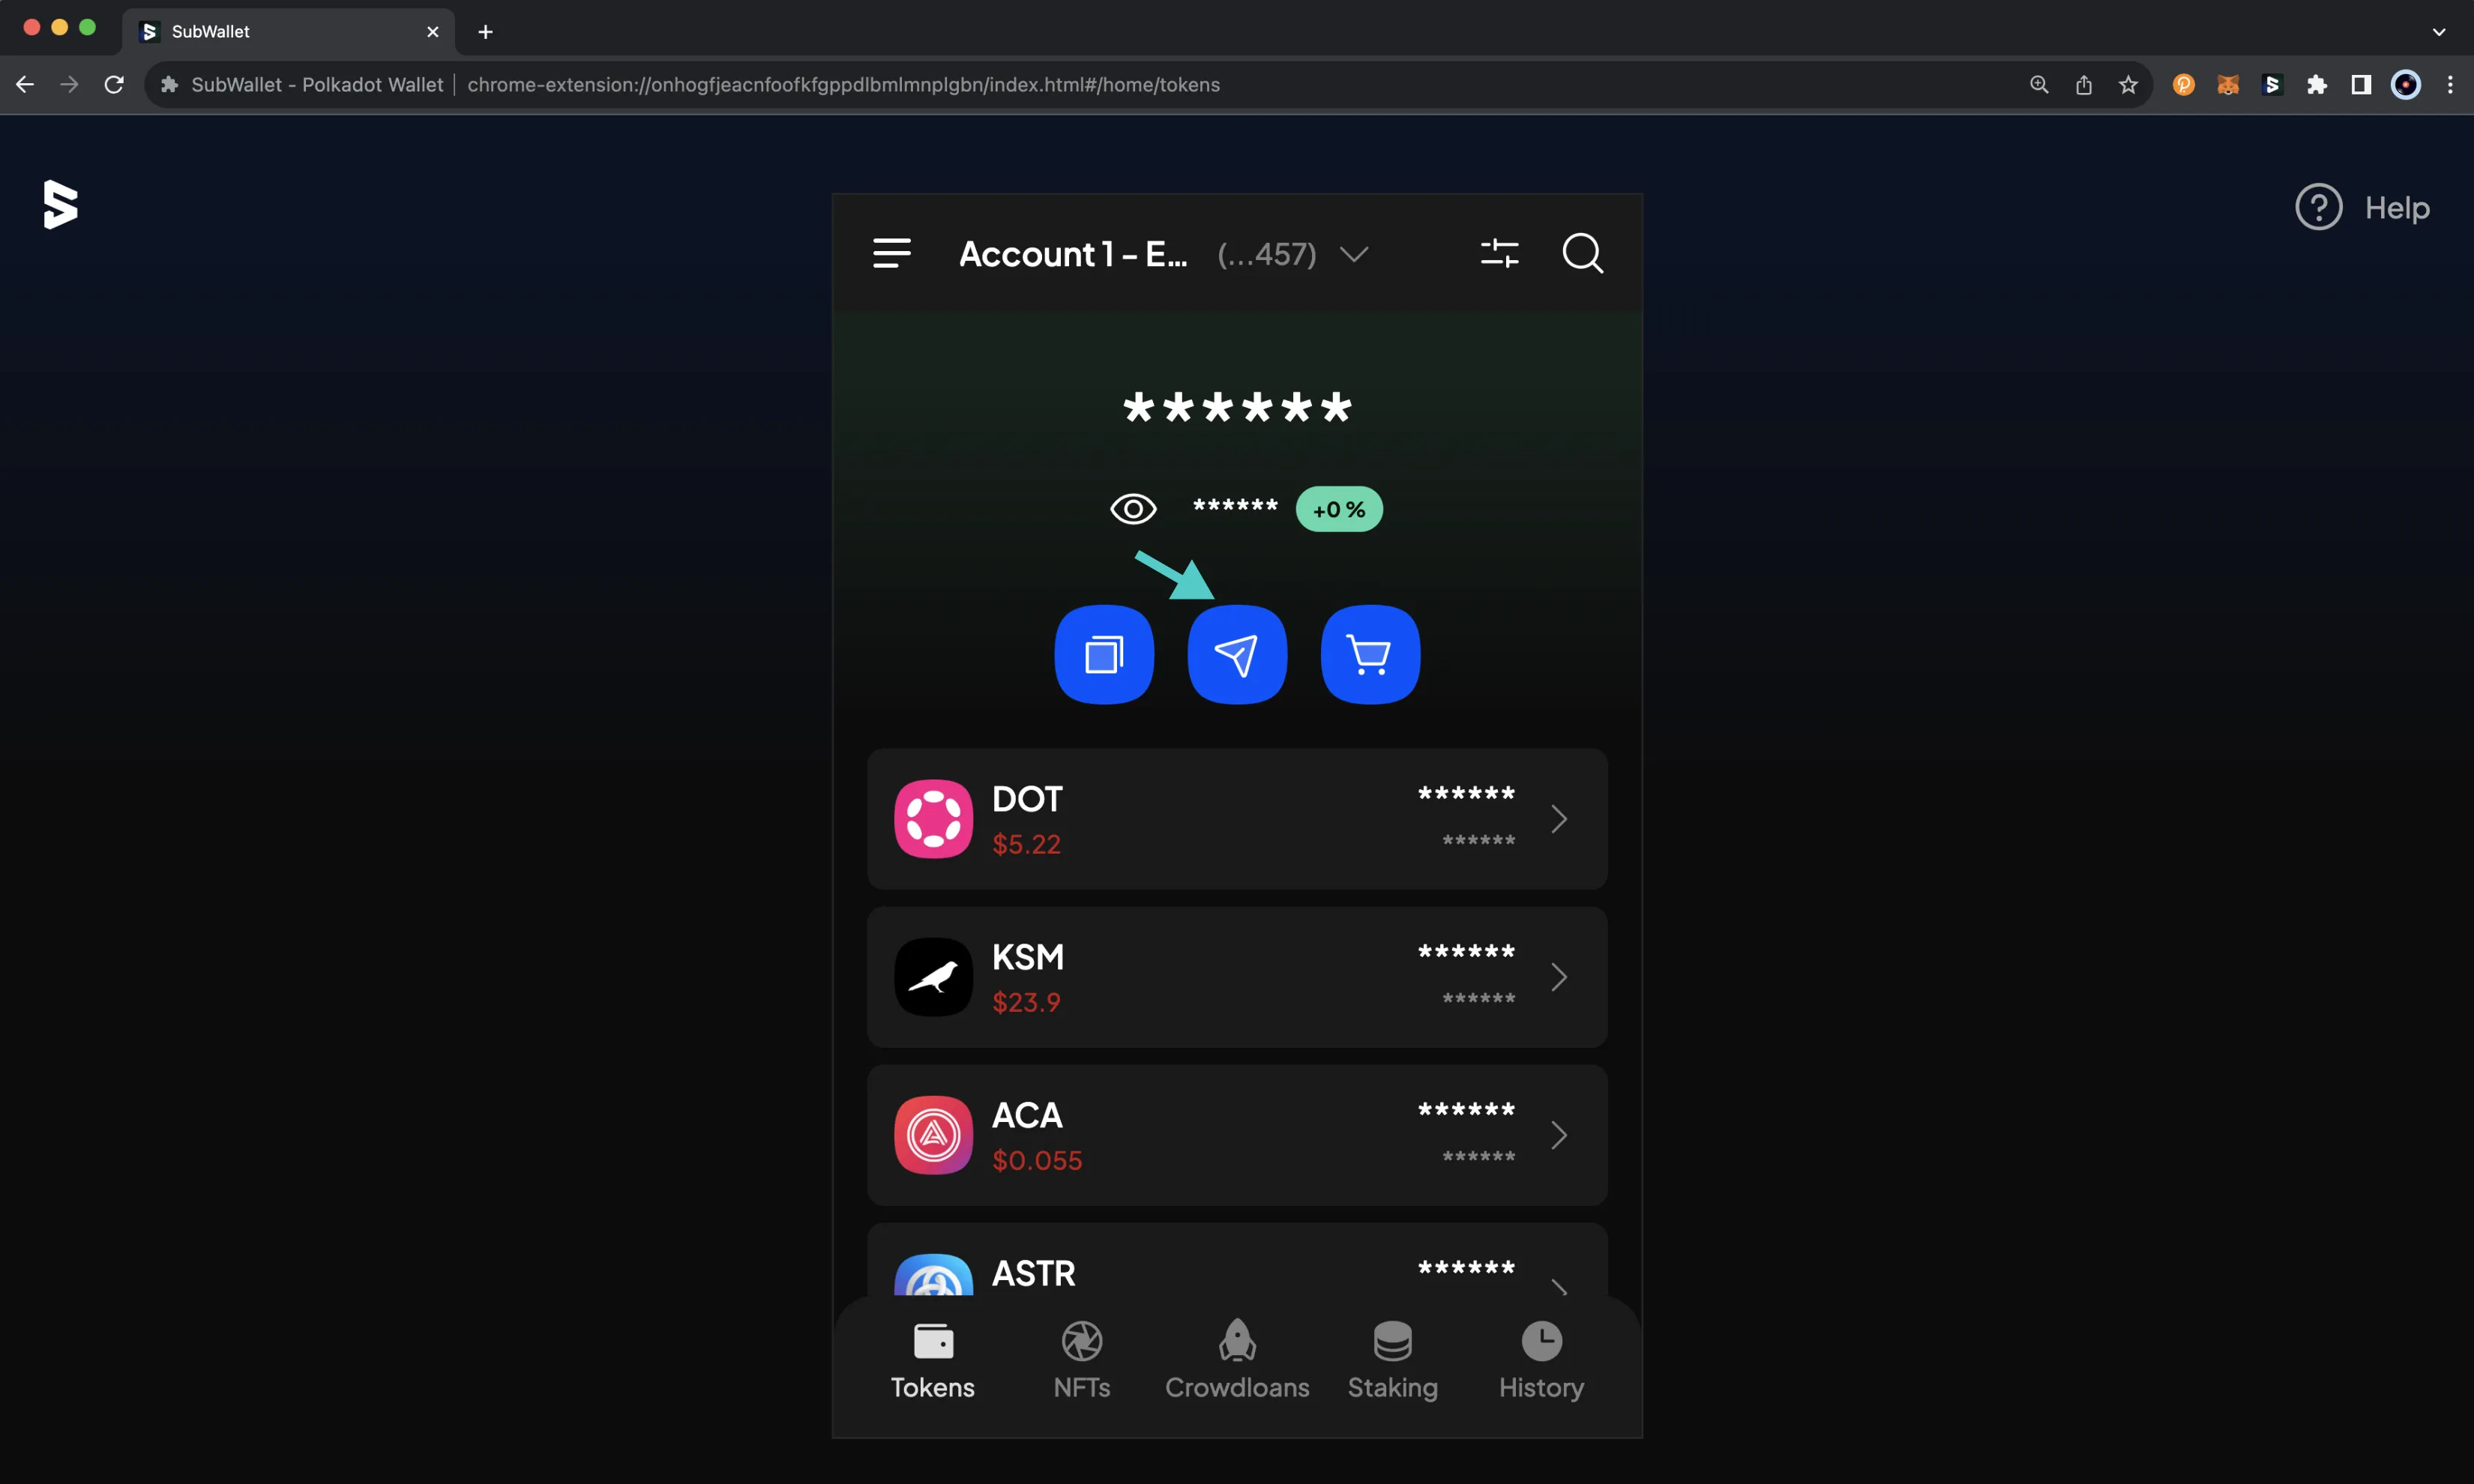
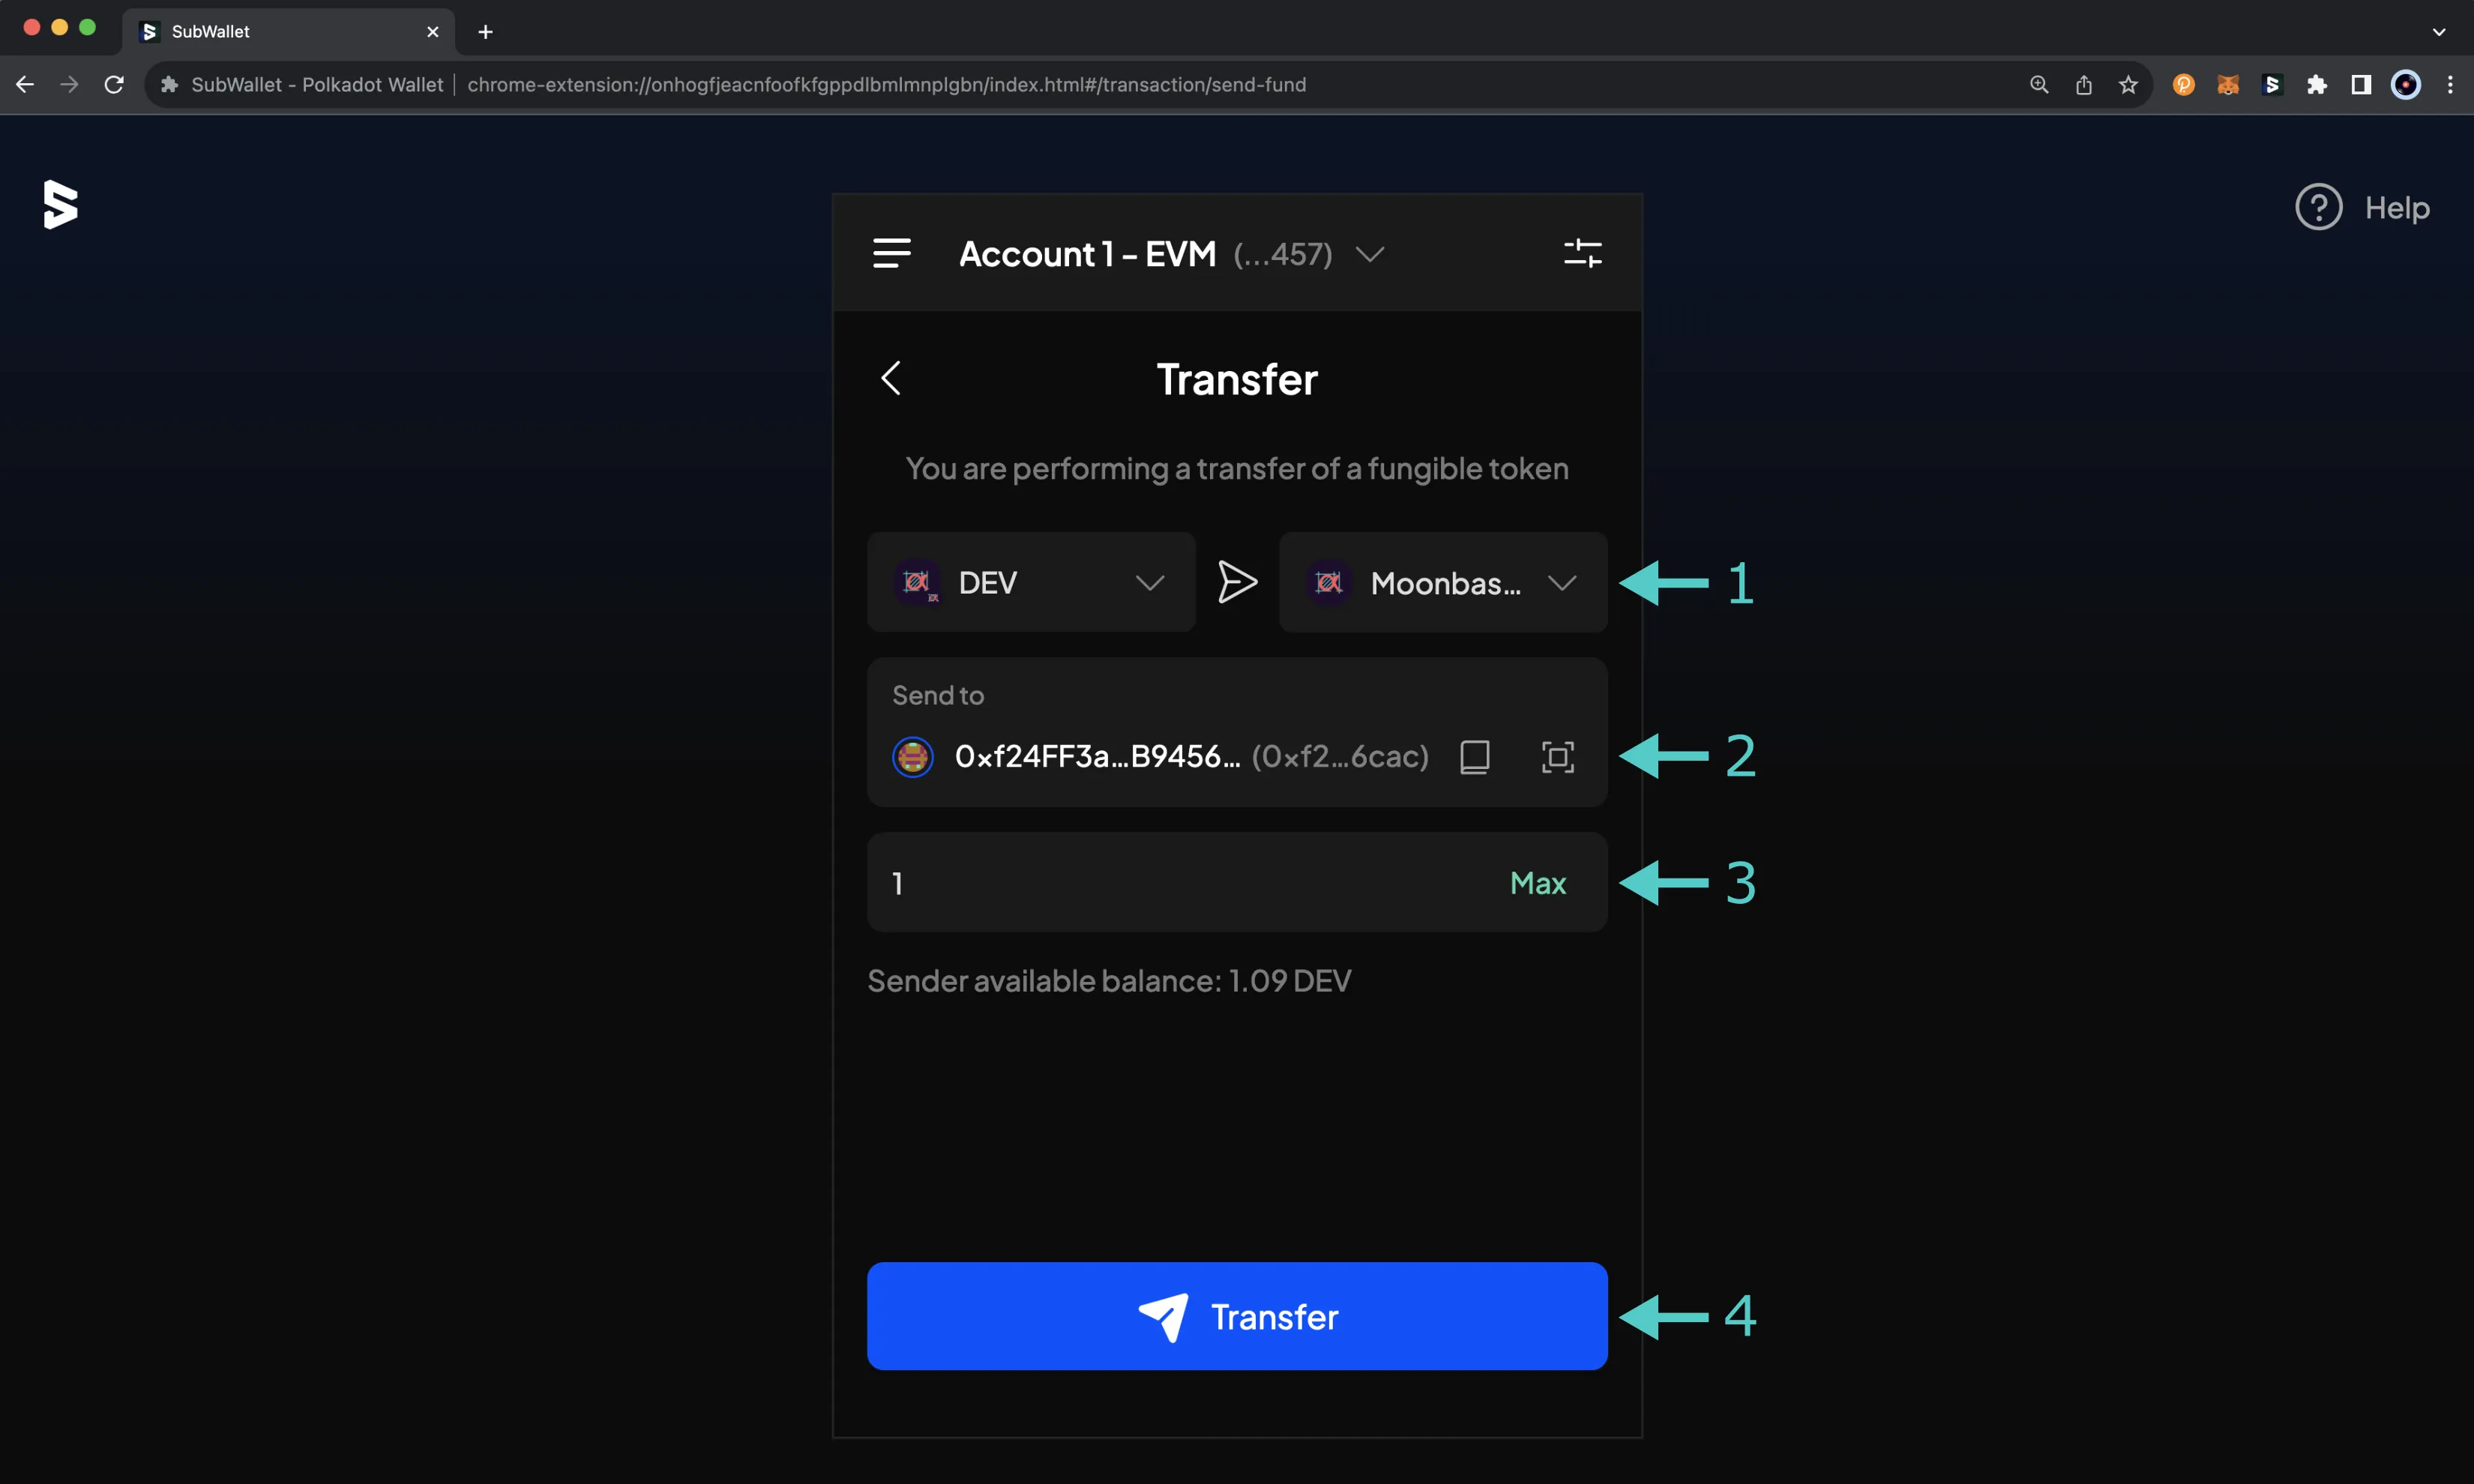
Next, you can take the following steps:
-
Specify the asset to send and the destination chain
Note
Some tokens are allowed to be transferred cross-chain, so when choosing the destination network, you can choose the dropdown menu to see the available options.
-
Enter the destination address, which can also be done using the address book or by scanning the recipient's QR code
Note
If you're using the mobile app, click Next to proceed.
-
Enter the amount of tokens to send
- Look over the transaction details, then press Transfer
On the next screen, you'll be able to review the transaction details and submit the transaction. If the transaction details look good, you can click Approve to send the transaction.
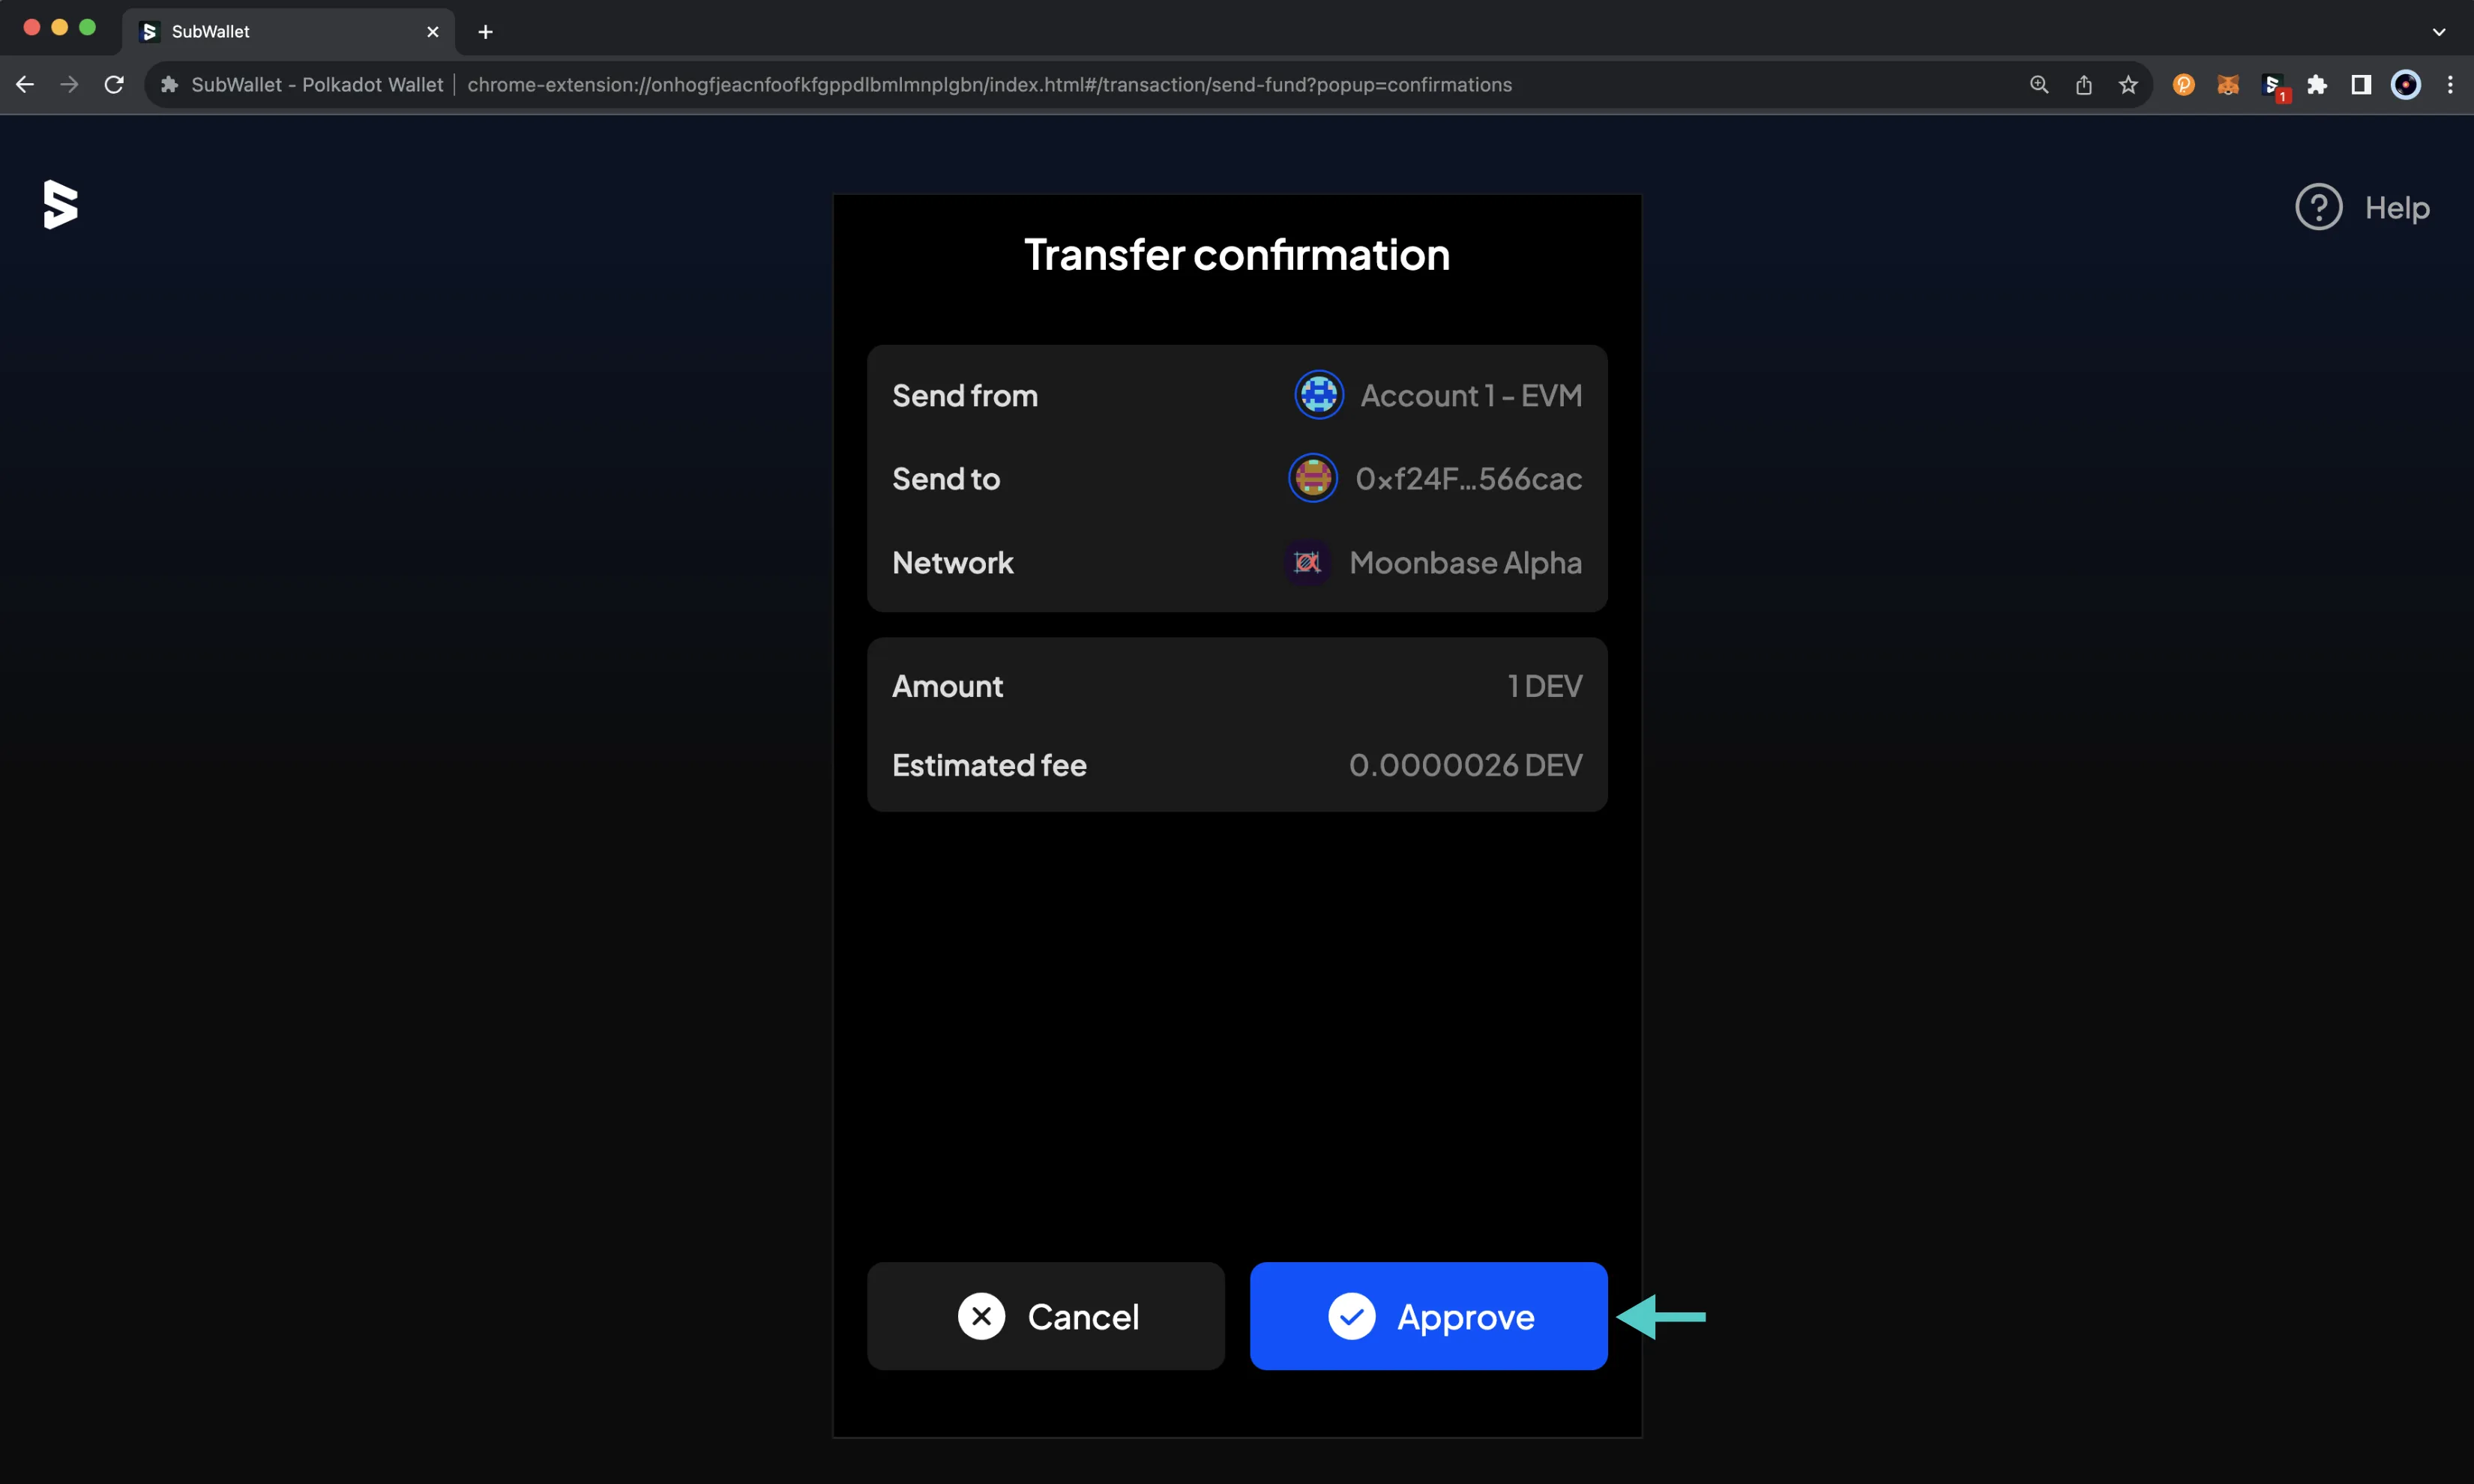
After you send the transaction, you'll be able to review the transaction details.
And that's it! For more information on how to use SubWallet, please refer to SubWallet's documentation.
| Created: November 17, 2023