How to use Polkadot.js Apps to Interact with Moonbeam
Introduction
As a Polkadot parachain, Moonbeam uses a unified account structure that allows you to interact with Substrate (Polkadot) functionality and Moonbeam's EVM, all from a single Ethereum-style address. This unified account structure means that you don't need to maintain both a Substrate and an Ethereum account to interact with Moonbeam - instead, you can do it all with a single Ethereum private key.
The Polkadot.js Apps interface natively supports H160 addresses and ECDSA keys. So, in this tutorial, you can check out this integration of Ethereum-based accounts on Polkadot.js Apps.
Note
Polkadot.js Apps is phasing out support for accounts stored locally in the browser's cache. Instead, it is recommended that you use a browser extension like Talisman to inject your accounts into Polkadot.js Apps.
Connect Polkadot.js Apps to Moonbeam
When launching Polkadot.js Apps for the first time, you may or may not be connected to the desired network.
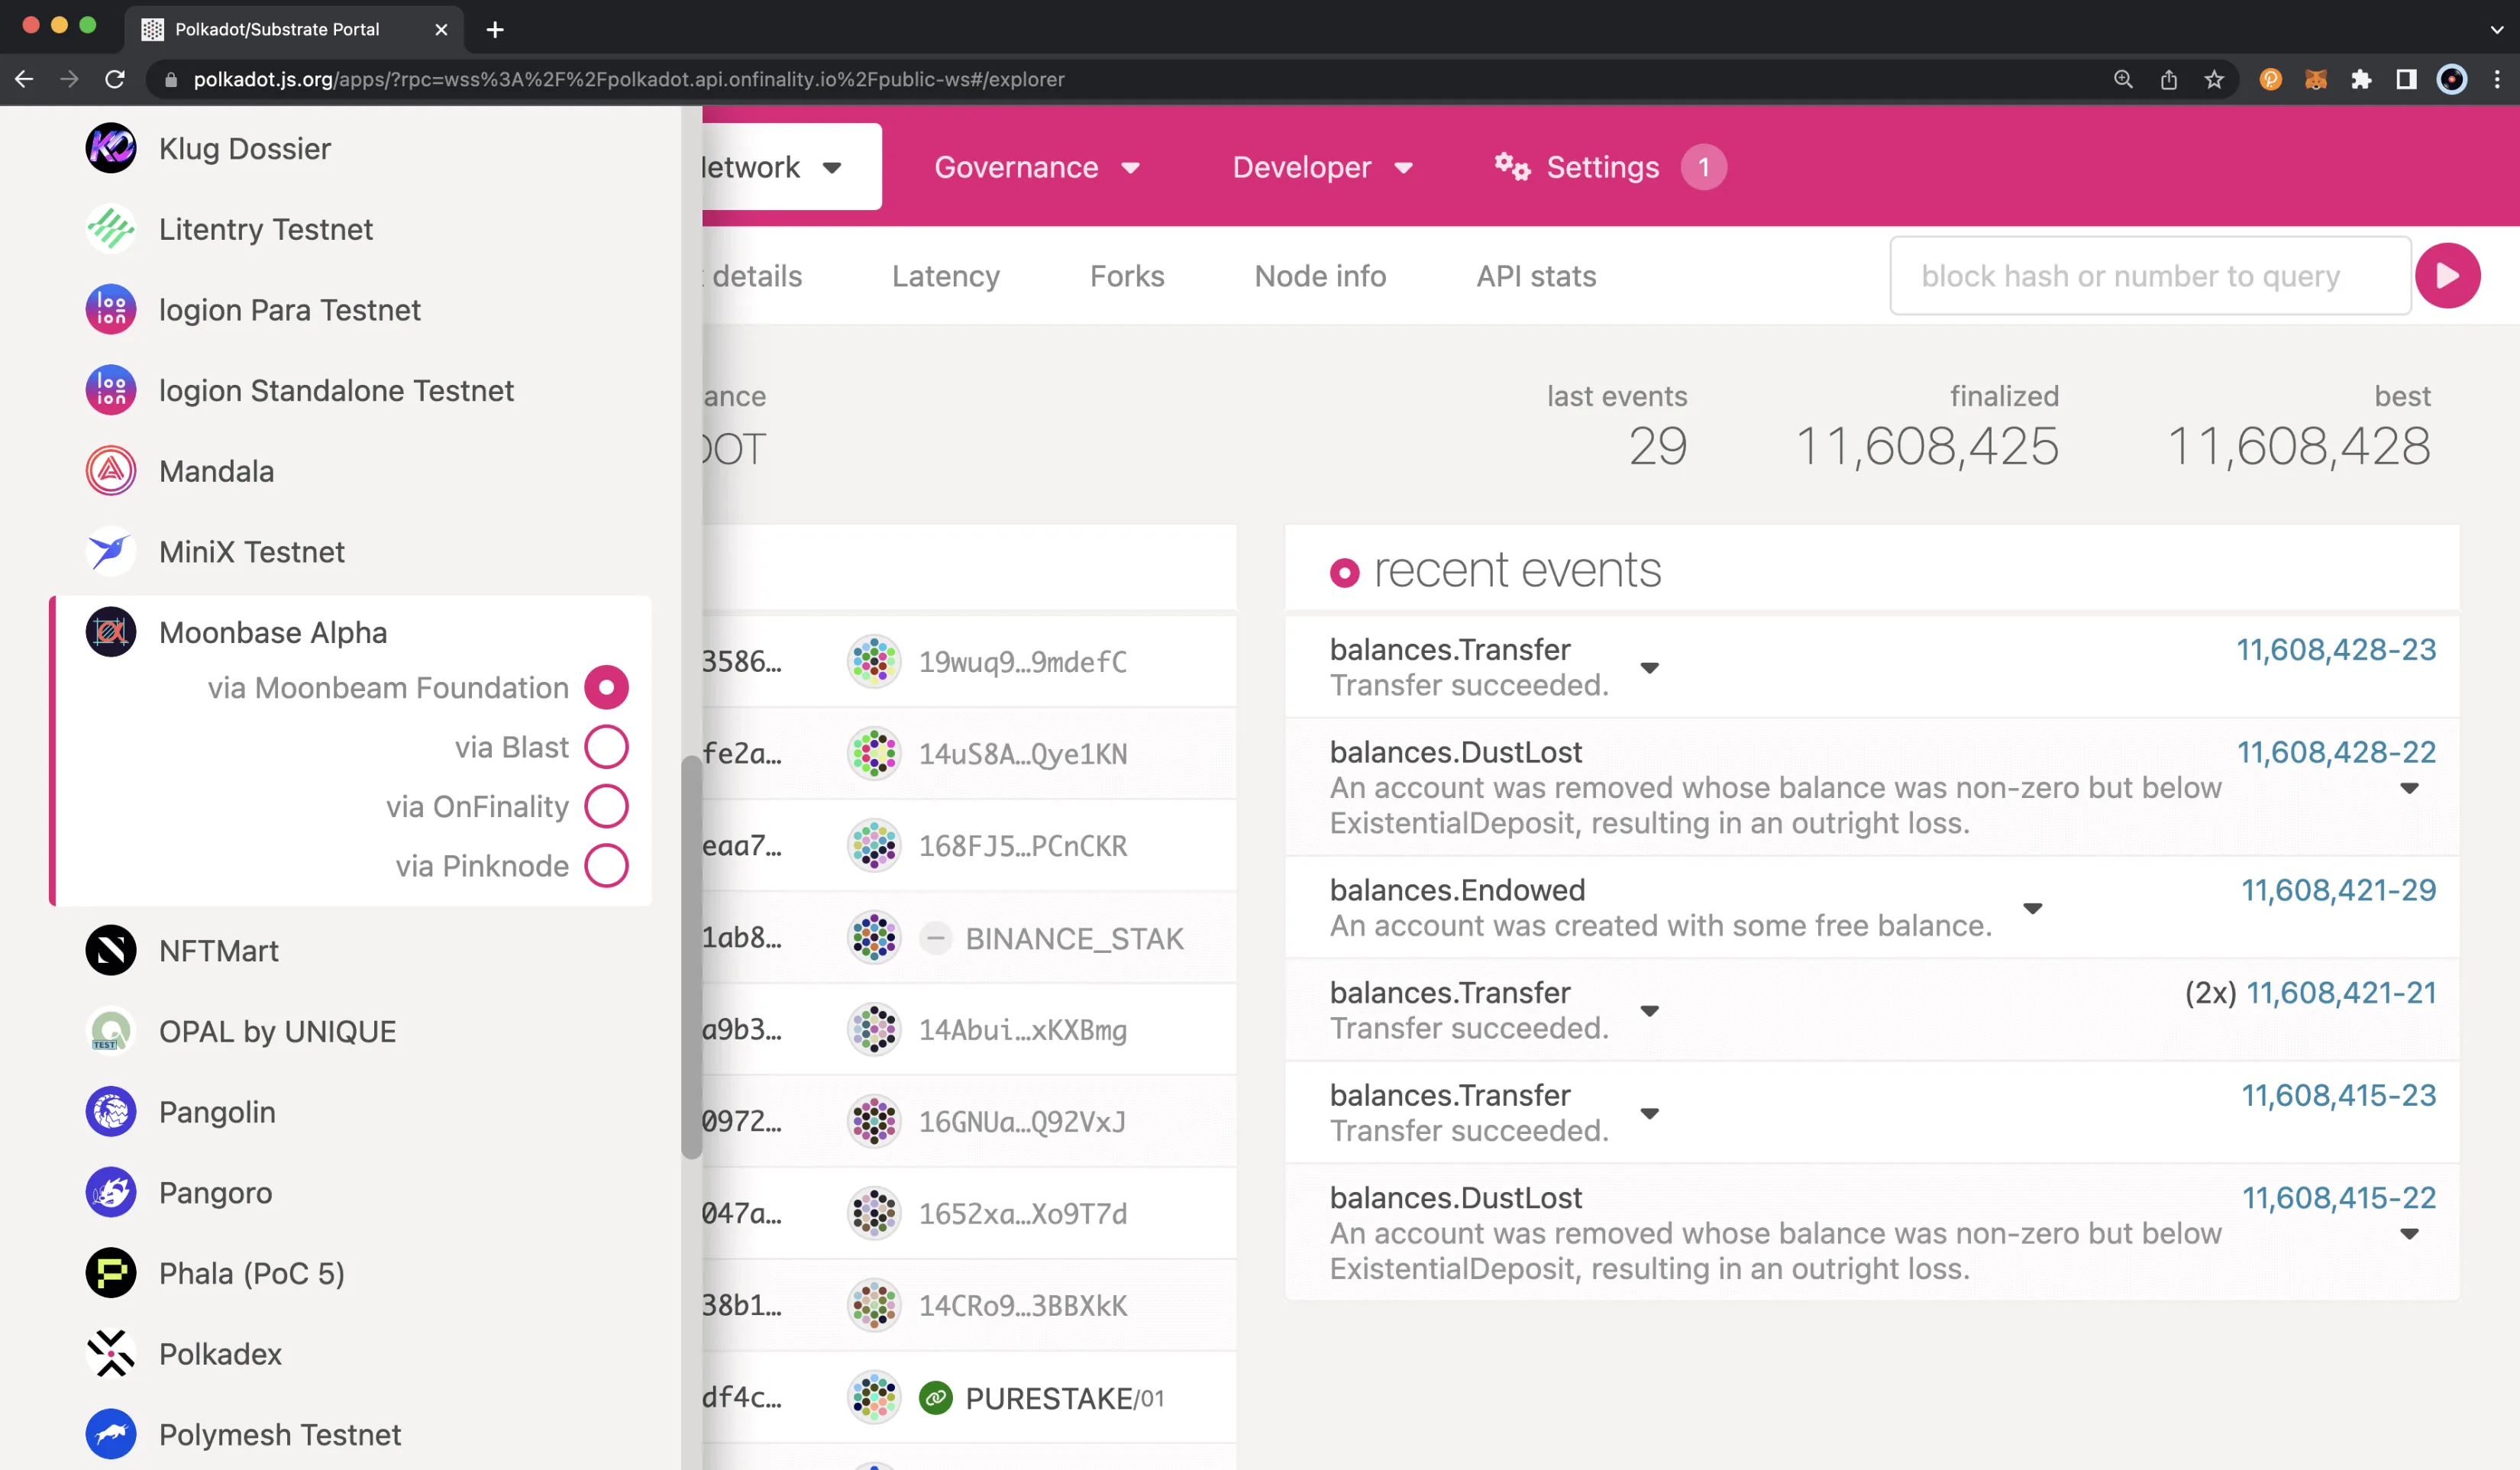
You can change the selected network by clicking the logo in the top left corner, where you'll find a list of networks organized by MainNets, TestNets, and local networks. Each network can be found under the following sections:
| Network | Section |
|---|---|
| Moonbeam | Polkadot & Parachains |
| Moonriver | Kusama & Parachains |
| Moonbase Alpha | Test Networks |
| Moonbeam Development Node | Development |
Once you've selected the correct network, you can scroll back to the top and click Switch.
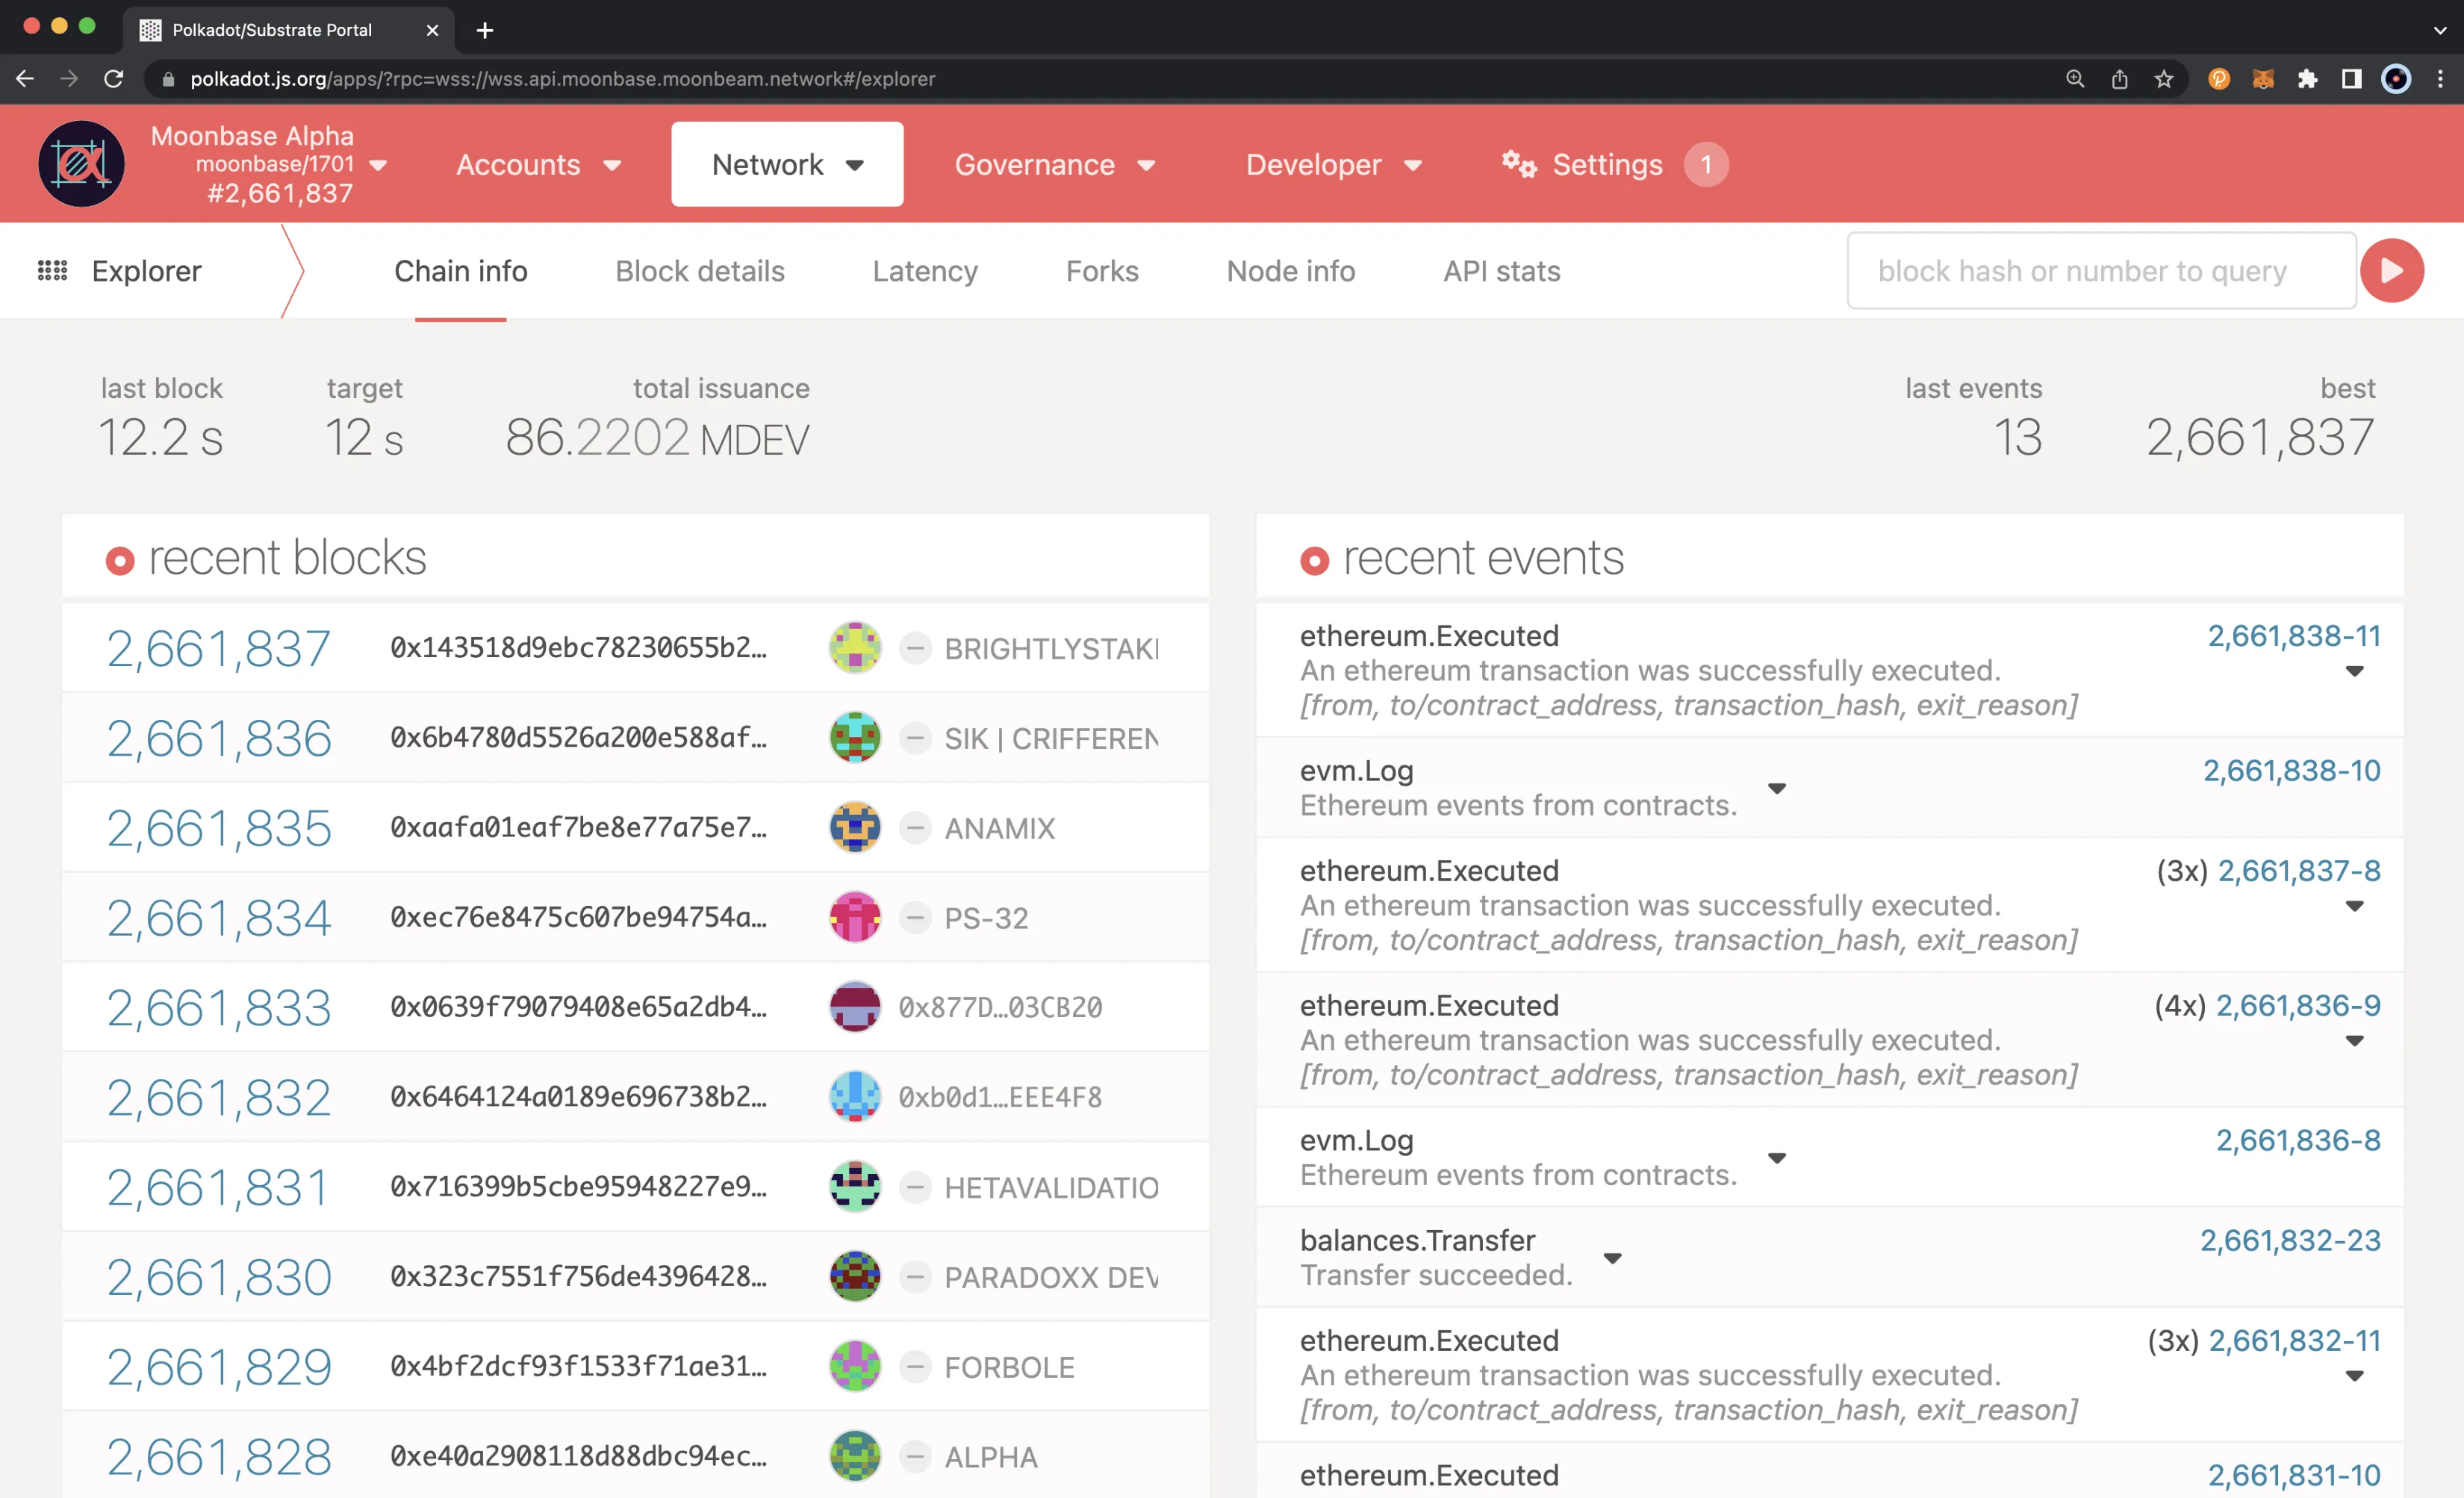
After switching, the Polkadot.js site will not only connect to the chosen network, but the logo and styling will change for each network.
Create or Import an H160 Account into Polkadot.js Apps
Note
For security purposes, it is recommended that you do not store accounts locally in the browser. A more secure method is using a browser extension like Talisman to inject your accounts into Polkadot.js Apps.
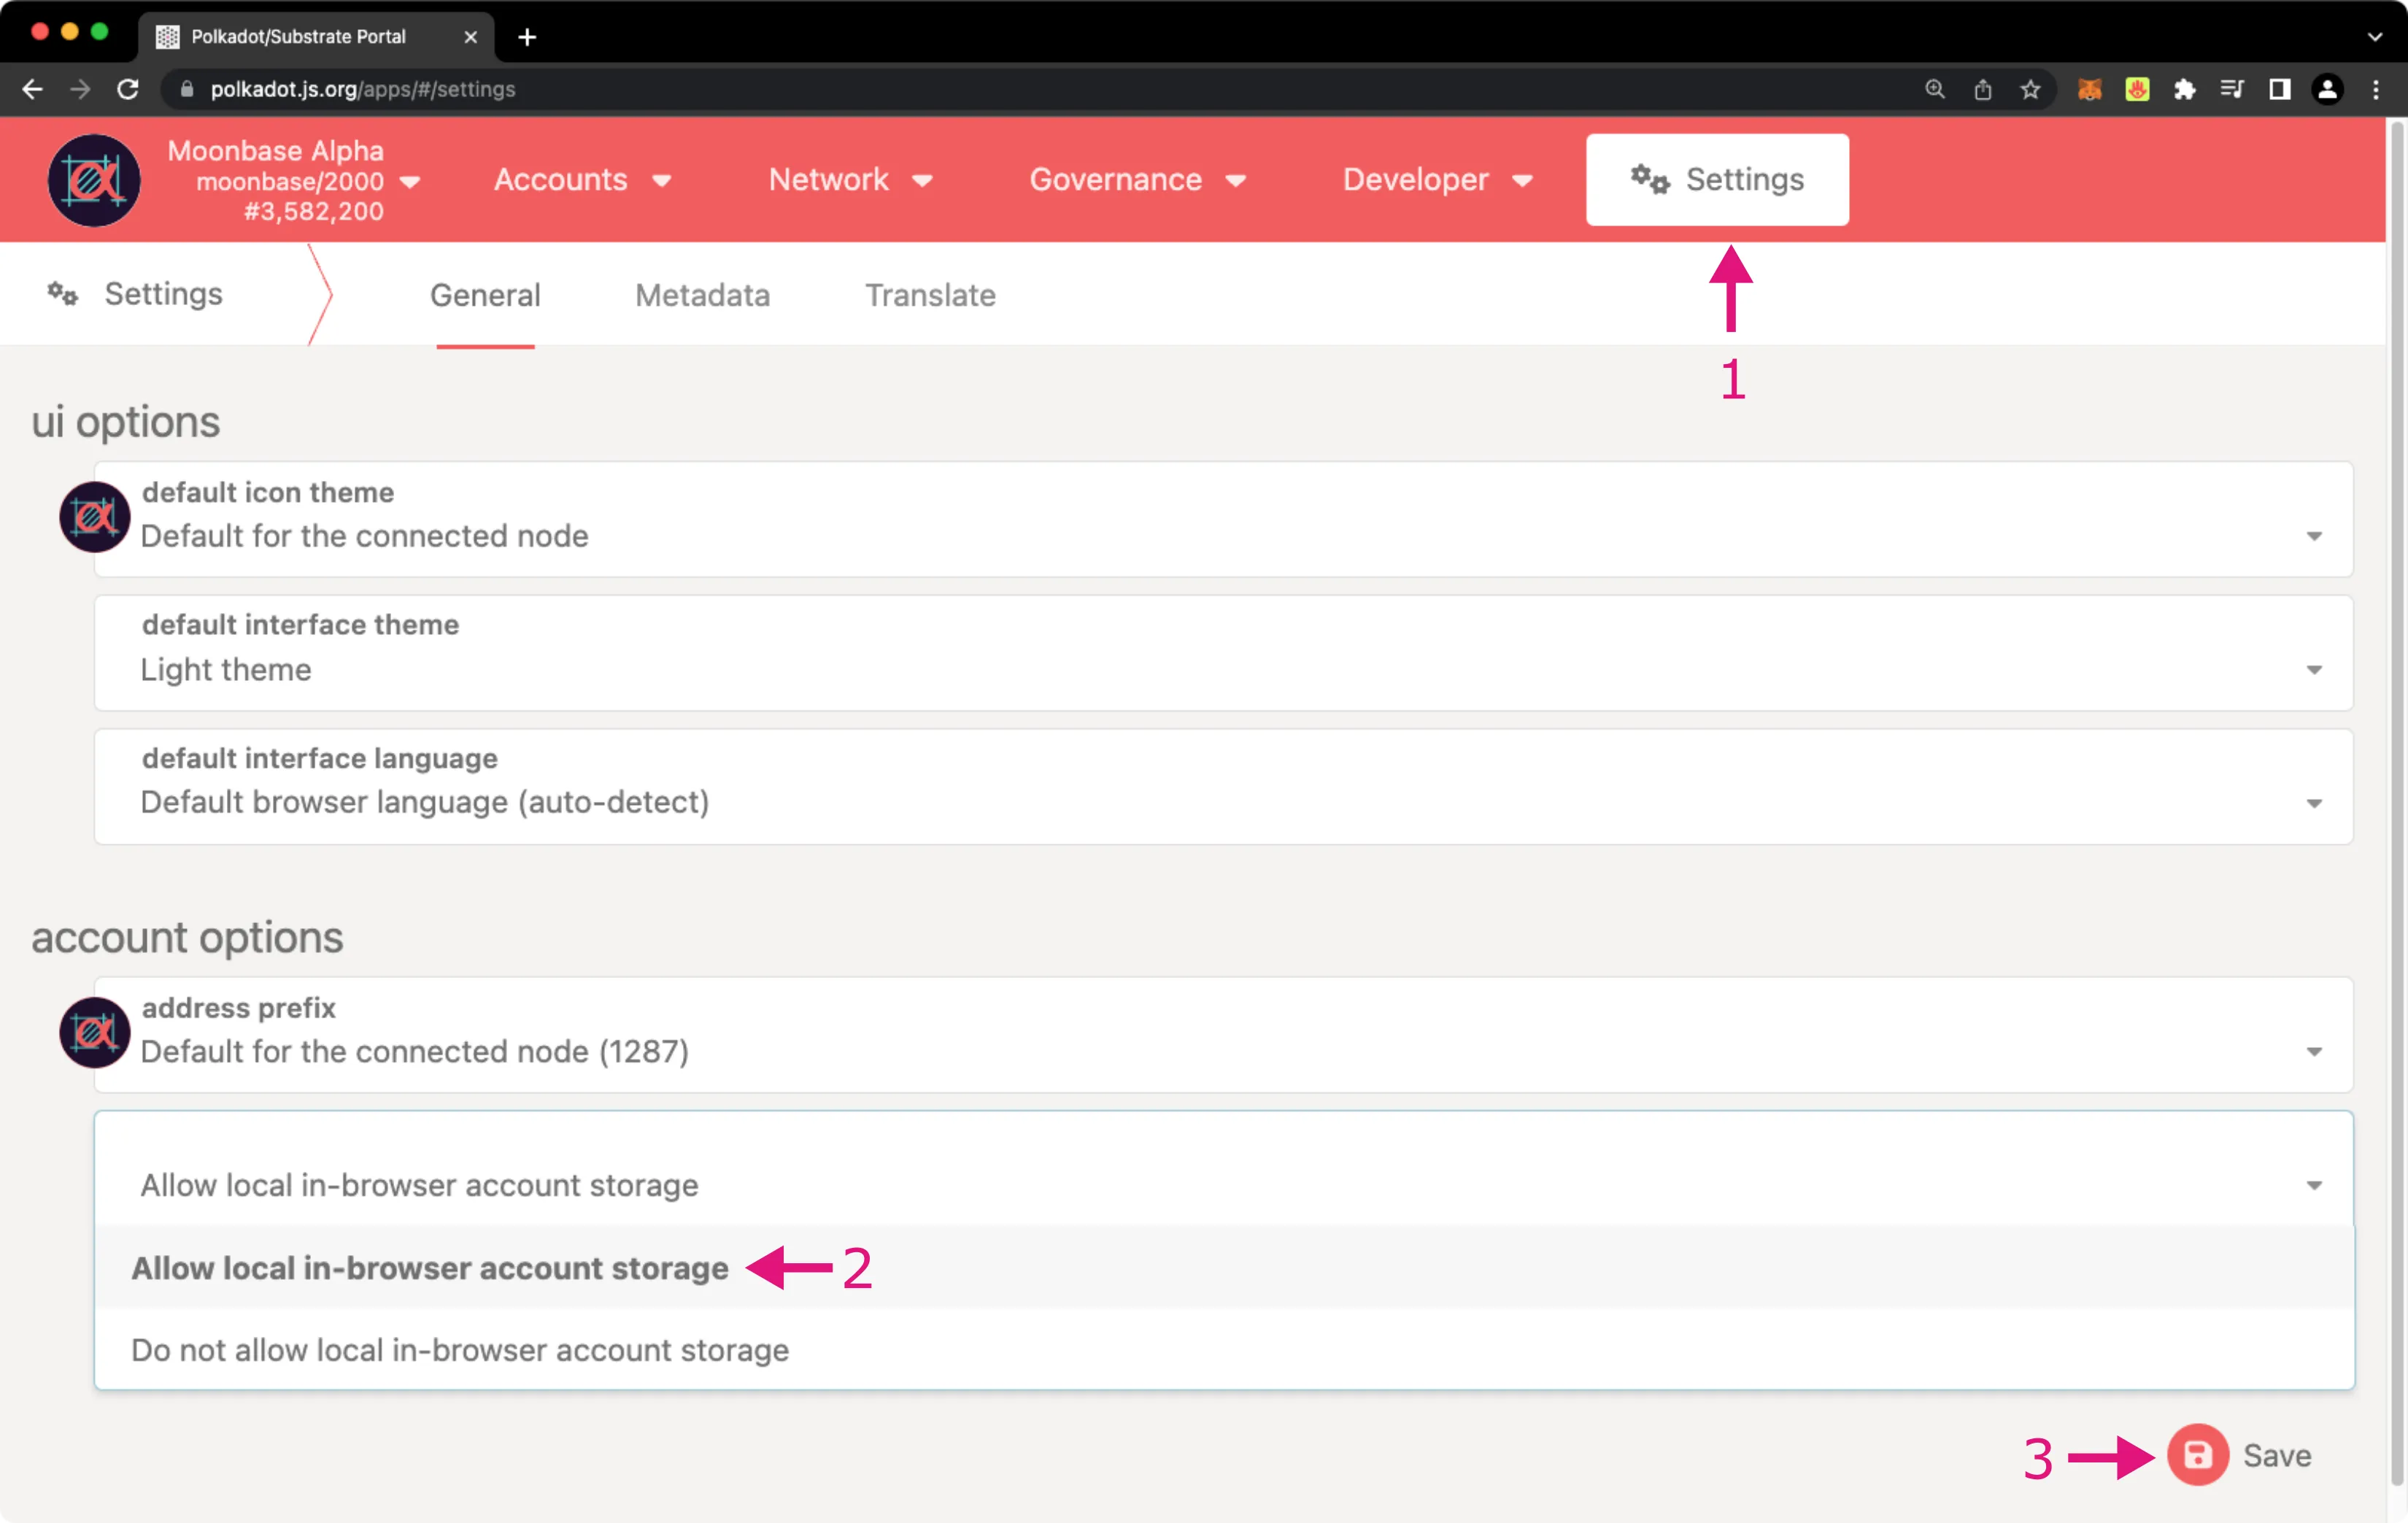
In this section, you'll learn how you can create a new account or import a preexisting MetaMask account to Polkadot.js Apps. First, there is one prerequisite step. As part of the process of phasing out support for accounts stored locally in the browser's cache, you'll need to enable support for local storage of accounts in the Settings tab. To do so, take the following steps:
- Navigate to the Settings tab
- Select Allow local in-browser account storage under the in-browser account creation heading
- Press Save
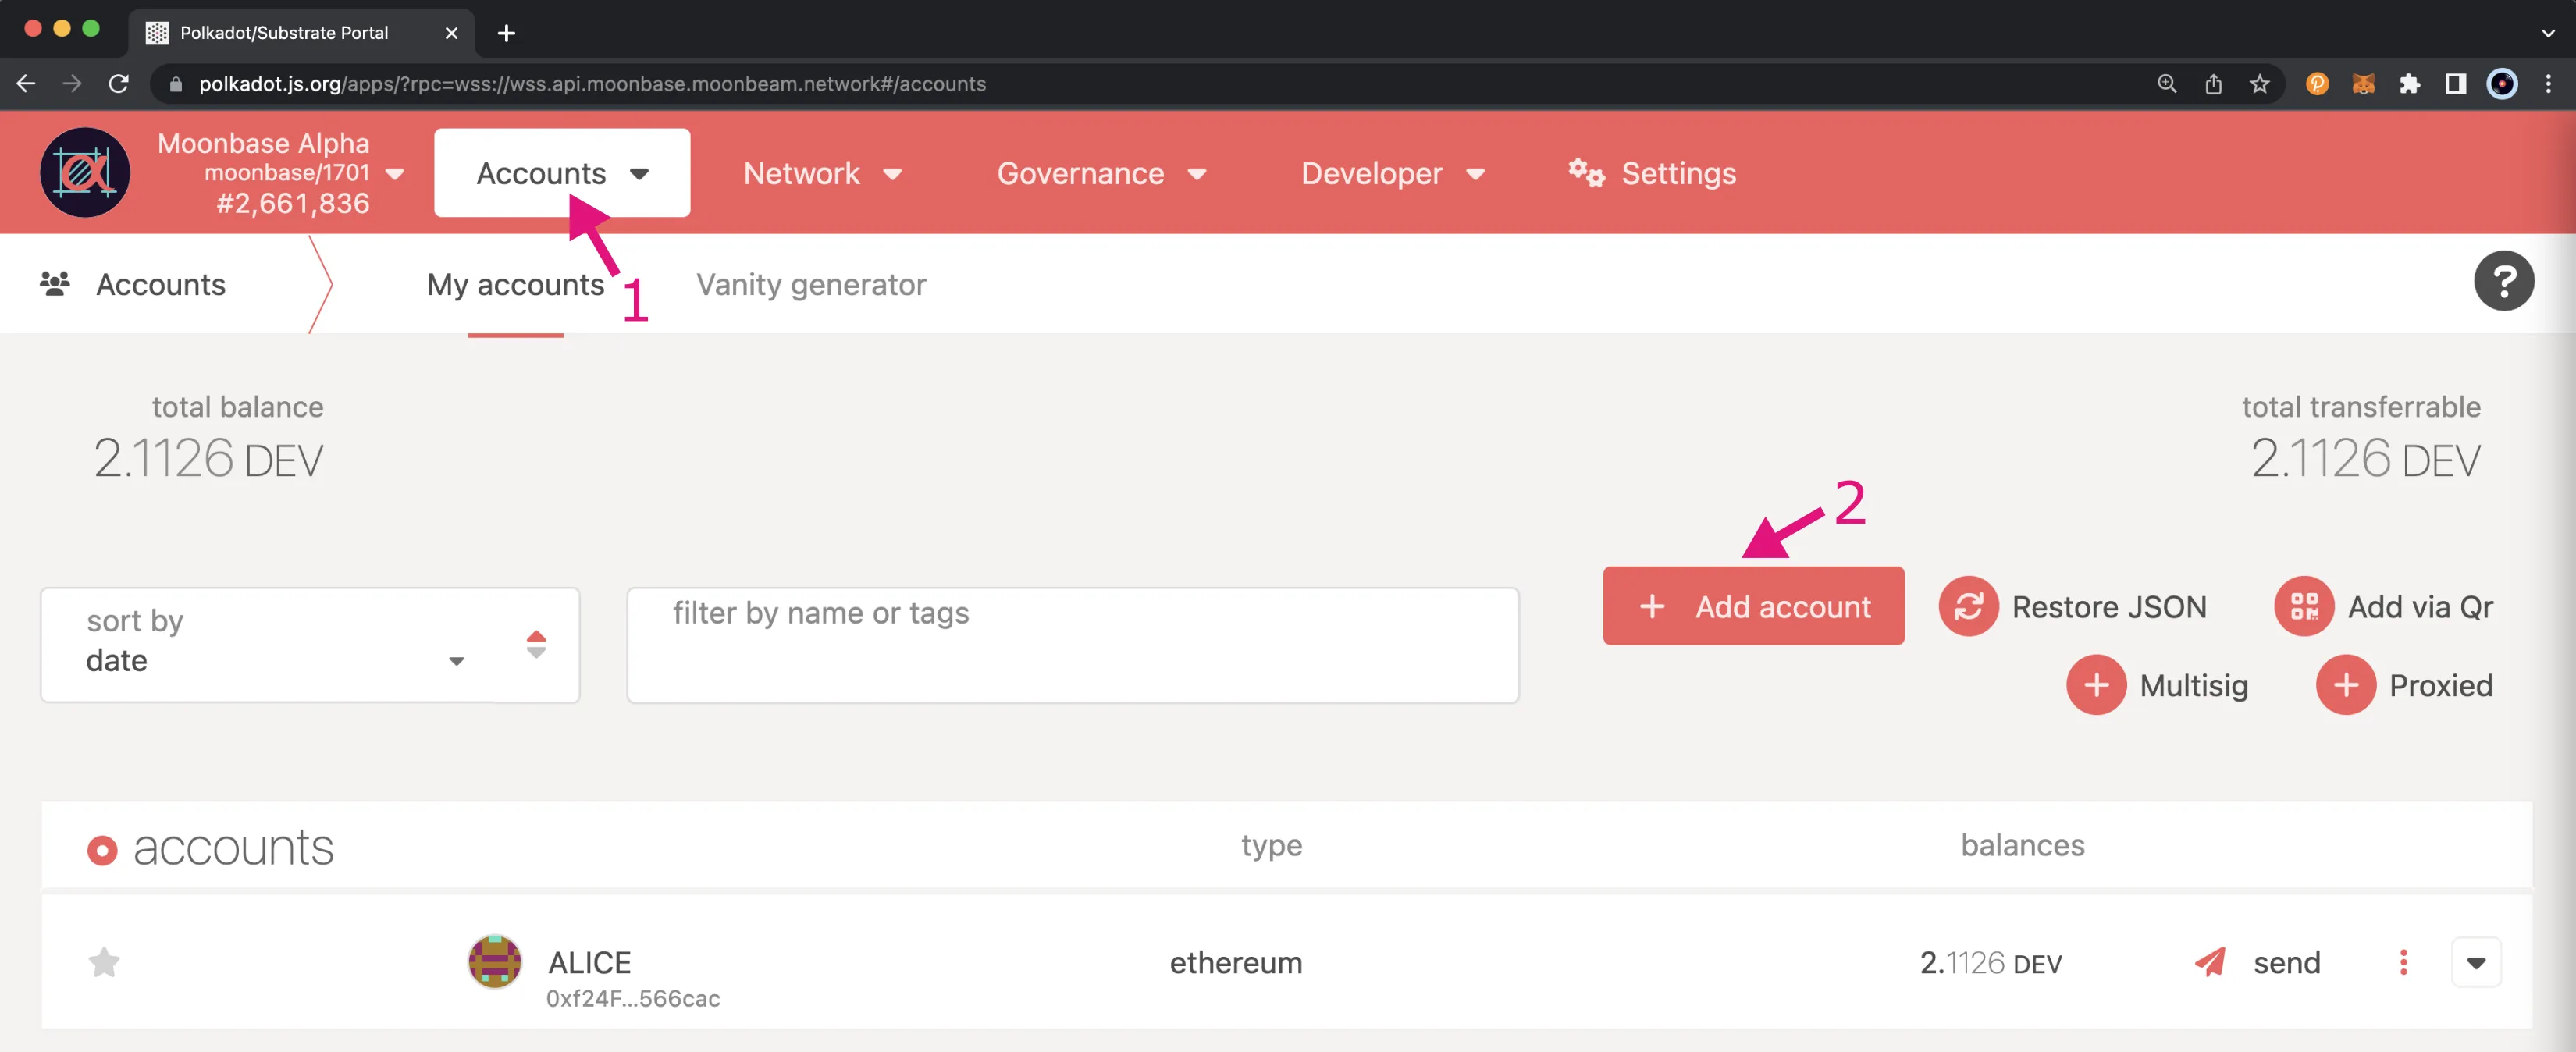
You can now head back to the Accounts page of Polkadot.js Apps and proceed with the next steps:
- Navigate to the Accounts section
- Click on the Add account button
This will open a wizard pop-up that will guide you through the process of adding an account to the Polkadot.js Apps interface:
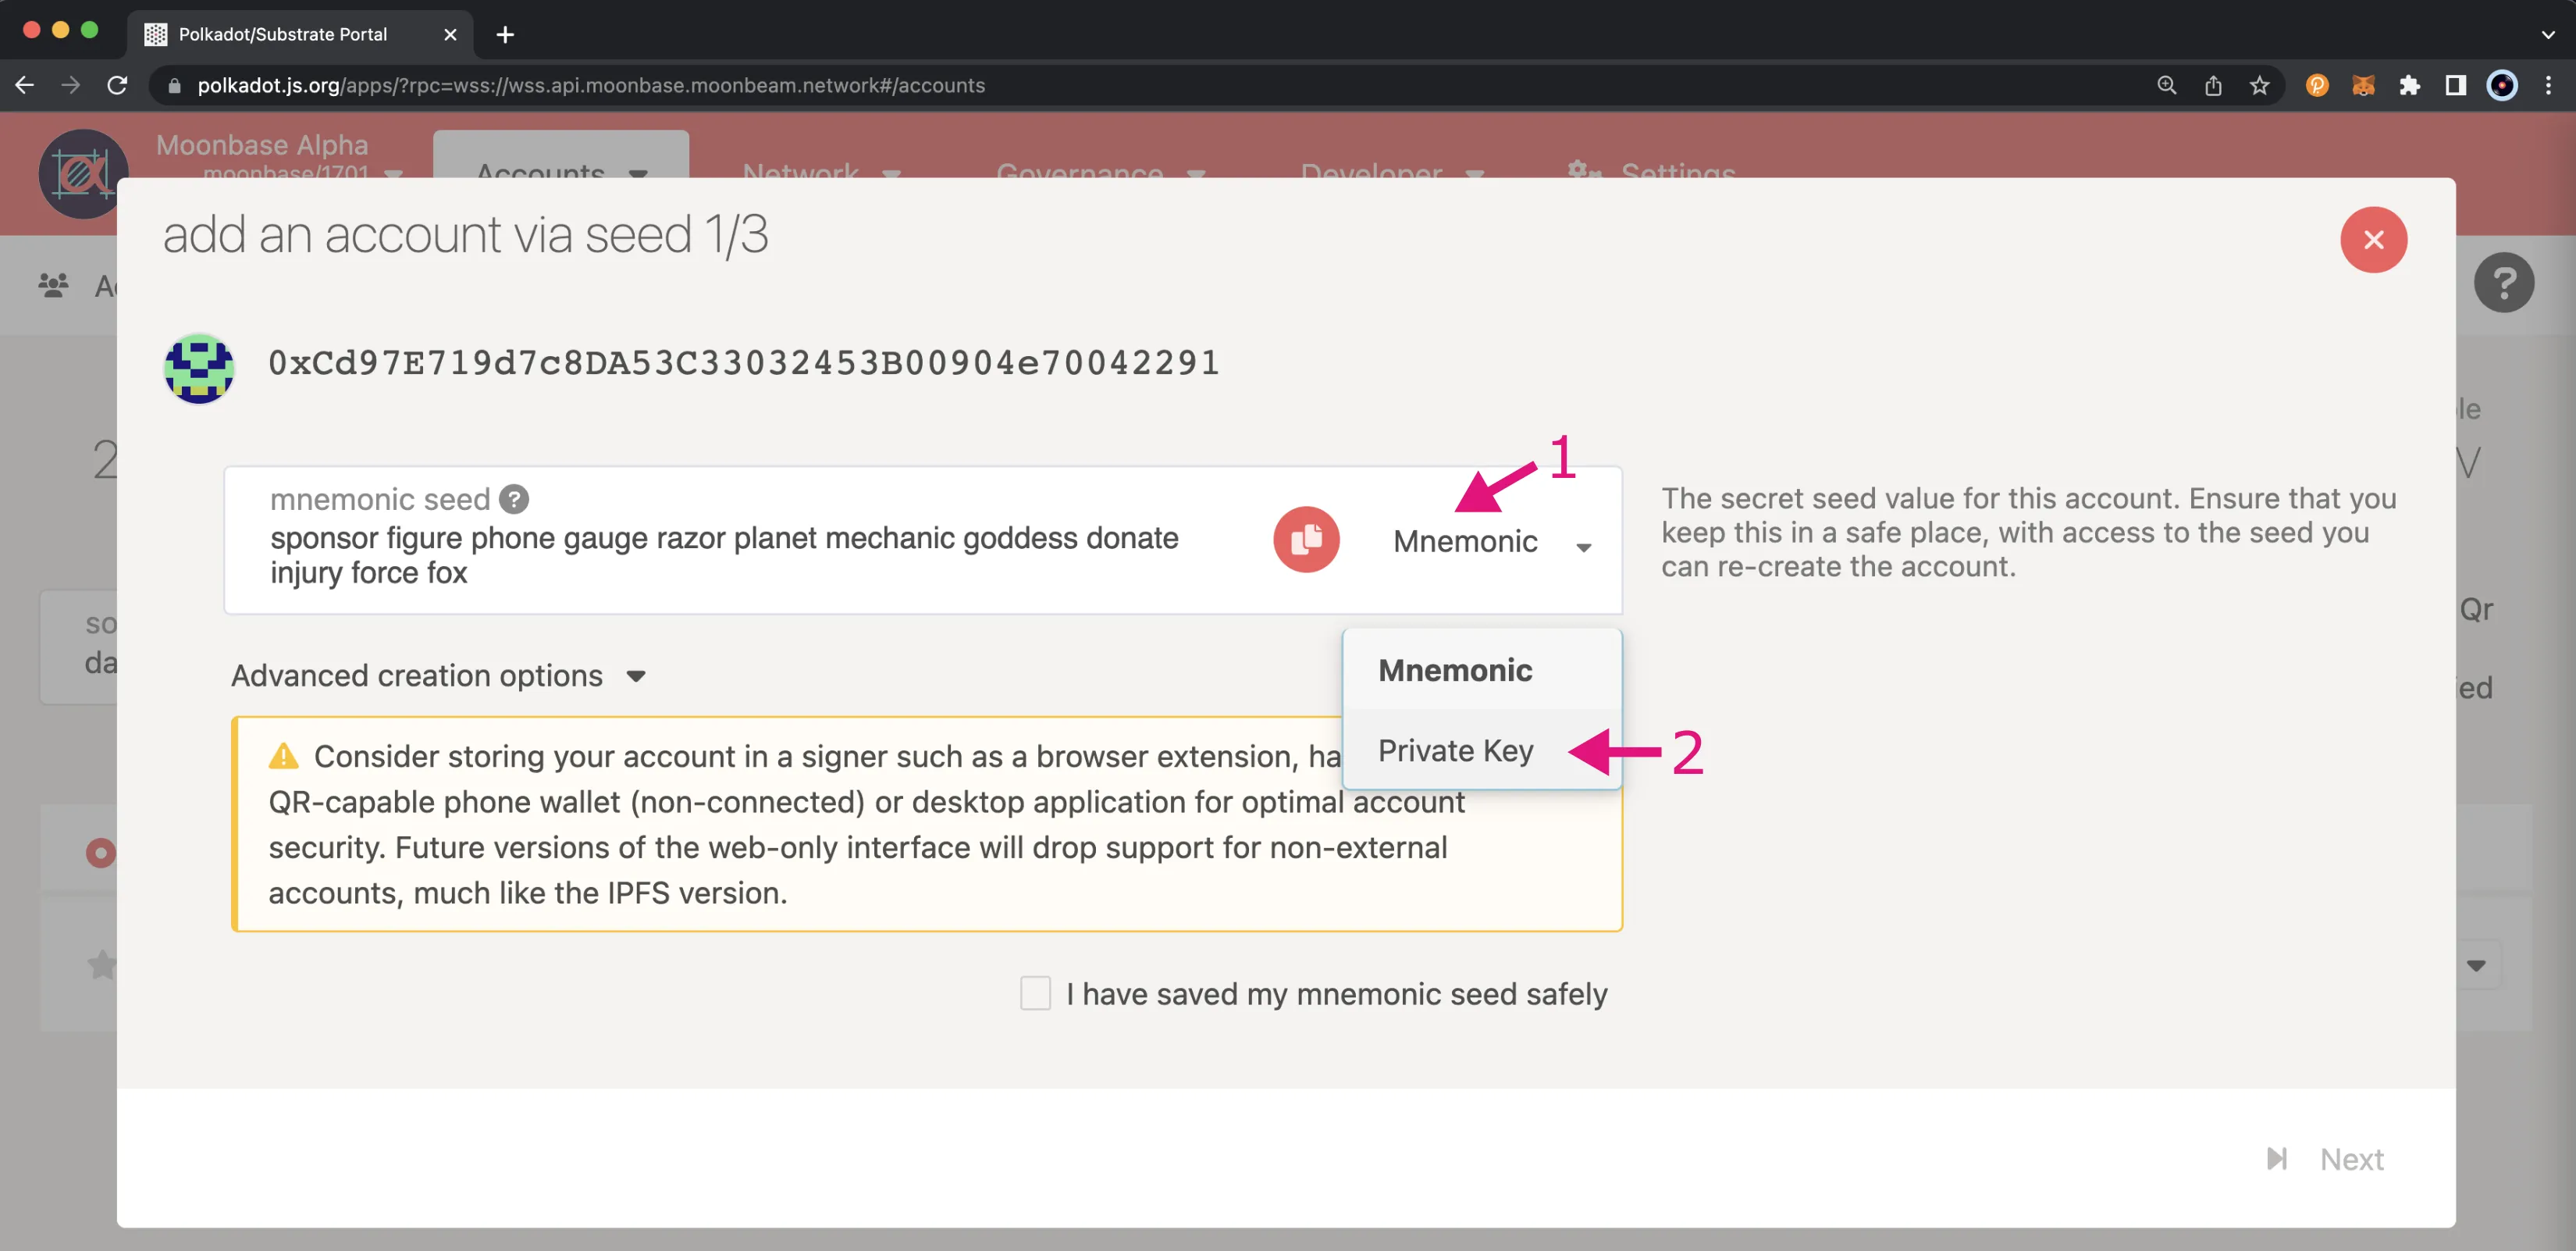
- Click on the drop-down menu
- Change the selection from Mnemonic to Private Key, this allows you to add an account through a private key
Note
Currently, you can only create or import accounts in Polkadot.js via a private key. Doing so with the mnemonic will result in a different public address if you later try to import this account to an Ethereum wallet such as MetaMask. This is because Polkadot.js uses BIP39, whereas Ethereum uses BIP32 or BIP44.
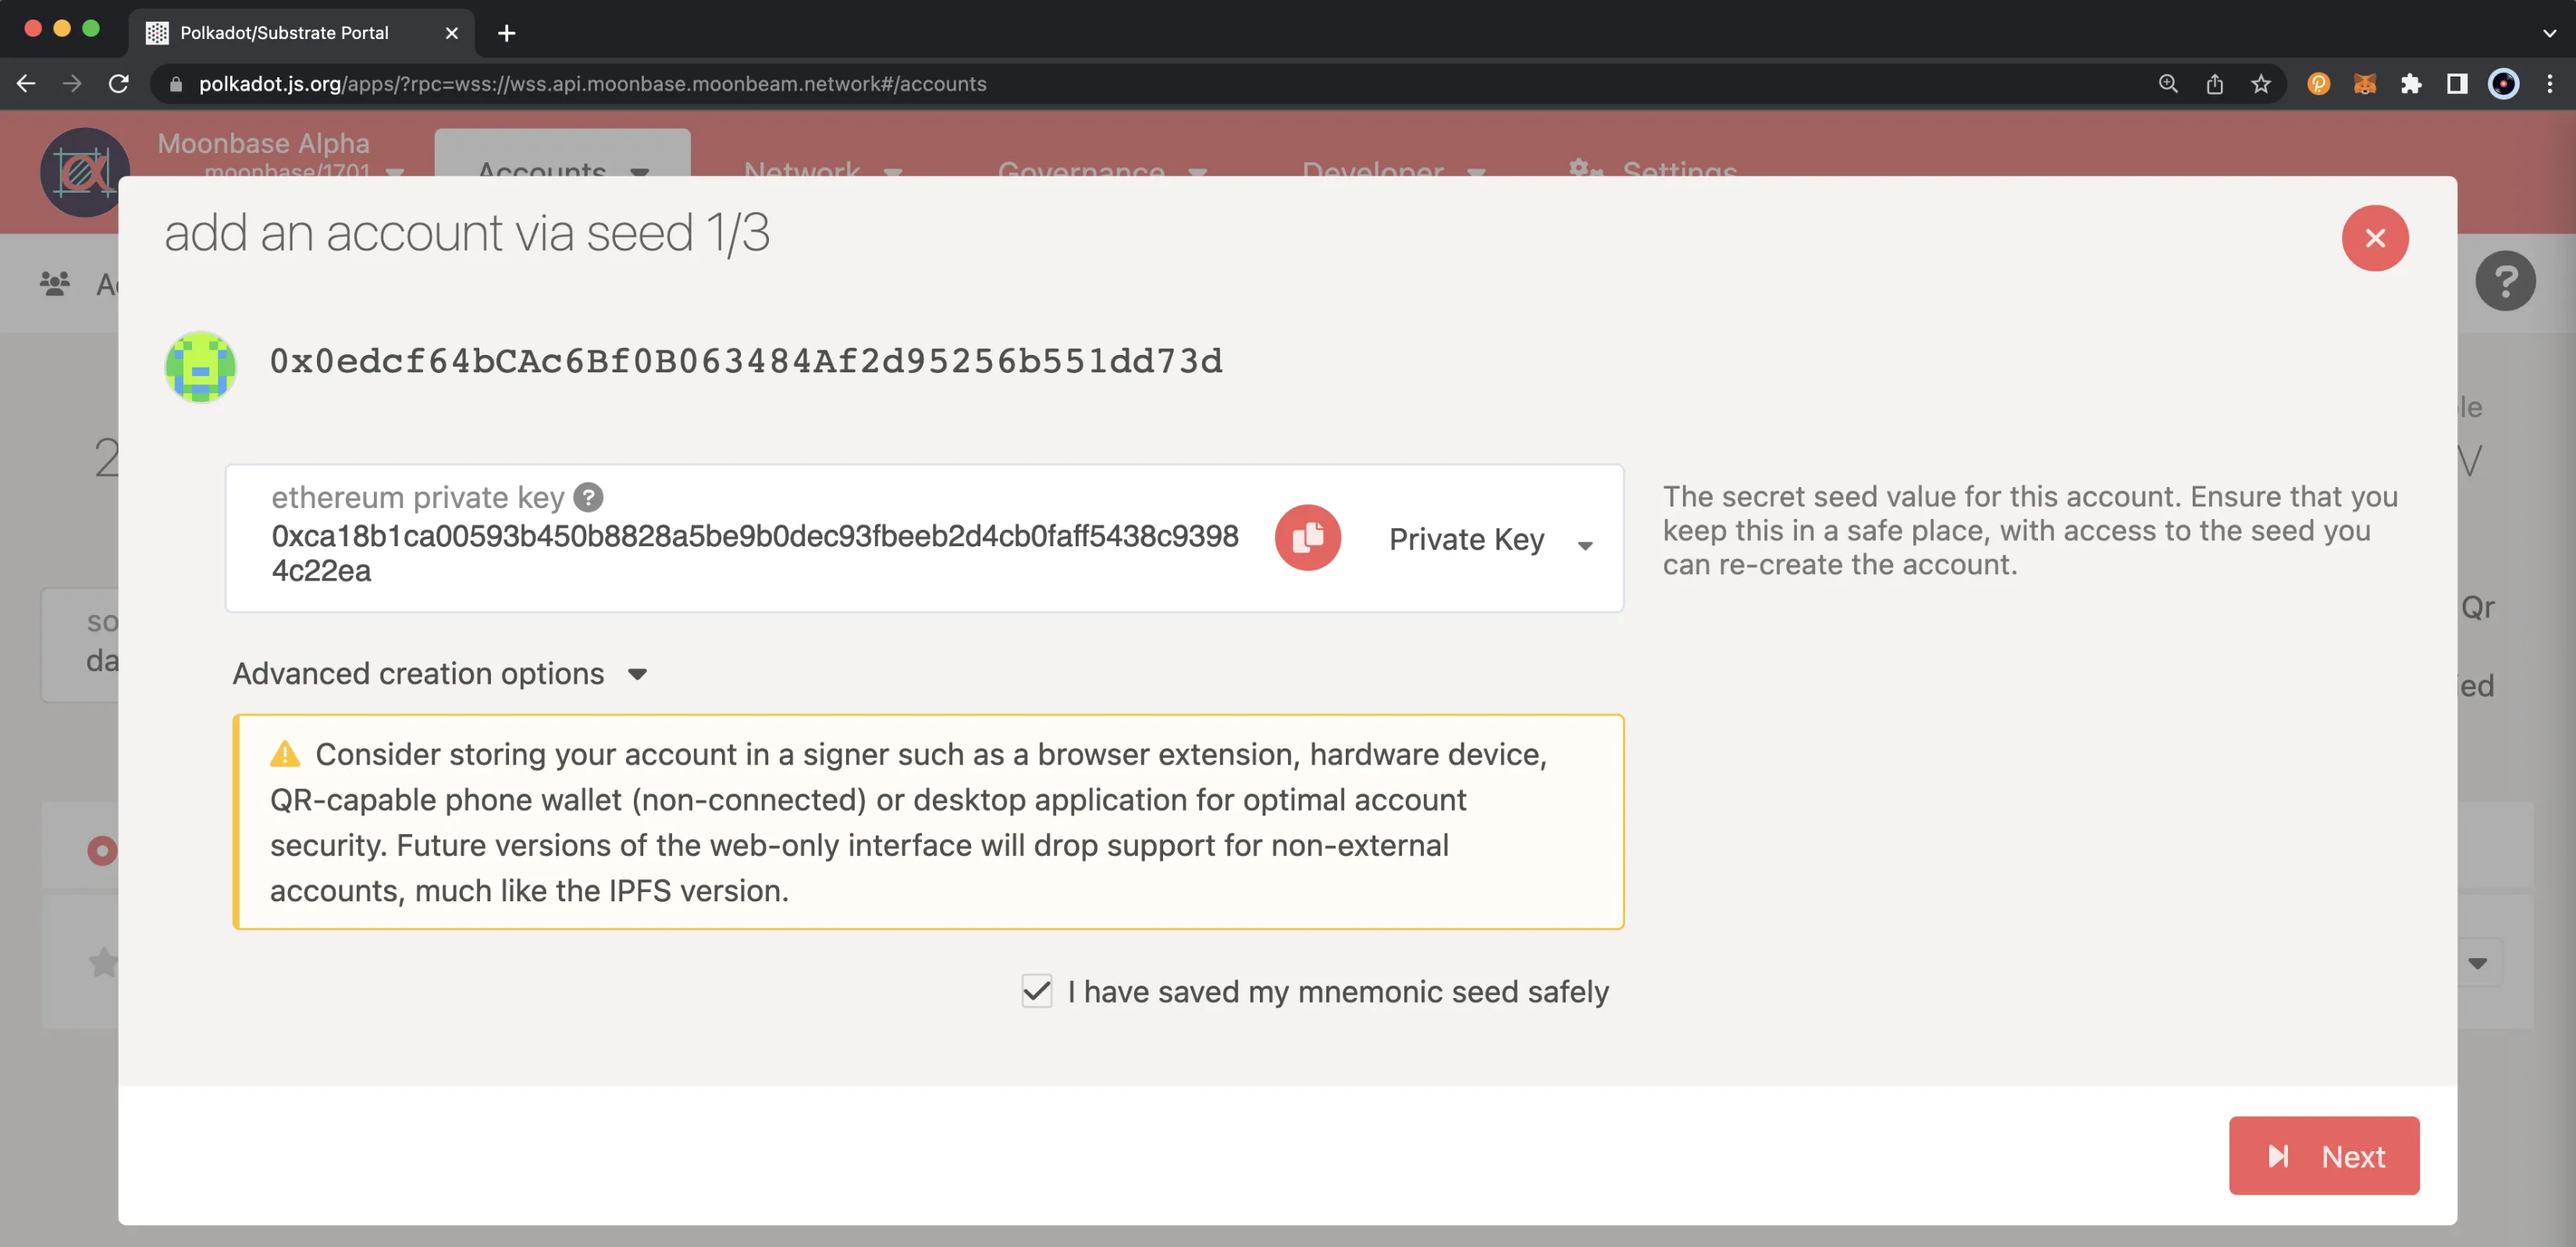
Next, if you want to create a new account, make sure you store the private key displayed by the wizard. If you want to import an existing account, enter your private key that you can export from MetaMask.
Note
Never reveal your private keys as they give direct access to your funds. The steps in this guide are for demonstration purposes only.
Make sure to include the prefix in the private key, i.e., 0x. If you entered the information correctly, the corresponding public address should appear in the upper left corner of the window, and then click Next.
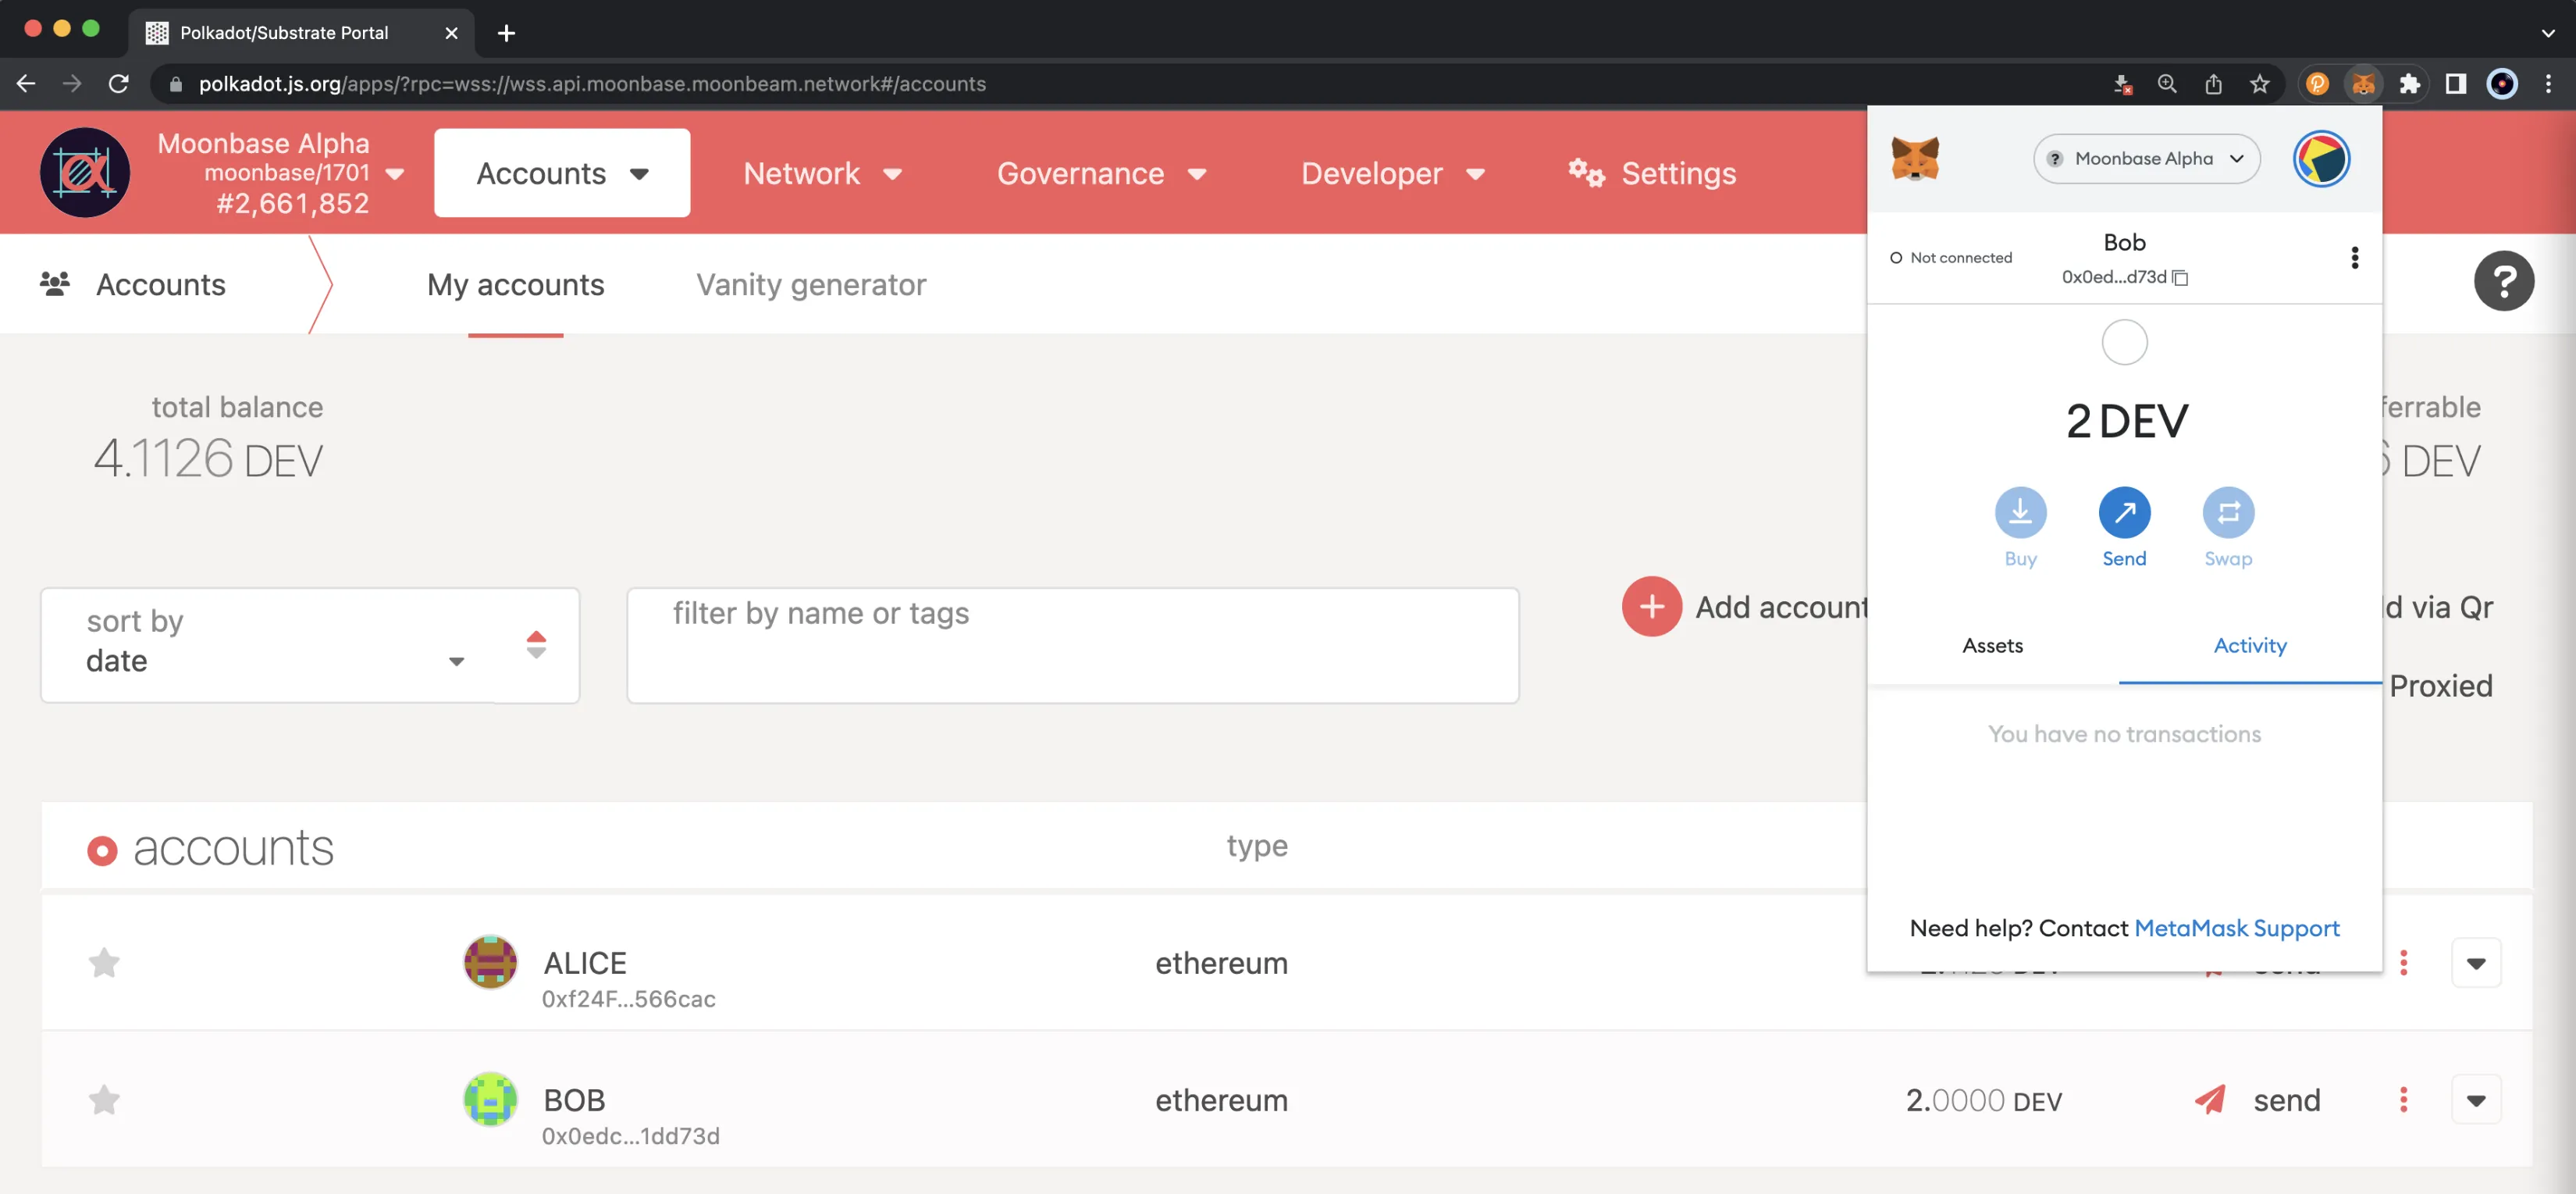
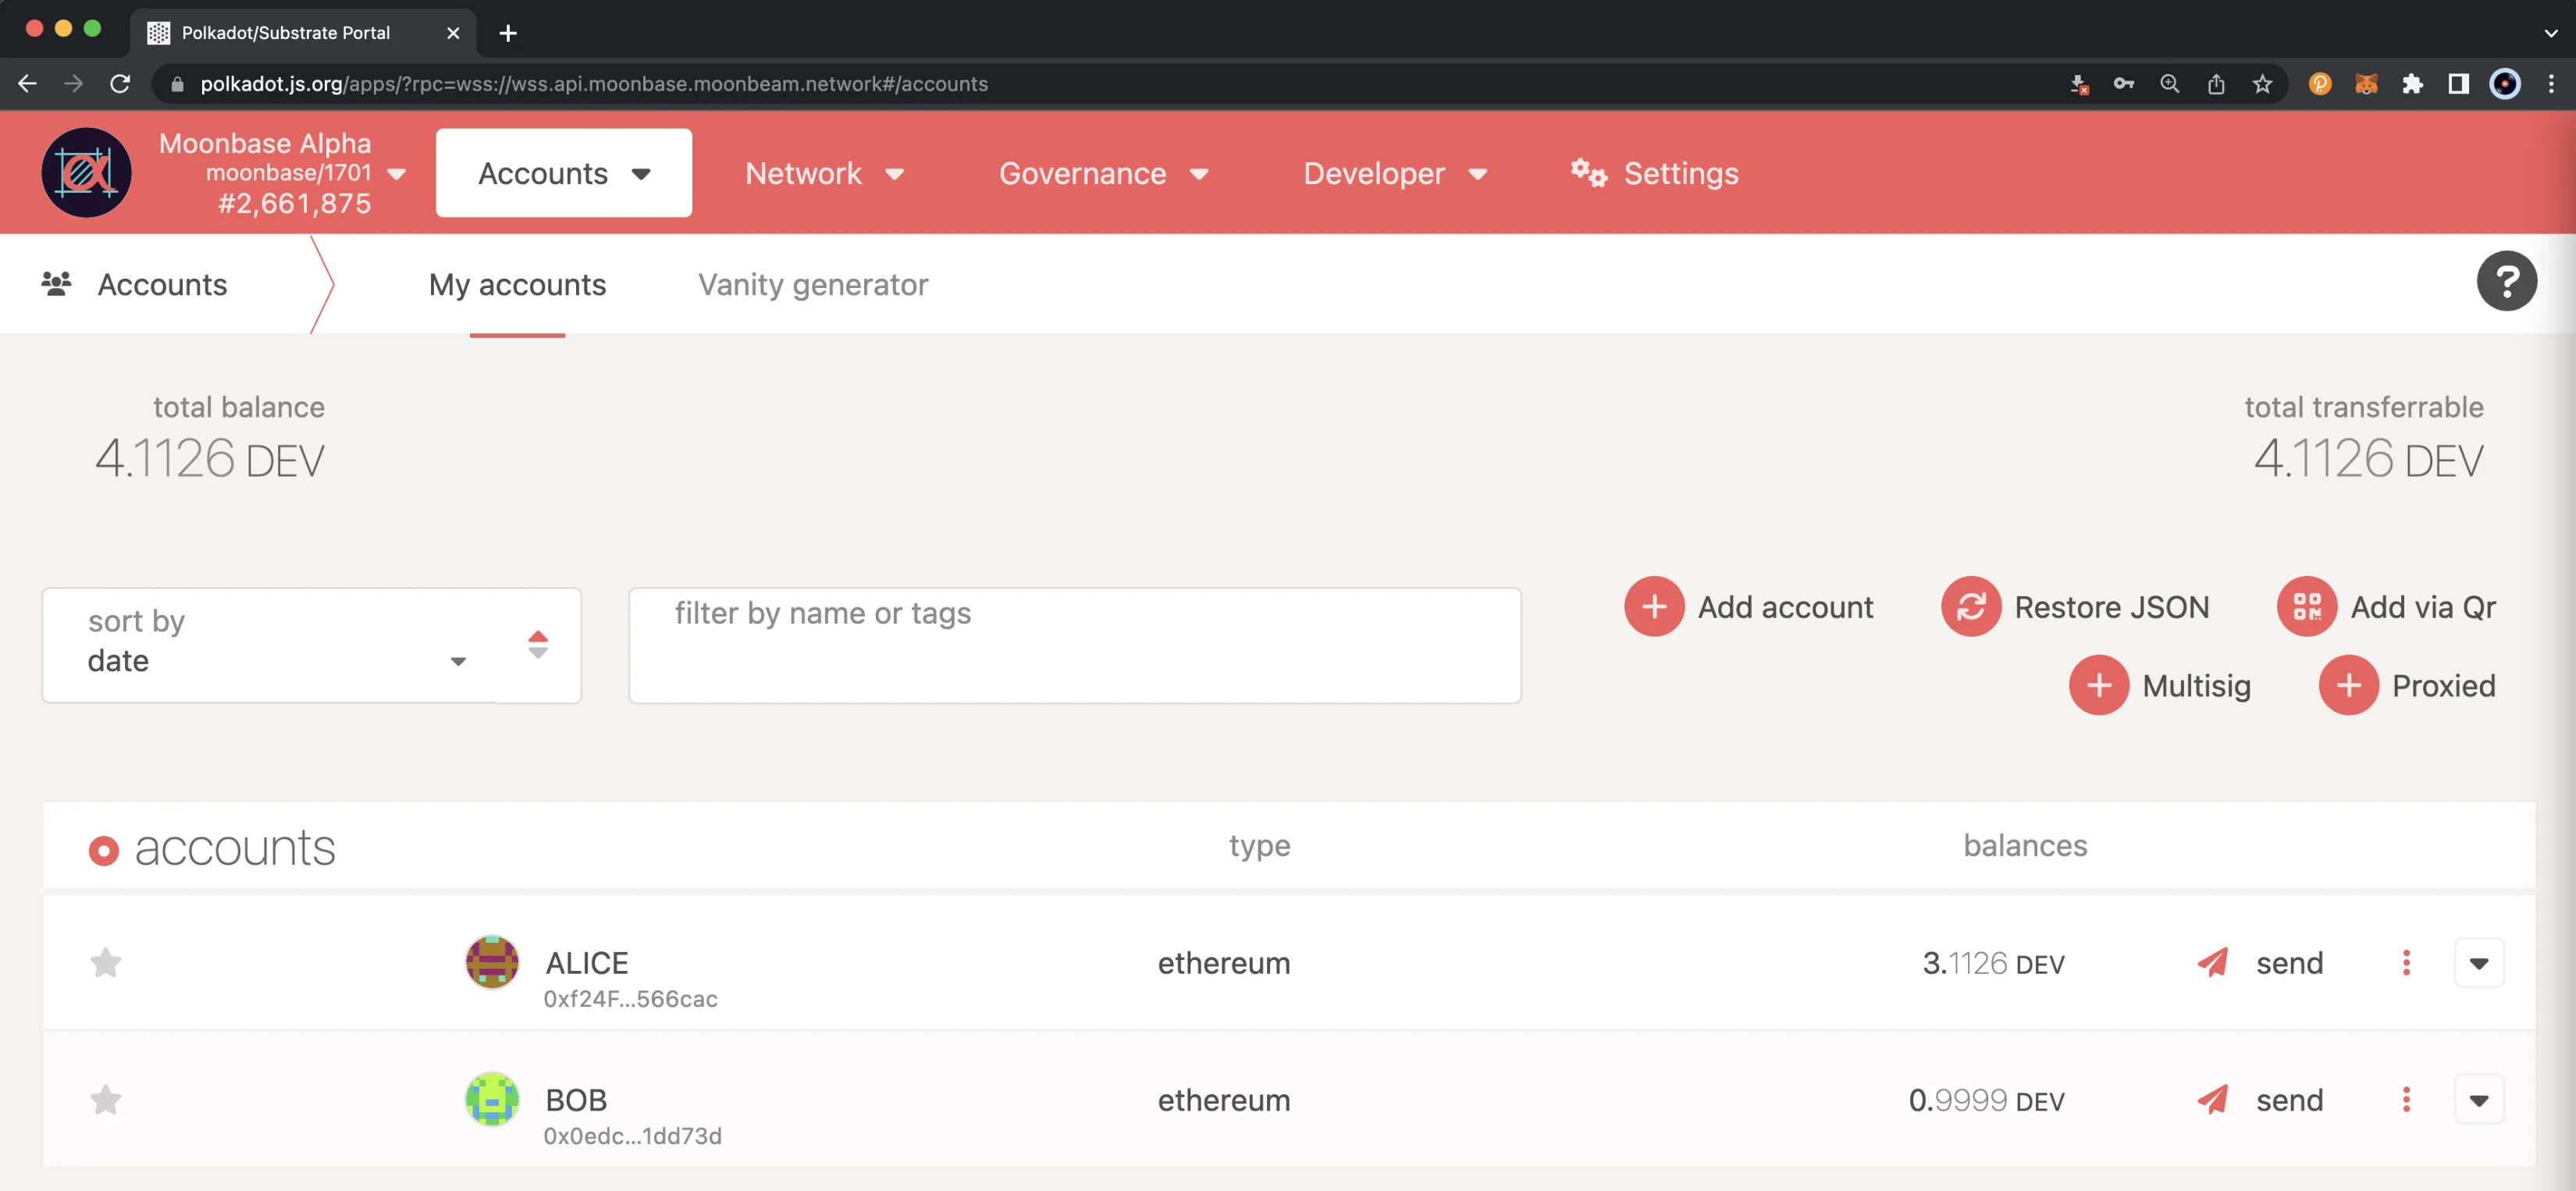
To finish the wizard, you can set an account name and password. After a confirmation message, you should see in the main Accounts tab the address with the corresponding balance: in this case, Bob's address. Moreover, you can overlay the MetaMask extension to see that both balances are the same.
Send a Transaction Through Substrate's API
Now, to demonstrate the potential of Moonbeam's unified accounts scheme, you can make a transfer through the Substrate API using Polkadot.js Apps. Remember that you are interacting with Substrate using an Ethereum-style H160 address. To do so, you can import another account.
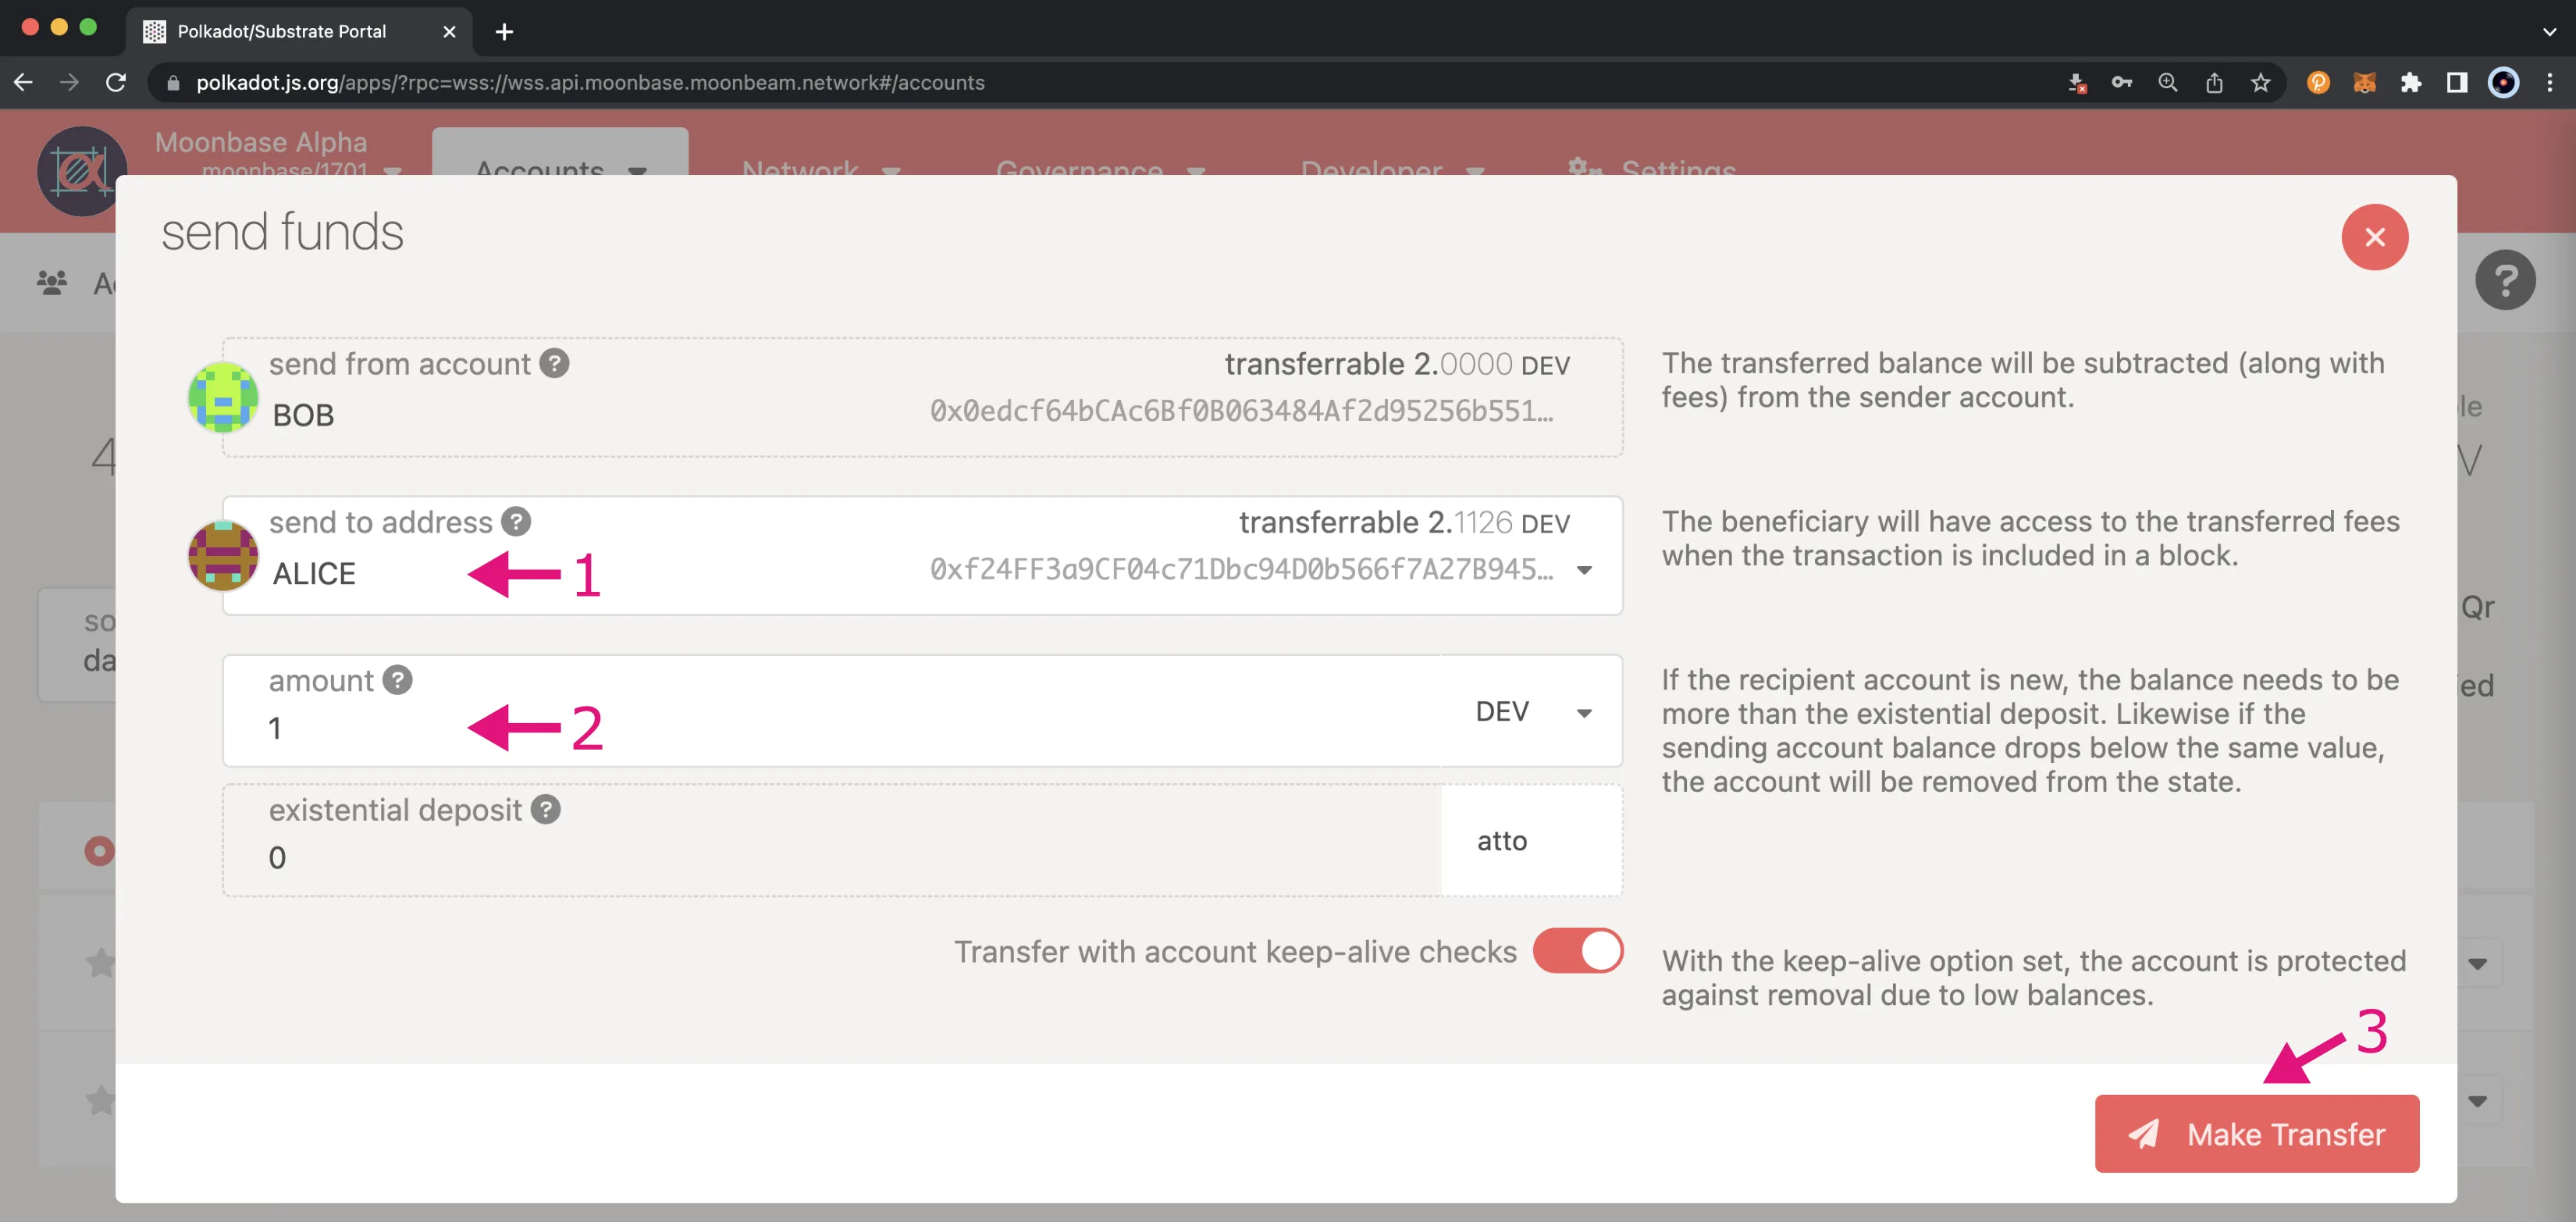
Next, click on Bob's send button, which opens another wizard that guides you through the process of sending a transaction.
- Set the send to address
- Enter the amount to send, which for this example is 1 DEV token
- When ready, click on the Make Transfer button
Then you'll be prompted to enter your password and sign and submit the transaction. Once the transaction is confirmed, you should see the balances updated for each account.
And that is it! We are excited about being able to support H160 accounts in Polkadot.js Apps, as we believe this will greatly enhance the user experience on the Moonbeam Network and its Ethereum compatibility features.
| Created: November 14, 2020
