Interacting with Moonbeam Using MetaMask
Introduction
Developers can leverage Moonbeam's Ethereum compatibility features to integrate tools, such as MetaMask, into their dApps. By doing so, they can use the injected library MetaMask provides to interact with the blockchain.
Currently, MetaMask can be configured to connect to a few networks: Moonbeam, Moonriver, the Moonbase Alpha TestNet, and a Moonbeam development node.
If you already have MetaMask installed, you can easily connect MetaMask to the network of your choice:
Note
MetaMask will pop up asking for permission to add a custom network. Once you approve permissions, MetaMask will switch your current network.
Learn how to integrate a Connect MetaMask button into your dApp, so that users can connect to Moonbase Alpha with a simple click of a button. The guide can also be adapted for the other Moonbeam-based networks.
Install the MetaMask Extension
First, you'll start with a fresh and default MetaMask installation from the Chrome store. After downloading, installing, and initializing the extension, follow the Get Started guide. In there, you need to create a wallet, set a password, and store your secret backup phrase (this gives direct access to your funds, so make sure to store these in a secure place).
Setup a Wallet
After installing MetaMask, the setup will automatically open a new task with a welcome screen. Here, you are offered two options:
- Create a new wallet - you'll go through some steps to get a new seed phrase. Ensure you store this phrase securely and you don't share it publicly
- Import an existing wallet - you already have a seed phrase stored, and you want to restore an account from that recovery phrase

Once you've clicked on the option that adapts to your needs, follow the steps, and you should be all setup.
Note
Multiple accounts can be derived from a seed phrase by changing what is known as the address index. By default, when creating or importing an account from the seed phrase, you get the account with the address index 0. You can get the other indexes by just adding new accounts in the main Metamask screen.
Import Accounts
Once you've created a wallet or imported an existing one, you can also import any account into MetaMask if you hold the private keys.
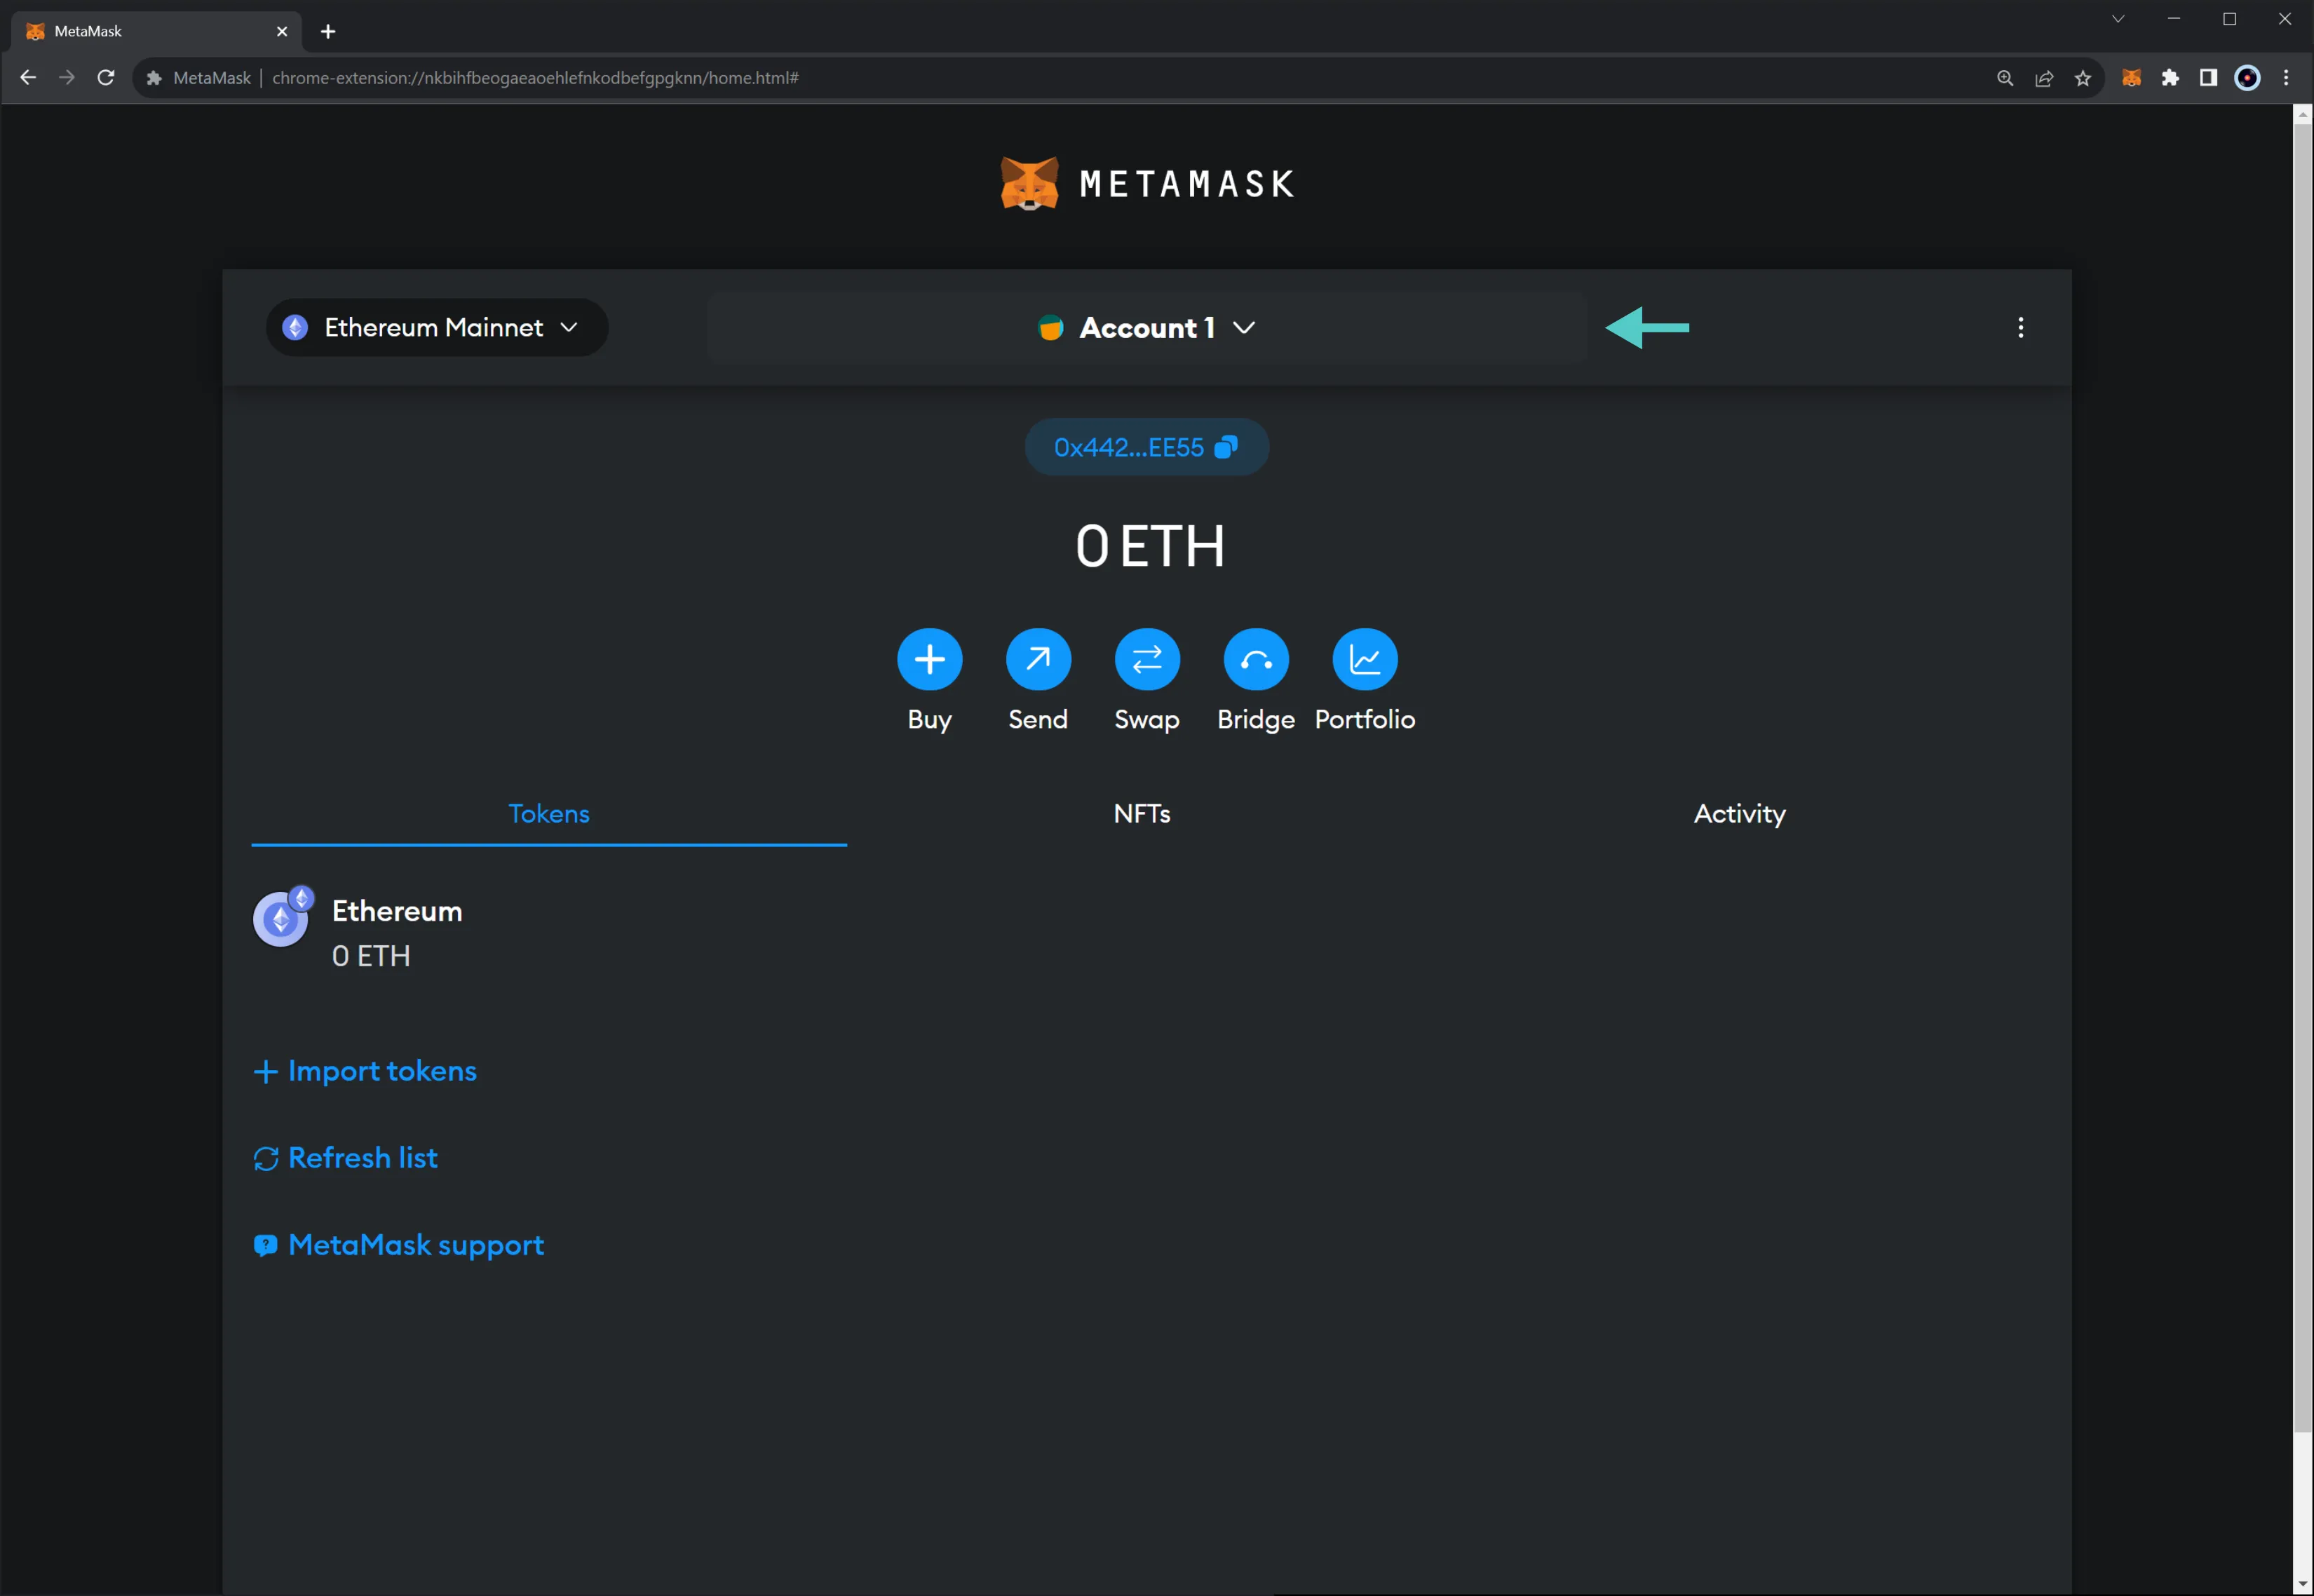
For this example, you'll use private keys from the development account. Click the account switcher button to import an account using its private keys. That is where it says Account 1.
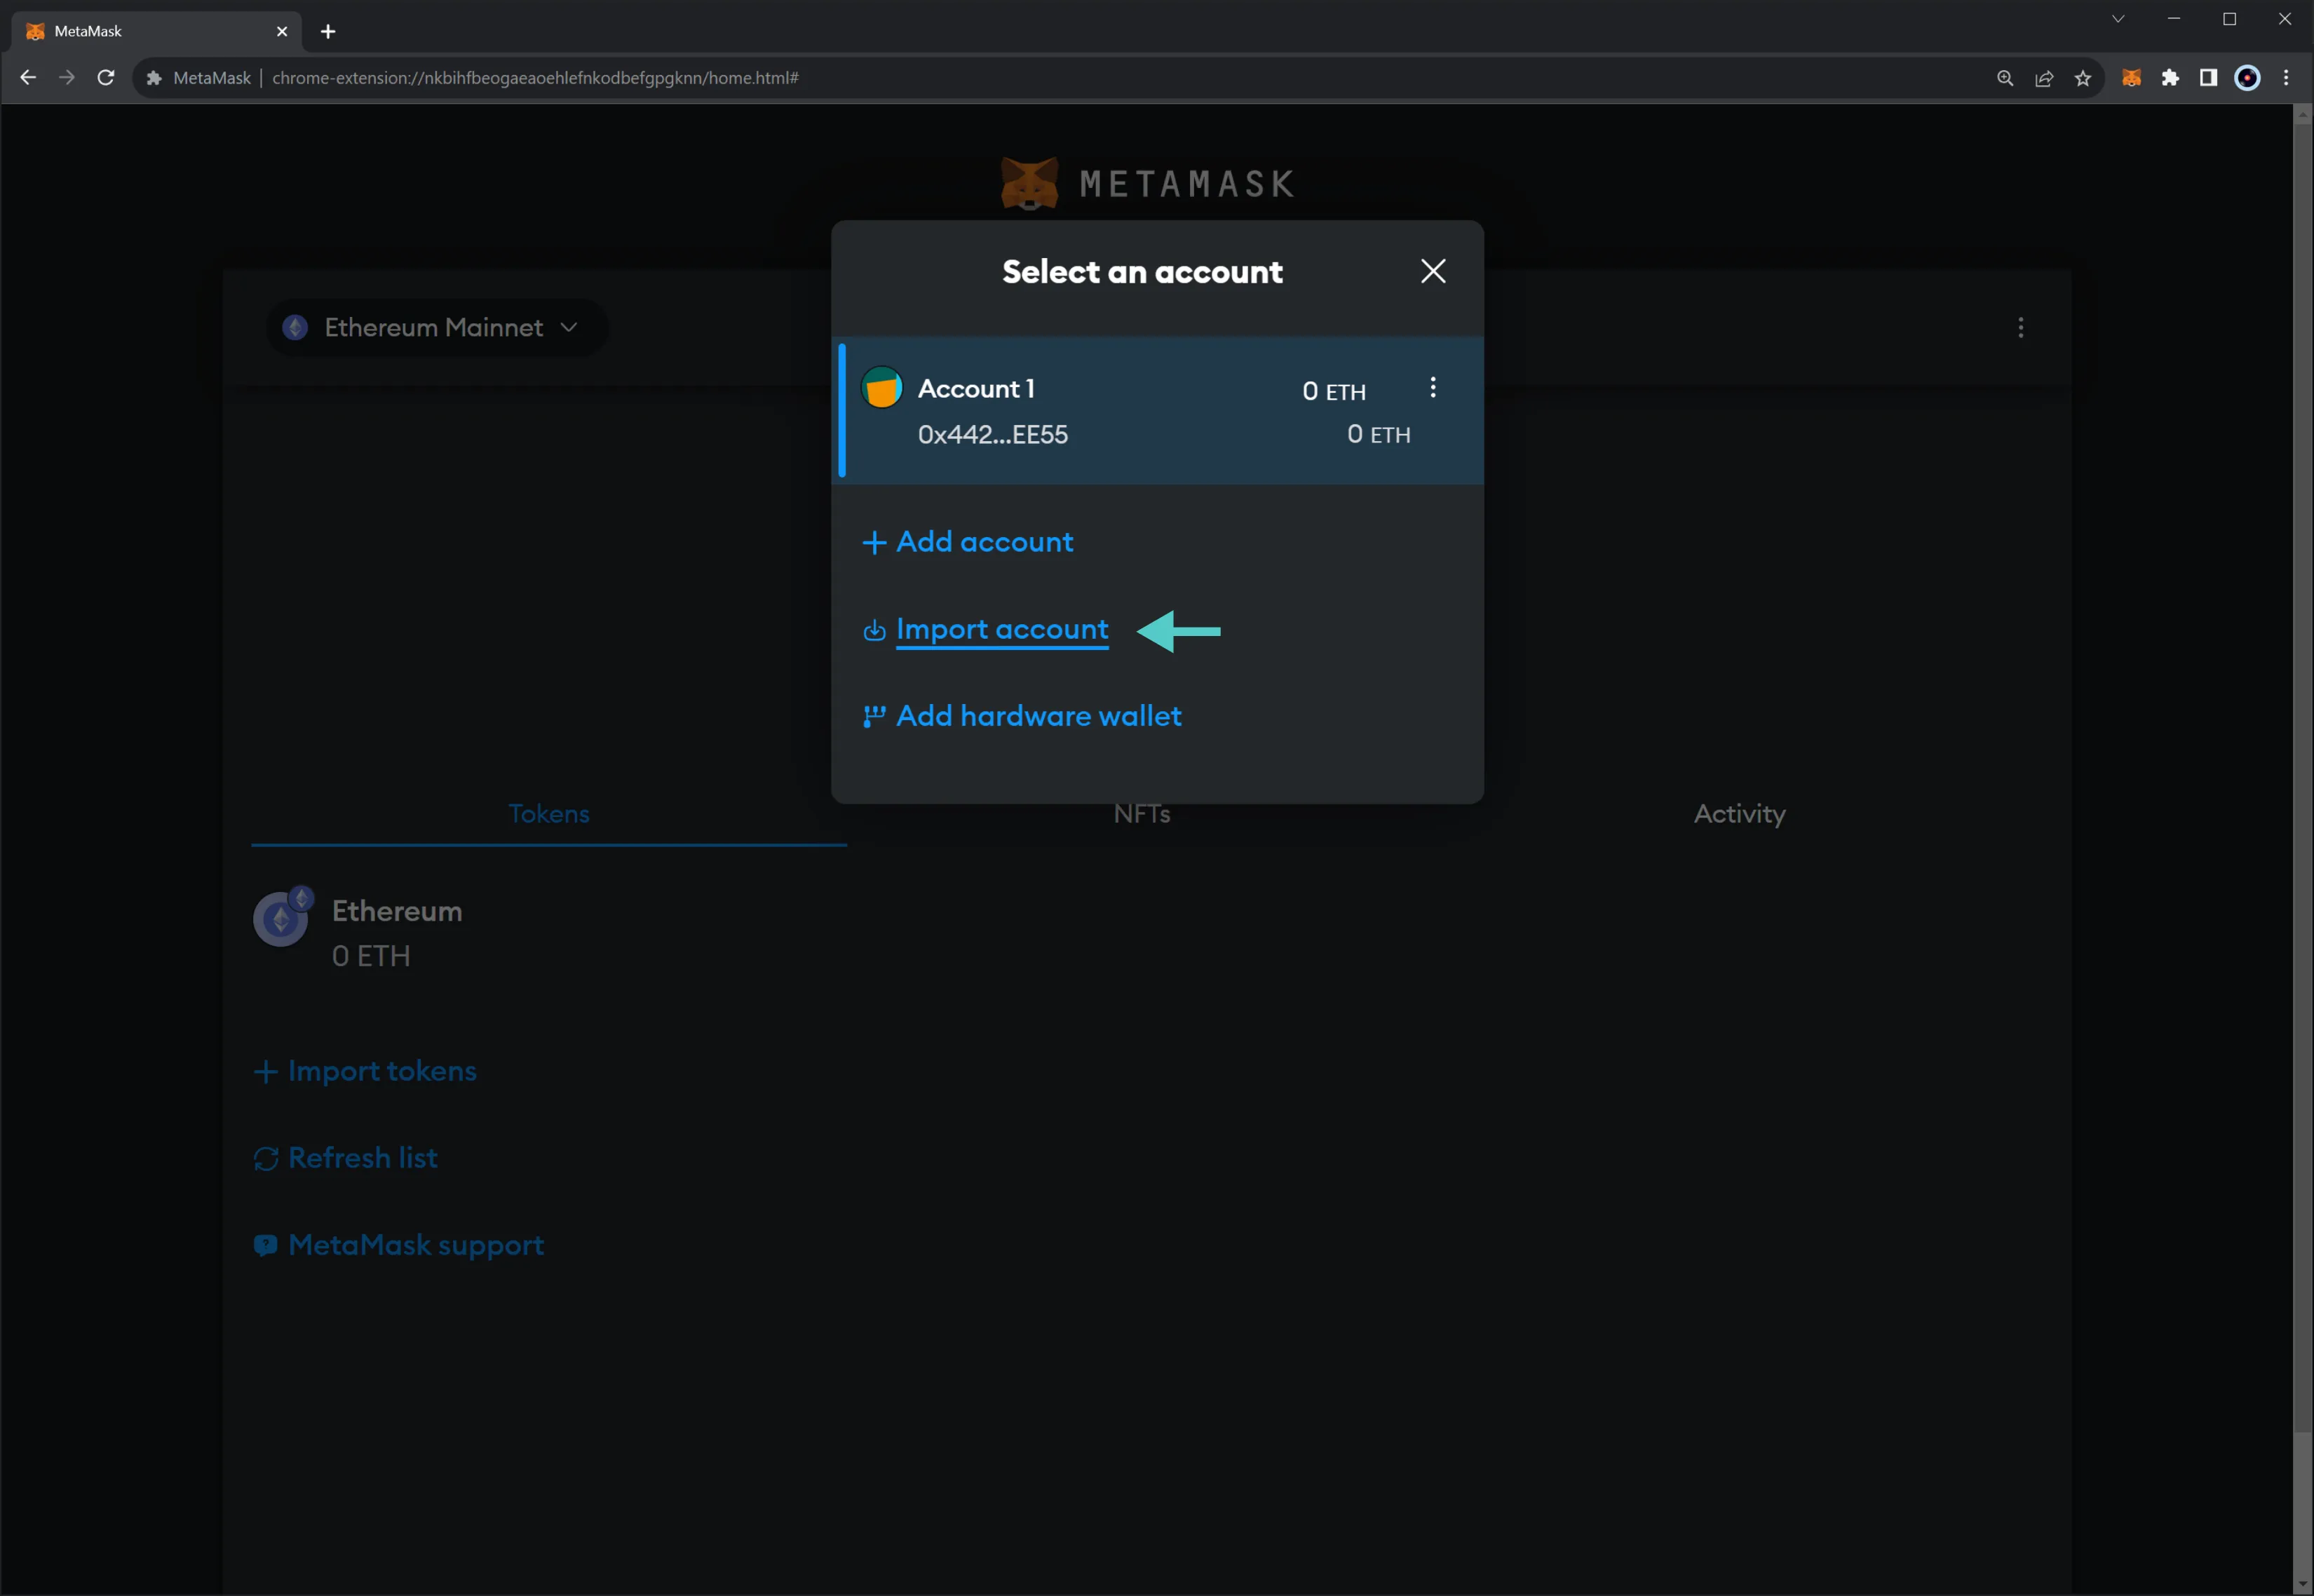
Next, click on Import Account.
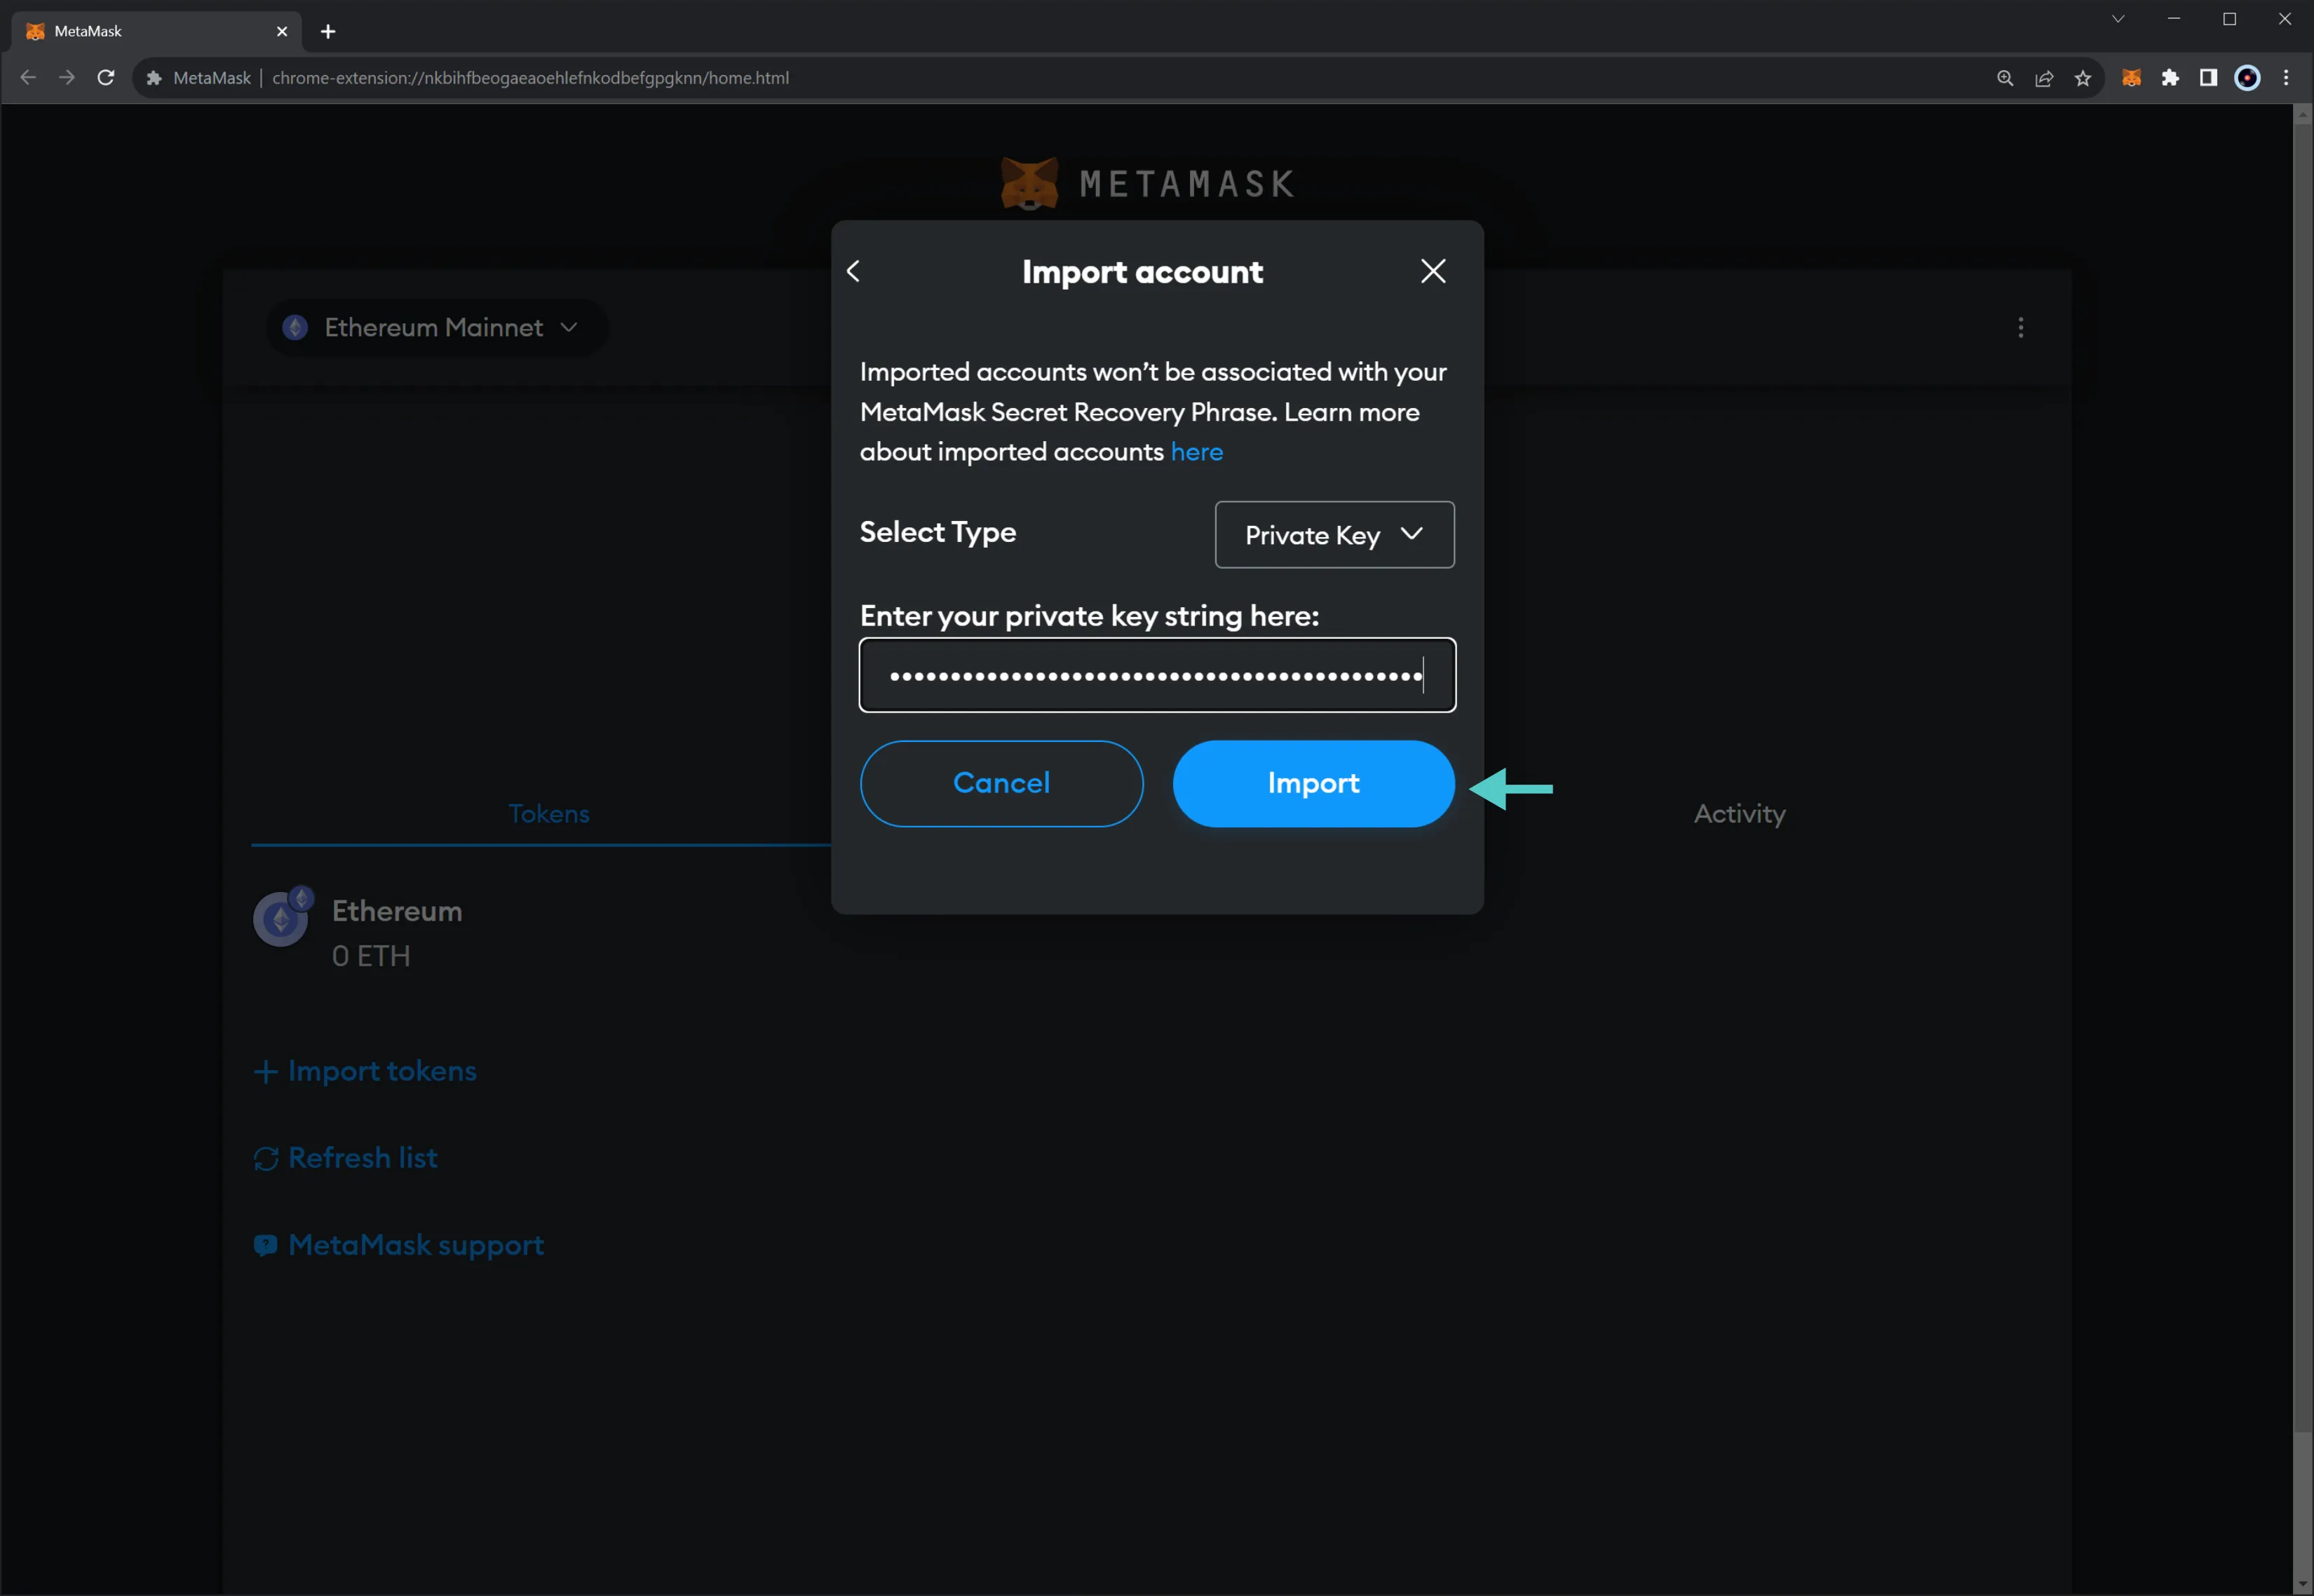
Finally, enter the private keys of the account you are trying to import. For example, you can use one of the accounts prefunded in the Moonbeam development node. This guide uses Gerald's key. Once you've entered the private key, click on Import.
Development account addresses and private keys
-
Alith:
- Public Address:
0xf24FF3a9CF04c71Dbc94D0b566f7A27B94566cac - Private Key:
0x5fb92d6e98884f76de468fa3f6278f8807c48bebc13595d45af5bdc4da702133
- Public Address:
-
Baltathar:
- Public Address:
0x3Cd0A705a2DC65e5b1E1205896BaA2be8A07c6e0 - Private Key:
0x8075991ce870b93a8870eca0c0f91913d12f47948ca0fd25b49c6fa7cdbeee8b
- Public Address:
-
Charleth:
- Public Address:
0x798d4Ba9baf0064Ec19eB4F0a1a45785ae9D6DFc - Private Key:
0x0b6e18cafb6ed99687ec547bd28139cafdd2bffe70e6b688025de6b445aa5c5b
- Public Address:
-
Dorothy:
- Public Address:
0x773539d4Ac0e786233D90A233654ccEE26a613D9 - Private Key:
0x39539ab1876910bbf3a223d84a29e28f1cb4e2e456503e7e91ed39b2e7223d68
- Public Address:
-
Ethan:
- Public Address:
0xFf64d3F6efE2317EE2807d223a0Bdc4c0c49dfDB - Private Key:
0x7dce9bc8babb68fec1409be38c8e1a52650206a7ed90ff956ae8a6d15eeaaef4
- Public Address:
-
Faith:
- Public Address:
0xC0F0f4ab324C46e55D02D0033343B4Be8A55532d - Private Key:
0xb9d2ea9a615f3165812e8d44de0d24da9bbd164b65c4f0573e1ce2c8dbd9c8df
- Public Address:
-
Goliath:
- Public Address:
0x7BF369283338E12C90514468aa3868A551AB2929 - Private Key:
0x96b8a38e12e1a31dee1eab2fffdf9d9990045f5b37e44d8cc27766ef294acf18
- Public Address:
-
Heath:
- Public Address:
0x931f3600a299fd9B24cEfB3BfF79388D19804BeA - Private Key:
0x0d6dcaaef49272a5411896be8ad16c01c35d6f8c18873387b71fbc734759b0ab
- Public Address:
-
Ida:
- Public Address:
0xC41C5F1123ECCd5ce233578B2e7ebd5693869d73 - Private Key:
0x4c42532034540267bf568198ccec4cb822a025da542861fcb146a5fab6433ff8
- Public Address:
-
Judith:
- Public Address:
0x2898FE7a42Be376C8BC7AF536A940F7Fd5aDd423 - Private Key:
0x94c49300a58d576011096bcb006aa06f5a91b34b4383891e8029c21dc39fbb8b
- Public Address:
- Gerald:
- Public Address:
0x6Be02d1d3665660d22FF9624b7BE0551ee1Ac91b - Private Key:
0x99b3c12287537e38c90a9219d4cb074a89a16e9cdb20bf85728ebd97c343e342
- Public Address:
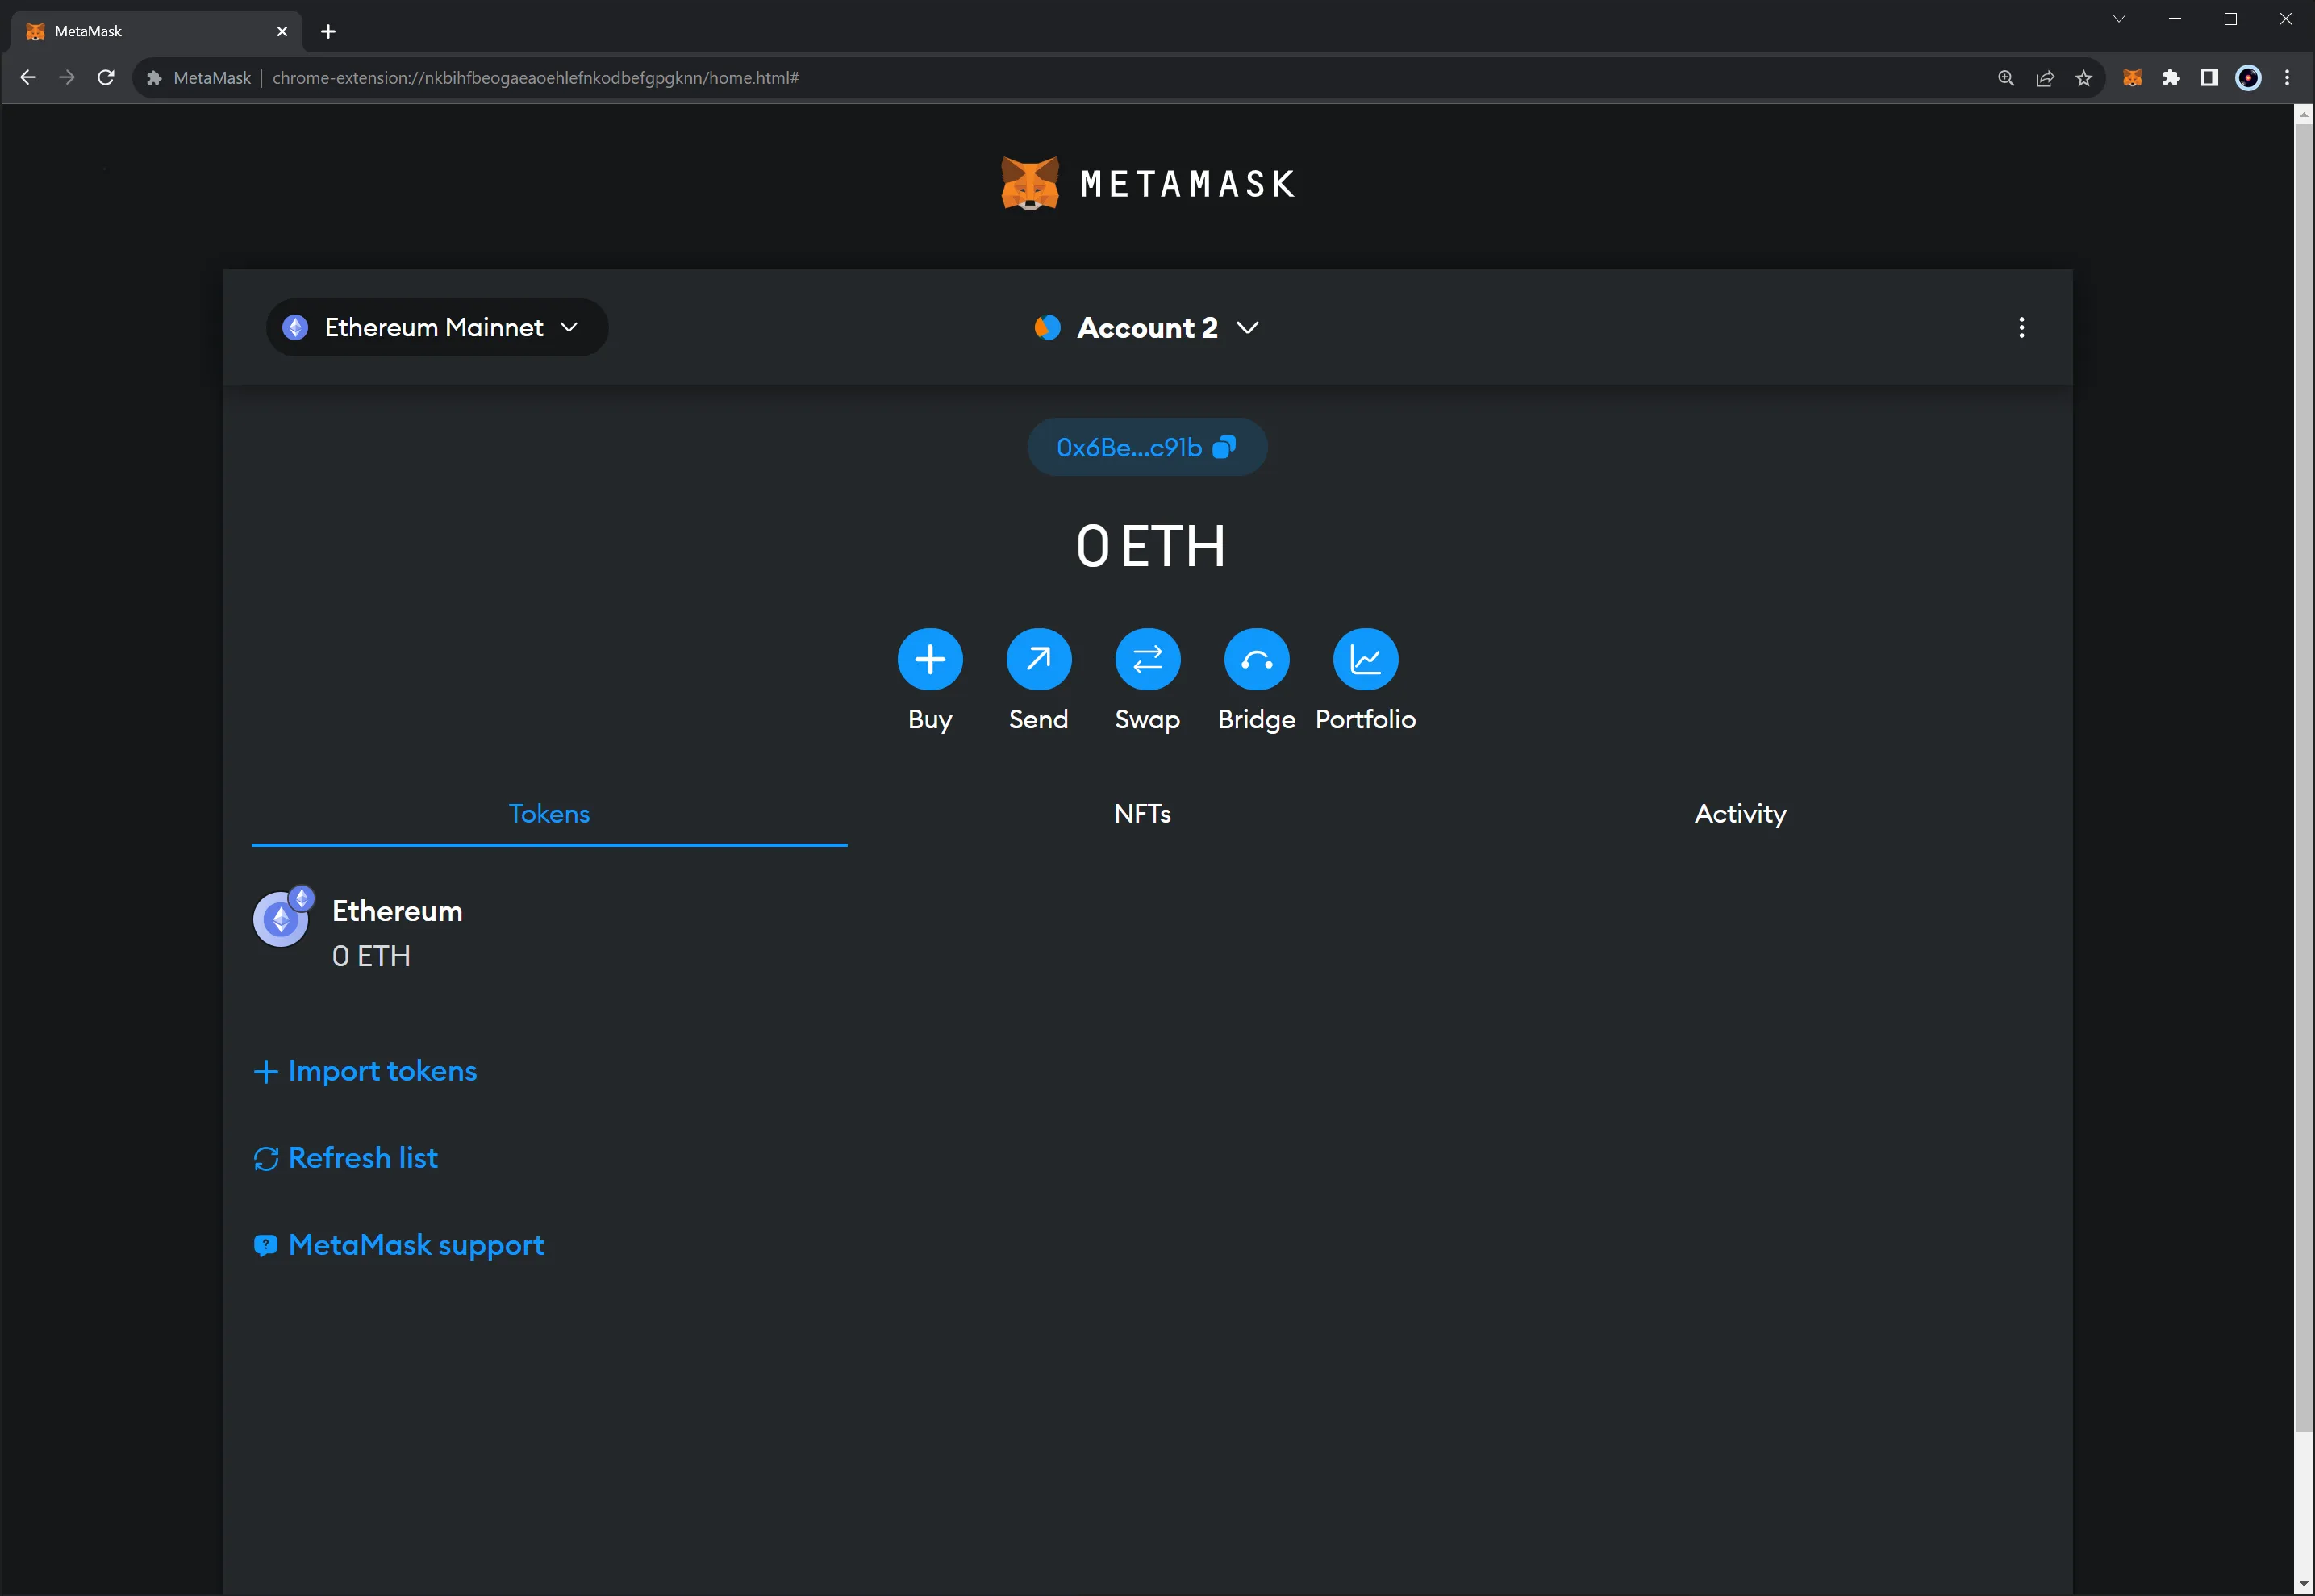
You should end up with an imported Account 2 that looks like this:
Connect MetaMask to Moonbeam
Once you have MetaMask installed and have created or imported an account, you can connect it to any Moonbeam-based network. To do so, take the following steps:
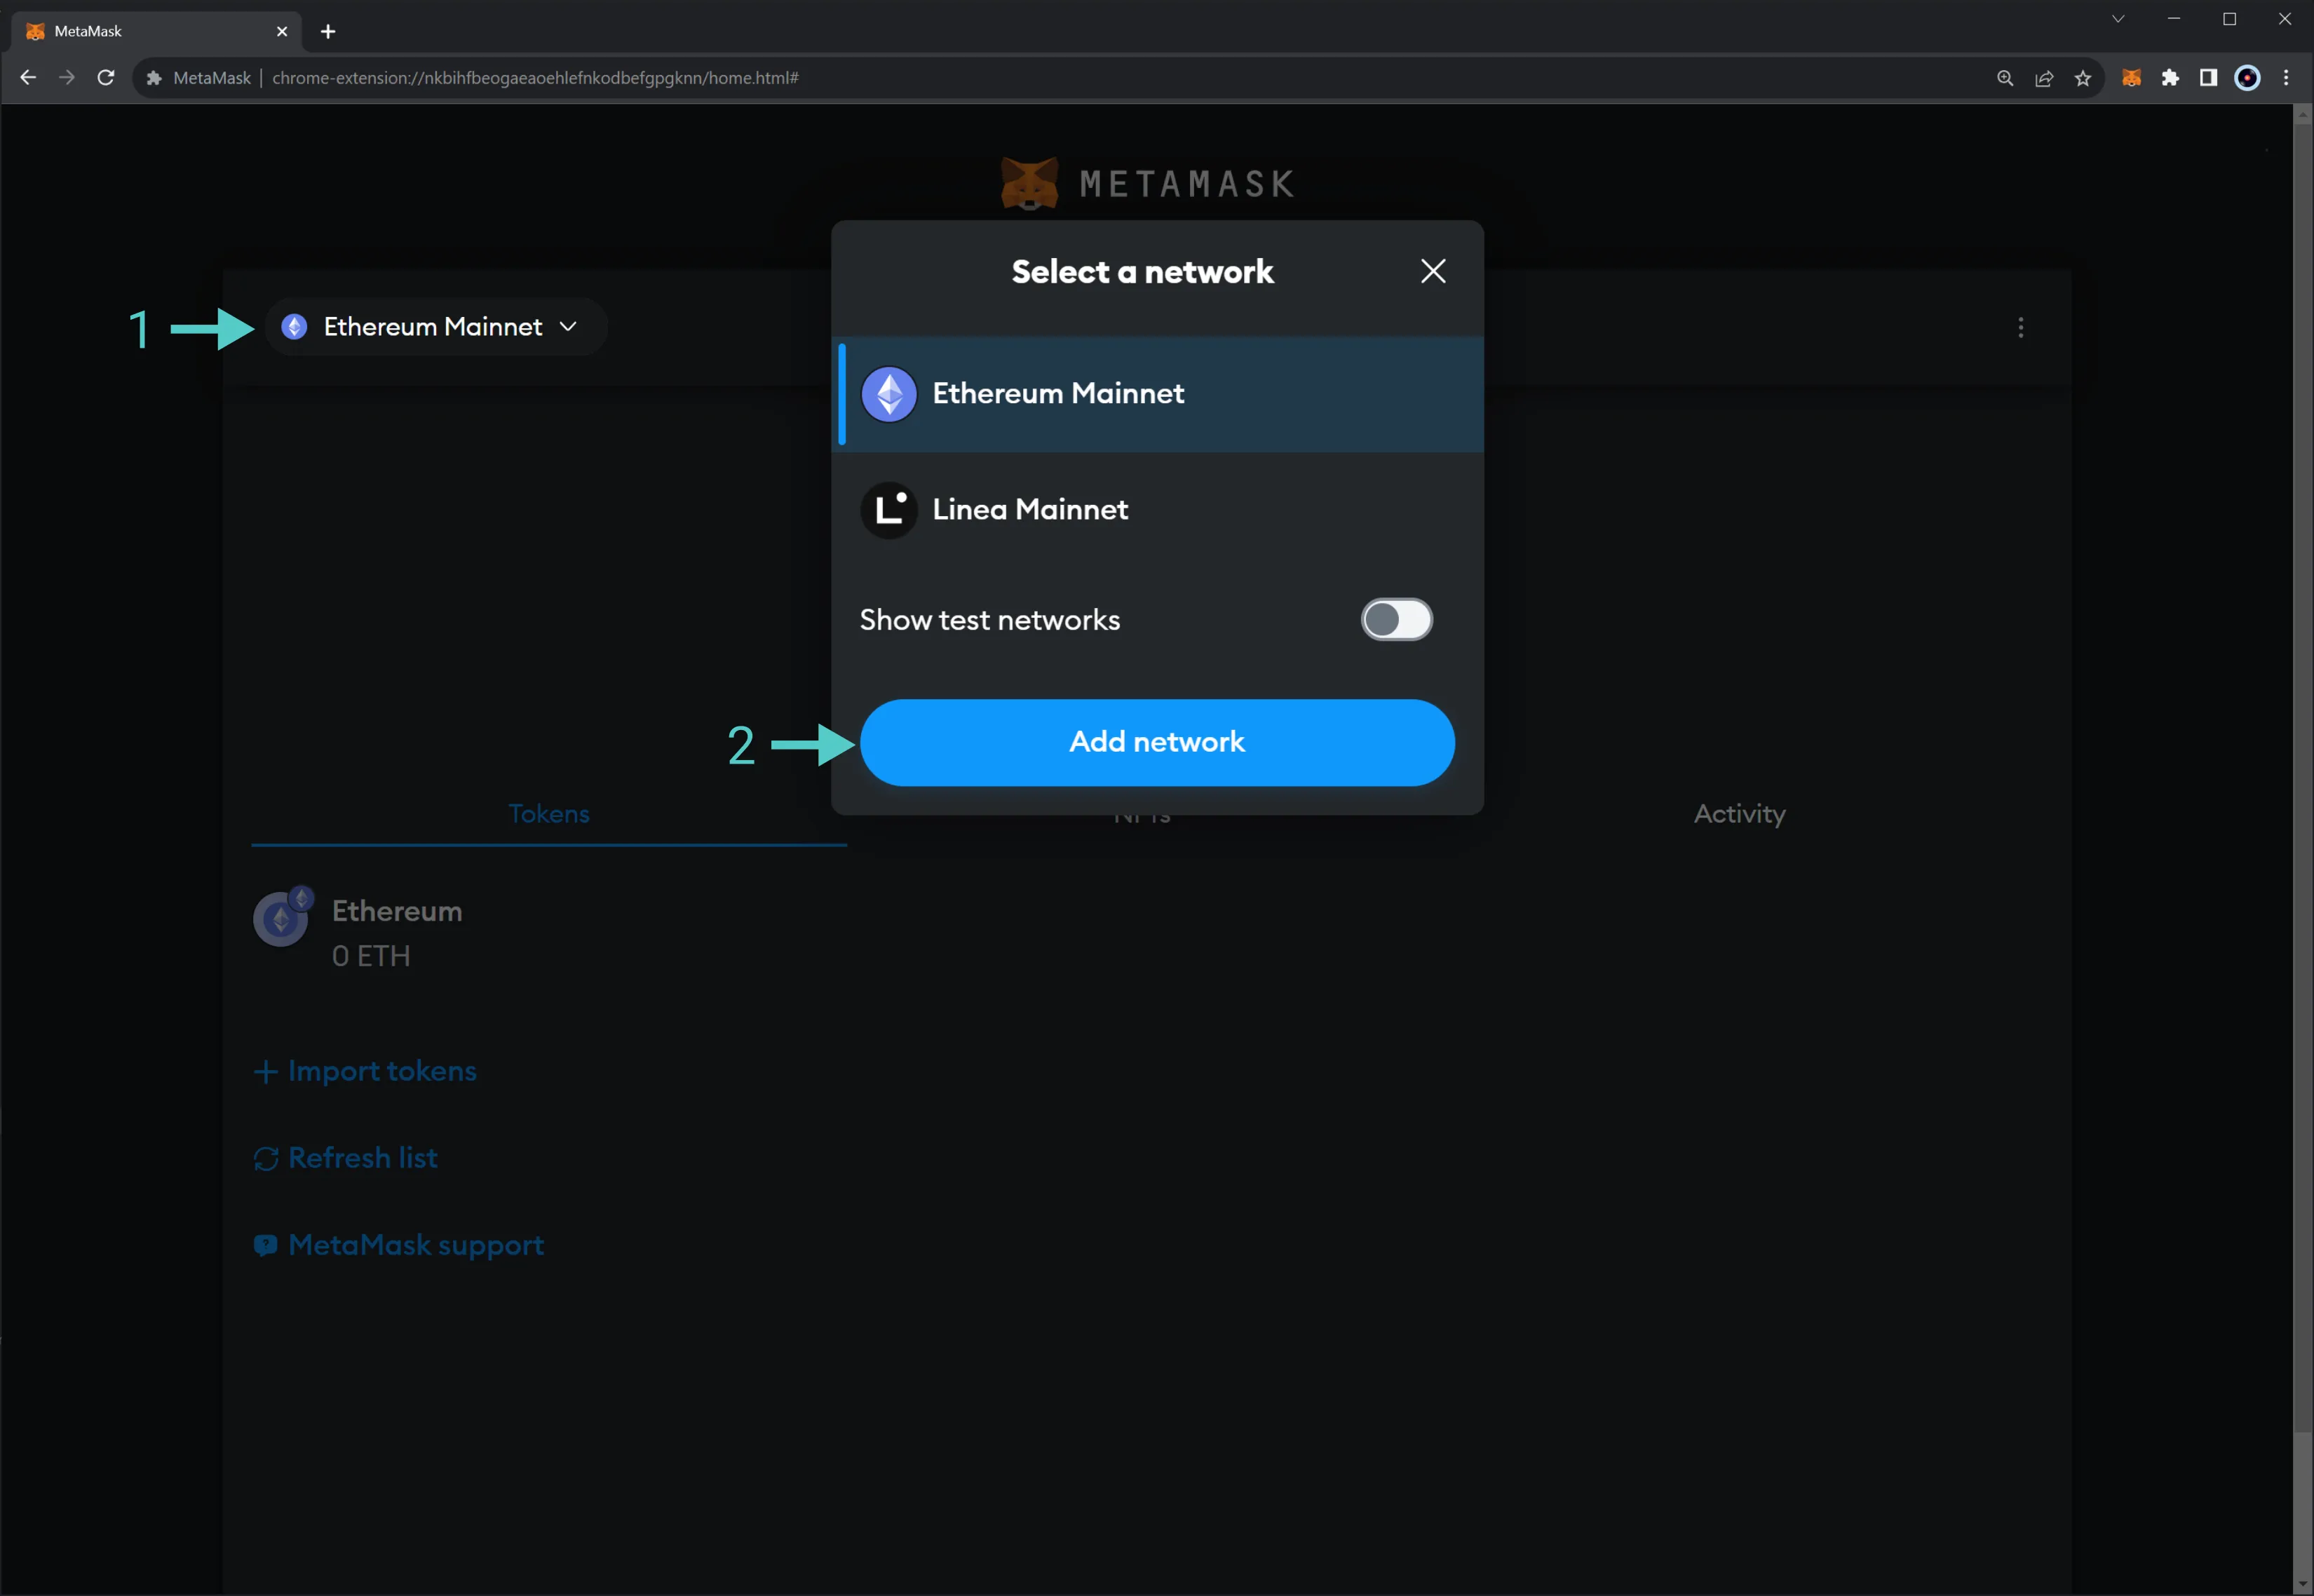
- Click in the upper left network selector menu
- Select Add Network
Next, go to the bottom of the page and click on Add a network manually:
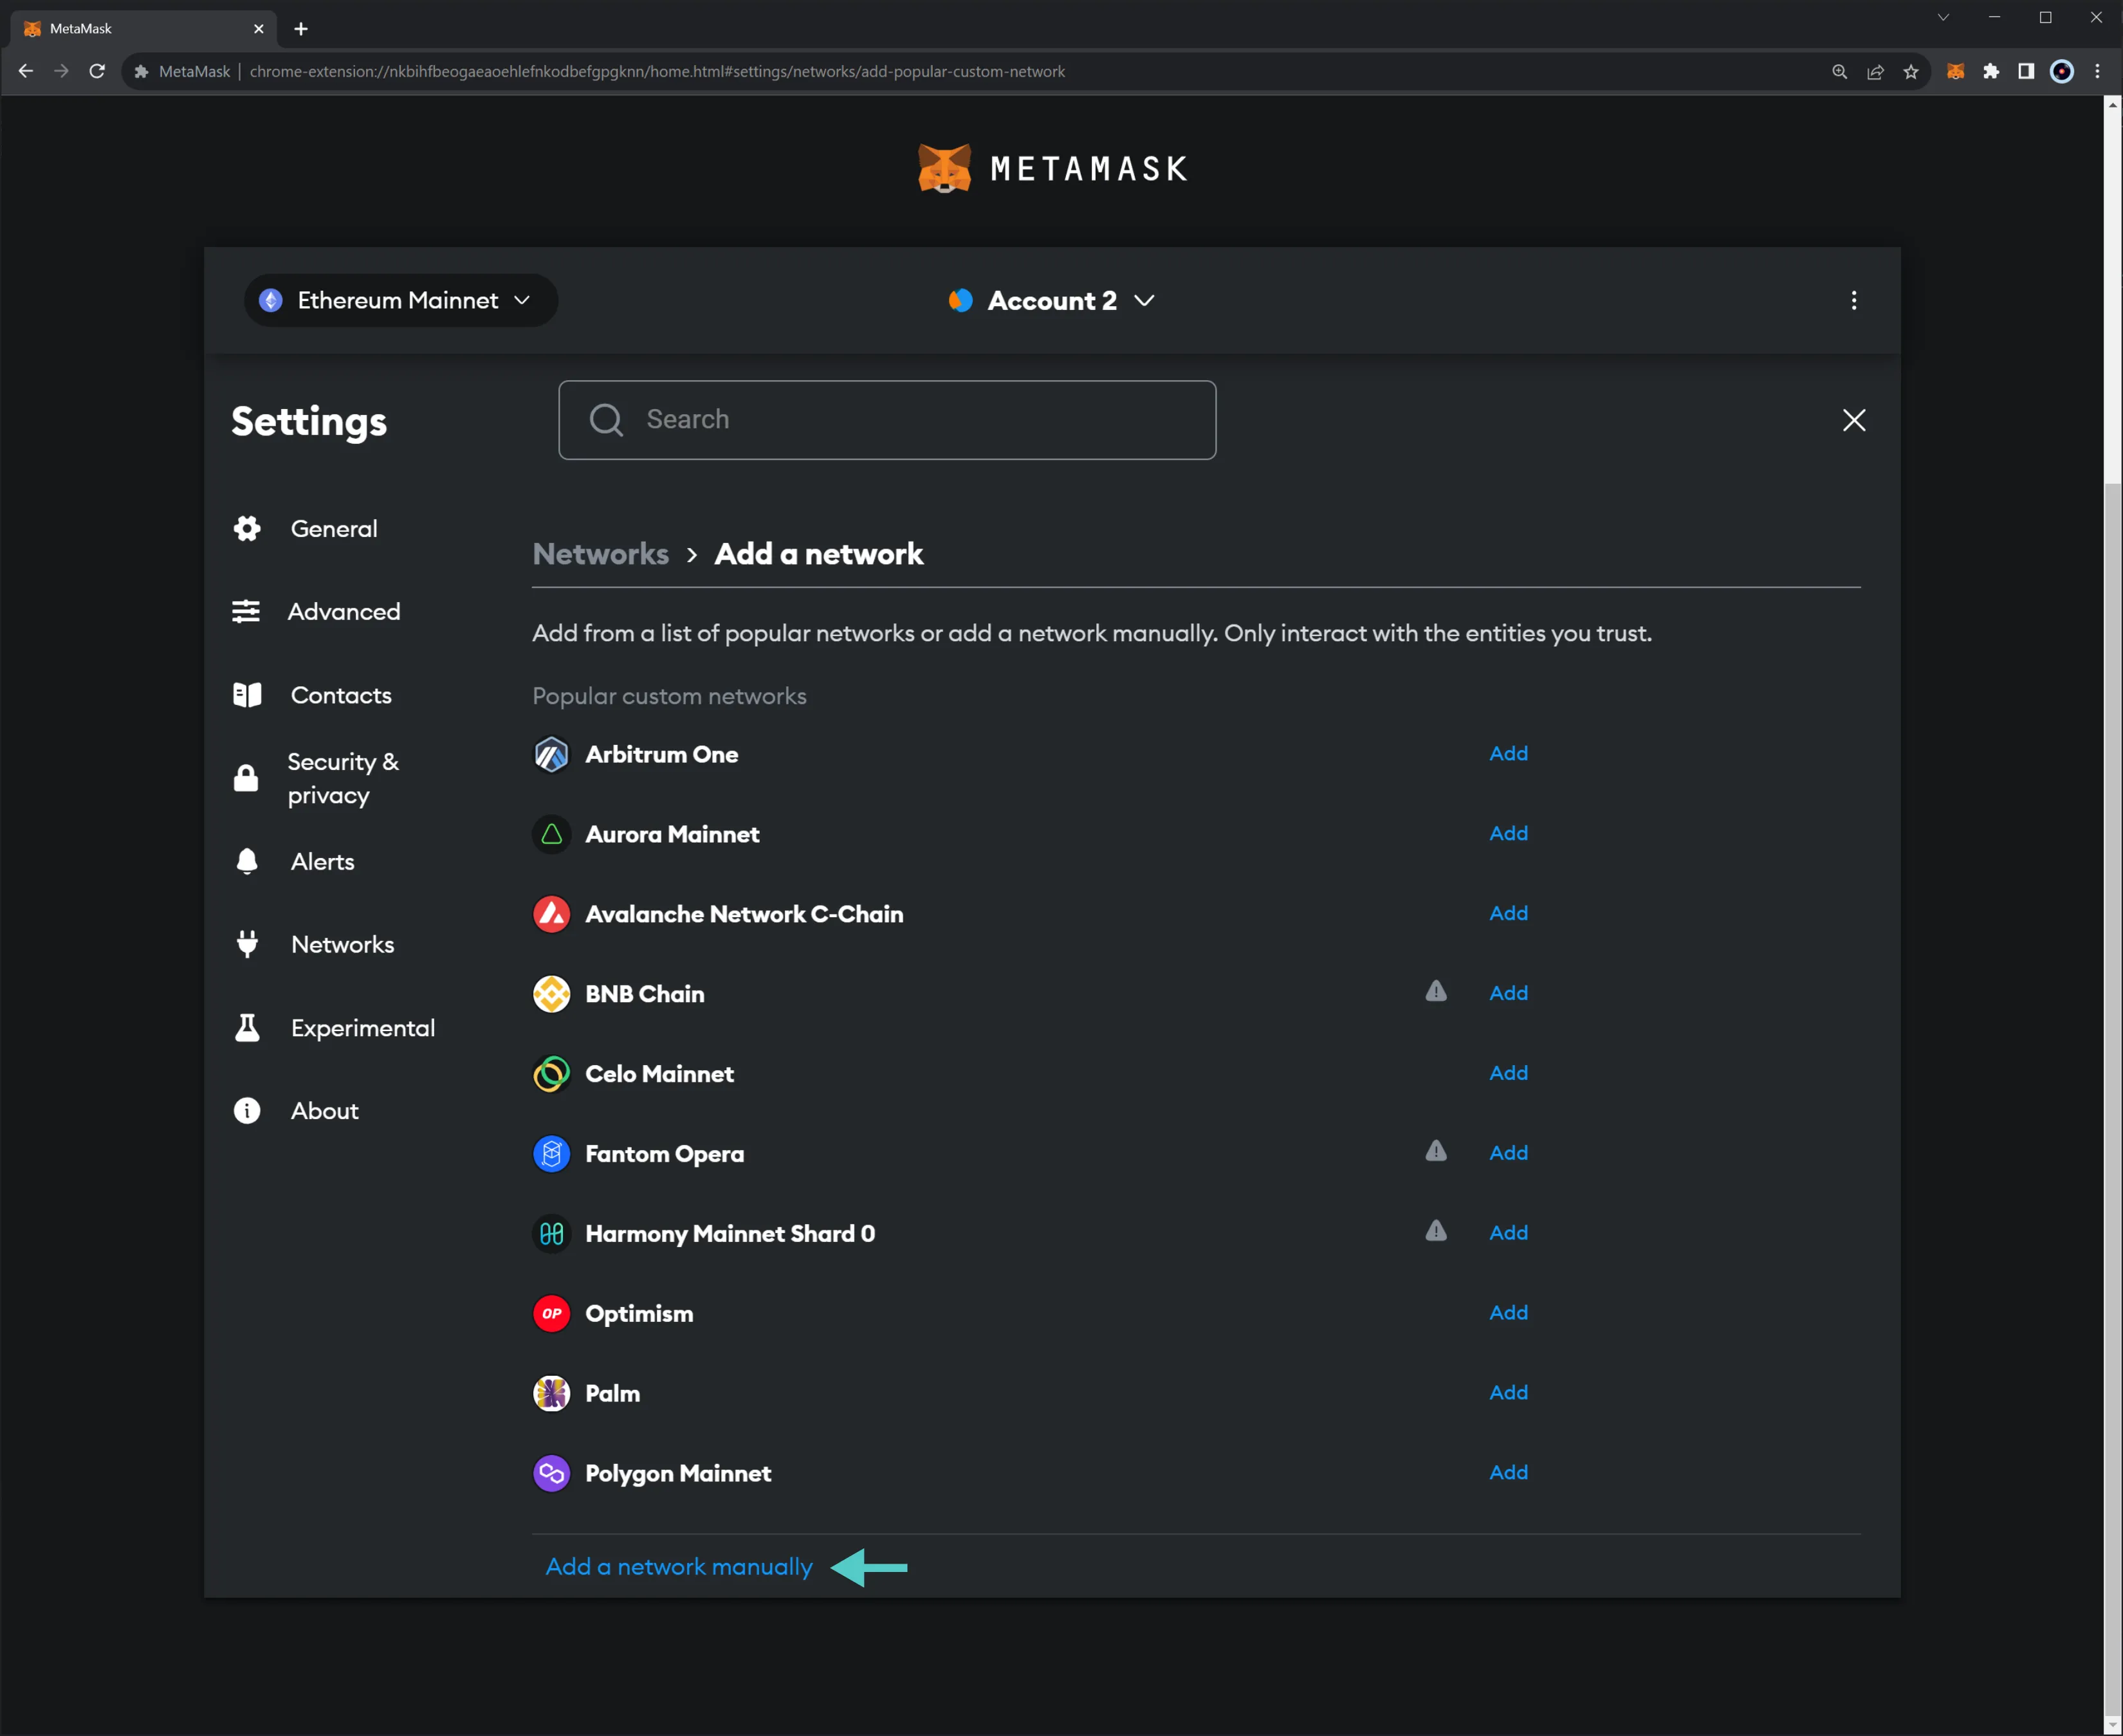
Here, you can configure MetaMask for the following networks:
| Variable | Value |
|---|---|
| Network Name | Moonbeam |
| RPC URL | https://rpc.api.moonbeam.network |
| Chain ID | 1284 (hex: 0x504) |
| Symbol (Optional) | GLMR |
| Block Explorer (Optional) | https://moonscan.io |
| Variable | Value |
|---|---|
| Network Name | Moonriver |
| RPC URL | https://rpc.api.moonriver.moonbeam.network |
| Chain ID | 1285 (hex: 0x505) |
| Symbol (Optional) | MOVR |
| Block Explorer (Optional) | https://moonriver.moonscan.io/ |
| Variable | Value |
|---|---|
| Network Name | Moonbase Alpha |
| RPC URL | https://rpc.api.moonbase.moonbeam.network |
| Chain ID | 1287 (hex: 0x507) |
| Symbol (Optional) | DEV |
| Block Explorer (Optional) | https://moonbase.moonscan.io/ |
| Variable | Value |
|---|---|
| Network Name | Moonbeam Dev |
| RPC URL | http://127.0.0.1:9944 |
| Chain ID | 1281 (hex: 0x501) |
| Symbol (Optional) | DEV |
| Block Explorer (Optional) | https://moonbeam-explorer.netlify.app/ |
To do so, fill in the following information:
- Network name - name that represents the network you are connecting to
- RPC URL - RPC endpoint of the network
- Chain ID - chain ID of the Ethereum compatible network
- Symbol - (optional) symbol of the native token of the network. For example, for Moonbeam, the value would be GLMR
- Block Explorer - (optional) URL of the block explorer
- Once you've verified all the information, click on Save

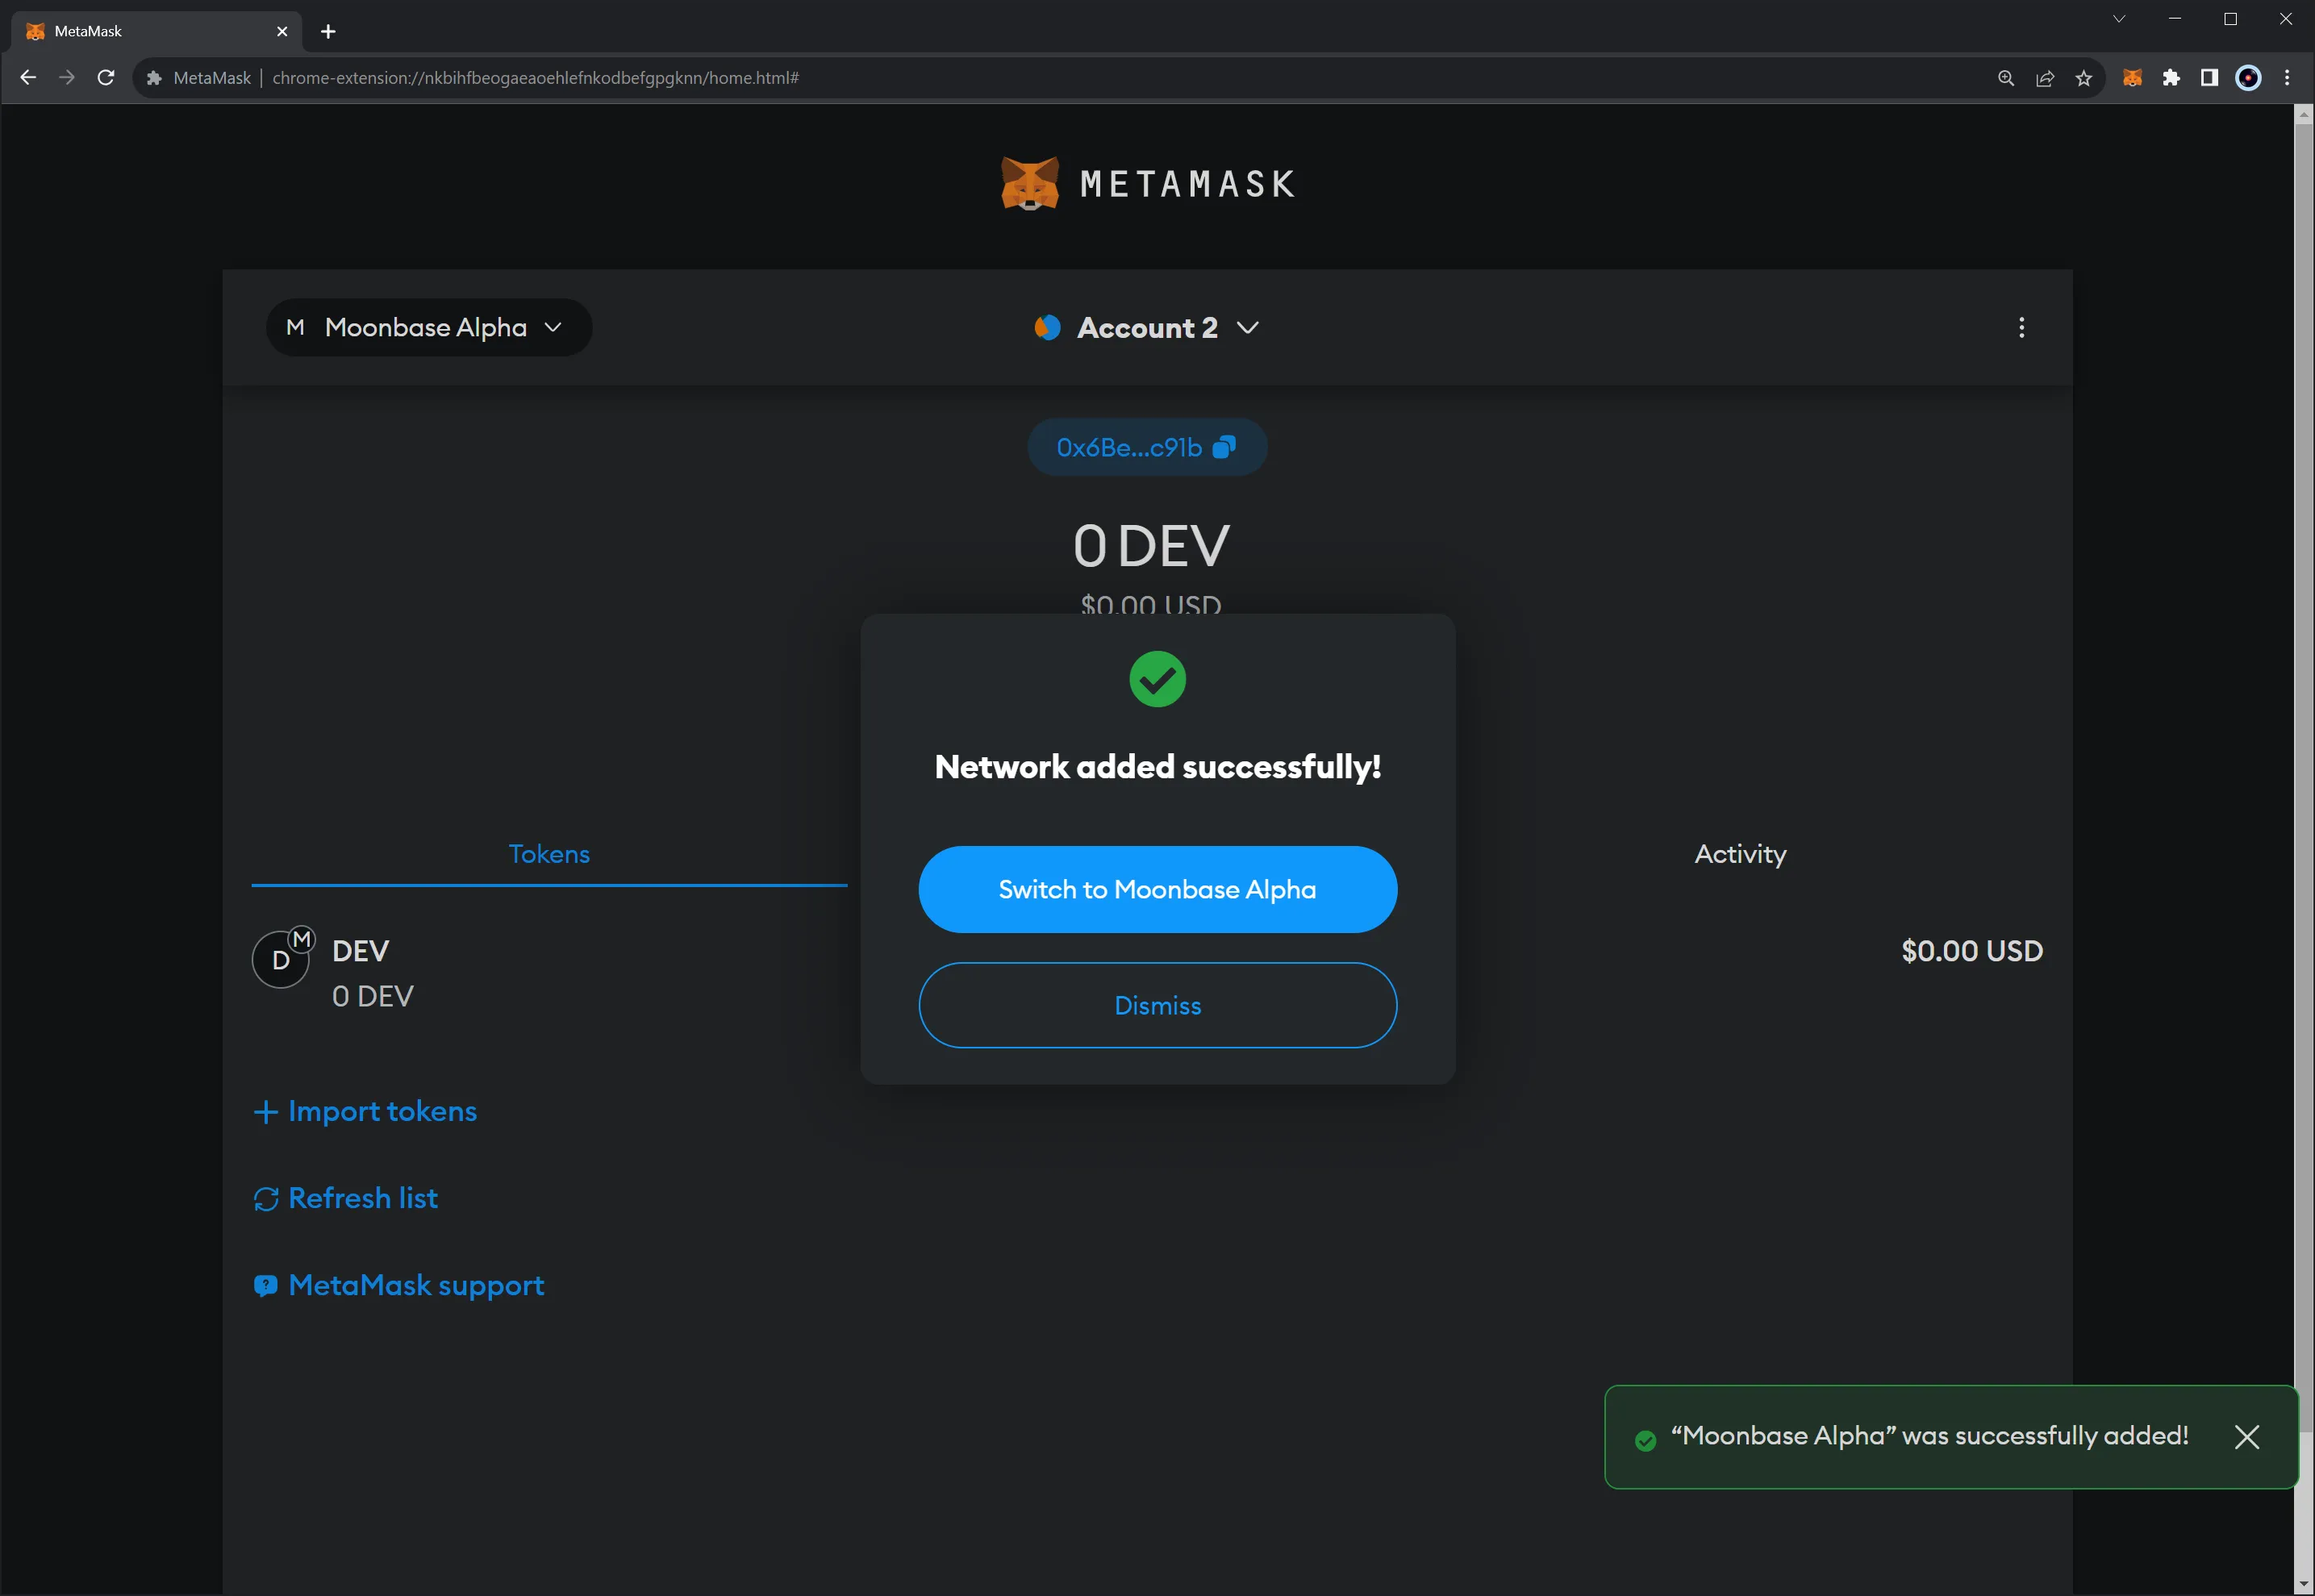
Once you've added the network, you'll be redirected to a screen stating that you've successfully added a network. Furthermore, you'll be prompted to Switch to Moonbase Alpha, the network added in this example.
Interact with the Network
Once you've connected Metamask to any Moonbeam-based network, you can start using your wallet by:
- Sending a token transfer to another address
- Adding ERC-20s to Metamask and interacting with them
- Adding ERC-721s to Metamask and interacting with them
Initiate a Transfer
This section showcases how to do a simple token transfer to another address as an example of using Metamask with Moonbeam.
To do so, take the following steps:
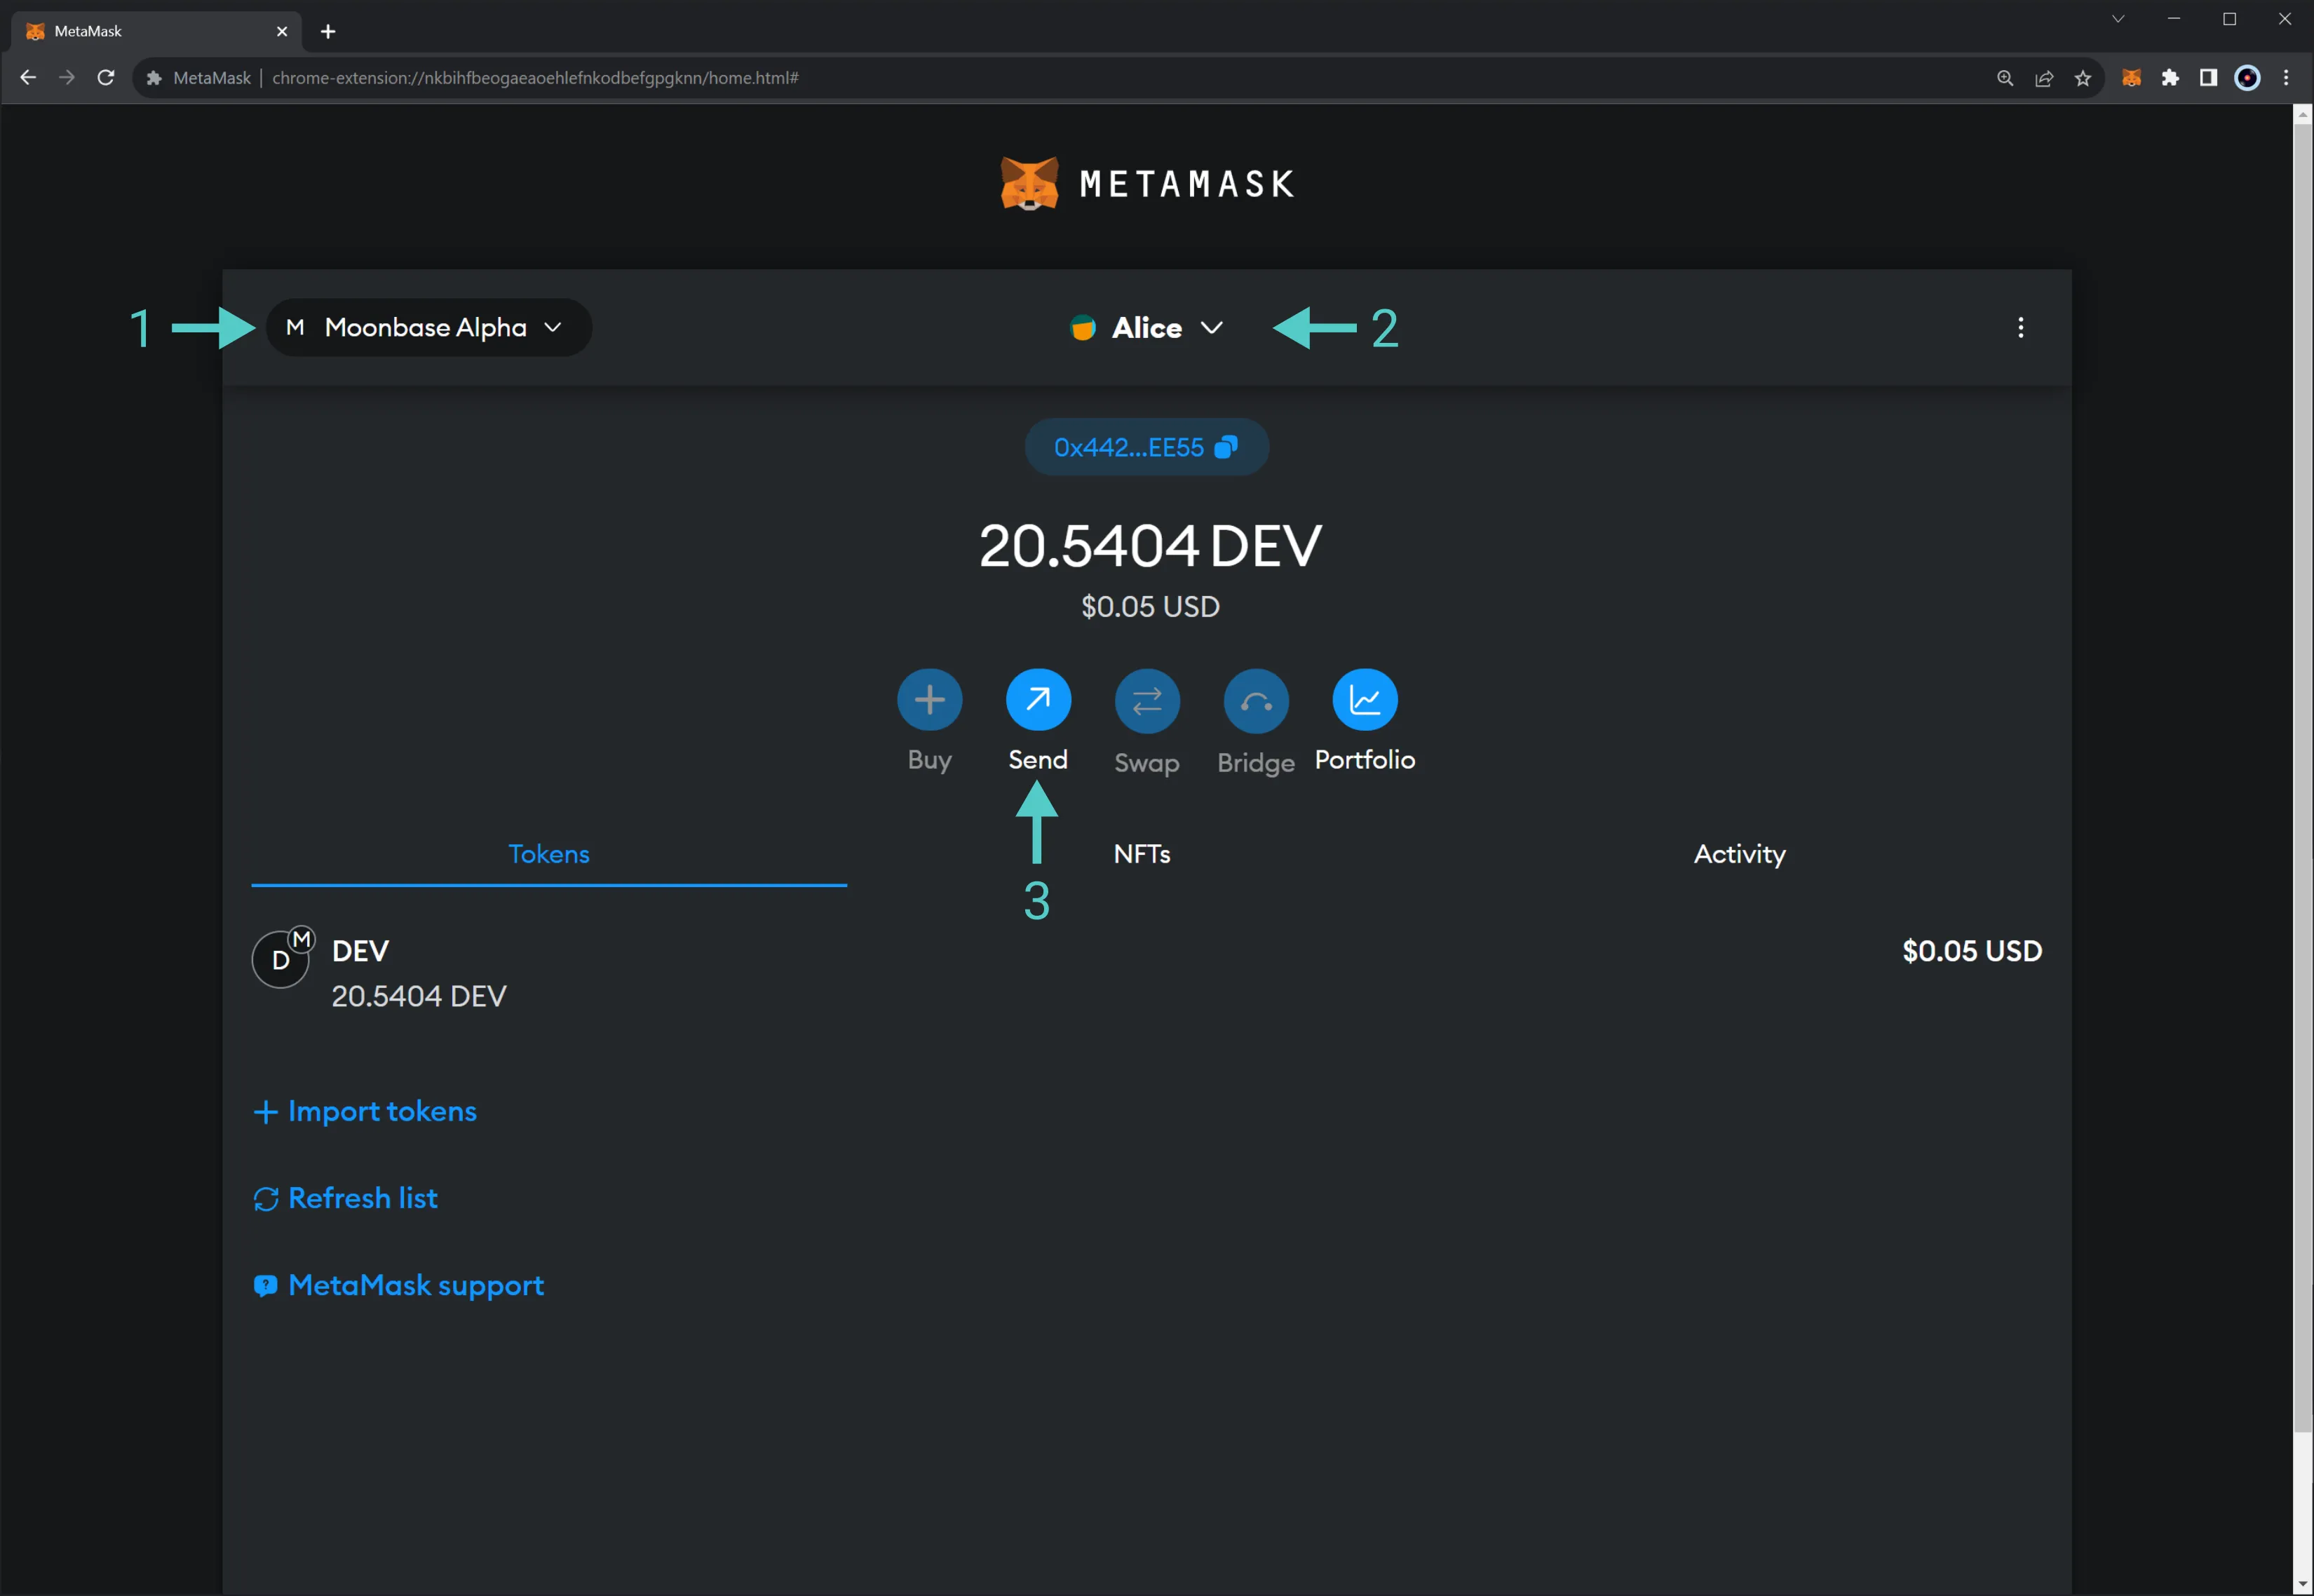
- Ensure you are connected to the correct network
- Ensure you have selected the account you want to use for the transfer
- On the main screen of your Metamask wallet, click on Send
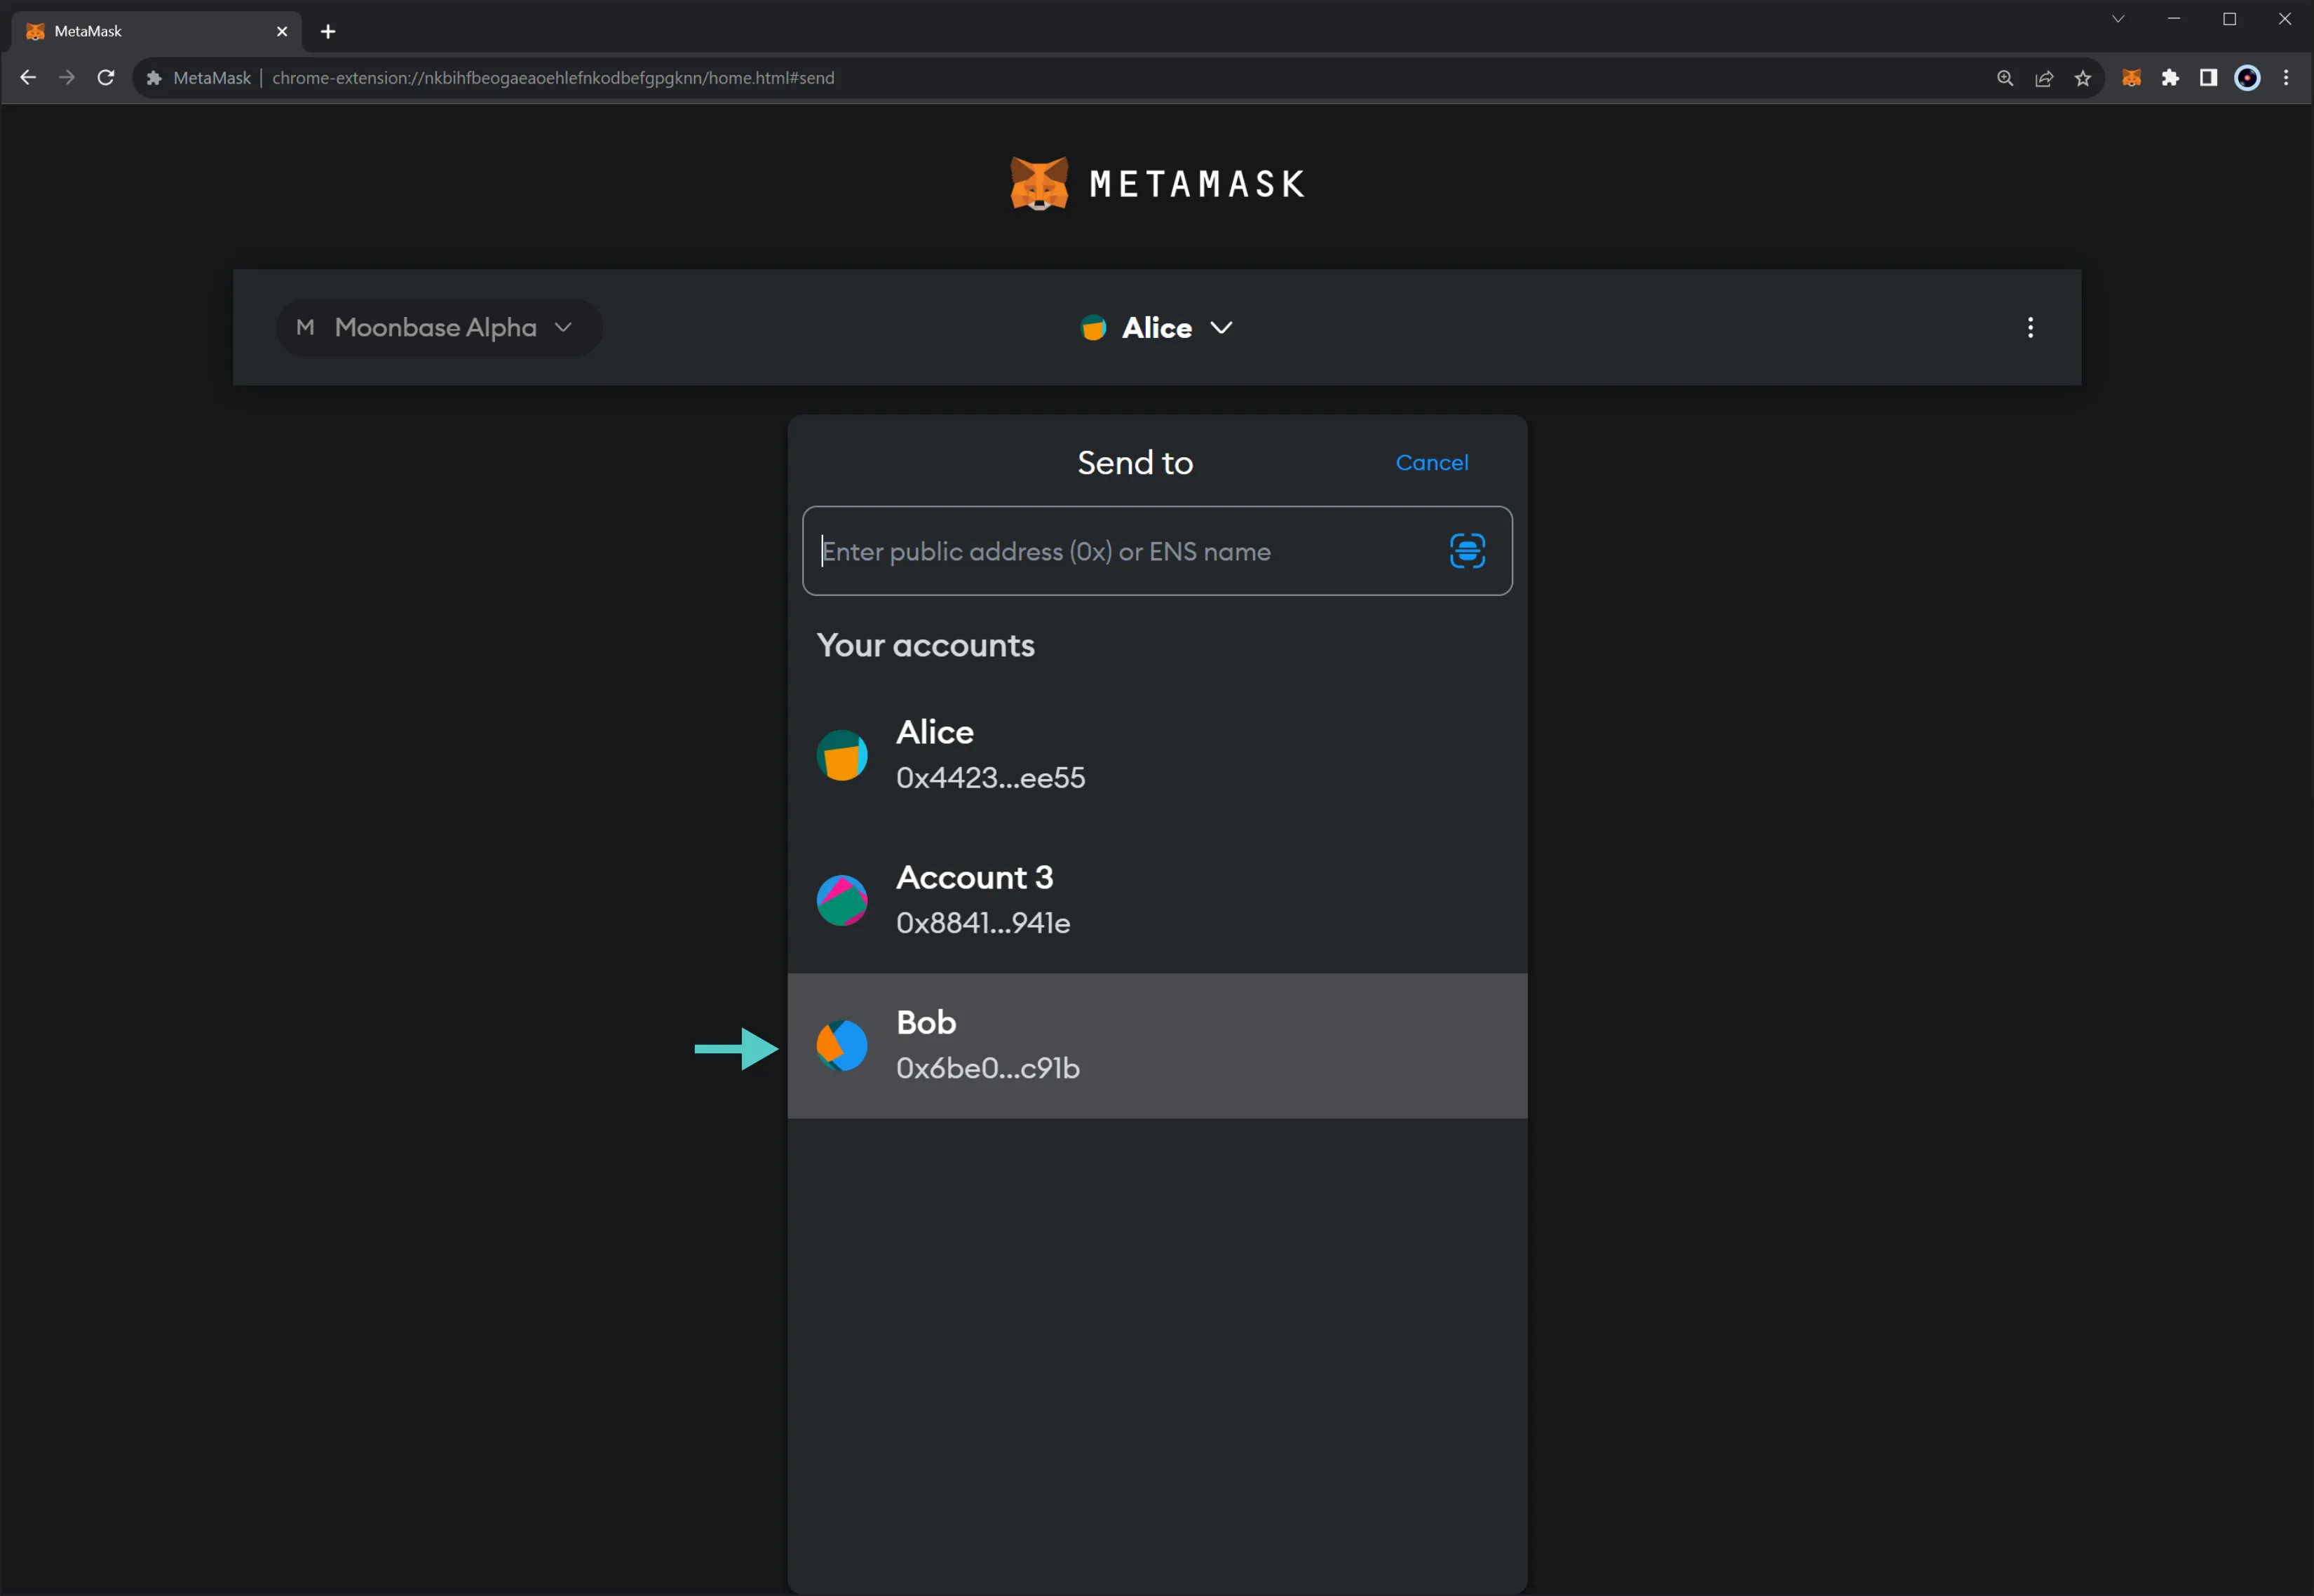
Next, you can enter the address to which you want to send the tokens. For this example, a wallet that has already been imported to Metamask is selected, known as Bob.
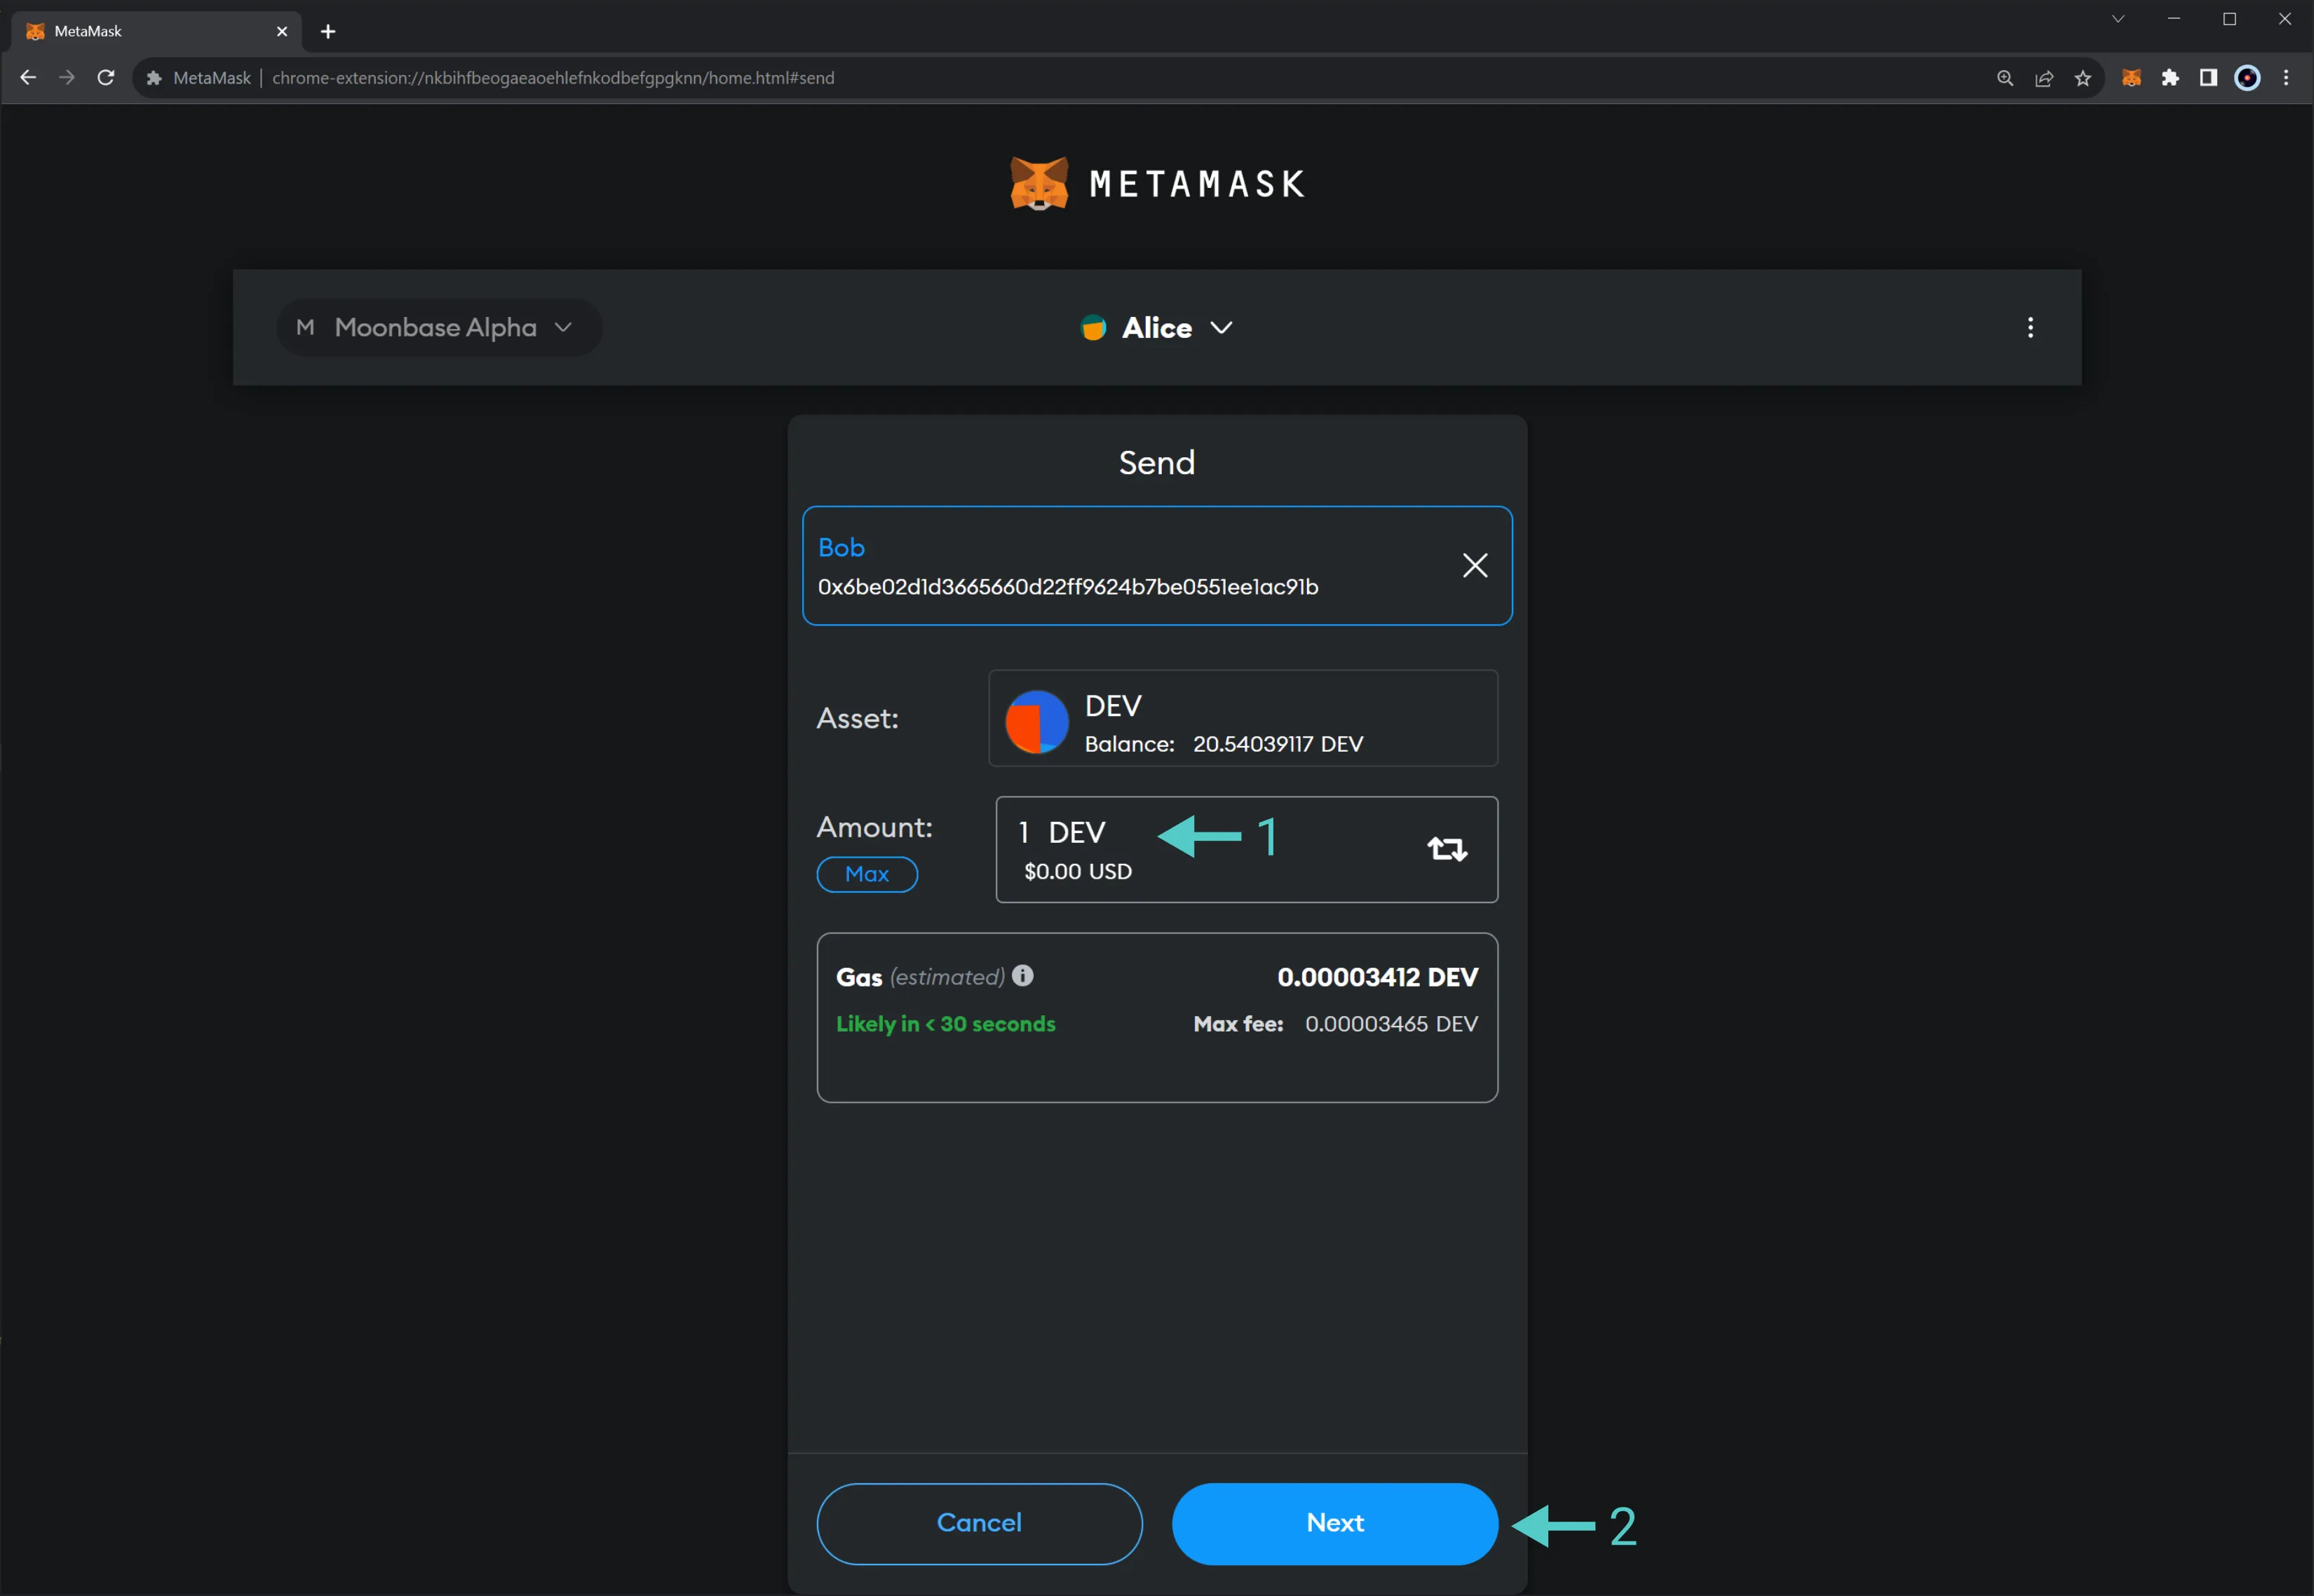
On the next screen, take the following steps:
- Enter the number of tokens you want to send
- Verify that all the information is correct, and click on Next
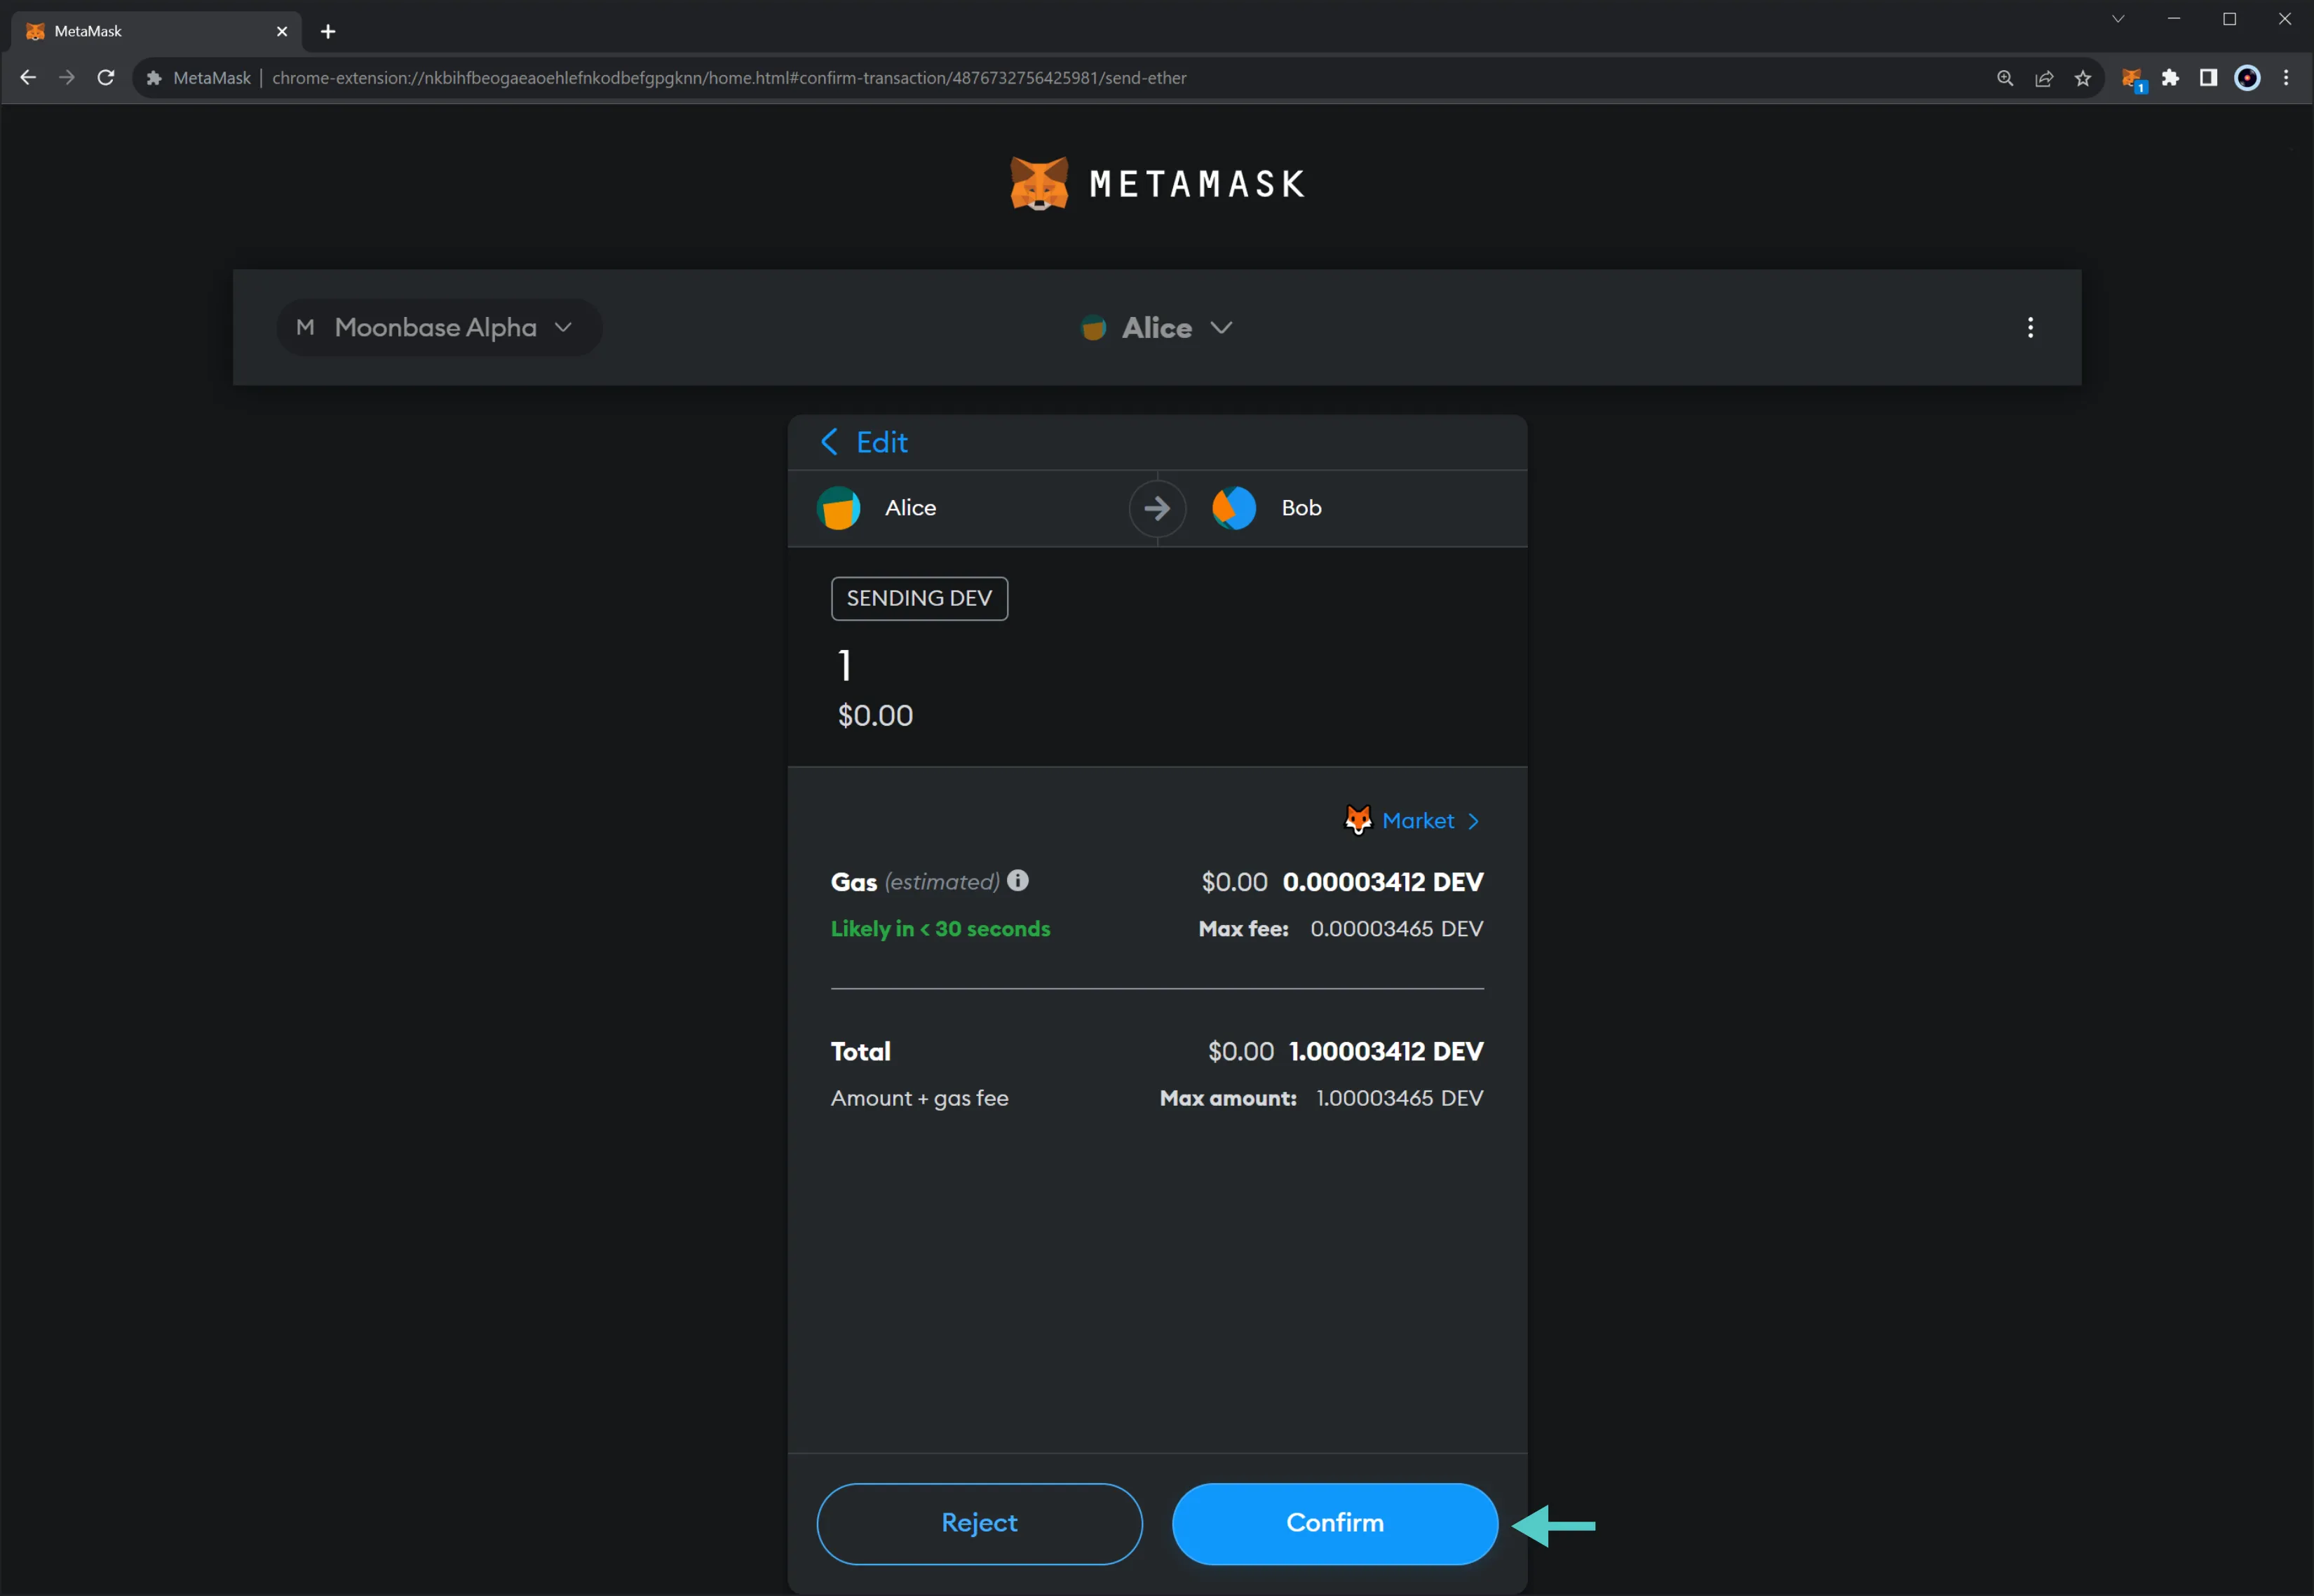
Lastly, confirm that all the gas-related parameters and fees are correct. After you've verified that everything is OK, click Confirm. At this point, your transaction has been sent to the network!
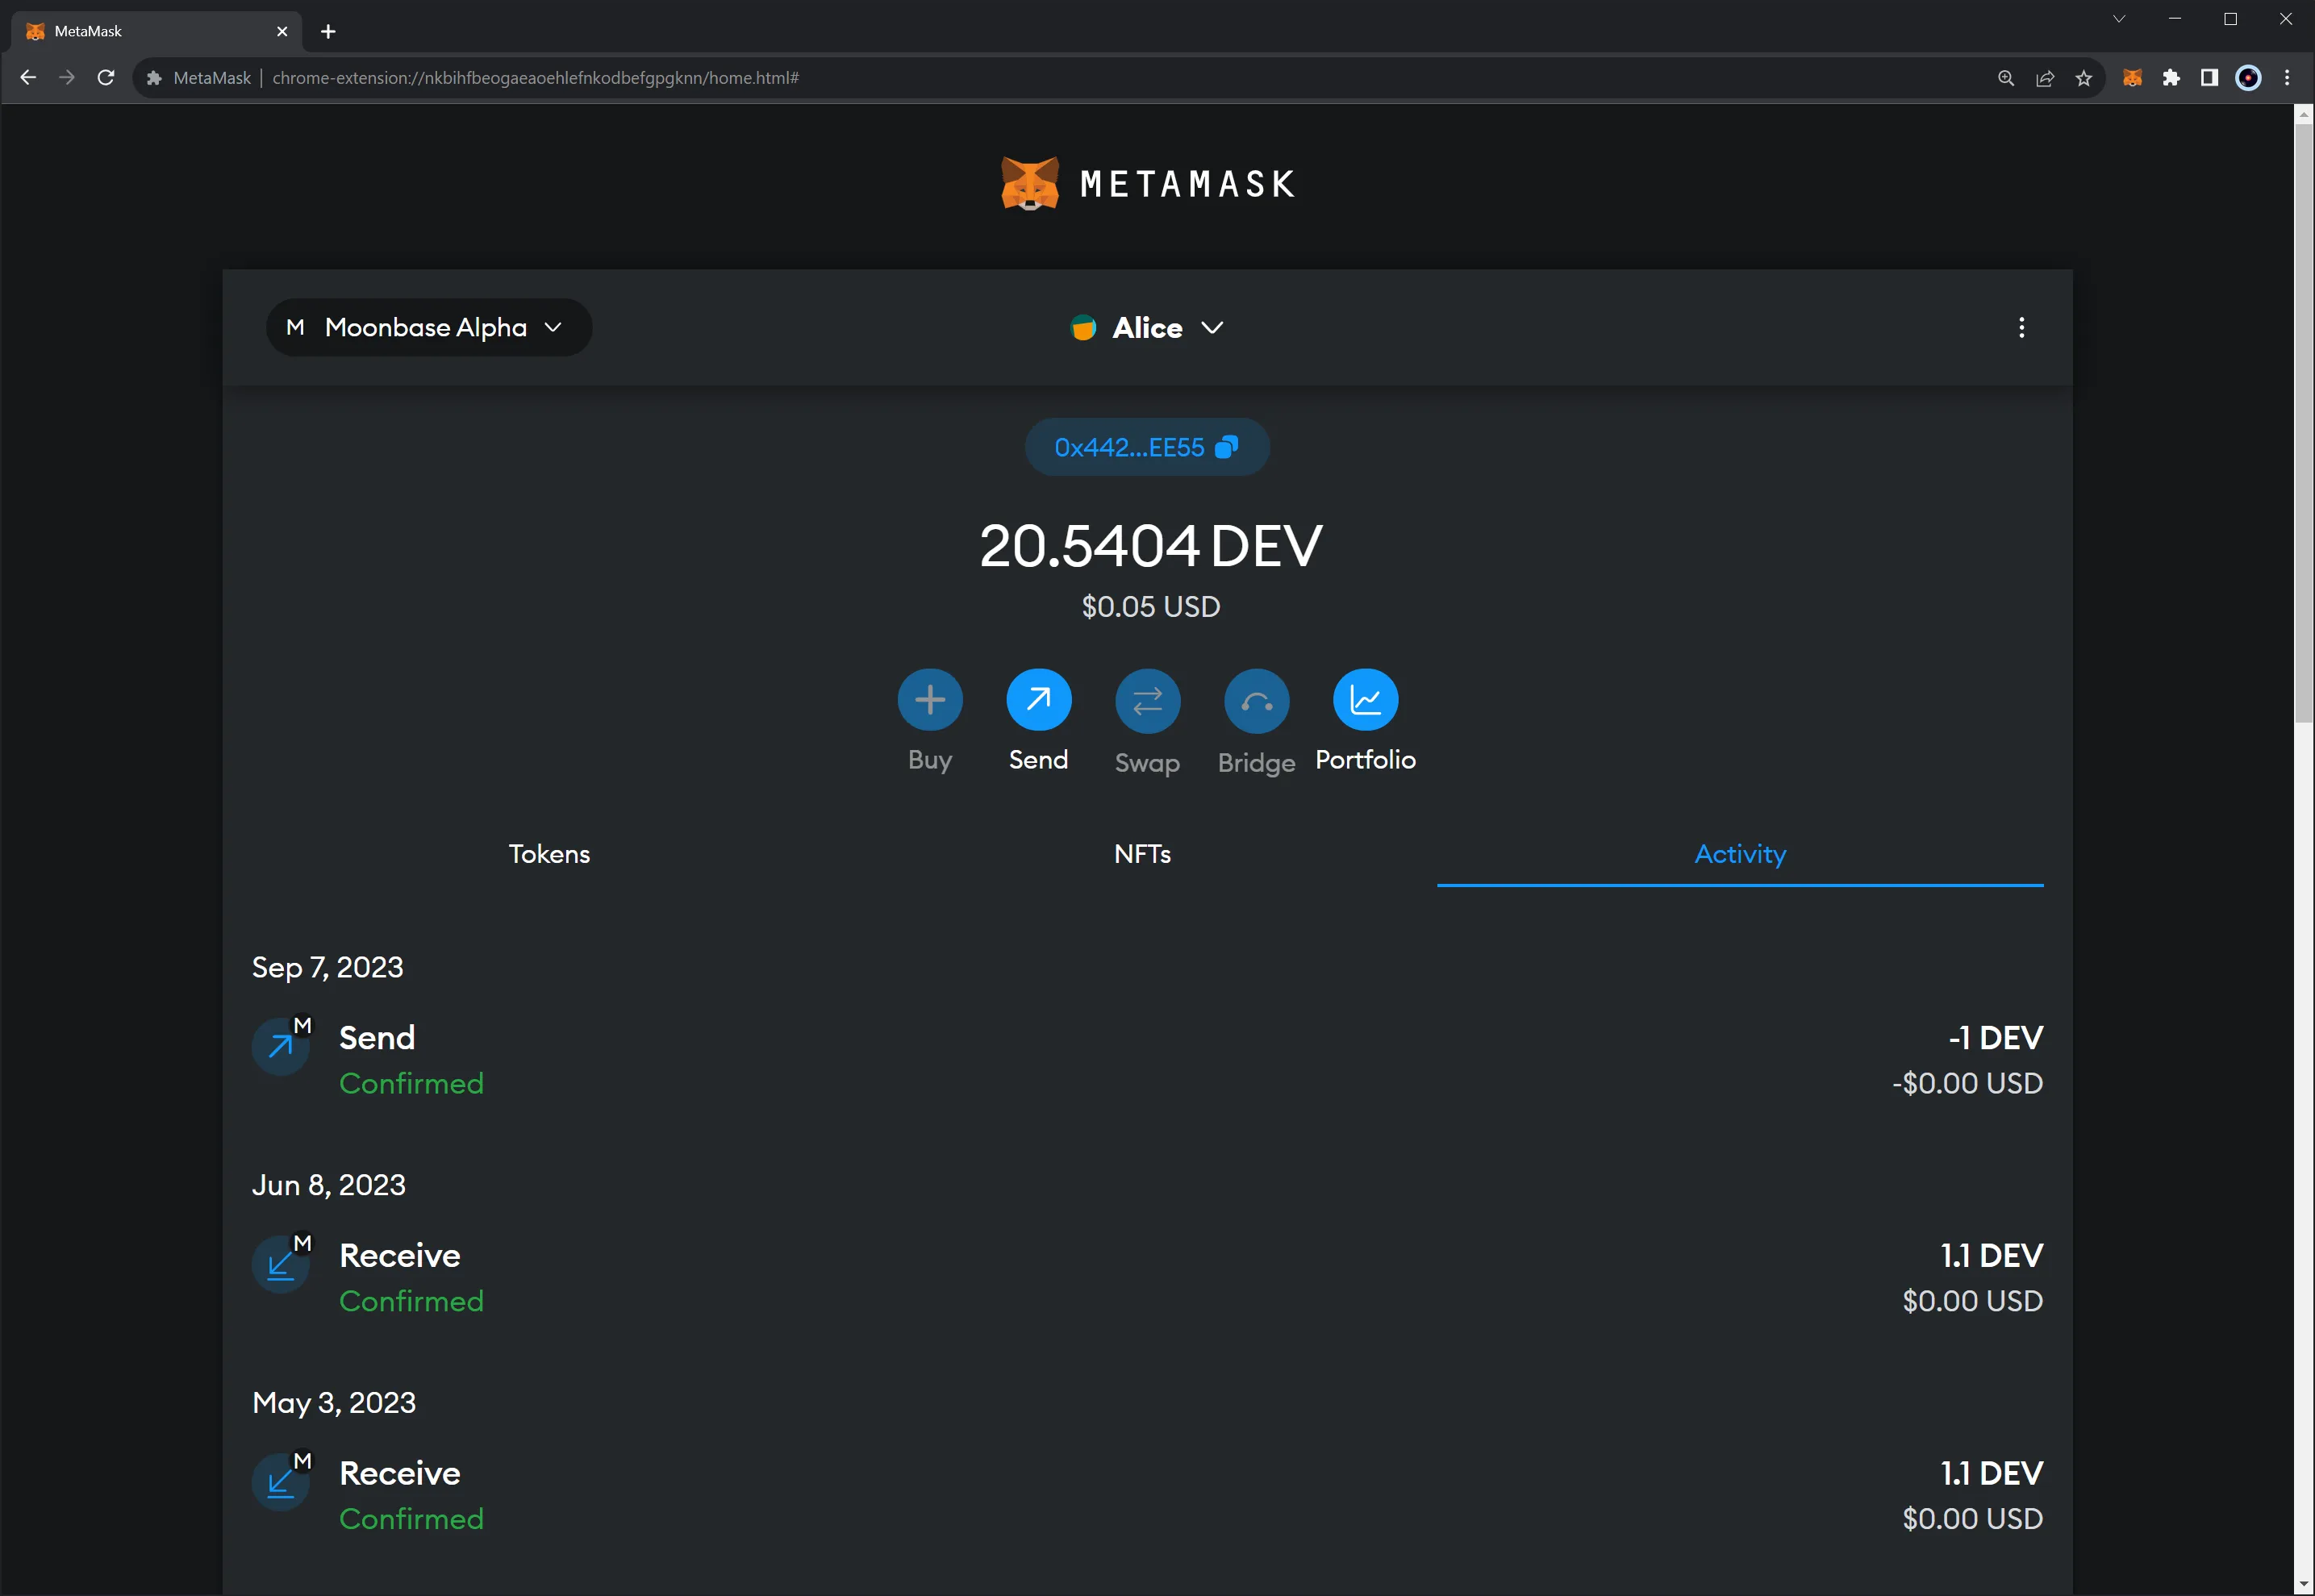
Once you've confirmed your transaction, you are taken back to the main screen of your wallet, where you'll see the transaction as Pending. After less than a minute, the transaction should be Confirmed. If you click on your transaction, you can check more details and view it in a block explorer.
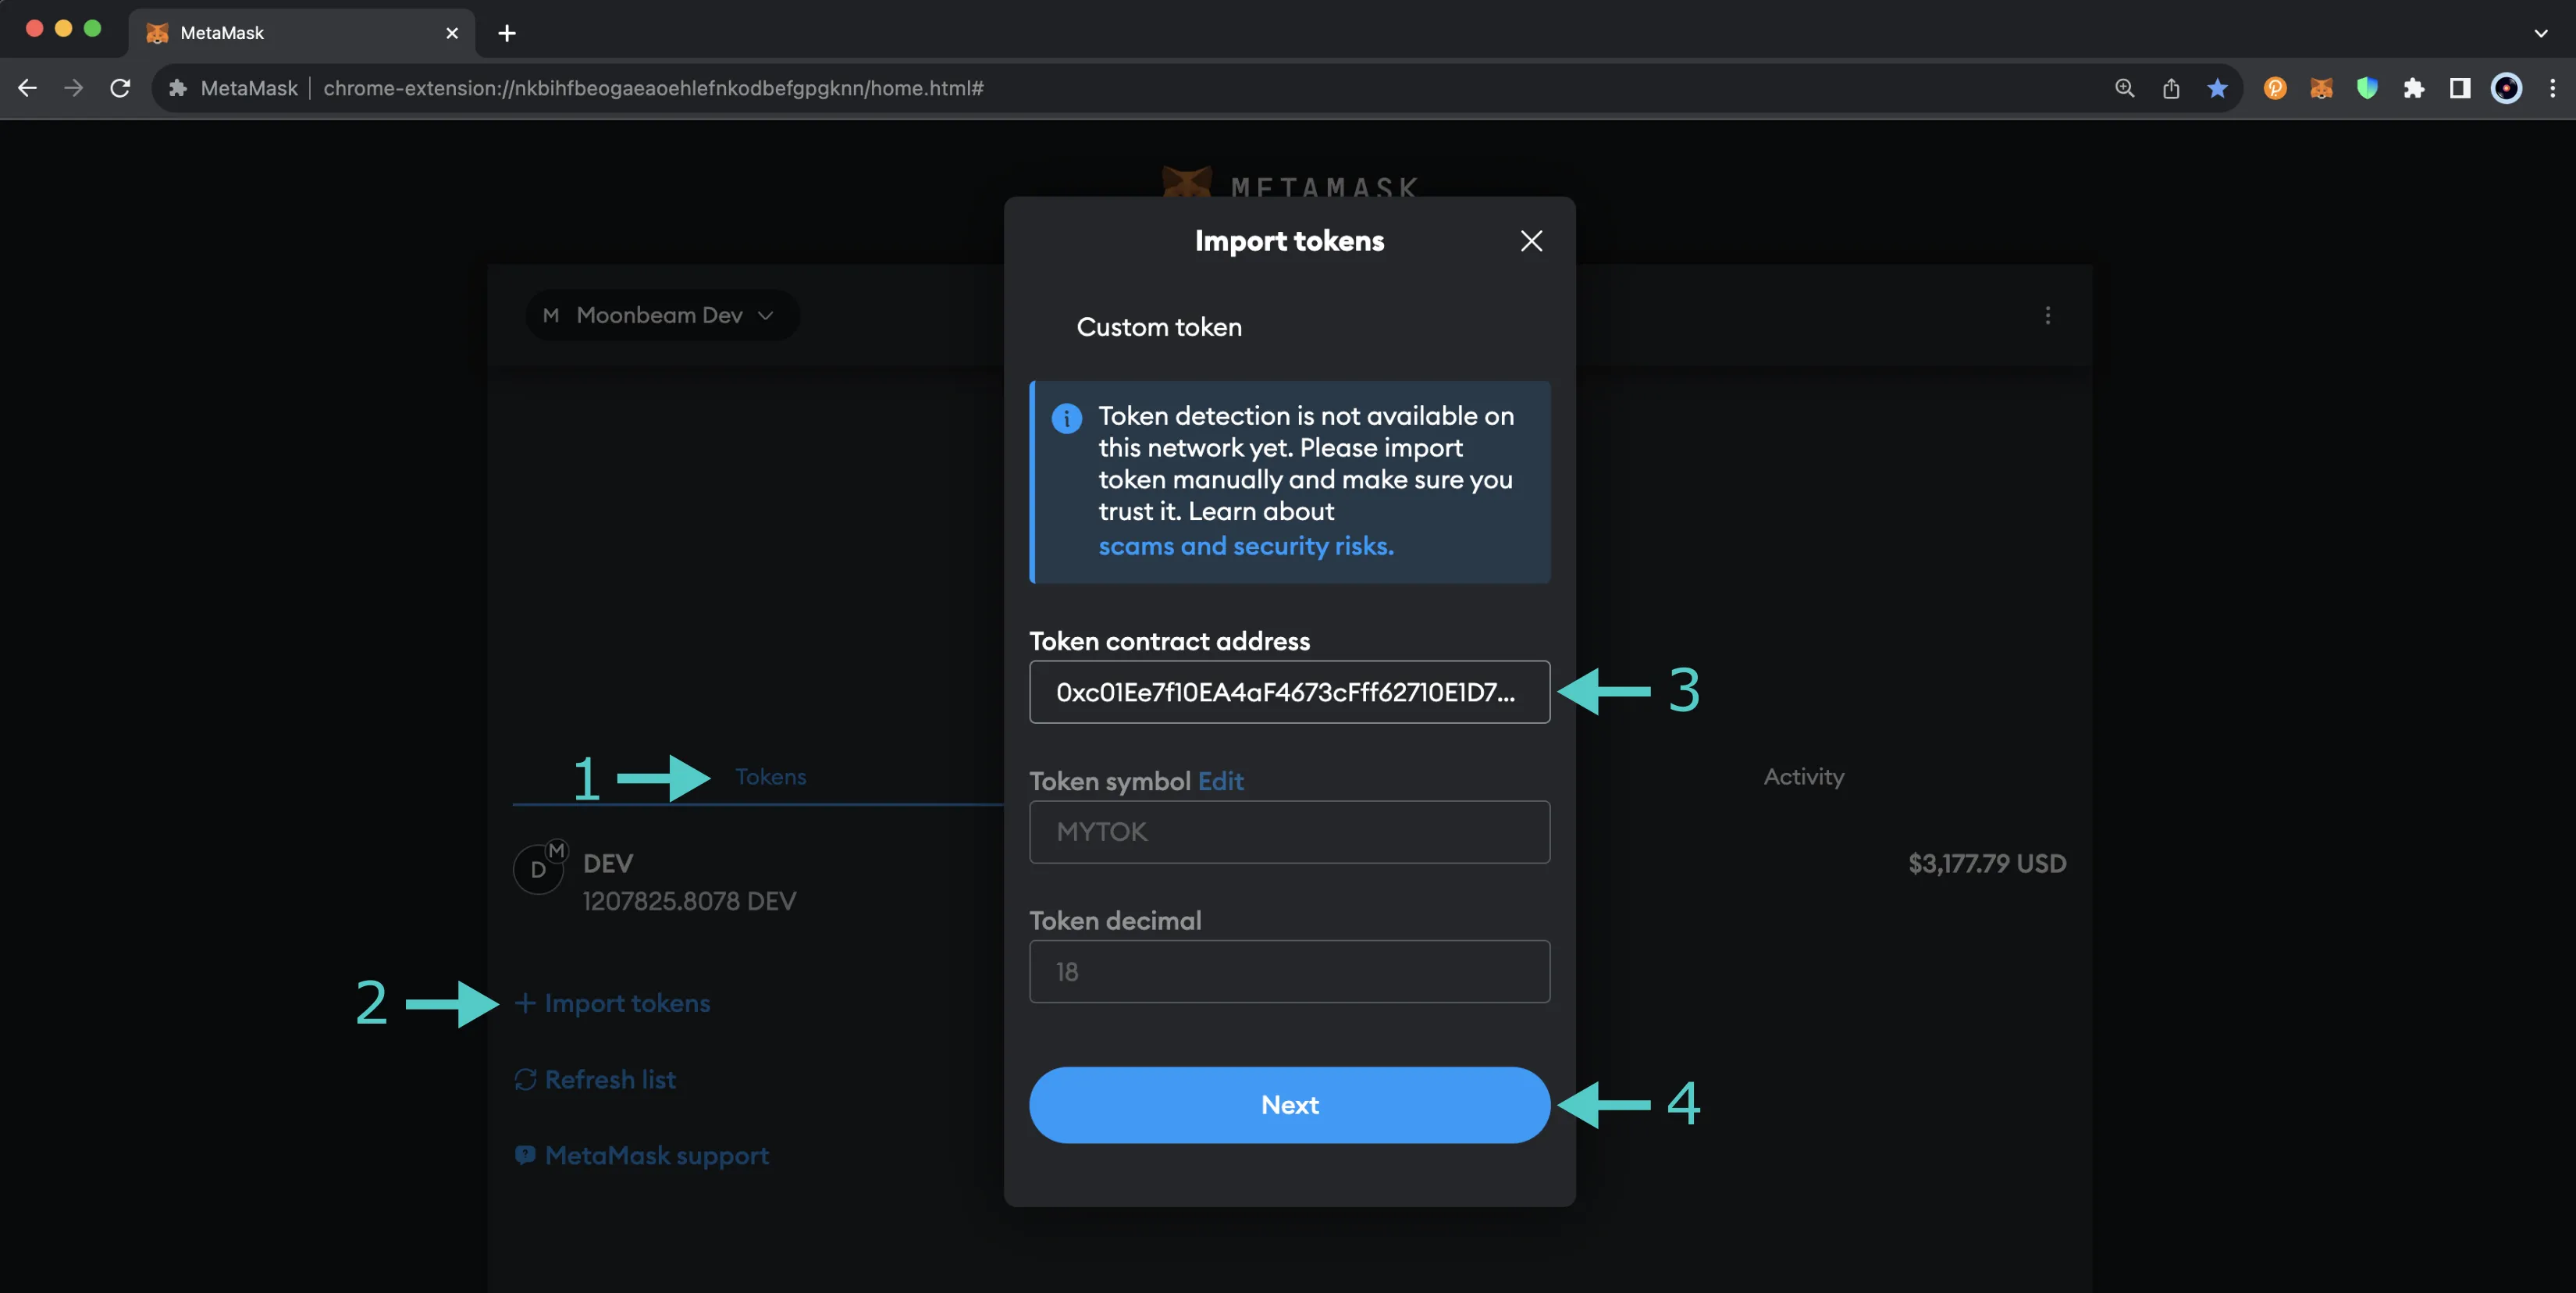
Add an ERC-20 Token
To add an ERC-20 to your MetaMask wallet, you'll need to import the token using its address:
- Make sure you've switched to the Tokens tab in MetaMask
- Click Import tokens
- Enter the contract address of the token you want to import. The Token symbol and Token decimal fields will automatically be populated, but you can edit the Token symbol if needed
- Click Next
Next, you'll be able to review the token import details. To finalize the import, you can click Import.
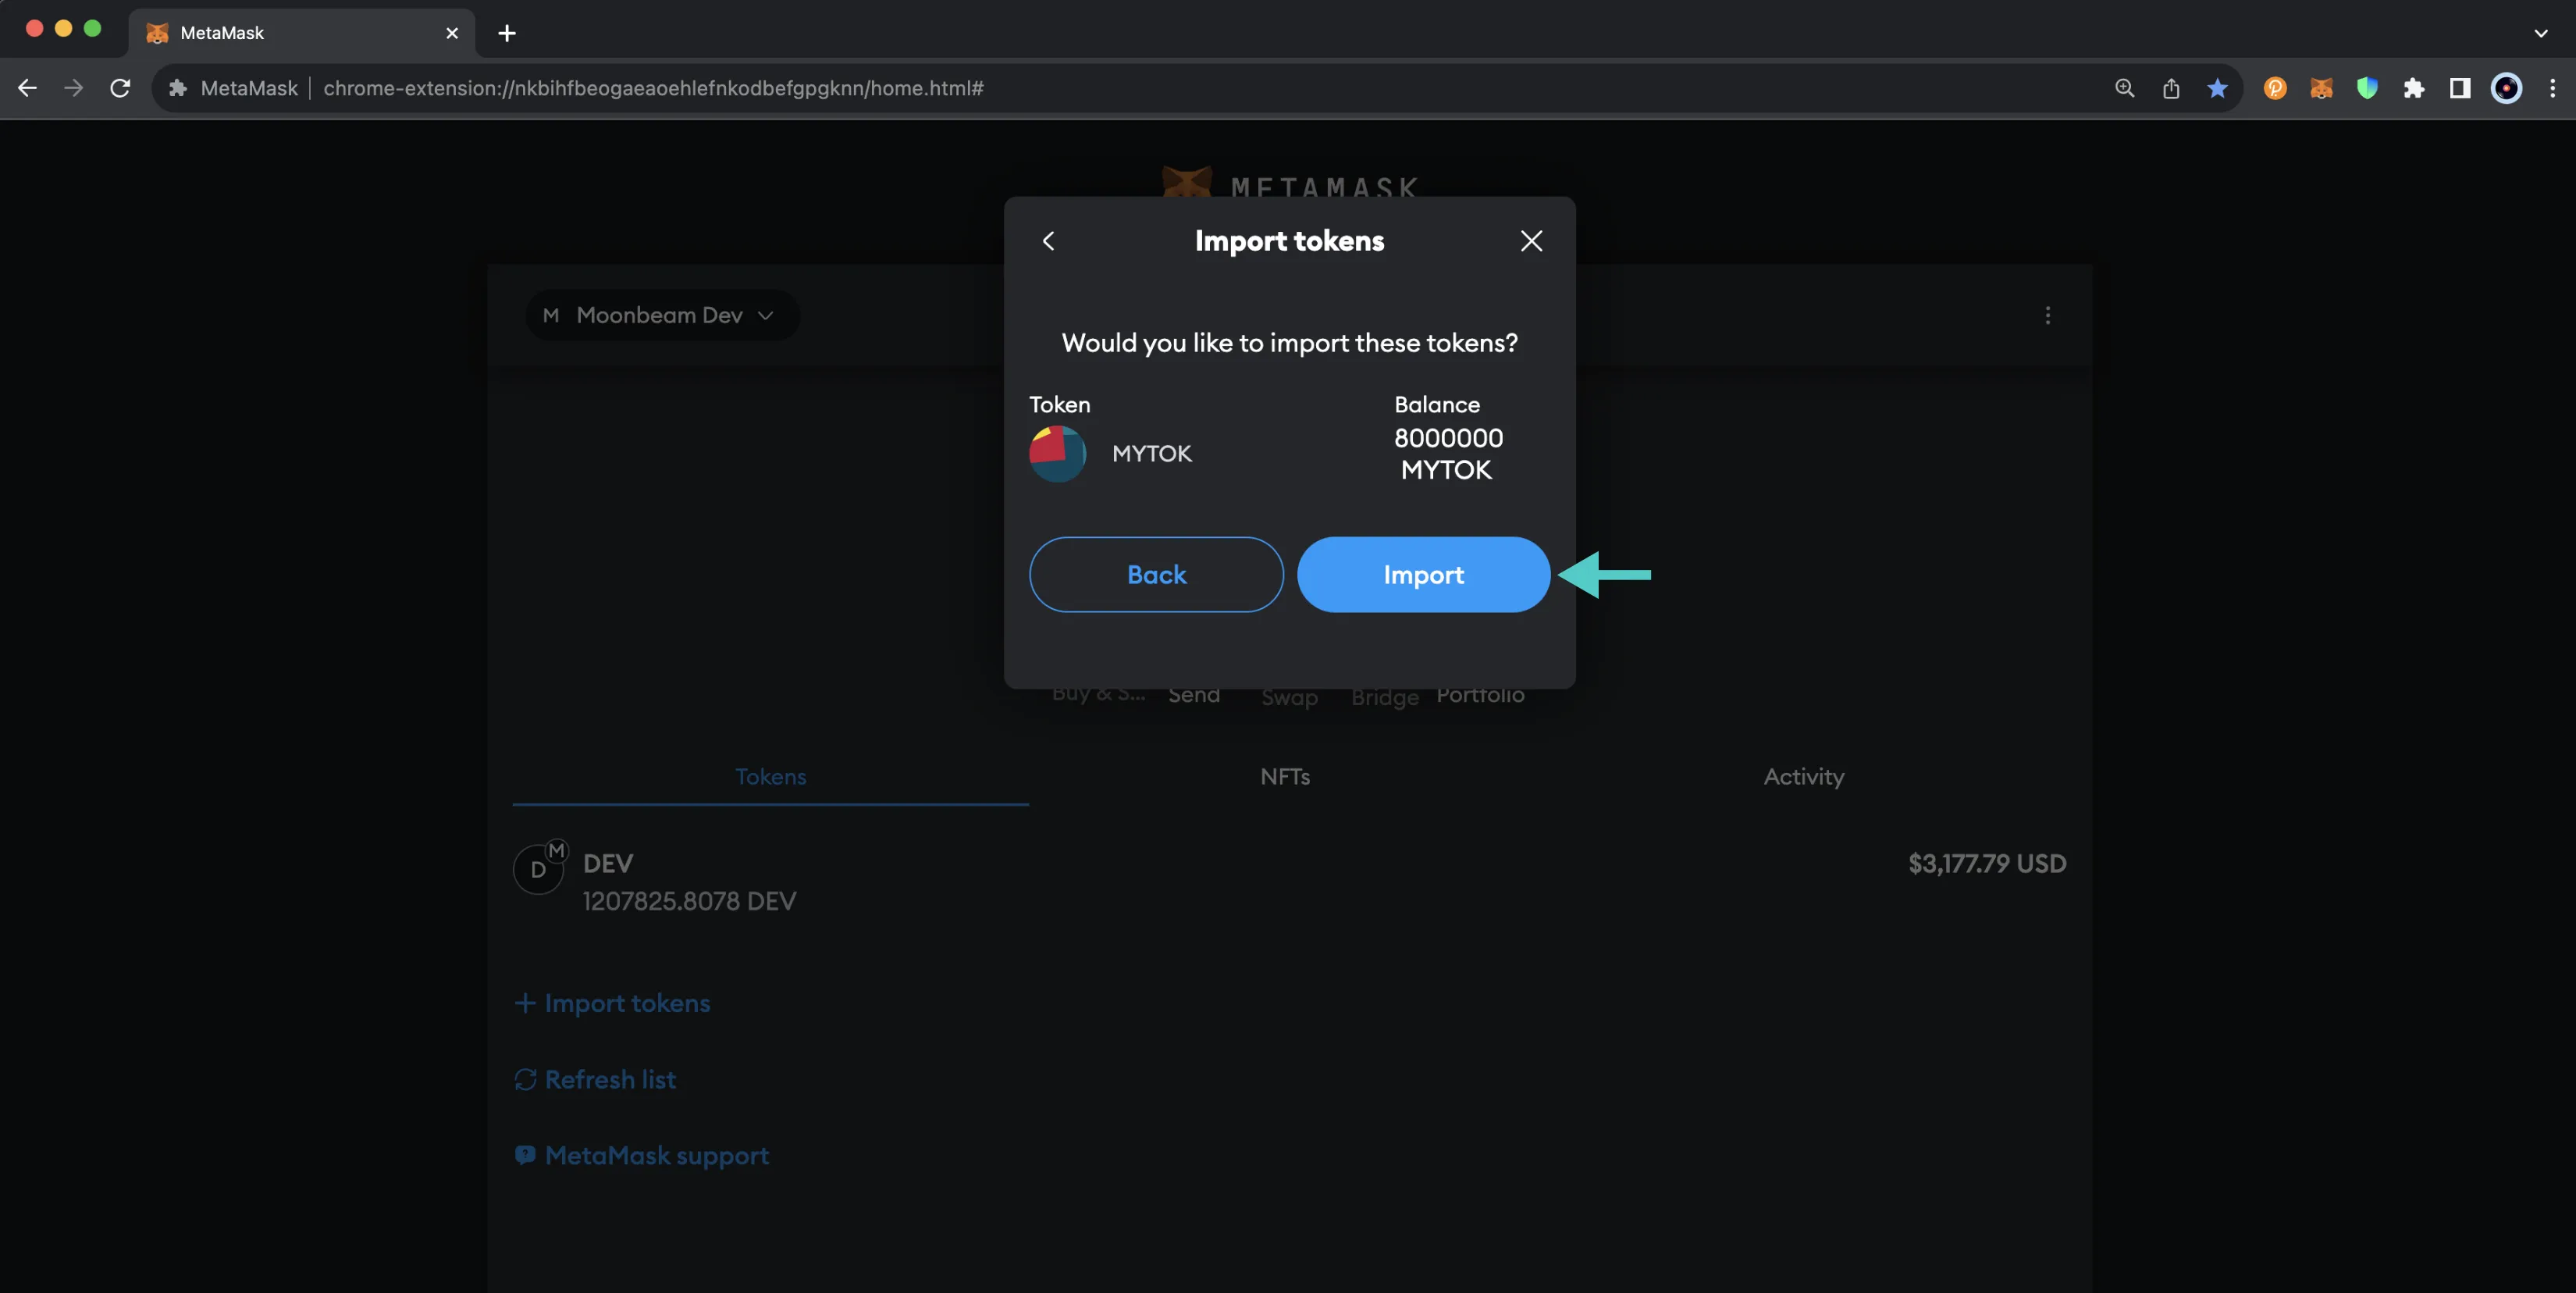
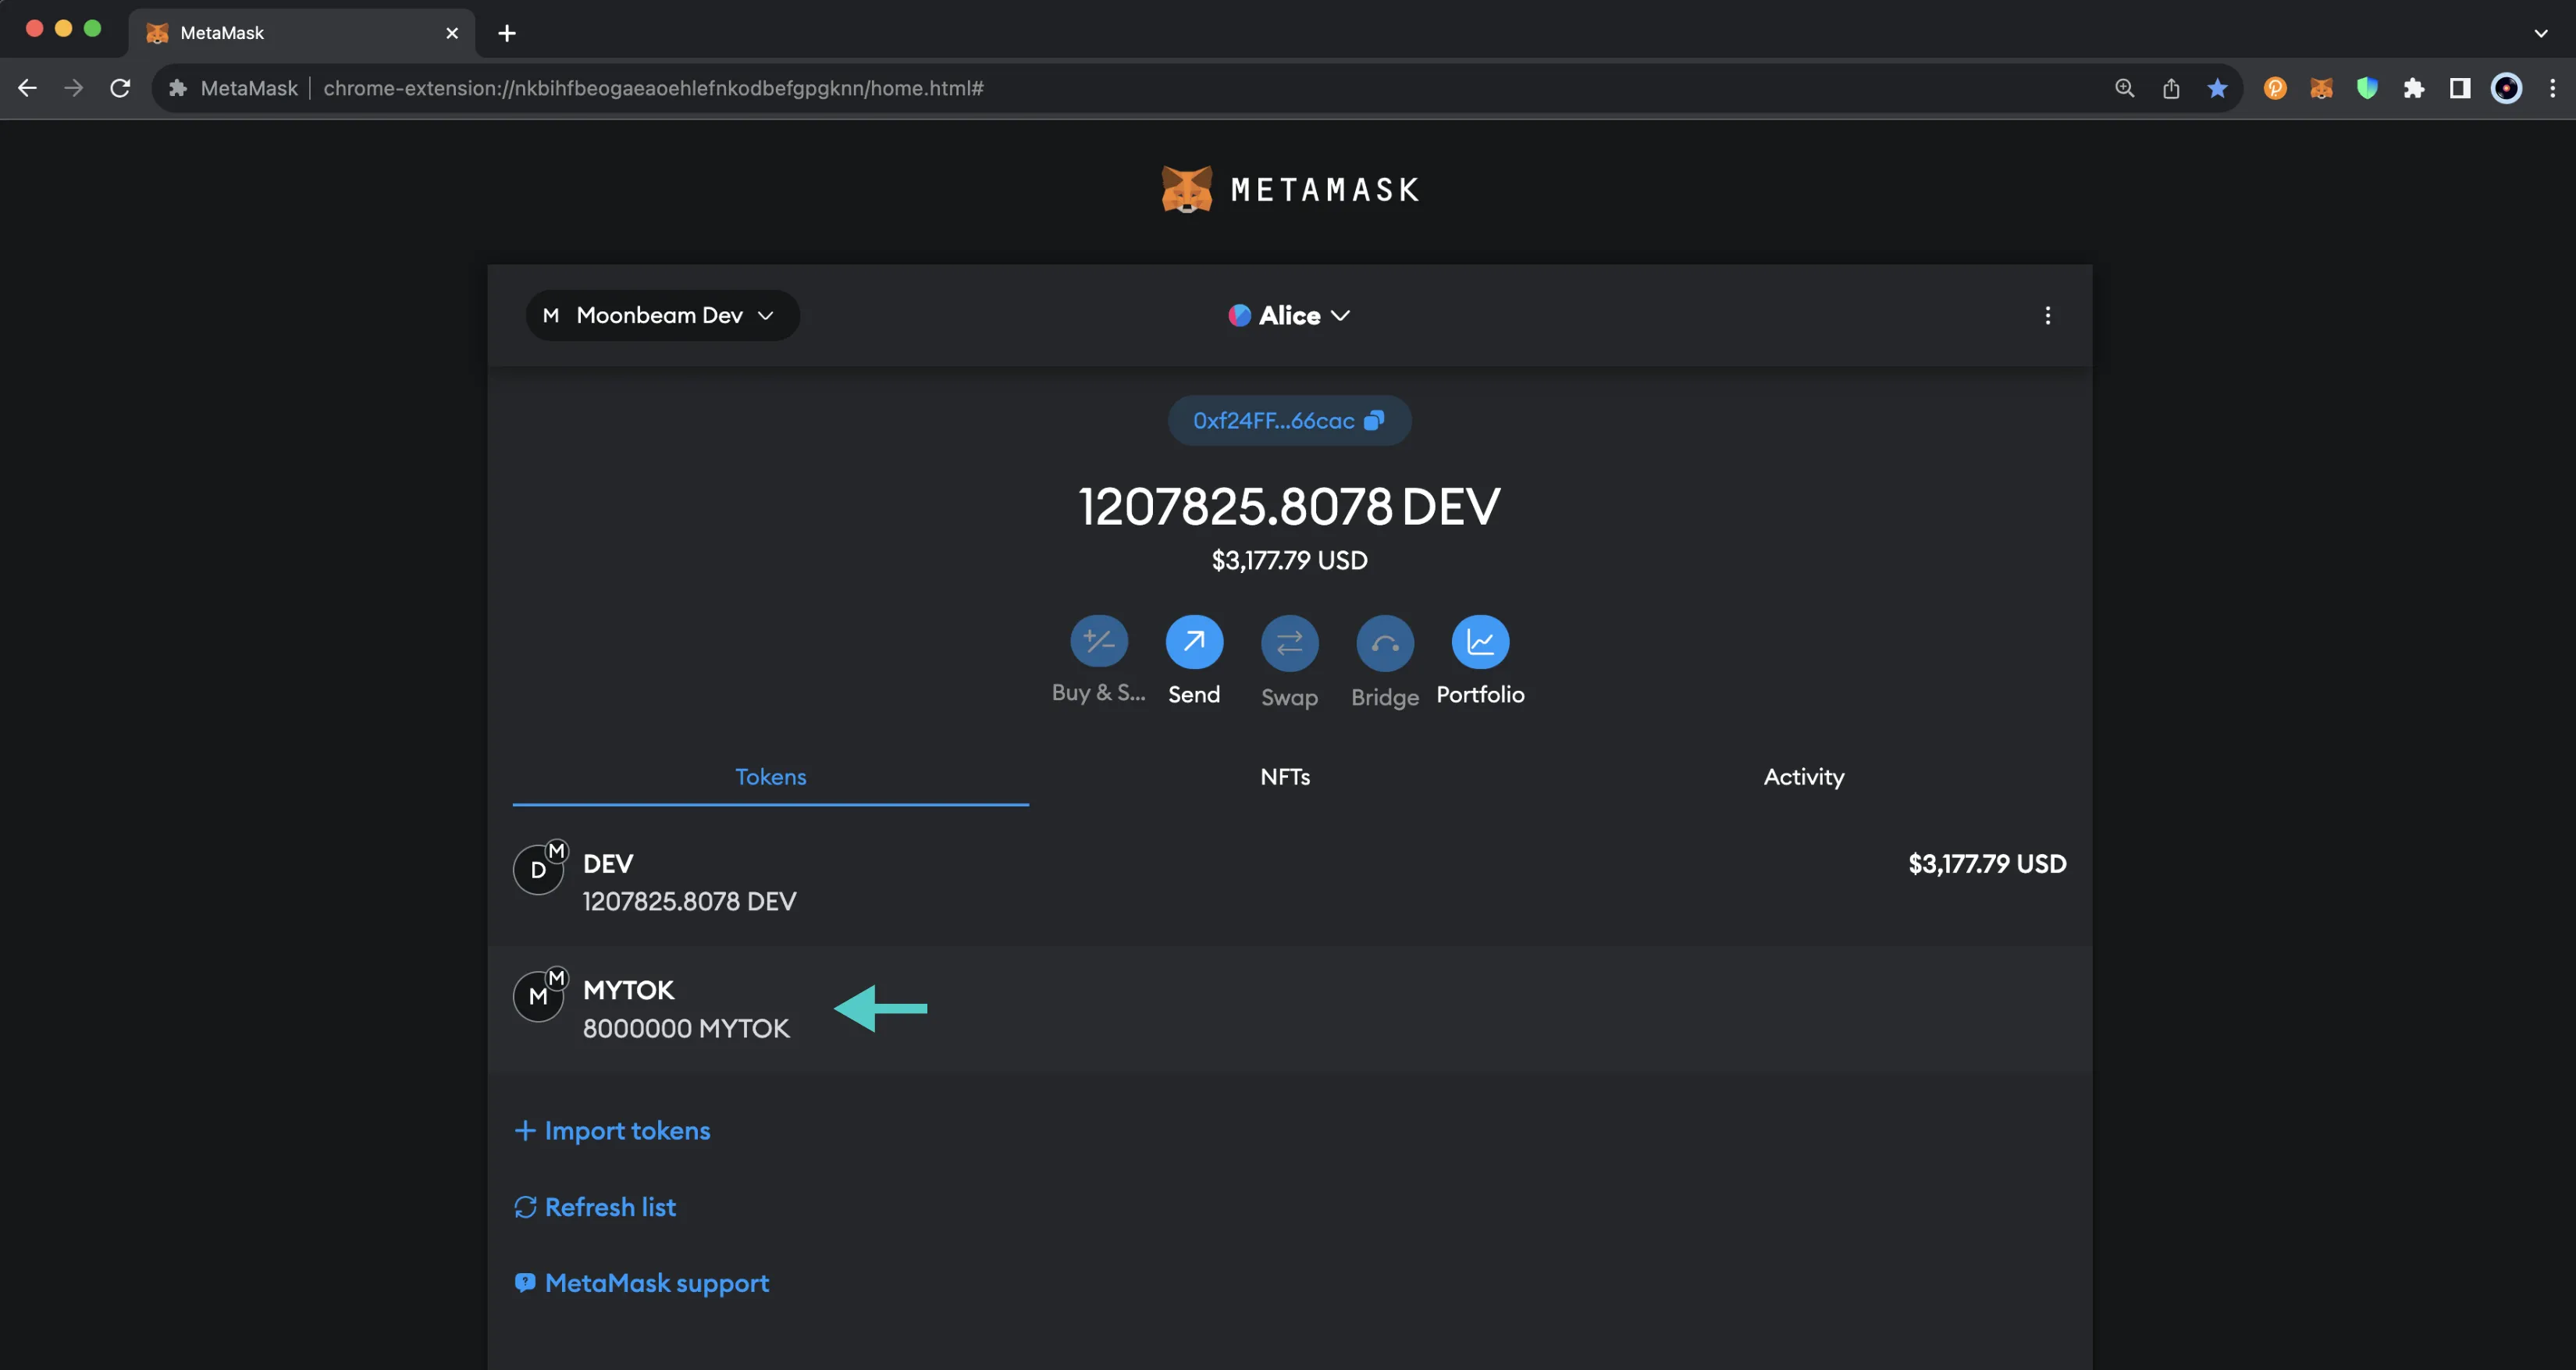
Under the Tokens tab, you'll be able to see the token and the account balance for the token.
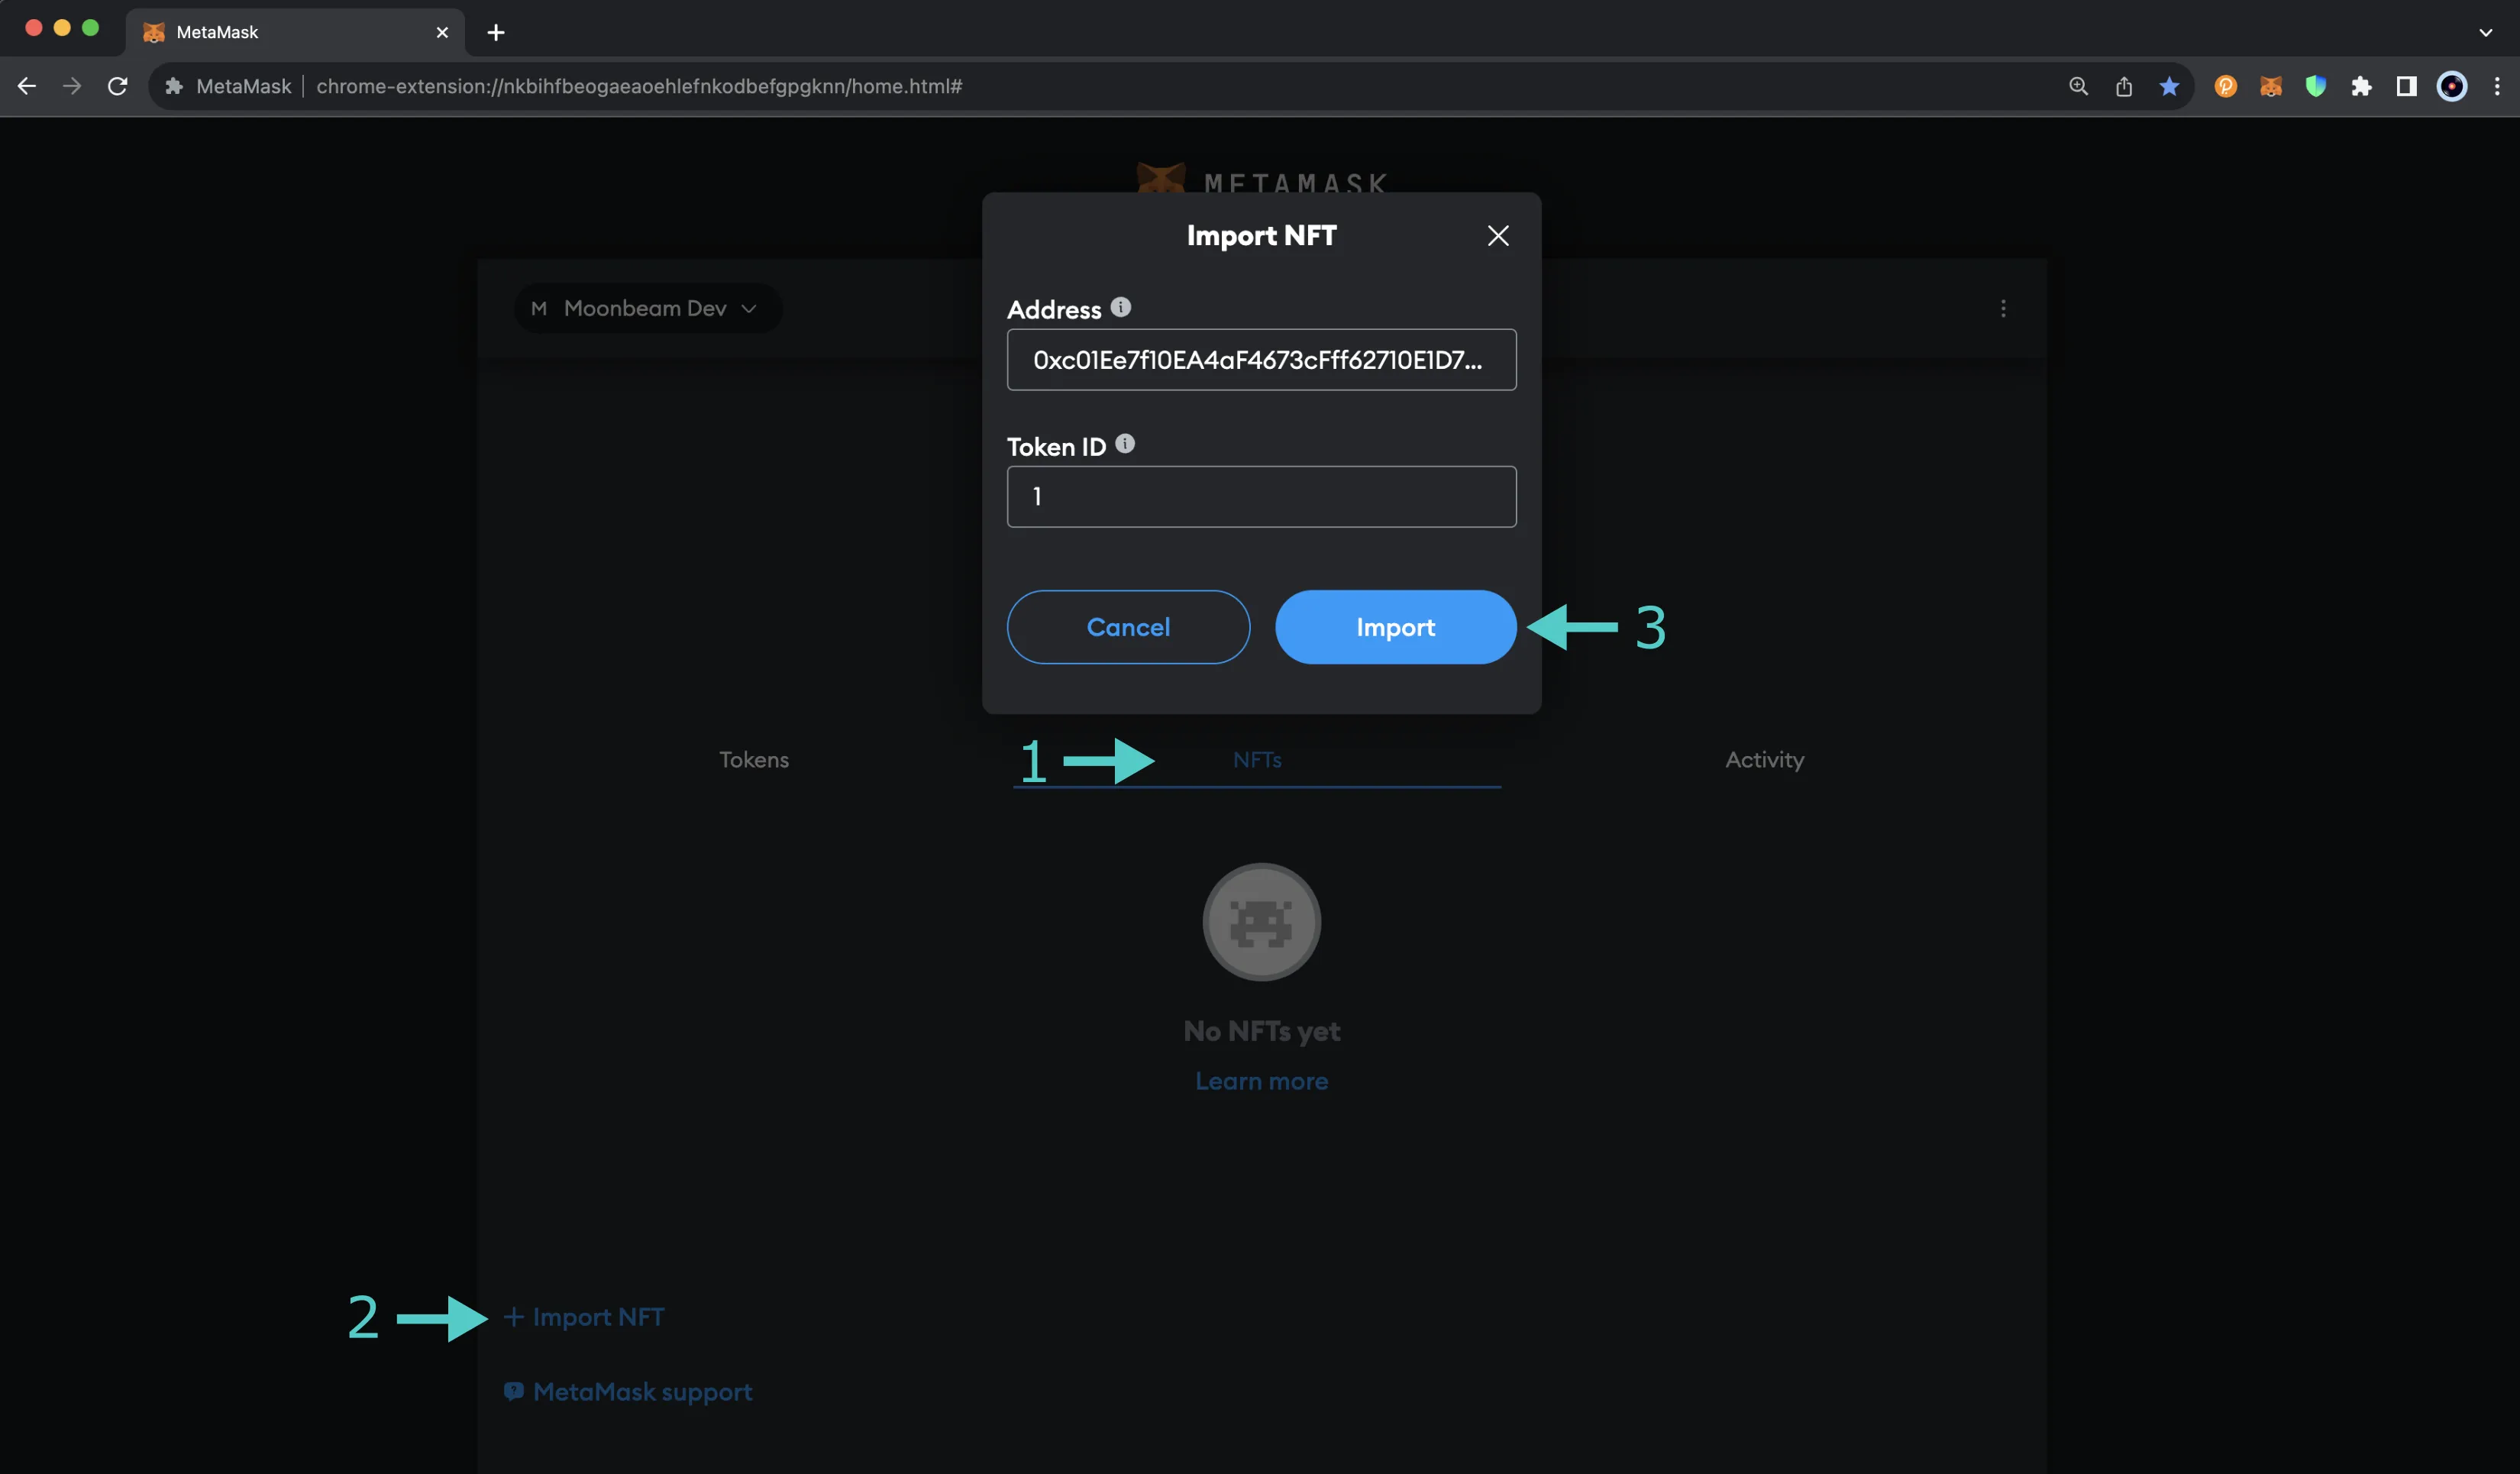
Add an ERC-721 Token
To add an ERC-721 to your MetaMask wallet, you'll need the token's address:
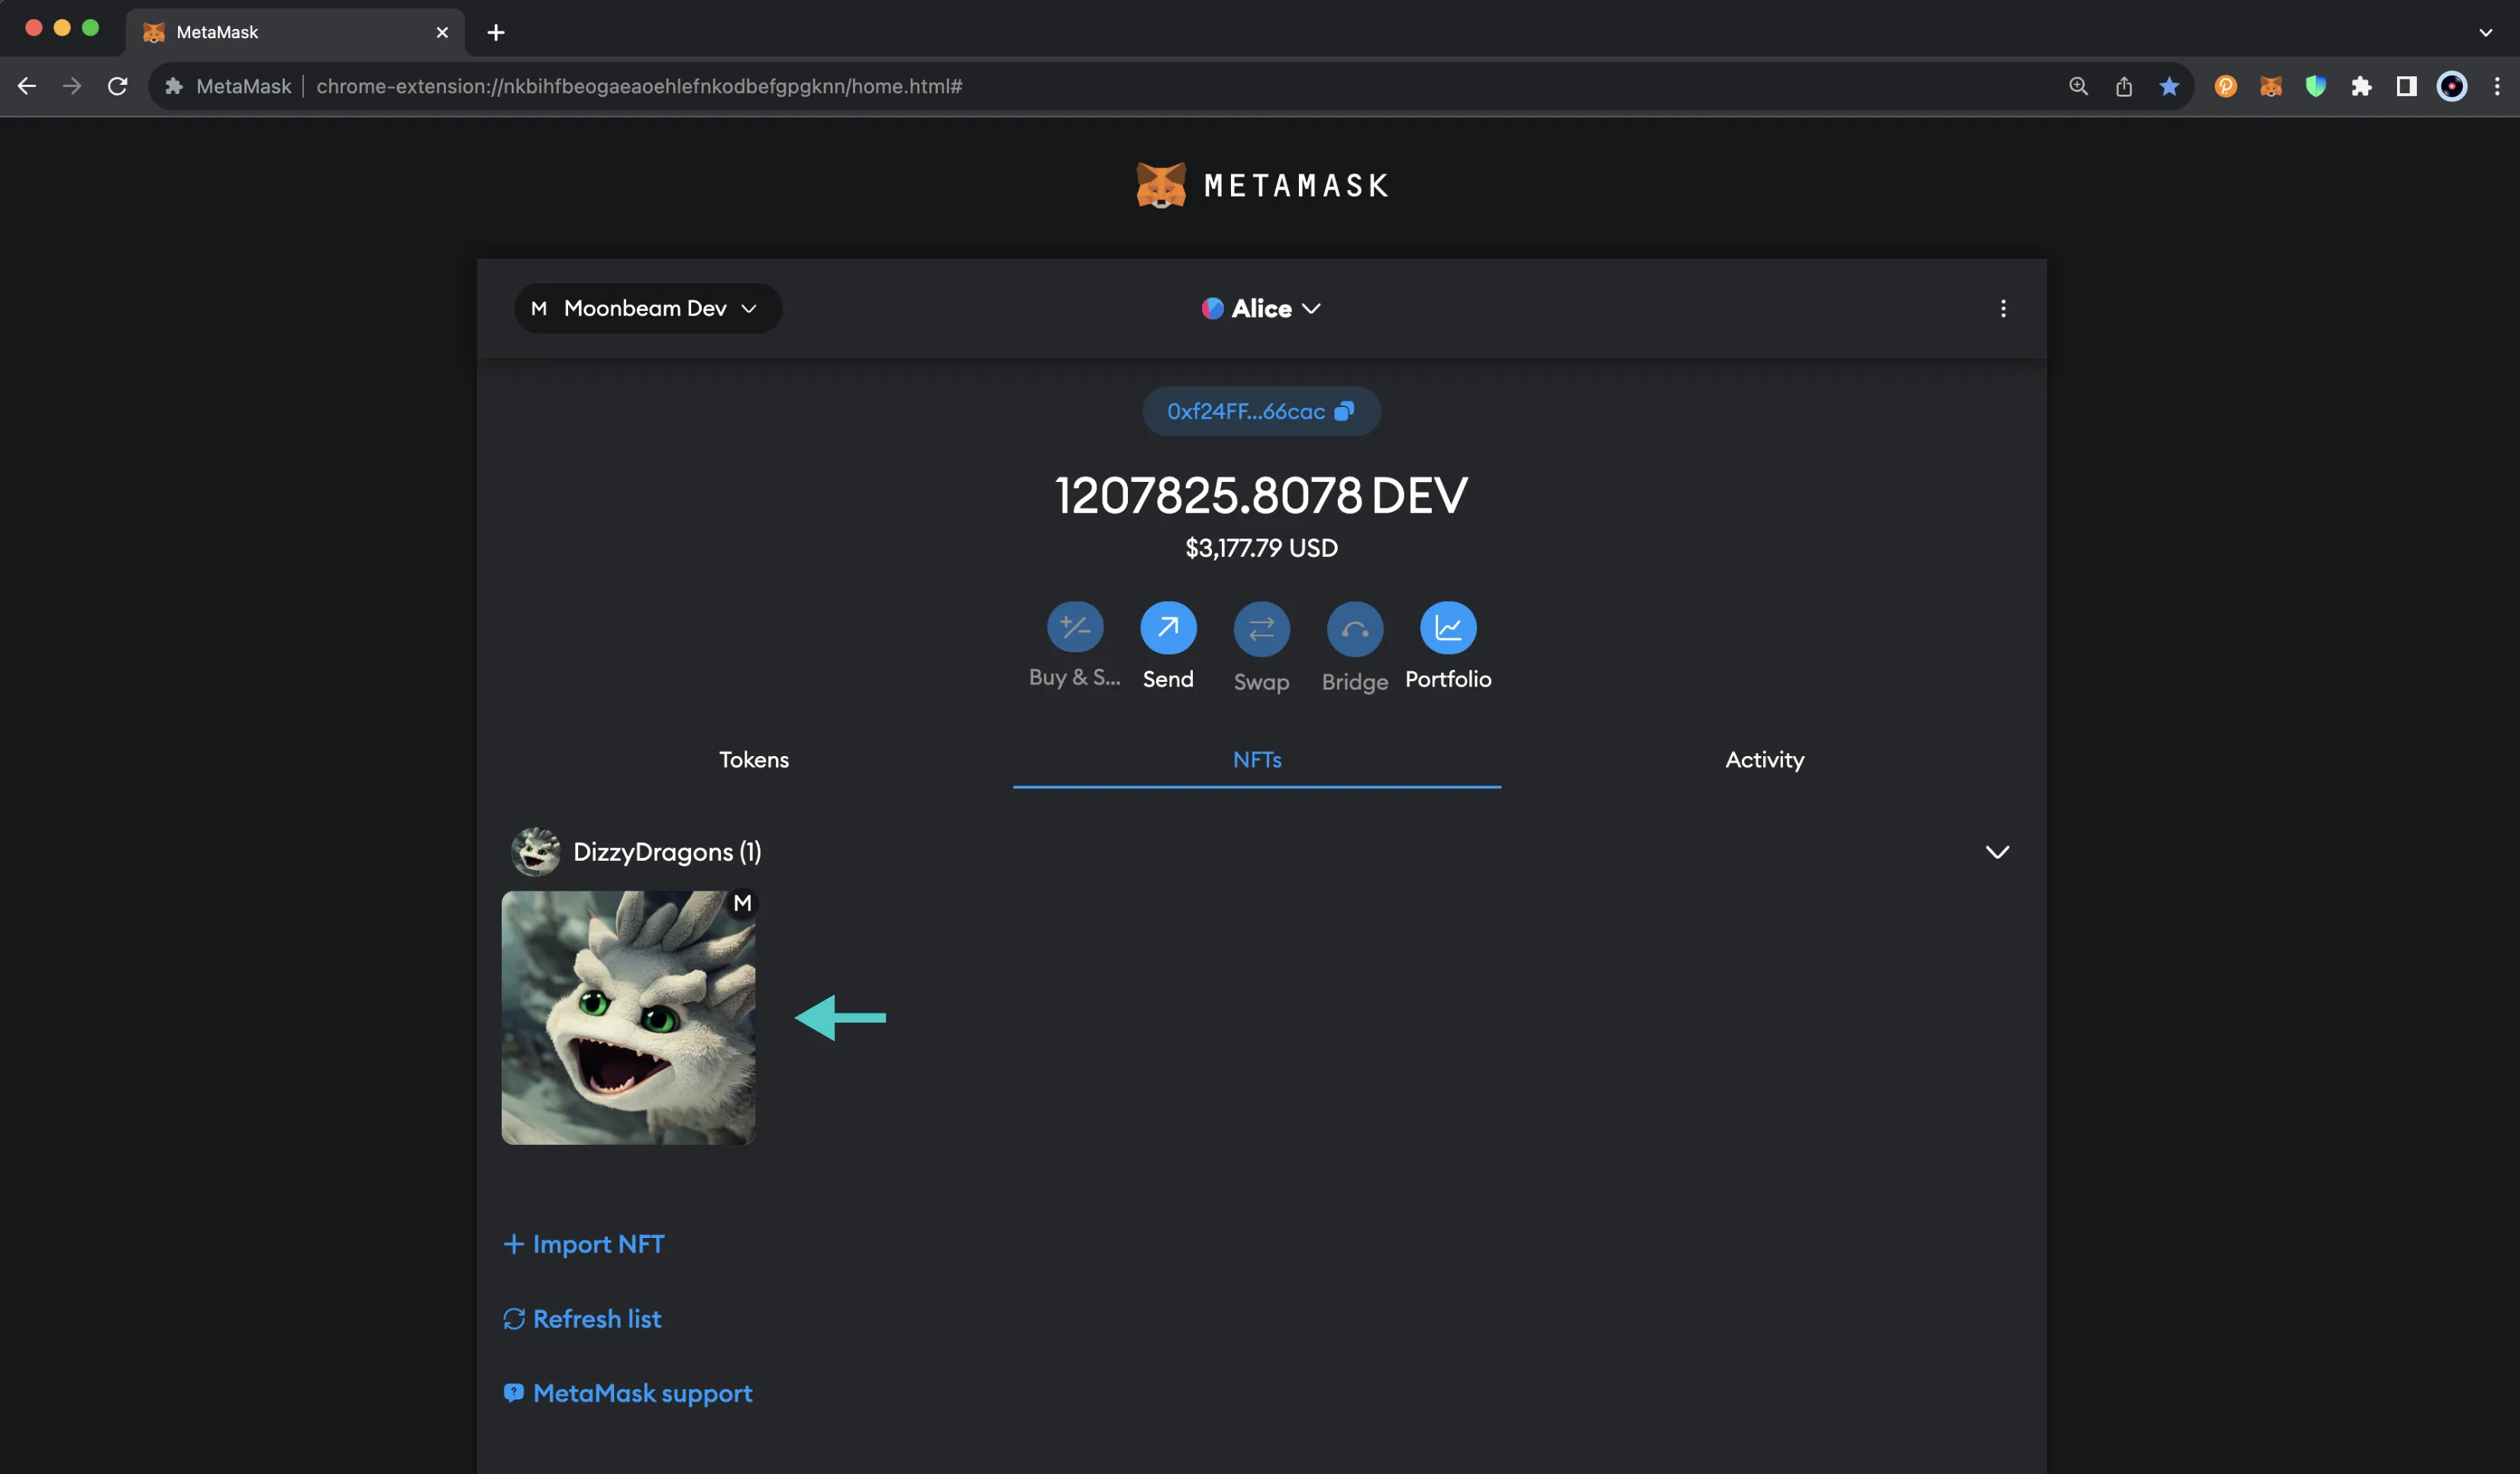
- Make sure you've switched to the NFTs tab in MetaMask
- Click Import NFT
- Enter the Address of the NFT you want to import and the Token ID
- Click Import
Once you've imported your NFT, you'll be able to see a preview of your NFT in the NFTs tab. You can click on the NFT to see more details.
| Created: June 29, 2020