cargo run
Compiling ethers-examples v0.1.0 (/Users/moonbeam/workspace/ethers-examples)
Finished dev [unoptimized + debuginfo] target(s) in 32.76s
Running `target/debug/ethers-examples`
Beginning transfer of 1 native currency 0x3b93…421e to 0xe773…8dde.
Transaction Receipt: {"transactionHash":"0x6f2338c63286f8b27951ddb6748191149d82647b44a00465f1f776624f490ce9","transactionIndex":"0x0","blockHash":"0x8234eb2083e649ab45c7c5fcdf2026d8f47676f7e29305023d1d00cc349ba215","blockNumber":"0x7ac12d","from":"0x3b939fead1557c741ff06492fd0127bd287a421e","to":"0xe773f740828a968c8a9e1e8e05db486937768dde","cumulativeGasUsed":"0x5208","gasUsed":"0x5208","contractAddress":null,"logs":[],"status":"0x1","logsBloom":"0x00000000000000000000000000000000000000000000000000000000000000000000000000000000000000000000000000000000000000000000000000000000000000000000000000000000000000000000000000000000000000000000000000000000000000000000000000000000000000000000000000000000000000000000000000000000000000000000000000000000000000000000000000000000000000000000000000000000000000000000000000000000000000000000000000000000000000000000000000000000000000000000000000000000000000000000000000000000000000000000000000000000000000000000000000000000000000000000000000000000","type":"0x0","effectiveGasPrice":"0x7735940"}
0x3b93…421e has 3601703984470865589125
0xe773…8dde has 1000000000000000000
## Deploy a Contract {: #deploy-a-contract }
The contract you'll be compiling and deploying in the next couple of sections is a simple incrementer contract, arbitrarily named `Incrementer.sol`. You can get started by creating a file for the contract:
```bash
touch Incrementer.sol
```
Next, you can add the Solidity code to the file:
```solidity
// SPDX-License-Identifier: MIT
pragma solidity ^0.8.0;
contract Incrementer {
uint256 public number;
constructor(uint256 _initialNumber) {
number = _initialNumber;
}
function increment(uint256 _value) public {
number = number + _value;
}
function reset() public {
number = 0;
}
}
```
The `constructor` function, which runs when the contract is deployed, sets the initial value of the number variable stored on-chain (the default is `0`). The `increment` function adds the `_value` provided to the current number, but a transaction needs to be sent, which modifies the stored data. Lastly, the `reset` function resets the stored value to zero.
!!! note
This contract is a simple example for illustration purposes only and does not handle values wrapping around.
During the rest of this section, you'll be creating a couple of functions, which will be contained in the `main.rs` file to avoid additional complexity from implementing modules. The first function will be to compile and deploy the contract. The remaining functions will interact with the deployed contract.
You should already have your provider and client set up in `main.rs` in the way described in the [Setting up the Ethers Provider and Client section](#setting-up-the-ethers-provider-and-client).
Before getting started with the contract deployment, you'll need to add a few more imports to your `main.rs` file:
```rust
use ethers_solc::Solc;
use ethers::{prelude::*};
use std::{path::Path, sync::Arc};
```
The `ethers_solc` import will be used to compile the smart contract. The `prelude` from Ethers imports some necessary data types and traits. Lastly, the `std` imports will enables you to store your smart contracts and wrap the client into an `Arc` type for thread safety.
### Compile and Deploy Contract Script {: #compile-and-deploy-contract-script }
This example function will compile and deploy the `Incrementer.sol` smart contract you created in the previous section. The `Incrementer.sol` smart contract should be in the root directory. In the `main.rs` file, you can take the following steps:
1. Create a new asynchronous function named `compile_deploy_contract` that takes a client object's reference as input, and returns an address in the form of `H160`
2. Define a variable named `source` as the path for the directory that hosts all of the smart contracts that should be compiled, which is the root directory
3. Use the `Solc` crate to compile all of the smart contracts in the root directory
4. Get the ABI and bytecode from the compiled result, searching for the `Incrementer.sol` contract
5. Create a contract factory for the smart contract using the ABI, bytecode, and client. The client must be wrapped into an `Arc` type for thread safety
6. Use the factory to deploy. For this example, the value `5` is used as the initial value in the constructor
7. Print out the address after the deployment
8. Return the address
9. Call the `compile_deploy_contract` function in `main`
```rust
// ...
// 1. Define an asynchronous function that takes a client provider as input and returns H160
async fn compile_deploy_contract(client: &Client) -> Result
cargo run
Compiling ethers-examples v0.1.0 (/Users/moonbeam/workspace/ethers-examples)
Finished dev [unoptimized + debuginfo] target(s) in 1.09s
Running `/Users/moonbeam/workspace/ethers-examples/target/debug/ethers-examples`
Incrementer.sol has been deployed to 0xeb8a4d5c7cd56c65c9dbd25f793b50a2c917bb5d
Incrementer's number is 5
### Interact with Contract (Send Methods) {: #interact-with-contract }
Send methods are the type of interaction that modify the contract's storage (change variables), meaning a transaction needs to be signed and sent. In this section, you'll create two functions: one to increment and one to reset the incrementer. This section will also require the `Incrementer_ABI.json` file initialized when [reading from the smart contract](#read-contract-data).
Take the following steps to create the function to increment:
1. Ensure that the abigen macro is called for the `Incrementer_ABI.json` somewhere in the `main.rs` file (if it is already in the `main.rs` file, you do not have to have a second one)
2. Create a new asynchronous function named `increment_number` that takes a client object's reference and an address as input
3. Create a new instance of the `Incrementer` object generated by the abigen macro with the client and contract address values
4. Call the `increment` function in the new `Incrementer` object by including a `U256` object as input. In this instance, the value provided is `5`
5. Call the `read_number` function in `main`
```rust
// ...
// 1. Generate a type-safe interface for the Incrementer smart contract
abigen!(
Incrementer,
"./Incrementer_ABI.json",
event_derives(serde::Deserialize, serde::Serialize)
);
// 2. Define an asynchronous function that takes a client provider and address as input
async fn increment_number(client: &Client, contract_addr: &H160) -> Result<(), Box
cargo run
Compiling ethers-examples v0.1.0 (/Users/moonbeam/workspace/ethers-examples)
Finished dev [unoptimized + debuginfo] target(s) in 1.09s
Running `/Users/moonbeam/workspace/ethers-examples/target/debug/ethers-examples`
Incrementer.sol has been deployed to 0xeb8a4d5c7cd56c65c9dbd25f793b50a2c917bb5d
Incrementer's number is 5
Incrementing number...
Transaction Receipt: {"transactionHash":"0x6f5c204e74b96b6cf6057512ba142ad727718646d4ebb7abe8bbabada198dafb","transactionIndex":"0x0","blockHash":"0x635a8a234b30c6ee907198ddda3a1478ae52c6adbcc4a67353dd9597ee626950","blockNumber":"0x7ac238","from":"0x3b939fead1557c741ff06492fd0127bd287a421e","to":"0xeb8a4d5c7cd56c65c9dbd25f793b50a2c917bb5d","cumulativeGasUsed":"0x68a6","gasUsed":"0x68a6","contractAddress":null,"logs":[],"status":"0x1","logsBloom":"0x00000000000000000000000000000000000000000000000000000000000000000000000000000000000000000000000000000000000000000000000000000000000000000000000000000000000000000000000000000000000000000000000000000000000000000000000000000000000000000000000000000000000000000000000000000000000000000000000000000000000000000000000000000000000000000000000000000000000000000000000000000000000000000000000000000000000000000000000000000000000000000000000000000000000000000000000000000000000000000000000000000000000000000000000000000000000000000000000000000000000","type":"0x2","effectiveGasPrice":"0xba43b740"}
Incrementer's number is 10
Next you can interact with the `reset` function:
1. Ensure that the abigen macro is called for the `Incrementer_ABI.json` somewhere in the `main.rs` file (if it is already in the `main.rs` file, you do not have to have a second one)
2. Create a new asynchronous function named `reset` that takes a client object's reference and an address as input
3. Create a new instance of the `Incrementer` object generated by the abigen macro with the client and contract address values
4. Call the `reset` function in the new `Incrementer` object
5. Call the `reset` function in `main`
```rust
// ...
// 1. Generate a type-safe interface for the Incrementer smart contract
abigen!(
Incrementer,
"./Incrementer_ABI.json",
event_derives(serde::Deserialize, serde::Serialize)
);
// 2. Define an asynchronous function that takes a client provider and address as input
async fn reset(client: &Client, contract_addr: &H160) -> Result<(), Box
cargo run
Compiling ethers-examples v0.1.0 (/Users/moonbeam/workspace/ethers-examples)
Finished dev [unoptimized + debuginfo] target(s) in 1.09s
Running `/Users/moonbeam/workspace/ethers-examples/target/debug/ethers-examples`
Incrementer.sol has been deployed to 0xeb8a4d5c7cd56c65c9dbd25f793b50a2c917bb5d
Incrementer's number is 5
Incrementing number...
Transaction Receipt: {"transactionHash":"0x6f5c204e74b96b6cf6057512ba142ad727718646d4ebb7abe8bbabada198dafb","transactionIndex":"0x0","blockHash":"0x635a8a234b30c6ee907198ddda3a1478ae52c6adbcc4a67353dd9597ee626950","blockNumber":"0x7ac238","from":"0x3b939fead1557c741ff06492fd0127bd287a421e","to":"0xeb8a4d5c7cd56c65c9dbd25f793b50a2c917bb5d","cumulativeGasUsed":"0x68a6","gasUsed":"0x68a6","contractAddress":null,"logs":[],"status":"0x1","logsBloom":"0x00000000000000000000000000000000000000000000000000000000000000000000000000000000000000000000000000000000000000000000000000000000000000000000000000000000000000000000000000000000000000000000000000000000000000000000000000000000000000000000000000000000000000000000000000000000000000000000000000000000000000000000000000000000000000000000000000000000000000000000000000000000000000000000000000000000000000000000000000000000000000000000000000000000000000000000000000000000000000000000000000000000000000000000000000000000000000000000000000000000000","type":"0x2","effectiveGasPrice":"0xba43b740"}
Incrementer's number is 10
Resetting number...
Transaction Receipt: {"transactionHash":"0xf1010597c6ab3d3cfcd6e8e68bf2eddf4ed38eb93a3052591c88b675ed1e83a4","transactionIndex":"0x0","blockHash":"0x5d4c09abf104cbd88e80487c170d8709aae7475ca84c1f3396f3e35222fbe87f","blockNumber":"0x7ac23b","from":"0x3b939fead1557c741ff06492fd0127bd287a421e","to":"0xeb8a4d5c7cd56c65c9dbd25f793b50a2c917bb5d","cumulativeGasUsed":"0x53c4","gasUsed":"0x53c4","contractAddress":null,"logs":[],"status":"0x1","logsBloom":"0x000000000000000000000000000000000000000000000000000000000000000000000000000000000000000000000000000000000000000000000000000000000000000000000000000000000000000000000000000000000000000000000000000000000000000000000000000000000000000000000000000000000000000000000000000000000000000000000000000000000000000000000000000000000000000000000000000000000000000000000000000000000000000000000000000000000000000000000000000000000000000000000000000000000000000000000000000000000000000000000000000000000000000000000000000000000","type":"0x2","effectiveGasPrice":"0xba43b740"}
Incrementer's number is 0
??? code "View the complete script"
```rust
use ethers::providers::{Provider, Http};
use ethers::{prelude::*};
use ethers_solc::Solc;
use std::{path::Path, sync::Arc};
type Client = SignerMiddleware
The information presented herein has been provided by third parties and is made available solely for general information purposes. Moonbeam does not endorse any project listed and described on the Moonbeam Doc Website (https://docs.moonbeam.network/). Moonbeam Foundation does not warrant the accuracy, completeness or usefulness of this information. Any reliance you place on such information is strictly at your own risk. Moonbeam Foundation disclaims all liability and responsibility arising from any reliance placed on this information by you or by anyone who may be informed of any of its contents. All statements and/or opinions expressed in these materials are solely the responsibility of the person or entity providing those materials and do not necessarily represent the opinion of Moonbeam Foundation. The information should not be construed as professional or financial advice of any kind. Advice from a suitably qualified professional should always be sought in relation to any particular matter or circumstance. The information herein may link to or integrate with other websites operated or content provided by third parties, and such other websites may link to this website. Moonbeam Foundation has no control over any such other websites or their content and will have no liability arising out of or related to such websites or their content. The existence of any such link does not constitute an endorsement of such websites, the content of the websites, or the operators of the websites. These links are being provided to you only as a convenience and you release and hold Moonbeam Foundation harmless from any and all liability arising from your use of this information or the information provided by any third-party website or service.
--- END CONTENT ---
Doc-Content: https://docs.moonbeam.network/builders/ethereum/libraries/viem/
--- BEGIN CONTENT ---
---
title: How to use viem Ethereum Library
description: Check out this tutorial to learn how to use the viem TypeScript interface for Ethereum to send transactions and deploy Solidity smart contracts to Moonbeam.
categories: Libraries and SDKs, Ethereum Toolkit
---
# viem TypeScript Ethereum Library
## Introduction {: #introduction }
[viem](https://viem.sh){target=\_blank} is a modular TypeScript library that allows developers to interact with abstractions over the JSON-RPC API, making it easy to interact with Ethereum nodes. Since Moonbeam has an Ethereum-like API available that is fully compatible with Ethereum-style JSON RPC invocations, developers can leverage this compatibility to interact with Moonbeam nodes. For more information on viem, check out their [documentation site](https://viem.sh/docs/getting-started){target=\_blank}.
In this guide, you'll learn how to use viem to send a transaction and deploy a contract on the Moonbase Alpha TestNet. This guide can be adapted for [Moonbeam](/builders/get-started/networks/moonbeam/){target=\_blank}, [Moonriver](/builders/get-started/networks/moonriver/){target=\_blank}, or a [Moonbeam development node](/builders/get-started/networks/moonbeam-dev/){target=\_blank}.
## Checking Prerequisites {: #checking-prerequisites }
For the examples in this guide, you will need to have the following:
- An account with funds.
You can get DEV tokens for testing on Moonbase Alpha once every 24 hours from the [Moonbase Alpha Faucet](https://faucet.moonbeam.network){target=\_blank}
-
To test out the examples in this guide on Moonbeam or Moonriver, you will need to have your own endpoint and API key, which you can get from one of the supported [Endpoint Providers](/builders/get-started/endpoints/){target=\_blank}
!!! note
The examples in this guide assume you have a MacOS or Ubuntu 22.04-based environment and will need to be adapted accordingly for Windows.
## Installing viem {: #installing-viem }
To get started, you'll need to create a basic TypeScript project. First, create a directory to store all of the files you'll be creating throughout this guide, and initialize the project with the following command:
```bash
mkdir viem-examples && cd viem-examples && npm init --y
```
For this guide, you'll need to install the viem library and the Solidity compiler. To install both packages, you can run the following command:
=== "npm"
```bash
npm install typescript ts-node viem solc@0.8.0
```
=== "yarn"
```bash
yarn add typescript ts-node viem solc@0.8.0
```
You can create a TypeScript configuration file by running:
```bash
npx tsc --init
```
!!! note
This tutorial was created using Node.js v18.18.0.
## Set Up a viem Client (Provider) {: #setting-up-a-viem-provider }
Throughout this guide, you'll be creating a bunch of scripts that provide different functionality, such as sending a transaction, deploying a contract, and interacting with a deployed contract. In most of these scripts, you'll need to create a [viem client](https://docs.ethers.org/v6/api/providers/){target=\_blank} to interact with the network.
To configure your project for Moonbeam or Moonriver, you will need to have your own endpoint and API key, which you can get from one of the supported [Endpoint Providers](/builders/get-started/endpoints/){target=\_blank}.
You can create a viem client for reading chain data, like balances or contract data, using the `createPublicClient` function, or you can create a viem client for writing chain data, like sending transactions, using the `createWalletClient` function.
### For Reading Chain Data {: #for-reading-chain-data }
To create a client for reading chain data, you can take the following steps:
1. Import the `createPublicClient` and `http` functions from `viem` and the network you want to interact with from `viem/chains`. The chain can be any of the following: `moonbeam`, `moonriver`, or `moonbaseAlpha`
2. Create the `client` using the `createPublicClient` function and pass in the network and the HTTP RPC endpoint
=== "Moonbeam"
```ts
import { createPublicClient, http } from 'viem';
import { moonbeam } from 'viem/chains';
const rpcUrl = '{{ networks.moonbeam.rpc_url }}'
const publicClient = createPublicClient({
chain: moonbeam,
transport: http(rpcUrl),
});
```
=== "Moonriver"
```ts
import { createPublicClient, http } from 'viem';
import { moonriver } from 'viem/chains';
const rpcUrl = '{{ networks.moonriver.rpc_url }}'
const publicClient = createPublicClient({
chain: moonriver,
transport: http(rpcUrl),
});
```
=== "Moonbase Alpha"
```ts
import { createPublicClient, http } from 'viem';
import { moonbaseAlpha } from 'viem/chains';
const rpcUrl = '{{ networks.moonbase.rpc_url }}'
const publicClient = createPublicClient({
chain: moonbaseAlpha,
transport: http(rpcUrl),
});
```
=== "Moonbeam Dev Node"
```ts
import { createPublicClient, http } from 'viem';
import { moonbeamDev } from 'viem/chains';
const rpcUrl = '{{ networks.development.rpc_url }}'
const publicClient = createPublicClient({
chain: moonbeamDev,
transport: http(rpcUrl),
})
```
### For Writing Chain Data {: #for-writing-chain-data }
To create a client for writing chain data, you can take the following steps:
1. Import the `createWalletClient` and `http` functions from `viem`, the `privateKeyToAccount` function for loading your accounts via their private keys, and the network you want to interact with from `viem/chains`. The chain can be any of the following: `moonbeam`, `moonriver`, or `moonbaseAlpha`
2. Create your account using the `privateKeyToAccount` function
3. Create the `client` using the `createWalletClient` function and pass in the account, network, and the HTTP RPC endpoint
!!! remember
This is for demo purposes only. Never store your private key in a TypeScript file.
=== "Moonbeam"
```ts
import { createWalletClient, http } from 'viem';
import { privateKeyToAccount } from 'viem/accounts';
import { moonbeam } from 'viem/chains';
const account = privateKeyToAccount('INSERT_PRIVATE_KEY');
const rpcUrl = '{{ networks.moonbeam.rpc_url }}'
const walletClient = createWalletClient({
account,
chain: moonbeam,
transport: http(rpcUrl),
});
```
=== "Moonriver"
```ts
import { createWalletClient, http } from 'viem';
import { privateKeyToAccount } from 'viem/accounts';
import { moonriver } from 'viem/chains';
const account = privateKeyToAccount('INSERT_PRIVATE_KEY');
const rpcUrl = '{{ networks.moonriver.rpc_url }}'
const walletClient = createWalletClient({
account,
chain: moonriver,
transport: http(rpcUrl),
});
```
=== "Moonbase Alpha"
```ts
import { createWalletClient, http } from 'viem';
import { privateKeyToAccount } from 'viem/accounts';
import { moonbaseAlpha } from 'viem/chains';
const account = privateKeyToAccount('INSERT_PRIVATE_KEY');
const rpcUrl = '{{ networks.moonbase.rpc_url }}'
const walletClient = createWalletClient({
account,
chain: moonbaseAlpha,
transport: http(rpcUrl),
});
```
=== "Moonbeam Dev Node"
```ts
import { createWalletClient, http } from 'viem';
import { privateKeyToAccount } from 'viem/accounts';
import { moonbeamDev } from 'viem/chains';
const account = privateKeyToAccount('INSERT_PRIVATE_KEY');
const rpcUrl = '{{ networks.development.rpc_url }}'
const walletClient = createWalletClient({
account,
chain: moonbeamDev,
transport: http(rpcUrl),
});
```
!!! note
To interact with browser-based wallets, you can use the following code to create an account:
```ts
const [account] = await window.ethereum.request({
method: 'eth_requestAccounts',
});
const walletClient = createWalletClient({
account,
chain: moonbeam,
transport: custom(window.ethereum),
});
```
## Send a Transaction {: #send-transaction }
During this section, you'll be creating a couple of scripts. The first one will be to check the balances of your accounts before trying to send a transaction. The second script will actually send the transaction.
You can also use the balance script to check the account balances after the transaction has been sent.
### Check Balances Script {: #check-balances-script }
You'll only need one file to check the balances of both addresses before and after the transaction is sent. To get started, you can create a `balances.ts` file by running:
```bash
touch balances.ts
```
Next, you will create the script for this file and complete the following steps:
1. Update your imports to include the `createPublicClient`, `http`, and `formatEther` functions from `viem` and the network you want to interact with from `viem/chains`
2. [Set up a public viem client](#for-reading-chain-data), which can be used for reading chain data, such as account balances
3. Define the `addressFrom` and `addressTo` variables
4. Create the asynchronous `balances` function that wraps the `publicClient.getBalance` method
5. Use the `publicClient.getBalance` function to fetch the balances for the `addressFrom` and `addressTo` addresses. You can also leverage the `formatEther` function to transform the balance into a more readable number (in GLMR, MOVR, or DEV)
6. Lastly, run the `balances` function
```ts
// 1. Imports
import { createPublicClient, http, formatEther } from 'viem';
import { moonbaseAlpha } from 'viem/chains';
// 2. Create a public client for reading chain data
const rpcUrl = 'https://rpc.api.moonbase.moonbeam.network';
const publicClient = createPublicClient({
chain: moonbaseAlpha,
transport: http(rpcUrl),
});
// 3. Create address variables
const addressFrom = 'INSERT_FROM_ADDRESS';
const addressTo = 'INSERT_TO_ADDRESS';
// 4. Create balances function
const balances = async () => {
// 5. Fetch balances
const balanceFrom = formatEther(
await publicClient.getBalance({ address: addressFrom })
);
const balanceTo = formatEther(
await publicClient.getBalance({ address: addressTo })
);
console.log(`The balance of ${addressFrom} is: ${balanceFrom} DEV`);
console.log(`The balance of ${addressTo} is: ${balanceTo} DEV`);
};
// 6. Call the balances function
balances();
```
To run the script and fetch the account balances, you can run the following command:
```bash
npx ts-node balances.ts
```
If successful, the balances for the origin and receiving address will be displayed in your terminal in DEV.
npx ts-node balances.ts
The balance of 0x3B939FeaD1557C741Ff06492FD0127bd287A421e is: 3601.72 DEV
The balance of 0x78F34038c82638E0563b974246D421154C26b004 is: 0 DEV
### Send Transaction Script {: #send-transaction-script }
You'll only need one file to execute a transaction between accounts. For this example, you'll be transferring 1 DEV token from an origin address (from which you hold the private key) to another address. To get started, you can create a `transaction.ts` file by running:
```bash
touch transaction.ts
```
Next, you will create the script for this file and complete the following steps:
1. Update your imports to include the `createWalletClient`, `http`, and `parseEther` functions from `viem`, the `privateKeyToAccount` function from `viem/accounts`, and the network you want to interact with from `viem/chains`
2. [Set up a viem wallet client](#for-writing-chain-data) for writing chain data, which can be used along with your private key to send transactions. **Note: This is for example purposes only. Never store your private keys in a TypeScript file**
3. [Set up a public viem client](#for-reading-chain-data) for reading chain data, which will be used to wait for the transaction receipt
4. Define the `addressTo` variable
5. Create the asynchronous `send` function, which wraps the transaction object and the `walletClient.sendTransaction` method
6. Use the `walletClient.sendTransaction` function to sign and send the transaction. You'll need to pass in the transaction object, which only requires the recipient's address and the amount to send. Note that `parseEther` can be used, which handles the necessary unit conversions from Ether to Wei, similar to using `parseUnits(value, decimals)`. Use `await` to wait until the transaction is processed and the transaction hash is returned
7. Use the `publicClient.waitForTransactionReceipt` function to wait for the transaction receipt, signaling that the transaction has been completed. This is particularly helpful if you need the transaction receipt or if you're running the `balances.ts` script directly after this one to check if the balances have been updated as expected
8. Lastly, run the `send` function
```ts
// 1. Imports
import { createPublicClient, createWalletClient, http, parseEther } from 'viem';
import { privateKeyToAccount } from 'viem/accounts';
import { moonbaseAlpha } from 'viem/chains';
// 2. Create a wallet client for writing chain data
const account = privateKeyToAccount('INSERT_PRIVATE_KEY');
const rpcUrl = 'https://rpc.api.moonbase.moonbeam.network';
const walletClient = createWalletClient({
account,
chain: moonbaseAlpha,
transport: http(rpcUrl),
});
// 3. Create a public client for reading chain data
const publicClient = createPublicClient({
chain: moonbaseAlpha,
transport: http(rpcUrl),
});
// 4. Create to address variable
const addressTo = 'INSERT_ADDRESS';
// 5. Create send function
const send = async () => {
console.log(
`Attempting to send transaction from ${account.address} to ${addressTo}`
);
// 6. Sign and send tx
const hash = await walletClient.sendTransaction({
to: addressTo,
value: parseEther('1'),
});
// 7. Wait for the transaction receipt
await publicClient.waitForTransactionReceipt({
hash,
});
console.log(`Transaction successful with hash: ${hash}`);
};
// 8. Call the send function
send();
```
To run the script, you can run the following command in your terminal:
```bash
npx ts-node transaction.ts
```
If the transaction was successful, in your terminal you'll see the transaction hash has been printed out.
!!! note
Viem requires that you prepend your private key with `0x`. Many wallets omit this `0x`, so verify you've included it as you replace `INSERT_PRIVATE_KEY`.
You can also use the `balances.ts` script to check that the balances for the origin and receiving accounts have changed. The entire workflow would look like this:
npx ts-node balances.ts
The balance of 0x3B939FeaD1557C741Ff06492FD0127bd287A421e is: 3601.72 DEV
The balance of 0x78F34038c82638E0563b974246D421154C26b004 is: 0 DEV
npx ts-node transaction.ts Attempting to send transaction from 0x3B939FeaD1557C741Ff06492FD0127bd287A421e to 0x78F34038c82638E0563b974246D421154C26b004 Transaction successful with hash: 0xc482d907b2ae4ca1202c6cc5b486694b8439a9853caad9c2cdafec39defa1968 npx ts-node balances.ts The balance of 0x3B939FeaD1557C741Ff06492FD0127bd287A421e is: 3600.72 DEV The balance of 0x78F34038c82638E0563b974246D421154C26b004 is: 1 DEV
## Deploy a Contract {: #deploy-contract }
The contract you'll be compiling and deploying in the next couple of sections is a simple incrementer contract, arbitrarily named `Incrementer.sol`. You can get started by creating a file for the contract:
```bash
touch Incrementer.sol
```
Next, you can add the Solidity code to the file:
```solidity
// SPDX-License-Identifier: MIT
pragma solidity ^0.8.0;
contract Incrementer {
uint256 public number;
constructor(uint256 _initialNumber) {
number = _initialNumber;
}
function increment(uint256 _value) public {
number = number + _value;
}
function reset() public {
number = 0;
}
}
```
The `constructor` function, which runs when the contract is deployed, sets the initial value of the number variable stored on-chain (the default is `0`). The `increment` function adds the `_value` provided to the current number, but a transaction needs to be sent, which modifies the stored data. Lastly, the `reset` function resets the stored value to zero.
!!! note
This contract is a simple example for illustration purposes only and does not handle values wrapping around.
### Compile Contract Script {: #compile-contract-script }
In this section, you'll create a script that uses the Solidity compiler to output the bytecode and interface (ABI) for the `Incrementer.sol` contract. To get started, you can create a `compile.ts` file by running:
```bash
touch compile.ts
```
Next, you will create the script for this file and complete the following steps:
1. Import the `fs` and `solc` packages
2. Using the `fs.readFileSync` function, you'll read and save the file contents of `Incrementer.sol` to `source`
3. Build the `input` object for the Solidity compiler by specifying the `language`, `sources`, and `settings` to be used
4. Using the `input` object, you can compile the contract using `solc.compile`
5. Extract the compiled contract file and export it to be used in the deployment script
```js
// 1. Import packages
const fs = require('fs');
const solc = require('solc');
// 2. Get path and load contract
const source = fs.readFileSync('Incrementer.sol', 'utf8');
// 3. Create input object
const input = {
language: 'Solidity',
sources: {
'Incrementer.sol': {
content: source,
},
},
settings: {
outputSelection: {
'*': {
'*': ['*'],
},
},
},
};
// 4. Compile the contract
const tempFile = JSON.parse(solc.compile(JSON.stringify(input)));
const contractFile = tempFile.contracts['Incrementer.sol']['Incrementer'];
// 5. Export contract data
export default contractFile;
```
### Deploy Contract Script {: #deploy-contract-script }
With the script for compiling the `Incrementer.sol` contract in place, you can then use the results to send a signed transaction that deploys it. To do so, you can create a file for the deployment script called `deploy.ts`:
```bash
touch deploy.ts
```
Next, you will create the script for this file and complete the following steps:
1. Update your imports to include the `createPublicClient`, `createWalletClient`, and `http` functions from `viem`, the `privateKeyToAccount` function from `viem/accounts`, the network you want to interact with from `viem/chains`, and the `contractFile` from the `compile.ts` file you created in the [Compile Contract Script](#compile-contract-script) section
2. [Set up a viem wallet client](#for-writing-chain-data) for writing chain data, which will be used along with your private key to deploy the `Incrementer` contract. **Note: This is for example purposes only. Never store your private keys in a TypeScript file**
3. [Set up a public viem client](#for-reading-chain-data) for reading chain data, which will be used to read the transaction receipt for the deployment
4. Load the contract `bytecode` and `abi` for the compiled contract
5. Create the asynchronous `deploy` function that will be used to deploy the contract via the `walletClient.deployContract` method
6. Use the `walletClient.deployContract` function to sign and send the transaction. You'll need to pass in the contract's ABI and bytecode, the account to deploy the transaction from, and the initial value for the incrementer. Use `await` to wait until the transaction is processed and the transaction hash is returned
7. Use the `publicClient.readContract` function to get the transaction receipt for the deployment. Use `await` to wait until the transaction is processed and the contract address is returned
8. Lastly, run the `deploy` function
```ts
// 1. Update imports
import { createPublicClient, createWalletClient, http } from 'viem';
import { privateKeyToAccount } from 'viem/accounts';
import { moonbaseAlpha } from 'viem/chains';
import contractFile from './compile';
// 2. Create a wallet client for writing chain data
// The private key must be prepended with `0x` to avoid errors
const account = privateKeyToAccount('INSERT_PRIVATE_KEY');
const rpcUrl = 'https://rpc.api.moonbase.moonbeam.network';
const walletClient = createWalletClient({
account,
chain: moonbaseAlpha,
transport: http(rpcUrl),
});
// 3. Create a public client for reading chain data
const publicClient = createPublicClient({
chain: moonbaseAlpha,
transport: http(rpcUrl),
});
// 4. Load contract information
const bytecode = contractFile.evm.bytecode.object;
const abi = contractFile.abi;
const _initialNumber = 5;
// 5. Create deploy function
const deploy = async () => {
console.log(`Attempting to deploy from account: ${account.address}`);
// 6. Send tx (initial value set to 5)
const contract = await walletClient.deployContract({
abi,
account,
bytecode,
args: [_initialNumber],
});
// 7. Get the transaction receipt for the deployment
const transaction = await publicClient.waitForTransactionReceipt({
hash: contract,
});
console.log(`Contract deployed at address: ${transaction.contractAddress}`);
};
// 8. Call the deploy function
deploy();
```
To run the script, you can enter the following command into your terminal:
```bash
npx ts-node deploy.ts
```
If successful, the contract's address will be displayed in the terminal.
npx ts-node transaction.ts Attempting to send transaction from 0x3B939FeaD1557C741Ff06492FD0127bd287A421e to 0x78F34038c82638E0563b974246D421154C26b004 Transaction successful with hash: 0xc482d907b2ae4ca1202c6cc5b486694b8439a9853caad9c2cdafec39defa1968 npx ts-node balances.ts The balance of 0x3B939FeaD1557C741Ff06492FD0127bd287A421e is: 3600.72 DEV The balance of 0x78F34038c82638E0563b974246D421154C26b004 is: 1 DEV
npx ts-node deploy.ts
Attempting to deploy from account: 0x3B939FeaD1557C741Ff06492FD0127bd287A421e
Contract deployed at address: 0x4503b1086c6780e888194fd9caebca5f65b210c9
### Read Contract Data (Call Methods) {: #read-contract-data }
Call methods are the type of interaction that doesn't modify the contract's storage (change variables), meaning no transaction needs to be sent. They simply read various storage variables of the deployed contract.
To get started, you can create a file and name it `get.ts`:
```bash
touch get.ts
```
Then you can take the following steps to create the script:
1. Update your imports to include the `createPublicClient` and `http` functions from `viem`, the network you want to interact with from `viem/chains`, and the `contractFile` from the `compile.ts` file you created in the [Compile Contract Script](#compile-contract-script) section
2. [Set up a public viem client](#for-reading-chain-data) for reading chain data, which will be used to read the current number of the `Incrementer` contract
3. Create the `contractAddress` variable using the address of the deployed contract and the `abi` variable using the `contractFile` from the `compile.ts` file
4. Create the asynchronous `get` function
5. Call the contract using the `publicClient.readContract` function, passing in the `abi`, the name of the function, the `contractAddress`, and any arguments (if needed). You can use `await`, which will return the value requested once the request promise resolves
6. Lastly, call the `get` function
```ts
// 1. Update imports
import { createPublicClient, http } from 'viem';
import { moonbaseAlpha } from 'viem/chains';
import contractFile from './compile';
// 2. Create a public client for reading chain data
const rpcUrl = 'https://rpc.api.moonbase.moonbeam.network';
const client = createPublicClient({
chain: moonbaseAlpha,
transport: http(rpcUrl),
});
// 3. Create contract variables
const contractAddress = 'INSERT_CONTRACT_ADDRESS';
const abi = contractFile.abi;
// 4. Create get function
const get = async () => {
console.log(`Making a call to contract at address: ${contractAddress}`);
// 5. Call contract
const data = await client.readContract({
abi,
functionName: 'number',
address: contractAddress,
args: [],
});
console.log(`The current number stored is: ${data}`);
};
// 6. Call get function
get();
```
To run the script, you can enter the following command in your terminal:
```bash
npx ts-node get.ts
```
If successful, the value will be displayed in the terminal.
npx ts-node get.ts
Making a call to contract at address: 0x4503b1086c6780e888194fd9caebca5f65b210c9
The current number stored is: 5
### Interact with Contract (Send Methods) {: #interact-with-contract }
Send methods are the type of interactions that modify the contract's storage (change variables), meaning a transaction needs to be signed and sent. In this section, you'll create two scripts: one to increment and one to reset the incrementer. To get started, you can create a file for each script and name them `increment.ts` and `reset.ts`:
```bash
touch increment.ts reset.ts
```
Open the `increment.ts` file and take the following steps to create the script:
1. Update your imports to include the `createWalletClient` and `http` functions from `viem`, the network you want to interact with from `viem/chains`, and the `contractFile` from the `compile.ts` file you created in the [Compile Contract Script](#compile-contract-script) section
2. [Set up a viem wallet client](#for-writing-chain-data) for writing chain data, which will be used along with your private key to send a transaction. **Note: This is for example purposes only. Never store your private keys in a TypeScript file**
3. [Set up a public viem client](#for-reading-chain-data) for reading chain data, which will be used to wait for the transaction receipt
4. Create the `contractAddress` variable using the address of the deployed contract, the `abi` variable using the `contractFile` from the `compile.ts` file, and the `_value` to increment the contract by
5. Create the asynchronous `increment` function
6. Call the contract using the `walletClient.writeContract` function, passing in the `abi`, the name of the function, the `contractAddress`, and the `_value`. You can use `await`, which will return the transaction hash once the request promise resolves
7. Use the `publicClient.waitForTransactionReceipt` function to wait for the transaction receipt, signaling that the transaction has been completed. This is particularly helpful if you need the transaction receipt or if you're running the `get.ts` script directly after this one to check that the current number has been updated as expected
8. Lastly, call the `increment` function
```js
// 1. Update imports
import { createPublicClient, createWalletClient, http } from 'viem';
import { privateKeyToAccount } from 'viem/accounts';
import { moonbaseAlpha } from 'viem/chains';
import contractFile from './compile';
// 2. Create a wallet client for writing chain data
const account = privateKeyToAccount('INSERT_PRIVATE_KEY');
const rpcUrl = 'https://rpc.api.moonbase.moonbeam.network';
const walletClient = createWalletClient({
account,
chain: moonbaseAlpha,
transport: http(rpcUrl),
});
// 3. Create a public client for reading chain data
const publicClient = createPublicClient({
chain: moonbaseAlpha,
transport: http(rpcUrl),
});
// 4. Create contract variables
const contractAddress = 'INSERT_CONTRACT_ADDRESS';
const abi = contractFile.abi;
const _value = 3;
// 5. Create increment function
const increment = async () => {
console.log(
`Calling the increment by ${_value} function in contract at address: ${contractAddress}`
);
// 6. Call contract
const hash = await walletClient.writeContract({
abi,
functionName: 'increment',
address: contractAddress,
args: [_value],
});
// 7. Wait for the transaction receipt
await publicClient.waitForTransactionReceipt({
hash,
});
console.log(`Tx successful with hash: ${hash}`);
};
// 8. Call increment function
increment();
```
To run the script, you can enter the following command in your terminal:
```bash
npx ts-node increment.ts
```
If successful, the transaction hash will be displayed in the terminal. You can use the `get.ts` script alongside the `increment.ts` script to make sure that value is changing as expected.
npx ts-node get.ts
Making a call to contract at address: 0x4503b1086c6780e888194fd9caebca5f65b210c9
The current number stored is: 5
npx ts-node increment.ts
Calling the increment by 3 function in contract at address: 0x4503b1086c6780e888194fd9caebca5f65b210c9
Tx successful with hash: 0x041c9767e7a96f60f372341647430560569fd6ff64a27b4b9c6241e55dde57e1
npx ts-node get.ts
Making a call to contract at address: 0x4503b1086c6780e888194fd9caebca5f65b210c9
The current number stored is: 8
Next, you can open the `reset.ts` file and take the following steps to create the script:
1. Update your imports to include the `createWalletClient` and `http` functions from `viem`, the network you want to interact with from `viem/chains`, and the `contractFile` from the `compile.ts` file you created in the [Compile Contract Script](#compile-contract-script) section
2. [Set up a viem wallet client](#for-writing-chain-data) for writing chain data, which will be used along with your private key to send a transaction. **Note: This is for example purposes only. Never store your private keys in a TypeScript file**
3. [Set up a public viem client](#for-reading-chain-data) for reading chain data, which will be used to wait for the transaction receipt
4. Create the `contractAddress` variable using the address of the deployed contract and the `abi` variable using the `contractFile` from the `compile.ts` file to increment the contract by
5. Create the asynchronous `reset` function
6. Call the contract using the `walletClient.writeContract` function, passing in the `abi`, the name of the function, the `contractAddress`, and an empty array for the arguments. You can use `await`, which will return the transaction hash once the request promise resolves
7. Use the `publicClient.waitForTransactionReceipt` function to wait for the transaction receipt, signaling that the transaction has been completed. This is particularly helpful if you need the transaction receipt or if you're running the `get.ts` script directly after this one to check that the current number has been reset to `0`
8. Lastly, call the `reset` function
```ts
// 1. Update imports
import { createPublicClient, createWalletClient, http } from 'viem';
import { privateKeyToAccount } from 'viem/accounts';
import { moonbaseAlpha } from 'viem/chains';
import contractFile from './compile';
// 2. Create a wallet client for writing chain data
const account = privateKeyToAccount('INSERT_PRIVATE_KEY');
const rpcUrl = 'https://rpc.api.moonbase.moonbeam.network';
const walletClient = createWalletClient({
account,
chain: moonbaseAlpha,
transport: http(rpcUrl),
});
// 3. Create a public client for reading chain data
const publicClient = createPublicClient({
chain: moonbaseAlpha,
transport: http(rpcUrl),
});
// 4. Create contract variables
const contractAddress = 'INSERT_CONTRACT_ADDRESS';
const abi = contractFile.abi;
// 5. Create reset function
const reset = async () => {
console.log(
`Calling the reset function in contract at address: ${contractAddress}`
);
// 6. Call contract
const hash = await walletClient.writeContract({
abi,
functionName: 'reset',
address: contractAddress,
args: [],
});
// 7. Wait for the transaction receipt
await publicClient.waitForTransactionReceipt({
hash,
});
console.log(`Tx successful with hash: ${hash}`);
};
// 8. Call reset function
reset();
```
To run the script, you can enter the following command in your terminal:
```bash
npx ts-node reset.ts
```
If successful, the transaction hash will be displayed in the terminal. You can use the `get.ts` script alongside the `reset.ts` script to make sure that value is changing as expected.
npx ts-node get.ts
Making a call to contract at address: 0x4503b1086c6780e888194fd9caebca5f65b210c9
The current number stored is: 8
npx ts-node reset.ts
Calling the reset function in contract at address: 0x4503b1086c6780e888194fd9caebca5f65b210c9
Tx successful with hash: 0xc1a772131ccf6a03675ff3e88798a6e70a99e145eeb0e98170ff2e3345ee14a7
npx ts-node get.ts
Making a call to contract at address: 0x4503b1086c6780e888194fd9caebca5f65b210c9
The current number stored is: 0
The information presented herein has been provided by third parties and is made available solely for general information purposes. Moonbeam does not endorse any project listed and described on the Moonbeam Doc Website (https://docs.moonbeam.network/). Moonbeam Foundation does not warrant the accuracy, completeness or usefulness of this information. Any reliance you place on such information is strictly at your own risk. Moonbeam Foundation disclaims all liability and responsibility arising from any reliance placed on this information by you or by anyone who may be informed of any of its contents. All statements and/or opinions expressed in these materials are solely the responsibility of the person or entity providing those materials and do not necessarily represent the opinion of Moonbeam Foundation. The information should not be construed as professional or financial advice of any kind. Advice from a suitably qualified professional should always be sought in relation to any particular matter or circumstance. The information herein may link to or integrate with other websites operated or content provided by third parties, and such other websites may link to this website. Moonbeam Foundation has no control over any such other websites or their content and will have no liability arising out of or related to such websites or their content. The existence of any such link does not constitute an endorsement of such websites, the content of the websites, or the operators of the websites. These links are being provided to you only as a convenience and you release and hold Moonbeam Foundation harmless from any and all liability arising from your use of this information or the information provided by any third-party website or service.
--- END CONTENT ---
Doc-Content: https://docs.moonbeam.network/builders/ethereum/libraries/web3js/
--- BEGIN CONTENT ---
---
title: How to use Web3.js Ethereum Library
description: Follow this tutorial to learn how to use the Ethereum Web3 JavaScript Library to deploy Solidity smart contracts to Moonbeam.
categories: Libraries and SDKs, Ethereum Toolkit
---
# Web3.js JavaScript Library
## Introduction {: #introduction }
!!! warning
Web3.js has been [sunset](https://blog.chainsafe.io/web3-js-sunset/){target=\_blank}. You can find tutorials on using [Ethers.js](/builders/ethereum/libraries/ethersjs/){target=\_blank} and [viem](/builders/ethereum/libraries/viem/){target=\_blank} on the [Libraries](/builders/ethereum/libraries/){target=\_blank} page.
[Web3.js](https://web3js.readthedocs.io){target=\_blank} is a set of libraries that allow developers to interact with Ethereum nodes using HTTP, IPC, or WebSocket protocols with JavaScript. Moonbeam has an Ethereum-like API available that is fully compatible with Ethereum-style JSON-RPC invocations. Therefore, developers can leverage this compatibility and use the Web3.js library to interact with a Moonbeam node as if they were doing so on Ethereum.
In this guide, you'll learn how to use the Web3.js library to send a transaction and deploy a contract on Moonbase Alpha. This guide can be adapted for [Moonbeam](/builders/get-started/networks/moonbeam/){target=\_blank}, [Moonriver](/builders/get-started/networks/moonriver/){target=\_blank}, or a [Moonbeam development node](/builders/get-started/networks/moonbeam-dev/){target=\_blank}.
## Checking Prerequisites {: #checking-prerequisites }
For the examples in this guide, you will need to have the following:
- An account with funds.
You can get DEV tokens for testing on Moonbase Alpha once every 24 hours from the [Moonbase Alpha Faucet](https://faucet.moonbeam.network){target=\_blank}
-
To test out the examples in this guide on Moonbeam or Moonriver, you will need to have your own endpoint and API key, which you can get from one of the supported [Endpoint Providers](/builders/get-started/endpoints/){target=\_blank}
!!! note
The examples in this guide assume you have a MacOS or Ubuntu 22.04-based environment and will need to be adapted accordingly for Windows.
## Installing Web3.js {: #install-web3js }
To get started, you'll need to start a basic JavaScript project. First, create a directory to store all of the files you'll be creating throughout this guide, and initialize the project with the following command:
```bash
mkdir web3-examples && cd web3-examples && npm init --y
```
For this guide, you'll need to install the Web3.js library and the Solidity compiler. To install both NPM packages, you can run the following command:
=== "npm"
```bash
npm install web3 solc@0.8.0
```
=== "yarn"
```bash
yarn add web3 solc@0.8.0
```
## Setup Web3.js with Moonbeam {: #setup-web3-with-moonbeam }
You can configure Web3.js to work with any of the Moonbeam networks.
To configure your project for Moonbeam or Moonriver, you will need to have your own endpoint and API key, which you can get from one of the supported [Endpoint Providers](/builders/get-started/endpoints/){target=\_blank}.
The simplest way to get started with each of the networks is as follows:
=== "Moonbeam"
```js
const { Web3 } = require('web3');
// Create Web3 instance
const web3 = new Web3('{{ networks.moonbeam.rpc_url }}'); // Insert your RPC URL here
```
=== "Moonriver"
```js
const { Web3 } = require('web3');
// Create Web3 instance
const web3 = new Web3('{{ networks.moonriver.rpc_url }}'); // Insert your RPC URL here
```
=== "Moonbase Alpha"
```js
const { Web3 } = require('web3');
// Create Web3 instance
const web3 = new Web3('{{ networks.moonbase.rpc_url }}');
```
=== "Moonbeam Dev Node"
```js
const { Web3 } = require('web3');
// Create Web3 instance
const web3 = new Web3('{{ networks.development.rpc_url }}');
```
Save this code snippet, as you'll need it for the scripts that are used in the following sections.
## Send a Transaction {: #send-a-transaction }
During this section, you'll be creating a couple of scripts. The first one will be to check the balances of your accounts before trying to send a transaction. The second script will actually send the transaction.
You can also use the balance script to check the account balances after the transaction has been sent.
### Check Balances Script {: #check-balances-script }
You'll only need one file to check the balances of both addresses before and after the transaction is sent. To get started, you can create a `balances.js` file by running:
```bash
touch balances.js
```
Next, you will create the script for this file and complete the following steps:
1. [Set up the Web3 provider](#setup-web3-with-moonbeam)
2. Define the `addressFrom` and `addressTo` variables
3. Create the asynchronous `balances` function, which wraps the `web3.eth.getBalance` method
4. Use the `web3.eth.getBalance` function to fetch the balances for the `addressFrom` and `addressTo` addresses. You can also leverage the `web3.utils.fromWei` function to transform the balance into a more readable number in DEV
5. Lastly, run the `balances` function
```js
// 1. Add the Web3 provider logic
// {...}
// 2. Create address variables
const addressFrom = 'INSERT_FROM_ADDRESS';
const addressTo = 'INSERT_TO_ADDRESS';
// 3. Create balances function
const balances = async () => {
// 4. Fetch balance info
const balanceFrom = web3.utils.fromWei(
await web3.eth.getBalance(addressFrom),
'ether'
);
const balanceTo = web3.utils.fromWei(
await web3.eth.getBalance(addressTo),
'ether'
);
console.log(`The balance of ${addressFrom} is: ${balanceFrom} DEV`);
console.log(`The balance of ${addressTo} is: ${balanceTo} DEV`);
};
// 5. Call balances function
balances();
```
??? code "View the complete script"
```js
const { Web3 } = require('web3');
// 1. Add the Web3 provider logic here:
const providerRPC = {
development: 'http://localhost:9944',
moonbase: 'https://rpc.api.moonbase.moonbeam.network',
};
const web3 = new Web3(providerRPC.moonbase); // Change to correct network
// 2. Create address variables
const addressFrom = 'INSERT_FROM_ADDRESS';
const addressTo = 'INSERT_TO_ADDRESS';
// 3. Create balances function
const balances = async () => {
// 4. Fetch balance info
const balanceFrom = web3.utils.fromWei(await web3.eth.getBalance(addressFrom), 'ether');
const balanceTo = web3.utils.fromWei(await web3.eth.getBalance(addressTo), 'ether');
console.log(`The balance of ${addressFrom} is: ${balanceFrom} DEV`);
console.log(`The balance of ${addressTo} is: ${balanceTo} DEV`);
};
// 5. Call balances function
balances();
```
To run the script and fetch the account balances, you can run the following command:
```bash
node balances.js
```
If successful, the balances for the origin and receiving address will be displayed in your terminal in DEV.
### Send Transaction Script {: #send-transaction-script }
You'll only need one file to execute a transaction between accounts. For this example, you'll be transferring 1 DEV token from an origin address (from which you hold the private key) to another address. To get started, you can create a `transaction.js` file by running:
```bash
touch transaction.js
```
Next, you will create the script for this file and complete the following steps:
1. [Set up the Web3 provider](#setup-web3-with-moonbeam)
2. Define the `accountFrom`, including the `privateKey`, and the `addressTo` variables. The private key is required to create a wallet instance. **Note: This is for example purposes only. Never store your private keys in a JavaScript file**
3. Create the asynchronous `send` function, which wraps the transaction object, and the sign and send transaction functions
4. Create and sign the transaction using the `web3.eth.accounts.signTransaction` function. Pass in the `gas`, `addressTo`, `value`, `gasPrice`, and `nonce` for the transaction along with the sender's `privateKey`
5. Send the signed transaction using the `web3.eth.sendSignedTransaction` method and pass in the raw transaction. Then use `await` to wait until the transaction is processed and the transaction receipt is returned
6. Lastly, run the `send` function
```js
// 1. Add the Web3 provider logic
// {...}
// 2. Create account variables
const accountFrom = {
privateKey: 'INSERT_YOUR_PRIVATE_KEY',
address: 'INSERT_PUBLIC_ADDRESS_OF_PK',
};
const addressTo = 'INSERT_TO_ADDRESS'; // Change addressTo
// 3. Create send function
const send = async () => {
console.log(
`Attempting to send transaction from ${accountFrom.address} to ${addressTo}`
);
// 4. Sign transaction with PK
const createTransaction = await web3.eth.accounts.signTransaction(
{
gas: 21000,
to: addressTo,
value: web3.utils.toWei('1', 'ether'),
gasPrice: await web3.eth.getGasPrice(),
nonce: await web3.eth.getTransactionCount(accountFrom.address),
},
accountFrom.privateKey
);
// 5. Send transaction and wait for receipt
const createReceipt = await web3.eth.sendSignedTransaction(
createTransaction.rawTransaction
);
console.log(
`Transaction successful with hash: ${createReceipt.transactionHash}`
);
};
// 6. Call send function
send();
```
??? code "View the complete script"
```js
const { Web3 } = require('web3');
// 1. Add the Web3 provider logic
const providerRPC = {
development: 'http://localhost:9944',
moonbase: 'https://rpc.api.moonbase.moonbeam.network',
};
const web3 = new Web3(providerRPC.moonbase); // Change to correct network
// 2. Create account variables
const accountFrom = {
privateKey: 'INSERT_YOUR_PRIVATE_KEY',
address: 'INSERT_PUBLIC_ADDRESS_OF_PK',
};
const addressTo = 'INSERT_TO_ADDRESS';
// 3. Create send function
const send = async () => {
console.log(
`Attempting to send transaction from ${accountFrom.address} to ${addressTo}`
);
// 4. Sign transaction with PK
const createTransaction = await web3.eth.accounts.signTransaction(
{
gas: 21000,
to: addressTo,
value: web3.utils.toWei('1', 'ether'),
gasPrice: await web3.eth.getGasPrice(),
nonce: await web3.eth.getTransactionCount(accountFrom.address),
},
accountFrom.privateKey
);
// 5. Send transaction and wait for receipt
const createReceipt = await web3.eth.sendSignedTransaction(
createTransaction.rawTransaction
);
console.log(
`Transaction successful with hash: ${createReceipt.transactionHash}`
);
};
// 6. Call send function
send();
```
To run the script, you can run the following command in your terminal:
```bash
node transaction.js
```
If the transaction was successful, in your terminal, you'll see the transaction hash has been printed out.
You can also use the `balances.js` script to check that the balances for the origin and receiving accounts have changed. The entire workflow would look like this:
node balances.js
The balance of 0x3B939FeaD1557C741Ff06492FD0127bd287A421e is: 3603.67979115380310679 DEV
The balance of 0xe29A0699e079FeBEe94A02f35C31B026f90F6040 is: 0. DEV
node transaction.js
Attempting to send transaction from 0x3B939FeaD1557C741Ff06492FD0127bd287A421e to 0xe29A0699e079FeBEe94A02f35C31B026f90F6040
Transaction successful with hash: 0xf1d628ed12c5f40e03e29aa2c23c8c09680ee595c60607c7363a81c0be8ef3cb
node balances.js
The balance of 0x3B939FeaD1557C741Ff06492FD0127bd287A421e is: 3602.67978852880310679 DEV
The balance of 0xe29A0699e079FeBEe94A02f35C31B026f90F6040 is: 1 DEV
### Common Errors When Sending Transactions {: #common-errors }
When sending a transaction with Web3.js, it is important that you have all of the required data for the transaction. You'll need to provide the `from` address or the `nonce` of the sender, the `gas` or `gasLimit`, and the `gasPrice`.
If you do not specify the `from` address or the `nonce` of the sender, you may receive the following error:
```bash
UnableToPopulateNonceError: Invalid value given "UnableToPopulateNonceError". Error: unable to populate nonce, no from address available.
```
To fix this, simply add either the `from` or `nonce` field to the transaction object.
If you do not specify the gas correctly, you may receive the following error:
```bash
MissingGasError: Invalid value given "gas: 0x5208, gasPrice: undefined, maxPriorityFeePerGas: undefined, maxFeePerGas: undefined". Error: "gas" is missing.
```
To resolve this error, you'll need to make sure that you've provided a `gasPrice` for the transaction. You can use `await web3.eth.getGasPrice()` to programmatically get this value.
## Deploy a Contract {: #deploy-a-contract }
The contract you'll be compiling and deploying in the next couple of sections is a simple incrementer contract, arbitrarily named `Incrementer.sol`. You can get started by creating a file for the contract:
```bash
touch Incrementer.sol
```
Next, you can add the Solidity code to the file:
```solidity
// SPDX-License-Identifier: MIT
pragma solidity ^0.8.0;
contract Incrementer {
uint256 public number;
constructor(uint256 _initialNumber) {
number = _initialNumber;
}
function increment(uint256 _value) public {
number = number + _value;
}
function reset() public {
number = 0;
}
}
```
The `constructor` function, which runs when the contract is deployed, sets the initial value of the number variable stored on-chain (the default is `0`). The `increment` function adds the `_value` provided to the current number, but a transaction needs to be sent, which modifies the stored data. Lastly, the `reset` function resets the stored value to zero.
!!! note
This contract is a simple example for illustration purposes only and does not handle values wrapping around.
### Compile Contract Script {: #compile-contract-script }
In this section, you'll create a script that uses the Solidity compiler to output the bytecode and interface (ABI) for the `Incrementer.sol` contract. To get started, you can create a `compile.js` file by running:
```bash
touch compile.js
```
Next, you will create the script for this file and complete the following steps:
1. Import the `fs` and `solc` packages
2. Using the `fs.readFileSync` function, you'll read and save the file contents of `Incrementer.sol` to `source`
3. Build the `input` object for the Solidity compiler by specifying the `language`, `sources`, and `settings` to be used
4. Using the `input` object, you can compile the contract using `solc.compile`
5. Extract the compiled contract file and export it to be used in the deployment script
```js
// 1. Import packages
const fs = require('fs');
const solc = require('solc');
// 2. Get path and load contract
const source = fs.readFileSync('Incrementer.sol', 'utf8');
// 3. Create input object
const input = {
language: 'Solidity',
sources: {
'Incrementer.sol': {
content: source,
},
},
settings: {
outputSelection: {
'*': {
'*': ['*'],
},
},
},
};
// 4. Compile the contract
const tempFile = JSON.parse(solc.compile(JSON.stringify(input)));
const contractFile = tempFile.contracts['Incrementer.sol']['Incrementer'];
// 5. Export contract data
module.exports = contractFile;
```
### Deploy Contract Script {: #deploy-contract-script }
With the script for compiling the `Incrementer.sol` contract in place, you can then use the results to send a signed transaction that deploys it. To do so, you can create a file for the deployment script called `deploy.js`:
```bash
touch deploy.js
```
Next, you will create the script for this file and complete the following steps:
1. Import the contract file from `compile.js`
2. [Set up the Web3 provider](#setup-web3-with-moonbeam)
3. Define the `accountFrom`, including the `privateKey`, and the `addressTo` variables. The private key is required to create a wallet instance. **Note: This is for example purposes only. Never store your private keys in a JavaScript file**
4. Save the `bytecode` and `abi` for the compiled contract
5. Create the asynchronous `deploy` function that will be used to deploy the contract
6. Create the contract instance using the `web3.eth.Contract` function
7. Create the constructor and pass in the `bytecode` and the initial value for the incrementer. For this example, you can set the initial value to `5`
8. Create and sign the transaction using the `web3.eth.accounts.signTransaction` function. Pass in the `data`, `gas`, `gasPrice`, and `nonce` for the transaction along with the sender's `privateKey`
9. Send the signed transaction using the `web3.eth.sendSignedTransaction` method and pass in the raw transaction. Then use `await` to wait until the transaction is processed and the transaction receipt is returned
10. Lastly, run the `deploy` function
```js
// 1. Import the contract file
const contractFile = require('./compile');
// 2. Add the Web3 provider logic
// {...}
// 3. Create address variables
const accountFrom = {
privateKey: 'INSERT_YOUR_PRIVATE_KEY',
address: 'INSERT_PUBLIC_ADDRESS_OF_PK',
};
// 4. Get the bytecode and ABI
const bytecode = contractFile.evm.bytecode.object;
const abi = contractFile.abi;
// 5. Create deploy function
const deploy = async () => {
console.log(`Attempting to deploy from account ${accountFrom.address}`);
// 6. Create contract instance
const incrementer = new web3.eth.Contract(abi);
// 7. Create constructor transaction
const incrementerTx = incrementer.deploy({
data: bytecode,
arguments: [5],
});
// 8. Sign transaction with PK
const createTransaction = await web3.eth.accounts.signTransaction(
{
data: incrementerTx.encodeABI(),
gas: await incrementerTx.estimateGas(),
gasPrice: await web3.eth.getGasPrice(),
nonce: await web3.eth.getTransactionCount(accountFrom.address),
},
accountFrom.privateKey
);
// 9. Send transaction and wait for receipt
const createReceipt = await web3.eth.sendSignedTransaction(
createTransaction.rawTransaction
);
console.log(`Contract deployed at address: ${createReceipt.contractAddress}`);
};
// 10. Call deploy function
deploy();
```
??? code "View the complete script"
```js
// 1. Import web3 and the contract file
const { Web3 } = require('web3');
const contractFile = require('./compile');
// 2. Add the Web3 provider logic
const providerRPC = {
development: 'http://localhost:9944',
moonbase: 'https://rpc.api.moonbase.moonbeam.network',
};
const web3 = new Web3(providerRPC.moonbase); // Change to correct network
// 3. Create address variables
const accountFrom = {
privateKey: 'INSERT_YOUR_PRIVATE_KEY',
address: 'INSERT_PUBLIC_ADDRESS_OF_PK',
};
// 4. Get the bytecode and API
const bytecode = contractFile.evm.bytecode.object;
const abi = contractFile.abi;
// 5. Create deploy function
const deploy = async () => {
console.log(`Attempting to deploy from account ${accountFrom.address}`);
// 6. Create contract instance
const incrementer = new web3.eth.Contract(abi);
// 7. Create constructor transaction
const incrementerTx = incrementer.deploy({
data: bytecode,
arguments: [5],
});
// 8. Sign transaction with PK
const createTransaction = await web3.eth.accounts.signTransaction(
{
data: incrementerTx.encodeABI(),
gas: await incrementerTx.estimateGas(),
gasPrice: await web3.eth.getGasPrice(),
nonce: await web3.eth.getTransactionCount(accountFrom.address),
},
accountFrom.privateKey
);
// 9. Send transaction and wait for receipt
const createReceipt = await web3.eth.sendSignedTransaction(
createTransaction.rawTransaction
);
console.log(`Contract deployed at address: ${createReceipt.contractAddress}`);
};
// 10. Call deploy function
deploy();
```
To run the script, you can enter the following command into your terminal:
```bash
node deploy.js
```
If successful, the contract's address will be displayed in the terminal.
node deploy.js
Attempting to deploy from account 0x3B939FeaD1557C741Ff06492FD0127bd287A421e
Contract deployed at address: 0x6dcb33a7f6235e74fd553b50c96f900707142892
### Read Contract Data (Call Methods) {: #read-contract-data }
Call methods are the type of interaction that doesn't modify the contract's storage (change variables), meaning no transaction needs to be sent. They simply read various storage variables of the deployed contract.
To get started, you can create a file and name it `get.js`:
```bash
touch get.js
```
Then you can take the following steps to create the script:
1. Import the `abi` from the `compile.js` file
2. [Set up the Web3 provider](#setup-web3-with-moonbeam)
3. Create the `contractAddress` variable using the address of the deployed contract
4. Create an instance of the contract using the `web3.eth.Contract` function and passing in the `abi` and `contractAddress`
5. Create the asynchronous `get` function
6. Use the contract instance to call one of the contract's methods and pass in any inputs if necessary. For this example, you will call the `number` method which doesn't require any inputs. You can use `await`, which will return the value requested once the request promise resolves
7. Lastly, call the `get` function
```js
// 1. Import the contract ABI
const { abi } = require('./compile');
// 2. Add the Web3 provider logic
// {...}
// 3. Create address variables
const contractAddress = 'INSERT_CONTRACT_ADDRESS';
// 4. Create contract instance
const incrementer = new web3.eth.Contract(abi, contractAddress);
// 5. Create get function
const get = async () => {
console.log(`Making a call to contract at address: ${contractAddress}`);
// 6. Call contract
const data = await incrementer.methods.number().call();
console.log(`The current number stored is: ${data}`);
};
// 7. Call get function
get();
```
??? code "View the complete script"
```js
// 1. Import Web3js and the contract ABI
const { Web3 } = require('web3');
const { abi } = require('./compile');
// 2. Add the Web3 provider logic
const providerRPC = {
development: 'http://localhost:9944',
moonbase: 'https://rpc.api.moonbase.moonbeam.network',
};
const web3 = new Web3(providerRPC.moonbase); // Change to correct network
// 3. Create address variables
const contractAddress = 'INSERT_CONTRACT_ADDRESS';
// 4. Create contract instance
const incrementer = new web3.eth.Contract(abi, contractAddress);
// 5. Create get function
const get = async () => {
console.log(`Making a call to contract at address: ${contractAddress}`);
// 6. Call contract
const data = await incrementer.methods.number().call();
console.log(`The current number stored is: ${data}`);
};
// 7. Call get function
get();
```
To run the script, you can enter the following command in your terminal:
```bash
node get.js
```
If successful, the value will be displayed in the terminal.
### Interact with Contract (Send Methods) {: #interact-with-contract }
Send methods are the type of interaction that modifies the contract's storage (change variables), meaning a transaction needs to be signed and sent. In this section, you'll create two scripts: one to increment and one to reset the incrementer. To get started, you can create a file for each script and name them `increment.js` and `reset.js`:
```bash
touch increment.js reset.js
```
Open the `increment.js` file and take the following steps to create the script:
1. Import the `abi` from the `compile.js` file
2. [Set up the Web3 provider](#setup-web3-with-moonbeam)
3. Define the `privateKey` for the origin account, the `contractAddress` of the deployed contract, and the `_value` to increment by. The private key is required to create a wallet instance. **Note: This is for example purposes only. Never store your private keys in a JavaScript file**
4. Create an instance of the contract using the `web3.eth.Contract` function and passing in the `abi` and `contractAddress`
5. Use the contract instance to build the increment transaction using the `methods.increment` function and passing in the `_value` as an input
6. Create the asynchronous `increment` function
7. Use the contract instance and the increment transaction you previously created to sign the transaction with the sender's private key. You'll use the `web3.eth.accounts.signTransaction` function and specify the `to` address, `data`, `gas`, `gasPrice`, and `nonce` for the transaction
8. Send the signed transaction using the `web3.eth.sendSignedTransaction` method and pass in the raw transaction. Then use `await` to wait until the transaction is processed and the transaction receipt is returned
9. Lastly, call the `increment` function
```js
// 1. Import the contract ABI
const { abi } = require('./compile');
// 2. Add the Web3 provider logic
// {...}
// 3. Create variables
const accountFrom = {
privateKey: 'INSERT_YOUR_PRIVATE_KEY',
address: 'INSERT_PUBLIC_ADDRESS_OF_PK',
};
const contractAddress = 'INSERT_CONTRACT_ADDRESS';
const _value = 3;
// 4. Create contract instance
const incrementer = new web3.eth.Contract(abi, contractAddress);
// 5. Build the increment transaction
const incrementTx = incrementer.methods.increment(_value);
// 6. Create increment function
const increment = async () => {
console.log(
`Calling the increment by ${_value} function in contract at address: ${contractAddress}`
);
// 7. Sign transaction with PK
const createTransaction = await web3.eth.accounts.signTransaction(
{
to: contractAddress,
data: incrementTx.encodeABI(),
gas: await incrementTx.estimateGas(),
gasPrice: await web3.eth.getGasPrice(),
nonce: await web3.eth.getTransactionCount(accountFrom.address),
},
accountFrom.privateKey
);
// 8. Send transaction and wait for receipt
const createReceipt = await web3.eth.sendSignedTransaction(
createTransaction.rawTransaction
);
console.log(`Tx successful with hash: ${createReceipt.transactionHash}`);
};
// 9. Call increment function
increment();
```
??? code "View the complete script"
```js
// 1. Import Web3js and the contract ABI
const { Web3 } = require('web3');
const { abi } = require('./compile');
// 2. Add the Web3 provider logic
const providerRPC = {
development: 'http://localhost:9944',
moonbase: 'https://rpc.api.moonbase.moonbeam.network',
};
const web3 = new Web3(providerRPC.moonbase); // Change to correct network
// 3. Create variables
const accountFrom = {
privateKey: 'INSERT_YOUR_PRIVATE_KEY',
address: 'INSERT_PUBLIC_ADDRESS_OF_PK',
};
const contractAddress = 'INSERT_CONTRACT_ADDRESS';
const _value = 3;
// 4. Create contract instance
const incrementer = new web3.eth.Contract(abi, contractAddress);
// 5. Build increment transaction
const incrementTx = incrementer.methods.increment(_value);
// 6. Create increment function
const increment = async () => {
console.log(
`Calling the increment by ${_value} function in contract at address: ${contractAddress}`
);
// 7. Sign transaction with PK
const createTransaction = await web3.eth.accounts.signTransaction(
{
to: contractAddress,
data: incrementTx.encodeABI(),
gas: await incrementTx.estimateGas(),
gasPrice: await web3.eth.getGasPrice(),
nonce: await web3.eth.getTransactionCount(accountFrom.address),
},
accountFrom.privateKey
);
// 8. Send transaction and wait for receipt
const createReceipt = await web3.eth.sendSignedTransaction(
createTransaction.rawTransaction
);
console.log(`Tx successful with hash: ${createReceipt.transactionHash}`);
};
// 9. Call increment function
increment();
```
To run the script, you can enter the following command in your terminal:
```bash
node increment.js
```
If successful, the transaction hash will be displayed in the terminal. You can use the `get.js` script alongside the `increment.js` script to make sure that value is changing as expected:
node get.js
Making a call to contract at address: 0x6dcb33a7f6235e74fd553b50c96f900707142892
The current number stored is: 5
node increment.js
Calling the increment by 3 function in contract at address: 0x6dcb33a7f6235e74fd553b50c96f900707142892
Tx successful with hash: 0xb03d1426376e7efc49d8b6c69aaf91e548578db7fd4a9ba575dbd8030821f6a3
node get.js
Making a call to contract at address: 0x6dcb33a7f6235e74fd553b50c96f900707142892
The current number stored is: 8
Next, you can open the `reset.js` file and take the following steps to create the script:
1. Import the `abi` from the `compile.js` file
2. [Set up the Web3 provider](#setup-web3-with-moonbeam)
3. Define the `privateKey` for the origin account and the `contractAddress` of the deployed contract. The private key is required to create a wallet instance. **Note: This is for example purposes only. Never store your private keys in a JavaScript file**
4. Create an instance of the contract using the `web3.eth.Contract` function and passing in the `abi` and `contractAddress`
5. Use the contract instance to build the reset transaction using the `methods.reset` function
6. Create the asynchronous `reset` function
7. Use the contract instance and the reset transaction you previously created to sign the transaction with the sender's private key. You'll use the `web3.eth.accounts.signTransaction` function and specify the `to` address, `data`, `gas`, `gasPrice`, and `nonce` for the transaction
8. Send the signed transaction using the `web3.eth.sendSignedTransaction` method and pass in the raw transaction. Then use `await` to wait until the transaction is processed and the transaction receipt is returned
9. Lastly, call the `reset` function
```js
// 1. Import the contract ABI
const { abi } = require('./compile');
// 2. Add the Web3 provider logic
// {...}
// 3. Create variables
const accountFrom = {
privateKey: 'INSERT_YOUR_PRIVATE_KEY',
address: 'INSERT_PUBLIC_ADDRESS_OF_PK',
};
const contractAddress = 'INSERT_CONTRACT_ADDRESS';
// 4. Create a contract instance
const incrementer = new web3.eth.Contract(abi, contractAddress);
// 5. Build reset transaction
const resetTx = incrementer.methods.reset();
// 6. Create reset function
const reset = async () => {
console.log(
`Calling the reset function in contract at address: ${contractAddress}`
);
// 7. Sign transaction with PK
const createTransaction = await web3.eth.accounts.signTransaction(
{
to: contractAddress,
data: resetTx.encodeABI(),
gas: await resetTx.estimateGas(),
gasPrice: await web3.eth.getGasPrice(),
nonce: await web3.eth.getTransactionCount(accountFrom.address),
},
accountFrom.privateKey
);
// 8. Send transaction and wait for receipt
const createReceipt = await web3.eth.sendSignedTransaction(
createTransaction.rawTransaction
);
console.log(`Tx successful with hash: ${createReceipt.transactionHash}`);
};
// 9. Call reset function
reset();
```
??? code "View the complete script"
```js
// 1. Import Web3js and the contract ABI
const { Web3 } = require('web3');
const { abi } = require('./compile');
// 2. Add the Web3 provider logic
const providerRPC = {
development: 'http://localhost:9944',
moonbase: 'https://rpc.api.moonbase.moonbeam.network',
};
const web3 = new Web3(providerRPC.moonbase); // Change to correct network
// 3. Create variables
const accountFrom = {
privateKey: 'INSERT_YOUR_PRIVATE_KEY',
address: 'INSERT_PUBLIC_ADDRESS_OF_PK',
};
const contractAddress = 'INSERT_CONTRACT_ADDRESS';
// 4. Create contract instance
const incrementer = new web3.eth.Contract(abi, contractAddress);
// 5. Build reset transaction
const resetTx = incrementer.methods.reset();
// 6. Create reset function
const reset = async () => {
console.log(`Calling the reset function in contract at address: ${contractAddress}`);
// 7. Sign transaction with PK
const createTransaction = await web3.eth.accounts.signTransaction(
{
to: contractAddress,
data: resetTx.encodeABI(),
gas: await resetTx.estimateGas(),
gasPrice: await web3.eth.getGasPrice(),
nonce: await web3.eth.getTransactionCount(accountFrom.address),
},
accountFrom.privateKey
);
// 8. Send transaction and wait for receipt
const createReceipt = await web3.eth.sendSignedTransaction(createTransaction.rawTransaction);
console.log(`Tx successful with hash: ${createReceipt.transactionHash}`);
};
// 9. Call reset function
reset();
```
To run the script, you can enter the following command in your terminal:
```bash
node reset.js
```
If successful, the transaction hash will be displayed in the terminal. You can use the `get.js` script alongside the `reset.js` script to make sure that value is changing as expected:
node get.js
Making a call to contract at address: 0x6dcb33a7f6235e74fd553b50c96f900707142892
The current number stored is: 8
node reset.js
Calling the reset function in contract at address: 0x6dcb33a7f6235e74fd553b50c96f900707142892
Tx successful with hash: 0x557e908ca4da05d5af50983dbc116fbf8049bb2e86b9ec1e9f7d3f516b8a4c55
node get.js
Making a call to contract at address: 0x6dcb33a7f6235e74fd553b50c96f900707142892
The current number stored is: 0
The information presented herein has been provided by third parties and is made available solely for general information purposes. Moonbeam does not endorse any project listed and described on the Moonbeam Doc Website (https://docs.moonbeam.network/). Moonbeam Foundation does not warrant the accuracy, completeness or usefulness of this information. Any reliance you place on such information is strictly at your own risk. Moonbeam Foundation disclaims all liability and responsibility arising from any reliance placed on this information by you or by anyone who may be informed of any of its contents. All statements and/or opinions expressed in these materials are solely the responsibility of the person or entity providing those materials and do not necessarily represent the opinion of Moonbeam Foundation. The information should not be construed as professional or financial advice of any kind. Advice from a suitably qualified professional should always be sought in relation to any particular matter or circumstance. The information herein may link to or integrate with other websites operated or content provided by third parties, and such other websites may link to this website. Moonbeam Foundation has no control over any such other websites or their content and will have no liability arising out of or related to such websites or their content. The existence of any such link does not constitute an endorsement of such websites, the content of the websites, or the operators of the websites. These links are being provided to you only as a convenience and you release and hold Moonbeam Foundation harmless from any and all liability arising from your use of this information or the information provided by any third-party website or service.
--- END CONTENT ---
Doc-Content: https://docs.moonbeam.network/builders/ethereum/libraries/web3py/
--- BEGIN CONTENT ---
---
title: How to use Web3.py Ethereum Library
description: Follow this tutorial to learn how to use the Ethereum Web3 Python Library to to send transactions and deploy Solidity smart contracts to Moonbeam.
categories: Libraries and SDKs, Ethereum Toolkit
---
# Web3.py Python Library
## Introduction {: #introduction }
[Web3.py](https://web3py.readthedocs.io) is a set of libraries that allow developers to interact with Ethereum nodes using HTTP, IPC, or WebSocket protocols with Python. Moonbeam has an Ethereum-like API available that is fully compatible with Ethereum-style JSON-RPC invocations. Therefore, developers can leverage this compatibility and use the Web3.py library to interact with a Moonbeam node as if they were doing so on Ethereum.
In this guide, you'll learn how to use the Web3.py library to send a transaction and deploy a contract on Moonbase Alpha. This guide can be adapted for [Moonbeam](/builders/get-started/networks/moonbeam/){target=\_blank}, [Moonriver](/builders/get-started/networks/moonriver/){target=\_blank}, or a [Moonbeam development node](/builders/get-started/networks/moonbeam-dev/){target=\_blank}.
## Checking Prerequisites {: #checking-prerequisites }
For the examples in this guide, you will need to have the following:
- An account with funds.
You can get DEV tokens for testing on Moonbase Alpha once every 24 hours from the [Moonbase Alpha Faucet](https://faucet.moonbeam.network){target=\_blank}
-
To test out the examples in this guide on Moonbeam or Moonriver, you will need to have your own endpoint and API key, which you can get from one of the supported [Endpoint Providers](/builders/get-started/endpoints/){target=\_blank}
!!! note
The examples in this guide assume you have a MacOS or Ubuntu 22.04-based environment and will need to be adapted accordingly for Windows.
## Create a Python Project {: #create-a-python-project }
To get started, you can create a directory to store all of the files you'll be creating throughout this guide:
```bash
mkdir web3-examples && cd web3-examples
```
For this guide, you'll need to install the Web3.py library and the Solidity compiler. To install both packages, you can run the following command:
```bash
pip3 install web3 py-solc-x solc-select
```
## Setup Web3.py with Moonbeam {: #setup-web3-with-moonbeam }
Throughout this guide, you'll be creating a bunch of scripts that provide different functionalities, such as sending a transaction, deploying a contract, and interacting with a deployed contract. In most of these scripts, you'll need to create a [Web3.py provider](https://web3py.readthedocs.io/en/stable/providers.html){target=\_blank} to interact with the network.
To configure your project for Moonbeam or Moonriver, you will need to have your own endpoint and API key, which you can get from one of the supported [Endpoint Providers](/builders/get-started/endpoints/){target=\_blank}.
To create a provider, you can take the following steps:
1. Import the `web3` library
2. Create the `web3` provider using the `Web3(Web3.HTTPProvider())` method and providing the endpoint URL
=== "Moonbeam"
```python
# 1. Import web3.py
from web3 import Web3
# 2. Create web3.py provider
web3 = Web3(Web3.HTTPProvider("{{ networks.moonbeam.rpc_url }}")) # Insert your RPC URL here
```
=== "Moonriver"
```python
# 1. Import web3.py
from web3 import Web3
# 2. Create web3.py provider
web3 = Web3(Web3.HTTPProvider("{{ networks.moonriver.rpc_url }}")) # Insert your RPC URL here
```
=== "Moonbase Alpha"
```python
# 1. Import web3.py
from web3 import Web3
# 2. Create web3.py provider
web3 = Web3(Web3.HTTPProvider("{{ networks.moonbase.rpc_url }}"))
```
=== "Moonbeam Dev Node"
```python
# 1. Import web3.py
from web3 import Web3
# 2. Create web3.py provider
web3 = Web3(Web3.HTTPProvider("{{ networks.development.rpc_url }}"))
```
Save this code snippet, as you'll need it for the scripts that are used in the following sections.
## Send a Transaction {: #send-a-transaction }
During this section, you'll be creating a couple of scripts. The first one will be to check the balances of your accounts before trying to send a transaction. The second script will actually send the transaction.
You can also use the balance script to check the account balances after the transaction has been sent.
### Check Balances Script {: #check-balances-script }
You'll only need one file to check the balances of both addresses before and after the transaction is sent. To get started, you can create a `balances.py` file by running:
```bash
touch balances.py
```
Next, you will create the script for this file and complete the following steps:
1. [Set up the Web3 provider](#setup-web3-with-moonbeam)
2. Define the `address_from` and `address_to` variables
3. Get the balance for the accounts using the `web3.eth.get_balance` function and format the results using the `web3.from_wei`
```python
from web3 import Web3
# 1. Add the Web3 provider logic here:
provider_rpc = {
"development": "http://localhost:9944",
"moonbase": "https://rpc.api.moonbase.moonbeam.network",
}
web3 = Web3(Web3.HTTPProvider(provider_rpc["moonbase"])) # Change to correct network
# 2. Create address variables
address_from = 'INSERT_FROM_ADDRESS'
address_to = 'INSERT_TO_ADDRESS'
# 3. Fetch balance data
balance_from = web3.from_wei(
web3.eth.get_balance(Web3.to_checksum_address(address_from)), "ether"
)
balance_to = web3.from_wei(
web3.eth.get_balance(Web3.to_checksum_address(address_to)), "ether"
)
print(f"The balance of { address_from } is: { balance_from } DEV")
print(f"The balance of { address_to } is: { balance_to } DEV")
```
To run the script and fetch the account balances, you can run the following command:
```bash
python3 balances.py
```
If successful, the balances for the origin and receiving address will be displayed in your terminal in ETH.
### Send Transaction Script {: #send-transaction-script }
You'll only need one file for executing a transaction between accounts. For this example, you'll be transferring 1 DEV token from an origin address (from which you hold the private key) to another address. To get started, you can create a `transaction.py` file by running:
```bash
touch transaction.py
```
Next, you will create the script for this file and complete the following steps:
1. Add imports, including Web3.py and the `rpc_gas_price_strategy`, which will be used in the following steps to get the gas price used for the transaction
2. [Set up the Web3 provider](#setup-web3-with-moonbeam)
3. Define the `account_from`, including the `private_key`, and the `address_to` variables. The private key is required to sign the transaction. **Note: This is for example purposes only. Never store your private keys in a Python file**
4. Use the [Web3.py Gas Price API](https://web3py.readthedocs.io/en/stable/gas_price.html){target=\_blank} to set a gas price strategy. For this example, you'll use the imported `rpc_gas_price_strategy`
5. Create and sign the transaction using the `web3.eth.account.sign_transaction` function. Pass in the `nonce` `gas`, `gasPrice`, `to`, and `value` for the transaction along with the sender's `private_key`. To get the `nonce` you can use the `web3.eth.get_transaction_count` function and pass in the sender's address. To predetermine the `gasPrice` you'll use the `web3.eth.generate_gas_price` function. For the `value`, you can format the amount to send from an easily readable format to Wei using the `web3.to_wei` function
6. Using the signed transaction, you can then send it using the `web3.eth.send_raw_transaction` function and wait for the transaction receipt by using the `web3.eth.wait_for_transaction_receipt` function
```python
# 1. Add imports
from web3.gas_strategies.rpc import rpc_gas_price_strategy
from web3 import Web3
# 2. Add the Web3 provider logic here:
provider_rpc = {
"development": "http://localhost:9944",
"moonbase": "https://rpc.api.moonbase.moonbeam.network",
}
web3 = Web3(Web3.HTTPProvider(provider_rpc["moonbase"])) # Change to correct network
# 3. Create address variables
account_from = {
'private_key': 'INSERT_YOUR_PRIVATE_KEY',
'address': 'INSERT_PUBLIC_ADDRESS_OF_PK',
}
address_to = 'INSERT_TO_ADDRESS'
print(
f'Attempting to send transaction from { account_from["address"] } to { address_to }'
)
# 4. Set the gas price strategy
web3.eth.set_gas_price_strategy(rpc_gas_price_strategy)
# 5. Sign tx with PK
tx_create = web3.eth.account.sign_transaction(
{
"nonce": web3.eth.get_transaction_count(
Web3.to_checksum_address(account_from["address"])
),
"gasPrice": web3.eth.generate_gas_price(),
"gas": 21000,
"to": Web3.to_checksum_address(address_to),
"value": web3.to_wei("1", "ether"),
},
account_from["private_key"],
)
# 6. Send tx and wait for receipt
tx_hash = web3.eth.send_raw_transaction(tx_create.rawTransaction)
tx_receipt = web3.eth.wait_for_transaction_receipt(tx_hash)
print(f"Transaction successful with hash: { tx_receipt.transactionHash.hex() }")
```
To run the script, you can run the following command in your terminal:
```bash
python3 transaction.py
```
If the transaction was successful, in your terminal you'll see the transaction hash has been printed out.
You can also use the `balances.py` script to check that the balances for the origin and receiving accounts have changed. The entire workflow would look like this:
python3 balances.py
The balance of 0x3B939FeaD1557C741Ff06492FD0127bd287A421e is: 3563.79 DEV
The balance of 0x9Bf5Ae10540a1ab9B363bEA02A9406E6b2efA9af is: 0 DEV
python3 transaction.py
Attempting to send transaction from 0x3B939FeaD1557C741Ff06492FD0127bd287A421e to 0x9Bf5Ae10540a1ab9B363bEA02A9406E6b2efA9af
Transaction successful with hash: 0xac70452510657ed43c27510578d3ce4b3b880d4cca1a24ade1497c6e0ee7f5d6
python3 balances.py
The balance of 0x3B939FeaD1557C741Ff06492FD0127bd287A421e is: 3562.79 DEV
The balance of 0x9Bf5Ae10540a1ab9B363bEA02A9406E6b2efA9af is: 1 DEV
## Deploy a Contract {: #deploy-a-contract }
The contract you'll be compiling and deploying in the next couple of sections is a simple incrementer contract, arbitrarily named `Incrementer.sol`. You can get started by creating a file for the contract:
```bash
touch Incrementer.sol
```
Next, you can add the Solidity code to the file:
```solidity
// SPDX-License-Identifier: MIT
pragma solidity ^0.8.0;
contract Incrementer {
uint256 public number;
constructor(uint256 _initialNumber) {
number = _initialNumber;
}
function increment(uint256 _value) public {
number = number + _value;
}
function reset() public {
number = 0;
}
}
```
The `constructor` function, which runs when the contract is deployed, sets the initial value of the number variable stored on-chain (the default is `0`). The `increment` function adds the `_value` provided to the current number, but a transaction needs to be sent, which modifies the stored data. Lastly, the `reset` function resets the stored value to zero.
!!! note
This contract is a simple example for illustration purposes only and does not handle values wrapping around.
### Compile Contract Script {: #compile-contract-script }
In this section, you'll create a script that uses the Solidity compiler to output the bytecode and interface (ABI) for the `Incrementer.sol` contract. To get started, you can create a `compile.py` file by running:
```bash
touch compile.py
```
Next, you will create the script for this file and complete the following steps:
1. Import the `solcx` package
2. **Optional** - If you haven't already installed the Solidity compiler, you can do so with by using the `solcx.install_solc` function
3. Compile the `Incrementer.sol` function using the `solcx.compile_files` function
4. Export the contract's ABI and bytecode
```python
# 1. Import solcx
import solcx
# 2. If you haven't already installed the Solidity compiler, uncomment the following line
# solcx.install_solc()
# 3. Compile contract
temp_file = solcx.compile_files(
'Incrementer.sol',
output_values=['abi', 'bin'],
# solc_version='0.8.19'
)
# 4. Export contract data
abi = temp_file['Incrementer.sol:Incrementer']['abi']
bytecode = temp_file['Incrementer.sol:Incrementer']['bin']
```
!!! note
If you see an error stating that `Solc is not installed`, uncomment step 2 described in the code snippet.
### Deploy Contract Script {: #deploy-contract-script }
With the script for compiling the `Incrementer.sol` contract in place, you can then use the results to send a signed transaction that deploys it. To do so, you can create a file for the deployment script called `deploy.py`:
```bash
touch deploy.py
```
Next, you will create the script for this file and complete the following steps:
1. Add imports, including Web3.py and the ABI and bytecode of the `Incrementer.sol` contract
2. [Set up the Web3 provider](#setup-web3-with-moonbeam)
3. Define the `account_from`, including the `private_key`. The private key is required to sign the transaction. **Note: This is for example purposes only. Never store your private keys in a Python file**
4. Create a contract instance using the `web3.eth.contract` function and passing in the ABI and bytecode of the contract
5. Build a constructor transaction using the contract instance and passing in the value to increment by. For this example, you can use `5`. You'll then use the `build_transaction` function to pass in the transaction information including the `from` address and the `nonce` for the sender. To get the `nonce` you can use the `web3.eth.get_transaction_count` function
6. Sign the transaction using the `web3.eth.account.sign_transaction` function and pass in the constructor transaction and the `private_key` of the sender
7. Using the signed transaction, you can then send it using the `web3.eth.send_raw_transaction` function and wait for the transaction receipt by using the `web3.eth.wait_for_transaction_receipt` function
```python
# 1. Add imports
from compile import abi, bytecode
from web3 import Web3
# 2. Add the Web3 provider logic here:
provider_rpc = {
"development": "http://localhost:9944",
"moonbase": "https://rpc.api.moonbase.moonbeam.network",
}
web3 = Web3(Web3.HTTPProvider(provider_rpc["moonbase"])) # Change to correct network
# 3. Create address variable
account_from = {
'private_key': 'INSERT_YOUR_PRIVATE_KEY',
'address': 'INSERT_PUBLIC_ADDRESS_OF_PK',
}
print(f'Attempting to deploy from account: { account_from["address"] }')
# 4. Create contract instance
Incrementer = web3.eth.contract(abi=abi, bytecode=bytecode)
# 5. Build constructor tx
construct_txn = Incrementer.constructor(5).build_transaction(
{
"from": Web3.to_checksum_address(account_from["address"]),
"nonce": web3.eth.get_transaction_count(
Web3.to_checksum_address(account_from["address"])
),
}
)
# 6. Sign tx with PK
tx_create = web3.eth.account.sign_transaction(
construct_txn, account_from["private_key"]
)
# 7. Send tx and wait for receipt
tx_hash = web3.eth.send_raw_transaction(tx_create.rawTransaction)
tx_receipt = web3.eth.wait_for_transaction_receipt(tx_hash)
print(f"Contract deployed at address: { tx_receipt.contractAddress }")
```
To run the script, you can enter the following command into your terminal:
```bash
python3 deploy.py
```
If successful, the contract's address will be displayed in the terminal.
python3 deploy.py
Attempting to deploy from account: 0x3B939FeaD1557C741Ff06492FD0127bd287A421e
Contract deployed at address: 0xFef3cFb8eE1FE727b3848E551ae5DC8903237B08
### Read Contract Data (Call Methods) {: #read-contract-data }
Call methods are the type of interaction that don't modify the contract's storage (change variables), meaning no transaction needs to be sent. They simply read various storage variables of the deployed contract.
To get started, you can create a file and name it `get.py`:
```bash
touch get.py
```
Then you can take the following steps to create the script:
1. Add imports, including Web3.py and the ABI of the `Incrementer.sol` contract
2. [Set up the Web3 provider](#setup-web3-with-moonbeam)
3. Define the `contract_address` of the deployed contract
4. Create a contract instance using the `web3.eth.contract` function and passing in the ABI and address of the deployed contract
5. Using the contract instance, you can then call the `number` function
```python
# 1. Import the ABI
from compile import abi
from web3 import Web3
# 2. Add the Web3 provider logic here:
provider_rpc = {
"development": "http://localhost:9944",
"moonbase": "https://rpc.api.moonbase.moonbeam.network",
}
web3 = Web3(Web3.HTTPProvider(provider_rpc["moonbase"])) # Change to correct network
# 3. Create address variable
contract_address = 'INSERT_CONTRACT_ADDRESS'
print(f"Making a call to contract at address: { contract_address }")
# 4. Create contract instance
Incrementer = web3.eth.contract(address=contract_address, abi=abi)
# 5. Call Contract
number = Incrementer.functions.number().call()
print(f"The current number stored is: { number } ")
```
To run the script, you can enter the following command in your terminal:
```bash
python3 get.py
```
If successful, the value will be displayed in the terminal.
### Interact with Contract (Send Methods) {: #interact-with-contract }
Send methods are the type of interaction that modify the contract's storage (change variables), meaning a transaction needs to be signed and sent. In this section, you'll create two scripts: one to increment and one to reset the incrementer. To get started, you can create a file for each script and name them `increment.py` and `reset.py`:
```bash
touch increment.py reset.py
```
Open the `increment.py` file and take the following steps to create the script:
1. Add imports, including Web3.py and the ABI of the `Incrementer.sol` contract
2. [Set up the Web3 provider](#setup-web3-with-moonbeam)
3. Define the `account_from`, including the `private_key`, the `contract_address` of the deployed contract, and the `value` to increment by. The private key is required to sign the transaction. **Note: This is for example purposes only. Never store your private keys in a Python file**
4. Create a contract instance using the `web3.eth.contract` function and passing in the ABI and address of the deployed contract
5. Build the increment transaction using the contract instance and passing in the value to increment by. You'll then use the `build_transaction` function to pass in the transaction information including the `from` address and the `nonce` for the sender. To get the `nonce` you can use the `web3.eth.get_transaction_count` function
6. Sign the transaction using the `web3.eth.account.sign_transaction` function and pass in the increment transaction and the `private_key` of the sender
7. Using the signed transaction, you can then send it using the `web3.eth.send_raw_transaction` function and wait for the transaction receipt by using the `web3.eth.wait_for_transaction_receipt` function
```python
# 1. Add imports
from compile import abi
from web3 import Web3
# 2. Add the Web3 provider logic here:
provider_rpc = {
"development": "http://localhost:9944",
"moonbase": "https://rpc.api.moonbase.moonbeam.network",
}
web3 = Web3(Web3.HTTPProvider(provider_rpc["moonbase"])) # Change to correct network
# 3. Create variables
account_from = {
'private_key': 'INSERT_YOUR_PRIVATE_KEY',
'address': 'INSERT_PUBLIC_ADDRESS_OF_PK',
}
contract_address = 'INSERT_CONTRACT_ADDRESS'
value = 3
print(
f"Calling the increment by { value } function in contract at address: { contract_address }"
)
# 4. Create contract instance
Incrementer = web3.eth.contract(address=contract_address, abi=abi)
# 5. Build increment tx
increment_tx = Incrementer.functions.increment(value).build_transaction(
{
"from": Web3.to_checksum_address(account_from["address"]),
"nonce": web3.eth.get_transaction_count(
Web3.to_checksum_address(account_from["address"])
),
}
)
# 6. Sign tx with PK
tx_create = web3.eth.account.sign_transaction(increment_tx, account_from["private_key"])
# 7. Send tx and wait for receipt
tx_hash = web3.eth.send_raw_transaction(tx_create.rawTransaction)
tx_receipt = web3.eth.wait_for_transaction_receipt(tx_hash)
print(f"Tx successful with hash: { tx_receipt.transactionHash.hex() }")
```
To run the script, you can enter the following command in your terminal:
```bash
python3 increment.py
```
If successful, the transaction hash will be displayed in the terminal. You can use the `get.py` script alongside the `increment.py` script to make sure that value is changing as expected:
python get.py
Making a call to contract at address: 0xFef3cFb8eE1FE727b3848E551ae5DC8903237B08
The current number stored is: 5
python increment.py
Calling the increment by 3 function in contract at address: 0xFef3cFb8eE1FE727b3848E551ae5DC8903237B08
Tx successful with hash: 0x47757fd97e3ef8db973e335d1f2d19c46b37d0dbd53fea1636ec559ccf119a13
python get.py
Making a call to contract at address: 0xFef3cFb8eE1FE727b3848E551ae5DC8903237B08
The current number stored is: 8
Next you can open the `reset.py` file and take the following steps to create the script:
1. Add imports, including Web3.py and the ABI of the `Incrementer.sol` contract
2. [Set up the Web3 provider](#setup-web3-with-moonbeam)
3. Define the `account_from`, including the `private_key`, and the `contract_address` of the deployed contract. The private key is required to sign the transaction. **Note: This is for example purposes only. Never store your private keys in a Python file**
4. Create a contract instance using the `web3.eth.contract` function and passing in the ABI and address of the deployed contract
5. Build the reset transaction using the contract instance. You'll then use the `build_transaction` function to pass in the transaction information including the `from` address and the `nonce` for the sender. To get the `nonce` you can use the `web3.eth.get_transaction_count` function
6. Sign the transaction using the `web3.eth.account.sign_transaction` function and pass in the reset transaction and the `private_key` of the sender
7. Using the signed transaction, you can then send it using the `web3.eth.send_raw_transaction` function and wait for the transaction receipt by using the `web3.eth.wait_for_transaction_receipt` function
```python
# 1. Add imports
from compile import abi
from web3 import Web3
# 2. Add the Web3 provider logic here:
provider_rpc = {
"development": "http://localhost:9944",
"moonbase": "https://rpc.api.moonbase.moonbeam.network",
}
web3 = Web3(Web3.HTTPProvider(provider_rpc["moonbase"])) # Change to correct network
# 3. Create variables
account_from = {
'private_key': 'INSERT_YOUR_PRIVATE_KEY',
'address': 'INSERT_PUBLIC_ADDRESS_OF_PK',
}
contract_address = 'INSERT_CONTRACT_ADDRESS'
print(f"Calling the reset function in contract at address: { contract_address }")
# 4. Create contract instance
Incrementer = web3.eth.contract(address=contract_address, abi=abi)
# 5. Build reset tx
reset_tx = Incrementer.functions.reset().build_transaction(
{
"from": Web3.to_checksum_address(account_from["address"]),
"nonce": web3.eth.get_transaction_count(
Web3.to_checksum_address(account_from["address"])
),
}
)
# 6. Sign tx with PK
tx_create = web3.eth.account.sign_transaction(reset_tx, account_from["private_key"])
# 7. Send tx and wait for receipt
tx_hash = web3.eth.send_raw_transaction(tx_create.rawTransaction)
tx_receipt = web3.eth.wait_for_transaction_receipt(tx_hash)
print(f"Tx successful with hash: { tx_receipt.transactionHash.hex() }")
```
To run the script, you can enter the following command in your terminal:
```bash
python3 reset.py
```
If successful, the transaction hash will be displayed in the terminal. You can use the `get.py` script alongside the `reset.py` script to make sure that value is changing as expected:
python get.py
Making a call to contract at address: 0xFef3cFb8eE1FE727b3848E551ae5DC8903237B08
The current number stored is: 8
python reset.py
Calling the reset function in contract at address: 0xFef3cFb8eE1FE727b3848E551ae5DC8903237B08
Tx successful with hash: 0x152f07430b524838da848b44d58577db252681fba6fbeaf117b2f9d432e301b2
python get.py
Making a call to contract at address: 0xFef3cFb8eE1FE727b3848E551ae5DC8903237B08
The current number stored is: 0
The information presented herein has been provided by third parties and is made available solely for general information purposes. Moonbeam does not endorse any project listed and described on the Moonbeam Doc Website (https://docs.moonbeam.network/). Moonbeam Foundation does not warrant the accuracy, completeness or usefulness of this information. Any reliance you place on such information is strictly at your own risk. Moonbeam Foundation disclaims all liability and responsibility arising from any reliance placed on this information by you or by anyone who may be informed of any of its contents. All statements and/or opinions expressed in these materials are solely the responsibility of the person or entity providing those materials and do not necessarily represent the opinion of Moonbeam Foundation. The information should not be construed as professional or financial advice of any kind. Advice from a suitably qualified professional should always be sought in relation to any particular matter or circumstance. The information herein may link to or integrate with other websites operated or content provided by third parties, and such other websites may link to this website. Moonbeam Foundation has no control over any such other websites or their content and will have no liability arising out of or related to such websites or their content. The existence of any such link does not constitute an endorsement of such websites, the content of the websites, or the operators of the websites. These links are being provided to you only as a convenience and you release and hold Moonbeam Foundation harmless from any and all liability arising from your use of this information or the information provided by any third-party website or service.
--- END CONTENT ---
Doc-Content: https://docs.moonbeam.network/builders/ethereum/precompiles/account/identity/
--- BEGIN CONTENT ---
---
title: Identity Precompile
description: Learn all you need to know about the Identity Precompile, such as its address, Solidity interface, and how to interact with it using popular Ethereum libraries.
categories: Precompiles, Ethereum Toolkit
---
# Identity Precompile on Moonbeam
## Introduction {: #introduction }
The Identity Precompile is a Solidity interface that allows you to create, manage, and retrieve information on on-chain identities. Identities are attached to accounts and include personal information, such as your legal name, display name, website, Twitter handle, Riot (now known as Element) name, and more. You can also take advantage of custom fields to include any other relevant information.
The Identity Precompile interacts directly with Substrate's [Identity Pallet](/builders/substrate/interfaces/account/identity/){target=\_blank} to provide the functionality needed to create and manage identities. This pallet is coded in Rust and is normally not accessible from the Ethereum side of Moonbeam. However, the Identity Precompile allows you to access this functionality directly from the Solidity interface.
The Identity Precompile is located at the following address:
=== "Moonbeam"
```text
{{networks.moonbeam.precompiles.identity }}
```
=== "Moonriver"
```text
{{networks.moonriver.precompiles.identity }}
```
=== "Moonbase Alpha"
```text
{{networks.moonbase.precompiles.identity }}
```
!!! note
There can be some unintended consequences when using the precompiled contracts on Moonbeam. Please refer to the [Security Considerations](/learn/core-concepts/security/){target=\_blank} page for more information.
## The Identity Precompile Solidity Interface {: #the-solidity-interface }
[`Identity.sol`](https://github.com/moonbeam-foundation/moonbeam/blob/master/precompiles/identity/Identity.sol){target=\_blank} is a Solidity interface that allows developers to interact with the precompile's methods.
??? code "Identity.sol"
```solidity
// SPDX-License-Identifier: GPL-3.0-only
pragma solidity >=0.8.3;
/// @dev The Identity contract's address.
address constant IDENTITY_ADDRESS = 0x0000000000000000000000000000000000000818;
/// @dev The Identity contract's instance.
Identity constant IDENTITY_CONTRACT = Identity(IDENTITY_ADDRESS);
/// @author The Moonbeam Team
/// @title Pallet Identity Interface
/// @title The interface through which solidity contracts will interact with the Identity pallet
/// @custom:address 0x0000000000000000000000000000000000000818
interface Identity {
/// @dev Associated raw data.
struct Data {
/// Is `true` if it represents data, else the absence of data is represented by `false`.
bool hasData;
/// The contained value.
bytes value;
}
/// @dev The super-identity of an alternative "sub" identity.
struct SuperOf {
/// Is `true` if the struct is valid, `false` otherwise.
bool isValid;
/// The super account.
address account;
/// The associated data.
Data data;
}
/// @dev Alternative "sub" identities of an account.
struct SubsOf {
/// The deposit against this identity.
uint256 deposit;
/// The sub accounts
address[] accounts;
}
/// @dev Registrar judgements are limited to attestations on these fields.
struct IdentityFields {
/// Set to `true` if the display field is supported, `false` otherwise.
bool display;
/// Set to `true` if the legal field is supported, `false` otherwise.
bool legal;
/// Set to `true` if the web field is supported, `false` otherwise.
bool web;
/// Set to `true` if the riot field is supported, `false` otherwise.
bool riot;
/// Set to `true` if the email field is supported, `false` otherwise.
bool email;
/// Set to `true` if the PGP Fingerprint field is supported, `false` otherwise.
bool pgpFingerprint;
/// Set to `true` if the image field is supported, `false` otherwise.
bool image;
/// Set to `true` if the twitter field is supported, `false` otherwise.
bool twitter;
}
/// @dev Registrar info.
struct Registrar {
/// Is `true` if the struct is valid, `false` otherwise.
bool isValid;
/// The registrar's index.
uint32 index;
/// The account address.
address account;
/// Amount required to be given to the registrar for them to provide judgement.
uint256 fee;
/// Relevant fields for this registrar.
IdentityFields fields;
}
/// @dev Represents an additional field in identity info.
struct Additional {
/// The assciated key.
Data key;
/// The assciated value.
Data value;
}
/// @dev The identity information set for an account.
struct IdentityInfo {
/// Represents the additional fields for the identity.
Additional[] additional;
/// Represents the display info for the identity.
Data display;
/// Represents the legal info for the identity.
Data legal;
/// Represents the web info for the identity.
Data web;
/// Represents the riot info for the identity.
Data riot;
/// Represents the email info for the identity.
Data email;
/// Set to `true` if `pgpFingerprint` is set, `false` otherwise.
bool hasPgpFingerprint;
/// Represents a 20-byte the PGP fingerprint info for the identity.
bytes pgpFingerprint;
/// Represents the image info for the identity.
Data image;
/// Represents the twitter info for the identity.
Data twitter;
}
/// @dev Judgement provided by a registrar.
struct Judgement {
/// The default value; no opinion is held.
bool isUnknown;
/// No judgement is yet in place, but a deposit is reserved as payment for providing one.
bool isFeePaid;
/// The deposit reserved for providing a judgement.
uint256 feePaidDeposit;
/// The data appears to be reasonably acceptable in terms of its accuracy.
bool isReasonable;
/// The target is known directly by the registrar and the registrar can fully attest to it.
bool isKnownGood;
/// The data was once good but is currently out of date.
bool isOutOfDate;
/// The data is imprecise or of sufficiently low-quality to be problematic.
bool isLowQuality;
/// The data is erroneous. This may be indicative of malicious intent.
bool isErroneous;
}
/// @dev Judgement item provided by a registrar.
struct JudgementInfo {
/// The registrar's index that provided this judgement.
uint32 registrarIndex;
/// The registrar's provided judgement.
Judgement judgement;
}
/// @dev Registrar info.
struct Registration {
/// Is `true` if the struct is valid, `false` otherwise.
bool isValid;
/// The judgments provided on this identity.
JudgementInfo[] judgements;
/// Amount required to be given to the registrar for them to provide judgement.
uint256 deposit;
/// The associated identity info.
IdentityInfo info;
}
/// @dev Alternative "sub" identity of an account.
struct SubAccount {
/// The account address.
address account;
/// The associated data.
Data data;
}
/// @dev Retrieve identity information for an account.
/// @custom:selector f0eb5e54
/// @param who The requested account
function identity(address who) external view returns (Registration memory);
/// @dev Retrieve super account for an account.
/// @custom:selector c18110d6
/// @param who The requested account
function superOf(address who) external view returns (SuperOf memory);
/// @dev Retrieve sub accounts for an account.
/// @custom:selector 3f08986b
/// @param who The requested account
function subsOf(address who) external view returns (SubsOf memory);
/// @dev Retrieve the registrars.
/// @custom:selector e88e512e
function registrars() external view returns (Registrar[] memory);
/// @dev Set identity info for the caller.
/// @custom:selector 7e08b4cb
/// @param info The identity info
function setIdentity(IdentityInfo memory info) external;
/// @dev Set sub accounts for the caller.
/// @custom:selector 5a5a3591
/// @param subs The sub accounts
function setSubs(SubAccount[] memory subs) external;
/// @dev Clears identity of the caller.
/// @custom:selector 7a6a10c7
function clearIdentity() external;
/// @dev Requests registrar judgement on caller's identity.
/// @custom:selector d523ceb9
/// @param regIndex The registrar's index
/// @param maxFee The maximum fee the caller is willing to pay
function requestJudgement(uint32 regIndex, uint256 maxFee) external;
/// @dev Cancels the caller's request for judgement from a registrar.
/// @custom:selector c79934a5
/// @param regIndex The registrar's index
function cancelRequest(uint32 regIndex) external;
/// @dev Sets the registrar's fee for providing a judgement. Caller must be the account at the index.
/// @custom:selector a541b37d
/// @param regIndex The registrar's index
/// @param fee The fee the registrar will charge
function setFee(uint32 regIndex, uint256 fee) external;
/// @dev Sets the registrar's account. Caller must be the account at the index.
/// @custom:selector 889bc198
/// @param regIndex The registrar's index
/// @param newAccount The new account to set
function setAccountId(uint32 regIndex, address newAccount) external;
/// @dev Sets the registrar's identity fields. Caller must be the account at the index.
/// @custom:selector 05297450
/// @param regIndex The registrar's index
/// @param fields The identity fields
function setFields(uint32 regIndex, IdentityFields memory fields) external;
/// @dev Provides judgement on an accounts identity.
/// @custom:selector cd7663a4
/// @param regIndex The registrar's index
/// @param target The target account to provide judgment for
/// @param judgement The judgement to provide
/// @param identity The hash of the identity info
function provideJudgement(
uint32 regIndex,
address target,
Judgement memory judgement,
bytes32 identity
) external;
/// @dev Add a "sub" identity account for the caller.
/// @custom:selector 98717196
/// @param sub The sub account
/// @param data The associated data
function addSub(address sub, Data memory data) external;
/// @dev Rename a "sub" identity account of the caller.
/// @custom:selector 452df561
/// @param sub The sub account
/// @param data The new associated data
function renameSub(address sub, Data memory data) external;
/// @dev Removes a "sub" identity account of the caller.
/// @custom:selector b0a323e0
/// @param sub The sub account
function removeSub(address sub) external;
/// @dev Removes the sender as a sub-account.
/// @custom:selector d5a3c2c4
function quitSub() external;
/// @dev An identity was set or reset (which will remove all judgements).
/// @custom:selector 3839f7832b2a6263aa1fd5040f37d10fd4f9e9c4a9ef07ec384cb1cef9fb4c0e
/// @param who Address of the target account
event IdentitySet(address who);
/// @dev An identity was cleared, and the given balance returned.
/// @custom:selector 3839f7832b2a6263aa1fd5040f37d10fd4f9e9c4a9ef07ec384cb1cef9fb4c0e
/// @param who Address of the target account
event IdentityCleared(address who);
/// @dev A judgement was asked from a registrar.
/// @custom:selector 3839f7832b2a6263aa1fd5040f37d10fd4f9e9c4a9ef07ec384cb1cef9fb4c0e
/// @param who Address of the requesting account
/// @param registrarIndex The registrar's index
event JudgementRequested(address who, uint32 registrarIndex);
/// @dev A judgement request was retracted.
/// @custom:selector 3839f7832b2a6263aa1fd5040f37d10fd4f9e9c4a9ef07ec384cb1cef9fb4c0e
/// @param who Address of the target account.
/// @param registrarIndex The registrar's index
event JudgementUnrequested(address who, uint32 registrarIndex);
/// @dev A judgement was given by a registrar.
/// @custom:selector 3839f7832b2a6263aa1fd5040f37d10fd4f9e9c4a9ef07ec384cb1cef9fb4c0e
/// @param target Address of the target account
/// @param registrarIndex The registrar's index
event JudgementGiven(address target, uint32 registrarIndex);
/// @dev A sub-identity was added to an identity and the deposit paid.
/// @custom:selector 3839f7832b2a6263aa1fd5040f37d10fd4f9e9c4a9ef07ec384cb1cef9fb4c0e
/// @param sub Address of the sub account
/// @param main Address of the main account
event SubIdentityAdded(address sub, address main);
/// @dev A sub-identity was removed from an identity and the deposit freed.
/// @custom:selector 3839f7832b2a6263aa1fd5040f37d10fd4f9e9c4a9ef07ec384cb1cef9fb4c0e
/// @param sub Address of the sub account
/// @param main Address of the main account
event SubIdentityRemoved(address sub, address main);
/// @dev A sub-identity was cleared and the given deposit repatriated from the main identity account to the sub-identity account
/// @custom:selector 3839f7832b2a6263aa1fd5040f37d10fd4f9e9c4a9ef07ec384cb1cef9fb4c0e
/// @param sub Address of the sub account
event SubIdentityRevoked(address sub);
}
```
The Identity Precompile contains some functions that can be called by anyone and some judgment-related functions that can only be called by a registrar. The functions that can be called by anyone are as follows:
??? function "**identity**(*address* who) - returns registration information for a given account"
=== "Parameters"
- `who` - address of the account to query the identity information for
??? function "**superOf**(*address* who) - retrieves the super account for a sub-account. If the given account is not a sub-account, the address returned is `0x0000000000000000000000000000000000000000`"
=== "Parameters"
- `who` - address of the account to query the super-account for
??? function "**subsOf**(*address* who) - returns the sub-accounts for a given account. If the given account doesn't have any sub-accounts, an empty array is returned (`[]`)"
=== "Parameters"
- `who` - address of the account to query the sub-accounts for
??? function "**registrars**() - returns the list of registrars"
=== "Parameters"
None.
??? function "**setIdentity**(*IdentityInfo memory* info) - sets the identity for the caller"
=== "Parameters"
- `info` - IdentityInfo memory struct containing the identity information to be set
??? function "**setSubs**(*SubAccount[] memory* subs) - sets the sub-accounts for the caller"
=== "Parameters"
- `subs` - SubAccount[] memory array containing the sub-accounts to be set
??? function "**clearIdentity**() - clears the identity for the caller"
=== "Parameters"
None.
??? function "**requestJudgement**(*uint32* regIndex, *uint256* maxFee) - requests judgment from a given registrar along with the maximum fee the caller is willing to pay"
=== "Parameters"
- `regIndex` - uint32 index of the registrar to request judgment from
- `maxFee` - uint256 maximum fee the caller is willing to pay for the judgment
??? function "**cancelRequest**(*uint32* regIndex) - cancels the caller's request for judgment from a given registrar"
=== "Parameters"
- `regIndex` - uint32 index of the registrar to cancel the judgment request from
??? function "**addSub**(*address* sub, *Data memory* data) - adds a sub-identity account for the caller"
=== "Parameters"
- `sub` - address of the sub-account to add
- `data` - Data memory struct containing the sub-account information
??? function "**renameSub**(*address* sub, *Data memory* data) - renames a sub-identity account for the caller"
=== "Parameters"
- `sub` - address of the sub-account to rename
- `data` - Data memory struct containing the new sub-account information
??? function "**removeSub**(*address* sub) - removes a sub identity account for the caller"
=== "Parameters"
- `sub` - address of the sub-account to remove
??? function "**quitSub**(*address* sub) - removes the caller as a sub-identity account"
=== "Parameters"
- `sub` - address of the sub-account to quit
The judgment-related functions that must be called by a registrar and the caller must be the registrar account that corresponds to the `regIndex` are:
??? function "**setFee**(*uint32* regIndex, *uint256* fee) - sets the fee for a registrar"
=== "Parameters"
- `regIndex` - uint32 index of the registrar setting the fee
- `fee` - uint256 new fee amount to be set for the registrar
??? function "**setAccountId**(*uint32* regIndex, *address* newAccount) - sets a new account for a registrar"
=== "Parameters"
- `regIndex` - uint32 index of the registrar being updated
- `newAccount` - address of the new account to be set for the registrar
??? function "**setFields**(*uint32* regIndex, *IdentityFields memory* fields) - sets the registrar's identity"
=== "Parameters"
- `regIndex` - uint32 index of the registrar setting their identity fields
- `fields` - IdentityFields memory struct containing the identity fields to be set
??? function "**provideJudgement**(*uint32* regIndex, *address* target, *Judgement memory* judgement, *bytes32* identity) - provides judgment on an account's identity"
=== "Parameters"
- `regIndex` - uint32 index of the registrar providing the judgment
- `target` - address of the account receiving the judgment
- `judgement` - Judgement memory struct containing the judgment details
- `identity` - bytes32 hash of the identity information being judged
## Interact with the Solidity Interface {: #interact-with-interface }
The following sections will cover how to interact with the Identity Precompile using [Ethereum libraries](/builders/ethereum/libraries/){target=\_blank}, such as [Ethers.js](/builders/ethereum/libraries/ethersjs/){target=\_blank}, [Web3.js](/builders/ethereum/libraries/web3js/){target=\_blank}, and [Web3.py](/builders/ethereum/libraries/web3py/){target=\_blank}.
The examples in this guide will be on Moonbase Alpha.
To test out the examples in this guide on Moonbeam or Moonriver, you will need to have your own endpoint and API key, which you can get from one of the supported [Endpoint Providers](/builders/get-started/endpoints/){target=\_blank}.
### Using Ethereum Libraries {: #use-ethereum-libraries }
To interact with the Identity Precompile's Solidity interface with an Ethereum library, you'll need the Identity Precompile's ABI.
??? code "Identity Precompile ABI"
```js
[
{
"anonymous": false,
"inputs": [
{
"indexed": false,
"internalType": "address",
"name": "who",
"type": "address"
}
],
"name": "IdentityCleared",
"type": "event"
},
{
"anonymous": false,
"inputs": [
{
"indexed": false,
"internalType": "address",
"name": "who",
"type": "address"
}
],
"name": "IdentitySet",
"type": "event"
},
{
"anonymous": false,
"inputs": [
{
"indexed": false,
"internalType": "address",
"name": "target",
"type": "address"
},
{
"indexed": false,
"internalType": "uint32",
"name": "registrarIndex",
"type": "uint32"
}
],
"name": "JudgementGiven",
"type": "event"
},
{
"anonymous": false,
"inputs": [
{
"indexed": false,
"internalType": "address",
"name": "who",
"type": "address"
},
{
"indexed": false,
"internalType": "uint32",
"name": "registrarIndex",
"type": "uint32"
}
],
"name": "JudgementRequested",
"type": "event"
},
{
"anonymous": false,
"inputs": [
{
"indexed": false,
"internalType": "address",
"name": "who",
"type": "address"
},
{
"indexed": false,
"internalType": "uint32",
"name": "registrarIndex",
"type": "uint32"
}
],
"name": "JudgementUnrequested",
"type": "event"
},
{
"anonymous": false,
"inputs": [
{
"indexed": false,
"internalType": "address",
"name": "sub",
"type": "address"
},
{
"indexed": false,
"internalType": "address",
"name": "main",
"type": "address"
}
],
"name": "SubIdentityAdded",
"type": "event"
},
{
"anonymous": false,
"inputs": [
{
"indexed": false,
"internalType": "address",
"name": "sub",
"type": "address"
},
{
"indexed": false,
"internalType": "address",
"name": "main",
"type": "address"
}
],
"name": "SubIdentityRemoved",
"type": "event"
},
{
"anonymous": false,
"inputs": [
{
"indexed": false,
"internalType": "address",
"name": "sub",
"type": "address"
}
],
"name": "SubIdentityRevoked",
"type": "event"
},
{
"inputs": [
{
"internalType": "address",
"name": "sub",
"type": "address"
},
{
"components": [
{
"internalType": "bool",
"name": "hasData",
"type": "bool"
},
{
"internalType": "bytes",
"name": "value",
"type": "bytes"
}
],
"internalType": "struct Identity.Data",
"name": "data",
"type": "tuple"
}
],
"name": "addSub",
"outputs": [],
"stateMutability": "nonpayable",
"type": "function"
},
{
"inputs": [
{
"internalType": "uint32",
"name": "regIndex",
"type": "uint32"
}
],
"name": "cancelRequest",
"outputs": [],
"stateMutability": "nonpayable",
"type": "function"
},
{
"inputs": [],
"name": "clearIdentity",
"outputs": [],
"stateMutability": "nonpayable",
"type": "function"
},
{
"inputs": [
{
"internalType": "address",
"name": "who",
"type": "address"
}
],
"name": "identity",
"outputs": [
{
"components": [
{
"internalType": "bool",
"name": "isValid",
"type": "bool"
},
{
"components": [
{
"internalType": "uint32",
"name": "registrarIndex",
"type": "uint32"
},
{
"components": [
{
"internalType": "bool",
"name": "isUnknown",
"type": "bool"
},
{
"internalType": "bool",
"name": "isFeePaid",
"type": "bool"
},
{
"internalType": "uint256",
"name": "feePaidDeposit",
"type": "uint256"
},
{
"internalType": "bool",
"name": "isReasonable",
"type": "bool"
},
{
"internalType": "bool",
"name": "isKnownGood",
"type": "bool"
},
{
"internalType": "bool",
"name": "isOutOfDate",
"type": "bool"
},
{
"internalType": "bool",
"name": "isLowQuality",
"type": "bool"
},
{
"internalType": "bool",
"name": "isErroneous",
"type": "bool"
}
],
"internalType": "struct Identity.Judgement",
"name": "judgement",
"type": "tuple"
}
],
"internalType": "struct Identity.JudgementInfo[]",
"name": "judgements",
"type": "tuple[]"
},
{
"internalType": "uint256",
"name": "deposit",
"type": "uint256"
},
{
"components": [
{
"components": [
{
"components": [
{
"internalType": "bool",
"name": "hasData",
"type": "bool"
},
{
"internalType": "bytes",
"name": "value",
"type": "bytes"
}
],
"internalType": "struct Identity.Data",
"name": "key",
"type": "tuple"
},
{
"components": [
{
"internalType": "bool",
"name": "hasData",
"type": "bool"
},
{
"internalType": "bytes",
"name": "value",
"type": "bytes"
}
],
"internalType": "struct Identity.Data",
"name": "value",
"type": "tuple"
}
],
"internalType": "struct Identity.Additional[]",
"name": "additional",
"type": "tuple[]"
},
{
"components": [
{
"internalType": "bool",
"name": "hasData",
"type": "bool"
},
{
"internalType": "bytes",
"name": "value",
"type": "bytes"
}
],
"internalType": "struct Identity.Data",
"name": "display",
"type": "tuple"
},
{
"components": [
{
"internalType": "bool",
"name": "hasData",
"type": "bool"
},
{
"internalType": "bytes",
"name": "value",
"type": "bytes"
}
],
"internalType": "struct Identity.Data",
"name": "legal",
"type": "tuple"
},
{
"components": [
{
"internalType": "bool",
"name": "hasData",
"type": "bool"
},
{
"internalType": "bytes",
"name": "value",
"type": "bytes"
}
],
"internalType": "struct Identity.Data",
"name": "web",
"type": "tuple"
},
{
"components": [
{
"internalType": "bool",
"name": "hasData",
"type": "bool"
},
{
"internalType": "bytes",
"name": "value",
"type": "bytes"
}
],
"internalType": "struct Identity.Data",
"name": "riot",
"type": "tuple"
},
{
"components": [
{
"internalType": "bool",
"name": "hasData",
"type": "bool"
},
{
"internalType": "bytes",
"name": "value",
"type": "bytes"
}
],
"internalType": "struct Identity.Data",
"name": "email",
"type": "tuple"
},
{
"internalType": "bool",
"name": "hasPgpFingerprint",
"type": "bool"
},
{
"internalType": "bytes",
"name": "pgpFingerprint",
"type": "bytes"
},
{
"components": [
{
"internalType": "bool",
"name": "hasData",
"type": "bool"
},
{
"internalType": "bytes",
"name": "value",
"type": "bytes"
}
],
"internalType": "struct Identity.Data",
"name": "image",
"type": "tuple"
},
{
"components": [
{
"internalType": "bool",
"name": "hasData",
"type": "bool"
},
{
"internalType": "bytes",
"name": "value",
"type": "bytes"
}
],
"internalType": "struct Identity.Data",
"name": "twitter",
"type": "tuple"
}
],
"internalType": "struct Identity.IdentityInfo",
"name": "info",
"type": "tuple"
}
],
"internalType": "struct Identity.Registration",
"name": "",
"type": "tuple"
}
],
"stateMutability": "view",
"type": "function"
},
{
"inputs": [
{
"internalType": "uint32",
"name": "regIndex",
"type": "uint32"
},
{
"internalType": "address",
"name": "target",
"type": "address"
},
{
"components": [
{
"internalType": "bool",
"name": "isUnknown",
"type": "bool"
},
{
"internalType": "bool",
"name": "isFeePaid",
"type": "bool"
},
{
"internalType": "uint256",
"name": "feePaidDeposit",
"type": "uint256"
},
{
"internalType": "bool",
"name": "isReasonable",
"type": "bool"
},
{
"internalType": "bool",
"name": "isKnownGood",
"type": "bool"
},
{
"internalType": "bool",
"name": "isOutOfDate",
"type": "bool"
},
{
"internalType": "bool",
"name": "isLowQuality",
"type": "bool"
},
{
"internalType": "bool",
"name": "isErroneous",
"type": "bool"
}
],
"internalType": "struct Identity.Judgement",
"name": "judgement",
"type": "tuple"
},
{
"internalType": "bytes32",
"name": "identity",
"type": "bytes32"
}
],
"name": "provideJudgement",
"outputs": [],
"stateMutability": "nonpayable",
"type": "function"
},
{
"inputs": [],
"name": "quitSub",
"outputs": [],
"stateMutability": "nonpayable",
"type": "function"
},
{
"inputs": [],
"name": "registrars",
"outputs": [
{
"components": [
{
"internalType": "bool",
"name": "isValid",
"type": "bool"
},
{
"internalType": "uint32",
"name": "index",
"type": "uint32"
},
{
"internalType": "address",
"name": "account",
"type": "address"
},
{
"internalType": "uint256",
"name": "fee",
"type": "uint256"
},
{
"components": [
{
"internalType": "bool",
"name": "display",
"type": "bool"
},
{
"internalType": "bool",
"name": "legal",
"type": "bool"
},
{
"internalType": "bool",
"name": "web",
"type": "bool"
},
{
"internalType": "bool",
"name": "riot",
"type": "bool"
},
{
"internalType": "bool",
"name": "email",
"type": "bool"
},
{
"internalType": "bool",
"name": "pgpFingerprint",
"type": "bool"
},
{
"internalType": "bool",
"name": "image",
"type": "bool"
},
{
"internalType": "bool",
"name": "twitter",
"type": "bool"
}
],
"internalType": "struct Identity.IdentityFields",
"name": "fields",
"type": "tuple"
}
],
"internalType": "struct Identity.Registrar[]",
"name": "",
"type": "tuple[]"
}
],
"stateMutability": "view",
"type": "function"
},
{
"inputs": [
{
"internalType": "address",
"name": "sub",
"type": "address"
}
],
"name": "removeSub",
"outputs": [],
"stateMutability": "nonpayable",
"type": "function"
},
{
"inputs": [
{
"internalType": "address",
"name": "sub",
"type": "address"
},
{
"components": [
{
"internalType": "bool",
"name": "hasData",
"type": "bool"
},
{
"internalType": "bytes",
"name": "value",
"type": "bytes"
}
],
"internalType": "struct Identity.Data",
"name": "data",
"type": "tuple"
}
],
"name": "renameSub",
"outputs": [],
"stateMutability": "nonpayable",
"type": "function"
},
{
"inputs": [
{
"internalType": "uint32",
"name": "regIndex",
"type": "uint32"
},
{
"internalType": "uint256",
"name": "maxFee",
"type": "uint256"
}
],
"name": "requestJudgement",
"outputs": [],
"stateMutability": "nonpayable",
"type": "function"
},
{
"inputs": [
{
"internalType": "uint32",
"name": "regIndex",
"type": "uint32"
},
{
"internalType": "address",
"name": "newAccount",
"type": "address"
}
],
"name": "setAccountId",
"outputs": [],
"stateMutability": "nonpayable",
"type": "function"
},
{
"inputs": [
{
"internalType": "uint32",
"name": "regIndex",
"type": "uint32"
},
{
"internalType": "uint256",
"name": "fee",
"type": "uint256"
}
],
"name": "setFee",
"outputs": [],
"stateMutability": "nonpayable",
"type": "function"
},
{
"inputs": [
{
"internalType": "uint32",
"name": "regIndex",
"type": "uint32"
},
{
"components": [
{
"internalType": "bool",
"name": "display",
"type": "bool"
},
{
"internalType": "bool",
"name": "legal",
"type": "bool"
},
{
"internalType": "bool",
"name": "web",
"type": "bool"
},
{
"internalType": "bool",
"name": "riot",
"type": "bool"
},
{
"internalType": "bool",
"name": "email",
"type": "bool"
},
{
"internalType": "bool",
"name": "pgpFingerprint",
"type": "bool"
},
{
"internalType": "bool",
"name": "image",
"type": "bool"
},
{
"internalType": "bool",
"name": "twitter",
"type": "bool"
}
],
"internalType": "struct Identity.IdentityFields",
"name": "fields",
"type": "tuple"
}
],
"name": "setFields",
"outputs": [],
"stateMutability": "nonpayable",
"type": "function"
},
{
"inputs": [
{
"components": [
{
"components": [
{
"components": [
{
"internalType": "bool",
"name": "hasData",
"type": "bool"
},
{
"internalType": "bytes",
"name": "value",
"type": "bytes"
}
],
"internalType": "struct Identity.Data",
"name": "key",
"type": "tuple"
},
{
"components": [
{
"internalType": "bool",
"name": "hasData",
"type": "bool"
},
{
"internalType": "bytes",
"name": "value",
"type": "bytes"
}
],
"internalType": "struct Identity.Data",
"name": "value",
"type": "tuple"
}
],
"internalType": "struct Identity.Additional[]",
"name": "additional",
"type": "tuple[]"
},
{
"components": [
{
"internalType": "bool",
"name": "hasData",
"type": "bool"
},
{
"internalType": "bytes",
"name": "value",
"type": "bytes"
}
],
"internalType": "struct Identity.Data",
"name": "display",
"type": "tuple"
},
{
"components": [
{
"internalType": "bool",
"name": "hasData",
"type": "bool"
},
{
"internalType": "bytes",
"name": "value",
"type": "bytes"
}
],
"internalType": "struct Identity.Data",
"name": "legal",
"type": "tuple"
},
{
"components": [
{
"internalType": "bool",
"name": "hasData",
"type": "bool"
},
{
"internalType": "bytes",
"name": "value",
"type": "bytes"
}
],
"internalType": "struct Identity.Data",
"name": "web",
"type": "tuple"
},
{
"components": [
{
"internalType": "bool",
"name": "hasData",
"type": "bool"
},
{
"internalType": "bytes",
"name": "value",
"type": "bytes"
}
],
"internalType": "struct Identity.Data",
"name": "riot",
"type": "tuple"
},
{
"components": [
{
"internalType": "bool",
"name": "hasData",
"type": "bool"
},
{
"internalType": "bytes",
"name": "value",
"type": "bytes"
}
],
"internalType": "struct Identity.Data",
"name": "email",
"type": "tuple"
},
{
"internalType": "bool",
"name": "hasPgpFingerprint",
"type": "bool"
},
{
"internalType": "bytes",
"name": "pgpFingerprint",
"type": "bytes"
},
{
"components": [
{
"internalType": "bool",
"name": "hasData",
"type": "bool"
},
{
"internalType": "bytes",
"name": "value",
"type": "bytes"
}
],
"internalType": "struct Identity.Data",
"name": "image",
"type": "tuple"
},
{
"components": [
{
"internalType": "bool",
"name": "hasData",
"type": "bool"
},
{
"internalType": "bytes",
"name": "value",
"type": "bytes"
}
],
"internalType": "struct Identity.Data",
"name": "twitter",
"type": "tuple"
}
],
"internalType": "struct Identity.IdentityInfo",
"name": "info",
"type": "tuple"
}
],
"name": "setIdentity",
"outputs": [],
"stateMutability": "nonpayable",
"type": "function"
},
{
"inputs": [
{
"components": [
{
"internalType": "address",
"name": "account",
"type": "address"
},
{
"components": [
{
"internalType": "bool",
"name": "hasData",
"type": "bool"
},
{
"internalType": "bytes",
"name": "value",
"type": "bytes"
}
],
"internalType": "struct Identity.Data",
"name": "data",
"type": "tuple"
}
],
"internalType": "struct Identity.SubAccount[]",
"name": "subs",
"type": "tuple[]"
}
],
"name": "setSubs",
"outputs": [],
"stateMutability": "nonpayable",
"type": "function"
},
{
"inputs": [
{
"internalType": "address",
"name": "who",
"type": "address"
}
],
"name": "subsOf",
"outputs": [
{
"components": [
{
"internalType": "uint256",
"name": "deposit",
"type": "uint256"
},
{
"internalType": "address[]",
"name": "accounts",
"type": "address[]"
}
],
"internalType": "struct Identity.SubsOf",
"name": "",
"type": "tuple"
}
],
"stateMutability": "view",
"type": "function"
},
{
"inputs": [
{
"internalType": "address",
"name": "who",
"type": "address"
}
],
"name": "superOf",
"outputs": [
{
"components": [
{
"internalType": "bool",
"name": "isValid",
"type": "bool"
},
{
"internalType": "address",
"name": "account",
"type": "address"
},
{
"components": [
{
"internalType": "bool",
"name": "hasData",
"type": "bool"
},
{
"internalType": "bytes",
"name": "value",
"type": "bytes"
}
],
"internalType": "struct Identity.Data",
"name": "data",
"type": "tuple"
}
],
"internalType": "struct Identity.SuperOf",
"name": "",
"type": "tuple"
}
],
"stateMutability": "view",
"type": "function"
}
]
```
Once you have the ABI, you can interact with the precompile using the Ethereum library of your choice. Generally speaking, you'll take the following steps:
1. Create a provider
2. Create a contract instance of the Identity Precompile
3. Interact with the Identity Precompile's functions
In the examples below, you'll learn how to assemble the data required to set an identity, how to set an identity, and how to retrieve the identity information once it's been set.
!!! remember
The following snippets are for demo purposes only. Never store your private keys in a JavaScript or Python file.
=== "Ethers.js"
```js
import { ethers } from 'ethers'; // Import Ethers library
import ABI from './identityPrecompileABI.js'; // Import Identity Precompile ABI
const privateKey = 'INSERT_PRIVATE_KEY';
const identityPrecompileAddress = '0x0000000000000000000000000000000000000818';
// Create Ethers provider and signer
const provider = new ethers.JsonRpcProvider(
'https://rpc.api.moonbase.moonbeam.network'
);
const signer = new ethers.Wallet(privateKey, provider);
// Create interface for the Identity Precompile
const identityPrecompile = new ethers.Contract(
identityPrecompileAddress,
ABI,
signer
);
// Interact with the Precompile Registry
const setIdentity = async () => {
// Assemble identity info
const identityInfo = {
additional: [],
display: {
hasData: true,
value: '0x416c696365', // Alice in hex
},
legal: {
hasData: false,
value: '0x',
},
web: {
hasData: false,
value: '0x',
},
riot: {
hasData: false,
value: '0x',
},
email: {
hasData: false,
value: '0x',
},
hasPgpFingerprint: false,
pgpFingerprint: '0x',
image: {
hasData: false,
value: '0x',
},
twitter: {
hasData: false,
value: '0x',
},
};
// Set the identity
const submitIdentity = await identityPrecompile.setIdentity(identityInfo);
console.log(`Identity set. Transaction hash: ${submitIdentity.hash}`);
// Retrieve the identity
const identity = await identityPrecompile.identity(signer.address);
console.log(`Identity is valid: ${identity[0]}`);
console.log(`Judgements provided for this identity: ${identity[1]}`);
console.log(`Deposit paid for this identity: ${identity[2]}`);
console.log(`Identity information: ${identity[3]}`);
console.log(`Display name: ${ethers.toUtf8String(identity[3][1][1])}`);
};
setIdentity();
```
=== "Web3.js"
```js
import { Web3 } from 'web3';
import ABI from './identityPrecompileABI.js'; // Import Identity Precompile ABI
const from = {
privateKey: 'INSERT_PRIVATE_KEY',
address: 'INSERT_ADDRESS',
};
const identityPrecompileAddress = '0x0000000000000000000000000000000000000818';
// Create provider
const web3 = new Web3('https://rpc.api.moonbase.moonbeam.network');
// Create interface for the Identity Precompile
const identityPrecompile = new web3.eth.Contract(
ABI,
identityPrecompileAddress,
{ from: from.address }
);
// Interact with the Precompile Registry
const setIdentity = async () => {
// Assemble identity info
const identityInfo = {
additional: [],
display: {
hasData: true,
value: '0x416c696365', // Alice in hex
},
legal: {
hasData: false,
value: '0x',
},
web: {
hasData: false,
value: '0x',
},
riot: {
hasData: false,
value: '0x',
},
email: {
hasData: false,
value: '0x',
},
hasPgpFingerprint: false,
pgpFingerprint: '0x',
image: {
hasData: false,
value: '0x',
},
twitter: {
hasData: false,
value: '0x',
},
};
// Set the identity
const submitIdentity = await identityPrecompile.methods.setIdentity(
identityInfo
);
const sendTransaction = await web3.eth.accounts.signTransaction(
{
to: identityPrecompileAddress,
data: submitIdentity.encodeABI(),
gas: await submitIdentity.estimateGas(),
gasPrice: await web3.eth.getGasPrice(),
nonce: await web3.eth.getTransactionCount(from.address),
},
from.privateKey
);
// Sign and send the transaction to set the identity
const createReceipt = await web3.eth.sendSignedTransaction(
sendTransaction.rawTransaction
);
console.log(
`Identity set. Transaction hash: ${createReceipt.transactionHash}`
);
// Retrieve the identity
const identity = await identityPrecompile.methods.identity(address).call();
console.log(`Identity is valid: ${identity[0]}`);
console.log(`Judgements provided for this identity: ${identity[1]}`);
console.log(`Deposit paid for this identity: ${identity[2]}`);
console.log(`Identity information: ${identity[3]}`);
console.log(`Display name: ${web3.utils.hexToUtf8(identity[3][1][1])}`);
};
setIdentity();
```
=== "Web3.py"
```py
from web3 import Web3
# Paste or import the Identity Precompile ABI
abi = "INSERT_IDENTITY_PRECOMPILE_ABI"
account_from = {
"private_key": "INSERT_PRIVATE_KEY",
"address": "INSERT_ADDRESS",
}
identity_precompile_address = "0x0000000000000000000000000000000000000818"
# Create provider
web3 = Web3(Web3.HTTPProvider("https://rpc.api.moonbase.moonbeam.network"))
# Create interface for the Precompile Registry
identity_precompile = web3.eth.contract(address=identity_precompile_address, abi=abi)
def set_identity():
# Assemble identity info
identity_info = {
"additional": [],
"display": {
"hasData": True,
"value": "0x416c696365", # Alice in hex
},
"legal": {
"hasData": False,
"value": "0x",
},
"web": {
"hasData": False,
"value": "0x",
},
"riot": {
"hasData": False,
"value": "0x",
},
"email": {
"hasData": False,
"value": "0x",
},
"hasPgpFingerprint": False,
"pgpFingerprint": "0x",
"image": {
"hasData": False,
"value": "0x",
},
"twitter": {
"hasData": False,
"value": "0x",
},
}
# Set the identity
submit_identity = identity_precompile.functions.setIdentity(
identity_info
).build_transaction(
{
"from": Web3.to_checksum_address(account_from["address"]),
"nonce": web3.eth.get_transaction_count(
Web3.to_checksum_address(account_from["address"])
),
}
)
# Sign and send the transaction to set the identity
tx_create = web3.eth.account.sign_transaction(
submit_identity, account_from["private_key"]
)
tx_hash = web3.eth.send_raw_transaction(tx_create.rawTransaction)
tx_receipt = web3.eth.wait_for_transaction_receipt(tx_hash)
print(f"Identity set. Transaction hash: { tx_receipt.transactionHash.hex() }")
# Retrieve the identity
identity = identity_precompile.functions.identity(account_from["address"]).call()
print(f"Identity is valid: { identity[0] }")
print(f"Judgements provided for this identity: { identity[1] }")
print(f"Deposit paid for this identity: { identity[2] }")
print(f"Identity information: { identity[3] }")
print(f"Display name: { web3.to_text(identity[3][1][1]) }")
set_identity()
```
--- END CONTENT ---
Doc-Content: https://docs.moonbeam.network/builders/ethereum/precompiles/account/proxy/
--- BEGIN CONTENT ---
---
title: Interacting with the Proxy Precompile
description: How to use the Moonbeam proxy Solidity precompile interface to add and remove proxy accounts from Substrate's Proxy Pallet.
keywords: solidity, ethereum, proxy, moonbeam, precompiled, contracts, substrate
categories: Precompiles, Ethereum Toolkit
---
# Interacting with the Proxy Precompile
## Introduction {: #introduction }
The Proxy Precompile on Moonbeam allows accounts to set proxy accounts that can perform specific limited actions on their behalf, such as governance, staking, or balance transfers.
If a user wanted to provide a second user access to a limited number of actions on their behalf, traditionally the only method to do so would be by providing the first account's private key to the second. However, Moonbeam has included the [Substrate Proxy Pallet](/builders/substrate/interfaces/account/proxy/){target=\_blank}, which enables proxy accounts. Proxy accounts ought to be used due to the additional layer of security that they provide, where many accounts can perform actions for a main account. This is best if, for example, a user wants to keep their wallet safe in cold storage but still wants to access parts of the wallet's functionality like governance or staking.
**The Proxy Precompile can only be called from an Externally Owned Account (EOA) or by the [Batch Precompile](/builders/ethereum/precompiles/ux/batch/){target=\_blank}.**
To learn more about proxy accounts and how to set them up for your own purposes without use of the Proxy Precompile, view the [Setting up a Proxy Account](/tokens/manage/proxy-accounts/){target=\_blank} page.
The Proxy Precompile is located at the following address:
=== "Moonbeam"
```text
{{networks.moonbeam.precompiles.proxy}}
```
=== "Moonriver"
```text
{{networks.moonriver.precompiles.proxy}}
```
=== "Moonbase Alpha"
```text
{{networks.moonbase.precompiles.proxy}}
```
!!! note
There can be some unintended consequences when using the precompiled contracts on Moonbeam. Please refer to the [Security Considerations](/learn/core-concepts/security/){target=\_blank} page for more information.
## The Proxy Solidity Interface {: #the-proxy-solidity-interface }
[`Proxy.sol`](https://github.com/moonbeam-foundation/moonbeam/blob/master/precompiles/proxy/Proxy.sol){target=\_blank} is an interface through which Solidity contracts can interact with the Proxy Pallet. You do not have to be familiar with the Substrate API since you can interact with it using the Ethereum interface you're familiar with.
The interface includes the following functions:
??? function "**addProxy**(*address* delegate, *ProxyType* proxyType, *uint32* delay) - registers a proxy account for the sender after a specified number of `delay` blocks (generally zero). Will fail if a proxy for the caller already exists"
=== "Parameters"
- `delegate` - address of the account to be registered as a proxy
- `proxyType` - ProxyType enumeration specifying the type of proxy to be registered
- `delay` - uint32 number of blocks before the proxy registration becomes active
??? function "**removeProxy**(*address* delegate, *ProxyType* proxyType, *uint32* delay) - removes a registered proxy for the sender"
=== "Parameters"
- `delegate` - address of the proxy account to be removed
- `proxyType` - ProxyType enumeration of the proxy type to be removed
- `delay` - uint32 delay value of the proxy to be removed
??? function "**removeProxies**() - removes all of the proxy accounts delegated to the sender"
=== "Parameters"
None.
??? function "**isProxy**(*address* real, *address* delegate, *ProxyType* proxyType, *uint32* delay) - returns a boolean, `true` if the delegate address is a proxy of type `proxyType`, for address `real`, with the specified `delay`"
=== "Parameters"
- `real` - address of the account that might be represented by the proxy
- `delegate` - address of the potential proxy account
- `proxyType` - ProxyType enumeration of the proxy type to check
- `delay` - uint32 delay value to check
The `proxyType` parameter is defined by the following `ProxyType` enum, where the values start at `0` with the most permissive proxy type and are represented as `uint8` values:
```solidity
enum ProxyType {
Any,
NonTransfer,
Governance,
Staking,
CancelProxy,
Balances,
AuthorMapping,
IdentityJudgement
}
```
## Proxy Types {: #proxy-types }
There are multiple types of proxy roles that can be delegated to accounts, where are represented in `Proxy.sol` through the `ProxyType` enum. The following list includes all of the possible proxies and the type of transactions they can make on behalf of the primary account:
- **Any** — the any proxy will allow the proxy account to make any type of transaction that the `Governance`, `Staking`, `Balances`, and `AuthorMapping` proxy types can perform. Note that balance transfers are only allowed to EOAs, not contracts or Precompiles
- **NonTransfer** — the non-transfer proxy will allow the proxy account to make any type of transaction through the `Governance`, `Staking` and `AuthorMapping` Precompiles, where the `msg.value` is checked to be zero
- **Governance** - the governance proxy will allow the proxy account to make any type of governance related transaction (includes both democracy or council pallets)
- **Staking** - the staking proxy will allow the proxy account to make staking related transactions through the `Staking` Precompile, including calls to the `AuthorMapping` Precompile
- **CancelProxy** - the cancel proxy will allow the proxy account to reject and remove delayed proxy announcements (of the primary account). Currently, this is not an action supported by the Proxy Precompile
- **Balances** - the balances proxy will allow the proxy account to only make balance transfers to EOAs
- **AuthorMapping** - this type of proxy account is used by collators to migrate services from one server to another
- **IdentityJudgement** - the identity judgement proxy will allow the proxy account to judge and certify the personal information associated with accounts on Polkadot. Currently, this is not an action supported by the Proxy Precompile
## Interact with the Solidity Interface {: #interact-with-the-solidity-interface }
The following section will cover how to interact with the Proxy Precompile from Remix. Please note that **the Proxy Precompile can only be called from an EOA or by the [Batch Precompile](/builders/ethereum/precompiles/ux/batch/){target=\_blank}**.
### Checking Prerequisites {: #checking-prerequisites }
The below example is demonstrated on Moonbase Alpha, however, similar steps can be taken for Moonbeam and Moonriver. You should:
- Have MetaMask installed and [connected to Moonbase Alpha](/tokens/connect/metamask/){target=\_blank}
- Have an account with some DEV tokens.
You can get DEV tokens for testing on Moonbase Alpha once every 24 hours from the [Moonbase Alpha Faucet](https://faucet.moonbeam.network){target=\_blank}
- Have a second account that you control to use as a proxy account (funding optional)
### Remix Set Up {: #remix-set-up }
To get started, get a copy of [`Proxy.sol`](https://github.com/moonbeam-foundation/moonbeam/blob/master/precompiles/proxy/Proxy.sol){target=\_blank} and take the following steps:
1. Click on the **File explorer** tab
2. Copy and paste the file contents into a [Remix file](https://remix.ethereum.org){target=\_blank} named `Proxy.sol`
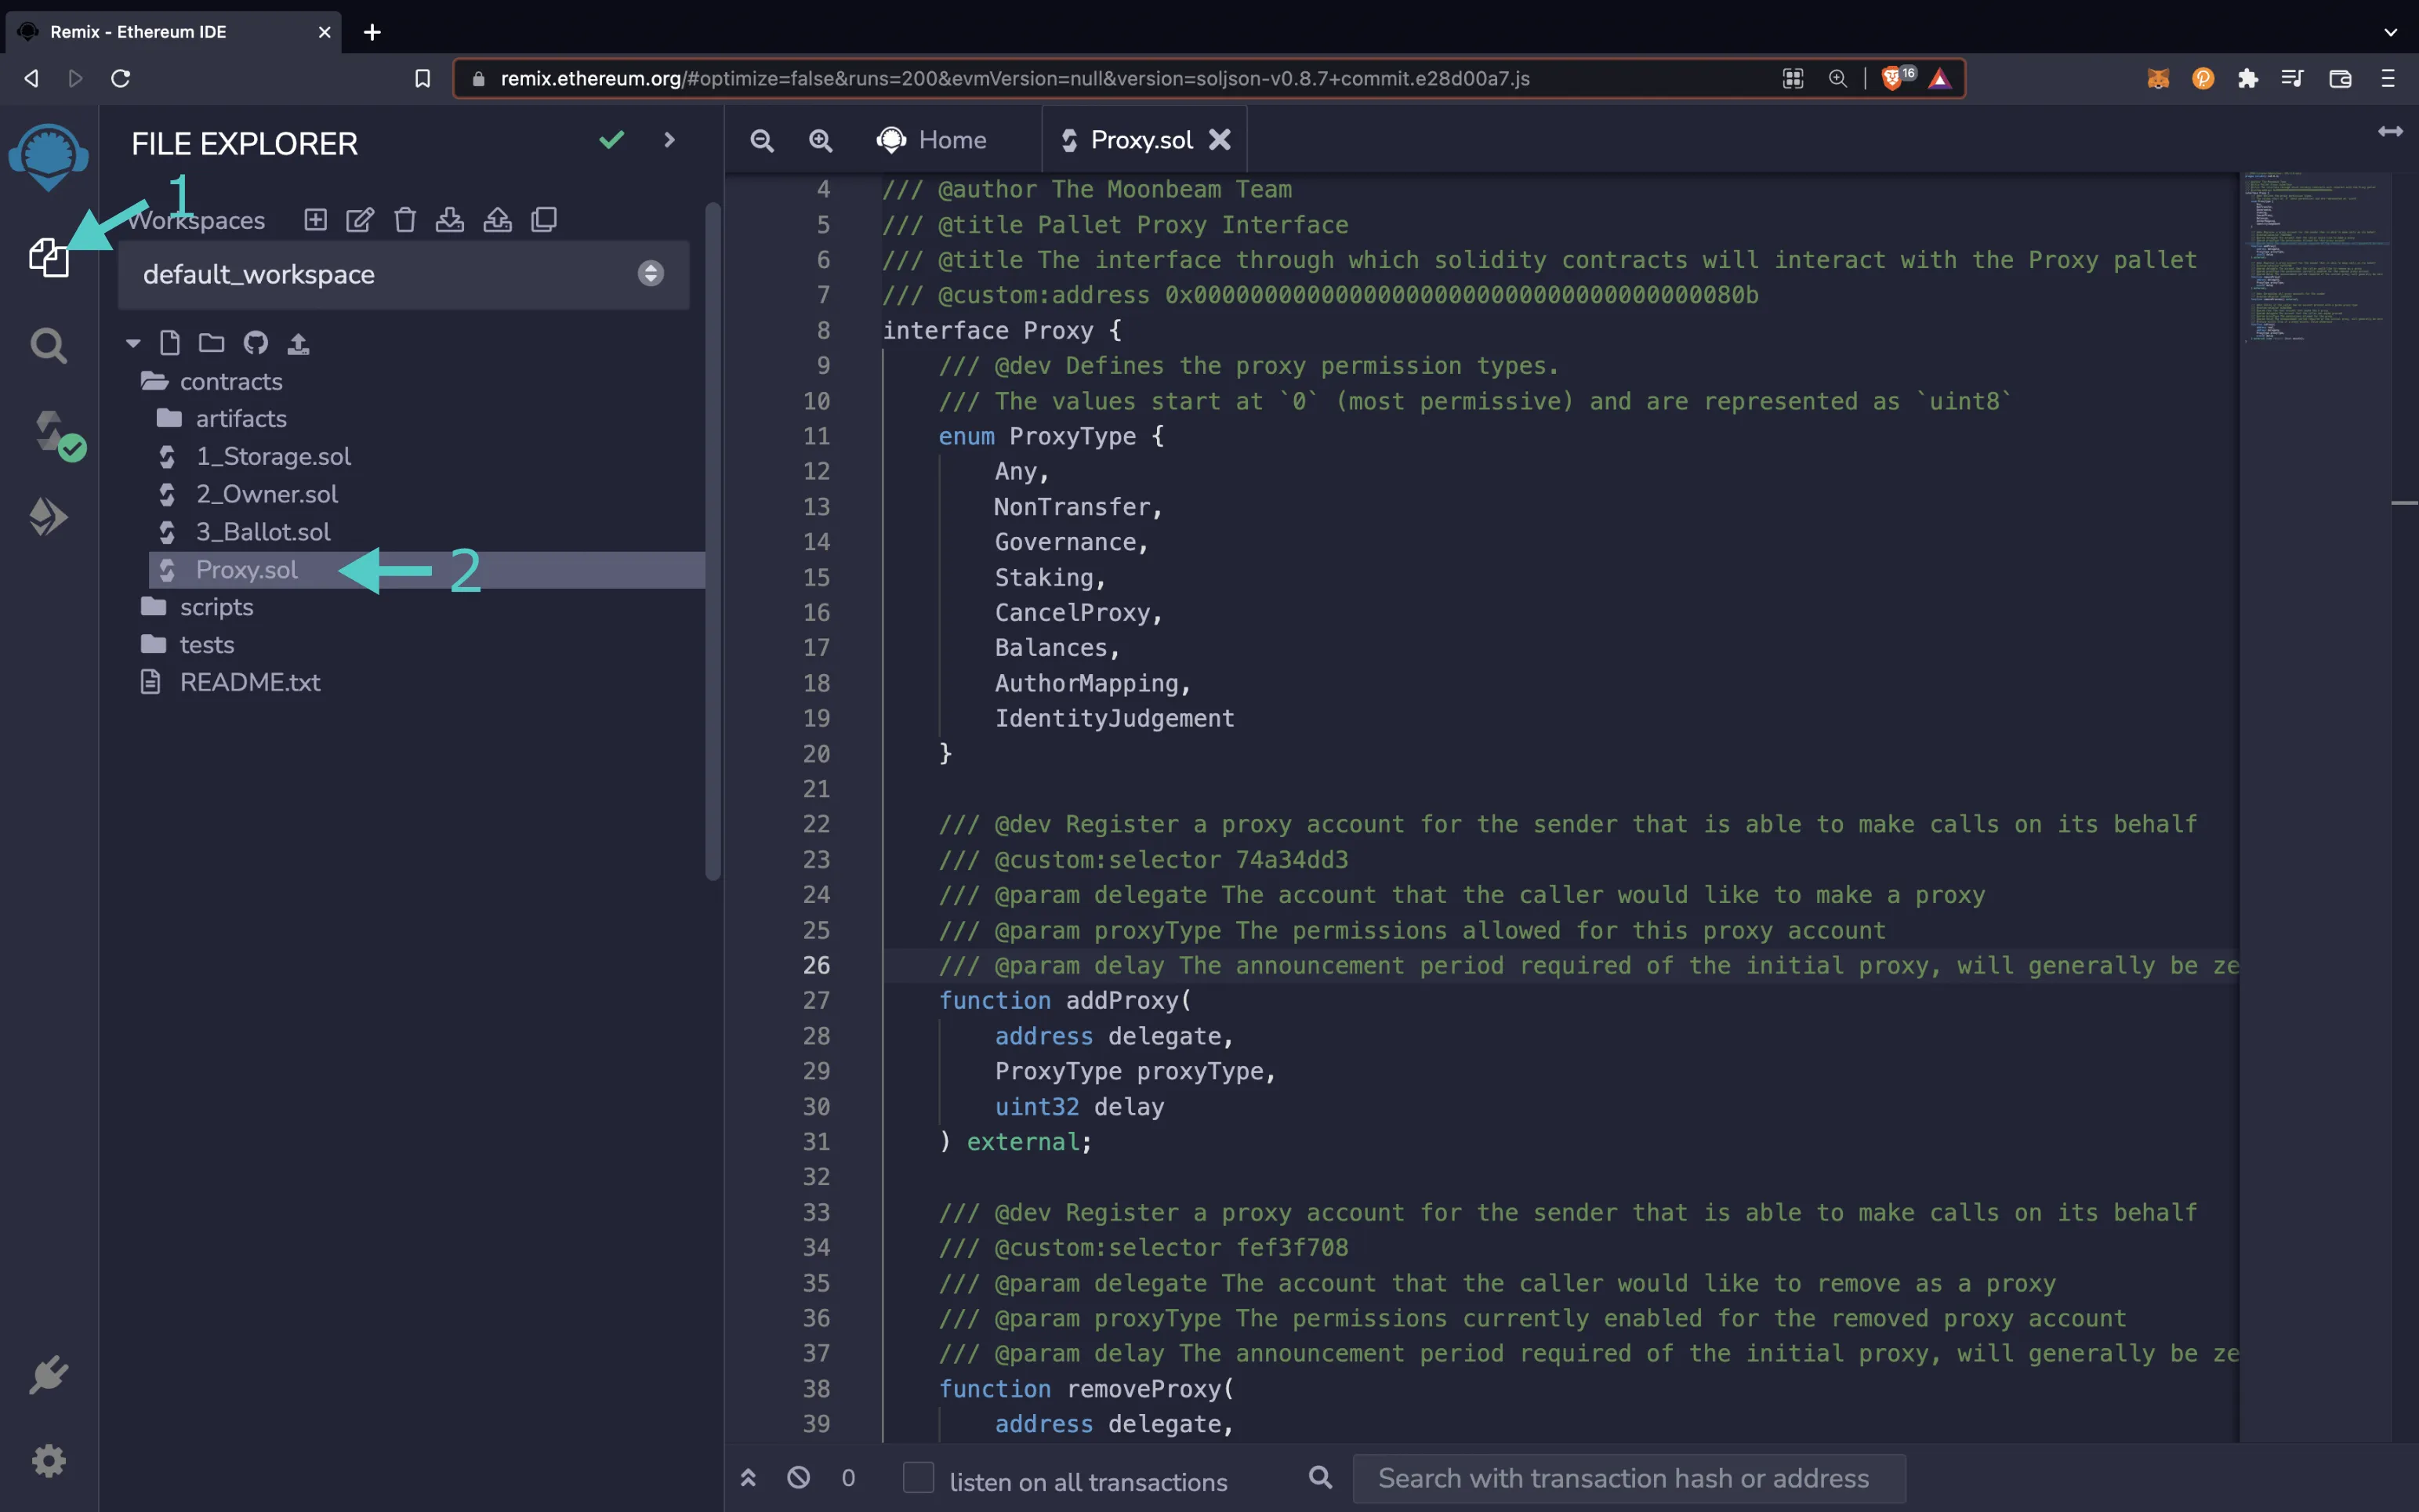
### Compile the Contract {: #compile-the-contract }
1. Click on the **Compile** tab, second from top
2. Then to compile the interface, click on **Compile Proxy.sol**
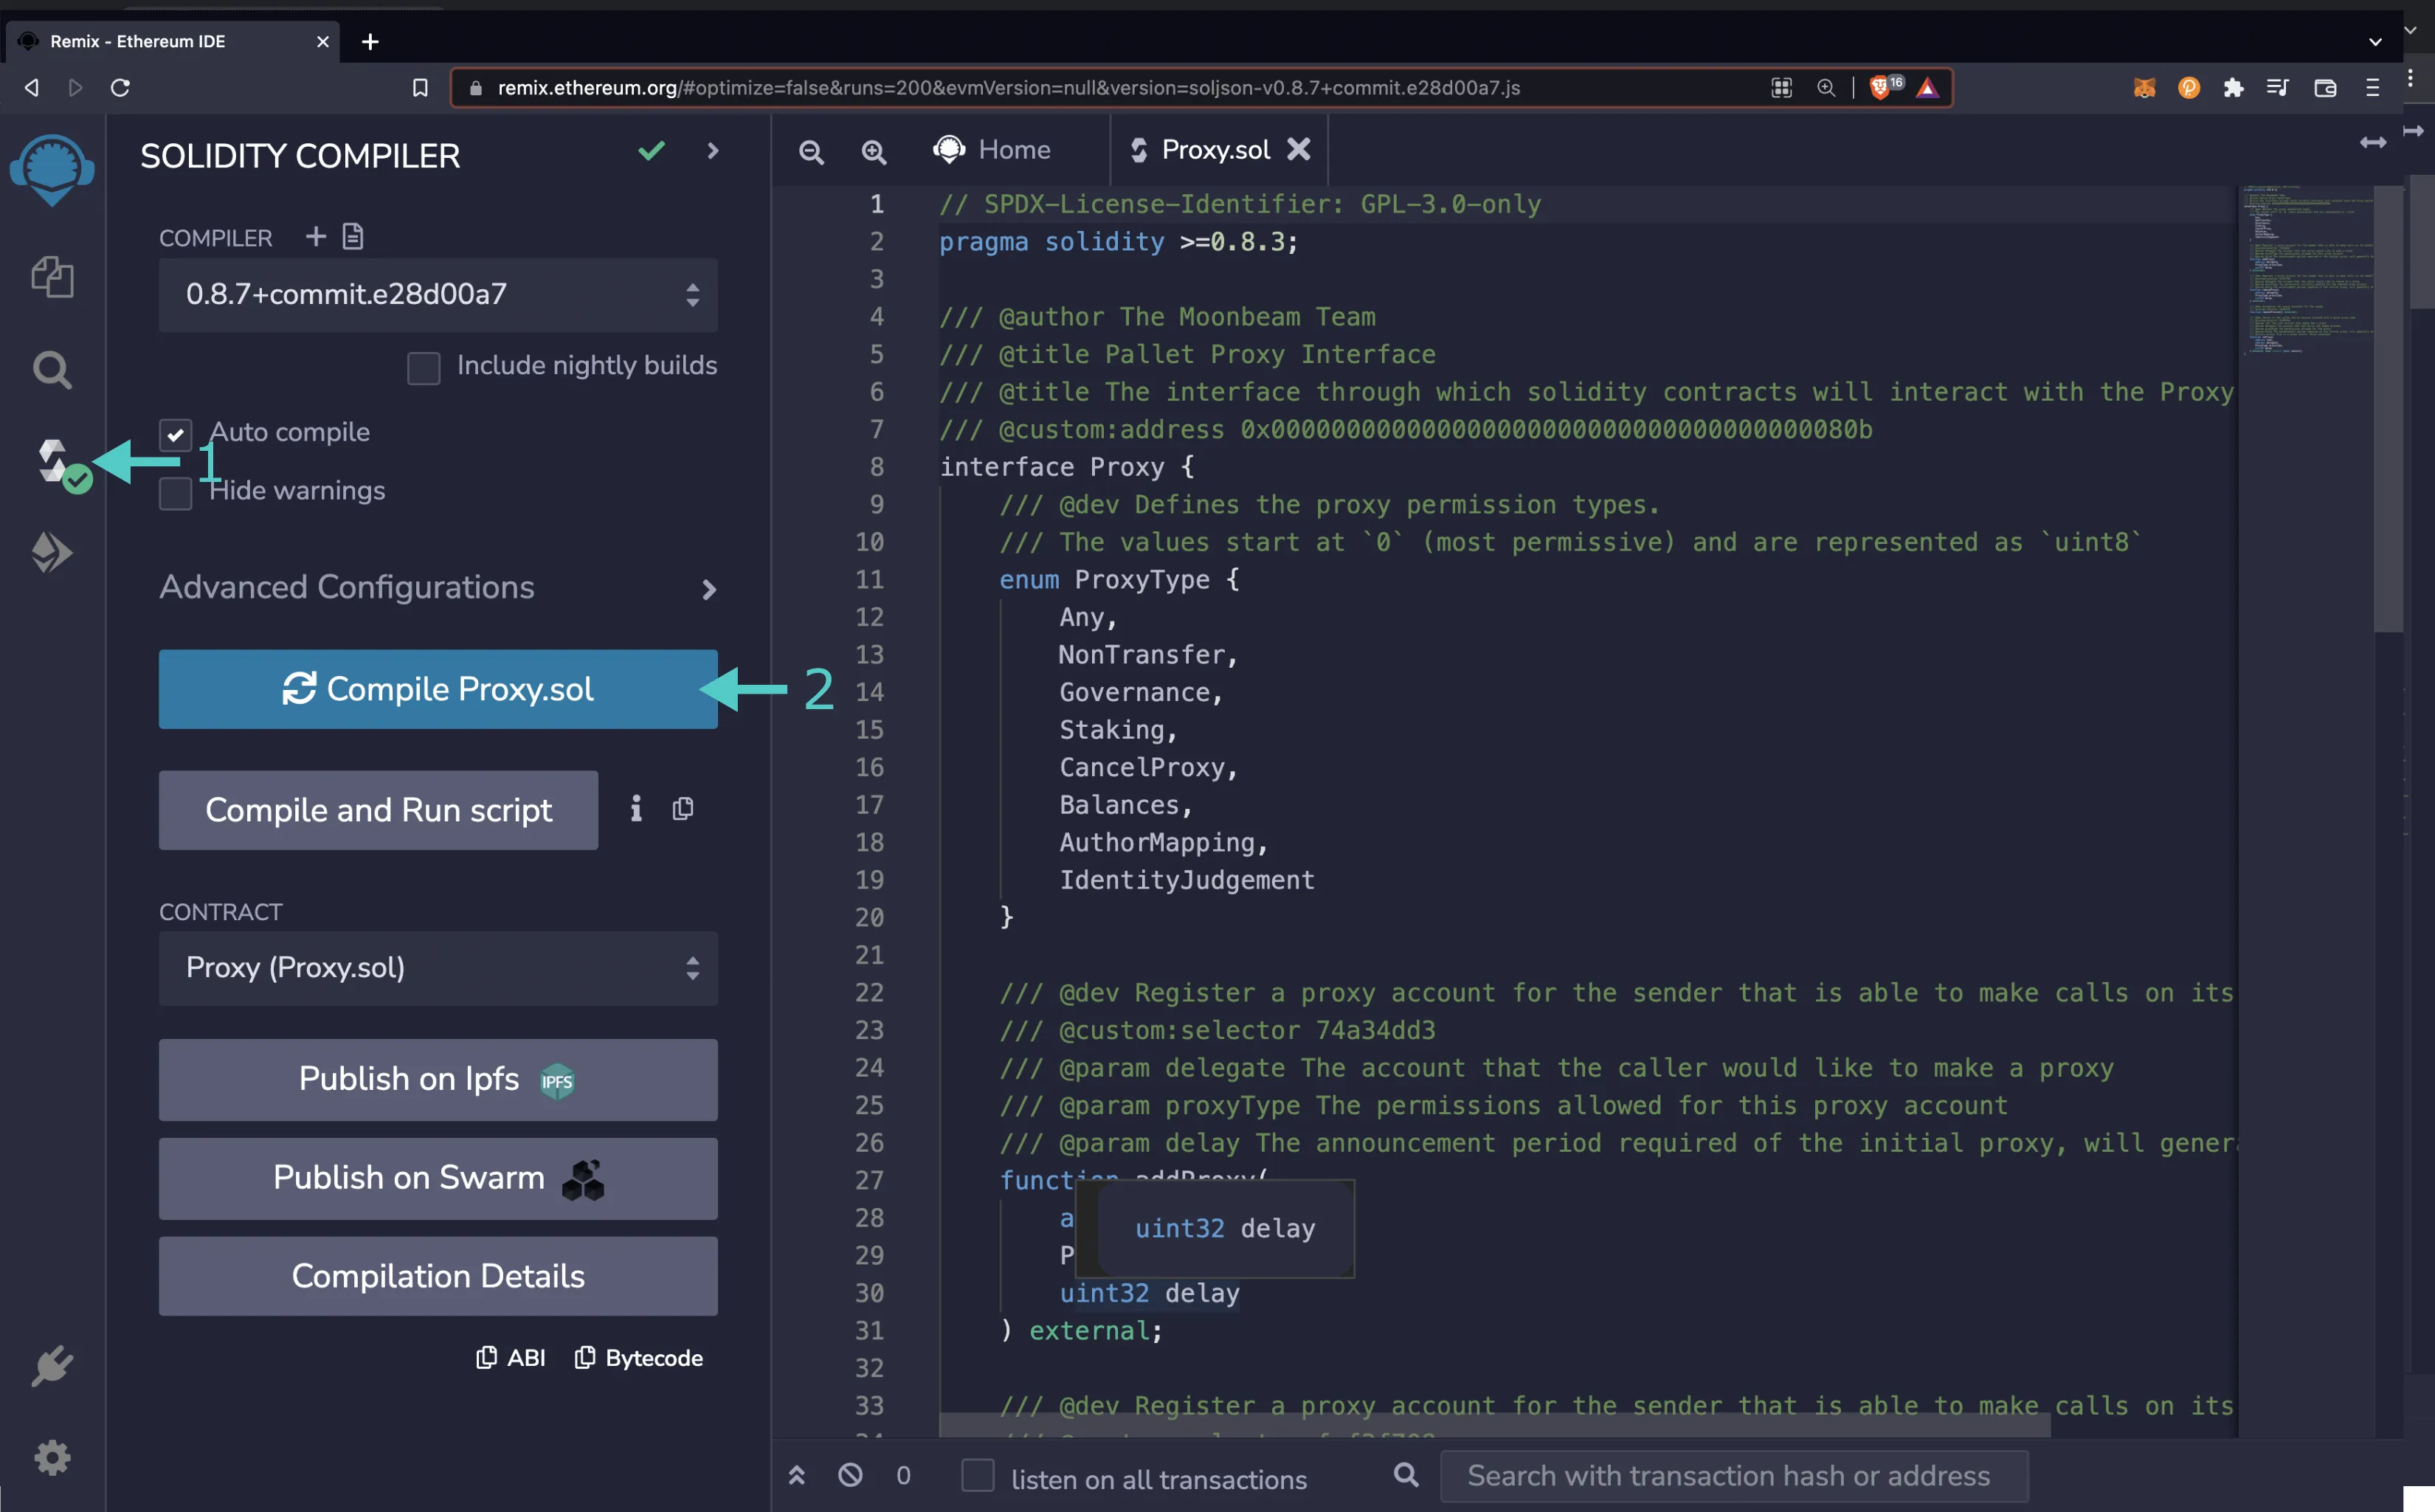
### Access the Contract {: #access-the-contract }
1. Click on the **Deploy and Run** tab, directly below the **Compile** tab in Remix. Note: you are not deploying a contract here, instead you are accessing a precompiled contract that is already deployed
2. Make sure **Injected Provider - Metamask** is selected in the **ENVIRONMENT** drop down
3. Ensure **Proxy.sol** is selected in the **CONTRACT** dropdown. Since this is a precompiled contract there is no need to deploy, instead you are going to provide the address of the Precompile in the **At Address** field
4. Provide the address of the Proxy Precompile for Moonbase Alpha: `{{networks.moonbase.precompiles.proxy}}` and click **At Address**
5. The Proxy Precompile will appear in the list of **Deployed Contracts**
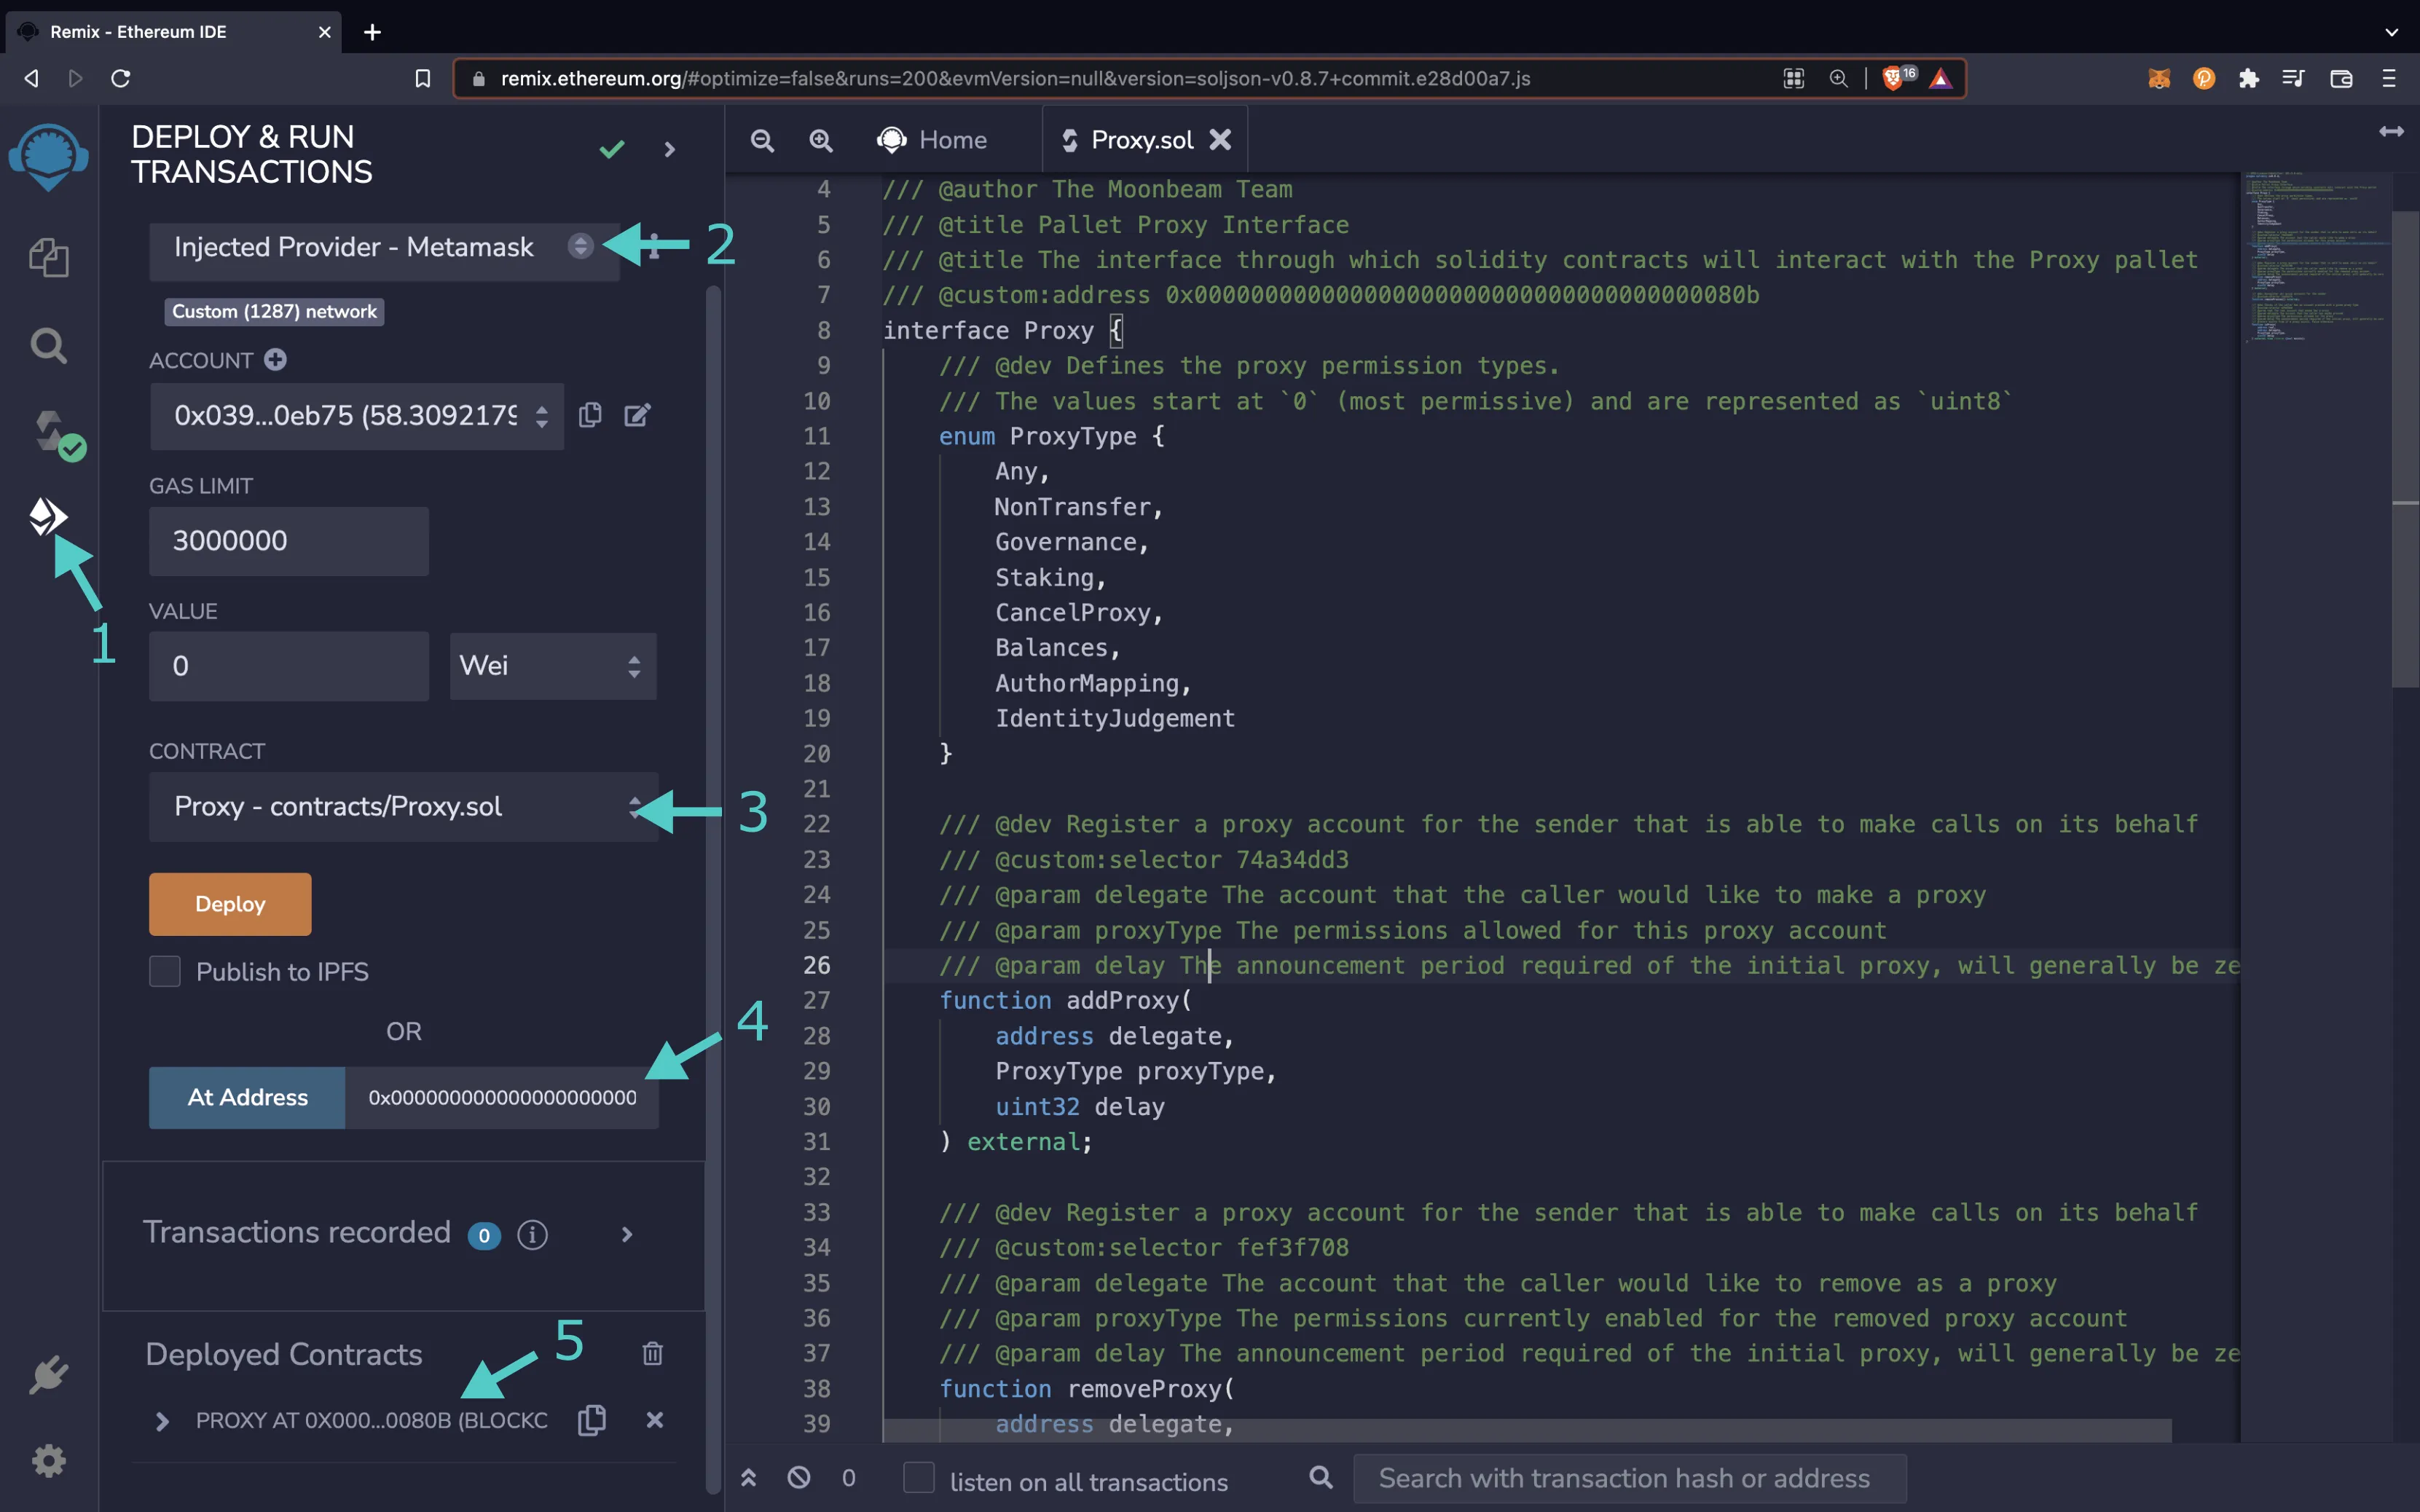
### Add a Proxy {: #add-proxy }
You can add a proxy for your account via the Proxy Precompile if your account doesn't already have a proxy. In this example, you will add a [balances](#:~:text=Balances) proxy to an account by taking the following steps:
1. Expand the Proxy Precompile contract to see the available functions
2. Find the **addProxy** function and press the button to expand the section
3. Insert your second account's address as the **delegate**, `5` as **proxyType**, and `0` as **delay**
4. Press **transact** and confirm the transaction in MetaMask
!!! note
When constructing the transaction in Remix, the **proxyType** is represented as a `uint8`, instead of the expected enum `ProxyType`. In Solidity, enums are compiled as `uint8`, so when you pass in `5` for **proxyType**, you indicate the sixth element in the `ProxyType` enum, which is the balances proxy.
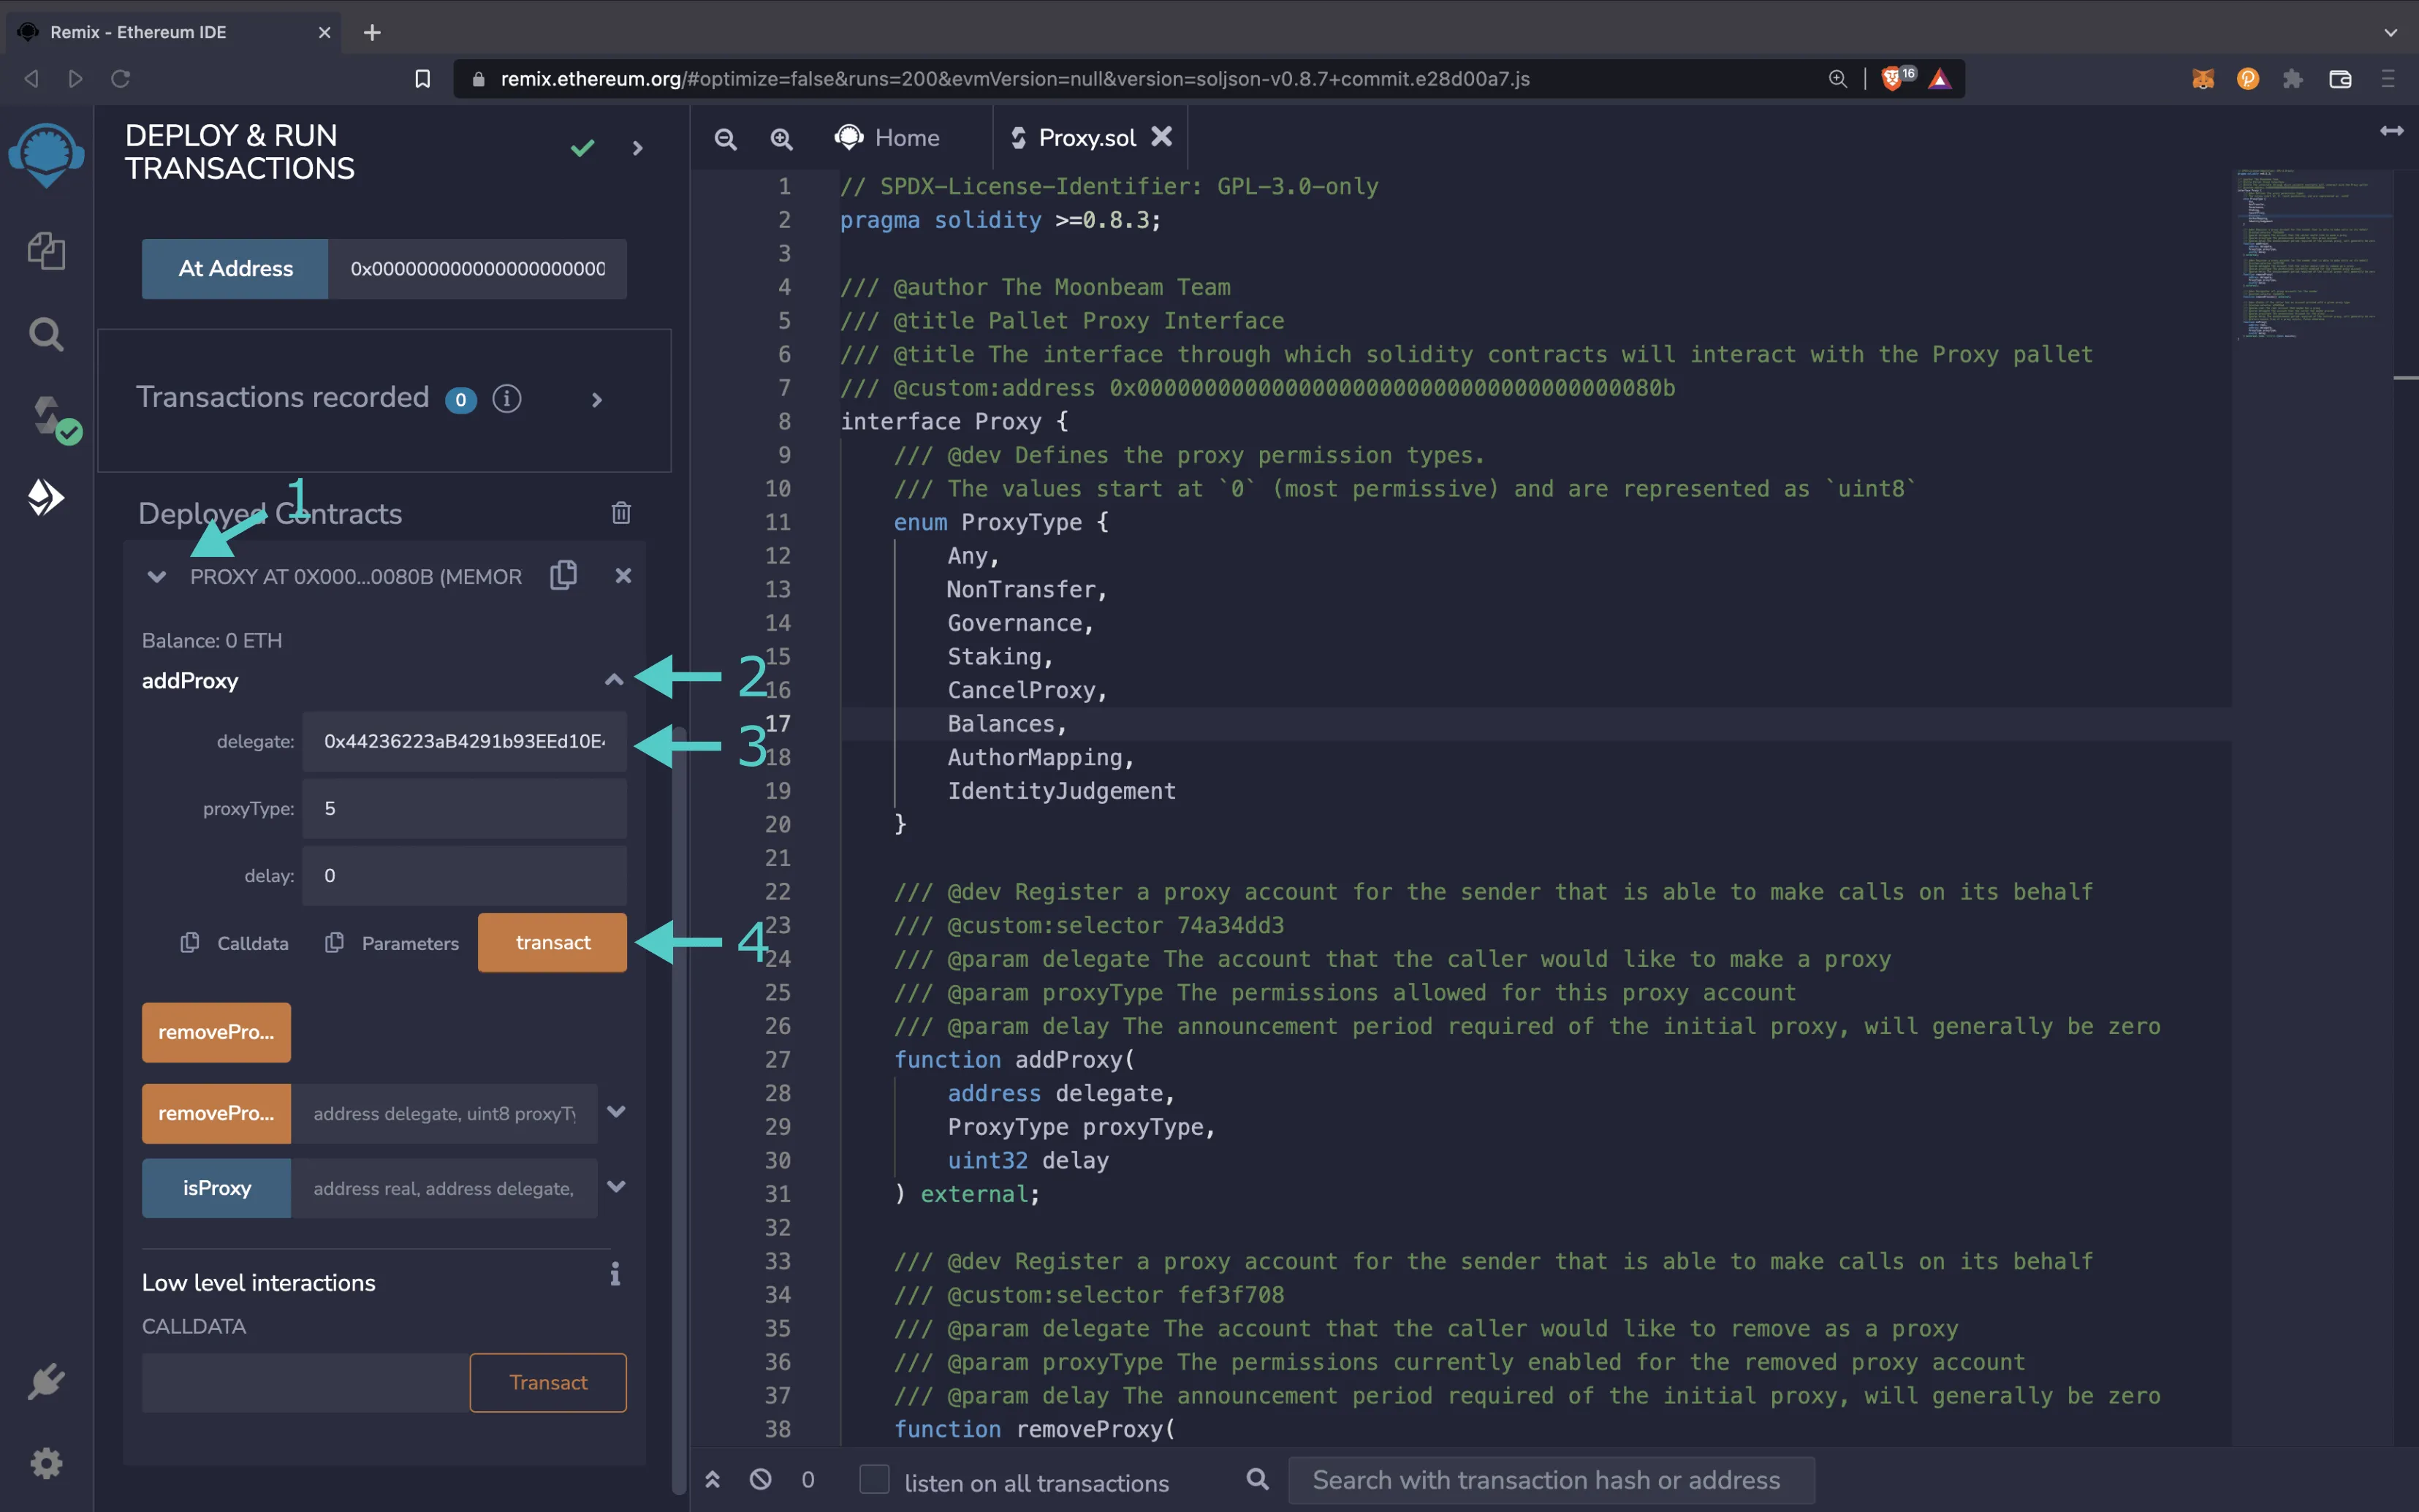
### Check a Proxy's Existence {: #check-proxy }
You can determine whether or not an account is a proxy account for a primary account. In this example, you will insert the parameters of the [previously added proxy](#add-proxy) to determine if the proxy account was successfully added:
1. Find the **isProxy** function and press the button to expand the section
2. Insert your primary account's address as **real**, your second account's address as **delegate**, `5` as **proxyType**, and `0` as **delay**
3. Press **call**
If everything went correctly, the output should be `true`.
### Remove a Proxy {: #remove-proxy }
You can remove a proxy from your account via the Proxy Precompile. In this example, you will remove the balances proxy [previously added](#add-proxy) to your delegate account by taking the following steps:
1. Expand the Proxy Precompile contract to see the available functions
2. Find the **removeProxy** function and press the button to expand the section
3. Insert your second account's address as the **delegate**, `5` as **proxyType**, `0` and as **delay**
4. Press **transact** and confirm the transaction in MetaMask
After the transaction is confirmed, if you repeat the steps to [check for a proxy's existence](#check-proxy), the result should be `false`.
And that's it! You've completed your introduction to the Proxy Precompile. Additional information on setting up proxies is available on the [Setting up a Proxy Account](/tokens/manage/proxy-accounts/){target=\_blank} page and the [Proxy Accounts](https://wiki.polkadot.com/learn/learn-proxies/){target=\_blank} page on Polkadot's documentation. Feel free to reach out on [Discord](https://discord.com/invite/PfpUATX){target=\_blank} if you have any questions about any aspect of the Proxy Precompile.
--- END CONTENT ---
Doc-Content: https://docs.moonbeam.network/builders/ethereum/precompiles/features/governance/collective/
--- BEGIN CONTENT ---
---
title: Collective Precompile Contract
description: Learn how to use the Moonbeam Collective Precompile to perform democracy functions through any of the collectives on Moonbeam, such as the Treasury Council.
keywords: solidity, ethereum, collective, proposal, council technical, committee, moonbeam, precompiled, contracts
categories: Precompiles, Ethereum Toolkit
---
# Interacting with the Collective Precompile
## Introduction {: #introduction }
The Collective Precompile enables a user to directly interact with [Substrate's collective pallet](https://paritytech.github.io/substrate/master/pallet_collective/index.html){target=\_blank} directly from a Solidity interface.
A collective is a group of members that are responsible for specific democracy-related actions such as proposing, voting on, executing, and closing motions. Each can execute different actions with different origins. Consequently, collectives can be created with very specific scopes. There are currently two collectives: the Treasury Council collective and the OpenGov Technical Committee collective. As such, there is a precompile for each collective. For more information on the OpenGov Technical Committee please refer to the [Governance on Moonbeam](/learn/features/governance/){target=\_blank} page, and for more information on the Treasury Council, please refer to the [Treasury on Moonbeam](/learn/features/treasury/){target=\_blank} page.
This guide will show you how to propose, vote on, and close a proposal using the Collective Precompile.
The Collective Precompiles are located at the following addresses:
=== "Moonbeam"
| Collective | Address |
|:---------------------------:|:--------------------------------------------------------------------:|
| Treasury Council | {{networks.moonbeam.precompiles.collective_treasury }} |
| OpenGov Technical Committee | {{networks.moonbeam.precompiles.collective_opengov_tech_committee }} |
=== "Moonriver"
| Collective | Address |
|:---------------------------:|:---------------------------------------------------------------------:|
| Treasury Council | {{networks.moonriver.precompiles.collective_treasury }} |
| OpenGov Technical Committee | {{networks.moonriver.precompiles.collective_opengov_tech_committee }} |
=== "Moonbase Alpha"
| Collective | Address |
|:---------------------------:|:--------------------------------------------------------------------:|
| Treasury Council | {{networks.moonbase.precompiles.collective_treasury }} |
| OpenGov Technical Committee | {{networks.moonbase.precompiles.collective_opengov_tech_committee }} |
!!! note
There can be some unintended consequences when using the precompiled contracts on Moonbeam. Please refer to the [Security Considerations](/learn/core-concepts/security/){target=\_blank} page for more information.
## The Collective Solidity Interface {: #the-call-permit-interface }
[`Collective.sol`](https://github.com/moonbeam-foundation/moonbeam/blob/master/precompiles/collective/Collective.sol){target=\_blank} is a Solidity interface that allows developers to interact with the precompile's five methods.
The interface includes the following functions:
??? function "**execute**(*bytes memory* proposal) - executes a proposal as a single member of the collective. The sender must be a member of the collective. This will *not* revert if the Substrate proposal is dispatched but fails"
=== "Parameters"
- `proposal` - bytes memory containing the [SCALE encoded](https://docs.polkadot.com/polkadot-protocol/parachain-basics/data-encoding/){target=\_blank} Substrate call that proposes an action
??? function "**propose**(*uint32* threshold, *bytes memory* proposal) - adds a new proposal to be voted on. The sender must be a member of the collective. If the threshold is less than two then the proposal will be dispatched and executed directly, with the proposer as dispatcher. If the threshold is met, the index of the new proposal is returned"
=== "Parameters"
- `threshold` - uint32 amount of members required to dispatch the proposal
- `proposal` - bytes memory containing the [SCALE encoded](https://docs.polkadot.com/polkadot-protocol/parachain-basics/data-encoding/){target=\_blank} Substrate call that proposes an action
??? function "**vote**(*bytes32* proposalHash, *uint32* proposalIndex, *bool* approve) - votes on a proposal. The sender must be a member of the collective"
=== "Parameters"
- `proposalHash` - bytes32 hash of the proposal
- `proposalIndex` - uint32 index of the proposal
- `approve` - bool indicating the vote to approve the proposal or not
??? function "**close**(*bytes32* proposalHash, *uint32* proposalIndex, *uint64* proposalWeightBound, *uint32* lengthBound) - closes a proposal. Can be called by anyone once there are enough votes. Returns a boolean indicating whether the proposal was executed or removed"
=== "Parameters"
- `proposalHash` - bytes32 hash of the proposal
- `proposalIndex` - uint32 index of the proposal
- `proposalWeightBound` - uint64 maximum amount of Substrate weight the proposal can use. If the proposal call uses more, the call will revert
- `lengthBound` - uint32 value higher or equal to the length of the SCALE encoded proposal in bytes
??? function "**proposalHash**(*bytes memory* proposal) - computes the hash of a proposal"
=== "Parameters"
- `proposal` - bytes memory containing the [SCALE encoded](https://docs.polkadot.com/polkadot-protocol/parachain-basics/data-encoding/){target=\_blank} Substrate call that proposes an action
The interface includes the following events:
- **Executed**(*bytes32* proposalHash) - emitted when a proposal is executed
- **Proposed**(*address indexed* who, *uint32* indexed proposalIndex, *bytes32 indexed* proposalHash, *uint32* threshold) - emitted when a proposal has successfully been proposed and can be executed or voted on
- **Voted**(*address indexed* who, *bytes32 indexed proposalHash, *bool* voted) - emitted when a proposal is voted on
- **Closed**(*bytes32 indexed* proposalHash) - emitted when a proposal has been closed
## Interacting with the Solidity Interface {: #interacting-with-the-solidity-interface }
The example in this section will show you how to submit a Treasury proposal using the Treasury Council Collective Precompile. As such, the proposal will be subject to meeting the voting requirements of the Treasury Council. The threshold for accepting a Treasury proposal is at least three-fifths of the Treasury Council. On the other hand, the threshold for rejecting a proposal is at least one-half of the Treasury Council. Please keep in mind that in order to propose and vote on the proposal, you must be a member of the Treasury Council.
If you are not a member of the Treasury Council on Moonbeam, Moonriver, or Moonbase Alpha, you can test out the features of the Collective Precompile using a [Moonbeam development node](/builders/get-started/networks/moonbeam-dev/){target=\_blank}. The Moonbeam development node comes with [ten pre-funded accounts](/builders/get-started/networks/moonbeam-dev/#pre-funded-development-accounts){target=\_blank}, of which Baltathar, Charleth, and Dorothy are automatically set as members of the Treasury Council collective. You can use any of these three accounts to follow along with the rest of the guide.
### Checking Prerequisites {: #checking-prerequisites }
The example in this guide will be shown on a Moonbeam development node, however, it can be adapted for any of the Moonbeam-based networks.
To get started, you will need to have the following:
- Have MetaMask installed and [connected to one of the Moonbeam-based networks](/tokens/connect/metamask/){target=\_blank}
- Have an account with funds. If using a Moonbeam development node, the development accounts are pre-funded. For Moonbeam, Moonriver, or Moonbase Alpha, you'll need to fund your account.
You can get DEV tokens for testing on Moonbase Alpha once every 24 hours from the [Moonbase Alpha Faucet](https://faucet.moonbeam.network){target=\_blank}
If you're using a Moonbeam development node and the development accounts, you'll also need to do the following:
- Set your development node to seal blocks on a time interval such as every 6 seconds (6000 milliseconds) using the `--sealing 6000` flag
- [Connect Polkadot.js Apps to your local Moonbeam development node](/builders/get-started/networks/moonbeam-dev/#connecting-polkadot-js-apps-to-a-local-moonbeam-node){target=\_blank}
- Import Baltathar's, Charleth's, and/or Dorothy's accounts into [Polkadot.js Apps](/tokens/connect/polkadotjs/#creating-or-importing-an-h160-account){target=\_blank} and [MetaMask](/tokens/connect/metamask/#import-accounts){target=\_blank}
### Remix Set Up {: #remix-set-up }
1. Get a copy of [`Collective.sol`](https://github.com/moonbeam-foundation/moonbeam/blob/master/precompiles/collective/Collective.sol){target=\_blank}
2. Copy and paste the file contents into a [Remix file](https://remix.ethereum.org){target=\_blank} named `Collective.sol`
### Compile the Contract {: #compile-the-contract }
1. Click on the **Compile** tab, second from top
2. Then to compile the interface, click on **Compile Collective.sol**
### Access the Contract {: #access-the-contract }
1. Click on the **Deploy and Run** tab, directly below the **Compile** tab in Remix. Note: You are not deploying a contract here; instead you are accessing a precompiled contract that is already deployed
2. Make sure **Injected Provider - Metamask** is selected in the **ENVIRONMENT** drop down
3. Ensure **Collective - Collective.sol** is selected in the **CONTRACT** dropdown. Since this is a precompiled contract there is no need to deploy, instead you are going to provide the address of the precompile in the **At Address** Field
4. Provide the address of the Collective Precompile,`{{networks.moonbase.precompiles.collective_treasury}}`, and click **At Address**
5. The Collective Precompile will appear in the list of **Deployed Contracts**
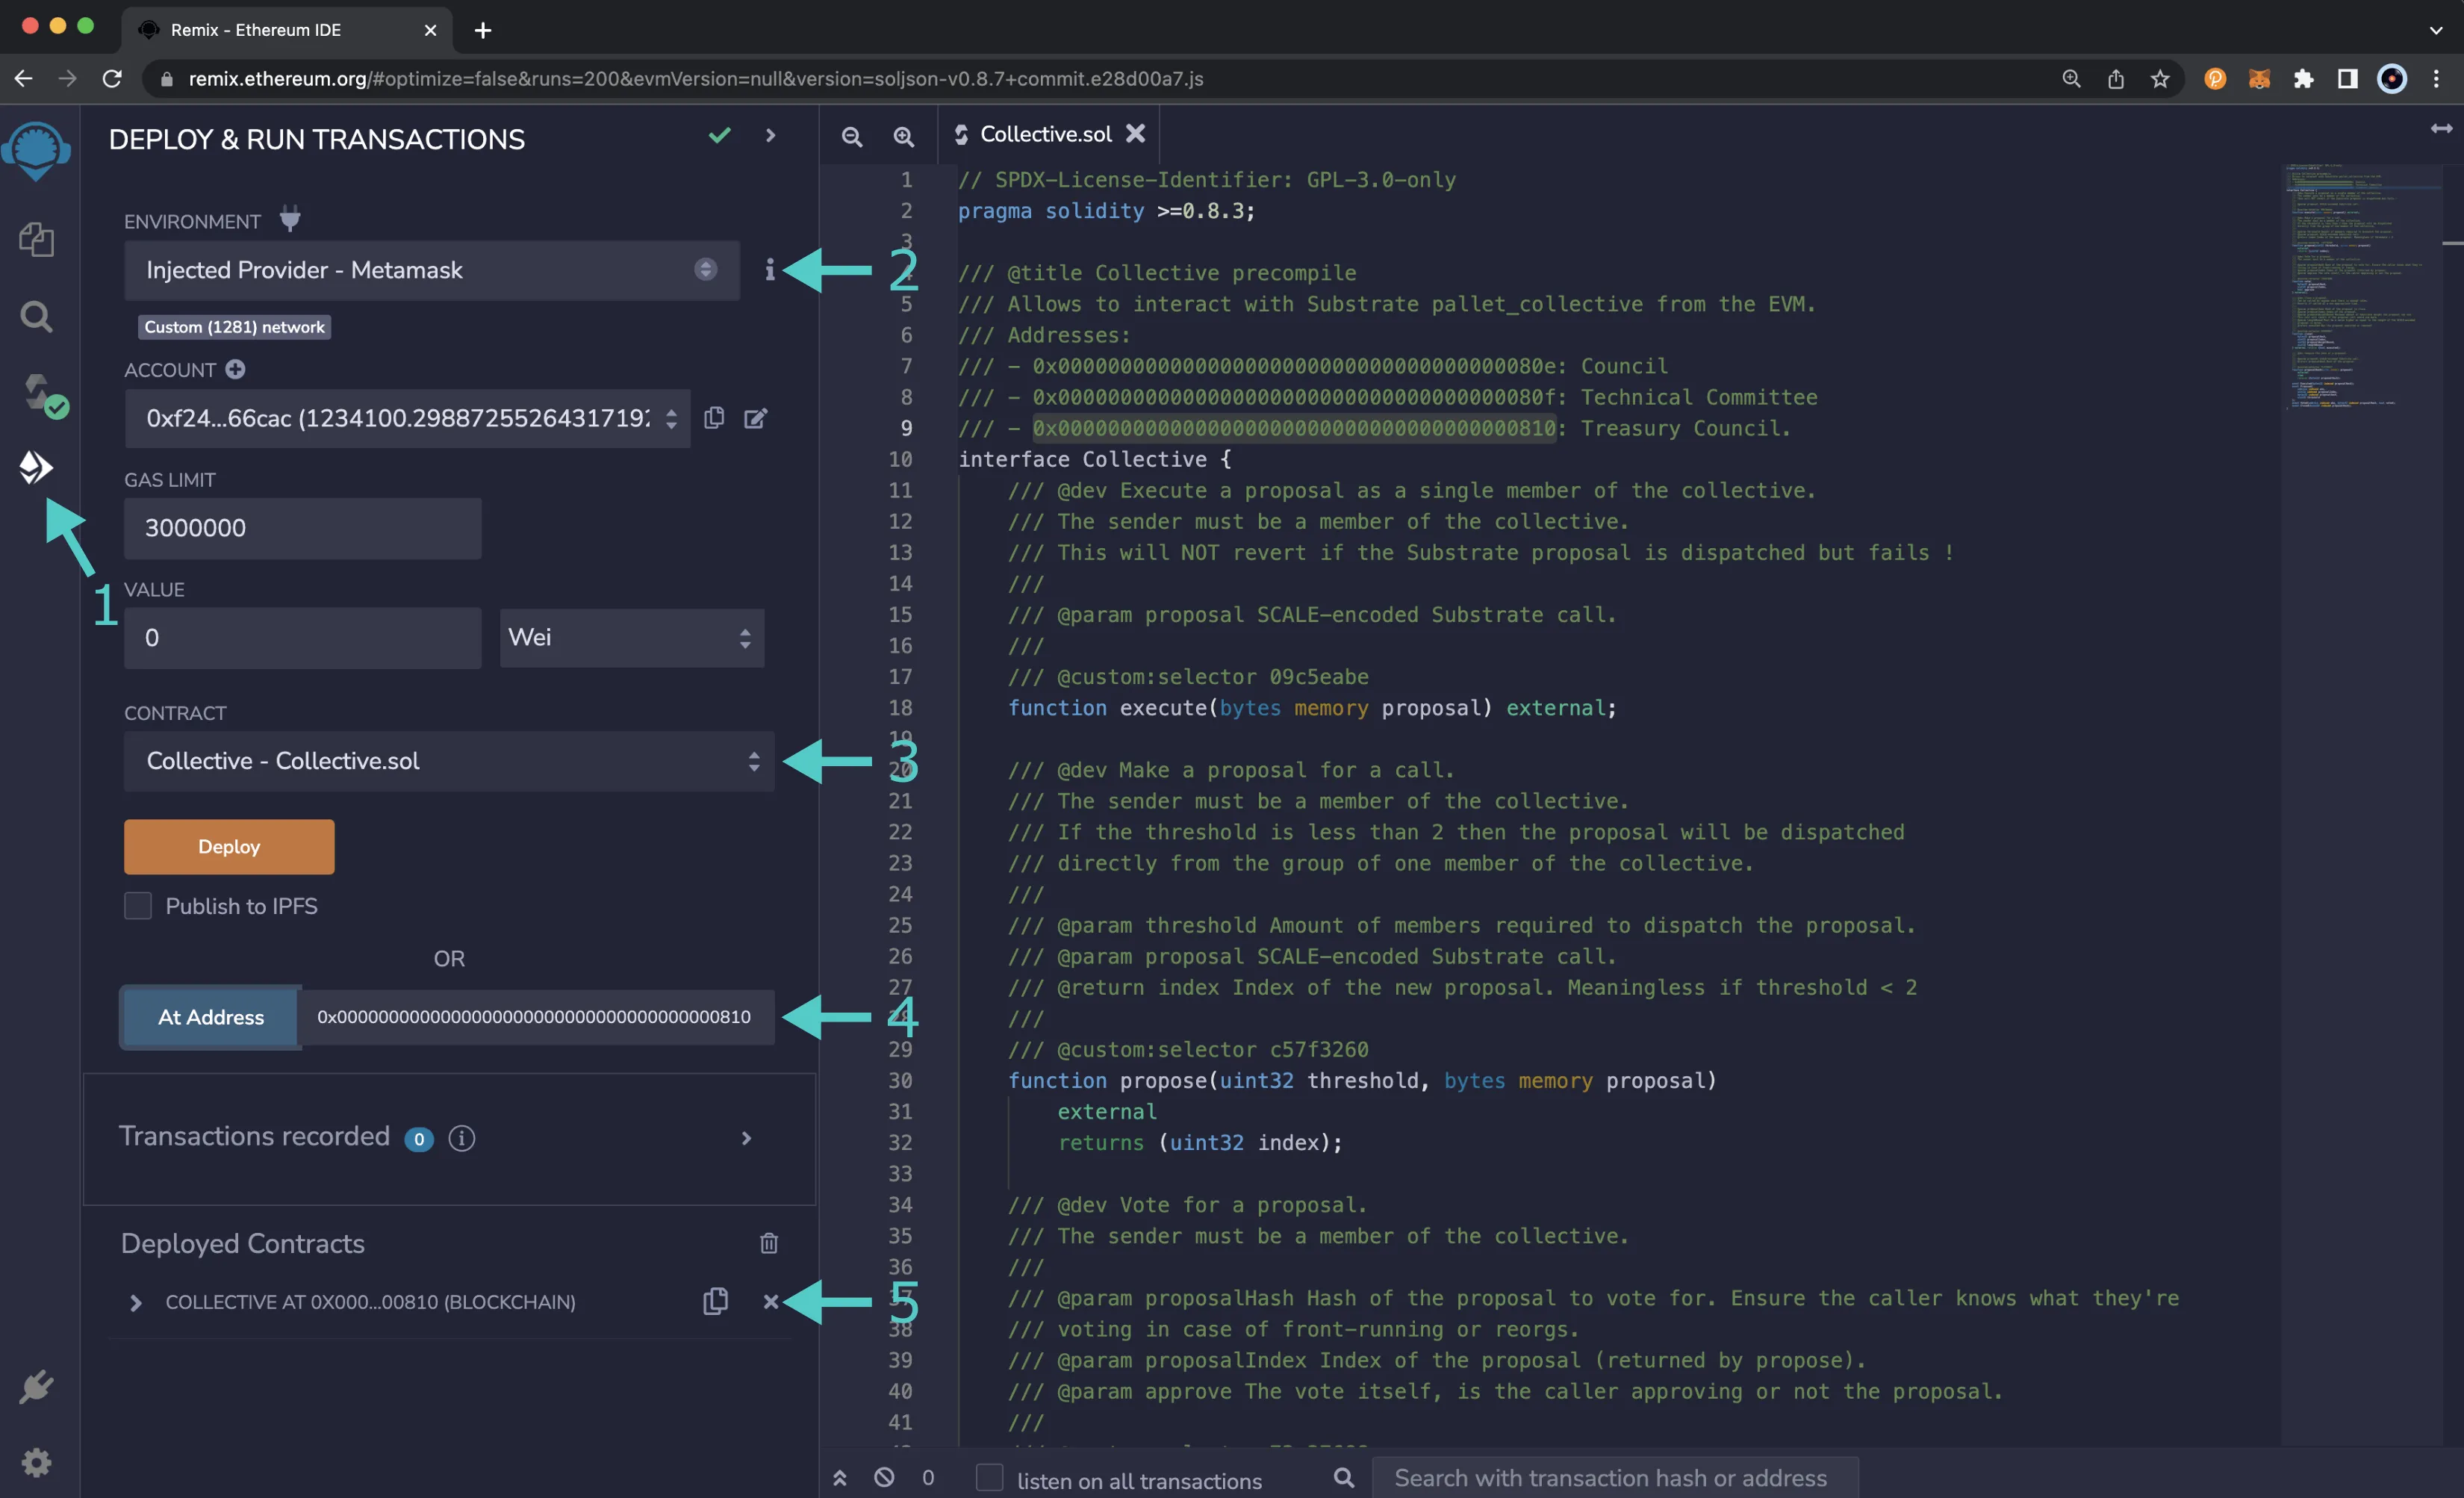
### Create a Proposal {: #create-a-proposal }
In order to submit a proposal to be voted on by the Treasury Council collective, you must first create a Treasury proposal. If a Treasury proposal that you want to vote on already exists and you have the proposal index, you can skip ahead to the next section.
To submit a Treasury proposal, you can do so via the [Polkadot.js Apps](https://polkadot.js.org/apps/?rpc=ws%3A%2F%2F127.0.0.1%3A9944#/treasury){target=\_blank} Treasury page. For this example, you can create a simple proposal to send Alith 10 DEV tokens that can be used to host a community event. To get started, click on **Submit proposal**, and fill out the following information:
1. From the **submit with account** dropdown, select the account you want to submit the proposal with. The bond for the proposal will be taken from this account
2. Select the **beneficiary**, which can be **Alith** for this example
3. Enter `10` for the **value**
4. Click on **Submit proposal** and then sign and submit the proposal
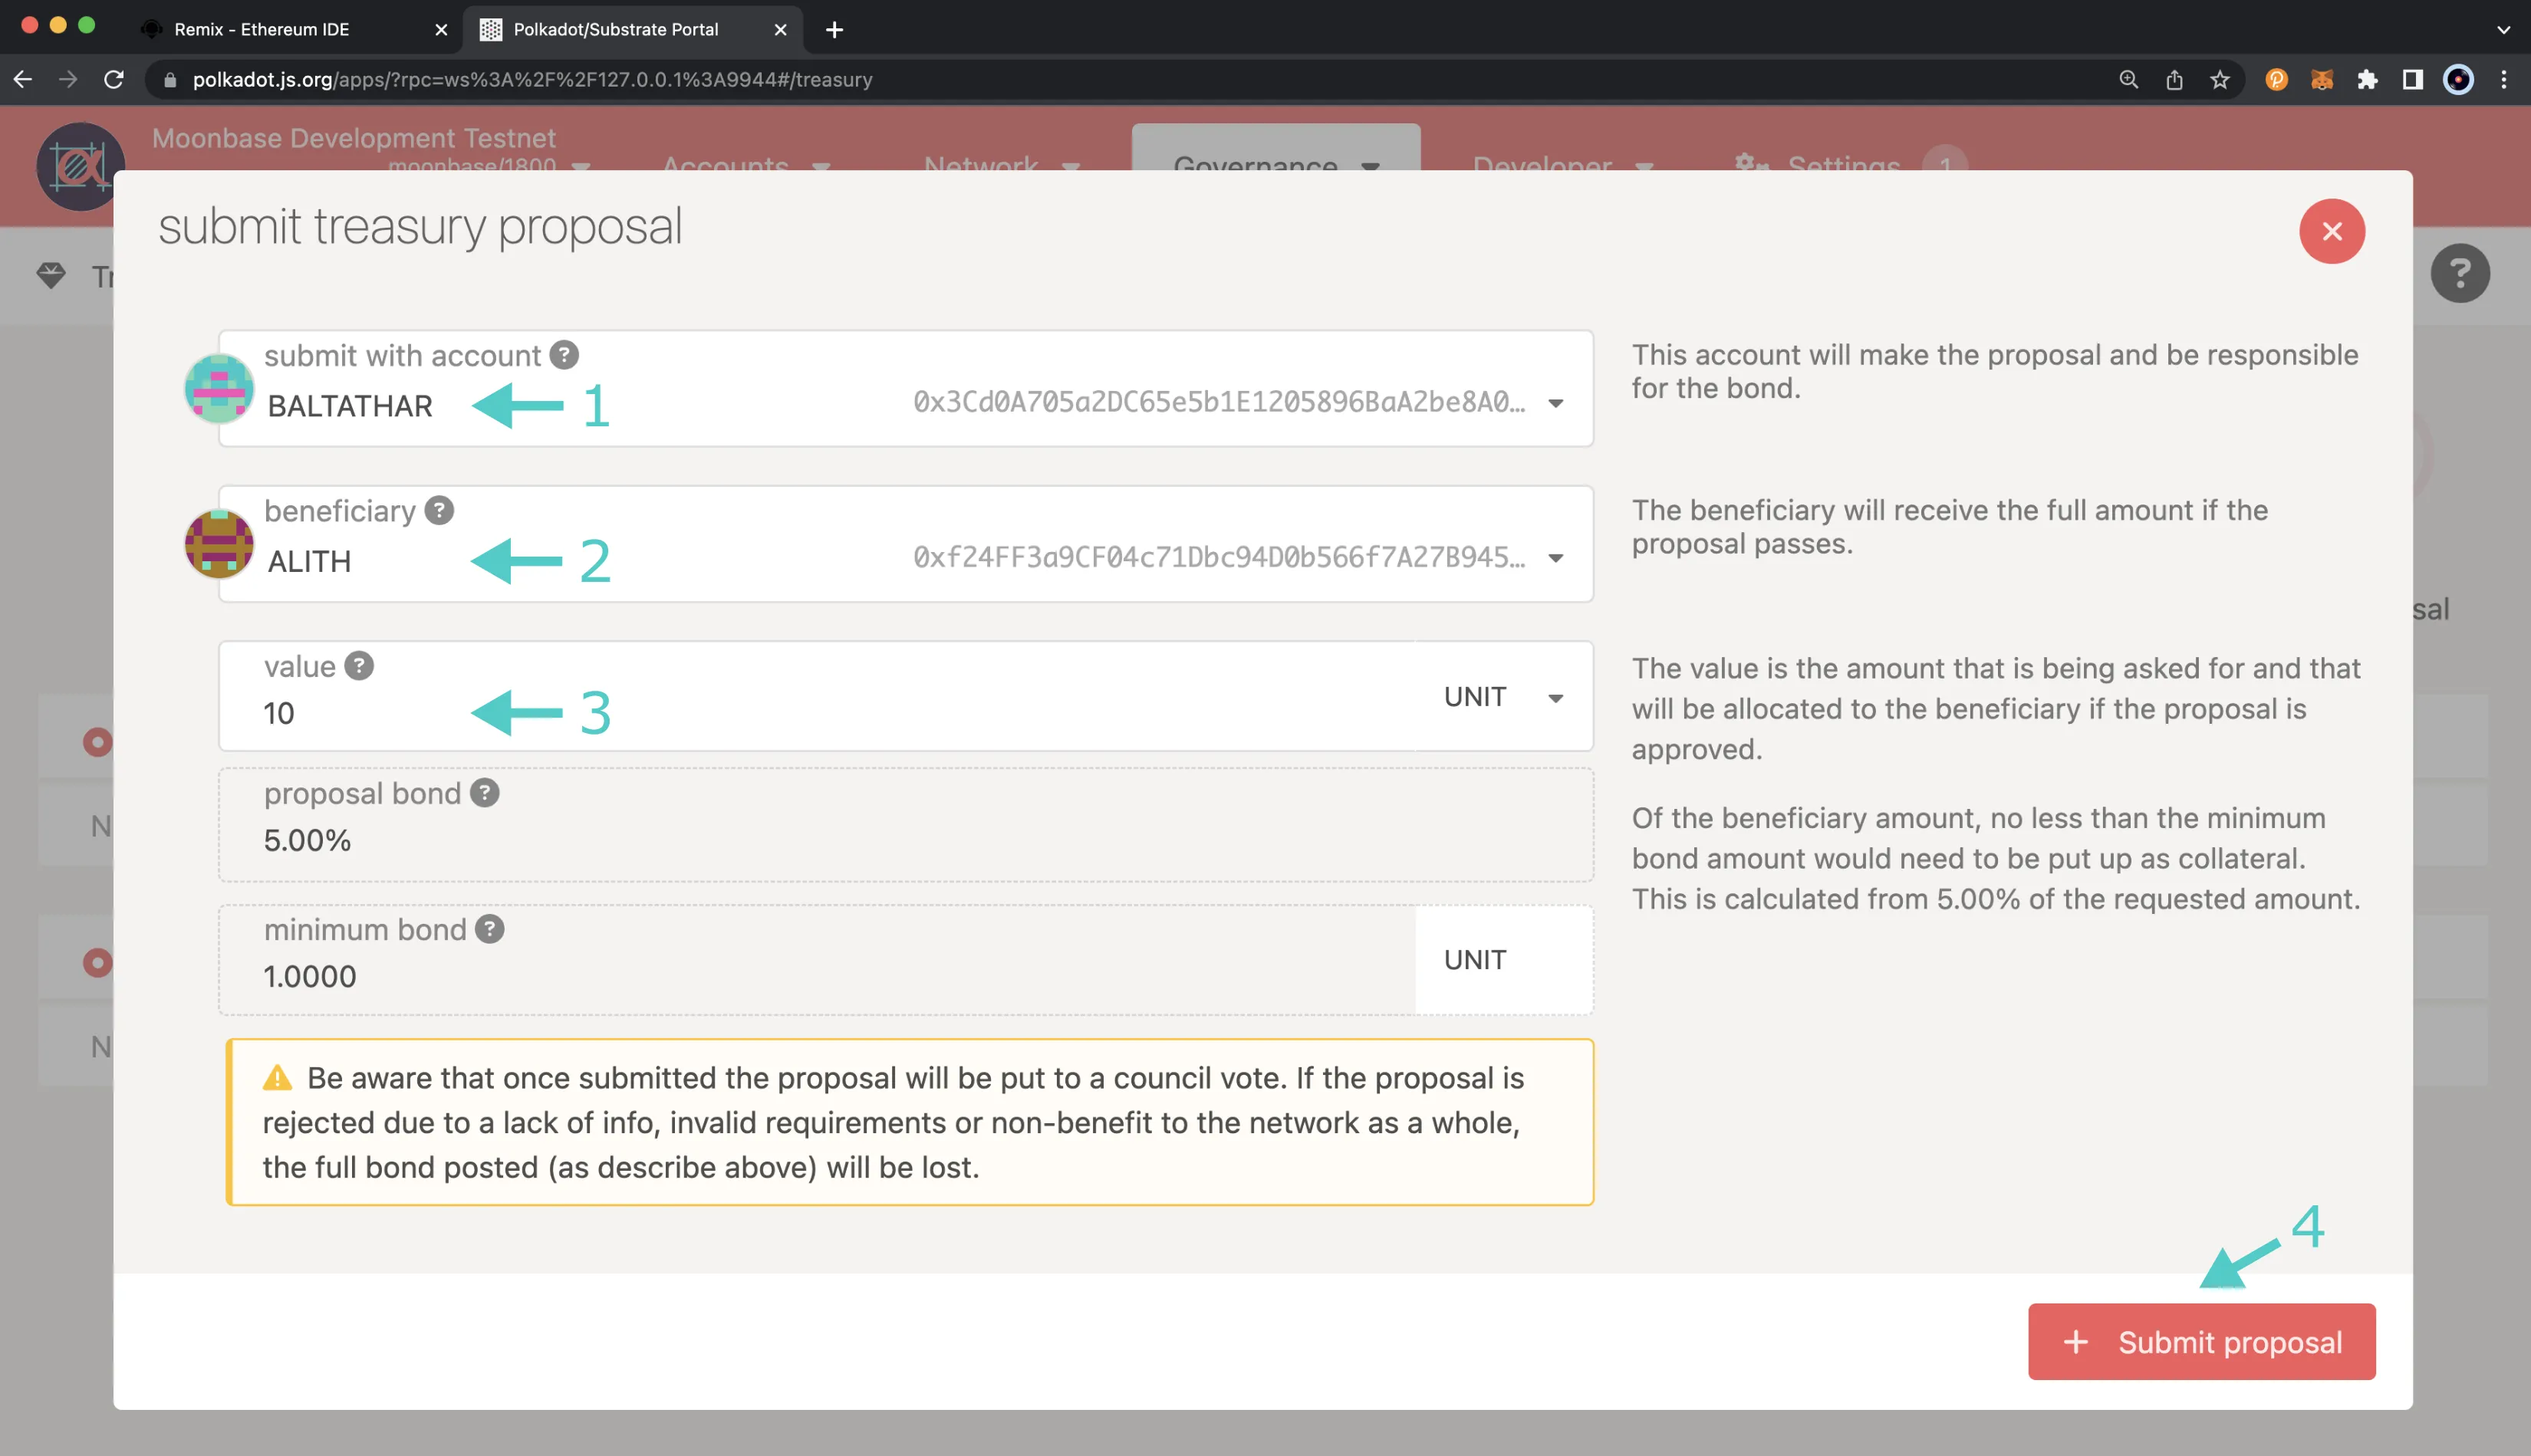
You should see the proposal appear in the **proposals** section. If this is the first proposal created, it will have a proposal index of `0`, which will be needed in the next section. To view all of the proposals, you can navigate to the **Developer** tab, select **Chain State**, and take the following steps:
1. From the **selected state query** dropdown, choose **treasury**
2. Select the **proposals** extrinsic
3. Toggle the **include option** slider off
4. Click **+** to submit the query
5. The results will appear below with the proposal index and the proposal details
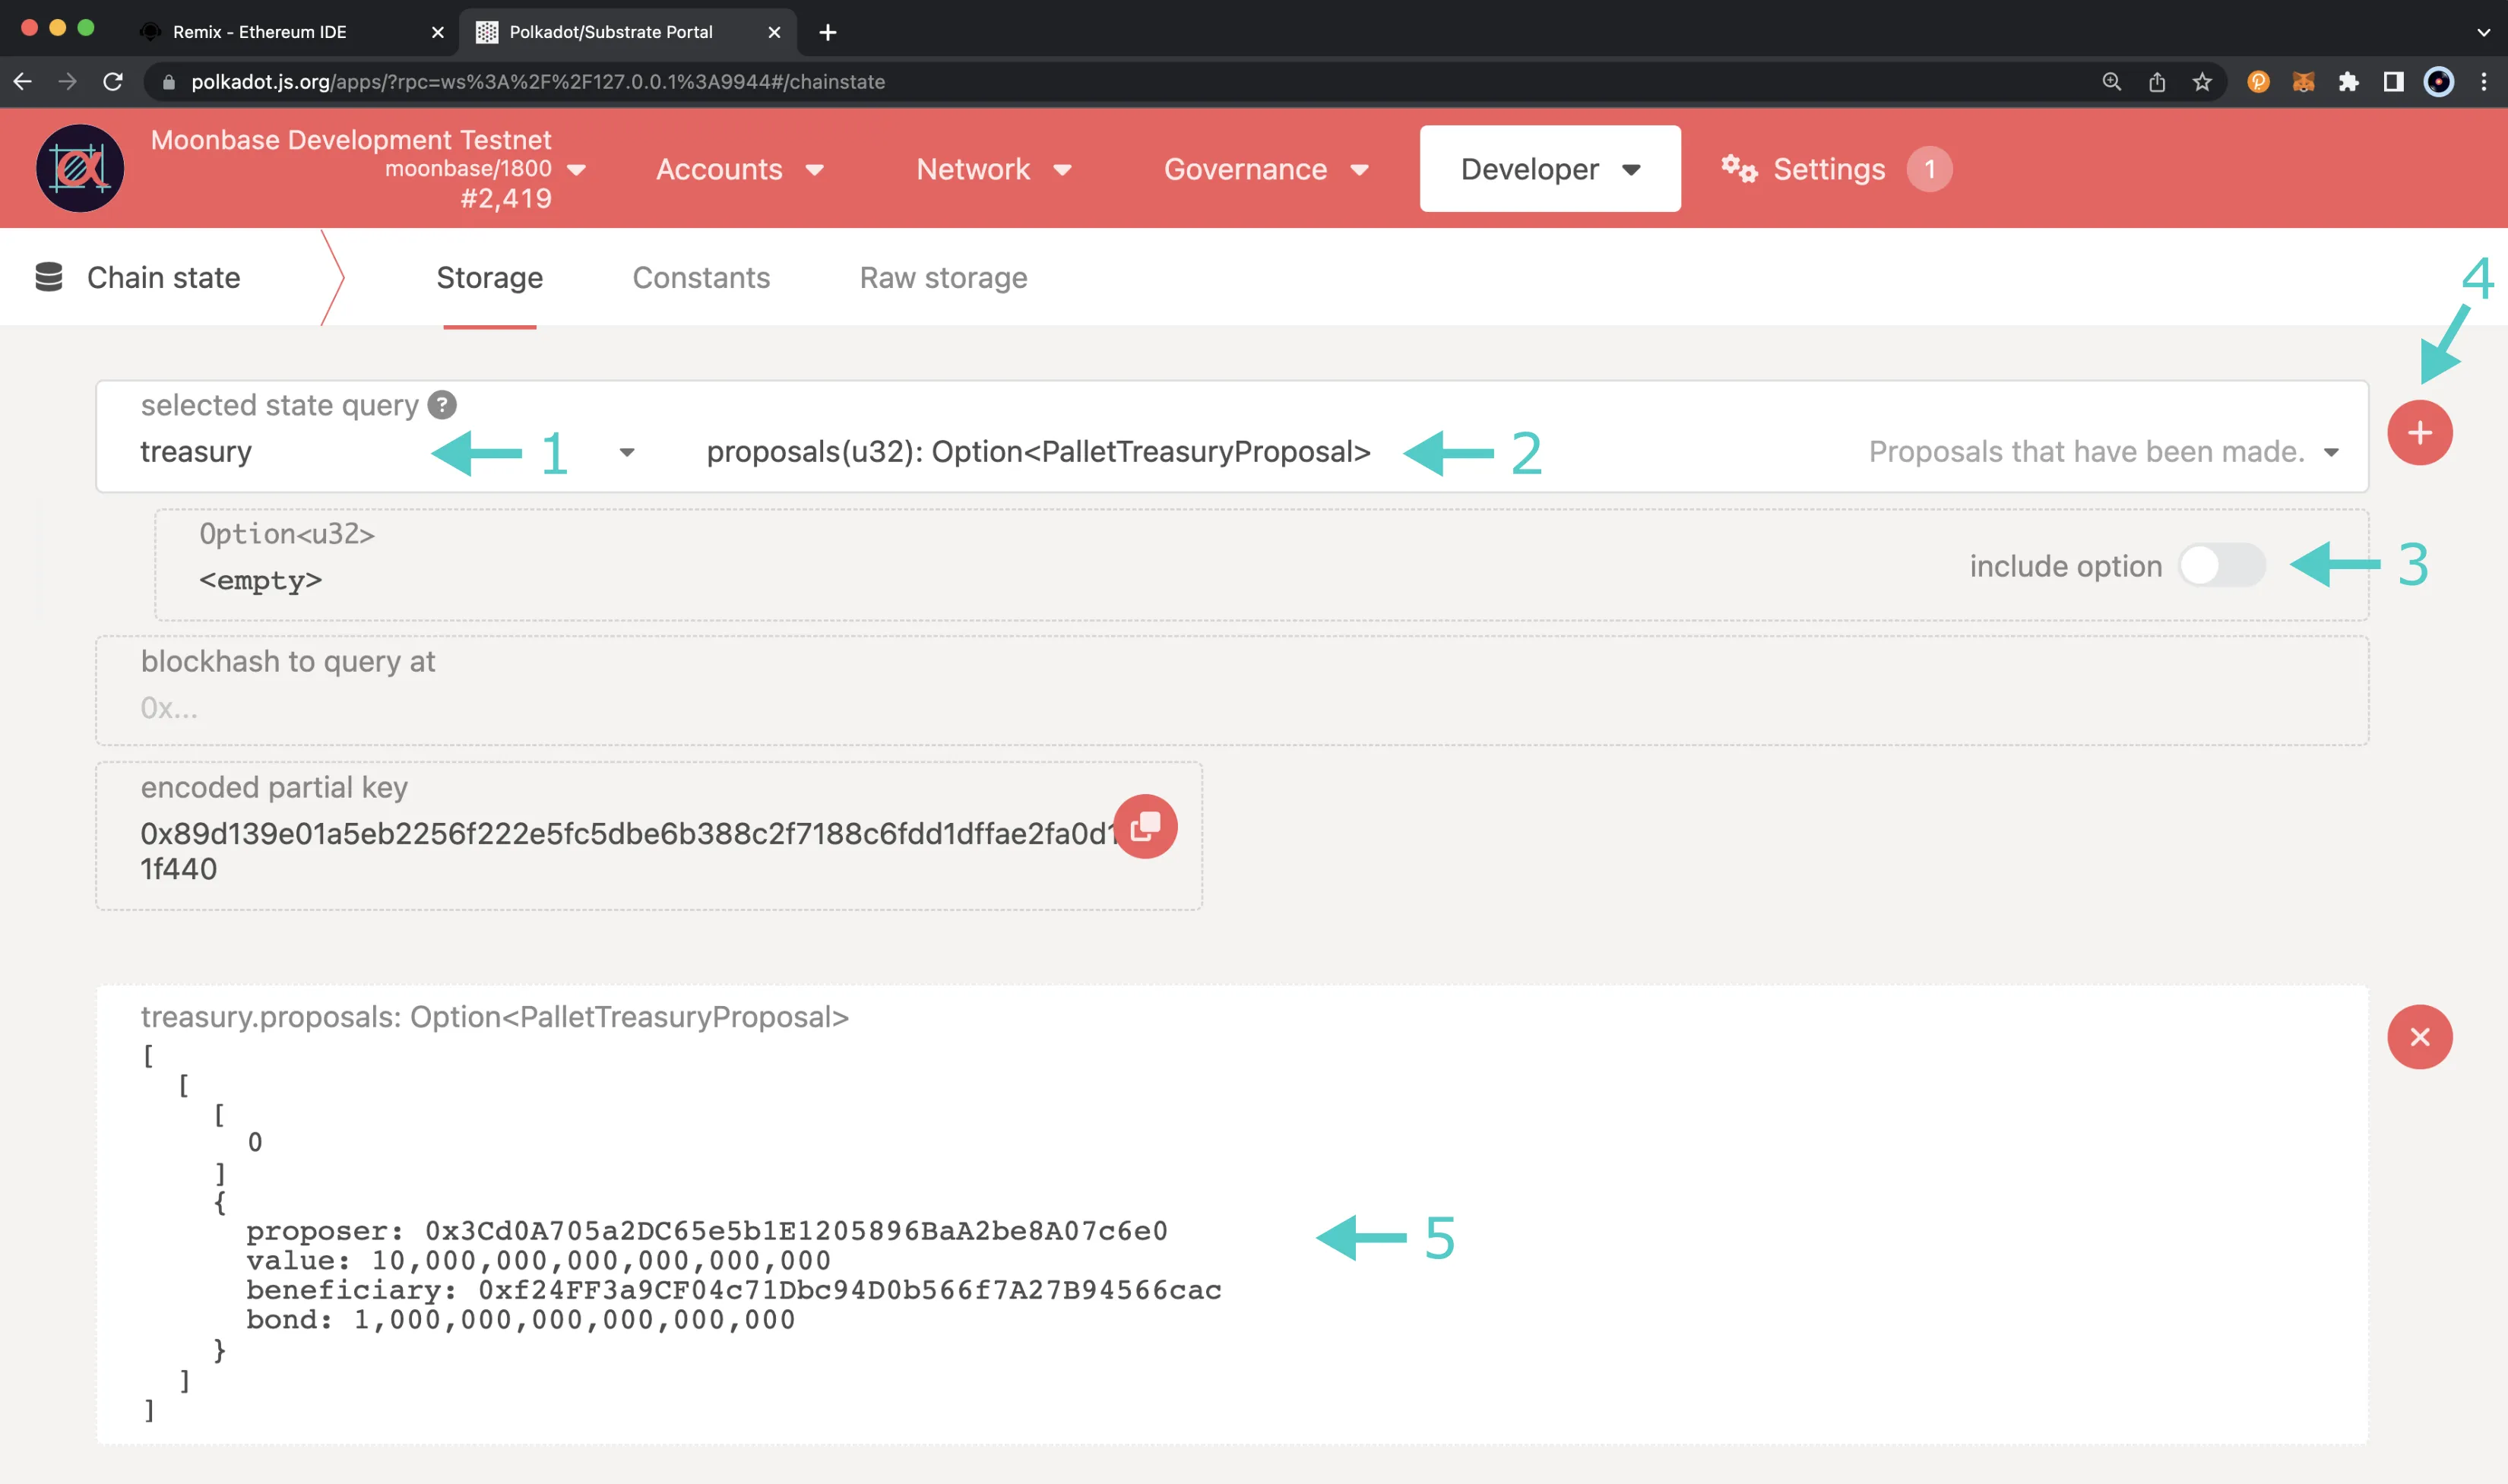
Now that you have the proposal and the proposal index, you'll be able to approve the proposal in the following section using the Collective Precompile.
### Propose the Proposal {: #propose-the-proposal }
In order to propose a proposal using the Collective Precompile, so that the corresponding collective can vote on it, you will need to obtain the encoded call data of the call, to be executed by proposal. You can get the encoded call data from Polkadot.js Apps. For this example, you need to propose the **approveProposal** extrinsic of the treasury pallet. To do so, navigate to the **Developer** tab, select **Extrinsics**, and take the following steps:
1. Select an account (any account is fine because you're not submitting any transaction here)
2. Select the **treasury** pallet
3. Choose the **approveProposal** extrinsic
4. Enter the proposal index that the collective will vote on to approve
5. Copy the **encoded call data** for the proposal
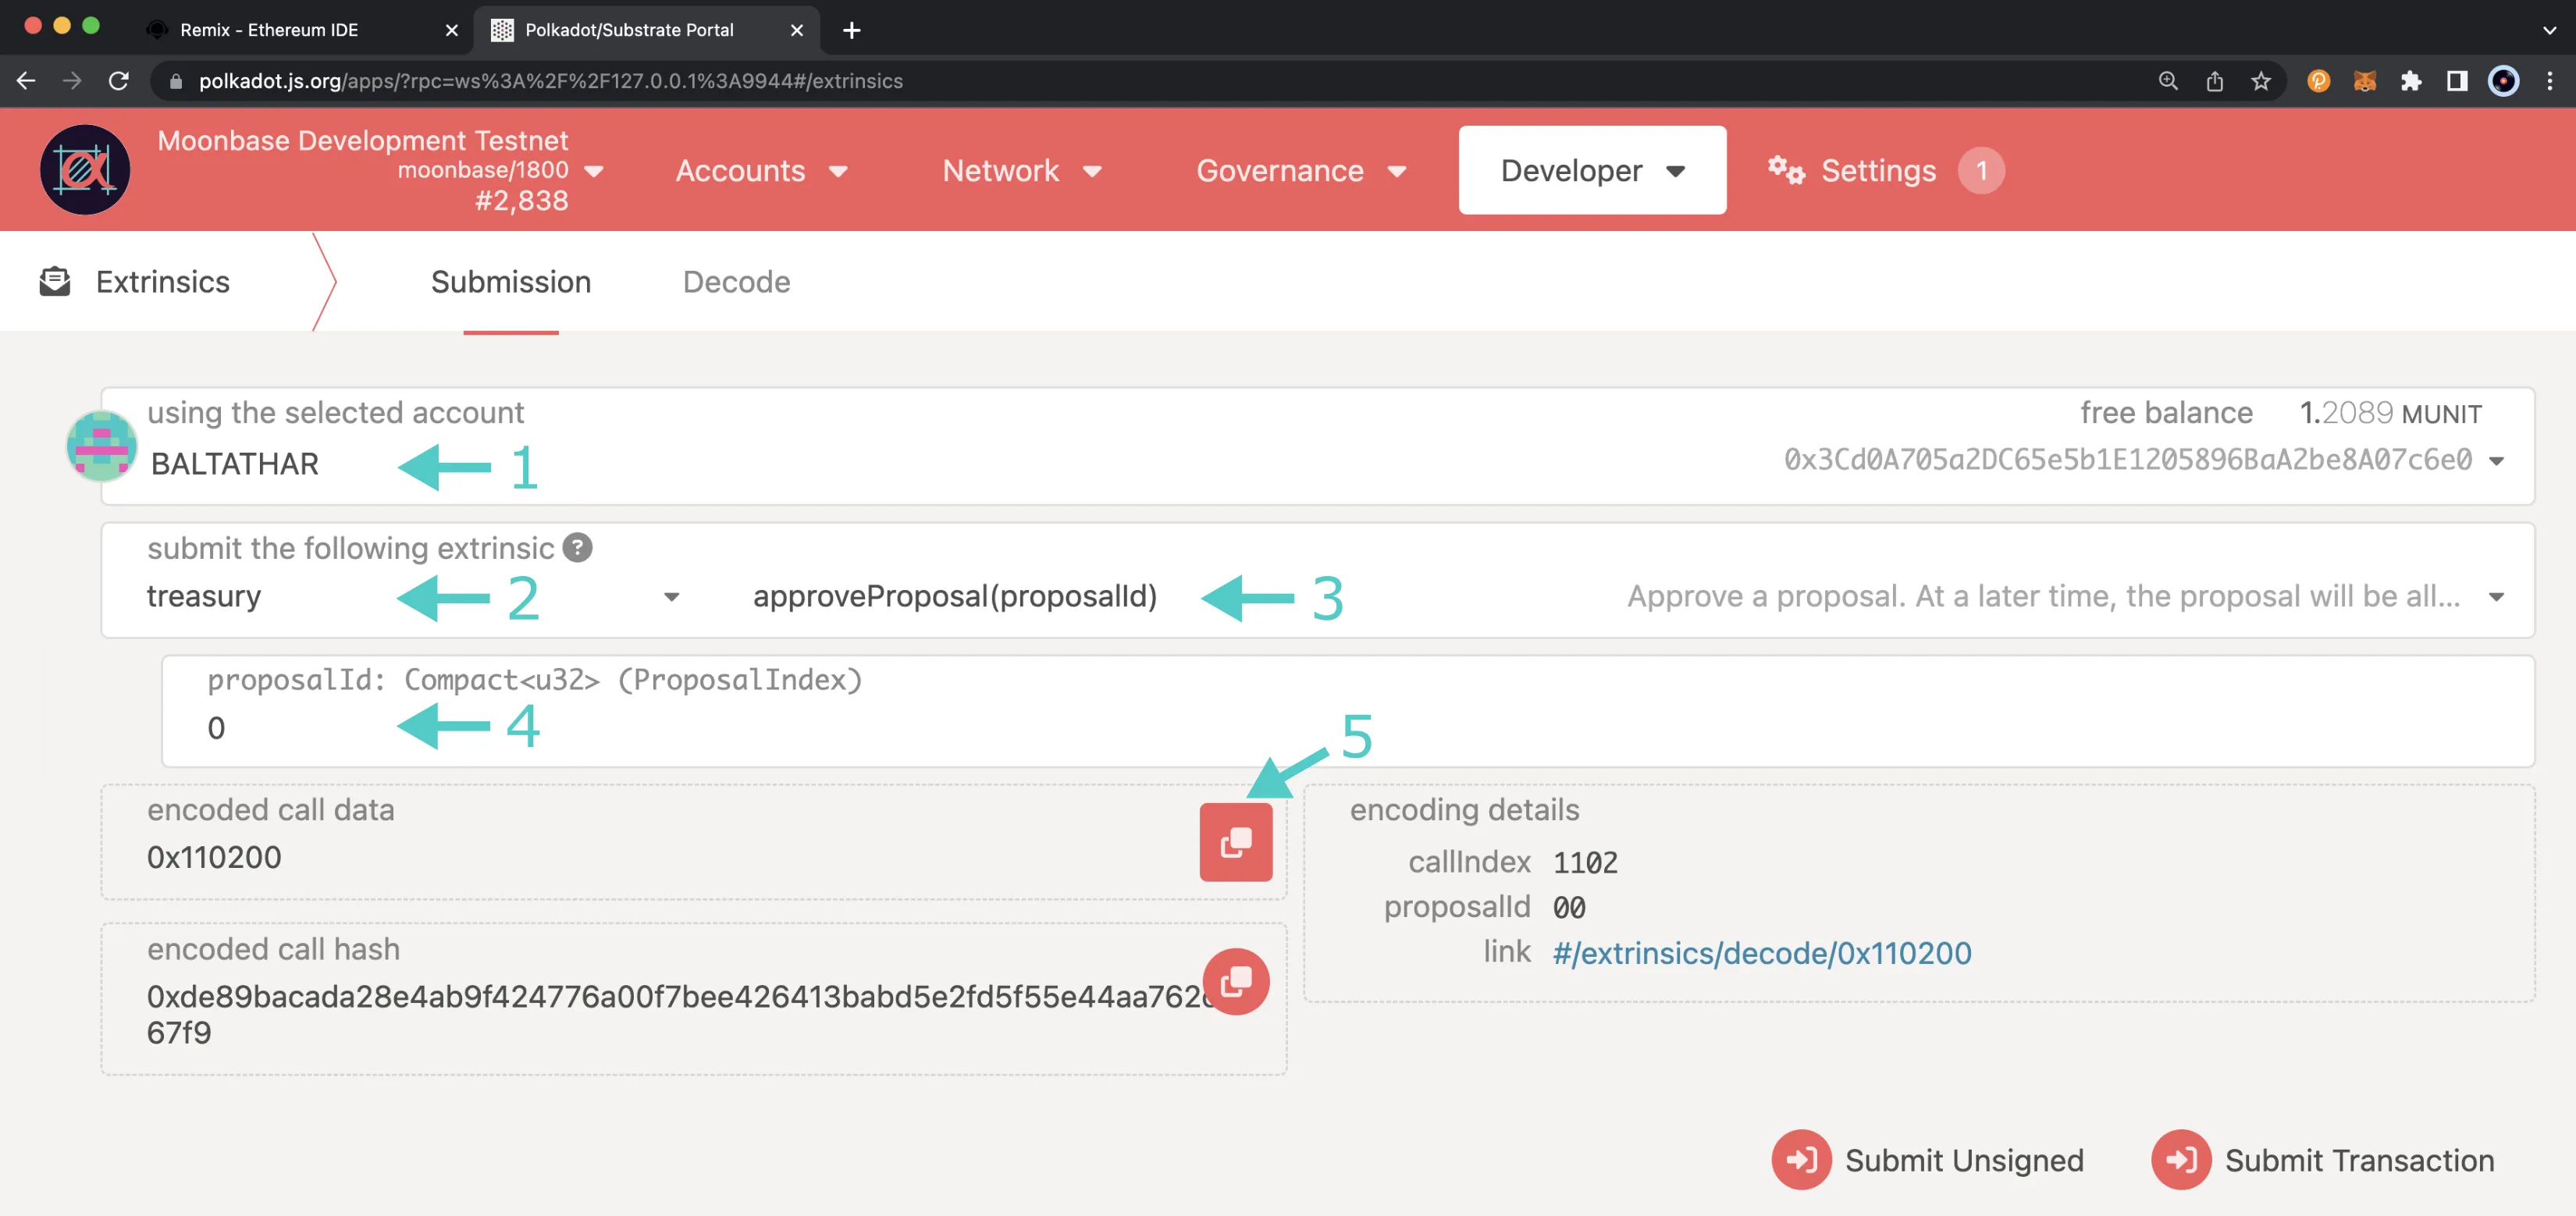
For this example, the extrinsic encoded call data for the proposal in this example is `0x110200`.
With the encoded proposal, you can head back to Remix and expand the **COLLECTIVE** precompile contract under the **Deployed Contracts** section. Make sure you're connected to your account that is a member of the Treasury Council, and take the following steps to propose the approval:
1. Expand the **propose** function
2. Enter the **threshold**. Keep in mind that for Treasury proposals to be approved, at least three-fifths of the Treasury Council is needed to vote in approval. As such, you can set the threshold to `2` for this example
3. For the **proposal** field, you can paste the encoded proposal you retrieved from Polkadot.js Apps
4. Click **transact**
5. MetaMask will pop up and you can confirm the transaction
### Vote on a Proposal {: #vote-on-a-proposal }
To vote on a proposal, you'll need to get the proposal hash by passing in the encoded proposal into the **proposalHash** function.

Once you have the proposal hash, make sure you're connected to your account that is a member of the Treasury Council, and take the following steps to vote on a proposal:
1. Expand the **vote** function in Remix
2. Enter the **proposalHash**
3. Enter the **proposalIndex**
4. Enter `true` for the **approve** field
5. Click **transact**
6. MetaMask will pop up and you can confirm the transaction
With the threshold set to `2`, you'll need to switch accounts in MetaMask to another member of the Treasury Council collective and repeat the steps above to vote and meet the threshold. Once the threshold has been met, you can then close the proposal, which will automatically execute it, and if approved, the proposal enters a queue to be placed into a spend period where the proposed amount will be distributed to the beneficiary. In this case, once the proposal is placed into a spend period, 10 DEV tokens will be distributed to Alith.
## Close a Proposal {: #close-a-proposal }
If a proposal has enough votes, anyone can close a proposal. You do not need to be a member of the Treasury Council in order to close a proposal. To close a proposal, you can take the following steps:
1. Expand the **close** function
2. Enter the **proposalHash**
3. Enter the **proposalIndex**
4. Enter the **proposalWeightBound**, which for this example can be `1000000000`
5. Enter the **lengthBound**, which can be a value equal to or greater than the length of the encoded call data for the proposal. For this example the encoded call data is `0x110200`, and as such, you can set this value to `8`
6. Click on **transact**
7. MetaMask will pop up and you can confirm the transaction
You can verify the proposal has been approved using Polkadot.js Apps. From the **Developer** tab, select **Chain State**, and take the following steps:
1. Select the **treasury** pallet
2. Select the **approvals** extrinsic
3. Click **+** to submit the query
4. The proposal will appear in the list of approvals
Once the proposal is in a spend period, the funds will get distributed to the beneficiary, and the original bond will be returned to the proposer. If the Treasury runs out of funds, the approved proposals will remain in storage until the following spend period when the Treasury has enough funds again.
--- END CONTENT ---
Doc-Content: https://docs.moonbeam.network/builders/ethereum/precompiles/features/governance/conviction-voting/
--- BEGIN CONTENT ---
---
title: Conviction Voting Precompile Contract
description: Learn how to vote on referenda, set up voting delegations, and more, directly through a Solidity interface with the Conviction Voting Precompile on Moonbeam.
categories: Precompiles, Ethereum Toolkit
---
# Interacting with the Conviction Voting Precompile
## Introduction {: #introduction }
As a Polkadot parachain and decentralized network, Moonbeam features native on-chain governance that enables stakeholders to participate in the direction of the network. With the introduction of OpenGov, also referred to as Governance v2, the Conviction Voting Pallet allows token holders to make, delegate, and manage Conviction-weighted votes on referenda. To learn more about Moonbeam's governance system, such as an overview of related terminology, principles, mechanics, and more, please refer to the [Governance on Moonbeam](/learn/features/governance/){target=\_blank} page.
The Conviction Voting Precompile interacts directly with Substrate's Conviction Voting Pallet. This pallet is coded in Rust and is normally not accessible from the Ethereum API side of Moonbeam. However, the Conviction Voting Precompile allows you to access governance-related functions of the Substrate Conviction Voting Pallet directly from a Solidity interface. Additionally, this enables a vastly improved end-user experience. For example, token holders can vote on referenda or delegate a vote directly from MetaMask, rather than importing an account in Polkadot.js Apps and navigating a complex UI.
The Conviction Voting Precompile is located at the following address:
=== "Moonbeam"
```text
{{ networks.moonbeam.precompiles.conviction_voting }}
```
=== "Moonriver"
```text
{{ networks.moonriver.precompiles.conviction_voting }}
```
=== "Moonbase Alpha"
```text
{{ networks.moonbase.precompiles.conviction_voting }}
```
!!! note
There can be some unintended consequences when using the precompiled contracts on Moonbeam. Please refer to the [Security Considerations](/learn/core-concepts/security/){target=\_blank} page for more information.
## The Conviction Voting Solidity Interface {: #the-conviction-voting-solidity-interface }
[`ConvictionVoting.sol`](https://github.com/moonbeam-foundation/moonbeam/blob/master/precompiles/conviction-voting/ConvictionVoting.sol){target=\_blank} is a Solidity interface that allows developers to interact with the precompile's methods.
The interfaces includes a `Conviction` enum that defines the [Conviction multiplier](/learn/features/governance/#conviction-multiplier-v2){target=\_blank} types. The enum has the following variables:
- **None** - 0.1x votes, unlocked
- **Locked1x** - 1x votes, locked for an Enactment Period following a successful vote
- **Locked2x** - 2x votes, locked for 2x Enactment Period following a successful vote
- **Locked3x** - 4x votes, locked for 4x Enactments Period following a successful vote
- **Locked4x** - 8x votes, locked for 8x Enactments Period following a successful vote
- **Locked5x** - 16x votes, locked for 16x Enactments Period following a successful vote
- **Locked6x** - 32x votes, locked for 32x Enactments Period following a successful vote
The interface includes the following functions:
??? function "**votingFor**(*address* who, *uint16* trackId) - returns the votes for a given account and Track"
=== "Parameters"
- `who` - address of the account to query the votes for
- `trackId` - uint16 Track ID where the requested changes need to occur
??? function "**classLocksFor**(*address* who) - returns the class locks for a given account"
=== "Parameters"
- `who` - address of the account to query the class locks for
??? function "**voteYes**(*uint32* pollIndex, *uint256* voteAmount, *Conviction* conviction) - votes a Conviction-weighted "Aye" on a poll (referendum)"
=== "Parameters"
- `pollIndex` - uint32 index of the poll (referendum)
- `voteAmount` - uint256 balance to be locked for the vote
- `conviction` - Conviction represents a value from the aforementioned `Conviction` enum
??? function "**voteNo**(*uint32* pollIndex, *uint256* voteAmount, *Conviction* conviction) - votes a Conviction-weighted "Nay" on a poll (referendum)"
=== "Parameters"
- `pollIndex` - uint32 index of the poll (referendum)
- `voteAmount` - uint256 balance to be locked for the vote
- `conviction` - Conviction represents a value from the aforementioned `Conviction` enum
??? function "**voteSplit**(*uint32* pollIndex, *uint256* aye, *uint256* nay) - votes a split vote, with a given amount locked for "Aye" and a given amount locked for "Nay", on a poll (referendum)"
=== "Parameters"
- `pollIndex` - uint32 index of the poll (referendum)
- `aye` - uint256 balance to be locked for the "Aye" vote
- `nay` - uint256 balance to be locked for the "Nay" vote
??? function "**voteSplitAbstain**(*uint32* pollIndex, *uint256* aye, *uint256* nay) - votes a split abstained vote, with a given amount locked for "Aye", a given amount locked for "Nay", and a given amount locked for an abstain vote (support), on a poll (referendum)"
=== "Parameters"
- `pollIndex` - uint32 index of the poll (referendum)
- `aye` - uint256 balance to be locked for the "Aye" vote
- `nay` - uint256 balance to be locked for the "Nay" vote
??? function "**removeVote**(*uint32* pollIndex) - [removes a vote](/builders/substrate/interfaces/features/governance/conviction-voting/#extrinsics){target=\_blank} in a poll (referendum)"
=== "Parameters"
- `pollIndex` - uint32 index of the poll (referendum)
??? function "**removeVoteForTrack**(*uint32* pollIndex, *uint16* trackId) - [removes a vote](/builders/substrate/interfaces/features/governance/conviction-voting/#extrinsics){target=\_blank} from a specific track in a poll (referendum)"
=== "Parameters"
- `pollIndex` - uint32 index of the poll (referendum)
- `trackId` - uint16 Track ID where the requested changes need to occur
??? function "**removeOtherVote**(*address* target, *uint16* trackId, *uint32* pollIndex) - [removes a vote](/builders/substrate/interfaces/features/governance/conviction-voting/#extrinsics){target=\_blank} in a poll (referendum) for another voter"
=== "Parameters"
- `target` - address that has a vote or tokens to be removed or unlocked
- `trackId` - uint16 Track ID where the requested changes need to occur
- `pollIndex` - uint32 index of the poll (referendum)
??? function "**delegate**(*uint16* trackId, *address* representative, *Conviction* conviction, *uint256* amount) - delegates another account as a representative to place a Conviction-weighted vote on the behalf of the sending account for a specific Track"
=== "Parameters"
- `trackId` - uint16 Track ID where the requested changes need to occur
- `representative` - address of the account to be delegated as representative
- `conviction` - Conviction represents a value from the aforementioned `Conviction` enum
- `amount` - uint256 balance to be delegated
??? function "**undelegate**(*uint16* trackId) - removes the caller's vote delegations for a specific Track"
=== "Parameters"
- `trackId` - uint16 Track ID where the requested changes need to occur
??? function "**unlock**(*uint16* trackId, *address* target) - unlocks the locked tokens of a specific account for a specific Track"
=== "Parameters"
- `trackId` - uint16 Track ID where the requested changes need to occur
- `target` - address that has a vote or tokens to be removed or unlocked
The interface also includes the following events:
- **Voted**(*uint32 indexed* pollIndex, *address* voter, *bool* aye, *uint256* voteAmount, *uint8* conviction) - emitted when an account makes a vote
- **VoteSplit**(*uint32 indexed* pollIndex, *address* voter, *uin256* aye, *uint256* nay) - emitted when an account makes a split vote
- **VoteSplitAbstained**(*uint32 indexed* pollIndex, *address* voter, *uin256* aye, *uint256* nay, *uint256* nay) - emitted when an account makes a split abstained vote
- **VoteRemoved**(*uint32 indexed* pollIndex, *address* voter) - emitted when an account's (`voter`) vote has been removed from an ongoing poll (referendum)
- **VoteRemovedForTrack**(*uint32 indexed* pollIndex, *uint16* trackId, *address* voter) - emitted when an account's (`voter`) vote has been removed from an ongoing poll (referendum) for a specific Track
- **VoteRemovedOther**(*uint32 indexed* pollIndex, *address* caller, *address* target, *uint16* trackId) - emitted when an account (`caller`) removed a vote for another account (`target`)
- **Delegated**(*uint16 indexed* trackId, *address* from, *address* to, *uint256* delegatedAmount, *uint8* conviction) - emitted when an account (`from`) delegates a Conviction-weighted vote of a given amount to another account (`to`)
- **Undelegated**(*uint16 indexed* trackId, *address* caller) - emitted when an account's (`caller`) delegations are removed for a specific Track
- **Unlocked**(*uint16 indexed* trackId, *address* caller) - emitted when an account's (`caller`) locked tokens are unlocked for a specific Track
## Interact with the Solidity Interface {: #interact-with-the-solidity-interface }
### Checking Prerequisites {: #checking-prerequisites }
The below example is demonstrated on Moonbase Alpha, however, similar steps can be taken for Moonriver. To follow the steps in this guide, you'll need to have the following:
- MetaMask installed and [connected to Moonbase Alpha](/tokens/connect/metamask/){target=\_blank}
- An account with some DEV tokens.
You can get DEV tokens for testing on Moonbase Alpha once every 24 hours from the [Moonbase Alpha Faucet](https://faucet.moonbeam.network){target=\_blank}
### Remix Set Up {: #remix-set-up }
1. Click on the **File explorer** tab
2. Paste a copy of [`ConvictionVoting.sol`](https://github.com/moonbeam-foundation/moonbeam/blob/master/precompiles/conviction-voting/ConvictionVoting.sol){target=\_blank} into a [Remix file](https://remix.ethereum.org){target=\_blank} named `ConvictionVoting.sol`
### Compile the Contract {: #compile-the-contract }
1. Click on the **Compile** tab, second from top
2. Then to compile the interface, click on **Compile ConvictionVoting.sol**
### Access the Contract {: #access-the-contract }
1. Click on the **Deploy and Run** tab, directly below the **Compile** tab in Remix. Note: you are not deploying a contract here, instead you are accessing a precompiled contract that is already deployed
2. Make sure **Injected Provider - Metamask** is selected in the **ENVIRONMENT** drop down
3. Ensure **ConvictionVoting.sol** is selected in the **CONTRACT** dropdown. Since this is a precompiled contract there is no need to deploy, instead you are going to provide the address of the precompile in the **At Address** field
4. Provide the address of the Conviction Voting Precompile for Moonbase Alpha: `{{ networks.moonbase.precompiles.conviction_voting }}` and click **At Address**
5. The Conviction Voting Precompile will appear in the list of **Deployed Contracts**
### Vote on a Referendum {: #vote-on-a-referendum }
You can lock tokens and vote on a referendum at anytime during the Lead-in Period or the Decide Period. In order for a referendum to pass, it needs to garner minimum Approval and Support, which vary by track. For more information on each of the relative periods and the Approval and Support requirements by Track, please refer to the [OpenGov section of the governance overview page](/learn/features/governance/#opengov){target=\_blank}.
First, you'll need to get the index of the referendum you wish to vote on. To get the index of a referendum, head to [Polkadot.js Apps](https://polkadot.js.org/apps/?rpc=wss://wss.api.moonbase.moonbeam.network%2Fpublic-ws#/referenda){target=\_blank} and take the following steps:
1. From the **Governance** tab dropdown, select **Referenda**
2. Look for the referenda you want to vote on. You can view more details about a specific referendum by clicking on the triangle icon. If there is no triangle icon, this means that only a proposal hash, and no preimage has been submitted for the proposal
3. Take note of the referendum index
Now, you're ready to return to Remix to vote on the referendum via the Conviction Voting Precompile. There are two methods you can use to vote on a referendum: `voteYes` or `voteNo`. As you probably have already figured out, if you're in agreement with the proposal, you'll use `voteYes` and if in disagreement, you'll use `voteNo`. You'll specify the amount of tokens you want to lock with your vote and the Conviction, using index of the Conviction you want to vote with in the [aforementioned `Conviction` enum](#the-conviction-voting-solidity-interface). For example, if you wanted to lock your tokens for the duration of two Enactment Periods following a successful vote, you would enter `2` for the `Locked2x` Conviction. For more information on Convictions, you can check out the [Conviction Multiplier section of the Governance v2 documentation](/learn/features/governance/#conviction-multiplier-v2){target=\_blank}.
To submit your vote, you can take the following steps:
1. Expand the Conviction Voting Precompile contract to see the available functions if it is not already open
2. Find the **voteYes** or **voteNo** function, however you want to vote, and press the button to expand the section
3. Enter the index of the referendum to vote on
4. Enter the number of tokens to lock in Wei. Avoid entering your full balance here because you need to pay for transaction fees
5. Enter the Conviction you want to vote with
6. Press **transact** and confirm the transaction in MetaMask
Once the referendum has closed, you can use the Conviction Voting precompile to remove your vote and unlock your tokens.
### Delegate a Vote {: #delegate-a-vote }
In addition to voting on a referendum yourself, you can delegate a Conviction-weighted vote to someone who is more knowledgeable on a particular topic to vote on your behalf, a process known as Vote Delegation. You can even delegate a different account for each of the Tracks.
To get started, you can take the following steps:
1. Find the **delegate** function and press the button to expand the section
2. Enter the Track ID of the Track that you want the delegation to be used on. Track IDs can be found in the [Referenda page of Polkadot.js Apps](https://polkadot.js.org/apps/?rpc=wss://wss.api.moonbase.moonbeam.network%2Fpublic-ws#/referenda){target=\_blank}
3. Enter the delegate account that will have the power to vote on your behalf
4. Enter the number of tokens they can vote with in Wei. Avoid entering your full balance here because you need to pay for transaction fees
5. Enter the Conviction they can vote with
6. Press **transact** and confirm the transaction in MetaMask
Now the delegate account can vote on your behalf! If you no longer want a delegate vote to exist, you can remove it using the `undelegate` function of the Conviction Voting Precompile.
And that's it! You've completed your introduction to the Conviction Voting Precompile. There are a few more functions that are documented in [`ConvictionVoting.sol`](https://github.com/moonbeam-foundation/moonbeam/blob/master/precompiles/conviction-voting/ConvictionVoting.sol){target=\_blank} — feel free to reach out on [Discord](https://discord.com/invite/PfpUATX){target=\_blank} if you have any questions about those functions or any other aspect of the Conviction Voting Precompile.
--- END CONTENT ---
Doc-Content: https://docs.moonbeam.network/builders/ethereum/precompiles/features/governance/preimage/
--- BEGIN CONTENT ---
---
title: Preimage Precompile Contract
description: Learn how to take the first necessary step to submit a proposal on-chain by submitting a preimage that contains the action to be carried out in the proposal.
categories: Precompiles, Ethereum Toolkit
---
# Interacting with the Preimage Precompile
## Introduction {: #introduction }
As a Polkadot parachain and decentralized network, Moonbeam features native on-chain governance that enables stakeholders to participate in the direction of the network. With the introduction of OpenGov, also referred to as Governance v2, the Preimage Pallet allows token holders to take the first step towards creating a proposal by submitting the preimage, which is the action to be carried out in the proposal, on-chain. The hash of the preimage is required to submit the proposal. To learn more about Moonbeam's governance system, such as an overview of related terminology, the roadmap of a proposal, and more, please refer to the [Governance on Moonbeam](/learn/features/governance/){target=\_blank} page.
The Preimage Precompile interacts directly with Substrate's Preimage Pallet. This pallet is coded in Rust and is normally not accessible from the Ethereum side of Moonbeam. However, the Preimage Precompile allows you to access functions needed to create and manage preimages, all of which are part of the Substrate Preimage Pallet, directly from a Solidity interface.
The Preimage Precompile is located at the following address:
=== "Moonbeam"
```text
{{ networks.moonbeam.precompiles.preimage }}
```
=== "Moonriver"
```text
{{ networks.moonriver.precompiles.preimage }}
```
=== "Moonbase Alpha"
```text
{{ networks.moonbase.precompiles.preimage }}
```
!!! note
There can be some unintended consequences when using the precompiled contracts on Moonbeam. Please refer to the [Security Considerations](/learn/core-concepts/security/){target=\_blank} page for more information.
## The Preimage Solidity Interface {: #the-preimage-solidity-interface }
[`Preimage.sol`](https://github.com/moonbeam-foundation/moonbeam/blob/master/precompiles/preimage/Preimage.sol){target=\_blank} is a Solidity interface that allows developers to interact with the precompile's two methods:
??? function "**notePreimage**(*bytes memory* encodedPropsal) - registers a preimage on-chain for an upcoming proposal. This doesn't require the proposal to be in the dispatch queue but does require a deposit which is returned once enacted. Uses the [`notePreimage`](/builders/substrate/interfaces/features/governance/preimage/#:~:text=notePreimage(encodedProposal)){target=\_blank} method of the preimage pallet"
=== "Parameters"
- `encodedProposal` - bytes memory containing the encoded proposal to be registered. Returns the preimage hash
??? function "**unnotePreimage**(*bytes32* hash) - clears an unrequested preimage from storage. Uses the [`unnotePreimage`](/builders/substrate/interfaces/features/governance/preimage/#:~:text=unnotePreimage(hash)){target=\_blank} method of the preimage pallet"
=== "Parameters"
- `hash` - bytes32 hash of the preimage to be removed from storage
The interface also includes the following events:
- **PreimageNoted**(*bytes32* hash) - emitted when a preimage was registered on-chain
- **PreimageUnnoted**(*bytes32* hash) - emitted when a preimage was un-registered on-chain
## Interact with the Solidity Interface {: #interact-with-the-solidity-interface }
### Checking Prerequisites {: #checking-prerequisites }
The below example is demonstrated on Moonbase Alpha, however, similar steps can be taken for Moonriver. To follow the steps in this guide, you'll need to have the following:
- MetaMask installed and [connected to Moonbase Alpha](/tokens/connect/metamask/){target=\_blank}
- An account with some DEV tokens.
You can get DEV tokens for testing on Moonbase Alpha once every 24 hours from the [Moonbase Alpha Faucet](https://faucet.moonbeam.network){target=\_blank}
### Remix Set Up {: #remix-set-up }
1. Click on the **File explorer** tab
2. Paste a copy of [`Preimage.sol`](https://github.com/moonbeam-foundation/moonbeam/blob/master/precompiles/preimage/Preimage.sol){target=\_blank} into a [Remix file](https://remix.ethereum.org){target=\_blank} named `Preimage.sol`
### Compile the Contract {: #compile-the-contract }
1. Click on the **Compile** tab, second from top
2. Then to compile the interface, click on **Compile Preimage.sol**
### Access the Contract {: #access-the-contract }
1. Click on the **Deploy and Run** tab, directly below the **Compile** tab in Remix. Note: you are not deploying a contract here, instead you are accessing a precompiled contract that is already deployed
2. Make sure **Injected Provider - Metamask** is selected in the **ENVIRONMENT** drop down
3. Ensure **Preimage.sol** is selected in the **CONTRACT** dropdown. Since this is a precompiled contract there is no need to deploy, instead you are going to provide the address of the precompile in the **At Address** field
4. Provide the address of the Preimage Precompile for Moonbase Alpha: `{{ networks.moonbase.precompiles.preimage }}` and click **At Address**
5. The Preimage Precompile will appear in the list of **Deployed Contracts**
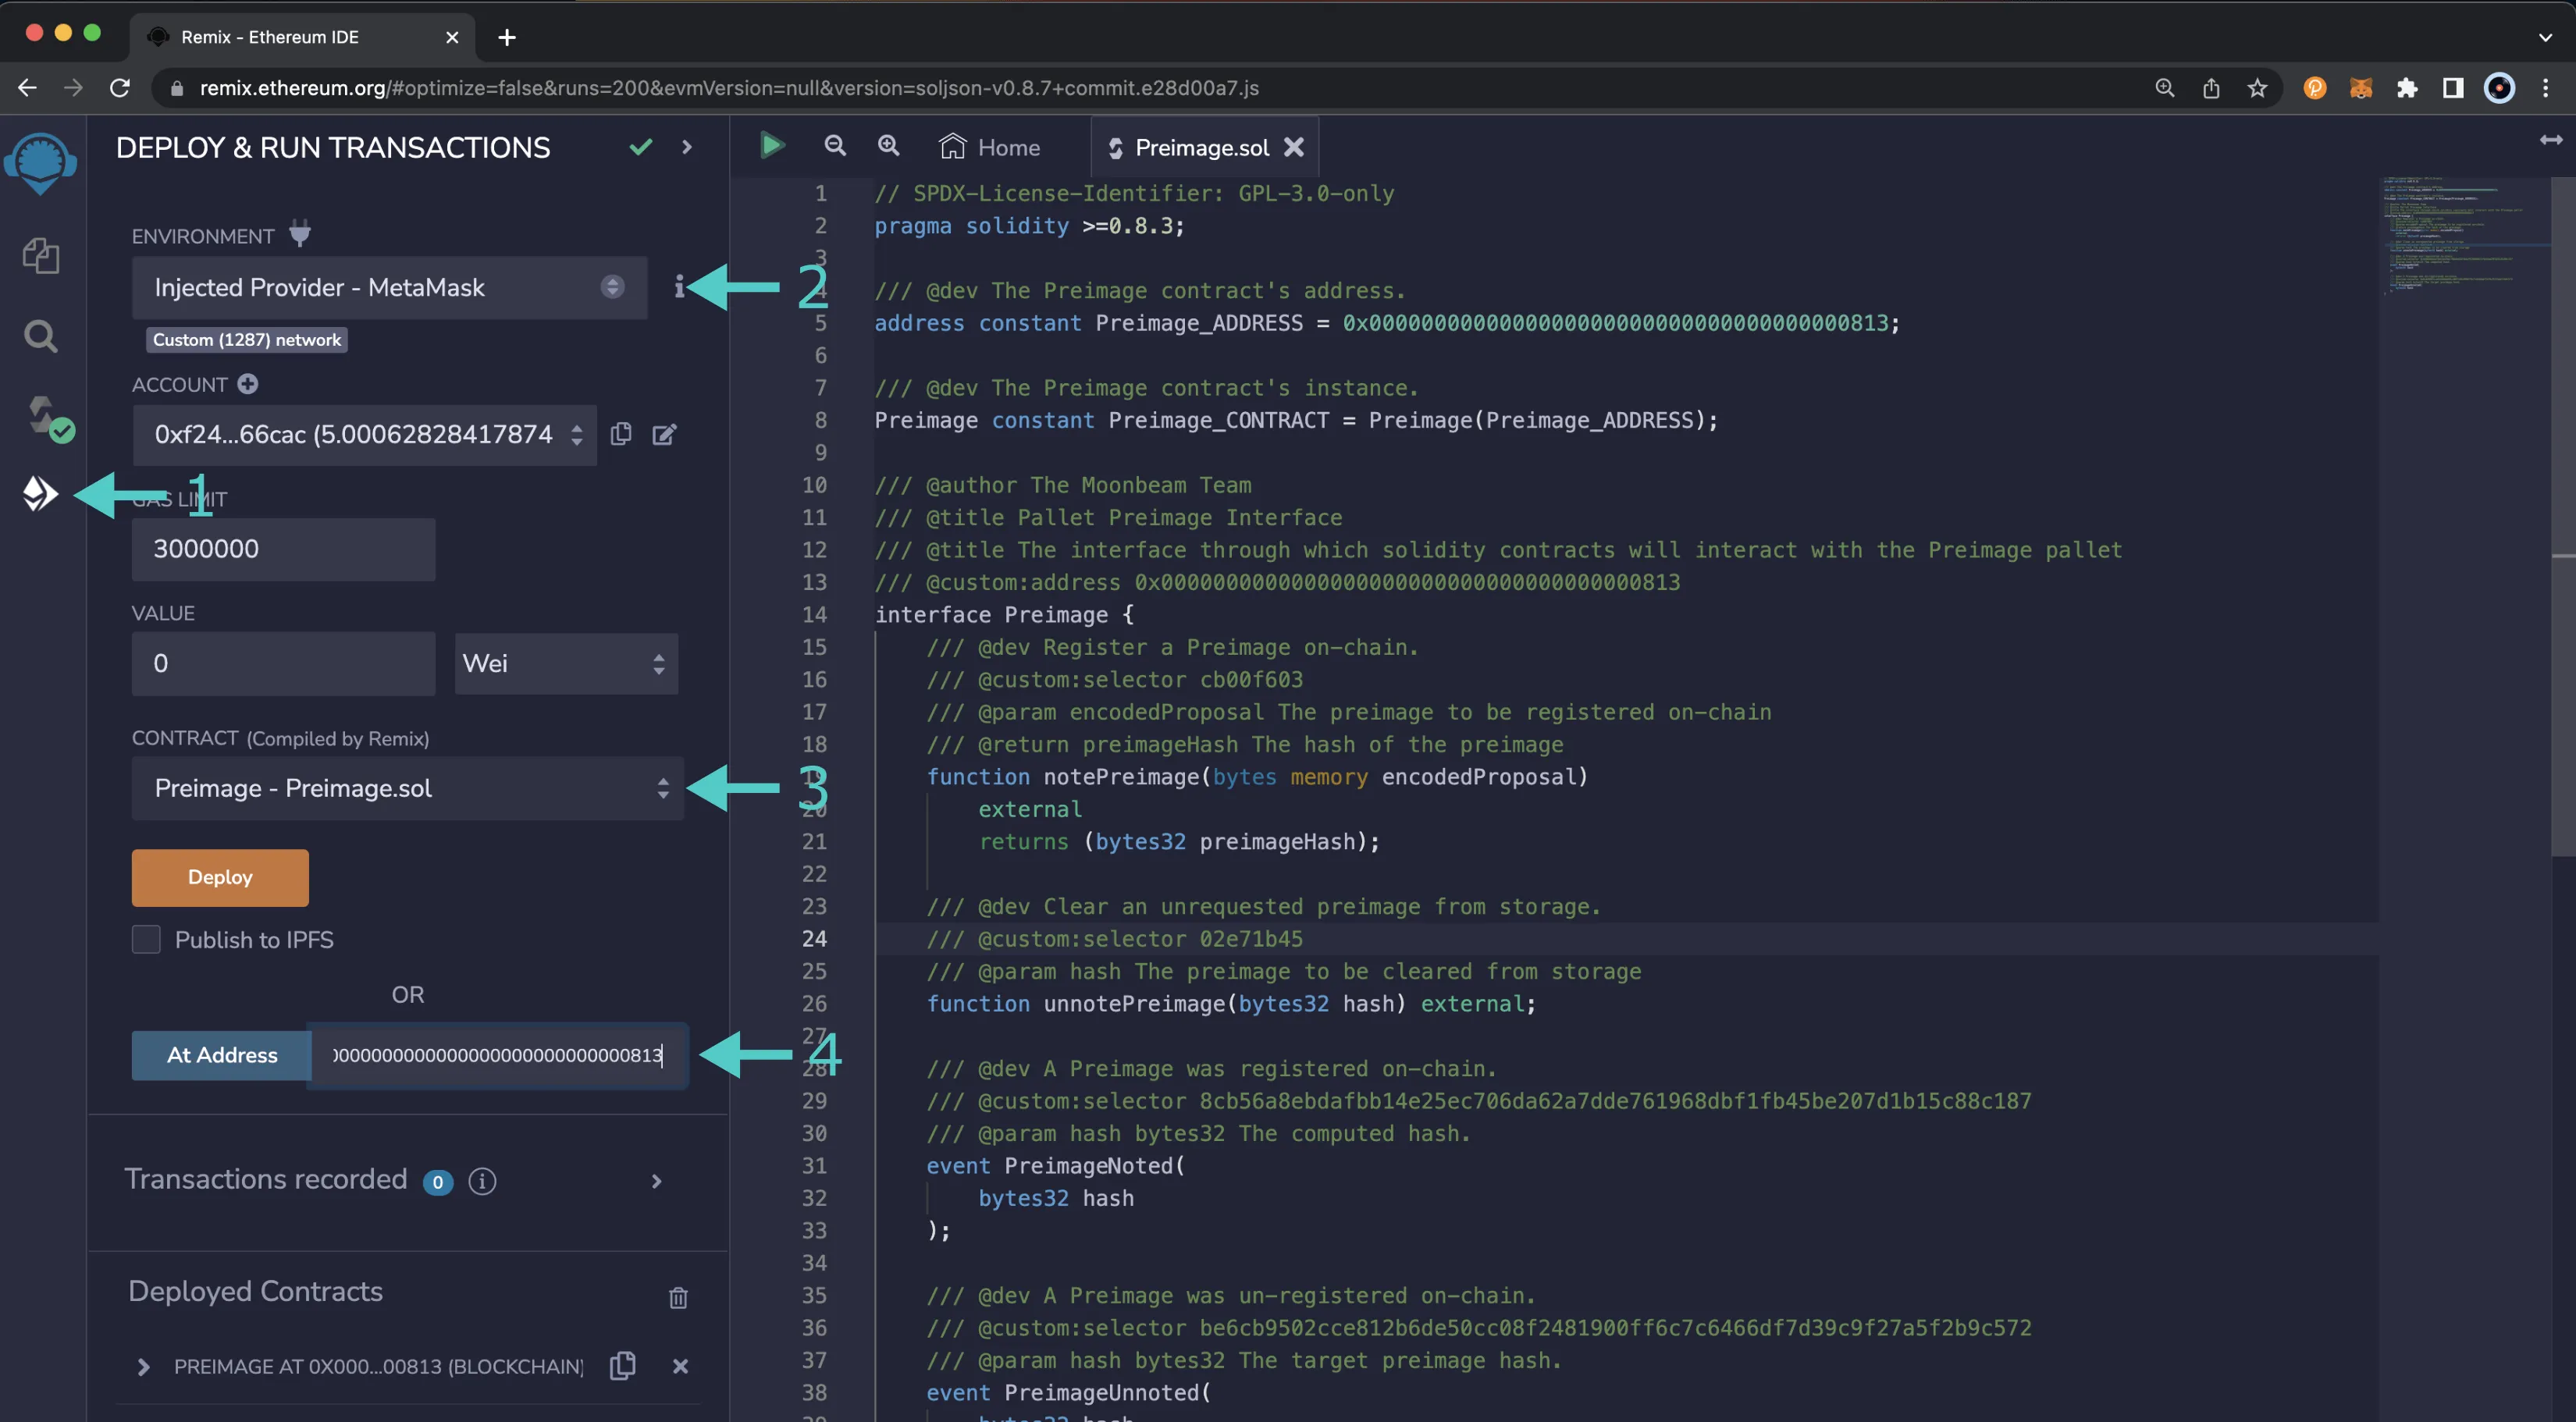
### Submit a Preimage of a Proposal {: #submit-a-preimage }
In order to submit a proposal, you'll first need to submit a preimage of that proposal, which essentially defines the proposed action on-chain. You can submit the preimage using the `notePreimage` function of the Preimage Precompile. The `notePreimage` function accepts the encoded proposal, so the first step you'll need to take is to get the encoded proposal, which can easily be done using Polkadot.js Apps.
In this section, you'll get the preimage hash and the encoded proposal data for a proposal. To get the preimage hash, you'll first need to navigate to the **Preimage** page of [Polkadot.js Apps](https://polkadot.js.org/apps/?rpc=wss://wss.api.moonbase.moonbeam.network%2Fpublic-ws#){target=\_blank}:
1. Navigate to the [**Governance** tab](https://polkadot.js.org/apps/?rpc=wss://wss.api.moonbase.moonbeam.network%2Fpublic-ws#/democracy){target=\_blank}
2. Select **Preimages** from the dropdown
3. From the **Preimages** page, click on **+ Add preimage**
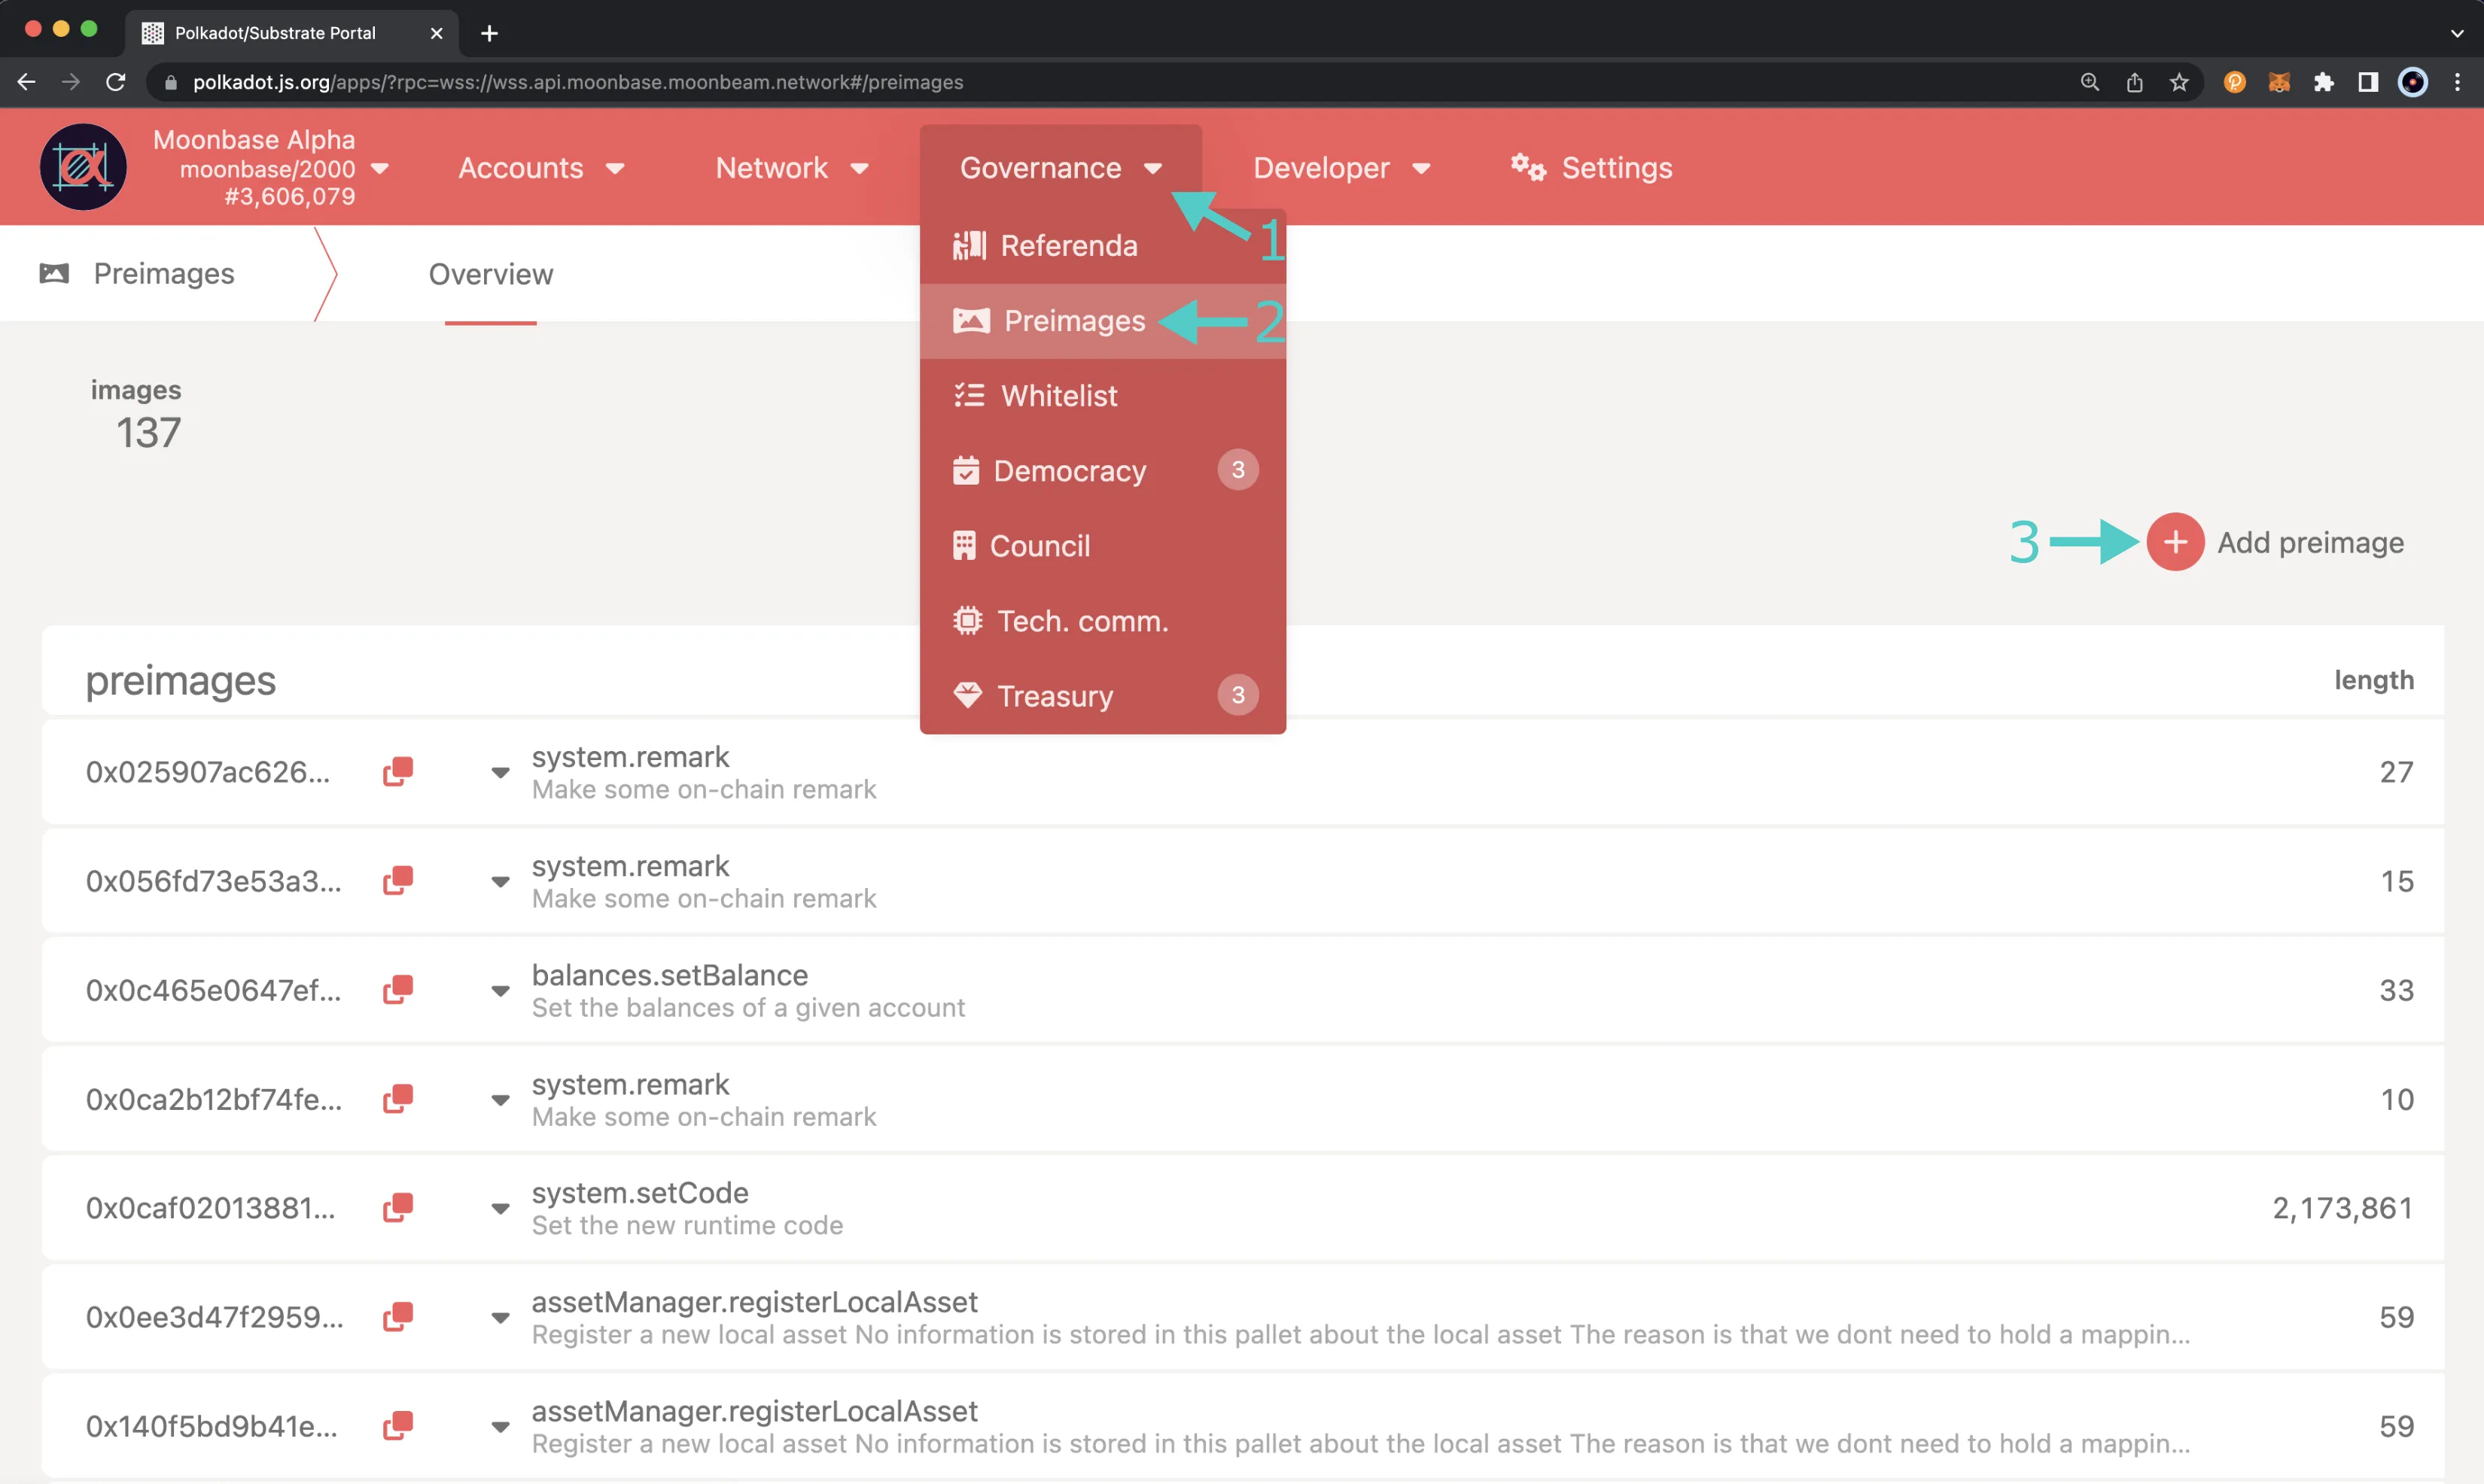
Then take the following steps:
1. Select an account (any account is fine because you're not submitting any transaction here)
2. Choose the pallet you want to interact with and the dispatchable function (or action) to propose. The action you choose will determine the fields that need to fill in the following steps. In this example, it is the **system** pallet and the **remark** function
3. Enter the text of the remark, ensuring it is unique. Duplicate proposals such as "Hello World!" will not be accepted
4. Click the **Submit preimage** button but don't sign or confirm the transaction on the next page
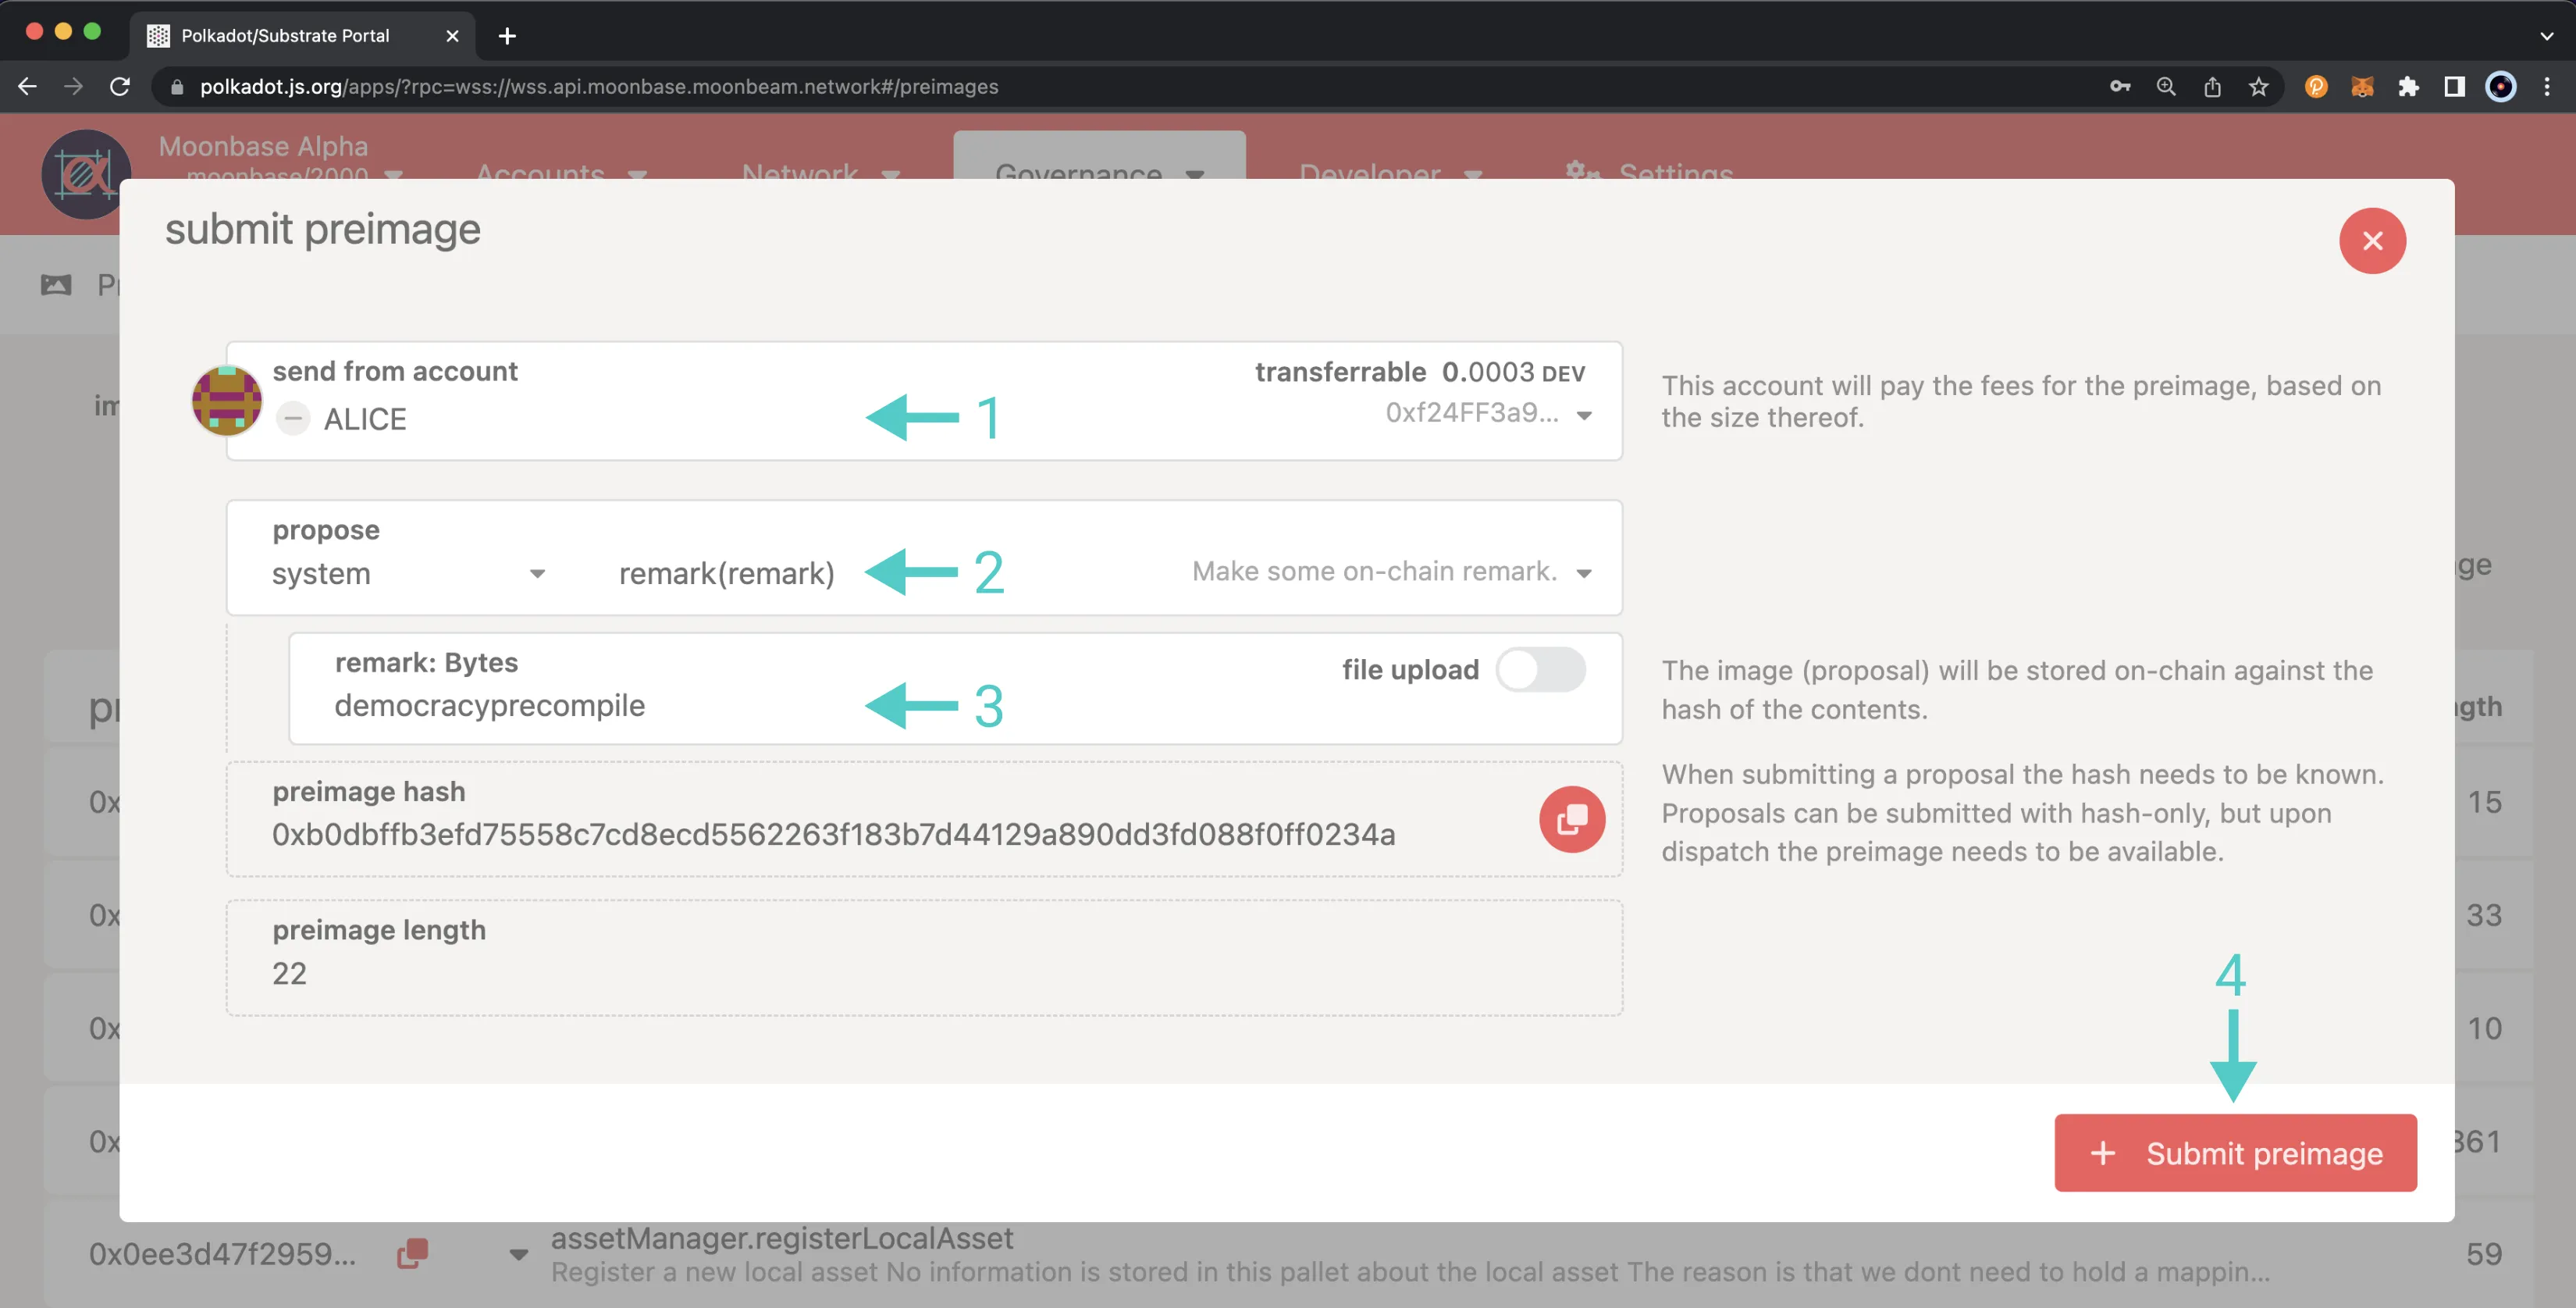
On the next screen, take the following steps:
1. Press the triangle icon to reveal the encoded proposal in bytes
2. Copy the **bytes** (encoded proposal) — you'll need them when calling the `notePreimage` function
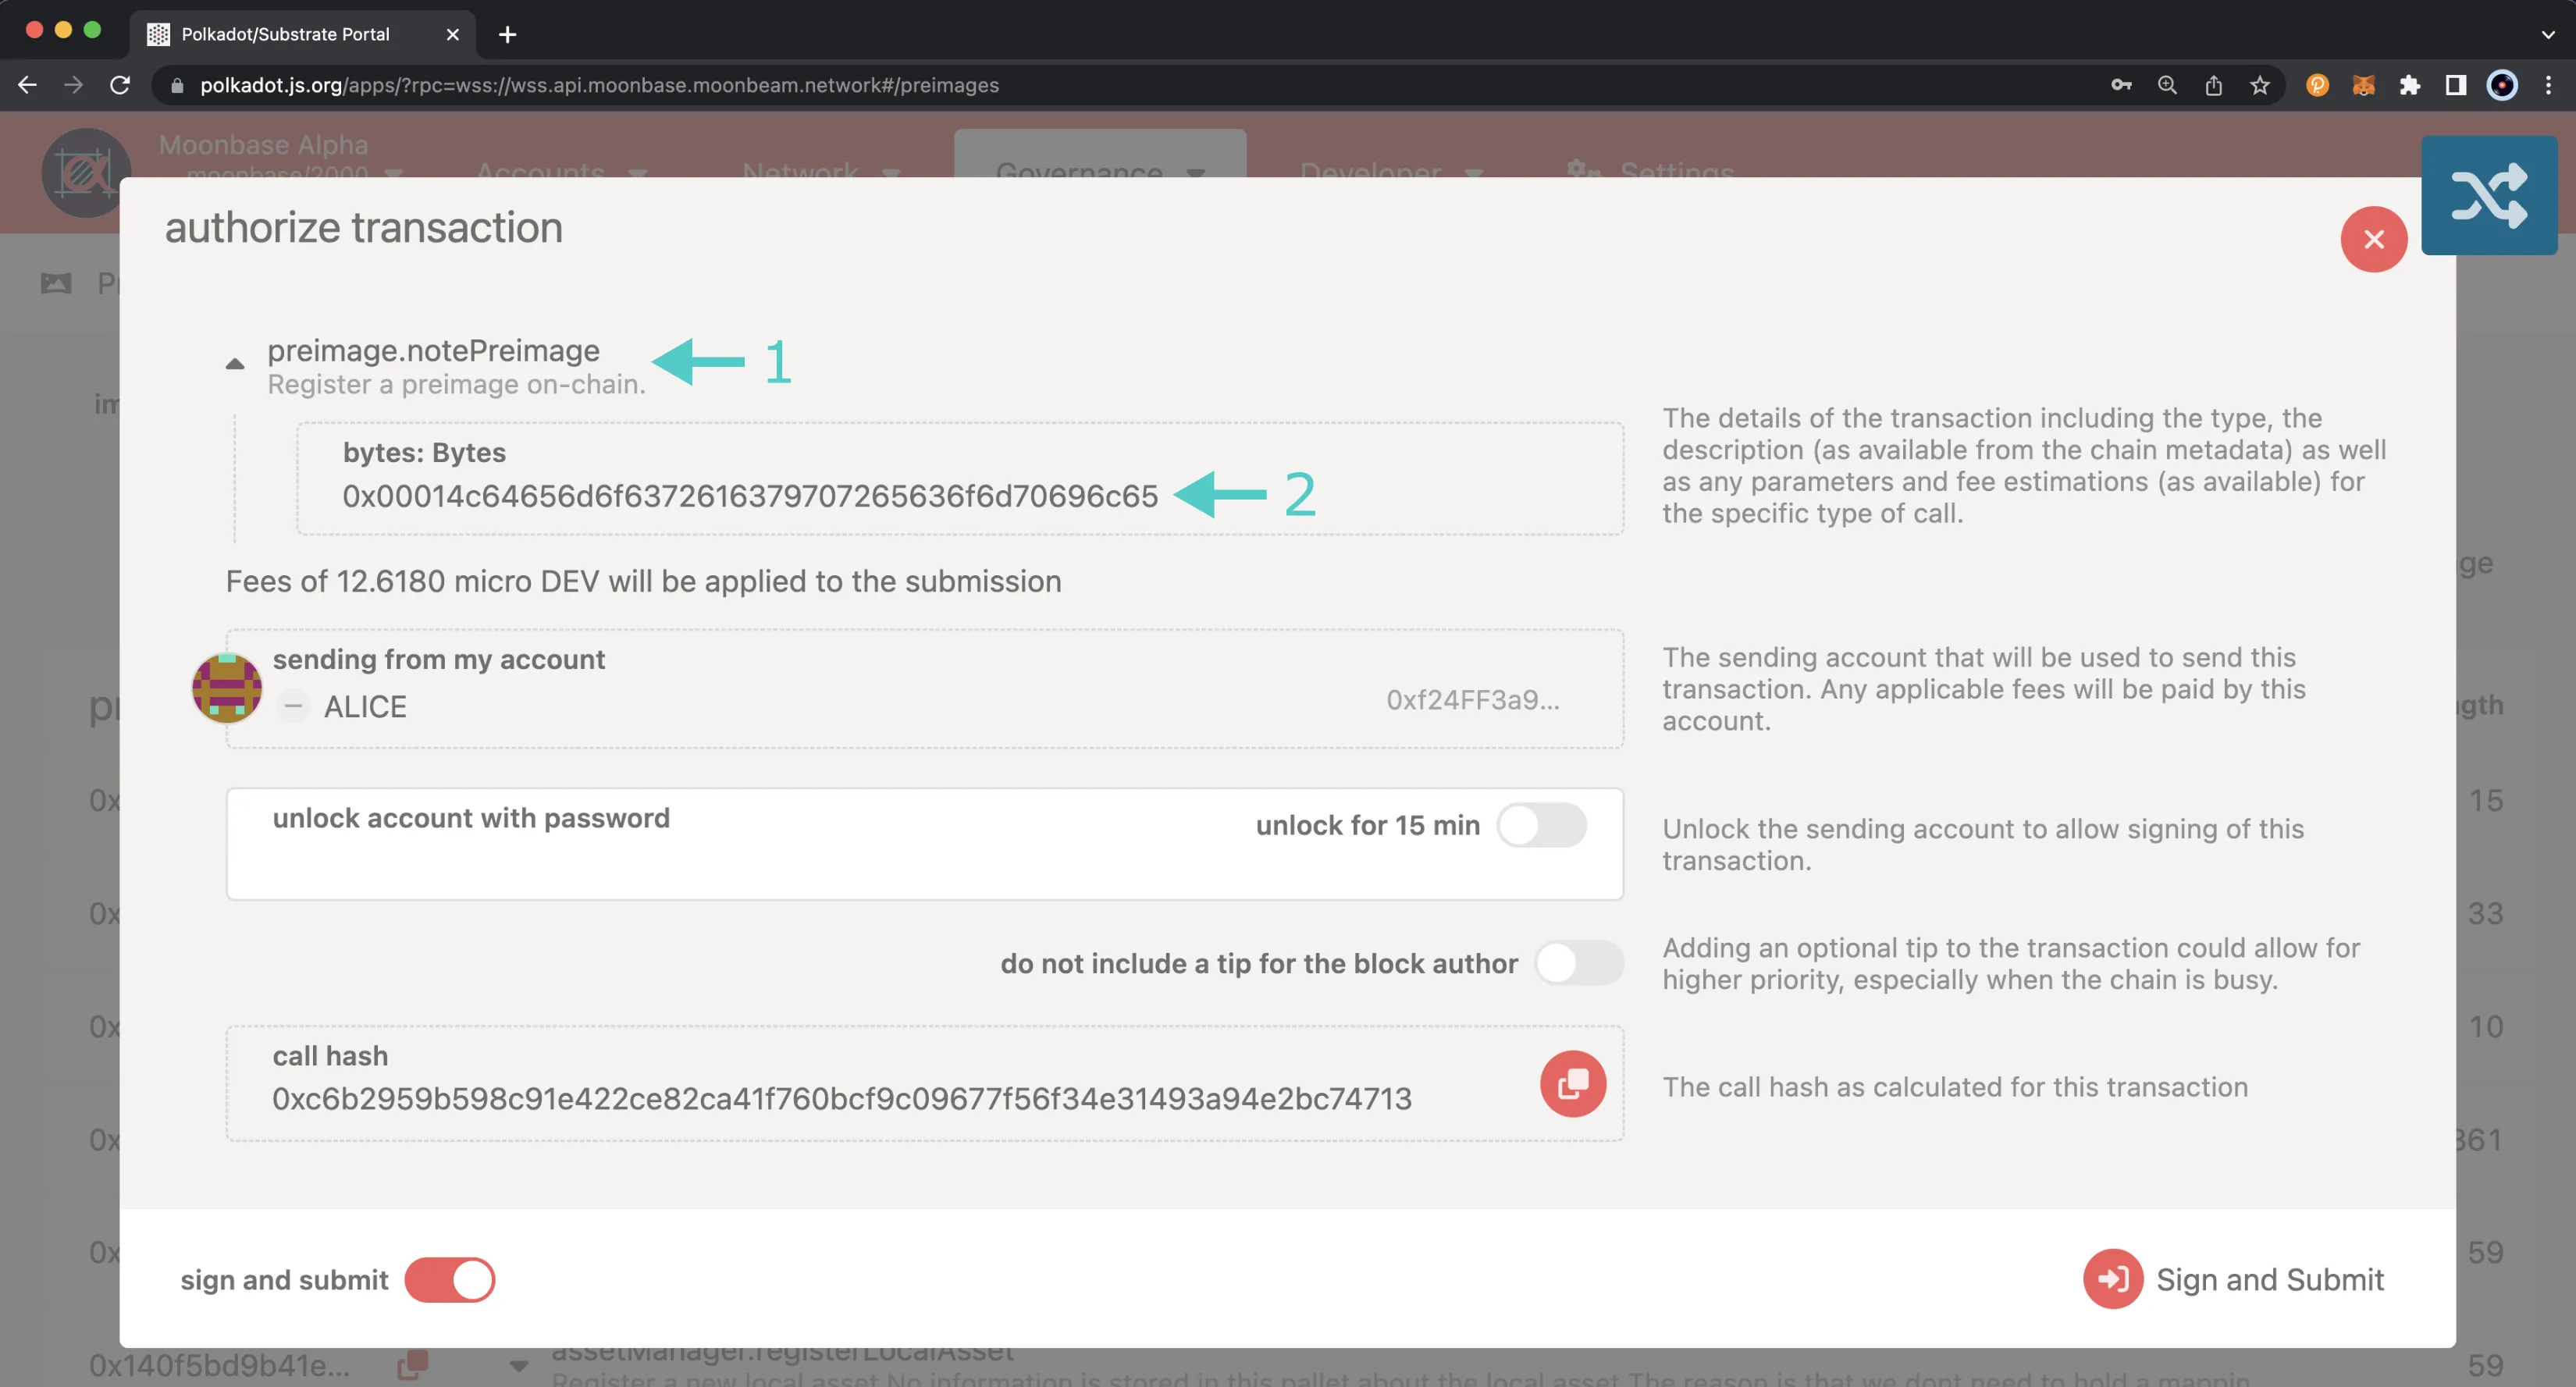
!!! note
You should NOT sign and submit the transaction here. You will submit this information via the `notePreimage` function in the next step.
Now you can take the **bytes** of the encoded proposal that you got from [Polkadot.js Apps](https://polkadot.js.org/apps/?rpc=wss://wss.api.moonbase.moonbeam.network%2Fpublic-ws#/democracy){target=\_blank} and submit it via the `notePreimage` function of the Preimage Precompile. To submit the preimage via the `notePreimage` function, take the following steps:
1. Expand the Preimage Precompile contract to see the available functions
2. Find the **notePreimage** function and press the button to expand the section
3. Provide the **bytes** of the encoded proposal that you noted in the prior section. Note, the encoded proposal is not the same as the preimage hash. Ensure you are entering the correct value into this field
4. Press **transact** and confirm the transaction in MetaMask
Now that you've submitted the preimage for your proposal your proposal can be submitted! Head over to the [Referenda Precompile documentation](/builders/ethereum/precompiles/features/governance/referenda/){target=\_blank} to learn how to submit your proposal.
If you wish to remove a preimage, you can follow the same steps noted above except use the `unnotePreimage` function and pass in the preimage hash instead of the encoded proposal.
--- END CONTENT ---
Doc-Content: https://docs.moonbeam.network/builders/ethereum/precompiles/features/governance/referenda/
--- BEGIN CONTENT ---
---
title: Referenda Precompile Contract
description: Learn how to view and submit proposals on-chain to be put forth for referenda, directly through a Solidity interface with the Referenda Precompile on Moonbeam.
categories: Precompiles, Ethereum Toolkit
---
# Interacting with the Referenda Precompile
## Introduction {: #introduction }
As a Polkadot parachain and decentralized network, Moonbeam features native on-chain governance that enables stakeholders to participate in the direction of the network. With the introduction of OpenGov, also referred to as Governance v2, the Referenda Pallet allows token holders to get information on existing referenda, submit a proposal to be put forth for referenda, and manage actions related to the Decision Deposit, which is required for a referenda to be decided on. To learn more about Moonbeam's governance system, such as an overview of related terminology, principles, mechanics, and more, please refer to the [Governance on Moonbeam](/learn/features/governance/){target=\_blank} page.
The Referenda Precompile interacts directly with Substrate's [Referenda Pallet](/builders/substrate/interfaces/features/governance/referenda/){target=\_blank}. This pallet is coded in Rust and is normally not accessible from the Ethereum side of Moonbeam. However, the Referenda Precompile allows you to access functions needed to view referenda, submit referenda, and manage the required Decision Deposit, all of which are part of the Substrate Referenda Pallet, directly from a Solidity interface.
The Referenda Precompile is located at the following address:
=== "Moonbeam"
```text
{{ networks.moonbeam.precompiles.referenda }}
```
=== "Moonriver"
```text
{{ networks.moonriver.precompiles.referenda }}
```
=== "Moonbase Alpha"
```text
{{ networks.moonbase.precompiles.referenda }}
```
!!! note
There can be some unintended consequences when using the precompiled contracts on Moonbeam. Please refer to the [Security Considerations](/learn/core-concepts/security/){target=\_blank} page for more information.
## The Referenda Solidity Interface {: #the-referenda-solidity-interface }
[`Referenda.sol`](https://github.com/moonbeam-foundation/moonbeam/blob/master/precompiles/referenda/Referenda.sol){target=\_blank} is a Solidity interface that allows developers to interact with the precompile's methods.
The methods are as follows:
??? function "**referendumCount**() - a read-only function that returns the total referendum count"
=== "Parameters"
None.
=== "Returns"
- `uint256` total count of referenda
??? function "**submissionDeposit**() - a read-only function that returns the Submission Deposit required for each referendum"
=== "Parameters"
None.
=== "Returns"
- `uint256` amount of the required Submission Deposit
??? function "**decidingCount**(*uint16* trackId) - a read-only function that returns the total count of deciding referenda for a given Track"
=== "Parameters"
- `trackId` - uint16 Track ID to query the deciding count for
=== "Returns"
- `uint256` count of deciding referenda for the specified Track
??? function "**trackIds**() - a read-only function that returns a list of the Track IDs for all Tracks (and Origins)"
=== "Parameters"
None.
=== "Returns"
- `uint16[]` array of Track IDs
??? function "**trackInfo**(*uint16* trackId) - a read-only function that returns the following governance parameters configured for a given Track ID"
=== "Parameters"
- `trackId` - uint16 Track ID to query the parameters for
=== "Returns"
- `string` name - the name of the Track
- `uint256` maxDeciding - the maximum number of referenda that can be decided on at once
- `uint256` decisionDeposit - the amount of the Decision Deposit
- `uint256` preparePeriod - the duration of the Prepare Period
- `uint256` decisionPeriod - the duration of the Decide Period
- `uint256` confirmPeriod - the duration of the Confirm Period
- `uint256` minEnactmentPeriod - the minimum amount of time the Enactment Period must be
- `bytes` minApproval - the minimum "Aye" votes as a percentage of overall Conviction-weighted votes needed for an approval
- `bytes` minSupport - minimum number of "Aye" votes, not taking into consideration Conviction-weighted votes, needed as a percent of the total supply needed for an approval
??? function "**referendumStatus**(*uint32* referendumIndex) - a read-only function that returns the status for a given referendum"
=== "Parameters"
- `referendumIndex` - uint32 index of the referendum to query the status for
=== "Returns"
ReferendumStatus enum:
```solidity
enum ReferendumStatus {
Ongoing,
Approved,
Rejected,
Cancelled,
TimedOut,
Killed
}
```
??? function "**ongoingReferendumInfo**(*uint32* referendumIndex) - a read-only function that returns information pertaining to an ongoing referendum"
=== "Parameters"
- `referendumIndex` - uint32 index of the ongoing referendum to query
=== "Returns"
- `uint16` trackId - the Track of this referendum
- `bytes` origin - the Origin for this referendum
- `bytes` proposal - the hash of the proposal up for referendum
- `bool` enactmentType - `true` if the proposal is scheduled to be dispatched *at* enactment time and `false` if *after* enactment time
- `uint256` enactmentTime - the time the proposal should be scheduled for enactment
- `uint256` submissionTime - the time of submission
- `address` submissionDepositor - the address of the depositor for the Submission Deposit
- `uint256` submissionDeposit - the amount of the Submission Deposit
- `address` decisionDepositor - the address of the depositor for the Decision Deposit
- `uint256` decisionDeposit - the amount of the Decision Deposit
- `uint256` decidingSince - when this referendum entered the Decide Period
- `uint256` decidingConfirmingEnd - when this referendum is scheduled to leave the Confirm Period
- `uint256` ayes - the number of "Aye" votes, expressed in terms of post-conviction lock-vote
- `uint32` support - percent of "Aye" votes, expressed pre-conviction, over total votes in the class
- `uint32` approval - percent of "Aye" votes over "Aye" and "Nay" votes
- `bool` inQueue - `true` if this referendum has been placed in the queue for being decided
- `uint256` alarmTime - the next scheduled wake-up
- `bytes` taskAddress - scheduler task address if scheduled
??? function "**closedReferendumInfo**(*uint32* referendumIndex) - a read-only function that returns information pertaining to a closed referendum"
=== "Parameters"
- `referendumIndex` - uint32 index of the closed referendum to query
=== "Returns"
- `uint256` end - when the referendum ended
- `address` submissionDepositor - the address of the depositor for the Submission Deposit
- `uint256` submissionDeposit - the amount of the Submission Deposit
- `address` decisionDepositor - the address of the depositor for the Decision Deposit
- `uint256` decisionDeposit - the amount of the Decision Deposit
??? function "**killedReferendumBlock**(*uint32* referendumIndex) - a read-only function that returns the block a given referendum was killed"
=== "Parameters"
- `referendumIndex` - uint32 index of the killed referendum to query
=== "Returns"
- `uint256` block number at which the referendum was killed
??? function "**submitAt**(*uint16* trackId, *bytes32* proposalHash, *uint32* proposalLen, *uint32* block) - submits a referendum given a Track ID corresponding to the origin from which the proposal is to be dispatched. Returns the referendum index of the submitted referendum"
=== "Parameters"
- `trackId` - uint16 Track ID corresponding to the origin from which the proposal is to be dispatched
- `proposalHash` - bytes32 preimage hash of the proposed runtime call
- `proposalLen` - uint32 length of the proposal
- `block` - uint32 block number *at* which this will be executed
=== "Returns"
- `uint32` index of the submitted referendum
??? function "**submitAfter**(*uint16* trackId, *bytes32* proposalHash, *uint32* proposalLen, *uint32* block) - submits a referendum given a Track ID corresponding to the origin from which the proposal is to be dispatched. Returns the referendum index of the submitted referendum"
=== "Parameters"
- `trackId` - uint16 Track ID corresponding to the origin from which the proposal is to be dispatched
- `proposalHash` - bytes32 preimage hash of the proposed runtime call
- `proposalLen` - uint32 length of the proposal
- `block` - uint32 block number *after* which this will be executed
=== "Returns"
- `uint32` index of the submitted referendum
??? function "**placeDecisionDeposit**(*uint32* index) - posts the Decision Deposit for a referendum given the index of the going referendum"
=== "Parameters"
- `index` - uint32 index of the ongoing referendum to place the Decision Deposit for
=== "Returns"
None.
??? function "**refundDecisionDeposit**(*uint32* index) - refunds the Decision Deposit for a closed referendum back to the depositor"
=== "Parameters"
- `index` - uint32 index of the closed referendum in which the Decision Deposit is still locked
=== "Returns"
None.
??? function "**refundSubmissionDeposit**(*uint32* index) - refunds the Submission Deposit for a closed referendum back to the depositor"
=== "Parameters"
- `index` - uint32 index of the closed referendum to refund the Submission Deposit for
=== "Returns"
None.
The interface also includes the following events:
- **SubmittedAt**(*uint16 indexed* trackId, *uint32* referendumIndex, *bytes32* hash) - emitted when a referenda has been submitted *at* a given block
- **SubmittedAfter**(*uint16 indexed* trackId, *uint32* referendumIndex, *bytes32* hash) - emitted when a referenda has been submitted *after* a given block
- **DecisionDepositPlaced**(*uint32* index, *address* caller, *uint256* depositedAmount) - emitted when a Decision Deposit for a referendum has been placed
- **DecisionDepositRefunded**(*uint32* index, *address* caller, *uint256* refundedAmount) - emitted when a Decision Deposit for a closed referendum has been refunded
- **SubmissionDepositRefunded**(*uint32* index, *address* caller, *uint256* refundedAmount) - emitted when a Submission Deposit for a valid referendum has been refunded
## Interact with the Solidity Interface {: #interact-with-the-solidity-interface }
### Checking Prerequisites {: #checking-prerequisites }
The below example is demonstrated on Moonbase Alpha, however, similar steps can be taken for Moonriver. To follow the steps in this guide, you'll need to have the following:
- MetaMask installed and [connected to Moonbase Alpha](/tokens/connect/metamask/){target=\_blank}
- An account with some DEV tokens.
You can get DEV tokens for testing on Moonbase Alpha once every 24 hours from the [Moonbase Alpha Faucet](https://faucet.moonbeam.network){target=\_blank}
### Remix Set Up {: #remix-set-up }
1. Click on the **File explorer** tab
2. Paste a copy of [`Referenda.sol`](https://github.com/moonbeam-foundation/moonbeam/blob/master/precompiles/referenda/Referenda.sol){target=\_blank} into a [Remix file](https://remix.ethereum.org){target=\_blank} named `Referenda.sol`
### Compile the Contract {: #compile-the-contract }
1. Click on the **Compile** tab, second from top
2. Then to compile the interface, click on **Compile Referenda.sol**
### Access the Contract {: #access-the-contract }
1. Click on the **Deploy and Run** tab, directly below the **Compile** tab in Remix. Note: you are not deploying a contract here, instead you are accessing a precompiled contract that is already deployed
2. Make sure **Injected Provider - Metamask** is selected in the **ENVIRONMENT** drop down
3. Ensure **Referenda.sol** is selected in the **CONTRACT** dropdown. Since this is a precompiled contract there is no need to deploy, instead you are going to provide the address of the precompile in the **At Address** field
4. Provide the address of the Referenda Precompile for Moonbase Alpha: `{{ networks.moonbase.precompiles.referenda }}` and click **At Address**
5. The Referenda Precompile will appear in the list of **Deployed Contracts**
### Submit a Proposal {: #submit-a-proposal }
In order to submit a proposal, you should have already submitted the preimage hash for the proposal. If you have not done so, please follow the steps outlined in the [Preimage Precompile](/builders/ethereum/precompiles/features/governance/preimage/){target=\_blank} documentation. There are two methods that can be used to submit a proposal: `submitAt` and `submitAfter`. The `submitAt` function submits a proposal to be executed *at* a given block and the `submitAfter` function submits a proposal to be executed *after* a specific block. For this example, `submitAt` will be used, but the same steps can be applied if you want to use `submitAfter` instead.
To submit the proposal, you'll need to determine which Track your proposal belongs to and the Track ID of that Track. For help with these requirements, you can refer to the [OpenGov section of the governance overview page](/learn/features/governance/#opengov){target=\_blank}.
You'll also need to make sure you have the preimage hash and the length of the preimage handy, both of which you should have received from following the steps in the [Preimage Precompile](/builders/ethereum/precompiles/features/governance/preimage/){target=\_blank} documentation. If you're unsure, you can find your preimage from the [Preimage page of Polkadot.js Apps](https://polkadot.js.org/apps/?rpc=wss://wss.api.moonbase.moonbeam.network#/preimages){target=\_blank} and copy the preimage hash. To get the length of the preimage, you can then query the `preimage` pallet using the `preimageFor` method from the [Polkadot.js Apps Chain State page](https://polkadot.js.org/apps/?rpc=wss://wss.api.moonbase.moonbeam.network#/chainstate){target=\_blank}.
Once you have the Track ID, preimage hash, and preimage length, you can go ahead and submit the proposal using the Referenda Precompile. From Remix, you can take the following steps:
1. Expand the Referenda Precompile contract to see the available functions
2. Find the **submitAt** function and press the button to expand the section
3. Enter the track ID that your proposal will be processed through
4. Enter the preimage hash. You should have received this from following the steps in the [Preimage Precompile](/builders/ethereum/precompiles/features/governance/preimage/){target=\_blank} documentation
5. Enter the length of the preimage
6. Enter the block you want the proposal to be executed at
7. Press **transact** and confirm the transaction in MetaMask
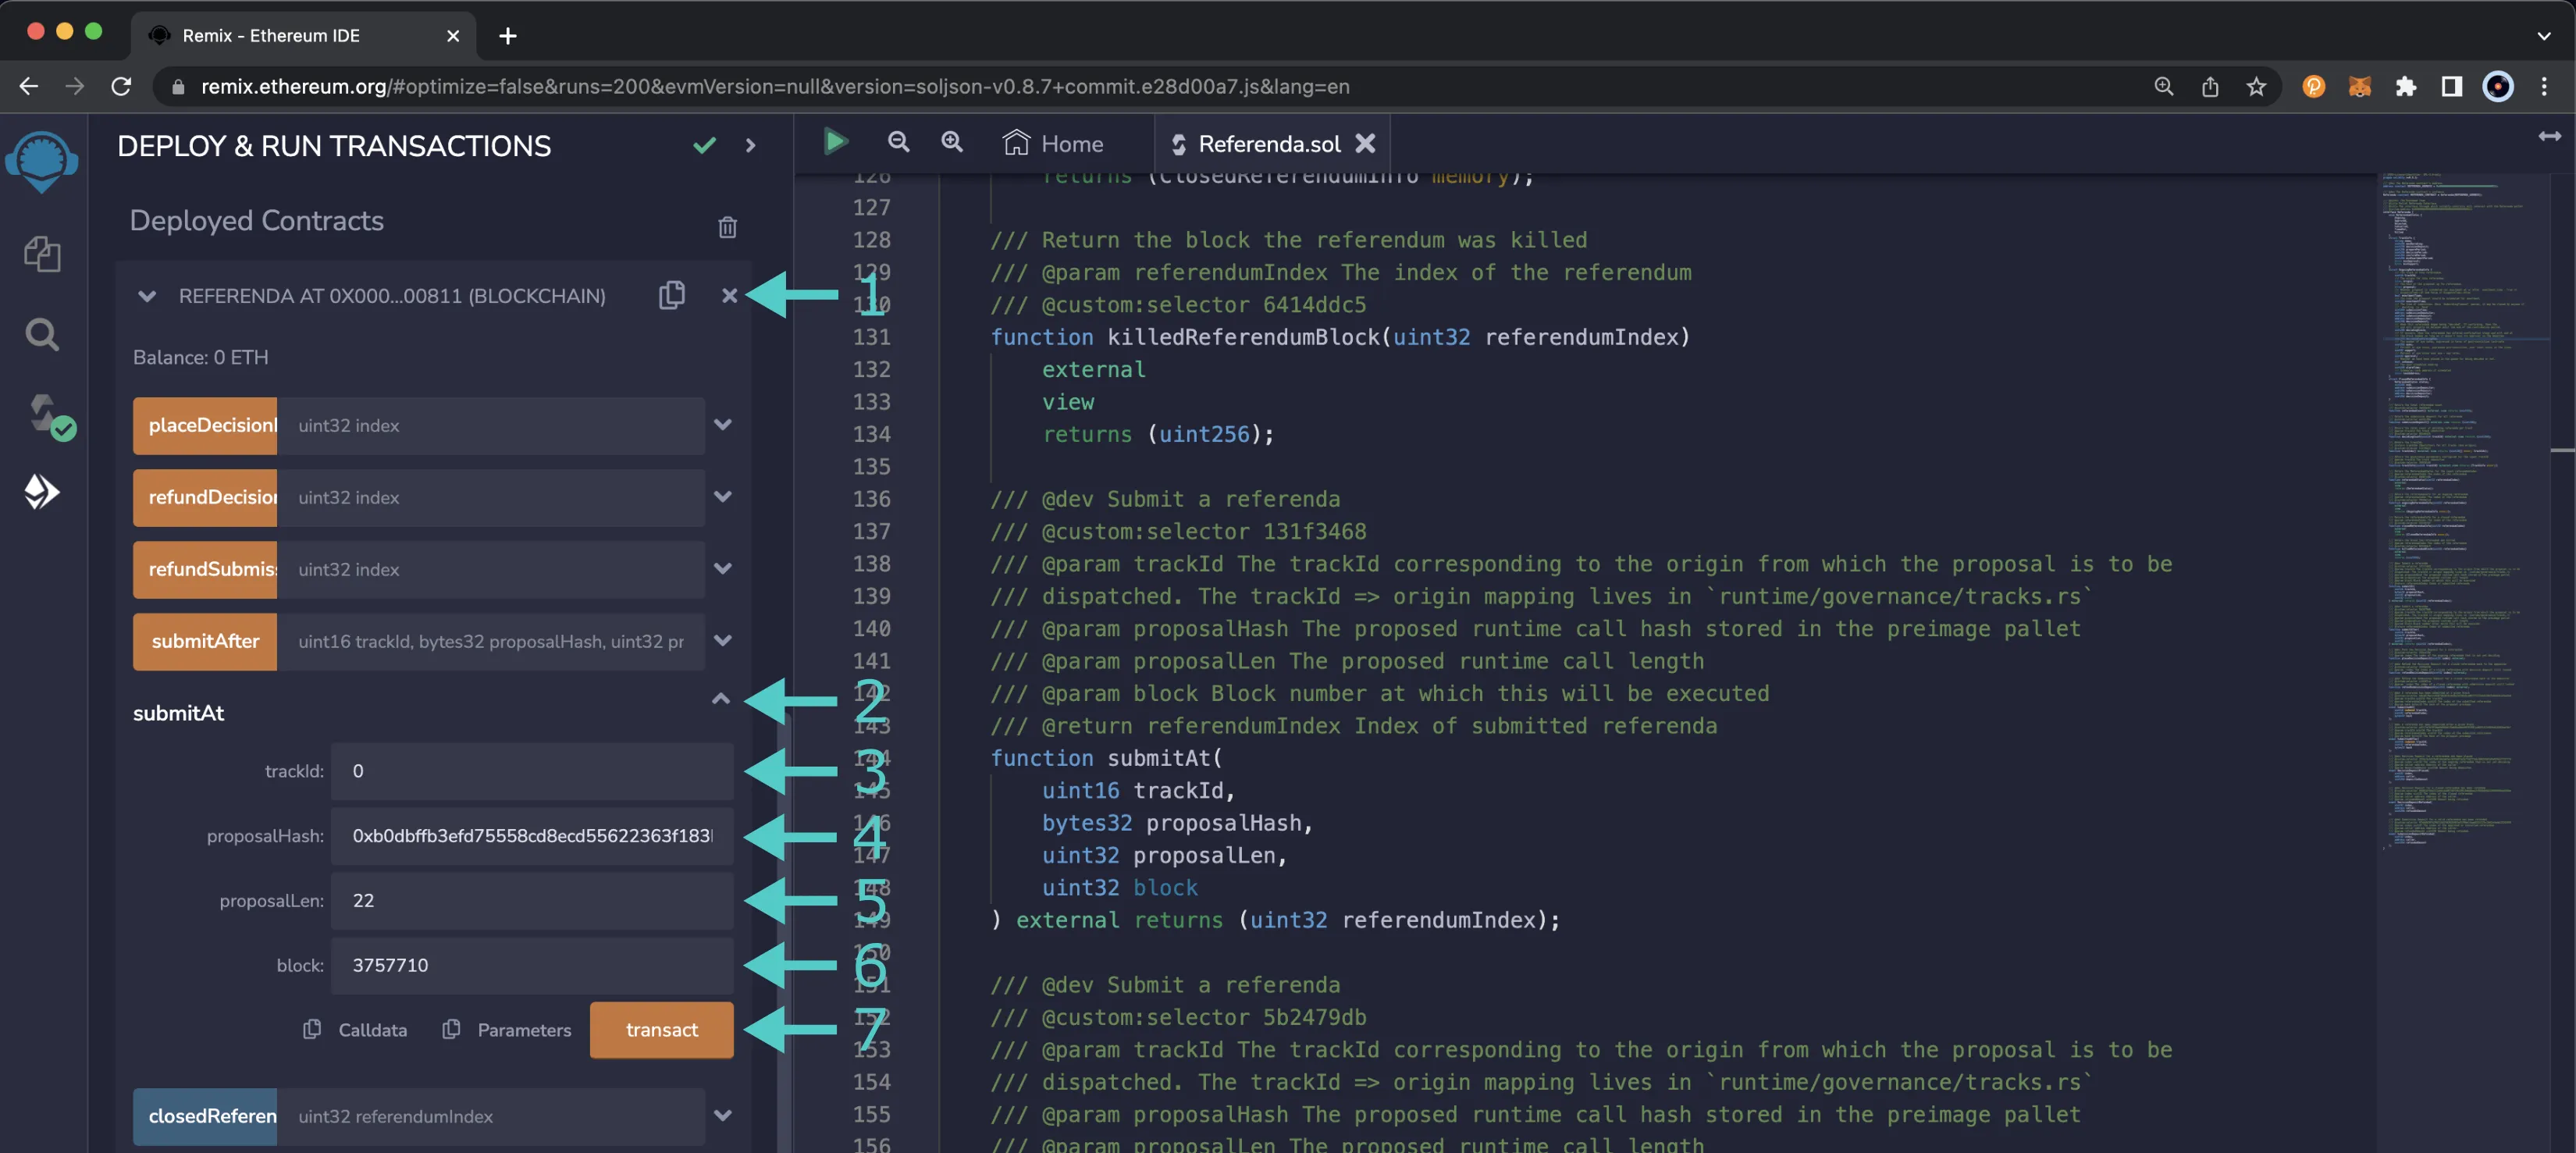
After your transaction has been confirmed you'll be able to see the proposal listed on the **Referenda** page of [Polkadot.js Apps](https://polkadot.js.org/apps/?rpc=wss://wss.api.moonbase.moonbeam.network%2Fpublic-ws#/referenda){target=\_blank}. You can also check out your proposal on [Polkassembly](https://moonbase.polkassembly.io/opengov){target=\_blank}, which sorts proposals by the Track they belong to.
### Submit Decision Deposit {: #submit-decision-deposit }
Now that you've submitted your proposal, the next step is to submit the Decision Deposit. The Decision Deposit is the minimum deposit amount required for a referendum to progress to the decision phase at the end of the Lead-in Period. For more information on the Decision Deposit, please refer to the [OpenGov section of the governance overview page](/learn/features/governance/#opengov){target=\_blank}.
You can submit the Decision Deposit using the `placeDecisionDeposit` function of the Referenda Precompile. You'll just need to have the index of the referendum and enough funds to do so. The Decision Deposit varies by Track, to find the minimum amount required you can take a look at the [General Parameters by Track table on the governance overview page](/learn/features/governance/#general-parameters-by-track){target=\_blank}.
To submit the deposit, you can take the following steps:
1. Find the **placeDecisionDeposit** function and press the button to expand the section
2. Enter the index of the referendum
3. Press **transact** and confirm the transaction in MetaMask
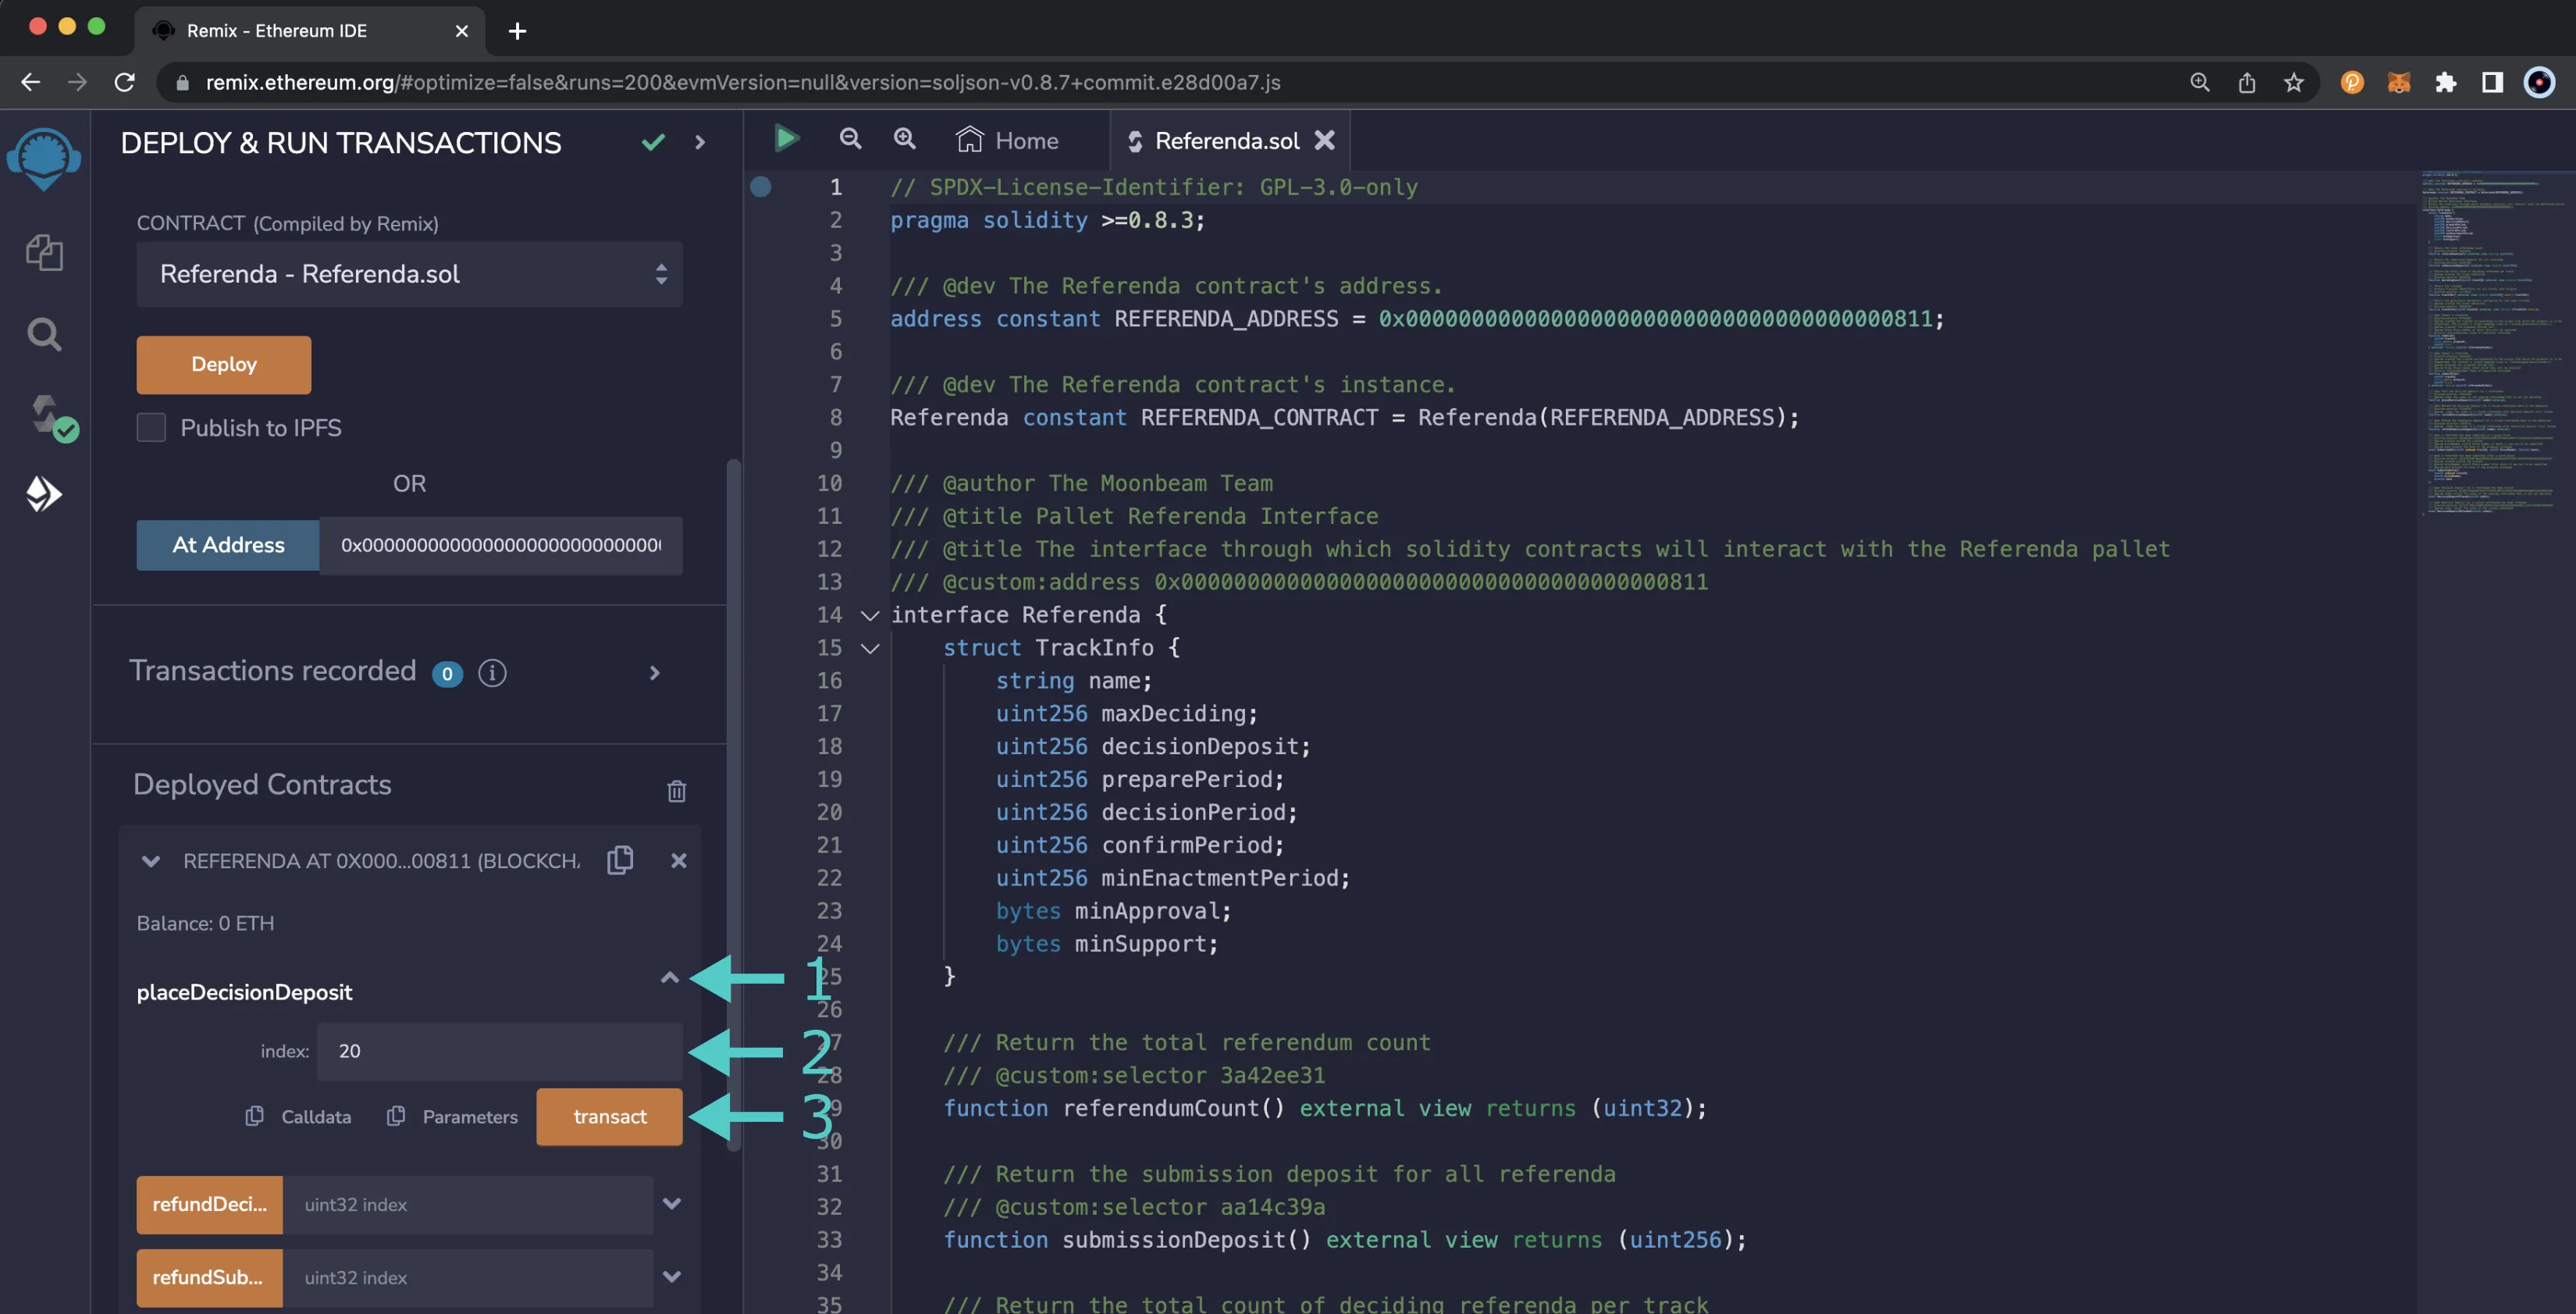
Now that the Decision Deposit has been placed, the referendum is one step closer to moving to the Decide Period. There will also need to be enough Capacity in the designated Track and the duration of the Prepare Period must pass for it to move to the Decide Period.
To vote on referenda, you can follow the steps outlined in the [Conviction Voting Precompile](/builders/ethereum/precompiles/features/governance/conviction-voting/){target=\_blank} documentation.
### Refund Decision Deposit {: #refund-decision-deposit }
Once a referendum has either been approved or rejected, the Decision Deposit can be refunded. This holds true as long as the referendum wasn't cancelled due to the proposal being malicious. If the proposal is deemed malicious and killed via the Root Track or the Emergency Killer Track, the Decision Deposit will be slashed.
To refund the Decision Deposit, you can use the `refundDecisionDeposit` function of the Referenda Precompile. To do so, you can take the following steps:
1. Find the **refundDecisionDeposit** function and press the button to expand the section
2. Enter the index of the referendum
3. Press **transact** and confirm the transaction in MetaMask
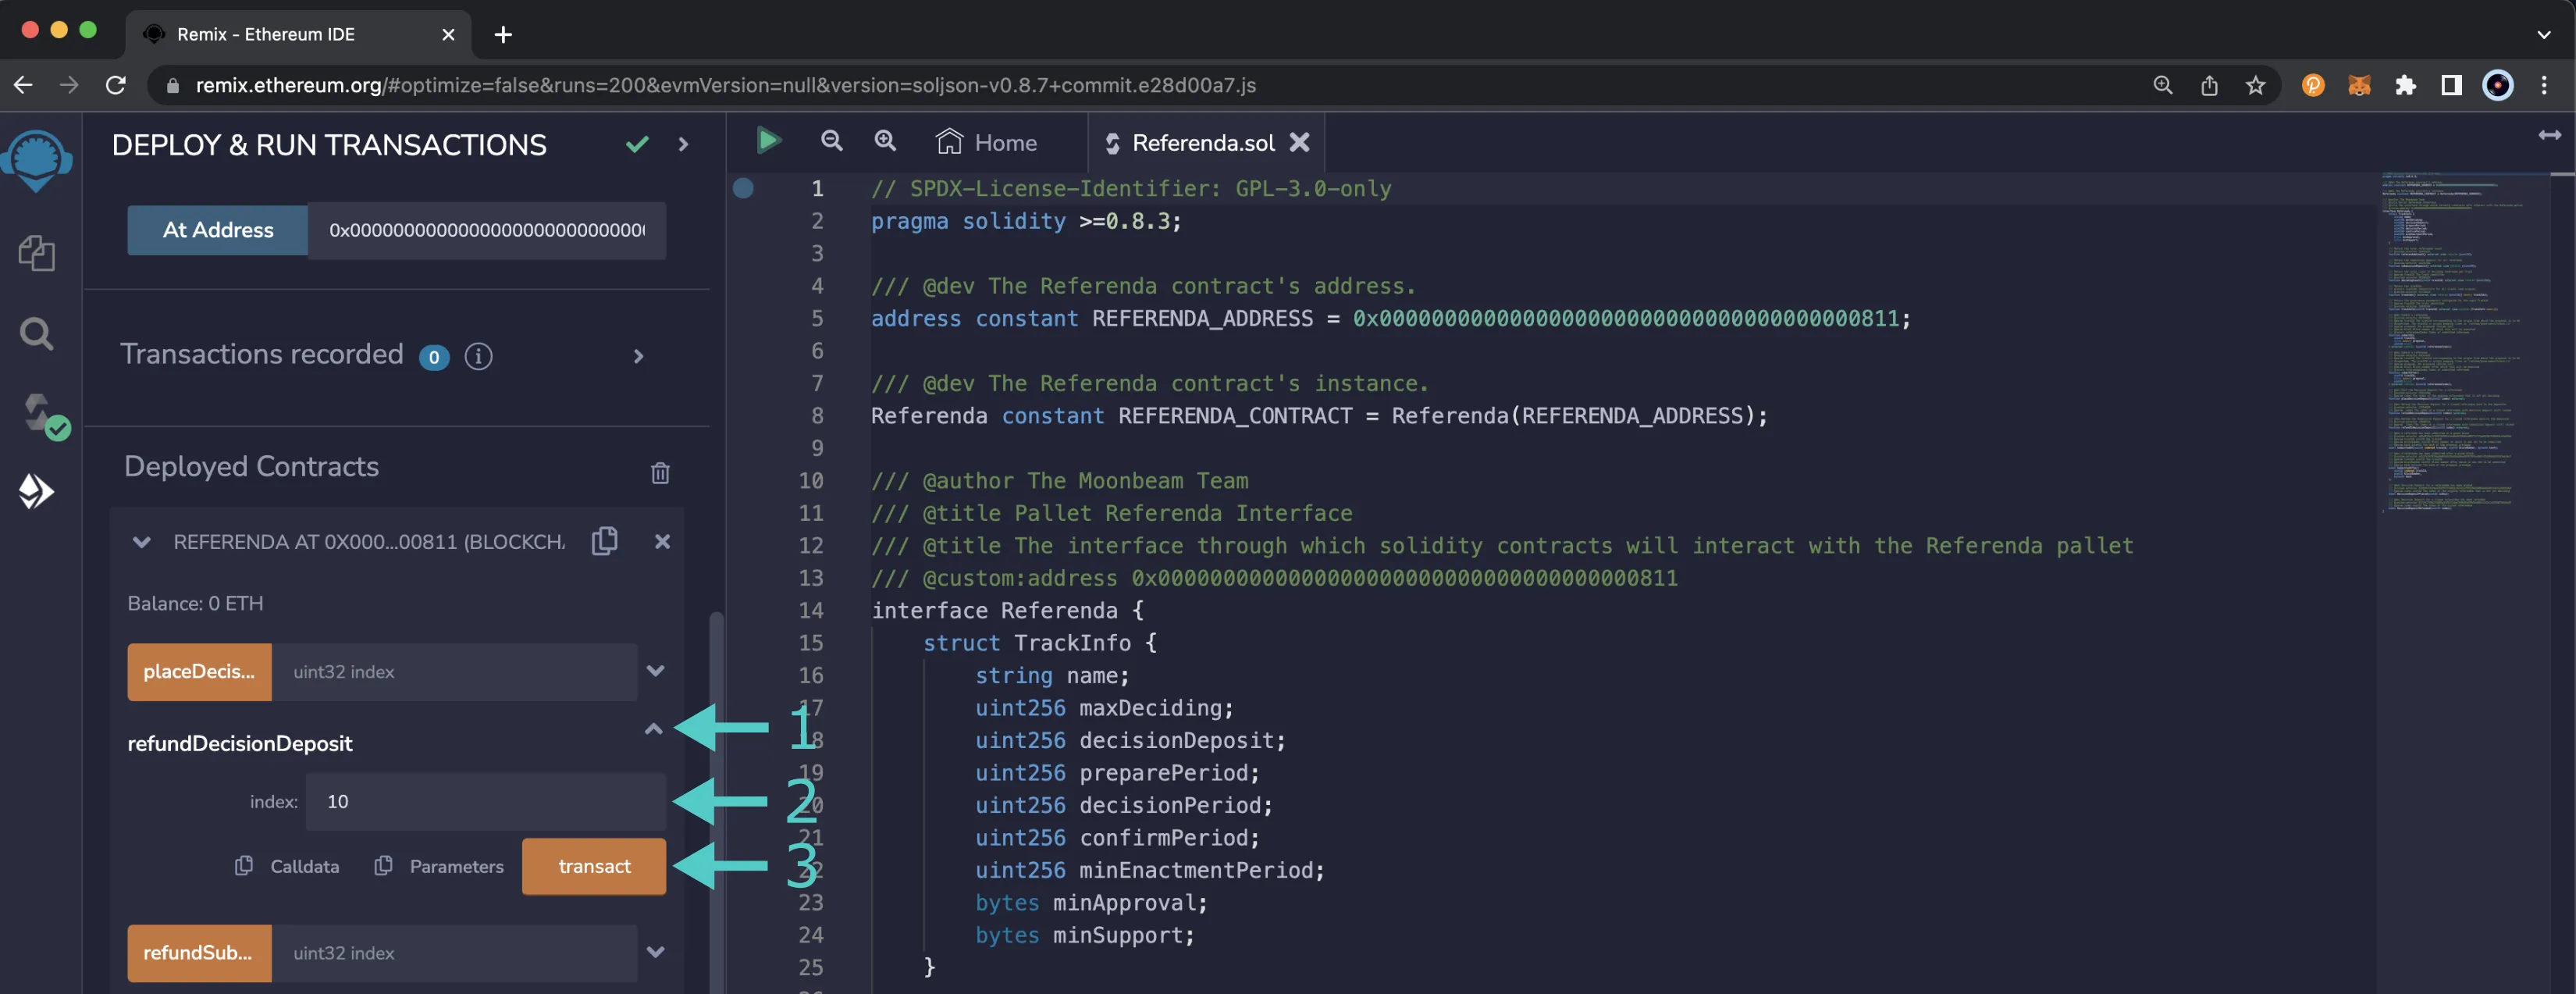
And that's it! You've completed your introduction to the Referenda Precompile. There are a few more functions that are documented in [`Referenda.sol`](https://github.com/moonbeam-foundation/moonbeam/blob/master/precompiles/referenda/Referenda.sol){target=\_blank} — feel free to reach out on [Discord](https://discord.com/invite/PfpUATX){target=\_blank} if you have any questions about those functions or any other aspect of the Referenda Precompile.
--- END CONTENT ---
Doc-Content: https://docs.moonbeam.network/builders/ethereum/precompiles/features/randomness/
--- BEGIN CONTENT ---
---
title: Randomness Precompile
description: Learn about the sources of VRF randomness on Moonbeam and how to use the randomness precompile and consumer interface to generate on-chain randomness.
keywords: solidity, ethereum, randomness, VRF, moonbeam, precompiled, contracts
categories: Precompiles, Ethereum Toolkit
---
# Interacting with the Randomness Precompile
## Introduction {: #introduction }
Moonbeam utilizes verifiable random functions (VRF) to generate randomness that can be verified on-chain. A VRF is a cryptographic function that takes some input and produces random values, along with a proof of authenticity that these random values were generated by the submitter. The proof can be verified by anyone to ensure the random values generated were calculated correctly.
There are two available sources of randomness that provide random inputs based on block producers' VRF keys and past randomness results: [local VRF](/learn/features/randomness/#local-vrf) and [BABE epoch randomness](/learn/features/randomness/#babe-epoch-randomness). Local VRF is determined directly within Moonbeam using the collator of the block's VRF key and the last block's VRF output. On the other hand, [BABE](https://docs.polkadot.com/polkadot-protocol/architecture/polkadot-chain/pos-consensus/#block-production-babe){target=\_blank} epoch randomness is based on all the VRF produced by the relay chain validators during a complete [epoch](https://wiki.polkadot.com/general/glossary/#epoch){target=\_blank}.
For more information on the two sources of randomness, how the request and fulfillment process works, and security considerations, please refer to the [Randomness on Moonbeam](/learn/features/randomness/){target=\_blank} page.
Moonbeam provides a randomness precompile, which is a Solidity interface that enables smart contract developers to generate randomness via local VRF or BABE epoch randomness using the Ethereum API. Moonbeam also provides a randomness consumer Solidity contract that your contract must inherit from in order to consume fulfilled randomness requests.
This guide will show you how to use the randomness precompile and randomness consumer contract to create a lottery where the winners will randomly be selected. You'll also learn how to interact with the randomness precompile directly to perform actions such as purging an expired randomness request.
The randomness precompile is located at the following address:
=== "Moonbeam"
```text
{{ networks.moonbeam.precompiles.randomness }}
```
=== "Moonriver"
```text
{{ networks.moonriver.precompiles.randomness }}
```
=== "Moonbase Alpha"
```text
{{ networks.moonbase.precompiles.randomness }}
```
!!! note
There can be some unintended consequences when using the precompiled contracts on Moonbeam. Please refer to the [Security Considerations](/learn/core-concepts/security/){target=\_blank} page for more information.
## The Randomness Solidity Interface {: #the-randomness-interface }
[Randomness.sol](https://github.com/moonbeam-foundation/moonbeam/blob/master/precompiles/randomness/Randomness.sol){target=\_blank} is a Solidity interface that allows developers to interact with the precompile's methods.
??? code "Randomness.sol"
```solidity
// SPDX-License-Identifier: GPL-3.0-only
pragma solidity >=0.8.3;
/// @dev The Randomness contract's address.
address constant RANDOMNESS_ADDRESS = 0x0000000000000000000000000000000000000809;
/// @dev The Randomness contract's instance.
Randomness constant RANDOMNESS_CONTRACT = Randomness(RANDOMNESS_ADDRESS);
/// @dev Maximum number of random words being requested
uint32 constant MAX_RANDOM_WORDS = 100;
/// @dev Minimum number of blocks before a request can be fulfilled for Local VRF Request
uint32 constant MIN_VRF_BLOCKS_DELAY = 2;
/// @dev Maximum number of blocks before a request can be fulfilled for Local VRF Request
uint32 constant MAX_VRF_BLOCKS_DELAY = 2000;
/// @dev The deposit amount needed to request random words. There is 1 deposit per request
uint256 constant REQUEST_DEPOSIT_AMOUNT = 1000000000000000000;
/// @author The Moonbeam Team
/// @title Pallet Randomness Interface
/// @dev The interface through which solidity contracts will interact with Randomness
/// @custom:address 0x0000000000000000000000000000000000000809
interface Randomness {
/// @notice Event emitted when the request has been successfully executed
event FulFillmentSucceeded();
/// @notice Event emitted when the request has failed to execute fulfillment
event FulFillmentFailed();
/// @notice The status of the request
/// @param DoesNotExist The request doesn't exist
/// @param Pending The request cannot be fulfilled yet
/// @param Ready The request is ready to be fulfilled
/// @param Expired The request has expired
enum RequestStatus {
DoesNotExist,
Pending,
Ready,
Expired
}
/// @notice The type of randomness source
/// @param LocalVRF Randomness VRF using the parachain material as seed
/// @param RelayBabeEpoch Randomness VRF using relay material from previous epoch
enum RandomnessSource {
LocalVRF,
RelayBabeEpoch
}
/// @notice The request details
/// @param id The id of the request (is always < 2**64)
/// @param refundAddress The address receiving the left-over fees after the fulfillment
/// @param contractAddress The address of the contract being called back during fulfillment
/// @param fee The amount to set aside to pay for the fulfillment
/// @param gasLimit The gas limit to use for the fulfillment
/// @param salt A string being mixed with the randomness seed to obtain different random words. This should be as unique as possible; using the same salt will lead to same randomness result.
/// @param numWords The number of random words requested (from 1 to MAX_RANDOM_WORDS)
/// @param randomnessSource The type of randomness source used to generate the random words
/// @param fulfillmentBlock The parachain block number at which the request can be fulfilled (for LocalVRF only)
/// @param fulfillmentEpochIndex The relay epoch index at which the request can be fulfilled (for RelayBabeEpoch)
/// @param expirationBlock The parachain block number at which the request expires (for LocalVRF only)
/// @param expirationEpochIndex The relay epoch index at which the request expires (for RelayBabeEpoch)
/// @param status The current status of the request
struct Request {
uint256 id;
address refundAddress;
address contractAddress;
uint256 fee;
uint256 gasLimit;
bytes32 salt;
uint32 numWords;
RandomnessSource randomnessSource;
uint32 fulfillmentBlock;
uint64 fulfillmentEpochIndex;
uint32 expirationBlock;
uint64 expirationEpochIndex;
RequestStatus status;
}
/// Return the current relay epoch index
/// @dev An epoch represents real time and not a block number
/// @dev Currently, time between epoch changes cannot be longer than:
/// @dev - Kusama/Westend/Rococo: 600 relay blocks (1 hour)
/// @dev - Polkadot: 2400 relay blocks (4 hours)
/// @custom:selector 81797566
function relayEpochIndex() external view returns (uint64);
/// Return the deposit required to perform a request
/// @dev Each request will need a deposit.
/// @custom:selector fb7cfdd7
function requiredDeposit() external view returns (uint256);
/// @notice Returns the request status
/// @param requestId The id of the request to check (must be < 2**64)
/// @return status Status of the request
/// @custom:selector d8a4676f
function getRequestStatus(uint256 requestId)
external
view
returns (RequestStatus status);
/// @notice Returns the request or revert
/// @param requestId The id of the request to check (must be < 2**64)
/// @return request The request
/// @custom:selector c58343ef
function getRequest(uint256 requestId)
external
view
returns (Request memory request);
/// @notice Request random words generated from the parachain VRF
/// @dev This is using pseudo-random VRF executed by the collator at the fulfillment
/// @dev Warning:
/// @dev The collator in charge of producing the block at fulfillment can decide to skip
/// @dev producing the block in order to have a different random word generated by the next
/// @dev collator, at the cost of a block reward. It is therefore economically viable to use
/// @dev this randomness source only if the financial reward at stake is lower than the block
/// @dev reward.
/// @dev In order to reduce the risk of a collator being able to predict the random words
/// @dev when the request is performed, it is possible to increase the delay to multiple blocks
/// @dev The higher the delay is, the less likely the collator will be able to know which
/// @dev collator will be in charge of fulfilling the request.
/// @dev Fulfillment is manual and can be executed by anyone (for free) after the given delay
/// @param refundAddress The address receiving the left-over fees after the fulfillment
/// @param fee The amount to set aside to pay for the fulfillment
/// @param gasLimit The gas limit to use for the fulfillment
/// @param salt A string being mixed with the randomness seed to obtain different random words
/// @param numWords The number of random words requested (from 1 to MAX_RANDOM_WORDS)
/// @param delay The number of blocks until the request can be fulfilled (between MIN_DELAY_BLOCKS and MAX_DELAY_BLOCKS)
/// @return requestId The id of the request requestLocalVRFRandomWords
/// @custom:selector 9478430c
function requestLocalVRFRandomWords(
address refundAddress,
uint256 fee,
uint64 gasLimit,
bytes32 salt,
uint8 numWords,
uint64 delay
) external returns (uint256);
/// @notice Request random words generated from the relaychain Babe consensus
/// @dev The random words are generated from the hash of the all the VRF provided by the
/// @dev relaychain validator during 1 epoch.
/// @dev It requires a delay of at least 1 epoch after the current epoch to be unpredictable
/// @dev at the time the request is performed.
/// @dev Warning:
/// @dev The validator (on the relaychain) of the last block of an epoch can decide to skip
/// @dev producing the block in order to choose the previous generated epoch random number
/// @dev at the cost of a relaychain block rewards. It is therefore economically viable to use
/// @dev this randomness source only if the financial reward at stake is lower than the relaychain
/// @dev block reward.
/// @dev (see https://crates.parity.io/pallet_babe/struct.RandomnessFromOneEpochAgo.html)
/// @dev Fulfillment is manual and can be executed by anyone (for free) at
/// @dev the beginning of the 2nd relay epoch following the current one
/// @param refundAddress The address receiving the left-over fees after the fulfillment
/// @param fee Amount to set aside to pay for the fulfillment. Those fees are taken from the contract
/// @param gasLimit Gas limit for the fulfillment
/// @param salt Salt to be mixed with raw randomness to get output
/// @param numWords Number of random words to be returned (limited to MAX_RANDOM_WORDS)
/// @return requestId The id of the request
/// @custom:selector 33c14a63
function requestRelayBabeEpochRandomWords(
address refundAddress,
uint256 fee,
uint64 gasLimit,
bytes32 salt,
uint8 numWords
) external returns (uint256);
/// @dev fulFill the request which will call the contract method "fulfillRandomWords"
/// @dev Fees of the caller are refunded if the request is fulfillable
/// @param requestId Request to be fulfilled (must be < 2**64)
/// @custom:selector 9a91eb0d
function fulfillRequest(uint256 requestId) external;
/// @param requestId Request receiving the additional fees (must be < 2**64)
/// @param feeIncrease Amount to increase
/// @custom:selector d0408a7f
function increaseRequestFee(uint256 requestId, uint256 feeIncrease)
external;
/// @param requestId Request to be purged (must be < 2**64)
/// @custom:selector 1d26cbab
function purgeExpiredRequest(uint256 requestId) external;
}
```
The interface includes functions, constants, events, and enums, as covered in the following sections.
### Functions {: #functions }
The interface includes the following functions:
??? function "**relayEpochIndex**() - returns the current relay epoch index, where an epoch represents real time and not a block number"
=== "Parameters"
None.
=== "Returns"
- `uint256` current relay epoch index
??? function "**requiredDeposit**() - returns the deposit required to perform a randomness request"
=== "Parameters"
None.
=== "Returns"
- `uint256` required deposit amount
??? function "**getRequestStatus**(*uint256* requestId) - returns the request status of a given randomness request"
=== "Parameters"
- `requestId` - uint256 ID of the randomness request
=== "Returns"
- `uint8` status code of the request
??? function "**getRequest**(*uint256* requestId) - returns the request details of a given randomness request"
=== "Parameters"
- `requestId` - uint256 ID of the randomness request
=== "Returns"
- `bool` whether the request is ready or not
- `bool` whether the request is expired or not
- `uint256` deposit amount
- `uint256` fee amount
??? function "**requestLocalVRFRandomWords**(*address* refundAddress, *uint256* fee, *uint64* gasLimit, *bytes32* salt, *uint8* numWords, *uint64* delay) - request random words generated from the parachain VRF"
=== "Parameters"
- `refundAddress` - address receiving the left-over fees after the fulfillment
- `fee` - uint256 amount to set aside to pay for the fulfillment
- `gasLimit` - uint64 gas limit to use for the fulfillment
- `salt` - bytes32 string that is mixed with the randomness seed to obtain different random words
- `numWords` - uint8 number of random words requested, up to the maximum number of random words
- `delay` - uint64 number of blocks that must pass before the request can be fulfilled. This value will need to be between the minimum and maximum number of blocks before a local VRF request can be fulfilled
=== "Returns"
- `uint256` ID of the created request
??? function "**requestRelayBabeEpochRandomWords**(*address* refundAddress, *uint256* fee, *uint64* gasLimit, *bytes32* salt, *uint8* numWords) - request random words generated from the relay chain BABE consensus"
=== "Parameters"
- `refundAddress` - address receiving the left-over fees after the fulfillment
- `fee` - uint256 amount to set aside to pay for the fulfillment
- `gasLimit` - uint64 gas limit to use for the fulfillment
- `salt` - bytes32 string that is mixed with the randomness seed to obtain different random words
- `numWords` - uint8 number of random words requested, up to the maximum number of random words
=== "Returns"
- `uint256` ID of the created request
??? function "**fulfillRequest**(*uint256* requestId) - fulfill the request which will call the consumer contract method [`fulfillRandomWords`](#:~:text=rawFulfillRandomWords(uint256 requestId, uint256[] memory randomWords)). Fees of the caller are refunded if the request is fulfillable"
=== "Parameters"
- `requestId` - uint256 ID of the randomness request
=== "Returns"
None.
??? function "**increaseRequestFee**(*uint256* requestId, *uint256* feeIncrease) - increases the fee associated with a given randomness request. This is needed if the gas price increases significantly before the request is fulfilled"
=== "Parameters"
- `requestId` - uint256 ID of the randomness request
- `feeIncrease` - uint256 amount to increase fees by
=== "Returns"
None.
??? function "**purgeExpiredRequest**(*uint256* requestId) - removes a given expired request from storage and transfers the request fees to the caller and the deposit back to the original requester"
=== "Parameters"
- `requestId` - uint256 ID of the randomness request
=== "Returns"
None.
### Constants {: #constants }
The interface includes the following constants:
- **maxRandomWords** - the maximum number of random words being requested
- **minBlockDelay** - the minimum number of blocks before a request can be fulfilled for local VRF requests
- **maxBlockDelay** - the maximum number of blocks before a request can be fulfilled for local VRF requests
- **deposit** - the deposit amount needed to request random words. There is one deposit per request
=== "Moonbeam"
| Variable | Value |
|:----------------------:|:---------------------------------------------------------------:|
| MAX_RANDOM_WORDS | {{ networks.moonbeam.randomness.max_random_words }} words |
| MIN_VRF_BLOCKS_DELAY | {{ networks.moonbeam.randomness.min_vrf_blocks_delay }} blocks |
| MAX_VRF_BLOCKS_DELAY | {{ networks.moonbeam.randomness.max_vrf_blocks_delay }} blocks |
| REQUEST_DEPOSIT_AMOUNT | {{ networks.moonbeam.randomness.req_deposit_amount.glmr }} GLMR |
=== "Moonriver"
| Variable | Value |
|:----------------------:|:----------------------------------------------------------------:|
| MAX_RANDOM_WORDS | {{ networks.moonriver.randomness.max_random_words }} words |
| MIN_VRF_BLOCKS_DELAY | {{ networks.moonriver.randomness.min_vrf_blocks_delay }} blocks |
| MAX_VRF_BLOCKS_DELAY | {{ networks.moonriver.randomness.max_vrf_blocks_delay }} blocks |
| REQUEST_DEPOSIT_AMOUNT | {{ networks.moonriver.randomness.req_deposit_amount.movr }} MOVR |
=== "Moonbase Alpha"
| Variable | Value |
|:----------------------:|:--------------------------------------------------------------:|
| MAX_RANDOM_WORDS | {{ networks.moonbase.randomness.max_random_words }} words |
| MIN_VRF_BLOCKS_DELAY | {{ networks.moonbase.randomness.min_vrf_blocks_delay }} blocks |
| MAX_VRF_BLOCKS_DELAY | {{ networks.moonbase.randomness.max_vrf_blocks_delay }} blocks |
| REQUEST_DEPOSIT_AMOUNT | {{ networks.moonbase.randomness.req_deposit_amount.dev }} DEV |
### Events {: #events }
The interface includes the following events:
- **FulfillmentSucceeded**() - emitted when the request has been successfully executed
- **FulfillmentFailed**() - emitted when the request has failed to execute fulfillment
### Enums {: #enums }
The interface includes the following enums:
- **RequestStatus** - the status of the request, which can be `DoesNotExist` (0), `Pending` (1), `Ready` (2), or `Expired` (3)
- **RandomnessSource** - the type of the randomness source, which can be `LocalVRF` (0) or `RelayBabeEpoch` (1)
## The Randomness Consumer Solidity Interface {: #randomness-consumer-solidity-interface }
The [`RandomnessConsumer.sol`](https://github.com/moonbeam-foundation/moonbeam/blob/4e2a5785424be6faa01cd14e90155d9d2ec734ee/precompiles/randomness/RandomnessConsumer.sol){target=\_blank} Solidity interface makes it easy for smart contracts to interact with the randomness precompile. Using the randomness consumer ensures the fulfillment comes from the randomness precompile.
??? code "RandomnessConsumer.sol"
```solidity
// SPDX-License-Identifier: GPL-3.0-only
pragma solidity >=0.8.3;
/// @dev The Randomness contract's address.
address constant RANDOMNESS_ADDRESS = 0x0000000000000000000000000000000000000809;
/// @dev The Randomness contract's instance.
Randomness constant RANDOMNESS_CONTRACT = Randomness(RANDOMNESS_ADDRESS);
/// @dev Maximum number of random words being requested
uint32 constant MAX_RANDOM_WORDS = 100;
/// @dev Minimum number of blocks before a request can be fulfilled for Local VRF Request
uint32 constant MIN_VRF_BLOCKS_DELAY = 2;
/// @dev Maximum number of blocks before a request can be fulfilled for Local VRF Request
uint32 constant MAX_VRF_BLOCKS_DELAY = 2000;
/// @dev The deposit amount needed to request random words. There is 1 deposit per request
uint256 constant REQUEST_DEPOSIT_AMOUNT = 1000000000000000000;
/// @author The Moonbeam Team
/// @title Pallet Randomness Interface
/// @dev The interface through which solidity contracts will interact with Randomness
/// @custom:address 0x0000000000000000000000000000000000000809
interface Randomness {
/// @notice Event emitted when the request has been successfully executed
event FulFillmentSucceeded();
/// @notice Event emitted when the request has failed to execute fulfillment
event FulFillmentFailed();
/// @notice The status of the request
/// @param DoesNotExist The request doesn't exist
/// @param Pending The request cannot be fulfilled yet
/// @param Ready The request is ready to be fulfilled
/// @param Expired The request has expired
enum RequestStatus {
DoesNotExist,
Pending,
Ready,
Expired
}
/// @notice The type of randomness source
/// @param LocalVRF Randomness VRF using the parachain material as seed
/// @param RelayBabeEpoch Randomness VRF using relay material from previous epoch
enum RandomnessSource {
LocalVRF,
RelayBabeEpoch
}
/// @notice The request details
/// @param id The id of the request (is always < 2**64)
/// @param refundAddress The address receiving the left-over fees after the fulfillment
/// @param contractAddress The address of the contract being called back during fulfillment
/// @param fee The amount to set aside to pay for the fulfillment
/// @param gasLimit The gas limit to use for the fulfillment
/// @param salt A string being mixed with the randomness seed to obtain different random words. This should be as unique as possible; using the same salt will lead to same randomness result.
/// @param numWords The number of random words requested (from 1 to MAX_RANDOM_WORDS)
/// @param randomnessSource The type of randomness source used to generate the random words
/// @param fulfillmentBlock The parachain block number at which the request can be fulfilled (for LocalVRF only)
/// @param fulfillmentEpochIndex The relay epoch index at which the request can be fulfilled (for RelayBabeEpoch)
/// @param expirationBlock The parachain block number at which the request expires (for LocalVRF only)
/// @param expirationEpochIndex The relay epoch index at which the request expires (for RelayBabeEpoch)
/// @param status The current status of the request
struct Request {
uint256 id;
address refundAddress;
address contractAddress;
uint256 fee;
uint256 gasLimit;
bytes32 salt;
uint32 numWords;
RandomnessSource randomnessSource;
uint32 fulfillmentBlock;
uint64 fulfillmentEpochIndex;
uint32 expirationBlock;
uint64 expirationEpochIndex;
RequestStatus status;
}
/// Return the current relay epoch index
/// @dev An epoch represents real time and not a block number
/// @dev Currently, time between epoch changes cannot be longer than:
/// @dev - Kusama/Westend/Rococo: 600 relay blocks (1 hour)
/// @dev - Polkadot: 2400 relay blocks (4 hours)
/// @custom:selector 81797566
function relayEpochIndex() external view returns (uint64);
/// Return the deposit required to perform a request
/// @dev Each request will need a deposit.
/// @custom:selector fb7cfdd7
function requiredDeposit() external view returns (uint256);
/// @notice Returns the request status
/// @param requestId The id of the request to check (must be < 2**64)
/// @return status Status of the request
/// @custom:selector d8a4676f
function getRequestStatus(uint256 requestId)
external
view
returns (RequestStatus status);
/// @notice Returns the request or revert
/// @param requestId The id of the request to check (must be < 2**64)
/// @return request The request
/// @custom:selector c58343ef
function getRequest(uint256 requestId)
external
view
returns (Request memory request);
/// @notice Request random words generated from the parachain VRF
/// @dev This is using pseudo-random VRF executed by the collator at the fulfillment
/// @dev Warning:
/// @dev The collator in charge of producing the block at fulfillment can decide to skip
/// @dev producing the block in order to have a different random word generated by the next
/// @dev collator, at the cost of a block reward. It is therefore economically viable to use
/// @dev this randomness source only if the financial reward at stake is lower than the block
/// @dev reward.
/// @dev In order to reduce the risk of a collator being able to predict the random words
/// @dev when the request is performed, it is possible to increase the delay to multiple blocks
/// @dev The higher the delay is, the less likely the collator will be able to know which
/// @dev collator will be in charge of fulfilling the request.
/// @dev Fulfillment is manual and can be executed by anyone (for free) after the given delay
/// @param refundAddress The address receiving the left-over fees after the fulfillment
/// @param fee The amount to set aside to pay for the fulfillment
/// @param gasLimit The gas limit to use for the fulfillment
/// @param salt A string being mixed with the randomness seed to obtain different random words
/// @param numWords The number of random words requested (from 1 to MAX_RANDOM_WORDS)
/// @param delay The number of blocks until the request can be fulfilled (between MIN_DELAY_BLOCKS and MAX_DELAY_BLOCKS)
/// @return requestId The id of the request requestLocalVRFRandomWords
/// @custom:selector 9478430c
function requestLocalVRFRandomWords(
address refundAddress,
uint256 fee,
uint64 gasLimit,
bytes32 salt,
uint8 numWords,
uint64 delay
) external returns (uint256);
/// @notice Request random words generated from the relaychain Babe consensus
/// @dev The random words are generated from the hash of the all the VRF provided by the
/// @dev relaychain validator during 1 epoch.
/// @dev It requires a delay of at least 1 epoch after the current epoch to be unpredictable
/// @dev at the time the request is performed.
/// @dev Warning:
/// @dev The validator (on the relaychain) of the last block of an epoch can decide to skip
/// @dev producing the block in order to choose the previous generated epoch random number
/// @dev at the cost of a relaychain block rewards. It is therefore economically viable to use
/// @dev this randomness source only if the financial reward at stake is lower than the relaychain
/// @dev block reward.
/// @dev (see https://crates.parity.io/pallet_babe/struct.RandomnessFromOneEpochAgo.html)
/// @dev Fulfillment is manual and can be executed by anyone (for free) at
/// @dev the beginning of the 2nd relay epoch following the current one
/// @param refundAddress The address receiving the left-over fees after the fulfillment
/// @param fee Amount to set aside to pay for the fulfillment. Those fees are taken from the contract
/// @param gasLimit Gas limit for the fulfillment
/// @param salt Salt to be mixed with raw randomness to get output
/// @param numWords Number of random words to be returned (limited to MAX_RANDOM_WORDS)
/// @return requestId The id of the request
/// @custom:selector 33c14a63
function requestRelayBabeEpochRandomWords(
address refundAddress,
uint256 fee,
uint64 gasLimit,
bytes32 salt,
uint8 numWords
) external returns (uint256);
/// @dev fulFill the request which will call the contract method "fulfillRandomWords"
/// @dev Fees of the caller are refunded if the request is fulfillable
/// @param requestId Request to be fulfilled (must be < 2**64)
/// @custom:selector 9a91eb0d
function fulfillRequest(uint256 requestId) external;
/// @param requestId Request receiving the additional fees (must be < 2**64)
/// @param feeIncrease Amount to increase
/// @custom:selector d0408a7f
function increaseRequestFee(uint256 requestId, uint256 feeIncrease)
external;
/// @param requestId Request to be purged (must be < 2**64)
/// @custom:selector 1d26cbab
function purgeExpiredRequest(uint256 requestId) external;
}
```
The consumer interface includes the following functions:
- **fulfillRandomWords**(*uint256* requestId, *uint256[] memory* randomWords) - handles the VRF response for a given request. This method is triggered by a call to `rawFulfillRandomWords`
- **rawFulfillRandomWords**(*uint256* requestId, *uint256[] memory* randomWords) - executed when the [`fulfillRequest` function](#:~:text=fulfillRequest(uint256 requestId)) of the randomness precompile is called. The origin of the call is validated, ensuring the randomness precompile is the origin, and then the `fulfillRandomWords` method is called
## Request & Fulfill Process {: #request-and-fulfill-process }
To consume randomness, you must have a contract that does the following:
- Imports the `Randomness.sol` precompile and `RandomnessConsumer.sol` interface
- Inherits from the `RandomnessConsumer.sol` interface
- Requests randomness through the precompile's [`requestLocalVRFRandomWords` method](#:~:text=requestLocalVRFRandomWords) or [`requestRelayBabeEpochRandomWords` method](#:~:text=requestRelayBabeEpochRandomWords), depending on the source of randomness you want to use
- Requests fulfillment through the precompile's [`fulfillRequest` method](#:~:text=fulfillRequest)
- Consumes randomness through a `fulfillRandomWords` method with the same [signature as the `fulfillRandomWords` method](#:~:text=fulfillRandomWords(uint256 requestId, uint256[] memory randomWords)) of the `RandomnessConsumer.sol` contract
When randomness is requested through the precompile's `requestLocalVRFRandomWords` or `requestRelayBabeEpochRandomWords` method, a fee is set aside to pay for the fulfillment of the request. When using local VRF, to increase unpredictability, a specified delay period (in blocks) must pass before the request can be fulfilled. At the very least, the delay period must be greater than one block. For BABE epoch randomness, you do not need to specify a delay but can fulfill the request at the beginning of the 2nd epoch following the current one.
After the delay, fulfillment of the request can be manually executed by anyone through the `fulfillRequest` method using the fee that was initially set aside for the request.
When fulfilling the randomness request via the precompile's `fulfillRequest` method, the [`rawFulfillRandomWords`](#:~:text=rawFulfillRandomWords(uint256 requestId, uint256[] memory randomWords)) function in the `RandomnessConsumer.sol` contract will be called, which will verify that the sender is the randomness precompile. From there, [`fulfillRandomWords`](#:~:text=fulfillRandomWords(uint256 requestId, uint256[] memory randomWords)) is called and the requested number of random words are computed using the current block's randomness result and a given salt and returned. If the fulfillment was successful, the [`FulfillmentSucceeded` event](#:~:text=FulfillmentSucceeded) will be emitted; otherwise the [`FulfillmentFailed` event](#:~:text=FulfillmentFailed) will be emitted.
For fulfilled requests, the cost of execution will be refunded from the request fee to the caller of `fulfillRequest`. Then any excess fees and the request deposit are transferred to the specified refund address.
Your contract's `fulfillRandomWords` callback is responsible for handling the fulfillment. For example, in a lottery contract, the callback would use the random words to choose a winner and payout the winnings.
If a request expires it can be purged through the precompile's [`purgeExpiredRequest` function](/builders/ethereum/precompiles/features/randomness/#:~:text=purgeExpiredRequest){target=\_blank}. When this function is called the request fee is paid out to the caller and the deposit will be returned to the original requester.
The happy path for a randomness request is shown in the following diagram:
## Generate a Random Number using the Randomness Precompile {: #interact-with-the-solidity-interfaces }
In the following sections of this tutorial, you'll learn how to create a smart contract that generates a random number using the Randomness Precompile and the Randomness Consumer. If you want to just explore some of the functions of the Randomness Precompile, you can skip ahead to the [Use Remix to Interact Directly with the Randomness Precompile](#interact-directly) section.
### Checking Prerequisites {: #checking-prerequisites }
For this guide, you will need to have the following:
- [MetaMask installed and connected to Moonbase Alpha](/tokens/connect/metamask/){target=\_blank}
- An account funded with DEV tokens.
You can get DEV tokens for testing on Moonbase Alpha once every 24 hours from the [Moonbase Alpha Faucet](https://faucet.moonbeam.network){target=\_blank}
### Create a Random Number Generator Contract {: #create-random-generator-contract }
The contract that will be created in this section includes the functions that you'll need at a bare minimum to request randomness and consume the results from fulfilling randomness requests.
**This contract is for educational purposes only and is not meant for production use.**
The contract will include the following functions:
- A constructor that accepts the deposit required to request randomness
- A function that submits randomness requests. For this example, the source of randomness will be local VRF, but you can easily modify the contract to use BABE epoch randomness
- A function that fulfills the request by calling the `fulfillRequest` function of the Randomness Precompile. This function will be `payable` as the fulfillment fee will need to be submitted at the time of the randomness request
- A function that consumes the fulfillment results. This function's signature must match the [signature of the `fulfillRandomWords` method](#:~:text=fulfillRandomWords(uint256 requestId, uint256[] memory randomWords)) of the Randomness Consumer contract
Without further ado, the contract is as follows:
```solidity
// SPDX-License-Identifier: GPL-3.0-only
pragma solidity >=0.8.0;
import "https://github.com/moonbeam-foundation/moonbeam/blob/master/precompiles/randomness/Randomness.sol";
import {RandomnessConsumer} from "https://github.com/moonbeam-foundation/moonbeam/blob/master/precompiles/randomness/RandomnessConsumer.sol";
contract RandomNumber is RandomnessConsumer {
// The Randomness Precompile Interface
Randomness public randomness =
Randomness(0x0000000000000000000000000000000000000809);
// Variables required for randomness requests
uint256 public requiredDeposit = randomness.requiredDeposit();
uint64 public FULFILLMENT_GAS_LIMIT = 100000;
// The fee can be set to any value as long as it is enough to cover
// the fulfillment costs. Any leftover fees will be refunded to the
// refund address specified in the requestRandomness function below.
// 150 Gwei should be sufficient for all networks.
// For Moonbase Alpha and Moonriver, you can specify 5 Gwei
uint256 public MIN_FEE = FULFILLMENT_GAS_LIMIT * 150 gwei;
uint32 public VRF_BLOCKS_DELAY = MIN_VRF_BLOCKS_DELAY;
bytes32 public SALT_PREFIX = "INSERT_ANY_STRING_FOR_SALT";
// Storage variables for the current request
uint256 public requestId;
uint256[] public random;
constructor() payable RandomnessConsumer() {
// Because this contract can only perform 1 random request at a time,
// We only need to have 1 required deposit
require(msg.value >= requiredDeposit);
}
function requestRandomness() public payable {
// Make sure that the value sent is enough
require(msg.value >= MIN_FEE);
// Request local VRF randomness
requestId = randomness.requestLocalVRFRandomWords(
msg.sender, // Refund address
msg.value, // Fulfillment fee
FULFILLMENT_GAS_LIMIT, // Gas limit for the fulfillment
SALT_PREFIX ^ bytes32(requestId++), // A salt to generate unique results
1, // Number of random words
VRF_BLOCKS_DELAY // Delay before request can be fulfilled
);
}
function fulfillRequest() public {
randomness.fulfillRequest(requestId);
}
function fulfillRandomWords(
uint256, // requestId
uint256[] memory randomWords
) internal override {
// Save the randomness results
random = randomWords;
}
}
```
As you can see, there are also some constants in the contract that can be edited as you see fit, especially the `SALT_PREFIX` which can be used to produce unique results.
In the following sections, you'll use Remix to deploy and interact with the contract.
### Remix Set Up {: #remix-set-up}
To add the contract to Remix and follow along with this section of the tutorial, you will need to create a new file named `RandomnessNumber.sol` in Remix and paste the `RandomNumber` contract into the file.
### Compile & Deploy the Random Number Generator Contract {: #compile-deploy-random-number }
To compile the `RandomNumber.sol` contract in Remix, you'll need to take the following steps:
1. Click on the **Compile** tab, second from top
2. Click on the **Compile RandomNumber.sol** button
If the contract was compiled successfully, you will see a green checkmark next to the **Compile** tab.
Now you can go ahead and deploy the contract by taking these steps:
1. Click on the **Deploy and Run** tab directly below the **Compile** tab
2. Make sure **Injected Provider - Metamask** is selected in the **ENVIRONMENT** dropdown. Once you select **Injected Provider - Metamask**, you might be prompted by MetaMask to connect your account to Remix
3. Make sure the correct account is displayed under **ACCOUNT**
4. Enter the deposit amount in the **VALUE** field, which is `{{ networks.moonbase.randomness.req_deposit_amount.wei }}` in Wei (`{{ networks.moonbase.randomness.req_deposit_amount.dev }}` Ether)
5. Ensure **RandomNumber - RandomNumber.sol** is selected in the **CONTRACT** dropdown
6. Click **Deploy**
7. Confirm the MetaMask transaction that appears by clicking **Confirm**
The **RANDOMNUMBER** contract will appear in the list of **Deployed Contracts**.
### Submit a Request to Generate a Random Number {: #request-randomness }
To request randomness, you're going to use the `requestRandomness` function of the contract, which will require you to submit a deposit as defined in the Randomness Precompile. You can submit the randomness request and pay the deposit by taking these steps:
1. Enter an amount in the **VALUE** field for the fulfillment fee, it must be equal to or greater than the minimum fee specified in the `RandomNumber` contract, which is `15000000` Gwei.
2. Expand the **RANDOMNUMBER** contract
3. Click on the **requestRandomness** button
4. Confrm the transaction in MetaMask
Once you submit the transaction, the `requestId` will be updated with the ID of the request. You can use the `requestId` call of the Random Number contract to get the request ID and the `getRequestStatus` function of the Randomness Precompile to check the status of this request ID.
### Fulfill the Request and Save the Random Number {: #fulfill-request-save-number }
After submitting the randomness request, you'll need to wait for the duration of the delay before you can fulfill the request. For the `RandomNumber.sol` contract, the delay was set to the minimum block delay defined in the Randomness Precompile, which is {{ networks.moonbase.randomness.min_vrf_blocks_delay }} blocks. You must also fulfill the request before it is too late. For local VRF, the request expires after {{ networks.moonbase.randomness.block_expiration }} blocks and for BABE epoch randomness, the request expires after {{ networks.moonbase.randomness.epoch_expiration }} epochs.
Assuming you've waited for the minimum blocks (or epochs if you're using BABE epoch randomness) to pass and the request hasn't expired, you can fulfill the request by taking the following steps:
1. Click on the **fulfillRequest** button
2. Confirming the transaction in MetaMask
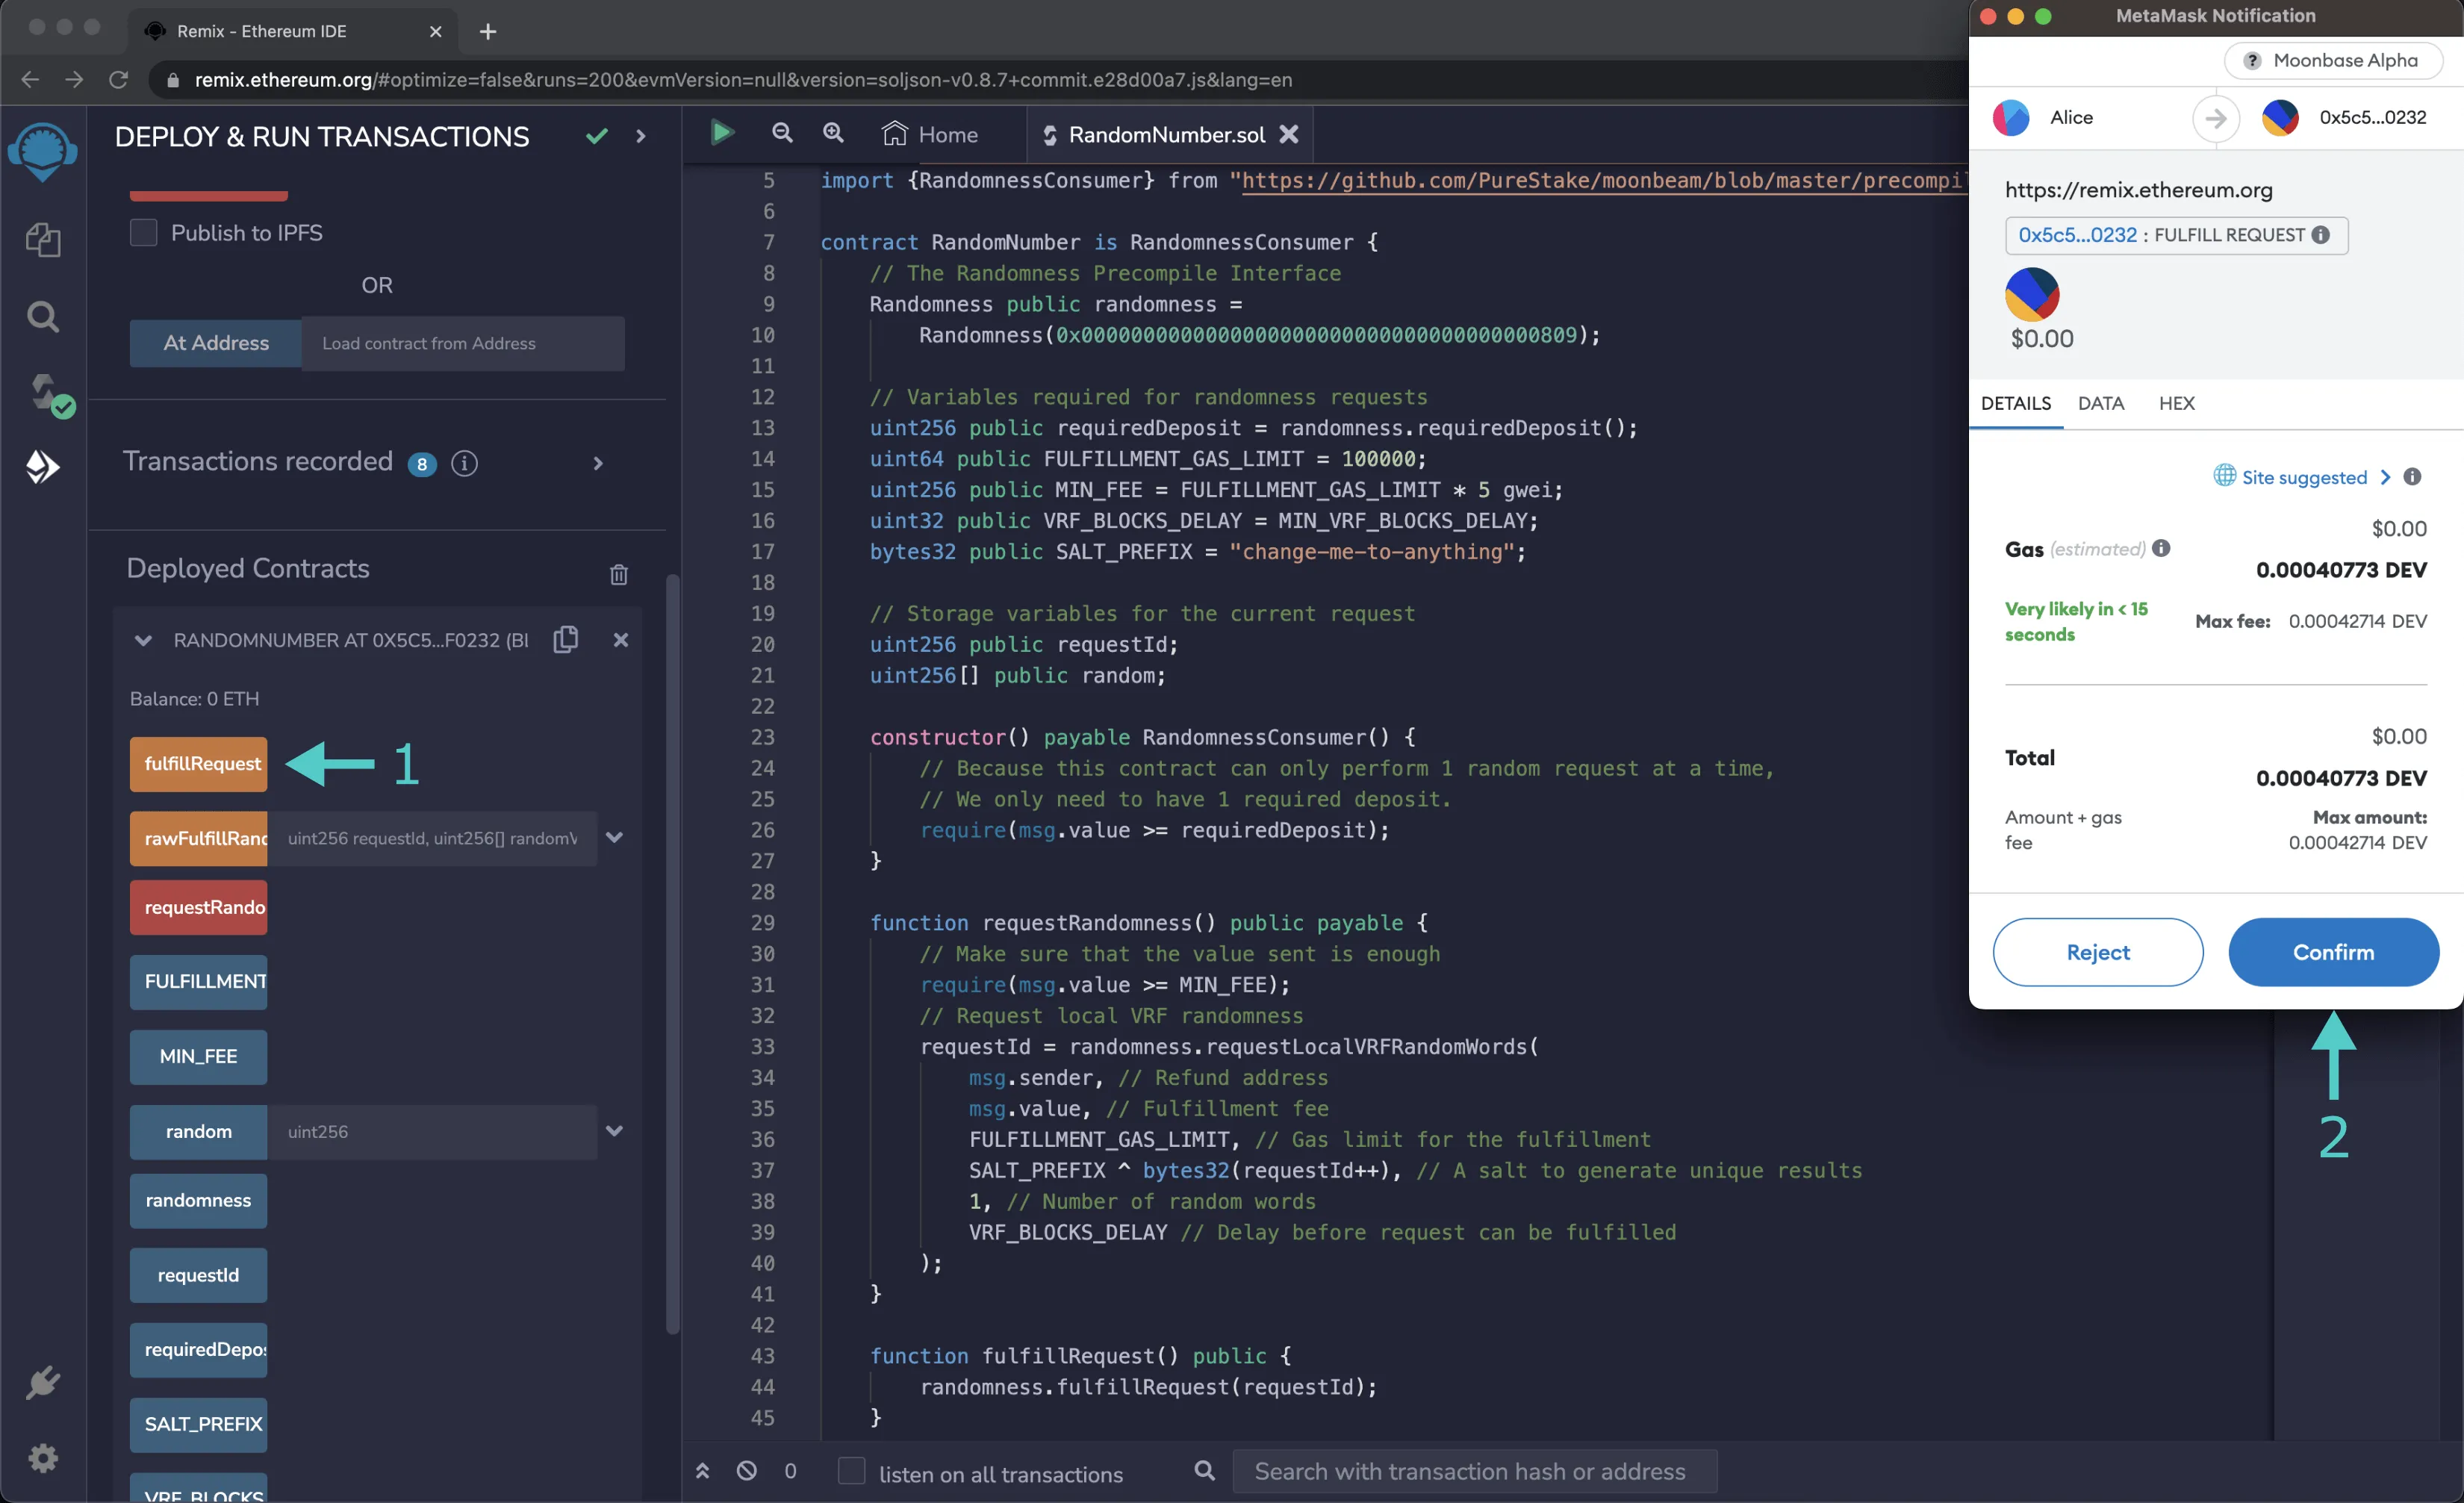
Once the request has been fulfilled, you can check the random number that was generated:
1. Expand the **random** function
2. Since the contract only requested one random word, you can get the random number by accessing the `0` index of the `random` array
3. Click **call**
4. The random number will appear below the **call** button
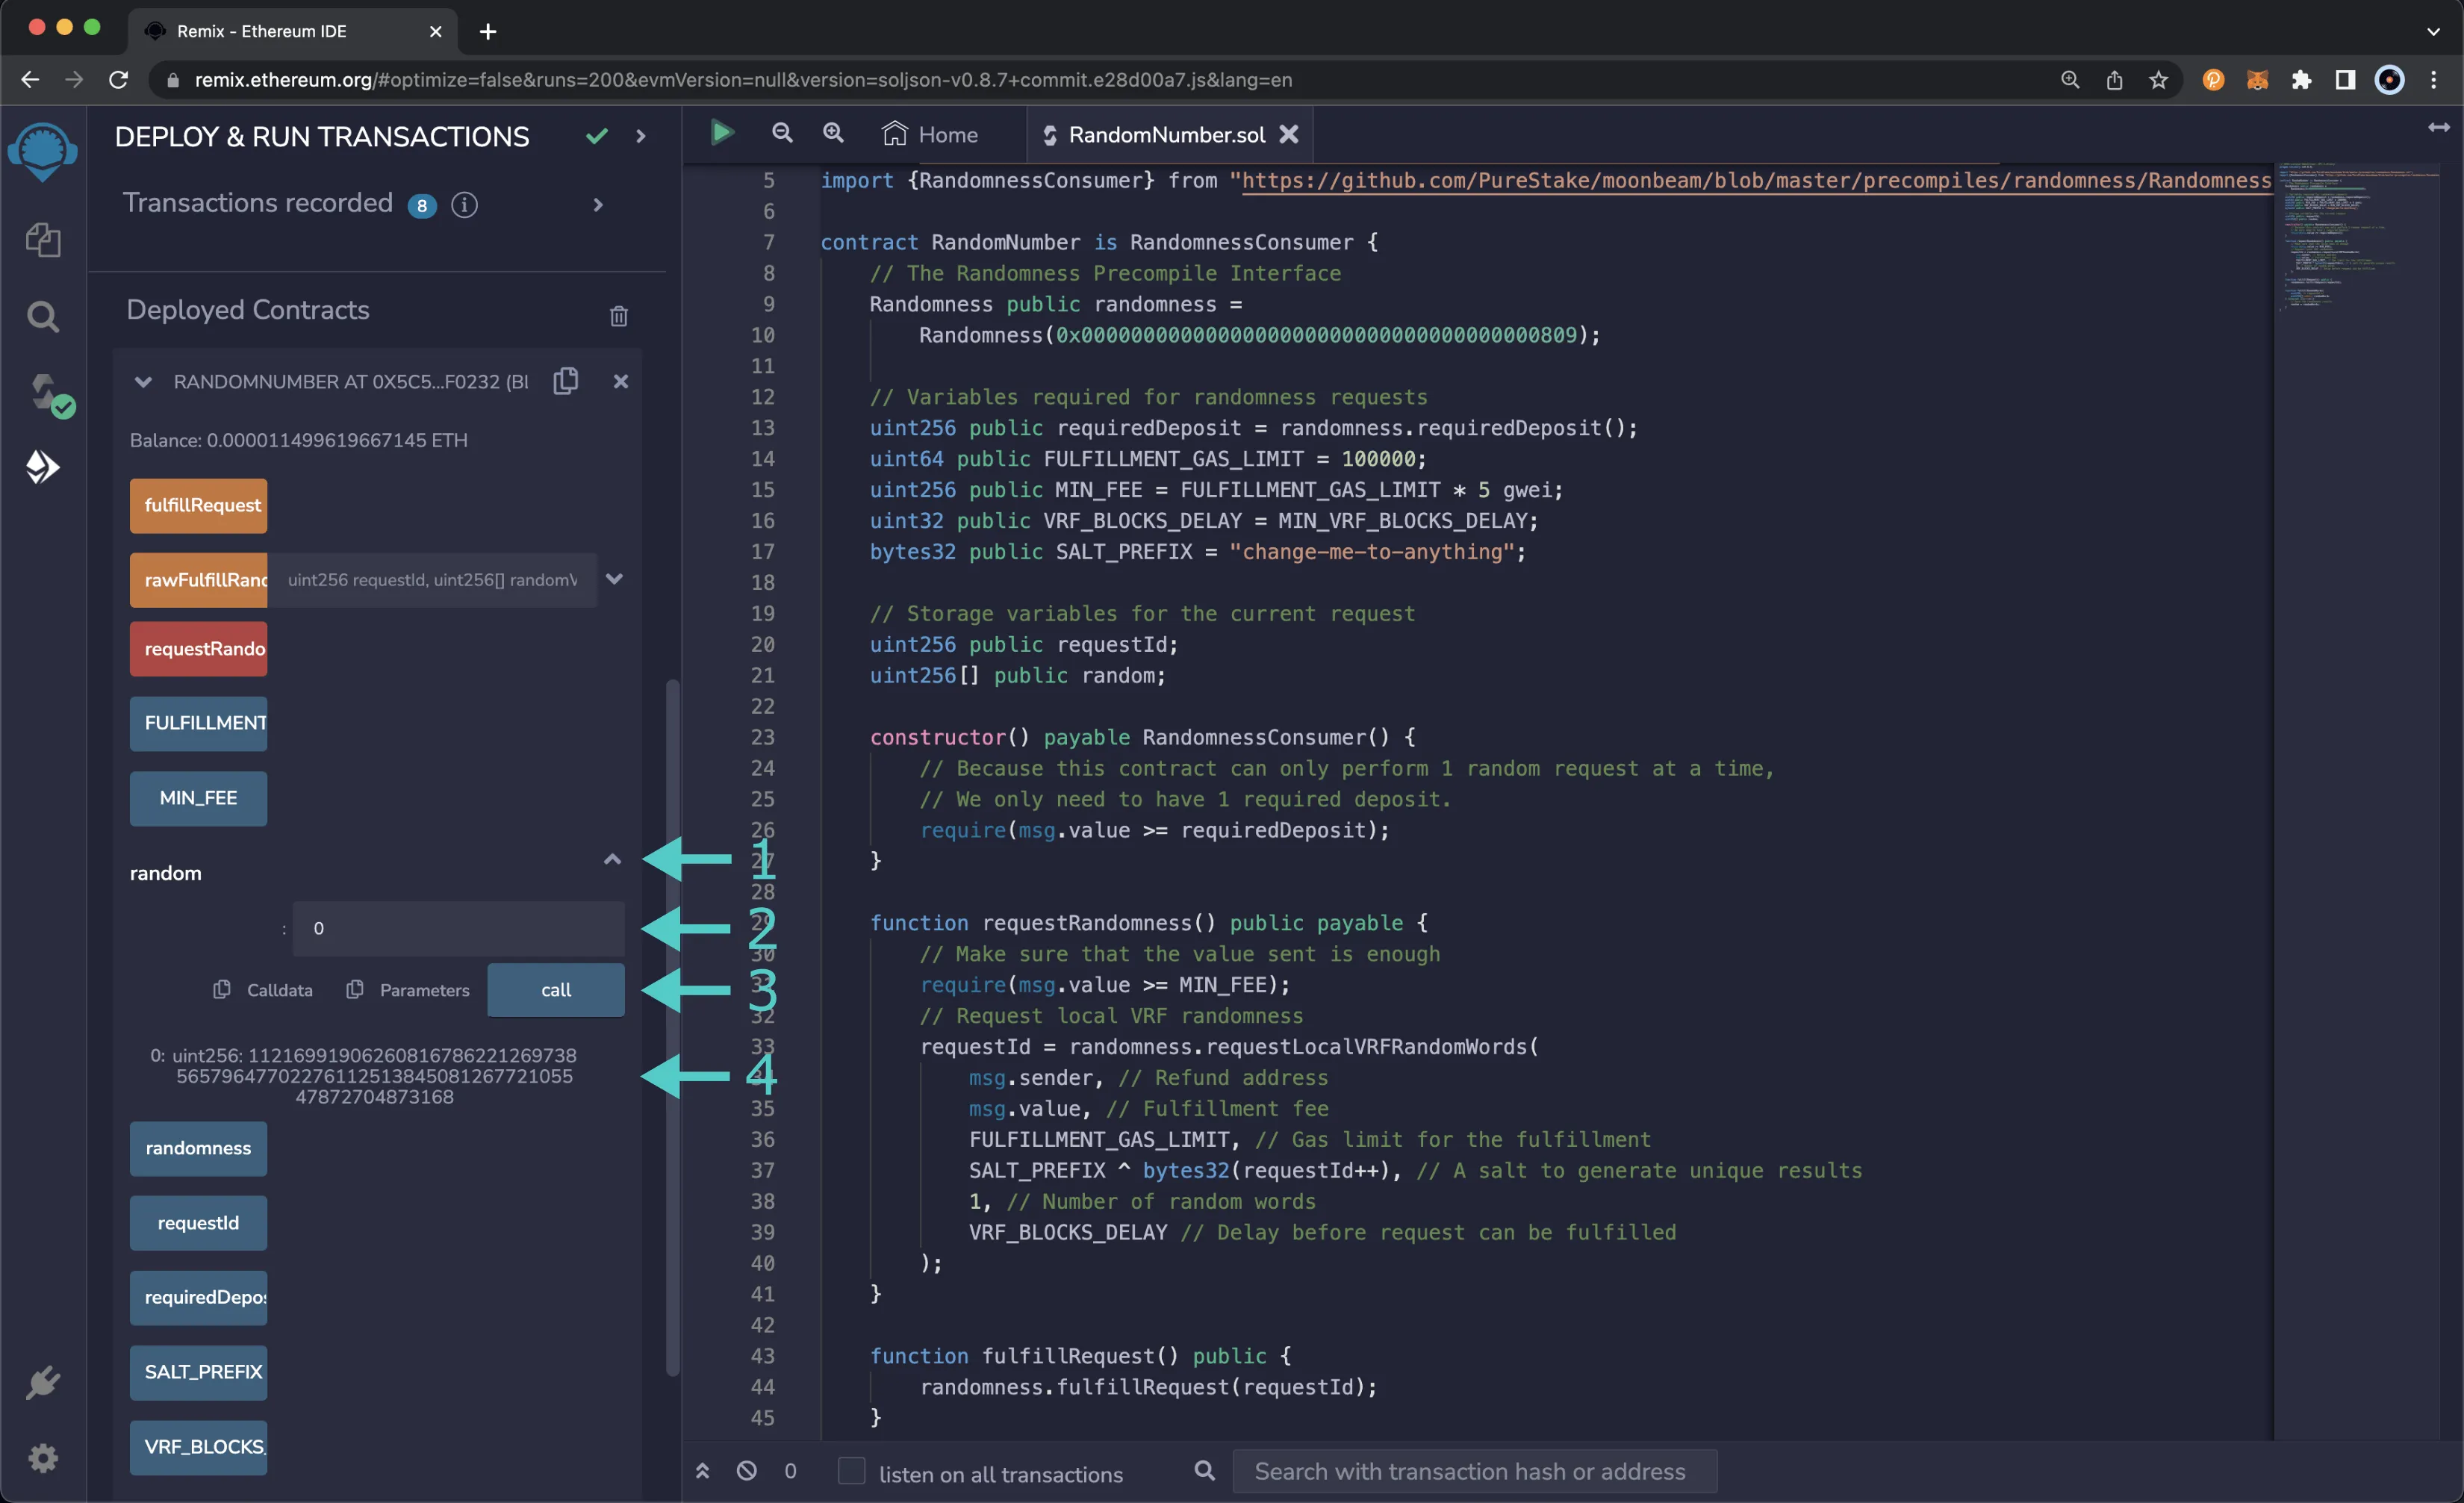
Upon successful fulfillment, the excess fees and deposit will be sent to the address specified as the refund address.
If the request happened to expire before it could be fulfilled, you can interact with the Randomness Precompile directly to purge the request and unlock the deposit and fees. Please refer to the following section for instructions on how to do this.
## Use Remix to Interact Directly with the Randomness Precompile {: #interact-directly }
In addition to interacting with the randomness precompile via a smart contract, you can also interact with it directly in Remix to perform operations such as creating a randomness request, checking on the status of a request, and purging expired requests. Remember, you need to have a contract that inherits from the consumer contract in order to fulfill requests, as such if you fulfill a request using the precompile directly there will be no way to consume the results.
### Remix Set Up {: #remix-set-up }
To add the interfaces to Remix and follow along with this section of the tutorial, you will need to:
1. Get a copy of [`Randomness.sol`](https://github.com/moonbeam-foundation/moonbeam/blob/master/precompiles/randomness/Randomness.sol){target=\_blank}
2. Paste the file contents into a Remix file named **Randomness.sol**
### Compile & Access the Randomness Precompile {: #compile-randomness }
Next, you will need to compile the `Randomness.sol` file in Remix. To get started, make sure you have the **Randomness.sol** file open and take the following steps:
1. Click on the **Compile** tab, second from top
2. To compile the contract, click on **Compile Randomness.sol**
If the contract was compiled successfully, you will see a green checkmark next to the **Compile** tab.
Instead of deploying the randomness precompile, you will access the interface given the address of the precompiled contract:
1. Click on the **Deploy and Run** tab directly below the **Compile** tab in Remix. Please note the precompiled contract is already deployed
2. Make sure **Injected Provider - Metamask** is selected in the **ENVIRONMENT** dropdown. Once selected, you might be prompted by MetaMask to connect your account to Remix
3. Make sure the correct account is displayed under **ACCOUNT**
4. Ensure **Randomness - Randomness.sol** is selected in the **CONTRACT** dropdown. Since this is a precompiled contract, there is no need to deploy any code. Instead we are going to provide the address of the precompile in the **At Address** Field
5. Provide the address of the batch precompile: `{{ networks.moonbase.precompiles.randomness }}` and click **At Address**
The **RANDOMNESS** precompile will appear in the list of **Deployed Contracts**. You will use this to fulfill the randomness request made from the lottery contract later on in this tutorial.
### Get Request Status & Purge Expired Request {: #get-request-status-and-purge }
Anyone can purge expired requests. You do not need to be the one who requested the randomness to be able to purge it. When you purge an expired request, the request fees will be transferred to you, and the deposit for the request will be returned to the original requester.
To purge a request, first you have to make sure that the request has expired. To do so, you can verify the status of a request using the `getRequestStatus` function of the precompile. The number that is returned from this call corresponds to the index of the value in the [`RequestStatus`](#enums) enum. As a result, you'll want to verify the number returned is `3` for `Expired`.
Once you've verified that the request is expired, you can call the `purgeExpiredRequest` function to purge the request.
To verify and purge a request, you can take the following steps:
1. Expand the **RANDOMNESS** contract
2. Enter the request ID of the request you want to verify has expired and click on **getRequestStatus**
3. The response will appear just underneath the function. Verify that you received a `3`
4. Expand the **purgeExpiredRequest** function and enter the request ID
5. Click on **transact**
6. MetaMask will pop-up and you can confirm the transaction

Once the transaction goes through, you can verify the request has been purged by calling the **getRequestStatus** function again with the same request ID. You should receive a status of `0`, or `DoesNotExist`. You can also expect the amount of the request fees to be transferred to your account.
--- END CONTENT ---
Doc-Content: https://docs.moonbeam.network/builders/ethereum/precompiles/features/staking/
--- BEGIN CONTENT ---
---
title: Staking Precompile Contract
description: Unlock the potential of staking with a specialized precompiled contract designed to streamline and optimize participation in Moonbeam.
keywords: solidity, ethereum, staking, moonbeam, precompiled, contracts
categories: Precompiles, Ethereum Toolkit
---
# Interacting with the Staking Precompile
## Introduction {: #introduction }
Moonbeam uses a Delegated Proof of Stake system through the [Parachain Staking](/builders/substrate/interfaces/features/staking/){target=\_blank} Pallet, allowing token holders (delegators) to express exactly which collator candidates they would like to support and with what quantity of stake. The design of the Parachain Staking Pallet is such that it enforces shared risk/reward on chain between delegators and candidates. For general information on staking, such as general terminology, staking variables, and more, please refer to the [Staking on Moonbeam](/learn/features/staking/){target=\_blank} page.
The staking module is coded in Rust and it is part of a pallet that is normally not accessible from the Ethereum side of Moonbeam. However, a staking precompile allows developers to access the staking features using the Ethereum API in a precompiled contract located at address:
=== "Moonbeam"
```text
{{networks.moonbeam.precompiles.staking}}
```
=== "Moonriver"
```text
{{networks.moonriver.precompiles.staking}}
```
=== "Moonbase Alpha"
```text
{{networks.moonbase.precompiles.staking}}
```
This guide will cover the available methods in the staking precompile interface. In addition, it will show you how to interact with the Parachain Staking Pallet through the staking precompile and the Ethereum API. The examples in this guide are done on Moonbase Alpha, but they can be adapted for Moonbeam or Moonriver.
!!! note
There can be some unintended consequences when using the precompiled contracts on Moonbeam. Please refer to the [Security Considerations](/learn/core-concepts/security/){target=\_blank} page for more information.
## Exit Delays {: #exit-delays }
Some of the Parachain Staking Pallet extrinsics include exit delays that you must wait before the request can be executed. The exit delays to note are as follows:
=== "Moonbeam"
| Variable | Value |
|:-----------------------:|:-----------------------------------------------------------------------------------------------------------------------------------------------------:|
| Decrease candidate bond | {{ networks.moonbeam.collator_timings.can_bond_less.rounds }} rounds ({{ networks.moonbeam.collator_timings.can_bond_less.hours }} hours) |
| Decrease delegator bond | {{ networks.moonbeam.delegator_timings.del_bond_less.rounds }} rounds ({{ networks.moonbeam.delegator_timings.del_bond_less.hours }} hours) |
| Revoke delegation | {{ networks.moonbeam.delegator_timings.revoke_delegations.rounds }} rounds ({{ networks.moonbeam.delegator_timings.revoke_delegations.hours }} hours) |
| Leave candidates | {{ networks.moonbeam.collator_timings.leave_candidates.rounds }} rounds ({{ networks.moonbeam.collator_timings.leave_candidates.hours }} hours) |
| Leave delegators | {{ networks.moonbeam.delegator_timings.leave_delegators.rounds }} rounds ({{ networks.moonbeam.delegator_timings.leave_delegators.hours }} hours) |
=== "Moonriver"
| Variable | Value |
|:-----------------------:|:-------------------------------------------------------------------------------------------------------------------------------------------------------:|
| Decrease candidate bond | {{ networks.moonriver.collator_timings.can_bond_less.rounds }} rounds ({{ networks.moonriver.collator_timings.can_bond_less.hours }} hours) |
| Decrease delegator bond | {{ networks.moonriver.delegator_timings.del_bond_less.rounds }} rounds ({{ networks.moonriver.delegator_timings.del_bond_less.hours }} hours) |
| Revoke delegation | {{ networks.moonriver.delegator_timings.revoke_delegations.rounds }} rounds ({{ networks.moonriver.delegator_timings.revoke_delegations.hours }} hours) |
| Leave candidates | {{ networks.moonriver.collator_timings.leave_candidates.rounds }} rounds ({{ networks.moonriver.collator_timings.leave_candidates.hours }} hours) |
| Leave delegators | {{ networks.moonriver.delegator_timings.leave_delegators.rounds }} rounds ({{ networks.moonriver.delegator_timings.leave_delegators.hours }} hours) |
=== "Moonbase Alpha"
| Variable | Value |
|:-----------------------:|:-----------------------------------------------------------------------------------------------------------------------------------------------------:|
| Decrease candidate bond | {{ networks.moonbase.collator_timings.can_bond_less.rounds }} rounds ({{ networks.moonbase.collator_timings.can_bond_less.hours }} hours) |
| Decrease delegator bond | {{ networks.moonbase.delegator_timings.del_bond_less.rounds }} rounds ({{ networks.moonbase.delegator_timings.del_bond_less.hours }} hours) |
| Revoke delegation | {{ networks.moonbase.delegator_timings.revoke_delegations.rounds }} rounds ({{ networks.moonbase.delegator_timings.revoke_delegations.hours }} hours) |
| Leave candidates | {{ networks.moonbase.collator_timings.leave_candidates.rounds }} rounds ({{ networks.moonbase.collator_timings.leave_candidates.hours }} hours) |
| Leave delegators | {{ networks.moonbase.delegator_timings.leave_delegators.rounds }} rounds ({{ networks.moonbase.delegator_timings.leave_delegators.hours }} hours) |
## Parachain Staking Solidity Interface {: #the-parachain-staking-solidity-interface }
[`StakingInterface.sol`](https://github.com/moonbeam-foundation/moonbeam/blob/master/precompiles/parachain-staking/StakingInterface.sol){target=\_blank} is an interface through which Solidity contracts can interact with parachain-staking. The beauty is that Solidity developers don’t have to learn the Substrate API. Instead, they can interact with staking functions using the Ethereum interface they are familiar with.
The Solidity interface includes the following functions:
??? function "**isDelegator**(*address* delegator) - read-only function that checks whether the specified address is currently a staking delegator. Uses the [`delegatorState`](/builders/substrate/interfaces/features/staking/#:~:text=delegatorState(AccountId20)){target=\_blank} method of the Parachain Staking Pallet"
=== "Parameters"
- `delegator` - address to check if they are currently a delegator
=== "Returns"
- `bool` whether the address is currently a delegator
??? function "**isCandidate**(*address* candidate) - read-only function that checks whether the specified address is currently a collator candidate. Uses the [`candidateState`](/builders/substrate/interfaces/features/staking/#:~:text=candidateState(AccountId20)){target=\_blank} method of the Parachain Staking Pallet"
=== "Parameters"
- `candidate` - address to check if they are currently a collator candidate
=== "Returns"
- `bool` whether the address is currently a candidate
??? function "**isSelectedCandidate**(*address* candidate) - read-only function that checks whether the specified address is currently part of the active collator set. Uses the [`selectedCandidates`](/builders/substrate/interfaces/features/staking/#:~:text=selectedCandidates()){target=\_blank} method of the Parachain Staking Pallet"
=== "Parameters"
- `candidate` - address to check if they are currently an active collator
=== "Returns"
- `bool` whether the address is currently an active collator
??? function "**points**(*uint256* round) - read-only function that gets the total points awarded to all collators in a given round. Uses the [`points`](/builders/substrate/interfaces/features/staking/#:~:text=points(u32)){target=\_blank} method of the Parachain Staking Pallet"
=== "Parameters"
- `round` - uint256 round number to query points for
=== "Returns"
- `uint256` total points awarded in the specified round
??? function "**awardedPoints**(*uint32* round, *address* candidate) - read-only function that returns the total points awarded in a given round to a given collator. If `0` is returned, it could be because no blocks were produced or the storage for that round has been removed. Uses the [`points`](/builders/substrate/interfaces/features/staking/#:~:text=awardedPts(u32, AccountId20)){target=\_blank} method of the Parachain Staking Pallet"
=== "Parameters"
- `round` - uint32 round number to query
- `candidate` - address of the collator to query points for
=== "Returns"
- `uint256` points awarded to the collator in the specified round
??? function "**delegationAmount**(*address* delegator, *address* candidate) - read-only function that returns the amount delegated by a given delegator in support of a given candidate. Uses the [`delegatorState`](/builders/substrate/interfaces/features/staking/#:~:text=delegatorState(AccountId20)){target=\_blank} method of the Parachain Staking Pallet"
=== "Parameters"
- `delegator` - address of the delegator
- `candidate` - address of the candidate
=== "Returns"
- `uint256` amount delegated
??? function "**isInTopDelegations**(*address* delegator, *address* candidate) - read-only function that returns a boolean indicating whether the given delegator is in the top delegations for the given candidate. Uses the [`topDelegations`](/builders/substrate/interfaces/features/staking/#:~:text=topDelegations(AccountId20)){target=\_blank} method of the Parachain Staking Pallet"
=== "Parameters"
- `delegator` - address of the delegator to check
- `candidate` - address of the candidate
=== "Returns"
- `bool` whether the delegator is in the top delegations
??? function "**minDelegation**() - read-only function that gets the minimum delegation amount. Uses the [`minDelegation`](/builders/substrate/interfaces/features/staking/#:~:text=minDelegation()){target=\_blank} method of the Parachain Staking Pallet"
=== "Parameters"
None.
=== "Returns"
- `uint256` minimum delegation amount
??? function "**candidateCount**() - read-only function that gets the current amount of collator candidates. Uses the [`candidatePool`](/builders/substrate/interfaces/features/staking/#:~:text=candidatePool()){target=\_blank} method of the Parachain Staking Pallet"
=== "Parameters"
None.
=== "Returns"
- `uint256` current number of collator candidates
??? function "**round**() - read-only function that returns the current round number. Uses the [`round`](/builders/substrate/interfaces/features/staking/#:~:text=round()){target=\_blank} method of the Parachain Staking Pallet"
=== "Parameters"
None.
=== "Returns"
- `uint256` current round number
??? function "**candidateDelegationCount**(*address* candidate) - read-only function that returns the number of delegations for the specified collator candidate address. Uses the [`candidateInfo`](/builders/substrate/interfaces/features/staking/#:~:text=candidateInfo(AccountId20)){target=\_blank} method of the Parachain Staking Pallet"
=== "Parameters"
- `candidate` - address of the collator candidate to query
=== "Returns"
- `uint256` number of delegations for the candidate
??? function "**candidateAutoCompoundingDelegationCount**(*address* candidate) - a read-only function that returns the number of auto-compounding delegations for the specified candidate. Uses the [`autoCompoundingDelegations`](/builders/substrate/interfaces/features/staking/#:~:text=autoCompoundingDelegations(AccountId20)){target=\_blank} method of the Parachain Staking Pallet"
=== "Parameters"
- `candidate` - address of the candidate to query
=== "Returns"
- `uint256` number of auto-compounding delegations
??? function "**delegatorDelegationCount**(*address* delegator) - read-only function that returns the number of delegations for the specified delegator address. Uses the [`delegatorState`](/builders/substrate/interfaces/features/staking/#:~:text=delegatorState(AccountId20)){target=\_blank} method of the Parachain Staking Pallet"
=== "Parameters"
- `delegator` - address of the delegator to query
=== "Returns"
- `uint256` number of delegations for the delegator
??? function "**selectedCandidates**() - read-only function that gets the selected candidates for the current round. Uses the [`selectedCandidates`](/builders/substrate/interfaces/features/staking/#:~:text=selectedCandidates()){target=\_blank} method of the Parachain Staking Pallet"
=== "Parameters"
None.
=== "Returns"
- `address[]` array of selected candidate addresses
??? function "**delegationRequestIsPending**(*address* delegator, *address* candidate) - returns a boolean to indicate whether there is a pending delegation request made by a given delegator for a given candidate"
=== "Parameters"
- `delegator` - address of the delegator
- `candidate` - address of the candidate
=== "Returns"
- `bool` whether there is a pending delegation request
??? function "**candidateExitIsPending**(*address* candidate) - returns a boolean to indicate whether a pending exit exists for a specific candidate. Uses the [`candidateInfo`](/builders/substrate/interfaces/features/staking/#:~:text=candidateInfo(AccountId20)){target=\_blank} method of the Parachain Staking Pallet"
=== "Parameters"
- `candidate` - address of the candidate to check
=== "Returns"
- `bool` whether there is a pending exit request
??? function "**candidateRequestIsPending**(*address* candidate) - returns a boolean to indicate whether there is a pending bond less request made by a given candidate. Uses the [`candidateInfo`](/builders/substrate/interfaces/features/staking/#:~:text=candidateInfo(AccountId20)){target=\_blank} method of the Parachain Staking Pallet"
=== "Parameters"
- `candidate` - address of the candidate to check
=== "Returns"
- `bool` whether there is a pending bond less request
??? function "**delegationAutoCompound**(*address* delegator, *address* candidate) - returns the auto-compound percentage for a delegation given the delegator and candidate"
=== "Parameters"
- `delegator` - address of the delegator
- `candidate` - address of the candidate
=== "Returns"
- `uint256` auto-compound percentage
??? function "**getDelegatorTotalStaked**(*address* delegator) - read-only function that returns the total staked amount of a given delegator, regardless of the candidate. Uses the [`delegatorState`](/builders/substrate/interfaces/features/staking/#:~:text=delegatorState(AccountId20)){target=\_blank} method of the Parachain Staking Pallet"
=== "Parameters"
- `delegator` - address of the delegator to query
=== "Returns"
- `uint256` total staked amount
??? function "**getCandidateTotalCounted**(*address* candidate) - read-only function that returns the total amount staked for a given candidate. Uses the [`candidateInfo`](/builders/substrate/interfaces/features/staking/#:~:text=candidateInfo(AccountId20)){target=\_blank} method of the Parachain Staking Pallet"
=== "Parameters"
- `candidate` - address of the candidate to query
=== "Returns"
- `uint256` total amount staked for the candidate
??? function "**joinCandidates**(*uint256* amount, *uint256* candidateCount) - allows the account to join the set of collator candidates with the specified bond amount and the current candidate count. Uses the [`joinCandidates`](/builders/substrate/interfaces/features/staking/#:~:text=joinCandidates(bond, candidateCount)){target=\_blank} method of the Parachain Staking Pallet"
=== "Parameters"
- `amount` - uint256 bond amount to stake as a candidate
- `candidateCount` - uint256 current number of candidates in the pool
=== "Returns"
None.
??? function "**scheduleLeaveCandidates**(*uint256* candidateCount) - schedules a request for a candidate to remove themselves from the candidate pool. Scheduling the request does not automatically execute it. There is an [exit delay](#exit-delays) that must be waited before you can execute the request via the `executeLeaveCandidates` extrinsic. Uses the [`scheduleLeaveCandidates`](/builders/substrate/interfaces/features/staking/#:~:text=scheduleLeaveCandidates(candidateCount)){target=\_blank} method of the Parachain Staking Pallet"
=== "Parameters"
- `candidateCount` - uint256 current number of candidates in the pool
=== "Returns"
None.
??? function "**executeLeaveCandidates**(*address* candidate, *uint256* candidateDelegationCount) - executes the due request to leave the set of collator candidates. Uses the [`executeLeaveCandidates`](/builders/substrate/interfaces/features/staking/#:~:text=executeLeaveCandidates(candidate, candidateDelegationCount)){target=\_blank} method of the Parachain Staking Pallet"
=== "Parameters"
- `candidate` - address of the candidate leaving the pool
- `candidateDelegationCount` - uint256 number of delegations for the candidate
=== "Returns"
None.
??? function "**cancelLeaveCandidates**(*uint256* candidateCount) - allows a candidate to cancel a pending scheduled request to leave the candidate pool. Given the current number of candidates in the pool. Uses the [`cancelLeaveCandidates`](/builders/substrate/interfaces/features/staking/#:~:text=cancelLeaveCandidates(candidateCount)){target=\_blank} method of the Parachain Staking Pallet"
=== "Parameters"
- `candidateCount` - uint256 current number of candidates in the pool
=== "Returns"
None.
??? function "**goOffline**() - temporarily leave the set of collator candidates without unbonding. Uses the [`goOffline`](/builders/substrate/interfaces/features/staking/#:~:text=goOffline()){target=\_blank} method of the Parachain Staking Pallet"
=== "Parameters"
None.
=== "Returns"
None.
??? function "**goOnline**() - rejoin the set of collator candidates after previously calling `goOffline()`. Uses the [`goOnline`](/builders/substrate/interfaces/features/staking/#:~:text=goOnline()){target=\_blank} method of the Parachain Staking Pallet"
=== "Parameters"
None.
=== "Returns"
None.
??? function "**candidateBondMore**(*uint256* more) - collator candidate increases bond by the specified amount. Uses the [`candidateBondMore`](/builders/substrate/interfaces/features/staking/#:~:text=candidateBondMore(more)){target=\_blank} method of the Parachain Staking Pallet"
=== "Parameters"
- `more` - uint256 amount to increase the bond by
=== "Returns"
None.
??? function "**scheduleCandidateBondLess**(*uint256* less) - schedules a request to decrease a candidates bond by the specified amount. Scheduling the request does not automatically execute it. There is an [exit delay](#exit-delays) that must be waited before you can execute the request via the `execute_candidate_bond_request` extrinsic. Uses the [`scheduleCandidateBondLess`](/builders/substrate/interfaces/features/staking/#:~:text=scheduleCandidateBondLess(less)){target=\_blank} method of the Parachain Staking Pallet"
=== "Parameters"
- `less` - uint256 amount to decrease the bond by
=== "Returns"
None.
??? function "**executeCandidateBondLess**(*address* candidate) - executes any due requests to decrease a specified candidate's bond amount. Uses the [`executeCandidateBondLess`](/builders/substrate/interfaces/features/staking/#:~:text=executeCandidateBondLess(candidate)){target=\_blank} method of the Parachain Staking Pallet"
=== "Parameters"
- `candidate` - address of the candidate to execute the bond decrease for
=== "Returns"
None.
??? function "**cancelCandidateBondLess**() - allows a candidate to cancel a pending scheduled request to decrease a candidates bond. Uses the [`cancelCandidateBondLess`](/builders/substrate/interfaces/features/staking/#:~:text=cancelCandidateBondLess()){target=\_blank} method of the Parachain Staking Pallet"
=== "Parameters"
None.
=== "Returns"
None.
??? function "**delegateWithAutoCompound**(*address* candidate, *uint256* amount, *uint8* autoCompound, *uint256* candidateDelegationCount, *uint256* candidateAutoCompoundingDelegationCount, *uint256* delegatorDelegationCount) - makes a delegation in support of a collator candidate and automatically sets the percent of rewards to auto-compound given an integer (no decimals) for `autoCompound` between 0-100. Uses the [`delegateWithAutoCompound`](/builders/substrate/interfaces/features/staking/#:~:text=delegateWithAutoCompound){target=\_blank} method of the Parachain Staking Pallet"
=== "Parameters"
- `candidate` - address of the candidate to delegate to
- `amount` - uint256 amount to delegate
- `autoCompound` - uint8 percentage of rewards to auto-compound (0-100)
- `candidateDelegationCount` - uint256 current number of delegations for the candidate
- `candidateAutoCompoundingDelegationCount` - uint256 current number of auto-compounding delegations for the candidate
- `delegatorDelegationCount` - uint256 current number of delegations from the delegator
=== "Returns"
None.
??? function "**scheduleRevokeDelegation**(*address* candidate) - schedules a request to revoke a delegation given the address of a candidate. Scheduling the request does not automatically execute it. There is an [exit delay](#exit-delays) that must be waited before you can execute the request via the `executeDelegationRequest` extrinsic. Uses the [`scheduleRevokeDelegation`](/builders/substrate/interfaces/features/staking/#:~:text=scheduleRevokeDelegation(collator)){target=\_blank} method of the Parachain Staking Pallet"
=== "Parameters"
- `candidate` - address of the candidate to revoke delegation from
=== "Returns"
None.
??? function "**delegatorBondMore**(*address* candidate, *uint256* more) - delegator increases bond to a collator by the specified amount. Uses the [`delegatorBondMore`](/builders/substrate/interfaces/features/staking/#:~:text=delegatorBondMore(candidate, more)){target=\_blank} method of the Parachain Staking Pallet"
=== "Parameters"
- `candidate` - address of the candidate to increase delegation for
- `more` - uint256 amount to increase the delegation by
=== "Returns"
None.
??? function "**scheduleDelegatorBondLess**(*address* candidate, *uint256* less) - schedules a request for a delegator to bond less with respect to a specific candidate. Scheduling the request does not automatically execute it. There is an [exit delay](#exit-delays) that must be waited before you can execute the request via the `executeDelegationRequest` extrinsic. Uses the [`scheduleDelegatorBondLess`](/builders/substrate/interfaces/features/staking/#:~:text=scheduleDelegatorBondLess(candidate, less)){target=\_blank} method of the Parachain Staking Pallet"
=== "Parameters"
- `candidate` - address of the candidate to decrease delegation for
- `less` - uint256 amount to decrease the delegation by
=== "Returns"
None.
??? function "**executeDelegationRequest**(*address* delegator, *address* candidate) - executes any due delegation requests provided the address of a delegator and a candidate. Uses the [`executeDelegationRequest`](/builders/substrate/interfaces/features/staking/#:~:text=executeDelegationRequest(delegator, candidate)){target=\_blank} method of the Parachain Staking Pallet"
=== "Parameters"
- `delegator` - address of the delegator
- `candidate` - address of the candidate
=== "Returns"
None.
??? function "**cancelDelegationRequest**(*address* candidate) - cancels any pending delegation requests provided the address of a candidate. Uses the [`cancelDelegationRequest`](/builders/substrate/interfaces/features/staking/#:~:text=cancelDelegationRequest(candidate)){target=\_blank} method of the Parachain Staking Pallet"
=== "Parameters"
- `candidate` - address of the candidate to cancel the delegation request for
=== "Returns"
None.
??? function "**setAutoCompound**(*address* candidate, *uint8* value, *uint256* candidateAutoCompoundingDelegationCount, *uint256* delegatorDelegationCount) - sets an auto-compound value for an existing delegation given an integer (no decimals) for the `value` between 0-100. Uses the [`setAutoCompound`](/builders/substrate/interfaces/features/staking/#:~:text=setAutoCompound){target=\_blank} method of the Parachain Staking Pallet"
=== "Parameters"
- `candidate` - address of the candidate
- `value` - uint8 percentage to auto-compound (0-100)
- `candidateAutoCompoundingDelegationCount` - uint256 current number of auto-compounding delegations for the candidate
- `delegatorDelegationCount` - uint256 current number of delegations from the delegator
=== "Returns"
None.
## Interact with the Solidity Interface {: #interact-with-solidity-interface }
### Checking Prerequisites {: #checking-prerequisites }
The below example is demonstrated on Moonbase Alpha, however, similar steps can be taken for Moonbeam and Moonriver.
- Have MetaMask installed and [connected to Moonbase Alpha](/tokens/connect/metamask/){target=\_blank}
- Have an account with at least `{{networks.moonbase.staking.min_del_stake}}` token.
You can get DEV tokens for testing on Moonbase Alpha once every 24 hours from the [Moonbase Alpha Faucet](https://faucet.moonbeam.network){target=\_blank}
!!! note
The example below requires more than `{{networks.moonbase.staking.min_del_stake}}` token due to the minimum delegation amount plus gas fees. If you need more than the faucet dispenses, please contact us on Discord and we will be happy to help you.
### Remix Set Up {: #remix-set-up }
1. Click on the **File explorer** tab
2. Get a copy of [`StakingInterface.sol`](https://github.com/moonbeam-foundation/moonbeam/blob/master/precompiles/parachain-staking/StakingInterface.sol){target=\_blank} and paste the file contents into a Remix file named `StakingInterface.sol`
### Compile the Contract {: #compile-the-contract }
1. Click on the **Compile** tab, second from top
2. Then to compile the interface, click on **Compile StakingInterface.sol**
### Access the Contract {: #access-the-contract }
1. Click on the **Deploy and Run** tab, directly below the **Compile** tab in Remix. Note: you are not deploying a contract here, instead you are accessing a precompiled contract that is already deployed
2. Make sure **Injected Provider - Metamask** is selected in the **ENVIRONMENT** drop down
3. Ensure **ParachainStaking - StakingInterface.sol** is selected in the **CONTRACT** dropdown. Since this is a precompiled contract there is no need to deploy, instead you are going to provide the address of the precompile in the **At Address** field
4. Provide the address of the staking precompile for Moonbase Alpha: `{{networks.moonbase.precompiles.staking}}` and click **At Address**
5. The Parachain Staking precompile will appear in the list of **Deployed Contracts**
### Delegate a Collator with Auto-Compounding {: #delegate-a-collator }
For this example, you are going to be delegating a collator and setting up the percentage of rewards to auto-compound on Moonbase Alpha. Delegators are token holders who stake tokens, vouching for specific candidates. Any user that holds a minimum amount of {{networks.moonbase.staking.min_del_stake}} token in their free balance can become a delegator. When delegating a candidate, you can simultaneously set up auto-compounding. You'll be able to specify a percentage of your rewards that will automatically be applied to your total delegation. You don't have to set up auto-compounding right away, you can always do it at a later time.
You can do your own research and select the candidate you desire. For this guide, the following candidate address will be used: `{{ networks.moonbase.staking.candidates.address1 }}`.
In order to delegate a candidate, you'll need to determine the candidate's current delegation count, their auto-compounding delegation count, and your own delegation count.
The candidate delegation count is the number of delegations backing a specific candidate. To obtain the candidate delegator count, you can call a function that the staking precompile provides. Expand the **PARACHAINSTAKING** contract found under the **Deployed Contracts** list, then:
1. Find and expand the **candidateDelegationCount** function
2. Enter the candidate address (`{{ networks.moonbase.staking.candidates.address1 }}`)
3. Click **call**
4. After the call is complete, the results will be displayed
The auto-compounding delegation count is the amount of delegations that have auto-compounding configured. To determine the number of delegations that have auto-compounding set up, you can
1. Find and expand the **candidateAutoCompoundingDelegationCount** function
2. Enter the candidate address (`{{ networks.moonbase.staking.candidates.address1 }}`)
3. Click **call**
4. After the call is complete, the results will be displayed
The last item you'll need to retrieve is your delegation count. If you don't know your existing number of delegations, you can easily get them by following these steps:
1. Find and expand the **delegatorDelegationCount** function
2. Enter your address
3. Click **call**
4. After the call is complete, the results will be displayed
Now that you have obtained the [candidate delegator count](#:~:text=To obtain the candidate delegator count), the [auto-compounding delegation count](#:~:text=To determine the number of delegations that have auto-compounding set up), and your [number of existing delegations](#:~:text=If you don't know your existing number of delegations), you have all of the information you need to delegate a candidate and set up auto-compounding. To get started:
1. Find and expand the **delegateWithAutoCompound** function
2. Enter the candidate address you would like to delegate. For this example you can use `{{ networks.moonbase.staking.candidates.address1 }}`
3. Provide the amount to delegate in Wei. There is a minimum of `{{networks.moonbase.staking.min_del_stake}}` token to delegate, so the lowest amount in Wei is `{{networks.moonbase.staking.min_del_stake_wei}}`
4. Enter an integer (no decimals) between 0-100 to represent the percentage of rewards to auto-compound
5. Enter the delegation count for the candidate
6. Enter the auto-compounding delegation count for the candidate
7. Enter your delegation count
8. Press **transact**
9. MetaMask will pop up, you can review the details and confirm the transaction
If you want to delegate without setting up auto-compounding, you can follow the previous steps, but instead of using **delegateWithAutoCompound**, you can use the **delegate** extrinsic.
### Verify Delegation {: #verify-delegation }
To verify your delegation was successful, you can check the chain state in Polkadot.js Apps. First, add your MetaMask address to the [address book in Polkadot.js Apps](https://polkadot.js.org/apps/?rpc=wss://wss.api.moonbase.moonbeam.network#/addresses){target=\_blank}.
Navigate to **Accounts** and then **Address Book**, click on **Add contact**, and enter the following information:
1. Add your MetaMask address
2. Provide a nickname for the account
3. Click **Save**
To verify your delegation was successful, head to [Polkadot.js Apps](https://polkadot.js.org/apps/?rpc=wss://wss.api.moonbase.moonbeam.network#/chainstate){target=\_blank} and navigate to **Developer** and then **Chain State**
1. Select the **parachainStaking** pallet
2. Select the **delegatorState** query
3. Enter your address
4. Optionally, you can enable the **include option** slider if you want to provide a specific blockhash to query
5. Click the **+** button to return the results and verify your delegation
!!! note
You do not have to enter anything in the **blockhash to query at** field if you are looking for an overview of your delegations.
### Confirm Auto-Compounding Percentage {: #confirm-auto-compounding }
You can confirm the percentage of rewards you've set to auto-compound in Remix using the `delegationAutoCompound` function of the Solidity interface:
1. Find and expand the **delegationAutoCompound** function
2. Enter your account you used to delegate with
3. Enter the candidate you've delegated
4. Click **call**
5. The response will appear below the **call** button
### Set or Change the Auto-Compounding Percentage {: #set-or-change-auto-compounding }
If you initially set up your delegation without auto-compounding or if you want to update the percentage on an existing delegation with auto-compounding set up, you can use the `setAutoCompound` function of the Solidity interface.
You'll need to get the number of delegations with auto-compounding set up for the candidate you want to set or update auto-compounding for. You'll also need to retrieve your own delegation count. You can follow the instructions in the [Delegate a Collator with Auto-Compounding](#delegate-a-collator) section to get both of these items.
Once you have the necessary information, you can take the following steps in Remix:
1. Find and expand the **setAutoCompound** function
2. Enter the candidate's account you want to set or update auto-compounding for
3. Enter a number 0-100 to represent the percentage of rewards you want to auto-compound
4. Enter the auto-compounding delegation count for the candidate
5. Enter your delegation count
6. Press **transact**
7. MetaMask will pop up, you can review the details and confirm the transaction
### Revoke a Delegation {: #revoke-a-delegation }
As of [runtime version 1001](https://moonbeam.network/news/moonriver-technical-update-staking-changes-as-part-of-runtime-upgrade-1001){target=\_blank}, there have been significant changes to the way users can interact with various staking features. Including the way staking exits are handled.
Exits now require you to schedule a request to exit or revoke a delegation, wait a delay period, and then execute the request.
To revoke a delegation for a specific candidate and receive your tokens back, you can use the `scheduleRevokeDelegation` extrinsic. Scheduling a request does not automatically revoke your delegation, you must wait an [exit delay](#exit-delays), and then execute the request by using the `executeDelegationRequest` method.
To revoke a delegation and receive your tokens back, head back over to Remix, then:
1. Find and expand the **scheduleRevokeDelegation** function
2. Enter the candidate address you would like to revoke the delegation for
3. Click **transact**
4. MetaMask will pop up, you can review the transaction details, and click **Confirm**
Once the transaction is confirmed, you must wait the duration of the exit delay before you can execute and revoke the delegation request. If you try to revoke it before the exit delay is up, your extrinsic will fail.
After the exit delay has passed, you can go back to Remix and follow these steps to execute the due request:
1. Find and expand the **executeDelegationRequest** function
2. Enter the address of the delegator you would like to revoke the delegation for
3. Enter the candidate address you would like to revoke the delegation from
4. Click **transact**
5. MetaMask will pop up, you can review the transaction details, and click **Confirm**
After the call is complete, the results will be displayed and the delegation will be revoked for the given delegator and from the specified candidate. You can also check your delegator state again on Polkadot.js Apps to confirm.
If for any reason you need to cancel a pending scheduled request to revoke a delegation, you can do so by following these steps in Remix:
1. Find and expand the **cancelDelegationRequest** function
2. Enter the candidate address you would like to cancel the pending request for
3. Click **transact**
4. MetaMask will pop up, you can review the transaction details, and click **Confirm**
You can check your delegator state again on Polkadot.js Apps to confirm that your delegation is still intact.
--- END CONTENT ---
Doc-Content: https://docs.moonbeam.network/builders/ethereum/precompiles/interoperability/gmp/
--- BEGIN CONTENT ---
---
title: GMP Precompile
description: Learn about the GMP precompile on Moonbeam and how to use it with the Moonbeam Routed Liquidity program provided by bridges like Wormhole.
keywords: solidity, ethereum, GMP, wormhole, moonbeam, bridge, connected, contracts, MRL
categories: Precompiles, Ethereum Toolkit
---
# Interacting with the GMP Precompile
## Introduction {: #introduction }
Moonbeam Routed Liquidity (MRL) refers to Moonbeam’s use case as the port parachain for liquidity from origin chains into other Polkadot parachains. This is possible because of general message passing (GMP), where messages with arbitrary data and tokens can be sent across non-parachain blockchains through [chain-agnostic GMP protocols](/builders/interoperability/protocols/){target=\_blank}. These GMP protocols can combine with [Polkadot's XCM messaging system](/builders/interoperability/xcm/overview/){target=\_blank} to allow for seamless liquidity routing.
The GMP precompile acts as an interface for Moonbeam Routed Liquidity, acting as a middleman between token-bearing messages from GMP protocols and parachains connected to Moonbeam via [XCMP](/builders/interoperability/xcm/overview/#xcm-transport-protocols){target=\_blank}. Currently, the GMP Precompile only supports the relaying of liquidity through the [Wormhole GMP protocol](/builders/interoperability/protocols/wormhole/){target=\_blank}.
The GMP Precompile is located at the following address:
=== "Moonbeam"
```text
{{networks.moonbeam.precompiles.gmp}}
```
=== "Moonriver"
```text
{{networks.moonriver.precompiles.gmp}}
```
=== "Moonbase Alpha"
```text
{{networks.moonbase.precompiles.gmp}}
```
In practice, it is unlikely that a developer will have to directly interact with the precompile. GMP protocols' relayers interact with the precompile to complete cross-chain actions, so the origin chain that the cross-chain action originates is where the developer has the responsibility to ensure that the GMP precompile is used *eventually*.
## The GMP Solidity Interface {: #the-gmp-solidity-interface }
[`Gmp.sol`](https://github.com/moonbeam-foundation/moonbeam/blob/master/precompiles/gmp/Gmp.sol){target=\_blank} is a Solidity interface that allows developers to interact with the precompile.
??? code "Gmp.sol"
```solidity
// SPDX-License-Identifier: GPL-3.0-only
pragma solidity >=0.8.3;
/// @dev The Gmp contract's address.
address constant GMP_ADDRESS = 0x0000000000000000000000000000000000000816;
/// @dev The Gmp contract's instance.
Gmp constant GMP_CONTRACT = Gmp(GMP_ADDRESS);
/// @author The Moonbeam Team
/// @title Gmp precompile
/// @dev Provides an endpoint to Gmp protocols which can automatically forward to XCM
/// @custom:address 0x0000000000000000000000000000000000000816
interface Gmp {
// TODO: Here we would specify the endpoints for each GMP protocol on a case by case basis.
// These endpoints are basically the hand offs for each protocol -- where they delegate to
// the target contract.
//
// This design should allow users to interact with this precompile with no changes to the
// underlying GMP protocols by simply specifying the correct precompile as the target.
/// Receive a wormhole VAA and process it
///
/// @custom:selector f53774ab
function wormholeTransferERC20(bytes memory vaa) external;
}
```
The GMP precompile has one method:
- **wormholeTransferERC20**(*bytes memory* vaa) - receives a Wormhole bridge transfer [verified action approval (VAA)](https://wormhole.com/docs/protocol/infrastructure/vaas/){target=\_blank}, mints tokens via the Wormhole token bridge, and forwards the liquidity to the custom payload’s [multilocation](/builders/interoperability/xcm/core-concepts/multilocations/){target=\_blank}. The payload is expected to be a precompile-specific SCALE encoded object, as explained in this guide's [Building the Payload for Wormhole](#building-the-payload-for-wormhole) section
VAAs are payload-containing packages generated after origin-chain transactions and are discovered by Wormhole [Guardians](https://wormhole.com/docs/protocol/infrastructure/guardians/){target=\_blank}.
The most common instance in which a user will have to interact with the precompile is during a recovery, where a relayer doesn’t complete an MRL transaction. For example, a user must search for the VAA that comes with their origin chain transaction and manually invoke the `wormholeTransferERC20` function.
## Building the Payload for Wormhole {: #building-the-payload-for-wormhole }
Currently, the GMP precompile only supports sending liquidity with Wormhole, through Moonbeam, and into other parachains. The GMP precompile does not assist with a route from parachains back to Moonbeam and subsequently, Wormhole-connected chains.
To send liquidity from a Wormhole-connected origin chain like Ethereum, users must invoke the [`transferTokensWithPayload` method](https://wormhole.com/docs/protocol/infrastructure/vaas/#token--message){target=\_blank} on the [origin-chain's deployment](https://wormhole.com/docs/protocol/infrastructure/core-contracts/#token-bridge){target=\_blank} of the [WormholeTokenBridge smart contract](https://github.com/wormhole-foundation/wormhole/blob/main/ethereum/contracts/bridge/interfaces/ITokenBridge.sol){target=\_blank}. This function requires a bytes payload, which must be formatted as a SCALE encoded multilocation object wrapped within [another precompile-specific versioned type](https://github.com/moonbeam-foundation/moonbeam/blob/{{ networks.moonbase.spec_version }}/precompiles/gmp/src/types.rs#L25-L48){target=\_blank}.
You may be unfamiliar with SCALE encoding and multilocations if you are unfamiliar with the Polkadot ecosystem. [SCALE encoding](https://docs.polkadot.com/polkadot-protocol/parachain-basics/data-encoding/){target=\_blank} is a compact form of encoding that Polkadot uses. The [`MultiLocation` type](https://wiki.polkadot.com/learn/learn-xcvm/){target=\_blank} is used to define a relative point in Polkadot, such as a specific account on a specific parachain (Polkadot blockchain).
Moonbeam’s GMP protocol requires a multilocation to represent the destination for liquidity routing, which most likely means an account on another parachain. Whatever it is, this destination must be expressed as relative to Moonbeam.
!!! remember
Multilocations being relative is important, because a parachain team may erroneously give you a multilocation relative to their own chain, which can be different. Providing an incorrect multilocation can result in **loss of funds**!
Each parachain will have its specific methods of interpreting a multilocation, and should confirm with the project that the multilocation that you formed is correct. However, you will most likely be forming a multilocation with an account.
Multiple types of accounts can be included in a multilocation, which you must know beforehand when constructing your multilocation. The two most common are:
- **AccountKey20** — an account ID that is 20-bytes in length, including Ethereum-compatible account IDs such as those on Moonbeam
- **AccountId32** — an account ID that is 32-bytes in length, standard in Polkadot and its parachains
The following multilocation templates target accounts on other parachains with Moonbeam as the relative origin. To use them, replace `INSERT_PARACHAIN_ID` with the parachain ID of the network you wish to send funds to and replace `INSERT_ADDRESS` with the address of the account you want to send funds to on that parachain.
=== "AccountId32"
```js
{
V4: {
parents: 1,
interior: {
X2: [
{ Parachain: 'INSERT_PARACHAIN_ID' },
{
AccountId32: {
id: 'INSERT_ADDRESS',
},
},
],
},
},
};
```
=== "AccountKey20"
```js
{
V4: {
parents: 1,
interior: {
X2: [
{ Parachain: 'INSERT_PARACHAIN_ID' },
{
AccountKey20: {
key: 'INSERT_ADDRESS',
},
},
],
},
}
};
```
It can be challenging to correctly SCALE encode the entire payload without the right tools, mainly due to the [custom types expected by the precompile](https://github.com/moonbeam-foundation/moonbeam/blob/{{ networks.moonbase.spec_version }}/precompiles/gmp/src/types.rs#L25-L48){target=\_blank}. Fortunately, the Polkadot.js API can assist with this.
The versioned user action expected by the precompile accepts two versions: V1 and V2. V1 accepts the `XcmRoutingUserAction` type, which attempts to route the transferred assets to the destination defined by the multilocation. V2 accepts the `XcmRoutingUserActionWithFee` type, which also attempts to route the transferred assets to the destination and allows a fee to be paid. Relayers can use V2 to specify a fee on Moonbeam to relay the transaction to the given destination.
The following script shows how to create a `Uint8Array` that can be used as a payload for the GMP precompile:
=== "V1"
```typescript
import { ApiPromise, WsProvider } from '@polkadot/api';
enum MRLTypes {
// Runtime defined MultiLocation. Allows for XCM versions 2, 3, and 4
XcmVersionedLocation = 'XcmVersionedLocation',
// MRL payload (V1) that only defines the destination MultiLocation
XcmRoutingUserAction = 'XcmRoutingUserAction',
// Wrapper object for the MRL payload
VersionedUserAction = 'VersionedUserAction',
}
// Parachain IDs of each parachain
enum Parachain {
MoonbaseBeta = 888,
// Insert additional parachain IDs
}
// List of parachains that use ethereum (20) accounts
const ETHEREUM_ACCOUNT_PARACHAINS = [Parachain.MoonbaseBeta];
// A function that creates a SCALE encoded payload to use with transferTokensWithPayload
async function createMRLPayload(
parachainId: Parachain,
account: string
): Promise
node signMessage.js
{
message: '0x5836e21a51f25aad199e2e0feb5ca19673ed56b3811285f5124d7a8171d75851',
messageHash: '0xa69b720d0293b9e8f4e471afb80f9d410b825abe5ce524e7d5755fd2a00bf9de',
v: '0x1b',
r: '0xb7d4783ee3b34d6fbc419d5b7bc67002c511322c5c71b49a7d78a8b7e9c5b30a',
s: '0x4e5939eaef3917b1cb09af9e632cc9a727b64191b7ee40a6ae34f6fdde60a371',
signature: '0xb7d4783ee3b34d6fbc419d5b7bc67002c511322c5c71b49a7d78a8b7e9c5b30a4e5939eaef3917b1cb09af9e632cc9a727b64191b7ee40a6ae34f6fdde60a3711b'
}
Save these values as you will need them in the next section.
### Test ECRecoverPublicKey Contract
You can now visit [Remix](https://remix.ethereum.org/){target=\_blank} to test the precompiled contract. Note that you could also use the Web3.js library, but in this case, you can go to Remix to ensure it is using the precompiled contract on the blockchain. The Solidity code you can use to retrieve the public key is the following:
```solidity title="RecoverPublicKey.sol"
// SPDX-License-Identifier: MIT
pragma solidity >=0.8.2 <0.9.0;
contract RecoverPublicKey {
function recoverPublicKey(
bytes32 hash,
uint8 v,
bytes32 r,
bytes32 s
) public view returns (bytes memory) {
address precompileAddress = 0x0000000000000000000000000000000000000402;
(bool success, bytes memory publicKey) = precompileAddress.staticcall(
abi.encodeWithSignature(
"ECRecoverPublicKey(bytes32,uint8,bytes32,bytes32)",
hash,
v,
r,
s
)
);
require(success, "ECRecoverPublicKey failed");
return publicKey;
}
}
```
Using the [Remix compiler and deployment](/builders/ethereum/dev-env/remix/){target=\_blank} and with [MetaMask pointing to Moonbase Alpha](/tokens/connect/metamask/){target=\_blank}, you can deploy the contract and call the `recoverPublicKey()` method which returns the public key for the account that signed the message. You can now use this public key value for other cryptographic functions and verifications.
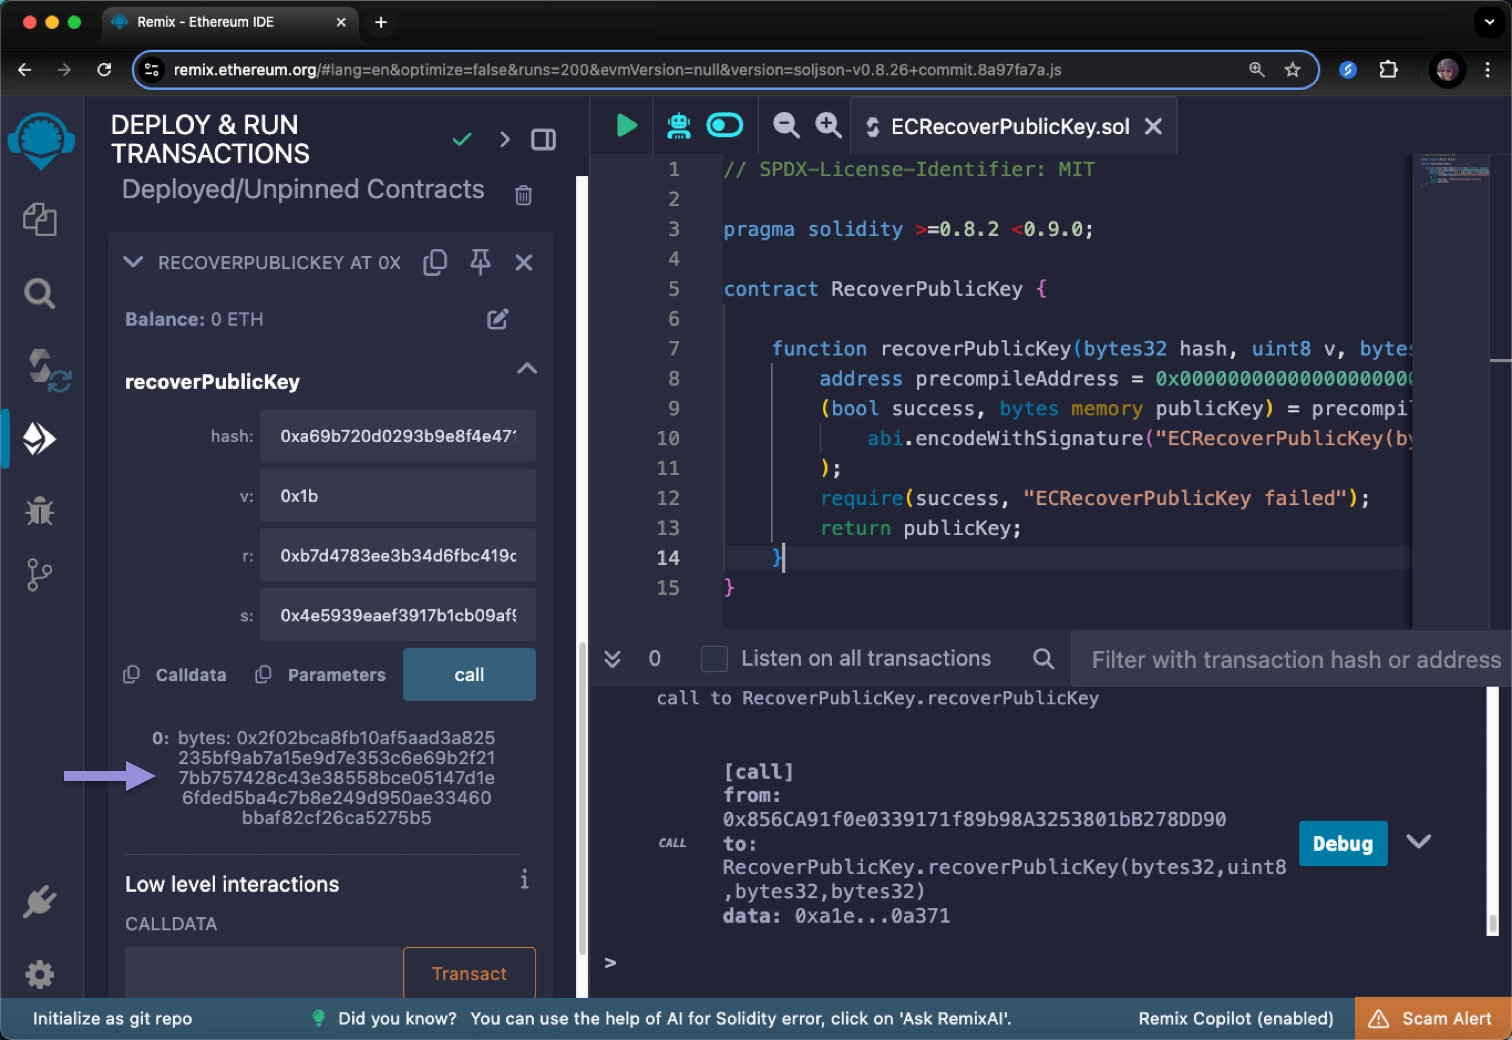
## Create a Hash with SHA3FIPS256 {: #create-a-hash-with-sha3fips256 }
SHA3-256 is part of the SHA-3 family of cryptographic hashes codified in [FIPS202](https://nvlpubs.nist.gov/nistpubs/FIPS/NIST.FIPS.202.pdf){target=\_blank} that produces an output 256 bits in length. Although the name is similar to SHA256, the SHA-3 family is built with an entirely different algorithm and accordingly produces a different hash output than SHA256 for the same input. You can verify this yourself using this [SHA3-256 Hash Calculator tool](https://md5calc.com/hash/sha3-256){target=\_blank}. After calculating the SHA3-256 output, change the algorithm in the drop-down selector to SHA256 and take note of the resulting output.
Currently there is no SHA3-256 support in Solidity, so it needs to be called with inline assembly. The following sample code can be used to call this precompile.
```solidity
pragma solidity ^0.7.0;
contract Precompiles {
function sha3fips(bytes memory data) public view returns (bytes32) {
bytes32[1] memory h;
assembly {
if iszero(
staticcall(not(0), 0x400, add(data, 32), mload(data), h, 32)
) {
invalid()
}
}
return h[0];
}
}
```
Using [Remix](/builders/ethereum/dev-env/remix/){target=\_blank} with [MetaMask pointing to Moonbase Alpha](/tokens/connect/metamask/){target=\_blank}, you can deploy the contract and call the `sha3fips(bytes memory data)` method to return the encoded string of the data parameter.
The information presented herein is for informational purposes only and has been provided by third parties. Moonbeam does not endorse any project listed and described on the Moonbeam docs website (https://docs.moonbeam.network/).
--- END CONTENT ---
Doc-Content: https://docs.moonbeam.network/builders/ethereum/precompiles/utility/registry/
--- BEGIN CONTENT ---
---
title: Precompile Registry
description: Learn how to access and interact with the Precompile Registry on Moonbeam, which can be used to check if a given address is a precompile and if it is supported.
categories: Precompiles, Ethereum Toolkit
---
# Precompile Registry on Moonbeam
## Introduction {: #introduction }
The Precompile Registry serves as a single source of truth for the available [precompiles on Moonbeam](/builders/ethereum/precompiles/overview/){target=\_blank}. The Precompile Registry can be used to determine if an address corresponds to a precompile and whether or not a precompile is active or deprecated. This is particularly useful when there are upstream changes within the Substrate and Polkadot ecosystems that result in backward-incompatible changes to precompiles. Developers can design an exit strategy to ensure their dApp recovers gracefully in these scenarios.
The Precompile Registry also serves an additional purpose, as it allows any user to set "dummy code" (`0x60006000fd`) for precompiles, which makes precompiles callable from Solidity. This is necessary as precompiles on Moonbeam, by default, don't have bytecode. The "dummy code" can bypass checks in Solidity that ensure contract bytecode exists and is non-empty.
The Registry Precompile is located at the following address:
=== "Moonbeam"
```text
{{networks.moonbeam.precompiles.registry }}
```
=== "Moonriver"
```text
{{networks.moonriver.precompiles.registry }}
```
=== "Moonbase Alpha"
```text
{{networks.moonbase.precompiles.registry }}
```
!!! note
There can be some unintended consequences when using the precompiled contracts on Moonbeam. Please refer to the [Security Considerations](/learn/core-concepts/security/){target=\_blank} page for more information.
## The Precompile Registry Solidity Interface {: #the-solidity-interface }
[`PrecompileRegistry.sol`](https://github.com/moonbeam-foundation/moonbeam/blob/master/precompiles/precompile-registry/PrecompileRegistry.sol){target=\_blank} is a Solidity interface that allows developers to interact with the precompile's methods.
??? code "PrecompileRegistry.sol"
```solidity
// SPDX-License-Identifier: GPL-3.0-only
pragma solidity >=0.8.3;
/// @dev The Precompile Registry contract's address.
address constant PRECOMPILE_REGISTRY_ADDRESS = 0x0000000000000000000000000000000000000815;
/// @dev The Precompile Registry contract's instance.
PrecompileRegistry constant PRECOMPILE_REGISTRY_CONTRACT = PrecompileRegistry(PRECOMPILE_REGISTRY_ADDRESS);
/// @author The Moonbeam Team
/// @title Precompile Registry
/// @dev Interface to the set of available precompiles.
interface PrecompileRegistry {
/// @dev Query if the given address is a precompile. Note that deactivated precompiles
/// are still considered precompiles and will return `true`.
/// @param a: Address to query
/// @return output Is this address a precompile?
/// @custom:selector 446b450e
function isPrecompile(address a) external view returns (bool);
/// @dev Query if the given address is an active precompile. Will return false if the
/// address is not a precompile or if this precompile is deactivated.
/// @param a: Address to query
/// @return output Is this address an active precompile?
/// @custom:selector 6f5e23cf
function isActivePrecompile(address a) external view returns (bool);
/// @dev Update the account code of a precompile address.
/// As precompiles are implemented inside the Runtime, they don't have a bytecode, and
/// their account code is empty by default. However in Solidity calling a function of a
/// contract often automatically adds a check that the contract bytecode is non-empty.
/// For that reason a dummy code (0x60006000fd) can be inserted at the precompile address
/// to pass that check. This function allows any user to insert that code to precompile address
/// if they need it.
/// @param a: Address of the precompile.
/// @custom:selector 48ceb1b4
function updateAccountCode(address a) external;
}
```
The interface includes the following functions:
??? function "**isPrecompile**(*address* a) - returns a boolean indicating whether a given address is a precompile or not. Returns `true` for active and deprecated precompiles"
=== "Parameters"
- `a` - address to check if it is a precompile
=== "Returns"
- `bool` whether the address is a precompile (active or deprecated)
??? function "**isActivePrecompile**(*address* a) - returns a boolean indicating whether a given address is an active precompile or not. Returns `false` if a precompile has been deprecated"
=== "Parameters"
- `a` - address to check if it is an active precompile
=== "Returns"
- `bool` whether the address is an active precompile
??? function "**updateAccountCode**(*address* a) - updates a given precompile's bytecode with dummy code (`0x60006000fd`) given the address of the precompile. Precompiles, by default, don't have bytecode associated with them. This function can be used to add dummy bytecode to bypass requirements in Solidity that check if a contract's bytecode is not empty before its functions can be called"
=== "Parameters"
- `a` - address of the precompile to update with dummy bytecode
=== "Returns"
None.
## Interact with the Precompile Registry Solidity Interface {: #interact-with-precompile-registry-interface }
The following sections will cover how to interact with the Registry Precompile from [Remix](/builders/ethereum/dev-env/remix/){target=\_blank} and [Ethereum libraries](/builders/ethereum/libraries/){target=\_blank}, such as [Ethers.js](/builders/ethereum/libraries/ethersjs/){target=\_blank}, [Web3.js](/builders/ethereum/libraries/web3js/){target=\_blank}, and [Web3.py](/builders/ethereum/libraries/web3py/){target=\_blank}.
The examples in this guide will be on Moonbase Alpha.
To test out the examples in this guide on Moonbeam or Moonriver, you will need to have your own endpoint and API key, which you can get from one of the supported [Endpoint Providers](/builders/get-started/endpoints/){target=\_blank}.
### Use Remix to Interact with the Precompile Registry {: #use-remix }
To quickly get started with [Remix](/builders/ethereum/dev-env/remix/){target=\_blank}, the [Precompile Registry contract has been loaded from GitHub](https://remix.ethereum.org/#url=https://github.com/moonbeam-foundation/moonbeam/blob/master/precompiles/precompile-registry/PrecompileRegistry.sol){target=\_blank}. You can also create a new file in Remix and manually paste in the contents of the [`PrecompileRegistry.sol`](#the-solidity-interface) contract.
Then you can take the following steps to compile, deploy, and interact with the Precompile Registry:
1. From the **Compile** tab, click on **Compile PrecompileRegistry.sol** to compile the contract. A green checkmark will appear upon successfully compiling the contract
2. From the **Deploy and run transactions** tab, you can load the Precompile Registry using its address:
1. Make sure **Injected Provider - Metamask** is selected in the **ENVIRONMENT** drop down and you've connected MetaMask to Moonbase Alpha
2. Ensure **PrecompileRegistry** is selected in the **CONTRACT** dropdown. Since this is a precompiled contract there is no need to deploy, instead you are going to provide the address of the Precompile in the **At Address** field
3. Provide the address of the Precompile Registry for Moonbase Alpha: `{{ networks.moonbase.precompiles.registry }}` and click **At Address**
4. The Precompile Registry will appear in the list of **Deployed Contracts**
3. You can interact with any of the precompile's methods. Under **Deployed Contracts**, expand the Precompile Registry to view the list of methods. For example, you can use the **isPrecompile** function to check if an address is a precompile
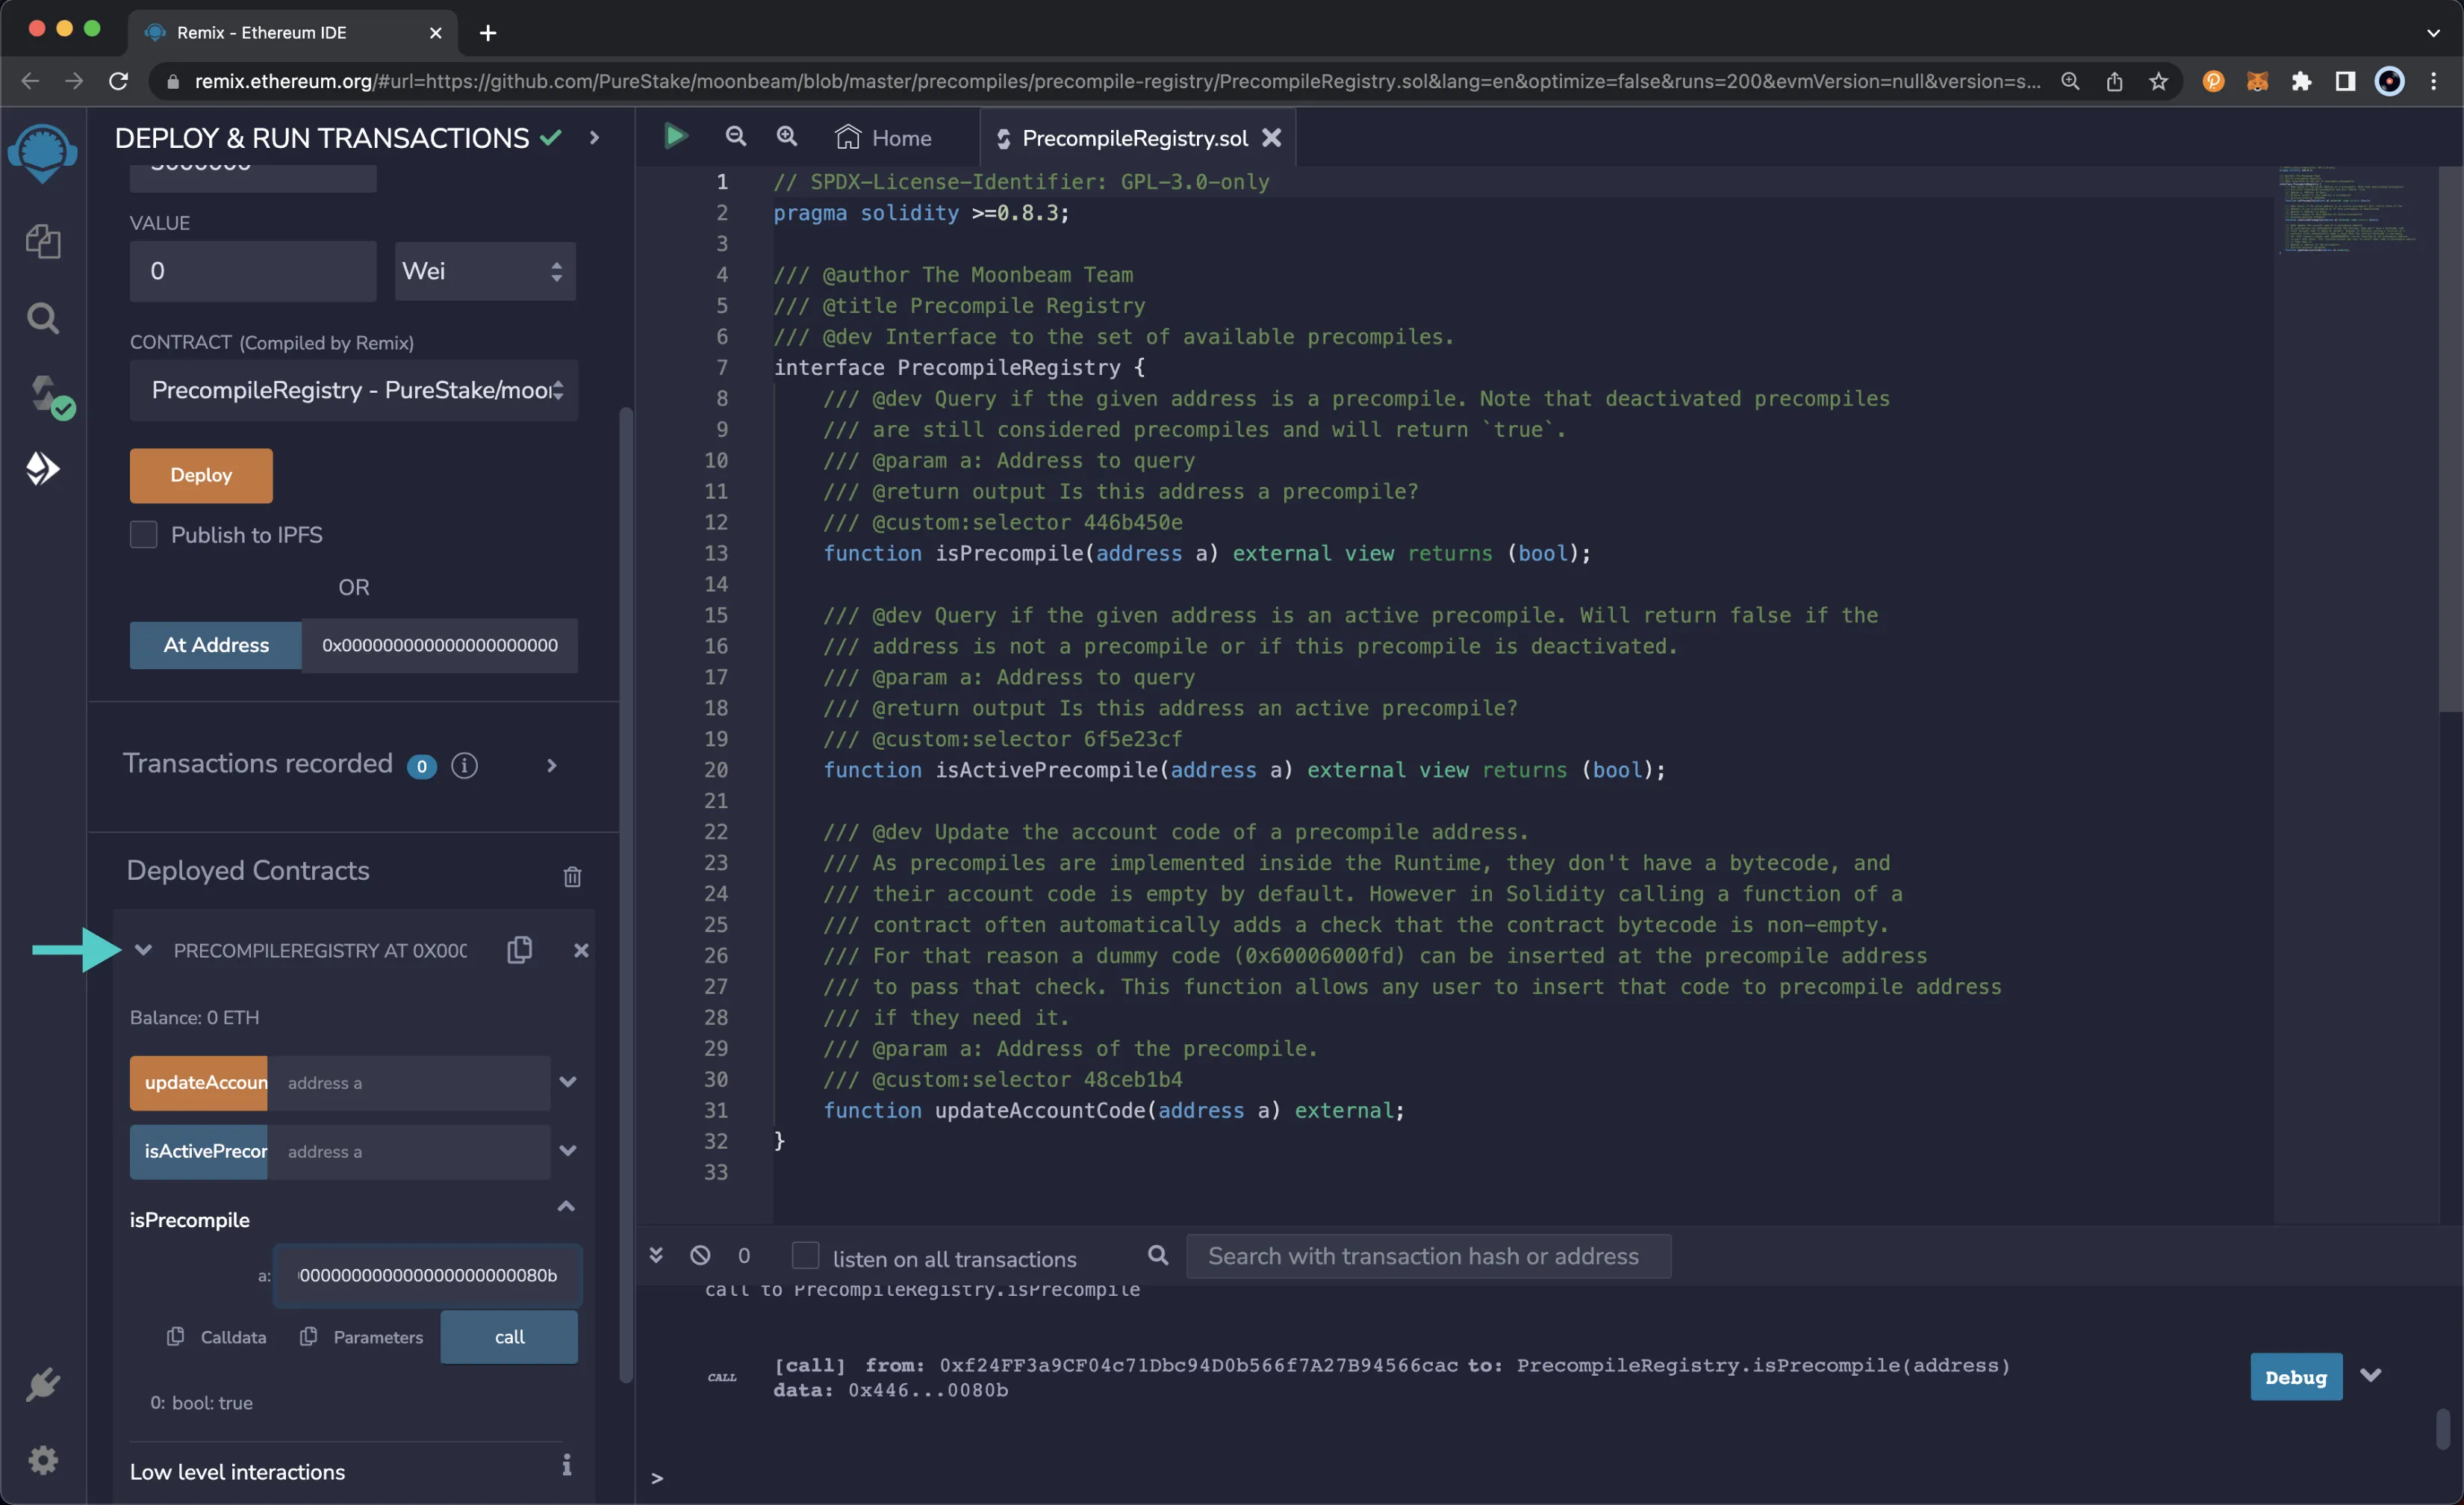
### Use Ethereum Libraries to Interact with the Precompile Registry {: #use-ethereum-libraries }
To interact with the Precompile Registry's Solidity interface with an Ethereum library, you'll need the Precompile Registry's ABI.
??? code "Precompile Registry ABI"
```js
[
{
"inputs": [
{
"internalType": "address",
"name": "a",
"type": "address"
}
],
"name": "isActivePrecompile",
"outputs": [
{
"internalType": "bool",
"name": "",
"type": "bool"
}
],
"stateMutability": "view",
"type": "function"
},
{
"inputs": [
{
"internalType": "address",
"name": "a",
"type": "address"
}
],
"name": "isPrecompile",
"outputs": [
{
"internalType": "bool",
"name": "",
"type": "bool"
}
],
"stateMutability": "view",
"type": "function"
},
{
"inputs": [
{
"internalType": "address",
"name": "a",
"type": "address"
}
],
"name": "updateAccountCode",
"outputs": [],
"stateMutability": "nonpayable",
"type": "function"
}
]
```
Once you have the ABI, you can interact with the Registry using the Ethereum library of your choice. Generally speaking, you'll take the following steps:
1. Create a provider
2. Create a contract instance of the Precompile Registry
3. Interact with the Precompile Registry's functions
!!! remember
The following snippets are for demo purposes only. Never store your private keys in a JavaScript or Python file.
=== "Ethers.js"
```js
import { ethers } from 'ethers'; // Import Ethers library
import ABI from './precompileRegistryABI.js'; // Import Precompile Registry ABI
const privateKey = 'INSERT_PRIVATE_KEY';
// Create Ethers provider and signer
const provider = new ethers.JsonRpcProvider(
'https://rpc.api.moonbase.moonbeam.network'
);
const signer = new ethers.Wallet(privateKey, provider);
// Create interface for the Precompile Registry
const precompileRegistry = new ethers.Contract(
'0x0000000000000000000000000000000000000815',
ABI,
signer
);
// Interact with the Precompile Registry
const isActivePrecompile = async () => {
const proxyPrecompile = '0x000000000000000000000000000000000000080b';
// Check if the Proxy Precompile is a precompile
const isPrecompile = await precompileRegistry.isPrecompile(proxyPrecompile);
// Should return 'Address is a precompile: true'
console.log(`Address is a precompile: ${isPrecompile}`);
// Check if the Proxy Precompile is an active precompile
const isActivePrecompile = await precompileRegistry.isActivePrecompile(
proxyPrecompile
);
// Should return 'Address is an active precompile: true'
console.log(`Address is an active precompile: ${isActivePrecompile}`);
};
isActivePrecompile();
```
=== "Web3.js"
```js
import { Web3 } from 'web3';
import ABI from './precompileRegistryABI.js'; // Import Precompile Registry ABI
const privateKey = 'INSERT_PRIVATE_KEY';
// Create provider
const web3 = new Web3('https://rpc.api.moonbase.moonbeam.network');
// Create interface for the Precompile Registry
const precompileRegistry = new web3.eth.Contract(
ABI,
'0x0000000000000000000000000000000000000815',
{ from: web3.eth.accounts.privateKeyToAccount(privateKey).address }
);
// Interact with the Precompile Registry
const isActivePrecompile = async () => {
const proxyPrecompile = '0x000000000000000000000000000000000000080b';
// Check if the Proxy Precompile is a precompile
const isPrecompile = await precompileRegistry.methods.isPrecompile(
proxyPrecompile
).call();
// Should return 'Address is a precompile: true'
console.log(`Address is a precompile: ${isPrecompile}`);
// Check if the Proxy Precompile is an active precompile
const isActivePrecompile =
await precompileRegistry.methods.isActivePrecompile(proxyPrecompile).call();
// Should return 'Address is an active precompile: true'
console.log(`Address is a precompile: ${isActivePrecompile}`);
};
isActivePrecompile();
```
=== "Web3.py"
```py
from web3 import Web3
abi = "INSERT_PRECOMPILE_REGISTRY_ABI" # Paste or import the Precompile Registry ABI
private_key = "INSERT_PRIVATE_KEY"
# Create provider
web3 = Web3(Web3.HTTPProvider("https://rpc.api.moonbase.moonbeam.network"))
# Create interface for the Precompile Registry
precompile_registry = web3.eth.contract(
address="0x0000000000000000000000000000000000000815", abi=abi
)
# Interact with the Precompile Registry
def is_active_precompile():
proxy_precompile = "0x000000000000000000000000000000000000080b"
# Check if the Proxy Precompile is a precompile
is_precompile = precompile_registry.functions.isPrecompile(proxy_precompile).call()
# Should return 'Address is a precompile: true'
print("Address is a precompile: ", is_precompile)
# Check if the Proxy Precompile is an active precompile
is_active_precompile = precompile_registry.functions.isActivePrecompile(
proxy_precompile
).call()
# Should return 'Address is an active precompile: true'
print("Address is an active precompile: ", is_active_precompile)
is_active_precompile()
```
--- END CONTENT ---
Doc-Content: https://docs.moonbeam.network/builders/ethereum/precompiles/utility/relay-data-verifier/
--- BEGIN CONTENT ---
---
title: Relay Data Verifier Precompile Contract
description: Learn how to verify data availability and authenticity on the relay chain via a Solidity interface with Moonbeam's Relay Data Verifier Precompile contract.
keywords: solidity, ethereum, verify, proof, relay chain, transaction, moonbeam, precompiled, contracts
categories: Precompiles, Ethereum Toolkit
---
# Interacting with the Relay Data Verifier Precompile
## Introduction {: #introduction }
Polkadot relies on state proofs to guarantee data integrity at a particular time. A state proof is a concise, cryptographic data structure representing a specific subset of transactions or state data within a trie. It consists of a set of hashes that form a path from the target data to the root hash stored in the block header.
A client can independently reconstruct the root hash and compare it with the original stored in the block header by providing a state proof. If the reconstructed root hash matches the original, it confirms the target data's authenticity, validity, and inclusion within the blockchain.
Polkadot's unique architecture and parachain block validation process means blockchains like Moonbeam have the relay chain storage root hash in their state. Consequently, Moonbeam can provide a mechanism to verify a relay chain state by checking the proof against the stored storage root hash.
Moonbeam's [relay data verifier precompiled](https://github.com/moonbeam-foundation/moonbeam/blob/master/precompiles/relay-data-verifier/RelayDataVerifier.sol){target=\_blank} contract provides an easy way for smart contracts to programmatically build functions that rely on verifying relay chain state in contract calls. Consequently, no oracles are needed to feed relay chain data to Moonbeam. This functionality is readily available at the following contract addresses:
=== "Moonbeam"
```text
{{networks.moonbeam.precompiles.relay_data_verifier }}
```
=== "Moonriver"
```text
{{networks.moonriver.precompiles.relay_data_verifier }}
```
=== "Moonbase Alpha"
```text
{{networks.moonbase.precompiles.relay_data_verifier }}
```
!!! note
There can be some unintended consequences when using the precompiled contracts on Moonbeam. Please refer to the [Security Considerations](/learn/core-concepts/security/){target=\_blank} page for more information.
## The Relay Data Verifier Solidity Interface {: #the-relay-data-verifier-solidity-interface }
[`RelayDataVerifier.sol`](https://github.com/moonbeam-foundation/moonbeam/blob/master/precompiles/relay-data-verifier/RelayDataVerifier.sol){target=\_blank} is a Solidity interface that allows developers to interact with the precompile's methods.
??? code "RelayDataVerifier.sol"
```solidity
// SPDX-License-Identifier: GPL-3.0-only
pragma solidity >=0.8.3;
/// @dev The RelayDataVerifier contract's address.
address constant RELAY_DATA_VERIFIER_ADDRESS = 0x0000000000000000000000000000000000000819;
/// @dev The RelayDataVerifier contract's instance.
RelayDataVerifier constant RELAY_DATA_VERIFIER_CONTRACT = RelayDataVerifier(
RELAY_DATA_VERIFIER_ADDRESS
);
/// @author The Moonbeam Team
/// @title Relay Proof Verifier Interface
/// @dev The interface that Solidity contracts use to interact with the Relay Proof Verifier
/// precompile.
/// A typical workflow to verify relay chain data is the following:
/// 1. Moonbeam RPC Call: Call `latestRelayBlockNumber` function to get the latest relay
/// block number tracked by the chain in `pallet-storage-root`.
/// 2. Relay RPC Call: Call `chain_getBlockHash(blockNumber)` RPC method to get the relay block hash
/// for the block number obtained in step 1.
/// 3. Relay RPC Call: Call `state_getReadProof(keys, at)` RPC method where `at`
/// is the relay block hash obtained in step 2 to get the 'ReadProof` of the entries.
/// 4. Moonbeam RPC Call: Submit an ethereum transaction (directly or through a SC) to call the
/// `verifyEntry` or `verifyEntries` function to verify the data against the relay block
/// number. The call data contain the relay block number obtained in step 1, and the read
/// proof generated in step 3, along with the key/s to verify.
/// @custom:address 0x0000000000000000000000000000000000000819
interface RelayDataVerifier {
/// @dev ReadProof struct returned by the `state_getReadProof` RPC method.
struct ReadProof {
// The block hash against which the proof is generated
bytes32 at;
/// The storage proof
bytes[] proof;
}
/// @dev Verifies a storage entry in the Relay Chain using a relay block number and a storage
/// proof. This function takes a relay block number, a storage proof, and the key of the storage
/// entry to verify. It returns the value associated with the key if the verification is
/// successful.
/// @custom:selector 27001faa
/// @param relayBlockNumber The relay block number against which the entry is being verified.
/// @param readProof The storage proof used to verify the entry.
/// @param key The key of the storage entry to verify.
/// @return value The value associated with the key, returned as a bytes array.
function verifyEntry(
uint32 relayBlockNumber,
ReadProof calldata readProof,
bytes calldata key
) external returns (bytes memory value);
/// @dev Verifies a set of entries in the Relay Chain and returns the corresponding values.
/// This function takes a relay block number, a storage proof, and an array of keys for the
/// storage entries to verify. It returns an array of values associated with the keys, in the
/// same order as the keys.
/// @custom:selector 2da33a45
/// @param relayBlockNumber The relay block number for which the data is being verified.
/// @param readProof The storage proof used to verify the data.
/// @param keys The keys of the storage entries to verify.
/// @return values The values associated with the keys, returned in the same order as the keys.
function verifyEntries(
uint32 relayBlockNumber,
ReadProof calldata readProof,
bytes[] calldata keys
) external returns (bytes[] memory values);
/// @dev Returns the latest relay block number that has a storage root stored on-chain.
/// @custom:selector aed36869
/// @return relayBlockNumber the lastest relay block number
function latestRelayBlockNumber()
external
view
returns (uint32 relayBlockNumber);
}
```
The interface includes the following functions:
???+ function "**latestRelayBlockNumber**() — retrieves the most recent relay chain block that has its storage root stored on the blockchain itself"
=== "Parameters"
None
=== "Returns"
The latest relay block number that has a storage root stored on-chain.
??? function "**verifyEntry**(_uint32_ relayBlockNumber, _ReadProof_ calldata readProof, _bytes_ callData key) — verifies a storage entry in the relay chain using a relay block number, a storage proof, and the storage key. It returns the value associated with the key if the verification is successful"
=== "Parameters"
- `relayBlockNumber` - the relay block number for which the data is being verified. The latest relay block number can be obtained from the `latestRelayBlockNumber()` function
- `readProof` - a struct defined in the precompile contract, containing the storage proof used to verify the data. The `ReadProof` struct is defined as:
```
struct ReadProof {
// The block hash against which the proof is generated
bytes32 at;
/// The storage proof
bytes[] proof;
}
```
- `key` - the storage key for the generated proof
=== "Returns"
When performing a [static call](https://docs.ethers.org/v6/api/contract/#BaseContractMethod-staticCall){target=\_blank} on the `verifyEntry` function, you can view the returned value associated with the key in hexadecimal format.
```js
'0x01000000040000000100000000000000f88ce384dca20000000000000000000000370589030a0000000000000000000000203d88792d0000000000000000000000000000000000000000000000000080'
```
??? function "**verifyEntries**(_uint32_ relayBlockNumber, _ReadProof_ calldata readProof, _bytes[]_ callData keys) — verifies a set of entries in the relay chain and returns the corresponding values. This function takes a relay block number, a storage proof, and an array of storage keys to verify. It returns an array of values associated with the keys, in the same order as the keys"
=== "Parameters"
- `relayBlockNumber` - the relay block number for which the data is being verified. The latest relay block number can be obtained from the `latestRelayBlockNumber()` function
- `readProof` - a struct defined in the precompile contract, containing the storage proof used to verify the data. The `ReadProof` struct is defined as:
```
struct ReadProof {
// The block hash against which the proof is generated
bytes32 at;
/// The storage proof
bytes[] proof;
}
```
- `keys` - the storage keys for the generated proof
=== "Returns"
When performing a [static call](https://docs.ethers.org/v6/api/contract/#BaseContractMethod-staticCall){target=\_blank} on the `verifyEntries` function, you can view an array containing the corresponding values mapped to their respective keys, represented in hexadecimal format.
```js
['0x01000000040000000100000000000000f88ce384dca20000000000000000000000370589030a0000000000000000000000203d88792d0000000000000000000000000000000000000000000000000080']
```
## Interact with the Solidity Interface {: #interact-with-the-solidity-interface }
A typical workflow to verify relay chain data involves the following steps:
1. **Moonbeam RPC call** - call the `latestRelayBlockNumber` function to get the latest relay block number tracked by the chain in the `pallet-storage-root`
2. **Relay RPC call** - call the `chain_getBlockHash(blockNumber)` RPC method to get the relay block hash for the block number obtained in step one
3. **Relay RPC call** - call the `state_getReadProof(keys, at)` RPC method to retrieve the storage proof, where `at` is the relay block hash obtained in step two, and `keys` is an array of strings which contains the keys for target storage items. For `@polkadot/api`, it can be obtained via `api.query.module.key()` function
4. **Moonbeam RPC call** - submit an Ethereum transaction to call the `verifyEntry` or `verifyEntries` function to verify the data against the relay block number. The call data should contain the relay block number obtained in step one, the read proof generated in step three, and the key(s) to verify
The following sections will cover how to interact with the Relay Data Verifier Precompile using Ethereum libraries, such as Ethers.js, Web3.js, and Web3.py. The examples in this guide will be on Moonbase Alpha.
### Checking Prerequisites {: #checking-prerequisites }
To follow along with this tutorial, you will need to have:
- Create or have an account on Moonbase Alpha to test out the different features in the precompile
- The account will need to be funded with `DEV` tokens.
You can get DEV tokens for testing on Moonbase Alpha once every 24 hours from the [Moonbase Alpha Faucet](https://faucet.moonbeam.network){target=\_blank}
### Using Ethereum Libraries {: #using-ethereum-libraries }
To interact with the Solidity interface using an Ethereum library, you'll need the precompile's ABI (Application Binary Interface). The ABI for the Relay Chain Data Verifier Precompile is as follows:
??? code "Relay Data Verifier Precompile ABI"
```js
[
{
inputs: [],
name: 'latestRelayBlockNumber',
outputs: [
{
internalType: 'uint32',
name: 'relayBlockNumber',
type: 'uint32',
},
],
stateMutability: 'view',
type: 'function',
},
{
inputs: [
{
internalType: 'uint32',
name: 'relayBlockNumber',
type: 'uint32',
},
{
components: [
{
internalType: 'bytes32',
name: 'at',
type: 'bytes32',
},
{
internalType: 'bytes[]',
name: 'proof',
type: 'bytes[]',
},
],
internalType: 'struct RelayDataVerifier.ReadProof',
name: 'readProof',
type: 'tuple',
},
{
internalType: 'bytes[]',
name: 'keys',
type: 'bytes[]',
},
],
name: 'verifyEntries',
outputs: [
{
internalType: 'bytes[]',
name: 'values',
type: 'bytes[]',
},
],
stateMutability: 'nonpayable',
type: 'function',
},
{
inputs: [
{
internalType: 'uint32',
name: 'relayBlockNumber',
type: 'uint32',
},
{
components: [
{
internalType: 'bytes32',
name: 'at',
type: 'bytes32',
},
{
internalType: 'bytes[]',
name: 'proof',
type: 'bytes[]',
},
],
internalType: 'struct RelayDataVerifier.ReadProof',
name: 'readProof',
type: 'tuple',
},
{
internalType: 'bytes',
name: 'key',
type: 'bytes',
},
],
name: 'verifyEntry',
outputs: [
{
internalType: 'bytes',
name: 'value',
type: 'bytes',
},
],
stateMutability: 'nonpayable',
type: 'function',
},
];
```
Once you have the ABI, you can interact with the precompile using the Ethereum library of your choice, such as [Ethers.js](/builders/ethereum/libraries/ethersjs/){target=\_blank}, [Web3.js](/builders/ethereum/libraries/web3js/){target=\_blank}, or [Web3.py](/builders/ethereum/libraries/web3py/){target=\_blank}. The general steps are as follows:
1. Create a provider
2. Create a contract instance of the precompile
3. Interact with the precompile's functions
The provided code example demonstrates how to use the Ethers.js library to interact with the Moonbase Alpha network and its relay chain, verifying a data entry using the `verifyEntry` function.
!!! note
The code snippets presented in the following sections are not meant for production environments. Please make sure you adapt it for each use case.
=== "Ethers.js"
```js
// For reading local ABI file
import * as fs from 'fs';
// Import Ethers library, to interact with Moonbeam networks
import { ethers } from 'ethers';
// Import Polkadot library, to interact with relay chain
import { ApiPromise, WsProvider } from '@polkadot/api';
const abi = JSON.parse(fs.readFileSync('./RelayChainDataVerifierABI.json'));
const privateKey = 'INSERT_PRIVATE_KEY';
const precompileAddress = '0x0000000000000000000000000000000000000819';
const moonbeamURL = 'https://rpc.api.moonbase.moonbeam.network';
const relayURL = 'wss://relay.api.moonbase.moonbeam.network';
// Create Ethers provider and signer
const provider = new ethers.JsonRpcProvider(moonbeamURL);
const signer = new ethers.Wallet(privateKey, provider);
const precompileContract = new ethers.Contract(precompileAddress, abi, signer);
async function run() {
// Create provider for relay chain
const wsProvider = new WsProvider(relayURL);
const api = await ApiPromise.create({ provider: wsProvider });
// Get the storage key for a random account on relay chain
const key = api.query.system.account.key(
'5CBATpb3yvEM4mhX9Dw3tyuqiWKhq9YBG6ugSbodRUSbodoU'
);
// Find the latest available relay chain block number from Moonbeam
const blockNum = await precompileContract.latestRelayBlockNumber();
// Get the block hash and storage proof from relay chain
const blockHash = await api.rpc.chain.getBlockHash(blockNum);
const proof = await api.rpc.state.getReadProof([key], blockHash);
// This tx will be rejected if the verification failed
const receipt = await precompileContract.verifyEntry(blockNum, proof, key);
await receipt.wait();
console.log(receipt.hash);
}
await run();
```
=== "Web3.js"
```js
// For reading local ABI file
import * as fs from 'fs';
// Import web3js library, to interact with Moonbeam networks
import { Web3 } from 'web3';
// Import Polkadot library, to interact with relay chain
import { ApiPromise, WsProvider } from '@polkadot/api';
const abi = JSON.parse(fs.readFileSync('./RelayChainDataVerifierABI.json'));
const privateKey = 'INSERT_PRIVATE_KEY';
const precompileAddress = '0x0000000000000000000000000000000000000819';
const moonbeamURL = 'https://rpc.api.moonbase.moonbeam.network';
const relayURL = 'wss://relay.api.moonbase.moonbeam.network';
// Create Web3js provider and signer
const web3 = new Web3(moonbeamURL);
const precompileContract = new web3.eth.Contract(abi, precompileAddress);
const account = web3.eth.accounts.privateKeyToAccount(privateKey);
async function run() {
// Create provider for relay chain
const wsProvider = new WsProvider(relayURL);
const api = await ApiPromise.create({ provider: wsProvider });
// Get the storage key for a random account on relay chain
const key = api.query.system.account.key(
'5CBATpb3yvEM4mhX9Dw3tyuqiWKhq9YBG6ugSbodRUSbodoU'
);
// Find the latest available relay chain block number from Moonbeam
const blockNum = await precompileContract.methods
.latestRelayBlockNumber()
.call();
// Get the block hash and storage proof from relay chain
const blockHash = await api.rpc.chain.getBlockHash(blockNum);
const proof = await api.rpc.state.getReadProof([key], blockHash);
const callObject = {
to: precompileAddress,
data: precompileContract.methods
.verifyEntry(blockNum, proof, key)
.encodeABI(),
gas: await precompileContract.methods
.verifyEntry(blockNum, proof, key)
.estimateGas(),
gasPrice: await web3.eth.getGasPrice(),
nonce: await web3.eth.getTransactionCount(account.address),
};
// This tx will be rejected if the verification failed
const tx = await web3.eth.accounts.signTransaction(
callObject,
account.privateKey
);
const receipt = await web3.eth.sendSignedTransaction(tx.rawTransaction);
console.log(receipt.transactionHash);
}
await run();
```
=== "Web3.py"
```py
# Import packages
from eth_account import Account
from substrateinterface import SubstrateInterface
from web3 import Web3
# Initialize variables
abi = INSERT_ABI
privateKey = "INSERT_PRIVATE_KEY"
precompileAddress = "0x0000000000000000000000000000000000000819"
moonbeamURL = "https://rpc.api.moonbase.moonbeam.network"
relayURL = "wss://relay.api.moonbase.moonbeam.network"
# Create provider for Moonbeam network
web3 = Web3(Web3.HTTPProvider(moonbeamURL))
account = Account.from_key(privateKey)
precompileContract = web3.eth.contract(address=precompileAddress, abi=abi)
# Create provider for relay chain
substrate = SubstrateInterface(url=relayURL)
# Get storage key
key = substrate.generate_storage_hash(
storage_module="System",
storage_function="Account",
params=["5CBATpb3yvEM4mhX9Dw3tyuqiWKhq9YBG6ugSbodRUSbodoU"],
)
# Find the latest available relay chain block number from Moonbeam
blockNum = precompileContract.functions.latestRelayBlockNumber().call()
# Get the block hash from relay chain
blockHash = substrate.get_block_hash(blockNum)
# Get the storage proof from relay chain
response = substrate.rpc_request("state_getReadProof", [[key], blockHash])
proof = response["result"]
# Call smart contract
tx = precompileContract.functions.verifyEntry(blockNum, proof, key).build_transaction(
{
"from": Web3.to_checksum_address(account.address),
"nonce": web3.eth.get_transaction_count(
Web3.to_checksum_address(account.address)
),
}
)
tx_create = web3.eth.account.sign_transaction(tx, privateKey)
tx_hash = web3.eth.send_raw_transaction(tx_create.rawTransaction)
tx_receipt = web3.eth.wait_for_transaction_receipt(tx_hash)
```
--- END CONTENT ---
Doc-Content: https://docs.moonbeam.network/builders/ethereum/precompiles/ux/batch/
--- BEGIN CONTENT ---
---
title: Batch Precompile Contract
description: Learn how to transact multiple transfers and contract interactions at once via a Solidity interface with Moonbeam's Batch Precompile contract.
keywords: solidity, ethereum, batch, transaction, moonbeam, precompiled, contracts
categories: Precompiles, Ethereum Toolkit
---
# Interacting with the Batch Precompile
## Introduction {: #introduction }
The batch precompiled contract on Moonbeam allows developers to combine multiple EVM calls into one.
Currently, having users interact with multiple contracts would require multiple transaction confirmations in the user's wallet. An example would be approving a smart contract's access to a token, then transferring it. With the batch precompile, developers can enhance user experience with batched transactions as it minimizes the number of transactions a user is required to confirm to one. Additionally, gas fees can be reduced since batching avoids multiple base gas fees (the initial 21000 units of gas spent to begin a transaction).
The precompile interacts directly with [Substrate's EVM pallet](/learn/platform/technology/#evm-pallet){target=\_blank}. The caller of the batch function will have their address act as the `msg.sender` for all subtransactions, but unlike [delegate calls](https://docs.soliditylang.org/en/v0.8.15/introduction-to-smart-contracts.html#delegatecall-callcode-and-libraries){target=\_blank}, the target contract will still affect its own storage. It is effectively the same as if the user signed multiple transactions, but with only one confirmation.
The precompile is located at the following address:
=== "Moonbeam"
```text
{{networks.moonbeam.precompiles.batch }}
```
=== "Moonriver"
```text
{{networks.moonriver.precompiles.batch }}
```
=== "Moonbase Alpha"
```text
{{networks.moonbase.precompiles.batch }}
```
!!! note
There can be some unintended consequences when using the precompiled contracts on Moonbeam. Please refer to the [Security Considerations](/learn/core-concepts/security/){target=\_blank} page for more information.
## The Batch Solidity Interface {: #the-batch-interface }
[`Batch.sol`](https://github.com/moonbeam-foundation/moonbeam/blob/master/precompiles/batch/Batch.sol){target=\_blank} is a Solidity interface that allows developers to interact with the precompile's three methods.
The interface includes the following functions:
??? function "**batchSome**(*address[]* to, *uint256[]* value, *bytes[]* callData, *uint64[]* gasLimit) - performs multiple calls, where the same index of each array combine into the information required for a single subcall. If a subcall reverts, following subcalls will still be attempted"
=== "Parameters"
- `to` - address[] array of addresses to direct subtransactions to, where each entry is a subtransaction
- `value` - uint256[] array of native currency values to send in the subtransactions, where the index corresponds to the subtransaction of the same index in the to array. If this array is shorter than the to array, all the following subtransactions will default to a value of 0
- `callData` - bytes[] array of call data to include in the subtransactions, where the index corresponds to the subtransaction of the same index in the to array. If this array is shorter than the to array, all of the following subtransactions will include no call data
- `gasLimit` - uint64[] array of gas limits in the subtransactions, where the index corresponds to the subtransaction of the same index in the to array. Values of 0 are interpreted as unlimited and will have all remaining gas of the batch transaction forwarded. If this array is shorter than the to array, all of the following subtransactions will have all remaining gas forwarded
??? function "**batchSomeUntilFailure**(*address[]* to, *uint256[]* value, *bytes[]* callData, *uint64[]* gasLimit) - performs multiple calls, where the same index of each array combine into the information required for a single subcall. If a subcall reverts, no following subcalls will be executed"
=== "Parameters"
- `to` - address[] array of addresses to direct subtransactions to, where each entry is a subtransaction
- `value` - uint256[] array of native currency values to send in the subtransactions, where the index corresponds to the subtransaction of the same index in the to array. If this array is shorter than the to array, all the following subtransactions will default to a value of 0
- `callData` - bytes[] array of call data to include in the subtransactions, where the index corresponds to the subtransaction of the same index in the to array. If this array is shorter than the to array, all of the following subtransactions will include no call data
- `gasLimit` - uint64[] array of gas limits in the subtransactions, where the index corresponds to the subtransaction of the same index in the to array. Values of 0 are interpreted as unlimited and will have all remaining gas of the batch transaction forwarded. If this array is shorter than the to array, all of the following subtransactions will have all remaining gas forwarded
??? function "**batchAll**(*address[]* to, *uint256[]* value, *bytes[]* callData, *uint64[]* gasLimit) - performs multiple calls atomically, where the same index of each array combine into the information required for a single subcall. If a subcall reverts, all subcalls will revert"
=== "Parameters"
- `to` - address[] array of addresses to direct subtransactions to, where each entry is a subtransaction
- `value` - uint256[] array of native currency values to send in the subtransactions, where the index corresponds to the subtransaction of the same index in the to array. If this array is shorter than the to array, all the following subtransactions will default to a value of 0
- `callData` - bytes[] array of call data to include in the subtransactions, where the index corresponds to the subtransaction of the same index in the to array. If this array is shorter than the to array, all of the following subtransactions will include no call data
- `gasLimit` - uint64[] array of gas limits in the subtransactions, where the index corresponds to the subtransaction of the same index in the to array. Values of 0 are interpreted as unlimited and will have all remaining gas of the batch transaction forwarded. If this array is shorter than the to array, all of the following subtransactions will have all remaining gas forwarded
The interface also includes the following required events:
- **SubcallSucceeded**(*uint256* index) - emitted when subcall of the given index succeeds
- **SubcallFailed**(*uint256* index) - emitted when a subcall of the given index fails
## Interact with the Solidity Interface {: #interact-with-the-solidity-interface }
### Checking Prerequisites {: #checking-prerequisites }
To follow along with this tutorial, you will need to have:
- [MetaMask installed and connected to Moonbase Alpha](/tokens/connect/metamask/){target=\_blank}
- Create or have two accounts on Moonbase Alpha to test out the different features in the batch precompile
- At least one of the accounts will need to be funded with `DEV` tokens.
You can get DEV tokens for testing on Moonbase Alpha once every 24 hours from the [Moonbase Alpha Faucet](https://faucet.moonbeam.network){target=\_blank}
### Example Contract {: #example-contract}
The contract `SimpleContract.sol` will be used as an example of batching contract interactions, but in practice, any contract can be interacted with.
```solidity
// SPDX-License-Identifier: GPL-3.0-only
pragma solidity >=0.8.0;
contract SimpleContract {
mapping(uint256 => string) public messages;
function setMessage(uint256 id, string calldata message) external {
messages[id] = message;
}
}
```
### Remix Set Up {: #remix-set-up }
You can interact with the batch precompile using [Remix](https://remix.ethereum.org){target=\_blank}. You'll need a copy of [`Batch.sol`](https://github.com/moonbeam-foundation/moonbeam/blob/master/precompiles/batch/Batch.sol){target=\_blank} and [`SimpleContract.sol`](#example-contract). To add the precompile to Remix and follow along with the tutorial, you will need to:
1. Click on the **File explorer** tab
2. Paste the `Batch.sol` contract into a Remix file named **Batch.sol**
3. Paste the `SimpleContract.sol` contract into a Remix file named **SimpleContract.sol**
### Compile the Contract {: #compile-the-contract }
Next, you will need to compile both files in Remix:
1. Make sure that you have the **Batch.sol** file open
2. Click on the **Compile** tab, second from top
3. To compile the contract, click on **Compile Batch.sol**
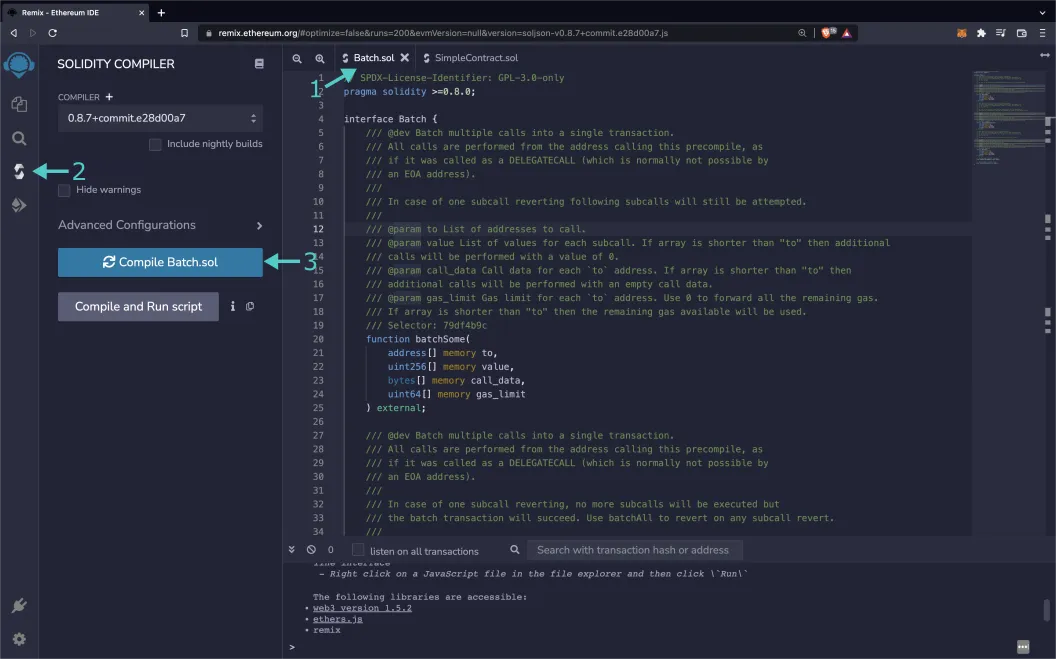
If the interface was compiled successfully, you will see a green checkmark next to the **Compile** tab.
### Access the Precompile {: #access-the-precompile }
Instead of deploying the batch precompile, you will access the interface given the address of the precompiled contract:
1. Click on the **Deploy and Run** tab directly below the **Compile** tab in Remix. Please note the precompiled contract is already deployed
2. Make sure **Injected Provider - Metamask** is selected in the **ENVIRONMENT** dropdown. Once you select **Injected Provider - Metamask**, you might be prompted by MetaMask to connect your account to Remix
3. Make sure the correct account is displayed under **ACCOUNT**
4. Ensure **Batch - Batch.sol** is selected in the **CONTRACT** dropdown. Since this is a precompiled contract, there is no need to deploy any code. Instead we are going to provide the address of the precompile in the **At Address** field
5. Provide the address of the batch precompile: `{{networks.moonbase.precompiles.batch}}` and click **At Address**
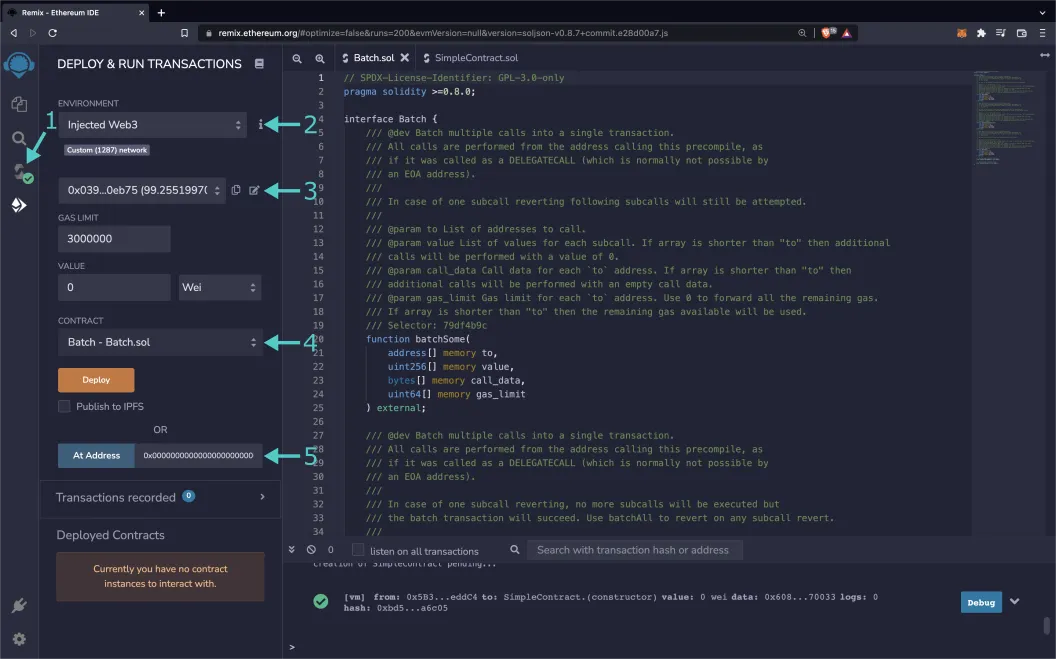
The **BATCH** precompile will appear in the list of **Deployed Contracts**.
### Deploy Example Contract {: #deploy-example-contract }
On the other hand, `SimpleContract.sol` will be deployed as a new contract. Before starting this section, repeat the [compilation step](#compile-the-contract) with the `SimpleContract.sol` file.
1. Click on the **Deploy and Run** tab directly below the **Compile** tab in Remix
2. Make sure **Injected Provider - Metamask** is selected in the **ENVIRONMENT** dropdown. Once you select **Injected Provider - Metamask**, you might be prompted by MetaMask to connect your account to Remix
3. Make sure the correct account is displayed under **ACCOUNT**
4. Ensure **SimpleContract - SimpleContract.sol** is selected in the **CONTRACT** dropdown
5. Click **Deploy**
6. Confirm the MetaMask transaction that appears by clicking **Confirm**

The **SIMPLECONTRACT** contract will appear in the list of **Deployed Contracts**.
### Send Native Currency via Precompile {: #send-native-currency-via-precompile }
Sending native currency with the batch precompile is more involved than pressing a few buttons in Remix or MetaMask. For this example, you will be using the **batchAll** function to send native currency atomically.
Transactions have a value field to specify the amount of native currency being sent with it. In Remix, this is represented by the **VALUE** input in the **DEPLOY & RUN TRANSACTIONS** tab. However, for the batch precompile, this data is provided within the **value** array input of the batch functions.
Try transferring native currency to two wallets of your choice via the batch precompile on Moonbase Alpha:
1. Make sure that you have at least 0.5 DEV in your connected wallet
2. Expand the batch contract under **Deployed Contracts**
3. Expand the **batchAll** function
4. For the **to** input, insert your addresses in the following format: `["INSERT_ADDRESS_1", "INSERT_ADDRESS_2"]`, where the first address corresponds to the first wallet of your choice and the second address corresponds to the second wallet of your choice
5. For the **value** input, insert the amount you wish to transfer in Wei for each address. For example, `["100000000000000000", "200000000000000000"]` will transfer 0.1 DEV to the first address and 0.2 DEV to the second address
6. For both of the remaining **callData** and **gasLimit** inputs, insert `[]`. Call data and gas limit are not a concern for transferring native currency
7. Press **transact**
8. Press **Confirm** in the MetaMask extension to confirm the transaction
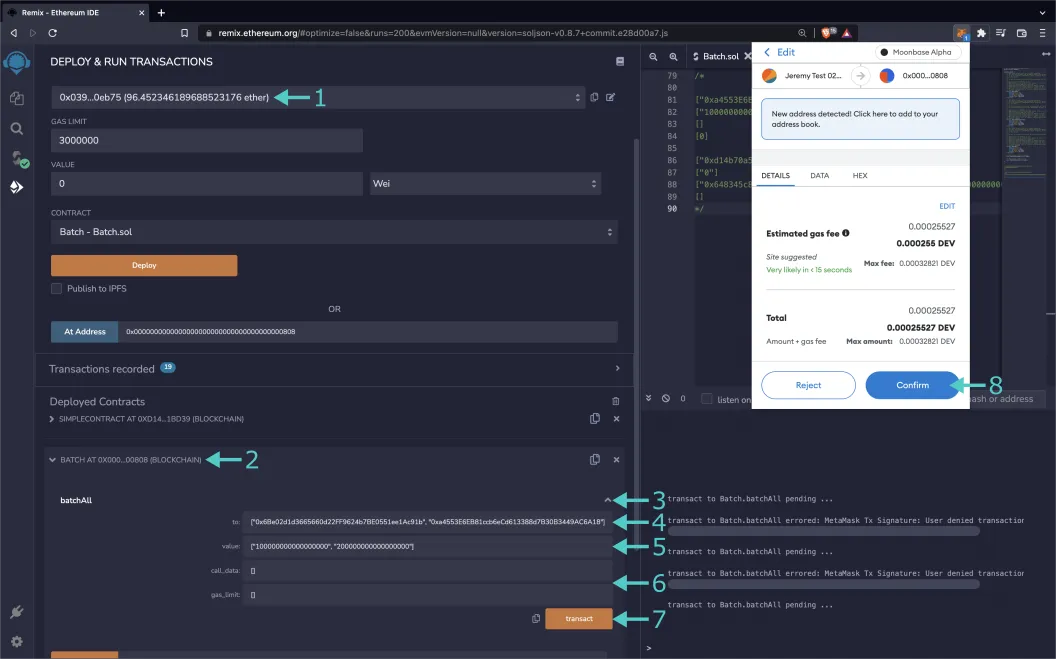
Once the transaction is complete, be sure to check both of the accounts' balances, either in MetaMask or in a [block explorer](/builders/get-started/explorers/){target=\_blank}. Congratulations! You've now sent a batched transfer via the batch precompile.
!!! note
Typically if you wanted to send the native currency to or through a contract, you would have to set the value within the overall transaction object and interact with a payable function. However, since the batch precompile interacts directly with Substrate code, this is not a typical Ethereum transaction and is thus not necessary.
### Find a Contract Interaction's Call Data {: #find-a-contract-interactions-call-data }
Visual interfaces like [Remix](/builders/ethereum/dev-env/remix/){target=\_blank} and handy libraries like [Ethers.js](/builders/ethereum/libraries/ethersjs/){target=\_blank} hide the way that Ethereum transactions interact with Solidity smart contracts. The name and input types of a function are hashed into a [function selector](https://docs.soliditylang.org/en/latest/abi-spec.html#function-selector-and-argument-encoding){target=\_blank} and the input data is encoded. These two pieces are then combined and sent as the transaction's call data. To send a subtransaction within a batch transaction, the sender needs to know its call data beforehand.
Try finding a transaction's call data using Remix:
1. Expand the `SimpleContract.sol` contract under **Deployed Contracts**
2. Expand the **setMessage** function
3. Enter the input of the function. For this example, **id** will be `1` and **message** will be `"moonbeam"`
4. Instead of sending the transaction, click the copy button next to the **transact** button to copy the call data
Now you have the transaction's call data! Considering the example values of `1` and `"moonbeam"`, we can keep an eye out for their encoded values in the call data:
```text
0x648345c8 // function selector
0000000000000000000000000000000000000000000000000000000000000001 // 1 id
0000000000000000000000000000000000000000000000000000000000000040 // 64 string offset
0000000000000000000000000000000000000000000000000000000000000008 // 8 length in bytes
6d6f6f6e6265616d000000000000000000000000000000000000000000000000 // "moonbeam" in bytes
```
The call data can be broken into five lines, where:
- The first line is the function selector
- The second line is equal to 1, which is the **id** that was provided
- What's left has to do with the **message** input. These last three lines are tricky, since strings are a [dynamic type](https://docs.soliditylang.org/en/v0.8.15/abi-spec.html#use-of-dynamic-types){target=\_blank} with a dynamic length. The third line refers to an offset to define where the string's data starts. The fourth line refers to the string's length, in this case 8 because "moonbeam" is 8 bytes long . Finally, the fifth line is "moonbeam" in hexadecimal format (8 ASCII characters are 16 hexadecimal characters) left aligned and with zeros for padding
### Function Interaction via Precompile {: #function-interaction-via-precompile }
This section's example will be using the **batchAll** function that will ensure the transactions are resolved atomically. Keep in mind that there are also two other batch functions that can either continue subtransactions despite errors or halt subsequent subtransactions but not revert previous ones.
Interacting with a function is very similar to [sending a native currency](#send-native-currency-via-precompile), since they are both transactions. However, call data is required to properly provide input to functions and a sender may desire to limit the amount of gas spent in each subtransaction.
The `callData` and `gasLimit` fields are more relevant for subtransactions that interact with contracts. For each function in the batch interface, the `callData` input is an array where each index corresponds to the call data for each recipient of the subtransaction, that is, each `to` input. If the size of the `callData` array is less than the `to` array, the remaining subtransactions will have no call data (functions with no inputs). The `gasLimit` input is an array that corresponds to the amount of gas that each can spend for each subtransaction. If its value at an index is 0 or the index is the size of the array or greater (and smaller than the `to` array's size), all of the remaining gas from the previous subtransaction is forwarded.
To use the precompile to send an atomic batch transaction, take the following steps:
1. Copy the `SimpleContract.sol` contract's address with the copy button on the right side of its header. Be sure to also have the [call data from the previous section](#find-a-contract-interactions-call-data)
2. Expand the batch contract under **Deployed Contracts**
3. Expand the **batchAll** function
4. For the **to** input, insert the address of the `SimpleContract.sol` contract that you previously copied in the following format: `["INSERT_SIMPLE_CONTRACT_ADDRESS"]`
5. For the value input, since `SimpleContract.sol` does not require any native currency to be paid to it, insert `["0"]` for 0 Wei
6. For the **callData** input, insert your call data from the previous section in the following format: `["INSERT_CALL_DATA"]`
7. For the **gasLimit** input, insert `[]`. You can put in a gas limit value, but it is optional
8. Press **transact**
9. Press **Confirm** in the MetaMask extension to confirm the transaction
If you used the same call data as the tutorial, check to make sure that the transaction has been successful:
1. Expand the `SimpleContract.sol` contract under **Deployed Contracts**
2. To the right of the **messages** button, insert `1`
3. Press the blue **messages** button
The phrase **"moonbeam"** should appear underneath it. Congratulations! You have interacted with a function with the batch precompile.
### Combining Subtransactions {: combining-subtransactions }
So far, transferring native currency and interacting with functions have been separate, but they can be intertwined.
The following four strings can be combined as inputs for a batch transaction. They will transact 1 DEV to the public Gerald (`0x6Be02d1d3665660d22FF9624b7BE0551ee1Ac91b`) account, and interact with a predeployed `SimpleContract.sol` contract twice. Here is a break-down:
There are three subtransactions, so there are three addresses in the `to` input array. The first is the public Gerald account, the next two are a predeployed `SimpleContract.sol` contract. You can replace the last two with your own instance of `SimpleContract.sol` if you wish. Or, replace only one: you can interact with multiple contracts in a single message.
```text
[
"0x6Be02d1d3665660d22FF9624b7BE0551ee1Ac91b",
"0xd14b70a55F6cBAc06d4FA49b99be0370D0e1BD39",
"0xd14b70a55F6cBAc06d4FA49b99be0370D0e1BD39"
]
```
There will also be three values for the `value` array. The first address in the `to` input array has to do with sending 1 DEV, so 1 DEV in Wei is within the array. The following two values are 0 because the function that their subtransactions are interacting with do not accept or require native currency.
```text
["1000000000000000000", "0", "0"]
```
You will need three values for the `callData` array. Since transferring native currency does not require call data, the string is simply blank. The second and third values in the array correspond to invocations of **setMessage** that set messages to ids 5 and 6.
```text
[
"0x",
"0x648345c8000000000000000000000000000000000000000000000000000000000000000500000000000000000000000000000000000000000000000000000000000000400000000000000000000000000000000000000000000000000000000000000009796f752061726520610000000000000000000000000000000000000000000000",
"0x648345c800000000000000000000000000000000000000000000000000000000000000060000000000000000000000000000000000000000000000000000000000000040000000000000000000000000000000000000000000000000000000000000000e61206d6f6f6e6265616d2070726f000000000000000000000000000000000000"
]
```
The final input is for `gas_input`. This array will be left empty to forward all remaining gas to each subtransaction.
```text
[]
```
Try sending a batched transaction with these inputs in Remix the same way [you batched a function call](#function-interaction-via-precompile).
And that's it! You've successfully interacted with the ERC-20 precompile using MetaMask and Remix!
## Ethereum Development Libraries {: #ethereum-development-libraries }
If you have followed the [Ethers.js tutorial](/builders/ethereum/libraries/ethersjs/){target=\_blank} on Moonbeam, you may find it difficult to find the call data for a function. The answer is hidden within Ether's `Interface` object, where the [encodeFunctionData](https://docs.ethers.org/v6/api/abi/#Interface-encodeFunctionData){target=\_blank} function allows you to input your function name and inputs to receive the resultant call data. [Web3.js](/builders/ethereum/libraries/web3js/){target=\_blank} has a similar function, [encodeFunctionCall](https://web3js.readthedocs.io/en/v1.2.11/web3-eth-abi.html#encodefunctioncall){target=\_blank}.
!!! note
The code snippets presented in the following sections are not meant for production environments. Please make sure you adapt it for each use-case.
=== "Ethers.js"
```js
// Import the contract ABI
const { abi } = require('./INSERT_ABI_PATH');
// Use ABI to create an interface
const yourContractInterface = new ethers.Interface(abi);
// Find call data for the setMessage function
const callData = yourContractInterface.encodeFunctionData(
'INSERT_FUNCTION_NAME',
[
'INSERT_INPUT_1',
'INSERT_INPUT_2',
// ...
]
);
```
=== "Web3.js"
```js
// Import the contract ABI
const { abi } = require('./INSERT_ABI_PATH');
// Find call data for the setMessage function
const callData = web3.eth.abi.encodeFunctionCall(abi, [
'INSERT_INPUT_1',
'INSERT_INPUT_2',
// ...
]);
```
=== "Web3.py"
```py
# Import the ABI and bytecode
from compile import abi, bytecode
# Create contract instance
your_contract = web3.eth.contract(abi=abi, bytecode=bytecode)
# Encode the contract call
call_data = your_contract.encodeABI(
fn_name="INSERT_FUNCTION_NAME", args=["INSERT_INPUT_1", "INSERT_INPUT_2", ...]
)
```
Afterwards, you should be all set to interact with the batch precompile as one typically would with a contract in [Ethers](/builders/ethereum/libraries/ethersjs/){target=\_blank}.
--- END CONTENT ---
Doc-Content: https://docs.moonbeam.network/builders/ethereum/precompiles/ux/call-permit/
--- BEGIN CONTENT ---
---
title: Call Permit Precompile Contract
description: Learn how to use the Call Permit Precompile contract on Moonbeam to sign a permit for any EVM call that can be dispatched by anyone or any smart contract.
keywords: solidity, ethereum, call permit, permit, gasless transaction, moonbeam, precompiled, contracts
categories: Precompiles, Ethereum Toolkit
---
# Interacting with the Call Permit Precompile
## Introduction {: #introduction }
The Call Permit Precompile on Moonbeam allows a user to sign a permit, an [EIP-712](https://eips.ethereum.org/EIPS/eip-712){target=\_blank} signed message, for any EVM call and it can be dispatched by anyone or any smart contract. It is similar to the [ERC-20 Permit Solidity Interface](/builders/interoperability/xcm/xc20/interact/#the-erc20-permit-interface){target=\_blank}, except it applies to any EVM call instead of approvals only.
When the call permit is dispatched, it is done so on behalf of the user who signed the permit and the user or contract that dispatches the permit is responsible for paying transaction fees. As such, the precompile can be used to perform gas-less transactions.
For example, Alice signs a call permit and Bob dispatches it and performs the call on behalf of Alice. Bob pays for the transaction fees and as such, Alice doesn't need to have any of the native currency to pay for the transaction, unless the call includes a transfer.
The Call Permit Precompile is located at the following address:
=== "Moonbeam"
```text
{{networks.moonbeam.precompiles.call_permit }}
```
=== "Moonriver"
```text
{{networks.moonriver.precompiles.call_permit }}
```
=== "Moonbase Alpha"
```text
{{networks.moonbase.precompiles.call_permit }}
```
!!! note
There can be some unintended consequences when using the precompiled contracts on Moonbeam. Please refer to the [Security Considerations](/learn/core-concepts/security/){target=\_blank} page for more information.
## The Call Permit Solidity Interface {: #the-call-permit-interface }
[`CallPermit.sol`](https://github.com/moonbeam-foundation/moonbeam/blob/master/precompiles/call-permit/CallPermit.sol){target=\_blank} is a Solidity interface that allows developers to interact with the precompile's three methods.
The interface includes the following functions:
??? function "**dispatch**(*address* from, *address* to, *uint256* value, *bytes* data, *uint64[]* gaslimit, *uint256* deadline, *uint8* v, *bytes32* r, *bytes32* s) - dispatches a call on the behalf of another user with a EIP-712 permit. This function can be called by anyone or any smart contract. The transaction will revert if the permit is not valid or if the dispatched call reverts or errors (such as out of gas). If successful, the nonce of the signer is increased to prevent this permit to be replayed"
=== "Parameters"
- `from` - address of the signer of the permit. The call will be dispatched on behalf of this address
- `to` - address the call is made to
- `value` - uint256 value being transferred from the `from` account
- `data` - bytes containing the call data, or action to be executed
- `gasLimit` - uint64[] gas limit the dispatched call requires. Providing an argument for this parameter prevents the dispatcher from manipulating the gas limit
- `deadline` - uint256 time in UNIX seconds after which the permit will no longer be valid. In JavaScript, you can get the current time in UNIX seconds by running `console.log(Date.now())` in a JavaScript script or a browser console
- `v` - uint8 recovery ID of the signature. The last one byte of the concatenated signature
- `r` - bytes32 first 32 bytes of the concatenated signature
- `s` - bytes32 second 32 bytes of the concatenated signature
??? function "**nonces**(*address* owner) - returns the current nonce for given owner"
=== "Parameters"
- `owner` - address of the account to query the nonce for
??? function "**DOMAIN_SEPARATOR**() - returns the EIP-712 domain separator which is used to avoid replay attacks. It follows the [EIP-2612](https://eips.ethereum.org/EIPS/eip-2612#specification){target=\_blank} implementation"
=== "Parameters"
None.
The domain separator is defined in the [EIP-712 standard](https://eips.ethereum.org/EIPS/eip-712){target=\_blank} and is calculated as:
```text
keccak256(PERMIT_DOMAIN, name, version, chain_id, address)
```
The parameters of the hash can be broken down as follows:
- **PERMIT_DOMAIN** - is the `keccak256` of `EIP712Domain(string name,string version,uint256 chainId,address verifyingContract)`
- **name** - is the name of the signing domain and must be `'Call Permit Precompile'` exactly
- **version** - is the version of the signing domain. For this case **version** is set to `1`
- **chainId** - is the chain ID of the network
- **verifyingContract** - is the address of the contract that will verify the signature. In this case, the Call Permit Precompile address
When `dispatch` is called, the permit needs to be verified before the call is dispatched. The first step is to [compute the domain separator](https://github.com/moonbeam-foundation/moonbeam/blob/ae705bb2e9652204ace66c598a00dcd92445eb81/precompiles/call-permit/src/lib.rs#L138){target=\_blank}. The calculation can be seen in [Moonbeam's implementation](https://github.com/moonbeam-foundation/moonbeam/blob/ae705bb2e9652204ace66c598a00dcd92445eb81/precompiles/call-permit/src/lib.rs#L112-L126){target=\_blank} or you can check out a practical example in [OpenZeppelin's EIP712 contract](https://github.com/OpenZeppelin/openzeppelin-contracts/blob/4a9cc8b4918ef3736229a5cc5a310bdc17bf759f/contracts/utils/cryptography/draft-EIP712.sol#L70-L84){target=\_blank}.
From there, a [hash of the signature and the given arguments](https://github.com/moonbeam-foundation/moonbeam/blob/ae705bb2e9652204ace66c598a00dcd92445eb81/precompiles/call-permit/src/lib.rs#L140-L151){target=\_blank} is generated which guarantees that the signature can only be used for the call permit. It uses a given nonce to ensure the signature is not subject to a replay attack. It is similar to [OpenZeppelin's `ERC20Permit` contract](https://github.com/OpenZeppelin/openzeppelin-contracts/blob/4a9cc8b4918ef3736229a5cc5a310bdc17bf759f/contracts/token/ERC20/extensions/draft-ERC20Permit.sol#L52){target=\_blank}, except the `PERMIT_TYPEHASH` is for a call permit, and the arguments match that of the [dispatch function](#:~:text=The interface includes the following functions) plus the nonce.
The domain separator and the hash struct can be used to build the [final hash](https://github.com/moonbeam-foundation/moonbeam/blob/ae705bb2e9652204ace66c598a00dcd92445eb81/precompiles/call-permit/src/lib.rs#L153-L157){target=\_blank} of the fully encoded message. A practical example is shown in [OpenZeppelin's EIP712 contract](https://github.com/OpenZeppelin/openzeppelin-contracts/blob/4a9cc8b4918ef3736229a5cc5a310bdc17bf759f/contracts/utils/cryptography/draft-EIP712.sol#L101){target=\_blank}.
With the final hash and the v, r, and s values, the signature can be [verified and recovered](https://github.com/moonbeam-foundation/moonbeam/blob/ae705bb2e9652204ace66c598a00dcd92445eb81/precompiles/call-permit/src/lib.rs#L211-L223){target=\_blank}. If successfully verified, the nonce will increase by one and the call will be dispatched.
## Setup the Contracts {: #setup-the-example-contract }
For this example, you'll learn how to sign a call permit that updates a message in a simple example contract, [`SetMessage.sol`](#example-contract). Before you can generate the call permit signature, you'll need to deploy the contract and define the `dispatch` function arguments for the call permit.
Once you've setup the example contract, then you can setup the Call Permit Precompile contract.
### Checking Prerequisites {: #checking-prerequisites }
To follow along with this tutorial, you will need to have:
- [MetaMask installed and connected to Moonbase Alpha](/tokens/connect/metamask/){target=\_blank}
- Create or have two accounts on Moonbase Alpha to test out the different features in the Call Permit Precompile
- At least one of the accounts will need to be funded with `DEV` tokens.
You can get DEV tokens for testing on Moonbase Alpha once every 24 hours from the [Moonbase Alpha Faucet](https://faucet.moonbeam.network){target=\_blank}
### Example Contract {: #example-contract }
The `SetMessage.sol` contract will be used as an example of using a call permit, but in practice, any contract can be interacted with.
```solidity
// SPDX-License-Identifier: GPL-3.0
pragma solidity 0.8.7;
contract SetMessage {
string storedMessage;
function set(string calldata x) public {
storedMessage = x;
}
function get() public view returns (string memory) {
return storedMessage;
}
}
```
### Remix Set Up {: #remix-set-up }
You can use [Remix](https://remix.ethereum.org){target=\_blank} to compile the example contract and deploy it. You'll need a copy of [`SetMessage.sol`](#example-contract){target=\_blank} and [`CallPermit.sol`](https://github.com/moonbeam-foundation/moonbeam/blob/master/precompiles/call-permit/CallPermit.sol){target=\_blank}. To add the contracts to Remix, you can take the following steps:
1. Click on the **File explorer** tab
2. Paste the `SetMessage.sol` contract into a Remix file named `SetMessage.sol`
3. Paste the `CallPermit.sol` contract into a Remix file named `CallPermit.sol`
### Compile & Deploy the Example Contract {: #compile-deploy-example-contract }
First you'll need to compile the example contract:
1. Click on the **Compile** tab, second from top
2. Then to compile the interface, click on **Compile SetMessage.sol**
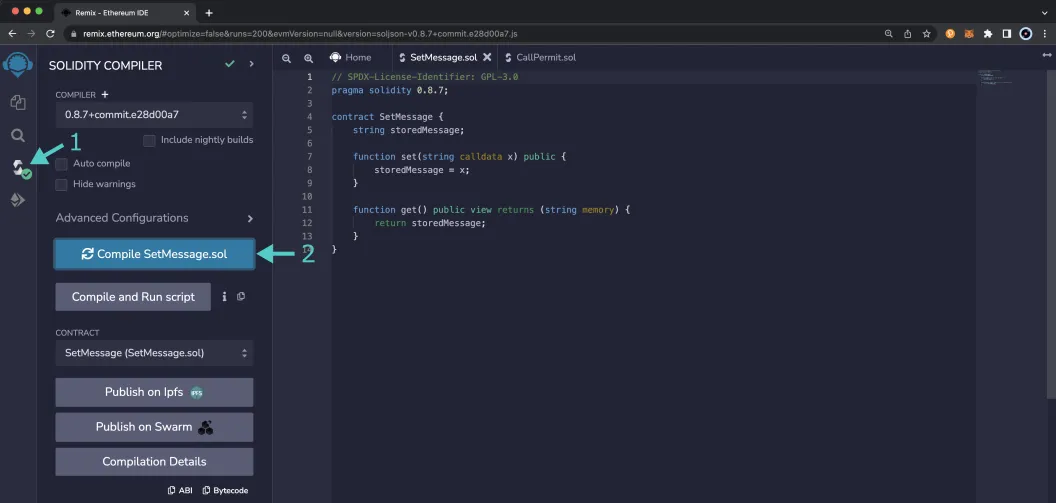
Then you can deploy it:
1. Click on the **Deploy and Run** tab, directly below the **Compile** tab in Remix. Note: you are not deploying a contract here, instead you are accessing a precompiled contract that is already deployed
2. Make sure **Injected Provider - Metamask** is selected in the **ENVIRONMENT** drop down
3. Ensure **SetMessage.sol** is selected in the **CONTRACT** dropdown
4. Click **Deploy**
4. MetaMask will pop up and you'll need to **Confirm** the transaction
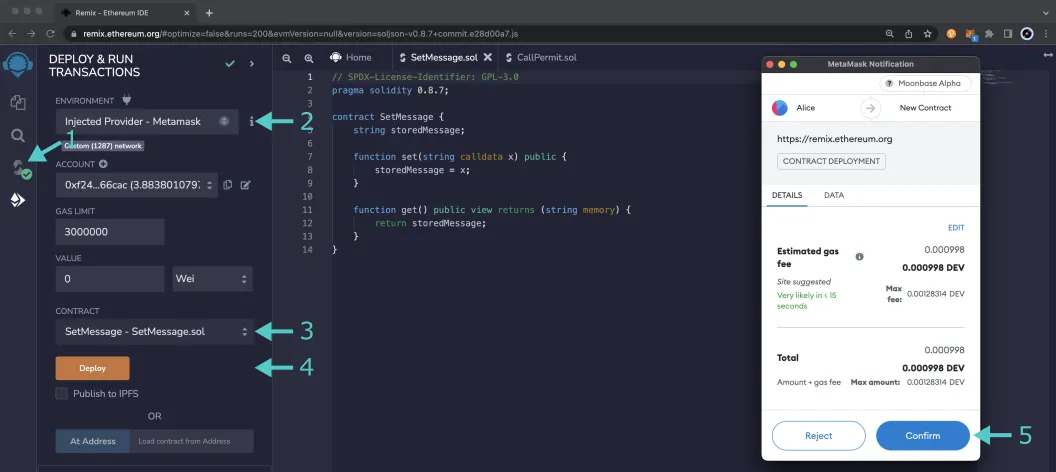
The contract will appear under the list of **Deployed Contracts** on the left side panel. Copy the contract address as you will need to use it to generate the call permit signature in the next section.
### Compile & Access the Call Permit Precompile {: #compile-access-call-permit }
First you'll need to compile the Call Permit Precompile contract:
1. Click on the **Compile** tab, second from top
2. Then to compile the interface, click on **Compile CallPermit.sol**
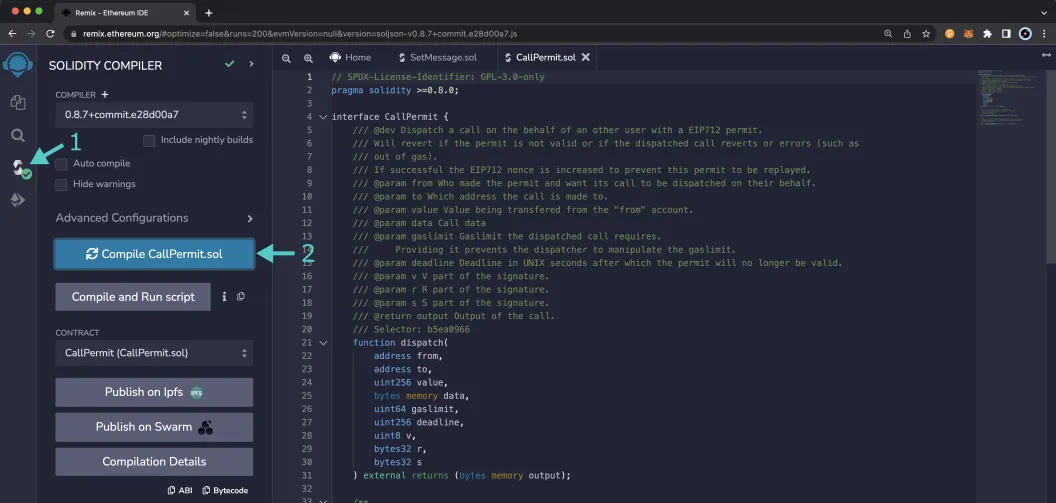
Then instead of deploying the contract, you'll just need to access it given the address of the precompile:
1. Click on the **Deploy and Run** tab, directly below the **Compile** tab in Remix. Note: you are not deploying a contract here, instead you are accessing a precompiled contract that is already deployed
2. Make sure **Injected Provider - Metamask** is selected in the **ENVIRONMENT** drop down
3. Ensure **CallPermit.sol** is selected in the **CONTRACT** dropdown. Since this is a precompiled contract there is no need to deploy, instead you are going to provide the address of the precompile in the **At Address** field
4. Provide the address of the Call Permit Precompile for Moonbase Alpha: `{{networks.moonbase.precompiles.call_permit}}` and click **At Address**
5. The Call Permit Precompile will appear in the list of **Deployed Contracts**

## Generate Call Permit Signature {: #generate-call-permit-signature}
In order to interact with the Call Permit Precompile, you have to have or generate a signature to dispatch the call permit with. There are several ways you can generate the signature, this guide will show you two different ways to generate it: in the browser using the [MetaMask extension](https://chromewebstore.google.com/detail/metamask/nkbihfbeogaeaoehlefnkodbefgpgknn){target=\_blank} and [JSFiddle](https://jsfiddle.net){target=\_blank} and using MetaMask's [`@metamask/eth-sig-util` npm package](https://www.npmjs.com/package/@metamask/eth-sig-util){target=\_blank}.
Regardless of which method you choose to generate the signature, the following steps will be taken:
1. The `message` will be created and includes some of the data that is needed to create the call permit. It includes the arguments that will be passed into the `dispatch` function and the nonce of the signer
2. A JSON structure of the data the user needs to sign will be assembled for the call permit and include all of the types for the `dispatch` arguments and the nonce. This will result in the `CallPermit` type and will be saved as the `primaryType`
3. The domain separator will be created using `"Call Permit Precompile"` exactly for the name, the version of your DApp or platform, the chain ID of the network the signature is to be used on, and the address of the contract that will verify the signature
4. All of the assembled data, the `types`, `domain`, `primaryType` and `message`, will be signed using MetaMask (either in the browser or through the MetaMask's JavaScript signing library)
5. The signature will be returned and you can use [Ethers.js](https://docs.ethers.org/v6){target=\_blank} [`Signature.from` method](https://docs.ethers.org/v6/api/crypto/#Signature_from){target=\_blank} to return the `v`, `r`, and `s` values of the signature
### The Call Permit Arguments {: #call-permit-arguments }
As seen in the [Call Permit Interface](#the-call-permit-interface) section, the `dispatch` function takes the following parameters: `from`, `to`, `value`, `data`, `gasLimit`, `deadline`, `v`, `r`, and `s`.
In order to get the signature arguments (`v`, `r`, and `s`), you'll need to sign a message containing the arguments for the remainder of the aforementioned parameters, plus the nonce of the signer.
- `from` - the address of the account you want to sign the call permit with
- `to` - the contract address for the `SetMessage.sol` contract
- `value` - can be `0` for this example as you'll just be setting a message instead of transferring any funds
- `data` - you can send any message you would like, you'll just need the hex representation of the message you want to set using the `SetMessage.sol` contract. This will contain the function selector of the `set` function and the string of the message. For this example, you can send `hello world`. To do so, you can use this hex representation:
```text
0x4ed3885e0000000000000000000000000000000000000000000000000000000000000020000000000000000000000000000000000000000000000000000000000000000b68656c6c6f20776f726c64000000000000000000000000000000000000000000
```
- `gasLimit` - `100000` will be enough to send the dispatched call
- `deadline` - you can get the current time in UNIX seconds by running `console.log(Date.now())` in a JavaScript script or a browser console. Once you have the current time, you can add additional time in seconds to represent when the call permit will expire
The nonce of the signer will also be needed. If this is your first time signing a call permit the nonce will be `0`. You can also check the nonce in Remix:
1. Expand the call permit contract
2. Next to the **nonces** function, enter the address of the signer and click on **nonces**
3. The result will be returned directly under the function
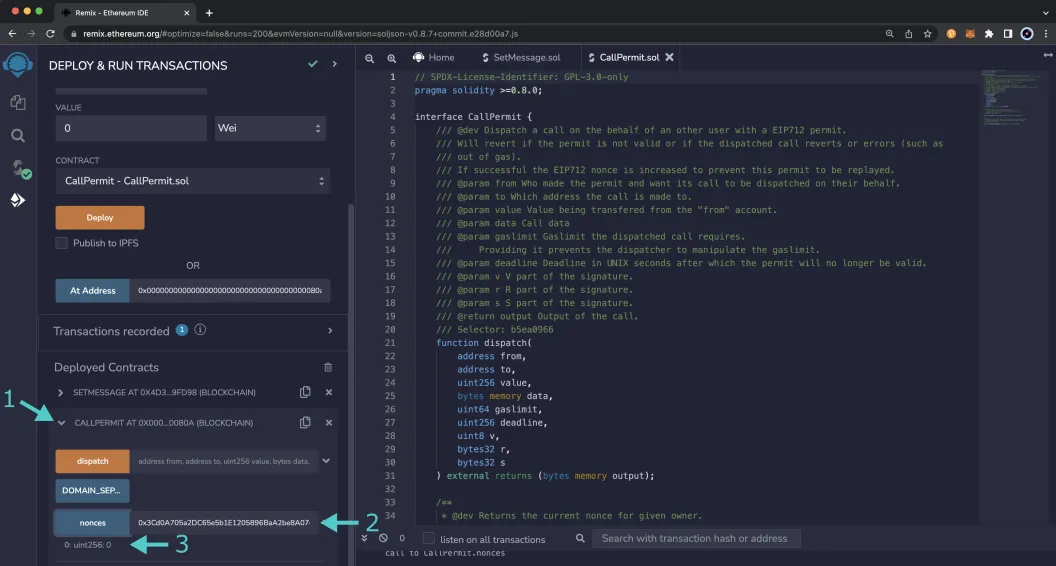
### Use the Browser {: #use-the-browser }
To get started, you can open [JSFiddle](https://jsfiddle.net){target=\_blank} or another JavaScript playground in the browser. First, you'll need to add [Ethers.js](/builders/ethereum/libraries/ethersjs/){target=\_blank} as it will be used to get the `v`, `r`, and `s` values of the signature:
1. Click on **Resources**
2. Start to type in `ethers` and the dropdown should populate matching libraries. Choose **ethers**
3. Click on the **+** button
The CDN for Ethers.js will appear in the list of libraries under **Resources**.
In the **Javascript** code box, copy and paste the following JavaScript snippet, making sure to replace the `to` variables (and any other variables as you see fit):
```js
const main = async () => {
await window.ethereum.enable();
const accounts = await window.ethereum.request({
method: 'eth_requestAccounts',
});
const from = accounts[0];
const to = 'INSERT_TO_ADDRESS';
const value = 0;
const data =
'0x4ed3885e0000000000000000000000000000000000000000000000000000000000000020000000000000000000000000000000000000000000000000000000000000000b68656c6c6f20776f726c64000000000000000000000000000000000000000000';
const gaslimit = 100000;
const nonce = 'INSERT_SIGNERS_NONCE';
const deadline = 'INSERT_DEADLINE';
const createPermitMessageData = function () {
const message = {
from: from,
to: to,
value: value,
data: data,
gaslimit: gaslimit,
nonce: nonce,
deadline: deadline,
};
const typedData = JSON.stringify({
types: {
EIP712Domain: [
{
name: 'name',
type: 'string',
},
{
name: 'version',
type: 'string',
},
{
name: 'chainId',
type: 'uint256',
},
{
name: 'verifyingContract',
type: 'address',
},
],
CallPermit: [
{
name: 'from',
type: 'address',
},
{
name: 'to',
type: 'address',
},
{
name: 'value',
type: 'uint256',
},
{
name: 'data',
type: 'bytes',
},
{
name: 'gaslimit',
type: 'uint64',
},
{
name: 'nonce',
type: 'uint256',
},
{
name: 'deadline',
type: 'uint256',
},
],
},
primaryType: 'CallPermit',
domain: {
name: 'Call Permit Precompile',
version: '1',
chainId: 1287,
verifyingContract: '0x000000000000000000000000000000000000080a',
},
message: message,
});
return {
typedData,
message,
};
};
const method = 'eth_signTypedData_v4';
const messageData = createPermitMessageData();
const params = [from, messageData.typedData];
web3.currentProvider.sendAsync(
{
method,
params,
from,
},
function (err, result) {
if (err) return console.dir(err);
if (result.error) {
alert(result.error.message);
return console.error('ERROR', result);
}
console.log('Signature:' + JSON.stringify(result.result));
const ethersSignature = ethers.Signature.from(result.result);
const formattedSignature = {
r: ethersSignature.r,
s: ethersSignature.s,
v: ethersSignature.v,
};
console.log(formattedSignature);
}
);
};
main();
```
To run the code, click **Run** at the top of the page (or you can also use `control` and `s`). MetaMask should pop up and prompt you to connect an account. Make sure to choose the account you want to sign the message with. Then go ahead and sign the message.
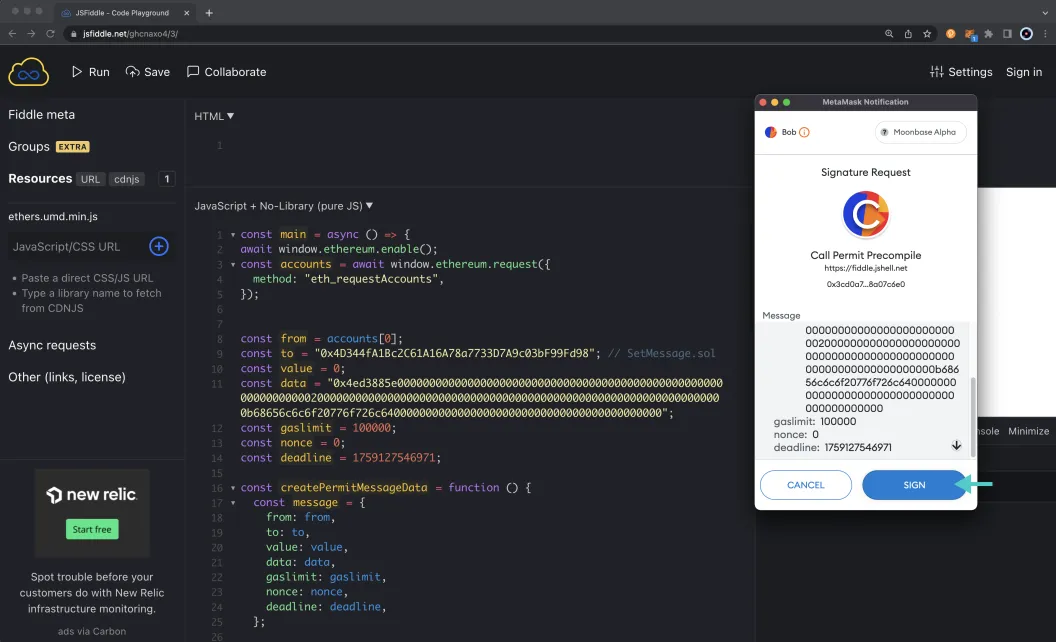
Once you've signed the message, go back to JSFiddle and if the console isn't already open, go ahead and open it to see the signature values include the `v`, `r`, and `s`, values. Copy these values as you'll need them when interacting with the Call Permit Precompile in the following sections.
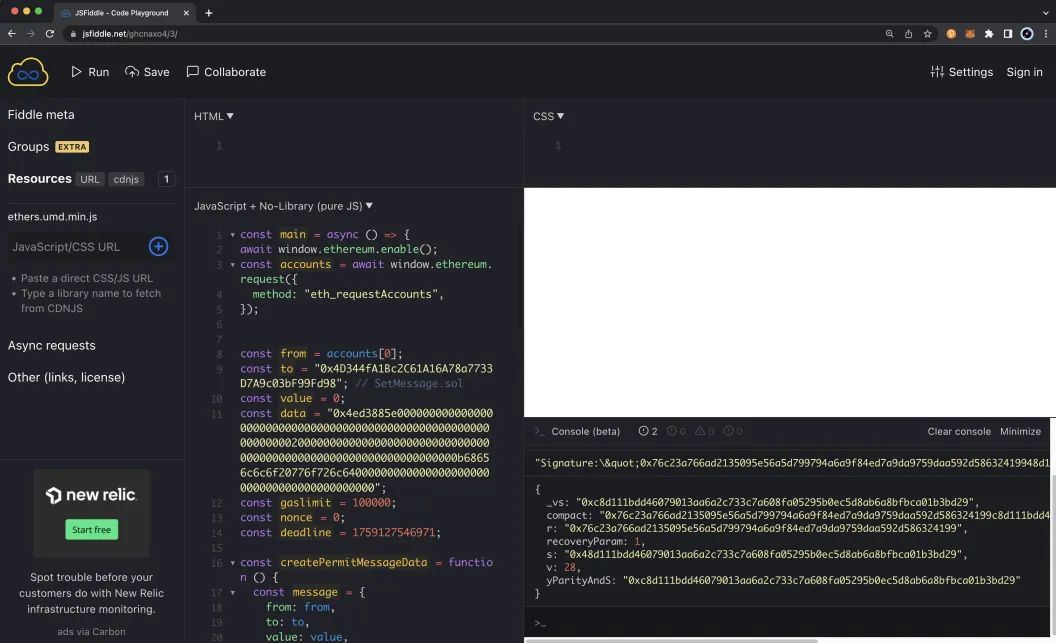
### Use MetaMask's JS Signing Library {: #use-metamasks-signing-library }
To generate the call permit signature using JavaScript and MetaMask's [`@metamask/eth-sig-util` npm package](https://www.npmjs.com/package/@metamask/eth-sig-util){target=\_blank}, you'll first need to create a project locally. You can do so with the following commands:
```bash
mkdir call-permit-example && cd call-permit-example && touch getSignature.js
npm init -y
```
You should now have a file where you can create the script to get the signature along with a `package.json` file. Open the `package.json` file, and below the `"dependencies"` section, add:
```json
"type": "module"
```
Next, you can install the MetaMask signing library and [Ethers.js](https://docs.ethers.org/v6){target=\_blank}:
```bash
npm i @metamask/eth-sig-util ethers
```
!!! note
Never reveal your private keys as they give direct access to your funds. The following steps are for demonstration purposes only.
In the `getSignature.js` file, you can copy the following code snippet:
```js
import { ethers } from 'ethers';
import { signTypedData, SignTypedDataVersion } from '@metamask/eth-sig-util';
const from = 'INSERT_FROM_ADDRESS';
const to = 'INSERT_TO_ADDRESS';
const value = 0;
const data =
'0x4ed3885e0000000000000000000000000000000000000000000000000000000000000020000000000000000000000000000000000000000000000000000000000000000b68656c6c6f20776f726c64000000000000000000000000000000000000000000';
const gaslimit = 100000;
const nonce = 'INSERT_SIGNERS_NONCE';
const deadline = 'INSERT_DEADLINE';
const createPermitMessageData = () => {
const message = {
from: from,
to: to,
value: value,
data: data,
gaslimit: gaslimit,
nonce: nonce,
deadline: deadline,
};
const typedData = {
types: {
EIP712Domain: [
{ name: 'name', type: 'string' },
{ name: 'version', type: 'string' },
{ name: 'chainId', type: 'uint256' },
{ name: 'verifyingContract', type: 'address' },
],
CallPermit: [
{ name: 'from', type: 'address' },
{ name: 'to', type: 'address' },
{ name: 'value', type: 'uint256' },
{ name: 'data', type: 'bytes' },
{ name: 'gaslimit', type: 'uint64' },
{ name: 'nonce', type: 'uint256' },
{ name: 'deadline', type: 'uint256' },
],
},
primaryType: 'CallPermit',
domain: {
name: 'Call Permit Precompile',
version: '1',
chainId: 1287,
verifyingContract: '0x000000000000000000000000000000000000080a',
},
message: message,
};
return {
typedData,
message,
};
};
const messageData = createPermitMessageData();
// For demo purposes only. Never store your private key in a JavaScript/TypeScript file
const signature = signTypedData({
privateKey: Buffer.from('INSERT_FROM_ACCOUNT_PRIVATE_KEY', 'hex'),
data: messageData.typedData,
version: SignTypedDataVersion.V4,
});
console.log(`Transaction successful with hash: ${signature}`);
const ethersSignature = ethers.Signature.from(signature);
const formattedSignature = {
r: ethersSignature.r,
s: ethersSignature.s,
v: ethersSignature.v,
};
console.log(formattedSignature);
```
To run the script, use the following command:
```bash
node getSignature.js
```
In the console, you should see the concatenated signature along with the values for the signature including the `v`, `r`, and `s` values. Copy these values as you'll need them when interacting with the Call Permit Precompile in the following sections.
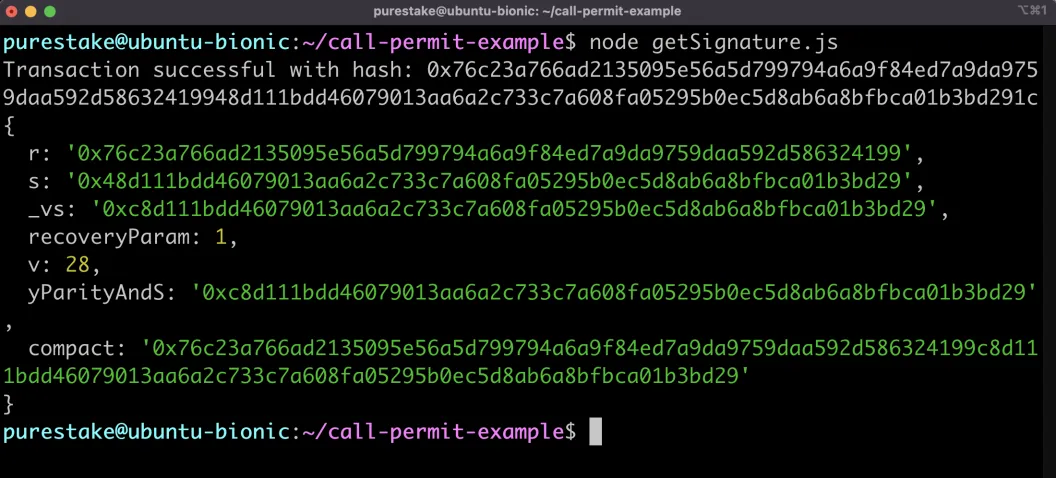
## Interact with the Solidity Interface {: #interact-with-the-solidity-interface }
Now that you have generated the call permit signature you will be able to test out calling the `dispatch` function of the Call Permit Precompile.
### Dispatch a Call {: #dispatch-a-call }
When you send the `dispatch` function, you'll need the same arguments as you used to sign the call permit. To get started, go back to the **Deploy and Run** tab in Remix and under the **Deployed Contracts** section expand the call permit contract. Make sure that you're connected to the account that you want to consume the call permit and pay the transaction fees with. Then take the following steps:
1. For the **from** field, enter the account address you used to sign the call permit with
2. Copy and paste the contract address of `SetMessage.sol`
3. Enter `0` for the **value** field
4. Enter the hex representation of the function selector for the `set` function and the string you want to set as the message for the `SetMessage.sol` contract. For this example, `hello world` can be used:
```text
0x4ed3885e0000000000000000000000000000000000000000000000000000000000000020000000000000000000000000000000000000000000000000000000000000000b68656c6c6f20776f726c64000000000000000000000000000000000000000000
```
5. Enter `100000` for the **gasLimit** field
6. Enter the `deadline` you used when signing the call permit
7. Copy the `v` value you should have retrieved while generating the call permit signature and paste it into the **v** field
8. Copy the `r` value you should have retrieved while generating the call permit signature and paste it into the **r** field
9. Copy the `s` value you should have retrieved while generating the call permit signature and paste it into the **s** field
10. Click **transact** to send the transaction
11. MetaMask should pop-up and you can confirm the transaction
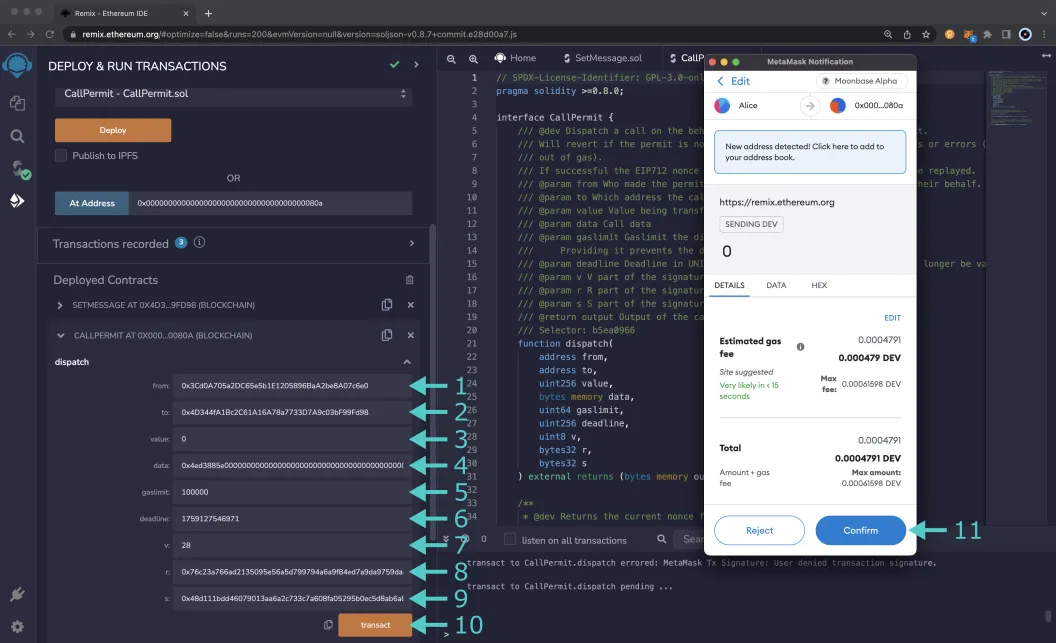
Once the transaction goes through, you can verify that the message was updated to `hello world`. To do so, you can:
1. Expand the `SetMessage.sol` contract
2. Click on **get**
3. The result will appear below the function, and it should show `hello world`
Congratulations! You've successfully generated a call permit signature and used it to dispatch a call on behalf of the call permit signer.
--- END CONTENT ---
Doc-Content: https://docs.moonbeam.network/builders/ethereum/precompiles/ux/erc20/
--- BEGIN CONTENT ---
---
title: Native Token ERC-20 Precompile
description: Learn how to access and interact with an ERC-20 representation of the native token on Moonbeam through the precompiled ERC-20 Interface.
keywords: solidity, ethereum, native, token, moonbeam, precompiled, contracts
categories: Precompiles, Ethereum Toolkit
---
# Native Token ERC-20 Precompile
## Introduction {: #introduction }
The native token ERC-20 precompiled contract on Moonbeam allows developers to interact with the native protocol token through an ERC-20 interface. Although GLMR and MOVR are not ERC-20 tokens, now you can interact with them as if they were native ERC-20s!
One of the main benefits of this precompile is that it removes the necessity of having a wrapped representation of the protocol token as an ERC-20 smart contract, such as WETH on Ethereum. Furthermore, it prevents having multiple wrapped representations of the same protocol token. Consequently, DApps that need to interact with the protocol token via an ERC-20 interface can do so without needing a separate smart contract.
Under the hood, the [ERC-20 precompile](https://github.com/moonbeam-foundation/moonbeam/blob/master/precompiles/balances-erc20/src/lib.rs){target=\_blank} executes specific Substrate actions related to the Substrate balances pallet, which is coded in Rust. The balances pallet provides functionality for handling the [various types of balances on Moonbeam](/learn/core-concepts/balances/#moonbeam-account-balances){target=\_blank}, setting the free balance, transferring balances, and more.
This guide will show you how to interact with DEV tokens, the native protocol tokens for the Moonbase Alpha TestNet, via the ERC-20 precompile. You can also follow and adapt this guide to learn how to use GLMR or MOVR as an ERC-20 token.
The precompile is located at the following address:
=== "Moonbeam"
```text
{{networks.moonbeam.precompiles.erc20 }}
```
=== "Moonriver"
```text
{{networks.moonriver.precompiles.erc20 }}
```
=== "Moonbase Alpha"
```text
{{networks.moonriver.precompiles.erc20 }}
```
!!! note
There can be some unintended consequences when using the precompiled contracts on Moonbeam. Please refer to the [Security Considerations](/learn/core-concepts/security/){target=\_blank} page for more information.
## The ERC-20 Solidity Interface {: #the-erc20-interface }
The [`ERC20.sol`](https://github.com/moonbeam-foundation/moonbeam/blob/master/precompiles/balances-erc20/ERC20.sol){target=\_blank} interface on Moonbeam follows the [EIP-20 Token Standard](https://eips.ethereum.org/EIPS/eip-20){target=\_blank} which is the standard API interface for tokens within smart contracts. The standard defines the required functions and events that a token contract must implement to be interoperable with different applications.
The interface includes the following functions:
??? function "**name**() - read-only function that returns the name of the token"
=== "Parameters"
None.
??? function "**symbol**() - read-only function that returns the symbol of the token"
=== "Parameters"
None.
??? function "**decimals**() - read-only function that returns the decimals of the token"
=== "Parameters"
None.
??? function "**totalSupply**() - read-only function that returns the total number of tokens in existence"
=== "Parameters"
None.
??? function "**balanceOf**(*address* who) - read-only function that returns the balance of the specified address"
=== "Parameters"
- `who` - address of the account to query the balance of
??? function "**allowance**(*address* owner, *address* spender) - read-only function that checks and returns the amount of tokens that a spender is allowed to spend on behalf of the owner"
=== "Parameters"
- `owner` - address of the account that owns the tokens
- `spender` - address of the account allowed to spend the tokens
??? function "**transfer**(*address* to, *uint256* value) - transfers a given amount of tokens to a specified address and returns `true` if the transfer was successful"
=== "Parameters"
- `to` - address of the recipient
- `value` - uint256 amount of tokens to transfer
??? function "**approve**(*address* spender, *uint256* value) - approves the provided address to spend a specified amount of tokens on behalf of `msg.sender`. Returns `true` if successful"
=== "Parameters"
- `spender` - address to be approved to spend the tokens
- `value` - uint256 amount of tokens to be approved for spending
??? function "**transferFrom**(*address* from, *address* to, *uint256* value) - transfers tokens from one given address to another given address and returns `true` if successful"
=== "Parameters"
- `from` - address to transfer tokens from
- `to` - address to transfer tokens to
- `value` - uint256 amount of tokens to transfer
!!! note
The ERC-20 standard does not specify the implications of multiple calls to `approve`. Changing an allowance with this function numerous times enables a possible attack vector. To avoid incorrect or unintended transaction ordering, you can first reduce the `spender` allowance to `0` and then set the desired allowance afterward. For more details on the attack vector, you can check out the [ERC-20 API: An Attack Vector on Approve/TransferFrom Methods](https://docs.google.com/document/d/1YLPtQxZu1UAvO9cZ1O2RPXBbT0mooh4DYKjA_jp-RLM/edit#){target=\_blank} overview.
The interface also includes the following required events:
- **Transfer**(*address indexed* from, *address indexed* to, *uint256* value) - emitted when a transfer has been performed
- **Approval**(*address indexed* owner, *address indexed* spender, *uint256* value) - emitted when an approval has been registered
!!! note
The ERC-20 precompile does not include `deposit` and `withdraw` functions and subsequent events that are expected from a wrapped token contract, such as WETH.
## Interact with the Solidity Interface {: #interact-with-the-solidity-interface }
### Checking Prerequisites {: #checking-prerequisites }
To follow along with this tutorial, you will need to have:
- [MetaMask installed and connected to Moonbase Alpha](/tokens/connect/metamask/){target=\_blank}
- Create or have two accounts on Moonbase Alpha to test out the different features in the ERC-20 precompile
- At least one of the accounts will need to be funded with `DEV` tokens.
You can get DEV tokens for testing on Moonbase Alpha once every 24 hours from the [Moonbase Alpha Faucet](https://faucet.moonbeam.network){target=\_blank}
### Add Token to MetaMask {: #add-token-to-metamask }
If you want to interact with Moonbase Alpha DEV tokens like you would with an ERC-20 in MetaMask, you can create a custom token using the precompile address.
To get started, open up MetaMask and make sure you are [connected to Moonbase Alpha](/tokens/connect/metamask/){target=\_blank} and:
1. Switch to the **Assets** tab
2. Click on **Import tokens**
Now, you can create a custom token:
1. Enter the precompile address for the token contract address - `{{networks.moonbase.precompiles.erc20 }}`. As soon as you enter the address, the **Token Symbol** and **Token Decimal** fields should automatically populate. If they don't you can enter `DEV` for the symbol and `18` for the decimal places
2. Click **Add Custom Token**
MetaMask will prompt you to import the tokens. You can review the token details and click **Import Tokens** to import DEV tokens into your wallet.
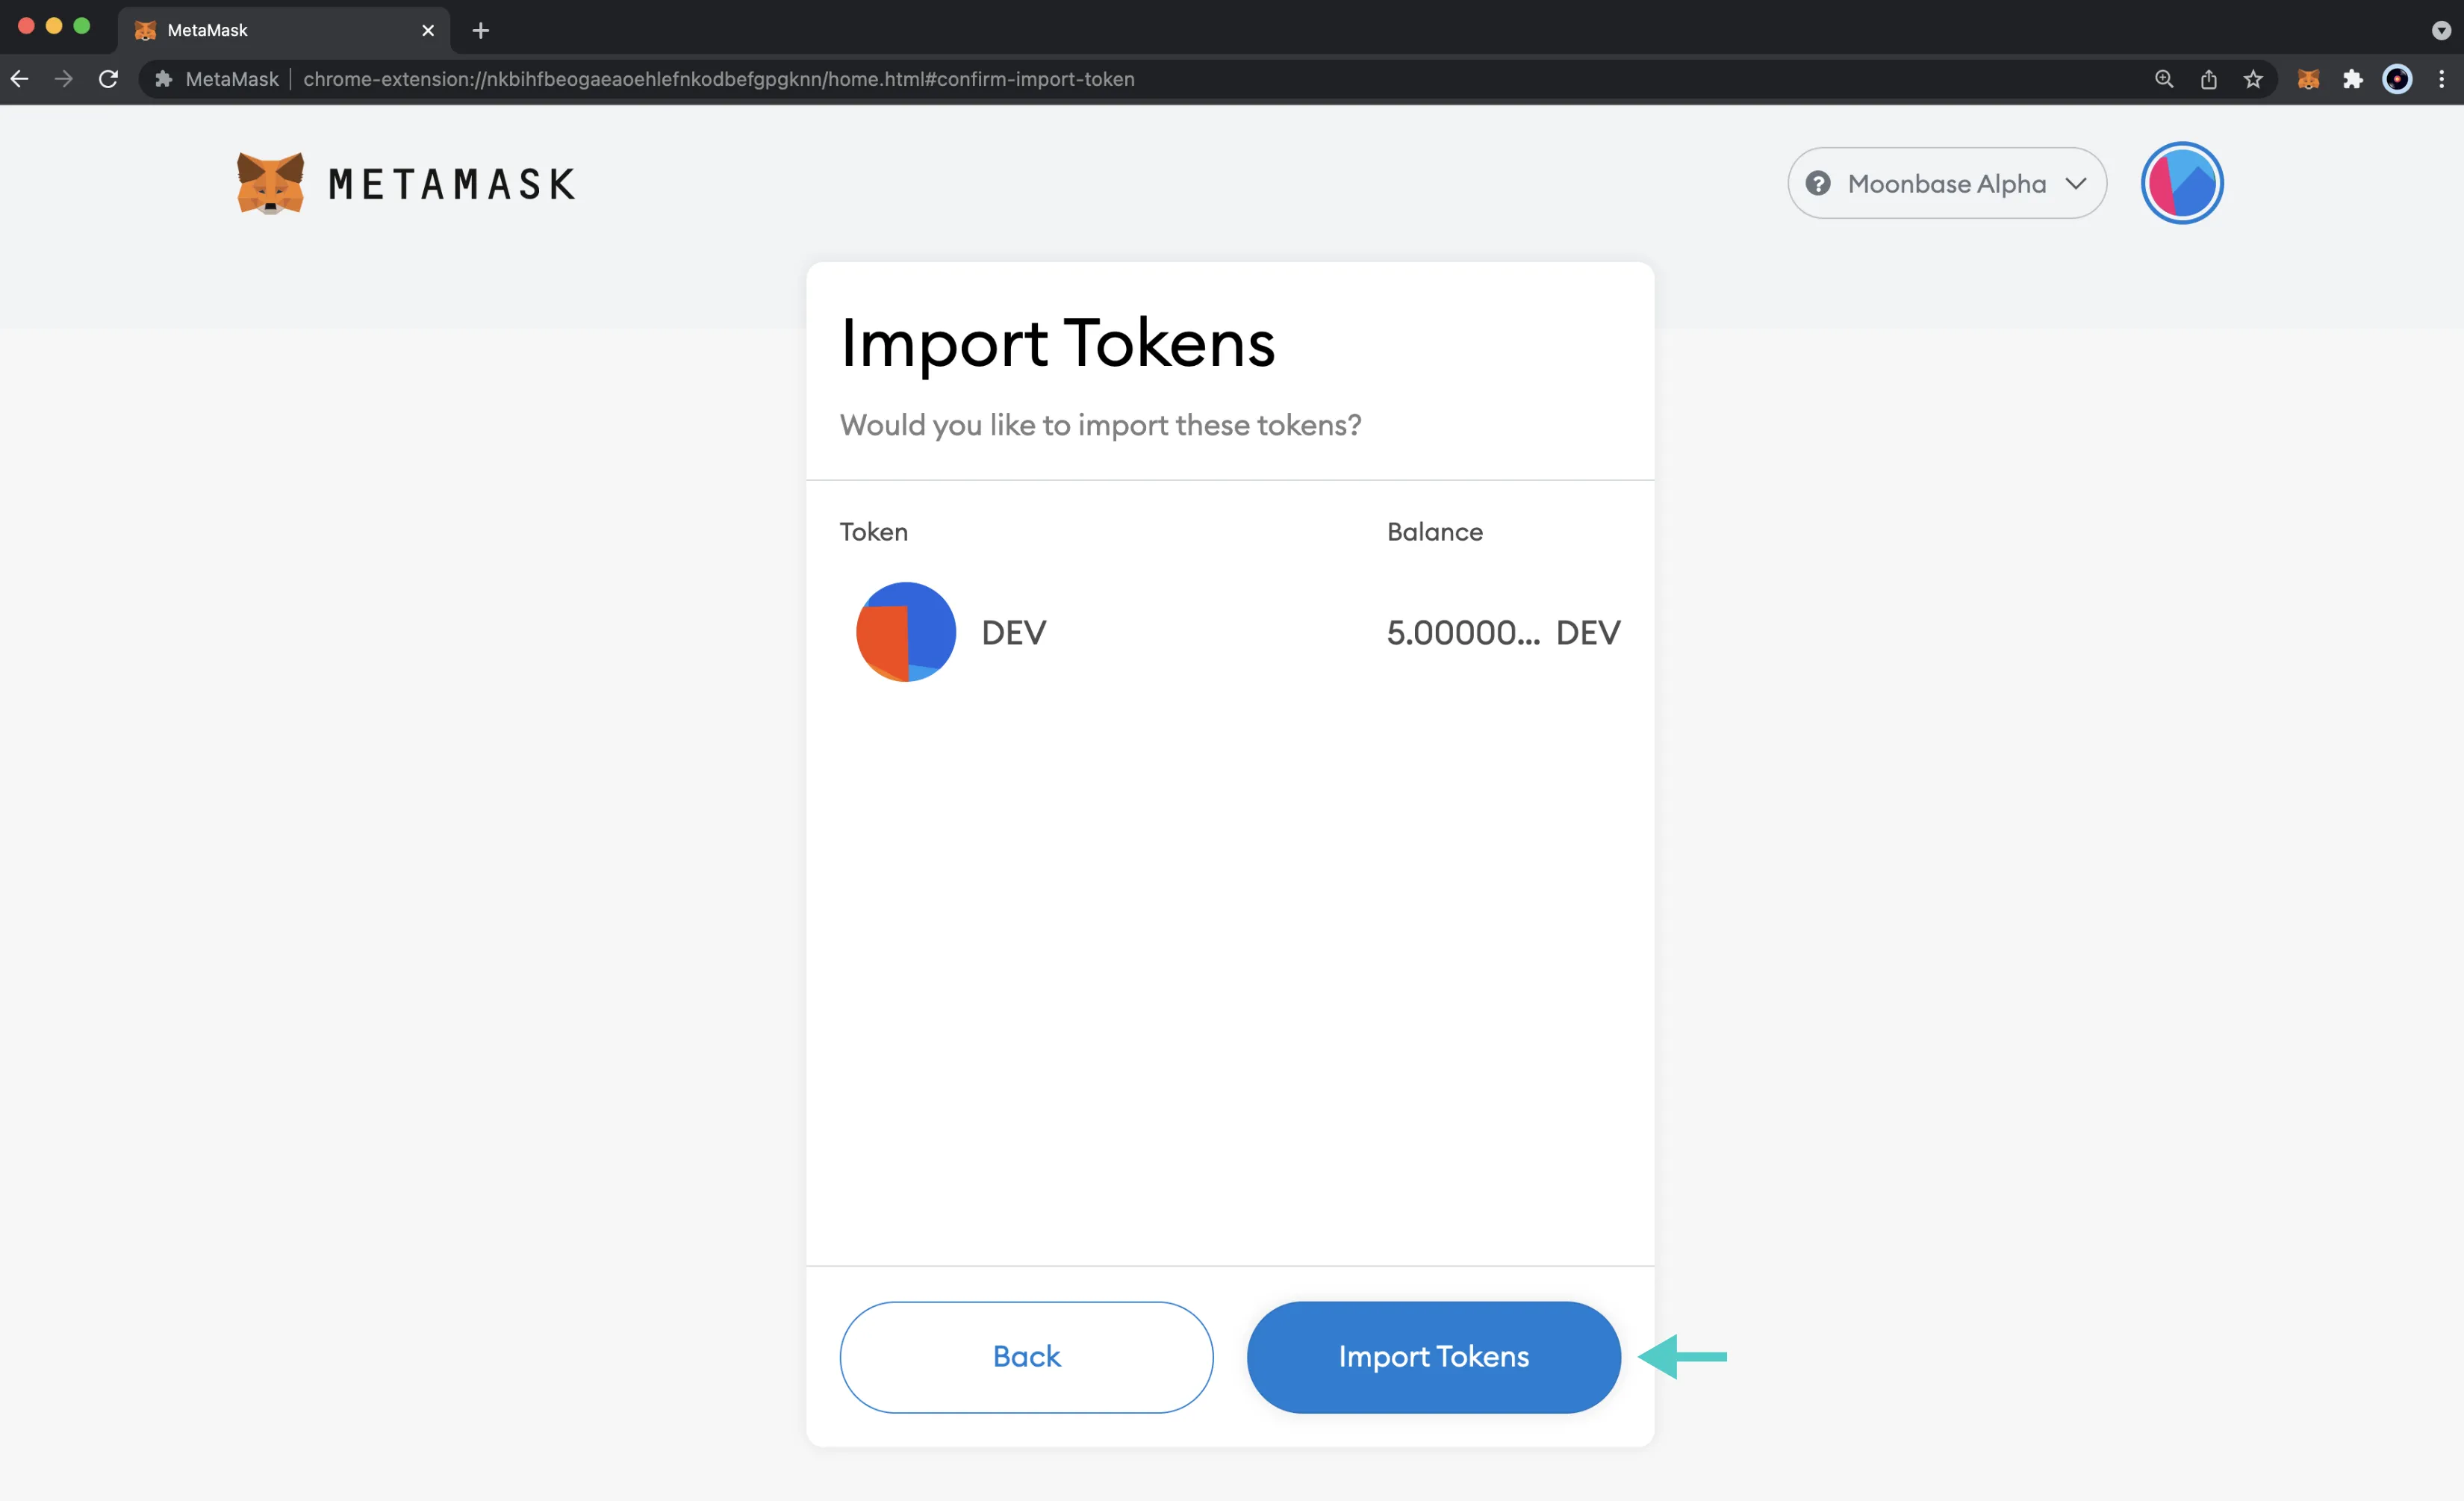
And that's it! You've successfully added the DEV token as a custom ERC-20 token on the Moonbase Alpha TestNet.
### Remix Set Up {: #remix-set-up }
You can interact with the ERC-20 precompile using [Remix](https://remix.ethereum.org){target=\_blank}. To add the precompile to Remix, you will need to:
1. Get a copy of [`ERC20.sol`](https://github.com/moonbeam-foundation/moonbeam/blob/master/precompiles/balances-erc20/ERC20.sol){target=\_blank}
2. Paste the file contents into a Remix file named `IERC20.sol`
### Compile the Contract {: #compile-the-contract }
Next, you will need to compile the interface in Remix:
1. Click on the **Compile** tab, second from top
2. Compile the interface by clicking on **Compile IERC20.sol**
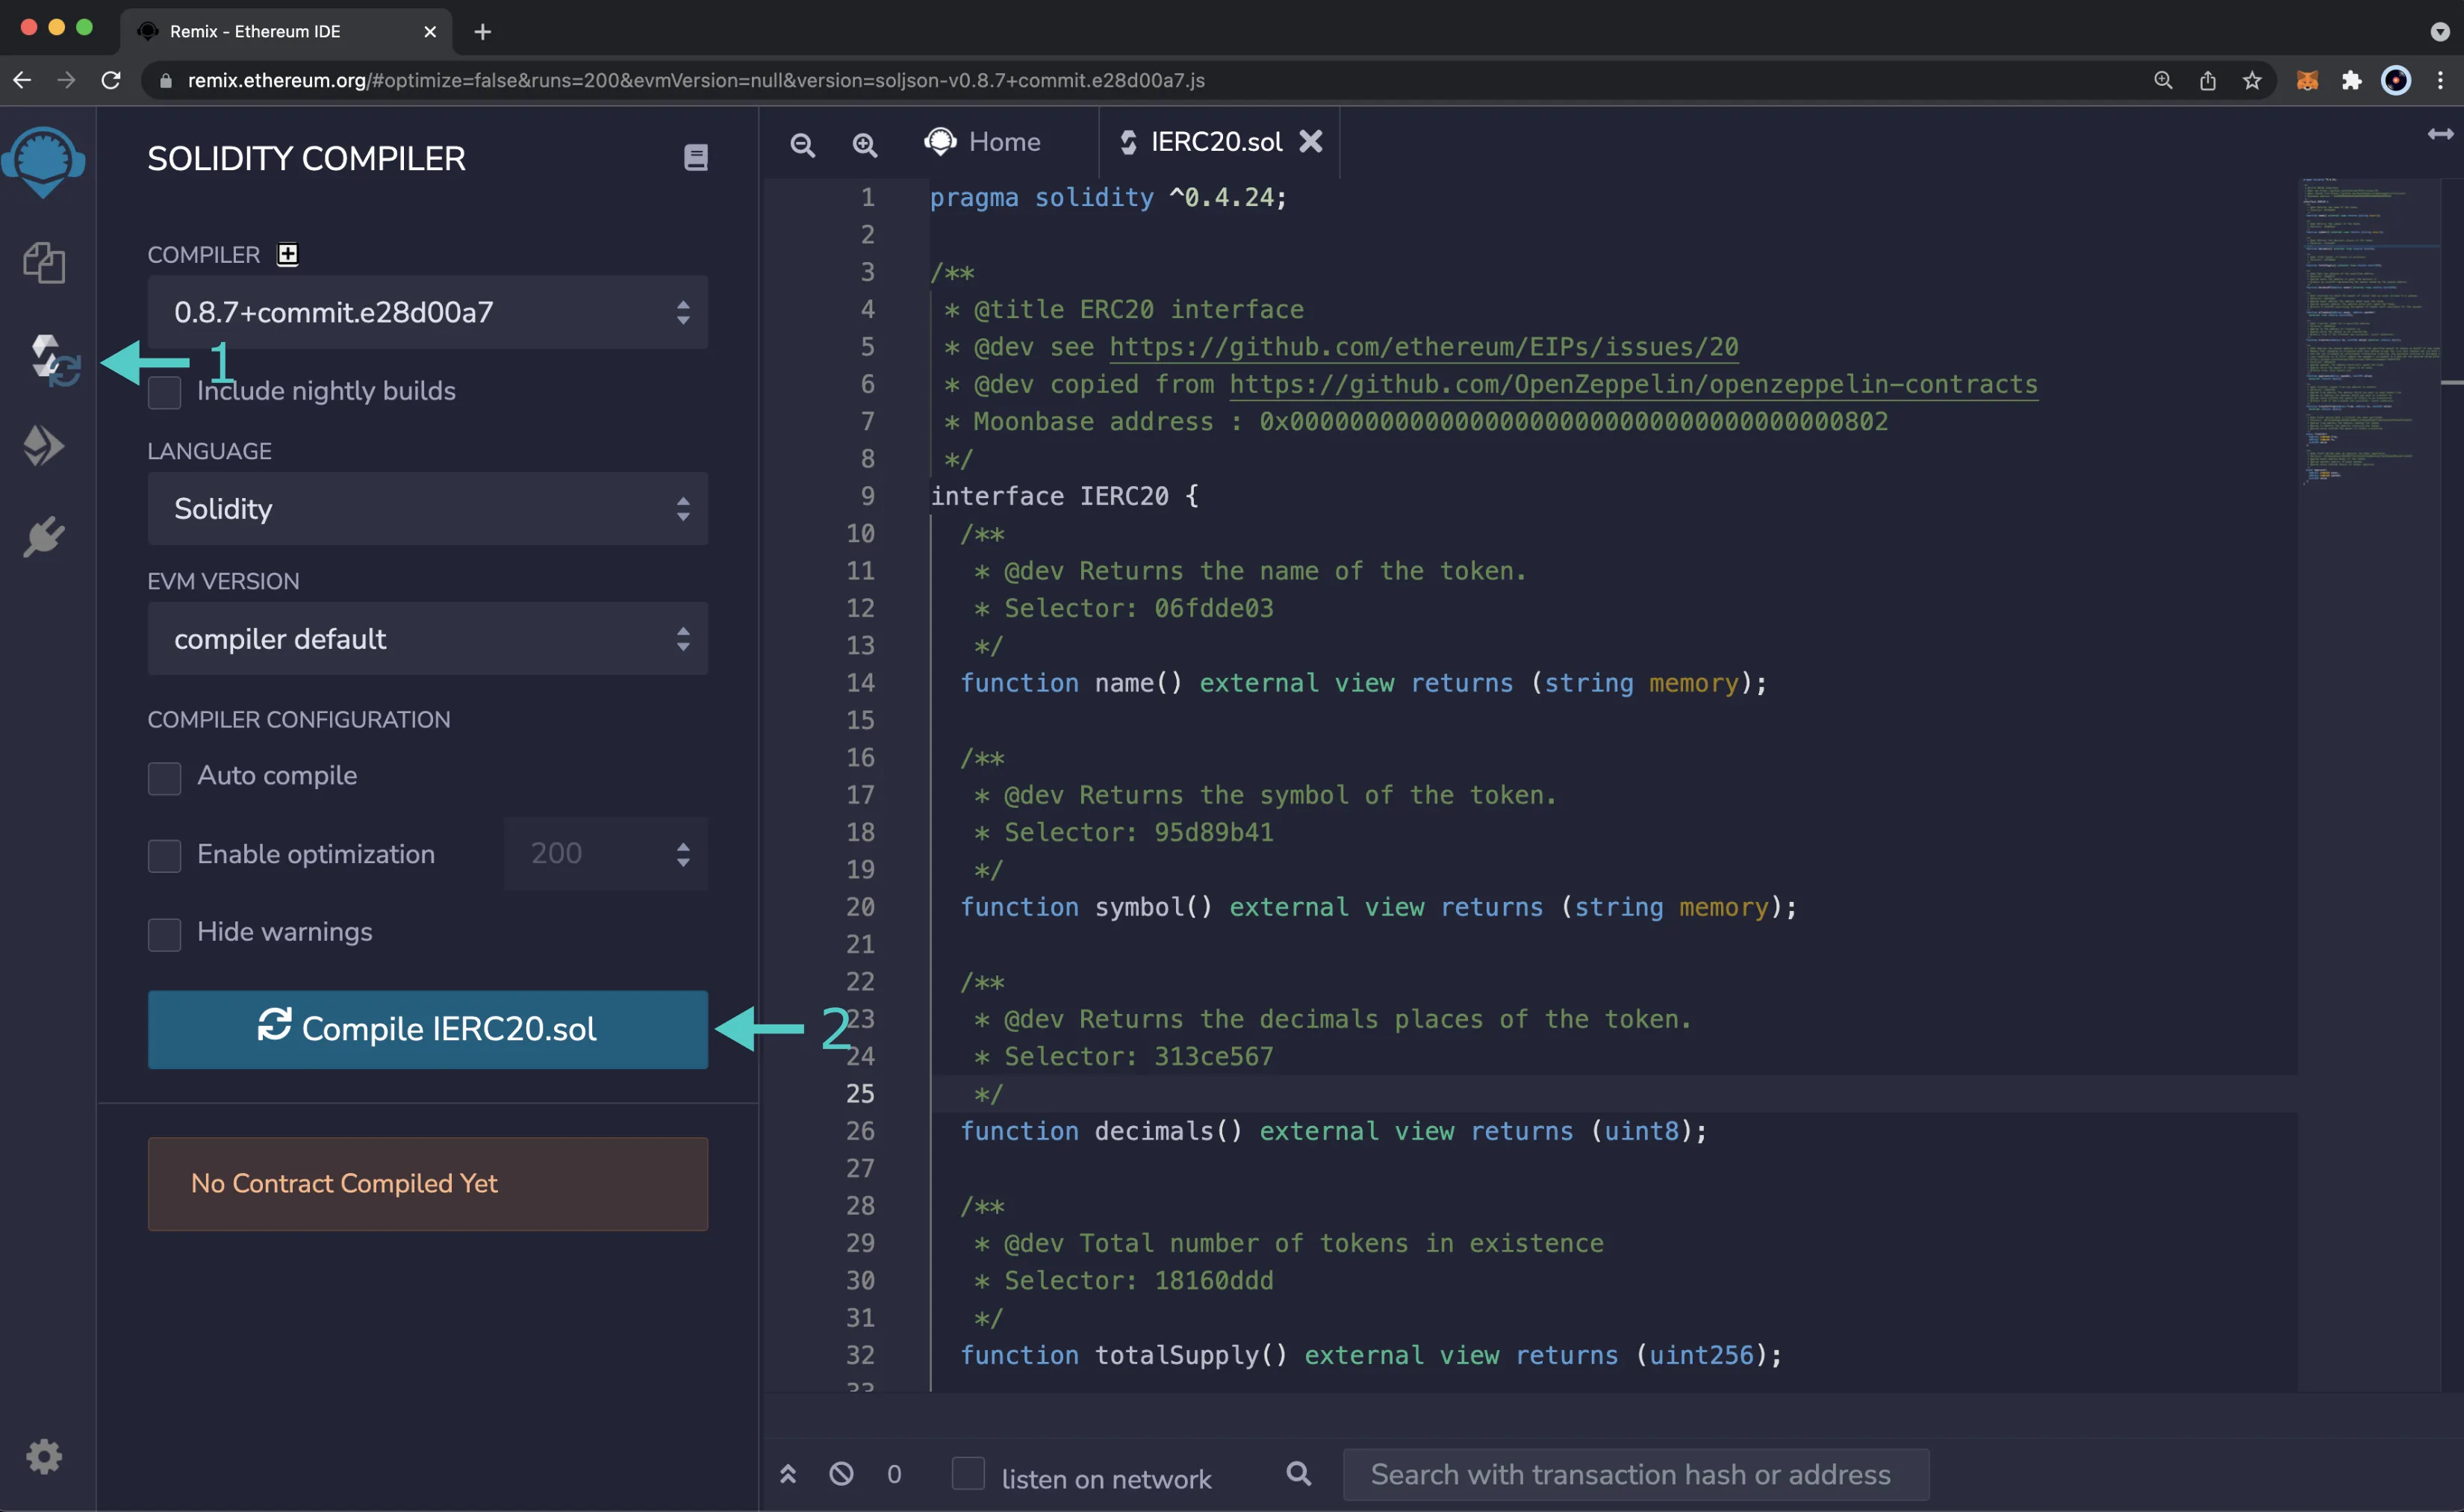
If the interface was compiled successfully, you will see a green checkmark next to the **Compile** tab.
### Access the Contract {: #access-the-contract }
Instead of deploying the ERC-20 precompile, you will access the interface given the address of the precompiled contract:
1. Click on the **Deploy and Run** tab directly below the **Compile** tab in Remix. Please note the precompiled contract is already deployed
2. Make sure **Injected Web3** is selected in the **ENVIRONMENT** dropdown. Once you select **Injected Web3**, you might be prompted by MetaMask to connect your account to Remix
3. Make sure the correct account is displayed under **ACCOUNT**
4. Ensure **IERC20 - IERC20.sol** is selected in the **CONTRACT** dropdown. Since this is a precompiled contract, there is no need to deploy any code. Instead you are going to provide the address of the precompile in the **At Address** field
5. Provide the address of the ERC-20 precompile: `{{networks.moonbase.precompiles.erc20}}` and click **At Address**
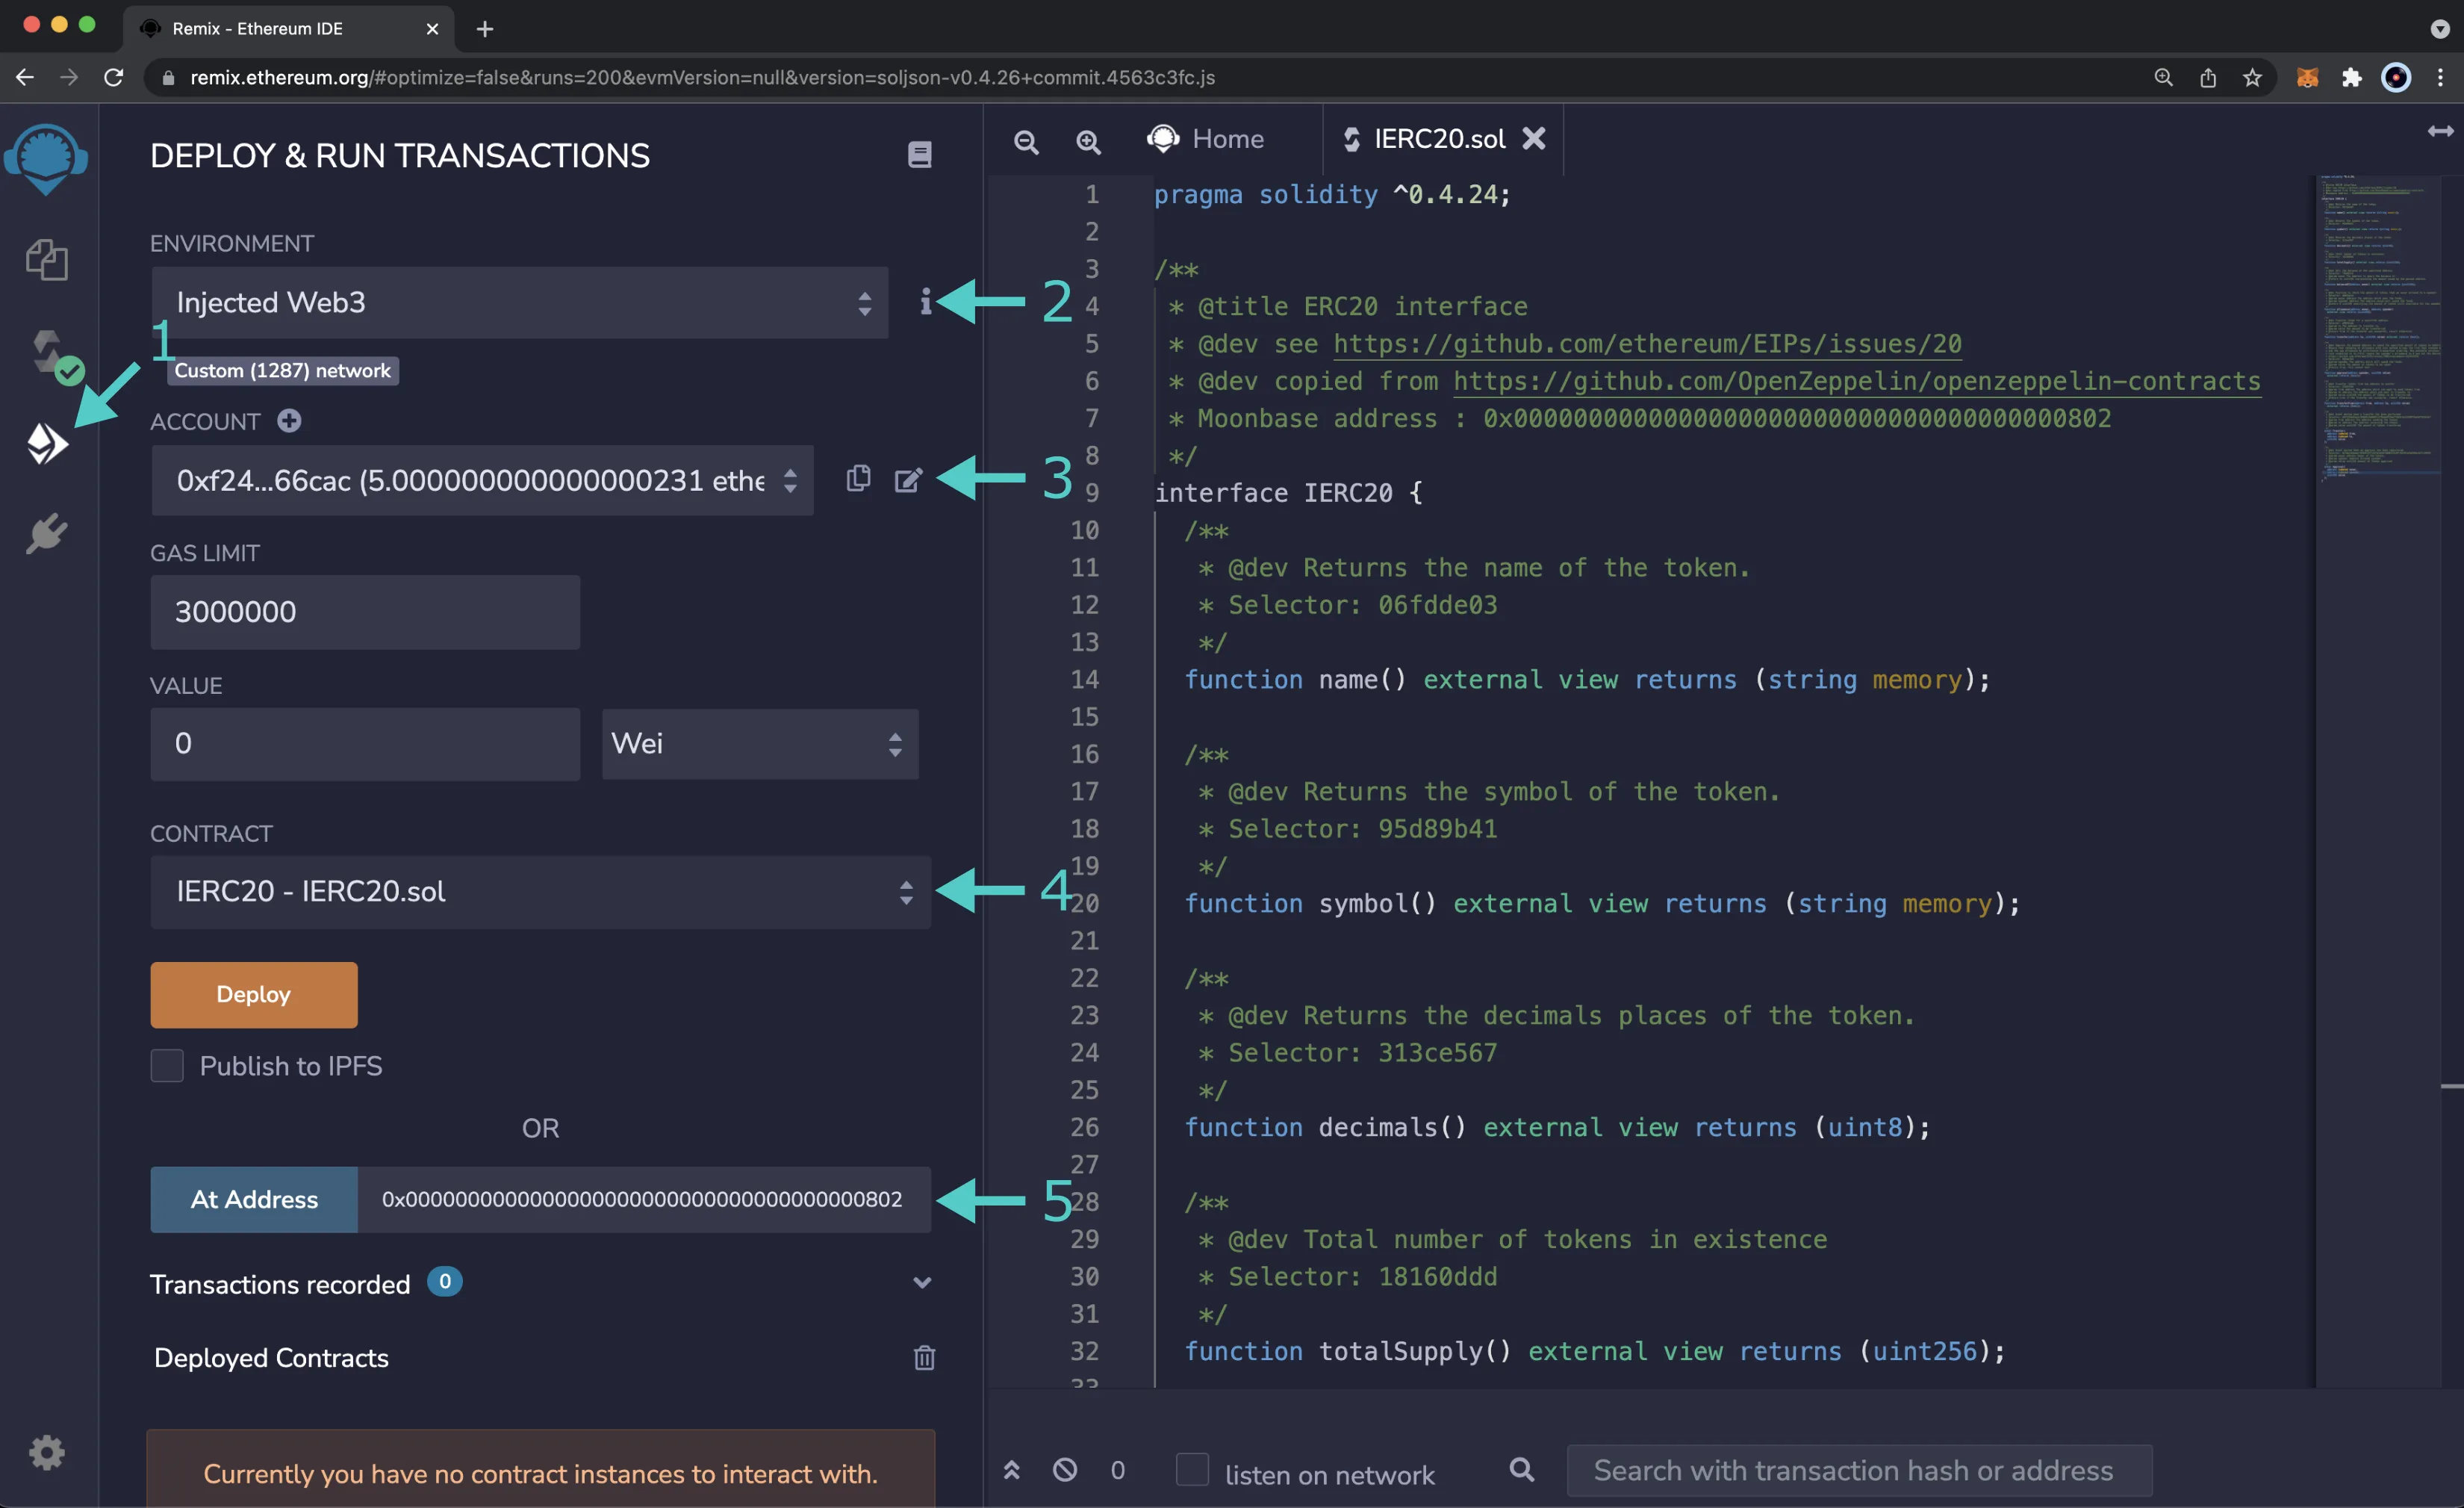
The **IERC20** precompile will appear in the list of **Deployed Contracts**.
### Get Basic Token Information {: #get-basic-token-information }
The ERC-20 interface allows you to quickly obtain token information, including the token's total supply, name, symbol, and decimal places. You can get this information by following these steps:
1. Expand the **IERC20** contract under **Deployed Contracts**
2. Click **decimals** to get the decimal places of the Moonbase Alpha native protocol token
3. Click **name** to get the name of the token
4. Click **symbol** to get the symbol of the token
5. Click **totalSupply** to obtain the total supply of tokens in existence on Moonbase Alpha
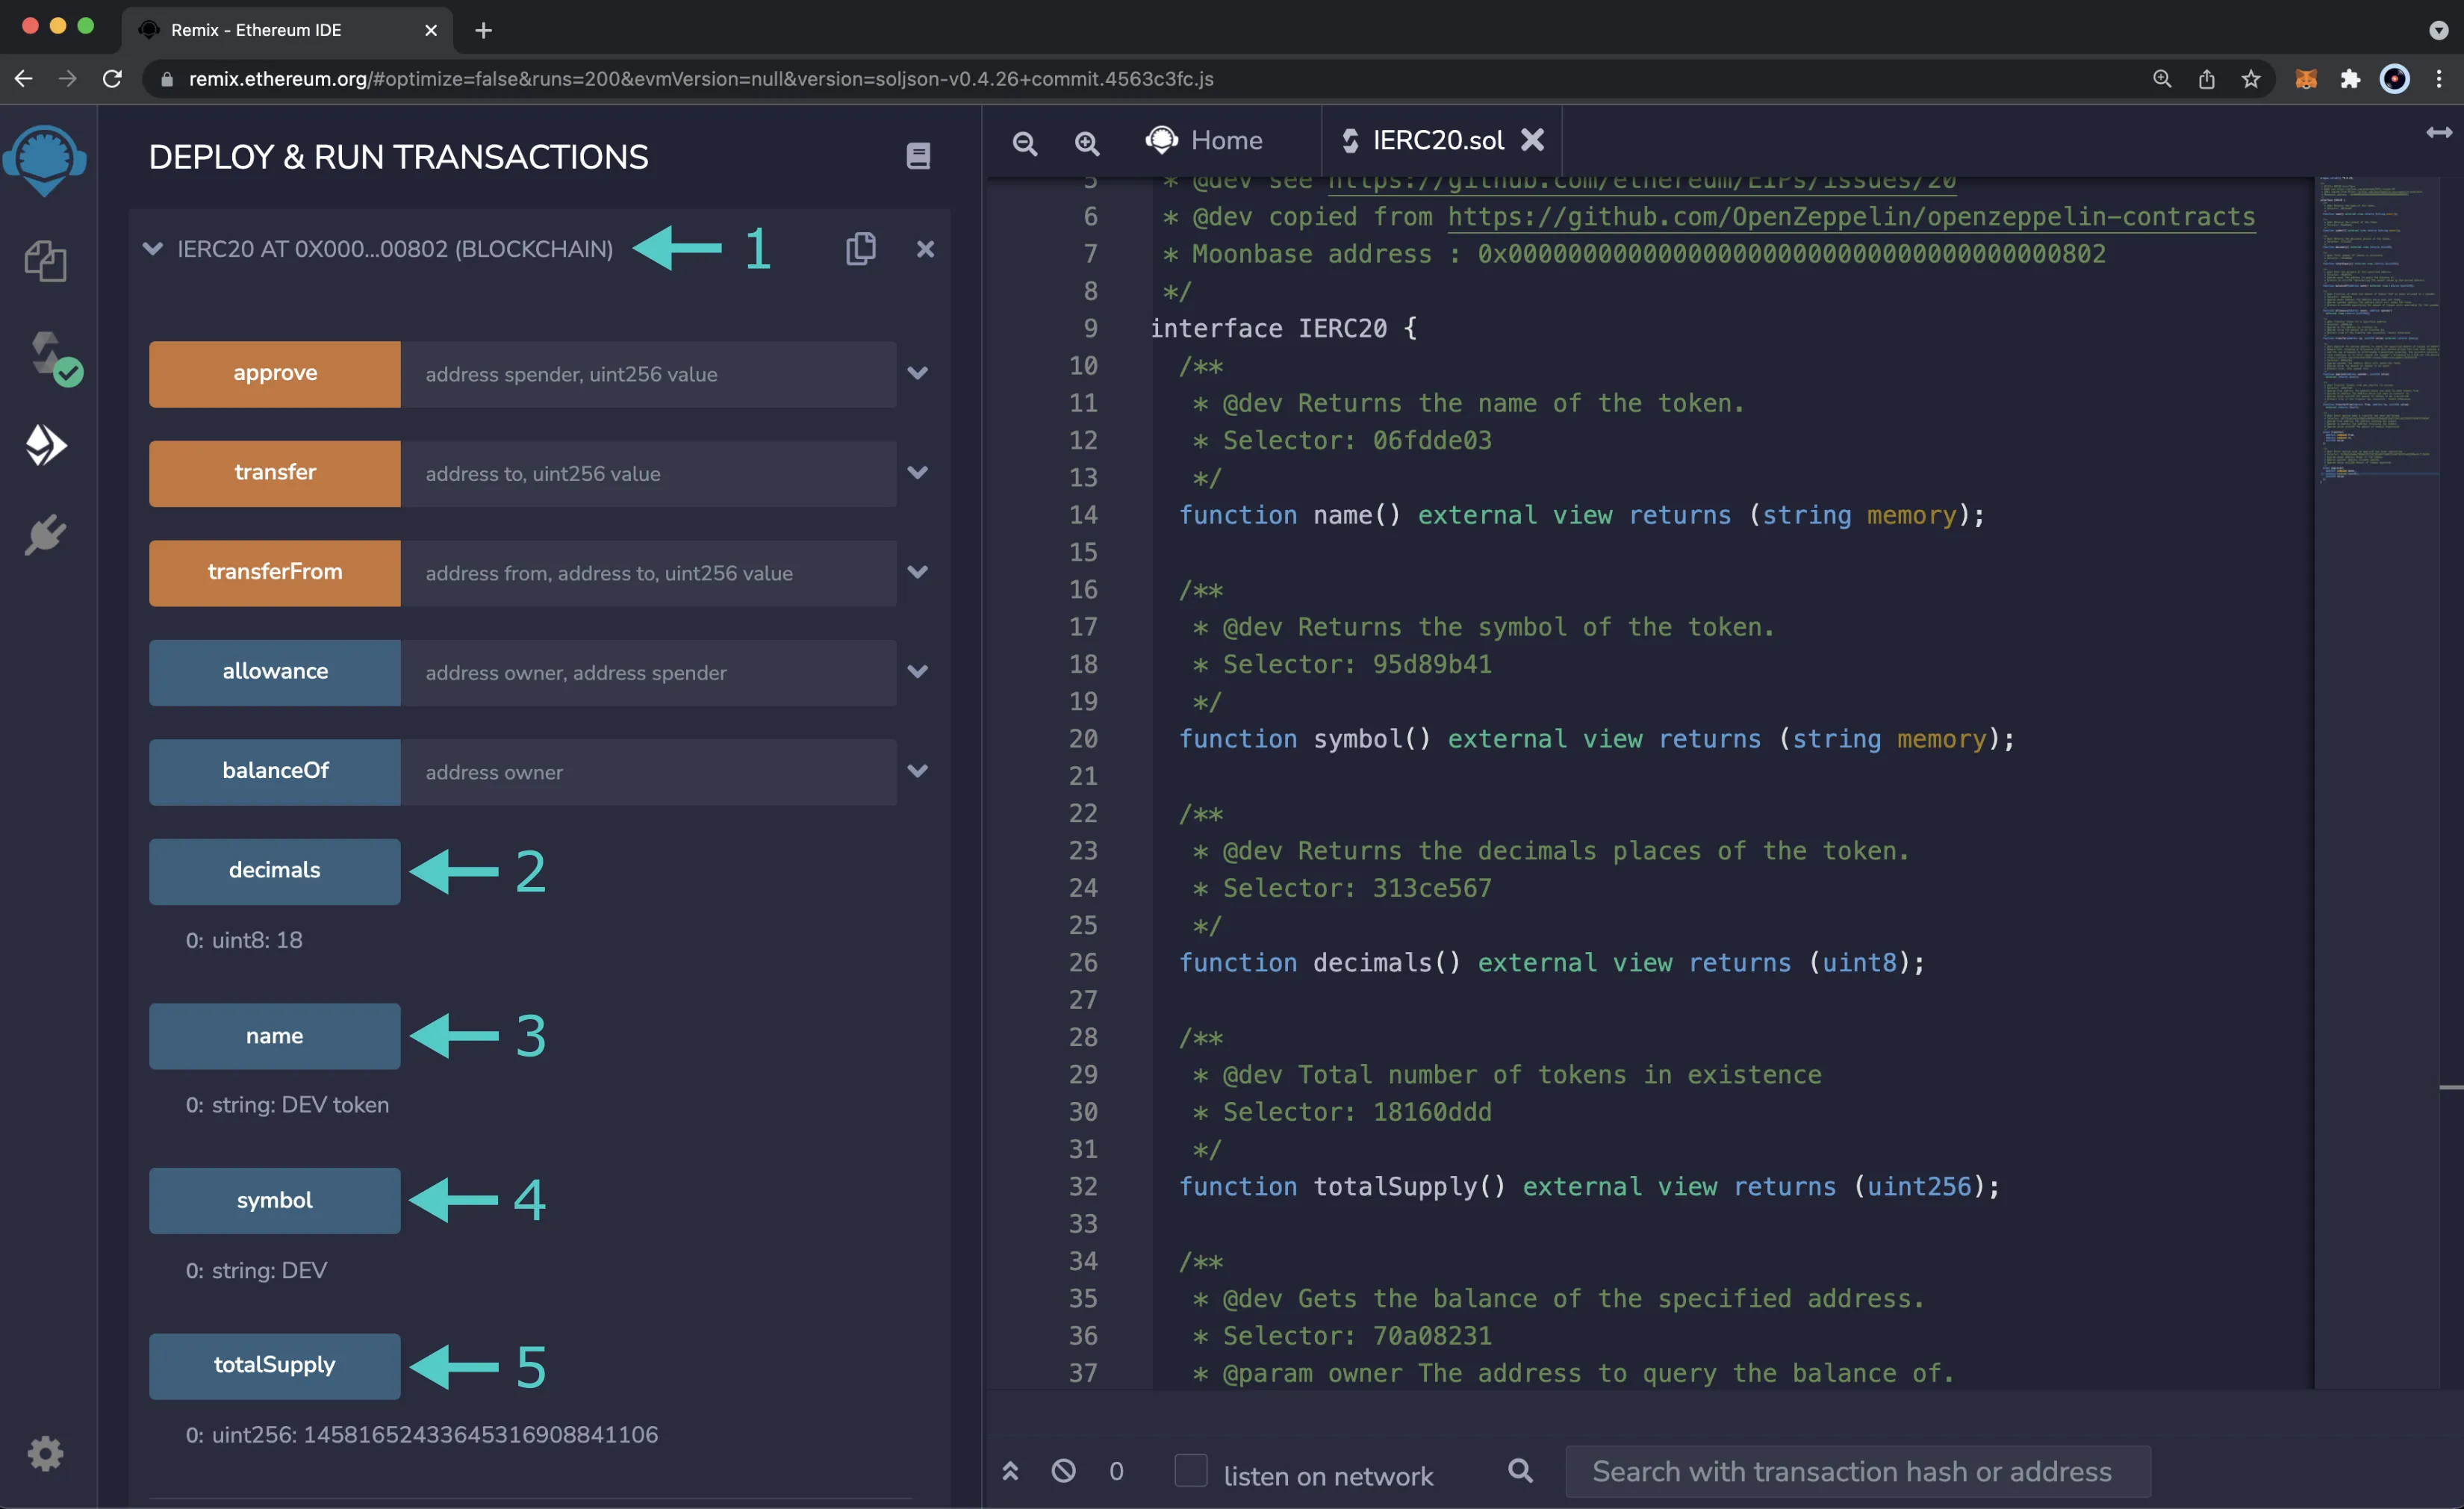
The response for each call will be displayed under the corresponding function.
### Get Account Balance {: #get-account-balance }
You can check the balance of any address on Moonbase Alpha by calling the `balanceOf` function and passing in an address:
1. Expand the **balanceOf** function
2. Enter an address you would like to check the balance of for the **owner**
2. Click **call**

Your balance will be displayed under the `balanceOf` function.
### Approve a Spend {: #approve-a-spend }
To approve a spend, you'll need to provide an address for the spender and the number of tokens that the spender is allowed to spend. The spender can be an externally owned account or a smart contract. For this example, you can approve the spender to spend 1 DEV token. To get started, please follow these steps:
1. Expand the **approve** function
2. Enter the address of the spender. You should have created two accounts before starting, so you can use the second account as the spender
3. Enter the amount of tokens the spender can spend for the **value**. For this example, you can allow the spender to spend 1 DEV token in Wei units (`1000000000000000000`)
4. Click **transact**
5. MetaMask will pop up, and you will be prompted to review the transaction details. Click **View full transaction details** to review the amount to be sent and the address of the spender
6. If everything looks ok, you can click **Confirm** to send the transaction
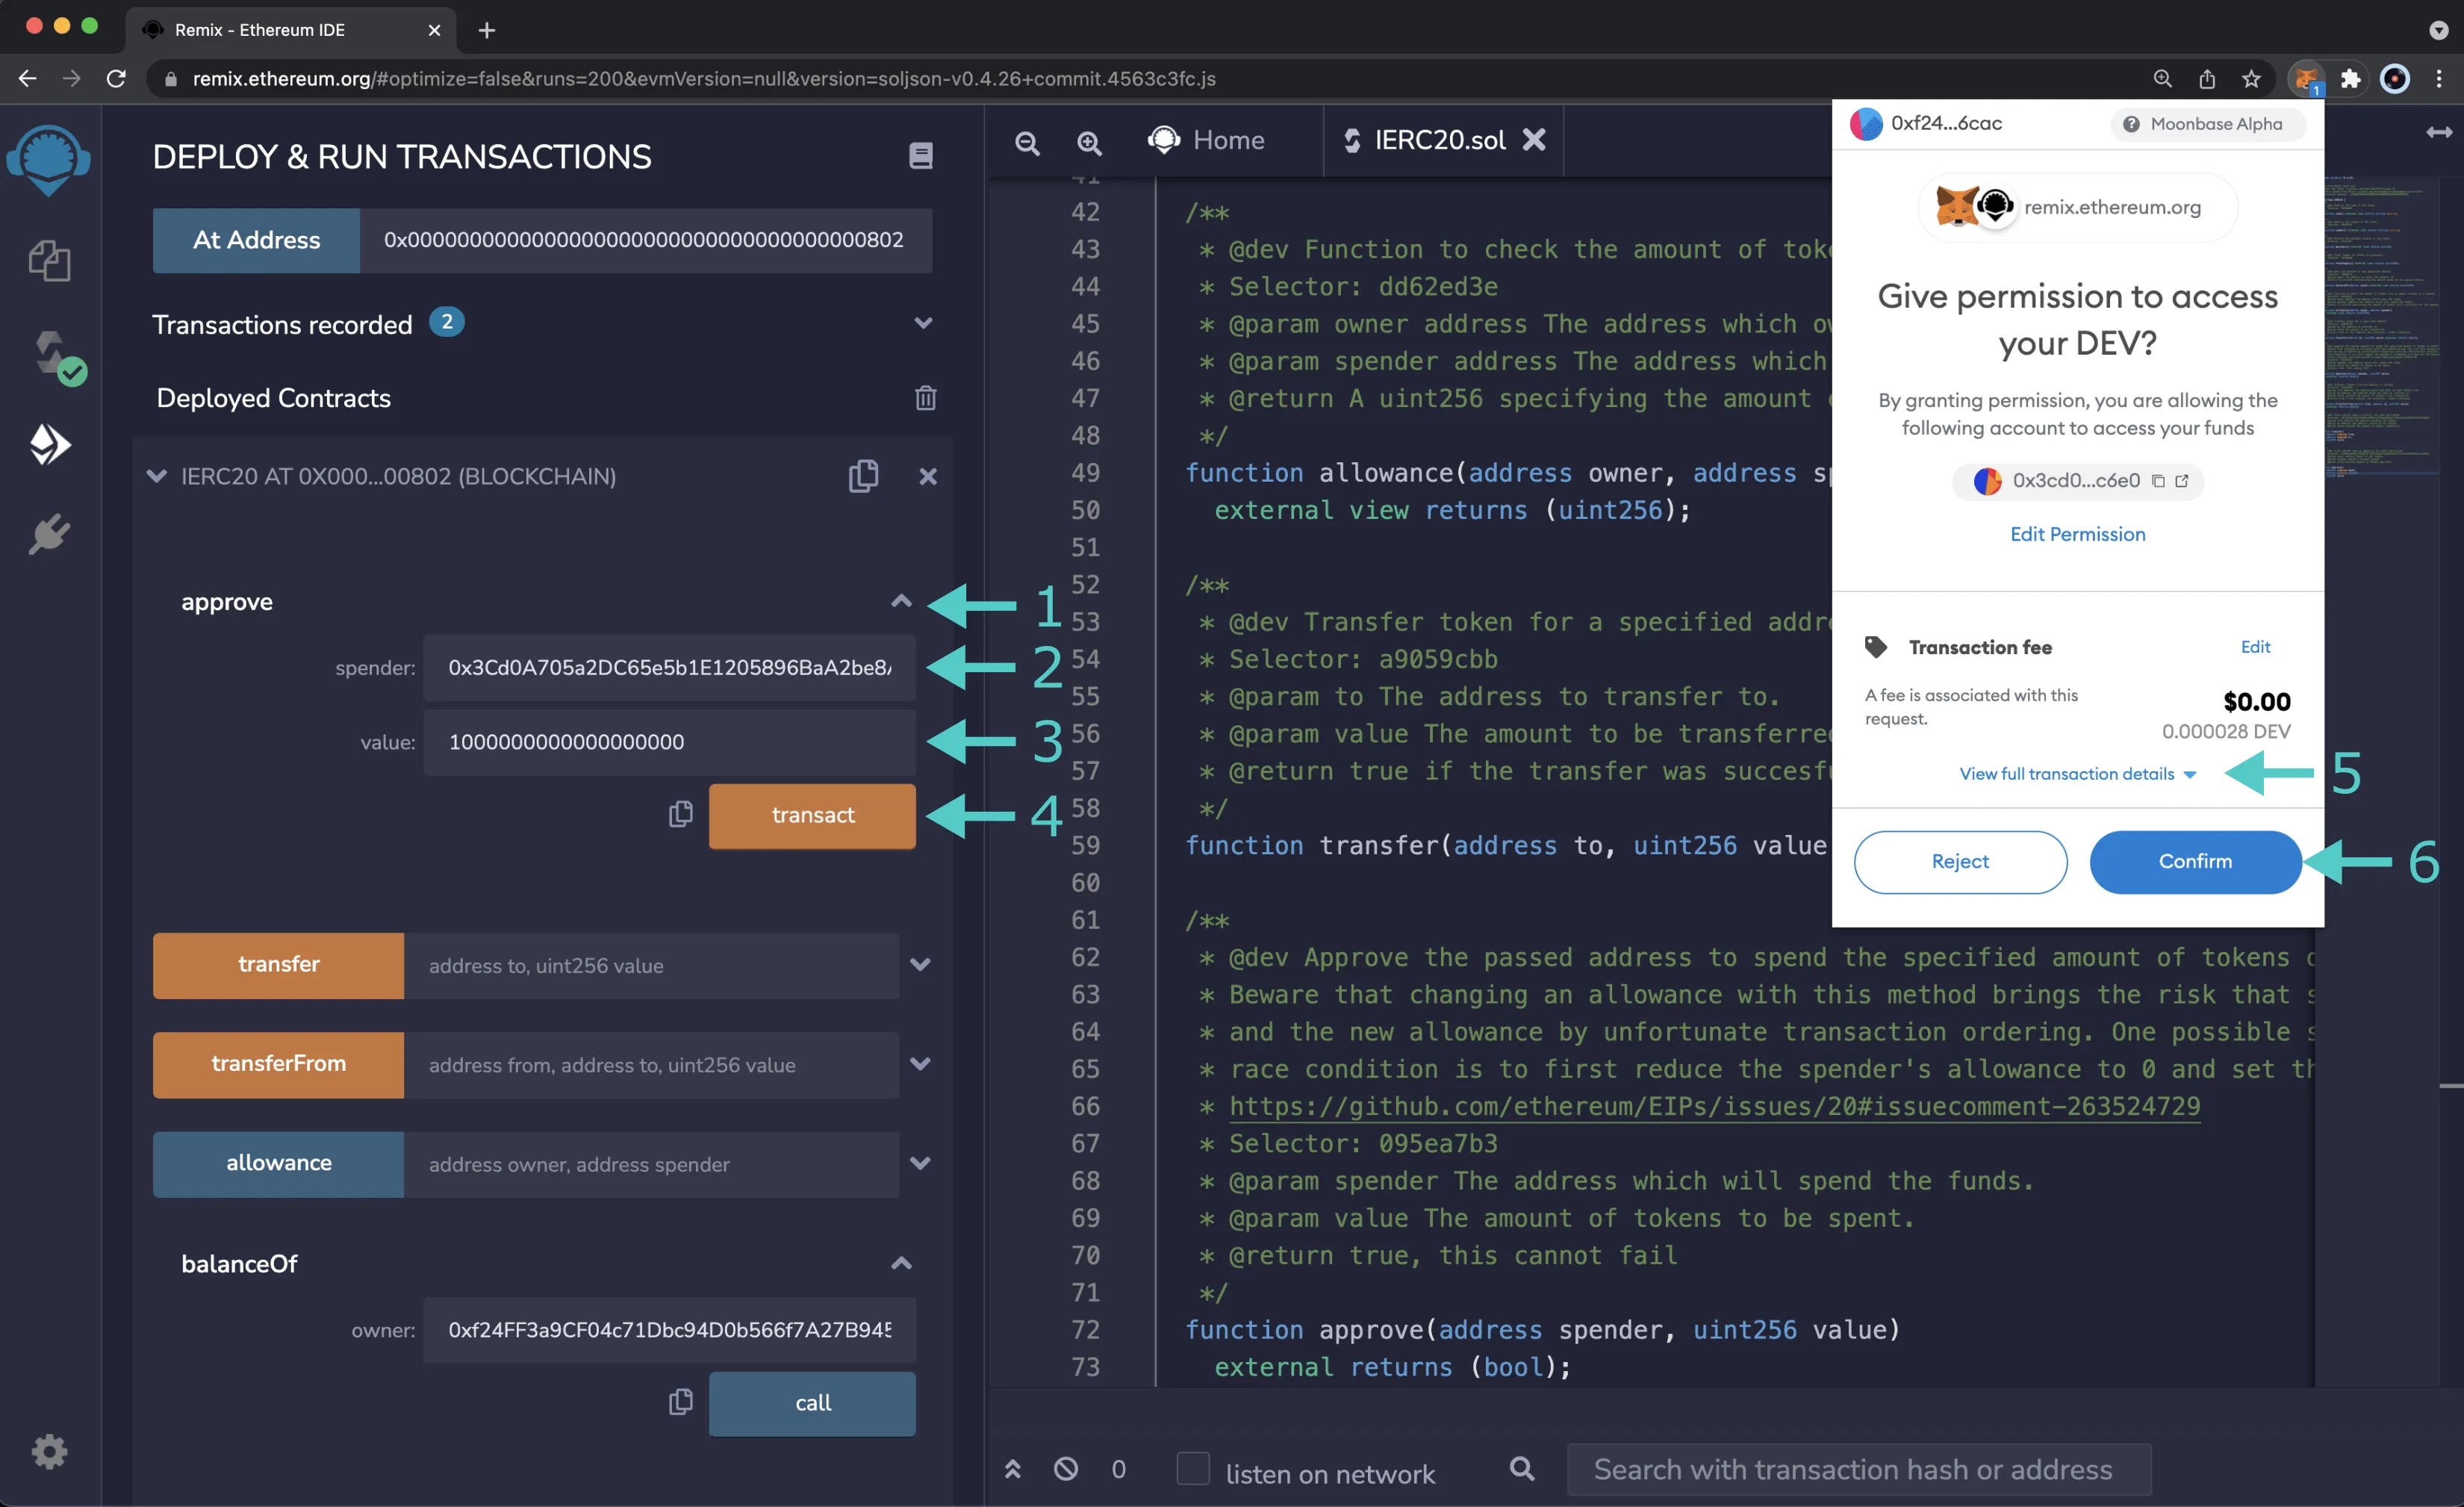
After the transaction has successfully gone through, you'll notice that the balance of your account hasn't changed. This is because you have only approved the spend for the given amount, and the spender hasn't spent the funds. In the next section, you will use the `allowance` function to verify that the spender is able to spend 1 DEV token on your behalf.
### Get Allowance of Spender {: #get-allowance-of-spender }
To check that the spender received the allowance approved in the [Approve a Spend](#approve-a-spend) section, you can:
1. Expand the **allowance** function
2. Enter your address for the **owner**
3. Enter the address of the **spender** that you used in the previous section
4. Click **call**
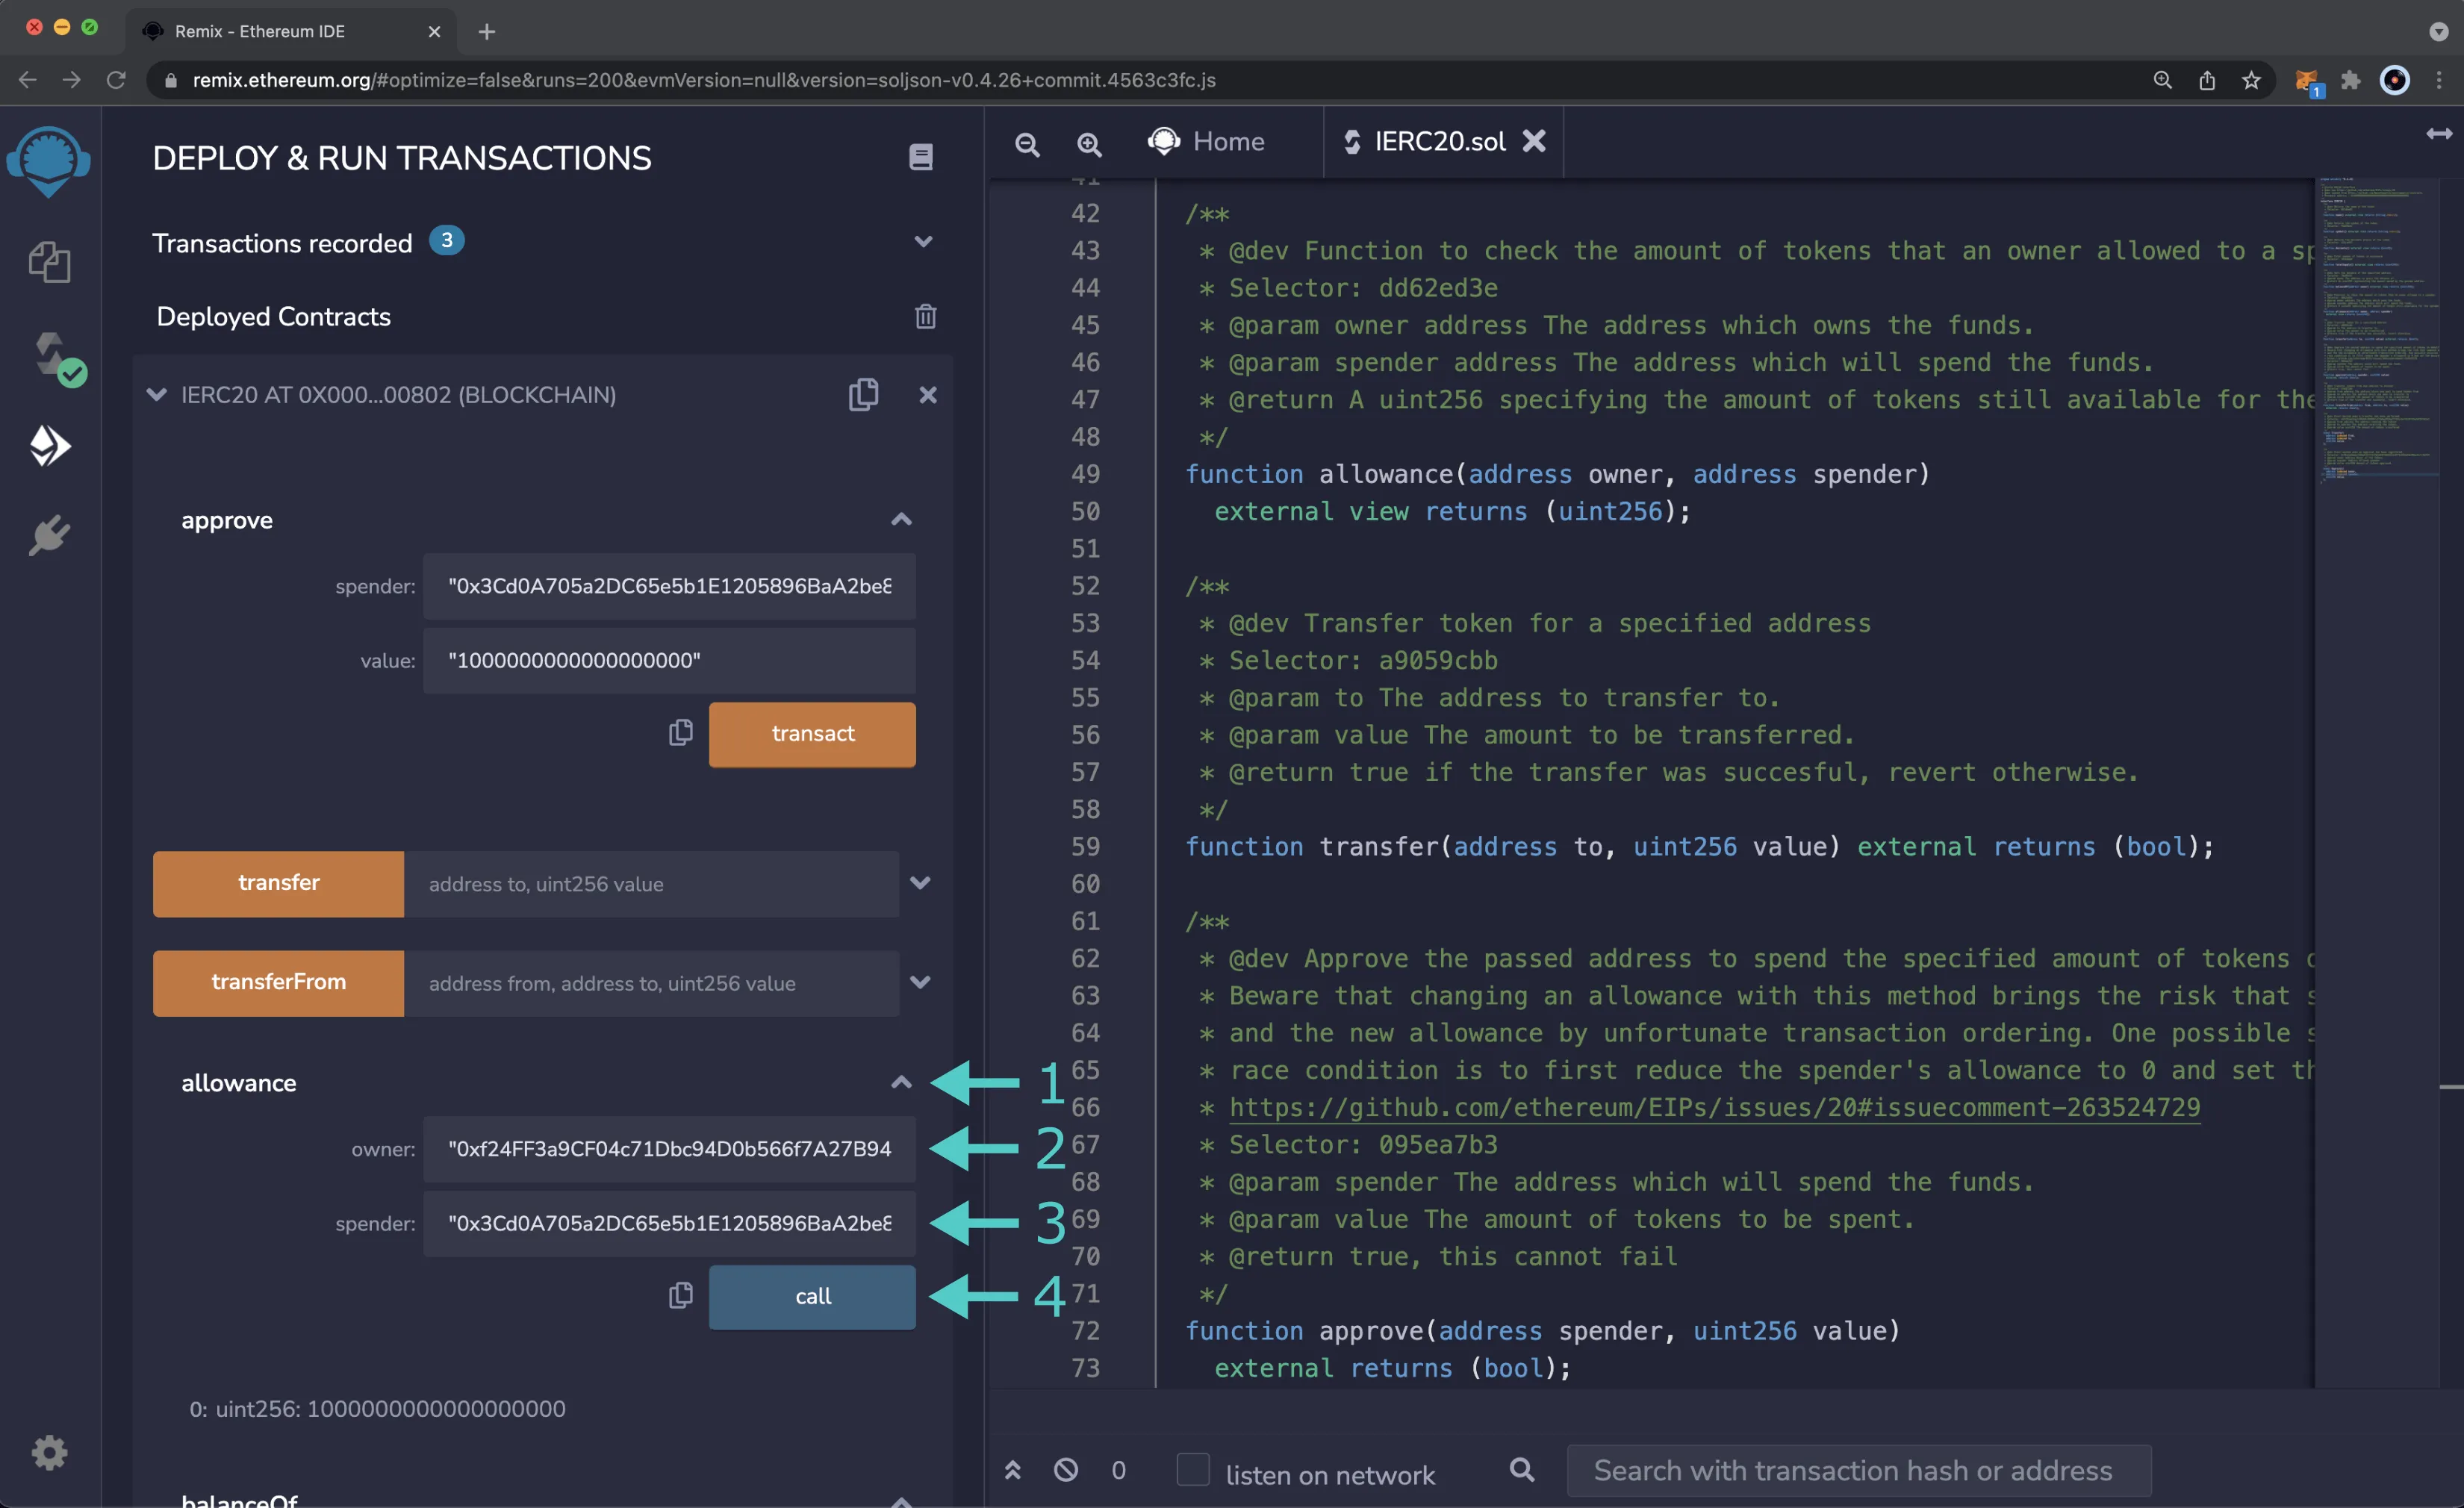
Once the call is complete, the allowance of the spender will be displayed, which should be equivalent to 1 DEV token (`1000000000000000000`).
### Send Transfer {: #send-transfer }
To do a standard transfer and send tokens from your account directly to another account, you can call the `transfer` function by following these steps:
1. Expand the **transfer** function
2. Enter the address to send DEV tokens to. You should have created two accounts before starting, so you can use the second account as the recipient
3. Enter the amount of DEV tokens to send. For this example, you can send 1 DEV token (`1000000000000000000`)
4. Click **transact**
5. MetaMask will pop up, you can review the transaction details, and if everything looks good, click **Confirm**
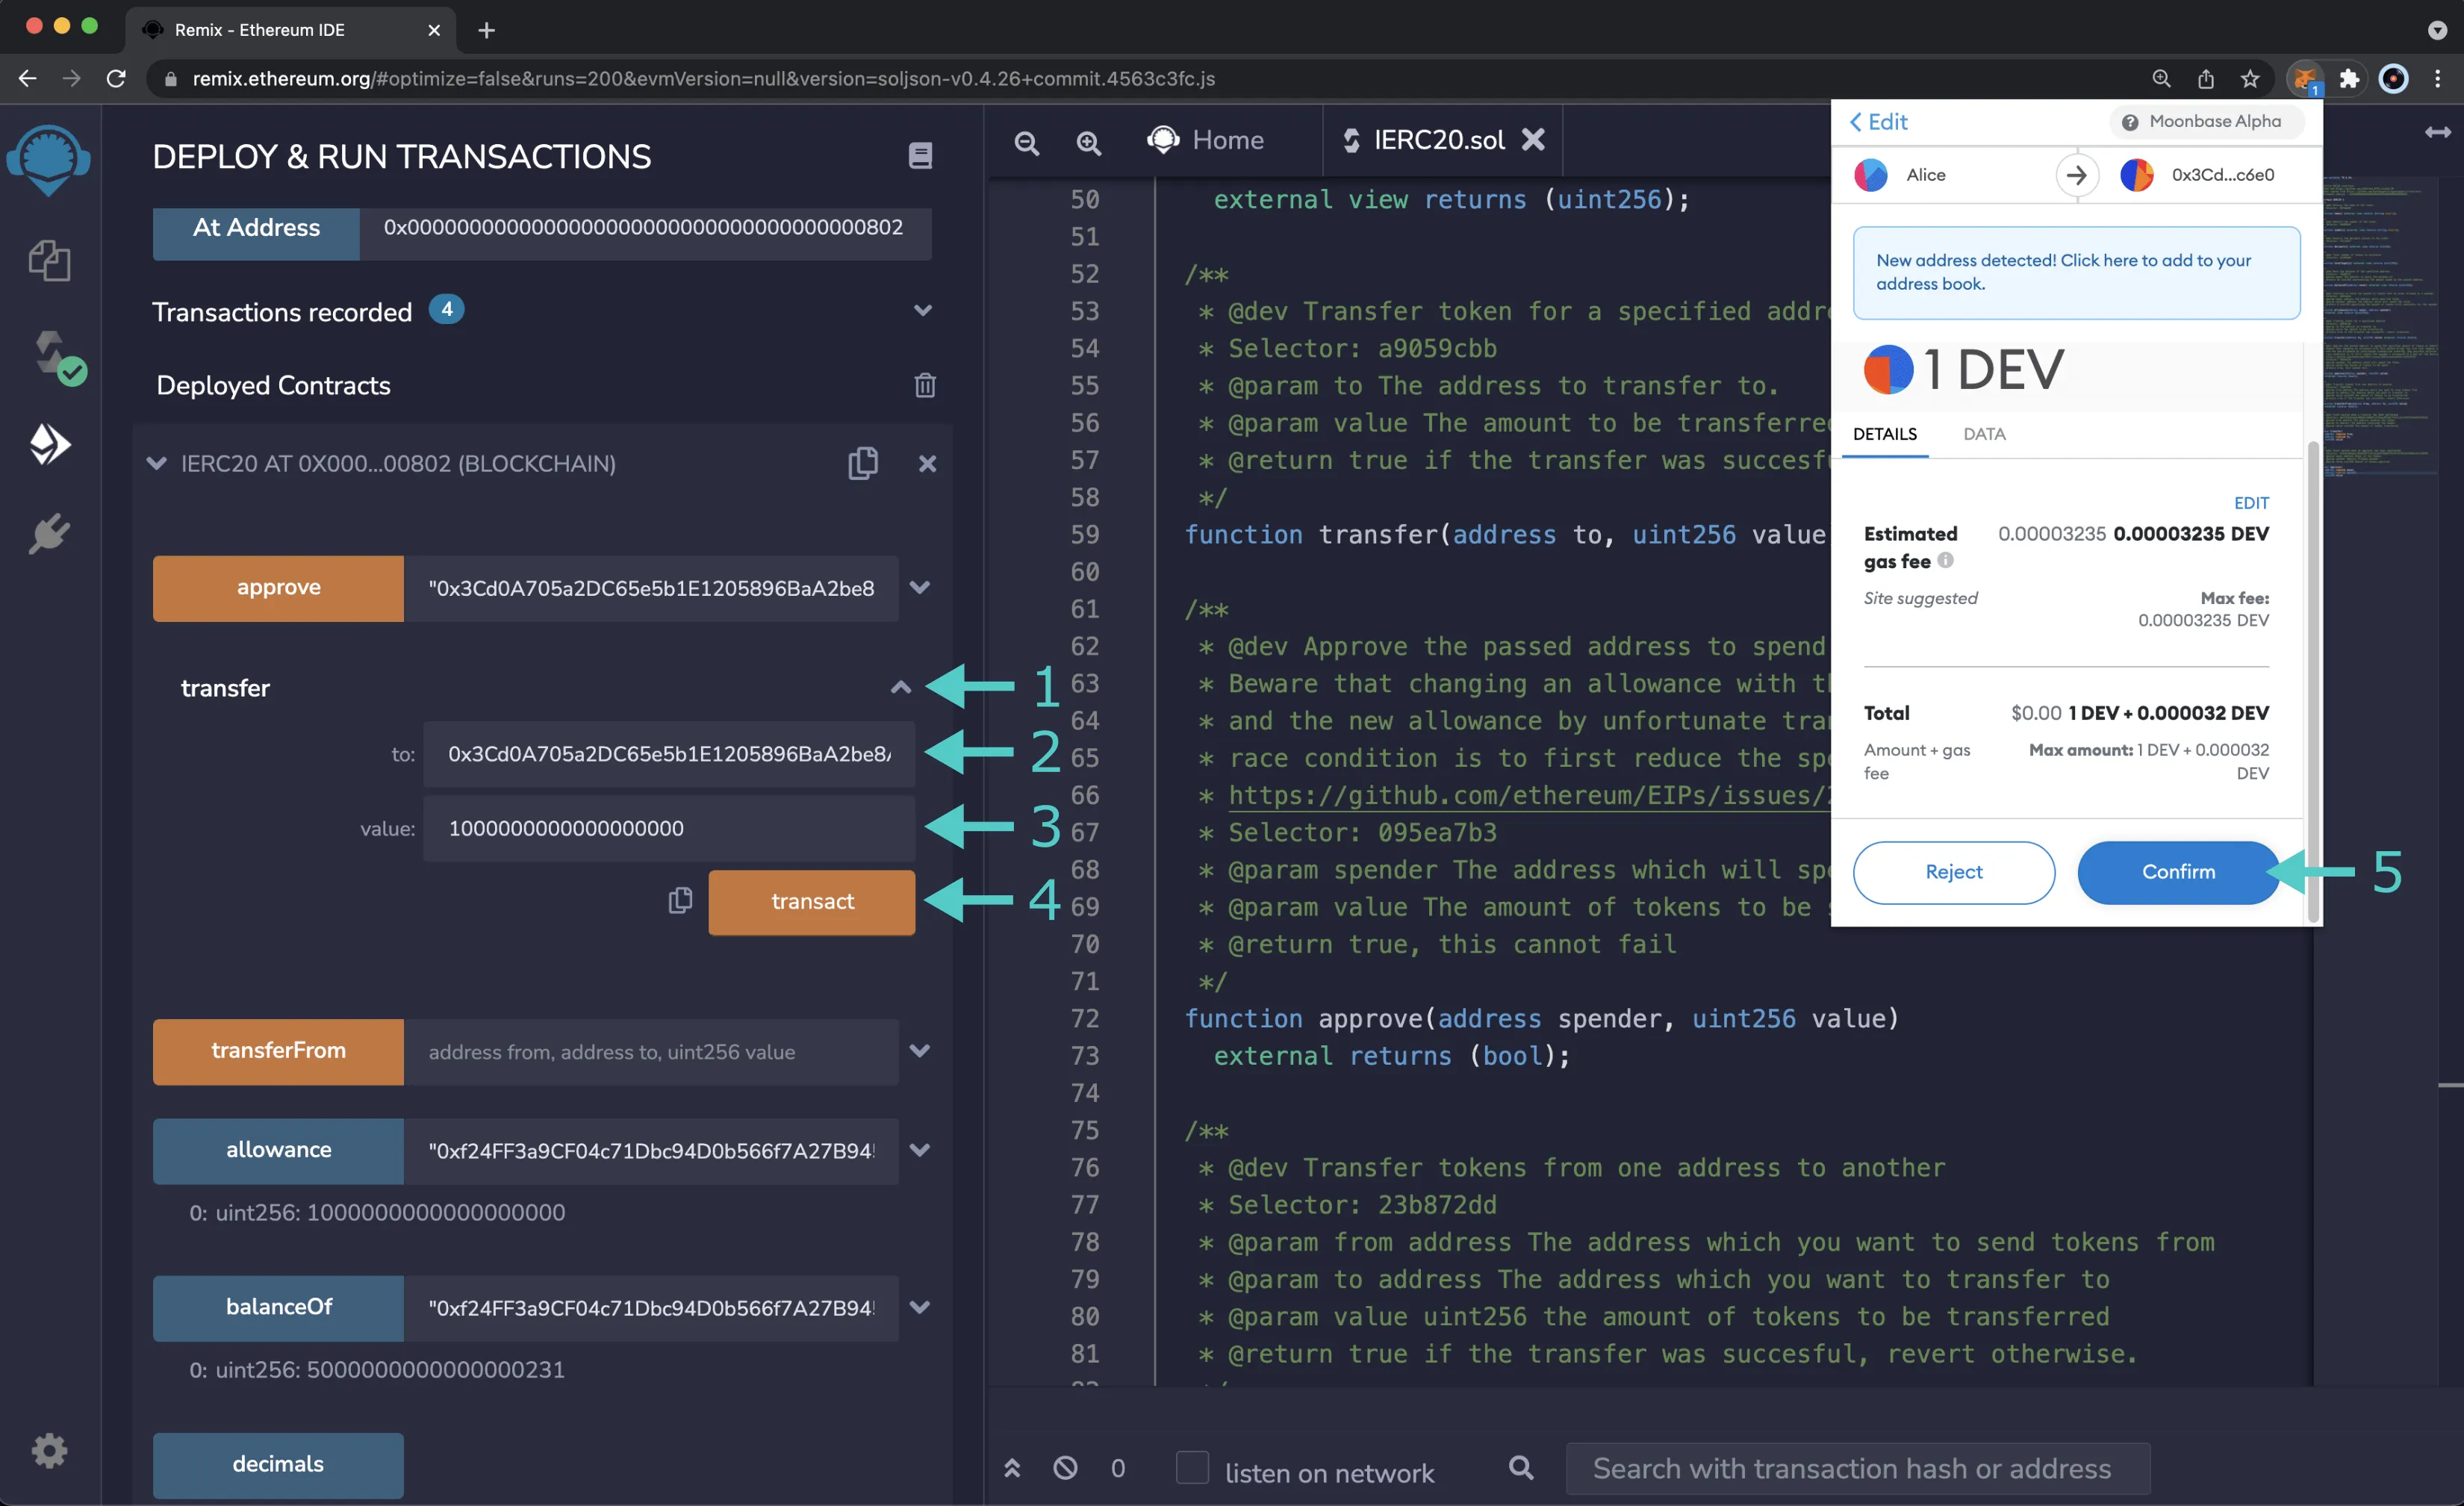
Once the transaction is complete, you can [check your balance](#get-account-balance) using the `balanceOf` function or by looking at MetaMask, and notice that this time your balance decreased by 1 DEV token. You can also use the `balanceOf` function to ensure that the recipients balance has increased by 1 DEV token as expected.
### Send Transfer From Specific Account {: #send-transferfrom }
So far, you should have approved an allowance of 1 DEV token for the spender and sent 1 DEV token via the standard `transfer` function. The `transferFrom` function varies from the standard `transfer` function as it allows you to define the address to which you want to send the tokens. So you can specify an address that has an allowance or your address as long as you have funds. For this example, you will use the spender's account to initiate a transfer of the allowed funds from the owner to the spender. The spender can send the funds to any account, but you can send the funds from the owner to the spender for this example.
First, you need to switch to the spender's account in MetaMask. Once you switch to the spender's account, you'll notice that the selected address in Remix under the **Accounts** tab is now the spender's.
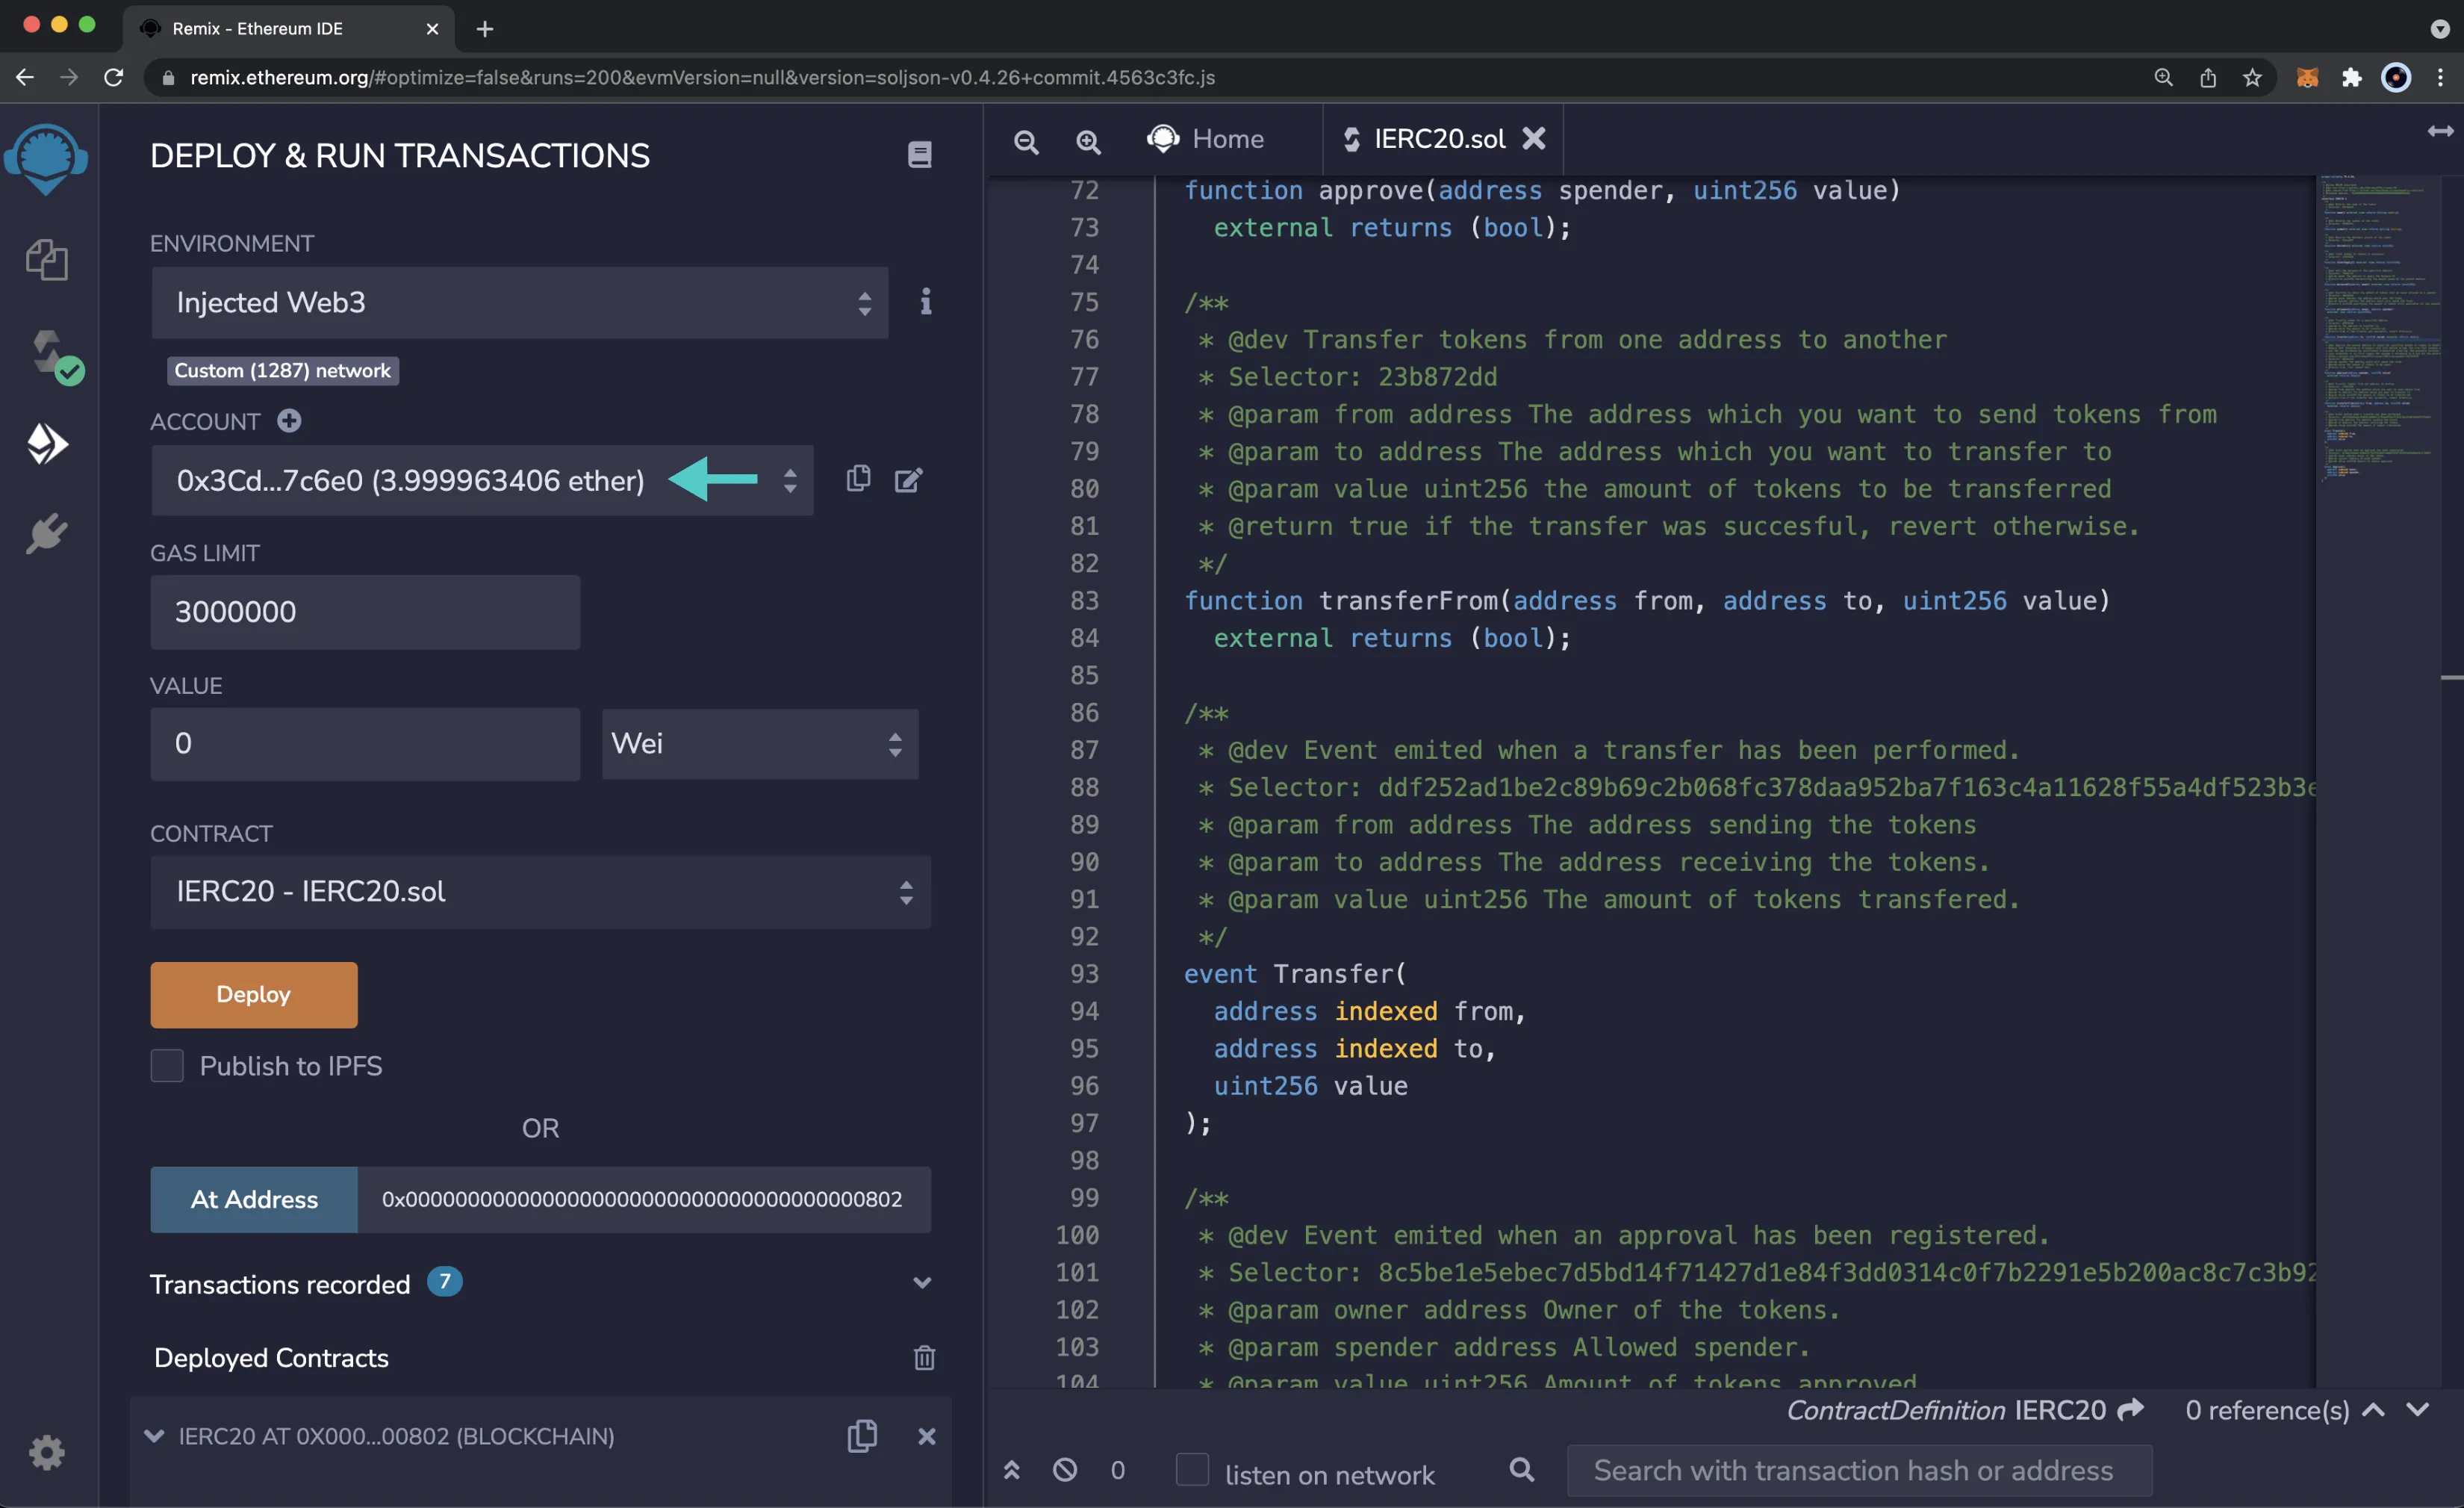
Next, you can initiate and send the transfer, to do so:
1. Expand the **transferFrom** function
2. Enter your address as the owner in the **from** field
3. Enter the recipient address, which should be the spender's address, in the **to** field
4. Enter the amount of DEV tokens to send. Again, the spender is currently only allowed to send 1 DEV token, so enter `1000000000000000000`
5. Click **transact**
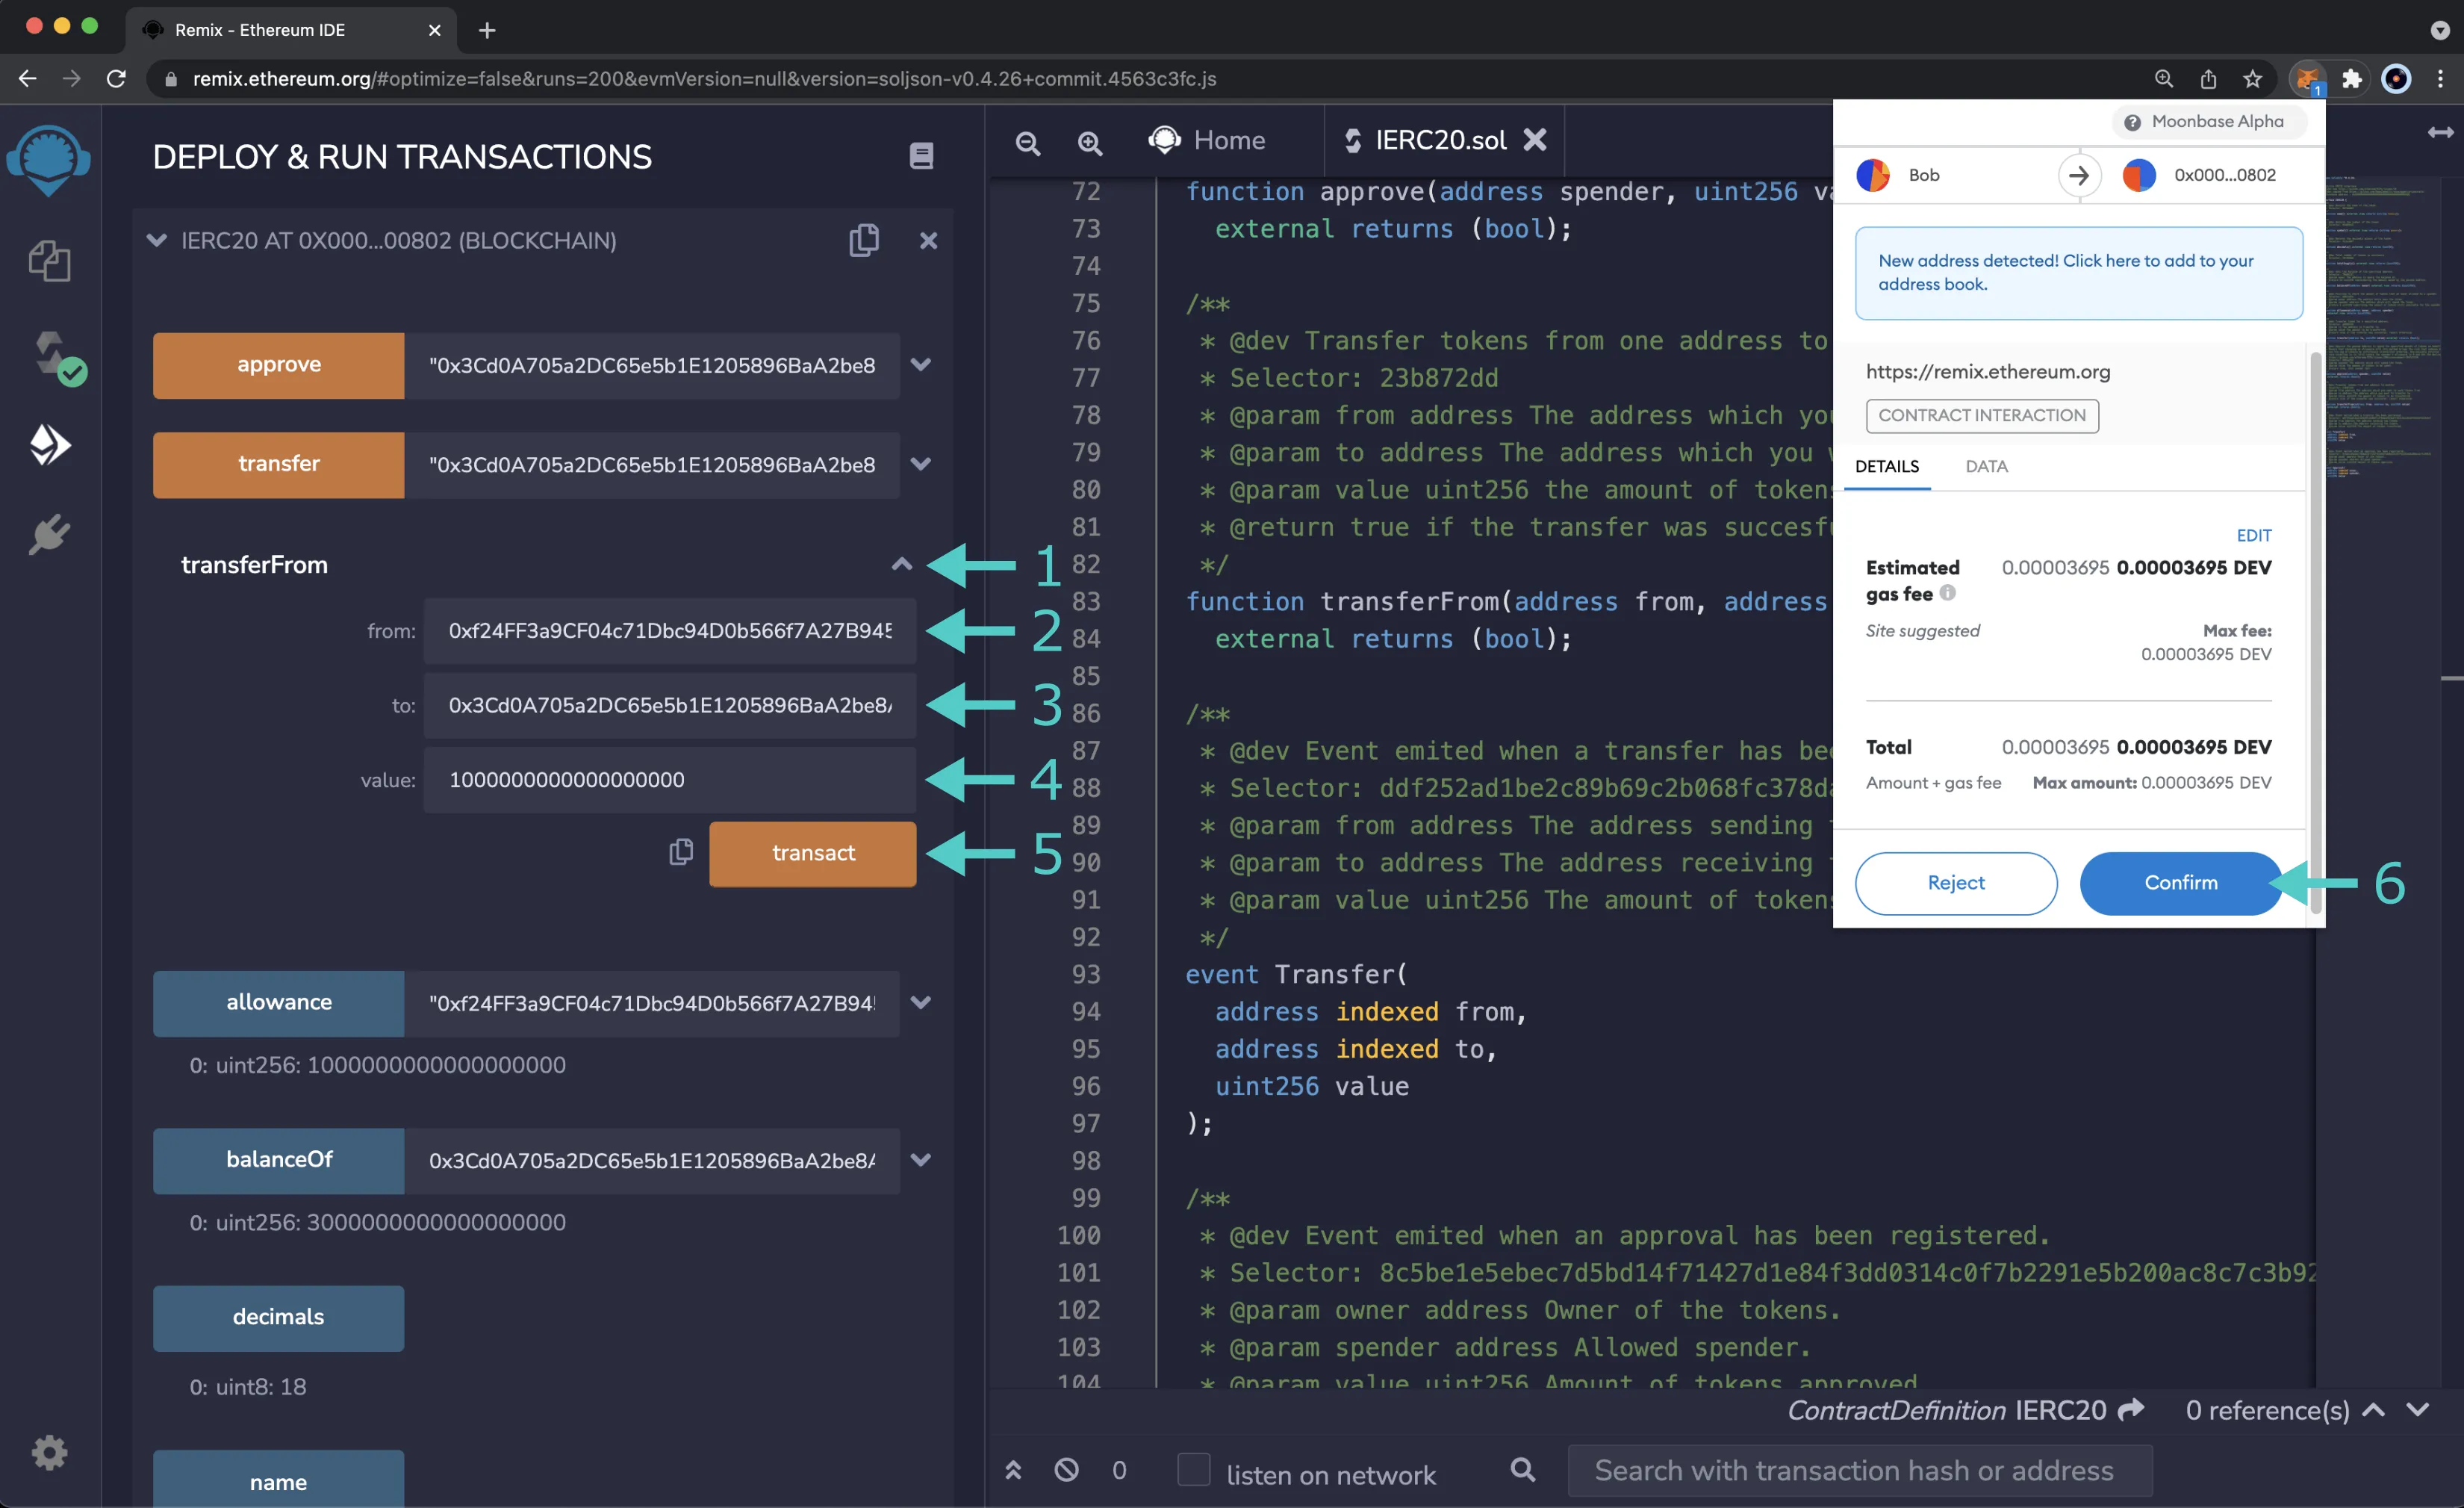
Once the transaction is complete, you can [check the balance](#get-account-balance) of the owner and spender using the `balanceOf` function. The spender's balance should have increased by 1 DEV token, and their allowance should now be depleted. To verify that the spender no longer has an allowance, you can call the `allowance` function, passing in the owner and spender's addresses. You should receive a result of 0.
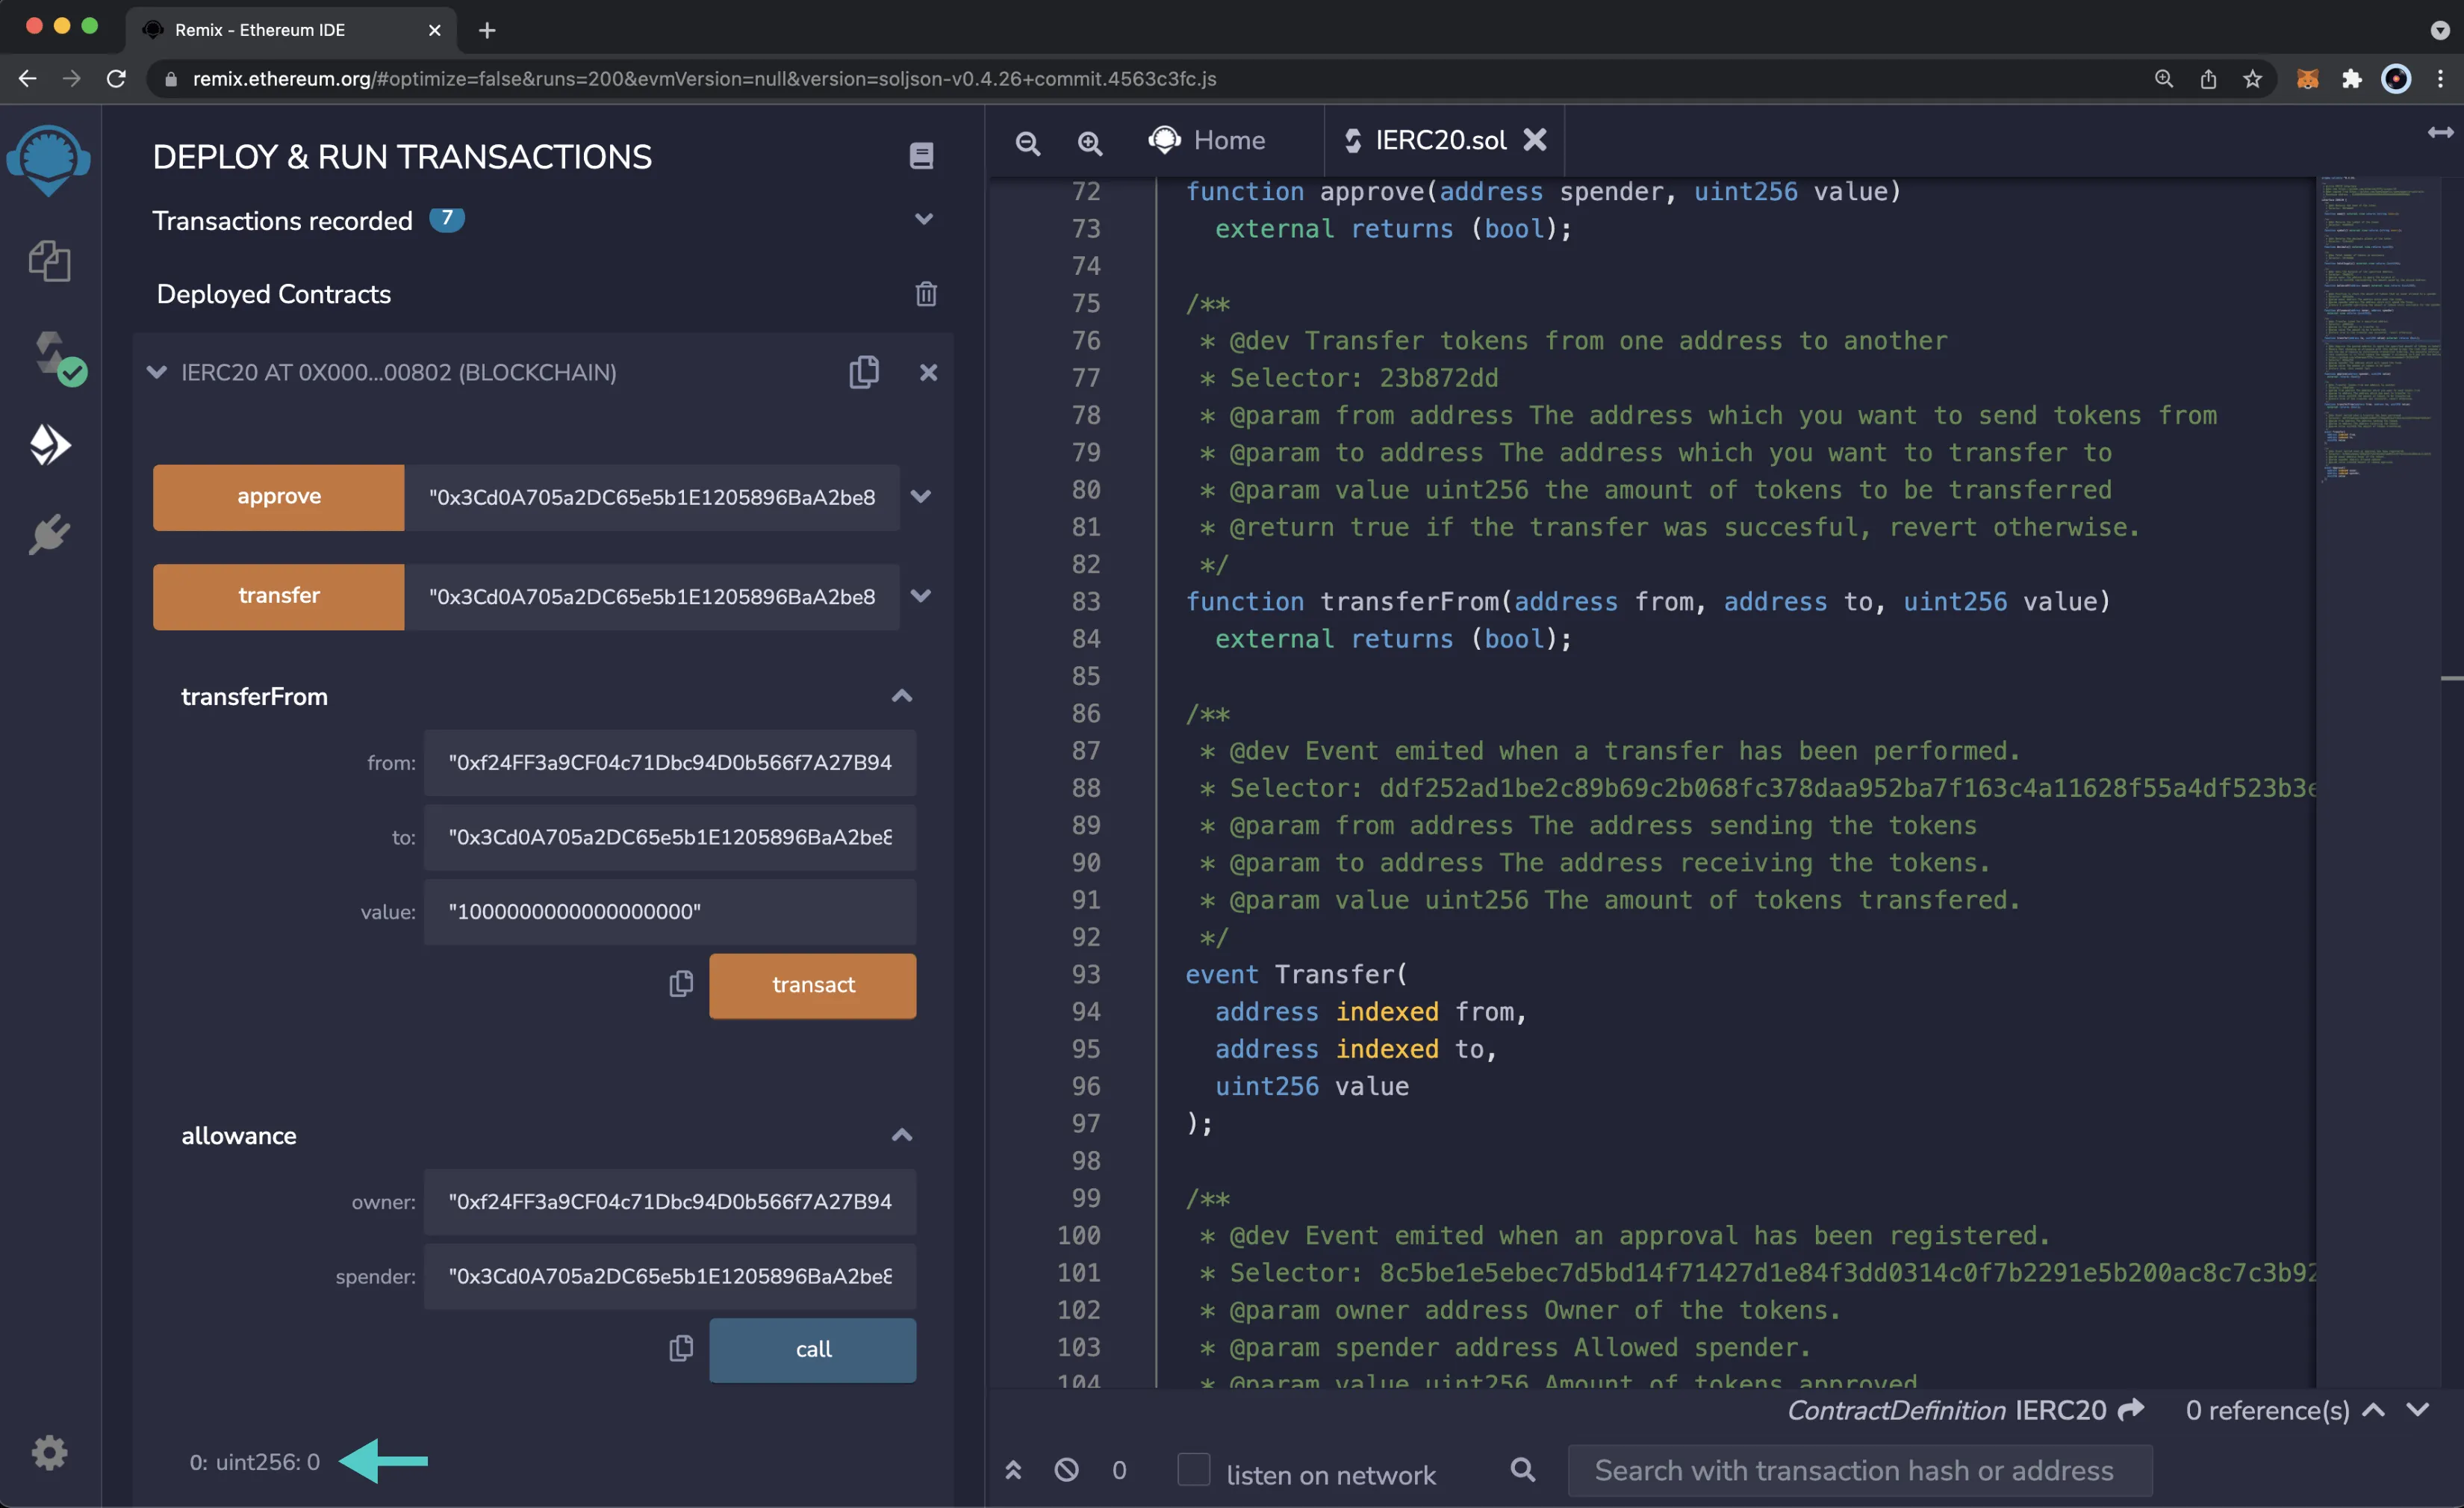
And that's it! You've successfully interacted with the ERC-20 precompile using MetaMask and Remix!
--- END CONTENT ---
Doc-Content: https://docs.moonbeam.network/builders/ethereum/verify-contracts/api-verification/
--- BEGIN CONTENT ---
---
title: Verify Smart Contracts through APIs
description: Learn how to verify smart contracts on Moonbeam-based networks using one of the available API-based verification methods.
categories: Ethereum Toolkit
---
# API-based Contract Verification
## Introduction {: #introduction }
Verifying smart contracts greatly improves their transparency and security. Smart contracts deployed on Moonbeam networks can be verified through API-based tools, including Moonscan API and Sourcify.
This page will outline the steps for using these API-based tools for verifying smart contracts, or retrieving verification status and metadata of smart contracts on Moonbeam networks.
## Using Moonscan API {: #using-moonscan-api }
[Moonscan](https://moonscan.io){target=\_blank} is an official fork of Etherscan that can be used to view and search on-chain data, and comes with a suite of developer tools and analytics to interact with data on Moonbeam networks.
The [Etherscan API](https://docs.etherscan.io){target=\_blank} provides a variety of endpoints for verifying smart contracts, retrieving verified contract ABI and source code, and interacting with verified contracts on Moonbeam networks.
### Generating an Etherscan API Key {: #generating-an-etherscan-api-key }
Before using the Moonscan API, you need to generate an Etherscan API key. Please follow the instructions in [the key generation section](/builders/ethereum/verify-contracts/etherscan-plugins/#generating-an-etherscan-api-key){target=\_blank} of the Etherscan plug-in verification page, as the API keys generated are used for both.
### Moonscan Public API URL {: #moonscan-public-api-url }
The Moonscan API URL for Moonbeam networks is as follows:
=== "Moonbeam"
```text
https://api-moonbeam.moonscan.io/api
```
=== "Moonriver"
```text
https://api-moonriver.moonscan.io/api
```
=== "Moonbase Alpha"
```text
https://api-moonbase.moonscan.io/api
```
### Verify Source Code {: #verify-source-code }
To verify a deployed contract's source code using the Moonscan API, you must form a POST request containing all the relevant contract creation information, and send the request to Moonscan's REST API. The following is sample code using JavaScript and [Axios](https://axios-http.com/docs/intro){target=\_blank}, an HTTP client:
=== "Moonbeam"
```javascript
// Submit Source Code for Verification
const response = await axios.post(
'https://api-moonbeam.moonscan.io/api',
{
apikey: 'INSERT_API_KEY',
module: 'contract',
action: 'verifysourcecode',
contractAddress: 'INSERT_CONTRACT_ADDRESS',
sourceCode: 'INSERT_SOURCE_CODE', // flattened if necessary
codeformat: 'solidity-single-file', // or you can use "solidity-standard-json-input"
contractname: 'INSERT_CONTRACT_NAME', // if codeformat = solidity-standard-json-input, then enter contractname as ex: erc20.sol:erc20
compilerversion: 'INSERT_COMPILER_VERSION', // see https://etherscan.io/solcversions for list of support versions
optimizationUsed: 0, // 0 = no optimization, 1 = optimization was used (applicable when codeformat=solidity-single-file)
runs: 200, // set to 200 as default unless otherwise (applicable when codeformat=solidity-single-file)
constructorArguments: 'INSERT_CONSTRUCTOR_ARGUMENTS', // if applicable
evmversion: 'INSERT_EVM_VERSION', // options: homestead, tangerineWhistle, spuriousDragon, byzantium, constantinople, petersburg, istanbul (applicable when codeformat=solidity-single-file)
licenseType: 1, // valid codes 1-14 where 1=No License ... 14=Business Source License 1.1, see https://etherscan.io/contract-license-types
libraryname1: 'INSERT_LIBRARY_NAME', // if applicable, enter the name of the first library used, i.e. SafeMath (up to 10 libraries can be used)
libraryaddress1: 'INSERT_LIBRARY_ADDRESS', // if applicable, enter the address of the first library used
libraryname2: 'INSERT_LIBRARY_NAME', // if applicable, enter the name of the second library used
libraryaddress2: 'INSERT_LIBRARY_ADDRESS', // if applicable, enter the address of the second library used
// ...
},
{ headers: { 'Content-Type': 'application/x-www-form-urlencoded' } }
);
if (response.data.status == '1') {
// 1 = submission success, use the guid returned (response.data.result) to check the status of your submission
// average time of processing is 30-60 seconds
console.log(
response.data.status +
'; ' +
response.data.message +
'; ' +
response.data.result
);
// response.data.result is the GUID receipt for the submission, you can use this guid for checking the verification status
} else {
// 0 = error
console.log(
response.data.status +
'; ' +
response.data.message +
'; ' +
response.data.result
);
}
```
=== "Moonriver"
```javascript
// Submit Source Code for Verification
const response = await axios.post(
'https://api-moonriver.moonscan.io/api',
{
apikey: 'INSERT_API_KEY',
module: 'contract',
action: 'verifysourcecode',
contractAddress: 'INSERT_CONTRACT_ADDRESS',
sourceCode: 'INSERT_SOURCE_CODE', // flattened if necessary
codeformat: 'solidity-single-file', // or you can use "solidity-standard-json-input"
contractname: 'INSERT_CONTRACT_NAME', // if codeformat = solidity-standard-json-input, then enter contractname as ex: erc20.sol:erc20
compilerversion: 'INSERT_COMPILER_VERSION', // see https://etherscan.io/solcversions for list of support versions
optimizationUsed: 0, // 0 = no optimization, 1 = optimization was used (applicable when codeformat=solidity-single-file)
runs: 200, // set to 200 as default unless otherwise (applicable when codeformat=solidity-single-file)
constructorArguments: 'INSERT_CONSTRUCTOR_ARGUMENTS', // if applicable
evmversion: 'INSERT_EVM_VERSION', // options: homestead, tangerineWhistle, spuriousDragon, byzantium, constantinople, petersburg, istanbul (applicable when codeformat=solidity-single-file)
licenseType: 1, // valid codes 1-14 where 1=No License ... 14=Business Source License 1.1, see https://etherscan.io/contract-license-types
libraryname1: 'INSERT_LIBRARY_NAME', // if applicable, enter the name of the first library used, i.e. SafeMath (up to 10 libraries can be used)
libraryaddress1: 'INSERT_LIBRARY_ADDRESS', // if applicable, enter the address of the first library used
libraryname2: 'INSERT_LIBRARY_NAME', // if applicable, enter the name of the second library used
libraryaddress2: 'INSERT_LIBRARY_ADDRESS', // if applicable, enter the address of the second library used
// ...
},
{ headers: { 'Content-Type': 'application/x-www-form-urlencoded' } }
);
if (response.data.status == '1') {
// 1 = submission success, use the guid returned (response.data.result) to check the status of your submission
// average time of processing is 30-60 seconds
console.log(
response.data.status +
'; ' +
response.data.message +
'; ' +
response.data.result
);
// response.data.result is the GUID receipt for the submission, you can use this guid for checking the verification status
} else {
// 0 = error
console.log(
response.data.status +
'; ' +
response.data.message +
'; ' +
response.data.result
);
}
```
=== "Moonbase Alpha"
```javascript
// Submit Source Code for Verification
const response = await axios.post(
'https://api-moonbase.moonscan.io/api',
{
apikey: 'INSERT_API_KEY',
module: 'contract',
action: 'verifysourcecode',
contractAddress: 'INSERT_CONTRACT_ADDRESS',
sourceCode: 'INSERT_SOURCE_CODE', // flattened if necessary
codeformat: 'solidity-single-file', // or you can use "solidity-standard-json-input"
contractname: 'INSERT_CONTRACT_NAME', // if codeformat = solidity-standard-json-input, then enter contractname as ex: erc20.sol:erc20
compilerversion: 'INSERT_COMPILER_VERSION', // see https://etherscan.io/solcversions for list of support versions
optimizationUsed: 0, // 0 = no optimization, 1 = optimization was used (applicable when codeformat=solidity-single-file)
runs: 200, // set to 200 as default unless otherwise (applicable when codeformat=solidity-single-file)
constructorArguments: 'INSERT_CONSTRUCTOR_ARGUMENTS', // if applicable
evmversion: 'INSERT_EVM_VERSION', // options: homestead, tangerineWhistle, spuriousDragon, byzantium, constantinople, petersburg, istanbul (applicable when codeformat=solidity-single-file)
licenseType: 1, // valid codes 1-14 where 1=No License ... 14=Business Source License 1.1, see https://etherscan.io/contract-license-types
libraryname1: 'INSERT_LIBRARY_NAME', // if applicable, enter the name of the first library used, i.e. SafeMath (up to 10 libraries can be used)
libraryaddress1: 'INSERT_LIBRARY_ADDRESS', // if applicable, enter the address of the first library used
libraryname2: 'INSERT_LIBRARY_NAME', // if applicable, enter the name of the second library used
libraryaddress2: 'INSERT_LIBRARY_ADDRESS', // if applicable, enter the address of the second library used
// ...
},
{ headers: { 'Content-Type': 'application/x-www-form-urlencoded' } }
);
if (response.data.status == '1') {
// 1 = submission success, use the guid returned (response.data.result) to check the status of your submission
// average time of processing is 30-60 seconds
console.log(
response.data.status +
'; ' +
response.data.message +
'; ' +
response.data.result
);
// response.data.result is the GUID receipt for the submission, you can use this guid for checking the verification status
} else {
// 0 = error
console.log(
response.data.status +
'; ' +
response.data.message +
'; ' +
response.data.result
);
}
```
Upon successful submission, a GUID will be returned as a part of the result. This GUID can be used to check for the submission status.
=== "Moonbeam"
```bash
curl https://api-moonbeam.moonscan.io/api
?module=contract
&action=checkverifystatus
&guid=INSERT_GUID_FROM_RESPONSE
&apikey=INSERT_API_KEY
```
=== "Moonriver"
```bash
curl https://api-moonriver.moonscan.io/api
?module=contract
&action=checkverifystatus
&guid=INSERT_GUID_FROM_RESPONSE
&apikey=INSERT_API_KEY
```
=== "Moonbase Alpha"
```bash
curl https://api-moonbase.moonscan.io/api
?module=contract
&action=checkverifystatus
&guid=INSERT_GUID_FROM_RESPONSE
&apikey=INSERT_API_KEY
```
### Retrieve Contract ABI for Verified Contracts {: #retrieve-contract-abi-for-verified-contracts }
Once your contract is verified on Moonscan, you can use the following endpoint to retrieve the contract ABI:
=== "Moonbeam"
```bash
curl https://api-moonbeam.moonscan.io/api
?module=contract
&action=getabi
&address=INSERT_CONTRACT_ADDRESS
&apikey=INSERT_API_KEY
```
=== "Moonriver"
```bash
curl https://api-moonriver.moonscan.io/api
?module=contract
&action=getabi
&address=INSERT_CONTRACT_ADDRESS
&apikey=INSERT_API_KEY
```
=== "Moonbase Alpha"
```bash
curl https://api-moonbase.moonscan.io/api
?module=contract
&action=getabi
&address=INSERT_CONTRACT_ADDRESS
&apikey=INSERT_API_KEY
```
### Retrieve Contract Source Code for Verified Contracts {: #retrieve-contract-source-code-for-verified-contracts }
Once your contract is verified on Moonscan, you can use the following endpoint to retrieve the contract source code:
=== "Moonbeam"
```bash
curl https://api-moonbeam.moonscan.io/api
?module=contract
&action=getsourcecode
&address=INSERT_CONTRACT_ADDRESS
&apikey=INSERT_API_KEY
```
=== "Moonriver"
```bash
curl https://api-moonriver.moonscan.io/api
?module=contract
&action=getsourcecode
&address=INSERT_CONTRACT_ADDRESS
&apikey=INSERT_API_KEY
```
=== "Moonbase Alpha"
```bash
curl https://api-moonbase.moonscan.io/api
?module=contract
&action=getsourcecode
&address=INSERT_CONTRACT_ADDRESS
&apikey=INSERT_API_KEY
```
## Using Sourcify API {: #using-sourcify-api }
[Sourcify](https://sourcify.dev){target=\_blank} is a multi-chain decentralized automated contract verification service, and maintains a public repository of contract metadata. Sourcify also provides a public server API for verification, and checking if a contract is verified, and a repository API for retrieving metadata files.
### Sourcify Public Server URL {: #sourcify-public-server-url }
Soucify API endpoints can be accessed through the following public servers:
=== "Production"
```text
https://sourcify.dev/server
```
=== "Staging"
```text
https://staging.sourcify.dev/server
```
### Moonbeam Network Chain ID's {: #moonbeam-network-chain-ids }
Sourcify uses chain ID's to identify the target network(s) for the request. The chain ID's of Moonbeam networks are as follows:
=== "Moonbeam"
```text
{{ networks.moonbeam.chain_id }}
```
=== "Moonriver"
```text
{{ networks.moonriver.chain_id }}
```
=== "Moonbase Alpha"
```bash
{{ networks.moonbase.chain_id }}
```
### Perfect vs. Partial Match {: #full-vs-partial-match }
Sourcify supports two types of verification match results.
Full matches (sometimes referred as perfect matches) refer to the cases when the bytecode of the deployed contract is byte-by-byte the same as compilation output of the given source code files under the compilation settings defined in the metadata file.
Partial matches refer to cases when the deployed bytecode of the onchain contract match the bytecode resulting from the recompilation with the metadata and the source files except the metadata hash. For partial matches, the deployed contract and the given source code and metadata are functionally the same, but there are differences in source code comments, variable names, or other metadata fields such as source paths.
### Verify Contract {: #verify-contract }
A POST request is used to verify a contract on Sourcify. The following is sample code using JavaScript:
=== "Moonbeam"
```javascript
// Submit Contract Source Code and Metadata for Verification
const response = await axios.post('https://sourcify.dev/server/verify', {
address: 'INSERT_CONTRACT_ADDRESS',
chain: {{ networks.moonbeam.chain_id }}, // chain ID of Moonbeam
files: {
'metadata-1.json': 'INSERT_JSON_FILE', // metadata file for contract file 1
'metadata-2.json': 'INSERT_JSON_FILE', // metadata file for contract file 2
'file1-name.sol': 'INSERT_SOL_FILE', // contract source file 1
'file2-name.sol': 'INSERT_SOL_FILE', // contract source file 2
//...
},
chosenContract: 1, // (optional) index of the contract, if the provided files contain multiple metadata files
});
if (result.status == 'perfect') {
// perfect match
console.log(result.status + ';' + result.address);
} else if (result.status == 'partial') {
// partial match
console.log(result.status + ';' + result.address);
} else {
// non-matching
console.log(result.status + ';' + result.address);
}
```
=== "Moonriver"
```javascript
// Submit Contract Source Code and Metadata for Verification
const response = await axios.post('https://sourcify.dev/server/verify', {
address: 'INSERT_CONTRACT_ADDRESS',
chain: {{ networks.moonriver.chain_id }}, // chain ID of Moonriver
files: {
'metadata-1.json': 'INSERT_JSON_FILE', // metadata file for contract file 1
'metadata-2.json': 'INSERT_JSON_FILE', // metadata file for contract file 2
'file1-name.sol': 'INSERT_SOL_FILE', // contract source file 1
'file2-name.sol': 'INSERT_SOL_FILE', // contract source file 2
//...
},
chosenContract: 1, // (optional) index of the contract, if the provided files contain multiple metadata files
});
if (result.status == 'perfect') {
// perfect match
console.log(result.status + ';' + result.address);
} else if (result.status == 'partial') {
// partial match
console.log(result.status + ';' + result.address);
} else {
// non-matching
console.log(result.status + ';' + result.address);
}
```
=== "Moonbase Alpha"
```javascript
// Submit Contract Source Code and Metadata for Verification
const response = await axios.post('https://sourcify.dev/server/verify', {
address: 'INSERT_CONTRACT_ADDRESS',
chain: {{ networks.moonbase.chain_id }}, // chain ID of Moonbase Alpha
files: {
'metadata-1.json': 'INSERT_JSON_FILE', // metadata file for contract file 1
'metadata-2.json': 'INSERT_JSON_FILE', // metadata file for contract file 2
'file1-name.sol': 'INSERT_SOL_FILE', // contract source file 1
'file2-name.sol': 'INSERT_SOL_FILE', // contract source file 2
//...
},
chosenContract: 1, // (optional) index of the contract, if the provided files contain multiple metadata files
});
if (result.status == 'perfect') {
// perfect match
console.log(result.status + ';' + result.address);
} else if (result.status == 'partial') {
// partial match
console.log(result.status + ';' + result.address);
} else {
// non-matching
console.log(result.status + ';' + result.address);
}
```
Alternatively, you can also use [the Sourcify hosted GUI](https://sourcify.dev/#/verifier){target=\_blank} to submit a contract for verification.
### Check Verification Status by Address and Chain ID {: check-verification-status-by-address-and-chain-id }
Sourcify provides endpoints for checking the verification status of contracts on multiple EVM chains at once. This can be done through URL parameters, by specifying the contract addresses and the chain ID's of the networks.
There are two variations of this endpoint, one for perfect matching and one for partial matching:
=== "Perfect Match"
```bash
curl https://sourcify.dev/server/check-by-addresses
?addresses={INSERT_ADDRESS_1, INSERT_ADDRESS_2, ...}
&chainIds={INSERT_CHAIN_ID_1, INSERT_CHAIN_ID_2, ...}
```
=== "Partial Match"
```bash
curl https://sourcify.dev/server/check-all-by-addresses
?addresses={INSERT_ADDRESS_1, INSERT_ADDRESS_2, ...}
&chainIds={INSERT_CHAIN_ID_1, INSERT_CHAIN_ID_2, ...}
```
An example response will be a JSON object of the following structure:
```json
[
{
"address": "address1",
"status": "perfect",
"chainIds": [
"chainId1",
"chaindId2"
]
},
{
"address": "address2",
"status": "partial",
"chainIds": [
"chaindId2"
]
}
]
```
### Retrieve Contract Source Files for Verified Contracts {: get-contract-source-files-for-verified-contracts }
You can also retrieve the source files of verified contracts from the Sourcify repository.
There are two variations of this endpoint, one for the source files of perfect matches:
=== "Moonbeam"
```bash
curl https://sourcify.dev/server/files/{{ networks.moonbeam.chain_id }}/INSERT_CONTRACT_ADDRESS
```
=== "Moonriver"
```bash
curl https://sourcify.dev/server/files/{{ networks.moonriver.chain_id }}/INSERT_CONTRACT_ADDRESS
```
=== "Moonbase Alpha"
```bash
curl https://sourcify.dev/server/files/{{ networks.moonbase.chain_id }}/INSERT_CONTRACT_ADDRESS
```
And one for the source files of both perfect and partial matches:
=== "Moonbeam"
```bash
curl https://sourcify.dev/server/files/any/{{ networks.moonbeam.chain_id }}/INSERT_CONTRACT_ADDRESS
```
=== "Moonriver"
```bash
curl https://sourcify.dev/server/files/any/{{ networks.moonriver.chain_id }}/INSERT_CONTRACT_ADDRESS
```
=== "Moonbase Alpha"
```bash
curl https://sourcify.dev/server/files/any/{{ networks.moonbase.chain_id }}/INSERT_CONTRACT_ADDRESS
```
### Using Sourcify with Foundry {: #using-sourcify-with-foundry }
Foundry's Forge tool has built-in support for Sourcify verification similar to how it has [built-in support for Etherscan](/builders/ethereum/verify-contracts/etherscan-plugins/#using-foundry-to-verify){target=\_blank}. The example in this section of the guide will use the `MyToken.sol` contract that was created in the [Using Foundry to Deploy to Moonbeam](/builders/ethereum/dev-env/foundry/){target=\_blank} guide.
A Foundry project that uses Sourcify must have their compiler emit metadata files. This can be configured in the `foundry.toml` file:
```toml
[profile.default]
# Input your custom or default config options here
extra_output_files = ["metadata"]
```
If you have already deployed the example contract, you can verify it with the `verify-contract` command. Before you can verify the contract, you will need to ABI-encode the constructor arguments. To do so for the example contract, you can run the following command:
```bash
cast abi-encode "constructor(uint256)" 100
```
The result should be `0x0000000000000000000000000000000000000000000000000000000000000064`. You can then verify the contract using the following command:
=== "Moonbeam"
```bash
forge verify-contract --chain-id {{ networks.moonbeam.chain_id }} \
--constructor-args 0x0000000000000000000000000000000000000000000000000000000000000064 \
--verifier sourcify INSERT_CONTRACT_ADDRESS src/MyToken.sol:MyToken
```
=== "Moonriver"
```bash
forge verify-contract --chain-id {{ networks.moonriver.chain_id }} \
--constructor-args 0x0000000000000000000000000000000000000000000000000000000000000064 \
--verifier sourcify INSERT_CONTRACT_ADDRESS src/MyToken.sol:MyToken
```
=== "Moonbase Alpha"
```bash
forge verify-contract --chain-id {{ networks.moonbase.chain_id }} \
--constructor-args 0x0000000000000000000000000000000000000000000000000000000000000064 \
--verifier sourcify INSERT_CONTRACT_ADDRESS src/MyToken.sol:MyToken
```
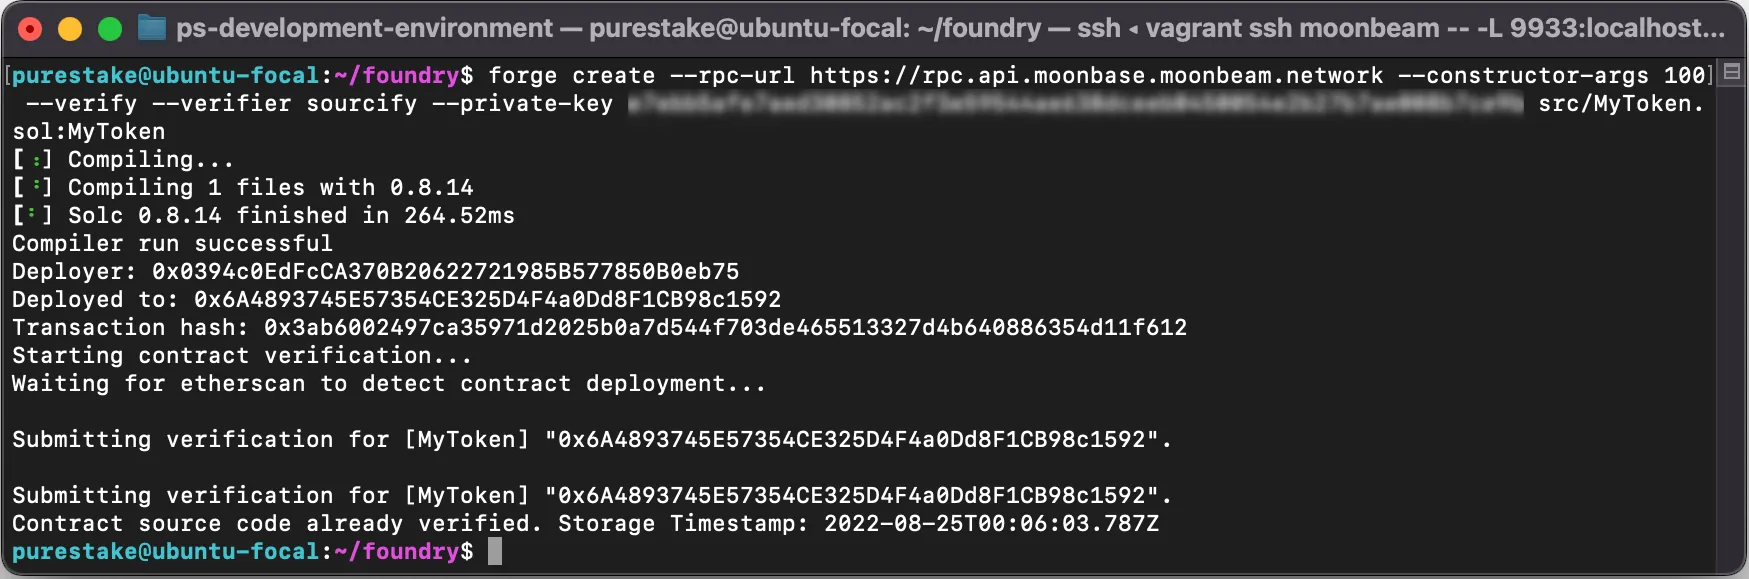
If you wanted to deploy the example contract and verify at the same time, then you would use the following command:
=== "Moonbeam"
```bash
forge create --rpc-url {{ networks.moonbeam.rpc_url }} \
--constructor-args 100 \
--verify --verifier sourcify \
--private-key INSERT_YOUR_PRIVATE_KEY \
src/MyToken.sol:MyToken
```
=== "Moonriver"
```bash
forge create --rpc-url {{ networks.moonriver.rpc_url }} \
--constructor-args 100 \
--verify --verifier sourcify \
--private-key INSERT_YOUR_PRIVATE_KEY \
src/MyToken.sol:MyToken
```
=== "Moonbase Alpha"
```bash
forge create --rpc-url {{ networks.moonbase.rpc_url }} \
--constructor-args 100 \
--verify --verifier sourcify \
--private-key INSERT_YOUR_PRIVATE_KEY \
src/MyToken.sol:MyToken
```

--- END CONTENT ---
Doc-Content: https://docs.moonbeam.network/builders/ethereum/verify-contracts/block-explorers/
--- BEGIN CONTENT ---
---
title: Verify Smart Contracts on Block Explorers
description: Learn how to verify smart contracts on Moonbeam-based networks using one of the available block explorers, such as Moonscan.
categories: Ethereum Toolkit
---
# Verify Smart Contracts using Block Explorers
## Introduction {: #introduction }
Verifying smart contracts on a block explorer is a great way to improve the transparency and security of deployed smart contracts on Moonbeam. Users can directly view the source code for verified smart contracts, and for some block explorers, they can also directly interact with the contract's public methods through the block explorer's interface.
This page will outline the steps for verifying smart contracts on Moonbeam networks through block explorers.
## Deploying the Contract {: #deploying-the-contract }
In order to verify a smart contract on a block explorer, the contract must first be deployed on the target network. This tutorial will be about deploying the smart contract to [Moonbase Alpha](/builders/get-started/networks/moonbase/){target=\_blank}, but it can be adapted for Moonbeam or Moonriver.
You can check out this page for a tutorial on [deploying smart contracts](/builders/ethereum/libraries/){target=\_blank} using Ethereum libraries on Moonbeam. You may also use a developer tool such as [Remix](/builders/ethereum/dev-env/remix/#deploying-a-contract-to-moonbeam-using-remix){target=\_blank}, [Hardhat](/builders/ethereum/dev-env/hardhat/){target=\_blank}, or another tool if preferred, to deploy the smart contract to Moonbeam.
This tutorial will use the same contract as the above deployment tutorial for the contract verification example.
The contract used is a simple incrementer, arbitrarily named `Incrementer.sol`. The Solidity code is the following:
```solidity
// SPDX-License-Identifier: MIT
pragma solidity ^0.8.0;
contract Incrementer {
uint256 public number;
constructor(uint256 _initialNumber) {
number = _initialNumber;
}
function increment(uint256 _value) public {
number = number + _value;
}
function reset() public {
number = 0;
}
}
```
### Collecting Information for Contract Verification
You will need to collect some information related to the contract's compiler and deployment in order to verify it successfully.
1. Take note of the Solidity compiler version used to compile and deploy the contract. The Solidity compiler version can usually be selected or specified in the deployment tool used
2. Take note of any SPDX license identifier used at the beginning of the Solidity source file (this example uses an MIT license):
```solidity
// SPDX-License-Identifier: MIT
```
3. (Optional) If optimization is enabled during compilation, take note of the value of the optimization runs parameter
4. (Optional) If the contract constructor method accepts arguments, take note of the [ABI-encoded form](https://docs.soliditylang.org/en/develop/abi-spec.html) of the constructor arguments
5. After deployment, take note of the deployed contract address of the smart contract. The deployment address of the contract can be found either in the console output if using a command-line-based tool such as Hardhat, or an Ethereum library, or it can be copied from the GUI in tools such as Remix IDE
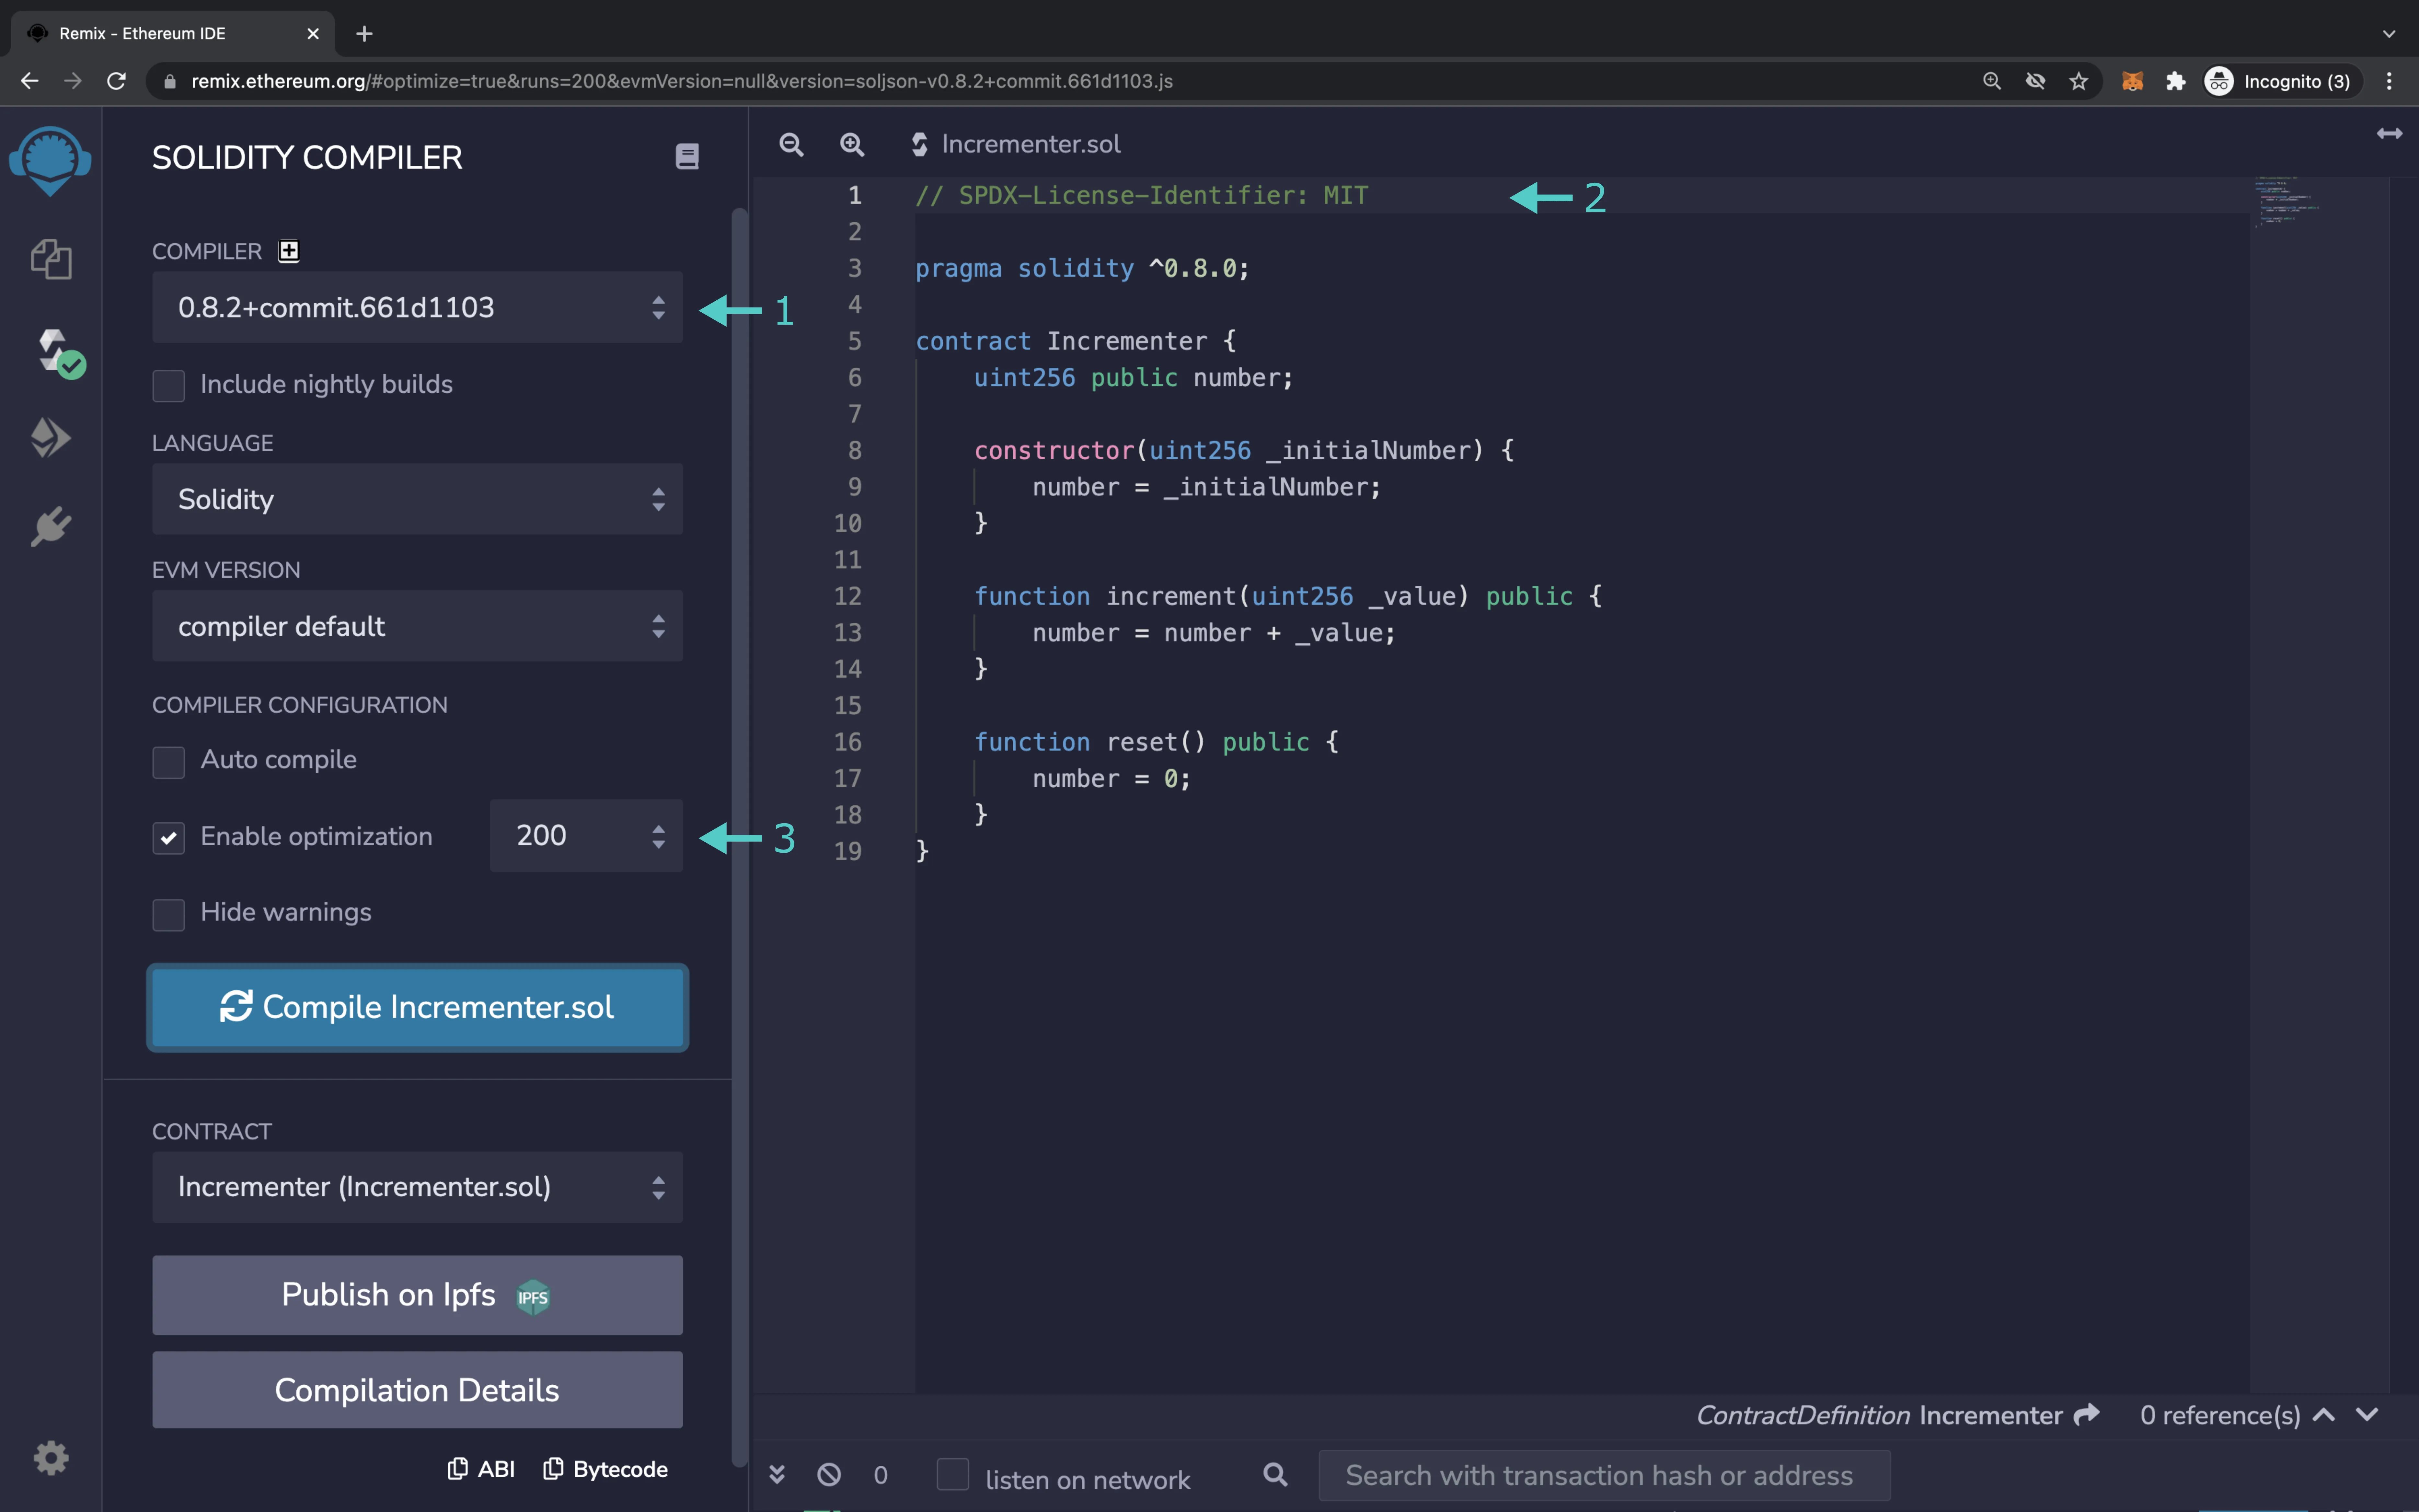
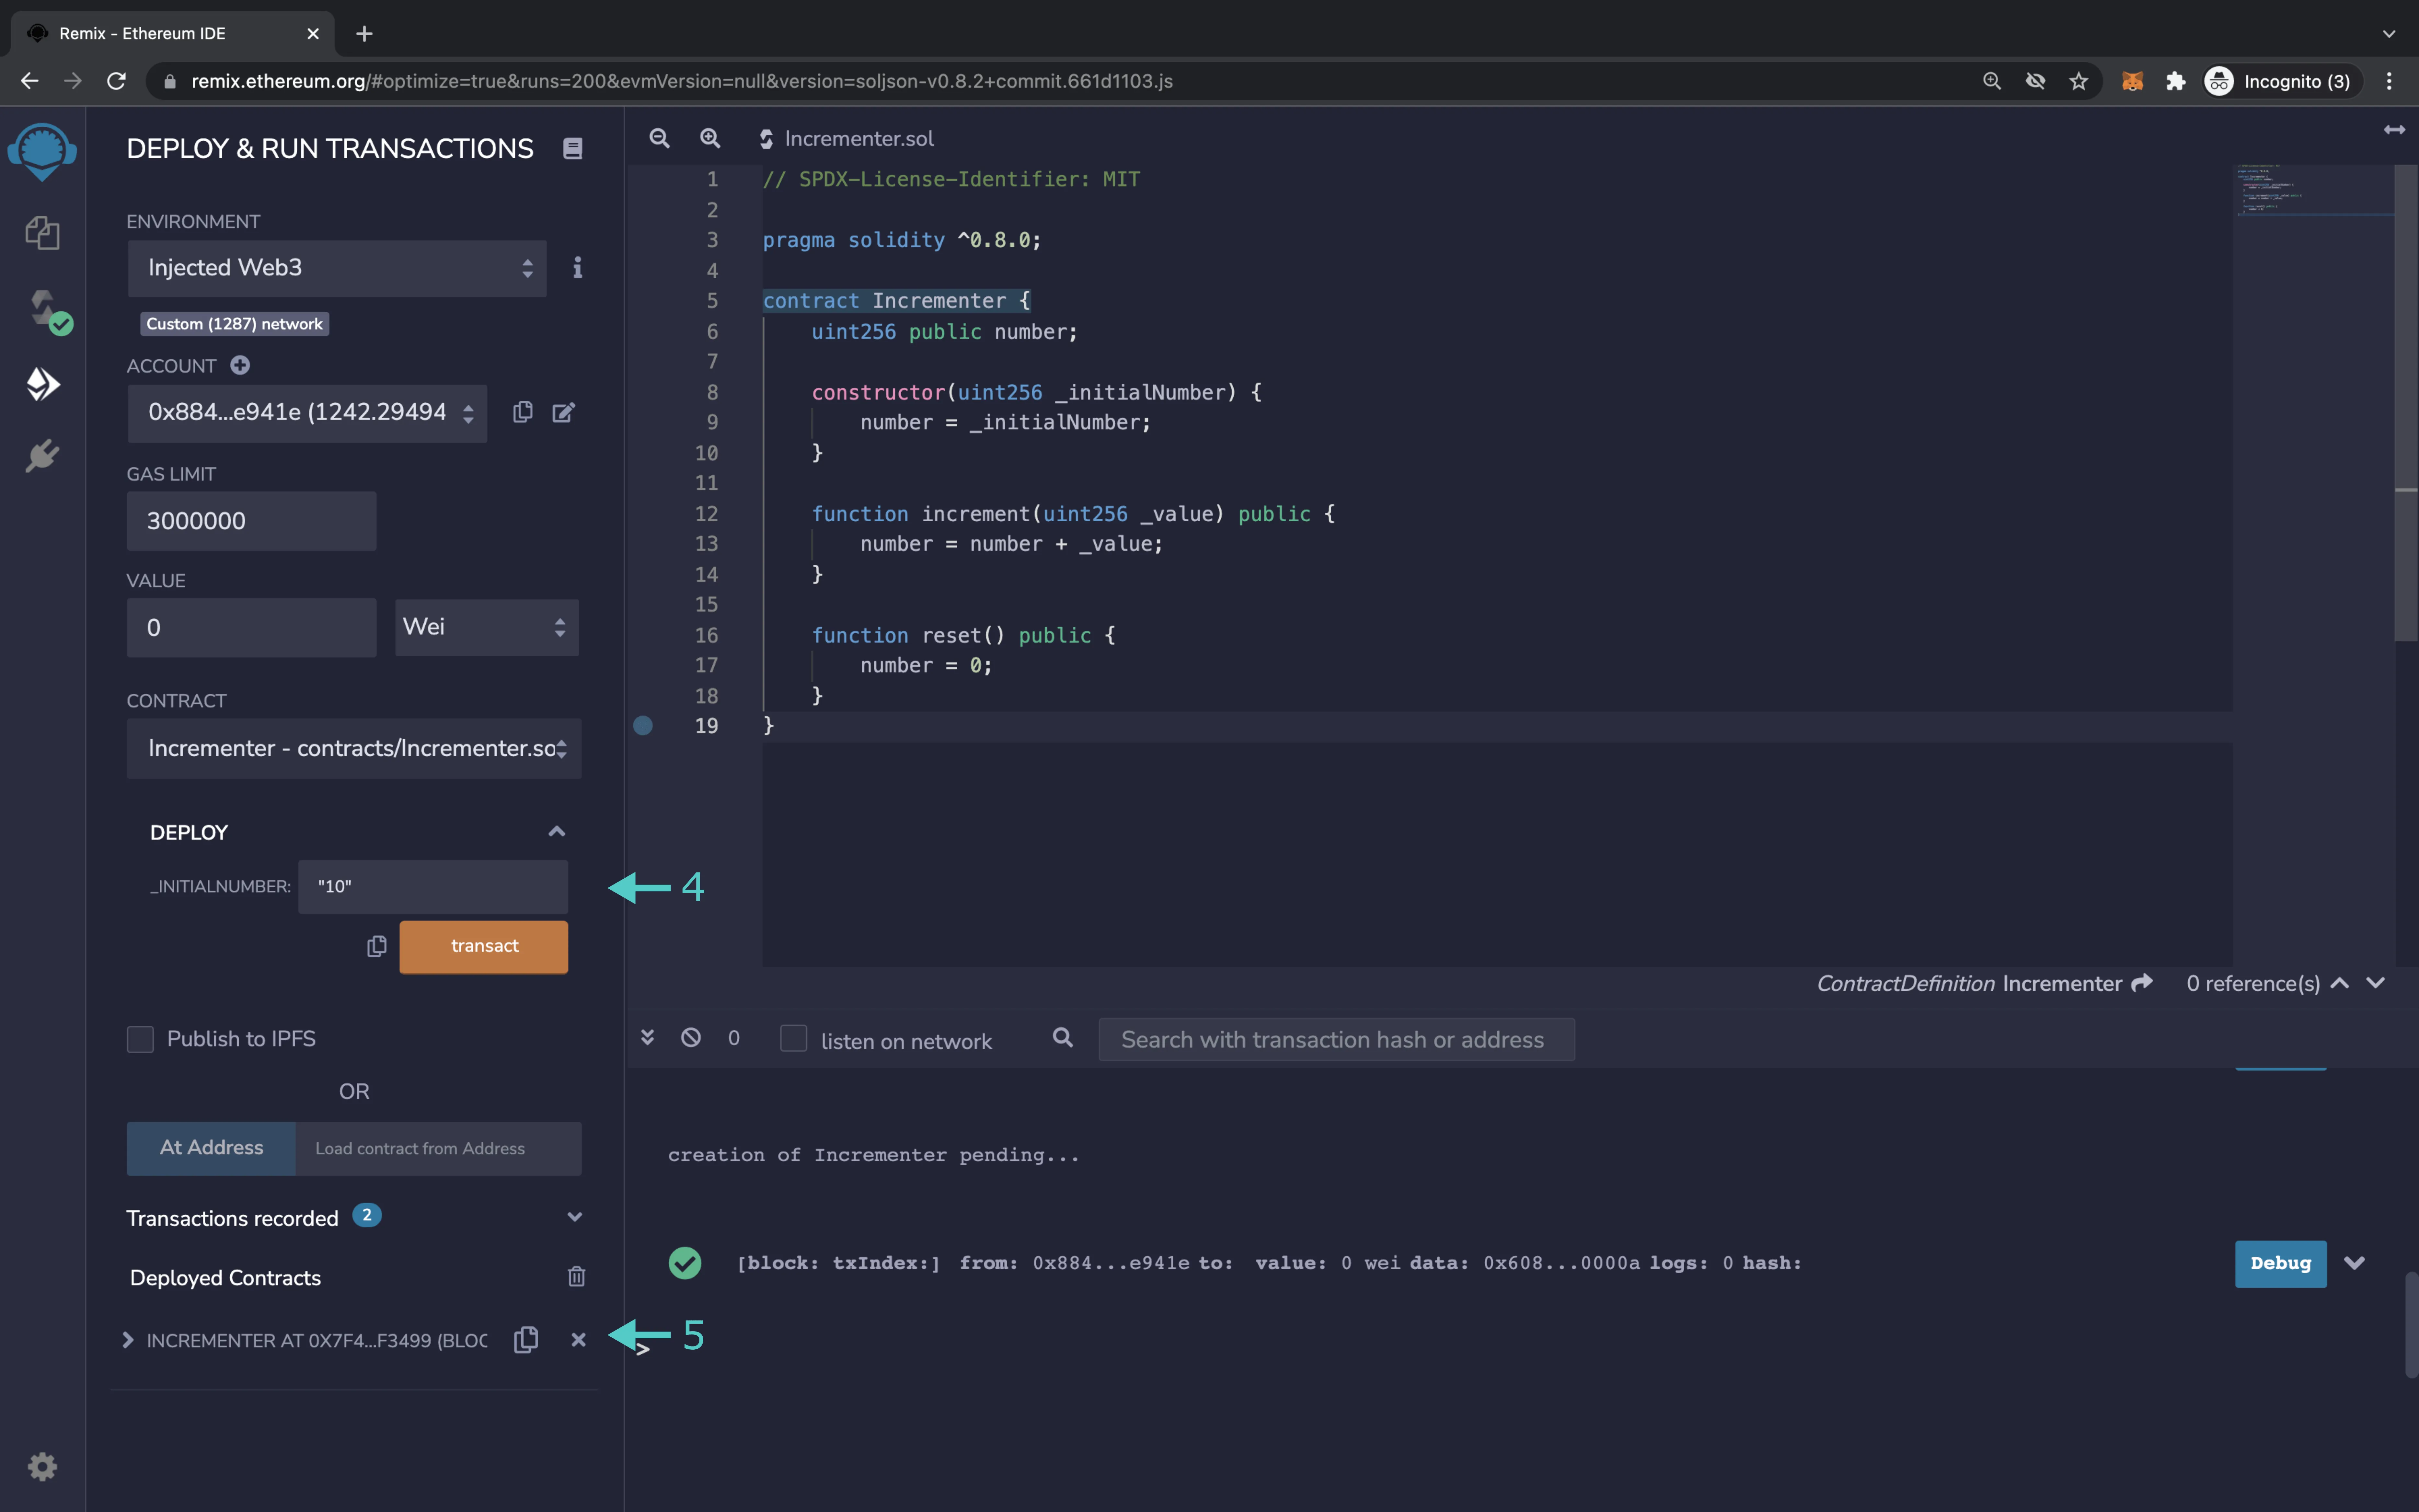
## Verify the Contract {: #verifying-the-contract }
The next step will be verifying the smart contract in an EVM-compatible explorer for the Moonbeam network that you deployed to.
### Moonscan {: #moonscan }
Take the following steps to verify the contract on Moonscan:
1. Go to the [Verify & Publish Contract Source Code](https://moonbase.moonscan.io/verifyContract) page of Moonscan
2. Fill in the contract's deployed address in the first field, including the `0x` prefix
3. Select the compiler type. For the current `Incrementer.sol` example, select **Solidity (Single file)**
4. After selecting the compiler type, select the compiler version used to compile the contract. If the compiler version used was a nightly commit, uncheck the box under the field to select the nightly version
5. Select the open-source license used. For the current `Incrementer.sol` example, select the option **MIT License (MIT)**. If there was none used, select **No License (None)**
6. Click the **Continue** button at the bottom of the form to continue on to the next page
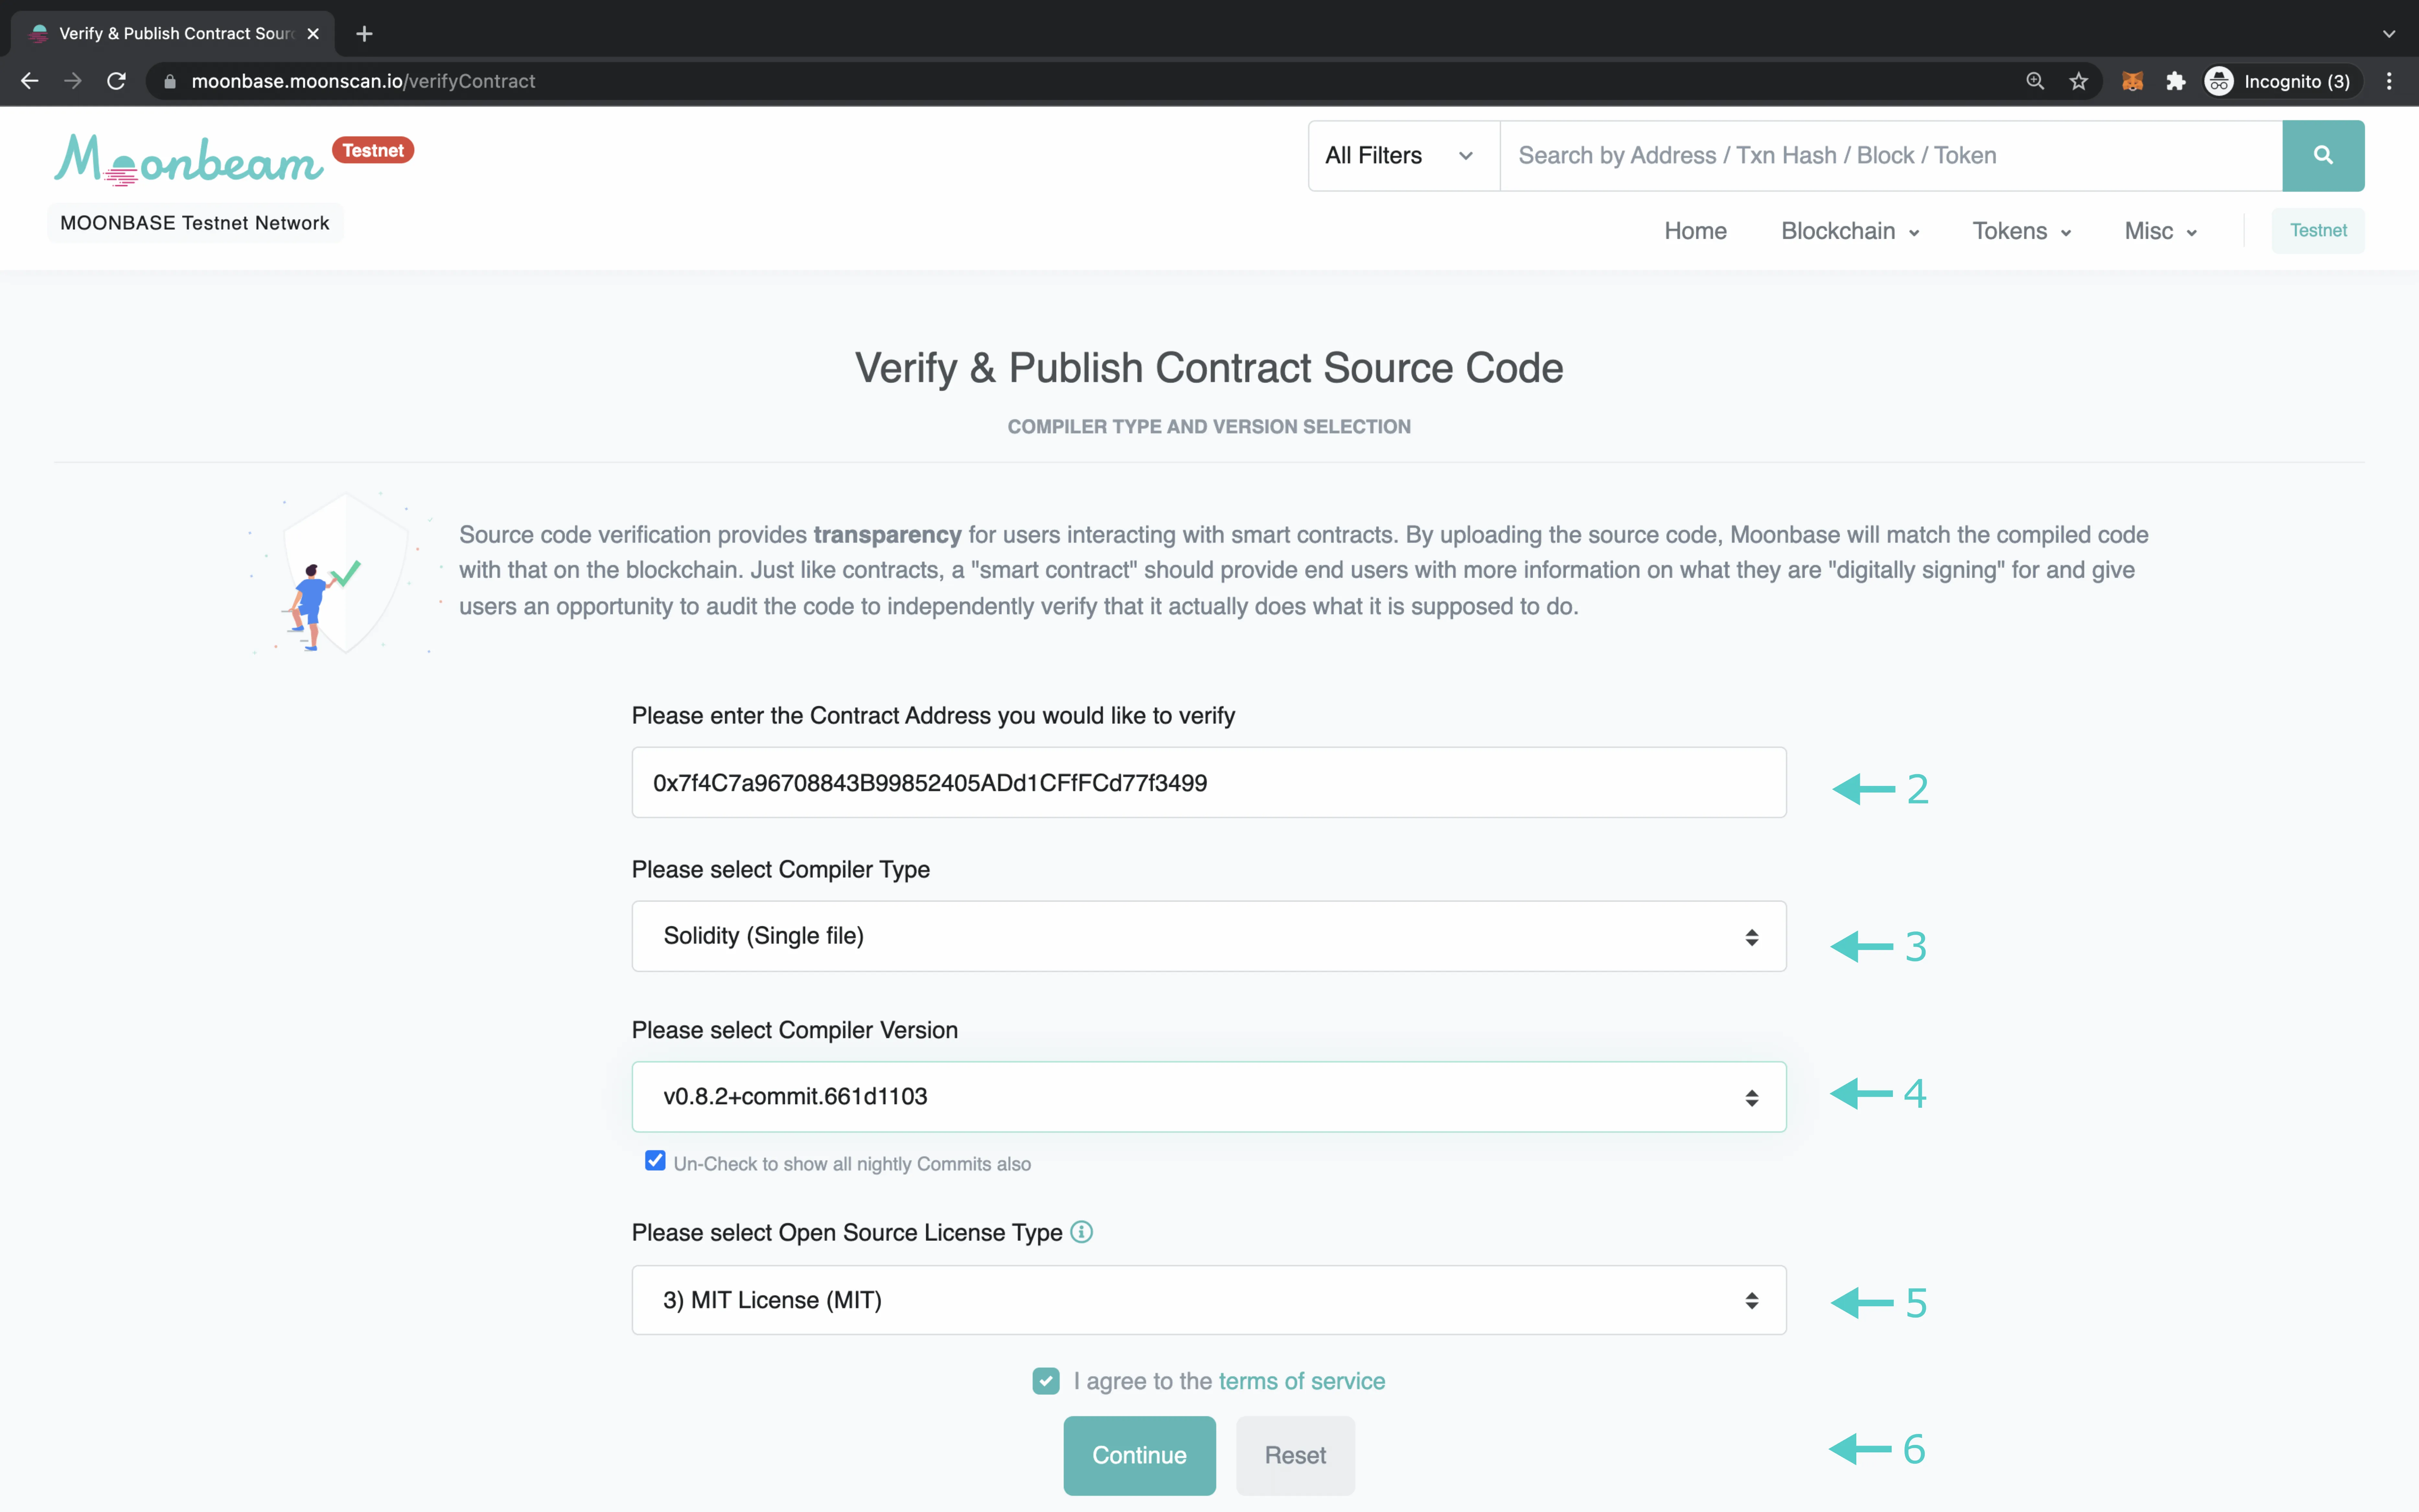
On the second page, the **Contract Address**, **Compiler**, and **Constructor Arguments** fields should be prefilled. Fill in the rest of the information:
1. Copy and paste the entirety of the contract's content into the text field labeled as such
2. (Optional) Select **Yes** for **Optimization** if it was enabled during compilation, and fill in the number of runs under **Misc Settings/Runs(Optimizer)**
3. (Optional) Add contract libraries and their addresses, if any were used in the contract
4. (Optional) Check any other optional fields that may apply to your contract, and fill them out accordingly
5. Click on the CAPTCHA at the bottom and the **Verify and Publish** button to confirm and begin verification
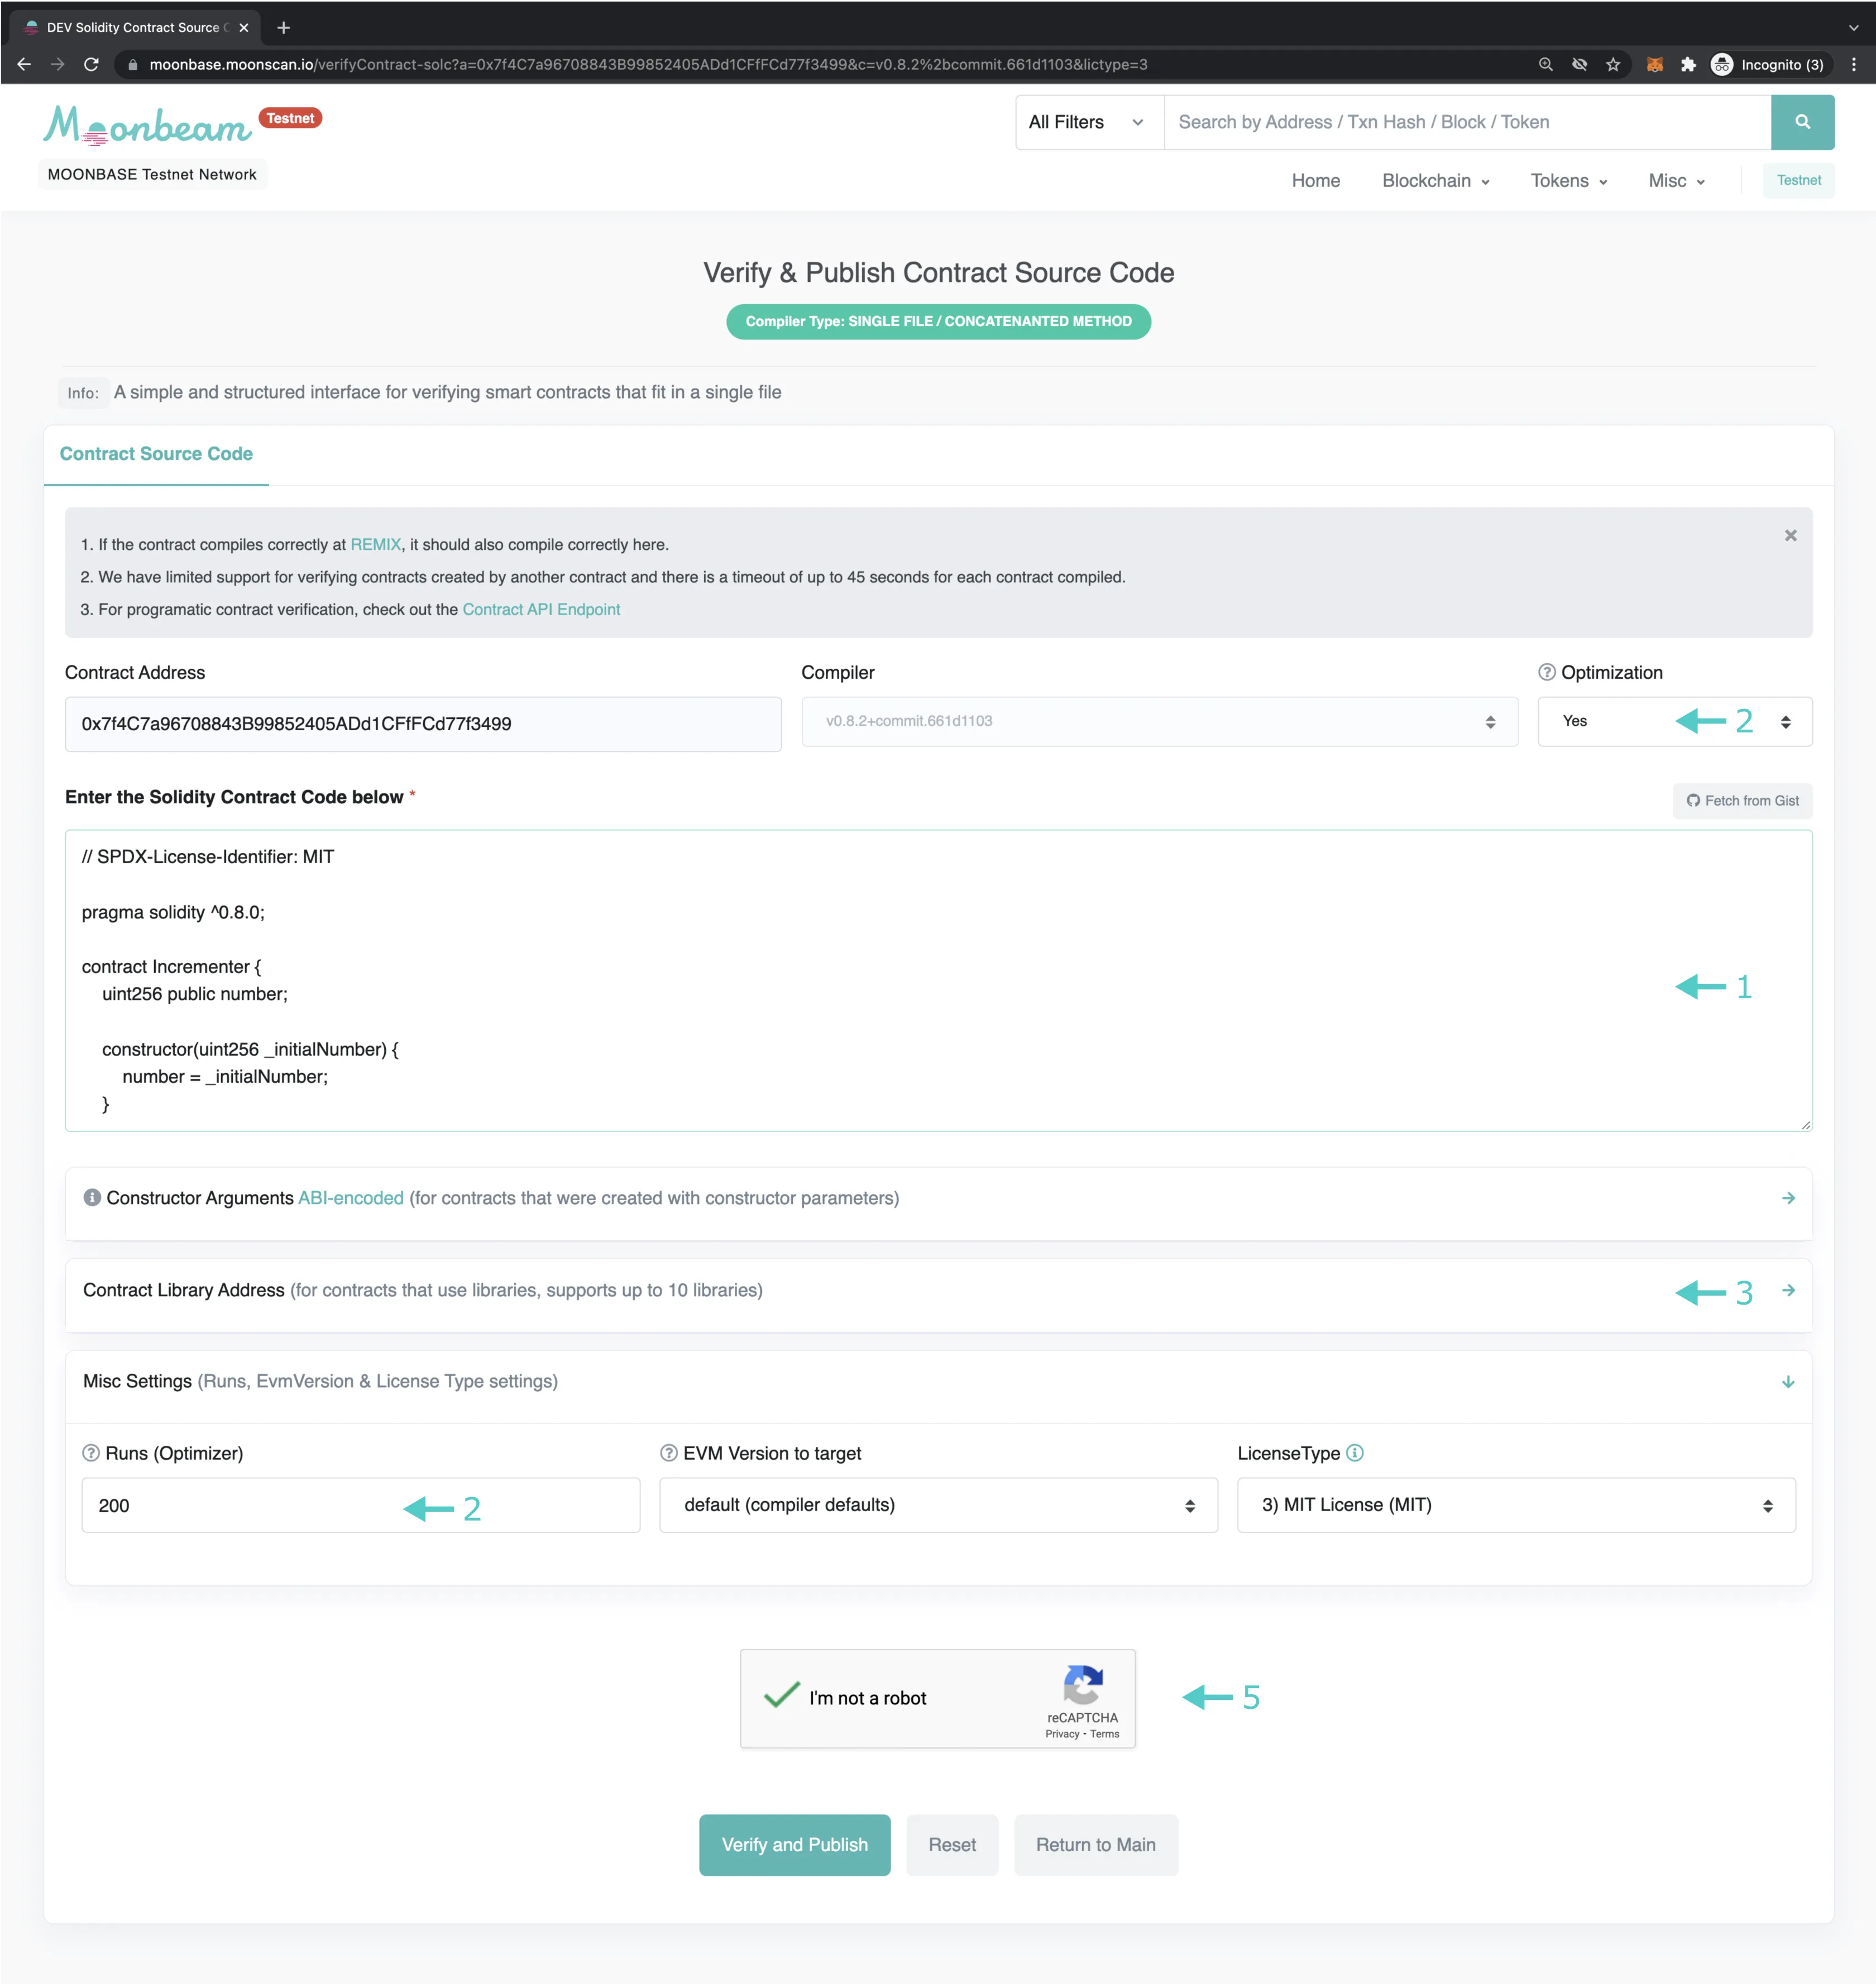
After a short wait, the result of verification will be displayed in the browser, and a success result page will display the contract's ABI-encoded constructor arguments, the contract name, bytecode, and ABI.
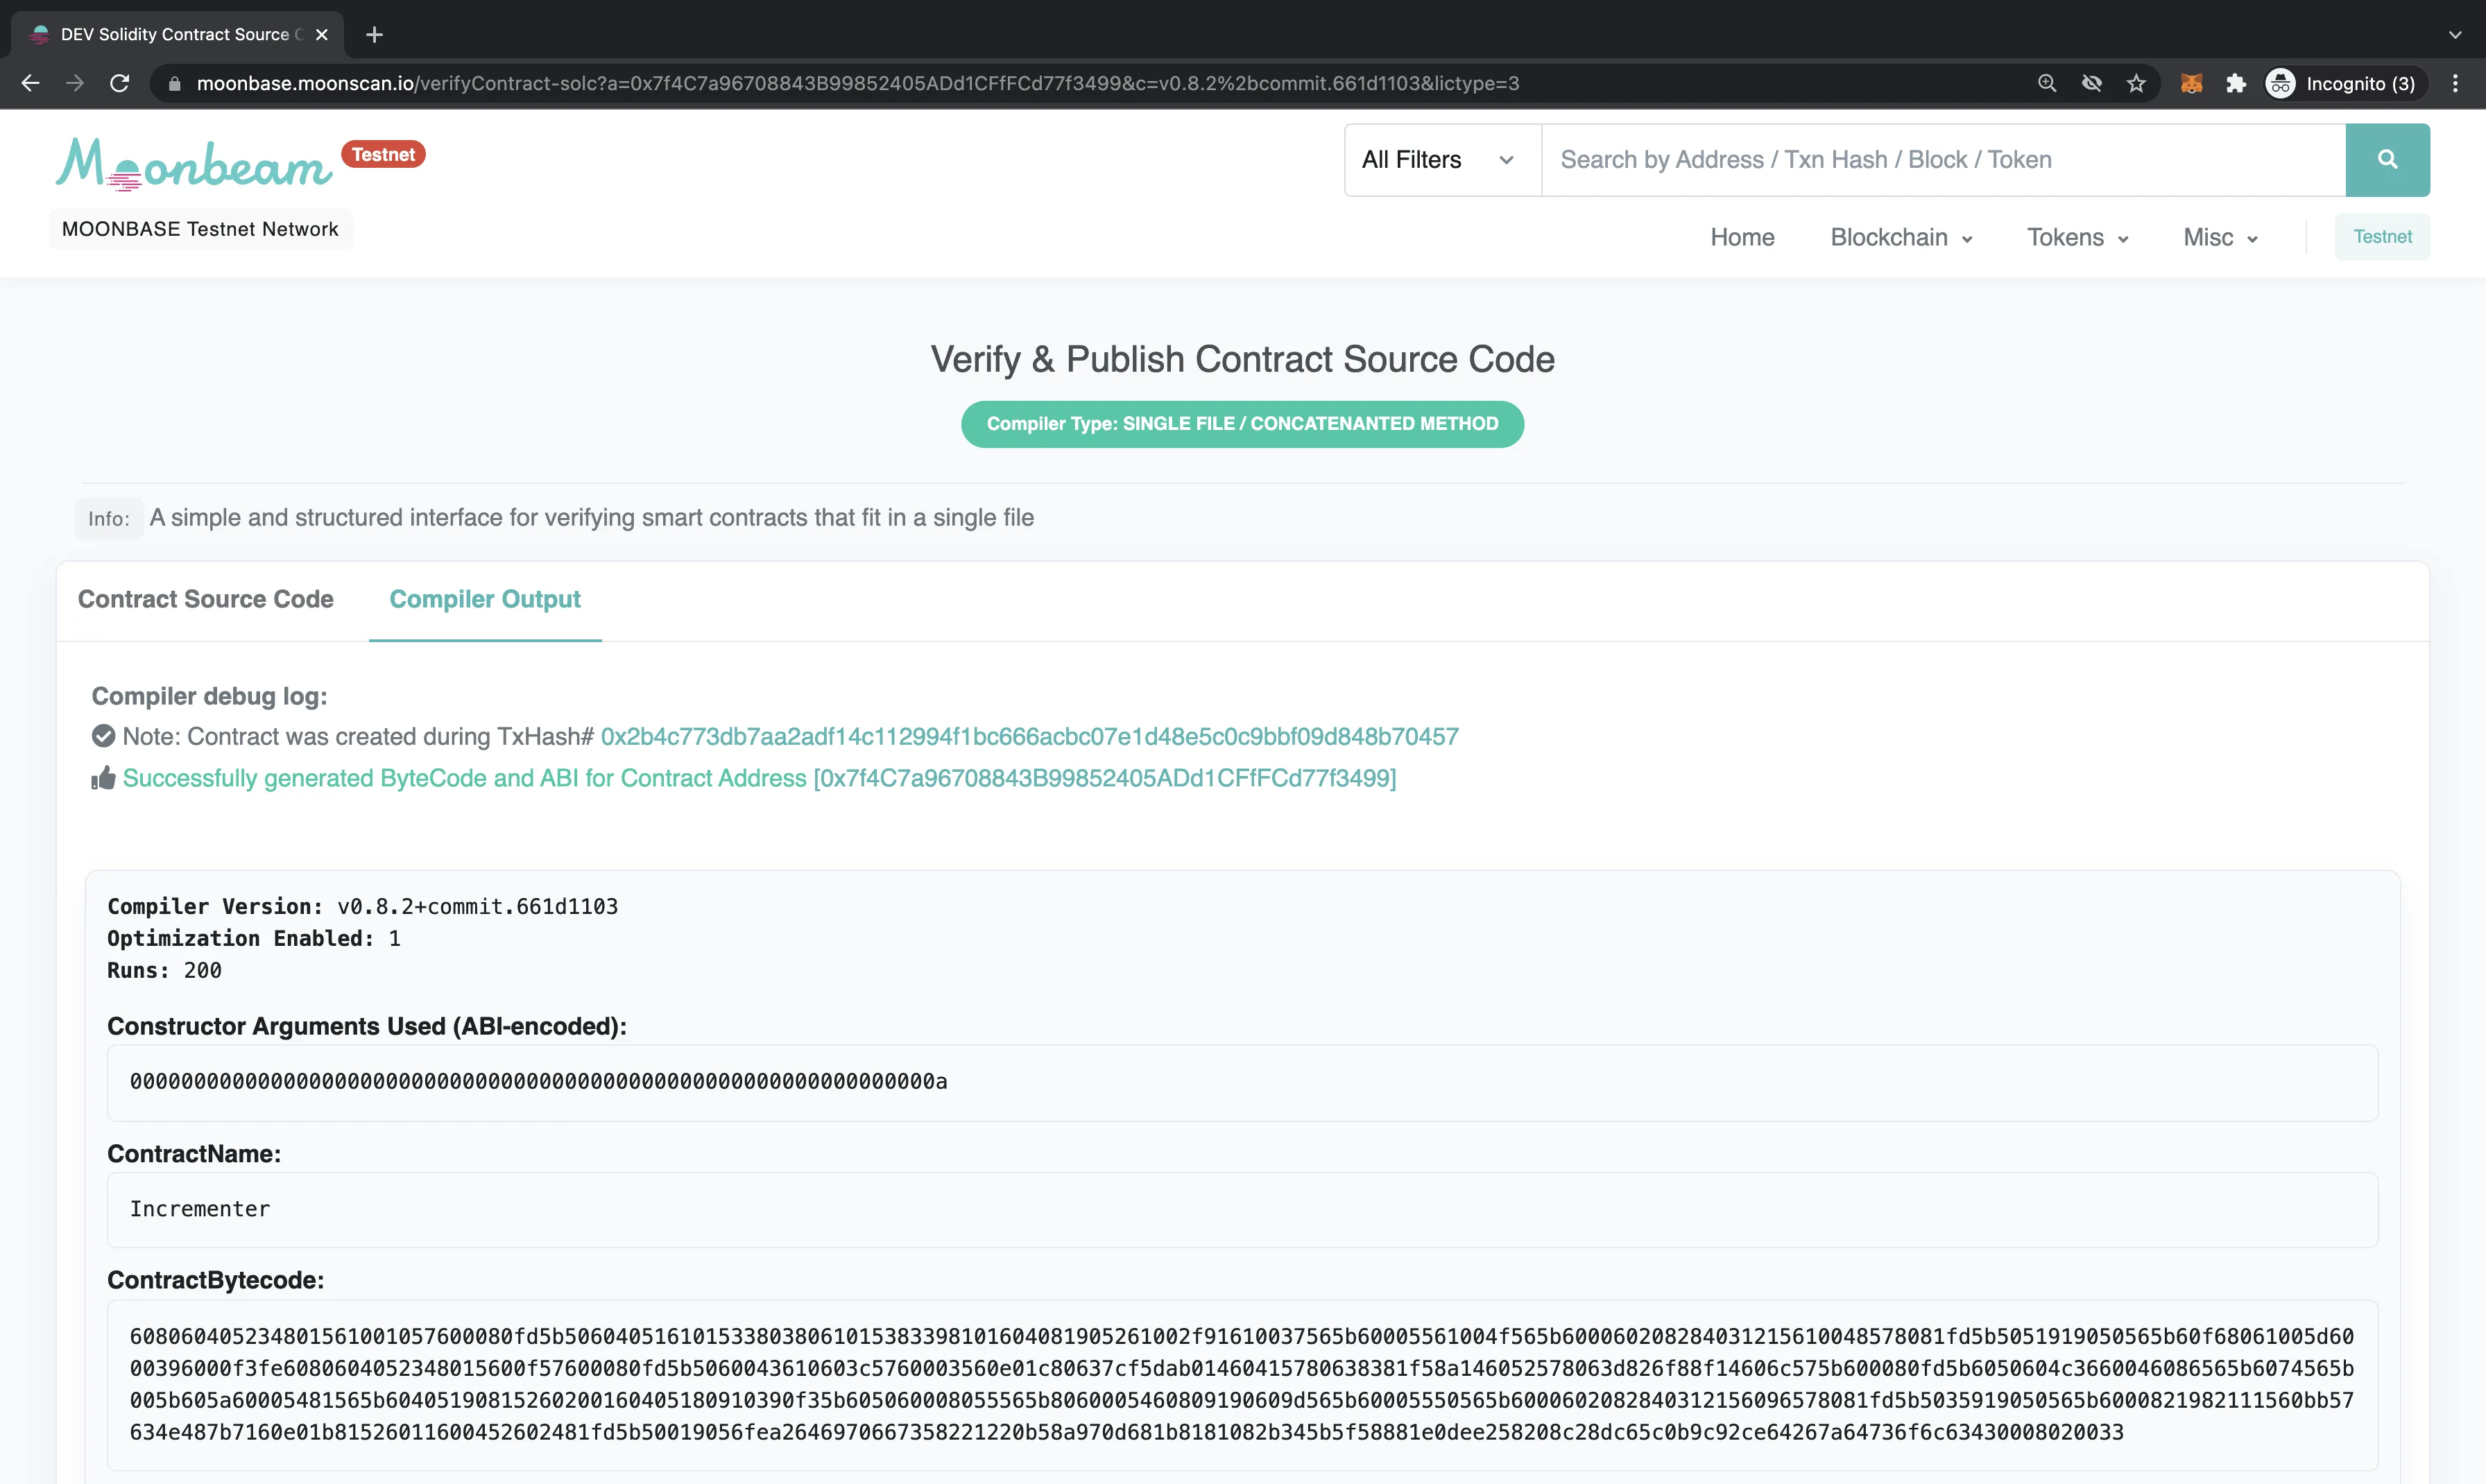
## Smart Contract Flattening {: #smart-contract-flattening }
For verifying smart contracts that are made up of multiple files, the process is slightly different and requires some pre-processing to combine all the dependencies of the target smart contract into a single Solidity file.
This pre-processing is usually referred to as smart contract flattening. There are a number of tools that can be used to flatten a multi-part smart contract into a single Solidity file, such as [Hardhat's Flatten task](https://hardhat.org/hardhat-runner/docs/advanced/flattening){target=\_blank}. Please refer to the respective smart contract flattening tool's documentation for more detailed instructions on its usage.
After flattening the multi-part smart contract, it can be verified using the new flattened Solidity file on a block explorer in the same way that a single-file smart contract is verified, as described in this tutorial.
### Verify Multi-Part Smart Contract on Moonscan {: #verify-multi-part-smart-contract-on-moonscan }
For verifying on Moonscan, there is a built-in feature to process multi-part smart contracts.
Select **Solidity (Multi-part files)** under **Compiler Type** (step 3 of the above example). Then, on the next page, select and upload all the different Solidity files that the contract consists of, including their nested dependency contract files.
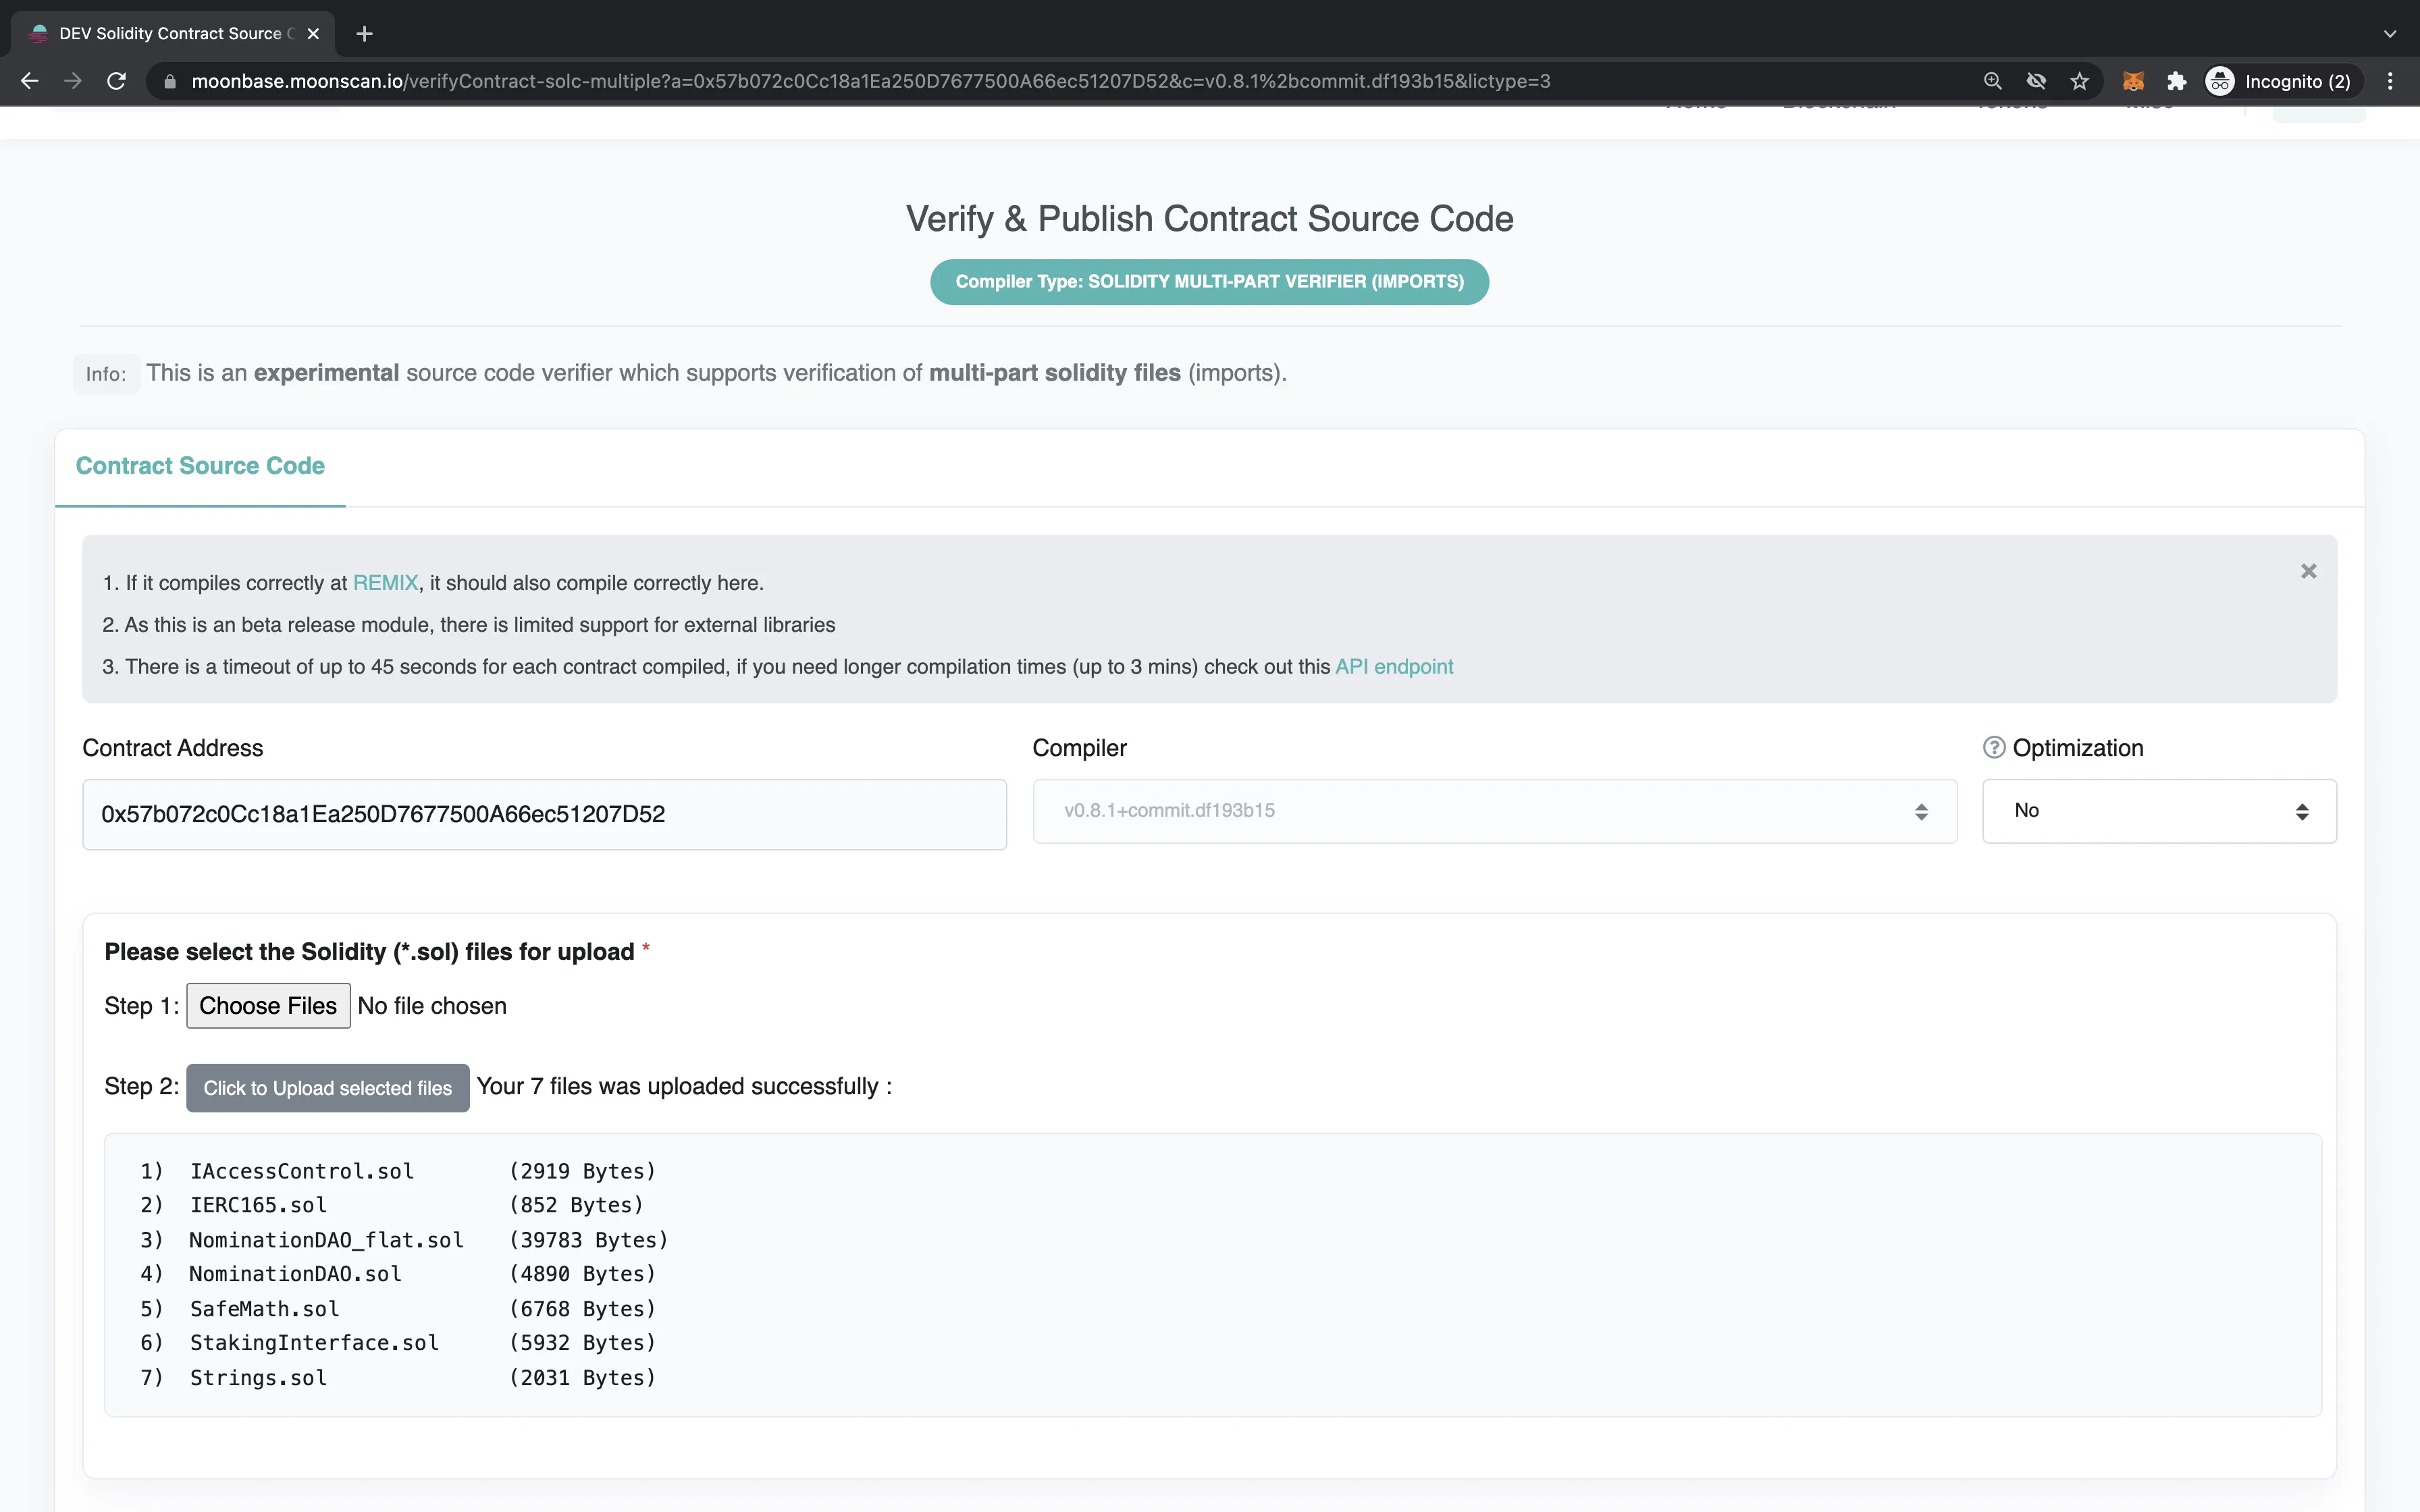
Aside from that, the process is largely the same as verifying single-file contracts on Moonscan.
--- END CONTENT ---
Doc-Content: https://docs.moonbeam.network/builders/ethereum/verify-contracts/etherscan-plugins/
--- BEGIN CONTENT ---
---
title: Verify Smart Contracts with Plugins
description: Learn how to verify smart contracts on Moonbeam networks using built-in tools from Hardhat and Foundry that support Moonscan’s API.
categories: Ethereum Toolkit
---
# Verify Smart Contracts with Etherscan Plugins
## Introduction {: #introduction }
Verifying smart contracts is a great way of improving the transparency and security of contracts deployed on Moonbeam. Hardhat and Foundry integrate with Etherscan's contract verification service to automate the process of verifying contracts by locally detecting which contracts to verify and which Solidity libraries are required, if any.
The Hardhat plugin integrates seamlessly into your [Hardhat](https://hardhat.org){target=\_blank} project. [Foundry](https://github.com/foundry-rs/foundry){target=\_blank} also has Etherscan capabilities, but they are built into its Forge tool instead of being included in a separate plugin.
This guide will show you how to use both plugins to verify smart contracts deployed on Moonbase Alpha. This guide can also be adapted for Moonbeam and Moonriver.
## Checking Prerequisites {: #checking-prerequisites }
To follow along with this tutorial, you will need to have:
- [MetaMask installed and connected to the Moonbase Alpha](/tokens/connect/metamask/){target=\_blank} TestNet
- An account funded with `DEV` tokens.
You can get DEV tokens for testing on Moonbase Alpha once every 24 hours from the [Moonbase Alpha Faucet](https://faucet.moonbeam.network){target=\_blank}
- An Etherscan API key
- Git installed and configured
## Generating an Etherscan API Key {: generating-an-etherscan-api-key }
To verify contracts on Moonscan for any Moonbeam network, you’ll need an [Etherscan API key](https://docs.etherscan.io/etherscan-v2/getting-an-api-key){target=\_blank}. Because Moonscan is part of Etherscan’s ecosystem, a single key works across all supported networks.
To create an [Etherscan account](https://etherscan.io/){target=\_blank} and generate your key, follow these steps:
1. Click **Sign In**
2. Select **Click to sign up** and then register your new account
Once you have an account and are signed in, you will then be able to create an API key.
1. Select **API Dashboard** from the left side menu
2. To add a new key, click the **+ Add** button
You will then be prompted to enter in an **AppName** for your API key and once you enter a name and click **Continue** it will appear in your list of API keys.
## Using the Hardhat Etherscan Plugin {: #using-the-hardhat-verify-plugin }
The example in this section of the guide will be based off of the `Box.sol` contract that was created in the [Using Hardhat to Deploy To Moonbeam](/builders/ethereum/dev-env/hardhat/){target=\_blank} guide.
To get started with the Hardhat Etherscan plugin, you will need to first install the plugin library:
```bash
npm install --save-dev @nomicfoundation/hardhat-verify
```
You can add your Etherscan API key to the `hardhat.config.js` file.
From within your Hardhat project, open your `hardhat.config.js` file. You'll need to import the `hardhat-verify` plugin, your Etherscan API key, and add the config for Etherscan:
```js
require('@nomicfoundation/hardhat-verify');
module.exports = {
networks: {
moonbeam: { ... },
moonriver: { ... },
moonbaseAlpha: { ... }
},
etherscan: {
apiKey: {
moonbeam: 'INSERT_ETHERSCAN_API_KEY',
moonriver: 'INSERT_ETHERSCAN_API_KEY',
moonbaseAlpha: 'INSERT_ETHERSCAN_API_KEY',
},
},
};
```
To verify the contract, you will run the `verify` command and pass in the address of the deployed contract and the network where it's deployed:
```bash
npx hardhat verify --network moonbase INSERT_CONTRACT_ADDRESS
```
In your terminal you should see the source code for your contract was successfully submitted for verification. If the verification was successful, you should see **Successfully verified contract** and there will be a link to the contract code on [Moonscan for Moonbase Alpha](https://moonbase.moonscan.io){target=\_blank}.
npx hardhat verify --network moonbase 0x5d73ecDB4652173b881893235B64F1a0BdE22dD6
Successfully submitted source code for contract contracts/Box.sol:Box at 0x5d73ecDB4652173b881893235B64F1a0BdE22dD6 for verification on the block explorer. Waiting for verification result...
Successfully verified contract Box on Etherscan. https://moonbase.moonscan.io/address/0x5d73ecDB4652173b881893235B64F1a0BdE22dD6#code
If you're verifying a contract that has constructor arguments, you'll need to run the above command and add the constructor arguments used to deploy the contract at the end of the command. For example:
```bash
npx hardhat verify --network moonbase INSERT_CONTRACT_ADDRESS INSERT_CONSTRUCTOR_ARGS
```
Please refer to the [Hardhat Verify documentation](https://hardhat.org/hardhat-runner/plugins/nomicfoundation-hardhat-verify){target=\_blank} for help with additional use cases such as:
- [complex arguments](https://hardhat.org/hardhat-runner/plugins/nomicfoundation-hardhat-verify#complex-arguments){target=\_blank}
- [libraries with undetectable addresses](https://hardhat.org/hardhat-runner/plugins/nomicfoundation-hardhat-verify#libraries-with-undetectable-addresses){target=\_blank}
- using [multiple API keys](https://hardhat.org/hardhat-runner/plugins/nomicfoundation-hardhat-verify#multiple-api-keys-and-alternative-block-explorers){target=\_blank}
- using the [`verify` command programmatically](https://hardhat.org/hardhat-runner/plugins/nomicfoundation-hardhat-verify#using-programmatically){target=\_blank}
- [determining the correct constructor arguments](https://info.etherscan.com/determine-correct-constructor-argument-during-source-code-verification-on-etherscan/){target=\_blank}
## Using Foundry to Verify {: #using-foundry-to-verify }
The example in this section of the guide will use the `MyToken.sol` contract that was created in the [Using Foundry to Deploy to Moonbeam](/builders/ethereum/dev-env/foundry/){target=\_blank} guide.
In addition to the Foundry project, you will need an [Etherscan API key](https://etherscan.io/){target=\_blank} to verify your contract.
If you have already deployed the example contract, you can verify it with the `verify-contract` command. Before you can verify the contract, you will need to ABI-encode the constructor arguments. To do so for the example contract, you can run the following command:
```bash
cast abi-encode "constructor(uint256)" 100
```
The result should be `0x0000000000000000000000000000000000000000000000000000000000000064`. You can then verify the contract using the following command:
=== "Moonbeam"
```bash
forge verify-contract --chain-id {{ networks.moonbeam.chain_id }} \
YOUR_CONTRACT_ADDRESS \
--constructor-args 0x0000000000000000000000000000000000000000000000000000000000000064 \
src/MyToken.sol:MyToken \
--etherscan-api-key INSERT_YOUR_ETHERSCAN_API_KEY
```
=== "Moonriver"
```bash
forge verify-contract --chain-id {{ networks.moonriver.chain_id }} \
YOUR_CONTRACT_ADDRESS \
--constructor-args 0x0000000000000000000000000000000000000000000000000000000000000064 \
src/MyToken.sol:MyToken \
--etherscan-api-key INSERT_YOUR_ETHERSCAN_API_KEY
```
=== "Moonbase Alpha"
```bash
forge verify-contract --chain-id {{ networks.moonbase.chain_id }} \
YOUR_CONTRACT_ADDRESS \
--constructor-args 0x0000000000000000000000000000000000000000000000000000000000000064 \
src/MyToken.sol:MyToken \
--etherscan-api-key INSERT_YOUR_ETHERSCAN_API_KEY
```
Successfully submitted source code for contract contracts/Box.sol:Box at 0x5d73ecDB4652173b881893235B64F1a0BdE22dD6 for verification on the block explorer. Waiting for verification result...
Successfully verified contract Box on Etherscan. https://moonbase.moonscan.io/address/0x5d73ecDB4652173b881893235B64F1a0BdE22dD6#code
forge verify-contract --chain-id 1284 \
YOUR_CONTRACT_ADDRESS \
--constructor-args 0x0000000000000000000000000000000000000000000000000000000000000064 \
src/MyToken.sol:MyToken \
--etherscan-api-key INSERT_YOUR_ETHERSCAN_API_KEY
Submitting verification for [src/MyToken. sol:MyToken] Ok("0×5A05EBOA18ee616bb5dac2C4D0a48991a83533d2" ) . Submitted contract for verification: Response:'OK' GUID:'f7iwagu9vspdrdfirbie1wp16cmuvfk3zvcsix9ey21t3a8ttt' URL: https: //moonbase.moonscan.io/address/0×5a05eb0a18ee616bb5dac2c4d0a48991a83533d2 Waiting for verification result... Contract successfully verified.
If you wanted to deploy the example contract and verify at the same time, then you would use the following command:
=== "Moonbeam"
```bash
forge create --rpc-url {{ networks.moonbeam.rpc_url }} \
--constructor-args 100 \
--etherscan-api-key INSERT_YOUR_ETHERSCAN_API_KEY \
--verify --private-key YOUR_PRIVATE_KEY \
src/MyToken.sol:MyToken
```
=== "Moonriver"
```bash
forge create --rpc-url {{ networks.moonriver.rpc_url }} \
--constructor-args 100 \
--etherscan-api-key INSERT_YOUR_ETHERSCAN_API_KEY \
--verify --private-key YOUR_PRIVATE_KEY \
src/MyToken.sol:MyToken
```
=== "Moonbase Alpha"
```bash
forge create --rpc-url {{ networks.moonbase.rpc_url }} \
--constructor-args 100 \
--etherscan-api-key INSERT_YOUR_ETHERSCAN_API_KEY \
--verify --private-key YOUR_PRIVATE_KEY \
src/MyToken.sol:MyToken
```
Submitting verification for [src/MyToken. sol:MyToken] Ok("0×5A05EBOA18ee616bb5dac2C4D0a48991a83533d2" ) . Submitted contract for verification: Response:'OK' GUID:'f7iwagu9vspdrdfirbie1wp16cmuvfk3zvcsix9ey21t3a8ttt' URL: https: //moonbase.moonscan.io/address/0×5a05eb0a18ee616bb5dac2c4d0a48991a83533d2 Waiting for verification result... Contract successfully verified.
forge create --rpc-url INSERT_RPC_API_ENDPOINT \
--constructor-args 100 \
--etherscan-api-key INSERT_YOUR_ETHERSCAN_API_KEY \
--verify --private-key YOUR_PRIVATE_KEY \
src/MyToken.sol:MyToken
Compiling... No files changed, compilation skipped Deployer: 0x0394c0EdFcCA370B20622721985B577850B0eb 75 Deployed to: 0d21b2653f61b5B5399A677D377D52D07C7668f67 Transaction hash: 0x80fff772b930f425ed3568f0b3d8844e5297691c78807c7b393c85910b7717 Starting contract verification... Waiting for etherscan to detect contract deployment...
Submitting verification for [src/MyToken.sol:MyToken]Ok("0x21b265361b5B5399A677D377D52D07C7668f67"). Submitted contract for verification: Response:'OK' GUID:'ebbliyrquc5itkavvhvmilanzu5rdqusikImgraanepjm8gpq' URL: https: //moonbase.moonscan.io/address/0x21b2653f61b55399a677d377d52d07c7668f67 Waiting for verification result... Contract successfully verified.
--- END CONTENT ---
Doc-Content: https://docs.moonbeam.network/builders/get-started/token-profile/
--- BEGIN CONTENT ---
---
title: Add Token Information on Moonscan
description: Add token information and create a token profile on Moonscan for ERC-20, ERC-721, and ERC-1155 tokens deployed to Moonbeam-based networks.
categories: Tokens and Accounts, Ethereum Toolkit
---
# Add Token Information on Moonscan
## Introduction {: #introduction }
This tutorial will guide you through the process of adding a profile for your ERC-20, ERC-721, or ERC-1155 tokens to [Moonscan](https://moonscan.io){target=\_blank}.
Moonscan is a block explorer and analytics platform for EVM-compatible chains. It is an integration of Moonbeam and Etherscan, and it allows users and developers to have access to developer tools and network statistics that provide granular insights into the EVM of Moonriver and Moonbeam.
Developers can create a profile for their tokens on Moonriver and Moonbeam. The profile captures basic information about the project behind the token, social media links, links to price data, and other information pertaining to the project’s token sales.

This tutorial will show you how to create a profile on Moonscan of a sample ERC-20 token, called DemoToken (DEMO), deployed to Moonriver. These instructions can be adapted for any of the Moonbeam-based networks, as well as for an ERC-721 or ERC-1155 token.
## Checking Prerequisites {: #checking-prerequisites }
To follow along with this tutorial, you will need to have the following:
- A [Moonscan Account](https://moonscan.io/register){target=\_blank}
You will need to verify ownership of the token contract address later on in this guide. You can either do this manually or automatically, but if you choose to do it automatically you'll also need the following:
- Access to the account that deployed the token contract, so you can sign messages as the owner
- MetaMask installed and connected to the network where the token is deployed to
## Getting Started {: #getting-started }
To get started, you'll need to make sure that you are logged into your Moonscan account. Once you’re signed into your account, you can go to the token page of the token you want to add a profile for. For ERC-20s, you can search the name of the token in the search bar. Or for any token, you can manually enter in the URL.
=== "Moonbeam"
```text
https://moonscan.io/token/INSERT_CONTRACT_ADDRESS
```
=== "Moonriver"
```text
https://moonriver.moonscan.io/token/INSERT_CONTRACT_ADDRESS
```
=== "Moonbase Alpha"
```text
https://moonbase.moonscan.io/token/INSERT_CONTRACT_ADDRESS
```
Next to Social Profiles, you can click on **Update**.
You’ll be taken to the **Token Update Application Form**.
If you haven’t verified your contract source code yet, you will need to do so before you can proceed to the next step. If you have already verified your contract, you can skip ahead to the [Verifying Address Ownership](#verifying-address-ownership) section.
## Verifying Contract Source Code {: #verifying-contract-source-code }
You can verify your contract source code a couple of ways. You can directly verify it from Moonscan, or if you developed the contract with Hardhat or Foundry, you can also use their corresponding [Etherscan integrations](/builders/ethereum/verify-contracts/etherscan-plugins/){target=\_blank}.
To verify your contract source code directly from Moonscan, you can click on the **tool** link.
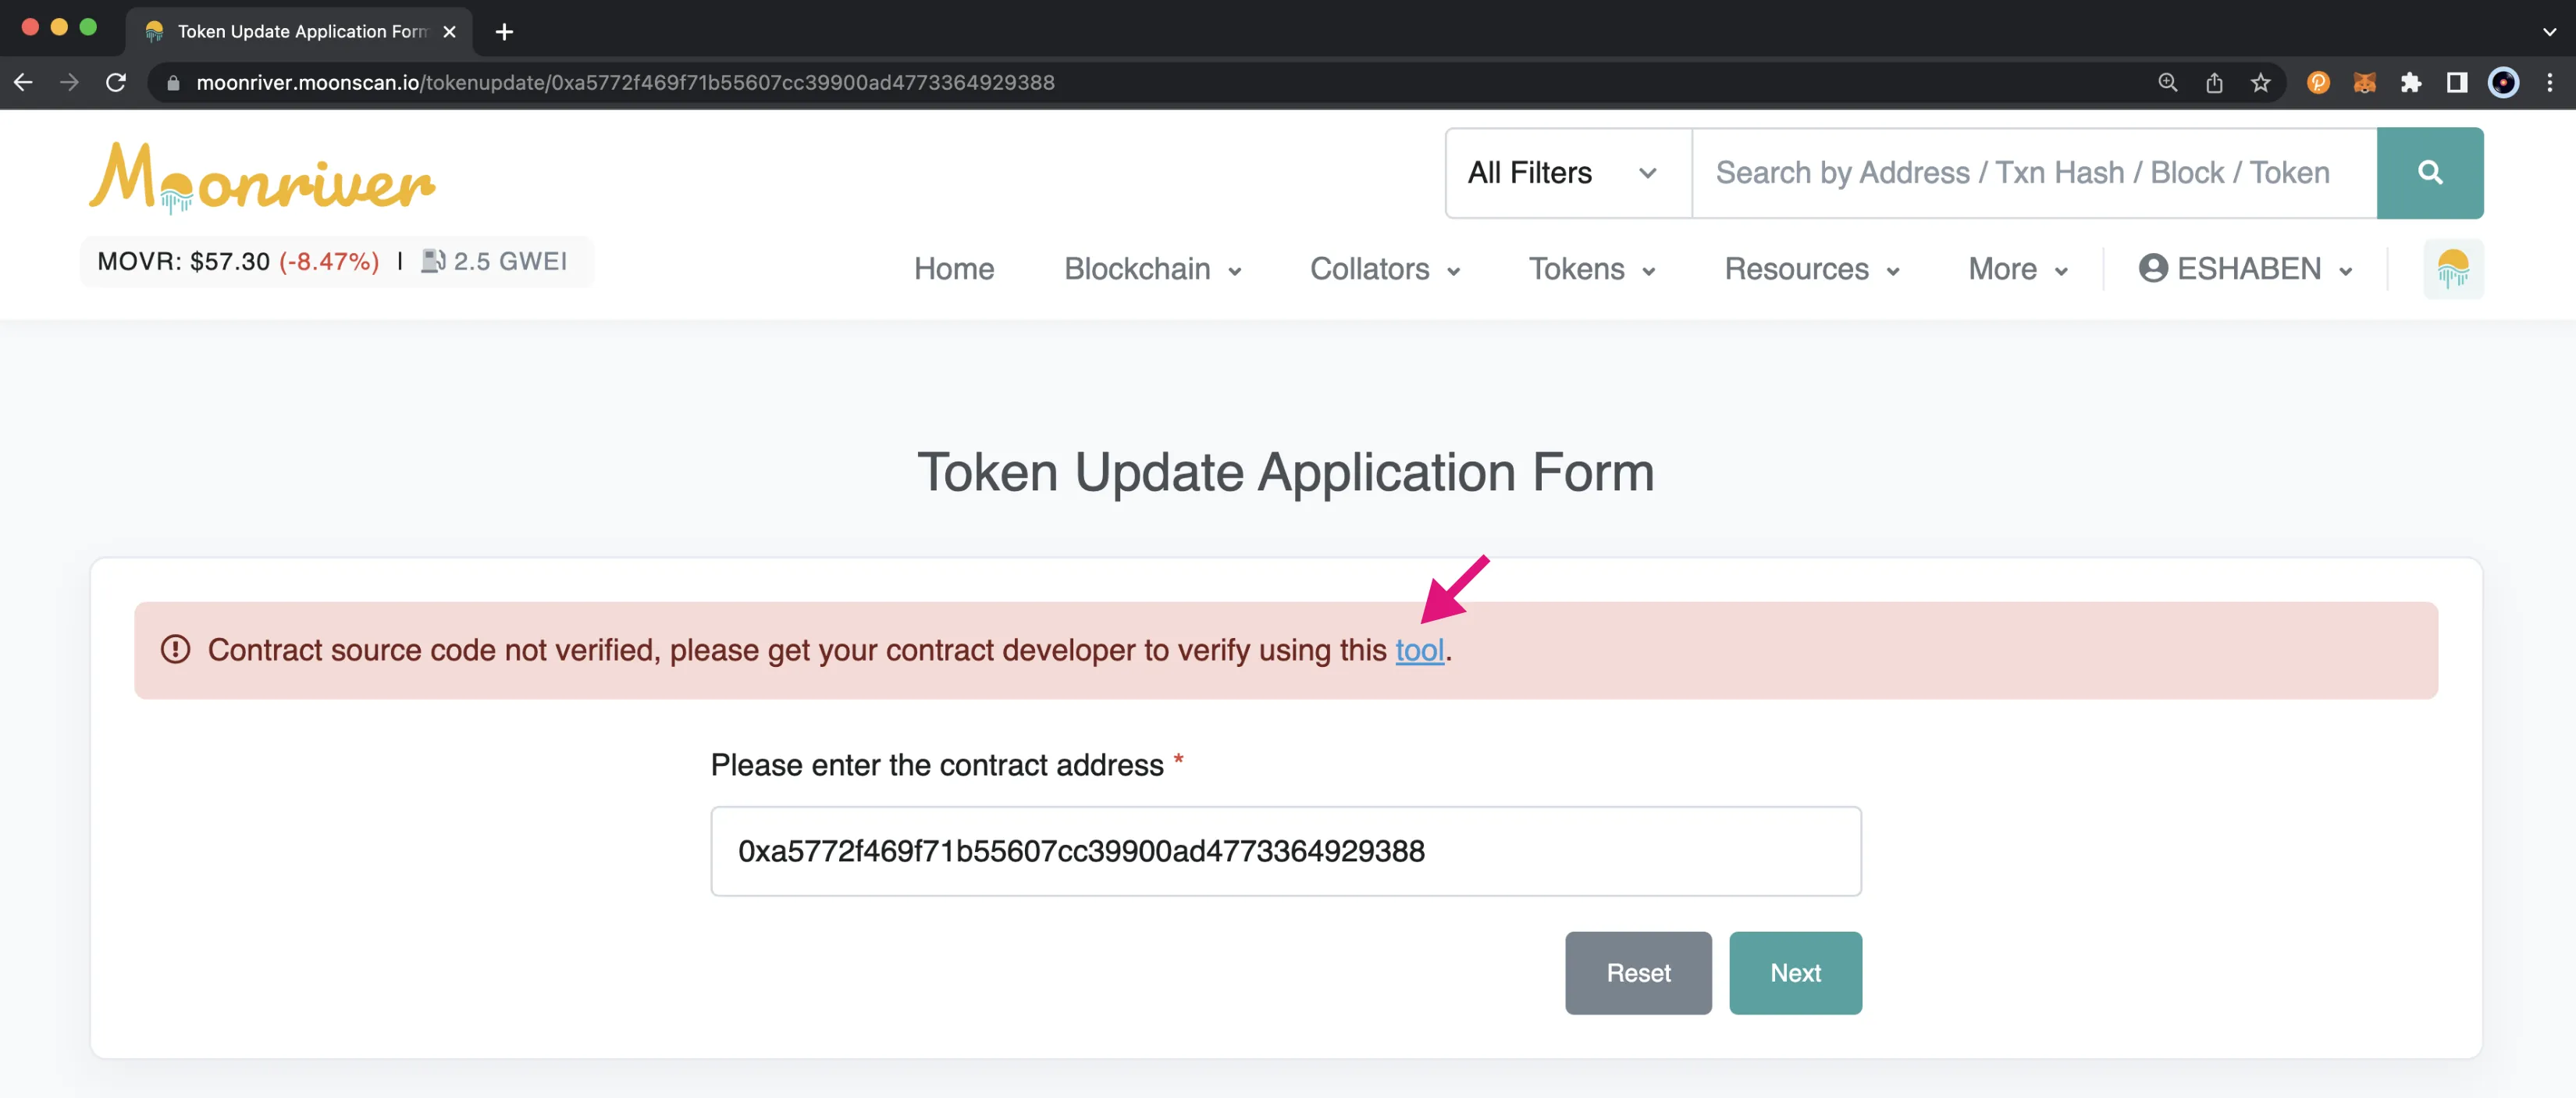
You’ll be taken to the **Verify & Publish Contract Source Code** page where you can enter in details about the contract and how it was compiled.
1. Enter the token contract address
2. Select the **Compiler Type** from the dropdown
3. Choose the **Compile Version** you used
4. Then select an **Open Source License Type**
5. Review and click the **I agree to the terms of service** checkbox
6. Click **Continue**
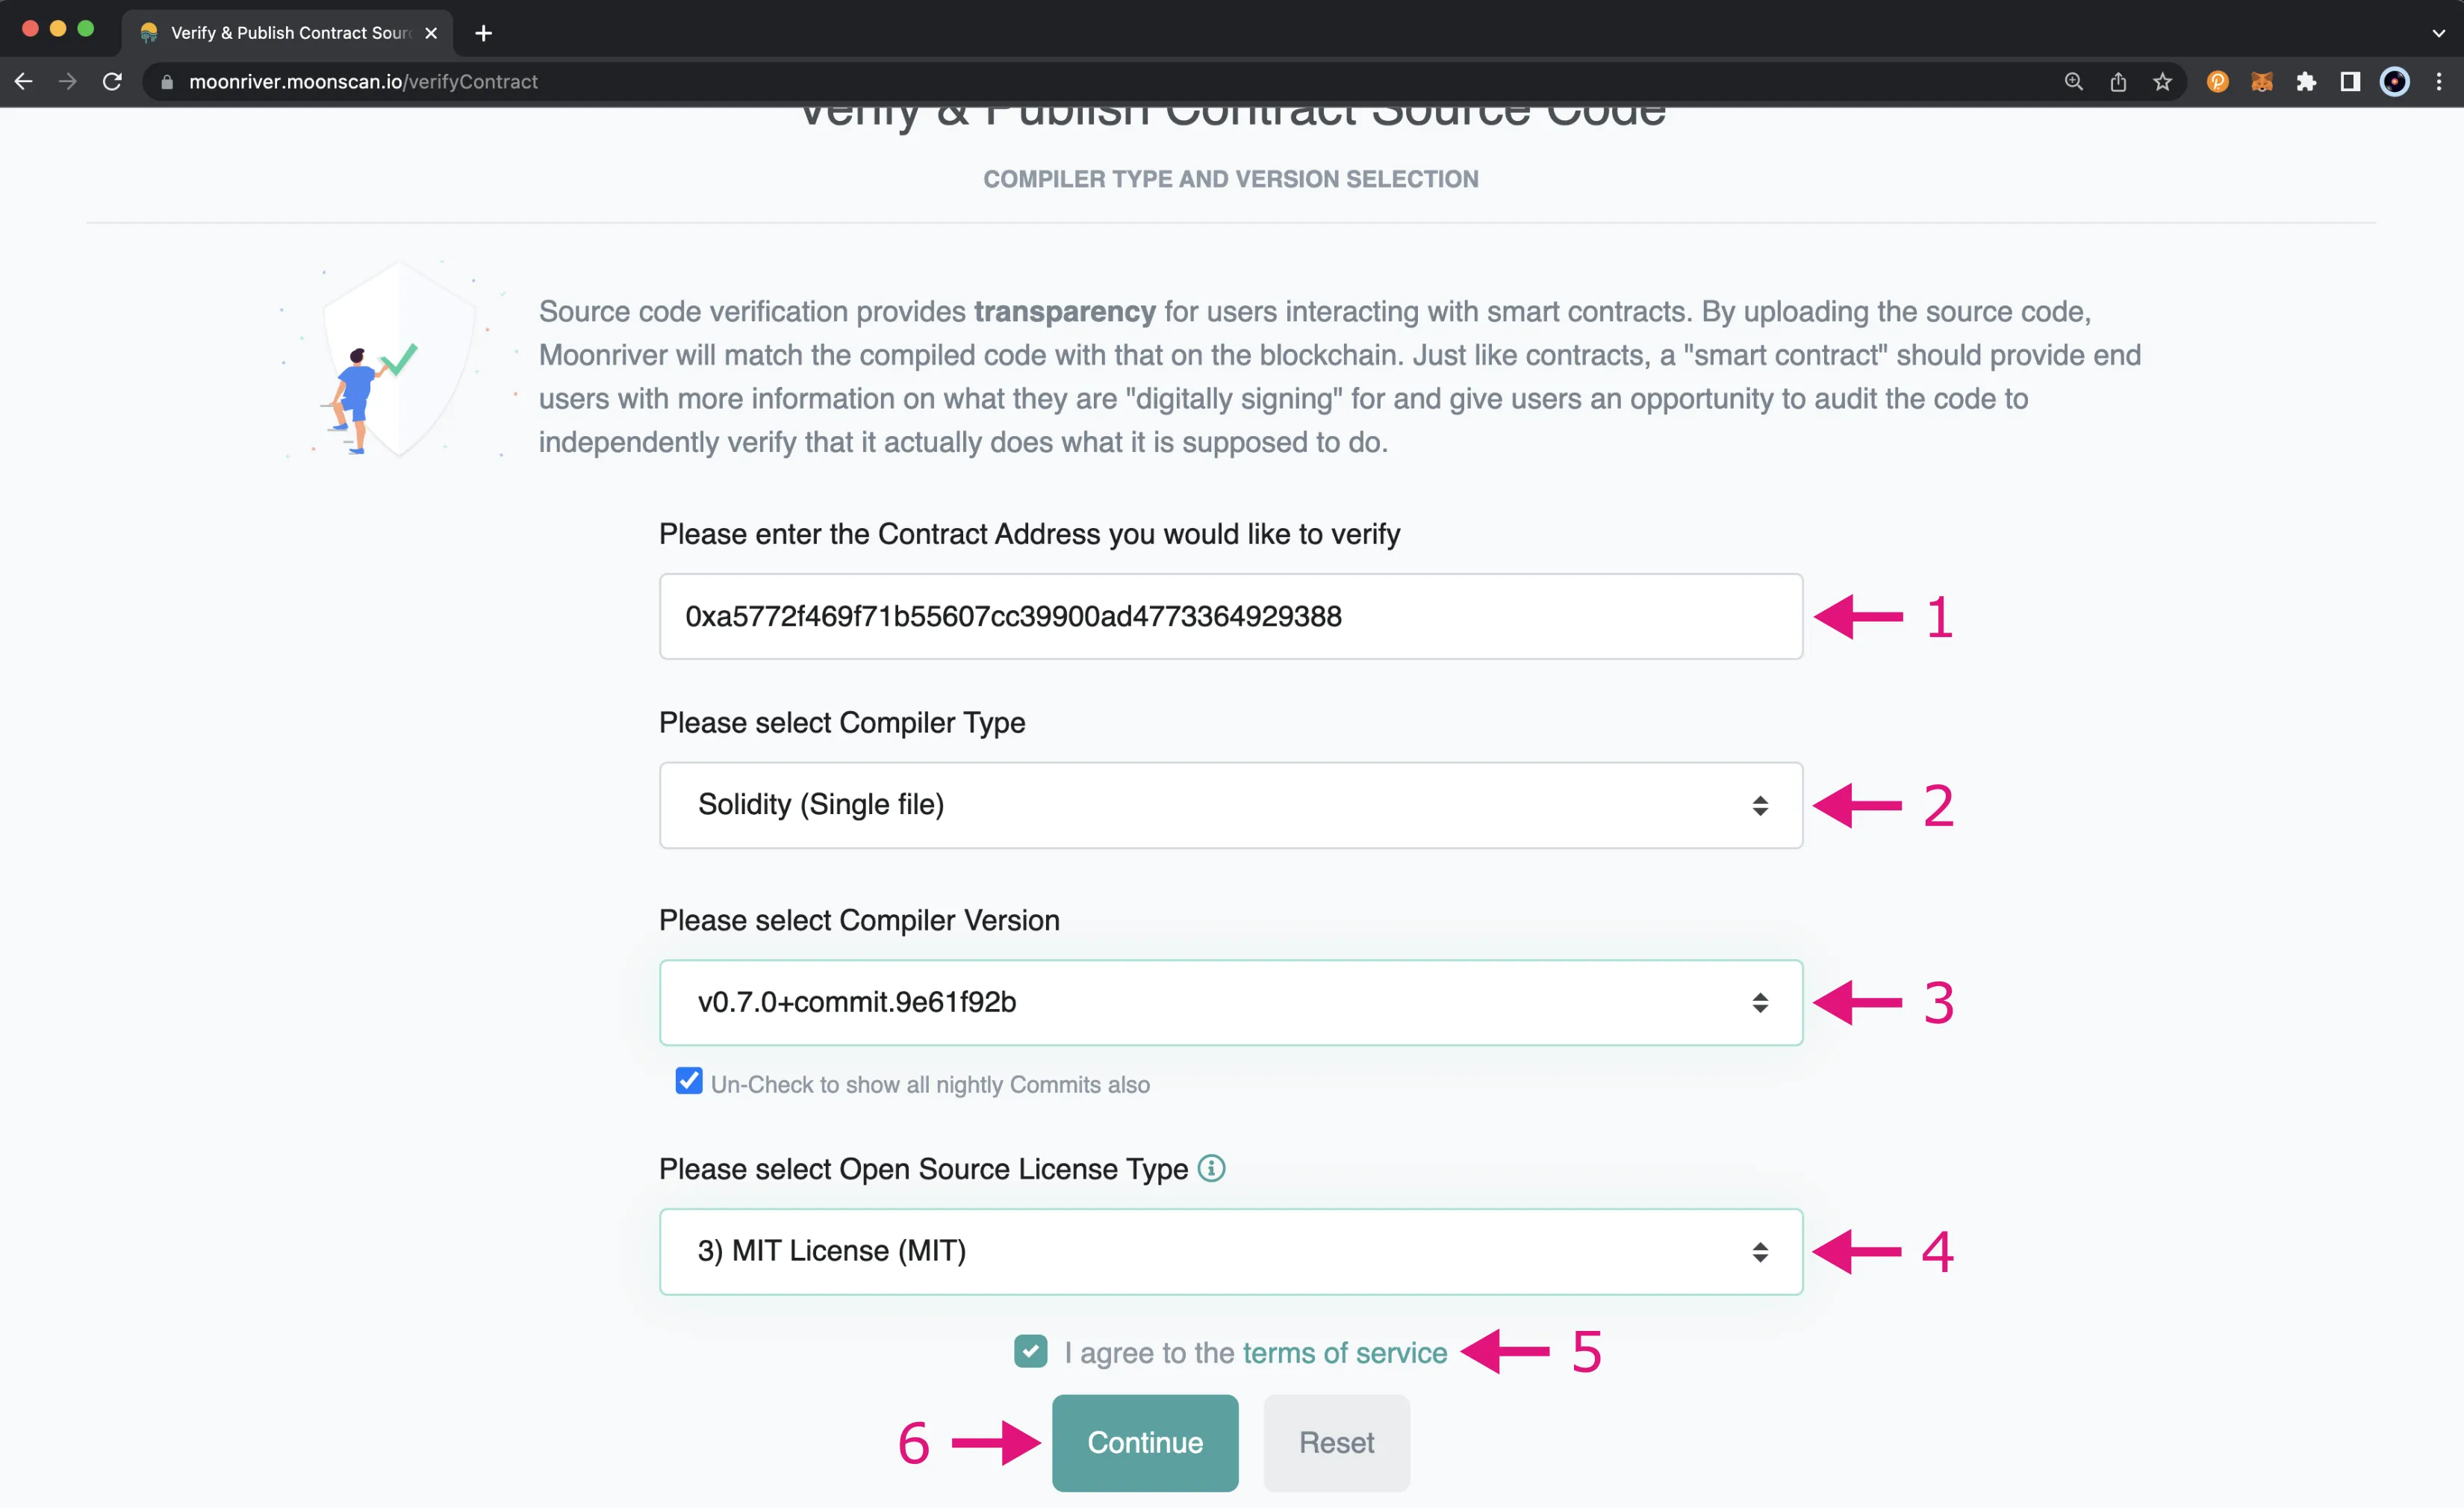
You’ll be taken to the next page where you can enter in the contract source code and specify additional settings and arguments used.
1. Contract Address and Compiler should already be filled in. If you enabled optimization, you can update the **Optimization** dropdown
2. Enter in a flattened version of the contract source code. To flatten the contract, you can use the Flattener Remix plugin
3. Update the **Constructor Arguments**, **Contract Library Address**, and **Misc Settings** sections if needed
4. Click **I’m not a robot**
5. Finally, click **Verify and Publish**
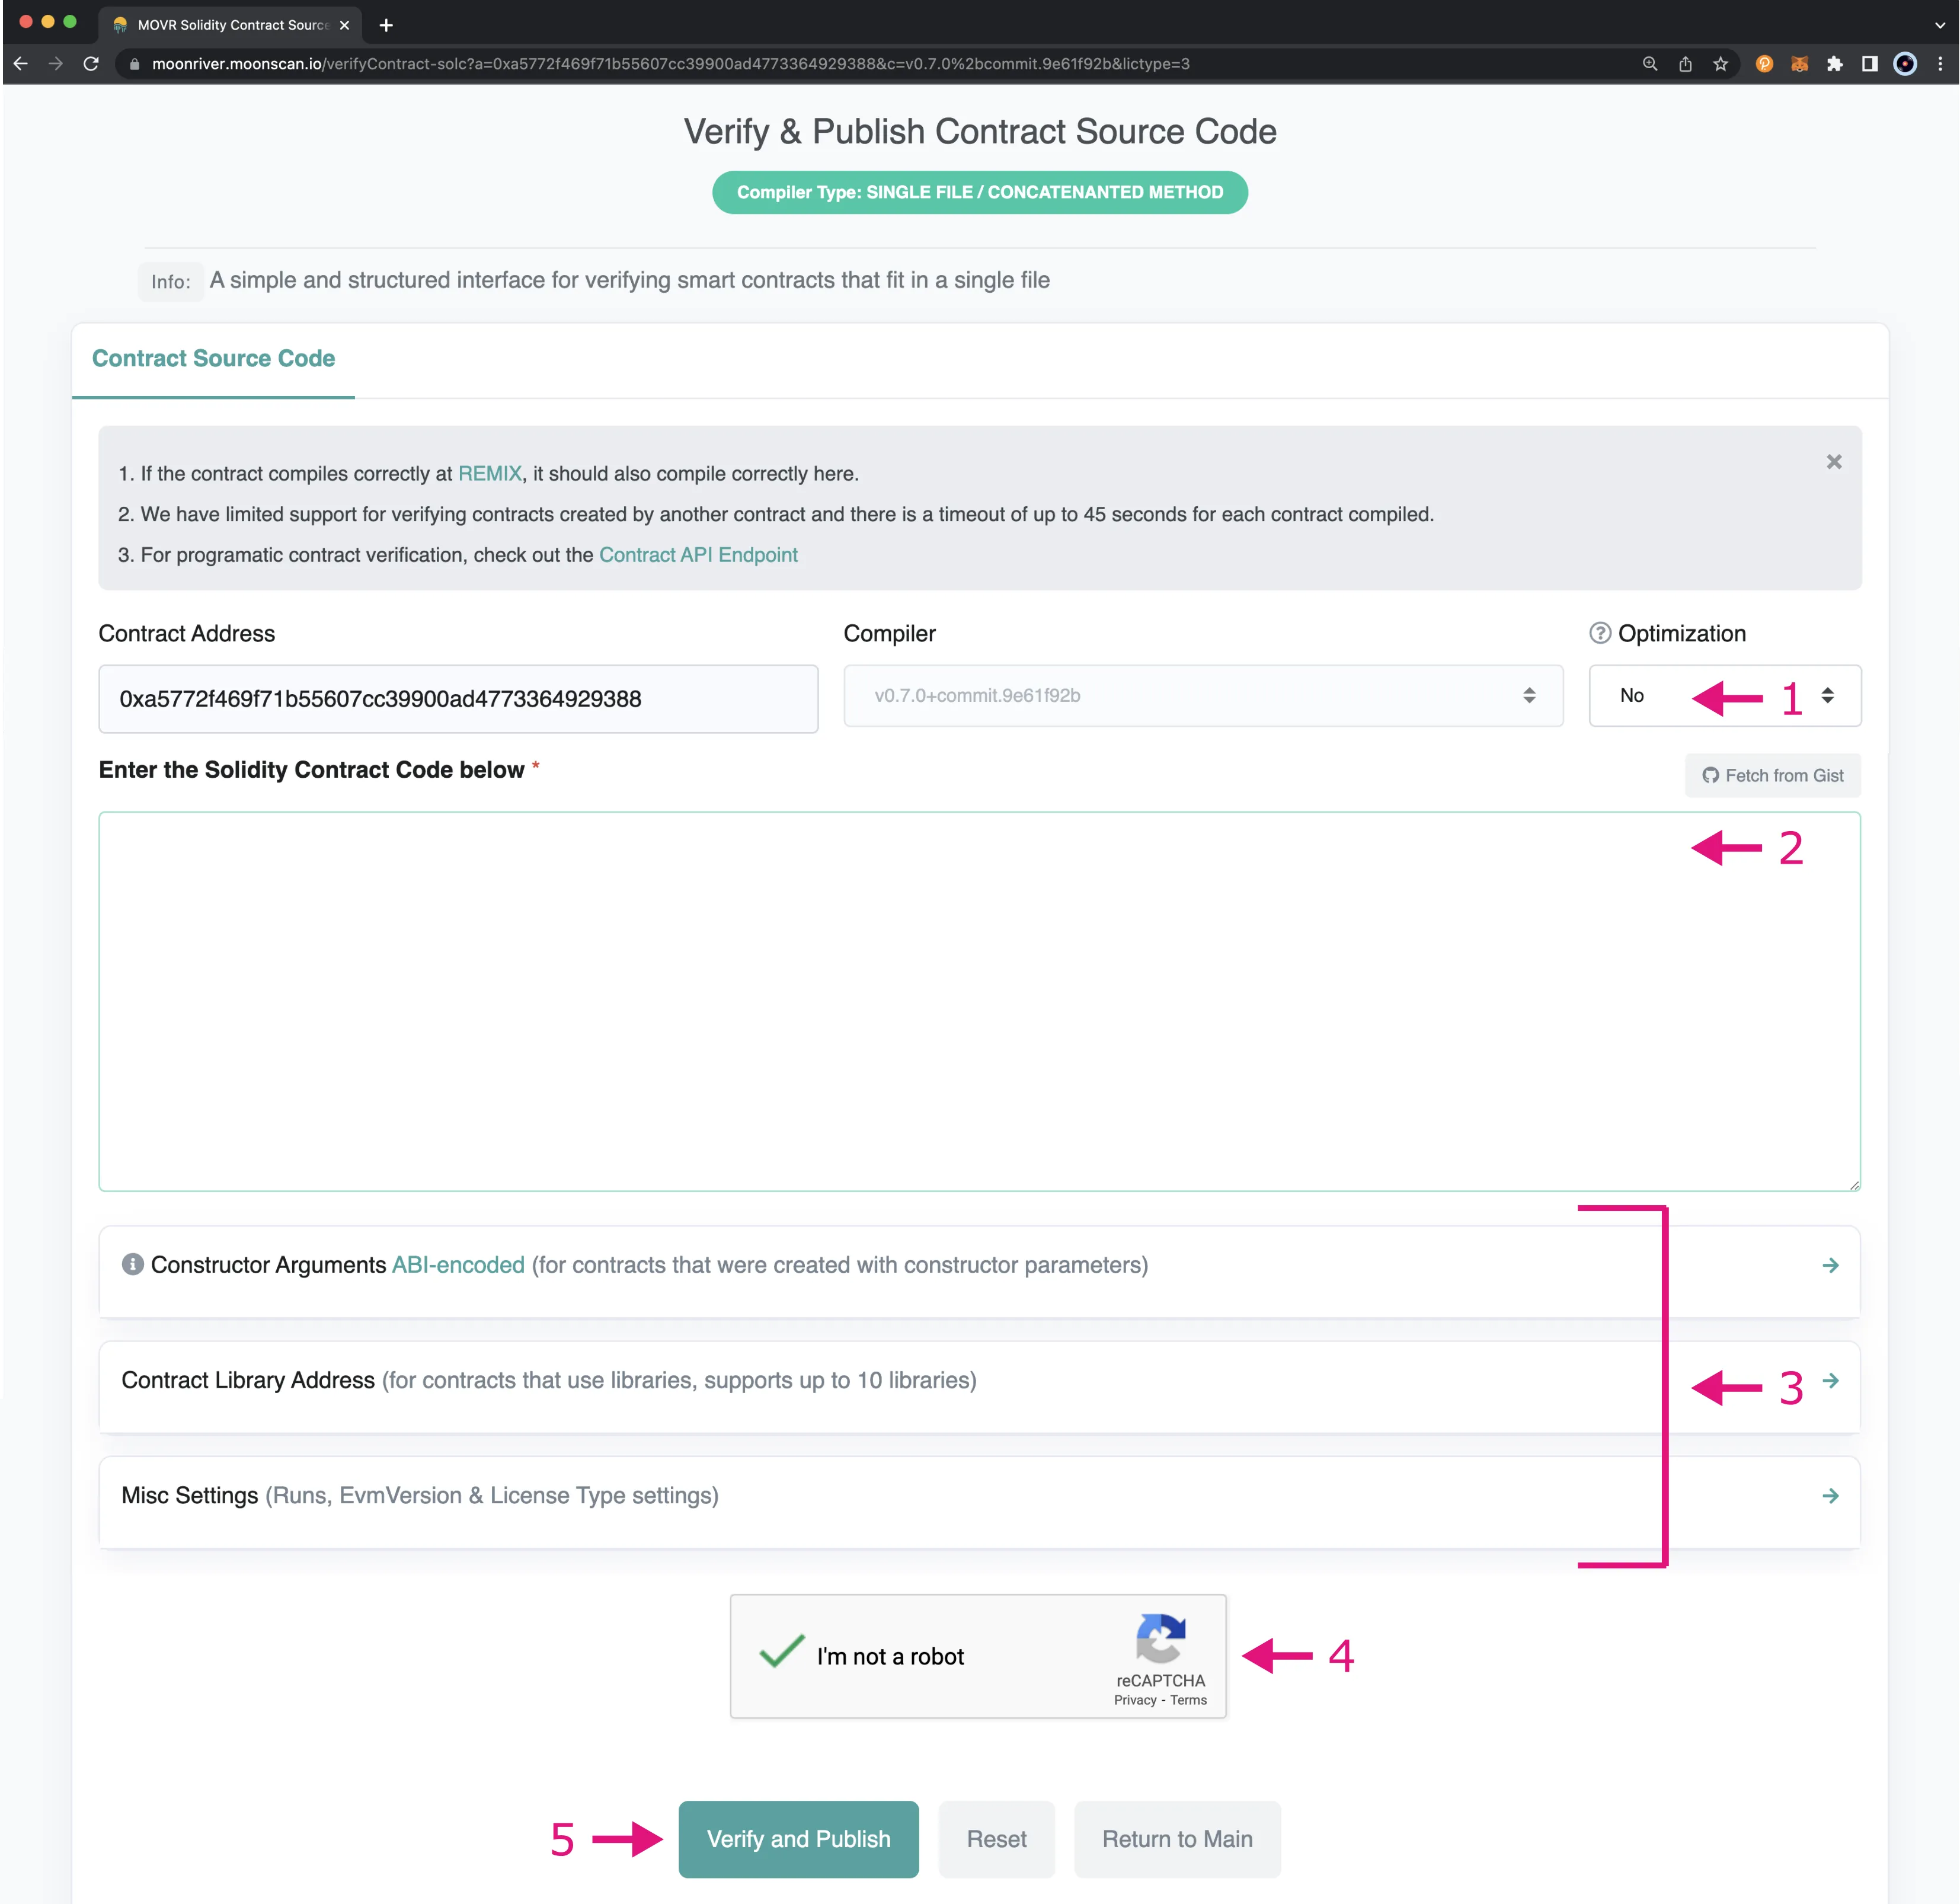
Now that your contract source code has been verified, you can move on to the next step, verifying that you’re the contract address owner.
## Verifying Address Ownership {: #verifying-address-ownership }
From the **Token Update Application Form** page, you should see a message at the top of the screen that states you need to verify the contract address owner. To get started with this process, you can click on the **tool** link.
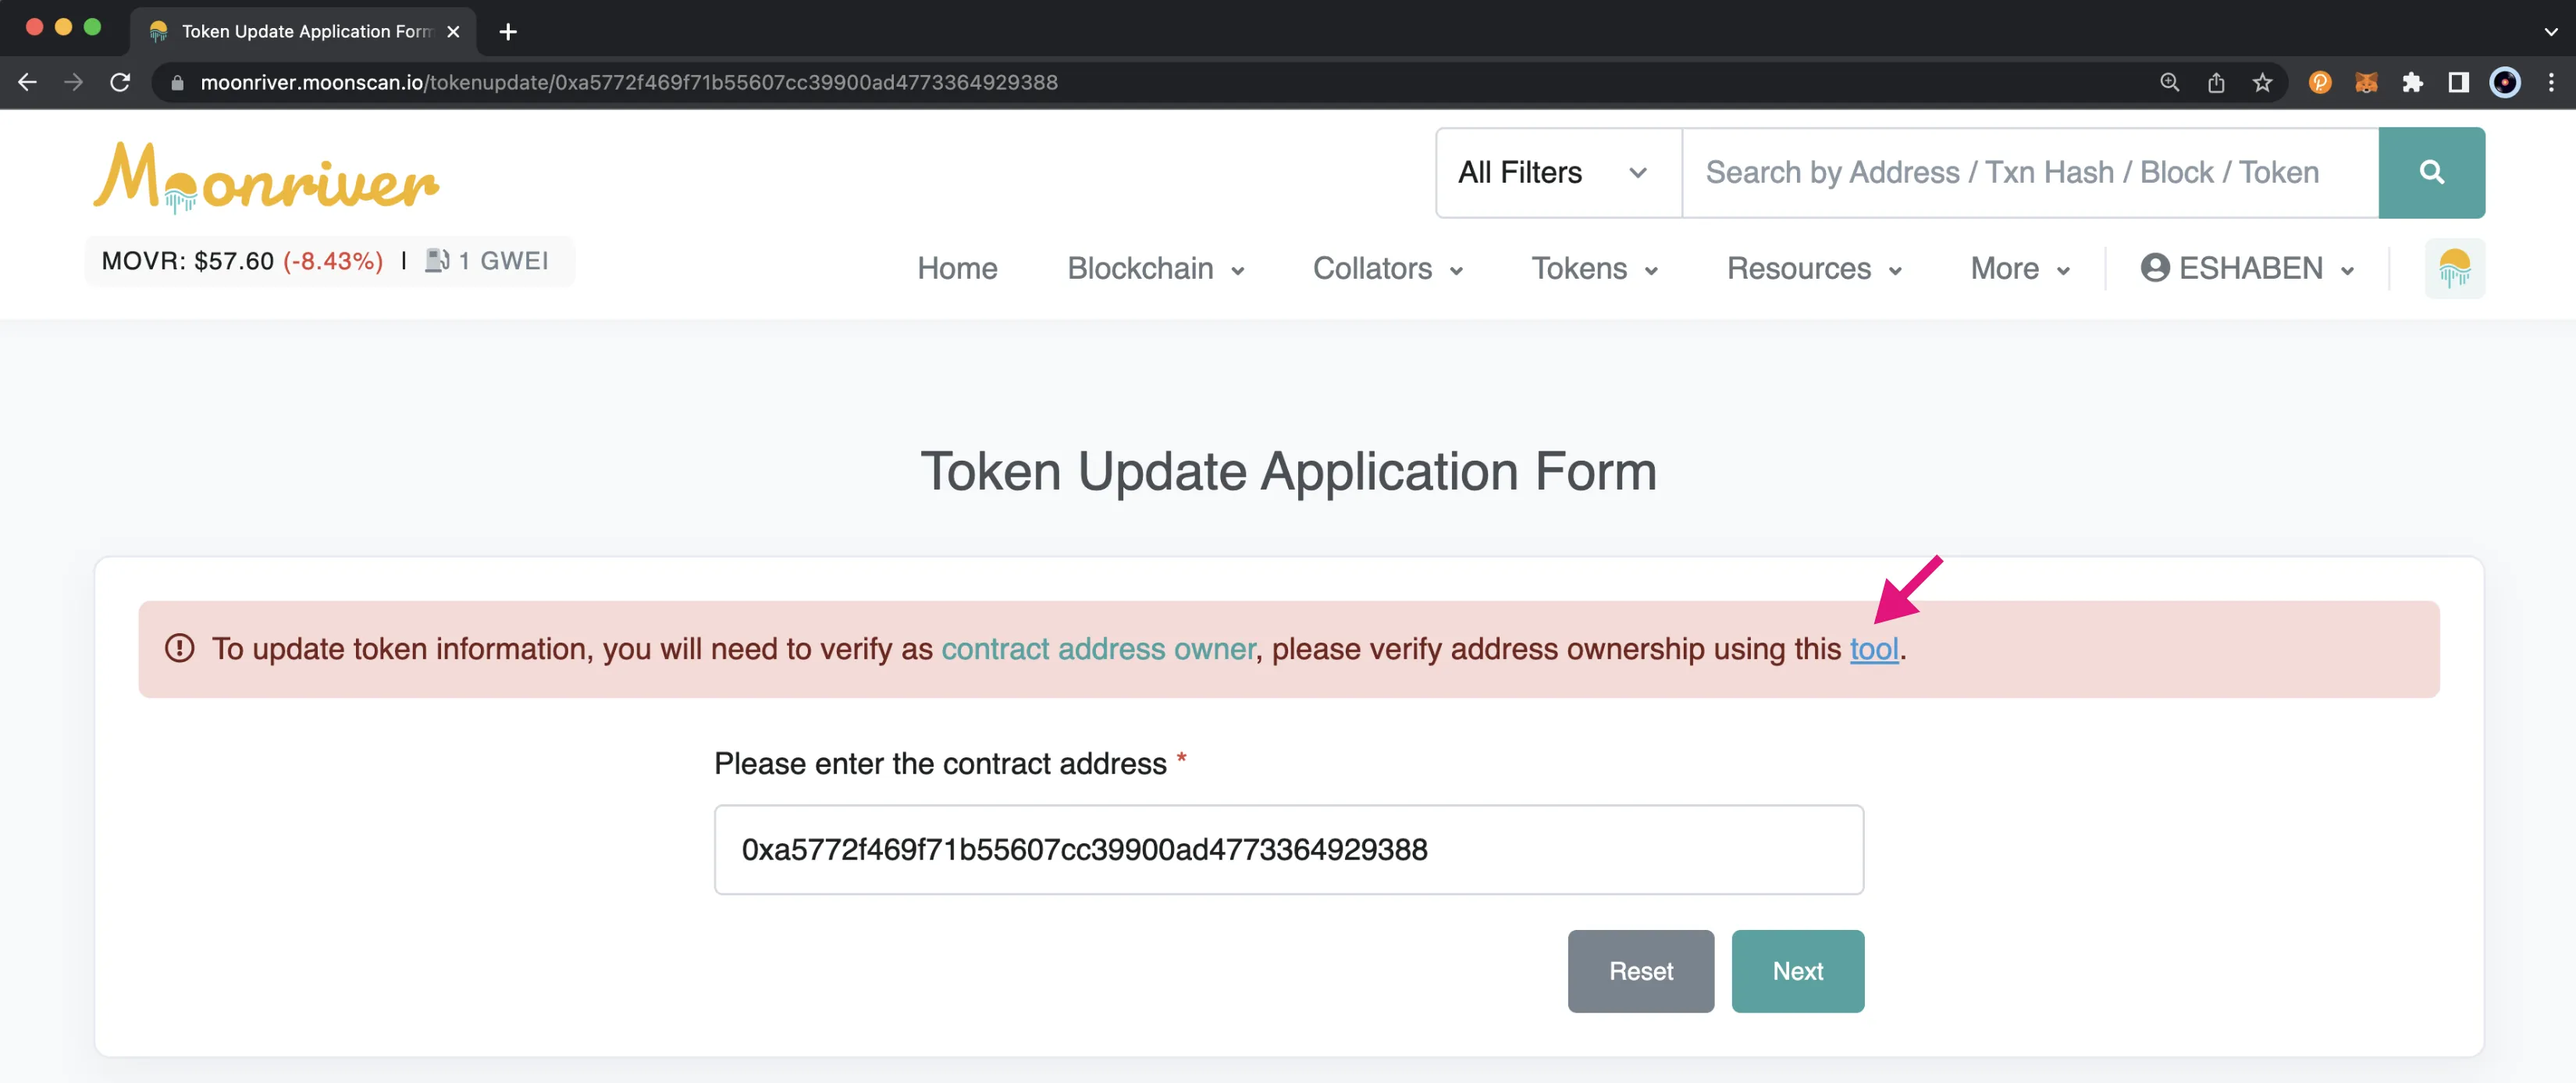
You’ll be taken to the **Verify Address Ownership** page, where you can choose to sign the message verifying your ownership either manually or by connecting to Web3. If you wish to verify ownership manually, you’ll need the message signature hash. Otherwise, if you connect to Web3, the hash will be calculated for you.
### Sign Message Manually {: #sign-message-manually }
If you wish to verify ownership manually, you’ll need the message signature hash. If you have calculated the hash yourself, you can click **Sign Message Manually**, enter the **Message Signature Hash**, and click **Verify Ownership**.
### Connect to Web3 {: #connect-to-web3 }
You can easily calculate the message signature hash using MetaMask. You will need to have the account you deployed the contract with loaded into MetaMask. Then you can click on **Connect to Web3** and MetaMask will pop-up.
1. Select the account to connect with, which should be the account you used to deploy the contract
2. Connect to the account
Back on the **Verify Address Ownership** page, you can take the following steps
1. Click **Sign with Web3**
2. MetaMask will pop-up and you can **Sign** the message
Once you’ve signed the message, you can then click **Click to Proceed**. You should now see that the **Message Signature Hash** has been automatically populated for you. All you have left to do is click **Verify Ownership**.
## Creating the Profile {: #creating-the-profile }
Now you can start filling in the necessary information to build the token profile, including project information, social media links, price data links, and more. You should make sure that all the links provided are working and are safe to visit before submitting.
At a minimum you will need to fill in the following information:
- **Request Type**
- **Token Contract Address**
- **Requester Name**
- **Requester Email Address**
- **Official Project Website**
- **Official Project Email Address**
- **Link to download a 32x32 png icon logo**
- **Project Description**
All of the other fields are optional. Once you’ve filled in the information, you can click **Submit** at the bottom of the page.
And that’s it! You’ve successfully created and submitted a profile for your token on Moonscan! The Moonscan team will review your submission as soon as possible and provide you with further instructions as needed.
--- END CONTENT ---
Doc-Content: https://docs.moonbeam.network/builders/interoperability/xcm/remote-execution/remote-evm-calls/
--- BEGIN CONTENT ---
---
title: Remote EVM Calls Through XCM
description: How to do remote calls to smart contracts on Moonbeam EVM through XCM from any Polkadot parachain that has an XCM channel established with Moonbeam.
categories: XCM Remote Execution, Ethereum Toolkit
---
# Remote EVM Calls Through XCM
## Introduction {: #introduction}
The [XCM Transactor Pallet](/builders/interoperability/xcm/remote-execution/substrate-calls/xcm-transactor-pallet/){target=\_blank} provides a simple interface to perform remote cross-chain calls through XCM. However, this does not consider the possibility of doing remote calls to Moonbeam's EVM, only to Substrate-specific pallets (functionalities).
Moonbeam's EVM is only accessible through the [Ethereum Pallet](https://github.com/polkadot-evm/frontier/tree/master/frame/ethereum){target=\_blank}. Among many other things, this pallet handles certain validations of transactions before getting them into the transaction pool. Then, it performs another validation step before inserting a transaction from the pool into a block. Lastly, it provides the interface through a `transact` function to execute a validated transaction. All these steps follow the same behavior as an Ethereum transaction in terms of structure and signature scheme.
However, calling the [Ethereum Pallet](https://github.com/polkadot-evm/frontier/tree/master/frame/ethereum){target=\_blank} directly through an XCM [`Transact`](https://github.com/paritytech/xcm-format#transact){target=\_blank} is not feasible. Mainly because the dispatcher account for the remote EVM call (referred to as `msg.sender` in Ethereum) does not sign the XCM transaction on the Moonbeam side. The XCM extrinsic is signed in the origin chain, and the XCM executor dispatches the call, through the [`Transact`](https://github.com/paritytech/xcm-format#transact){target=\_blank} instruction, from a known caller linked to the sender in the origin chain. In this context, the Ethereum Pallet will not be able to verify the signature and, ultimately, validate the transaction.
To this end, the [Ethereum XCM Pallet](https://github.com/moonbeam-foundation/moonbeam/tree/master/pallets/ethereum-xcm){target=\_blank} was introduced. It acts as a middleware between the XCM [`Transact`](https://github.com/paritytech/xcm-format#transact){target=\_blank} instruction and the [Ethereum Pallet](https://github.com/polkadot-evm/frontier/tree/master/frame/ethereum){target=\_blank}, as special considerations need to be made when performing EVM calls remotely through XCM. The pallet performs the necessary checks and validates the transaction. Next, the pallet calls the Ethereum Pallet to dispatch the transaction to the EVM. Due to how the EVM is accessed, there are some differences between regular and remote EVM calls.
The happy path for both regular and remote EVM calls through XCM is portrayed in the following diagram:
This guide will go through the differences between regular and remote EVM calls. In addition, it will show you how to perform remote EVM calls through the extrinsic exposed by the [Ethereum XCM pallet](https://github.com/moonbeam-foundation/moonbeam/tree/master/pallets/ethereum-xcm){target=\_blank}.
!!! note
Remote EVM calls are done through the [XCM Transactor Pallet](/builders/interoperability/xcm/remote-execution/substrate-calls/xcm-transactor-pallet/){target=\_blank}. Therefore, it is recommended to get familiar with XCM Transactor concepts before trying to perform remote EVM calls through XCM.
**Note that remote calls to Moonbeam's EVM through XCM are still being actively developed**. In addition, **developers must understand that sending incorrect XCM messages can result in the loss of funds.** Consequently, it is essential to test XCM features on a TestNet before moving to a production environment.
## Differences between Regular and Remote EVM Calls through XCM {: #differences-regular-remote-evm}
As explained in the [introduction](#introduction), the paths that regular and remote EVM calls take to get to the EVM are quite different. The main reason behind this difference is the dispatcher of the transaction.
A regular EVM call has an apparent sender who signs the Ethereum transaction with its private key. The signature, of ECDSA type, can be verified with the signed message and the `r-s` values that are produced by the signing algorithm. Ethereum signatures use an additional variable called `v`, which is the recovery identifier.
With remote EVM calls, the signer signs an XCM transaction in another chain. Moonbeam receives that XCM message, which follows the conventional remote execution via XCM form:
- [`DescendOrigin`](/builders/interoperability/xcm/core-concepts/instructions/#descend-origin){target=\_blank} (optional)
- [`WithdrawAsset`](/builders/interoperability/xcm/core-concepts/instructions/#withdraw-asset){target=\_blank}
- [`BuyExecution`](/builders/interoperability/xcm/core-concepts/instructions/#buy-execution){target=\_blank}
- [`Transact`](/builders/interoperability/xcm/core-concepts/instructions/#transact){target=\_blank}
XCM execution happens through a [Computed Origin account mechanism](/builders/interoperability/xcm/remote-execution/computed-origins/){target=\_blank}, which by default uses the source chain's Sovereign account in the destination chain. If `DescendOrigin` is included, Moonbeam will mutate the origin of the XCM call to a keyless account that a user from the source chain can control remotely via XCM. The remote EVM call is dispatched from that keyless account (or a related [proxy](/tokens/manage/proxy-accounts/){target=\_blank}). Therefore, because the transaction is not signed, it does not have the real `v-r-s` values of the signature, but `0x1` instead.
Since remote EVM calls do not have the actual `v-r-s` values of the signature, there could be collision problems with the EVM transaction hash, as it is calculated as the keccak256 hash of the signed transaction blob. In consequence, if two accounts with the same nonce submit the same transaction object, they will end up with the same EVM transaction hash. Therefore, all remote EVM transactions use a global nonce that is attached to the [Ethereum XCM Pallet](https://github.com/moonbeam-foundation/moonbeam/tree/master/pallets/ethereum-xcm){target=\_blank}.
Another significant difference is in terms of the gas price. The fee for remote EVM calls is charged at an XCM execution level. Consequently, the gas price at an EVM level is zero, and the EVM will not charge for the execution itself. This can also be seen in the receipt of a remote EVM call transaction. Accordingly, the XCM message must be configured so that the `BuyExecution` buys enough weight to cover the gas cost.
The last difference is in terms of the gas limit. Ethereum uses a gas-metered system to moderate the amount of execution that can be done in a block. On the contrary, Moonbeam uses a [weight-based system](https://docs.polkadot.com/polkadot-protocol/parachain-basics/blocks-transactions-fees/fees/){target=\_blank} in which each call is characterized by the time it takes to execute in a block. Each unit of weight corresponds to one picosecond of execution time.
As of runtime 2900, the configuration of the XCM queue suggests that XCM messages should be executable within the following weight units:
=== "Moonbeam"
```text
125,000,000,000 (0.125 seconds of block execution time)
```
=== "Moonriver"
```text
500,000,000,000 (0.5 seconds of block execution time)
```
=== "Moonbase Alpha"
```text
500,000,000,000 (0.5 seconds of block execution time)
```
!!! note
Prior to runtime 2900, the weight limit of XCM messages across all networks was `20,000,000,000` weight units (this is, `0.02` seconds of block execution time).
Suppose the XCM message can't be executed due to the lack of execution time in a given block, and the weight requirement exceeds the above limits. In that case, the XCM message will be marked as `overweight` and only be executable through democracy.
The maximum weight limit per XCM message constrains the gas limit available for remote EVM calls through XCM. For all Moonbeam-based networks, there is a ratio of [`25,000` units of gas per unit of weight](https://github.com/moonbeam-foundation/moonbeam/blob/{{ networks.moonbase.spec_version }}/runtime/moonbase/src/lib.rs#L417){target=\_blank} ([`WEIGHT_REF_TIME_PER_SECOND`](https://paritytech.github.io/substrate/master/frame_support/weights/constants/constant.WEIGHT_REF_TIME_PER_SECOND.html){target=\_blank} / [`GAS_PER_SECOND`](https://github.com/moonbeam-foundation/moonbeam/blob/{{ networks.moonbase.spec_version }}/runtime/moonbase/src/lib.rs#L413){target=\_blank}). Considering that you need some XCM message weight to execute the XCM instructions, a remote EVM call might consume 2,000,000,000 units. The following equation can be used to determine the maximum gas units for a remote EVM call:
```text
Maximum Gas Units = (Maximum Weight Units - Remote EVM Weight Units) / 25,000
```
Therefore, the maximum gas limit you can provide for a remote EVM call can be calculated:
=== "Moonbeam"
```text
Maximum Gas Units = (125,000,000,000 - 2,000,000,000) / 25,000
Maximum Gas Units = 4,920,000
```
=== "Moonriver"
```text
Maximum Gas Units = (500,000,000,000 - 2,000,000,000) / 25,000
Maximum Gas Units = 19,920,000
```
=== "Moonbase Alpha"
```text
Maximum Gas Units = (500,000,000,000 - 2,000,000,000) / 25,000
Maximum Gas Units = 19,920,000
```
!!! note
These values are subject to change in the future.
In summary, these are the main differences between regular and remote EVM calls:
- Remote EVM calls use a global nonce (owned by the [Ethereum XCM Pallet](https://github.com/moonbeam-foundation/moonbeam/tree/master/pallets/ethereum-xcm){target=\_blank}) instead of a nonce per account
- The `v-r-s` values of the signature for remote EVM calls are `0x1`. The sender can't be retrieved from the signature through standard methods (for example, through [ECRECOVER](/builders/ethereum/precompiles/utility/eth-mainnet/#verify-signatures-with-ecrecover){target=\_blank}). Nevertheless, the `from` is included in both the transaction receipt and when getting the transaction by hash (using the Ethereum JSON-RPC)
- The gas price for all remote EVM calls is zero. The EVM execution is charged at an XCM execution level and not at an EVM level
- The current maximum gas limit you can set for a remote EVM call is different, as outlined above
## Ethereum XCM Pallet Interface {: #ethereum-xcm-pallet-interface}
### Extrinsics {: #extrinsics }
The Ethereum XCM Pallet provides the following extrinsics (functions) that can be called by the `Transact` instruction to access Moonbeam's EVM through XCM:
???+ function "**transact**(xcmTransaction) — function to remotely call the EVM through XCM. Only callable through the execution of an XCM message"
=== "Parameters"
- `xcmTransaction` - the Ethereum transaction details of the call that will be dispatched. The `xcmTransaction` structure, which is versioned, contains the following:
- `gasLimit` - the gas limit for the Ethereum transaction
- `action` - the action to be executed, which provides two options: `Call` and `Create`. The current implementation of the [Ethereum XCM Pallet](https://github.com/moonbeam-foundation/moonbeam/tree/master/pallets/ethereum-xcm){target=\_blank} does not support the `CREATE` operation. Therefore, you can't deploy a smart contract through remote EVM calls. For `Call`, you'll need to specify the contract address you're interacting with
- `value` - the amount of native tokens to send
- `input` - the encoded call data of the contract interaction
=== "Polkadot.js API Example"
```js
import { ApiPromise, WsProvider } from '@polkadot/api';
const xcmTransaction = {
V2: {
gasLimit: INSERT_GAS_LIMIT,
action: { Call: 'INSERT_CONTRACT_ADDRESS_TO_CALL' },
value: INSERT_VALUE,
input: 'INSERT_CONTRACT_CALL_DATA',
},
};
const main = async () => {
const api = await ApiPromise.create({
provider: new WsProvider('INSERT_WSS_ENDPOINT'),
});
const tx = api.tx.ethereumXcm.transact(xcmTransaction);
};
main();
```
!!! note
In the following sections, you'll learn exactly how to get the Ethereum transaction call data and build an XCM message using this extrinsic.
??? function "**transactThroughProxy**(transactAs, xcmTransaction) — function to remotely call the EVM through XCM and be dispatched from a given account with known keys (the `msg.sender`)"
=== "Parameters"
- `xcmTransaction` - the Ethereum transaction details of the call that will be dispatched. The `xcmTransaction` structure, which is versioned, contains the following:
- `gasLimit` - the gas limit for the Ethereum transaction
- `action` - the action to be executed, which provides two options: `Call` and `Create`. The current implementation of the [Ethereum XCM Pallet](https://github.com/moonbeam-foundation/moonbeam/tree/master/pallets/ethereum-xcm){target=\_blank} does not support the `CREATE` operation. Therefore, you can't deploy a smart contract through remote EVM calls. For `Call`, you'll need to specify the contract address you're interacting with
- `value` - the amount of native tokens to send
- `input` - the encoded call data of the contract interaction
- `xcmTransactAs` - the account from which the remote EVM call will be dispatched (the `msg.sender`). This account needs to have set the Computed Origin account as a [proxy](/tokens/manage/proxy-accounts/){target=\_blank} of type `any` on Moonbeam, or the remote EVM call will fail. Transaction fees are still paid by the Computed Origin account
=== "Polkadot.js API Example"
```js
import { ApiPromise, WsProvider } from '@polkadot/api';
const xcmTransaction = {
V2: {
gasLimit: INSERT_GAS_LIMIT,
action: { Call: 'INSERT_CONTRACT_ADDRESS_TO_CALL' },
value: INSERT_VALUE,
input: 'INSERT_CONTRACT_CALL_DATA',
},
};
const xcmTransactAs = 'INSERT_COMPUTED_ORIGIN_PROXY_ADDRESS';
const main = async () => {
const api = await ApiPromise.create({
provider: new WsProvider('INSERT_WSS_ENDPOINT'),
});
const tx = api.tx.ethereumXcm.transactThroughProxy(
xcmTransaction,
xcmTransactAs
);
};
main();
```
## Building a Remote EVM Call Through XCM {: #build-remote-evm-call-xcm}
This guide covers building an XCM message for remote EVM calls using the [XCM Pallet](https://github.com/paritytech/polkadot-sdk/blob/{{ polkadot_sdk }}/polkadot/xcm/pallet-xcm/src/lib.rs){target=\_blank} from the relay chain to Moonbase Alpha. More specifically, it will use the `transact` function. The steps to use the `transactThroughProxy` function are identical. However, you'll need to provide the `transactAs` account and ensure that this account has set the Computed Origin account as a proxy of type `any` on Moonbase Alpha.
!!! note
When using `transactThroughProxy`, the EVM call is dispatched by the `transactAs` account you provide, acting as the `msg.sender`, as long as this account has set the Computed Origin account as a proxy of type `any` in the Moonbeam-based network you are using. However, transaction fees are still paid by the Computed Origin account, so you need to ensure it has enough funds to cover them.
The process for building and performing the remote execution can be summarized as follows:
1. Calculate the call data for the EVM call that will be performed on Moonbase Alpha
2. Use the EVM call data to generate the call data for the `transact` extrinsic of the Ethereum XCM Pallet on Moonbase Alpha
3. Build the XCM message on the relay chain, which will include the `WithdrawAsset`, `BuyExecution`, and `Transact` instructions. In the `Transact` instruction, you'll use the Ethereum XCM `transact` call data
4. Using Alice's account on the relay chain, you'll send the XCM message via the `send` extrinsic of the XCM Pallet
5. Alice's Computed Origin account on Moonbase Alpha will dispatch the EVM call data
### Checking Prerequisites {: #ethereumxcm-check-prerequisites}
To be able to send the call from the relay chain, you need the following:
- An [account](https://polkadot.js.org/apps/?rpc=wss://relay.api.moonbase.moonbeam.network#/accounts){target=\_blank} on the relay chain with funds (UNIT) to pay for the transaction fees. You can acquire some xcUNIT by swapping for DEV tokens (Moonbase Alpha's native token) on [Moonbeam-Swap](https://moonbeam-swap.netlify.app){target=\_blank}, a demo Uniswap-V2 clone on Moonbase Alpha, and then [send them to the relay chain](/builders/interoperability/xcm/xc20/send-xc20s/xtokens-precompile/){target=\_blank}. Additionally, you can [contact us on Discord](https://discord.com/invite/PfpUATX){target=\_blank} to get some UNIT tokens directly
- The address of your Computed Origin account. Please refer to the [Computed Origin](/builders/interoperability/xcm/remote-execution/computed-origins/){target=\_blank} guide to learn how to calculate your Computed Origin address
- To fund your Computed Origin account. The account must have enough DEV tokens (or GLMR/MOVR for Moonbeam/Moonriver) to cover the cost of the XCM execution of the remote EVM call. Note that this is the account from which the remote EVM call will be dispatched (the `msg.sender`). Consequently, the account must satisfy whatever conditions are required for the EVM call to be executed correctly. For example, hold any relevant ERC-20 token if you are doing an ERC-20 transfer
!!! note
Suppose you are using the `transactThroughProxy` function. In that case, the `transactAs` account must satisfy whatever conditions are required for the EVM call to be executed correctly, as it acts as the `msg.sender`. However, the Computed Origin account is the one that needs to hold the DEV tokens (or GLMR/MOVR for Moonbeam/Moonriver) to cover the cost of the XCM execution of the remote EVM call.
### Ethereum XCM Transact Call Data {: #ethereumxcm-transact-data }
Before you send the XCM message from the relay chain to Moonbase Alpha, you need to get the encoded call data that will be dispatched through the execution of the [`Transact`](https://github.com/paritytech/xcm-format#transact){target=\_blank} XCM instruction.
In this example, you'll be interacting with the `transact` function of the [Ethereum XCM Pallet](https://github.com/moonbeam-foundation/moonbeam/tree/master/pallets/ethereum-xcm), which accepts an `xcmTransaction` as a parameter.
The `xcmTransaction` parameter requires you to define the `gasLimit`, `action`, `value`, and `input`.
For the action to be executed, you'll be performing a contract interaction with a simple [incrementer contract](https://moonbase.moonscan.io/address/0xa72f549a1a12b9b49f30a7f3aeb1f4e96389c5d8#code){target=\_blank}, which is located at `0xa72f549a1a12b9b49f30a7f3aeb1f4e96389c5d8`. You'll be calling the `increment` function, which has no input argument and will increase the value of the `number` by one. It will also store the block's timestamp in which the function is executed to the `timestamp` variable.
The encoded call data for the `increment` function is `0xd09de08a`, which is the function selector and is the first eight hexadecimal characters (or 4 bytes) of the keccak256 hash of `increment()`. If you choose to interact with a function that has input parameters, they also need to be encoded. The easiest way to get the encoded call data is to emulate a transaction either in [Remix](/builders/ethereum/dev-env/remix/#interacting-with-a-moonbeam-based-erc-20-from-metamask){target=\_blank} or [Moonscan](https://moonbase.moonscan.io/address/0xa72f549a1a12b9b49f30a7f3aeb1f4e96389c5d8#code){target=\_blank}. Then, in Metamask, check the **HEX DATA: 4 BYTES** selector under the **HEX** tab to get the call data. You don't need to sign the transaction.
Now that you have the encoded contract interaction data, you can determine the gas limit for this call using the [`eth_estimateGas` JSON-RPC method](https://ethereum.org/en/developers/docs/apis/json-rpc/#eth_estimategas){target=\_blank}. For this example, you can set the gas limit to `155000`.
For the value, you can set it to `0` since this particular interaction does not need DEV (or GLMR/MOVR for Moonbeam/Moonriver). For an interaction that requires DEV, you'll need to modify this value accordingly.
Now that you have all of the components required for the `xcmTransaction` parameter, you can build it:
```js
const xcmTransaction = {
V2: {
gasLimit: 155000,
action: { Call: '0xa72f549a1a12b9b49f30a7f3aeb1f4e96389c5d8' },
value: 0,
input: '0xd09de08a',
},
};
```
Next, you can write the script to get the encoded call data for the transaction. You'll take the following steps:
1. Provide the input data for the call. This includes:
- The Moonbase Alpha endpoint URL to create the provider
- The value for the `xcmTransaction` parameter of the `transact` function
2. Create the [Polkadot.js API](/builders/substrate/libraries/polkadot-js-api/){target=\_blank} provider
3. Craft the `ethereumXcm.transact` extrinsic with the `xcmTransaction` value
4. Get the encoded call data for the extrinsic. You don't need to sign and send the transaction
```js
import { ApiPromise, WsProvider } from '@polkadot/api'; // Version 10.13.1
// 1. Input data
const providerWsURL = 'wss://wss.api.moonbase.moonbeam.network';
const xcmTransaction = {
V2: {
gasLimit: 155000,
action: { Call: '0xa72f549a1a12b9b49f30a7f3aeb1f4e96389c5d8' },
value: 0,
input: '0xd09de08a',
},
};
const getEncodedCalldata = async () => {
// 2. Create Substrate API Provider
const substrateProvider = new WsProvider(providerWsURL);
const api = await ApiPromise.create({ provider: substrateProvider });
// 3. Create the extrinsic
const tx = api.tx.ethereumXcm.transact(xcmTransaction);
// 4. Get the encoded call data
const encodedCall = tx.method.toHex();
console.log(`Encoded Calldata: ${encodedCall}`);
api.disconnect();
};
getEncodedCalldata();
```
!!! note
You can view an example of the output of the above script on [Polkadot.js Apps](https://polkadot.js.org/apps/?rpc=wss://wss.api.moonbase.moonbeam.network#/extrinsics/decode/0x260001785d02000000000000000000000000000000000000000000000000000000000000a72f549a1a12b9b49f30a7f3aeb1f4e96389c5d8000000000000000000000000000000000000000000000000000000000000000010d09de08a00){target=\_blank} using the following encoded call data: `0x260001785d02000000000000000000000000000000000000000000000000000000000000a72f549a1a12b9b49f30a7f3aeb1f4e96389c5d8000000000000000000000000000000000000000000000000000000000000000010d09de08a00`.
You'll use the encoded call data in the `Transact` instruction in the following section.
### Estimate Weight Required at Most {: #estimate-weight-required-at-most }
When using the `Transact` instruction, you'll need to define the `requireWeightAtMost` field, which is the required weight for the transaction. This field accepts two arguments: the `refTime` and `proofSize`. The `refTime` is the amount of computational time that can be used for execution, and the `proofSize` is the amount of storage in bytes that can be used.
To get an estimate for the `refTime` and `proofSize`, you can use the [`paymentInfo` method of the Polkadot.js API](/builders/substrate/libraries/polkadot-js-api/#fees){target=\_blank}. Since these weights are required for the `Transact` call data, you can extend the script from the previous section to add in the call to `paymentInfo`.
The `paymentInfo` method accepts the same parameters you would normally pass to the `.signAndSend` method, which is the sending account and, optionally, some additional values such as a nonce or signer.
To modify the encoded call data script, you'll need to add Alice's Computed Origin address and use it to call the `tx.paymentInfo` method.
???+ code "Modified script"
```js
import { ApiPromise, WsProvider } from '@polkadot/api'; // Version 10.13.1
// 1. Input data
const providerWsURL = 'wss://wss.api.moonbase.moonbeam.network';
const xcmTransaction = {
V2: {
gasLimit: 155000,
action: { Call: '0xa72f549a1a12b9b49f30a7f3aeb1f4e96389c5d8' },
value: 0,
input: '0xd09de08a',
},
};
const getEncodedCalldata = async () => {
// 2. Create Substrate API Provider
const substrateProvider = new WsProvider(providerWsURL);
const api = await ApiPromise.create({ provider: substrateProvider });
// 3. Create the extrinsic
const tx = api.tx.ethereumXcm.transact(xcmTransaction);
// 4. Estimate the required weight
const alice = '0xdd2399f3b5ca0fc584c4637283cda4d73f6f87c0';
const info = await tx.paymentInfo(alice);
console.log(`Required Weight: ${info.weight}`);
api.disconnect();
};
getEncodedCalldata();
```
The script, at the time of writing, returns an estimate of `3900000000` for `refTime` and `9687` for `proofSize`.
### Building the XCM for Remote XCM Execution {: #build-xcm-remote-evm}
Now that you've generated the call data for the EVM call, you're going to use the XCM Pallet on the relay chain to perform the remote execution. To do so, you'll use the `send` function, which accepts two parameters:
- `dest` - the XCM versioned multilocation representing a chain in the ecosystem where the XCM message is being sent to (the target chain)
- `message` - the SCALE-encoded versioned XCM message to be executed
You can start assembling these parameters by taking the following steps:
1. Build the multilocation of the destination, which is Moonbase Alpha:
```js
const dest = { V4: { parents: 0, interior: { X1: [{ Parachain: 1000 }] } } };
```
2. Build the `WithdrawAsset` instruction, which will require you to define:
- The multilocation of the DEV token on Moonbase Alpha
- The amount of DEV tokens to withdraw
```js
const instr1 = {
WithdrawAsset: [
{
id: { parents: 0, interior: { X1: [{ PalletInstance: 3 }] } },
fun: { Fungible: 10000000000000000n }, // 0.01 DEV
},
],
};
```
3. Build the `BuyExecution` instruction, which will require you to define:
- The multilocation of the DEV token on Moonbase Alpha
- The amount of DEV tokens to buy for execution
- The weight limit
```js
const instr2 = {
BuyExecution: [
{
id: { parents: 0, interior: { X1: [{ PalletInstance: 3 }] } },
fun: { Fungible: 10000000000000000n }, // 0.01 DEV
},
{ Unlimited: null },
],
};
```
4. Build the `Transact` instruction, which will require you to define:
- The origin kind
- The required weight for the transaction, which you calculated in the [Estimate Weight Required at Most](#estimate-weight-required-at-most) section
- The encoded call data, which you generated in the [Ethereum XCM Transact Call Data](#ethereumxcm-transact-data) section
```js
const instr3 = {
Transact: {
originKind: 'SovereignAccount',
requireWeightAtMost: { refTime: 3900000000n, proofSize: 9687n },
call: {
encoded:
'0x260001785d02000000000000000000000000000000000000000000000000000000000000a72f549a1a12b9b49f30a7f3aeb1f4e96389c5d8000000000000000000000000000000000000000000000000000000000000000010d09de08a00',
},
},
};
```
5. Combine the XCM instructions into a versioned XCM message:
```js
const message = { V4: [instr1, instr2, instr3] };
```
Now that you have the values for each of the parameters, you can write the script for the execution. You'll take the following steps:
1. Provide the input data for the call. This includes:
- The relay chain endpoint URL to create the provider
- The values for each of the parameters of the `send` function
2. Create a Keyring instance that will be used to send the transaction
3. Create the [Polkadot.js API](/builders/substrate/libraries/polkadot-js-api/){target=\_blank} provider
4. Craft the `xcmPallet.send` extrinsic with the `dest` and `message` values
5. Send the transaction using the `signAndSend` extrinsic and the Keyring instance you created in the second step
!!! remember
This is for demo purposes only. Never store your private key in a JavaScript file.
```js
import { ApiPromise, WsProvider, Keyring } from '@polkadot/api'; // Version 10.13.1
import { cryptoWaitReady } from '@polkadot/util-crypto';
// 1. Input data
const providerWsURL =
'wss://relay.api.moonbase.moonbeam.network';
const privateKey = 'INSERT_PRIVATE_KEY';
const dest = { V4: { parents: 0, interior: { X1: [{ Parachain: 1000 }] } } };
const instr1 = {
WithdrawAsset: [
{
id: { parents: 0, interior: { X1: [{ PalletInstance: 3 }] } },
fun: { Fungible: 10000000000000000n }, // 0.01 DEV
},
],
};
const instr2 = {
BuyExecution: [
{
id: { parents: 0, interior: { X1: [{ PalletInstance: 3 }] } },
fun: { Fungible: 10000000000000000n }, // 0.01 DEV
},
{ Unlimited: null },
],
};
const instr3 = {
Transact: {
originKind: 'SovereignAccount',
requireWeightAtMost: { refTime: 3900000000n, proofSize: 9687n },
call: {
encoded:
'0x260001785d02000000000000000000000000000000000000000000000000000000000000a72f549a1a12b9b49f30a7f3aeb1f4e96389c5d8000000000000000000000000000000000000000000000000000000000000000010d09de08a00',
},
},
};
const message = { V4: [instr1, instr2, instr3] };
const sendXcmMessage = async () => {
// 2. Create Keyring instance
await cryptoWaitReady();
const keyring = new Keyring({ type: 'sr25519' });
const alice = keyring.addFromUri(privateKey);
// 3. Create Substrate API Provider
const substrateProvider = new WsProvider(providerWsURL);
const api = await ApiPromise.create({ provider: substrateProvider });
// 4. Create the extrinsic
const tx = api.tx.xcmPallet.send(dest, message);
// 5. Send the transaction
const txHash = await tx.signAndSend(alice);
console.log(`Submitted with hash ${txHash}`);
api.disconnect();
};
sendXcmMessage();
```
!!! note
You can view an example of the output of the above script on [Polkadot.js Apps](https://polkadot.js.org/apps/?rpc=wss://relay.api.moonbase.moonbeam.network#/extrinsics/decode/0x630004000100a10f040c000400010403001300008a5d784563011300010403001300008a5d784563010006010300286bee007901260001581501000000000000000000000000000000000000000000000000000000000000a72f549a1a12b9b49f30a7f3aeb1f4e96389c5d8000000000000000000000000000000000000000000000000000000000000000010d09de08a00){target=\_blank} using the following encoded call data: `0x630004000100a10f040c000400010403001300008a5d784563011300010403001300008a5d784563010006010300286bee007901260001581501000000000000000000000000000000000000000000000000000000000000a72f549a1a12b9b49f30a7f3aeb1f4e96389c5d8000000000000000000000000000000000000000000000000000000000000000010d09de08a00`.
Once the transaction is processed, you can check the relevant extrinsics and events in the [relay chain](https://polkadot.js.org/apps/?rpc=wss://relay.api.moonbase.moonbeam.network#/explorer/query/0x2a0e40a2e5261e792190826ce338ed513fe44dec16dd416a12f547d358773f98){target=\_blank} and [Moonbase Alpha](https://polkadot.js.org/apps/?rpc=wss://wss.api.moonbase.moonbeam.network#/explorer/query/0x7570d6fa34b9dccd8b8839c2986260034eafef732bbc09f8ae5f857c28765145){target=\_blank}.
In the relay chain, the extrinsic is `xcmPallet.send`, and the associated event is `xcmPallet.Sent` (among others related to the fee). In Moonbase Alpha, the XCM execution happens within the `parachainSystem.setValidationData` extrinsic, and there are multiple associated events that can be highlighted:
- **parachainSystem.DownwardMessagesReceived** — event that signals that a message from the relay chain was received. With the current XCM implementation, messages from other parachains will show the same event
- **balances.Withdraw** — event related to the withdrawing of tokens to pay for the execution of the call. Note that the `who` address is the Computed Origin account calculated before
- **ethereum.Executed** — event associated with the execution of the remote EVM call. It provides the `from`, `to`, `transactionHash` (calculated with the non-standard signature and global pallet nonce), and the `exitReason`. Currently, some common EVM errors, like out of gas, will show `Reverted` in the exit reason
- **polkadotXcm.AssetsTrapped** — event that is emitted when part of the tokens withdrawn from the account (for fees) are not used. Generally, when there are leftover tokens in the registry that are not allocated to an account. These tokens are temporarily burned and can be retrieved through a democracy proposal. A combination of both `RefundSurplus` and `DepositAsset` XCM instructions can prevent assets from getting trapped
To verify that the remote EVM call through XCM was successful, you can head to the [contract's page in Moonscan](https://moonbase.moonscan.io/address/0xa72f549a1a12b9b49f30a7f3aeb1f4e96389c5d8#readContract){target=\_blank} and verify the new value for the number and its timestamp.
## Remote EVM Call Transaction by Hash {: #remote-evm-call-txhash}
As mentioned before, there are some [differences between regular and remote XCM EVM calls](#differences-regular-remote-evm). Some main differences can be seen when retrieving the transaction by its hash using the Ethereum JSON-RPC.
To do so, you first need to retrieve the transaction hash you want to query. For this example, you can use the transaction hash from the [previous section](#build-remote-evm-call-xcm), which is [0x753588d6e59030eeffd31aabccdd0fb7c92db836fcaa8ad71512cf3a7d0cb97f](https://moonbase.moonscan.io/tx/0x753588d6e59030eeffd31aabccdd0fb7c92db836fcaa8ad71512cf3a7d0cb97f){target=\_blank}. Open the terminal, and execute the following command:
```sh
curl --location --request POST 'https://rpc.api.moonbase.moonbeam.network' \
--header 'Content-Type: application/json' \
--data-raw '{
"jsonrpc":"2.0",
"id":1,
"method":"eth_getTransactionByHash",
"params": ["0x753588d6e59030eeffd31aabccdd0fb7c92db836fcaa8ad71512cf3a7d0cb97f"]
}
'
```
If the JSON-RPC request is sent correctly, the response should look like this:
```json
{
"jsonrpc": "2.0",
"result": {
"hash": "0x753588d6e59030eeffd31aabccdd0fb7c92db836fcaa8ad71512cf3a7d0cb97f",
"nonce": "0x129",
"blockHash": "0xeb8222567e434215f472f0c53f68a606c77ea8f475e5fbc3a5b715db6cce8887",
"blockNumber": "0x46c268",
"transactionIndex": "0x0",
"from": "0xdd2399f3b5ca0fc584c4637283cda4d73f6f87c0",
"to": "0xa72f549a1a12b9b49f30a7f3aeb1f4e96389c5d8",
"value": "0x0",
"gasPrice": "0x0",
"maxFeePerGas": "0x0",
"maxPriorityFeePerGas": "0x0",
"gas": "0x25d78",
"input": "0xd09de08a",
"creates": null,
"raw": "0x02eb820507820129808083025d7894a72f549a1a12b9b49f30a7f3aeb1f4e96389c5d88084d09de08ac0010101",
"publicKey": "0x14745b9075ac0f0426c61c9a2895f130ea6f3b964e8f49cefdb4e2d248306f19396361d877f8b9ad60a94a5ec28325a1b9baa2ae59e7a9f6fe1731caec130ab4",
"chainId": "0x507",
"standardV": "0x1",
"v": "0x1",
"r": "0x1",
"s": "0x1",
"accessList": [],
"type": "0x2"
},
"id": 1
}
```
Note that the `v-r-s` values are set to `0x1`, and the gas price-related fields are set to `0x0`. In addition, the `nonce` field corresponds to a global nonce of the [Ethereum XCM Pallet](https://github.com/moonbeam-foundation/moonbeam/tree/master/pallets/ethereum-xcm){target=\_blank}, and not the transaction count of the dispatcher account.
!!! note
You might be able to find some transaction hash collisions in the Moonbase Alpha TestNet, as early versions of remote EVM calls through XCM did not use a global nonce of the [Ethereum XCM Pallet](https://github.com/moonbeam-foundation/moonbeam/tree/master/pallets/ethereum-xcm){target=\_blank}.
--- END CONTENT ---
Doc-Content: https://docs.moonbeam.network/builders/interoperability/xcm/xc20/send-xc20s/xtokens-precompile/
--- BEGIN CONTENT ---
---
title: Send XC-20s to Other Chains
description: Learn how to send assets cross-chain via Cross-Consensus Messaging (XCM) using the X-Tokens Precompile with familiar Ethereum libraries like Ethers and Web3.
categories: Precompiles, XC-20, Ethereum Toolkit
---
# Using the X-Tokens Precompile To Send XC-20s
## Introduction {: #introduction }
Building an XCM message for fungible asset transfers is not an easy task. Consequently, there are wrapper functions and pallets that developers can leverage to use XCM features on Polkadot and Kusama. One example of such wrappers is the [Polkadot XCM](/builders/interoperability/xcm/xc20/send-xc20s/xcm-pallet/){target=\_blank} Pallet, which provides different methods to transfer fungible assets via XCM.
The [Polkadot XCM Pallet](/builders/interoperability/xcm/xc20/send-xc20s/xcm-pallet/){target=\_blank} is coded in Rust and is normally not accessible from the Ethereum API side of Moonbeam. However, the [XCM Precompile](/builders/interoperability/xcm/xc20/send-xc20s/eth-api/){target=\_blank} and the X-Tokens Precompile allow you to interact directly with the Polkadot XCM pallet to send XC-20s from a Solidity interface.
This guide will show you how to leverage the X-Tokens Precompile to send [XC-20s](/builders/interoperability/xcm/xc20/overview/){target=\_blank} from a Moonbeam-based network to other chains in the ecosystem (relay chain/parachains) using Ethereum libraries like Ethers and Web3.
**Developers must understand that sending incorrect XCM messages can result in the loss of funds.** Consequently, it is essential to test XCM features on a TestNet before moving to a production environment.
## X-Tokens Precompile Contract Address {: #contract-address }
The X-Tokens Precompile is located at the following addresses:
=== "Moonbeam"
```text
{{networks.moonbeam.precompiles.xtokens}}
```
=== "Moonriver"
```text
{{networks.moonriver.precompiles.xtokens}}
```
=== "Moonbase Alpha"
```text
{{networks.moonbase.precompiles.xtokens}}
```
!!! note
There can be some unintended consequences when using the precompiled contracts on Moonbeam. Please refer to the [Security Considerations](/learn/core-concepts/security/){target=\_blank} page for more information.
## The X-Tokens Solidity Interface {: #xtokens-solidity-interface }
[Xtokens.sol](https://github.com/moonbeam-foundation/moonbeam/blob/master/precompiles/xtokens/Xtokens.sol){target=\_blank} is an interface through which developers can interact with the X-Tokens Pallet using the Ethereum API.
??? code "Xtokens.sol"
```solidity
// SPDX-License-Identifier: GPL-3.0-only
pragma solidity >=0.8.3;
/// @dev The Xtokens contract's address.
address constant XTOKENS_ADDRESS = 0x0000000000000000000000000000000000000804;
/// @dev The Xtokens contract's instance.
Xtokens constant XTOKENS_CONTRACT = Xtokens(XTOKENS_ADDRESS);
/// @author The Moonbeam Team
/// @title Xtokens Interface
/// @dev The interface through which solidity contracts will interact with xtokens pallet
/// @custom:address 0x0000000000000000000000000000000000000804
interface Xtokens {
// A multilocation is defined by its number of parents and the encoded junctions (interior)
struct Multilocation {
uint8 parents;
bytes[] interior;
}
// A MultiAsset is defined by a multilocation and an amount
struct MultiAsset {
Multilocation location;
uint256 amount;
}
// A Currency is defined by address and the amount to be transferred
struct Currency {
address currencyAddress;
uint256 amount;
}
/// Transfer a token through XCM based on its currencyId
///
/// @dev The token transfer burns/transfers the corresponding amount before sending
/// @param currencyAddress The ERC20 address of the currency we want to transfer
/// @param amount The amount of tokens we want to transfer
/// @param destination The Multilocation to which we want to send the tokens
/// @param weight The weight we want to buy in the destination chain
/// (uint64::MAX means Unlimited weight)
/// @custom:selector b9f813ff
function transfer(
address currencyAddress,
uint256 amount,
Multilocation memory destination,
uint64 weight
) external;
/// Transfer a token through XCM based on its currencyId specifying fee
///
/// @dev The token transfer burns/transfers the corresponding amount before sending
/// @param currencyAddress The ERC20 address of the currency we want to transfer
/// @param amount The amount of tokens we want to transfer
/// @param destination The Multilocation to which we want to send the tokens
/// @param weight The weight we want to buy in the destination chain
/// (uint64::MAX means Unlimited weight)
/// @custom:selector 3e506ef0
function transferWithFee(
address currencyAddress,
uint256 amount,
uint256 fee,
Multilocation memory destination,
uint64 weight
) external;
/// Transfer a token through XCM based on its MultiLocation
///
/// @dev The token transfer burns/transfers the corresponding amount before sending
/// @param asset The asset we want to transfer, defined by its multilocation.
/// Currently only Concrete Fungible assets
/// @param amount The amount of tokens we want to transfer
/// @param destination The Multilocation to which we want to send the tokens
/// @param weight The weight we want to buy in the destination chain
/// (uint64::MAX means Unlimited weight)
/// @custom:selector b4f76f96
function transferMultiasset(
Multilocation memory asset,
uint256 amount,
Multilocation memory destination,
uint64 weight
) external;
/// Transfer a token through XCM based on its MultiLocation specifying fee
///
/// @dev The token transfer burns/transfers the corresponding amount before sending
/// @param asset The asset we want to transfer, defined by its multilocation.
/// Currently only Concrete Fungible assets
/// @param amount The amount of tokens we want to transfer
/// @param destination The Multilocation to which we want to send the tokens
/// @param weight The weight we want to buy in the destination chain
/// (uint64::MAX means Unlimited weight)
/// @custom:selector 150c016a
function transferMultiassetWithFee(
Multilocation memory asset,
uint256 amount,
uint256 fee,
Multilocation memory destination,
uint64 weight
) external;
/// Transfer several tokens at once through XCM based on its address specifying fee
///
/// @dev The token transfer burns/transfers the corresponding amount before sending
/// @param currencies The currencies we want to transfer, defined by their address and amount.
/// @param feeItem Which of the currencies to be used as fee
/// @param destination The Multilocation to which we want to send the tokens
/// @param weight The weight we want to buy in the destination chain
/// (uint64::MAX means Unlimited weight)
/// @custom:selector ab946323
function transferMultiCurrencies(
Currency[] memory currencies,
uint32 feeItem,
Multilocation memory destination,
uint64 weight
) external;
/// Transfer several tokens at once through XCM based on its location specifying fee
///
/// @dev The token transfer burns/transfers the corresponding amount before sending
/// @param assets The assets we want to transfer, defined by their location and amount.
/// @param feeItem Which of the currencies to be used as fee
/// @param destination The Multilocation to which we want to send the tokens
/// @param weight The weight we want to buy in the destination chain
/// (uint64::MAX means Unlimited weight)
/// @custom:selector 797b45fd
function transferMultiAssets(
MultiAsset[] memory assets,
uint32 feeItem,
Multilocation memory destination,
uint64 weight
) external;
}
```
The interface includes the following functions:
???+ function "**transfer**(*address* currencyAddress, *uint256* amount, *Multilocation* *memory* destination, *uint64* weight) — transfer a currency, given the contract address of the currency"
=== "Parameters"
- `currencyAddress` - the address of the asset to transfer
- For [External XC-20s](/builders/interoperability/xcm/xc20/overview/#external-xc20s){target=\_blank}, provide the [XC-20 precompile address](/builders/interoperability/xcm/xc20/overview/#current-xc20-assets){target=\_blank}
- For native tokens (i.e., GLMR, MOVR, and DEV), provide the [ERC-20 precompile](/builders/ethereum/precompiles/ux/erc20/#the-erc20-interface){target=\_blank} address, which is `{{networks.moonbeam.precompiles.erc20 }}`
- For [Local XC-20s](/builders/interoperability/xcm/xc20/overview/#local-xc20s){target=\_blank}, provide the token's address
- `amount` - the number of tokens that are going to be sent via XCM
- `destination` - the multilocation of the destination address for the tokens being sent via XCM. It supports different address formats, such as 20- or 32-byte addresses (Ethereum or Substrate). The multilocation must be formatted in a particular way, which is described in the [Building the Precompile Multilocation](#building-the-precompile-multilocation) section
- `weight` - the weight to be purchased to pay for XCM execution on the destination chain, which is charged from the transferred asset
??? function "**transferWithFee**(*address* currencyAddress, *uint256* amount, *uint256* fee, *Multilocation* *memory* destination, *uint64* weight) — transfer a currency, defined as either the native token (self-reserved) or the asset ID, and specify the fee separately from the amount"
=== "Parameters"
- `currencyAddress` - the address of the asset to transfer
- For [External XC-20s](/builders/interoperability/xcm/xc20/overview/#external-xc20s){target=\_blank}, provide the [XC-20 precompile address](/builders/interoperability/xcm/xc20/overview/#current-xc20-assets){target=\_blank}
- For native tokens (i.e., GLMR, MOVR, and DEV), provide the [ERC-20 precompile](/builders/ethereum/precompiles/ux/erc20/#the-erc20-interface){target=\_blank} address, which is `{{networks.moonbeam.precompiles.erc20 }}`
- For [Local XC-20s](/builders/interoperability/xcm/xc20/overview/#local-xc20s){target=\_blank}, provide the token's address
- `amount` - the number of tokens that are going to be sent via XCM
- `fee` — the amount to be spent to pay for the XCM execution in the target (destination) chain. If this value is not high enough to cover execution costs, the assets will be trapped in the destination chain
- `destination` - the multilocation of the destination address for the tokens being sent via XCM. It supports different address formats, such as 20- or 32-byte addresses (Ethereum or Substrate). The multilocation must be formatted in a particular way, which is described in the [Building the Precompile Multilocation](#building-the-precompile-multilocation) section
- `weight` - the weight to be purchased to pay for XCM execution on the destination chain, which is charged from the transferred asset
??? function "**transferMultiasset**(*Multilocation* *memory* asset, *uint256* amount, *Multilocation* *memory* destination, *uint64* weight) — transfer a fungible asset, defined by its multilocation"
=== "Parameters"
- `asset` - the multilocation of the asset to transfer. The multilocation must be formatted in a particular way, which is described in the [Building the Precompile Multilocation](#building-the-precompile-multilocation) section
- `amount` - the number of tokens that are going to be sent via XCM
- `destination` - the multilocation of the destination address for the tokens being sent via XCM. It supports different address formats, such as 20- or 32-byte addresses (Ethereum or Substrate). The multilocation must be formatted in a particular way, which is described in the [Building the Precompile Multilocation](#building-the-precompile-multilocation) section
- `weight` - the weight to be purchased to pay for XCM execution on the destination chain, which is charged from the transferred asset
??? function "**transferMultiassetWithFee**(*Multilocation* *memory* asset, *uint256* amount, *uint256* fee, *Multilocation* *memory* destination, *uint64* weight) — transfer a fungible asset, defined by its multilocation, and pay the fee with a different asset, also defined by its multilocation"
=== "Parameters"
- `asset` - the multilocation of the asset to transfer. The multilocation must be formatted in a particular way, which is described in the [Building the Precompile Multilocation](#building-the-precompile-multilocation) section
- `amount` - the number of tokens that are going to be sent via XCM
- `fee` — the amount to be spent to pay for the XCM execution in the target (destination) chain. If this value is not high enough to cover execution costs, the assets will be trapped in the destination chain
- `destination` - the multilocation of the destination address for the tokens being sent via XCM. It supports different address formats, such as 20- or 32-byte addresses (Ethereum or Substrate). The multilocation must be formatted in a particular way, which is described in the [Building the Precompile Multilocation](#building-the-precompile-multilocation) section
- `weight` - the weight to be purchased to pay for XCM execution on the destination chain, which is charged from the transferred asset
??? function "**transferMulticurrencies**(*Currency[]* *memory* currencies, *uint32* feeItem, *Multilocation* *memory* destination, *uint64* weight) — transfer different currencies, specifying which is used as the fee. Each currency is defined as either the native token (self-reserved) or the asset ID"
=== "Parameters"
- `currencies` - an array of the currencies to send, which are identified by their currency address, and the amount to send
- `feeItem` — an index to define the asset position of an array of assets being sent, used to pay for the XCM execution in the target chain. For example, if only one asset is being sent, the `feeItem` would be `0`
- `destination` - the multilocation of the destination address for the tokens being sent via XCM. It supports different address formats, such as 20- or 32-byte addresses (Ethereum or Substrate). The multilocation must be formatted in a particular way, which is described in the [Building the Precompile Multilocation](#building-the-precompile-multilocation) section
- `weight` - the weight to be purchased to pay for XCM execution on the destination chain, which is charged from the transferred asset
??? function "**transferMultiassets**(*MultiAsset[]* *memory* assets, *uint32* feeItem, *Multilocation* *memory* destination, *uint64* weight) — transfer several fungible assets, defined by their multilocation, and pay the fee with one of the assets, also defined by its multilocation"
=== "Parameters"
- `assets` - an array of the multilocations of each asset to transfer. The multilocation must be formatted in a particular way, which is described in the [Building the Precompile Multilocation](#building-the-precompile-multilocation) section
- `feeItem` — an index to define the asset position of an array of assets being sent, used to pay for the XCM execution in the target chain. For example, if only one asset is being sent, the `feeItem` would be `0`
- `destination` - the multilocation of the destination address for the tokens being sent via XCM. It supports different address formats, such as 20- or 32-byte addresses (Ethereum or Substrate). The multilocation must be formatted in a particular way, which is described in the [Building the Precompile Multilocation](#building-the-precompile-multilocation) section
- `weight` - the weight to be purchased to pay for XCM execution on the destination chain, which is charged from the transferred asset
## Building the Precompile Multilocation {: #building-the-precompile-multilocation }
[Multilocations](/builders/interoperability/xcm/core-concepts/multilocations/){target=\_blank} define a specific point in the entire relay chain/parachain ecosystem relative to a given origin. They are frequently used by the X-Tokens Precompile to define the location of assets and destination chains and accounts.
Multilocations need to be formatted in a specific way that precompiles can understand, which is different than the format seen when interacting with pallets. In the X-Tokens Precompile interface, the `Multilocation` structure is defined as follows:
```solidity
struct Multilocation {
uint8 parents;
bytes[] interior;
}
```
As with a standard [multilocation](/builders/interoperability/xcm/core-concepts/multilocations/){target=\_blank}, there are `parents` and `interior` elements. However, instead of defining the multilocation as an object, with Ethereum libraries, the struct is defined as an array, which contains a `uint8` for the `parents` as the first element and a bytes array for the `interior` as the second element.
The normal values you would see for the `parents` element are:
| Origin | Destination | Parents Value |
|:-----------:|:-----------:|:-------------:|
| Parachain A | Parachain A | 0 |
| Parachain A | Relay Chain | 1 |
| Parachain A | Parachain B | 1 |
For the `interior` element, the number of fields you need to drill down to in the target chain to reach the exact location of the target, such as the specific asset or account, represents the size of the bytes array:
| Array | Size | Interior Value |
|:------------:|:----:|:--------------:|
| [] | 0 | Here |
| [XYZ] | 1 | X1 |
| [XYZ, ABC] | 2 | X2 |
| [XYZ, ... N] | N | XN |
!!! note
Interior value `Here` is often used for the relay chain (either as a destination or to target the relay chain asset).
Each field required to reach the exact location of the target needs to be defined as a hex string. The first byte (2 hexadecimal characters) corresponds to the selector of the field. For example:
| Byte Value | Selector | Data Type |
|:----------:|:--------------:|-----------|
| 0x00 | Parachain | bytes4 |
| 0x01 | AccountId32 | bytes32 |
| 0x02 | AccountIndex64 | u64 |
| 0x03 | AccountKey20 | bytes20 |
| 0x04 | PalletInstance | byte |
| 0x05 | GeneralIndex | u128 |
| 0x06 | GeneralKey | bytes[] |
Next, depending on the selector and its data type, the following bytes correspond to the actual data being provided. Note that for `AccountId32`, `AccountIndex64`, and `AccountKey20`, the optional `network` field is appended at the end. For example:
| Selector | Data Value | Represents |
|:--------------:|:----------------------:|:----------------------------------:|
| Parachain | "0x00+000007E7" | Parachain ID 2023 |
| AccountId32 | "0x01+AccountId32+00" | AccountId32, Network(Option) Null |
| AccountId32 | "0x01+AccountId32+03" | AccountId32, Network Polkadot |
| AccountKey20 | "0x03+AccountKey20+00" | AccountKey20, Network(Option) Null |
| PalletInstance | "0x04+03" | Pallet Instance 3 |
!!! note
The `interior` data usually needs to be wrapped around quotes, or you might get an `invalid tuple value` error.
The following code snippet goes through some examples of multilocation structures, as they would need to be fed into the X-Tokens Precompile functions:
```js
// Multilocation targeting the relay chain or its asset from a parachain
[
1, // parents = 1
[], // interior = here
]
// Multilocation targeting Moonbase Alpha DEV token from another parachain
[
1, // parents = 1
[ // interior = X2 (the array has a length of 2)
'0x00000003E8', // Parachain selector + Parachain ID 1000 (Moonbase Alpha)
'0x0403', // Pallet Instance selector + Pallet Instance 3 (Balances Pallet)
],
]
// Multilocation targeting Alice's account on the relay chain from Moonbase Alpha
[
1, // parents = 1
[ // interior = X1 (the array has a length of 1)
// AccountKey32 selector + AccountId32 address in hex + Network(Option) Null
'0x01c4db7bcb733e117c0b34ac96354b10d47e84a006b9e7e66a229d174e8ff2a06300',
],
]
```
## Building an XCM Message {: #build-xcm-xtokens-precompile }
This guide covers the process of building an XCM message using the X-Tokens Precompile, more specifically, with the `transfer` and `transferMultiasset` functions. Nevertheless, these two cases can be extrapolated to the other functions of the precompile, especially once you become familiar with multilocations.
You'll be transferring xcUNIT tokens, which are the [XC-20](/builders/interoperability/xcm/xc20/overview/){target=\_blank} representation of the Alphanet relay chain token, UNIT. You can adapt this guide for any other XC-20.
### Checking Prerequisites {: #xtokens-check-prerequisites}
To follow along with the examples in this guide, you need to have the following:
- The ABI of the X-Tokens Precompile
??? code "X-Tokens Precompile ABI"
```js
export default [
{
inputs: [
{
internalType: 'address',
name: 'currencyAddress',
type: 'address',
},
{
internalType: 'uint256',
name: 'amount',
type: 'uint256',
},
{
components: [
{
internalType: 'uint8',
name: 'parents',
type: 'uint8',
},
{
internalType: 'bytes[]',
name: 'interior',
type: 'bytes[]',
},
],
internalType: 'struct Xtokens.Multilocation',
name: 'destination',
type: 'tuple',
},
{
internalType: 'uint64',
name: 'weight',
type: 'uint64',
},
],
name: 'transfer',
outputs: [],
stateMutability: 'nonpayable',
type: 'function',
},
{
inputs: [
{
components: [
{
components: [
{
internalType: 'uint8',
name: 'parents',
type: 'uint8',
},
{
internalType: 'bytes[]',
name: 'interior',
type: 'bytes[]',
},
],
internalType: 'struct Xtokens.Multilocation',
name: 'location',
type: 'tuple',
},
{
internalType: 'uint256',
name: 'amount',
type: 'uint256',
},
],
internalType: 'struct Xtokens.MultiAsset[]',
name: 'assets',
type: 'tuple[]',
},
{
internalType: 'uint32',
name: 'feeItem',
type: 'uint32',
},
{
components: [
{
internalType: 'uint8',
name: 'parents',
type: 'uint8',
},
{
internalType: 'bytes[]',
name: 'interior',
type: 'bytes[]',
},
],
internalType: 'struct Xtokens.Multilocation',
name: 'destination',
type: 'tuple',
},
{
internalType: 'uint64',
name: 'weight',
type: 'uint64',
},
],
name: 'transferMultiAssets',
outputs: [],
stateMutability: 'nonpayable',
type: 'function',
},
{
inputs: [
{
components: [
{
internalType: 'address',
name: 'currencyAddress',
type: 'address',
},
{
internalType: 'uint256',
name: 'amount',
type: 'uint256',
},
],
internalType: 'struct Xtokens.Currency[]',
name: 'currencies',
type: 'tuple[]',
},
{
internalType: 'uint32',
name: 'feeItem',
type: 'uint32',
},
{
components: [
{
internalType: 'uint8',
name: 'parents',
type: 'uint8',
},
{
internalType: 'bytes[]',
name: 'interior',
type: 'bytes[]',
},
],
internalType: 'struct Xtokens.Multilocation',
name: 'destination',
type: 'tuple',
},
{
internalType: 'uint64',
name: 'weight',
type: 'uint64',
},
],
name: 'transferMultiCurrencies',
outputs: [],
stateMutability: 'nonpayable',
type: 'function',
},
{
inputs: [
{
components: [
{
internalType: 'uint8',
name: 'parents',
type: 'uint8',
},
{
internalType: 'bytes[]',
name: 'interior',
type: 'bytes[]',
},
],
internalType: 'struct Xtokens.Multilocation',
name: 'asset',
type: 'tuple',
},
{
internalType: 'uint256',
name: 'amount',
type: 'uint256',
},
{
components: [
{
internalType: 'uint8',
name: 'parents',
type: 'uint8',
},
{
internalType: 'bytes[]',
name: 'interior',
type: 'bytes[]',
},
],
internalType: 'struct Xtokens.Multilocation',
name: 'destination',
type: 'tuple',
},
{
internalType: 'uint64',
name: 'weight',
type: 'uint64',
},
],
name: 'transferMultiasset',
outputs: [],
stateMutability: 'nonpayable',
type: 'function',
},
{
inputs: [
{
components: [
{
internalType: 'uint8',
name: 'parents',
type: 'uint8',
},
{
internalType: 'bytes[]',
name: 'interior',
type: 'bytes[]',
},
],
internalType: 'struct Xtokens.Multilocation',
name: 'asset',
type: 'tuple',
},
{
internalType: 'uint256',
name: 'amount',
type: 'uint256',
},
{
internalType: 'uint256',
name: 'fee',
type: 'uint256',
},
{
components: [
{
internalType: 'uint8',
name: 'parents',
type: 'uint8',
},
{
internalType: 'bytes[]',
name: 'interior',
type: 'bytes[]',
},
],
internalType: 'struct Xtokens.Multilocation',
name: 'destination',
type: 'tuple',
},
{
internalType: 'uint64',
name: 'weight',
type: 'uint64',
},
],
name: 'transferMultiassetWithFee',
outputs: [],
stateMutability: 'nonpayable',
type: 'function',
},
{
inputs: [
{
internalType: 'address',
name: 'currencyAddress',
type: 'address',
},
{
internalType: 'uint256',
name: 'amount',
type: 'uint256',
},
{
internalType: 'uint256',
name: 'fee',
type: 'uint256',
},
{
components: [
{
internalType: 'uint8',
name: 'parents',
type: 'uint8',
},
{
internalType: 'bytes[]',
name: 'interior',
type: 'bytes[]',
},
],
internalType: 'struct Xtokens.Multilocation',
name: 'destination',
type: 'tuple',
},
{
internalType: 'uint64',
name: 'weight',
type: 'uint64',
},
],
name: 'transferWithFee',
outputs: [],
stateMutability: 'nonpayable',
type: 'function',
},
];
```
- An account with funds.
You can get DEV tokens for testing on Moonbase Alpha once every 24 hours from the [Moonbase Alpha Faucet](https://faucet.moonbeam.network){target=\_blank}
- Some xcUNIT tokens. You can swap DEV tokens (Moonbase Alpha's native token) for xcUNITs on [Moonbeam-Swap](https://moonbeam-swap.netlify.app/#/swap){target=\_blank}, a demo Uniswap-V2 clone on Moonbase Alpha
!!! note
You can adapt this guide to transfer another [external XC-20 or a local XC-20](/builders/interoperability/xcm/xc20/overview/){target=\_blank}. For external XC-20s, you'll need the asset ID and the number of decimals the asset has. For local XC-20s, you'll need the contract address.
To check your xcUNIT balance, you can add the XC-20's [precompile address](/builders/interoperability/xcm/xc20/interact/#calculate-xc20-address){target=\_blank} to MetaMask with the following address:
```text
0xFfFFfFff1FcaCBd218EDc0EbA20Fc2308C778080
```
!!! note
To test out the examples on Moonbeam or Moonriver, you can replace the RPC URL with your own endpoint and API key, which you can get from one of the supported [Endpoint Providers](/builders/get-started/endpoints/){target=\_blank}.
### Determining Weight Needed for XCM Execution {: #determining-weight }
To determine the weight needed for XCM execution on the destination chain, you'll need to know which XCM instructions are executed on the destination chain. You can find an overview of the XCM instructions used in the [XCM Instructions for Transfers via X-Tokens](/builders/interoperability/xcm/xc20/send-xc20s/overview/#xcm-instructions-for-asset-transfers){target=\_blank} guide.
!!! note
Some weights include database reads and writes; for example, the `WithdrawAsset` and `DepositAsset` instructions include both one database read and one write. To get the total weight, you'll need to add the weight of any required database reads or writes to the base weight of the given instruction.
For Westend-based relay chains, like Alphanet, you can get the weight cost for read and write database operations for [Rocks DB](https://github.com/paritytech/polkadot-sdk/blob/polkadot-{{ networks.alphanet.spec_version }}/polkadot/runtime/westend/constants/src/weights/rocksdb_weights.rs#L27-L31){target=\_blank} (which is the default database) in the [polkadot-sdk](https://github.com/paritytech/polkadot-sdk){target=\_blank} repository on GitHub.
Since Alphanet is a Westend-based relay chain, you can refer to the instruction weights defined in the [Westend runtime code](https://github.com/paritytech/polkadot-sdk/tree/polkadot-{{ networks.alphanet.spec_version }}/polkadot/runtime/westend){target=\_blank}, which are broken up into two types of instructions: [fungible](https://github.com/paritytech/polkadot-sdk/blob/polkadot-{{ networks.alphanet.spec_version }}/polkadot/runtime/westend/src/weights/xcm/pallet_xcm_benchmarks_fungible.rs){target=\_blank} and [generic](https://github.com/paritytech/polkadot-sdk/blob/polkadot-{{ networks.alphanet.spec_version }}/polkadot/runtime/westend/src/weights/xcm/pallet_xcm_benchmarks_generic.rs){target=\_blank}.
It's important to note that each chain defines its own weight requirements. To determine the weight required for each XCM instruction on a given chain, please refer to the chain's documentation or reach out to a member of their team. To learn how to find the weights required by Moonbeam, Polkadot, or Kusama, you can refer to our documentation on [Weights and Fees](/builders/interoperability/xcm/core-concepts/weights-fees/){target=\_blank}.
### X-Tokens Precompile Transfer Function {: #precompile-transfer }
To use the `transfer` function of the X-Tokens Precompile, you'll take these general steps:
1. Create a provider using a Moonbase Alpha RPC endpoint
2. Create a signer to send the transaction. This example uses a private key to create the signer and is for demo purposes only. **Never store your private key in a JavaScript file**
3. Create a contract instance of the X-Tokens Precompile using the address and ABI of the precompile
4. Assemble the arguments for the `transfer` function:
- `currencyAddress` - the address for xcUNIT: `0xFfFFfFff1FcaCBd218EDc0EbA20Fc2308C778080`
- `amount` - 1 xcUNIT. Since xcUNIT has 12 decimals, you can use: `1000000000000`
- `destination` - the multilocation of the destination, which targets Alice's account on the relay chain: `'0x01c4db7bcb733e117c0b34ac96354b10d47e84a006b9e7e66a229d174e8ff2a06300'`
- `weight` - the [weight](#determining-weight) to purchase for the XCM execution on the destination chain: `{{ networks.alphanet.xcm_message.transfer.weight.display }}`
5. Create the `transfer` function, passing in the arguments
6. Sign and send the transaction
=== "Ethers.js"
```js
import { ethers } from 'ethers'; // Import Ethers library
import abi from './xtokensABI.js'; // Import the X-Tokens ABI
const privateKey = 'INSERT_PRIVATE_KEY';
// Create Ethers provider and signer
const provider = new ethers.JsonRpcProvider(
'https://rpc.api.moonbase.moonbeam.network'
);
const signer = new ethers.Wallet(privateKey, provider);
// Create X-Tokens contract instance
const xTokens = new ethers.Contract(
'0x0000000000000000000000000000000000000804',
abi,
signer
);
// Arguments for the transfer function
const currencyAddress = '0xFfFFfFff1FcaCBd218EDc0EbA20Fc2308C778080'; // xcUNIT address
const amount = 1000000000000;
const destination = [
// Target the relay chain from Moonbase Alpha
1,
// Target Alice's 32-byte relay chain account
['0x01c4db7bcb733e117c0b34ac96354b10d47e84a006b9e7e66a229d174e8ff2a06300'],
];
const weight = 305986000;
// Sends 1 xcUNIT to the relay chain using the transfer function
async function transferToAlice() {
// Creates, signs, and sends the transfer transaction
const transaction = await xTokens.transfer(
currencyAddress,
amount,
destination,
weight
);
// Waits for the transaction to be included in a block
await transaction.wait();
console.log(transaction);
}
transferToAlice();
```
=== "Web3.js"
```js
import Web3 from 'web3'; // Import Web3 library
import abi from './xtokensABI.js'; // Import the X-Tokens ABI
const privateKey = 'INSERT_PRIVATE_KEY';
// Create Web3 provider
const web3 = new Web3('https://rpc.api.moonbase.moonbeam.network'); // Change to network of choice
// Create contract instance
const xTokens = new web3.eth.Contract(
abi,
'0x0000000000000000000000000000000000000804',
{ from: web3.eth.accounts.privateKeyToAccount(privateKey).address } // 'from' is necessary for gas estimation
);
// Arguments for the transfer function
const currencyAddress = '0xFfFFfFff1FcaCBd218EDc0EbA20Fc2308C778080'; // xcUNIT address
const amount = 1000000000000;
const destination = [
// Target the relay chain from Moonbase Alpha
1,
// Target Alice's 32-byte relay chain account
['0x01c4db7bcb733e117c0b34ac96354b10d47e84a006b9e7e66a229d174e8ff2a06300'],
];
const weight = 305986000;
// Sends 1 xcUNIT to the relay chain using the transfer function
async function transferToAlice() {
// Create transaction
const transferTx = xTokens.methods.transfer(
currencyAddress,
amount,
destination,
weight
);
// Sign transaction
const signedTx = await web3.eth.accounts.signTransaction(
{
to: '0x0000000000000000000000000000000000000804',
data: transferTx.encodeABI(),
gas: await transferTx.estimateGas(),
},
privateKey
);
// Send signed transaction
const sendTx = await web3.eth.sendSignedTransaction(signedTx.rawTransaction);
console.log(sendTx);
}
transferToAlice();
```
=== "Web3.py"
```py
from web3 import Web3
abi = "INSERT_XTOKENS_ABI" # Paste or import the x-tokens ABI
private_key = "INSERT_PRIVATE_KEY" # This is for demo purposes, never store your private key in plain text
address = "INSERT_ADDRESS" # The wallet address that corresponds to your private key
# Create Web3 provider
web3 = Web3(Web3.HTTPProvider("https://rpc.api.moonbase.moonbeam.network"))
# Create contract instance
x_tokens = web3.eth.contract(
address="0x0000000000000000000000000000000000000804", abi=abi
)
# Arguments for the transfer function
currencyAddress = "0xFfFFfFff1FcaCBd218EDc0EbA20Fc2308C778080" # xcUNIT address
amount = 1000000000000
destination = [
# Target the relay chain from Moonbase Alpha
1,
# Target Alice's 32-byte relay chain account
["0x01c4db7bcb733e117c0b34ac96354b10d47e84a006b9e7e66a229d174e8ff2a06300"],
]
weight = 305986000
# Sends 1 xcUNIT to the relay chain using the transfer function
def transfer_to_alice():
# Create transaction
transferTx = x_tokens.functions.transfer(
currencyAddress, amount, destination, weight
).build_transaction(
{
"from": address,
"nonce": web3.eth.get_transaction_count(address),
}
)
# Sign transaction
signedTx = web3.eth.account.sign_transaction(transferTx, private_key)
# Send tx and wait for receipt
hash = web3.eth.send_raw_transaction(signedTx.rawTransaction)
receipt = web3.eth.wait_for_transaction_receipt(hash)
print(f"Tx successful with hash: { receipt.transactionHash.hex() }")
transfer_to_alice()
```
### X-Tokens Precompile Transfer Multiasset Function {: #precompile-transfer-multiasset}
To use the `transfer` function of the X-Tokens Precompile, you'll take these general steps:
1. Create a provider using a Moonbase Alpha RPC endpoint
2. Create a signer to send the transaction. This example uses a private key to create the signer and is for demo purposes only. **Never store your private key in a JavaScript file**
3. Create a contract instance of the X-Tokens Precompile using the address and ABI of the precompile
4. Assemble the arguments for the `transferMultiasset` function:
- `asset` - the multilocation for xcUNIT: `[1, []]`
- `amount` - 1 xcUNIT. Since xcUNIT has 12 decimals, you can use: `1000000000000`
- `destination` - the multilocation of the destination, which targets Alice's account on the relay chain: `'0x01c4db7bcb733e117c0b34ac96354b10d47e84a006b9e7e66a229d174e8ff2a06300'`
- `weight` - the [weight](#determining-weight) to purchase for the XCM execution on the destination chain: `{{ networks.alphanet.xcm_message.transfer.weight.numbers_only }}`
5. Create the `transferMultiasset` function, passing in the arguments
6. Sign and send the transaction
=== "Ethers.js"
```js
import { ethers } from 'ethers'; // Import Ethers library
import abi from './xtokensABI.js'; // Import the X-Tokens ABI
const privateKey = 'INSERT_PRIVATE_KEY';
// Create Ethers provider and signer
const provider = new ethers.JsonRpcProvider(
'https://rpc.api.moonbase.moonbeam.network'
);
const signer = new ethers.Wallet(privateKey, provider);
// Create X-Tokens contract instance
const xTokens = new ethers.Contract(
'0x0000000000000000000000000000000000000804',
abi,
signer
);
// Arguments for the transfer multiasset function
const asset = [1, []]; // Multilocation targeting the relay chain
const amount = 1000000000000;
const dest = [
// Target the relay chain from Moonbase Alpha
1,
// Target Alice's 32-byte relay chain account
['0x01c4db7bcb733e117c0b34ac96354b10d47e84a006b9e7e66a229d174e8ff2a06300'],
];
const weight = 305986000;
// Sends 1 xcUNIT to the relay chain using the transferMultiasset function
async function transferMultiassetToAlice() {
const transaction = await xTokens.transferMultiasset(
asset,
amount,
dest,
weight
);
await transaction.wait();
console.log(transaction);
}
transferMultiassetToAlice();
```
=== "Web3.js"
```js
import Web3 from 'web3'; // Import Web3 library
import abi from './xtokensABI.js'; // Import the X-Tokens ABI
const privateKey = 'INSERT_PRIVATE_KEY';
// Create Web3 provider
const web3 = new Web3('https://rpc.api.moonbase.moonbeam.network'); // Change to network of choice
// Create contract instance
const xTokens = new web3.eth.Contract(
abi,
'0x0000000000000000000000000000000000000804',
{ from: web3.eth.accounts.privateKeyToAccount(privateKey).address } // 'from' is necessary for gas estimation
);
// Arguments for the transfer multiasset function
const asset = [1, []]; // Multilocation targeting the relay chain
const amount = 1000000000000;
const dest = [
// Target the relay chain from Moonbase Alpha
1,
// Target Alice's 32-byte relay chain account
['0x01c4db7bcb733e117c0b34ac96354b10d47e84a006b9e7e66a229d174e8ff2a06300'],
];
const weight = 305986000;
// Sends 1 xcUNIT to the relay chain using the transferMultiasset function
async function transferMultiassetToAlice() {
// Create transaction
const transferTx = xTokens.methods.transferMultiasset(
asset,
amount,
dest,
weight
);
// Sign transaction
const signedTx = await web3.eth.accounts.signTransaction(
{
to: '0x0000000000000000000000000000000000000804',
data: transferTx.encodeABI(),
gas: await transferTx.estimateGas(),
},
privateKey
);
// Send signed transaction
const sendTx = await web3.eth.sendSignedTransaction(signedTx.rawTransaction);
console.log(sendTx);
}
transferMultiassetToAlice();
```
=== "Web3.py"
```py
from web3 import Web3
abi = "INSERT_XTOKENS_ABI" # Paste or import the x-tokens ABI
private_key = "INSERT_PRIVATE_KEY" # This is for demo purposes, never store your private key in plain text
address = "INSERT_ADDRESS" # The wallet address that corresponds to your private key
# Create Web3 provider
web3 = Web3(Web3.HTTPProvider("https://rpc.api.moonbase.moonbeam.network"))
# Create contract instance
x_tokens = web3.eth.contract(
address="0x0000000000000000000000000000000000000804", abi=abi
)
# Arguments for the transfer function
asset = [1, []] # Multilocation targeting the relay chain
amount = 1000000000000
dest = [
# Target the relay chain from Moonbase Alpha
1,
# Target Alice's 32-byte relay chain account
["0x01c4db7bcb733e117c0b34ac96354b10d47e84a006b9e7e66a229d174e8ff2a06300"],
]
weight = 305986000
# Sends 1 xcUNIT to the relay chain using the transferMultiasset function
def transfer_multiasset_to_alice():
# Create transaction
transferTx = x_tokens.functions.transferMultiasset(
asset, amount, dest, weight
).build_transaction(
{
"from": address,
"nonce": web3.eth.get_transaction_count(address),
}
)
# Sign transaction
signedTx = web3.eth.account.sign_transaction(transferTx, private_key)
# Send tx and wait for receipt
hash = web3.eth.send_raw_transaction(signedTx.rawTransaction)
receipt = web3.eth.wait_for_transaction_receipt(hash)
print(f"Tx successful with hash: { receipt.transactionHash.hex() }")
transfer_multiasset_to_alice()
```
--- END CONTENT ---
Doc-Content: https://docs.moonbeam.network/tutorials/interoperability/remote-batched-evm-calls/
--- BEGIN CONTENT ---
---
title: Remote Batch EVM Calls via XCM
description: In this guide, we'll use remote EVM execution via XCM coupled with the Batch Precompile to execute multiple contract calls in Moonbeam's EVM remotely via XCM.
template: main.html
categories: Tutorials, Ethereum Toolkit
---
# Remote Batch EVM Calls via XCM
_by Kevin Neilson_
## Introduction {: #introduction }
In this tutorial, we’ll be making a series of remote batch EVM calls from a relay chain (what Polkadot is to Moonbeam) using Polkadot's general message passing protocol called [XCM](/builders/interoperability/xcm/overview/){target=\_blank}. To do so, we'll be using a particular combination of XCM instructions that allow you to [call Moonbeam's EVM through an XCM message](/builders/interoperability/xcm/remote-execution/remote-evm-calls/){target=\_blank}. The unique twist to this tutorial is that rather than making a single remote EVM contract call, we'll be using Moonbeam's [Batch Precompile](/builders/ethereum/precompiles/ux/batch/){target=\_blank} to combine multiple EVM calls into a single transaction.
To get the most out of this tutorial, you may wish to first familiarize yourself with [Remote EVM Calls Through XCM](/builders/interoperability/xcm/remote-execution/remote-evm-calls/){target=\_blank} as well as Moonbeam's [Batch Precompile](/builders/ethereum/precompiles/ux/batch/){target=\_blank}.
**The content of this tutorial is for educational purposes only!**
For this example, you'll be working on top of Moonbase Alpha (Moonbeam TestNet), which has its own relay chain called [Moonbase relay](https://polkadot.js.org/apps/?rpc=wss://relay.api.moonbase.moonbeam.network#/accounts){target=\_blank} (akin to the Polkadot relay chain). The relay chain token is called UNIT, while Moonbase Alpha's is called DEV. Importantly, you **must understand that sending incorrect XCM messages can result in the loss of funds.** Consequently, it is essential to test XCM features on a TestNet before moving to a production environment.
The goal of this tutorial is to show you how the [Batch Precompile](/builders/ethereum/precompiles/ux/batch/){target=\_blank} can work in conjunction with [Polkadot's XCM](/builders/interoperability/xcm/overview/){target=\_blank} to allow you to trigger batch remote EVM calls on Moonbeam. To avoid adding complexity to this tutorial, the actual batch EVM calls we'll be making will be quite simple. We'll be initiating multiple mints of [planet ERC-20 test tokens on Moonbase Alpha](https://moonbase-minterc20.netlify.app){target=\_blank}. Although we've chosen simple contract calls for demonstration purposes, there are lots more real-life defi examples that you may wish to emulate, such as token approvals and swaps, claiming rewards from multiple pools, or swapping and depositing into LP pools.
Throughout this tutorial, we will refer to the account executing the batch EVM calls via XCM as Alice. Let's preview the flow of this tutorial:
1. Alice has an account on the relay chain, and she wants to mint Mars (MARS) and Neptune (NEPT) tokens (ERC-20s on Moonbase Alpha) using [Moonbase Minter](https://moonbase-minterc20.netlify.app){target=\_blank}. Alice needs to send an XCM message to Moonbase Alpha from her relay chain account
2. The XCM message will be received by Moonbase Alpha and its instructions executed. The instructions state Alice's intention to buy some block execution time in Moonbase Alpha and execute a call to Moonbase's Batch Precompile, composed of two distinct mint calls. The batch EVM call is dispatched through a special account Alice controls on Moonbase Alpha via XCM messages. This account is known as the [Computed Origin account](/builders/interoperability/xcm/remote-execution/computed-origins/){target=\_blank}. Even though this is a keyless account (private key is unknown), the public address can be [calculated in a deterministic way](/builders/interoperability/xcm/remote-execution/computed-origins/#calculate-computed-origin){target=\_blank}
3. The successful XCM execution will result in the mint commands being executed by the EVM, and Alice will receive her MARS and NEPT tokens in her special account
4. The execution of the remote EVM call through XCM will result in some EVM logs that are picked up by explorers. There is an EVM transaction and receipt that anyone can query to verify
The "happy path" of a remote batch EVM call dispatched via XCM is as follows:

## Checking Prerequisites {: #checking-prerequisites }
Considering all the steps summarized in the [introduction](#introduction), the following prerequisites need to be accounted for:
- You need to have UNITs on the relay chain to pay for transaction fees when sending the XCM. If you have a Moonbase Alpha account funded with DEV tokens, you can swap some DEV for xcUNIT here on [Moonbeam Swap](https://moonbeam-swap.netlify.app/#/swap){target=\_blank}. Then withdraw the xcUNIT from Moonbase Alpha to [your account on the Moonbase relay chain](https://polkadot.js.org/apps/?rpc=wss://relay.api.moonbase.moonbeam.network#/accounts){target=\_blank} using [apps.moonbeam.network](https://apps.moonbeam.network/moonbase-alpha){target=\_blank}.
You can get DEV tokens for testing on Moonbase Alpha once every 24 hours from the [Moonbase Alpha Faucet](https://faucet.moonbeam.network){target=\_blank}
- Your [Computed Origin account](/builders/interoperability/xcm/remote-execution/computed-origins/){target=\_blank} must hold DEV tokens to fund the call to the Batch Precompile, and also pay for the XCM execution (although this could be paid in UNIT tokens as xcUNIT). We will calculate the Computed Origin account address in the next section
## Calculating your Computed Origin Account {: #calculating-your-computed-origin-account }
Copy the account of your existing or newly created account on the [Moonbase relay chain](https://polkadot.js.org/apps/?rpc=wss://relay.api.moonbase.moonbeam.network#/accounts){target=\_blank}. You're going to need it to calculate the corresponding Computed Origin account, which is a special type of account that’s keyless (the private key is unknown). Transactions from a Computed Origin account can be initiated only via valid XCM instructions from the corresponding account on the relay chain. In other words, you are the only one who can initiate transactions on your Computed Origin account, and if you lose access to your Moonbase relay account, you’ll also lose access to your Computed Origin account.
To generate the Computed Origin account, first clone the [xcm-tools](https://github.com/Moonsong-Labs/xcm-tools){target=\_blank} repo. Run `yarn` to install the necessary packages, and then run:
```sh
yarn calculate-multilocation-derivative-account \
--ws-provider wss://wss.api.moonbase.moonbeam.network \
--address INSERT_MOONBASE_RELAY_ACCOUNT \
--para-id INSERT_ORIGIN_PARACHAIN_ID_IF_APPLIES \
--parents INSERT_PARENTS_VALUE_IF_APPLIES
```
Let's review the parameters passed along with this command:
- The `--ws-provider` or `-w` flag corresponds to the endpoint we’re using to fetch this information
- The `--address` or `-a` flag corresponds to your Moonbase relay chain address
- The `--para-id` or `-p` flag corresponds to the parachain ID of the origin chain (if applicable). If you are sending the XCM from the relay chain, you don't need to provide this parameter
- The `-parents` flag corresponds to the parents value of the origin chain in relation to the destination chain. If you're deriving a multi-location derivative account on a parachain destination from a relay chain origin, this value would be `1`. If left out, the parents value defaults to `0`
For our case, we will send the remote EVM call via XCM from Alice's account, which is `5Fe4nNwxJ9ai9hVkUubiy4e6BVs1tzJGDLXAdhUKuePq9CLp`. A parachain ID is omitted from the command since we are sending the XCM instruction from the relay chain. A parents value of `1` indicates that the relay chain is a parent of the destination parachain. The command and response should resemble the following image:
Compiling... No files changed, compilation skipped Deployer: 0x0394c0EdFcCA370B20622721985B577850B0eb 75 Deployed to: 0d21b2653f61b5B5399A677D377D52D07C7668f67 Transaction hash: 0x80fff772b930f425ed3568f0b3d8844e5297691c78807c7b393c85910b7717 Starting contract verification... Waiting for etherscan to detect contract deployment...
Submitting verification for [src/MyToken.sol:MyToken]Ok("0x21b265361b5B5399A677D377D52D07C7668f67"). Submitted contract for verification: Response:'OK' GUID:'ebbliyrquc5itkavvhvmilanzu5rdqusikImgraanepjm8gpq' URL: https: //moonbase.moonscan.io/address/0x21b2653f61b55399a677d377d52d07c7668f67 Waiting for verification result... Contract successfully verified.
yarn calculate-multilocation-derivative-account \
--ws-provider wss://wss.api.moonbase.moonbeam.network \
--address 5Fe4nNwxJ9ai9hVkUubiy4e6BVs1tzJGDLXAdhUKuePq9CLp \
--parents 1
yarn run v1.22.10 warning ../../../package.json: No license field $ ts-node 'scripts/calculate-multilocation-derivative-account.ts' --ws-provider wss://wss.api.moonbase.moonbeam.network --address 5Fe4nNwxJ9ai9hVkUubiy4e6BVs1tzJGDLXAdhUKuePq9CLp --parents 1
Remote Origin calculated as ParentChain Parents 1 AccountId32: 5Fe4nNwxJ9ai9hVkUubiy4e6BVs1tzJGDLXAdhUKuePq9CLp 32 byte address is 0xf0615483cbe76f5b2aa80a8ce2b2e9a8206deb65b8a1323270e25802f600f95c 20 byte address is 0xf0615483cbe76f5b2aa80a8ce2b2e9a8206deb65 ✨ Done in 1.02s.
The values are all summarized in the following table:
| Name | Value |
|:-------------------------------------------:|:---------------------------------------------------------------------------------------------------------------------------------------------------------:|
| Origin Chain Encoded Address | `5Fe4nNwxJ9ai9hVkUubiy4e6BVs1tzJGDLXAdhUKuePq9CLp` |
| Origin Chain Decoded Address | `0x9e263df66ff98212347e9a6b51d56f7a982bc25bb1300cd20e5a68d726789043` |
| Computed Origin Account (32 bytes) | `0xf0615483cbe76f5b2aa80a8ce2b2e9a8206deb65b8a1323270e25802f600f95c` |
| Computed Origin Account (20 bytes) | `0xf0615483cbe76f5b2aa80a8ce2b2e9a8206deb65` |
The script will return 32-byte and 20-byte addresses. We’re interested in the Ethereum-style account, the 20-byte one, which is `0xf0615483cbe76f5b2aa80a8ce2b2e9a8206deb65`. Feel free to look up your Computed Origin account on [Moonscan](https://moonbase.moonscan.io){target=\_blank}. Next, you can fund this account with DEV tokens.
You can get DEV tokens for testing on Moonbase Alpha once every 24 hours from the [Moonbase Alpha Faucet](https://faucet.moonbeam.network){target=\_blank}.
## Preparing the Mint EVM Calldata {: #preparing-the-mint-evm-calldata }
First, we'll generate the necessary calldata for minting the MARS and NEPT tokens. We'll then reference the Batch Precompile to batch the calls into a single one.
The function being targeted here is the `mint` function of [Moonbase Minter](https://moonbase-minterc20.netlify.app){target=\_blank}. It takes no parameters, and the function calldata is the same for each planet. However, each planet has a different contract address.
The easiest way to get the calldata is through the [Moonbase Minter](https://moonbase-minterc20.netlify.app){target=\_blank} page. Once you land on the website, take the following steps:
1. Press **Connect MetaMask** and unlock your wallet
2. Click on any of the **Mint** buttons since they all have the same calldata
3. MetaMask should pop up, but **do not sign the transaction**. In MetaMask, click on the **hex** tab, and the encoded calldata should show up
4. Click on the **Copy raw transaction data** button. This will copy the encoded calldata to the clipboard, which should match: `0x2004ffd9`
!!! note
Other wallets also offer the same capabilities of checking the encoded calldata before signing the transaction.
## Preparing the Batch Calldata {: #preparing-the-batched-calldata }
Now that we have the calldata for the mint actions, we can work with the Batch Precompile to combine multiple calls into a single one. The Batch Precompile offers several different methods of batching your transactions according to your tolerance for subcall failures. For this example, we'll use the `batchAll` function, which reverts all subcalls if a single subcall fails. For more information about how each method of the Batch Precompile works, be sure to check out the full [Batch Precompile tutorial](/builders/ethereum/precompiles/ux/batch/){target=\_blank}.
For demonstration purposes, we'll be using [Remix](http://remix.ethereum.org){target=\_blank} to visualize and construct our calldata. If needed, the [Batch Precompile page](/builders/ethereum/precompiles/ux/batch/#remix-set-up){target=\_blank} offers a step-by-step guide for getting started with the Batch Precompile in Remix.
To quickly get started, go ahead and copy [`Batch.sol`](https://raw.githubusercontent.com/moonbeam-foundation/moonbeam/master/precompiles/batch/Batch.sol){target=\_blank} and compile it. From the **Deploy** tab of Remix, specify your environment in Remix as **Injected Web3** and make sure your wallet is on the Moonbase Alpha network. As it is a precompile, we won't be deploying anything but rather will access the Batch Precompile at its respective address:
=== "Moonbeam"
```text
{{networks.moonbeam.precompiles.batch }}
```
=== "Moonriver"
```text
{{networks.moonriver.precompiles.batch }}
```
=== "Moonbase Alpha"
```text
{{networks.moonbase.precompiles.batch }}
```
After inputting the address and pressing **At Address**, take the following steps to prepare the batch calls:
1. Expand the **batchAll** or another desired method of the Batch Precompile
2. In the **To** field, place the addresses of the MARS and NEPT contracts enclosed in quotes and separated by a comma. The entire line should be wrapped in brackets as follows:
`["0x1FC56B105c4F0A1a8038c2b429932B122f6B631f","0xed13B028697febd70f34cf9a9E280a8f1E98FD29"]`
3. Provide an empty array (`[]`) in the value field. We don't want to send any tokens to the contracts, as they are not payable contracts
4. In the `callData` field, provide the following: `["0x2004ffd9","0x2004ffd9"]`. Note that you need to provide the calldata for each call, even if the calldata is identical, like it is with both `mint` calls
5. Optionally, you could specify a gas limit, but there is no need here, so simply provide an empty array (`[]`)
6. To validate that you have correctly configured the calls, you can press **Transact**, but don't confirm the transaction in your wallet. If you get an error, double-check that you have correctly formatted each parameter
7. MetaMask should pop up, but **do not sign the transaction**. In MetaMask, click on the **hex** tab, and the encoded calldata should show up
8. Click on the **Copy raw transaction data** button. This will copy the encoded calldata of the batch call to the clipboard
We've now finished preparing our EVM calldata for the batch call. Next, we'll need to prepare the XCM instructions that will execute our remote batch call.
## Generating the Moonbeam Encoded Calldata {: #generating-the-moonbeam-encoded-call-data }
Now that we have the batch EVM calldata that contains the two mint commands, we need to generate the bytes that the `Transact` XCM instruction from the XCM message will execute. Note that these bytes represent the action that will be executed in the remote chain. In this example, we want the XCM message execution to enter the EVM and issue the two mint commands, from which we got the encoded calldata.
To get the SCALE (encoding type) encoded calldata for the transaction parameters, we can leverage the following [Polkadot.js API](/builders/substrate/libraries/polkadot-js-api/){target=\_blank} script (note that it requires `@polkadot/api`).
```js
import { ApiPromise, WsProvider } from '@polkadot/api'; // Version 10.13.1
// 1. Input Data
const providerWsURL = 'wss://wss.api.moonbase.moonbeam.network';
const batchPrecompile = '0x0000000000000000000000000000000000000808';
const contractCall =
'0x96e292b8000000000000000000000000000000000000000000000000000000000000008000000000000000000000000000000000000000000000000000000000000000e0000000000000000000000000000000000000000000000000000000000000010000000000000000000000000000000000000000000000000000000000000001e000000000000000000000000000000000000000000000000000000000000000020000000000000000000000001fc56b105c4f0a1a8038c2b429932b122f6b631f000000000000000000000000ed13b028697febd70f34cf9a9e280a8f1e98fd29000000000000000000000000000000000000000000000000000000000000000000000000000000000000000000000000000000000000000000000000000000020000000000000000000000000000000000000000000000000000000000000040000000000000000000000000000000000000000000000000000000000000008000000000000000000000000000000000000000000000000000000000000000042004ffd90000000000000000000000000000000000000000000000000000000000000000000000000000000000000000000000000000000000000000000000042004ffd9000000000000000000000000000000000000000000000000000000000000000000000000000000000000000000000000000000000000000000000000';
const generateCallData = async () => {
// 2. Create Substrate API Provider
const substrateProvider = new WsProvider(providerWsURL);
const api = await ApiPromise.create({ provider: substrateProvider });
// 3. Estimate Gas for EVM Call
const gasLimit = 140000n;
// 4. Call Parameters
const callParams = {
V2: {
gasLimit: gasLimit + 10000n, // Estimated plus some extra gas
action: { Call: batchPrecompile }, // Address of the Batch Precompile
value: 0, // Not a payable contract
input: contractCall, // Batch of the 2 mint calls
},
};
// 5. Create the Extrinsic
const tx = api.tx.ethereumXcm.transact(callParams);
// 6. Get SCALE Encoded Calldata
const encodedCall = tx.method.toHex();
console.log(`Encoded Calldata: ${encodedCall}`);
api.disconnect();
};
generateCallData();
```
!!! note
You can also get the SCALE encoded calldata by manually building the extrinsic in [Polkadot.js Apps](https://polkadot.js.org/apps/?rpc=wss://wss.api.moonbase.moonbeam.network#/extrinsics){target=\_blank}.
Let's go through each of the main components of the snippet shown above:
1. Provide the input data for the request. This includes:
- Moonbase Alpha endpoint URL to create the providers
- Address of the Batch Precompile
- Encoded calldata for the batch call that contains both mint commands
2. Create the necessary providers. One is a [Polkadot.js API](/builders/substrate/libraries/polkadot-js-api/){target=\_blank} provider, through which we can call [Moonbeam pallets](/builders/substrate/interfaces/){target=\_blank} directly
3. Here, we are hardcoding the gas limit for simplicity and to avoid gas estimation issues as a result of the Batch Precompile
4. [Build the remote EVM call containing the batch call](/builders/interoperability/xcm/remote-execution/remote-evm-calls/#build-remote-evm-call-xcm){target=\_blank}
5. Create the Ethereum XCM pallet call to the `transact` method, providing the call parameters specified above
6. Get the SCALE calldata of the specific transaction parameter, which we need to provide to the `Transact` XCM instruction later on. Note that in this particular scenario, because we need only the calldata of the transaction parameters, we have to use `tx.method.toHex()`
Once you have the code set up, you can execute it with `node`, and you'll get the Moonbase Alpha remote EVM calldata:
yarn run v1.22.10 warning ../../../package.json: No license field $ ts-node 'scripts/calculate-multilocation-derivative-account.ts' --ws-provider wss://wss.api.moonbase.moonbeam.network --address 5Fe4nNwxJ9ai9hVkUubiy4e6BVs1tzJGDLXAdhUKuePq9CLp --parents 1
Remote Origin calculated as ParentChain Parents 1 AccountId32: 5Fe4nNwxJ9ai9hVkUubiy4e6BVs1tzJGDLXAdhUKuePq9CLp 32 byte address is 0xf0615483cbe76f5b2aa80a8ce2b2e9a8206deb65b8a1323270e25802f600f95c 20 byte address is 0xf0615483cbe76f5b2aa80a8ce2b2e9a8206deb65 ✨ Done in 1.02s.
node generate-encoded-calldata.js
Encoded Calldata: 0x260001f0490200000000000000000000000000000000000000000000000000000000000000000000000000000000000000000000000008080000000000000000000000000000000000000000000000000000000000000000110896e292b8000000000000000000000000000000000000000000000000000000000000008000000000000000000000000000000000000000000000000000000000000000e0000000000000000000000000000000000000000000000000000000000000010000000000000000000000000000000000000000000000000000000000000001e000000000000000000000000000000000000000000000000000000000000000020000000000000000000000001fc56b105c4f0a1a8038c2b429932b122f6b631f000000000000000000000000ed13b028697febd70f34cf9a9e280a8f1e98fd29000000000000000000000000000000000000000000000000000000000000000000000000000000000000000000000000000000000000000000000000000000020000000000000000000000000000000000000000000000000000000000000040000000000000000000000000000000000000000000000000000000000000008000000000000000000000000000000000000000000000000000000000000000042004ffd90000000000000000000000000000000000000000000000000000000000000000000000000000000000000000000000000000000000000000000042004ffd900000000000000000000000000000000000000000000000000000000000000000000000000000000000000000000000000000000000000000000000000000000000000000000000
The encoded calldata for this example is:
```text
0x260001f0490200000000000000000000000000000000000000000000000000000000000000000000000000000000000000000000000008080000000000000000000000000000000000000000000000000000000000000000110896e292b8000000000000000000000000000000000000000000000000000000000000008000000000000000000000000000000000000000000000000000000000000000e0000000000000000000000000000000000000000000000000000000000000010000000000000000000000000000000000000000000000000000000000000001e000000000000000000000000000000000000000000000000000000000000000020000000000000000000000001fc56b105c4f0a1a8038c2b429932b122f6b631f000000000000000000000000ed13b028697febd70f34cf9a9e280a8f1e98fd29000000000000000000000000000000000000000000000000000000000000000000000000000000000000000000000000000000000000000000000000000000020000000000000000000000000000000000000000000000000000000000000040000000000000000000000000000000000000000000000000000000000000008000000000000000000000000000000000000000000000000000000000000000042004ffd90000000000000000000000000000000000000000000000000000000000000000000000000000000000000000000000000000000000000000000000042004ffd900000000000000000000000000000000000000000000000000000000000000000000000000000000000000000000000000000000000000000000000000
```
And that is it! You have everything you need to start crafting the XCM message itself! It has been a long journey, but we are almost there.
## Building the XCM Message from the Relay Chain {: #building-the-xcm-message-relay-chain }
We are almost in the last part of this tutorial! In this section, we'll craft the XCM message using the [Polkadot.js API](/builders/substrate/libraries/polkadot-js-api/){target=\_blank}. We'll also break down the message instruction by instruction to understand what is happening each step of the way.
The XCM message we are about to build is composed of the following instructions:
- [`WithdrawAsset`](/builders/interoperability/xcm/core-concepts/instructions/#withdraw-asset){target=\_blank} — takes funds from the account dispatching the XCM in the destination chain and puts them in holding where they can be used for later actions
- [`BuyExecution`](/builders/interoperability/xcm/core-concepts/instructions/#buy-execution){target=\_blank} — buy a certain amount of block execution time
- [`Transact`](/builders/interoperability/xcm/core-concepts/instructions/#transact){target=\_blank} — use part of the block execution time bought with the previous instruction to execute some arbitrary bytes
- [`DepositAsset`](/builders/interoperability/xcm/core-concepts/instructions/#deposit-asset){target=\_blank} — takes assets from holding and deposits them to a given account
To build the XCM message, which will initiate the remote EVM call through XCM, and get its SCALE encoded calldata, you can use the following snippet:
```js
import { ApiPromise, WsProvider } from '@polkadot/api'; // Version 10.13.1
// 1. Input Data
const providerWsURL =
'wss://relay.api.moonbase.moonbeam.network';
const amountToWithdraw = BigInt(1 * 10 ** 16); // 0.01 DEV
const devMultiLocation = {
parents: 0,
interior: { X1: { PalletInstance: 3 } },
};
const weightTransact = 43500000000n; // 25000 * Gas limit of EVM call
const multiLocAccount = '0xf0615483cbe76f5b2aa80a8ce2b2e9a8206deb65'; // REPLACE with your Computed Origin account
const transactBytes =
'0x260001f0490200000000000000000000000000000000000000000000000000000000000000000000000000000000000000000000000008080000000000000000000000000000000000000000000000000000000000000000110896e292b8000000000000000000000000000000000000000000000000000000000000008000000000000000000000000000000000000000000000000000000000000000e0000000000000000000000000000000000000000000000000000000000000010000000000000000000000000000000000000000000000000000000000000001e000000000000000000000000000000000000000000000000000000000000000020000000000000000000000001fc56b105c4f0a1a8038c2b429932b122f6b631f000000000000000000000000ed13b028697febd70f34cf9a9e280a8f1e98fd29000000000000000000000000000000000000000000000000000000000000000000000000000000000000000000000000000000000000000000000000000000020000000000000000000000000000000000000000000000000000000000000040000000000000000000000000000000000000000000000000000000000000008000000000000000000000000000000000000000000000000000000000000000042004ffd90000000000000000000000000000000000000000000000000000000000000000000000000000000000000000000000000000000000000000000000042004ffd900000000000000000000000000000000000000000000000000000000000000000000000000000000000000000000000000000000000000000000000000';
// 2. XCM Destination (Moonbase Alpha Parachain ID 1000)
const dest = { V4: { parents: 0, interior: { X1: [{ Parachain: 1000 }] } } };
// 3. XCM Instruction 1
const instr1 = {
WithdrawAsset: [
{
id: { Concrete: devMultiLocation },
fun: { Fungible: amountToWithdraw },
},
],
};
// 4. XCM Instruction 2
const instr2 = {
BuyExecution: {
fees: {
id: { Concrete: devMultiLocation },
fun: { Fungible: amountToWithdraw },
},
weightLimit: { Unlimited: null },
},
};
// 5. XCM Instruction 3
const instr3 = {
Transact: {
originKind: 'SovereignAccount',
requireWeightAtMost: { refTime: weightTransact, proofSize: 200000n },
call: {
encoded: transactBytes,
},
},
};
// 6. XCM Instruction 4
const instr4 = {
DepositAsset: {
assets: { Wild: 'All' },
beneficiary: {
parents: 0,
interior: { X1: [{ AccountKey20: { key: multiLocAccount } }] },
},
},
};
// 7. Build XCM Message
const message = { V4: [instr1, instr2, instr3, instr4] };
const generateCallData = async () => {
// 8. Create Substrate API Provider
const substrateProvider = new WsProvider(providerWsURL);
const api = await ApiPromise.create({ provider: substrateProvider });
// 9. Create the Extrinsic
const tx = api.tx.xcmPallet.send(dest, message);
// 10. Get SCALE Encoded Calldata
const encodedCall = tx.toHex();
console.log(`Encoded Calldata: ${encodedCall}`);
api.disconnect();
};
generateCallData();
```
!!! note
You can also get the SCALE encoded calldata by manually building the extrinsic in [Polkadot.js Apps](https://polkadot.js.org/apps/?rpc=wss://relay.api.moonbase.moonbeam.network#/extrinsics){target=\_blank}.
Let's go through each of the main components of the snippet shown above:
1. Provide the input data for the call. This includes:
- [Moonbase relay chain](https://polkadot.js.org/apps/?rpc=wss://relay.api.moonbase.moonbeam.network#/accounts){target=\_blank} endpoint URL to create the provider
- Amount of tokens (in Wei) to withdraw from the Computed Origin account. For this example, `0.01` tokens are more than enough. To understand how to get this value, please refer to the [XCM fee page](/builders/interoperability/xcm/core-concepts/weights-fees/#moonbeam-reserve-assets){target=\_blank}
- The [multilocation of the DEV token](/builders/interoperability/xcm/xc-registration/assets/#register-moonbeam-native-assets){target=\_blank}, as seen by Moonbase Alpha
- The weight for the `transact` XCM instruction. This can be obtained by multiplying `25000` by the gas limit obtained before. It is recommended to add approximately 10% more of the estimated value. You can read more about this value on the [Remote EVM Calls through XCM](/builders/interoperability/xcm/remote-execution/remote-evm-calls/#build-xcm-remote-evm){target=\_blank} page
- The Computed Origin account, as it will be needed later for an XCM instruction
- The bytes for the `transact` XCM instruction that we calculated in the previous section
2. Define the destination multilocation for the XCM message. In this case, it is the Moonbase Alpha parachain
3. First XCM instruction, `WithdrawAsset`. You need to provide the asset multilocation and the amount you want to withdraw. Both variables were already described before
4. Second XCM instruction, `BuyExecution`. Here, we are paying for Moonbase Alpha block execution time in DEV tokens by providing its multilocation and the amount we took out with the previous instruction. Next, we are buying all the execution we can (`Unlimited` weight) with `0.01 DEV` tokens which should be around 20 billion weight units, plenty for our example
5. Third XCM instruction, `Transact`. The instruction will use a portion of the weight bought (defined as `requireWeightAtMost`) and execute the arbitrary bytes that are provided (`transactBytes`)
6. Fourth XCM instruction, `DepositAsset`. Whatever is left in holding after the actions executed before (in this case, it should be only DEV tokens) is deposited into the Computed Origin account, set as the `beneficiary`.
7. Build the XCM message by concatenating the instructions inside a `V3` array
8. Create the [Polkadot.js API](/builders/substrate/libraries/polkadot-js-api/){target=\_blank} provider
9. Craft the `xcmPallet.send` extrinsic with the destination and XCM message. This method will append the [`DescendOrigin`](/builders/interoperability/xcm/core-concepts/instructions/#descend-origin){target=\_blank} XCM instruction to our XCM message, and it is the instruction that will provide the necessary information to calculate the Computed Origin account
10. Get the SCALE encoded calldata. Note that in this particular scenario, because we need the full SCALE encoded calldata, we have to use `tx.toHex()`. This is because we will submit this transaction using the calldata
Once you have the code set up, you can execute it with `node`, and you'll get the relay chain XCM calldata:
node build-xcm-message.js
Encoded Calldata: 0xb50a04630004000100a10f041000040000000f0000c16ff28623130000000f0000c16ff28623000601070053cd200a02350c007d09260001f0490200000000000000000000000000000000000000000000000000000000000000000000000000000000000000000000000008080000000000000000000000000000000000000000000000000000000000000000110896e292b8000000000000000000000000000000000000000000000000000000000000008000000000000000000000000000000000000000000000000000000000000000e0000000000000000000000000000000000000000000000000000000000000010000000000000000000000000000000000000000000000000000000000000001e000000000000000000000000000000000000000000000000000000000000000020000000000000000000000001fc56b105c4f0a1a8038c2b429932b122f6b631f000000000000000000000000ed13b028697febd70f34cf9a9e280a8f1e98fd29000000000000000000000000000000000000000000000000000000000000000000000000000000000000000000000000000000000000000000000000000000020000000000000000000000000000000000000000000000000000000000000040000000000000000000000000000000000000000000000000000000000000008000000000000000000000000000000000000000000000000000000000000000042004ffd90000000000000000000000000000000000000000000000000000000000000000000000000000000000000000000000000000000000000000000000042004ffd9000000000000000000000000000000000000000000000000000000000000000000000000000000000000000000000000000000000000000000000000000d010000010300f0615483cbe76f5b2aa80a8ce2b2e9a8206deb65
The encoded calldata for this example is:
```text
0xb50a04630004000100a10f041000040000000f0000c16ff28623130000000f0000c16ff28623000601070053cd200a02350c007d09260001f0490200000000000000000000000000000000000000000000000000000000000000000000000000000000000000000000000008080000000000000000000000000000000000000000000000000000000000000000110896e292b8000000000000000000000000000000000000000000000000000000000000008000000000000000000000000000000000000000000000000000000000000000e0000000000000000000000000000000000000000000000000000000000000010000000000000000000000000000000000000000000000000000000000000001e000000000000000000000000000000000000000000000000000000000000000020000000000000000000000001fc56b105c4f0a1a8038c2b429932b122f6b631f000000000000000000000000ed13b028697febd70f34cf9a9e280a8f1e98fd29000000000000000000000000000000000000000000000000000000000000000000000000000000000000000000000000000000000000000000000000000000020000000000000000000000000000000000000000000000000000000000000040000000000000000000000000000000000000000000000000000000000000008000000000000000000000000000000000000000000000000000000000000000042004ffd90000000000000000000000000000000000000000000000000000000000000000000000000000000000000000000000000000000000000000000000042004ffd9000000000000000000000000000000000000000000000000000000000000000000000000000000000000000000000000000000000000000000000000000d010000010300f0615483cbe76f5b2aa80a8ce2b2e9a8206deb65
```
!!! note
The encoded calldata for you should be slightly different, as you should have replaced the Computed Origin account in the script with the one you created in the [Calculating Your Computed Origin Account](#calculating-your-computed-origin-account) section.
Now that we have the SCALE encoded calldata, the last step is to submit the transaction, which will send our XCM message to Moonbase Alpha, and do the remote batch EVM call!
## Sending the XCM Message from the Relay Chain {: #send-xcm-message-relay-chain }
Congratulations on making it here, you're almost done! Let's recap what we've done so far:
- We've created a relay chain account that is funded with UNIT tokens (relay chain native tokens)
- We determined its Computed Origin account on Moonbase Alpha and funded this new address with DEV tokens
- We obtained the Batch Precompile calldata which combines two mint calls for MARS and NEPT ERC-20 tokens
- We built the SCALE encoded calldata in Moonbase Alpha to access its EVM via XCM
- We crafted our transaction to send an XCM message to Moonbase Alpha, in which we will ask it to execute the SCALE encoded calldata that was previously built. This, in turn, will execute the call to the Batch Precompile which includes the mint calls for both the MARS and NEPT ERC-20 tokens!
To send the XCM message that we built in the previous section, you can use the following code snippet:
```js
import { ApiPromise, WsProvider, Keyring } from '@polkadot/api'; // Version 10.13.1
import { cryptoWaitReady } from '@polkadot/util-crypto';
// 1. Input Data
const providerWsURL =
'wss://relay.api.moonbase.moonbeam.network';
const MNEMONIC = 'INSERT_MNEMONIC'; // Not safe, only for testing
const txCall =
'0xb50a04630004000100a10f041000040000000f0000c16ff28623130000000f0000c16ff28623000601070053cd200a02350c007d09260001f0490200000000000000000000000000000000000000000000000000000000000000000000000000000000000000000000000008080000000000000000000000000000000000000000000000000000000000000000110896e292b8000000000000000000000000000000000000000000000000000000000000008000000000000000000000000000000000000000000000000000000000000000e0000000000000000000000000000000000000000000000000000000000000010000000000000000000000000000000000000000000000000000000000000001e000000000000000000000000000000000000000000000000000000000000000020000000000000000000000001fc56b105c4f0a1a8038c2b429932b122f6b631f000000000000000000000000ed13b028697febd70f34cf9a9e280a8f1e98fd29000000000000000000000000000000000000000000000000000000000000000000000000000000000000000000000000000000000000000000000000000000020000000000000000000000000000000000000000000000000000000000000040000000000000000000000000000000000000000000000000000000000000008000000000000000000000000000000000000000000000000000000000000000042004ffd90000000000000000000000000000000000000000000000000000000000000000000000000000000000000000000000000000000000000000000000042004ffd9000000000000000000000000000000000000000000000000000000000000000000000000000000000000000000000000000000000000000000000000000d010000010300f0615483cbe76f5b2aa80a8ce2b2e9a8206deb65';
const sendXCM = async () => {
// 2. Create Keyring Instance
await cryptoWaitReady();
const keyring = new Keyring({ type: 'sr25519' });
const alice = keyring.addFromUri(MNEMONIC);
// 3. Create Substrate API Provider
const substrateProvider = new WsProvider(providerWsURL);
const api = await ApiPromise.create({ provider: substrateProvider });
// 4. Create the Extrinsic
const tx = await api.tx(txCall).signAndSend(alice, (result) => {
// 5. Check Transaction Status
console.log(`Transaction sent`);
if (result.status.isInBlock) {
console.log(
`Transaction included in blockHash ${result.status.asInBlock}`
);
}
});
api.disconnect();
};
sendXCM();
```
Once you have the code set up, you can execute it with `node`, and the XCM message will be sent to initiate your call to the Batch Precompile for the mints of MARS and NEPT ERC-20 tokens in Moonbase Alpha. Don't worry if you see an `Abnormal Closure` error. You can verify that your remote batch call was successful by looking up your Computed Origin account on [Moonbase Moonscan](https://moonbase.moonscan.io){target=\_blank}.
node send-xcm-message.js
Transaction sent
Transaction sent
And that is it! You've sent an XCM message, which performed a remote EVM call to the Batch Precompile via XCM and resulted in the minting of MARS and NEPT ERC-20 tokens. But let's go into more detail about what happened.
This action will emit different events. The first one is only relevant [in the relay chain](https://polkadot.js.org/apps/?rpc=wss://relay.api.moonbase.moonbeam.network#/explorer/query/10936471){target=\_blank}, and it is named `xcmPallet.Sent`, which is from the `xcmPallet.send` extrinsic. In [Moonbase Alpha](https://polkadot.js.org/apps/?rpc=wss://wss.api.moonbase.moonbeam.network#/explorer/query/4626493){target=\_blank}, the following events emitted by the `parachainSystem.setValidationData` extrinsic (where all the inbound XCM messages are processed) are of interest:
- `parachainSystem.DownwardMessagesReceived` — states that there was an XCM message received
- `evm.Log` — internal events emitted by the different contract calls. The structure is the same: contract address, topics, and relevant data
- `ethereum.Executed` — contains information on the `from` address, the `to` address, and the transaction hash of an EVM call done
- `polkadotXcm.AssetsTrapped` — flags that some assets were in holding and were not deposited to a given address. If the `Transact` XCM instruction does not exhaust the tokens allocated to it, it will execute a [`RefundSurplus`](/builders/interoperability/xcm/core-concepts/instructions/#refund-surplus){target=\_blank} after the XCM is processed. This instruction will take any leftover tokens from the execution bought and put them in holding. We could prevent this by adjusting the fee provided to the `Transact` instruction or by adding the instruction right after the `Transact`
- `dmpQueue.ExecutedDownward` — states the result of executing a message received from the relay chain (a DMP message). In this case, the `outcome` is marked as `Complete`
Our XCM was successfully executed! If you visit [Moonbase Alpha Moonscan](https://moonbase.moonscan.io){target=\_blank} and search for [the transaction hash](https://moonbase.moonscan.io/tx/0xd5e855bc3ade42d040f3c29abe129bd8f488dee0014e731eba4617883aac3891){target=\_blank}, you'll find the call to the Batch Precompile that was executed via the XCM message. Note that you can only call the `mint` commands once per hour per planet. If you wish to experiment further and make additional mint calls, simply change the destination contract address to a different planet when configuring the batch call.
!!! challenge
Use the Batch Precompile and remote EVM calls via XCM to combine an approval and a Uniswap V2 swap of MARS for any other token you want. As a thought experiment, consider carefully which method of the Batch Precompile is best suited to combine an approval and a swap transaction. Both the [Uniswap V2 Swap from Polkadot via XCM tutorial](/tutorials/interoperability/uniswapv2-swap-xcm/){target=\_blank} and the [Batch Precompile tutorial](/tutorials/eth-api/batch-approve-swap/){target=\_blank} are great resources to help you get started.
This tutorial is for educational purposes only. As such, any contracts or code created in this tutorial should not be used in production.
--- END CONTENT ---
Doc-Content: https://docs.moonbeam.network/tokens/connect/ledger/ethereum/
--- BEGIN CONTENT ---
---
title: Ethereum App
description: This guide walks you through how to use your Ledger hardware wallet to sign transactions in Moonbeam-based networks using the Ethereum app on Ledger Live.
categories: Tokens and Accounts, Ethereum Toolkit
---
# Interacting with Moonbeam Using Ledger and the Ethereum App
## Introduction {: #introduction }
Hardware wallets provide a safer way to store crypto funds because the private key (used for signing transactions) is stored offline. Ledger offers two hardware wallet solutions at the time of writing: Ledger Nano S and Ledger Nano X.
For Moonbeam, Moonriver, and the Moonbase Alpha TestNet, you can use the Ethereum app on Ledger Live by setting the chain ID. For Moonbeam, the chain ID is 1284, for Moonriver it's 1285, and for Moonbase Alpha it's 1287.
For Moonbeam and Moonriver you also have the option of using the dedicated [Moonbeam app](/tokens/connect/ledger/moonbeam/){target=\_blank} or [Moonriver app](/tokens/connect/ledger/moonriver/){target=\_blank} on Ledger Live, this way you do not have to worry about setting the chain ID and you know you are connected to the right network. Please note that you can only use the Moonbeam app to connect to the Moonbeam network, and the Moonriver app can only be used to connect to the Moonriver network. These dedicated apps will not work for other Moonbeam-based networks.
In this tutorial, you will learn how to get started with your Ledger hardware wallet on Moonbeam using the Ethereum app. This guide only illustrates the steps for a Ledger Nano X device, but you can follow along with a Ledger Nano S as well.
The information presented herein is for informational purposes only and has been provided by third parties. Moonbeam does not endorse any project listed and described on the Moonbeam docs website (https://docs.moonbeam.network/).
## Checking Prerequisites {: #checking-prerequisites }
Before you get started, update [Ledger Live](https://www.ledger.com/ledger-live){target=\_blank} to the latest version available. Also, make sure you've your Ledger hardware wallet device running the latest firmware. The Ledger support website offers tutorials on [how to update](https://support.ledger.com/article/360013349800-zde){target=\_blank} the firmware.
At the time of writing, the following versions were used:
- [Ledger Live 2.35.1](https://support.ledger.com/article/What-s-new-in-Ledger-Live){target=\_blank}
- [Ledger Nano S firmware v2.0.0](https://support.ledger.com/article/360010446000-zd){target=\_blank}
- [Ledger Nano X firmware v2.0.1](https://support.ledger.com/article/360014980580-zd){target=\_blank}
As of November 29, 2022, the Moonbeam and Ledger Live integration was released, allowing you to send and receive GLMR tokens with your Ledger device directly in Ledger Live. With this integration, you'll no longer need to connect your Ledger to MetaMask. If you prefer this method, please skip ahead to the [Use Ledger Live to Send & Receive GLMR](#use-ledger-live) section of this guide.
If you prefer to use MetaMask as an intermediary between your Ledger device and Moonbeam, make sure that your MetaMask is [connected to Moonbeam](/tokens/connect/metamask/){target=\_blank}.
As of [MetaMask version 10.5.0](https://consensys.io/blog/metamask-and-ledger-integration-fixed){target=\_blank}, connecting your Ledger device with MetaMask on Chrome is easy again. You just need to have the latest version of MetaMask installed.
## Install the Ledger Live App {: install-the-ledger-live-app }
If you want to connect to Moonbeam, Moonriver, or the Moonbase Alpha TestNet you can do so by installing the Ethereum app, and later on you'll need to specify a chain ID.
To get started, open up Ledger Live and:
1. Select **Manager** from the menu
2. Connect and unlock your device (this must be done before installation)
3. In the **App catalog** search for Ethereum (ETH) and click **Install**. Your Ledger device will show **Processing** and once the installation is complete, the app will appear on your Ledger device
In the Ledger Live app, depending on which app(s) you installed you should see them listed under the **Apps installed** tab on the **Manager** page. After the app(s) have been successfully installed, you can close out of Ledger Live.
 ## Import your Ledger Account to MetaMask {: #import-your-ledger-account-to-metamask }
Now that you've installed the app(s) on Ledger Live, you can connect your Ledger to the computer and unlock it, and open the Ethereum app.
Then import your Ledger account to MetaMask using the following steps:
1. Click on the top-right logo to expand the menu
2. Select **Connect Hardware Wallet**
In the next screen, you are prompted to select which hardware wallet you'll like to use in MetaMask. At the moment of writing, only Ledger and Trezor hardware wallets are supported. Here, take the following steps:
1. Select the Ledger logo
2. Click on **Continue**
If you're using Chrome or a Chrome-based browser like Brave, you'll be prompted to select your Ledger device to connect via WebHID:
1. Select your Ledger device from the pop-up
2. Click **Connect**
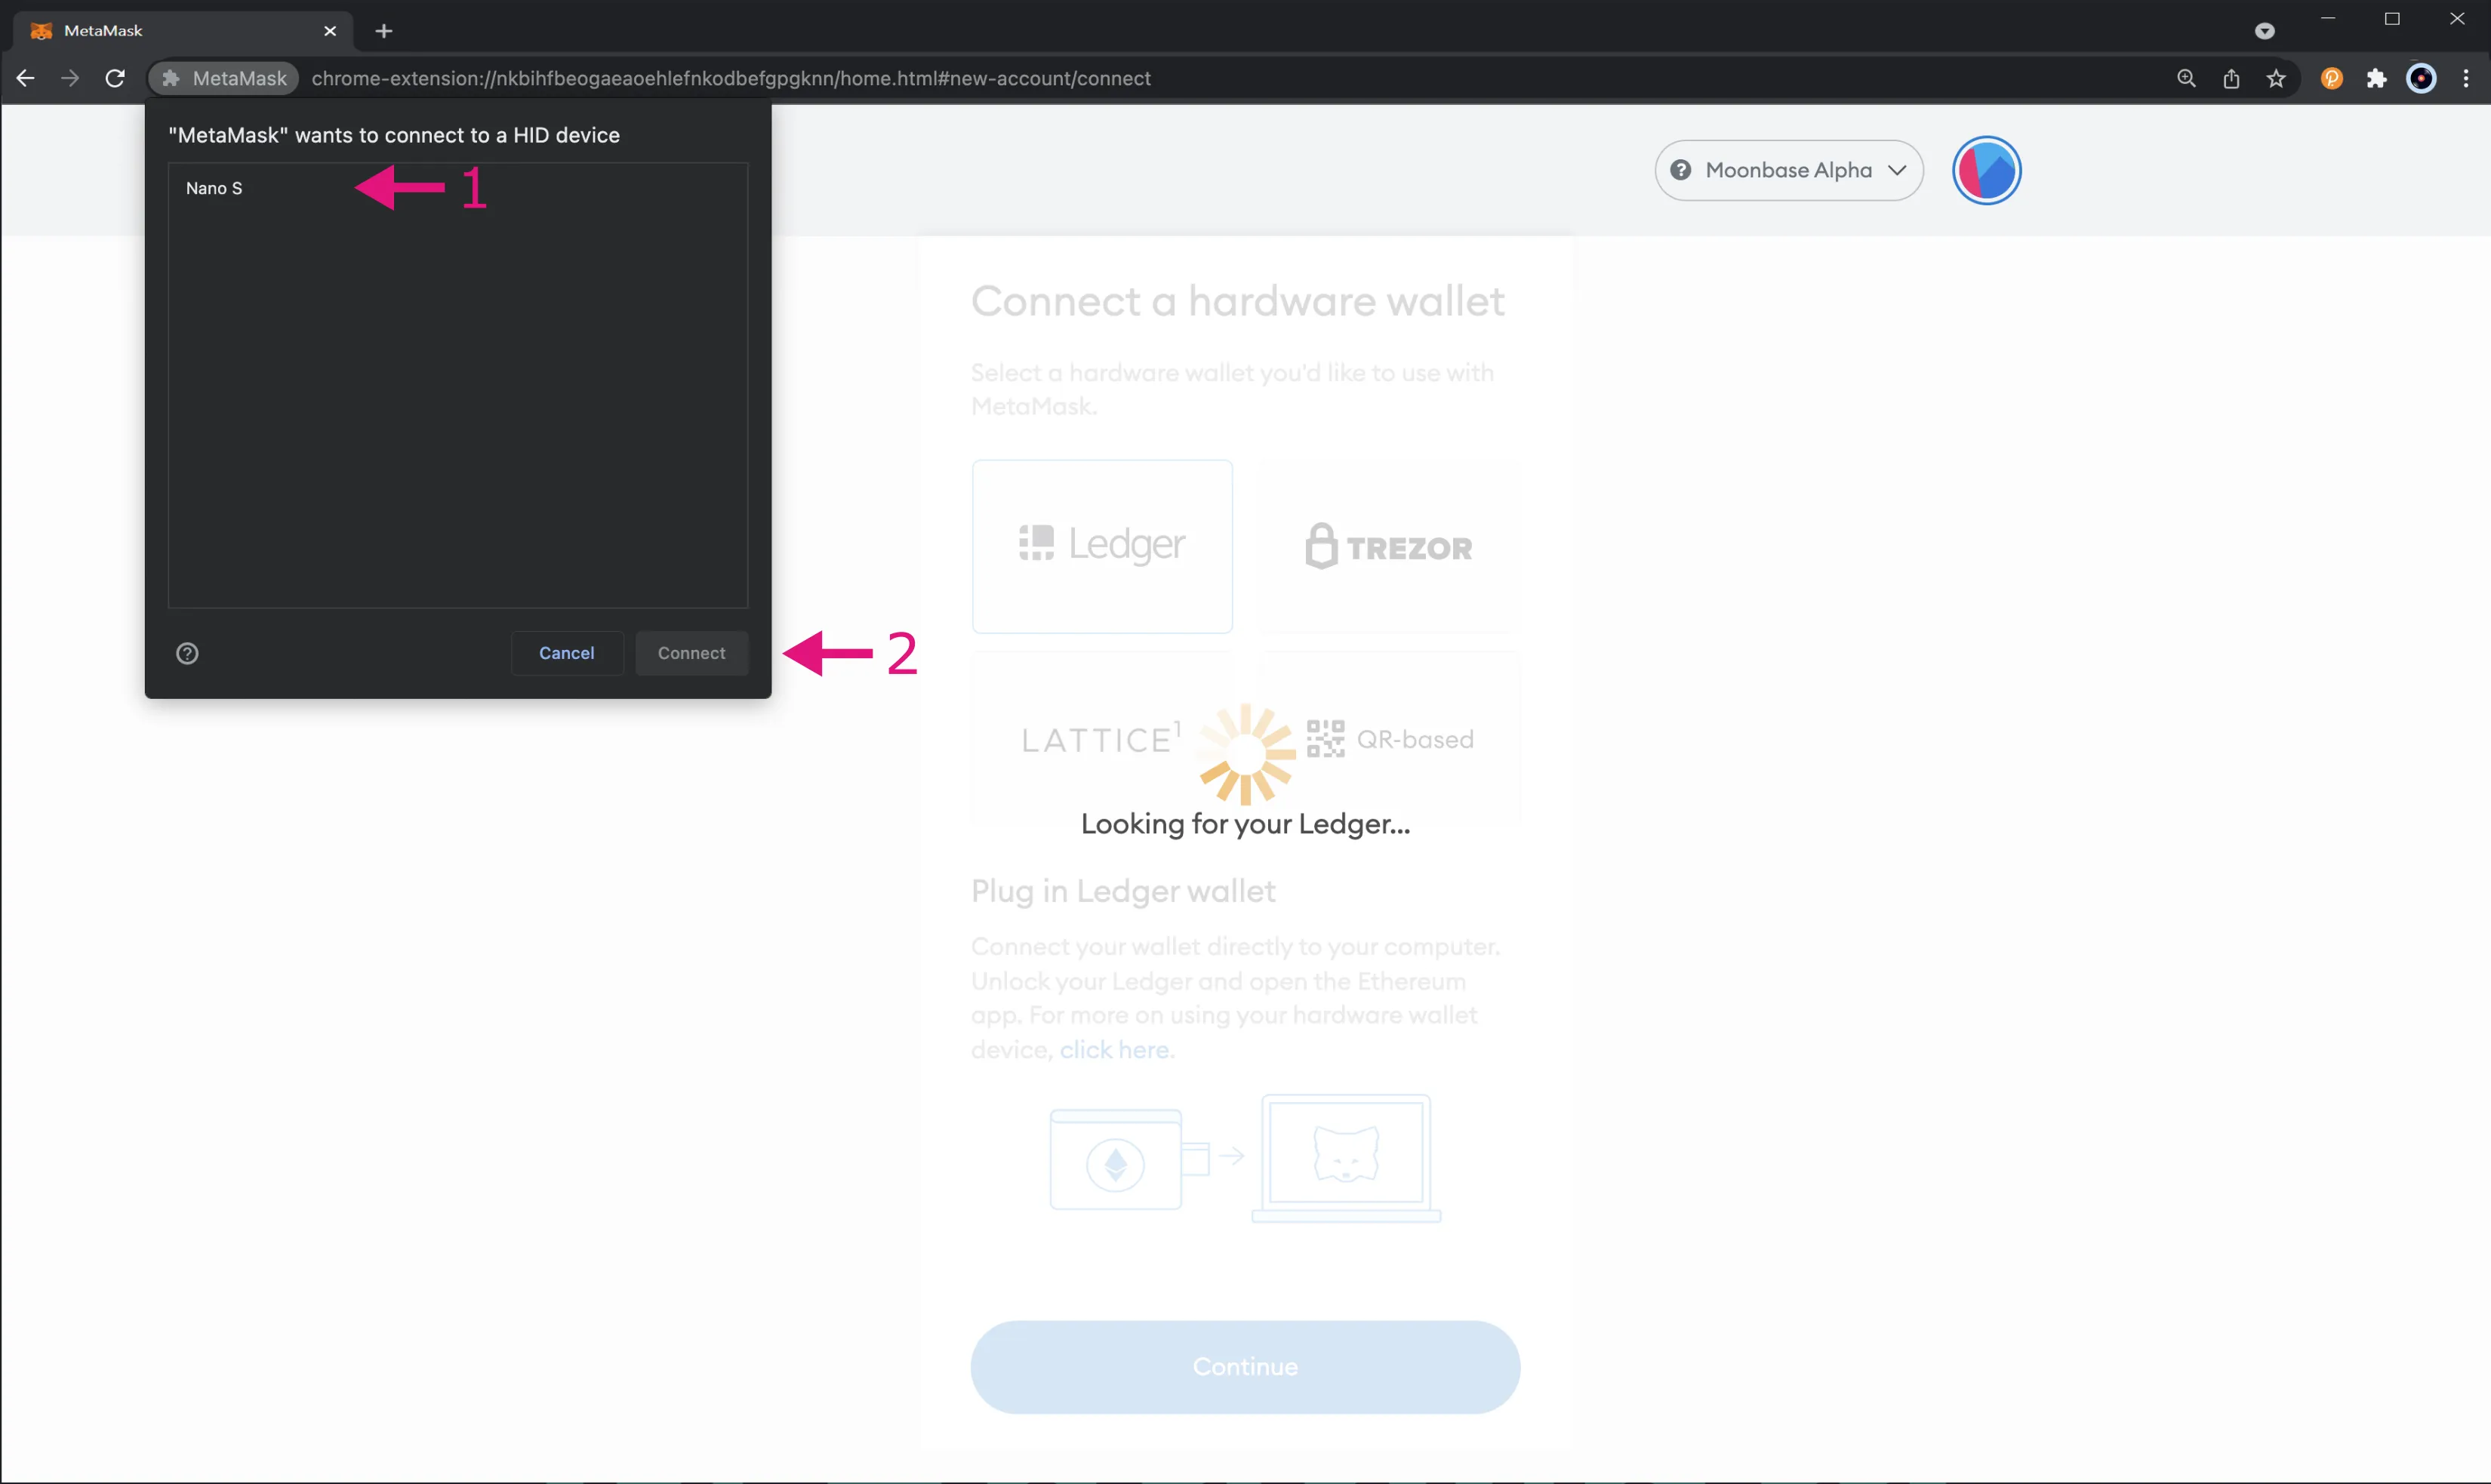
If a pop-up doesn't appear, you may need to change your MetaMask settings to enable a WebHID connection. You can check and update your MetaMask settings by following these steps:
1. Expand the top-right menu and go to **Settings**
2. Navigate to **Advanced**
3. Scroll down to **Preferred Ledger Connection Type** and select **WebHID** from the dropdown
!!! note
The **Preferred Ledger Connection Type** setting is only available on Chrome and Chrome-based browsers. This setting doesn't exist on other browsers such as Firefox.
If MetaMask was able to connect successfully to your Ledger device, you should see a list of five Moonbeam/Ethereum-styled accounts. If not, double-check that Ledger Live is closed, you've connected your Ledger device to the computer, and unlocked it, and make sure the Ethereum app is open.
### Import Accounts and View Balances {: #import-accounts-and-view-balances }
From the list of accounts, take the following steps:
1. Select the accounts you would like to import from your Ledger device
2. Click on **Unlock**
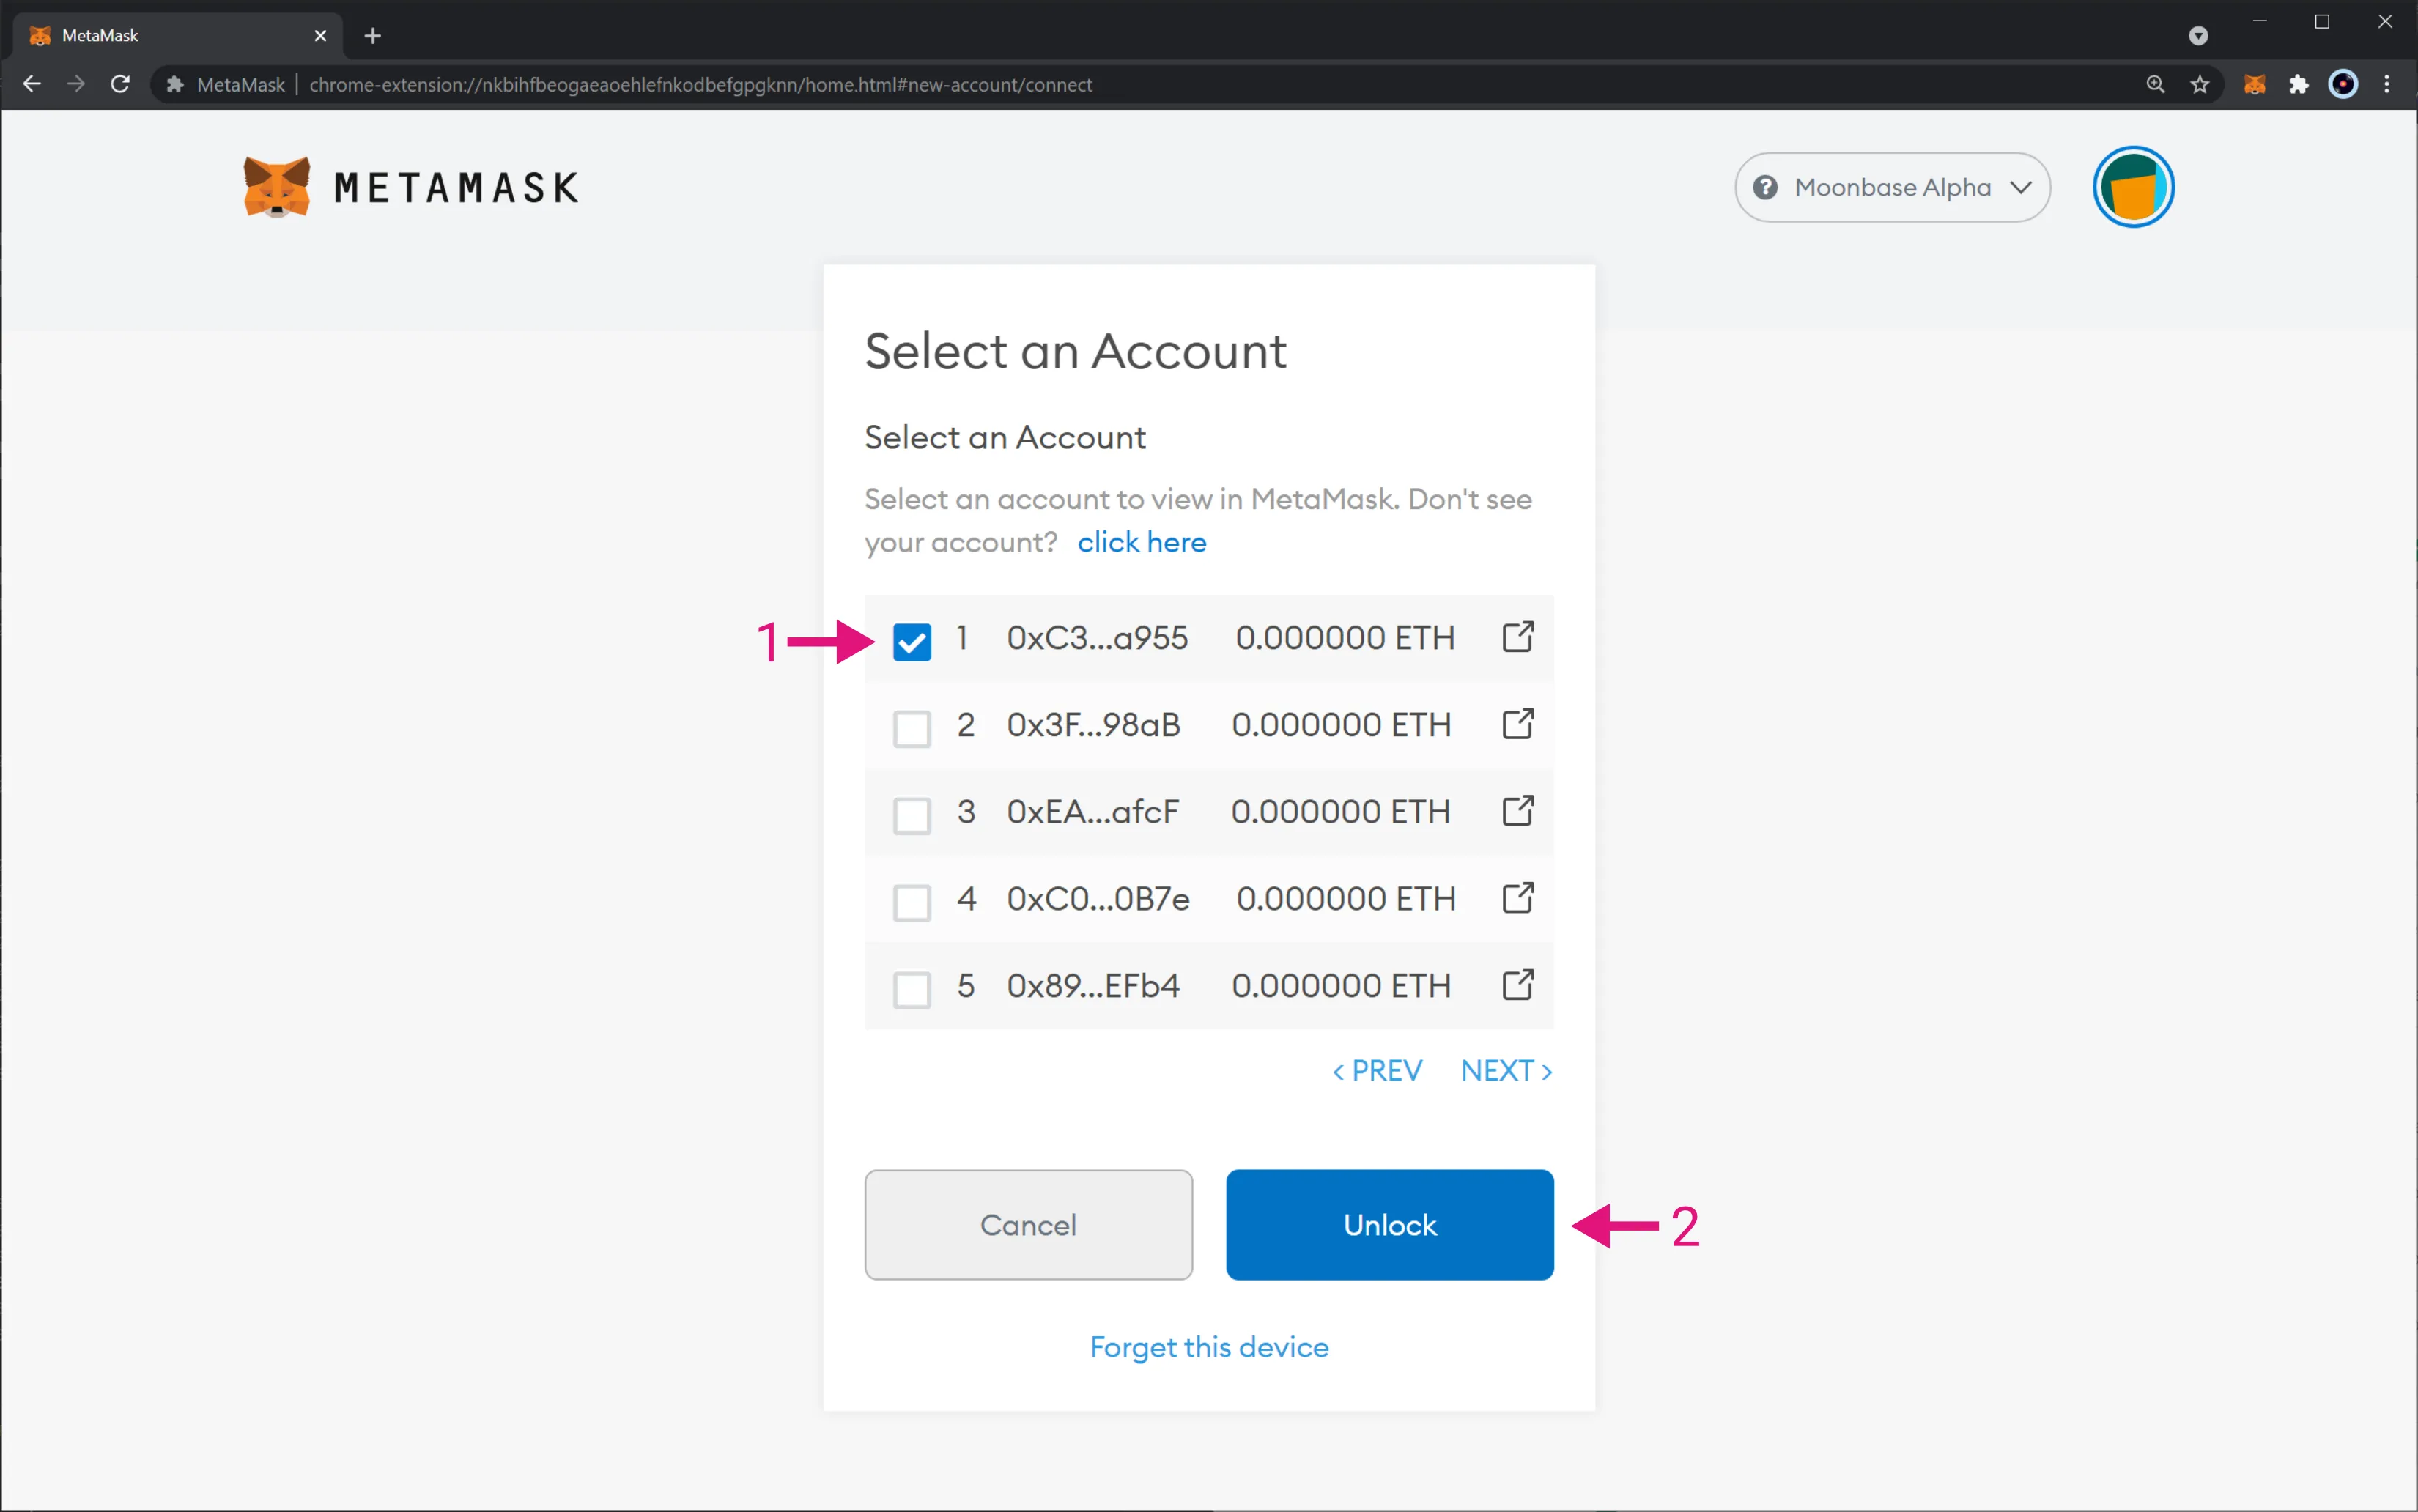
If you've imported your Ledger account successfully, you should see your account and balance displayed in the main MetaMask screen like shown in the following image:
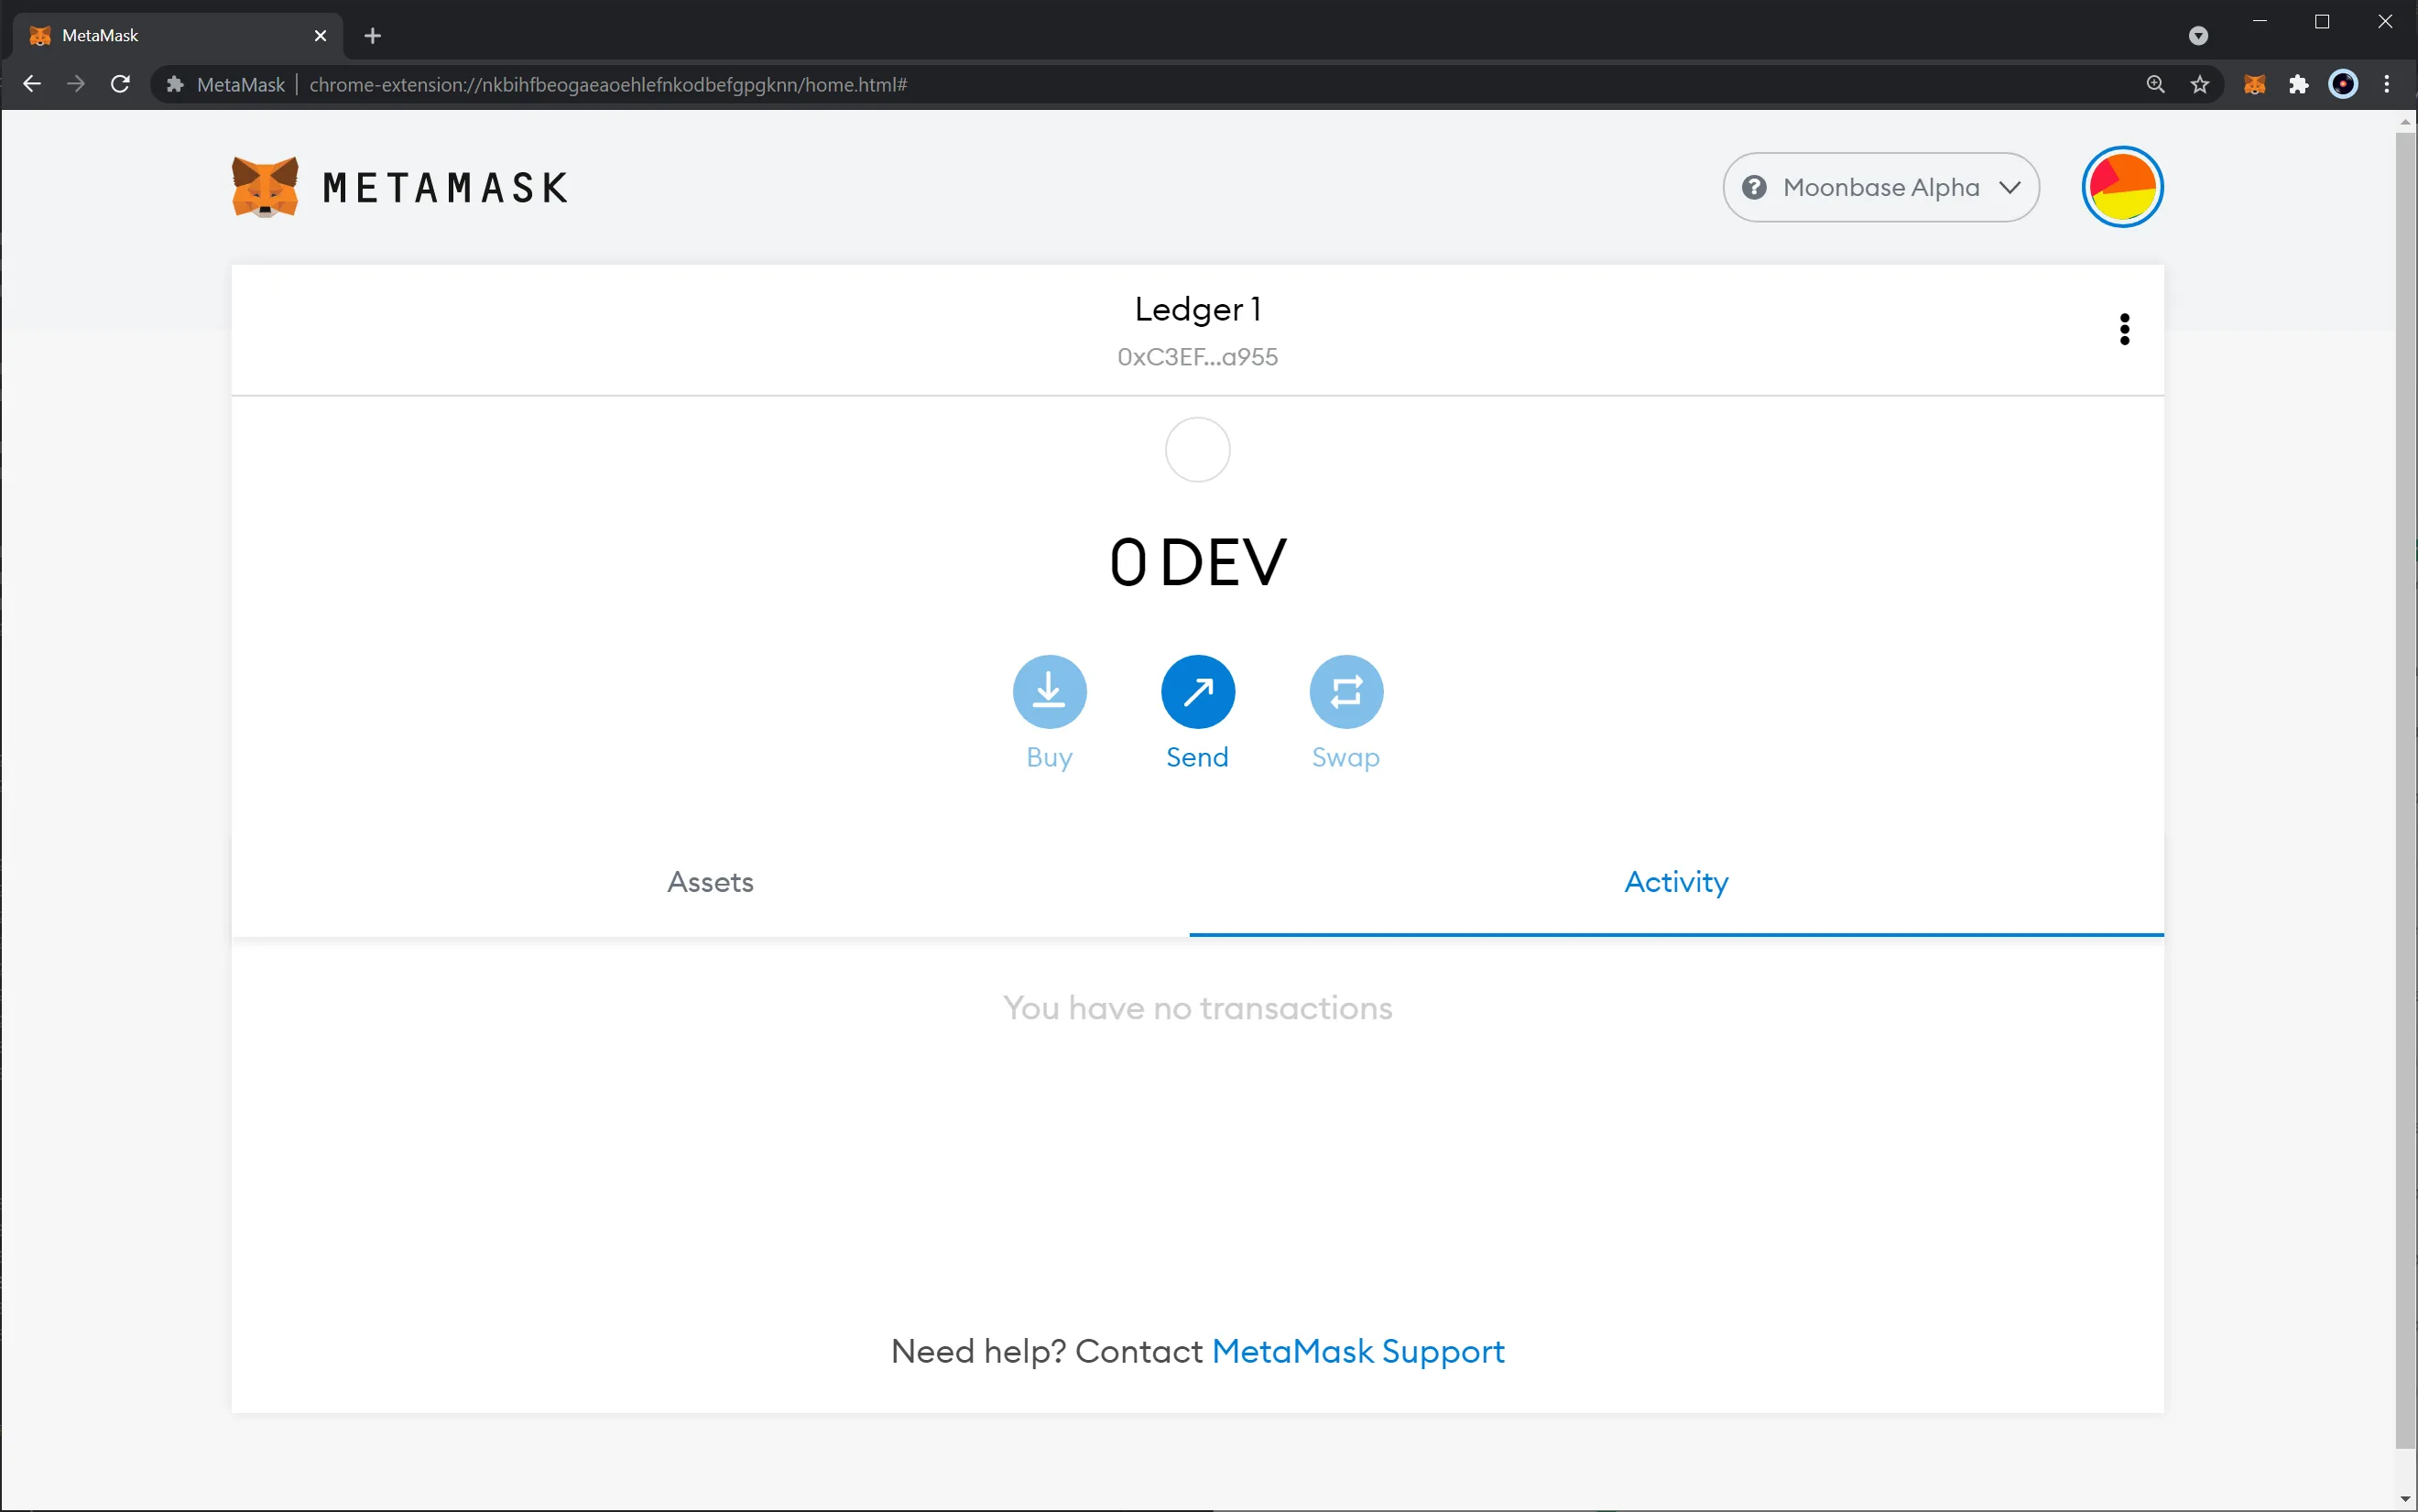
You can switch accounts in MetaMask at any time to view the balance of your other imported Ledger accounts.
You've now successfully imported a Moonbeam compatible account from your Ledger device and are now ready to start interacting with your Ledger device.
## Receive Tokens {: #receive-tokens }
To get started interacting with your Ledger device, you will need to send some funds to it. Copy your address from MetaMask by clicking on your account name and address in MetaMask.
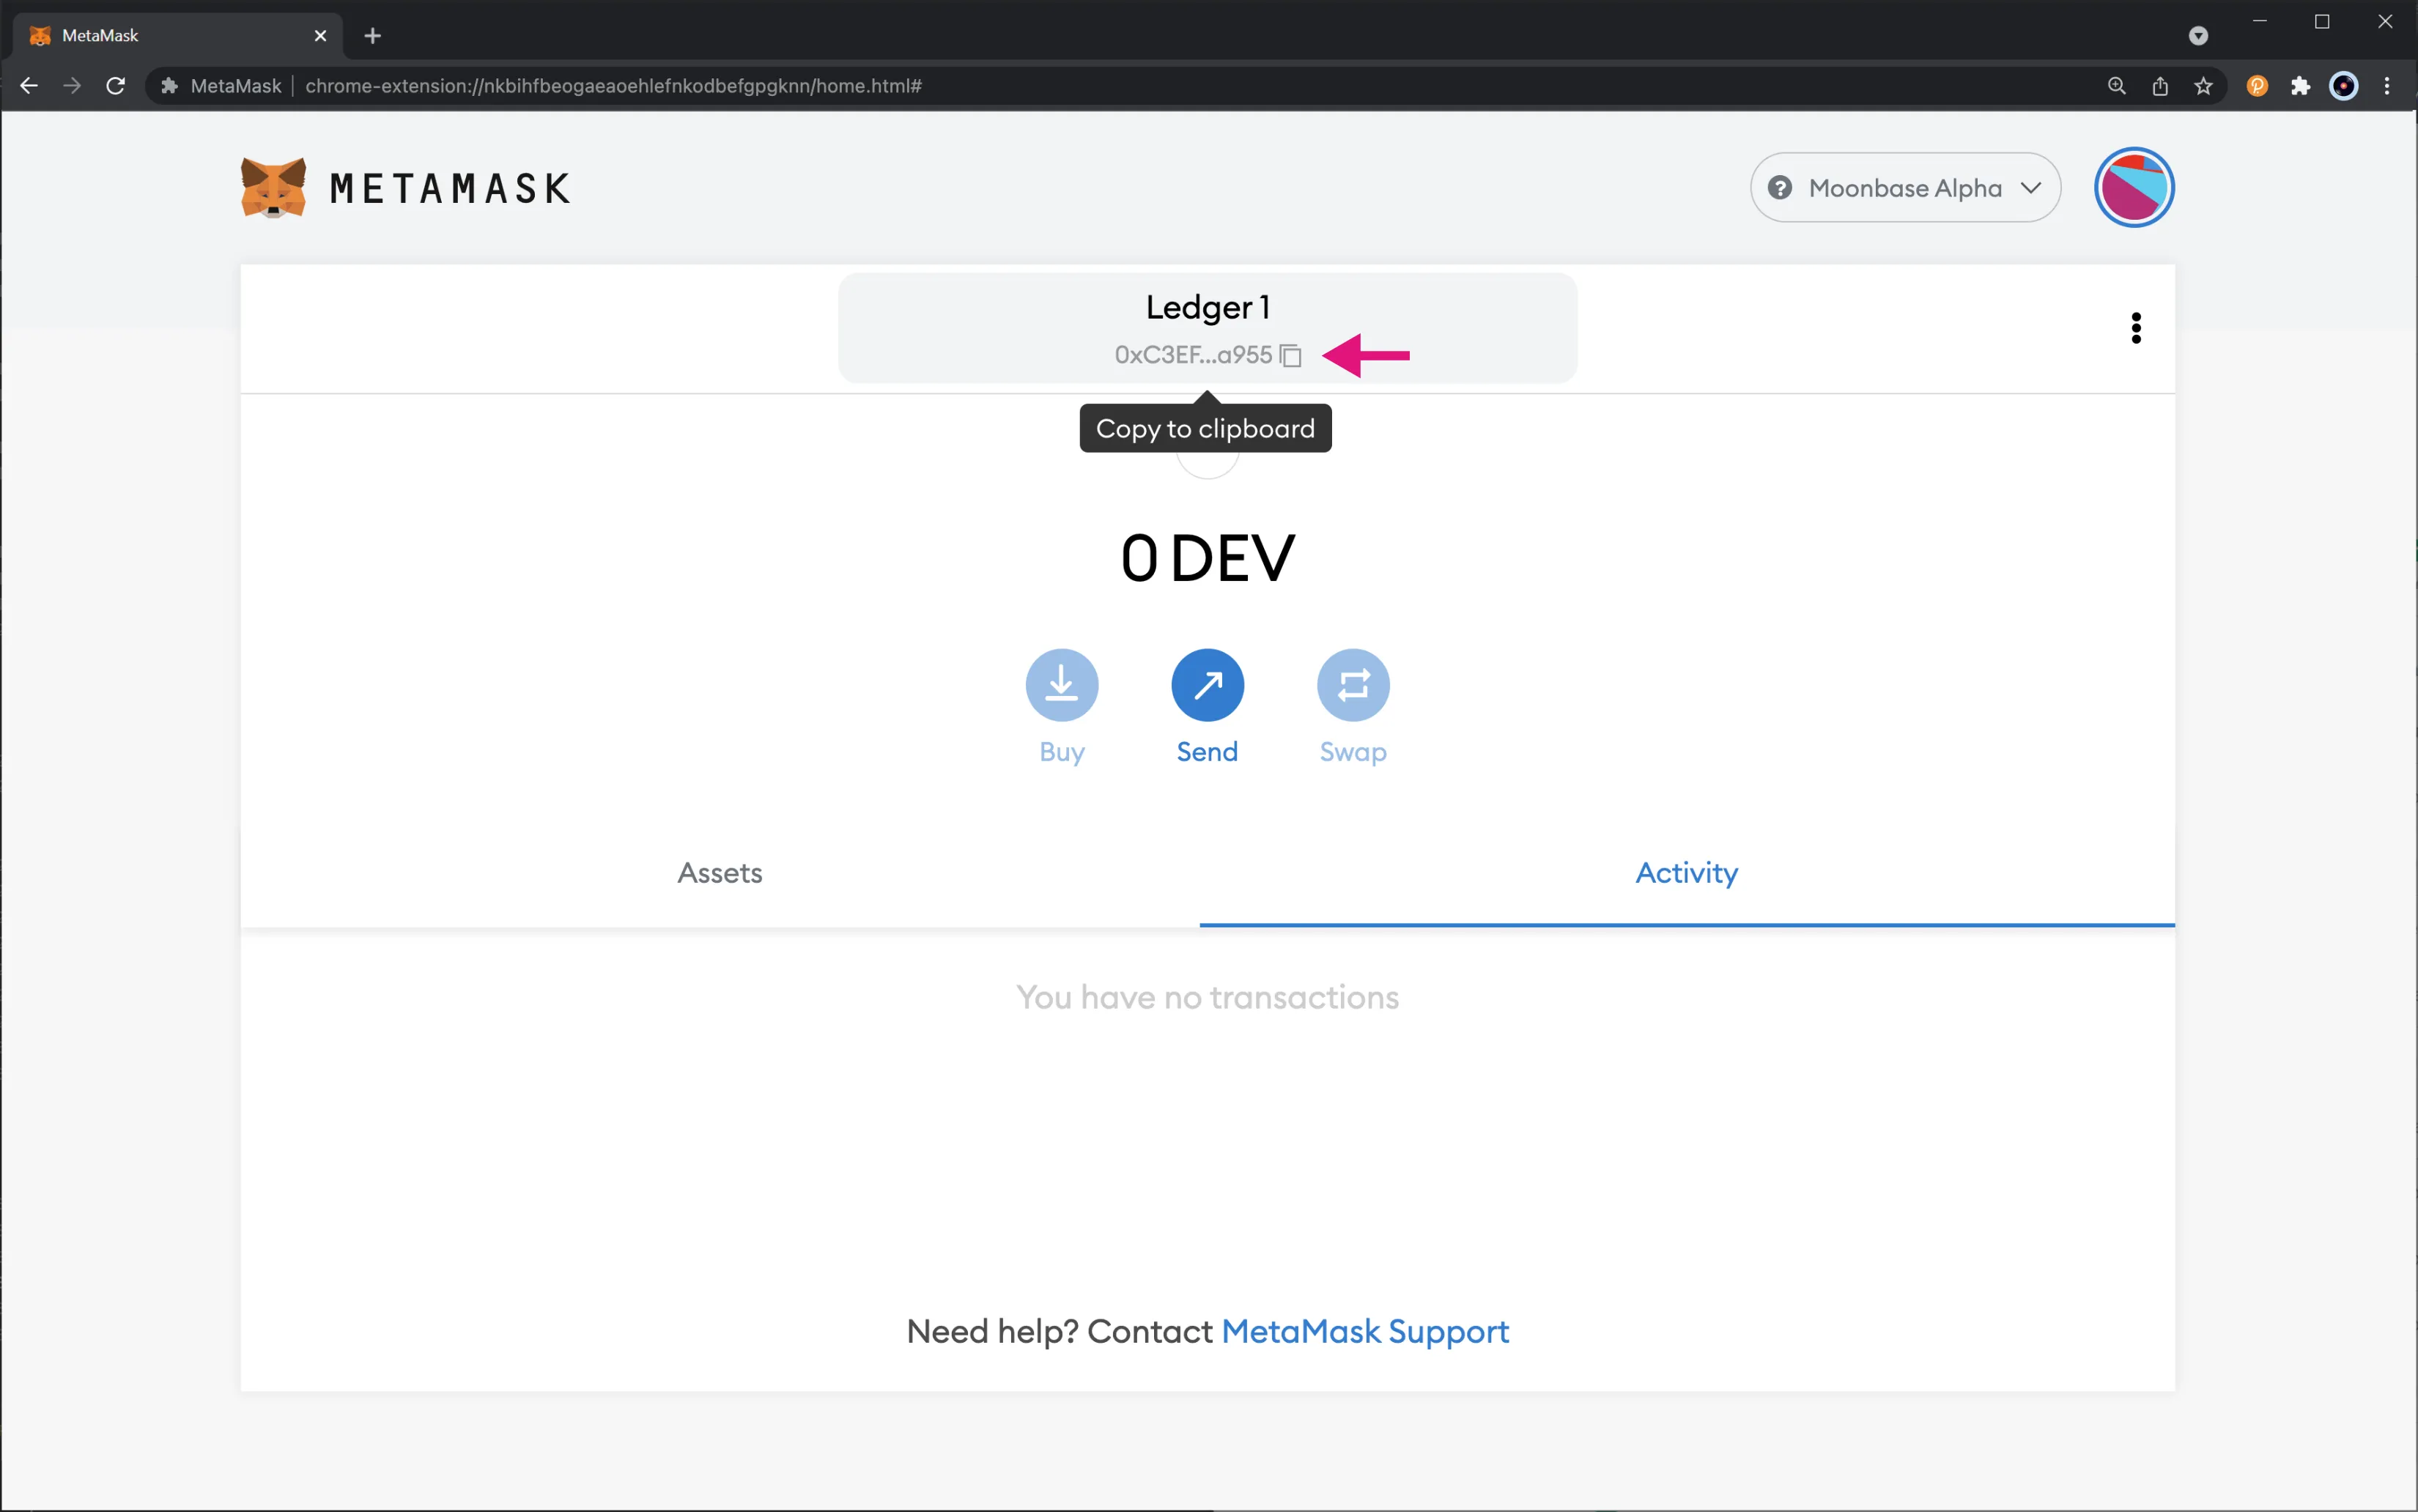
Next, you will need to obtain some GLMR, MOVR, or DEV tokens and using the address you just copied, send the tokens to your account. After the transaction has successfully gone through, you will see your balance update.
You can get DEV tokens for testing on Moonbase Alpha once every 24 hours from the [Moonbase Alpha Faucet](https://faucet.moonbeam.network){target=\_blank}.
## Send Tokens {: #send-tokens }
Next up is sending and signing transactions on Moonbeam using your Ledger device. To get started sending a transaction, click on the **Send** button:
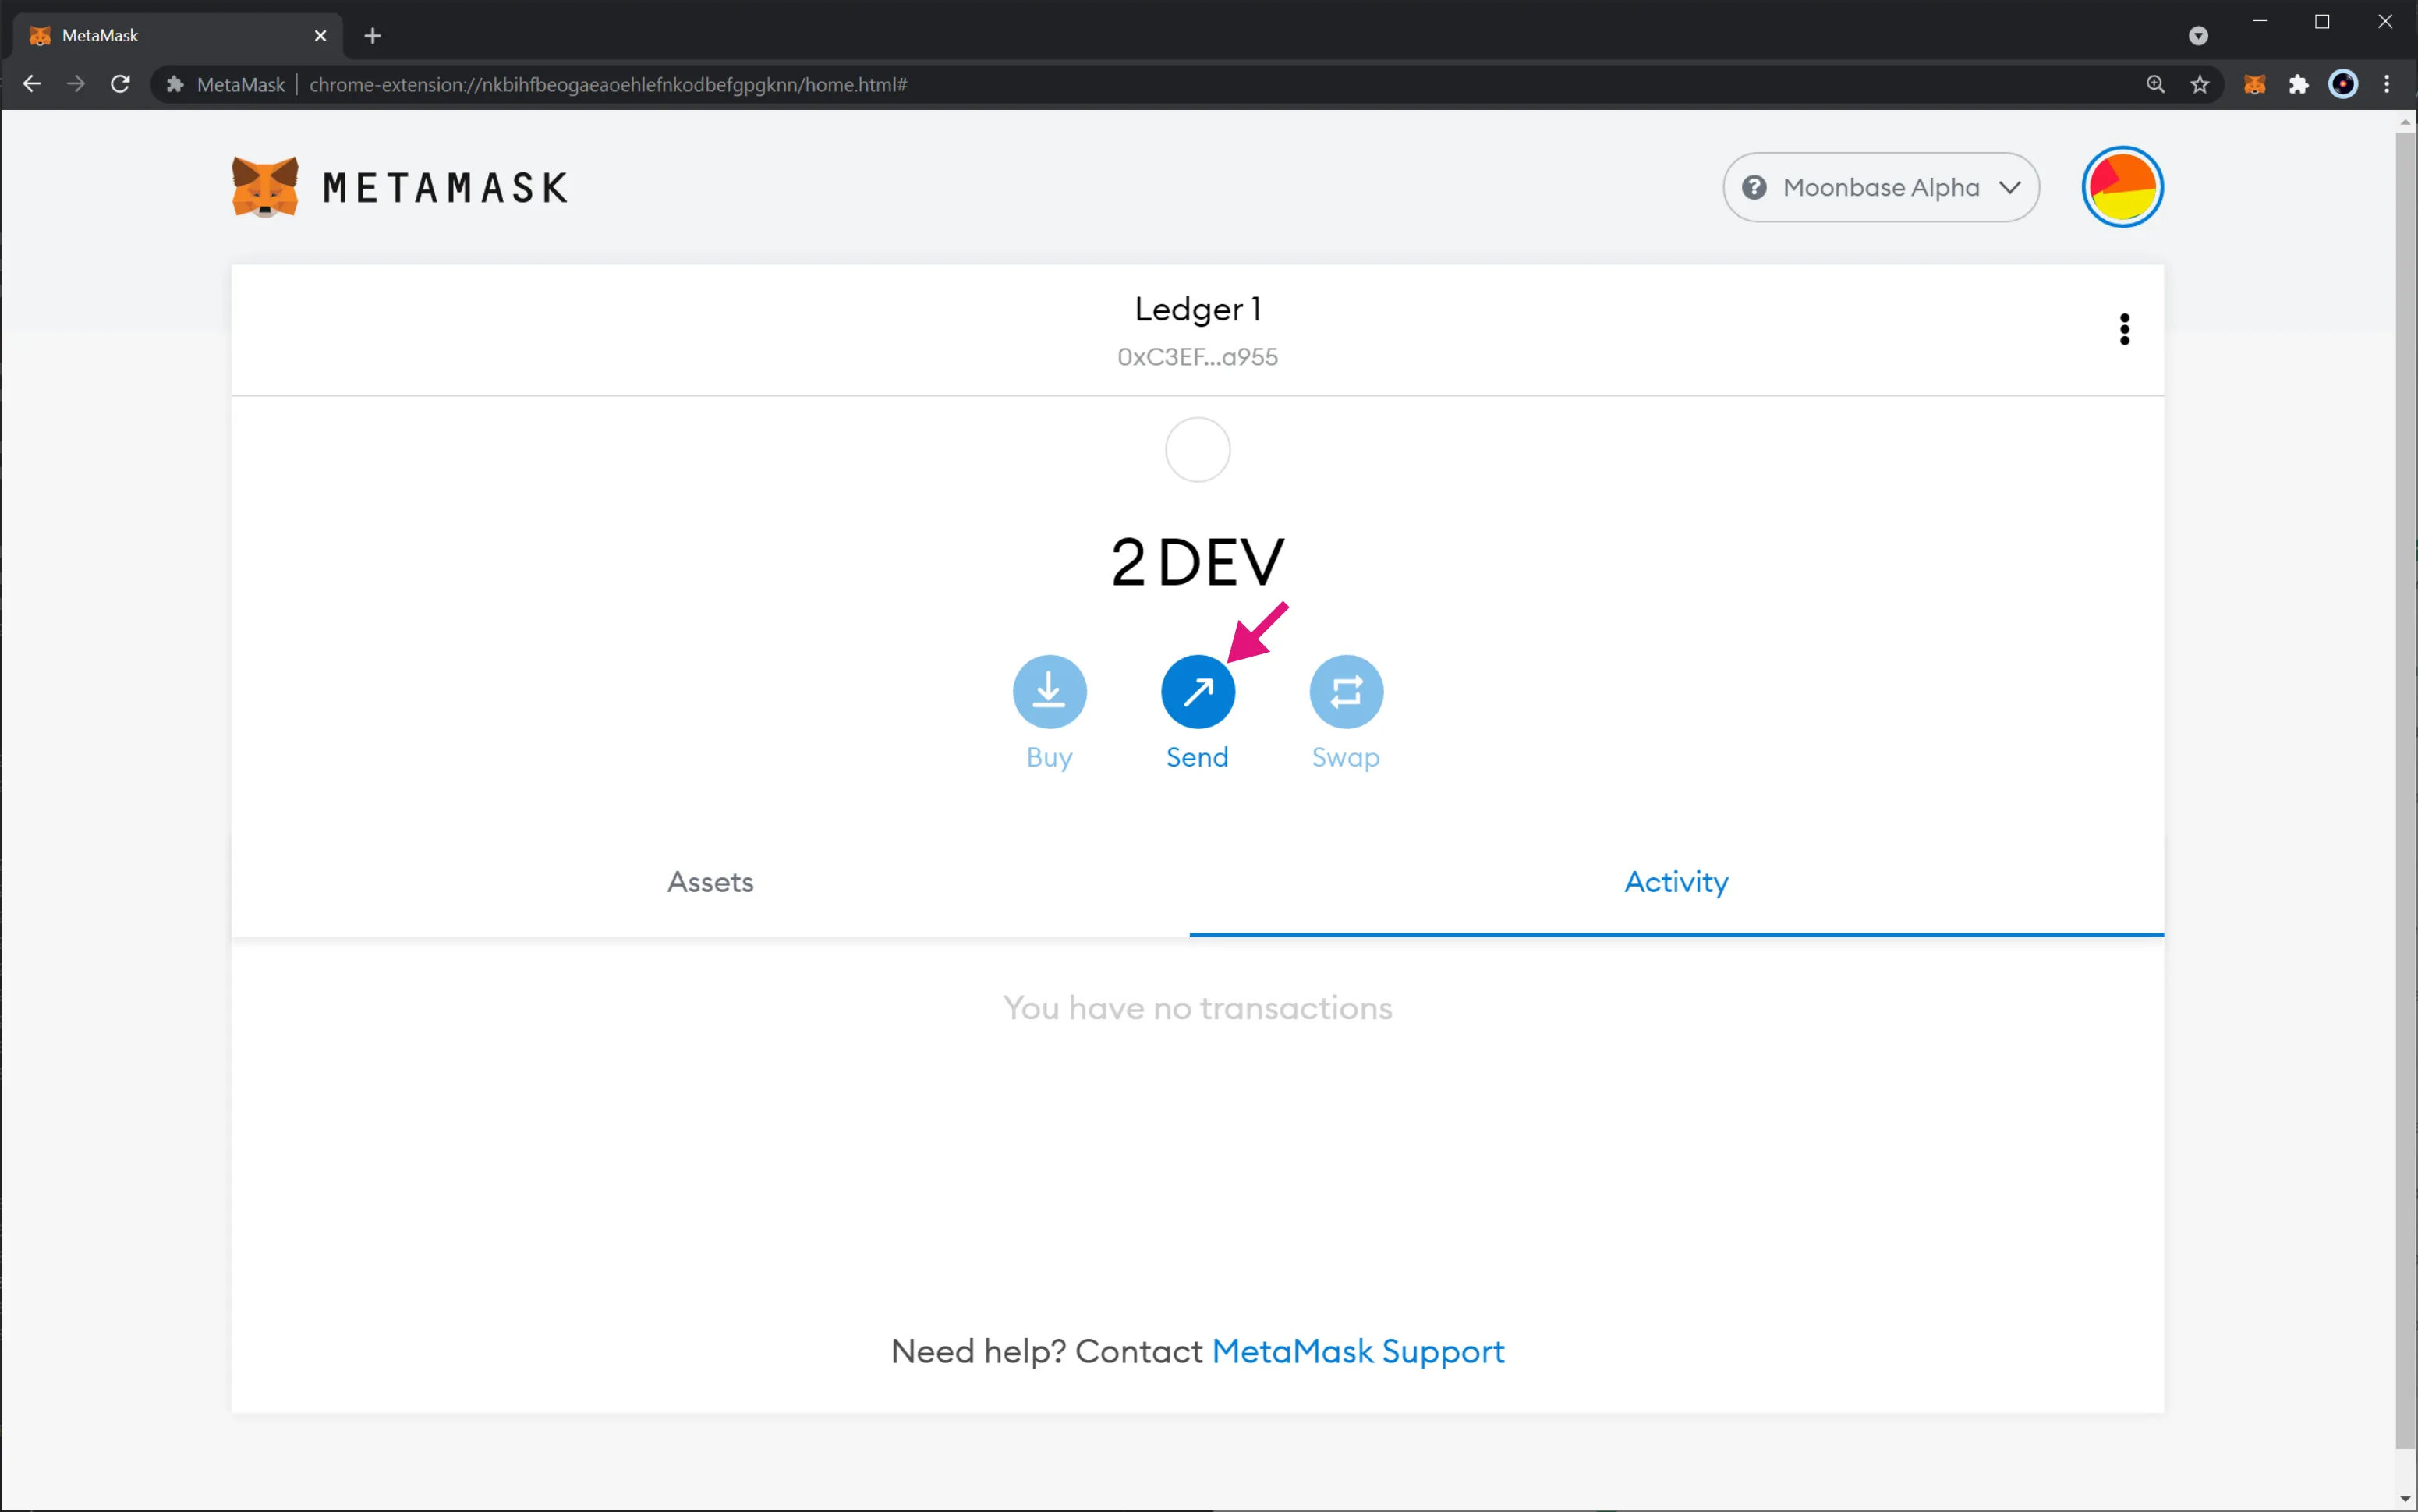
As you would in a standard transaction, set the recipient address, enter the number of tokens to send, review transaction details and confirm it. This will initiate the transaction signature wizard in your Ledger device. Here, take the following steps:
1. Click the button to proceed to the next screen. Your Ledger device is only warning you to review the transaction
2. Check the number of tokens being sent then proceed to the next screen
3. Check the recipient's address and proceed to the next screen
4. Check the chain ID of the network. This information confirms which network MetaMask is connected to. For Moonbeam the chain ID is 1284 (hex: 0x504), Moonriver is 1285 (hex: 0x505), and Moonbase Alpha is 1287 (hex: 0x507). When ready, proceed to the next screen
5. Check the max fees applicable to this transaction. This is the gas price multiplied by the gas limit you've set on MetaMask. When ready, proceed to the next screen
6. If you agree with all the transaction details, approve it. This will sign the transaction and will trigger MetaMask to send it. If you don't agree with all the transaction details, reject it. This will cancel the transaction, and MetaMask will mark it as failed
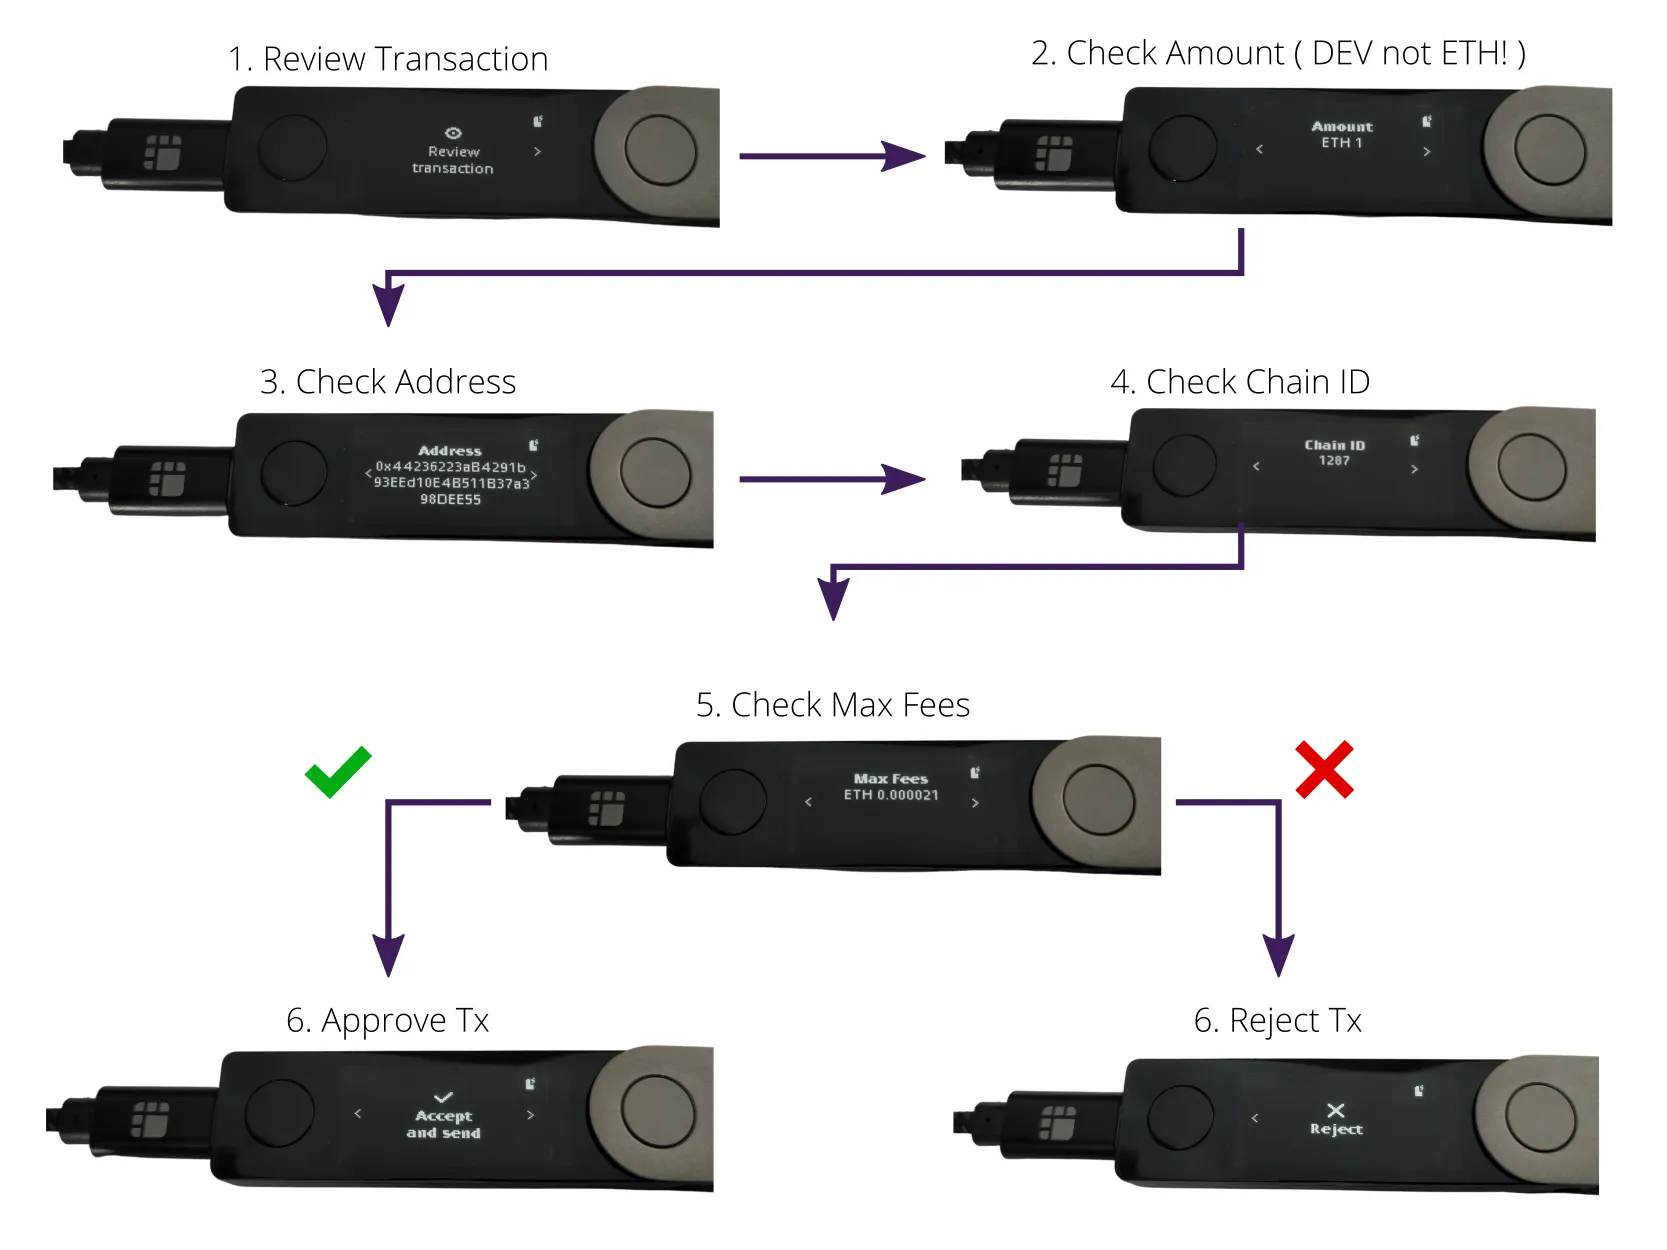
Right after you've approved the transaction, MetaMask sends it to the network. Once the transaction is confirmed, it will be displayed as **Send** on the **Activity** tab in MetaMask.
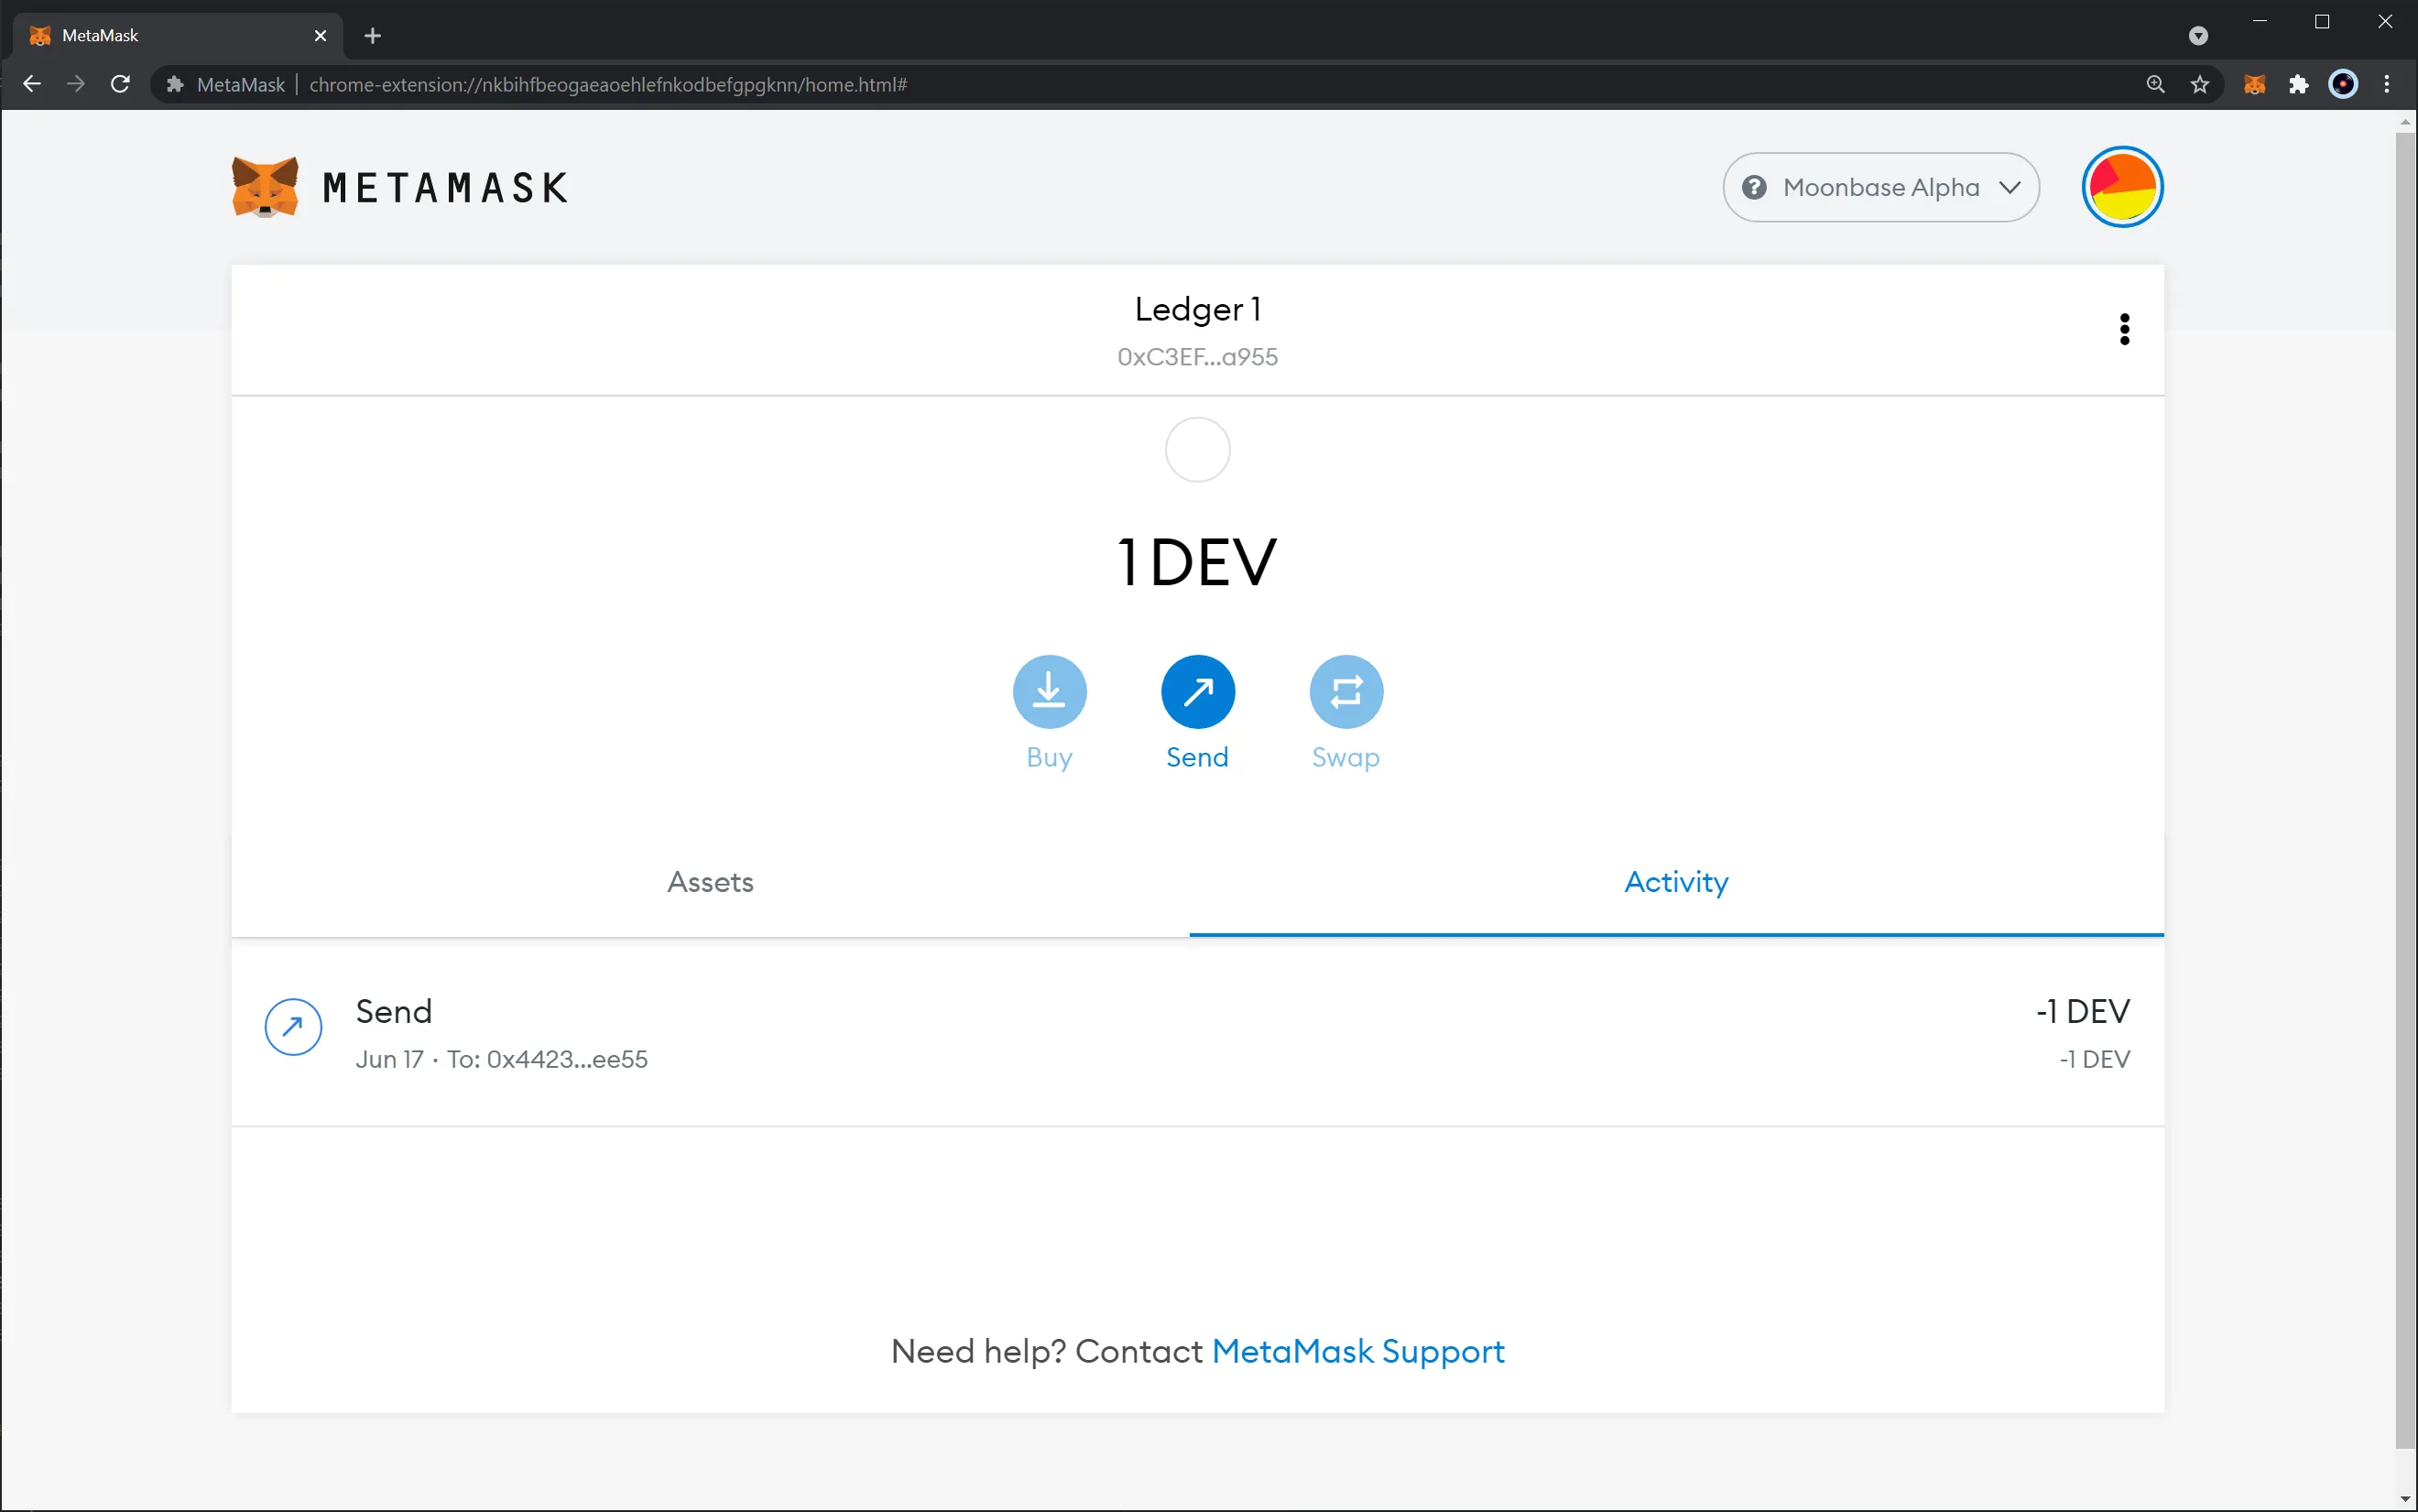
And that is it! You've signed a transaction and sent some tokens on Moonbeam using your Ledger hardware wallet!
## Interact with Contracts Using your Ledger {: #interact-with-contracts-using-your-ledger }
By default, Ledger devices don't admit a `data` field in the transaction object. Consequently, users can't deploy or interact with smart contracts.
However, if you want to use your Ledger hardware wallet for transactions related to smart contracts, you need to change a configuration parameter inside the app on your device. To do so, take the following steps:
1. On your Ledger, open the Moonriver or Ethereum app
2. Navigate to **Settings**
3. Find the **Blind signing** page. It should state **NOT Enabled** at the bottom
4. Select/validate the option to change its value to **Enabled**
!!! note
This option is necessary to use your Ledger device to interact with ERC-20 token contracts that might live inside the Moonbeam ecosystem.
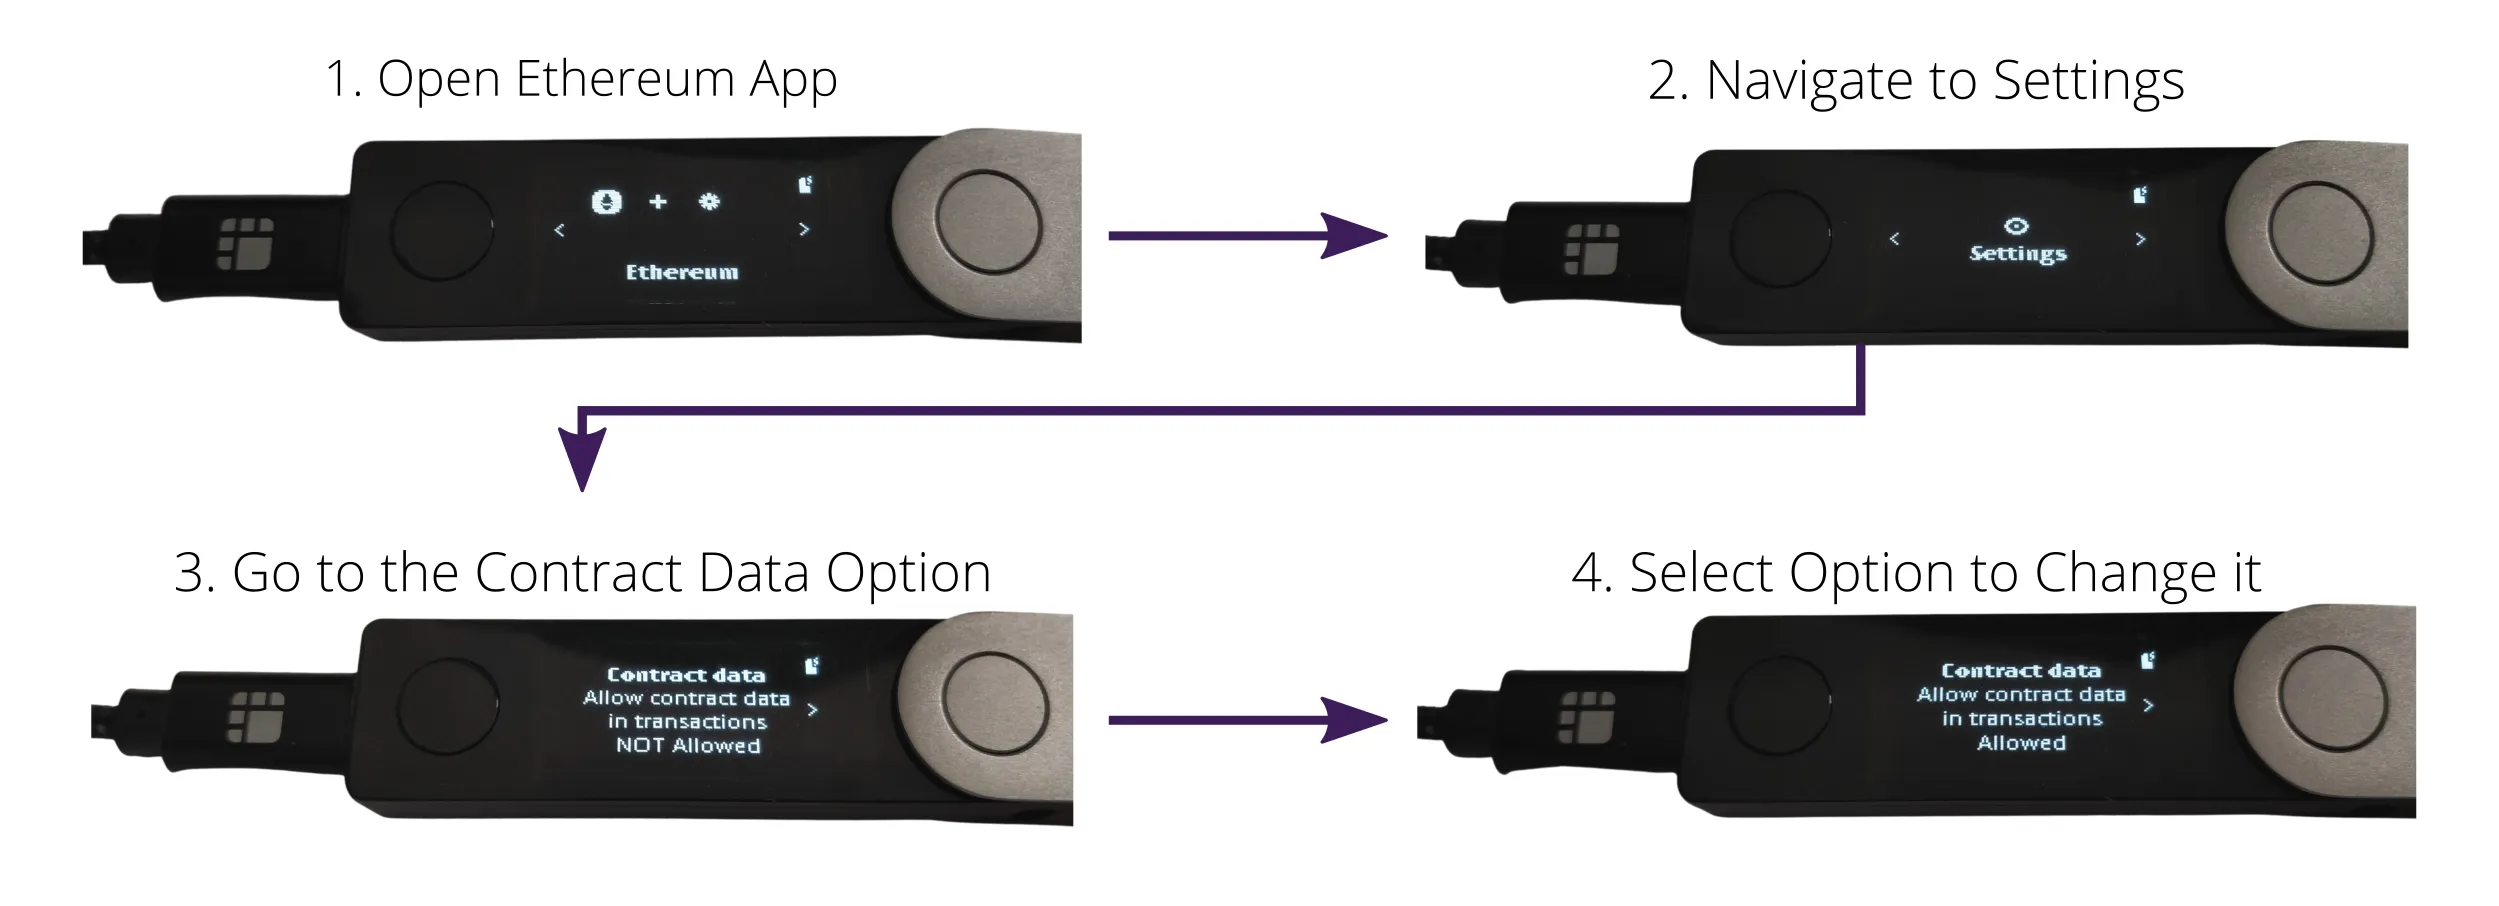
## Use Ledger Live to Send & Receive GLMR {: #use-ledger-live }
You can also use your Ledger device to send and receive GLMR tokens securely from within Ledger Live. This enables you to manage your GLMR tokens without connecting your device to MetaMask.
When you open up the Ledger Live app, make sure that you've installed the latest updates. If there are any pending updates that need to be installed, there will be a banner at the top of the screen that prompts you to install the updates.
To get started, you'll need to login to your Ledger device to unlock it. From Ledger Live, click on **My Ledger**. On your device, you'll be prompted to allow Ledger manager; you can click both buttons on your device to allow it.
Once on the Ledger manager, you'll need to make sure that your firmware is up to date, and if the Moonbeam and/or Ethereum apps need to be updated, go ahead and install the latest versions.
Next, you'll need to add an account to your Ledger Live app. To do so, you can take the following steps:
1. Click on **Accounts** from the left-side menu
2. Select **Add account**
3. A dropdown will appear. Search for GLMR and **Moonbeam (GLMR)** should appear for you to select
4. Click **Continue**
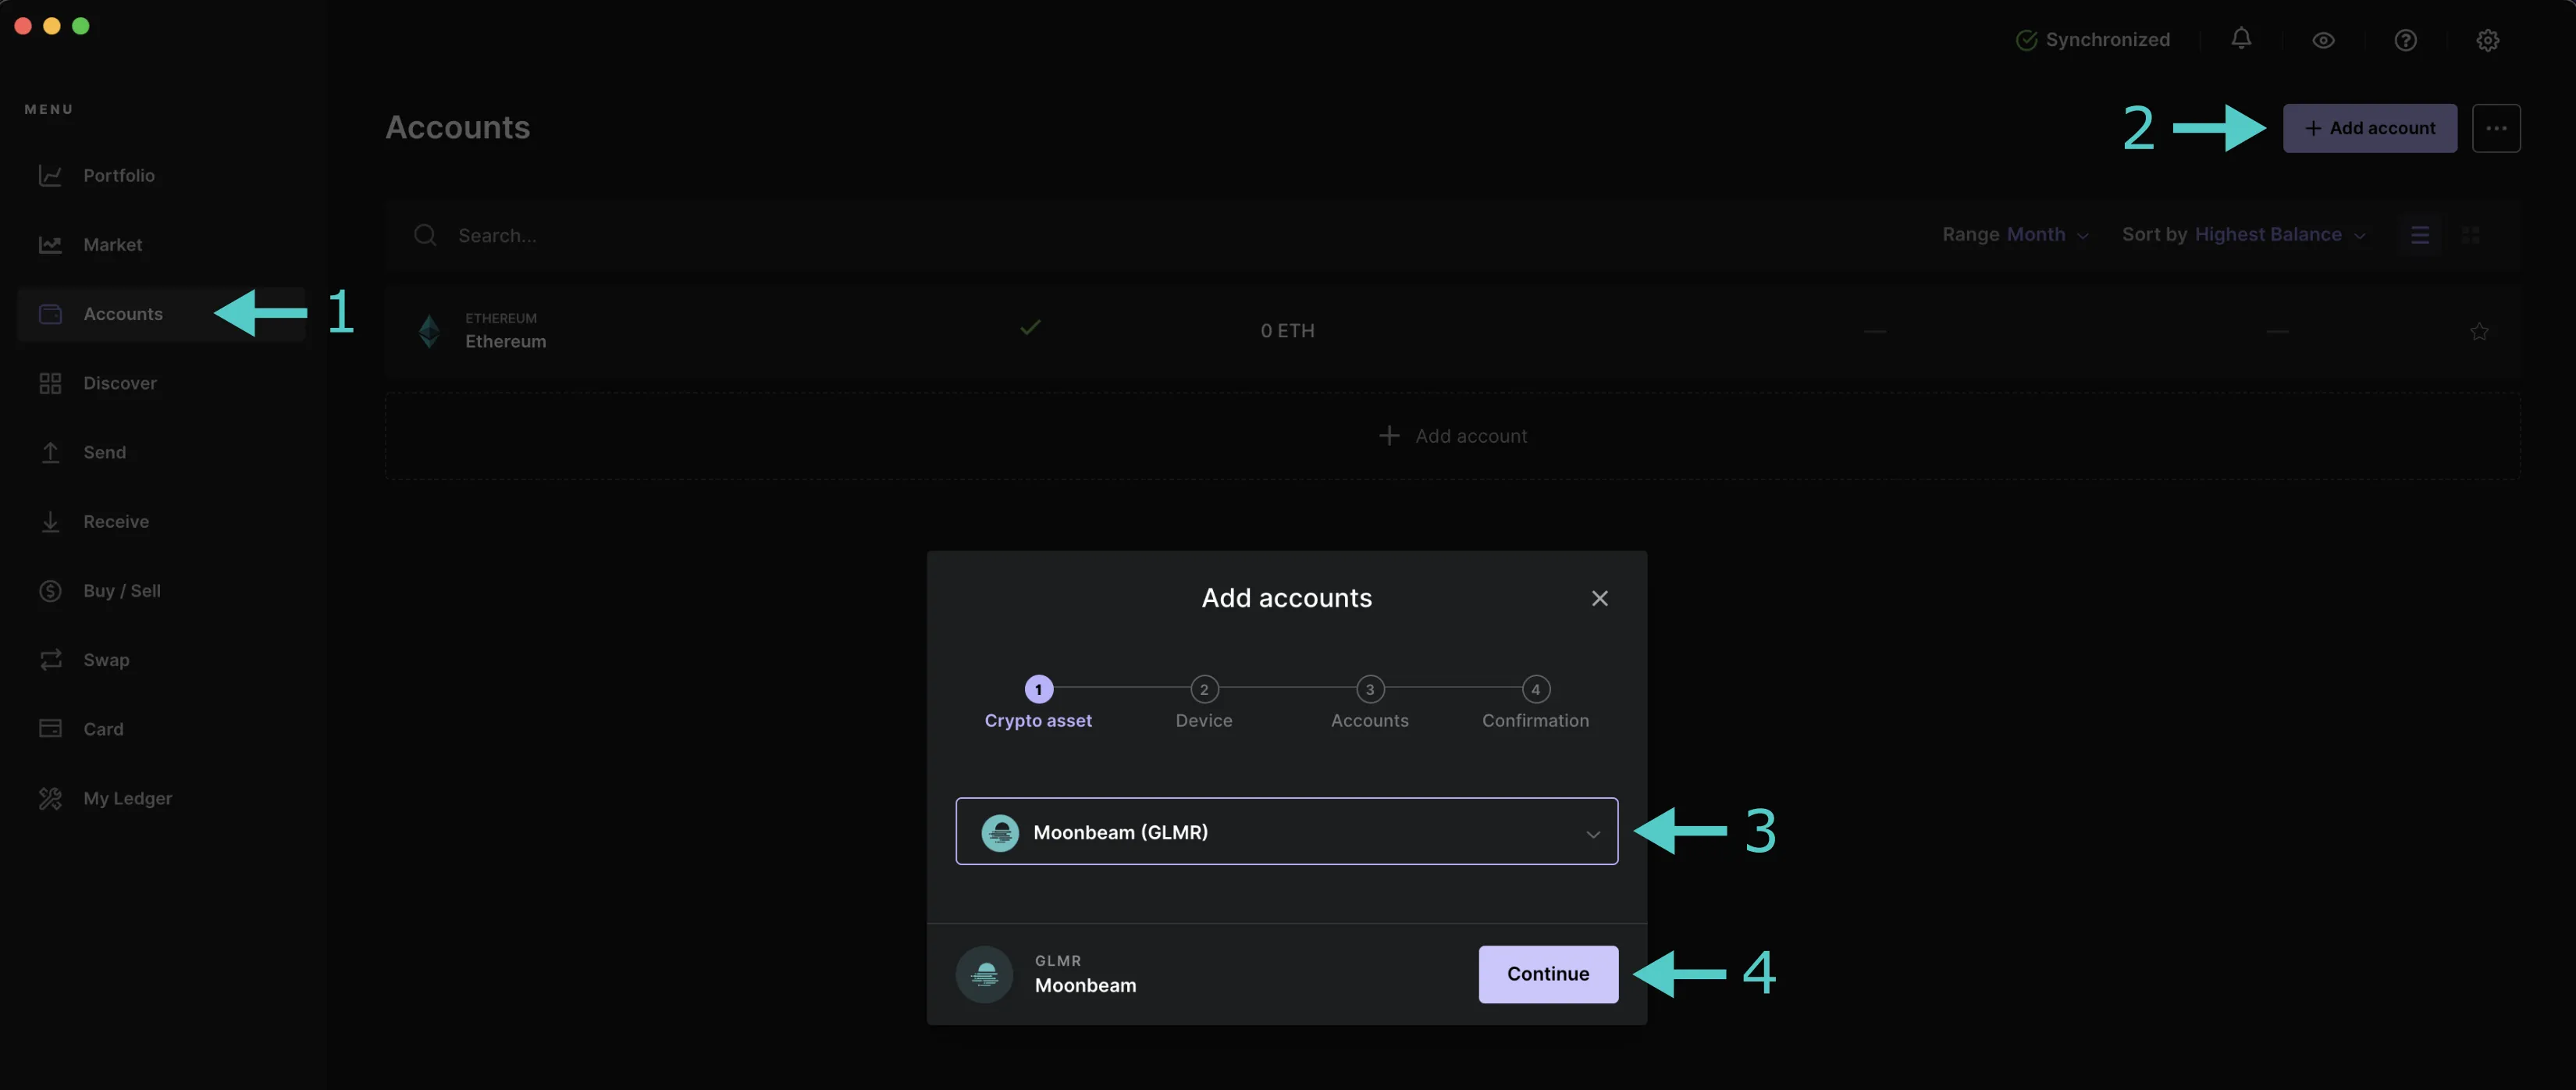
Next, you'll be able to enter an account name and click **Add account**. If your account was successfully added, you can click **Done** and your account will appear in your list of accounts.
### Receive Tokens
To receive GLMR to your Ledger device, you can take the following steps from Ledger Live:
1. Click on **Receive** from the left-side menu
2. A pop-up will appear. You can select your Moonbeam account where you want to receive tokens from the **Account to credit** dropdown
3. Click **Continue**
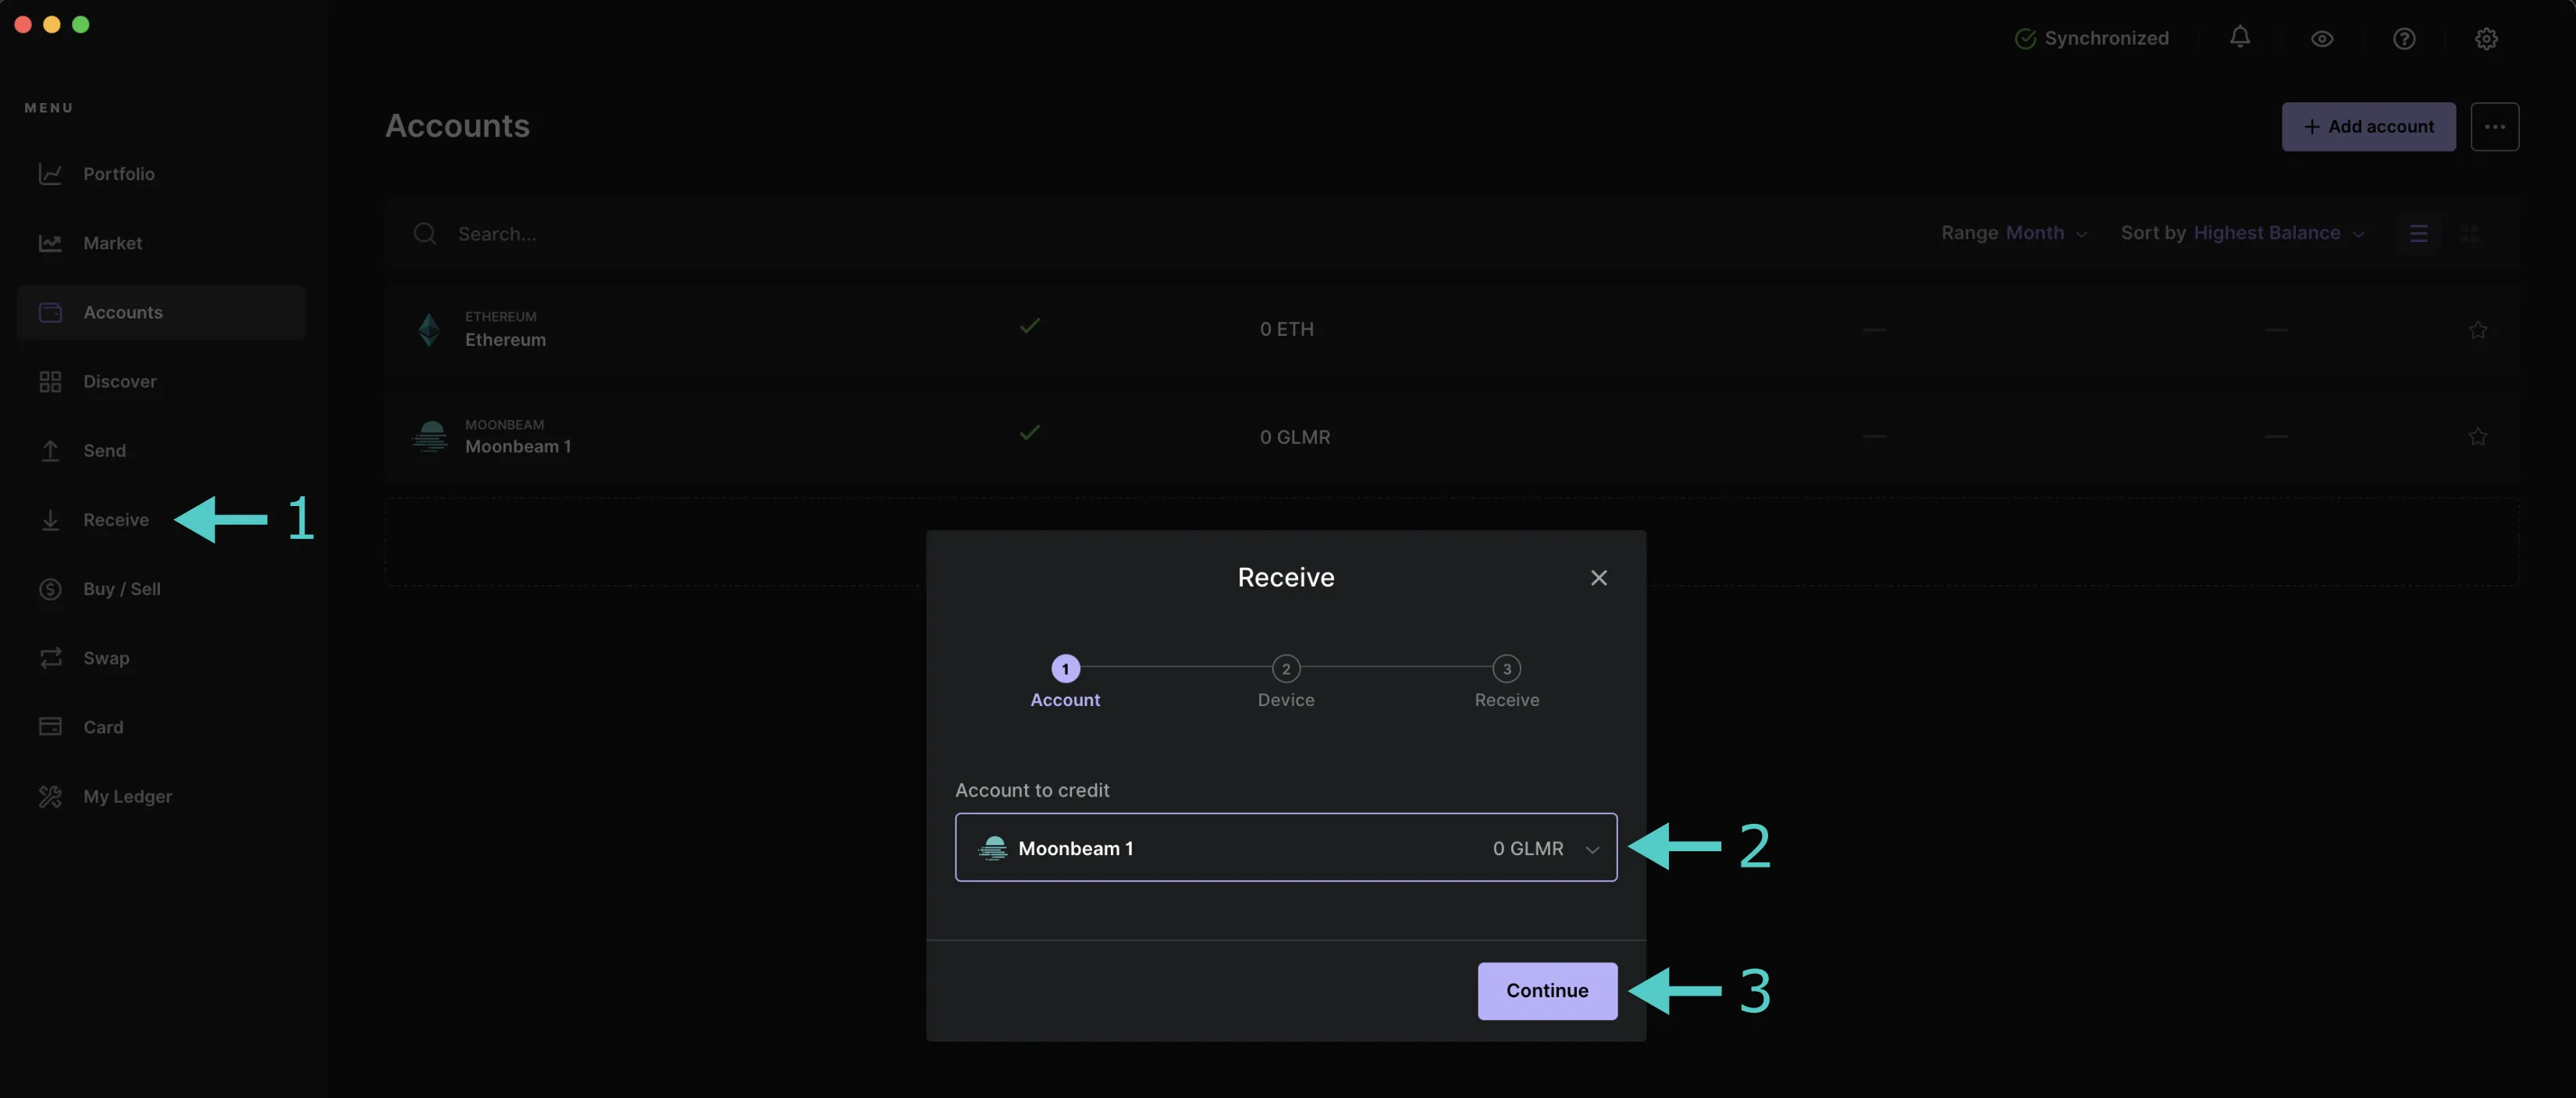
Next, your address should appear on Ledger Live, and you'll be prompted to verify your address on your Ledger device. On your device, you can take the following steps:
1. You should see **Verify Address** on your device's screen. Click the right button to start verifying your address
2. On the next screen, you should see your address. Compare the address on your device to the one displayed on Ledger Live and verify it matches. At this time, you'll want to copy the address from Ledger Live so you can send a transaction to it. Click the right button to continue
3. Now, you should see the **Approve** screen. If the addresses match, you can click both buttons on your device to approve the verification. Otherwise, click the right button again to get to the **Reject** screen where you can click both buttons to reject the verification
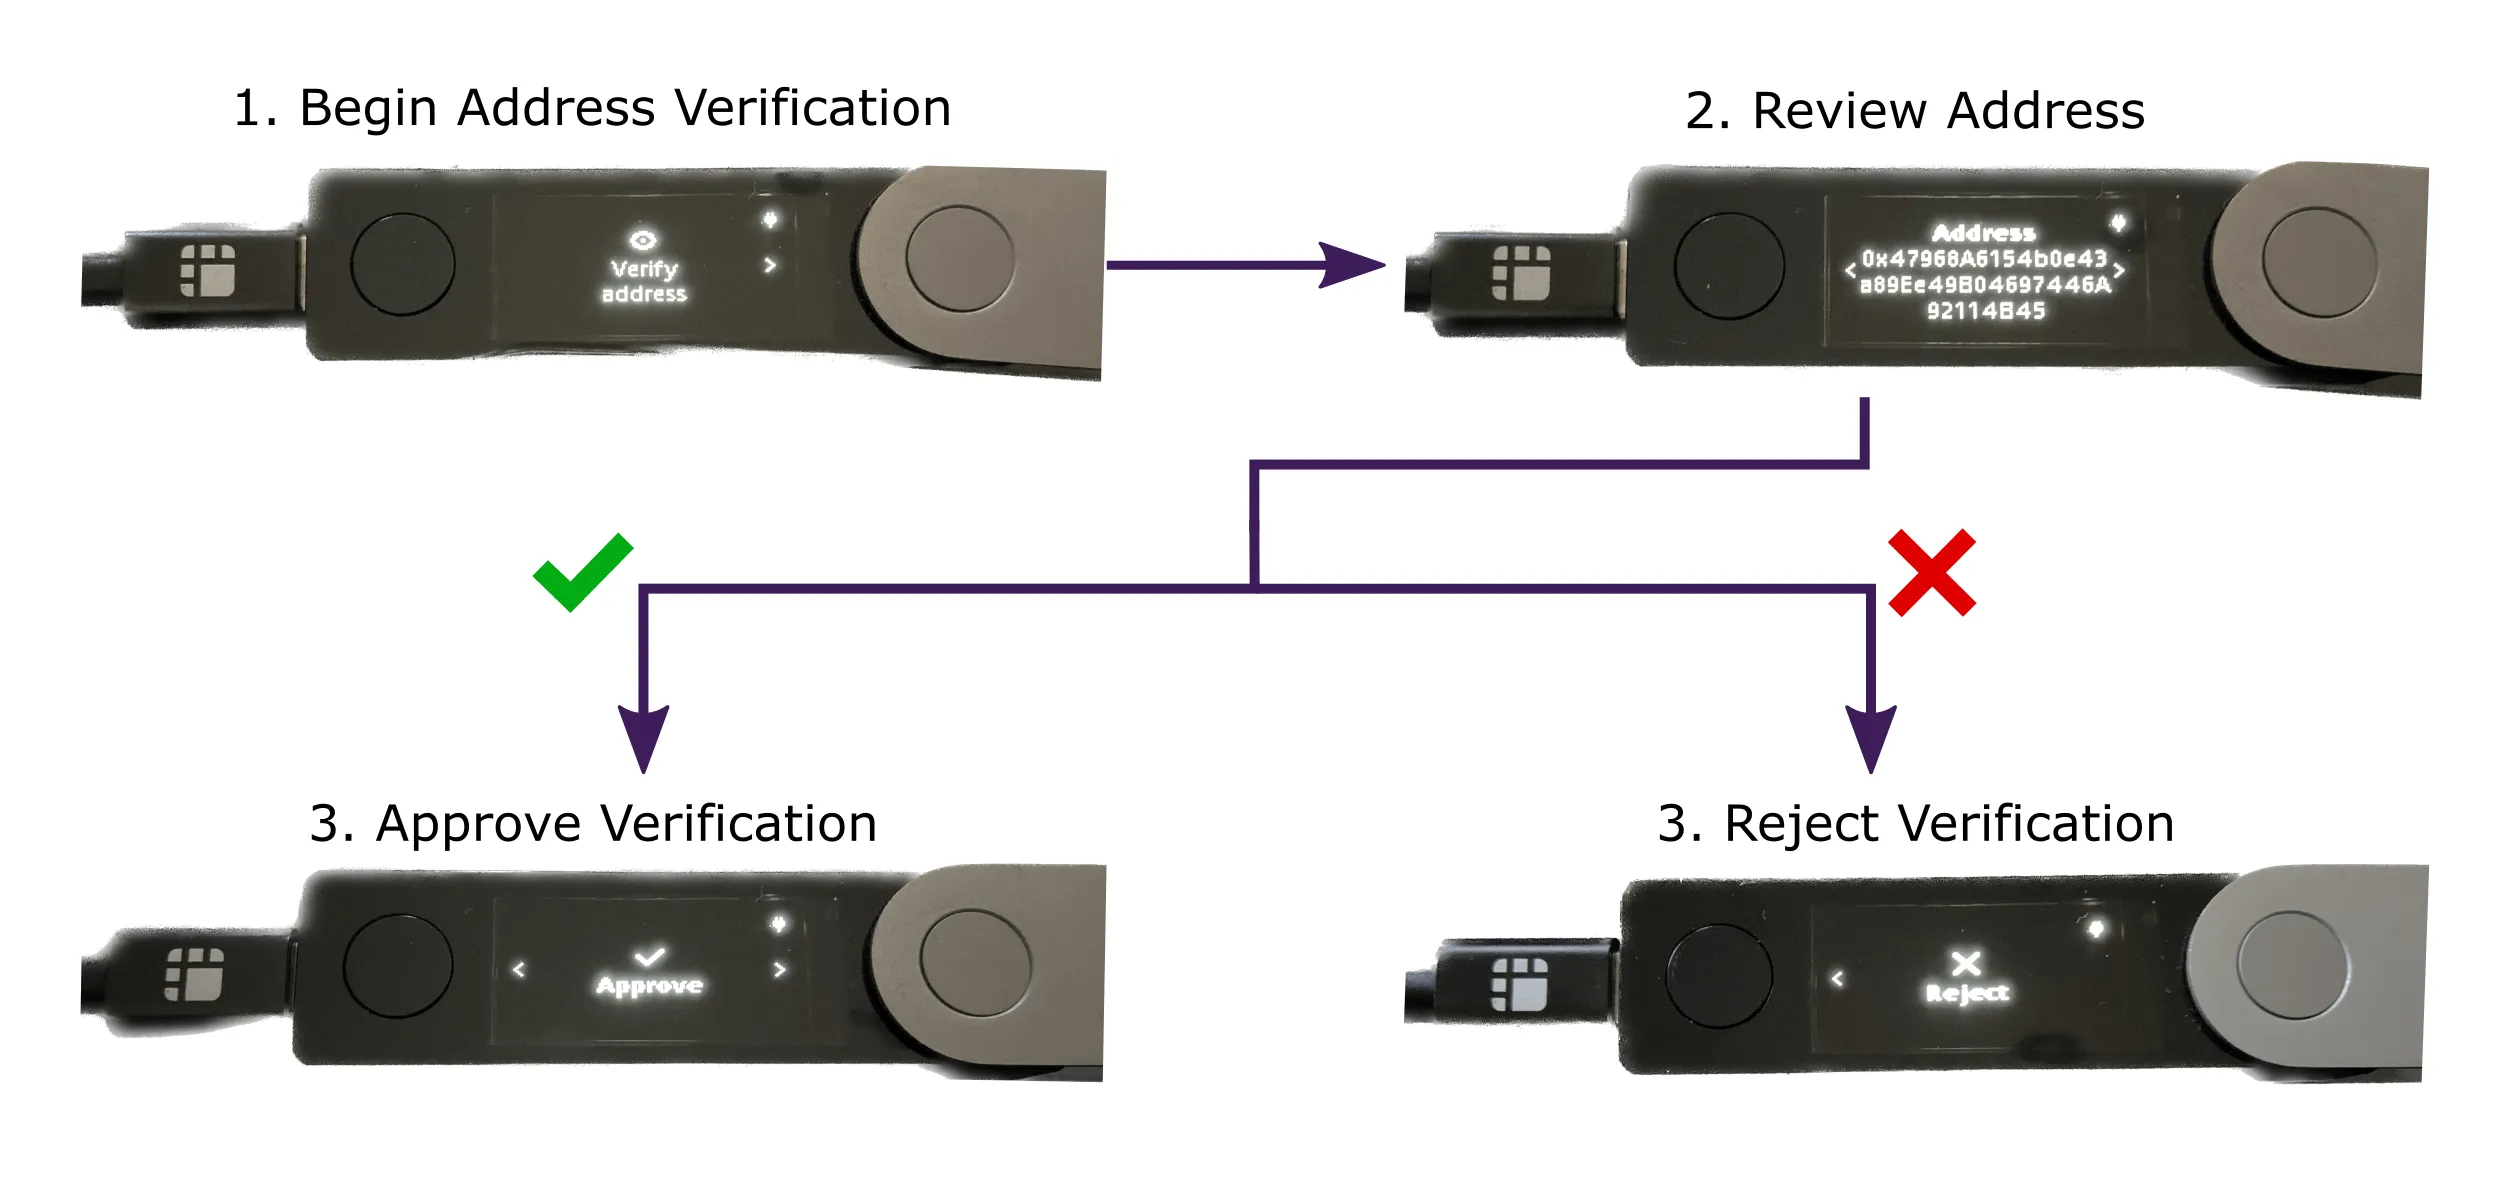
Over on Ledger Live, you'll see that your address has been shared securely, and you can click **Done**. Now, you can send some GLMR to your Ledger account.
### Send Tokens
To send GLMR from your Ledger device, you can take the following steps from Ledger Live:
1. Click on **Send** from the left-side menu
2. A pop-up will appear. From the **Account to debit** dropdown, you can select your Moonbeam account that you want to send tokens from
3. Enter an address in the **Receipient address** field
4. Click **Continue**
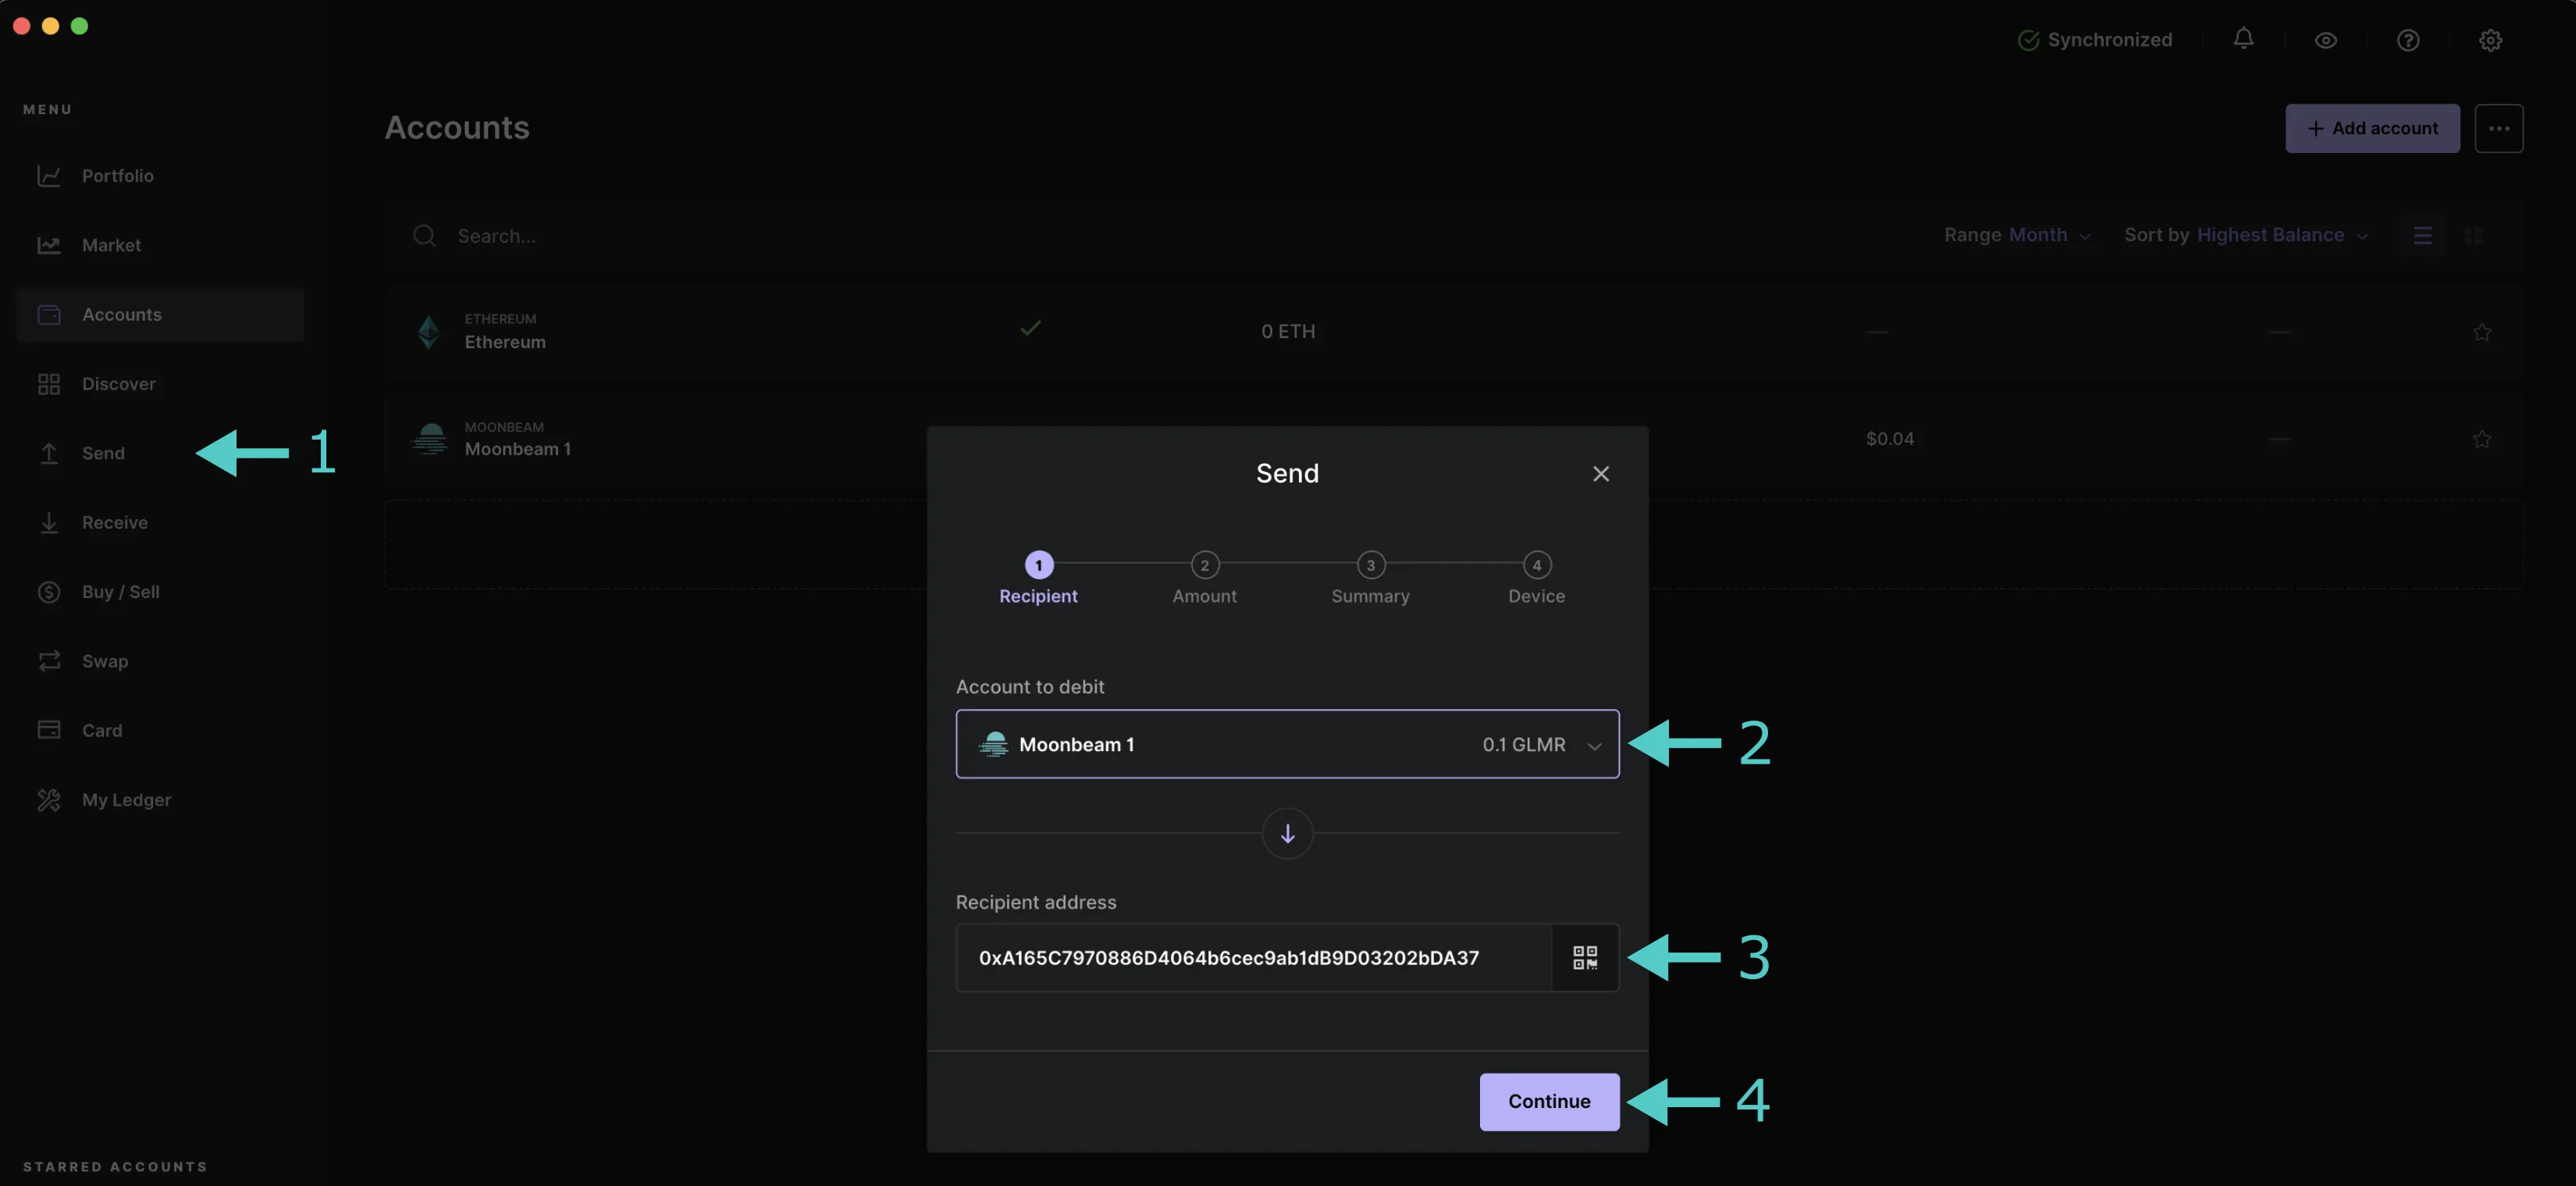
On the next screen, you can enter the amount of GLMR that you would like to send and click **Continue**.
The last step on Ledger Live is to verify that the transaction details are correct. If everything looks good, you can click **Continue**. Then you'll be prompted to confirm the transaction on your Ledger device:
1. The first screen will be the **Review transaction** screen. Click the right button to proceed to the next screen
2. Verify the amount of GLMR you're sending and click the right button to proceed
3. Verify the address you're sending the GLMR to and click the right button to proceed
4. The **Network** screen should show **Moonbeam**. Click the right button to proceed
5. Review the **Max Fees** and click the right button to proceed
6. If everything looks good, you can click both buttons to **Accept and send** the transaction. Otherwise, you can click the right button to get to the **Reject** screen where you can click both buttons to reject the transaction
On Ledger Live, you should see that your transaction was sent, and you can view the details of the transaction. Once the transaction has been confirmed, your GLMR balance will update.
And that is it! You've successfully used the Moonbeam Ledger Live integration to receive and send tokens with your Ledger device directly from Ledger Live!
## Import your Ledger Account to MetaMask {: #import-your-ledger-account-to-metamask }
Now that you've installed the app(s) on Ledger Live, you can connect your Ledger to the computer and unlock it, and open the Ethereum app.
Then import your Ledger account to MetaMask using the following steps:
1. Click on the top-right logo to expand the menu
2. Select **Connect Hardware Wallet**

In the next screen, you are prompted to select which hardware wallet you'll like to use in MetaMask. At the moment of writing, only Ledger and Trezor hardware wallets are supported. Here, take the following steps:
1. Select the Ledger logo
2. Click on **Continue**

If you're using Chrome or a Chrome-based browser like Brave, you'll be prompted to select your Ledger device to connect via WebHID:
1. Select your Ledger device from the pop-up
2. Click **Connect**

If a pop-up doesn't appear, you may need to change your MetaMask settings to enable a WebHID connection. You can check and update your MetaMask settings by following these steps:
1. Expand the top-right menu and go to **Settings**
2. Navigate to **Advanced**
3. Scroll down to **Preferred Ledger Connection Type** and select **WebHID** from the dropdown
!!! note
The **Preferred Ledger Connection Type** setting is only available on Chrome and Chrome-based browsers. This setting doesn't exist on other browsers such as Firefox.
If MetaMask was able to connect successfully to your Ledger device, you should see a list of five Moonbeam/Ethereum-styled accounts. If not, double-check that Ledger Live is closed, you've connected your Ledger device to the computer, and unlocked it, and make sure the Ethereum app is open.
### Import Accounts and View Balances {: #import-accounts-and-view-balances }
From the list of accounts, take the following steps:
1. Select the accounts you would like to import from your Ledger device
2. Click on **Unlock**

If you've imported your Ledger account successfully, you should see your account and balance displayed in the main MetaMask screen like shown in the following image:

You can switch accounts in MetaMask at any time to view the balance of your other imported Ledger accounts.
You've now successfully imported a Moonbeam compatible account from your Ledger device and are now ready to start interacting with your Ledger device.
## Receive Tokens {: #receive-tokens }
To get started interacting with your Ledger device, you will need to send some funds to it. Copy your address from MetaMask by clicking on your account name and address in MetaMask.

Next, you will need to obtain some GLMR, MOVR, or DEV tokens and using the address you just copied, send the tokens to your account. After the transaction has successfully gone through, you will see your balance update.
You can get DEV tokens for testing on Moonbase Alpha once every 24 hours from the [Moonbase Alpha Faucet](https://faucet.moonbeam.network){target=\_blank}.
## Send Tokens {: #send-tokens }
Next up is sending and signing transactions on Moonbeam using your Ledger device. To get started sending a transaction, click on the **Send** button:

As you would in a standard transaction, set the recipient address, enter the number of tokens to send, review transaction details and confirm it. This will initiate the transaction signature wizard in your Ledger device. Here, take the following steps:
1. Click the button to proceed to the next screen. Your Ledger device is only warning you to review the transaction
2. Check the number of tokens being sent then proceed to the next screen
3. Check the recipient's address and proceed to the next screen
4. Check the chain ID of the network. This information confirms which network MetaMask is connected to. For Moonbeam the chain ID is 1284 (hex: 0x504), Moonriver is 1285 (hex: 0x505), and Moonbase Alpha is 1287 (hex: 0x507). When ready, proceed to the next screen
5. Check the max fees applicable to this transaction. This is the gas price multiplied by the gas limit you've set on MetaMask. When ready, proceed to the next screen
6. If you agree with all the transaction details, approve it. This will sign the transaction and will trigger MetaMask to send it. If you don't agree with all the transaction details, reject it. This will cancel the transaction, and MetaMask will mark it as failed

Right after you've approved the transaction, MetaMask sends it to the network. Once the transaction is confirmed, it will be displayed as **Send** on the **Activity** tab in MetaMask.

And that is it! You've signed a transaction and sent some tokens on Moonbeam using your Ledger hardware wallet!
## Interact with Contracts Using your Ledger {: #interact-with-contracts-using-your-ledger }
By default, Ledger devices don't admit a `data` field in the transaction object. Consequently, users can't deploy or interact with smart contracts.
However, if you want to use your Ledger hardware wallet for transactions related to smart contracts, you need to change a configuration parameter inside the app on your device. To do so, take the following steps:
1. On your Ledger, open the Moonriver or Ethereum app
2. Navigate to **Settings**
3. Find the **Blind signing** page. It should state **NOT Enabled** at the bottom
4. Select/validate the option to change its value to **Enabled**
!!! note
This option is necessary to use your Ledger device to interact with ERC-20 token contracts that might live inside the Moonbeam ecosystem.

## Use Ledger Live to Send & Receive GLMR {: #use-ledger-live }
You can also use your Ledger device to send and receive GLMR tokens securely from within Ledger Live. This enables you to manage your GLMR tokens without connecting your device to MetaMask.
When you open up the Ledger Live app, make sure that you've installed the latest updates. If there are any pending updates that need to be installed, there will be a banner at the top of the screen that prompts you to install the updates.
To get started, you'll need to login to your Ledger device to unlock it. From Ledger Live, click on **My Ledger**. On your device, you'll be prompted to allow Ledger manager; you can click both buttons on your device to allow it.
Once on the Ledger manager, you'll need to make sure that your firmware is up to date, and if the Moonbeam and/or Ethereum apps need to be updated, go ahead and install the latest versions.
Next, you'll need to add an account to your Ledger Live app. To do so, you can take the following steps:
1. Click on **Accounts** from the left-side menu
2. Select **Add account**
3. A dropdown will appear. Search for GLMR and **Moonbeam (GLMR)** should appear for you to select
4. Click **Continue**

Next, you'll be able to enter an account name and click **Add account**. If your account was successfully added, you can click **Done** and your account will appear in your list of accounts.
### Receive Tokens
To receive GLMR to your Ledger device, you can take the following steps from Ledger Live:
1. Click on **Receive** from the left-side menu
2. A pop-up will appear. You can select your Moonbeam account where you want to receive tokens from the **Account to credit** dropdown
3. Click **Continue**

Next, your address should appear on Ledger Live, and you'll be prompted to verify your address on your Ledger device. On your device, you can take the following steps:
1. You should see **Verify Address** on your device's screen. Click the right button to start verifying your address
2. On the next screen, you should see your address. Compare the address on your device to the one displayed on Ledger Live and verify it matches. At this time, you'll want to copy the address from Ledger Live so you can send a transaction to it. Click the right button to continue
3. Now, you should see the **Approve** screen. If the addresses match, you can click both buttons on your device to approve the verification. Otherwise, click the right button again to get to the **Reject** screen where you can click both buttons to reject the verification

Over on Ledger Live, you'll see that your address has been shared securely, and you can click **Done**. Now, you can send some GLMR to your Ledger account.
### Send Tokens
To send GLMR from your Ledger device, you can take the following steps from Ledger Live:
1. Click on **Send** from the left-side menu
2. A pop-up will appear. From the **Account to debit** dropdown, you can select your Moonbeam account that you want to send tokens from
3. Enter an address in the **Receipient address** field
4. Click **Continue**

On the next screen, you can enter the amount of GLMR that you would like to send and click **Continue**.

The last step on Ledger Live is to verify that the transaction details are correct. If everything looks good, you can click **Continue**. Then you'll be prompted to confirm the transaction on your Ledger device:
1. The first screen will be the **Review transaction** screen. Click the right button to proceed to the next screen
2. Verify the amount of GLMR you're sending and click the right button to proceed
3. Verify the address you're sending the GLMR to and click the right button to proceed
4. The **Network** screen should show **Moonbeam**. Click the right button to proceed
5. Review the **Max Fees** and click the right button to proceed
6. If everything looks good, you can click both buttons to **Accept and send** the transaction. Otherwise, you can click the right button to get to the **Reject** screen where you can click both buttons to reject the transaction

On Ledger Live, you should see that your transaction was sent, and you can view the details of the transaction. Once the transaction has been confirmed, your GLMR balance will update.
And that is it! You've successfully used the Moonbeam Ledger Live integration to receive and send tokens with your Ledger device directly from Ledger Live!
The information presented herein has been provided by third parties and is made available solely for general information purposes. Moonbeam does not endorse any project listed and described on the Moonbeam Doc Website (https://docs.moonbeam.network/). Moonbeam Foundation does not warrant the accuracy, completeness or usefulness of this information. Any reliance you place on such information is strictly at your own risk. Moonbeam Foundation disclaims all liability and responsibility arising from any reliance placed on this information by you or by anyone who may be informed of any of its contents. All statements and/or opinions expressed in these materials are solely the responsibility of the person or entity providing those materials and do not necessarily represent the opinion of Moonbeam Foundation. The information should not be construed as professional or financial advice of any kind. Advice from a suitably qualified professional should always be sought in relation to any particular matter or circumstance. The information herein may link to or integrate with other websites operated or content provided by third parties, and such other websites may link to this website. Moonbeam Foundation has no control over any such other websites or their content and will have no liability arising out of or related to such websites or their content. The existence of any such link does not constitute an endorsement of such websites, the content of the websites, or the operators of the websites. These links are being provided to you only as a convenience and you release and hold Moonbeam Foundation harmless from any and all liability arising from your use of this information or the information provided by any third-party website or service.
--- END CONTENT ---
Doc-Content: https://docs.moonbeam.network/tokens/connect/ledger/moonbeam/
--- BEGIN CONTENT ---
---
title: Moonbeam App
description: This guide walks you through how to use your Ledger hardware wallet to sign transactions in Moonbeam using the native Moonbeam Ledger Live app.
categories: Tokens and Accounts, Ethereum Toolkit
---
# Interacting with Moonbeam Using Ledger and the Moonbeam App
## Introduction {: #introduction }
Hardware wallets provide a safer way to store crypto funds because the private key (used for signing transactions) is stored offline. Ledger offers two hardware wallet solutions at the time of writing: Ledger Nano S and Ledger Nano X.
You can interact with Moonbeam using your Ledger hardware wallet through the Moonbeam Ledger Live app. With the dedicated Moonbeam app, you do not have to worry about setting the chain ID and you know you are connected to the right network. Please note that you can only use the Moonbeam app to connect to the Moonbeam network, it cannot be used to connect to other Moonbeam-based networks.
You also have the option of using the Ethereum app to connect to Moonbeam. The main difference between using the Moonbeam and the Ethereum app is that you have to specify the chain ID when you use the Ethereum app, which is 1284 for Moonbeam. If you're interested in using the Ethereum app instead, you can check out the [Interacting with Moonbeam Using Ledger and the Ethereum App](/tokens/connect/ledger/ethereum/){target=\_blank} guide.
In this tutorial, you will learn how to get started with your Ledger hardware wallet on Moonbeam using the Moonbeam app. This guide only illustrates the steps for a Ledger Nano X device, but you can follow along with a Ledger Nano S as well.
The information presented herein is for informational purposes only and has been provided by third parties. Moonbeam does not endorse any project listed and described on the Moonbeam docs website (https://docs.moonbeam.network/).
## Checking Prerequisites {: #checking-prerequisites }
Before you get started, update [Ledger Live](https://www.ledger.com/ledger-live){target=\_blank} to the latest version available. Also, make sure you've your Ledger hardware wallet device running the latest firmware. The Ledger support website offers tutorials on [how to update](https://support.ledger.com/article/360013349800-zde){target=\_blank} the firmware.
At the time of writing, the following versions were used:
- [Ledger Live 2.35.1](https://support.ledger.com/article/What-s-new-in-Ledger-Live){target=\_blank}
- [Ledger Nano S firmware v2.0.0](https://support.ledger.com/article/360010446000-zd){target=\_blank}
- [Ledger Nano X firmware v2.0.1](https://support.ledger.com/article/360014980580-zd){target=\_blank}
As of November 29, 2022, the Moonbeam and Ledger Live integration was released, allowing you to send and receive GLMR tokens with your Ledger device directly in Ledger Live. With this integration, you'll no longer need to connect your Ledger to MetaMask. If you prefer this method, please skip ahead to the [Use Ledger Live to Send & Receive GLMR](#use-ledger-live) section of this guide.
If you prefer to use MetaMask as an intermediary between your Ledger device and Moonbeam, make sure that your MetaMask is [connected to Moonbeam](/tokens/connect/metamask/){target=\_blank}.
As of [MetaMask version 10.5.0](https://consensys.io/blog/metamask-and-ledger-integration-fixed){target=\_blank}, connecting your Ledger device with MetaMask on Chrome is easy again. You just need to have the latest version of MetaMask installed.
## Install the Moonbeam Ledger Live App {: install-the-moonbeam-ledger-live-app }
The Moonbeam app is dependent on the Ethereum app, so first you will need to install the Ethereum app. Once the Ethereum app is installed you will be able to install the Moonbeam app without a problem. Please note that the Moonbeam app is only for the Moonbeam network, it will not work for Moonriver or Moonbase Alpha.
To get started, open up Ledger Live and:
1. Select **Manager** from the menu
2. Connect and unlock your device (this must be done before installation)
3. In the **App catalog** search for Ethereum (ETH) and click **Install**. Your Ledger device will show **Processing** and once the installation is complete, the app will appear on your Ledger device
4. Search for Moonbeam (GLMR) in the **App catalog** and click **Install**. Again, your Ledger device will show **Processing** and once complete, the Moonbeam app will appear on your Ledger device
In the Ledger Live app, you should see the Ethereum and Moonbeam app listed under the **Apps installed** tab on the **Manager** page. After the apps have been successfully installed, you can close out of Ledger Live.
 ## Import your Ledger Account to MetaMask {: #import-your-ledger-account-to-metamask }
Now that you've installed the Ledger Live apps, you can connect your Ledger to the computer, unlock it, and open the Moonbeam app.
Then import your Ledger account to MetaMask using the following steps:
1. Click on the top-right logo to expand the menu
2. Select **Connect Hardware Wallet**
In the next screen, you are prompted to select which hardware wallet you'll like to use in MetaMask. At the moment of writing, only Ledger and Trezor hardware wallets are supported. Here, take the following steps:
1. Select the Ledger logo
2. Click on **Continue**
If you're using Chrome or a Chrome-based browser like Brave, you'll be prompted to select your Ledger device to connect via WebHID:
1. Select your Ledger device from the pop-up
2. Click **Connect**
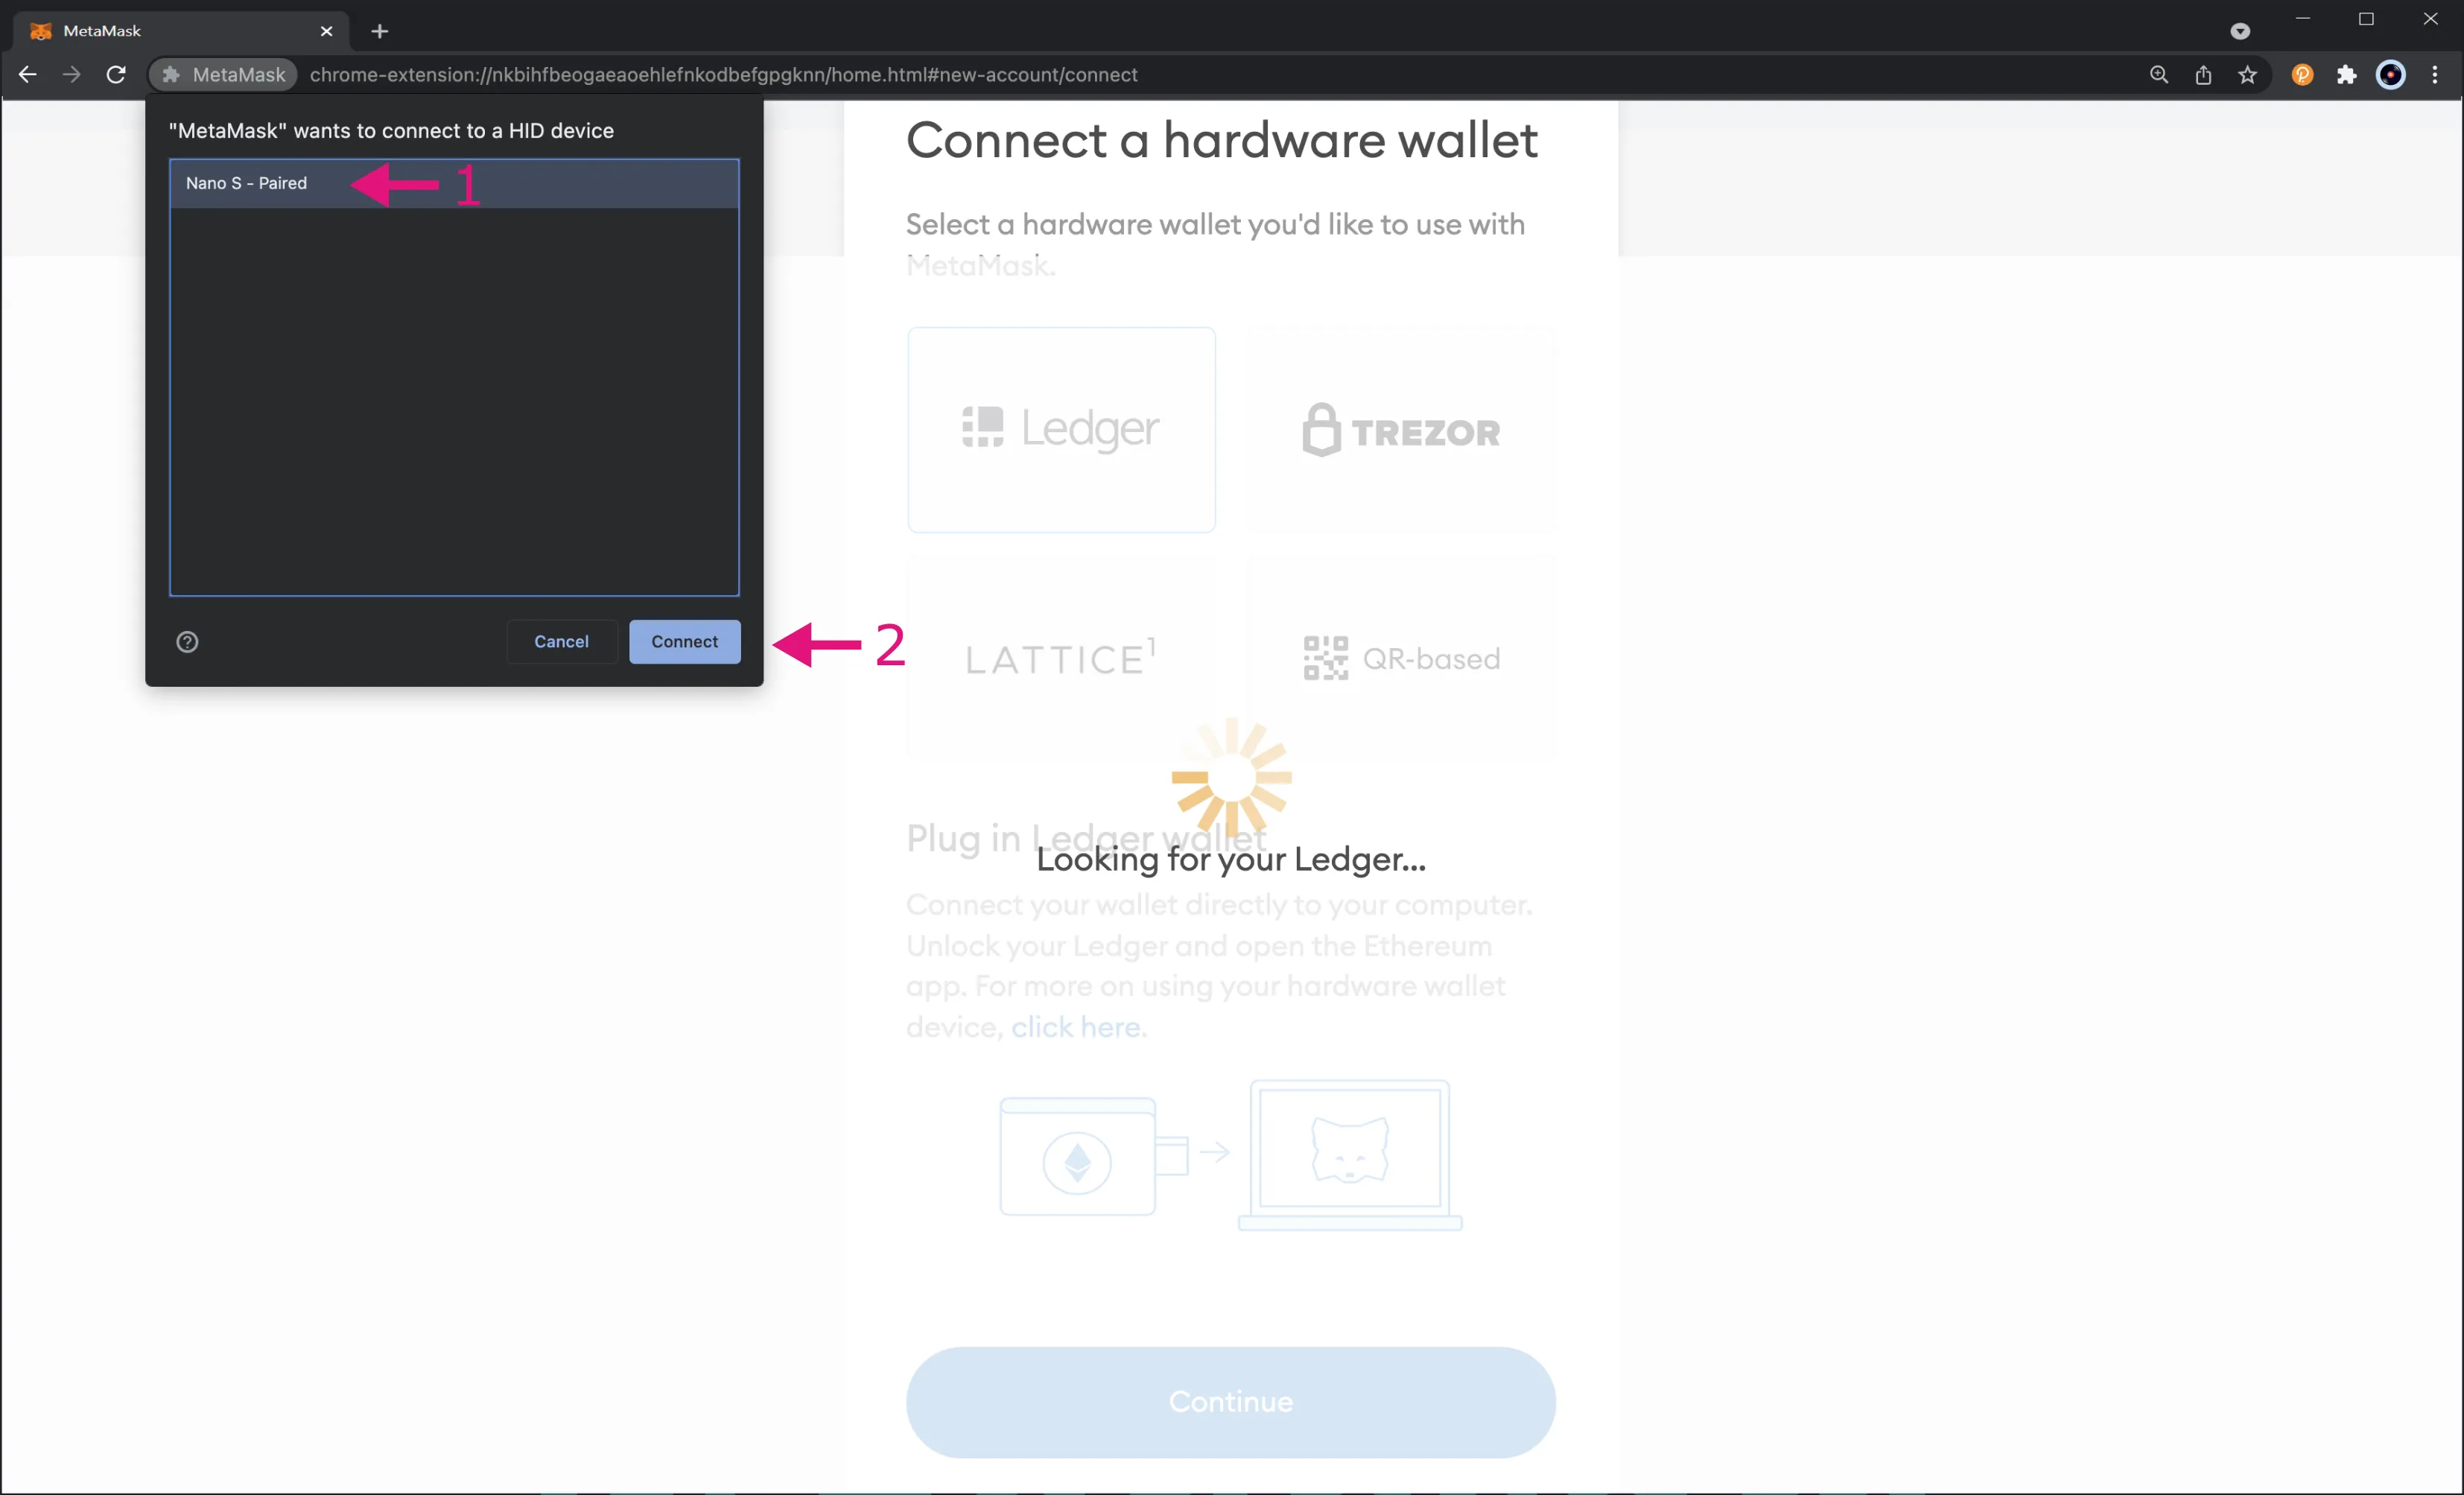
If a pop-up doesn't appear, you may need to change your MetaMask settings to enable a WebHID connection. You can check and update your MetaMask settings by following these steps:
1. Expand the top-right menu and go to **Settings**
2. Navigate to **Advanced**
3. Scroll down to **Preferred Ledger Connection Type** and select **WebHID** from the dropdown
!!! note
The **Preferred Ledger Connection Type** setting is only available on Chrome and Chrome-based browsers. This setting doesn't exist on other browsers such as Firefox.
If MetaMask was able to connect successfully to your Ledger device, you should see a list of five Moonbeam/Ethereum-styled accounts. If not, double-check that Ledger Live is closed, you've connected your Ledger device to the computer, unlocked it, and have the Moonbeam app open.
### Import Accounts and View Balances {: #import-accounts-and-view-balances }
From the list of accounts, take the following steps:
1. Select the accounts you would like to import from your Ledger device
2. Click on **Unlock**
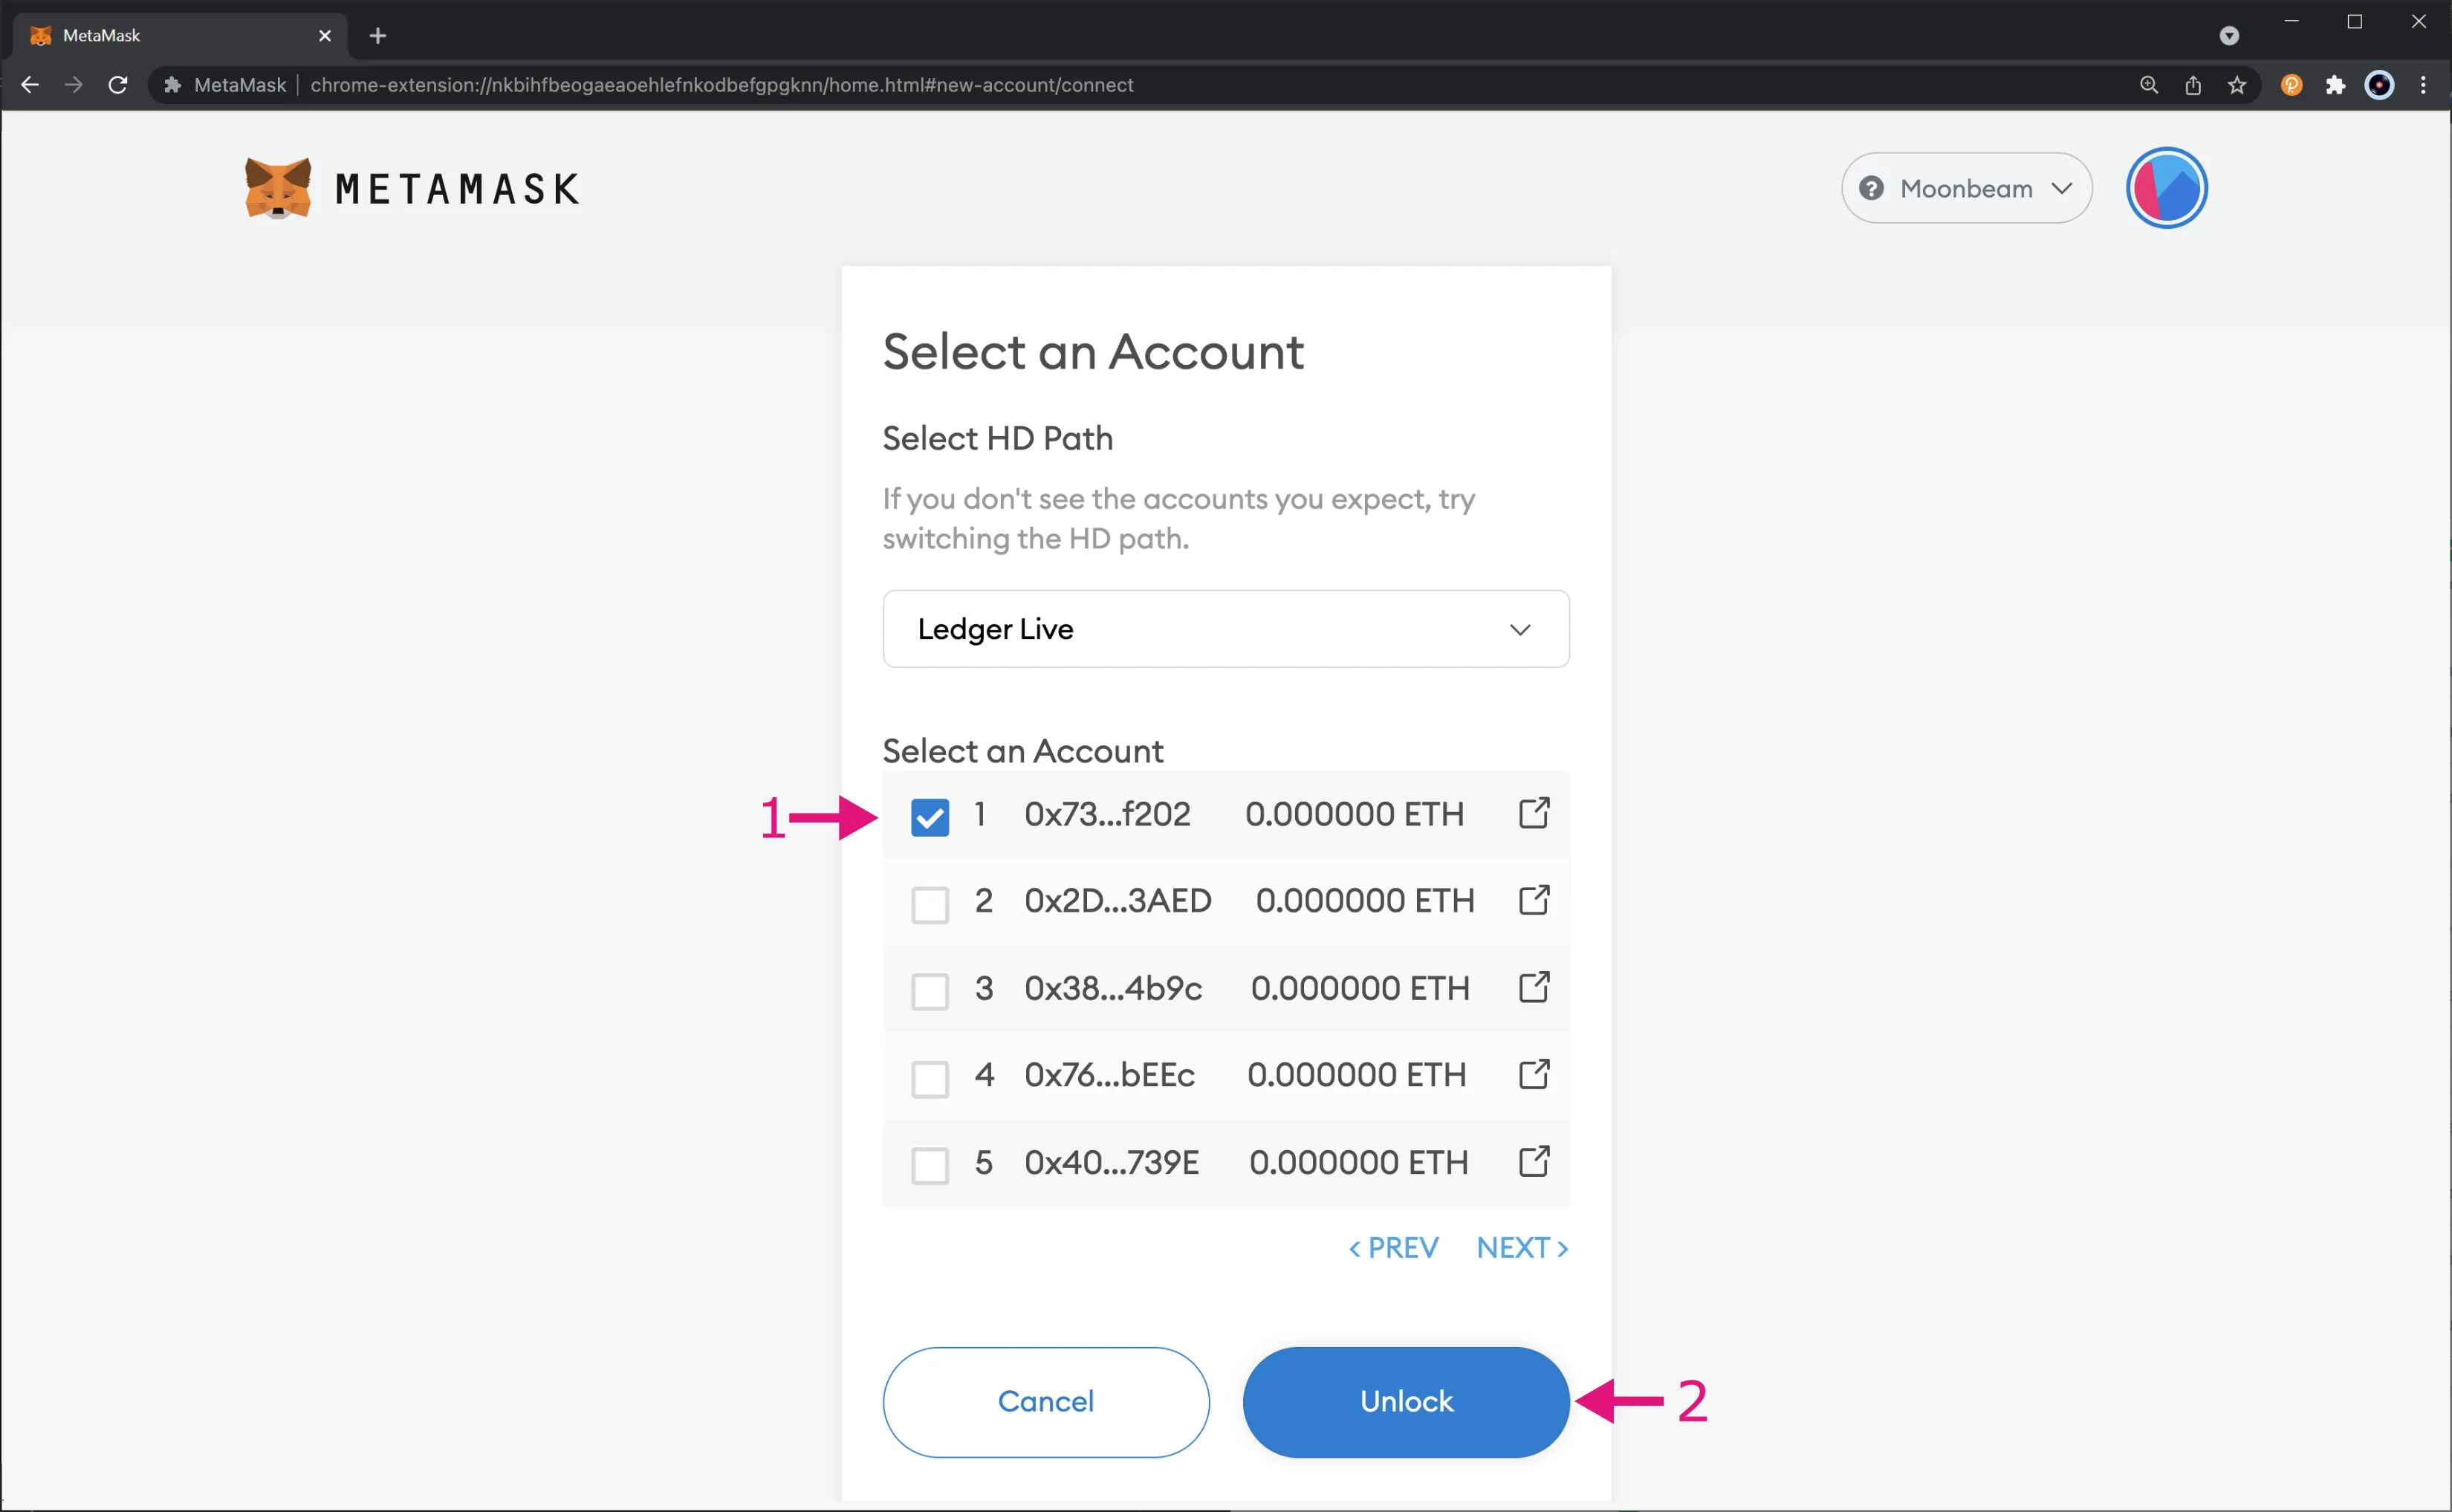
If you've imported your Ledger account successfully, you should see your account and balance displayed in the main MetaMask screen like shown in the following image:
You can switch accounts in MetaMask at any time to view the balance of your other imported Ledger accounts.
You've now successfully imported a Moonbeam compatible account from your Ledger device and are now ready to start interacting with your Ledger device.
## Receive Tokens {: #receive-tokens }
To get started interacting with your Ledger device, you will need to send some funds to it. Copy your address from MetaMask by clicking on your account name and address in MetaMask.
Next, you will need to obtain some GLMR tokens and using the address you just copied, send the tokens to your account. After the transaction has successfully gone through, you will see your balance update.
## Send Tokens {: #send-tokens }
Next up is sending and signing transactions on Moonbeam using your Ledger device. To get started sending a transaction, click on the **Send** button:
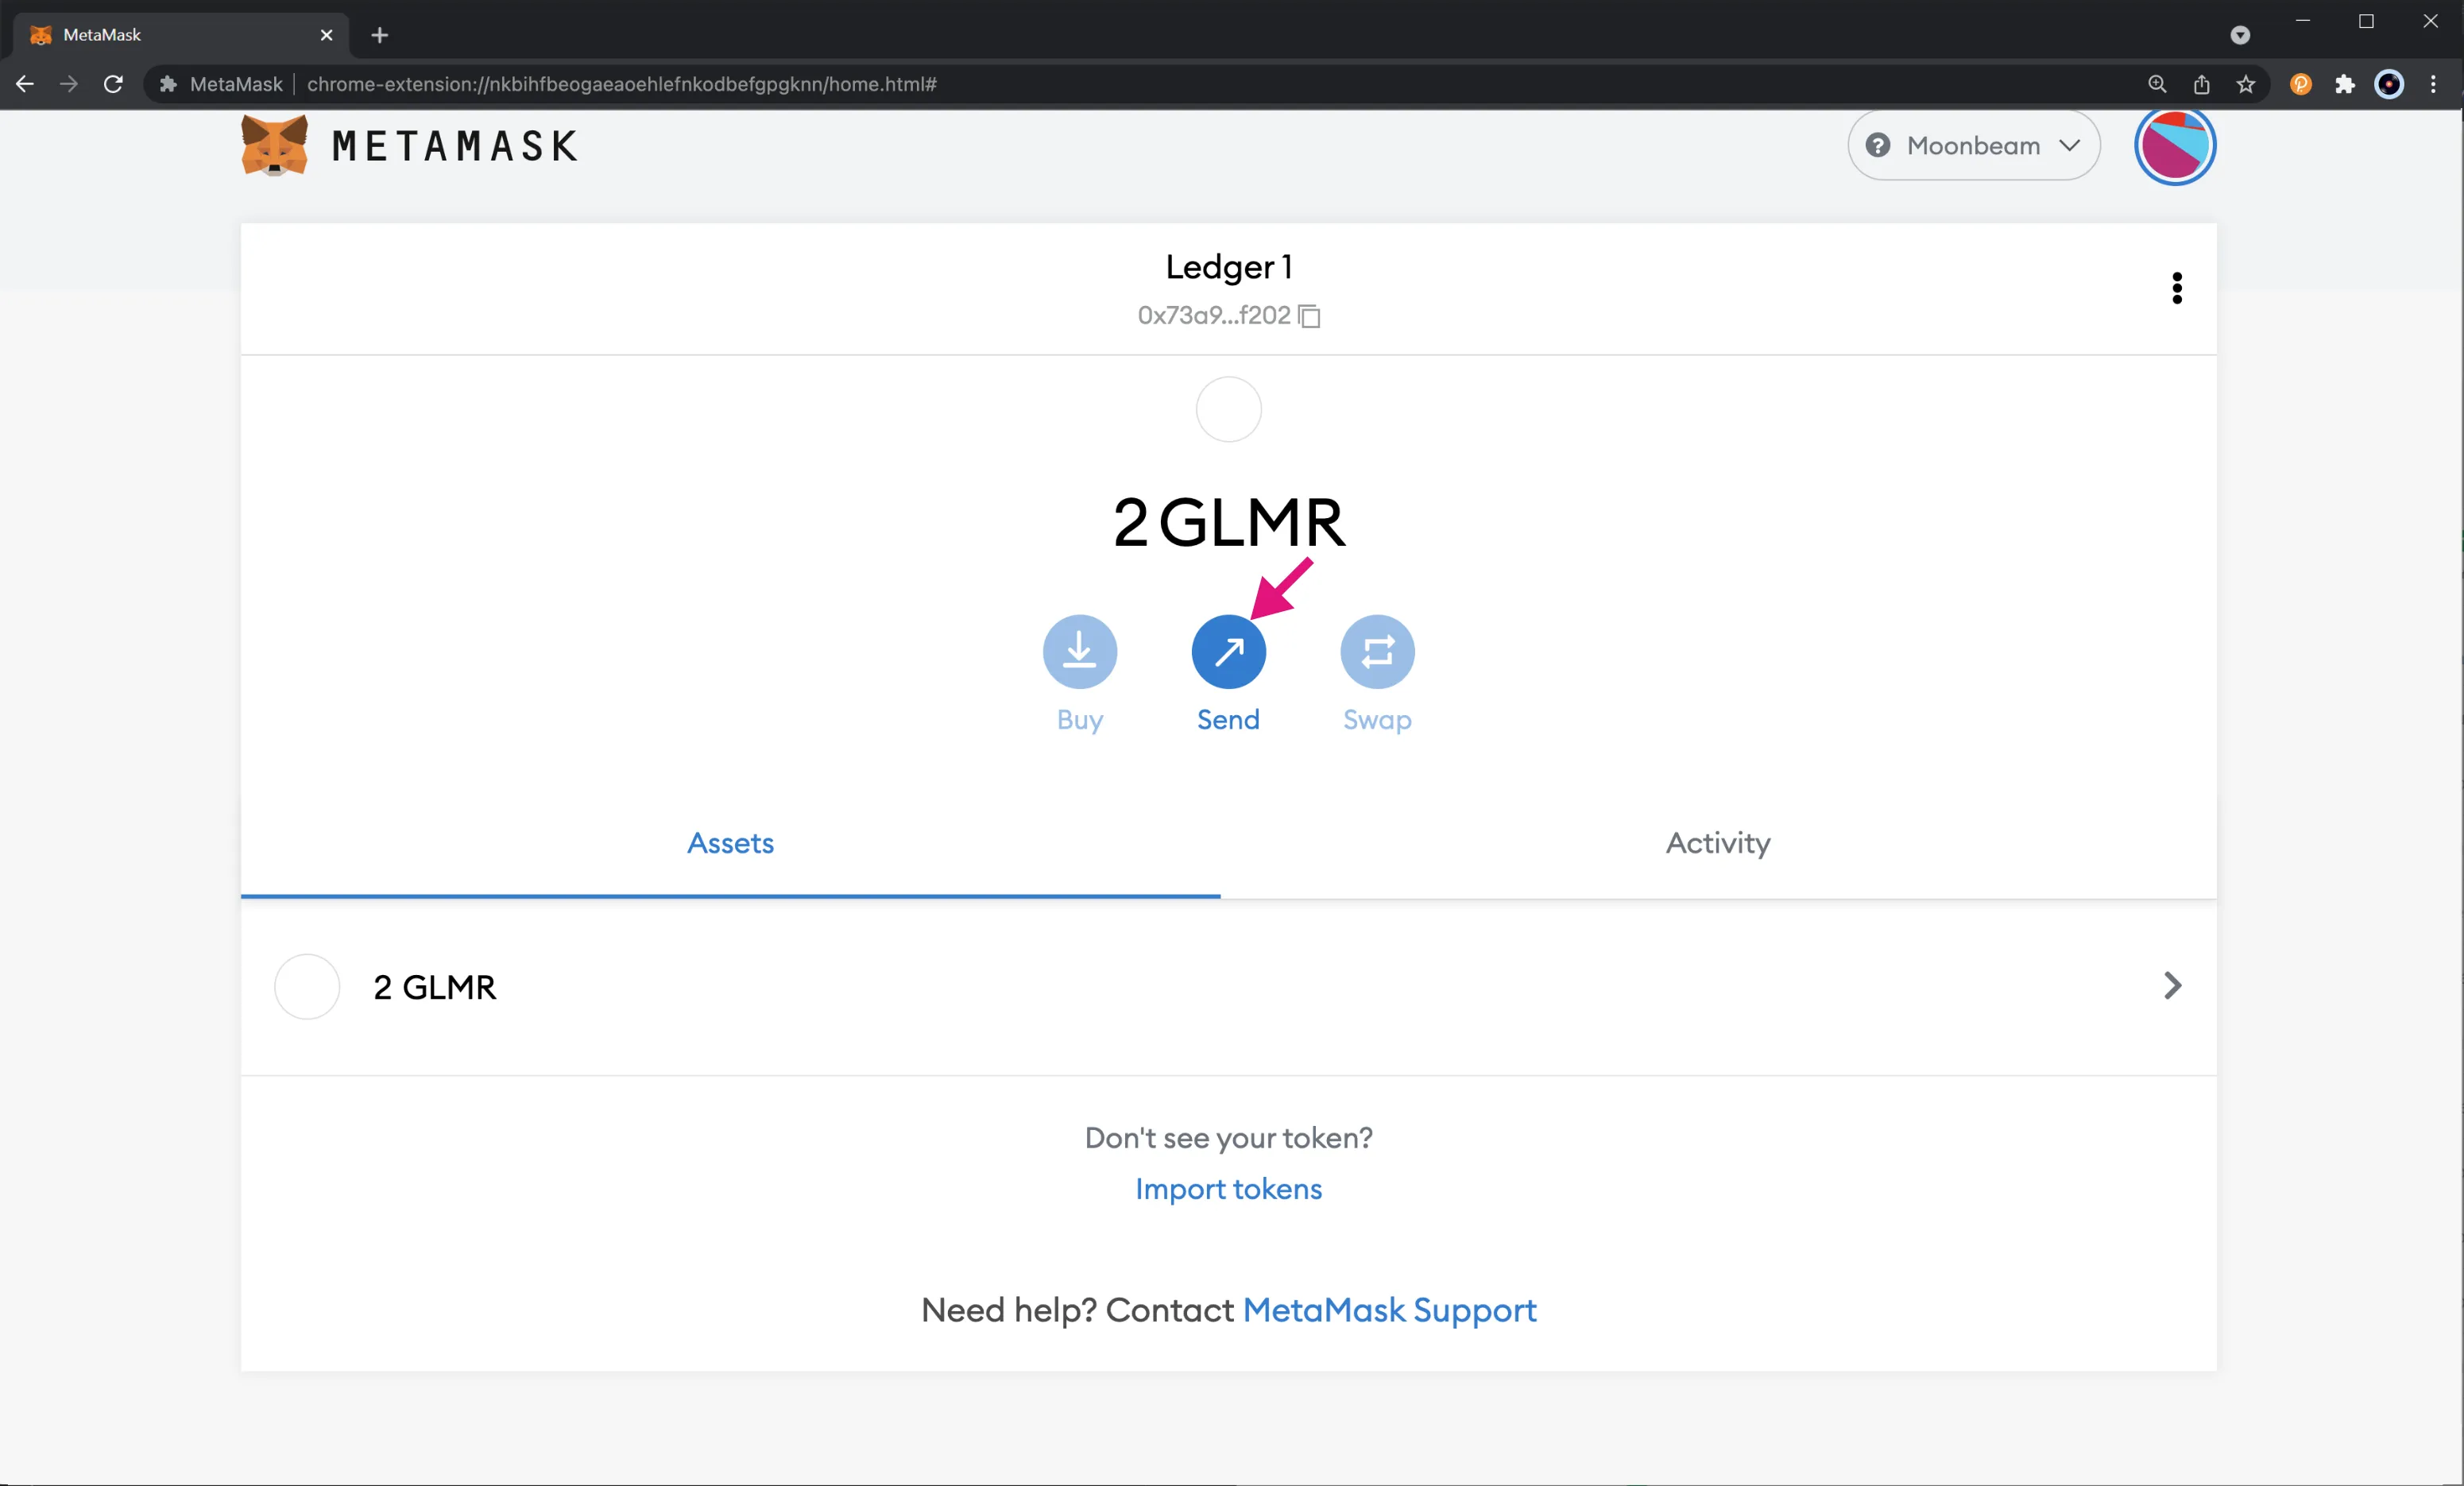
As you would in a standard transaction, set the recipient address, enter the number of tokens to send, review transaction details and confirm it. This will initiate the transaction signature wizard in your Ledger device. Here, take the following steps:
1. Click the button to proceed to the next screen. Your Ledger device is only warning you to review the transaction
2. Check the number of tokens being sent then proceed to the next screen
3. Check the recipient's address and proceed to the next screen
4. Check the max fees applicable to this transaction. This is the gas price multiplied by the gas limit you've set on MetaMask. When ready, proceed to the next screen
5. If you agree with all the transaction details, approve it. This will sign the transaction and will trigger MetaMask to send it. If you don't agree with all the transaction details, reject it. This will cancel the transaction, and MetaMask will mark it as failed
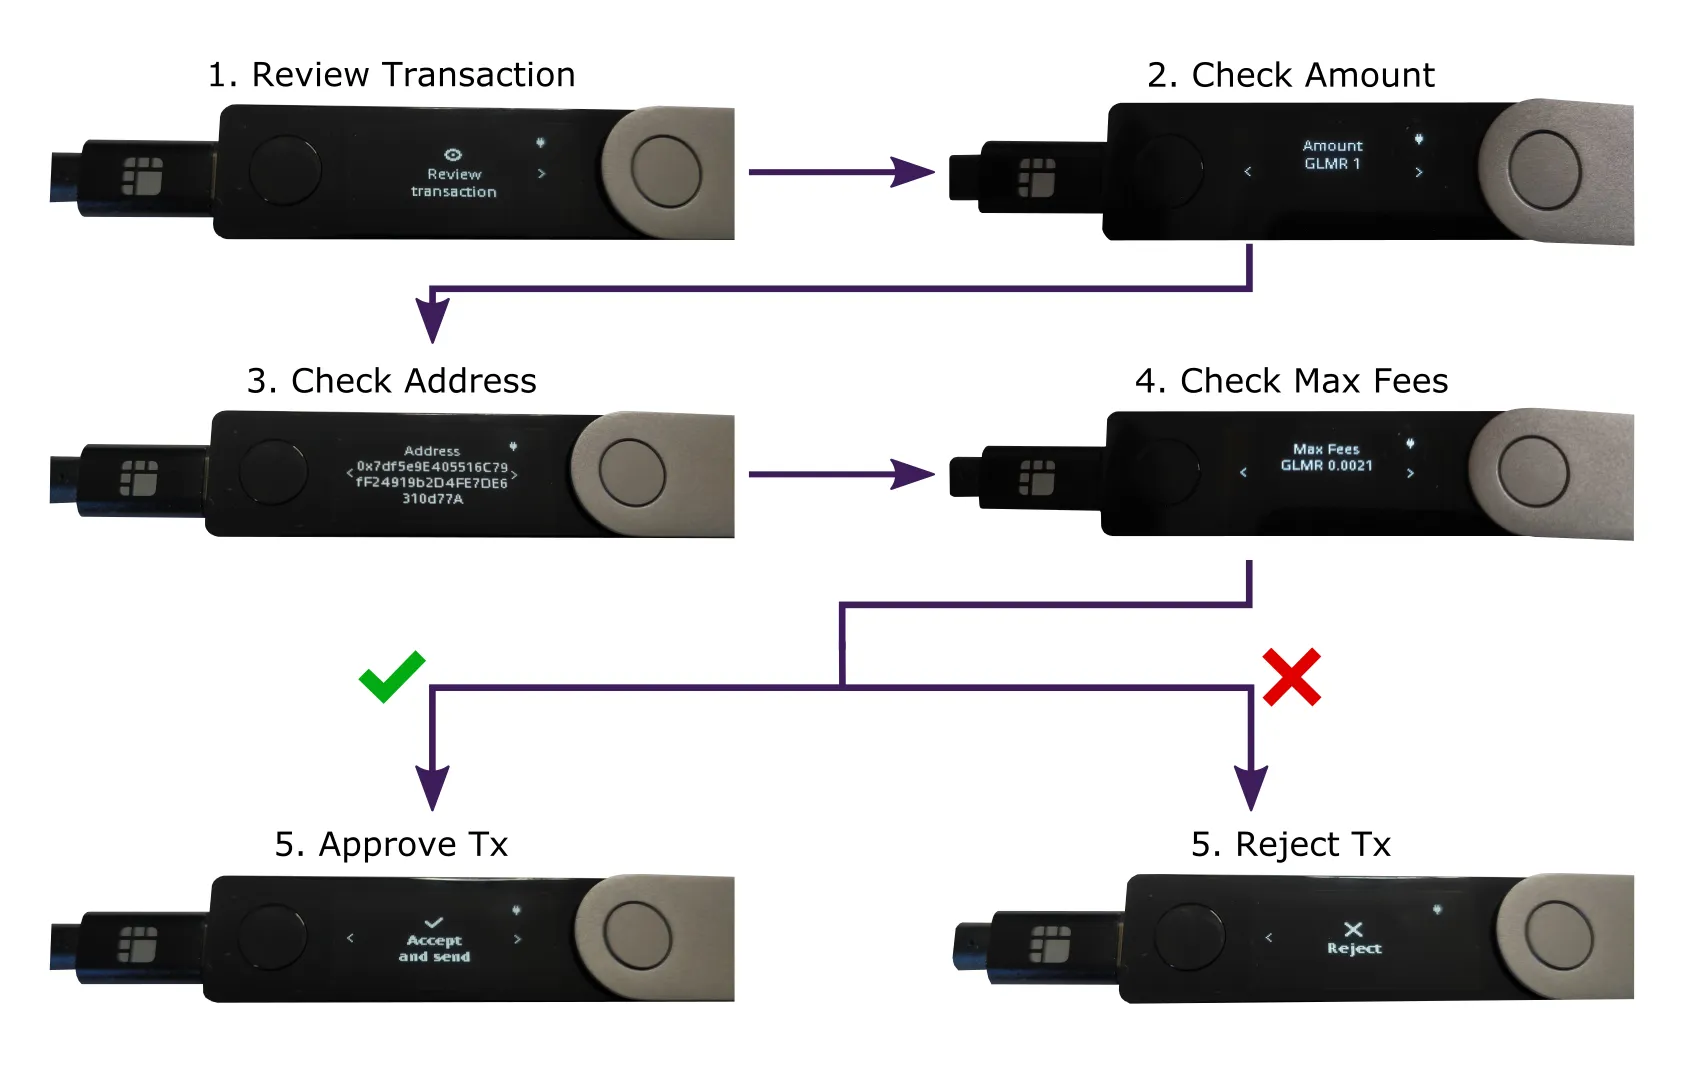
Right after you've approved the transaction, MetaMask sends it to the network. Once the transaction is confirmed, it will be displayed as **Send** on the **Activity** tab in MetaMask.
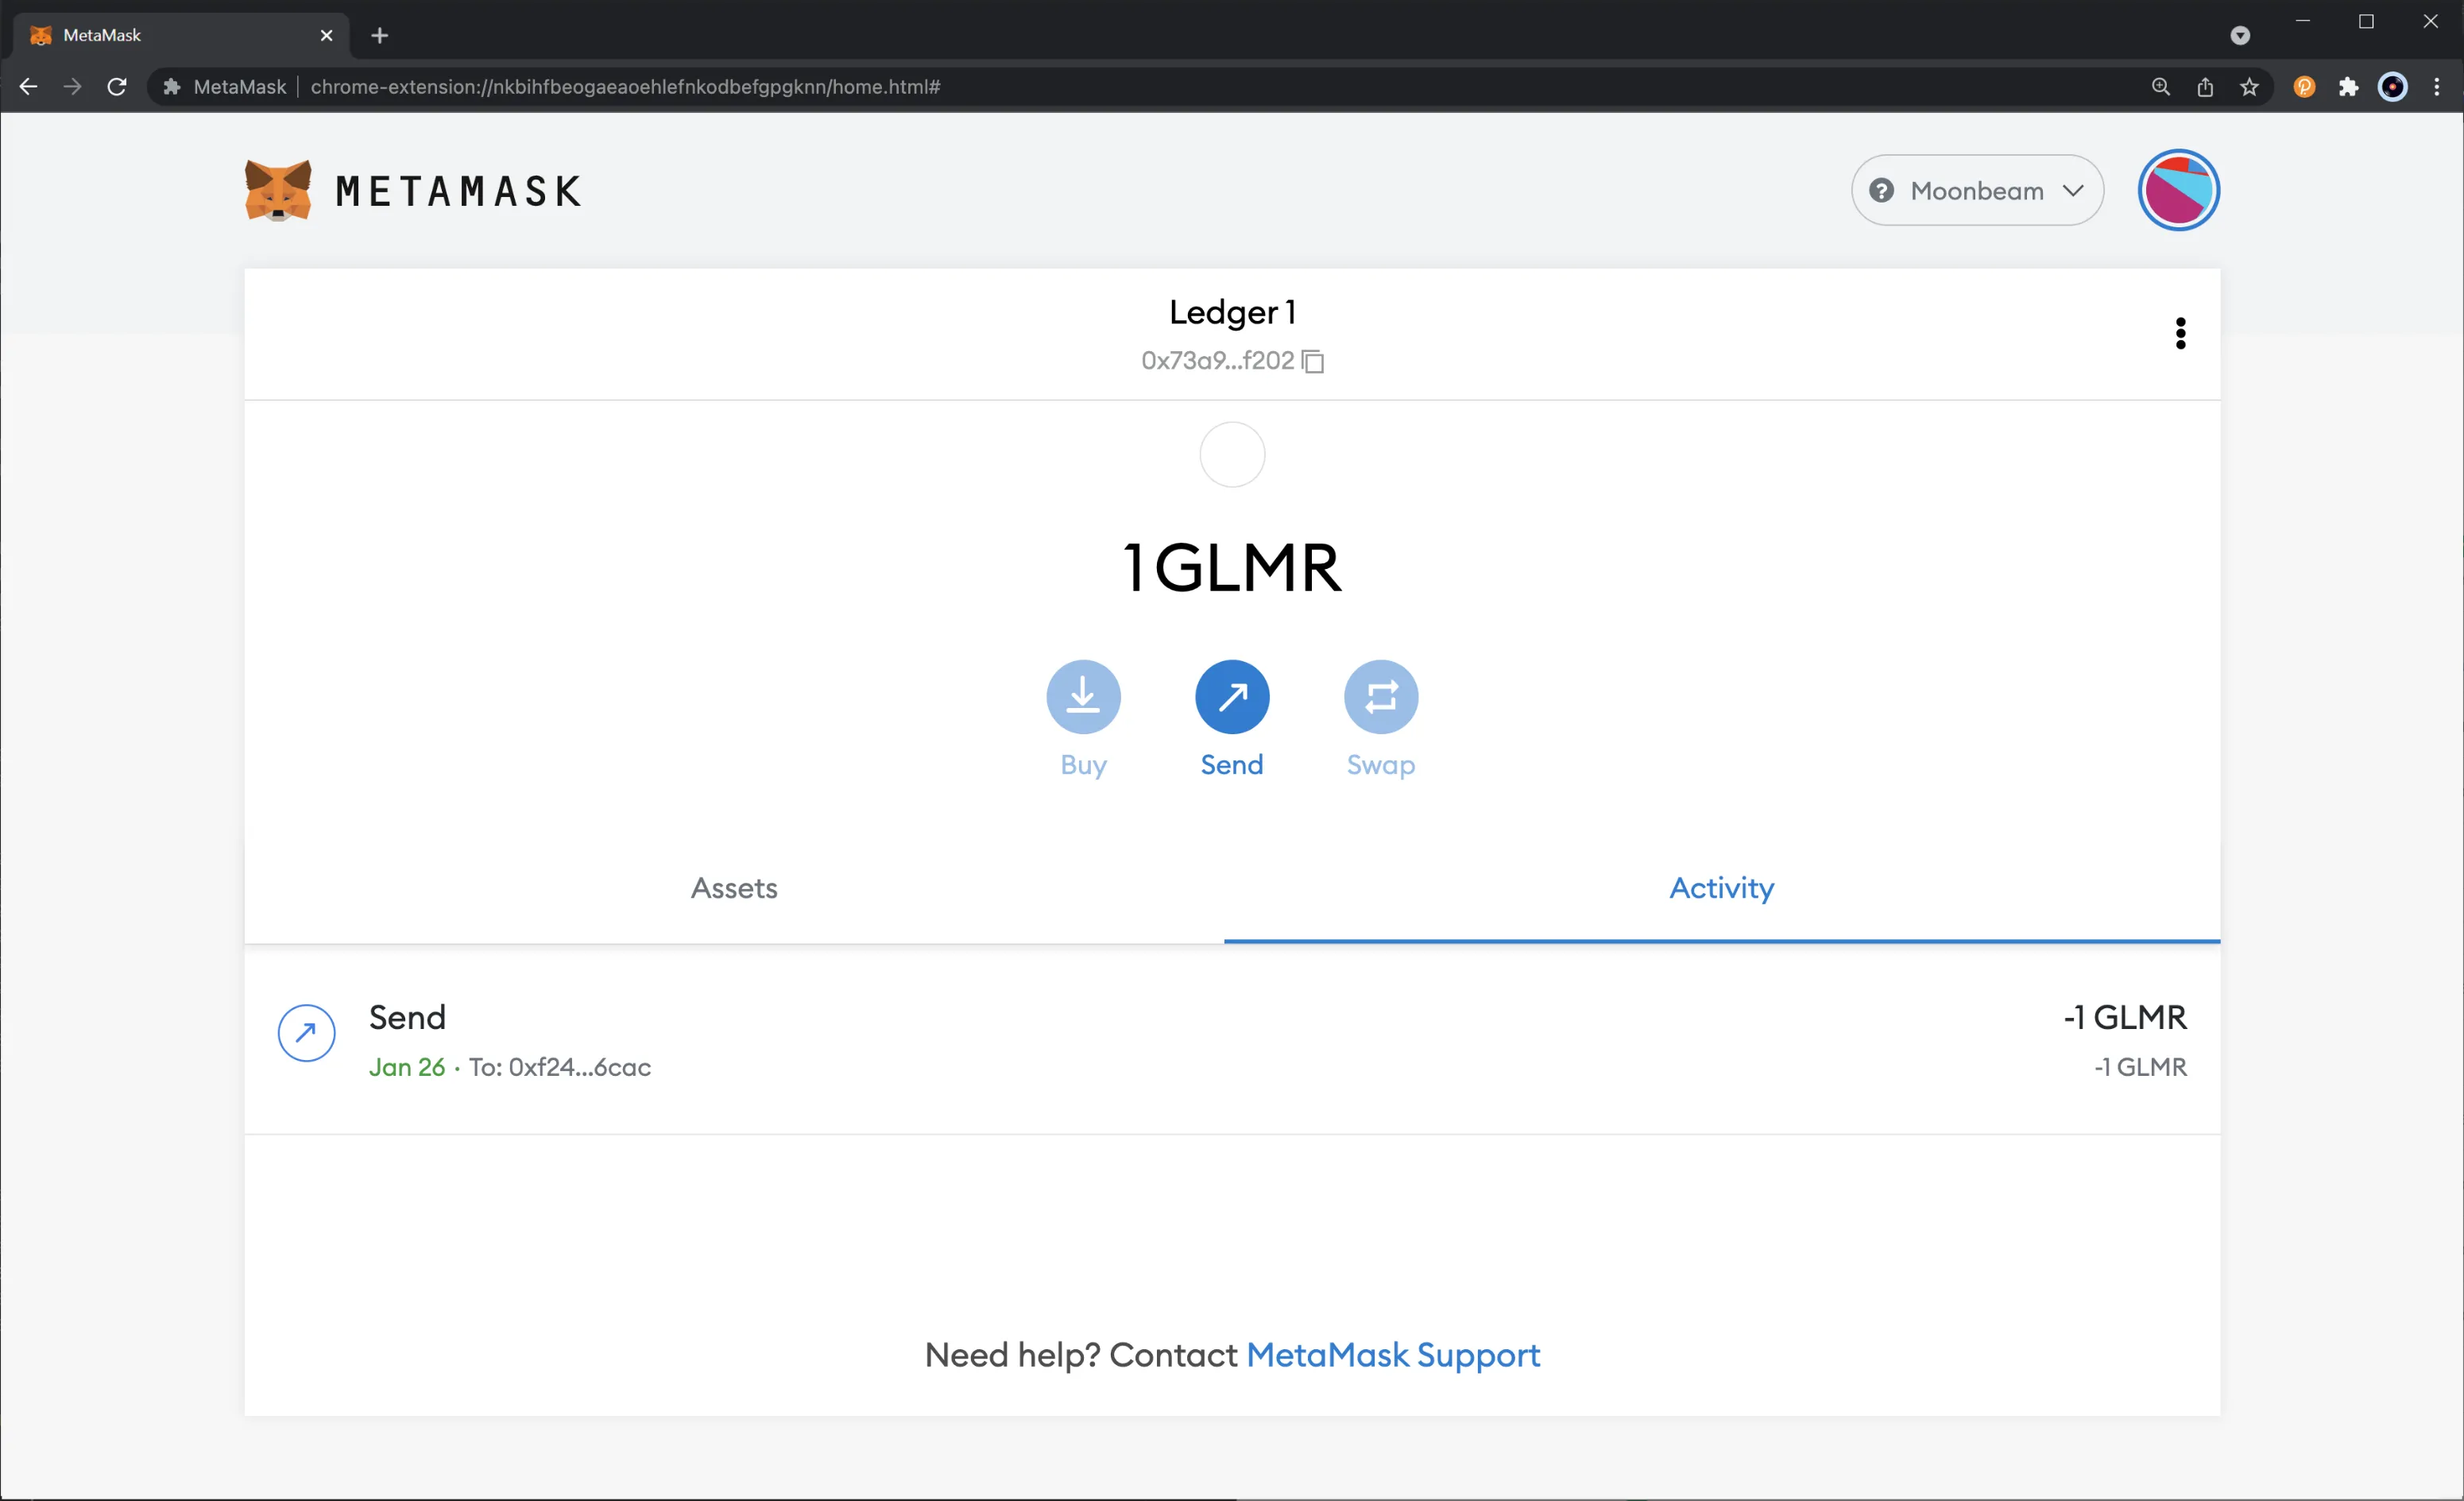
And that is it! You've signed a transaction and sent some GLMR tokens using your Ledger hardware wallet!
## Interact with Contracts Using your Ledger {: #interact-with-contracts-using-your-ledger }
By default, Ledger devices don't admit a `data` field in the transaction object. Consequently, users can't deploy or interact with smart contracts.
However, if you want to use your Ledger hardware wallet for transactions related to smart contracts, you need to change a configuration parameter inside the app on your device. To do so, take the following steps:
1. On your Ledger, open the Moonriver or Ethereum app
2. Navigate to **Settings**
3. Find the **Blind signing** page. It should state **NOT Enabled** at the bottom
4. Select/validate the option to change its value to **Enabled**
!!! note
This option is necessary to use your Ledger device to interact with ERC-20 token contracts that might live inside the Moonbeam ecosystem.
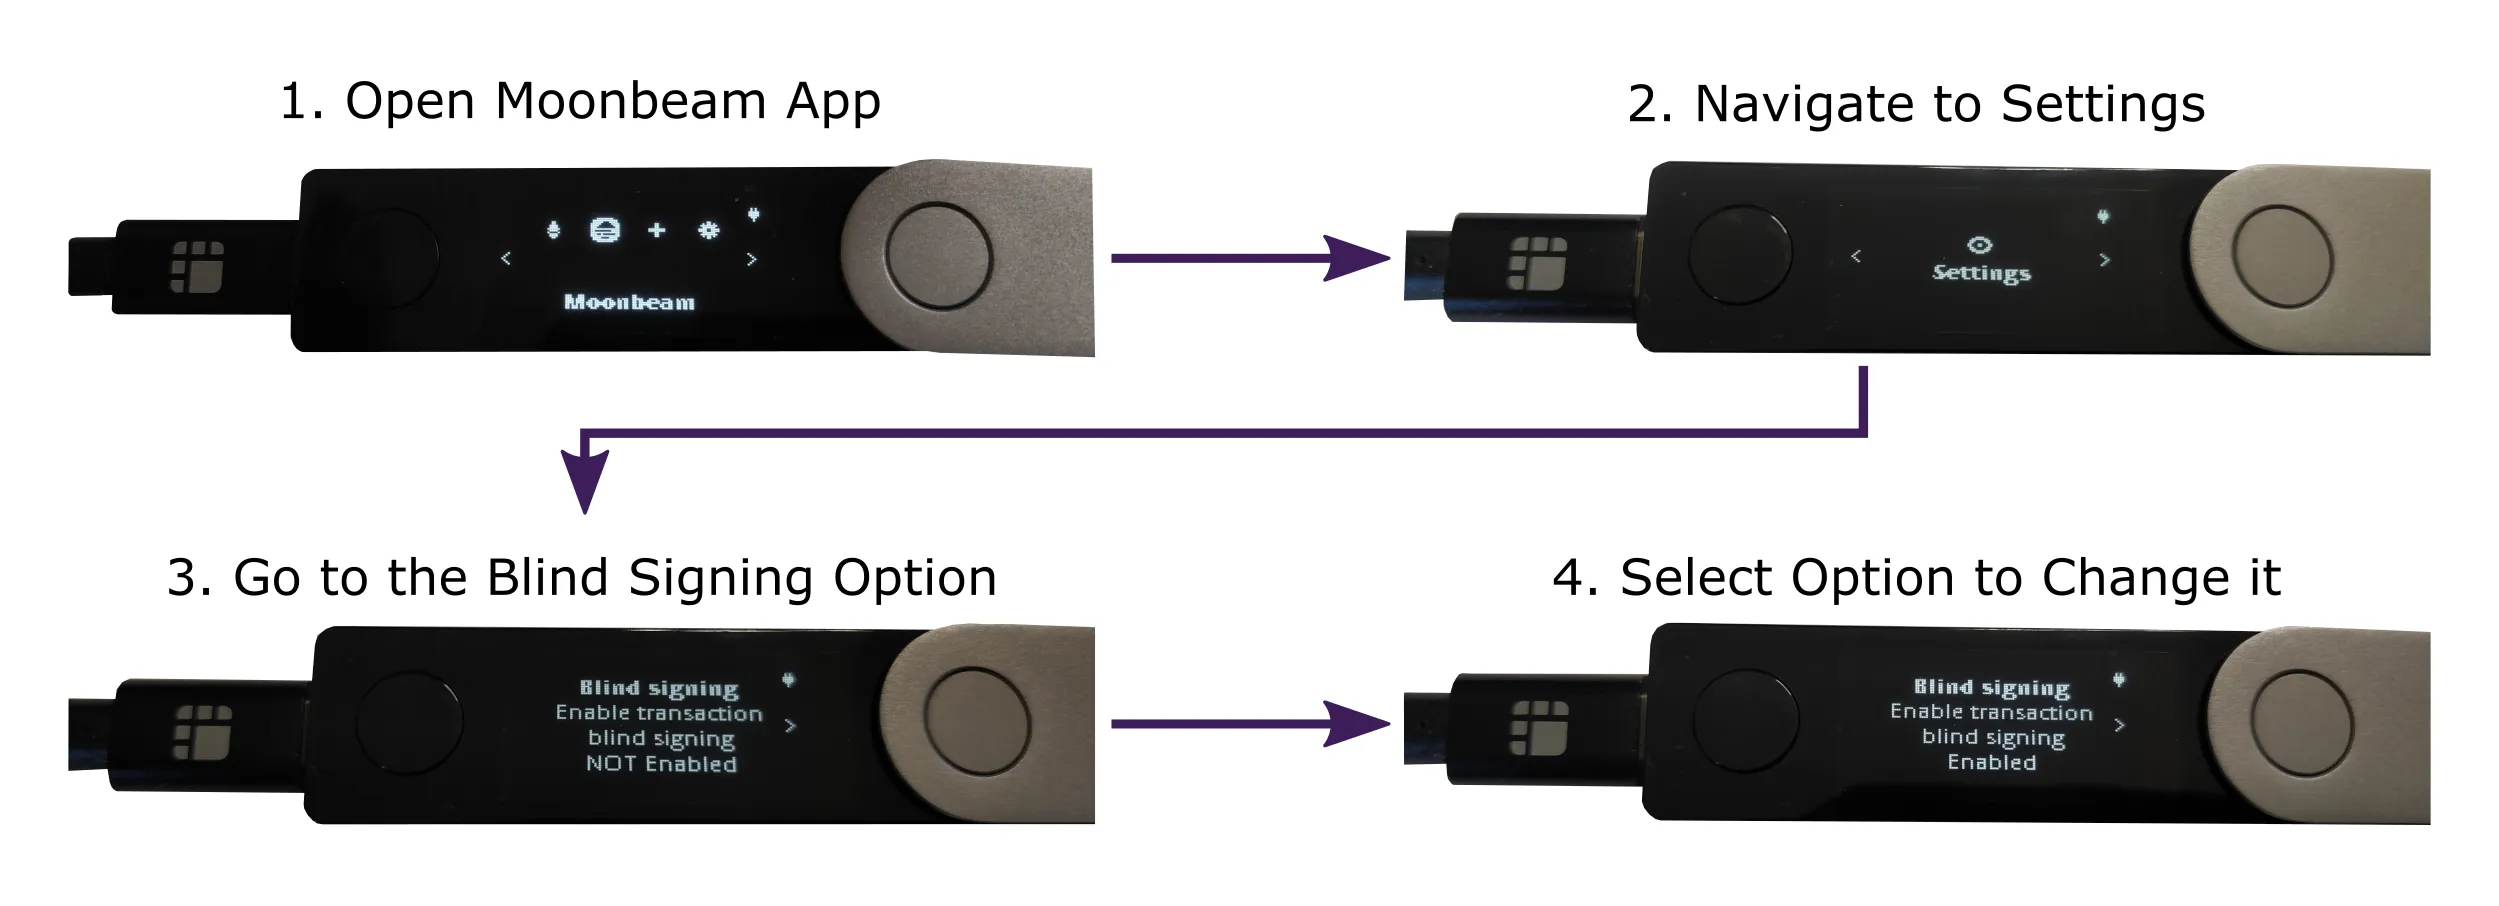
## Use Ledger Live to Send & Receive GLMR {: #use-ledger-live }
You can also use your Ledger device to send and receive GLMR tokens securely from within Ledger Live. This enables you to manage your GLMR tokens without connecting your device to MetaMask.
When you open up the Ledger Live app, make sure that you've installed the latest updates. If there are any pending updates that need to be installed, there will be a banner at the top of the screen that prompts you to install the updates.
To get started, you'll need to login to your Ledger device to unlock it. From Ledger Live, click on **My Ledger**. On your device, you'll be prompted to allow Ledger manager; you can click both buttons on your device to allow it.
Once on the Ledger manager, you'll need to make sure that your firmware is up to date, and if the Moonbeam and/or Ethereum apps need to be updated, go ahead and install the latest versions.
Next, you'll need to add an account to your Ledger Live app. To do so, you can take the following steps:
1. Click on **Accounts** from the left-side menu
2. Select **Add account**
3. A dropdown will appear. Search for GLMR and **Moonbeam (GLMR)** should appear for you to select
4. Click **Continue**

Next, you'll be able to enter an account name and click **Add account**. If your account was successfully added, you can click **Done** and your account will appear in your list of accounts.
### Receive Tokens
To receive GLMR to your Ledger device, you can take the following steps from Ledger Live:
1. Click on **Receive** from the left-side menu
2. A pop-up will appear. You can select your Moonbeam account where you want to receive tokens from the **Account to credit** dropdown
3. Click **Continue**

Next, your address should appear on Ledger Live, and you'll be prompted to verify your address on your Ledger device. On your device, you can take the following steps:
1. You should see **Verify Address** on your device's screen. Click the right button to start verifying your address
2. On the next screen, you should see your address. Compare the address on your device to the one displayed on Ledger Live and verify it matches. At this time, you'll want to copy the address from Ledger Live so you can send a transaction to it. Click the right button to continue
3. Now, you should see the **Approve** screen. If the addresses match, you can click both buttons on your device to approve the verification. Otherwise, click the right button again to get to the **Reject** screen where you can click both buttons to reject the verification

Over on Ledger Live, you'll see that your address has been shared securely, and you can click **Done**. Now, you can send some GLMR to your Ledger account.
### Send Tokens
To send GLMR from your Ledger device, you can take the following steps from Ledger Live:
1. Click on **Send** from the left-side menu
2. A pop-up will appear. From the **Account to debit** dropdown, you can select your Moonbeam account that you want to send tokens from
3. Enter an address in the **Receipient address** field
4. Click **Continue**

On the next screen, you can enter the amount of GLMR that you would like to send and click **Continue**.

The last step on Ledger Live is to verify that the transaction details are correct. If everything looks good, you can click **Continue**. Then you'll be prompted to confirm the transaction on your Ledger device:
1. The first screen will be the **Review transaction** screen. Click the right button to proceed to the next screen
2. Verify the amount of GLMR you're sending and click the right button to proceed
3. Verify the address you're sending the GLMR to and click the right button to proceed
4. The **Network** screen should show **Moonbeam**. Click the right button to proceed
5. Review the **Max Fees** and click the right button to proceed
6. If everything looks good, you can click both buttons to **Accept and send** the transaction. Otherwise, you can click the right button to get to the **Reject** screen where you can click both buttons to reject the transaction

On Ledger Live, you should see that your transaction was sent, and you can view the details of the transaction. Once the transaction has been confirmed, your GLMR balance will update.
And that is it! You've successfully used the Moonbeam Ledger Live integration to receive and send tokens with your Ledger device directly from Ledger Live!
## Import your Ledger Account to MetaMask {: #import-your-ledger-account-to-metamask }
Now that you've installed the Ledger Live apps, you can connect your Ledger to the computer, unlock it, and open the Moonbeam app.
Then import your Ledger account to MetaMask using the following steps:
1. Click on the top-right logo to expand the menu
2. Select **Connect Hardware Wallet**

In the next screen, you are prompted to select which hardware wallet you'll like to use in MetaMask. At the moment of writing, only Ledger and Trezor hardware wallets are supported. Here, take the following steps:
1. Select the Ledger logo
2. Click on **Continue**

If you're using Chrome or a Chrome-based browser like Brave, you'll be prompted to select your Ledger device to connect via WebHID:
1. Select your Ledger device from the pop-up
2. Click **Connect**

If a pop-up doesn't appear, you may need to change your MetaMask settings to enable a WebHID connection. You can check and update your MetaMask settings by following these steps:
1. Expand the top-right menu and go to **Settings**
2. Navigate to **Advanced**
3. Scroll down to **Preferred Ledger Connection Type** and select **WebHID** from the dropdown
!!! note
The **Preferred Ledger Connection Type** setting is only available on Chrome and Chrome-based browsers. This setting doesn't exist on other browsers such as Firefox.
If MetaMask was able to connect successfully to your Ledger device, you should see a list of five Moonbeam/Ethereum-styled accounts. If not, double-check that Ledger Live is closed, you've connected your Ledger device to the computer, unlocked it, and have the Moonbeam app open.
### Import Accounts and View Balances {: #import-accounts-and-view-balances }
From the list of accounts, take the following steps:
1. Select the accounts you would like to import from your Ledger device
2. Click on **Unlock**

If you've imported your Ledger account successfully, you should see your account and balance displayed in the main MetaMask screen like shown in the following image:

You can switch accounts in MetaMask at any time to view the balance of your other imported Ledger accounts.
You've now successfully imported a Moonbeam compatible account from your Ledger device and are now ready to start interacting with your Ledger device.
## Receive Tokens {: #receive-tokens }
To get started interacting with your Ledger device, you will need to send some funds to it. Copy your address from MetaMask by clicking on your account name and address in MetaMask.

Next, you will need to obtain some GLMR tokens and using the address you just copied, send the tokens to your account. After the transaction has successfully gone through, you will see your balance update.
## Send Tokens {: #send-tokens }
Next up is sending and signing transactions on Moonbeam using your Ledger device. To get started sending a transaction, click on the **Send** button:

As you would in a standard transaction, set the recipient address, enter the number of tokens to send, review transaction details and confirm it. This will initiate the transaction signature wizard in your Ledger device. Here, take the following steps:
1. Click the button to proceed to the next screen. Your Ledger device is only warning you to review the transaction
2. Check the number of tokens being sent then proceed to the next screen
3. Check the recipient's address and proceed to the next screen
4. Check the max fees applicable to this transaction. This is the gas price multiplied by the gas limit you've set on MetaMask. When ready, proceed to the next screen
5. If you agree with all the transaction details, approve it. This will sign the transaction and will trigger MetaMask to send it. If you don't agree with all the transaction details, reject it. This will cancel the transaction, and MetaMask will mark it as failed

Right after you've approved the transaction, MetaMask sends it to the network. Once the transaction is confirmed, it will be displayed as **Send** on the **Activity** tab in MetaMask.

And that is it! You've signed a transaction and sent some GLMR tokens using your Ledger hardware wallet!
## Interact with Contracts Using your Ledger {: #interact-with-contracts-using-your-ledger }
By default, Ledger devices don't admit a `data` field in the transaction object. Consequently, users can't deploy or interact with smart contracts.
However, if you want to use your Ledger hardware wallet for transactions related to smart contracts, you need to change a configuration parameter inside the app on your device. To do so, take the following steps:
1. On your Ledger, open the Moonriver or Ethereum app
2. Navigate to **Settings**
3. Find the **Blind signing** page. It should state **NOT Enabled** at the bottom
4. Select/validate the option to change its value to **Enabled**
!!! note
This option is necessary to use your Ledger device to interact with ERC-20 token contracts that might live inside the Moonbeam ecosystem.

## Use Ledger Live to Send & Receive GLMR {: #use-ledger-live }
You can also use your Ledger device to send and receive GLMR tokens securely from within Ledger Live. This enables you to manage your GLMR tokens without connecting your device to MetaMask.
When you open up the Ledger Live app, make sure that you've installed the latest updates. If there are any pending updates that need to be installed, there will be a banner at the top of the screen that prompts you to install the updates.
To get started, you'll need to login to your Ledger device to unlock it. From Ledger Live, click on **My Ledger**. On your device, you'll be prompted to allow Ledger manager; you can click both buttons on your device to allow it.
Once on the Ledger manager, you'll need to make sure that your firmware is up to date, and if the Moonbeam and/or Ethereum apps need to be updated, go ahead and install the latest versions.
Next, you'll need to add an account to your Ledger Live app. To do so, you can take the following steps:
1. Click on **Accounts** from the left-side menu
2. Select **Add account**
3. A dropdown will appear. Search for GLMR and **Moonbeam (GLMR)** should appear for you to select
4. Click **Continue**

Next, you'll be able to enter an account name and click **Add account**. If your account was successfully added, you can click **Done** and your account will appear in your list of accounts.
### Receive Tokens
To receive GLMR to your Ledger device, you can take the following steps from Ledger Live:
1. Click on **Receive** from the left-side menu
2. A pop-up will appear. You can select your Moonbeam account where you want to receive tokens from the **Account to credit** dropdown
3. Click **Continue**

Next, your address should appear on Ledger Live, and you'll be prompted to verify your address on your Ledger device. On your device, you can take the following steps:
1. You should see **Verify Address** on your device's screen. Click the right button to start verifying your address
2. On the next screen, you should see your address. Compare the address on your device to the one displayed on Ledger Live and verify it matches. At this time, you'll want to copy the address from Ledger Live so you can send a transaction to it. Click the right button to continue
3. Now, you should see the **Approve** screen. If the addresses match, you can click both buttons on your device to approve the verification. Otherwise, click the right button again to get to the **Reject** screen where you can click both buttons to reject the verification

Over on Ledger Live, you'll see that your address has been shared securely, and you can click **Done**. Now, you can send some GLMR to your Ledger account.
### Send Tokens
To send GLMR from your Ledger device, you can take the following steps from Ledger Live:
1. Click on **Send** from the left-side menu
2. A pop-up will appear. From the **Account to debit** dropdown, you can select your Moonbeam account that you want to send tokens from
3. Enter an address in the **Receipient address** field
4. Click **Continue**

On the next screen, you can enter the amount of GLMR that you would like to send and click **Continue**.

The last step on Ledger Live is to verify that the transaction details are correct. If everything looks good, you can click **Continue**. Then you'll be prompted to confirm the transaction on your Ledger device:
1. The first screen will be the **Review transaction** screen. Click the right button to proceed to the next screen
2. Verify the amount of GLMR you're sending and click the right button to proceed
3. Verify the address you're sending the GLMR to and click the right button to proceed
4. The **Network** screen should show **Moonbeam**. Click the right button to proceed
5. Review the **Max Fees** and click the right button to proceed
6. If everything looks good, you can click both buttons to **Accept and send** the transaction. Otherwise, you can click the right button to get to the **Reject** screen where you can click both buttons to reject the transaction

On Ledger Live, you should see that your transaction was sent, and you can view the details of the transaction. Once the transaction has been confirmed, your GLMR balance will update.
And that is it! You've successfully used the Moonbeam Ledger Live integration to receive and send tokens with your Ledger device directly from Ledger Live!
The information presented herein has been provided by third parties and is made available solely for general information purposes. Moonbeam does not endorse any project listed and described on the Moonbeam Doc Website (https://docs.moonbeam.network/). Moonbeam Foundation does not warrant the accuracy, completeness or usefulness of this information. Any reliance you place on such information is strictly at your own risk. Moonbeam Foundation disclaims all liability and responsibility arising from any reliance placed on this information by you or by anyone who may be informed of any of its contents. All statements and/or opinions expressed in these materials are solely the responsibility of the person or entity providing those materials and do not necessarily represent the opinion of Moonbeam Foundation. The information should not be construed as professional or financial advice of any kind. Advice from a suitably qualified professional should always be sought in relation to any particular matter or circumstance. The information herein may link to or integrate with other websites operated or content provided by third parties, and such other websites may link to this website. Moonbeam Foundation has no control over any such other websites or their content and will have no liability arising out of or related to such websites or their content. The existence of any such link does not constitute an endorsement of such websites, the content of the websites, or the operators of the websites. These links are being provided to you only as a convenience and you release and hold Moonbeam Foundation harmless from any and all liability arising from your use of this information or the information provided by any third-party website or service.
--- END CONTENT ---
Doc-Content: https://docs.moonbeam.network/tokens/connect/ledger/moonriver/
--- BEGIN CONTENT ---
---
title: Using the Moonriver Ledger App
description: This guide walks you through how to use your Ledger hardware wallet to sign transactions on Moonriver using the native Moonriver Ledger Live app.
categories: Tokens and Accounts, Ethereum Toolkit
---
# Interacting with Moonriver Using Ledger and the Moonriver App
## Introduction {: #introduction }
Hardware wallets provide a safer way to store crypto funds because the private key (used for signing transactions) is stored offline. Ledger offers two hardware wallet solutions at the time of writing: Ledger Nano S and Ledger Nano X.
You can interact with Moonriver using your Ledger hardware wallet through the Moonriver Ledger Live app. With the dedicated Moonriver app, you do not have to worry about setting the chain ID and you know you are connected to the right network. Please note that you can only use the Moonriver app to connect to the Moonriver network, it cannot be used to connect to other Moonbeam-based networks.
You also have the option of using the Ethereum app to connect to Moonriver. The main difference between using the Moonriver and the Ethereum app is that you have to specify the chain ID when you use the Ethereum app, which is 1285 for Moonriver. If you're interested in using the Ethereum app on Moonriver instead, you can check out the [Interacting with Moonbeam Using Ledger and the Ethereum App](/tokens/connect/ledger/ethereum/){target=\_blank} guide.
In this tutorial, you will learn how to get started with your Ledger hardware wallet on Moonriver using the Moonriver app. This guide only illustrates the steps for a Ledger Nano X device, but you can follow along with a Ledger Nano S as well.
The information presented herein is for informational purposes only and has been provided by third parties. Moonbeam does not endorse any project listed and described on the Moonbeam docs website (https://docs.moonbeam.network/).
## Checking Prerequisites {: #checking-prerequisites }
Before you get started, update [Ledger Live](https://www.ledger.com/ledger-live){target=\_blank} to the latest version available. Also, make sure you've your Ledger hardware wallet device running the latest firmware. The Ledger support website offers tutorials on [how to update](https://support.ledger.com/article/360013349800-zde){target=\_blank} the firmware.
At the time of writing, the following versions were used:
- [Ledger Live 2.35.1](https://support.ledger.com/article/What-s-new-in-Ledger-Live){target=\_blank}
- [Ledger Nano S firmware v2.0.0](https://support.ledger.com/article/360010446000-zd){target=\_blank}
- [Ledger Nano X firmware v2.0.1](https://support.ledger.com/article/360014980580-zd){target=\_blank}
In addition, you'll need MetaMask as an intermediary between your Ledger device and Moonbeam. Make sure that your MetaMask is [connected to Moonbeam](/tokens/connect/metamask/){target=\_blank}.
As of [MetaMask version 10.5.0](https://consensys.io/blog/metamask-and-ledger-integration-fixed){target=\_blank}, connecting your Ledger device with MetaMask on Chrome is easy again. You just need to have the latest version of MetaMask installed.
## Install the Moonriver Ledger Live App {: install-the-moonriver-ledger-live-app }
The Moonriver app is dependent on the Ethereum app, so first you will need to install the Ethereum app. Once the Ethereum app is installed you will be able to install the Moonriver app without a problem. Please note that the Moonriver app is only for the Moonriver network, it will not work for Moonbeam or Moonbase Alpha.
To get started, open up Ledger Live and:
1. Select **Manager** from the menu
2. Connect and unlock your device (this must be done before installation)
3. In the **App catalog** search for Ethereum (ETH) and click **Install**. Your Ledger device will show **Processing** and once the installation is complete, the app will appear on your Ledger device
4. Search for Moonriver (MOVR) in the **App catalog** and click **Install**. Again, your Ledger device will show **Processing** and once complete, the Moonriver app will appear on your Ledger device
In the Ledger Live app, you should see the Ethereum and Moonriver app listed under the **Apps installed** tab on the **Manager** page. After the apps have been successfully installed, you can close out of Ledger Live.
 ## Import your Ledger Account to MetaMask {: #import-your-ledger-account-to-metamask }
Now that you've installed the Ledger Live apps, you can connect your Ledger to the computer, unlock it, and open the Moonriver app.
Then import your Ledger account to MetaMask using the following steps:
1. Click on the top-right logo to expand the menu
2. Select **Connect Hardware Wallet**
In the next screen, you are prompted to select which hardware wallet you'll like to use in MetaMask. At the moment of writing, only Ledger and Trezor hardware wallets are supported. Here, take the following steps:
1. Select the Ledger logo
2. Click on **Continue**
If you're using Chrome or a Chrome-based browser like Brave, you'll be prompted to select your Ledger device to connect via WebHID:
1. Select your Ledger device from the pop-up
2. Click **Connect**
If a pop-up doesn't appear, you may need to change your MetaMask settings to enable a WebHID connection. You can check and update your MetaMask settings by following these steps:
1. Expand the top-right menu and go to **Settings**
2. Navigate to **Advanced**
3. Scroll down to **Preferred Ledger Connection Type** and select **WebHID** from the dropdown
!!! note
The **Preferred Ledger Connection Type** setting is only available on Chrome and Chrome-based browsers. This setting doesn't exist on other browsers such as Firefox.
If MetaMask was able to connect successfully to your Ledger device, you should see a list of five Moonriver/Ethereum-styled accounts. If not, double-check that Ledger Live is closed, you've connected your Ledger device to the computer, unlocked it, and have the Moonriver app open.
### Import Accounts and View Balances {: #import-accounts-and-view-balances }
From the list of accounts, take the following steps:
1. Select the accounts you would like to import from your Ledger device
2. Click on **Unlock**
If you've imported your Ledger account successfully, you should see your account and balance displayed in the main MetaMask screen like shown in the following image:

You can switch accounts in MetaMask at any time to view the balance of your other imported Ledger accounts.
You've now successfully imported a Moonriver compatible account from your Ledger device and are now ready to start interacting with your Ledger device.
## Receive Tokens {: #receive-tokens }
To get started interacting with your Ledger device, you will need to send some funds to it. Copy your address from MetaMask by clicking on your account name and address in MetaMask.
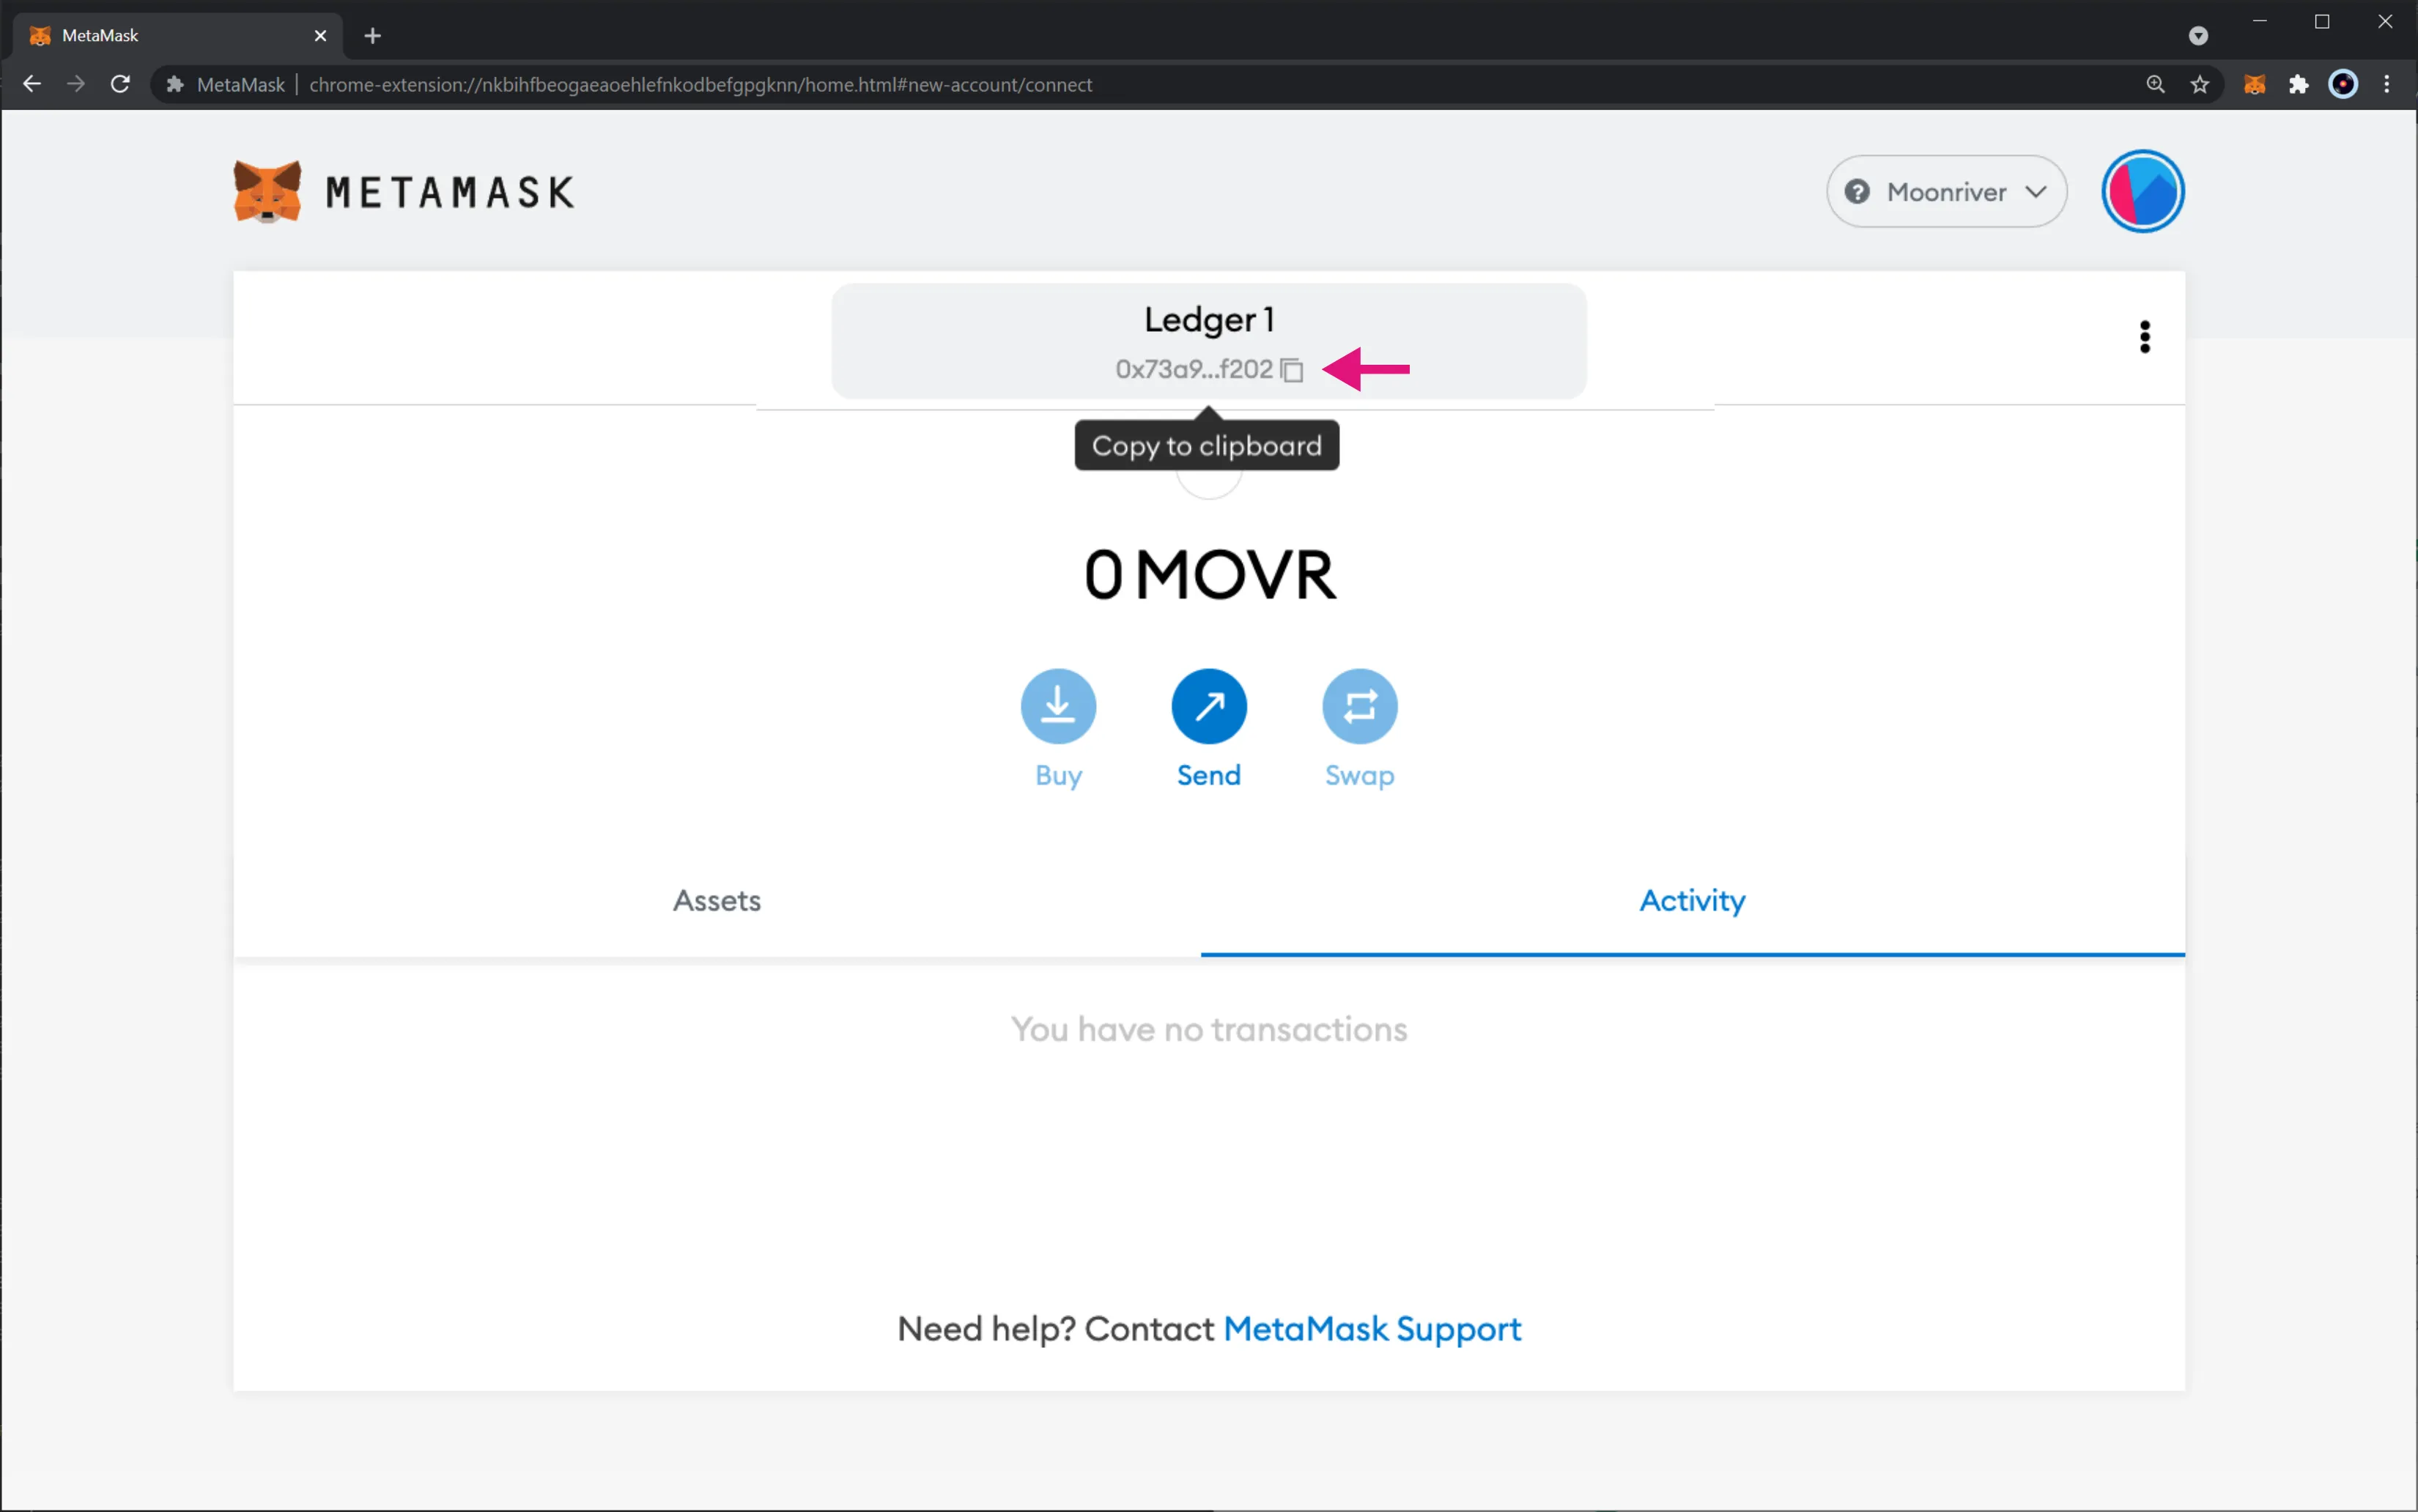
Next, you will need to obtain some MOVR tokens and using the address you just copied, send the tokens to your account. After the transaction has successfully gone through, you will see your balance update.
## Send Tokens {: #send-tokens }
Next up is sending and signing transactions on Moonriver using your Ledger device. To get started sending a transaction, click on the **Send** button:
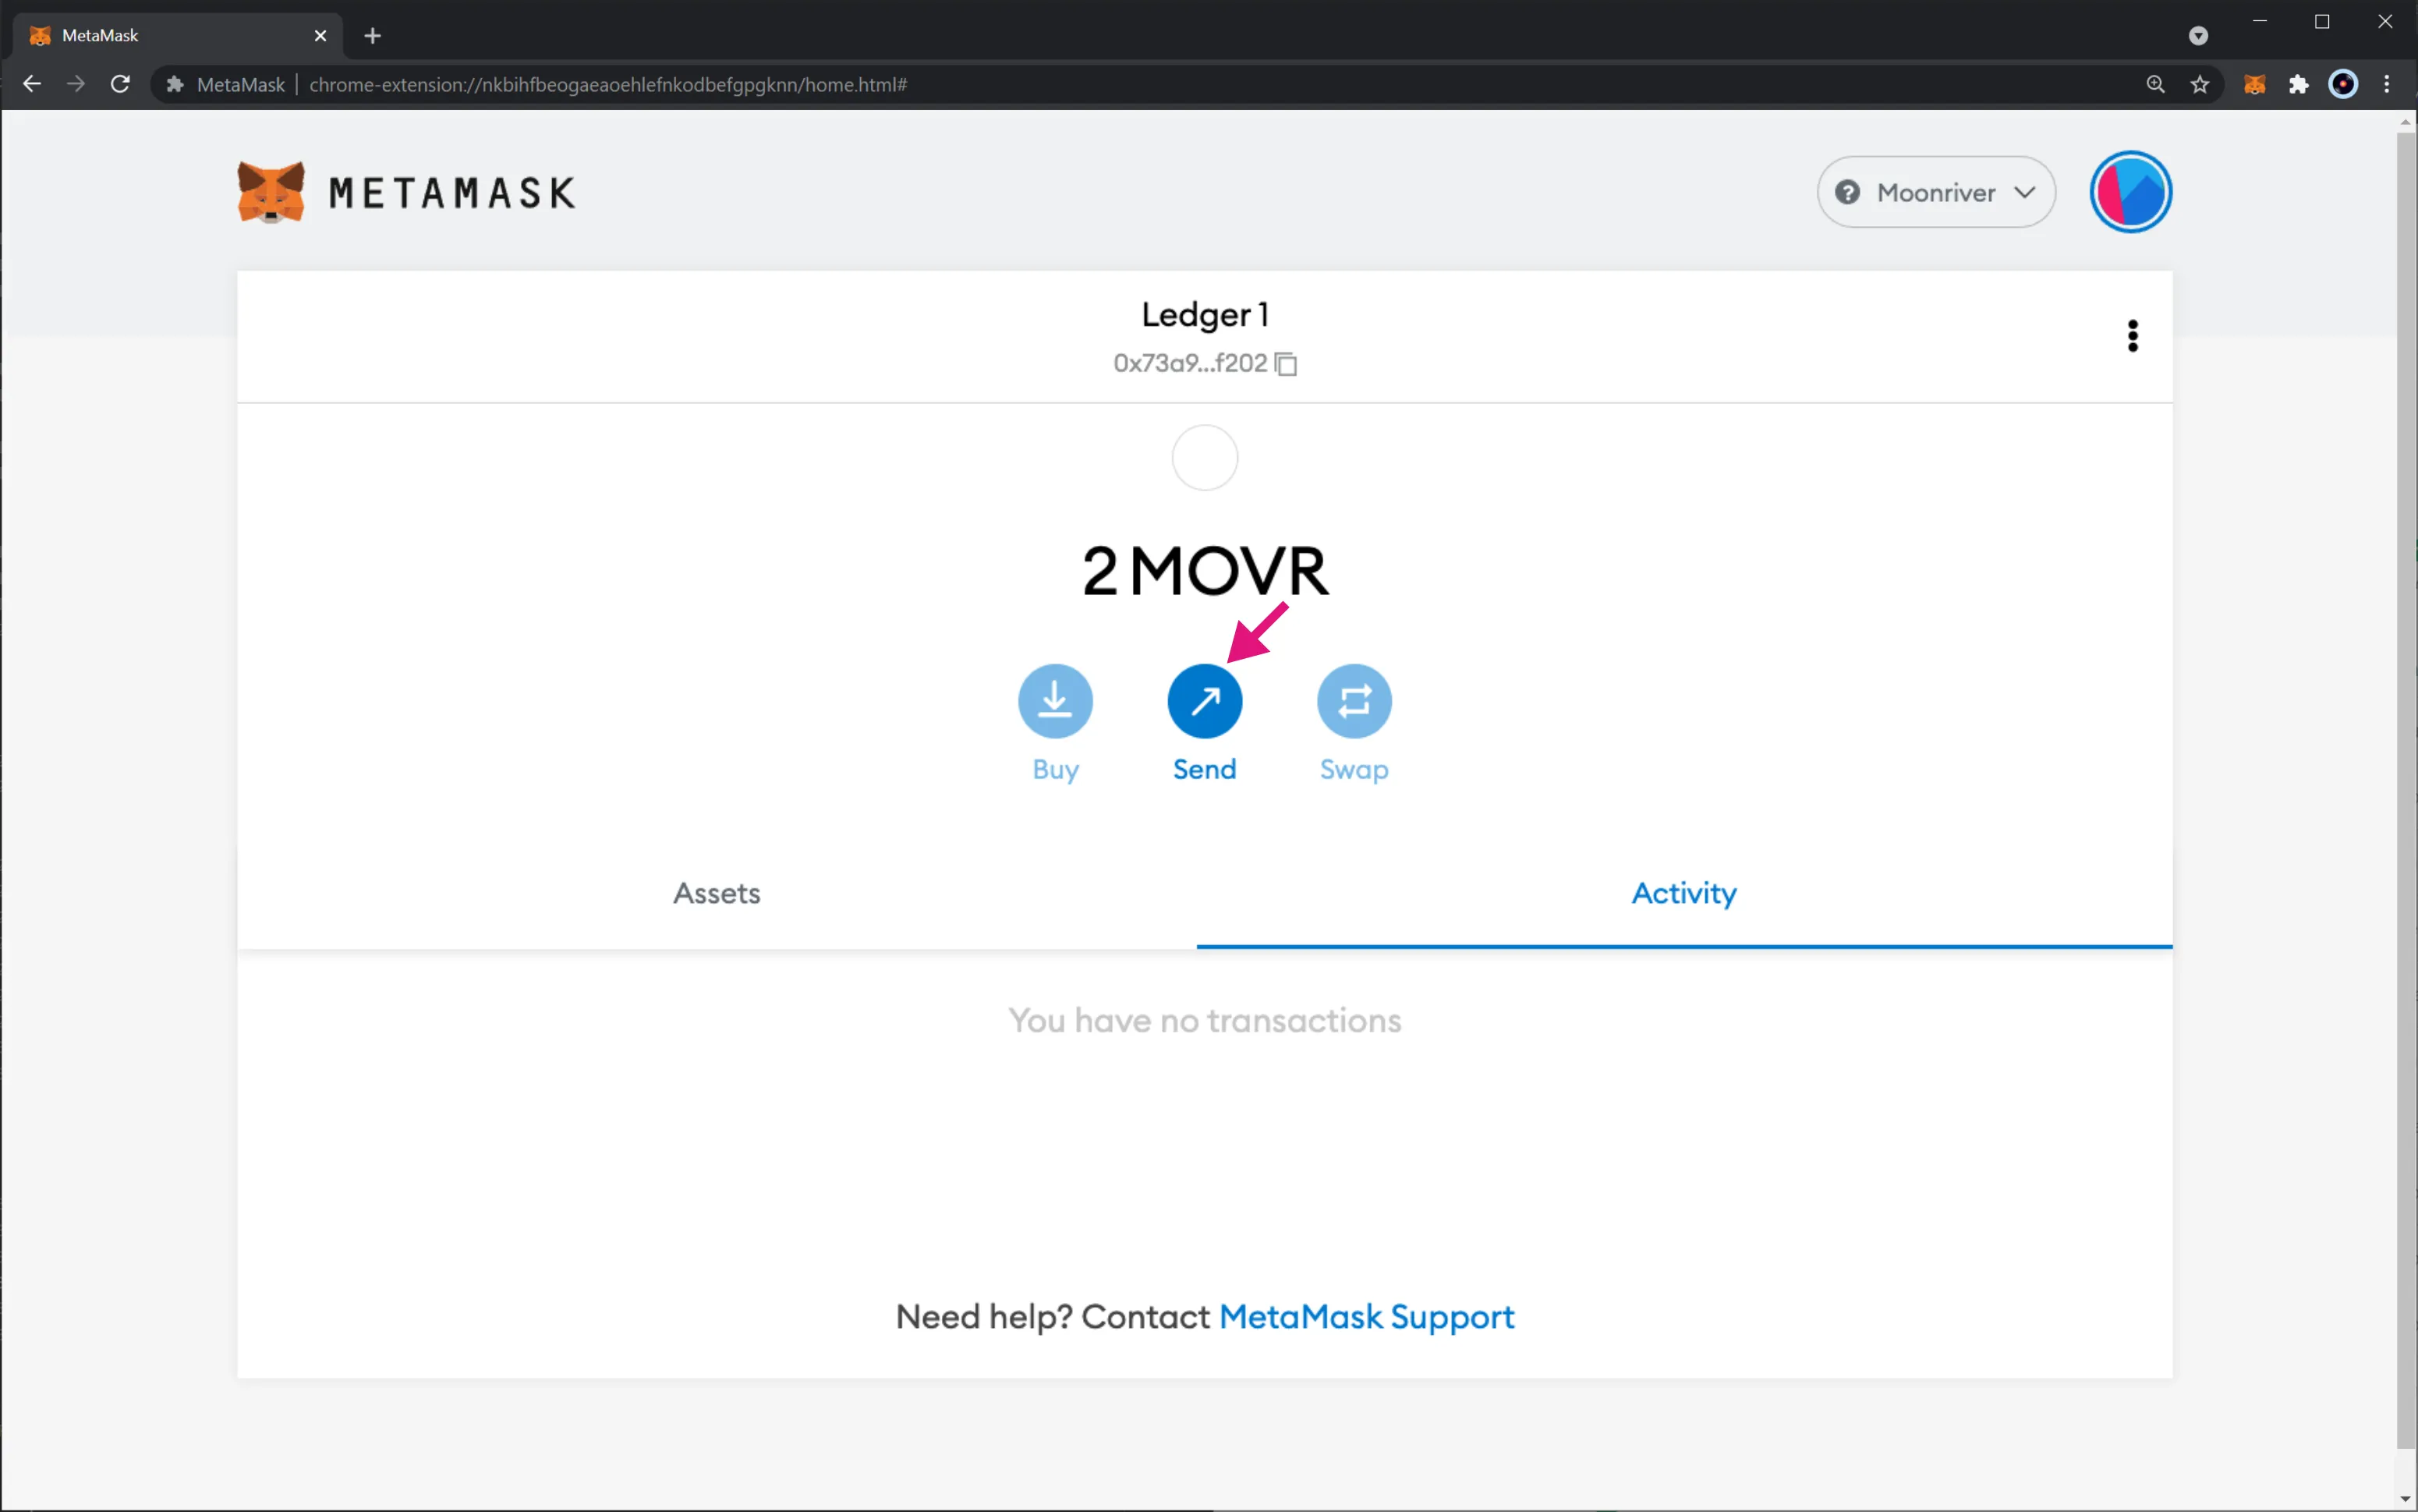
As you would in a standard transaction, set the recipient address, enter the number of tokens to send, review transaction details and confirm it. This will initiate the transaction signature wizard in your Ledger device. Here, take the following steps:
1. Click the button to proceed to the next screen. Your Ledger device is only warning you to review the transaction
2. Check the number of tokens being sent then proceed to the next screen
3. Check the recipient's address and proceed to the next screen
4. Check the max fees applicable to this transaction. This is the gas price multiplied by the gas limit you've set on MetaMask. When ready, proceed to the next screen
5. If you agree with all the transaction details, approve it. This will sign the transaction and will trigger MetaMask to send it. If you don't agree with all the transaction details, reject it. This will cancel the transaction, and MetaMask will mark it as failed
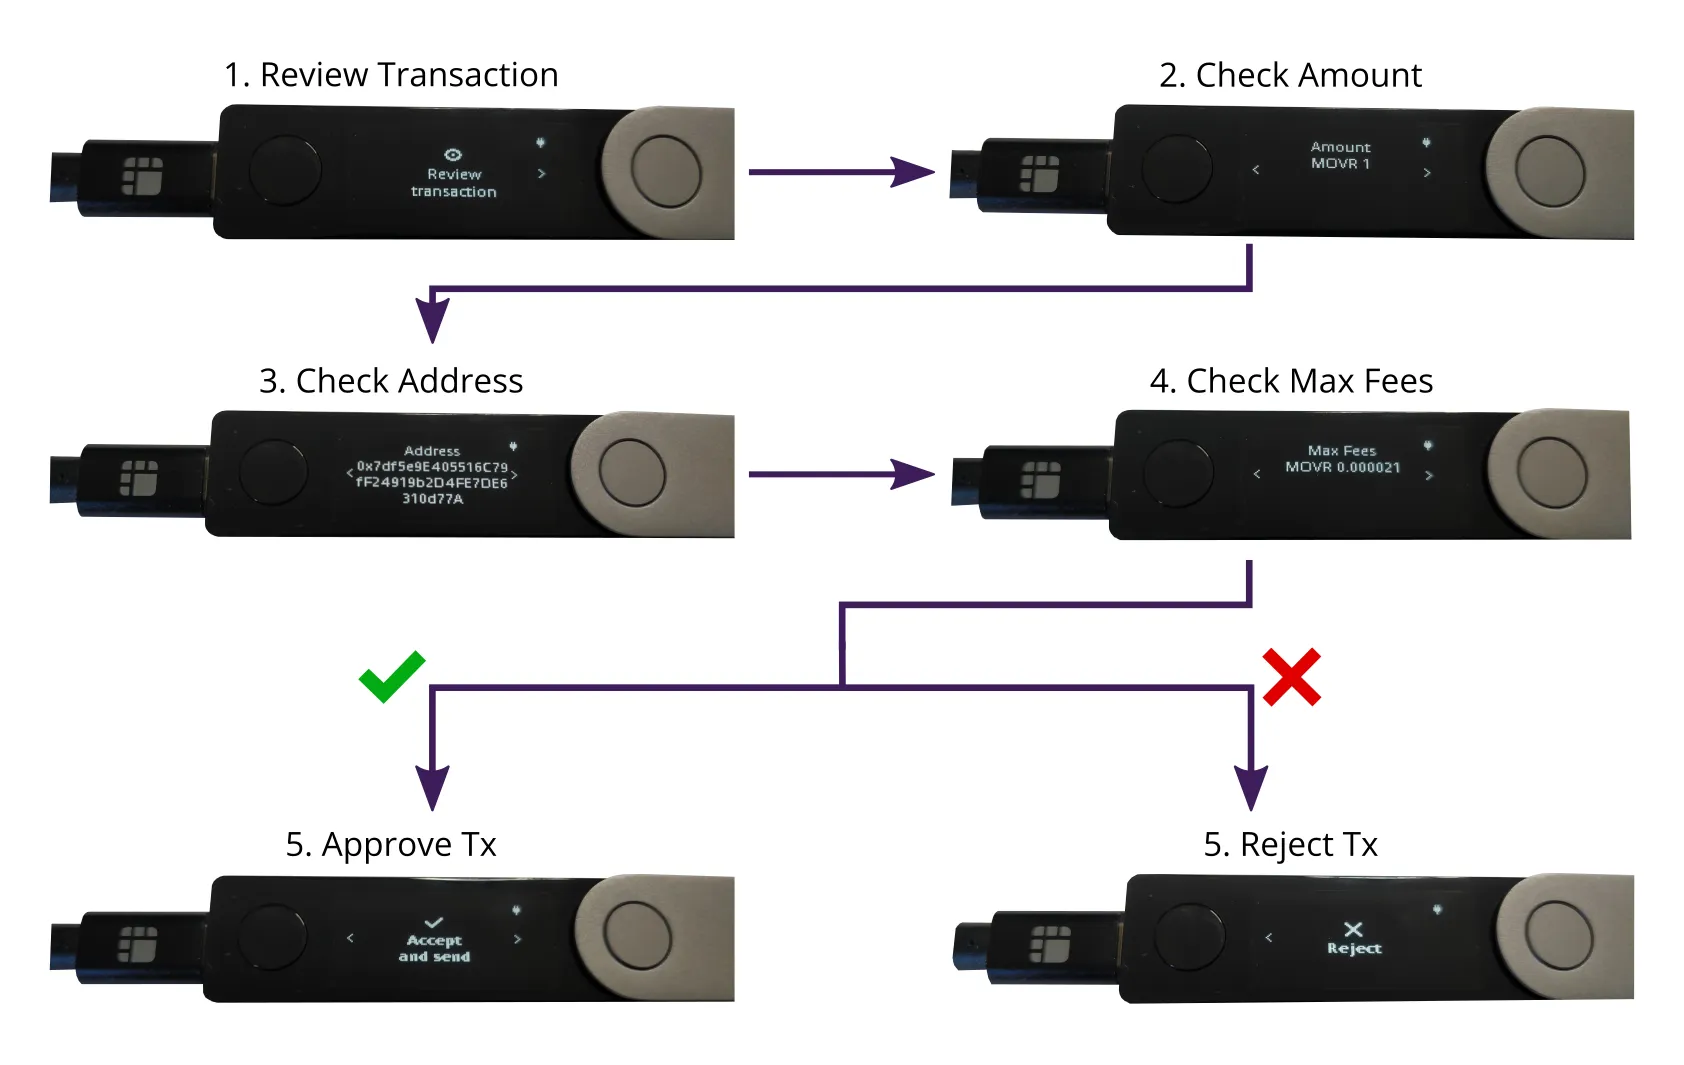
Right after you've approved the transaction, MetaMask sends it to the network. Once the transaction is confirmed, it will be displayed as **Send** on the **Activity** tab in MetaMask.
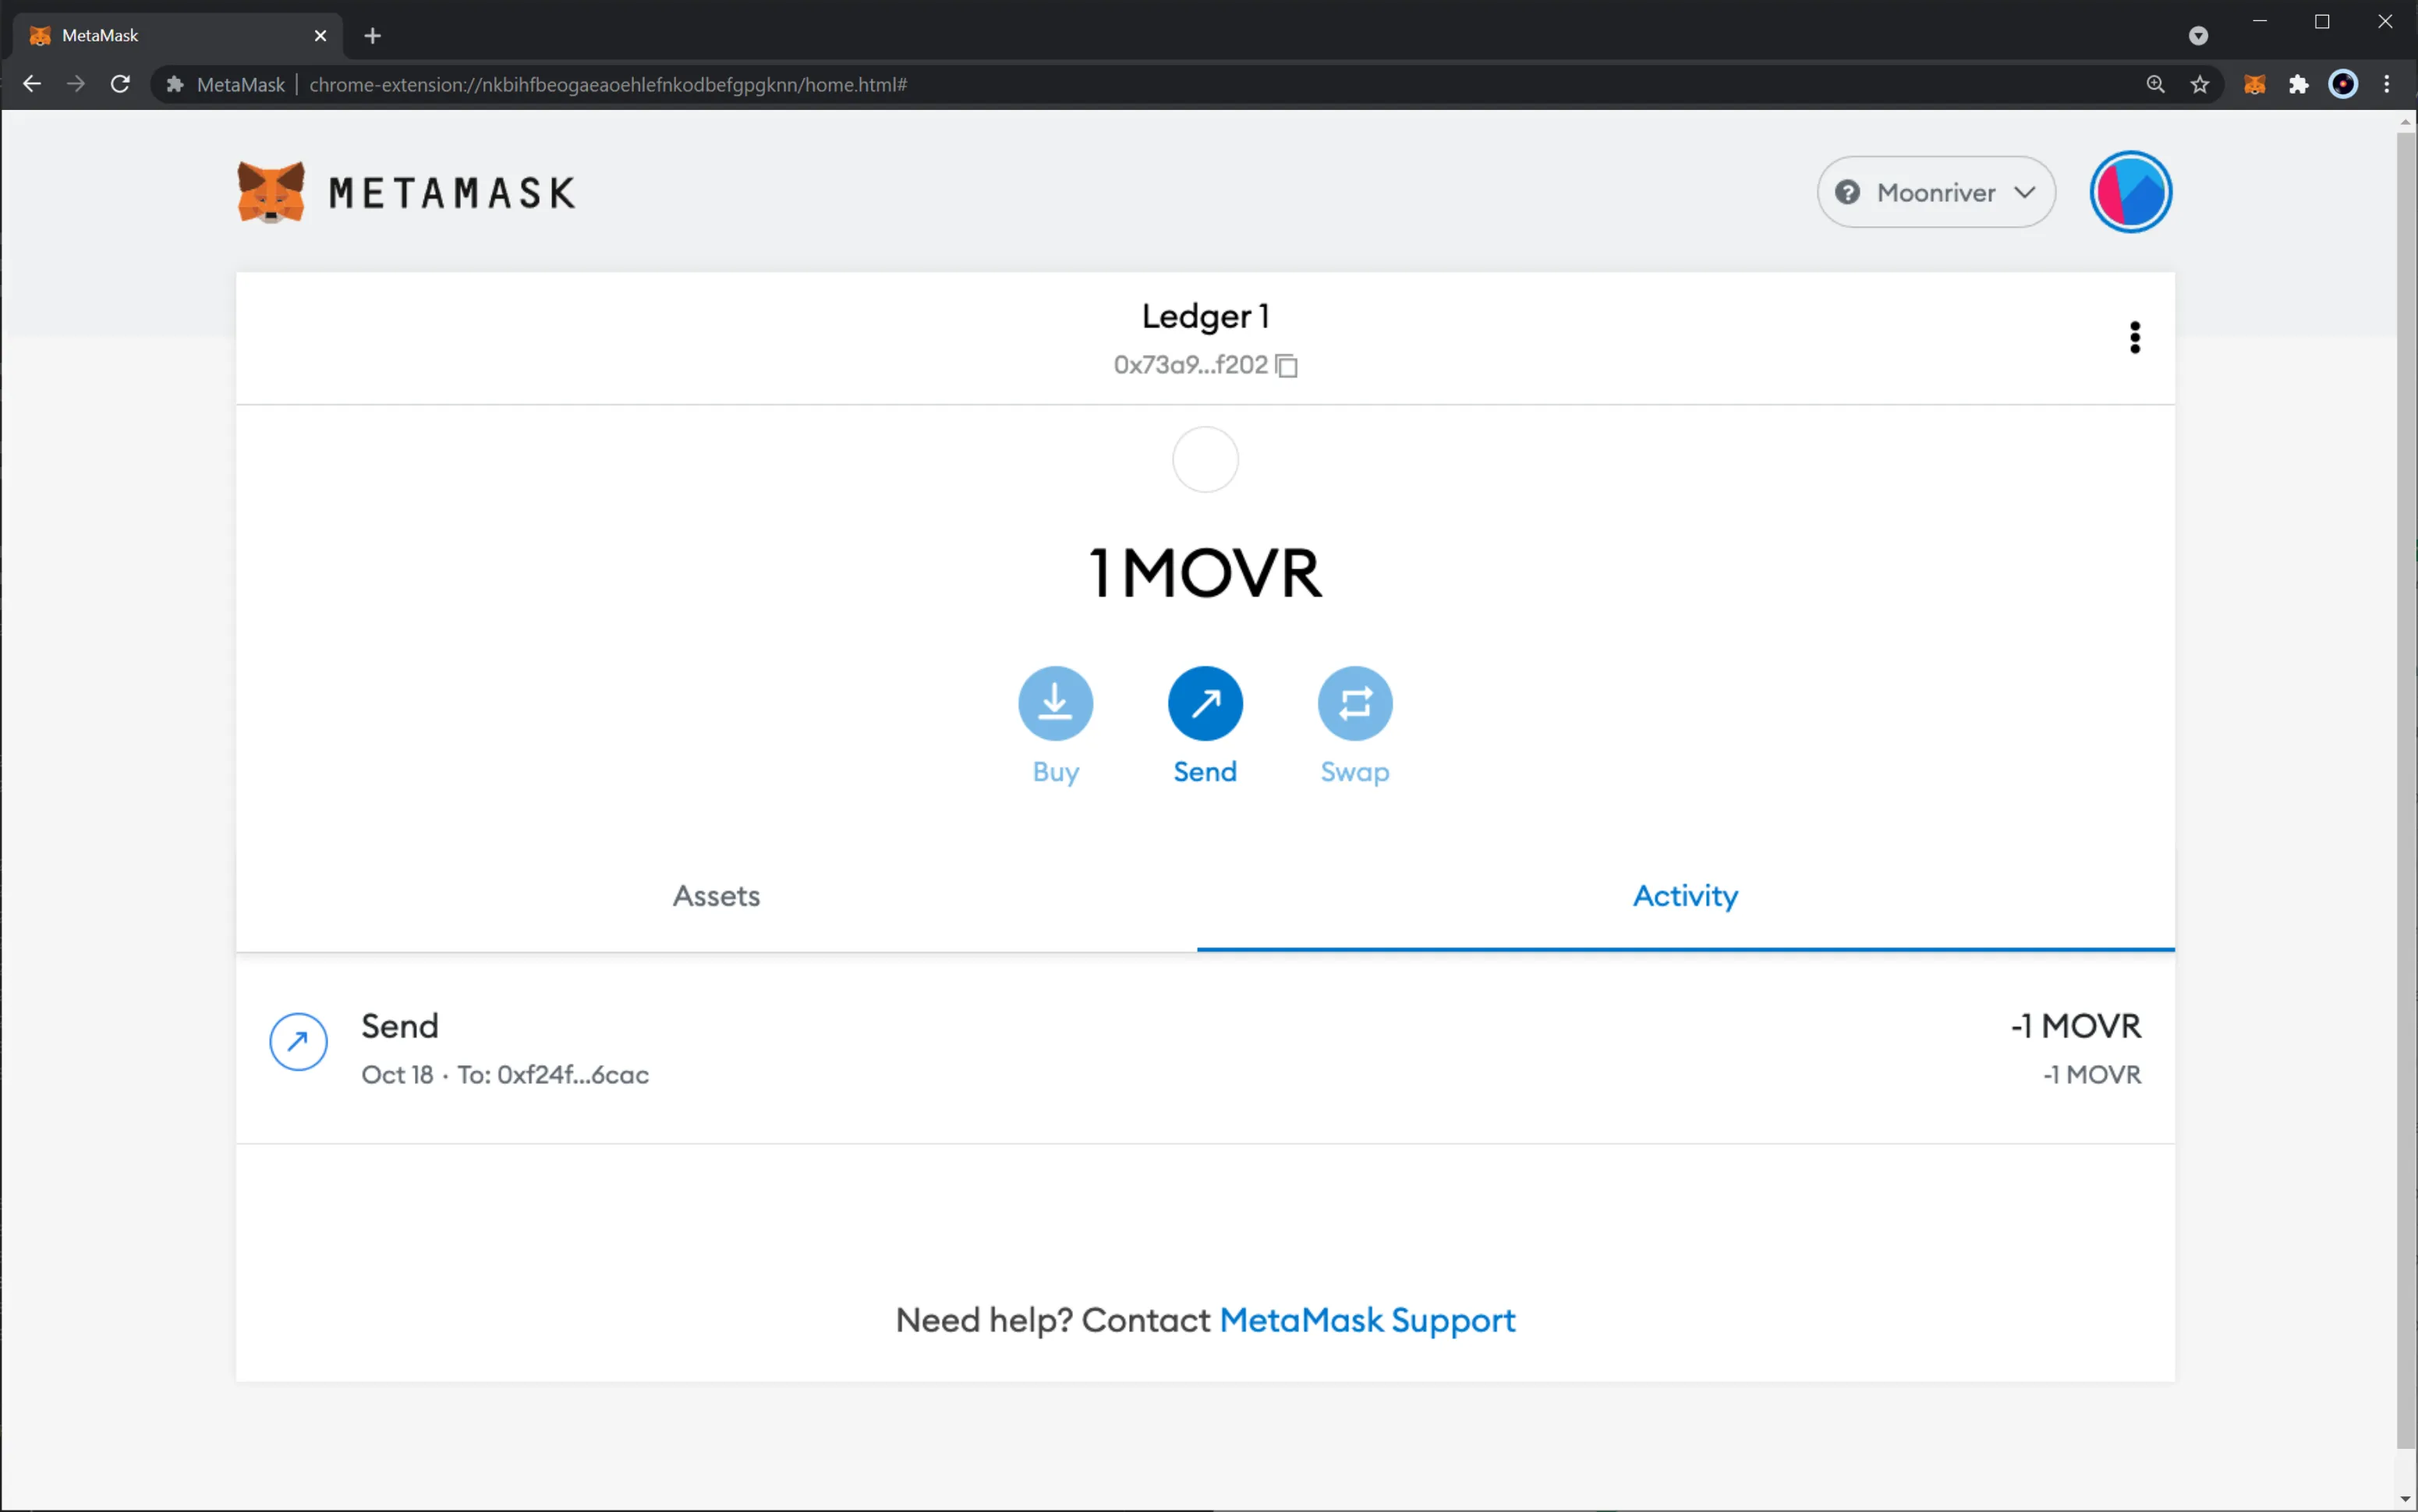
And that is it! You've signed a transaction and sent some MOVR tokens using your Ledger hardware wallet!
## Interact with Contracts Using your Ledger {: #interact-with-contracts-using-your-ledger }
By default, Ledger devices don't admit a `data` field in the transaction object. Consequently, users can't deploy or interact with smart contracts.
However, if you want to use your Ledger hardware wallet for transactions related to smart contracts, you need to change a configuration parameter inside the app on your device. To do so, take the following steps:
1. On your Ledger, open the Moonriver or Ethereum app
2. Navigate to **Settings**
3. Find the **Blind signing** page. It should state **NOT Enabled** at the bottom
4. Select/validate the option to change its value to **Enabled**
!!! note
This option is necessary to use your Ledger device to interact with ERC-20 token contracts that might live inside the Moonbeam ecosystem.
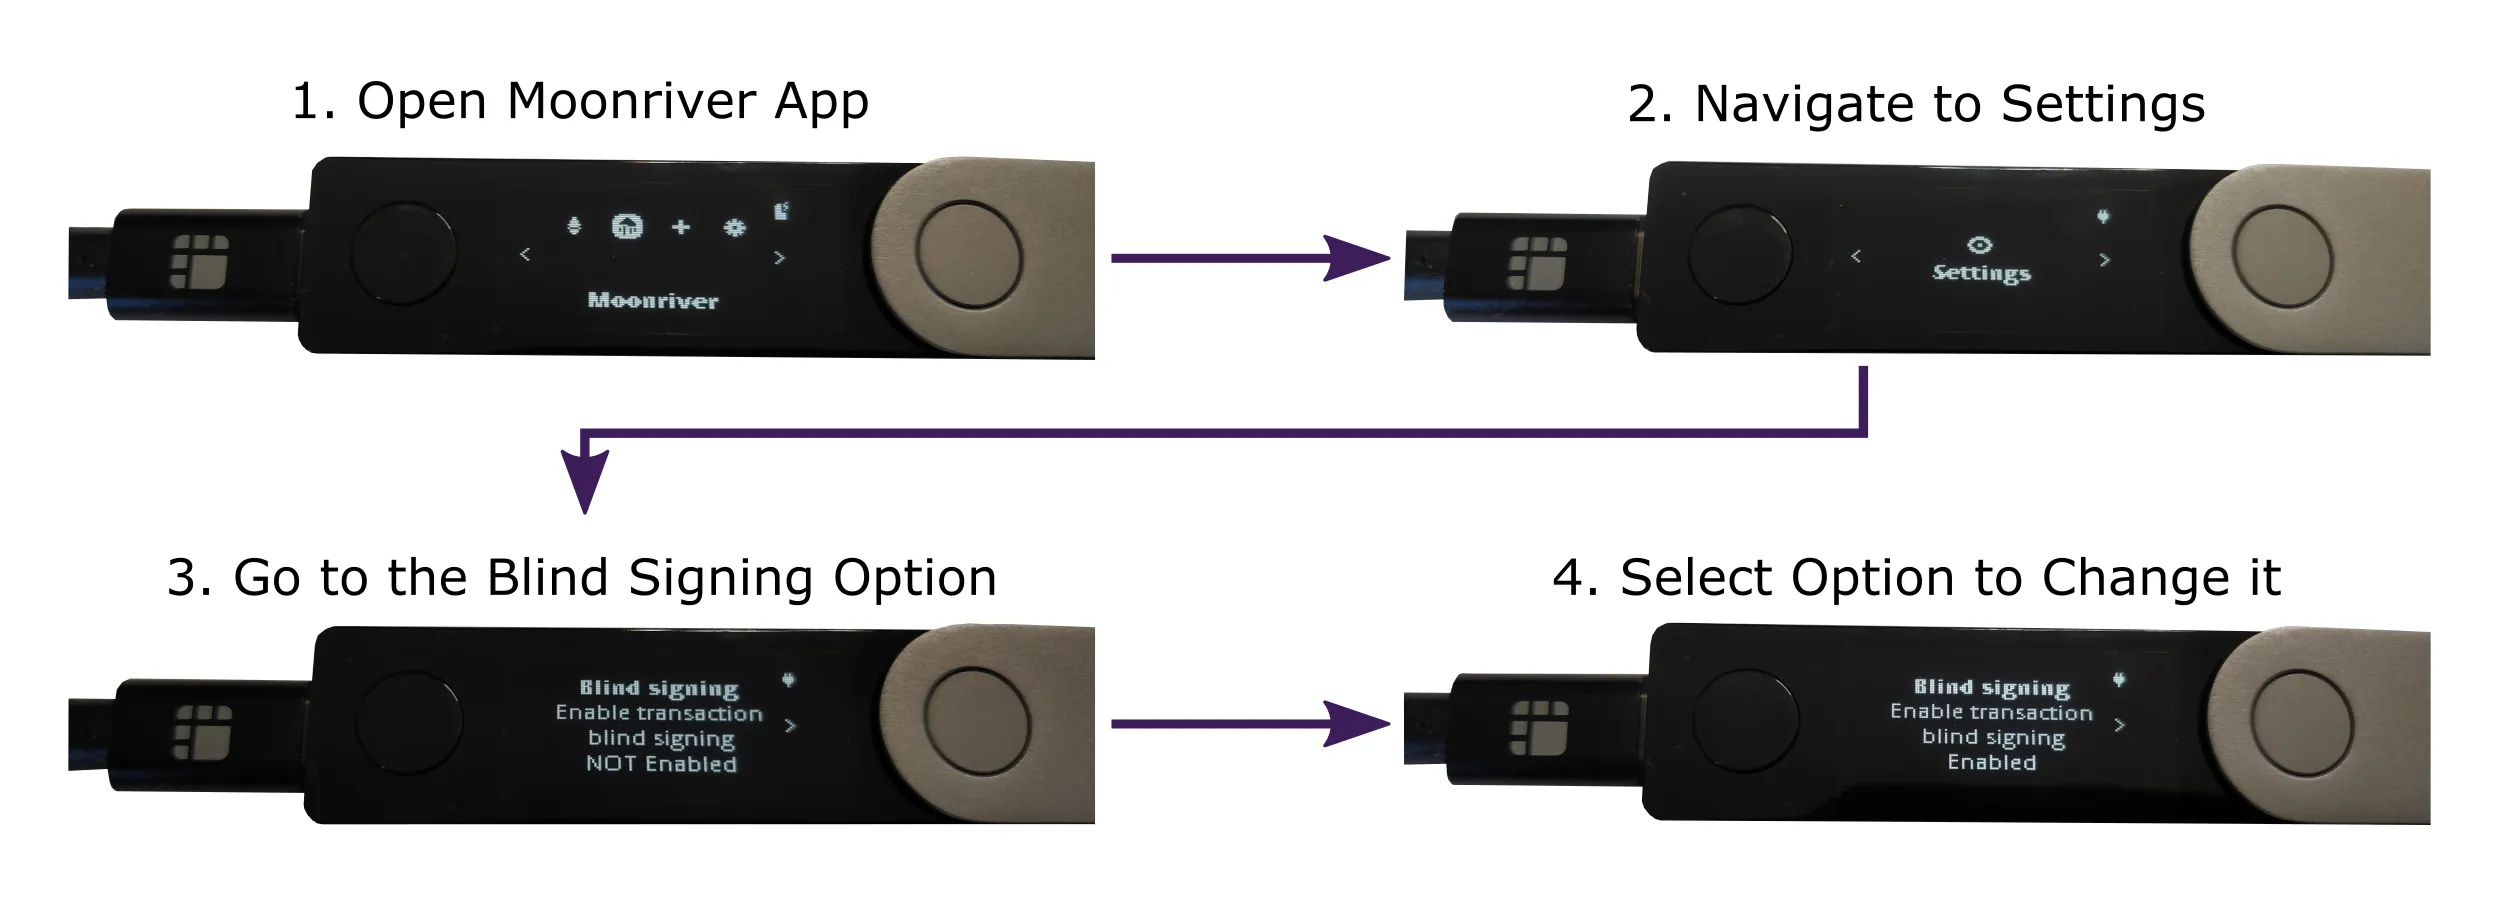
## Import your Ledger Account to MetaMask {: #import-your-ledger-account-to-metamask }
Now that you've installed the Ledger Live apps, you can connect your Ledger to the computer, unlock it, and open the Moonriver app.
Then import your Ledger account to MetaMask using the following steps:
1. Click on the top-right logo to expand the menu
2. Select **Connect Hardware Wallet**

In the next screen, you are prompted to select which hardware wallet you'll like to use in MetaMask. At the moment of writing, only Ledger and Trezor hardware wallets are supported. Here, take the following steps:
1. Select the Ledger logo
2. Click on **Continue**

If you're using Chrome or a Chrome-based browser like Brave, you'll be prompted to select your Ledger device to connect via WebHID:
1. Select your Ledger device from the pop-up
2. Click **Connect**

If a pop-up doesn't appear, you may need to change your MetaMask settings to enable a WebHID connection. You can check and update your MetaMask settings by following these steps:
1. Expand the top-right menu and go to **Settings**
2. Navigate to **Advanced**
3. Scroll down to **Preferred Ledger Connection Type** and select **WebHID** from the dropdown
!!! note
The **Preferred Ledger Connection Type** setting is only available on Chrome and Chrome-based browsers. This setting doesn't exist on other browsers such as Firefox.
If MetaMask was able to connect successfully to your Ledger device, you should see a list of five Moonriver/Ethereum-styled accounts. If not, double-check that Ledger Live is closed, you've connected your Ledger device to the computer, unlocked it, and have the Moonriver app open.
### Import Accounts and View Balances {: #import-accounts-and-view-balances }
From the list of accounts, take the following steps:
1. Select the accounts you would like to import from your Ledger device
2. Click on **Unlock**

If you've imported your Ledger account successfully, you should see your account and balance displayed in the main MetaMask screen like shown in the following image:

You can switch accounts in MetaMask at any time to view the balance of your other imported Ledger accounts.
You've now successfully imported a Moonriver compatible account from your Ledger device and are now ready to start interacting with your Ledger device.
## Receive Tokens {: #receive-tokens }
To get started interacting with your Ledger device, you will need to send some funds to it. Copy your address from MetaMask by clicking on your account name and address in MetaMask.

Next, you will need to obtain some MOVR tokens and using the address you just copied, send the tokens to your account. After the transaction has successfully gone through, you will see your balance update.
## Send Tokens {: #send-tokens }
Next up is sending and signing transactions on Moonriver using your Ledger device. To get started sending a transaction, click on the **Send** button:

As you would in a standard transaction, set the recipient address, enter the number of tokens to send, review transaction details and confirm it. This will initiate the transaction signature wizard in your Ledger device. Here, take the following steps:
1. Click the button to proceed to the next screen. Your Ledger device is only warning you to review the transaction
2. Check the number of tokens being sent then proceed to the next screen
3. Check the recipient's address and proceed to the next screen
4. Check the max fees applicable to this transaction. This is the gas price multiplied by the gas limit you've set on MetaMask. When ready, proceed to the next screen
5. If you agree with all the transaction details, approve it. This will sign the transaction and will trigger MetaMask to send it. If you don't agree with all the transaction details, reject it. This will cancel the transaction, and MetaMask will mark it as failed

Right after you've approved the transaction, MetaMask sends it to the network. Once the transaction is confirmed, it will be displayed as **Send** on the **Activity** tab in MetaMask.

And that is it! You've signed a transaction and sent some MOVR tokens using your Ledger hardware wallet!
## Interact with Contracts Using your Ledger {: #interact-with-contracts-using-your-ledger }
By default, Ledger devices don't admit a `data` field in the transaction object. Consequently, users can't deploy or interact with smart contracts.
However, if you want to use your Ledger hardware wallet for transactions related to smart contracts, you need to change a configuration parameter inside the app on your device. To do so, take the following steps:
1. On your Ledger, open the Moonriver or Ethereum app
2. Navigate to **Settings**
3. Find the **Blind signing** page. It should state **NOT Enabled** at the bottom
4. Select/validate the option to change its value to **Enabled**
!!! note
This option is necessary to use your Ledger device to interact with ERC-20 token contracts that might live inside the Moonbeam ecosystem.

The information presented herein has been provided by third parties and is made available solely for general information purposes. Moonbeam does not endorse any project listed and described on the Moonbeam Doc Website (https://docs.moonbeam.network/). Moonbeam Foundation does not warrant the accuracy, completeness or usefulness of this information. Any reliance you place on such information is strictly at your own risk. Moonbeam Foundation disclaims all liability and responsibility arising from any reliance placed on this information by you or by anyone who may be informed of any of its contents. All statements and/or opinions expressed in these materials are solely the responsibility of the person or entity providing those materials and do not necessarily represent the opinion of Moonbeam Foundation. The information should not be construed as professional or financial advice of any kind. Advice from a suitably qualified professional should always be sought in relation to any particular matter or circumstance. The information herein may link to or integrate with other websites operated or content provided by third parties, and such other websites may link to this website. Moonbeam Foundation has no control over any such other websites or their content and will have no liability arising out of or related to such websites or their content. The existence of any such link does not constitute an endorsement of such websites, the content of the websites, or the operators of the websites. These links are being provided to you only as a convenience and you release and hold Moonbeam Foundation harmless from any and all liability arising from your use of this information or the information provided by any third-party website or service.
--- END CONTENT ---
Doc-Content: https://docs.moonbeam.network/tokens/connect/mathwallet/
--- BEGIN CONTENT ---
---
title: Connect MathWallet
description: This guide walks you through how to connect Mathwallet, a browser-based wallet that works with Ethereum, to Moonbeam.
categories: Tokens and Accounts, Ethereum Toolkit
---
# Interacting with Moonbeam Using MathWallet
## Introduction {: #introduction }
MathWallet [announced](https://mathwallet.org/moonbeam-wallet/en) that it is now natively supporting each of the [Moonbeam-based networks](/learn/platform/networks/){target=\_blank}. This means that you are now able to interact with any of the networks using another wallet besides MetaMask.
In this tutorial, we'll go through how to setup MathWallet to connect to each of the networks: [Moonbeam](#connect-to-moonbeam), [Moonriver](#connect-to-moonriver), and [Moonbase Alpha](#connect-to-moonbase-alpha). We'll also present a brief example of using MathWallet as a Web3 provider for other tools such as [Remix](/builders/ethereum/dev-env/remix/){target=\_blank}.
The information presented herein is for informational purposes only and has been provided by third parties. Moonbeam does not endorse any project listed and described on the Moonbeam docs website (https://docs.moonbeam.network/).
## Checking Prerequisites {: #checking-prerequisites }
First, you need to install the MathWallet browser extension, which you can get from their [website](https://mathwallet.org/en-us){target=\_blank}.
With the browser extension installed, please open it and set a password.
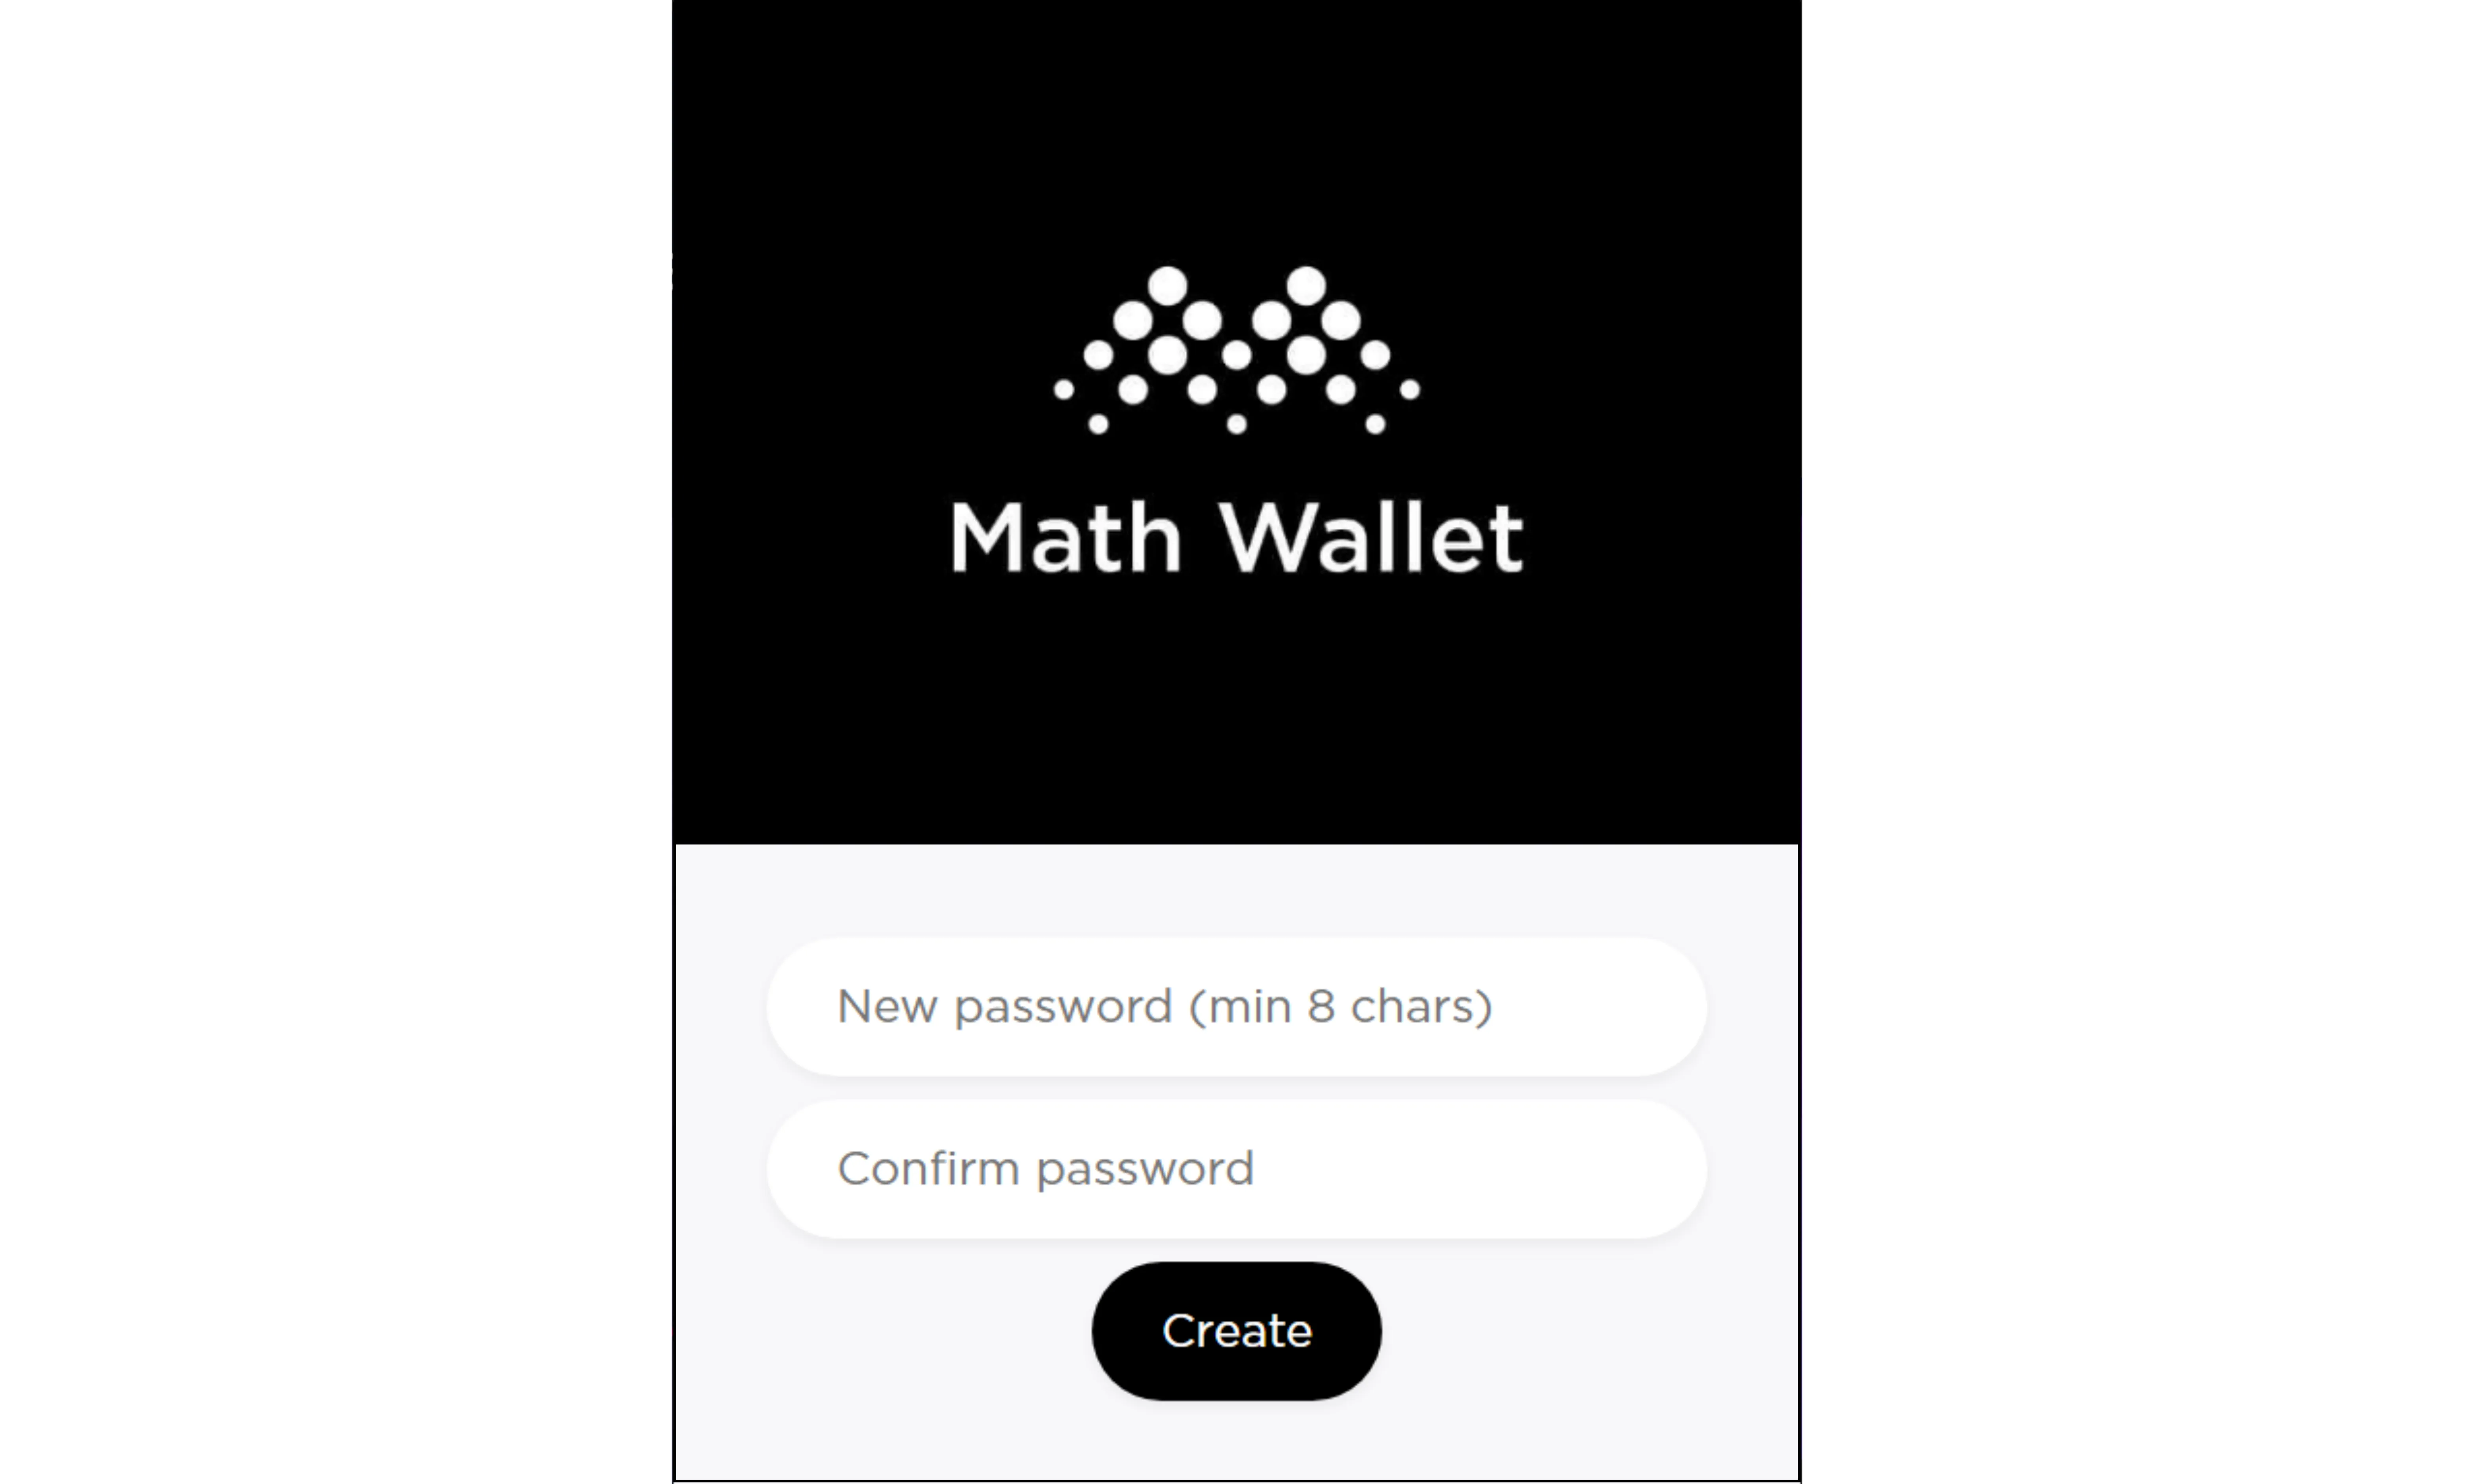
## Connect to Moonbeam {: #connect-to-moonbeam }
To get started with Moonbeam, all you have to do is click **Switch Network** and select **Moonbeam**.
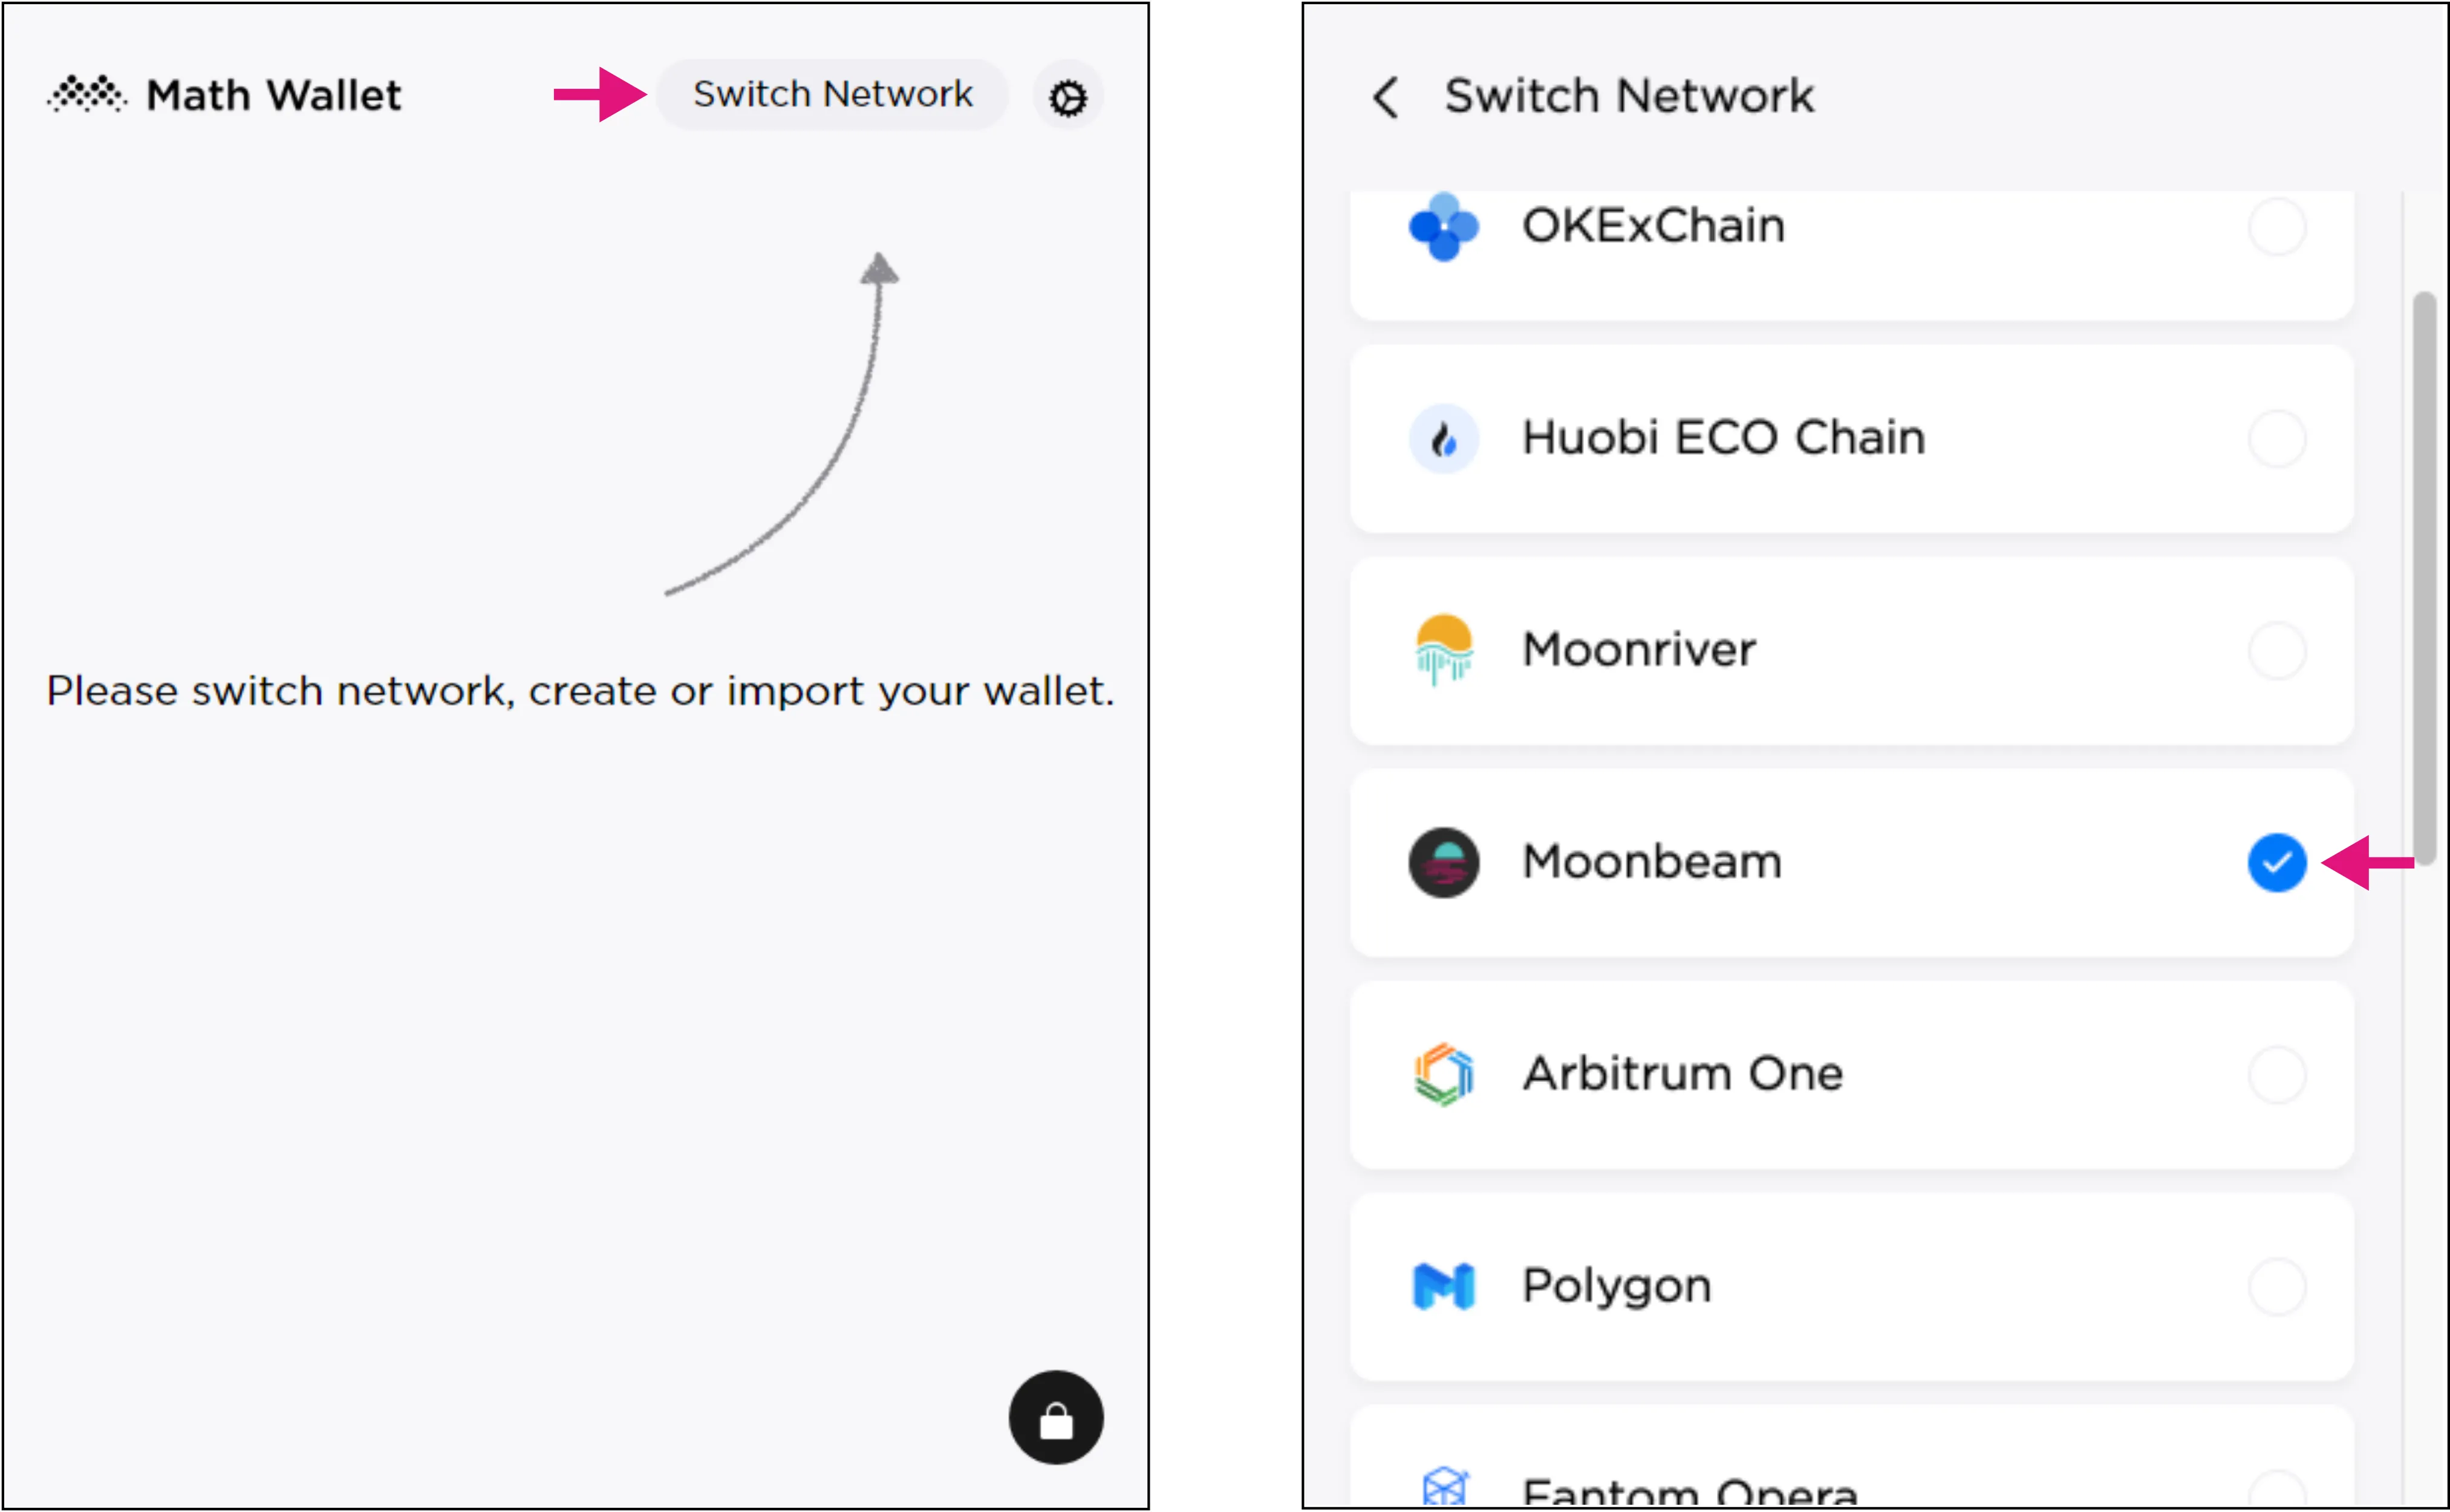
And that is it, you now have MathWallet connected to Moonbeam! Your wallet should look like this:
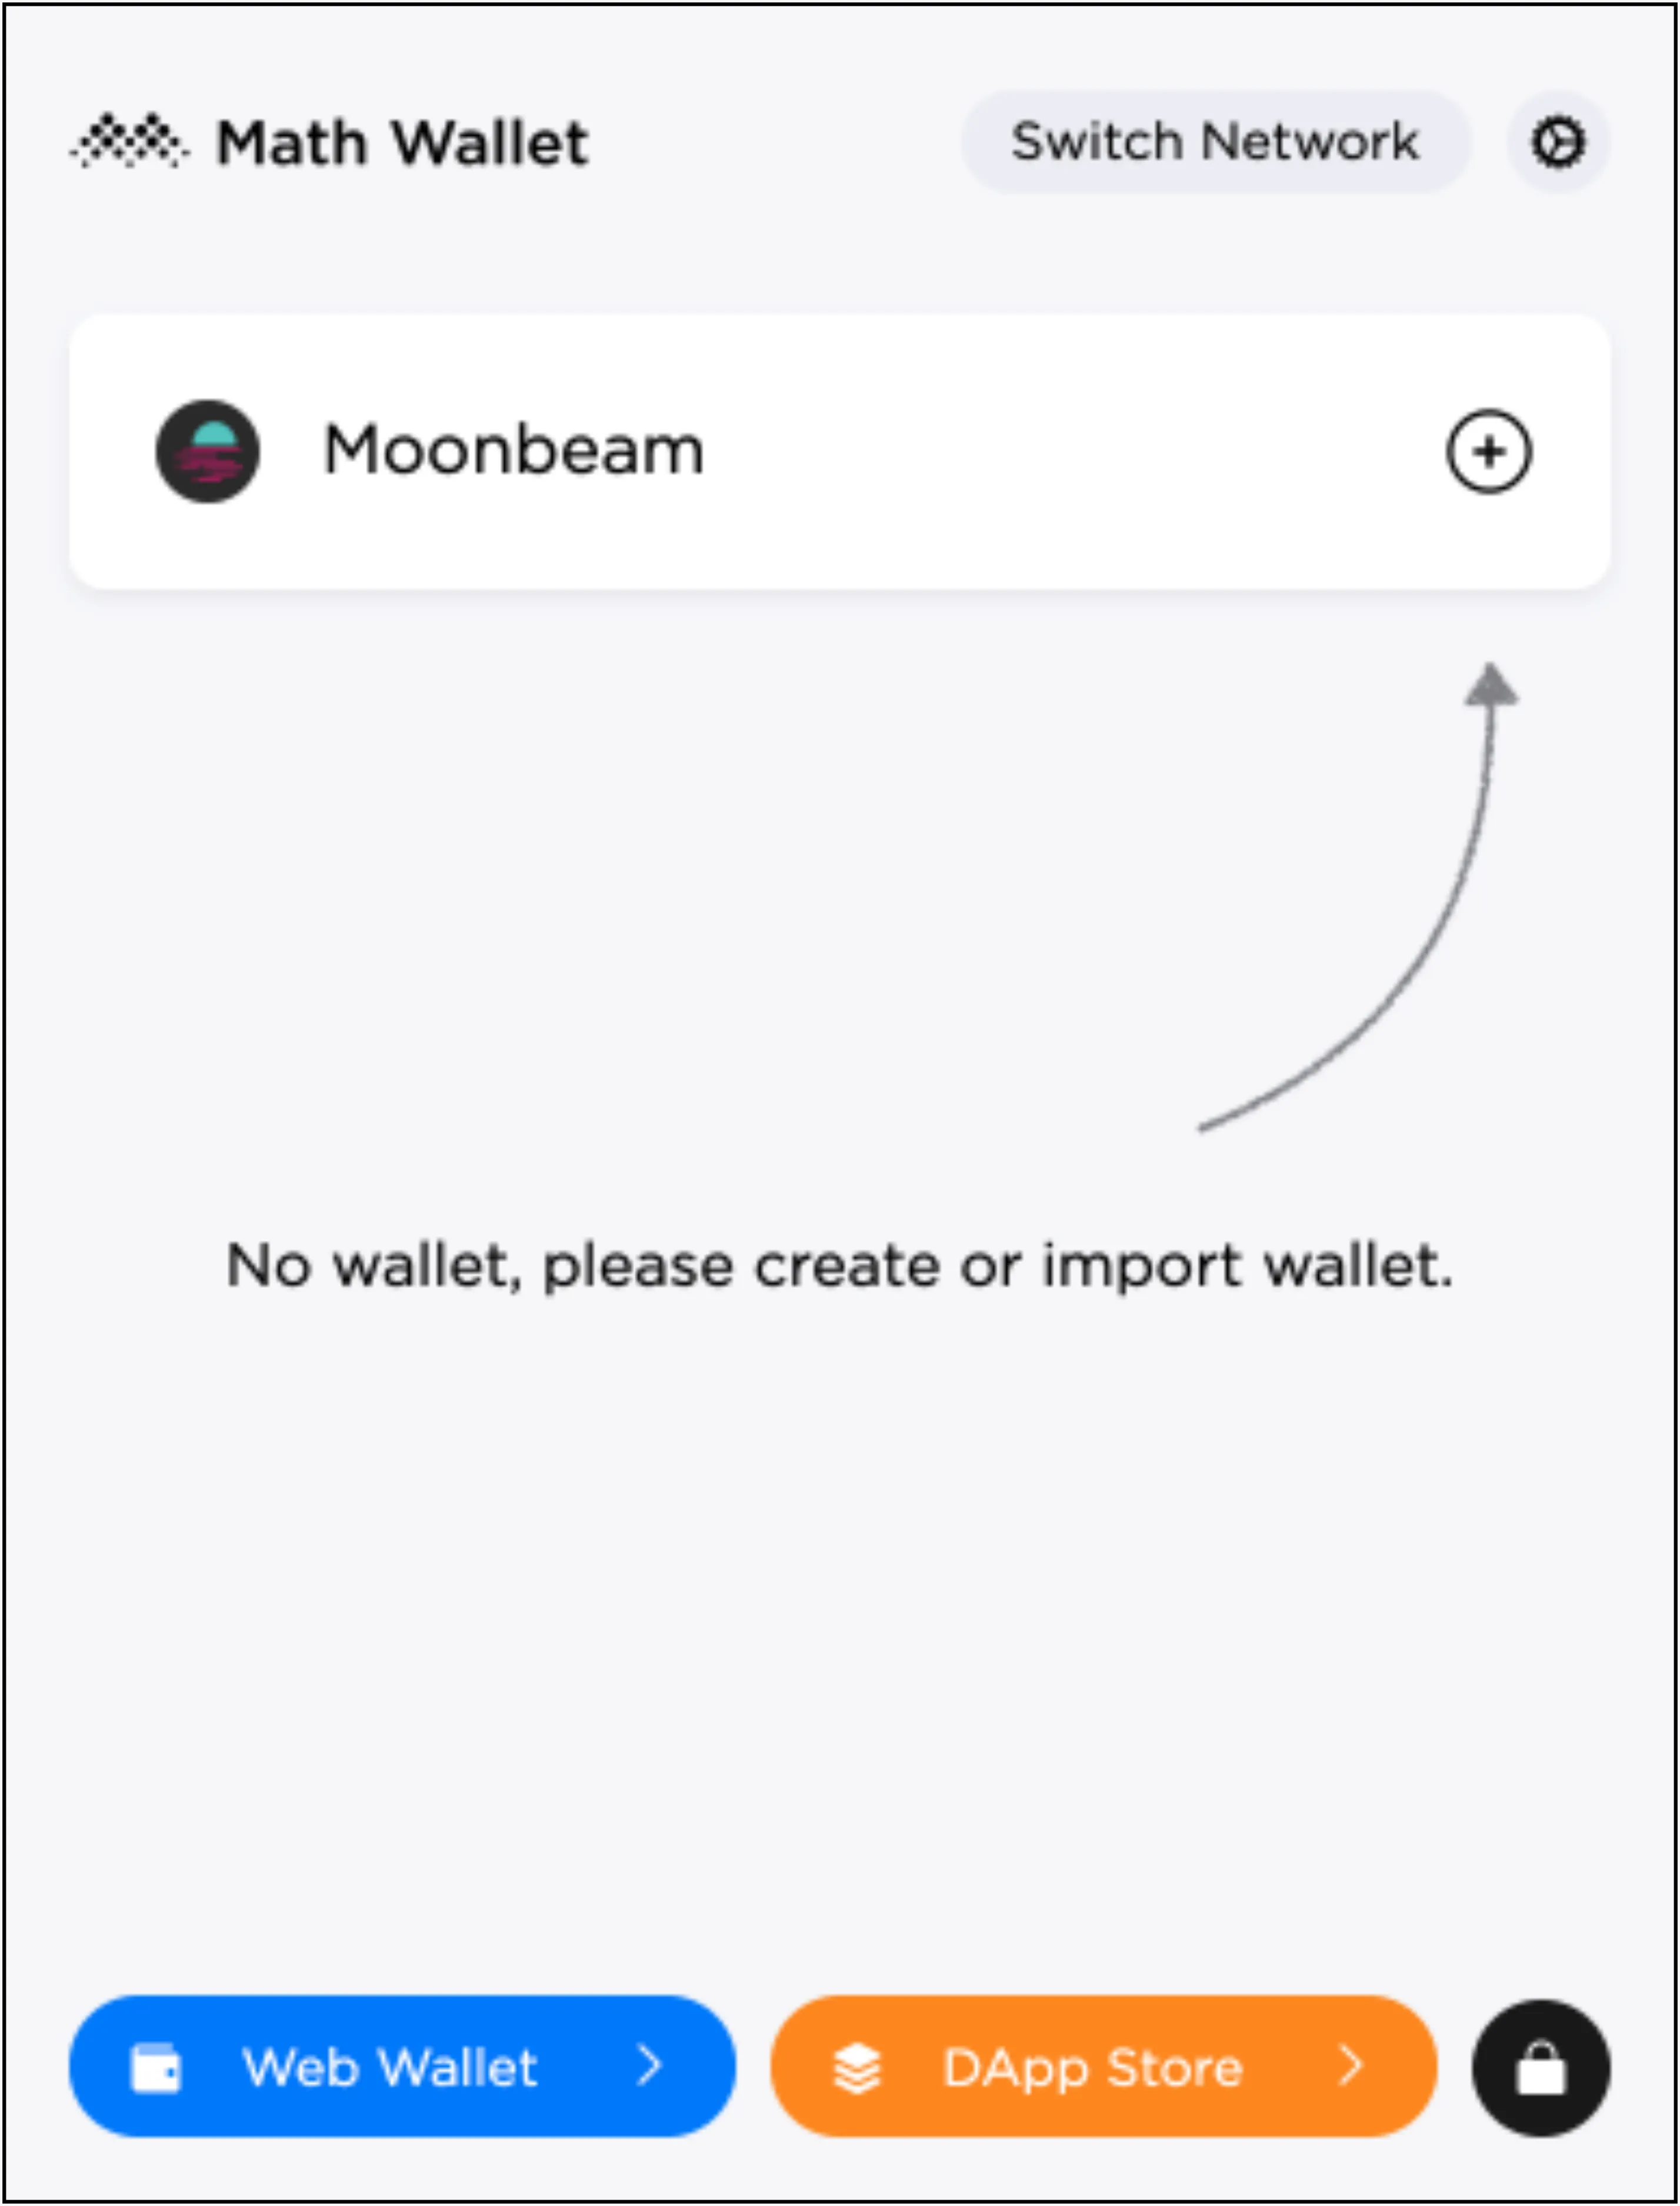 Now that you've successfully connected to Moonbeam, you can skip ahead to the [Adding a Wallet](#adding-a-wallet) section to get started creating or importing a wallet.
## Connect to Moonriver {: #connect-to-moonriver }
Getting started with Moonriver is a straightforward process. All you have to do is click **Switch Network** and select **Moonriver**.
And that is it, you now have MathWallet connected to Moonriver! Your wallet should look like this:
Now that you've successfully connected to Moonbeam, you can skip ahead to the [Adding a Wallet](#adding-a-wallet) section to get started creating or importing a wallet.
## Connect to Moonriver {: #connect-to-moonriver }
Getting started with Moonriver is a straightforward process. All you have to do is click **Switch Network** and select **Moonriver**.

And that is it, you now have MathWallet connected to Moonriver! Your wallet should look like this:
 Now that you've successfully connected to Moonriver, you can skip ahead to the [Adding a Wallet](#adding-a-wallet) section to get started creating or importing a wallet.
## Connect to Moonbase Alpha {: #connect-to-moonbase-alpha }
In this part, we'll go through the process of connecting MathWallet to Moonbase Alpha. First you'll need to enable Moonbase Alpha. To do so, go to the settings by clicking on the gear icon. Then click on **Networks** and scroll down through the **Ethereum** section until you find **Moonbase Alpha** and toggle the switch.
Lastly you'll need to switch to Moonbase Alpha. From the main screen, click **Switch Network** and select **Moonbase Alpha**.
And that is it, you now have MathWallet connected to the Moonbase Alpha TestNet! Your wallet should look like this:
Now that you've successfully connected to Moonbase Alpha, you can move on to the [Adding a Wallet](#adding-a-wallet) section to get started creating or importing a wallet.
## Adding a Wallet {: #adding-a-wallet }
The following steps will show you how to interact with the Moonbase Alpha TestNet, but can also be used to interact with Moonbeam and Moonriver.
After you are connected to Moonbase Alpha, you can now create a wallet to get an account and start interacting with the TestNet. Currently, there are three ways to add a wallet:
- Create a wallet
- Import an existing wallet using a mnemonic or private key
- Connect hardware wallet (_not supported for now_)
### Create a Wallet {: #create-a-wallet }
The following steps for creating a wallet can be modified for Moonbeam and Moonriver.
To create a new wallet, click the :heavy_plus_sign: sign next to **Moonbase Alpha** and select **Create Wallet**.

Set and confirm a wallet name. Next, make sure you safely store the mnemonic, as it provides direct access to your funds. Once you have completed the process, you should see your newly created wallet with its associated public address.
### Import a Wallet {: #import-a-wallet }
To create a new wallet, click the :heavy_plus_sign: sign next to **Moonbase Alpha** and select **Import Wallet**.
Next, select between importing using a mnemonic or a private key. For the first option, enter the mnemonic word by word, separated by spaces. For the second option, enter the private key (either with the `0x` prefix or not, it works both ways).
After clicking next, set a wallet name, and that is it! You should see your imported wallet with its associated public address.
## Using MathWallet {: #using-mathwallet }
MathWallet serves as a Web3 provider in tools such as [Remix](/builders/ethereum/dev-env/remix/). By having MathWallet connected to Moonbase Alpha or Moonriver, you can deploy contracts as you would like using MetaMask, signing the transactions with MathWallet instead.
For example, in Remix, when deploying a smart contract to Moonbase Alpha, make sure you select the **Injected Web3** option in the **ENVIRONMENT** menu. If you have MathWallet connected, you will see the TestNet chain ID just below the box (_{{ networks.moonbase.chain_id }}_) and your MathWallet account injected into Remix as well. When sending a transaction, you should see a similar pop-up from MathWallet:
By clicking on **Accept** you are signing this transaction, and the contract will be deployed to the Moonbase Alpha TestNet.
Now that you've successfully connected to Moonriver, you can skip ahead to the [Adding a Wallet](#adding-a-wallet) section to get started creating or importing a wallet.
## Connect to Moonbase Alpha {: #connect-to-moonbase-alpha }
In this part, we'll go through the process of connecting MathWallet to Moonbase Alpha. First you'll need to enable Moonbase Alpha. To do so, go to the settings by clicking on the gear icon. Then click on **Networks** and scroll down through the **Ethereum** section until you find **Moonbase Alpha** and toggle the switch.

Lastly you'll need to switch to Moonbase Alpha. From the main screen, click **Switch Network** and select **Moonbase Alpha**.

And that is it, you now have MathWallet connected to the Moonbase Alpha TestNet! Your wallet should look like this:

Now that you've successfully connected to Moonbase Alpha, you can move on to the [Adding a Wallet](#adding-a-wallet) section to get started creating or importing a wallet.
## Adding a Wallet {: #adding-a-wallet }
The following steps will show you how to interact with the Moonbase Alpha TestNet, but can also be used to interact with Moonbeam and Moonriver.
After you are connected to Moonbase Alpha, you can now create a wallet to get an account and start interacting with the TestNet. Currently, there are three ways to add a wallet:
- Create a wallet
- Import an existing wallet using a mnemonic or private key
- Connect hardware wallet (_not supported for now_)
### Create a Wallet {: #create-a-wallet }
The following steps for creating a wallet can be modified for Moonbeam and Moonriver.
To create a new wallet, click the :heavy_plus_sign: sign next to **Moonbase Alpha** and select **Create Wallet**.

Set and confirm a wallet name. Next, make sure you safely store the mnemonic, as it provides direct access to your funds. Once you have completed the process, you should see your newly created wallet with its associated public address.

### Import a Wallet {: #import-a-wallet }
To create a new wallet, click the :heavy_plus_sign: sign next to **Moonbase Alpha** and select **Import Wallet**.

Next, select between importing using a mnemonic or a private key. For the first option, enter the mnemonic word by word, separated by spaces. For the second option, enter the private key (either with the `0x` prefix or not, it works both ways).

After clicking next, set a wallet name, and that is it! You should see your imported wallet with its associated public address.

## Using MathWallet {: #using-mathwallet }
MathWallet serves as a Web3 provider in tools such as [Remix](/builders/ethereum/dev-env/remix/). By having MathWallet connected to Moonbase Alpha or Moonriver, you can deploy contracts as you would like using MetaMask, signing the transactions with MathWallet instead.
For example, in Remix, when deploying a smart contract to Moonbase Alpha, make sure you select the **Injected Web3** option in the **ENVIRONMENT** menu. If you have MathWallet connected, you will see the TestNet chain ID just below the box (_{{ networks.moonbase.chain_id }}_) and your MathWallet account injected into Remix as well. When sending a transaction, you should see a similar pop-up from MathWallet:

By clicking on **Accept** you are signing this transaction, and the contract will be deployed to the Moonbase Alpha TestNet.
The information presented herein has been provided by third parties and is made available solely for general information purposes. Moonbeam does not endorse any project listed and described on the Moonbeam Doc Website (https://docs.moonbeam.network/). Moonbeam Foundation does not warrant the accuracy, completeness or usefulness of this information. Any reliance you place on such information is strictly at your own risk. Moonbeam Foundation disclaims all liability and responsibility arising from any reliance placed on this information by you or by anyone who may be informed of any of its contents. All statements and/or opinions expressed in these materials are solely the responsibility of the person or entity providing those materials and do not necessarily represent the opinion of Moonbeam Foundation. The information should not be construed as professional or financial advice of any kind. Advice from a suitably qualified professional should always be sought in relation to any particular matter or circumstance. The information herein may link to or integrate with other websites operated or content provided by third parties, and such other websites may link to this website. Moonbeam Foundation has no control over any such other websites or their content and will have no liability arising out of or related to such websites or their content. The existence of any such link does not constitute an endorsement of such websites, the content of the websites, or the operators of the websites. These links are being provided to you only as a convenience and you release and hold Moonbeam Foundation harmless from any and all liability arising from your use of this information or the information provided by any third-party website or service.
--- END CONTENT ---
Doc-Content: https://docs.moonbeam.network/tokens/connect/metamask/
--- BEGIN CONTENT ---
---
title: How to Connect MetaMask
description: This guide walks you through how to connect MetaMask, a browser-based Ethereum wallet, to Moonbeam-based networks and how to transfer funds.
categories: Tokens and Accounts, Ethereum Toolkit
---
# Interacting with Moonbeam Using MetaMask
## Introduction {: #introduction }
Developers can leverage Moonbeam's Ethereum compatibility features to integrate tools, such as [MetaMask](https://metamask.io){target=\_blank}, into their dApps. By doing so, they can use the injected library MetaMask provides to interact with the blockchain.
Currently, MetaMask can be configured to connect to a few networks: Moonbeam, Moonriver, the Moonbase Alpha TestNet, and a Moonbeam development node.
If you already have MetaMask installed, you can easily connect MetaMask to the network of your choice:
!!! note
MetaMask will pop up asking for permission to add a custom network. Once you approve permissions, MetaMask will switch your current network.
Learn [how to integrate a Connect MetaMask button](/builders/integrations/wallets/metamask/){target=\_blank} into your dApp, so that users can connect to Moonbase Alpha with a simple click of a button. The guide can also be adapted for the other Moonbeam-based networks.
The information presented herein is for informational purposes only and has been provided by third parties. Moonbeam does not endorse any project listed and described on the Moonbeam docs website (https://docs.moonbeam.network/).
## Install the MetaMask Extension {: #install-the-metamask-extension }
First, you'll start with a fresh and default [MetaMask](https://metamask.io){target=\_blank} installation from the Chrome store. After downloading, installing, and initializing the extension, follow the **Get Started** guide. In there, you need to create a wallet, set a password, and store your secret backup phrase (this gives direct access to your funds, so make sure to store these in a secure place).
## Setup a Wallet {: #setup-a-wallet }
After installing [MetaMask](https://metamask.io){target=\_blank}, the setup will automatically open a new task with a welcome screen. Here, you are offered two options:
- **Create a new wallet** - you'll go through some steps to get a new seed phrase. Ensure you store this phrase securely and you don't share it publicly
- **Import an existing wallet** - you already have a seed phrase stored, and you want to restore an account from that recovery phrase

Once you've selected the option that fits your needs, follow the steps, and you should be all set.
!!! note
Multiple accounts can be derived from a seed phrase by changing what is known as the address index. By default, when creating or importing an account from the seed phrase, you get the account with the address index 0. You can get the other indexes by just adding new accounts in the main Metamask screen.
## Import Accounts {: #import-accounts }
Once you've created a wallet or imported an existing one, you can also import any account into MetaMask if you hold the private keys.
For this example, you'll use private keys from the development account. Click the account switcher button to import an account using its private keys. That is where it says **Account 1**.
Next, click on **Import Account**.
Finally, enter the private keys of the account you are trying to import. For example, you can use one of the accounts prefunded in the Moonbeam development node. This guide uses Gerald's key. Once you've entered the private key, click on **Import**.
??? note "Development account addresses and private keys"
- Alith:
- Public Address: `0xf24FF3a9CF04c71Dbc94D0b566f7A27B94566cac`
- Private Key: `0x5fb92d6e98884f76de468fa3f6278f8807c48bebc13595d45af5bdc4da702133`
- Baltathar:
- Public Address: `0x3Cd0A705a2DC65e5b1E1205896BaA2be8A07c6e0`
- Private Key: `0x8075991ce870b93a8870eca0c0f91913d12f47948ca0fd25b49c6fa7cdbeee8b`
- Charleth:
- Public Address: `0x798d4Ba9baf0064Ec19eB4F0a1a45785ae9D6DFc`
- Private Key: `0x0b6e18cafb6ed99687ec547bd28139cafdd2bffe70e6b688025de6b445aa5c5b`
- Dorothy:
- Public Address: `0x773539d4Ac0e786233D90A233654ccEE26a613D9`
- Private Key: `0x39539ab1876910bbf3a223d84a29e28f1cb4e2e456503e7e91ed39b2e7223d68`
- Ethan:
- Public Address: `0xFf64d3F6efE2317EE2807d223a0Bdc4c0c49dfDB`
- Private Key: `0x7dce9bc8babb68fec1409be38c8e1a52650206a7ed90ff956ae8a6d15eeaaef4`
- Faith:
- Public Address: `0xC0F0f4ab324C46e55D02D0033343B4Be8A55532d`
- Private Key: `0xb9d2ea9a615f3165812e8d44de0d24da9bbd164b65c4f0573e1ce2c8dbd9c8df`
- Goliath:
- Public Address: `0x7BF369283338E12C90514468aa3868A551AB2929`
- Private Key: `0x96b8a38e12e1a31dee1eab2fffdf9d9990045f5b37e44d8cc27766ef294acf18`
- Heath:
- Public Address: `0x931f3600a299fd9B24cEfB3BfF79388D19804BeA`
- Private Key: `0x0d6dcaaef49272a5411896be8ad16c01c35d6f8c18873387b71fbc734759b0ab`
- Ida:
- Public Address: `0xC41C5F1123ECCd5ce233578B2e7ebd5693869d73`
- Private Key: `0x4c42532034540267bf568198ccec4cb822a025da542861fcb146a5fab6433ff8`
- Judith:
- Public Address: `0x2898FE7a42Be376C8BC7AF536A940F7Fd5aDd423`
- Private Key: `0x94c49300a58d576011096bcb006aa06f5a91b34b4383891e8029c21dc39fbb8b`
- Gerald:
- Public Address: `0x6Be02d1d3665660d22FF9624b7BE0551ee1Ac91b`
- Private Key: `0x99b3c12287537e38c90a9219d4cb074a89a16e9cdb20bf85728ebd97c343e342`
You should end up with an imported **Account 2** that looks like this:
## Connect MetaMask to Moonbeam {: #connect-metamask-to-moonbeam }
Once you have [MetaMask](https://metamask.io){target=\_blank} installed and have created or imported an account, you can connect it to any Moonbeam-based network. To do so, take the following steps:
1. Click in the upper left network selector menu
2. Select **Add Network**
Next, go to the bottom of the page and click on **Add a network manually**:
Here, you can configure MetaMask for the following networks:
=== "Moonbeam"
| Variable | Value |
|:-------------------------:|:--------------------------------------------------------------------------------:|
| Network Name | `Moonbeam` |
| RPC URL | `{{ networks.moonbeam.public_rpc_url }}` |
| Chain ID | `{{ networks.moonbeam.chain_id }}` (hex: `{{ networks.moonbeam.hex_chain_id }}`) |
| Symbol (Optional) | `GLMR` |
| Block Explorer (Optional) | `{{ networks.moonbeam.block_explorer }}` |
=== "Moonriver"
| Variable | Value |
|:-------------------------:|:----------------------------------------------------------------------------------:|
| Network Name | `Moonriver` |
| RPC URL | `{{ networks.moonriver.public_rpc_url }}` |
| Chain ID | `{{ networks.moonriver.chain_id }}` (hex: `{{ networks.moonriver.hex_chain_id }}`) |
| Symbol (Optional) | `MOVR` |
| Block Explorer (Optional) | `{{ networks.moonriver.block_explorer }}` |
=== "Moonbase Alpha"
| Variable | Value |
|:-------------------------:|:--------------------------------------------------------------------------------:|
| Network Name | `Moonbase Alpha` |
| RPC URL | `{{ networks.moonbase.rpc_url }}` |
| Chain ID | `{{ networks.moonbase.chain_id }}` (hex: `{{ networks.moonbase.hex_chain_id }}`) |
| Symbol (Optional) | `DEV` |
| Block Explorer (Optional) | `{{ networks.moonbase.block_explorer }}` |
=== "Moonbeam Dev Node"
| Variable | Value |
|:-------------------------:|:--------------------------------------------------------------------------------------:|
| Network Name | `Moonbeam Dev` |
| RPC URL | `{{ networks.development.rpc_url }}` |
| Chain ID | `{{ networks.development.chain_id }}` (hex: `{{ networks.development.hex_chain_id }}`) |
| Symbol (Optional) | `DEV` |
| Block Explorer (Optional) | `{{ networks.development.block_explorer }}` |
To do so, fill in the following information:
1. **Network name** - name that represents the network you are connecting to
2. **RPC URL** - [RPC endpoint](/builders/get-started/endpoints/){target=\_blank} of the network
3. **Chain ID** - chain ID of the Ethereum compatible network
4. **Symbol** - (optional) symbol of the native token of the network. For example, for Moonbeam, the value would be **GLMR**
5. **Block Explorer** - (optional) URL of the [block explorer](/builders/get-started/explorers/){target=\_blank}
6. Once you've verified all the information, click on **Save**

Once you've added the network, you'll be redirected to a screen stating that you've successfully added a network. Furthermore, you'll be prompted to **Switch to Moonbase Alpha**, the network added in this example.
## Interact with the Network {: #interact-with-the-network }
Once you've [connected Metamask](#connect-metamask-to-moonbeam) to any Moonbeam-based network, you can start using your wallet by:
- Sending a token transfer to another address
- Adding ERC-20s to Metamask and interacting with them
- Adding ERC-721s to Metamask and interacting with them
### Initiate a Transfer { #initiate-a-transfer }
This section showcases how to do a simple token transfer to another address as an example of using Metamask with Moonbeam.
To do so, take the following steps:
1. Ensure you are connected to the correct network
2. Ensure you have selected the account you want to use for the transfer
3. On the main screen of your Metamask wallet, click on **Send**
Next, you can enter the address to which you want to send the tokens. For this example, a wallet that has already been imported to Metamask is selected, known as **Bob**.
On the next screen, take the following steps:
1. Enter the number of tokens you want to send
2. Verify that all the information is correct, and click on **Next**
Lastly, confirm that all the gas-related parameters and fees are correct. After you've verified that everything is OK, click **Confirm**. At this point, your transaction has been sent to the network!
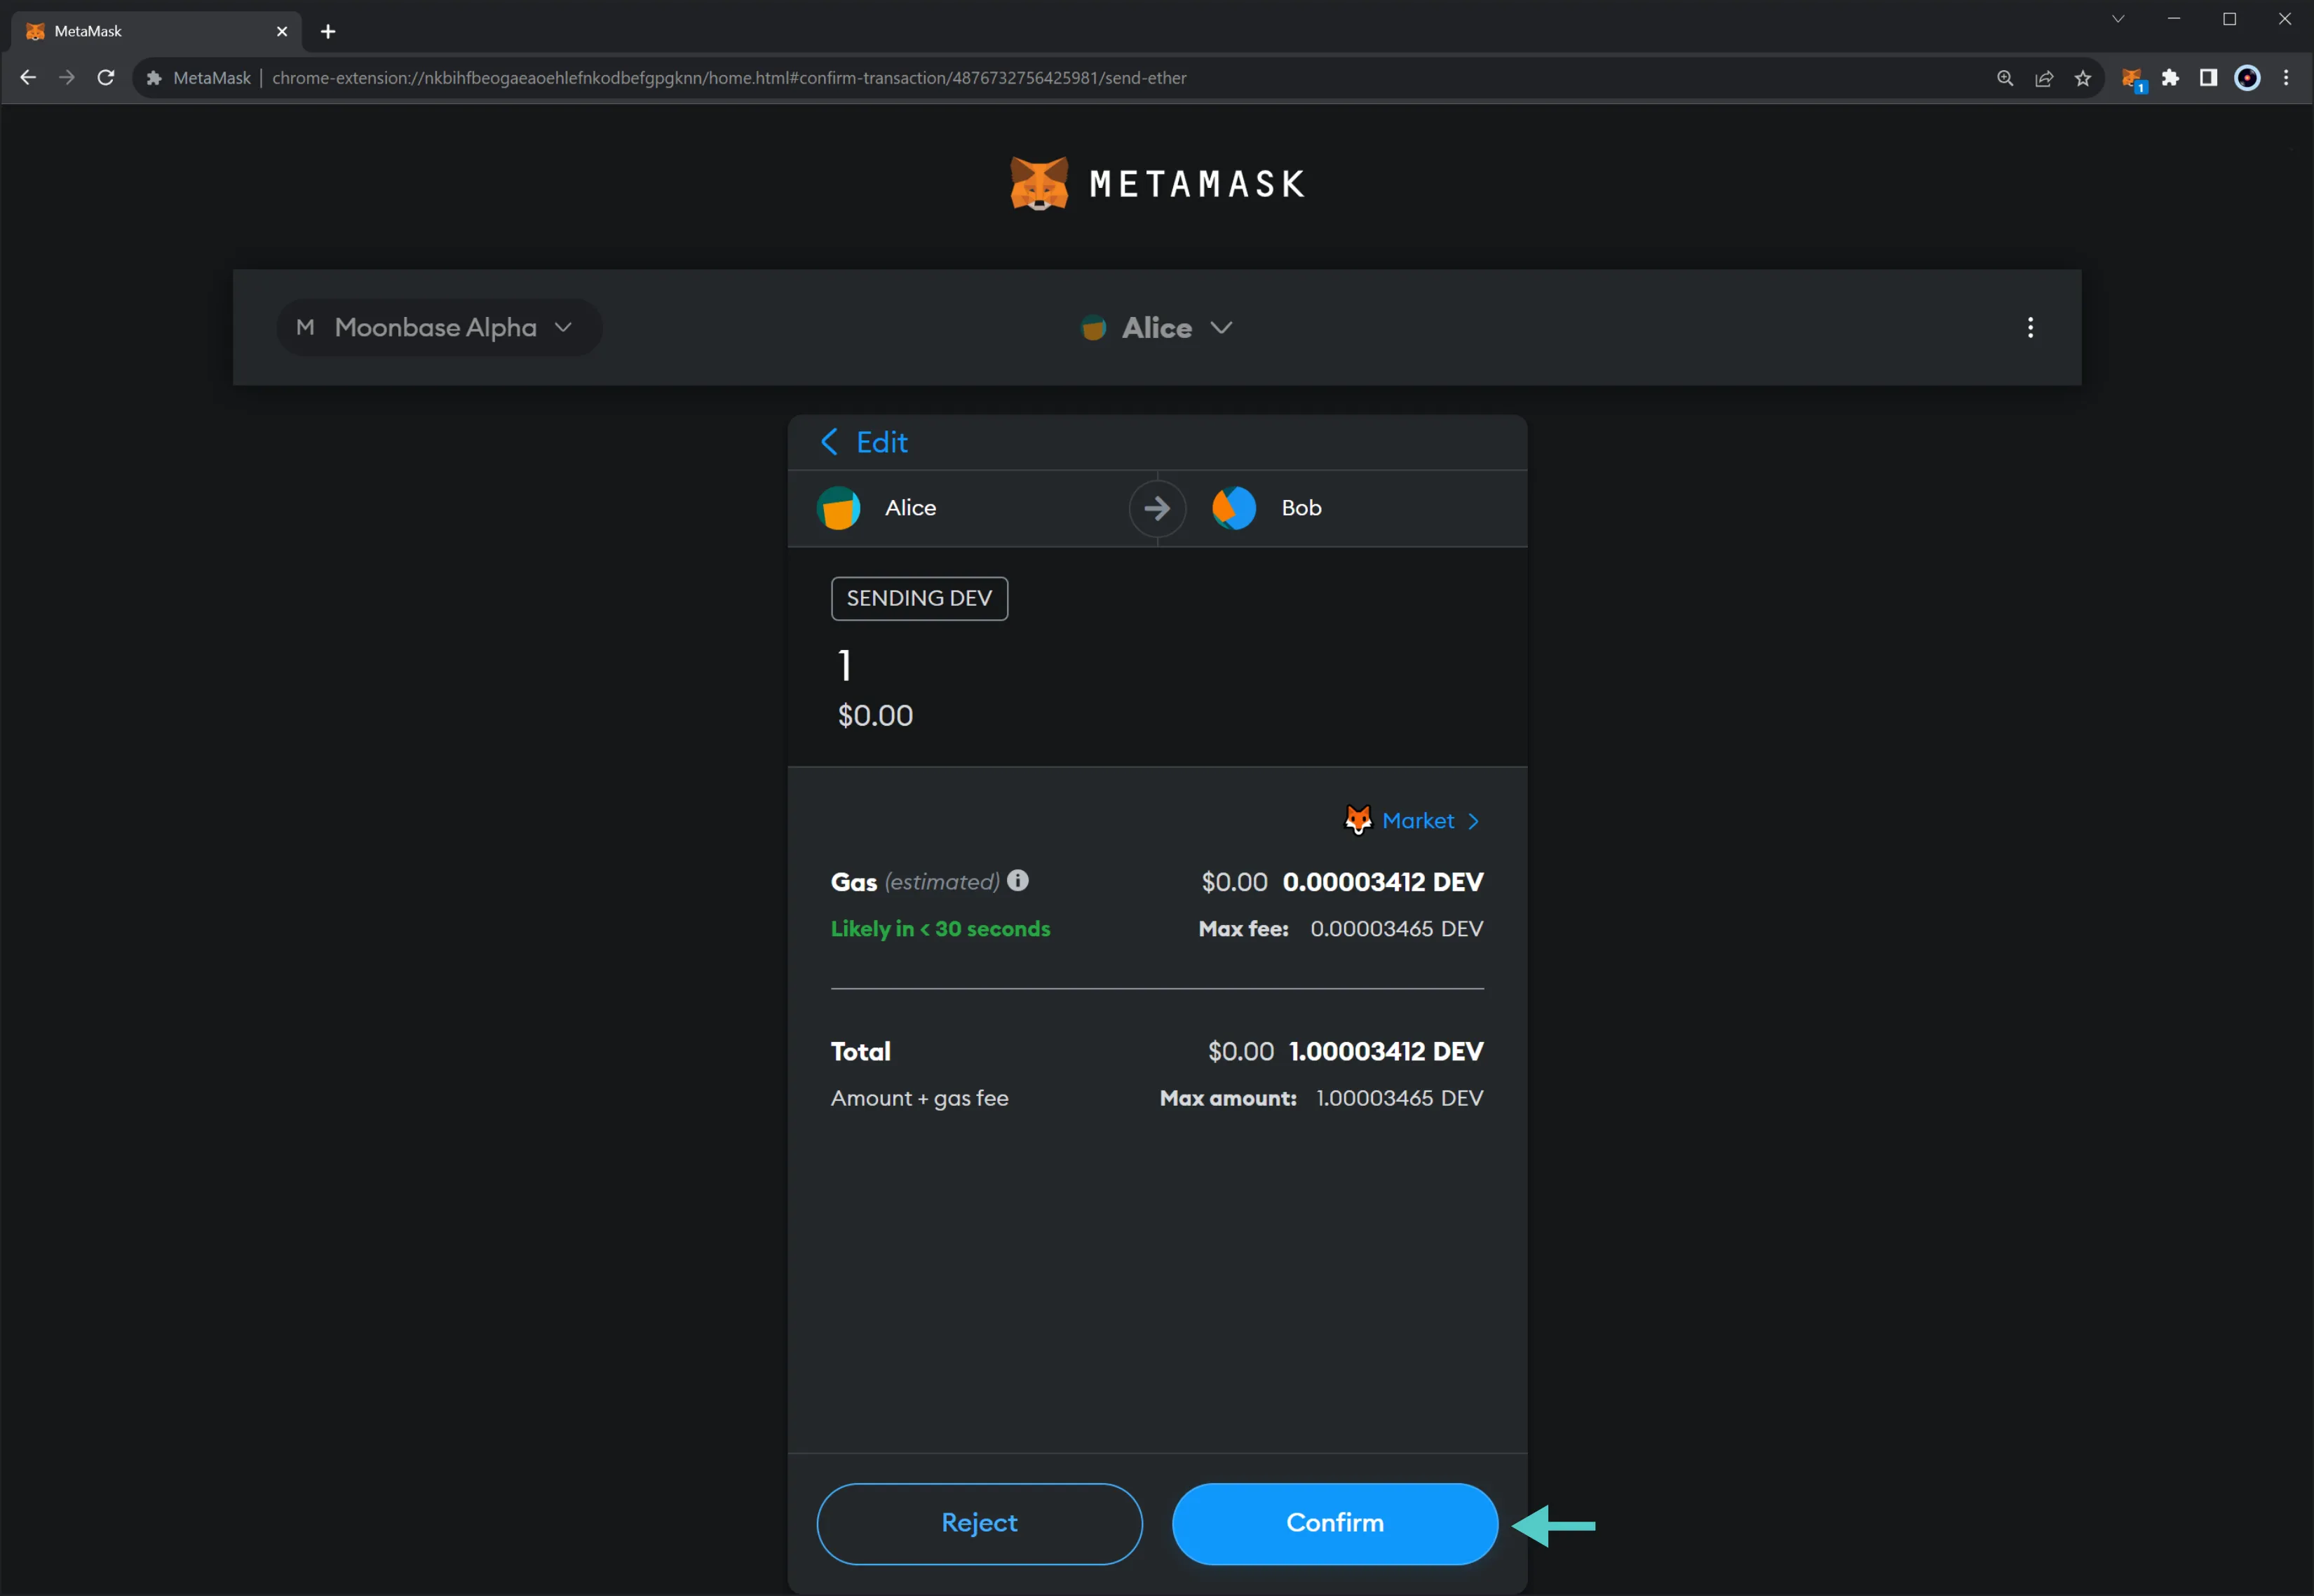
Once you've confirmed your transaction, you are taken back to the main screen of your wallet, where you'll see the transaction as **Pending**. After less than a minute, the transaction should be **Confirmed**. If you click on your transaction, you can check more details and view it in a block explorer.
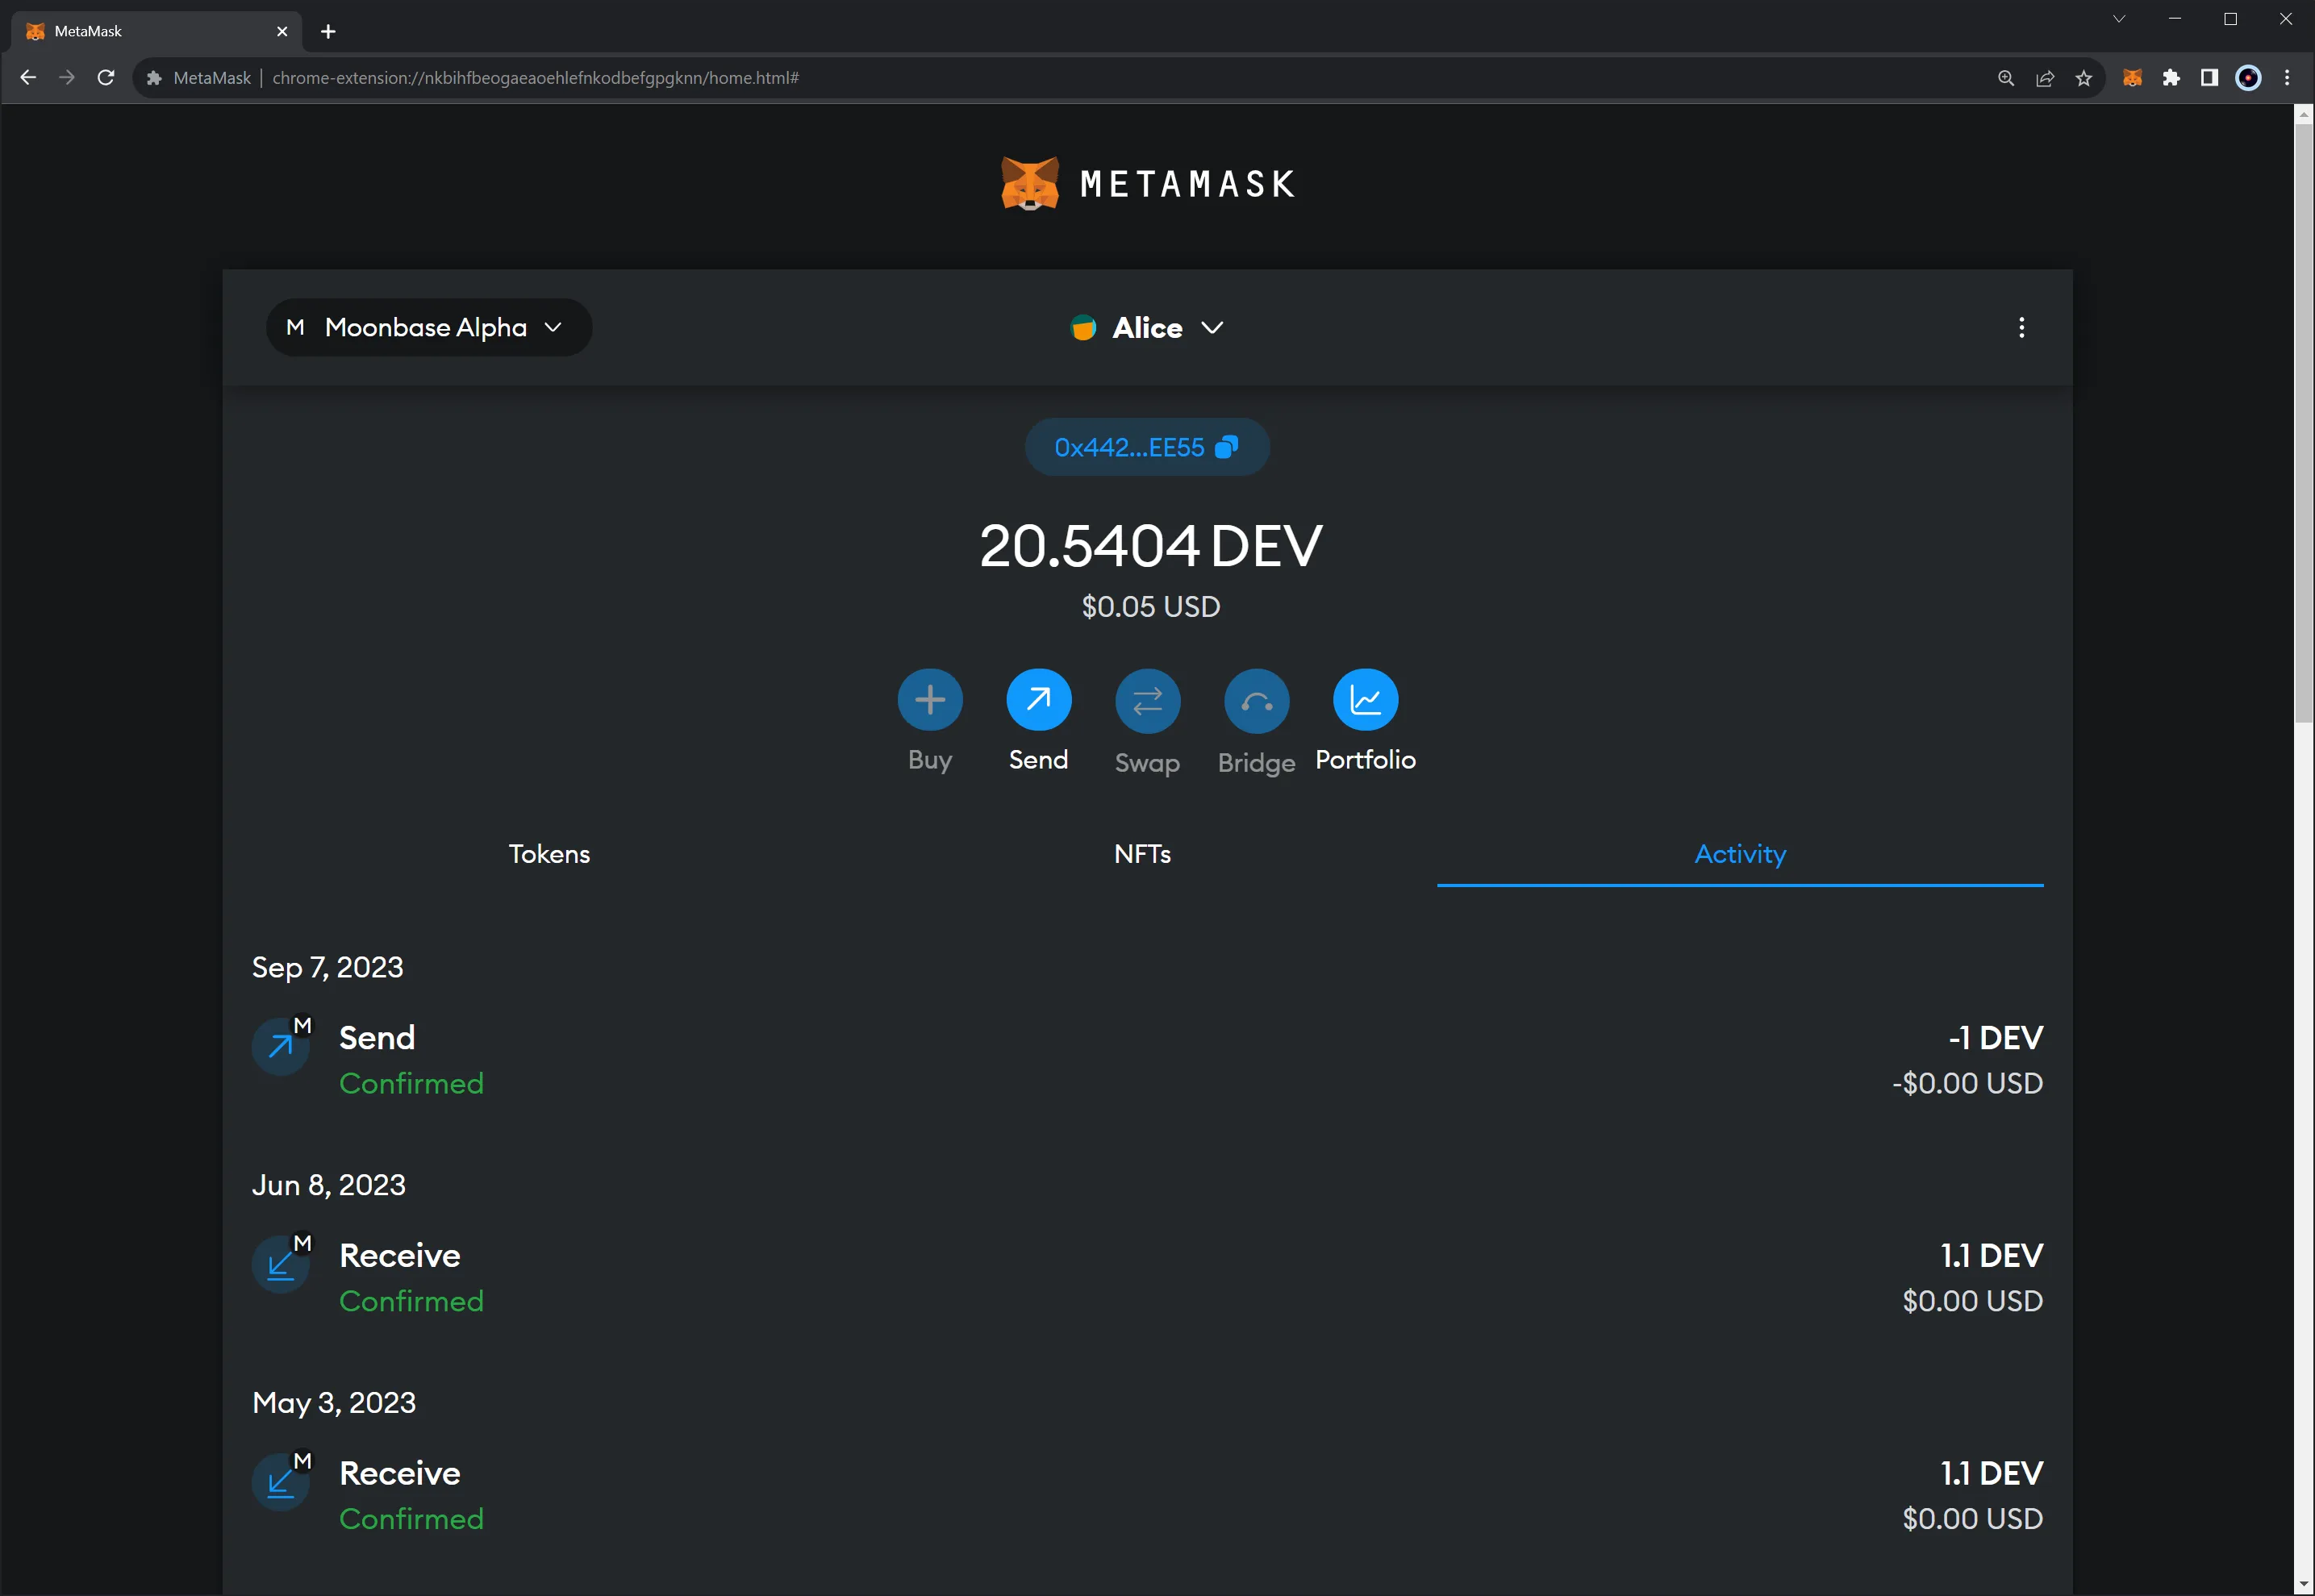
### Add an ERC-20 Token {: #add-an-erc20-token }
To add an ERC-20 to your MetaMask wallet, you'll need to import the token using its address:
1. Make sure you've switched to the **Tokens** tab in MetaMask
2. Click **Import tokens**
3. Enter the contract address of the token you want to import. The **Token symbol** and **Token decimal** fields will automatically be populated, but you can edit the **Token symbol** if needed
4. Click **Next**
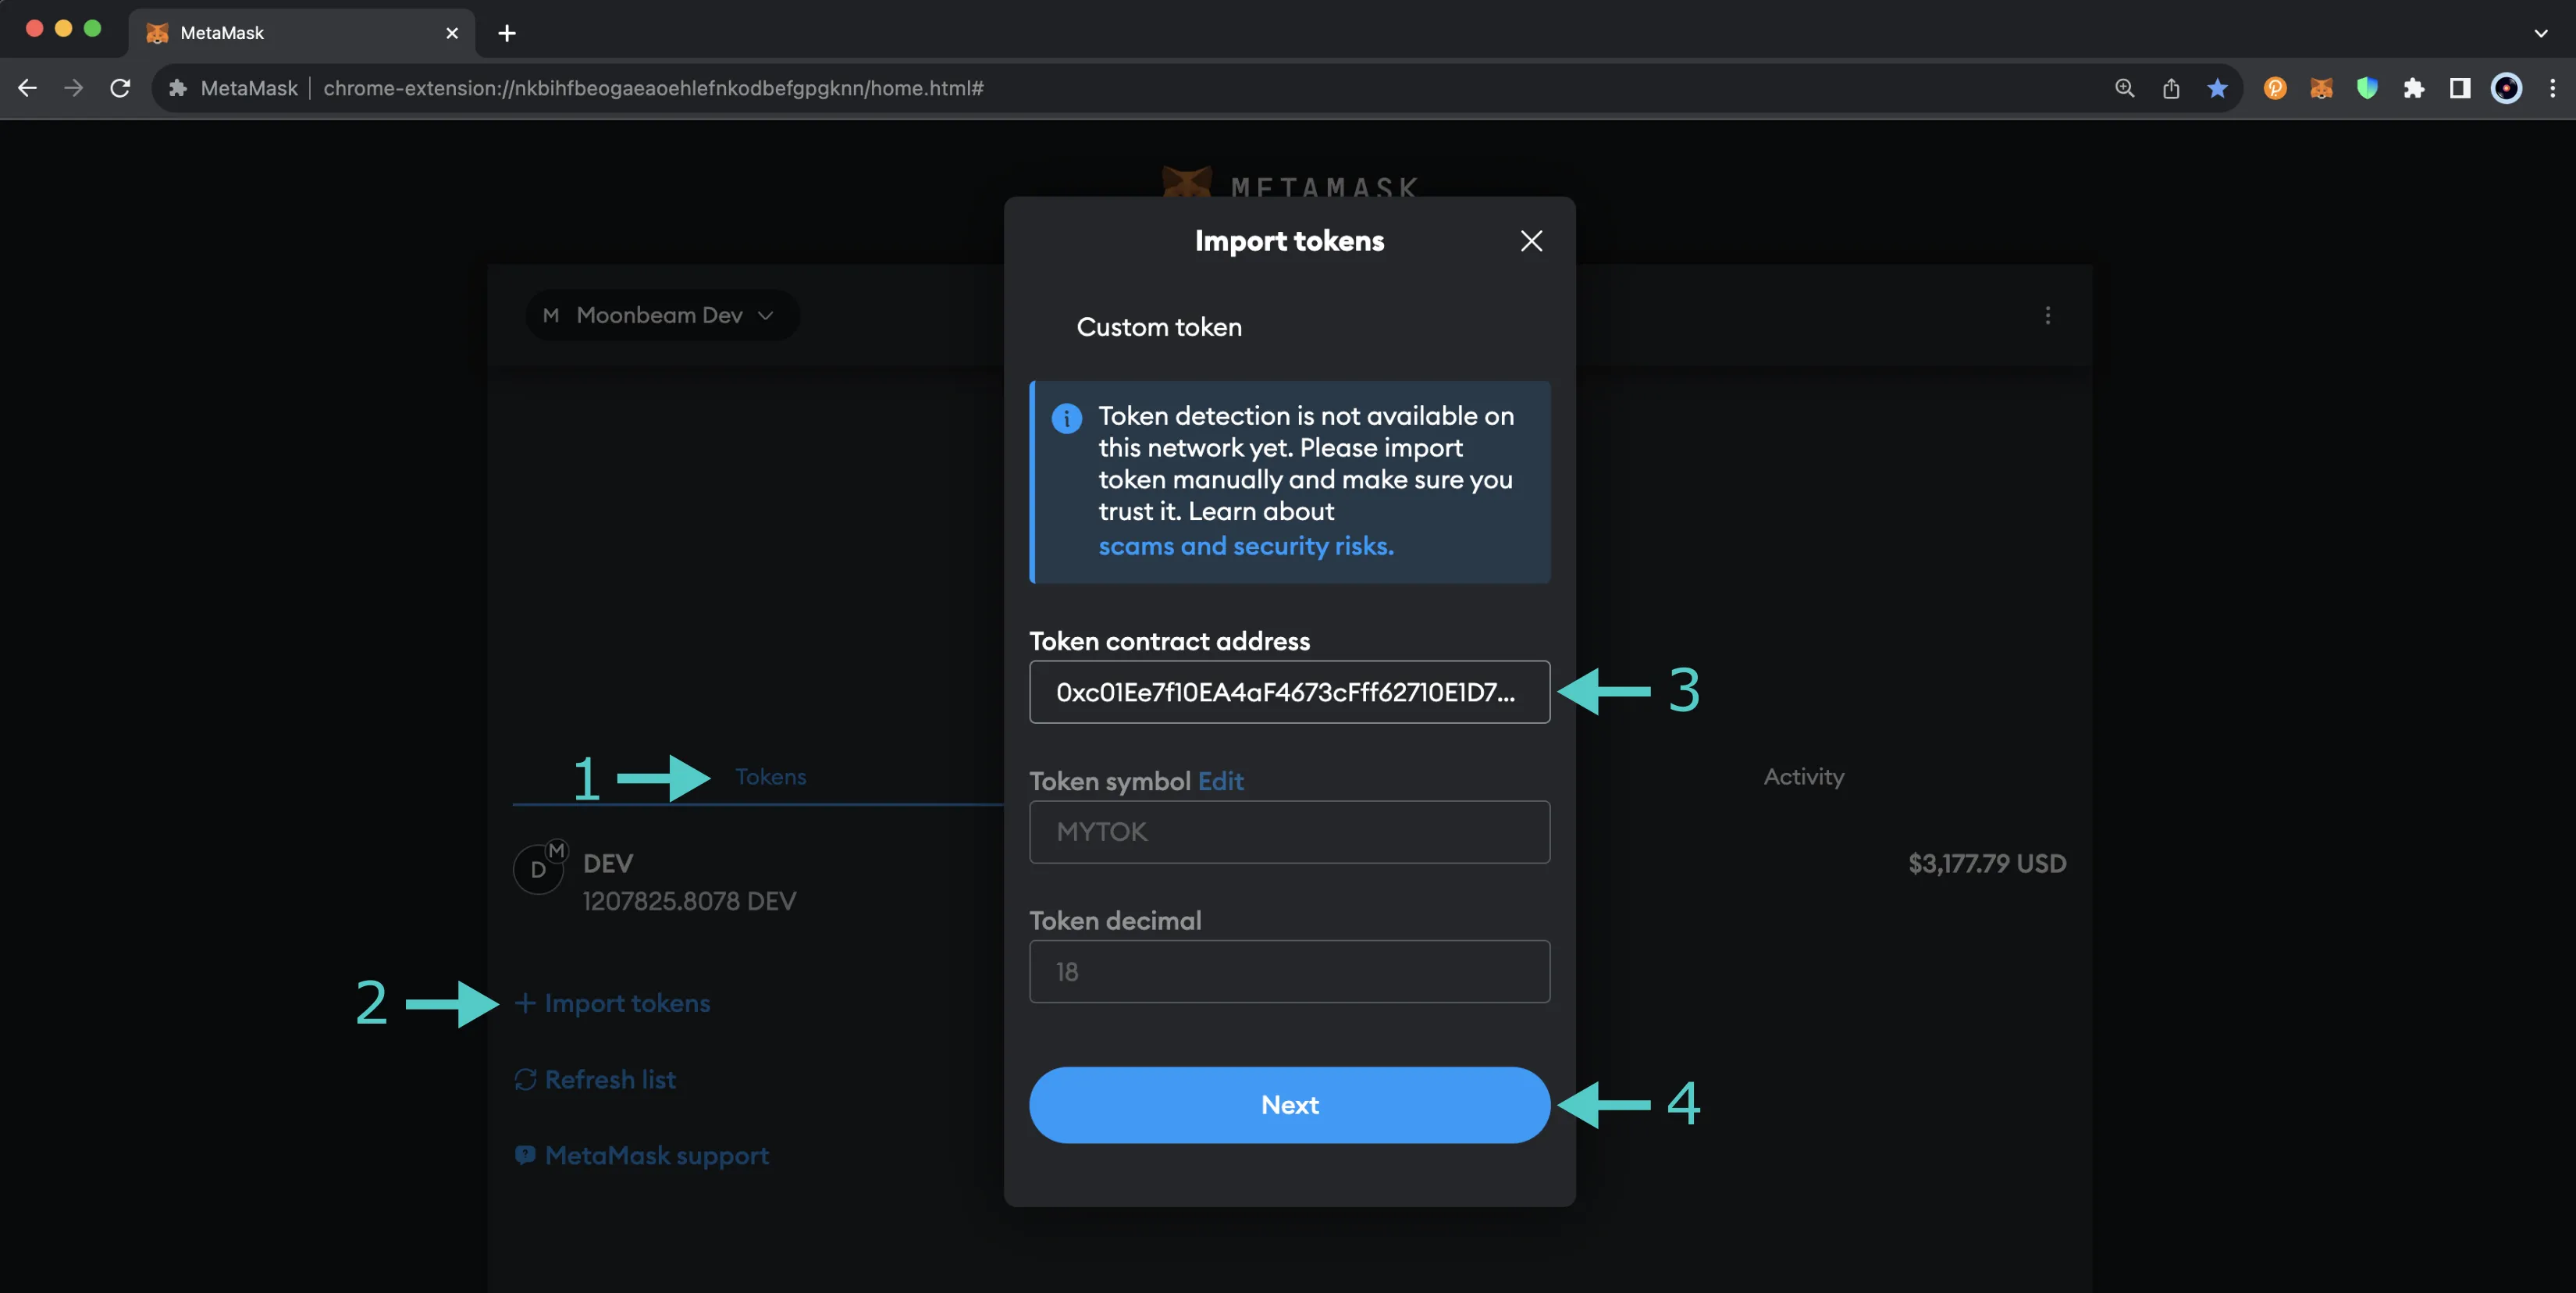
Next, you'll be able to review the token import details. To finalize the import, you can click **Import**.
Under the **Tokens** tab, you'll be able to see the token and the account balance for the token.
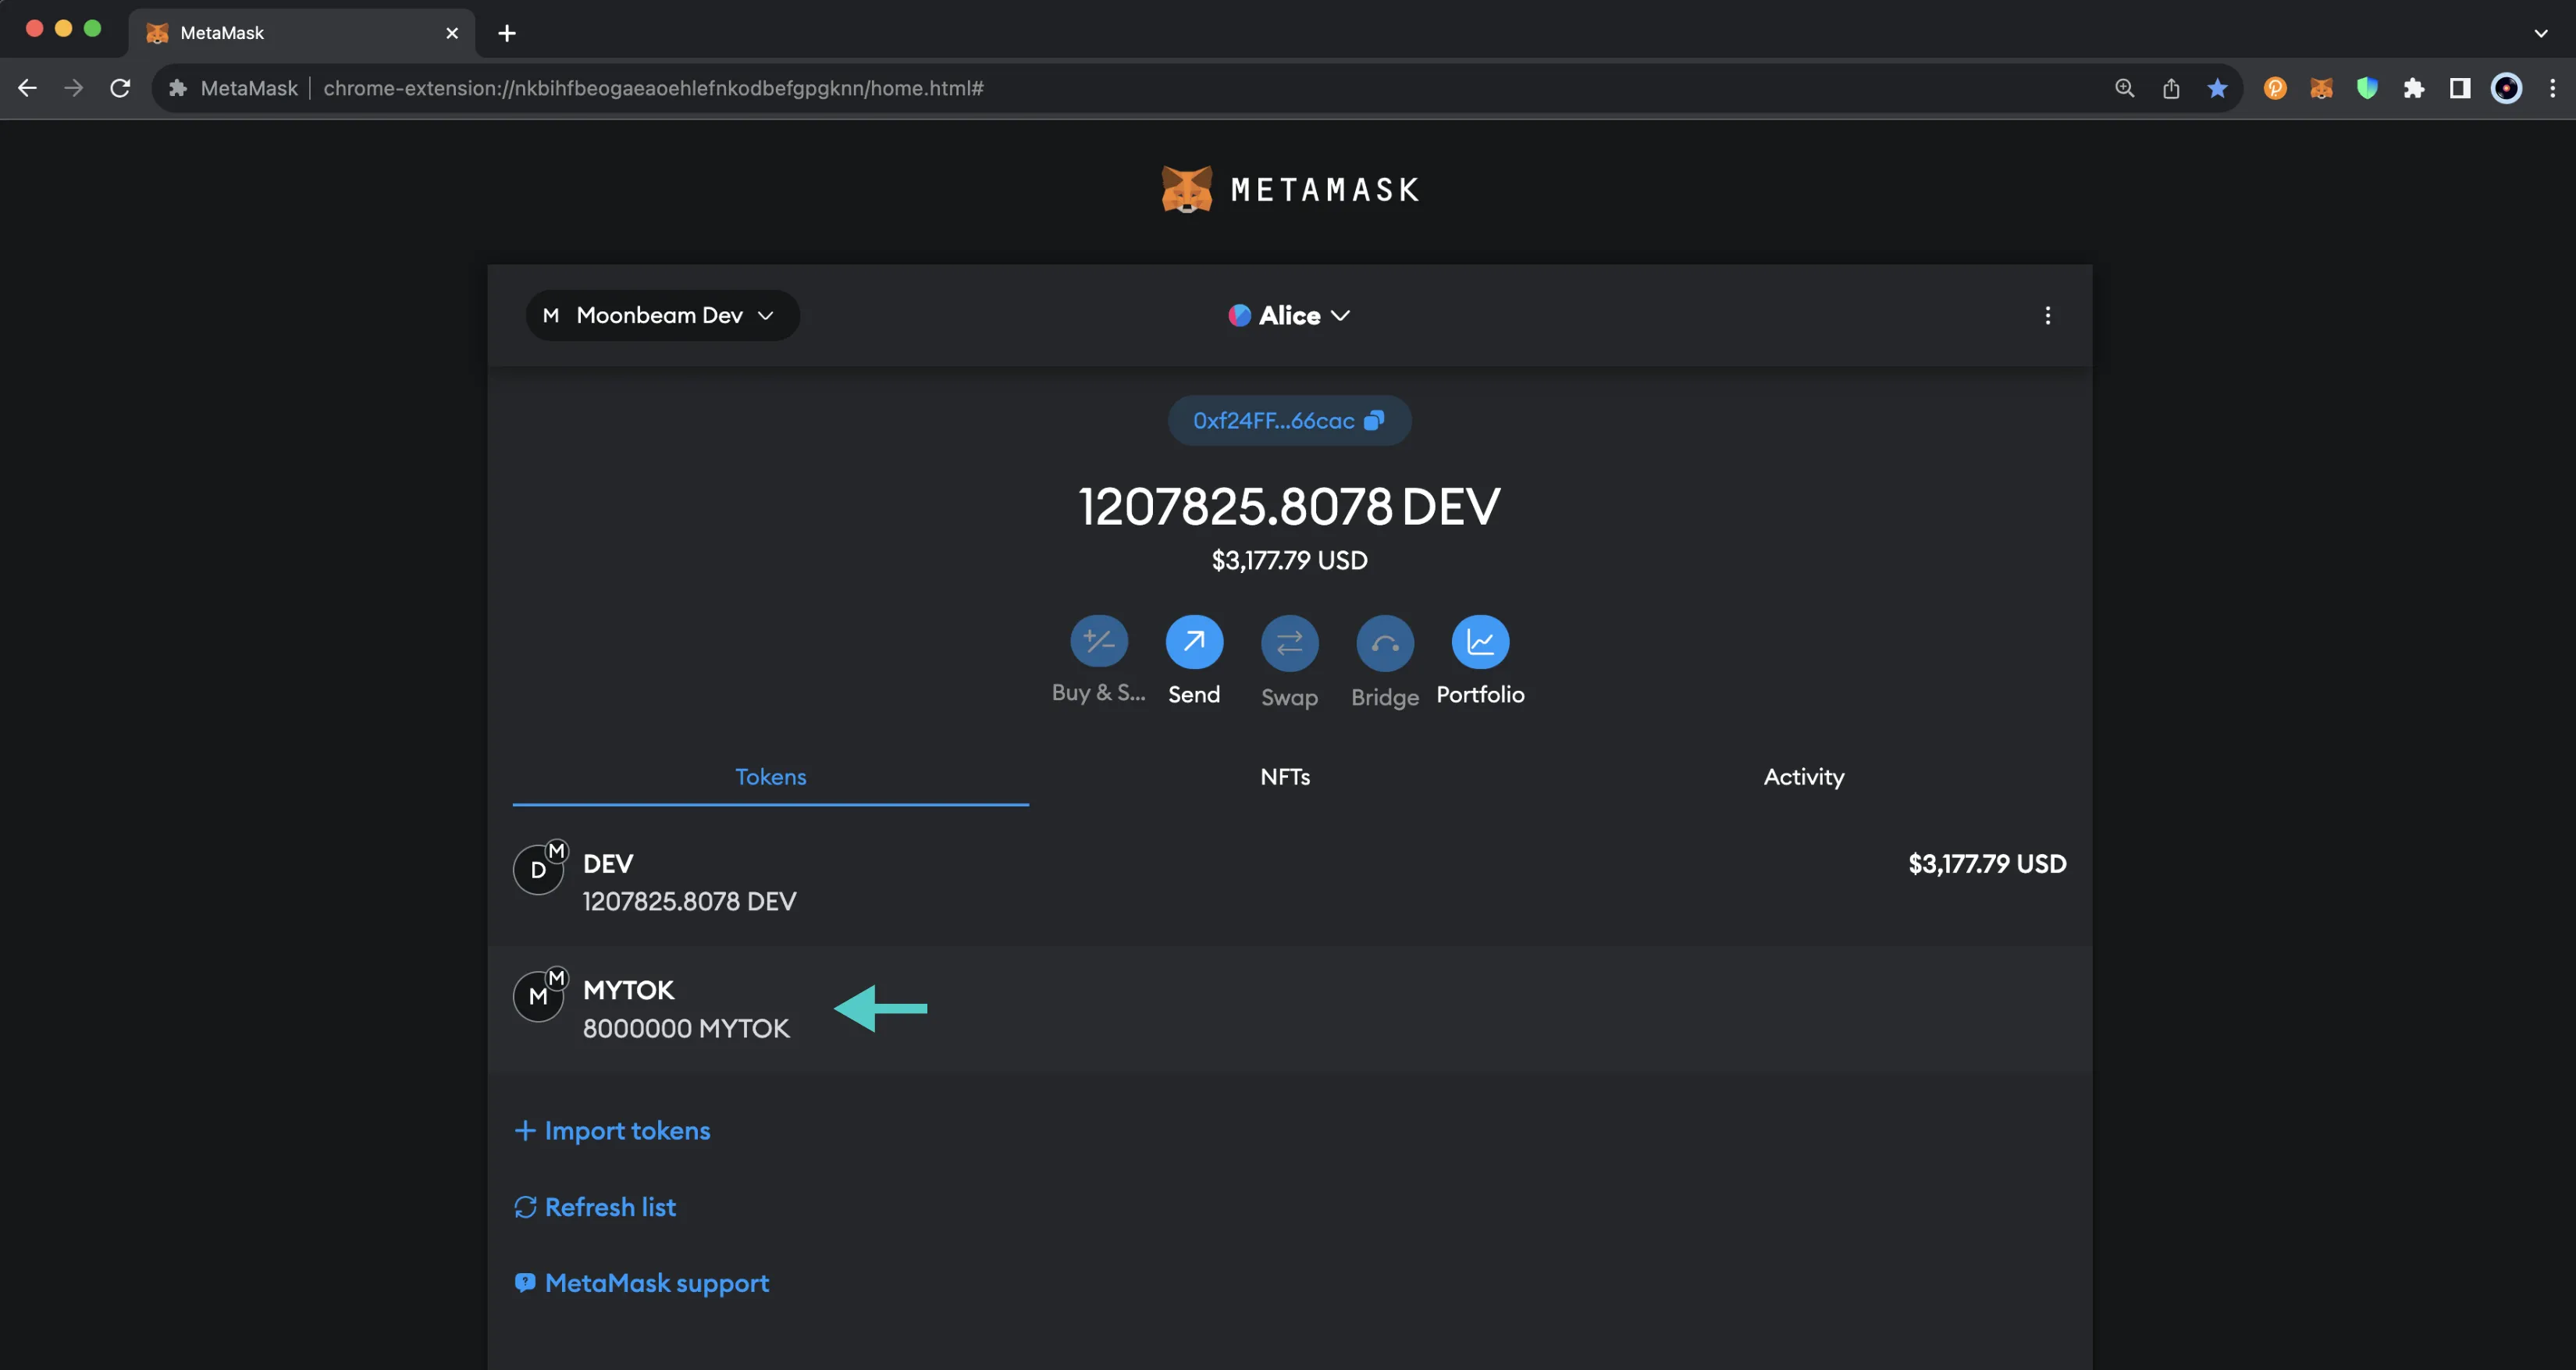
### Add an ERC-721 Token {: #add-an-erc721-token }
To add an ERC-721 to your MetaMask wallet, you'll need the token's address:
1. Make sure you've switched to the **NFTs** tab in MetaMask
2. Click **Import NFT**
3. Enter the **Address** of the NFT you want to import and the **Token ID**
4. Click **Import**
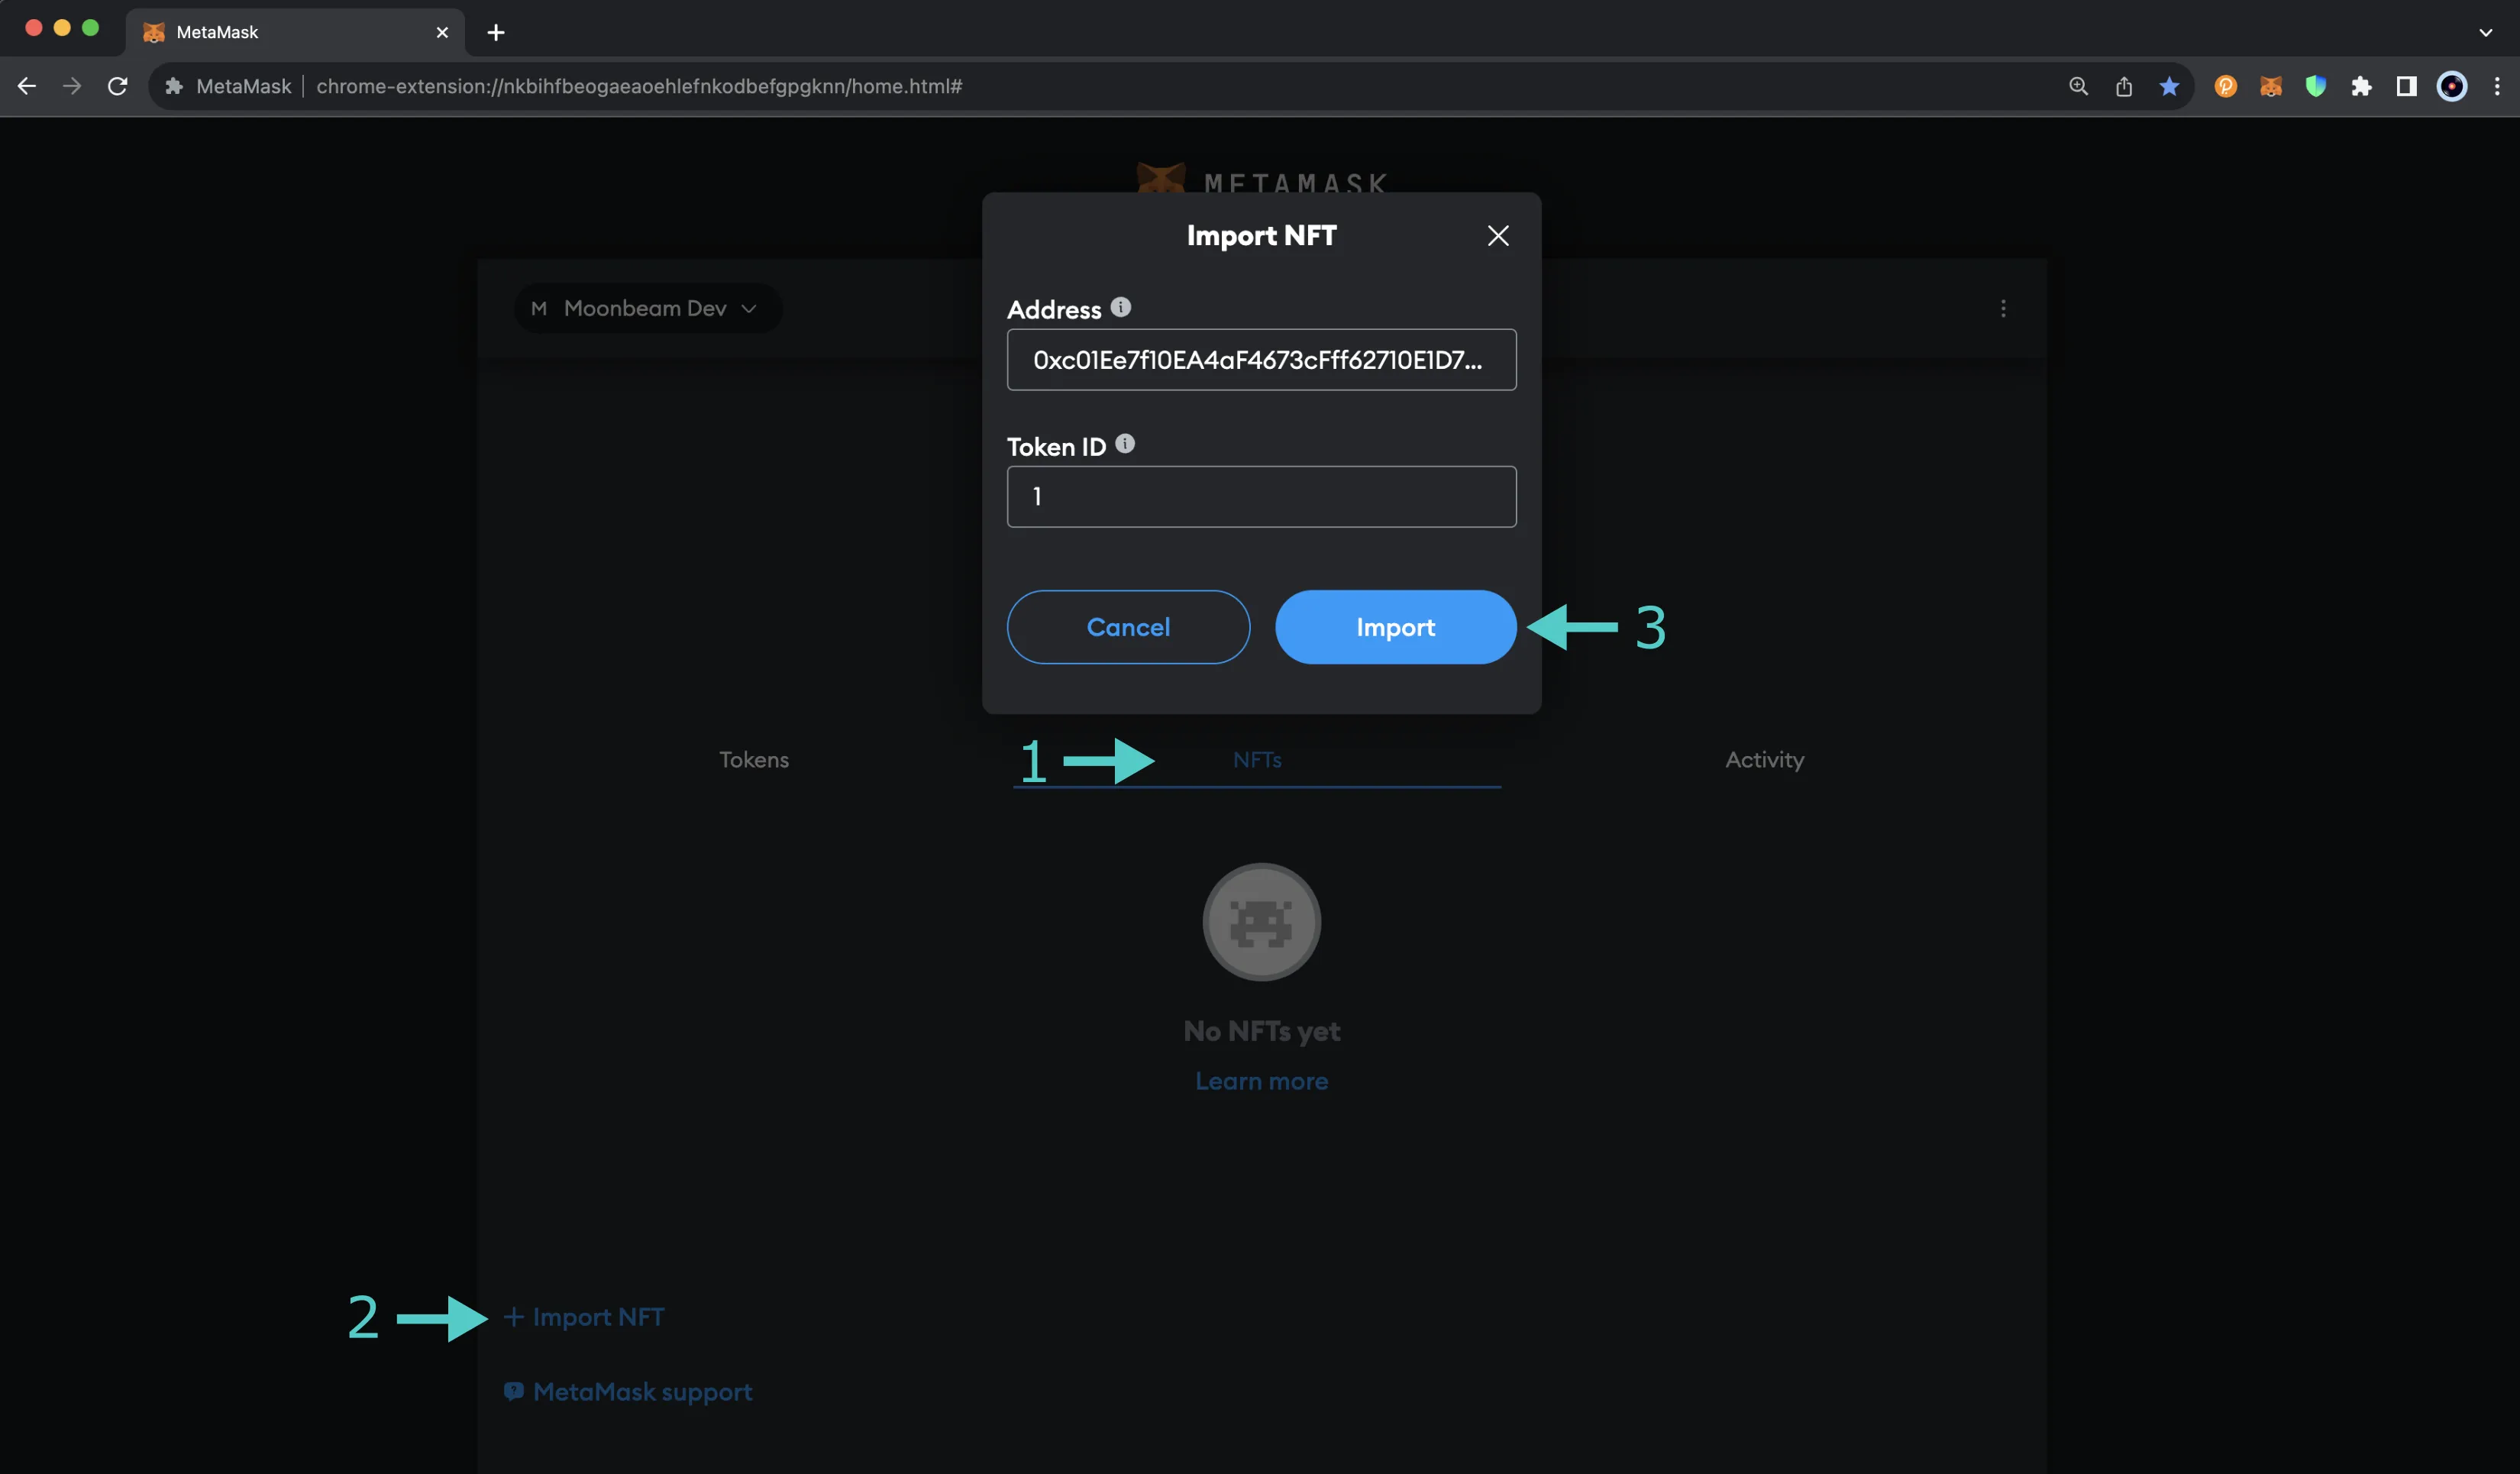
Once you've imported your NFT, you'll be able to see a preview of your NFT in the **NFTs** tab. You can click on the NFT to see more details.
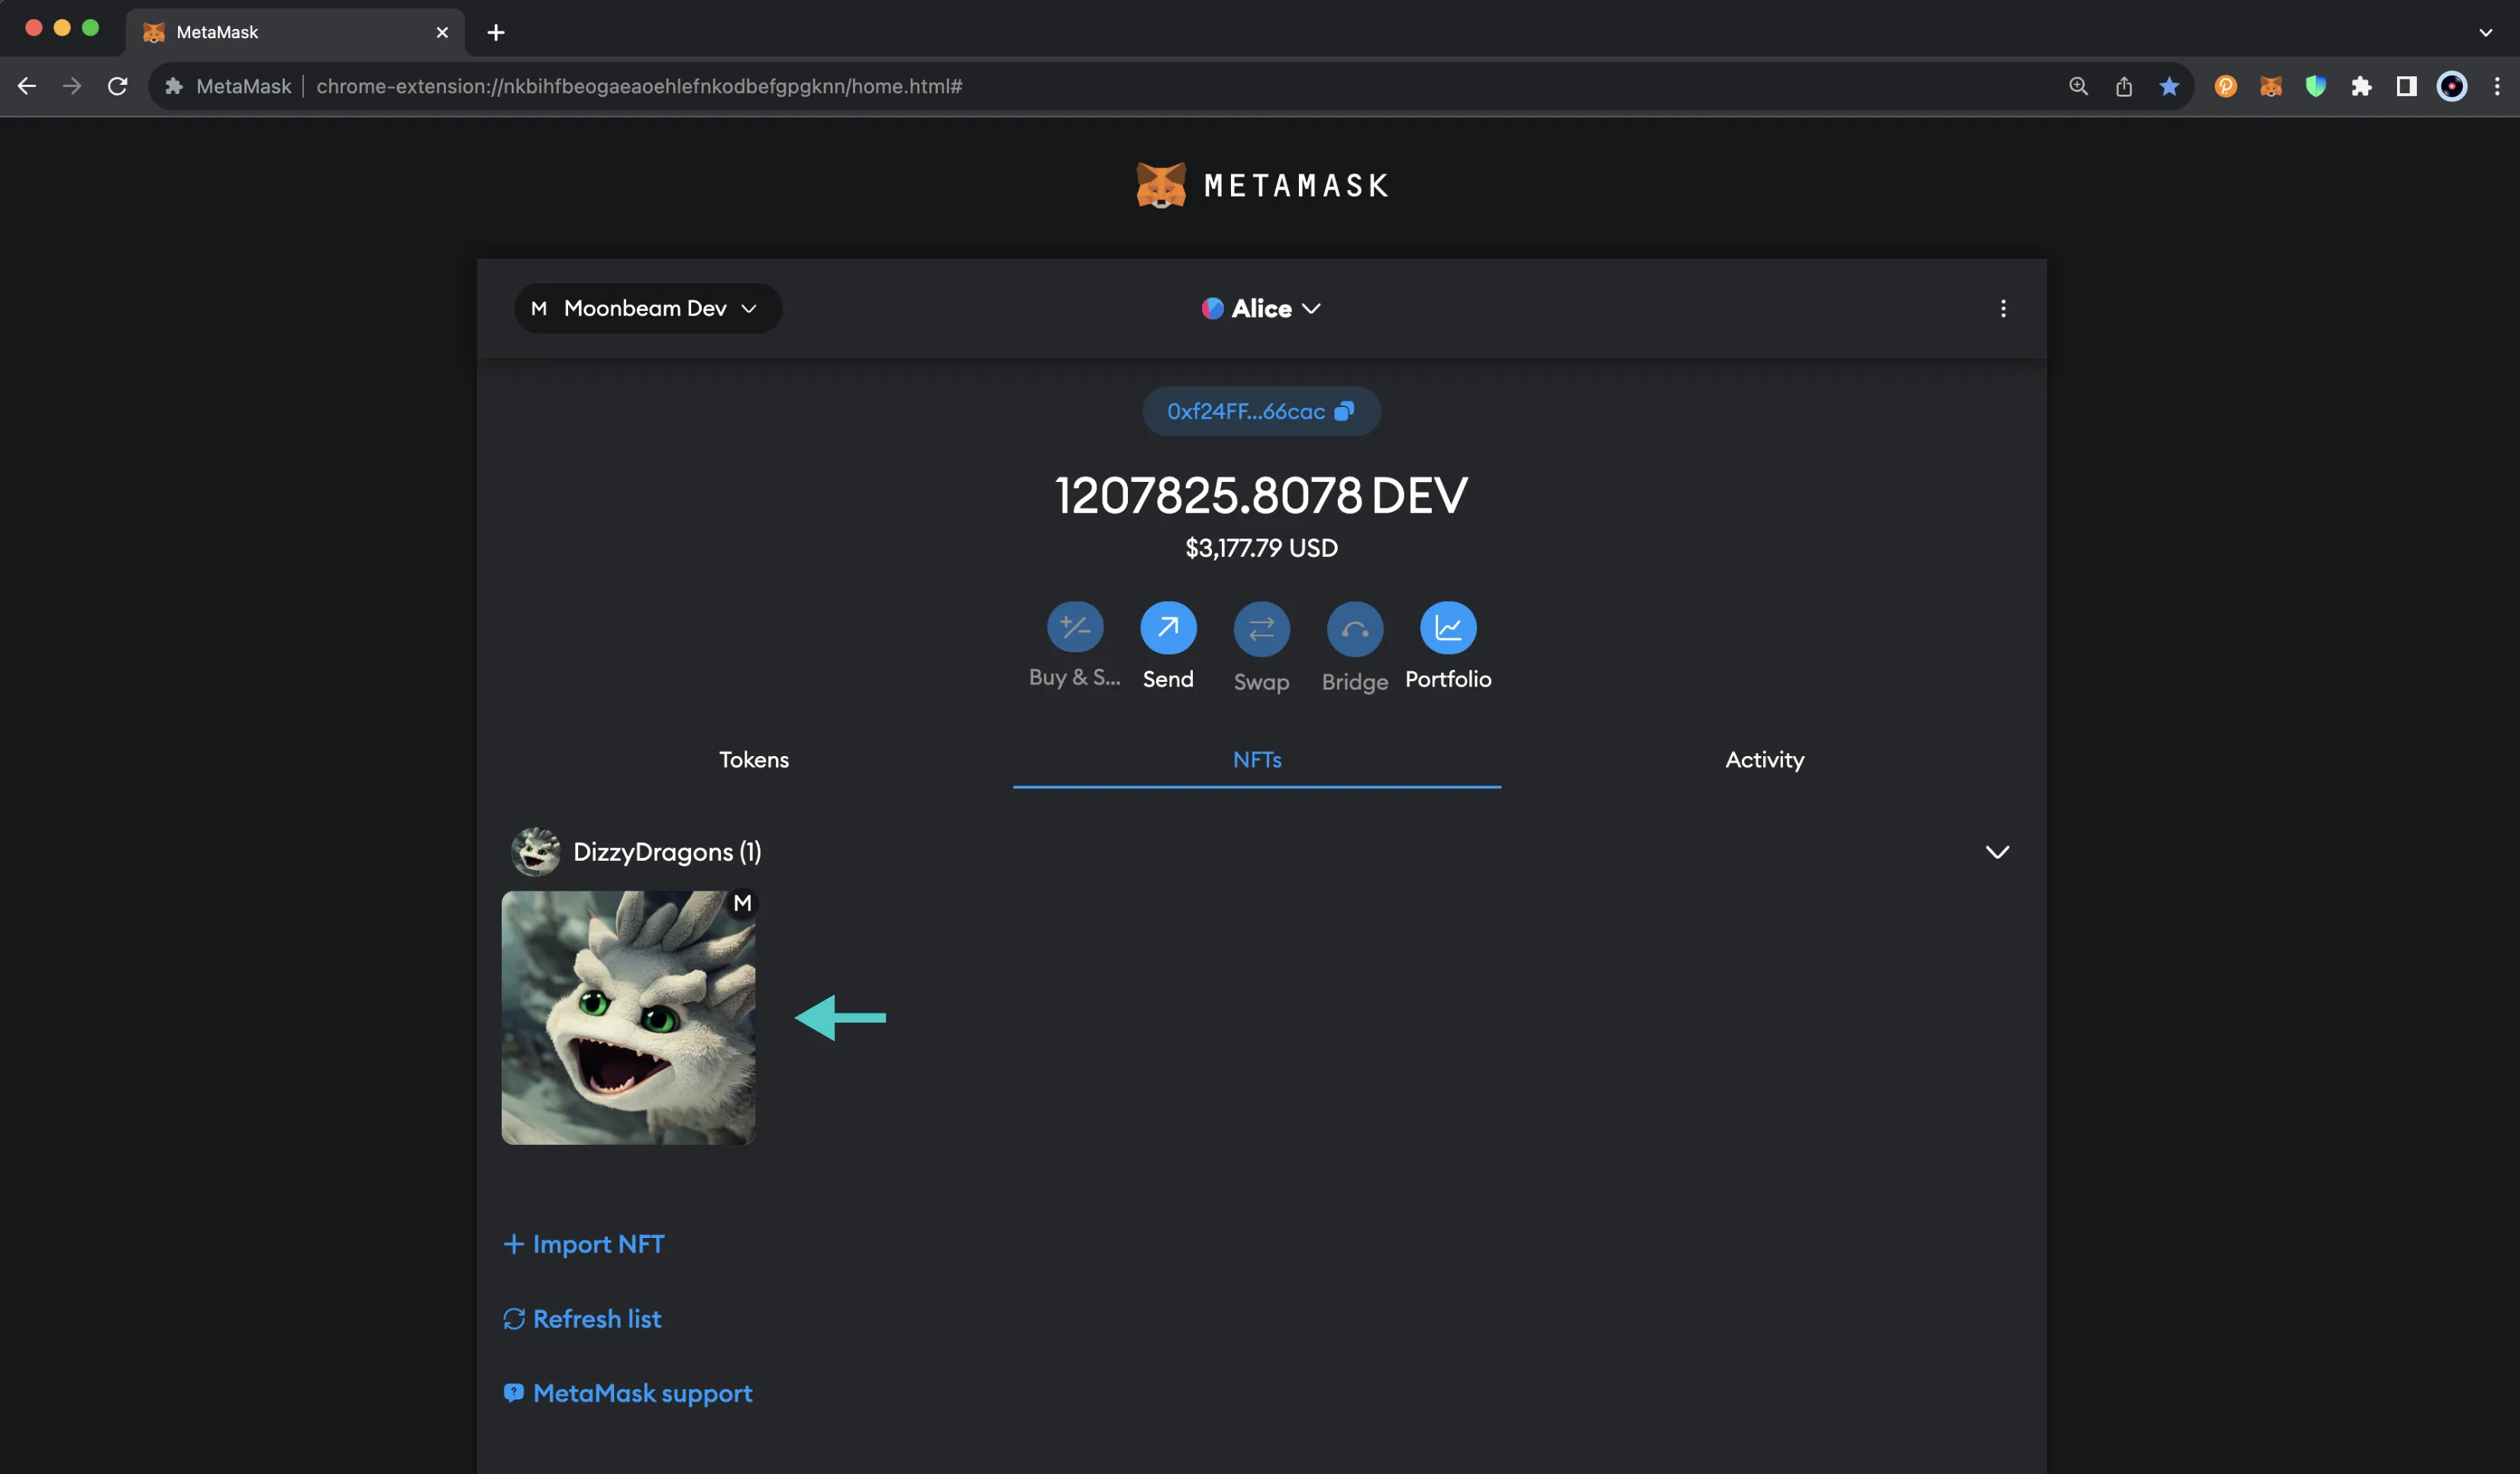
The information presented herein has been provided by third parties and is made available solely for general information purposes. Moonbeam does not endorse any project listed and described on the Moonbeam Doc Website (https://docs.moonbeam.network/). Moonbeam Foundation does not warrant the accuracy, completeness or usefulness of this information. Any reliance you place on such information is strictly at your own risk. Moonbeam Foundation disclaims all liability and responsibility arising from any reliance placed on this information by you or by anyone who may be informed of any of its contents. All statements and/or opinions expressed in these materials are solely the responsibility of the person or entity providing those materials and do not necessarily represent the opinion of Moonbeam Foundation. The information should not be construed as professional or financial advice of any kind. Advice from a suitably qualified professional should always be sought in relation to any particular matter or circumstance. The information herein may link to or integrate with other websites operated or content provided by third parties, and such other websites may link to this website. Moonbeam Foundation has no control over any such other websites or their content and will have no liability arising out of or related to such websites or their content. The existence of any such link does not constitute an endorsement of such websites, the content of the websites, or the operators of the websites. These links are being provided to you only as a convenience and you release and hold Moonbeam Foundation harmless from any and all liability arising from your use of this information or the information provided by any third-party website or service.
--- END CONTENT ---
Doc-Content: https://docs.moonbeam.network/tokens/connect/on-ramps/
--- BEGIN CONTENT ---
---
title: Fiat On-Ramps Available for Moonbeam
description: This guide introduces on-ramps for Moonbeam, including Transak and Onramp, and provides an overview of the process to acquire GLMR from each.
categories: Tokens and Accounts, Ethereum Toolkit
---
# Fiat On-Ramp Services to Acquire GLMR for Moonbeam
## Introduction
Interacting with dApps or deploying smart contracts on Moonbeam requires users to hold GLMR tokens, which are used to pay for network transaction fees (gas), except when using [gasless transactions](/tutorials/eth-api/call-permit-gasless-txs/){target=\_blank}. To help users acquire GLMR, there are several reliable on-ramp services available to convert local currency (fiat) into GLMR. This guide covers two popular options - [Transak](https://transak.com/buy/glmr){target=\_blank} and [Onramp](https://onramp.money/){target=\_blank} - each offering different payment methods and features to suit individual needs. Supporting bank transfers, credit cards, and mobile payment solutions, these platforms provide secure and regulated ways to acquire GLMR tokens.
You can find a current list of supported on-ramps on the [Moonbeam dApp](https://apps.moonbeam.network/moonbeam){target=\_blank}. Please be aware that the availability of these services may vary by jurisdiction. For more information, please visit the website of the respective on-ramp.
## Transak
Using Transak is a straightforward way to purchase GLMR tokens for the Moonbeam network. The process begins at [Transak](https://transak.com/buy/glmr){target=\_blank} with selecting GLMR as the desired cryptocurrency. Users select their local currency and purchase amount, then review the associated fees and processing time details. The next step requires entering the destination Moonbeam wallet address. For bank transfers and other fiat payment methods, a one-time KYC verification process must be completed by providing valid identification documents. After payment completion through the selected method (bank transfer, credit card, or other supported options), Transak processes the transaction and sends the GLMR tokens directly to the specified wallet address. Delivery time varies depending on the payment method selected, ranging from near-instant for card payments to up to 2 business days for bank transfers.
## Onramp
[Onramp](https://onramp.money/){target=\_blank} offers a seamless fiat-to-crypto gateway for purchasing GLMR tokens, supporting over 400 different cryptocurrencies through their platform. The process begins with a straightforward phone-based OTP login system for verification. After login, the platform displays transaction details, including the GLMR amount and current market rates, for confirmation. Based on geographical location, Onramp displays relevant bank account details and available payment methods. Once payment is completed through the selected method, Onramp handles all aspects of the conversion - from payment processing to regulatory compliance and wallet management. Upon confirmation of the deposit, the platform automatically purchases GLMR at the current market price and then initiates an automatic withdrawal to the specified Moonbeam wallet address. Additional KYC verification may be required for larger transactions, but the platform manages all compliance requirements internally to ensure a smooth experience.
The information presented herein has been provided by third parties and is made available solely for general information purposes. Moonbeam does not endorse any project listed and described on the Moonbeam Doc Website (https://docs.moonbeam.network/). Moonbeam Foundation does not warrant the accuracy, completeness or usefulness of this information. Any reliance you place on such information is strictly at your own risk. Moonbeam Foundation disclaims all liability and responsibility arising from any reliance placed on this information by you or by anyone who may be informed of any of its contents. All statements and/or opinions expressed in these materials are solely the responsibility of the person or entity providing those materials and do not necessarily represent the opinion of Moonbeam Foundation. The information should not be construed as professional or financial advice of any kind. Advice from a suitably qualified professional should always be sought in relation to any particular matter or circumstance. The information herein may link to or integrate with other websites operated or content provided by third parties, and such other websites may link to this website. Moonbeam Foundation has no control over any such other websites or their content and will have no liability arising out of or related to such websites or their content. The existence of any such link does not constitute an endorsement of such websites, the content of the websites, or the operators of the websites. These links are being provided to you only as a convenience and you release and hold Moonbeam Foundation harmless from any and all liability arising from your use of this information or the information provided by any third-party website or service.
--- END CONTENT ---
Doc-Content: https://docs.moonbeam.network/tokens/connect/polkadotjs/
--- BEGIN CONTENT ---
---
title: How to use Polkadot.js Apps
description: Follow this quick tutorial to learn how to use Moonbeam’s Ethereum-style H160 addresses and send transactions with Polkadot.js Apps.
categories: Tokens and Accounts, Ethereum Toolkit
---
# How to use Polkadot.js Apps to Interact with Moonbeam
## Introduction {: #introduction }
As a Polkadot parachain, Moonbeam uses a [unified account structure](/learn/core-concepts/unified-accounts/){target=\_blank} that allows you to interact with Substrate (Polkadot) functionality and Moonbeam's EVM, all from a single Ethereum-style address. This unified account structure means that you don't need to maintain both a Substrate and an Ethereum account to interact with Moonbeam - instead, you can do it all with a single Ethereum private key.
The Polkadot.js Apps interface natively supports H160 addresses and ECDSA keys. So, in this tutorial, you can check out this integration of Ethereum-based accounts on [Polkadot.js Apps](https://polkadot.js.org/apps/?rpc=wss://wss.api.moonbase.moonbeam.network%2Fpublic-ws#/accounts){target=\_blank}.
The information presented herein is for informational purposes only and has been provided by third parties. Moonbeam does not endorse any project listed and described on the Moonbeam docs website (https://docs.moonbeam.network/).
!!! note
Polkadot.js Apps is phasing out support for accounts stored locally in the browser's cache. Instead, it is recommended that you use a browser extension like [Talisman to inject your accounts into Polkadot.js Apps](/tokens/connect/talisman/){target=\_blank}.
## Connect Polkadot.js Apps to Moonbeam {: #connect-polkadotjs-apps }
When launching [Polkadot.js Apps](https://polkadot.js.org/apps/?rpc=wss://wss.api.moonbase.moonbeam.network%2Fpublic-ws#/accounts){target=\_blank} for the first time, you may or may not be connected to the desired network.
You can change the selected network by clicking the logo in the top left corner, where you'll find a list of networks organized by MainNets, TestNets, and local networks. Each network can be found under the following sections:
| Network | Section |
|:-------------------------:|:---------------------:|
| Moonbeam | Polkadot & Parachains |
| Moonriver | Kusama & Parachains |
| Moonbase Alpha | Test Networks |
| Moonbeam Development Node | Development |
Once you've selected the correct network, you can scroll back to the top and click **Switch**.

After switching, the Polkadot.js site will not only connect to the chosen network, but the logo and styling will change for each network.
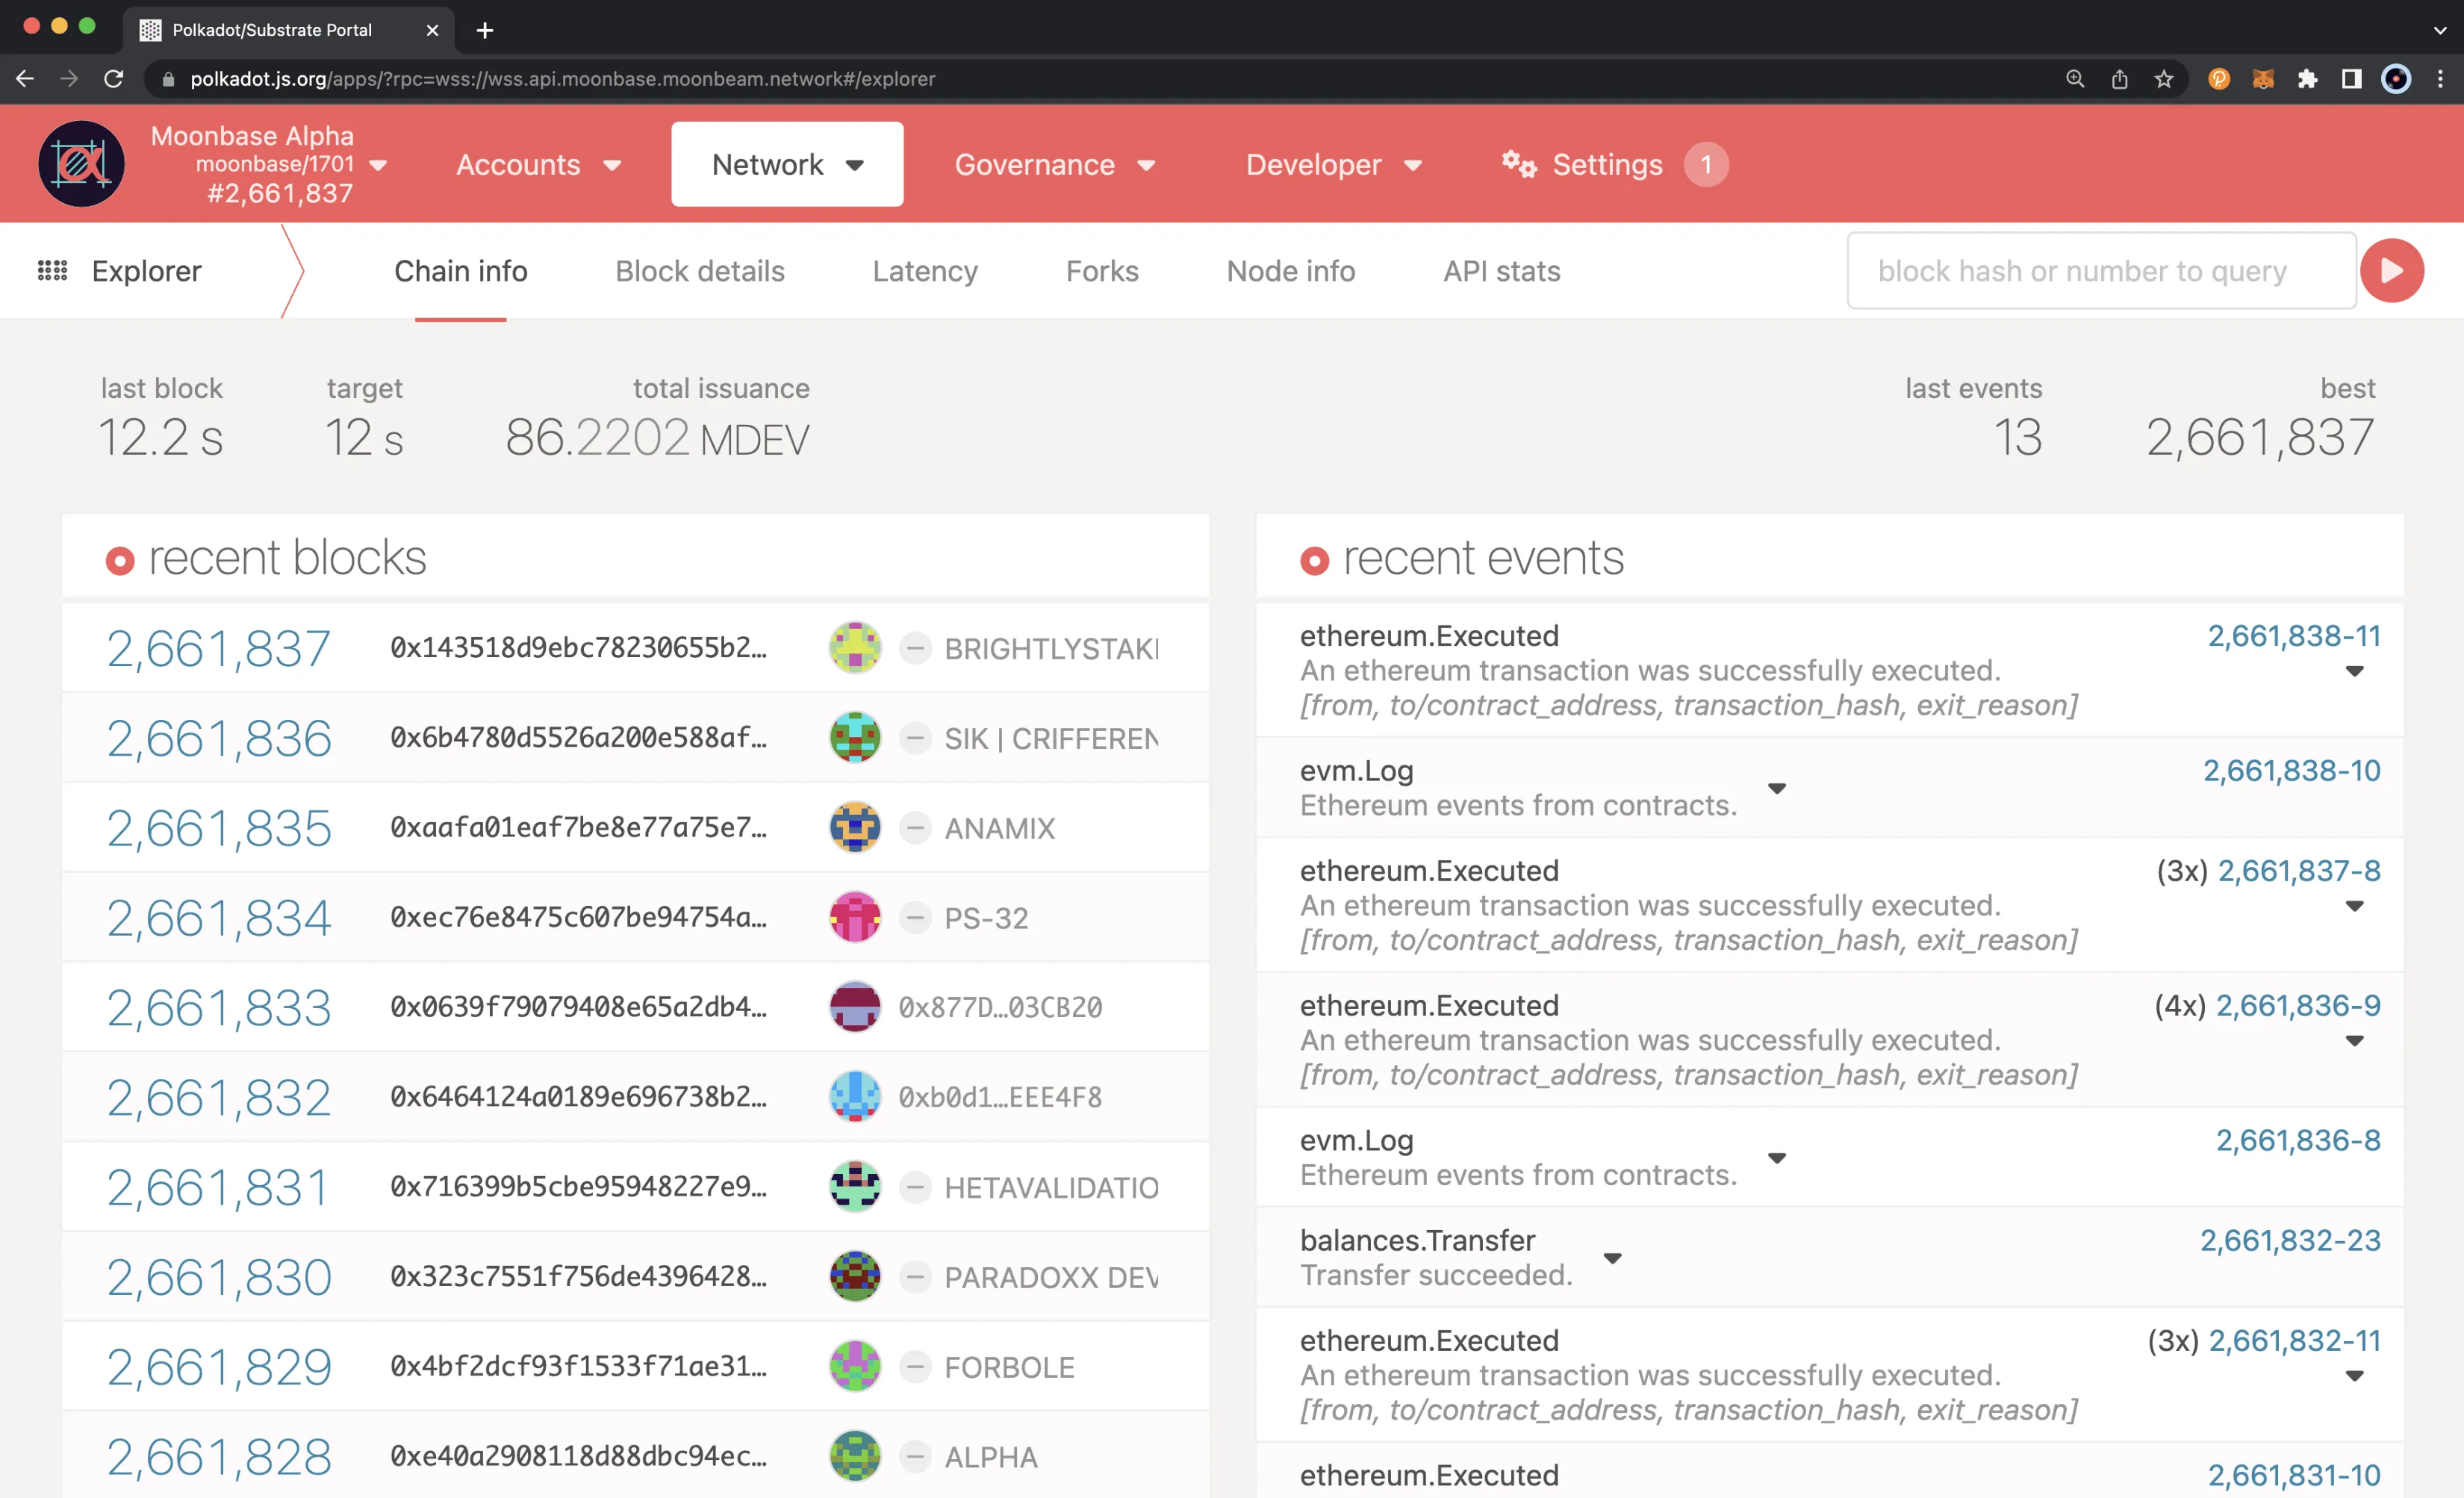
## Create or Import an H160 Account into Polkadot.js Apps {: #creating-or-importing-an-h160-account }
!!! note
For security purposes, it is recommended that you do not store accounts locally in the browser. A more secure method is using a browser extension like [Talisman to inject your accounts into Polkadot.js Apps](/tokens/connect/talisman/){target=\_blank}.
In this section, you'll learn how you can create a new account or import a preexisting MetaMask account to Polkadot.js Apps. First, there is one prerequisite step. As part of the process of phasing out support for accounts stored locally in the browser's cache, you'll need to enable support for local storage of accounts in the **Settings** tab. To do so, take the following steps:
1. Navigate to the **Settings** tab
2. Select **Allow local in-browser account storage** under the **in-browser account creation** heading
3. Press **Save**
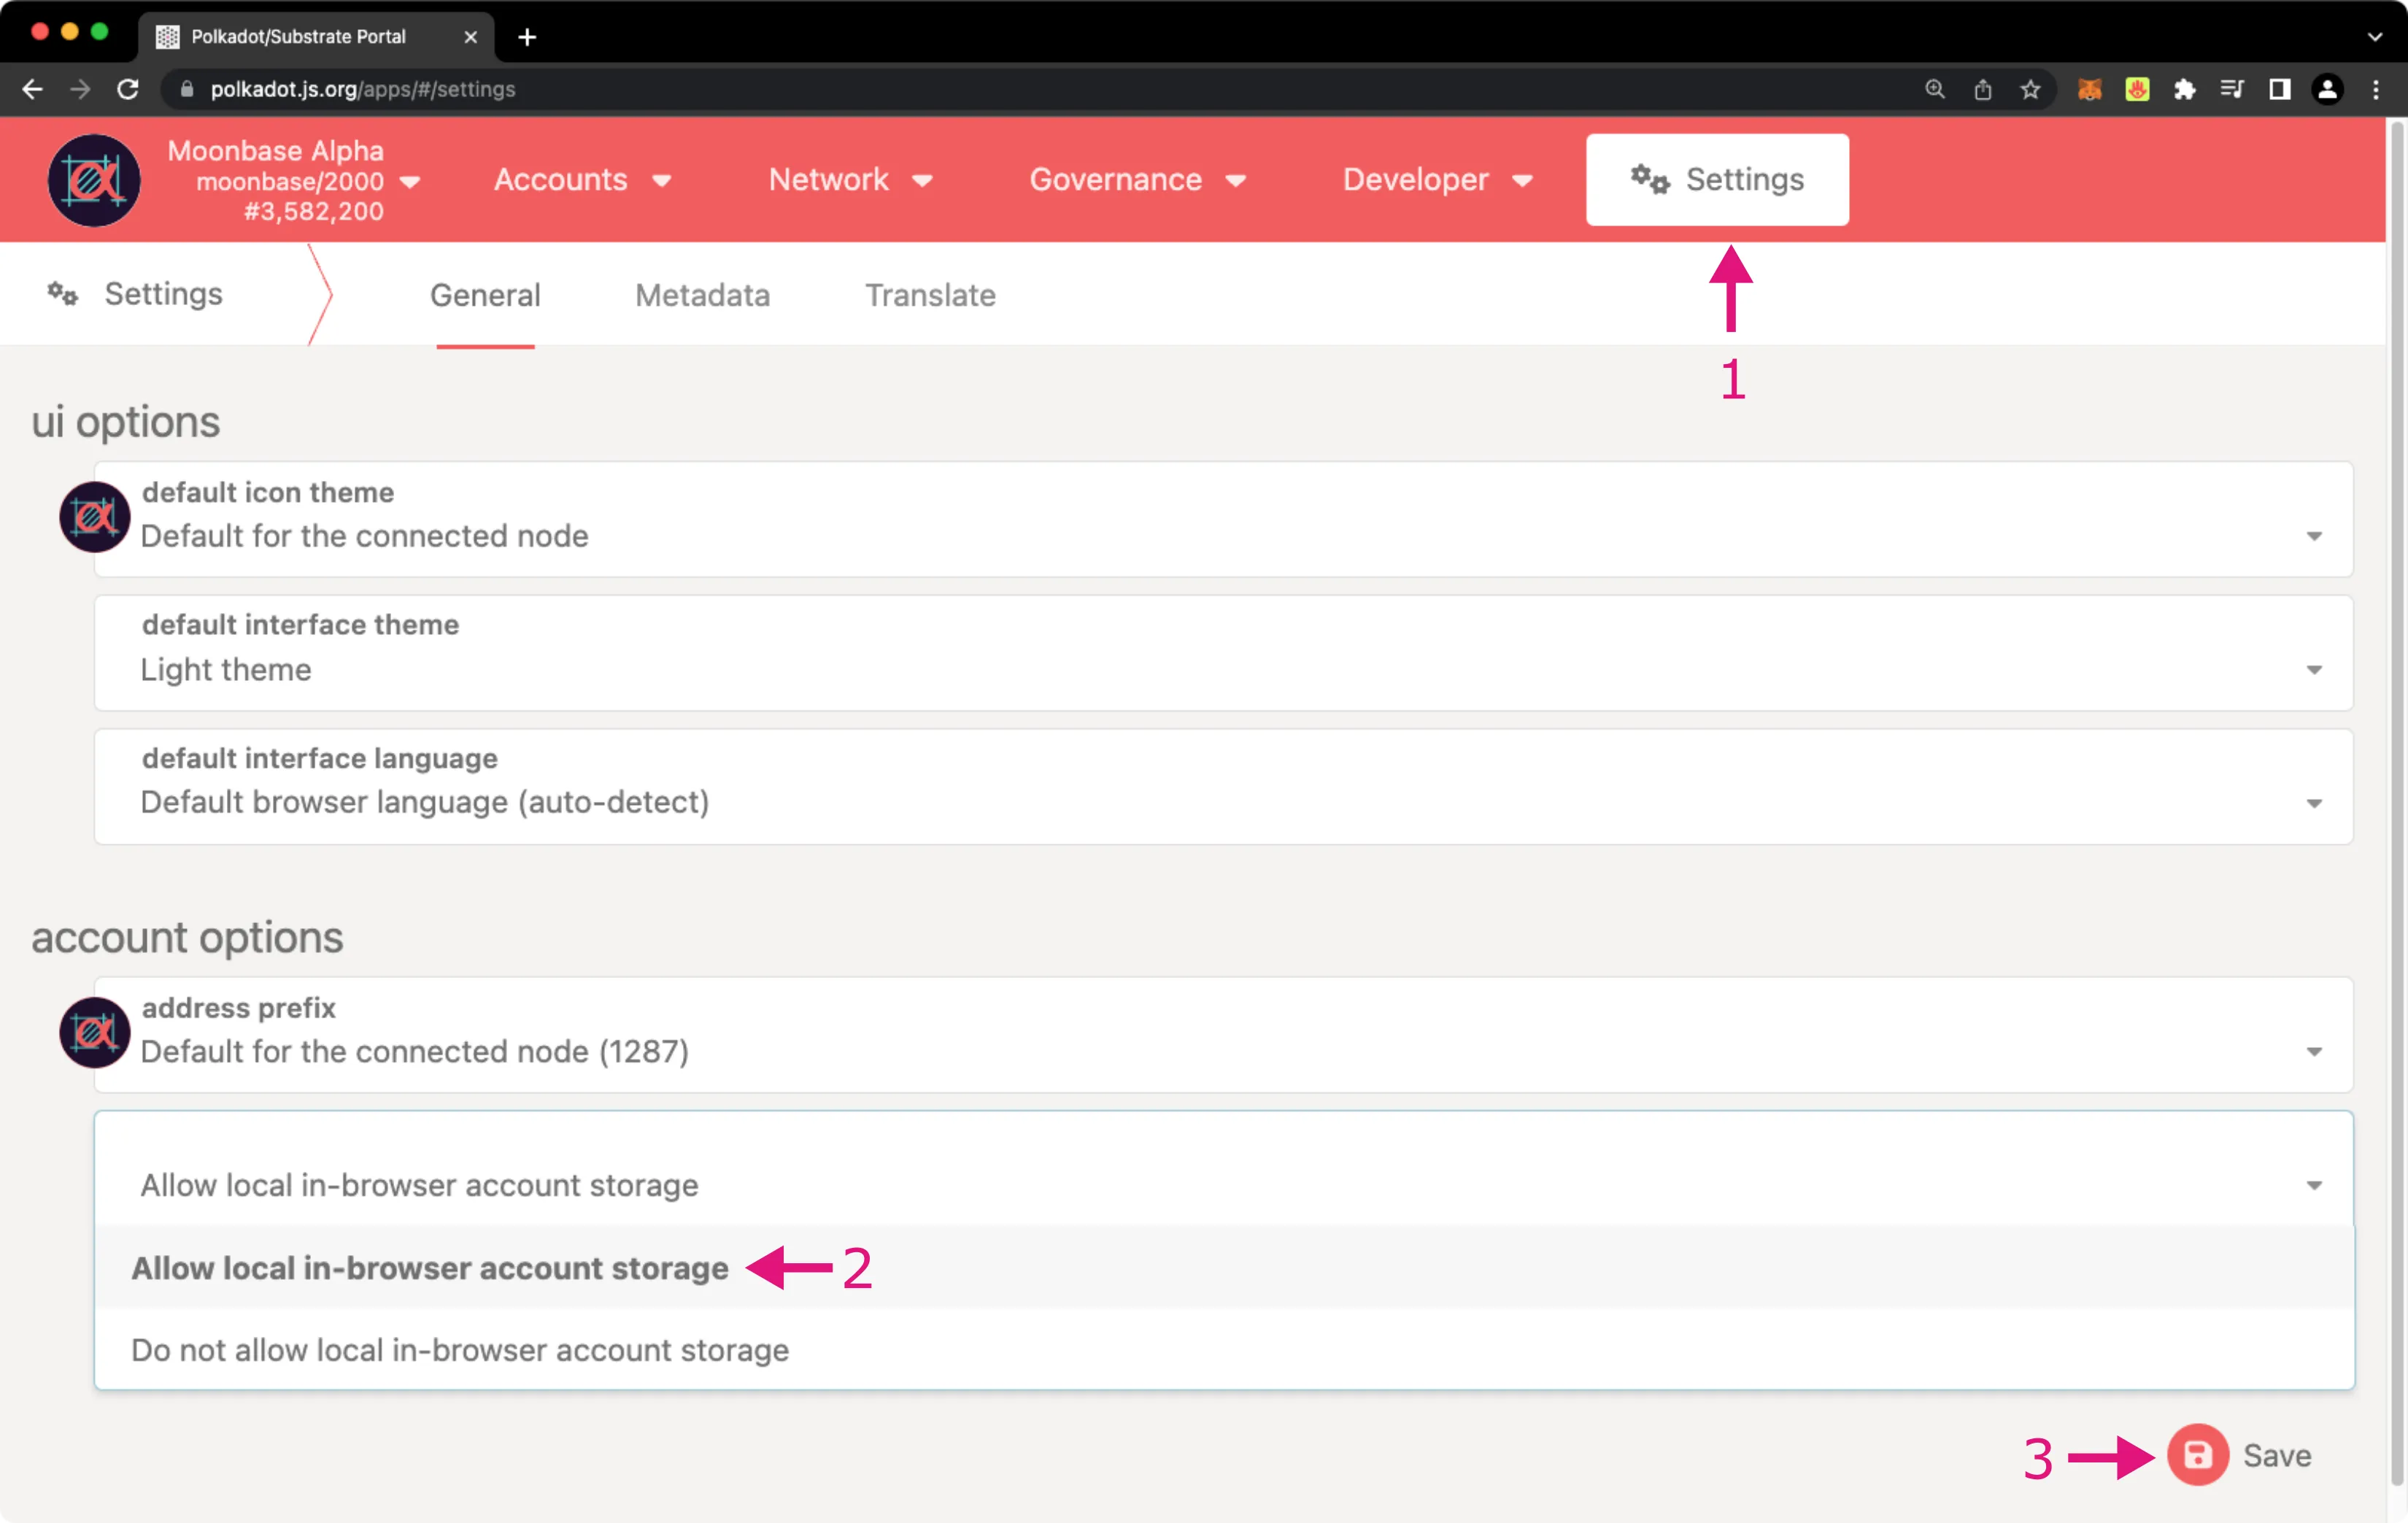
You can now head back to the [Accounts page of Polkadot.js Apps](https://polkadot.js.org/apps/?rpc=wss://wss.api.moonbase.moonbeam.network%2Fpublic-ws#/accounts){target=\_blank} and proceed with the next steps:
1. Navigate to the **Accounts** section
2. Click on the **Add account** button
This will open a wizard pop-up that will guide you through the process of adding an account to the Polkadot.js Apps interface:
1. Click on the drop-down menu
2. Change the selection from **Mnemonic** to **Private Key**, this allows you to add an account through a private key
!!! note
Currently, you can only create or import accounts in Polkadot.js via a private key. Doing so with the mnemonic will result in a different public address if you later try to import this account to an Ethereum wallet such as MetaMask. This is because Polkadot.js uses BIP39, whereas Ethereum uses BIP32 or BIP44.
Next, if you want to create a new account, make sure you store the private key displayed by the wizard. If you want to import an existing account, enter your private key that you can export from MetaMask.
!!! note
Never reveal your private keys as they give direct access to your funds. The steps in this guide are for demonstration purposes only.
Make sure to include the prefix in the private key, i.e., `0x`. If you entered the information correctly, the corresponding public address should appear in the upper left corner of the window, and then click **Next**.
To finish the wizard, you can set an account name and password. After a confirmation message, you should see in the main **Accounts** tab the address with the corresponding balance: in this case, Bob's address. Moreover, you can overlay the MetaMask extension to see that both balances are the same.
## Send a Transaction Through Substrate's API {: #sending-a-transaction-through-substrates-api }
Now, to demonstrate the potential of Moonbeam's [unified accounts](/learn/core-concepts/unified-accounts/){target=\_blank} scheme, you can make a transfer through the Substrate API using Polkadot.js Apps. Remember that you are interacting with Substrate using an Ethereum-style H160 address. To do so, you can import another account.
Next, click on Bob's **send** button, which opens another wizard that guides you through the process of sending a transaction.
1. Set the **send to address**
2. Enter the **amount** to send, which for this example is 1 DEV token
3. When ready, click on the **Make Transfer** button
Then you'll be prompted to enter your password and sign and submit the transaction. Once the transaction is confirmed, you should see the balances updated for each account.
And that is it! We are excited about being able to support H160 accounts in Polkadot.js Apps, as we believe this will greatly enhance the user experience on the Moonbeam Network and its Ethereum compatibility features.
The information presented herein has been provided by third parties and is made available solely for general information purposes. Moonbeam does not endorse any project listed and described on the Moonbeam Doc Website (https://docs.moonbeam.network/). Moonbeam Foundation does not warrant the accuracy, completeness or usefulness of this information. Any reliance you place on such information is strictly at your own risk. Moonbeam Foundation disclaims all liability and responsibility arising from any reliance placed on this information by you or by anyone who may be informed of any of its contents. All statements and/or opinions expressed in these materials are solely the responsibility of the person or entity providing those materials and do not necessarily represent the opinion of Moonbeam Foundation. The information should not be construed as professional or financial advice of any kind. Advice from a suitably qualified professional should always be sought in relation to any particular matter or circumstance. The information herein may link to or integrate with other websites operated or content provided by third parties, and such other websites may link to this website. Moonbeam Foundation has no control over any such other websites or their content and will have no liability arising out of or related to such websites or their content. The existence of any such link does not constitute an endorsement of such websites, the content of the websites, or the operators of the websites. These links are being provided to you only as a convenience and you release and hold Moonbeam Foundation harmless from any and all liability arising from your use of this information or the information provided by any third-party website or service.
--- END CONTENT ---
Doc-Content: https://docs.moonbeam.network/tokens/connect/subwallet/
--- BEGIN CONTENT ---
---
title: How to Connect SubWallet to Moonbeam
description: This guide walks you through how to connect SubWallet, a comprehensive Polkadot, Substrate, and Ethereum wallet, to Moonbeam.
categories: Tokens and Accounts, Ethereum Toolkit
---
# Interacting with Moonbeam Using SubWallet
## Introduction {: #introduction }
Developers and users of Moonbeam have a variety of options when it comes to wallets. Thanks to Moonbeam's seamless Ethereum compatibility, Moonbeam supports a great variety of popular wallets, including [SubWallet](https://www.subwallet.app){target=\_blank}.
SubWallet is a comprehensive Web3 wallet that natively supports Substrate and Ethereum accounts. Although Moonbeam is a Substrate-based blockchain, it has a [unified account system](/learn/core-concepts/unified-accounts/){target=\_blank} that replaces the default Substrate-style accounts and keys with Ethereum-style accounts and keys. Since SubWallet supports Ethereum-style accounts, you can interact with your Moonbeam account using SubWallet.
This guide takes you through all the necessary steps, from installing SubWallet to setting up a wallet, connecting it to Moonbeam, and sending funds.
The information presented herein is for informational purposes only and has been provided by third parties. Moonbeam does not endorse any project listed and described on the Moonbeam docs website (https://docs.moonbeam.network/).
## Install SubWallet {: #install-subwallet }
There are several ways you can interact with SubWallet: they have **a browser extension, a mobile app, and a web-accessible dashboard**.
You can get started by heading to [SubWallet's download page](https://www.subwallet.app/download.html){target=\_blank} and downloading SubWallet for the platform of your choice.
If you choose to use the web-accessible dashboard, you won't need to download anything. You can access the dashboard at [web.subwallet.app](https://web.subwallet.app/welcome){target=\_blank}.
The interfaces for the mobile app, browser extension, and web dashboard are quite similar, so you can adapt the following instructions, which focus on the browser extension, for the mobile app and web dashboard.
## Setup a Wallet {: #setup-a-wallet }
Once you've downloaded the SubWallet Browser Extension, you'll be prompted to set up your wallet. You'll be able to choose from the following options:
- **Create a new account** - allows you to create an entirely new account by creating a password and generating a seed phrase
- **Import an account** - allows you to import an existing account using the seed phrase, JSON file, private key, or by QR code
- **Attach an account** - allows you to connect to an account without the private key. You can use this method to connect to a cold storage wallet, like Keystone, or a watch-only account. With a watch-only account, you will not be able to transfer funds or interact with your account; you'll only be able to view account balances
!!! note
Ledger is supported on the browser extension but is not yet available on the mobile app. Support for Ledger on the mobile app is coming soon!
- **Connect wallet** - *only available on the web dashboard* - allows you to connect to a browser extension wallet. You can use this method to easily connect to an account you've created using the SubWallet browser extension or another wallet, such as MetaMask
The following sections will provide step-by-step instructions for [creating a new account](#create-a-new-account) and [importing an existing account](#import-an-account) with SubWallet.
If you're attaching an account, you can find step-by-step instructions on [SubWallet's Account management documentation](https://docs.subwallet.app/main/extension-user-guide/account-management){target=\_blank}. Similarly, if you're connecting a wallet on the web dashboard, you can find instructions on [SubWallet's Connect extension documentation](https://docs.subwallet.app/main/web-dashboard-user-guide/account-management/connect-extension){target=\_blank}.
### Create a New Account {: #create-a-new-account }
Creating a new account will generate a seed phrase that can derive multiple Ethereum and Substrate accounts. By default, SubWallet will generate a single Ethereum and a single Substrate account, but you can easily derive more from the same seed phrase. To interact with Moonbeam, you will need to use an Ethereum account. Click **Create a new account** to get started.
On the following screen, you'll be prompted to create a password to secure your new wallet:
1. Enter a password that has at least 8 characters
2. Confirm the password by entering it again
3. Click **Continue**
You'll then be prompted to back up your seed phrase. This is an important step, especially because you have the option to later derive additional accounts from this seed phrase.
1. View your seed phrase and save it in a safe place
!!! remember
You should never share your seed phrase (mnemonic) or private key with anyone. This gives them direct access to your funds. This guide is for educational purposes only.
2. Once you've safely stored your seed phrase, click **I have kept it somewhere safe**
!!! note
If you're creating a new account on the mobile app, you'll have to re-enter your seed phrase to verify that you have stored it. The words have to be entered in the correct order.
After you've created a password and saved your seed phrase, you'll be connected to your account. You can [add additional accounts](#add-additional-accounts) at any time.
### Import an Account {: #import-an-account }
To import an existing account into SubWallet, you can select **Import an account**.
On the following screen, select the method by which you would like to import the existing account. You can choose from **Import from seed phrase**, **Import from Polkadot.{js}**, **Import by MetaMask private key**, and **Import by QR code**.
If you select **Import from seed phrase**, there are some incompatibility issues that can arise when importing an account from seed phrase. For example, Trust Wallet and SafePal are among the wallets not compatible with SubWallet. If you run into incompatibility issues, SubWallet recommends creating a new wallet.
If you select **Import from Polkadot.{js}**, you'll need to make sure that the account was created in Polkadot.js via private key. If it was created with a seed phrase and you attempt to import it to SubWallet, a different public address will be used. This is because Polkadot.js uses [BIP39](https://github.com/bitcoin/bips/blob/master/bip-0039.mediawiki){target=\_blank}, whereas Ethereum uses [BIP32](https://github.com/bitcoin/bips/blob/master/bip-0032.mediawiki){target=\_blank} or [BIP44](https://github.com/bitcoin/bips/blob/master/bip-0044.mediawiki){target=\_blank}.
If you import your account via seed phrase, you can select your account type as either Substrate (Polkadot) or EVM (Ethereum), or both. Moonbeam uses Ethereum-style accounts, so you'll need to select **Ethereum** to import an account for Moonbeam-based networks.
Once you've completed the import process, you'll be prompted to enter a password to secure your new wallet:
1. Enter a password that has at least 8 characters
2. Confirm the password by entering it again
3. Click **Continue**

Next, you'll be able to provide the relevant seed phrase, private key, JSON file, or QR code, and you can begin using your new account right away. You can add [additional accounts](#add-additional-accounts) at any time.
### Add Additional Accounts {: #add-additional-accounts }
After you have created a new account or imported an existing account to SubWallet, you can add additional accounts by taking the following steps:
1. Click on the account dropdown
2. Select one of the options from the bottom of the screen. You can click **Create a new account**, the import button to import an existing account, or the attach button to attach to an existing cold storage wallet or watch-only account
If you're creating a new account, you can then choose **Create with new seed phrase** or **Derive from an existing account**. If you're creating a new account with a new seed phrase, you'll need to select the account type and back up the account, similar to the instructions in the [Create a New Account](#create-a-new-account) section. If you choose to derive a new account, you'll be prompted to select the existing account that you want to derive the account from.
If you're importing a new account, you'll need to choose whether to import using a seed phrase, JSON file, MetaMask private key or QR code, then repeat the process outlined in the [Import an Account](#import-an-account) section.
If you're attaching an account, you can find out step-by-step instructions on [SubWallet's Account management documentation](https://docs.subwallet.app/main/extension-user-guide/account-management){target=\_blank}.
## Connect SubWallet to Moonbeam {: #connect-subwallet-to-moonbeam }
To configure SubWallet for Moonbeam, select the **Customize your asset display** icon next to the **Search a token** icon.

To add Moonbeam, you can:
1. Search for "Moon" to view all Moonbeam-based networks, or search for a specific network
2. Toggle the switch to connect to the network

If you're trying to connect to a [local Moonbeam development node](/builders/get-started/networks/moonbeam-dev/){target=\_blank}, you can select the hamburger menu from the top left corner, which will take you to the settings page.
From the settings menu, click **Manage networks**.

Click the **+** icon in the top right corner and enter in the [network configurations](/builders/get-started/quick-start/#network-configurations){target=\_blank}. You can also manage and connect to other networks from this menu.
By default, all balances are hidden in SubWallet, but if you press the **Show balance** icon, you can toggle balance visibility.

## Interact with the Network {: #interact-with-the-network }
Once you've [connected SubWallet](#connect-subwallet-to-moonbeam) to any Moonbeam-based network, you can start using your wallet by:
- Receiving a token from another address
- Sending a token to another address
- Adding tokens to SubWallet and interacting with them
### Receive a Token {: #receive-a-token }
To receive a token from another account, you would need to show your wallet address to your counterparty, and they can send their assets to such address.
To copy your address, click on the **Get address** icon.

If you have multiple accounts and have selected **All accounts** from the account dropdown menu, you'll need to select the receiving account you want to send the assets to. Otherwise, make sure that the account you're connected to (which is displayed at the top of the screen) is the account you want to send the assets to. **This should be your Moonbeam account, which is an Ethereum-style address.**
Next, you can search for and choose the token that you would like to receive. For this example, DEV is chosen.
!!! note
SubWallet supports receiving cross-chain tokens, so please be sure to check that the chain logo under the token name matches your desired chain.
You will be shown the QR code and the address linked to your account. **Double-check that the address shown is an Ethereum-style account**.
Now you just need to show the QR code or address to the sender.
### Send a Transaction {: #send-a-transaction }
To get started with a simple token transfer to another address on Moonbeam, you can click the **Send** icon.
Next, you can take the following steps:
1. Specify the asset to send and the destination chain
!!! note
Some tokens are allowed to be transferred cross-chain, so when choosing the destination network, you can choose the dropdown menu to see the available options.
2. Enter the destination address, which can also be done using the address book or by scanning the recipient's QR code
!!! note
If you're using the mobile app, click **Next** to proceed.
3. Enter the amount of tokens to send
4. Look over the transaction details, then press **Transfer**
On the next screen, you'll be able to review the transaction details and submit the transaction. If the transaction details look good, you can click **Approve** to send the transaction.
After you send the transaction, you'll be able to review the transaction details.
And that's it! For more information on how to use SubWallet, please refer to [SubWallet's documentation](https://docs.subwallet.app/main){target=\_blank}.
The information presented herein has been provided by third parties and is made available solely for general information purposes. Moonbeam does not endorse any project listed and described on the Moonbeam Doc Website (https://docs.moonbeam.network/). Moonbeam Foundation does not warrant the accuracy, completeness or usefulness of this information. Any reliance you place on such information is strictly at your own risk. Moonbeam Foundation disclaims all liability and responsibility arising from any reliance placed on this information by you or by anyone who may be informed of any of its contents. All statements and/or opinions expressed in these materials are solely the responsibility of the person or entity providing those materials and do not necessarily represent the opinion of Moonbeam Foundation. The information should not be construed as professional or financial advice of any kind. Advice from a suitably qualified professional should always be sought in relation to any particular matter or circumstance. The information herein may link to or integrate with other websites operated or content provided by third parties, and such other websites may link to this website. Moonbeam Foundation has no control over any such other websites or their content and will have no liability arising out of or related to such websites or their content. The existence of any such link does not constitute an endorsement of such websites, the content of the websites, or the operators of the websites. These links are being provided to you only as a convenience and you release and hold Moonbeam Foundation harmless from any and all liability arising from your use of this information or the information provided by any third-party website or service.
--- END CONTENT ---
Doc-Content: https://docs.moonbeam.network/tokens/connect/talisman/
--- BEGIN CONTENT ---
---
title: Using Talisman with Polkadot JS Apps
description: Follow this quick tutorial to learn how to use Moonbeam’s Ethereum-style H160 addresses and send transactions with Polkadot.js Apps and Talisman.
categories: Tokens and Accounts, Ethereum Toolkit
---
# Interacting with Moonbeam Using Talisman
## Introduction {: #introduction }
As a Polkadot parachain, Moonbeam uses a [unified account structure](/learn/core-concepts/unified-accounts/){target=\_blank} that allows you to interact with Substrate (Polkadot) functionality and Moonbeam's EVM, all from a single Ethereum-style address. This unified account structure means that you don't need to maintain both a Substrate and an Ethereum account to interact with Moonbeam - instead, you can do it all with a single Ethereum private key.
[Polkadot.js Apps](https://polkadot.js.org/apps/?rpc=wss://wss.api.moonbase.moonbeam.network%2Fpublic-ws#/accounts){target=\_blank} supports H160 accounts injected into the browser via an extension like [Talisman](https://talisman.xyz){target=\_blank}. Note, Polkadot.js Apps is phasing out support for [accounts stored locally in the browser's cache](/tokens/connect/polkadotjs/). While you can continue to use any accounts that you've imported and stored in your browser locally via Polkadot.js Apps, you won't be able to add any new ones. This means that you'll need to use an extension like Talisman. Furthermore, injecting your account from an extension like Talisman is generally regarded to be safer than storing the account directly in the browser.
This guide will include all of the steps for setting up an account in Talisman and using it to interact with Moonbeam through Polkadot.js Apps.
The information presented herein is for informational purposes only and has been provided by third parties. Moonbeam does not endorse any project listed and described on the Moonbeam docs website (https://docs.moonbeam.network/).
## Setting up Talisman {: #setting-up-talisman }
Talisman is a crypto-wallet that natively supports Substrate (Polkadot) and Ethereum accounts. The Talisman wallet browser extension is available on [Google Chrome](https://chromewebstore.google.com/detail/talisman-wallet/fijngjgcjhjmmpcmkeiomlglpeiijkld){target=\_blank} and [Brave](https://chromewebstore.google.com/detail/talisman-wallet/fijngjgcjhjmmpcmkeiomlglpeiijkld){target=\_blank}, and a corresponding asset dashboard is accessible at [app.talisman.xyz](https://app.talisman.xyz){target=\_blank}
First, download and install the [Talisman extension](https://talisman.xyz){target=\_blank}. Once the extension opens up, you'll be prompted to either create a new wallet or import an existing one. For the purposes of this demo, you'll create a new wallet. On the following screen you'll be prompted to create a password to secure the new wallet.
!!! Remember
Talisman does not require you to back up your seed phrase but will nudge you with a reminder at the bottom of the screen. If you don't back up your seed phrase, you could lose all of your assets.
To back up your newly created wallet, take the following steps:
1. Press **Backup Now**
2. Enter the password to your Talisman wallet
3. Press **View Recovery Phrase** and store it in a secure place
## Setting up Talisman to Connect to Testnets {: #setting-up-talisman-to-connect-to-testnets }
Talisman works with all Moonbeam networks [after you enable Ethereum accounts](#connecting-talisman-to-moonbase-alpha-polkadot.js-apps). You can also see your balances across all networks in the **Portfolio** tab by clicking on the extension's Talisman logo in the upper left-hand corner. By default, Talisman hides your testnet account balances. However, you can change this by taking the following steps:
1. Open the Talisman extension and click on the Talisman logo
2. Select **Settings**
3. Select **Ethereum Networks**
4. Click **Enable Testnets**
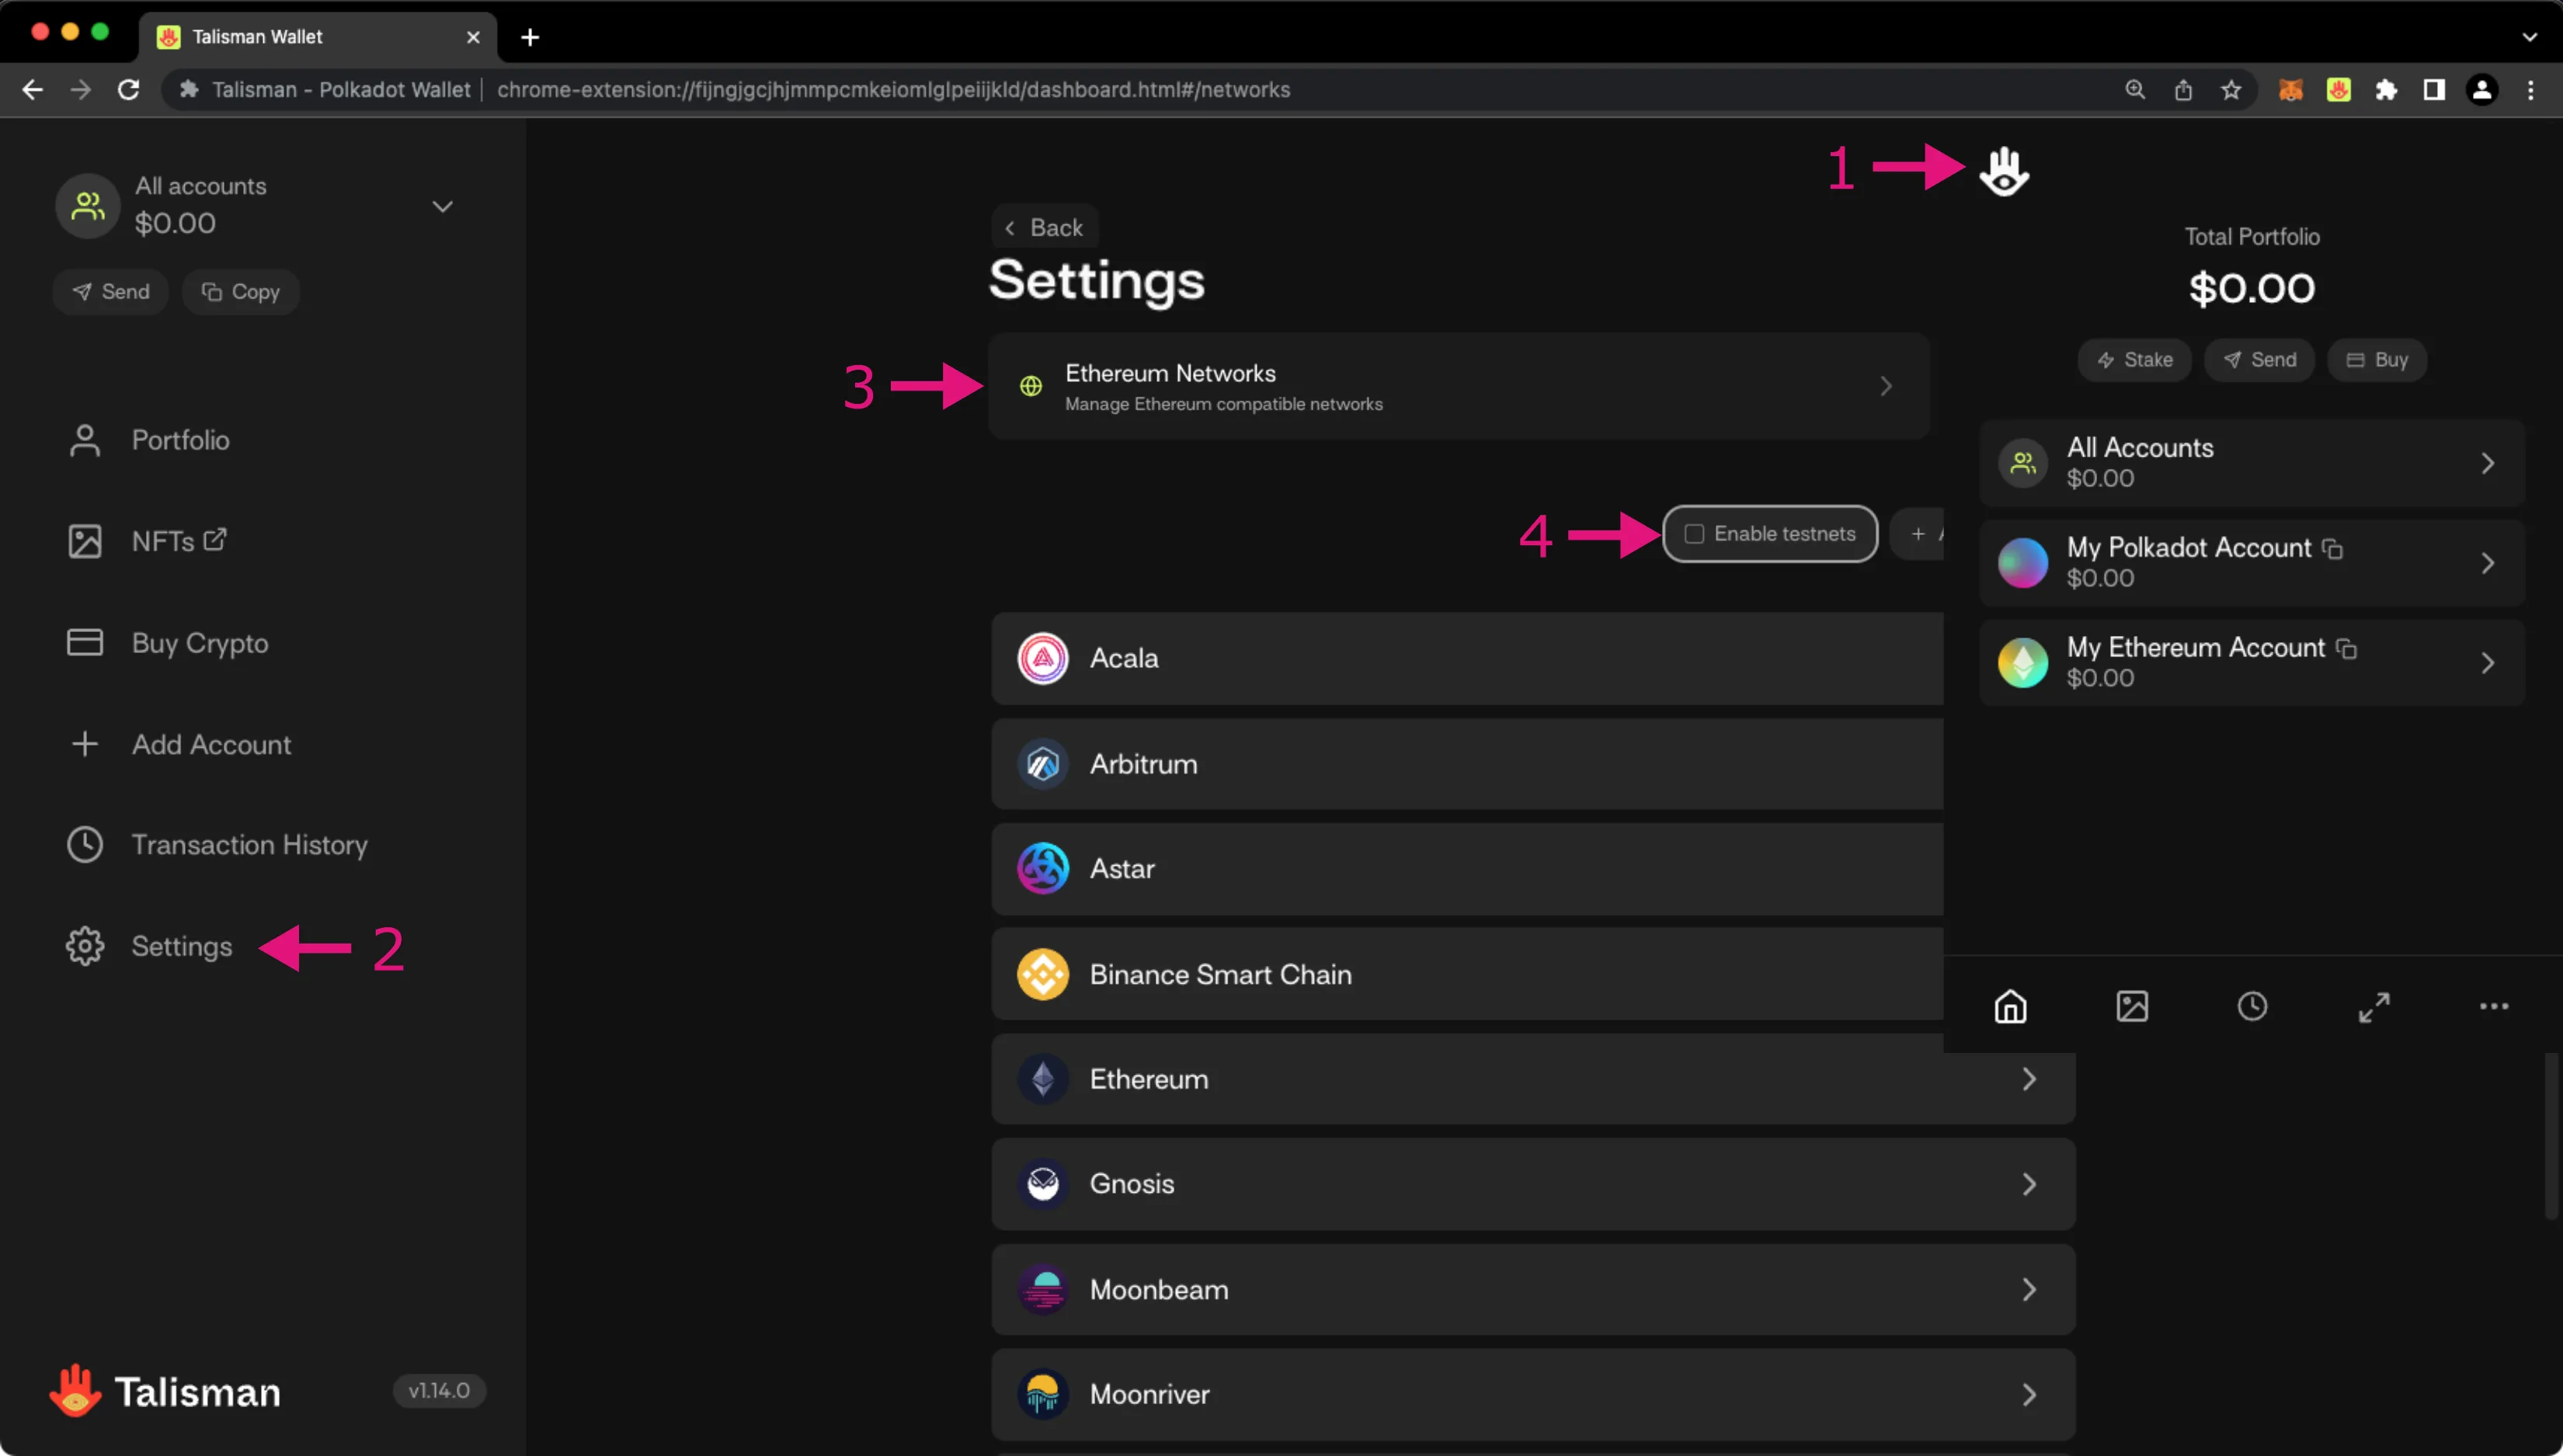
## Connecting Talisman to Moonbeam and Polkadot.js Apps {: #connecting-talisman-to-moonbase-alpha-polkadot.js-apps }
Connecting Talisman to a Moonbeam-based network in Polkadot.js Apps is straightforward. Remember that you need to [enable testnets](#setting-up-talisman-to-connect-to-testnets) if you want to connect to Moonbase Alpha.
To connect to a Moonbeam-based network, the Moonbase Alpha testnet in this example, head to [Moonbase Alpha Polkadot.js Apps](https://polkadot.js.org/apps/?rpc=wss://wss.api.moonbase.moonbeam.network%2Fpublic-ws#/accounts){target=\_blank}. The Talisman extension will prompt you to select the accounts you'd like to use with Polkadot.js Apps. If it doesn't automatically pop up, you can open the Talisman extension and press the **Connected / Not Connected** button at the top. To configure Talisman to correctly interface with Moonbeam networks on Polkadot.js Apps, you should take the following steps:
1. Check the box next to **Show Ethereum Accounts**
2. Select the accounts you want to connect to Polkadot.js Apps. In this example, it is only **My Ethereum Account**. This is the default name assigned by Talisman which you can rename if you'd like
3. Press **Connect 1**. The value will change depending on the number of accounts you are connecting
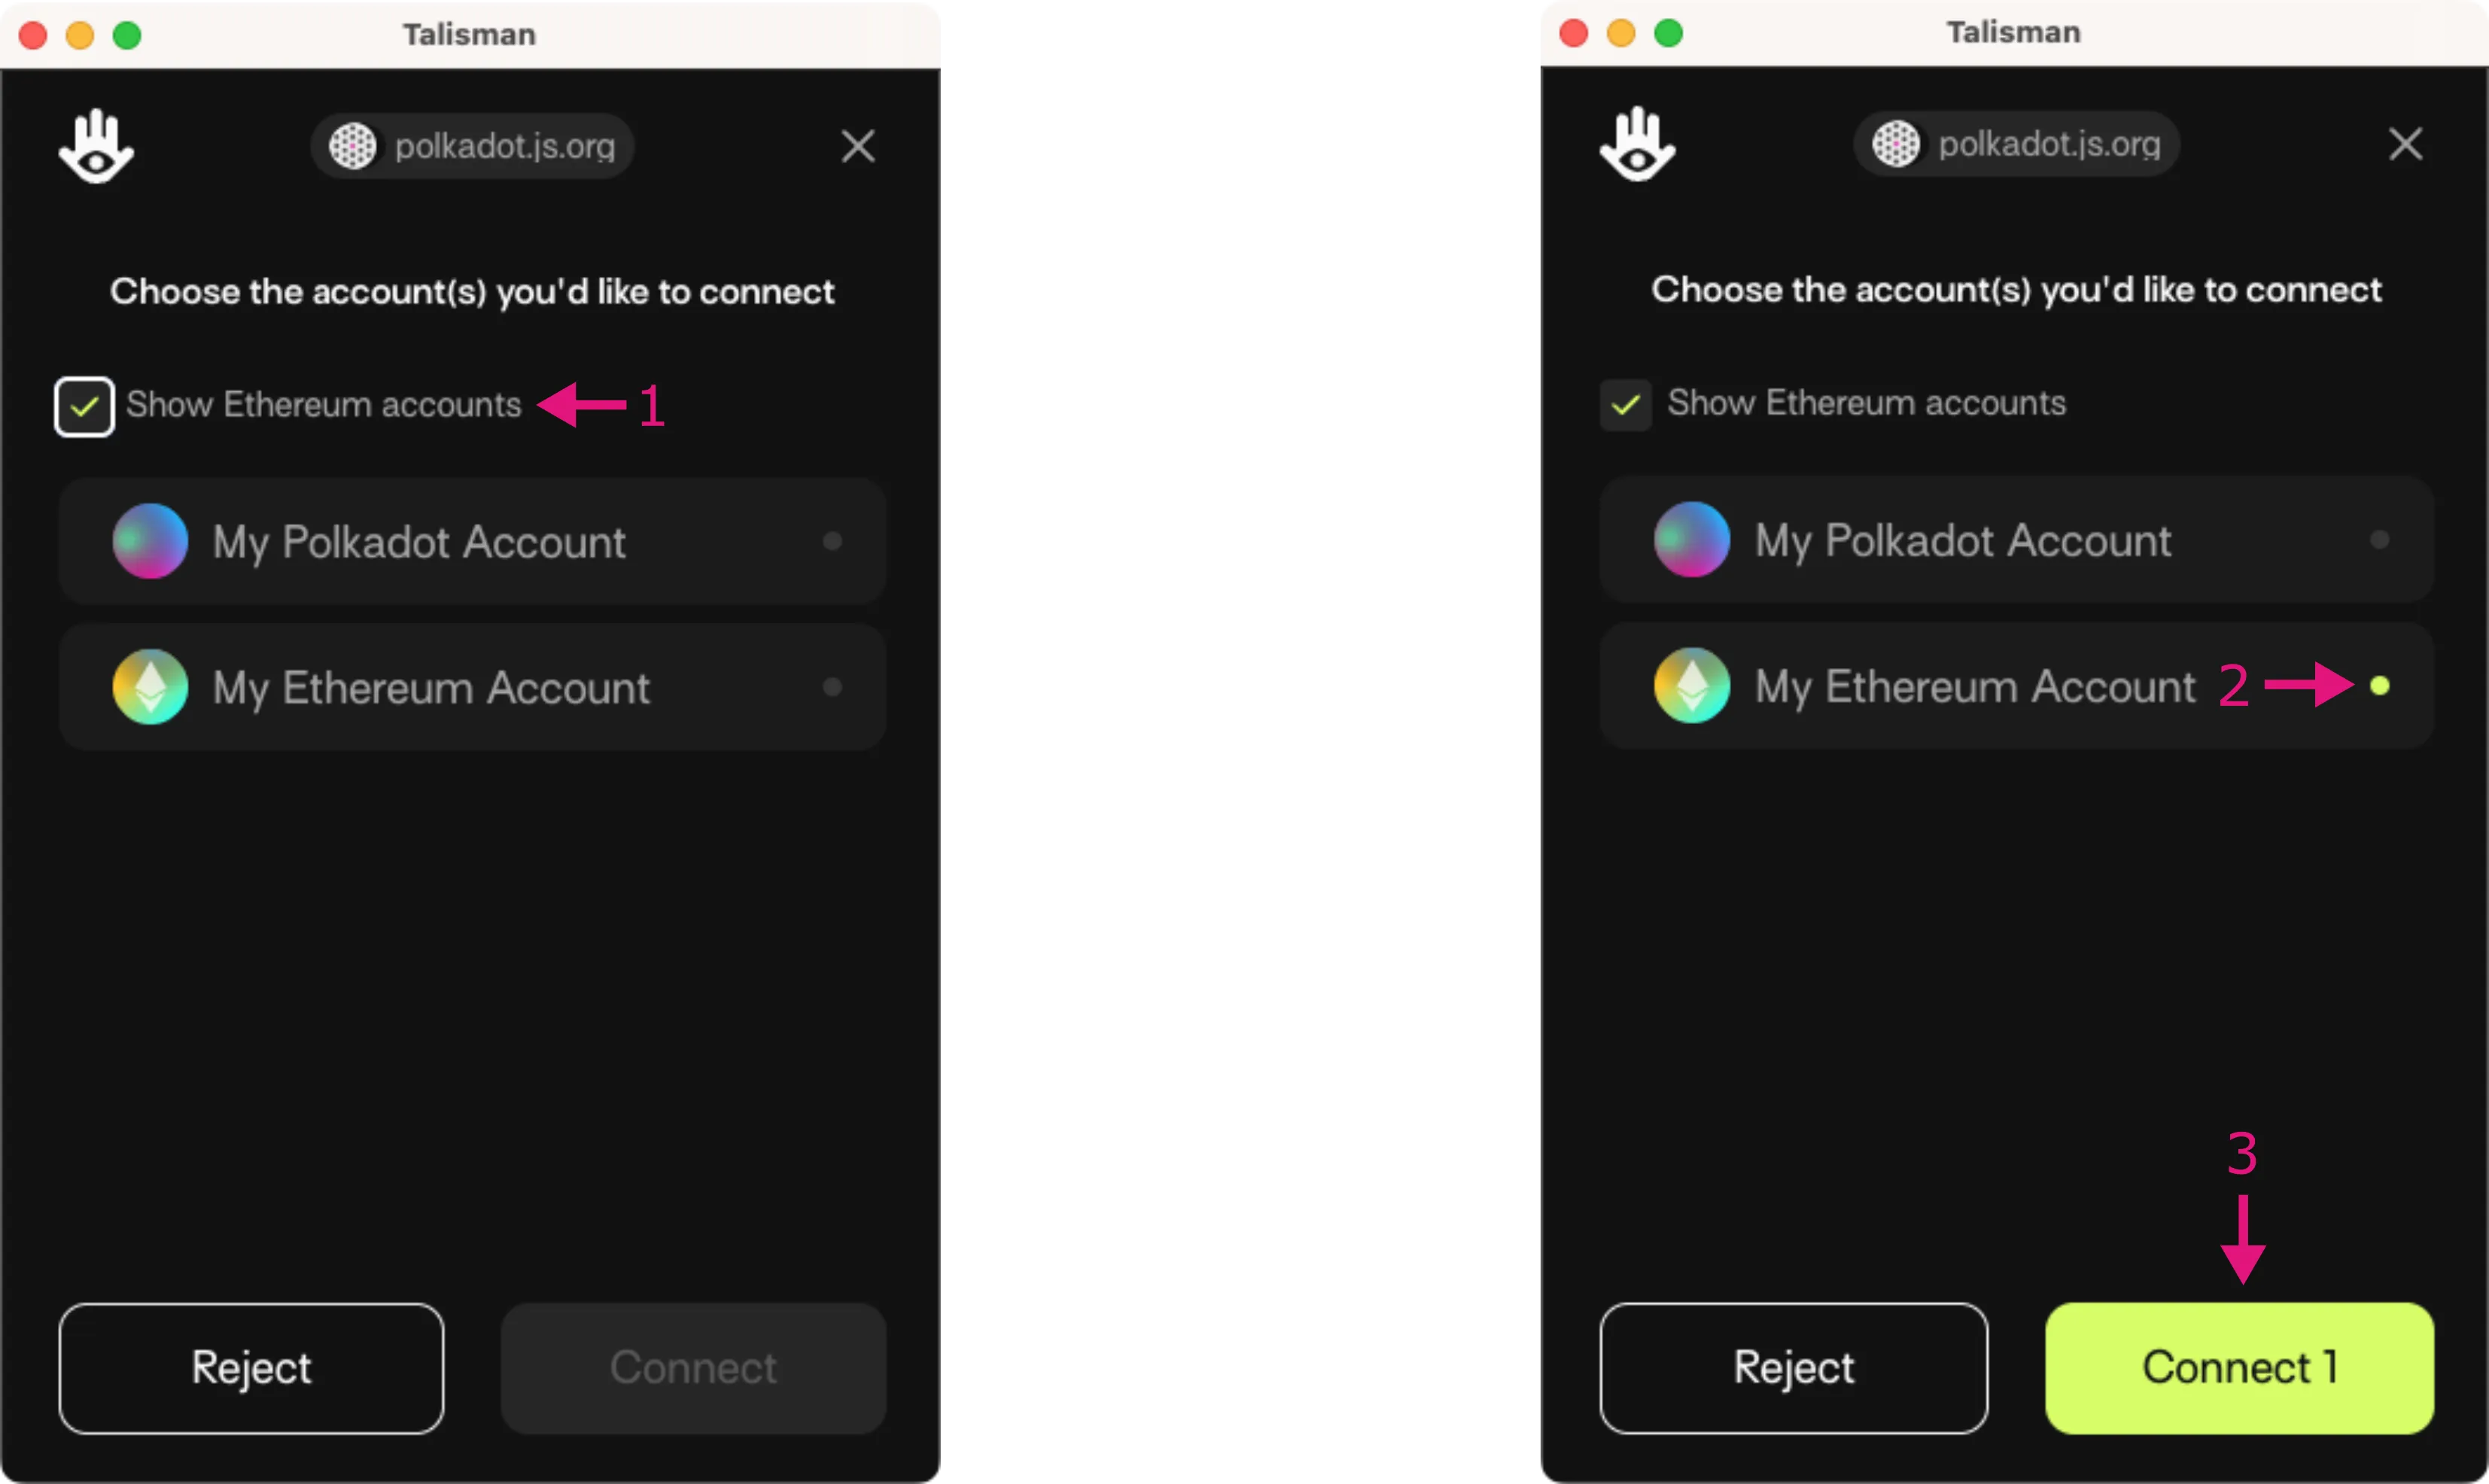
Your Talisman wallet is now connected to Polkadot.js Apps. After refreshing Polkadot.js Apps, you should see your Talisman account in the [Accounts page of Polkadot.js Apps](https://polkadot.js.org/apps/?rpc=wss://wss.api.moonbase.moonbeam.network%2Fpublic-ws#/accounts){target=\_blank}. When launching [Polkadot.js Apps](https://polkadot.js.org/apps/?rpc=wss://wss.api.moonbase.moonbeam.network%2Fpublic-ws#/accounts){target=\_blank} for the first time, you may or may not be connected to the desired network. You can change your selected network to the Moonbase Alpha TestNet by clicking the logo in the top left corner, then scroll down to the **Test Networks** section, select Moonbase Alpha, and scroll back to the top and click **Switch**.
After switching, the Polkadot.js site will not only connect to Moonbase Alpha, but also change its styling to make a perfect match.

## Adding a New Account to Talisman {: #adding-a-new-account-to-talisman }
In this section, you'll learn how you can create a new account, or import an already existing MetaMask account to Polkadot.js Apps.
1. Open the Talisman extension and click on the Talisman logo in the upper left hand corner
2. Select **Add Account**
3. Select **New Account**
4. Select **Ethereum** as the account type
5. Give your new account a name
6. Press **Create**
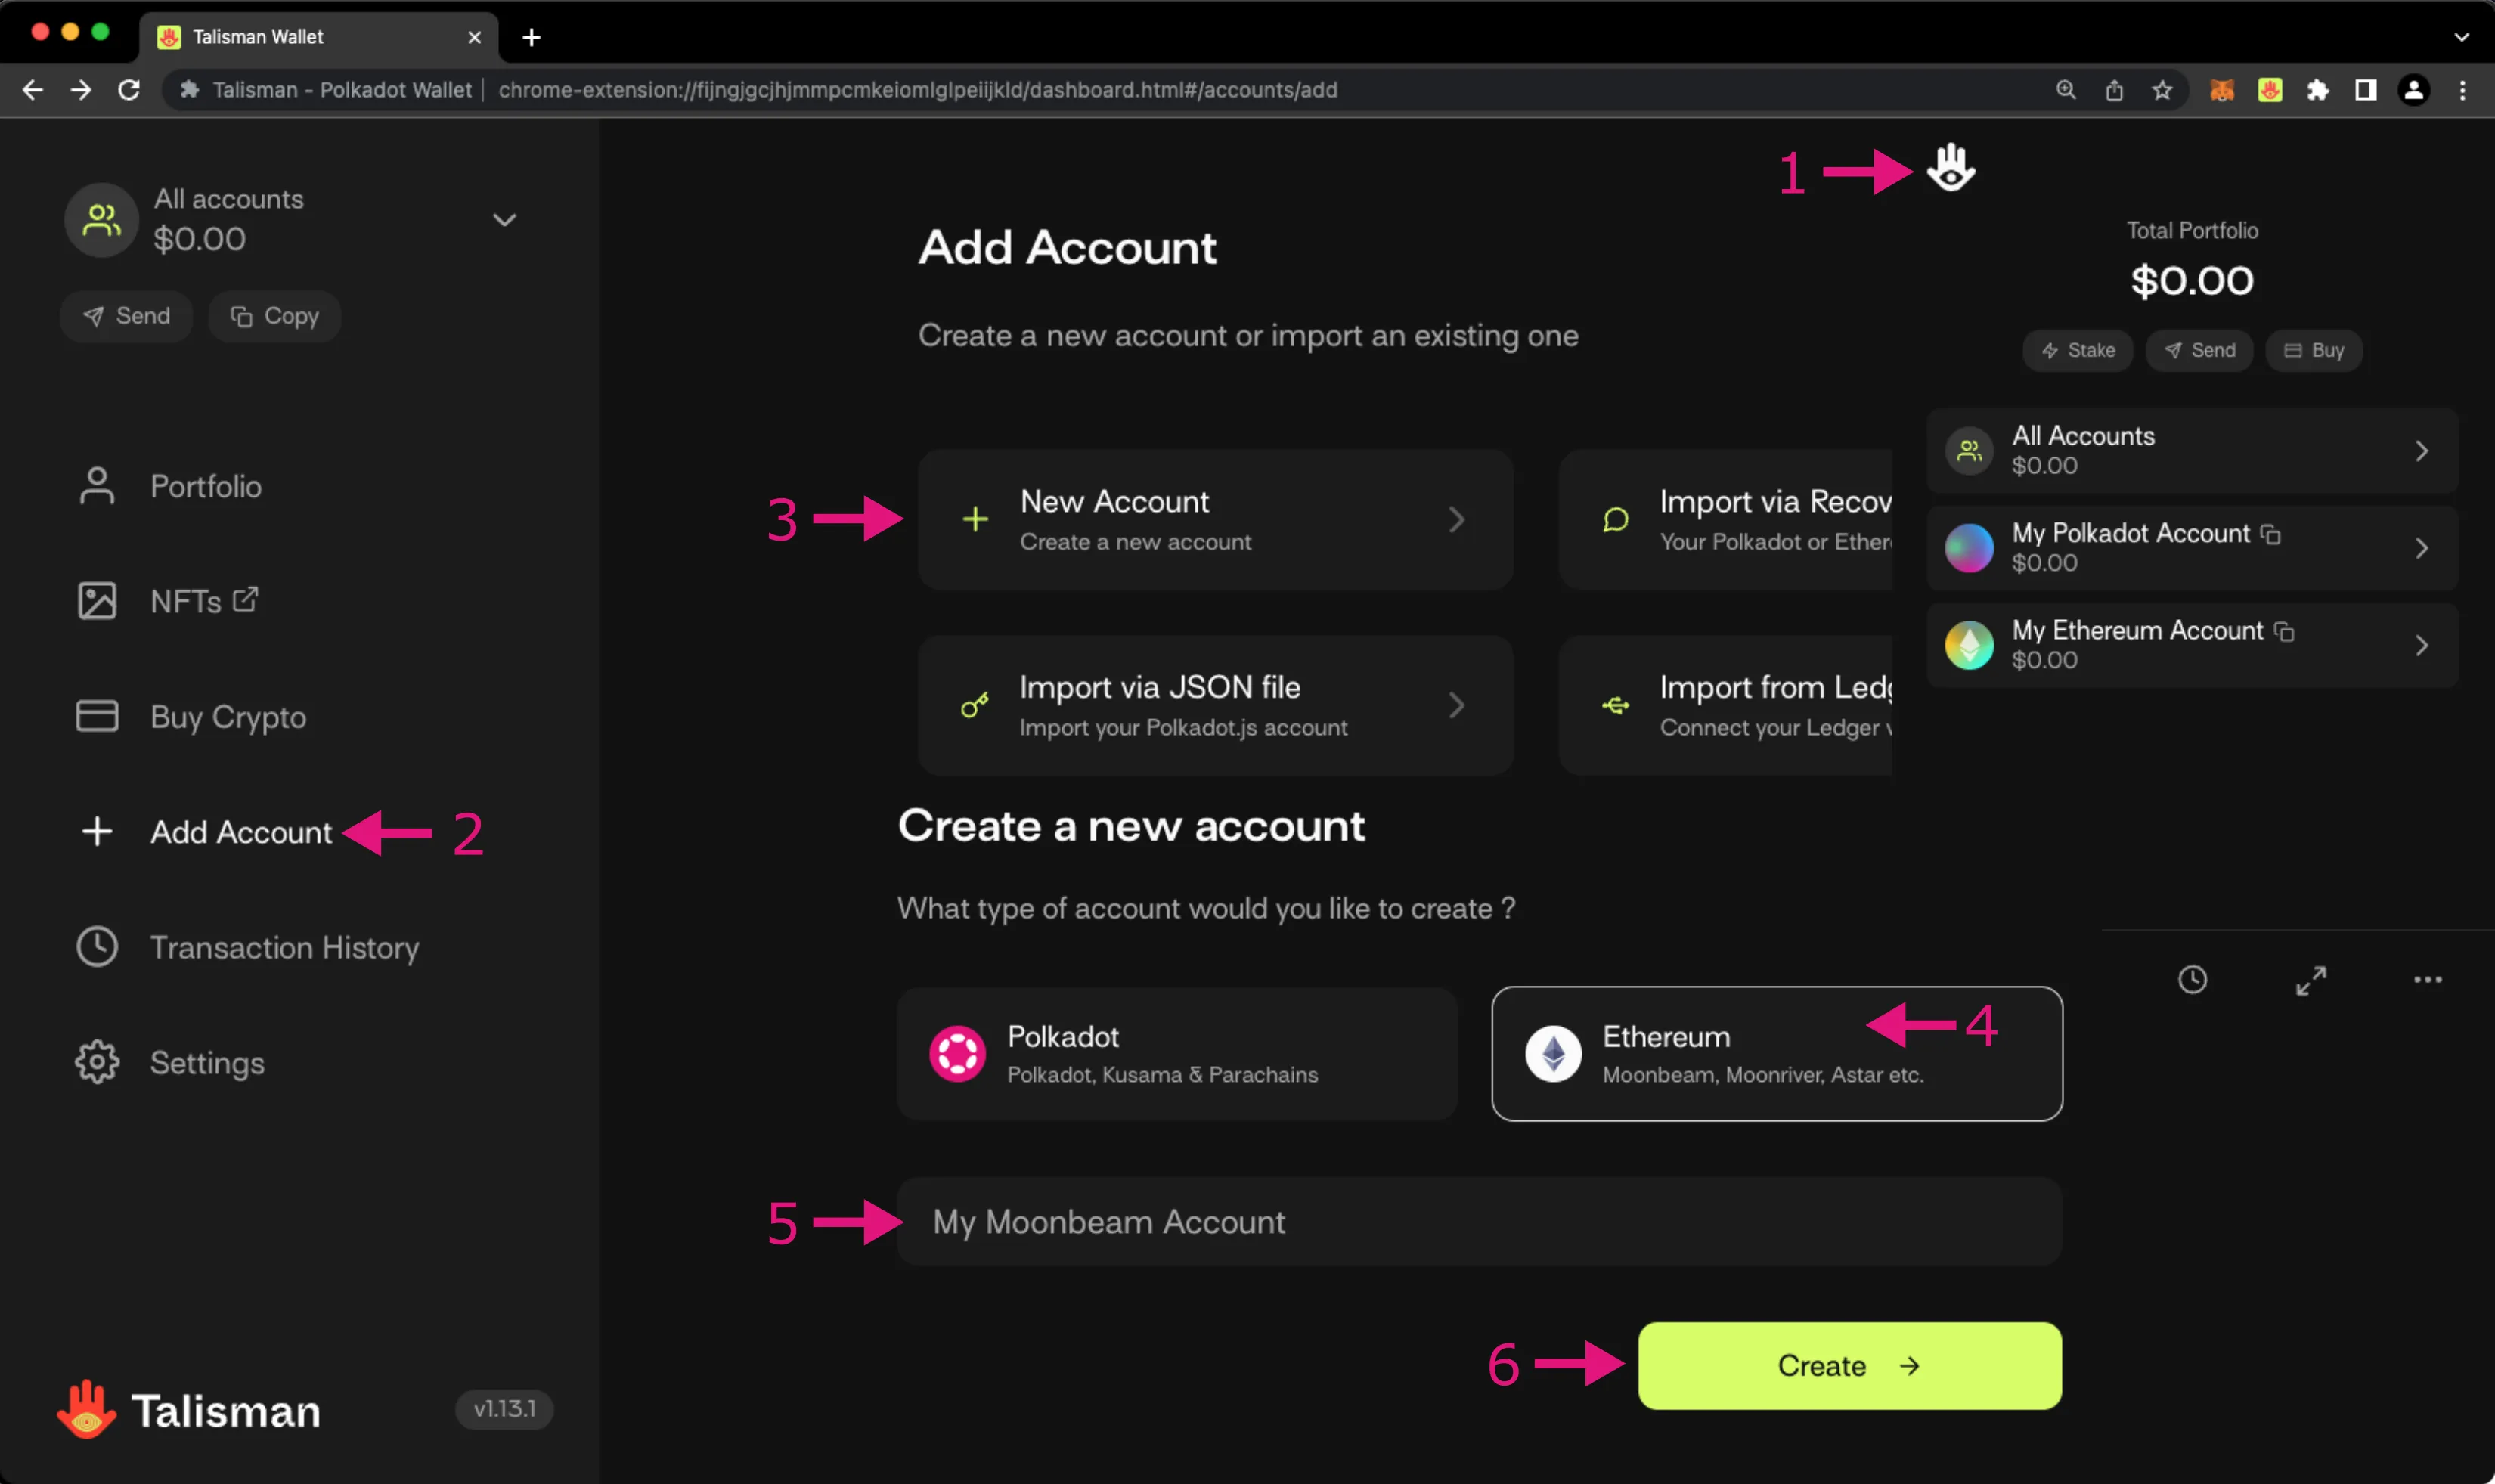
Although our new account has been successfully created, Polkadot.js Apps isn't aware of it yet. To connect the new account to Polkadot.js Apps, take the following steps from [Polkadot.js Apps](https://polkadot.js.org/apps/?rpc=wss://wss.api.moonbase.moonbeam.network%2Fpublic-ws#/accounts){target=\_blank}:
1. Open the Talisman extension and Press the **Connected / Not-connected** button
2. Ensure **Show Eth accounts** is checked
3. Click on the account you'd like to connect. The green dot next to the account will light up if it is selected

## Sending a Transaction Through Substrate's API {: #sending-a-transaction-through-substrates-api }
Now, to demonstrate the potential of Moonbeam's [unified accounts](/learn/core-concepts/unified-accounts/){target=\_blank} scheme you can make a transfer through the Substrate API using Polkadot.js Apps. Remember that you are interacting with Substrate using an Ethereum-style H160 address. To do so, you can [add another account](#adding-a-new-account-to-talisman). The accounts in Talisman have been renamed to the familiar Alice and Bob accounts. To send some DEV funds from Alice to Bob, take the following steps:
Click on Alice's **send** button, which opens another wizard that guides you through the process of sending a transaction.
1. Set the **send to address**
2. Enter the **amount** to send, which is 4 DEV tokens in this example
3. When ready, click on the **Make Transfer** button
4. Approve the transaction in the Talisman pop up
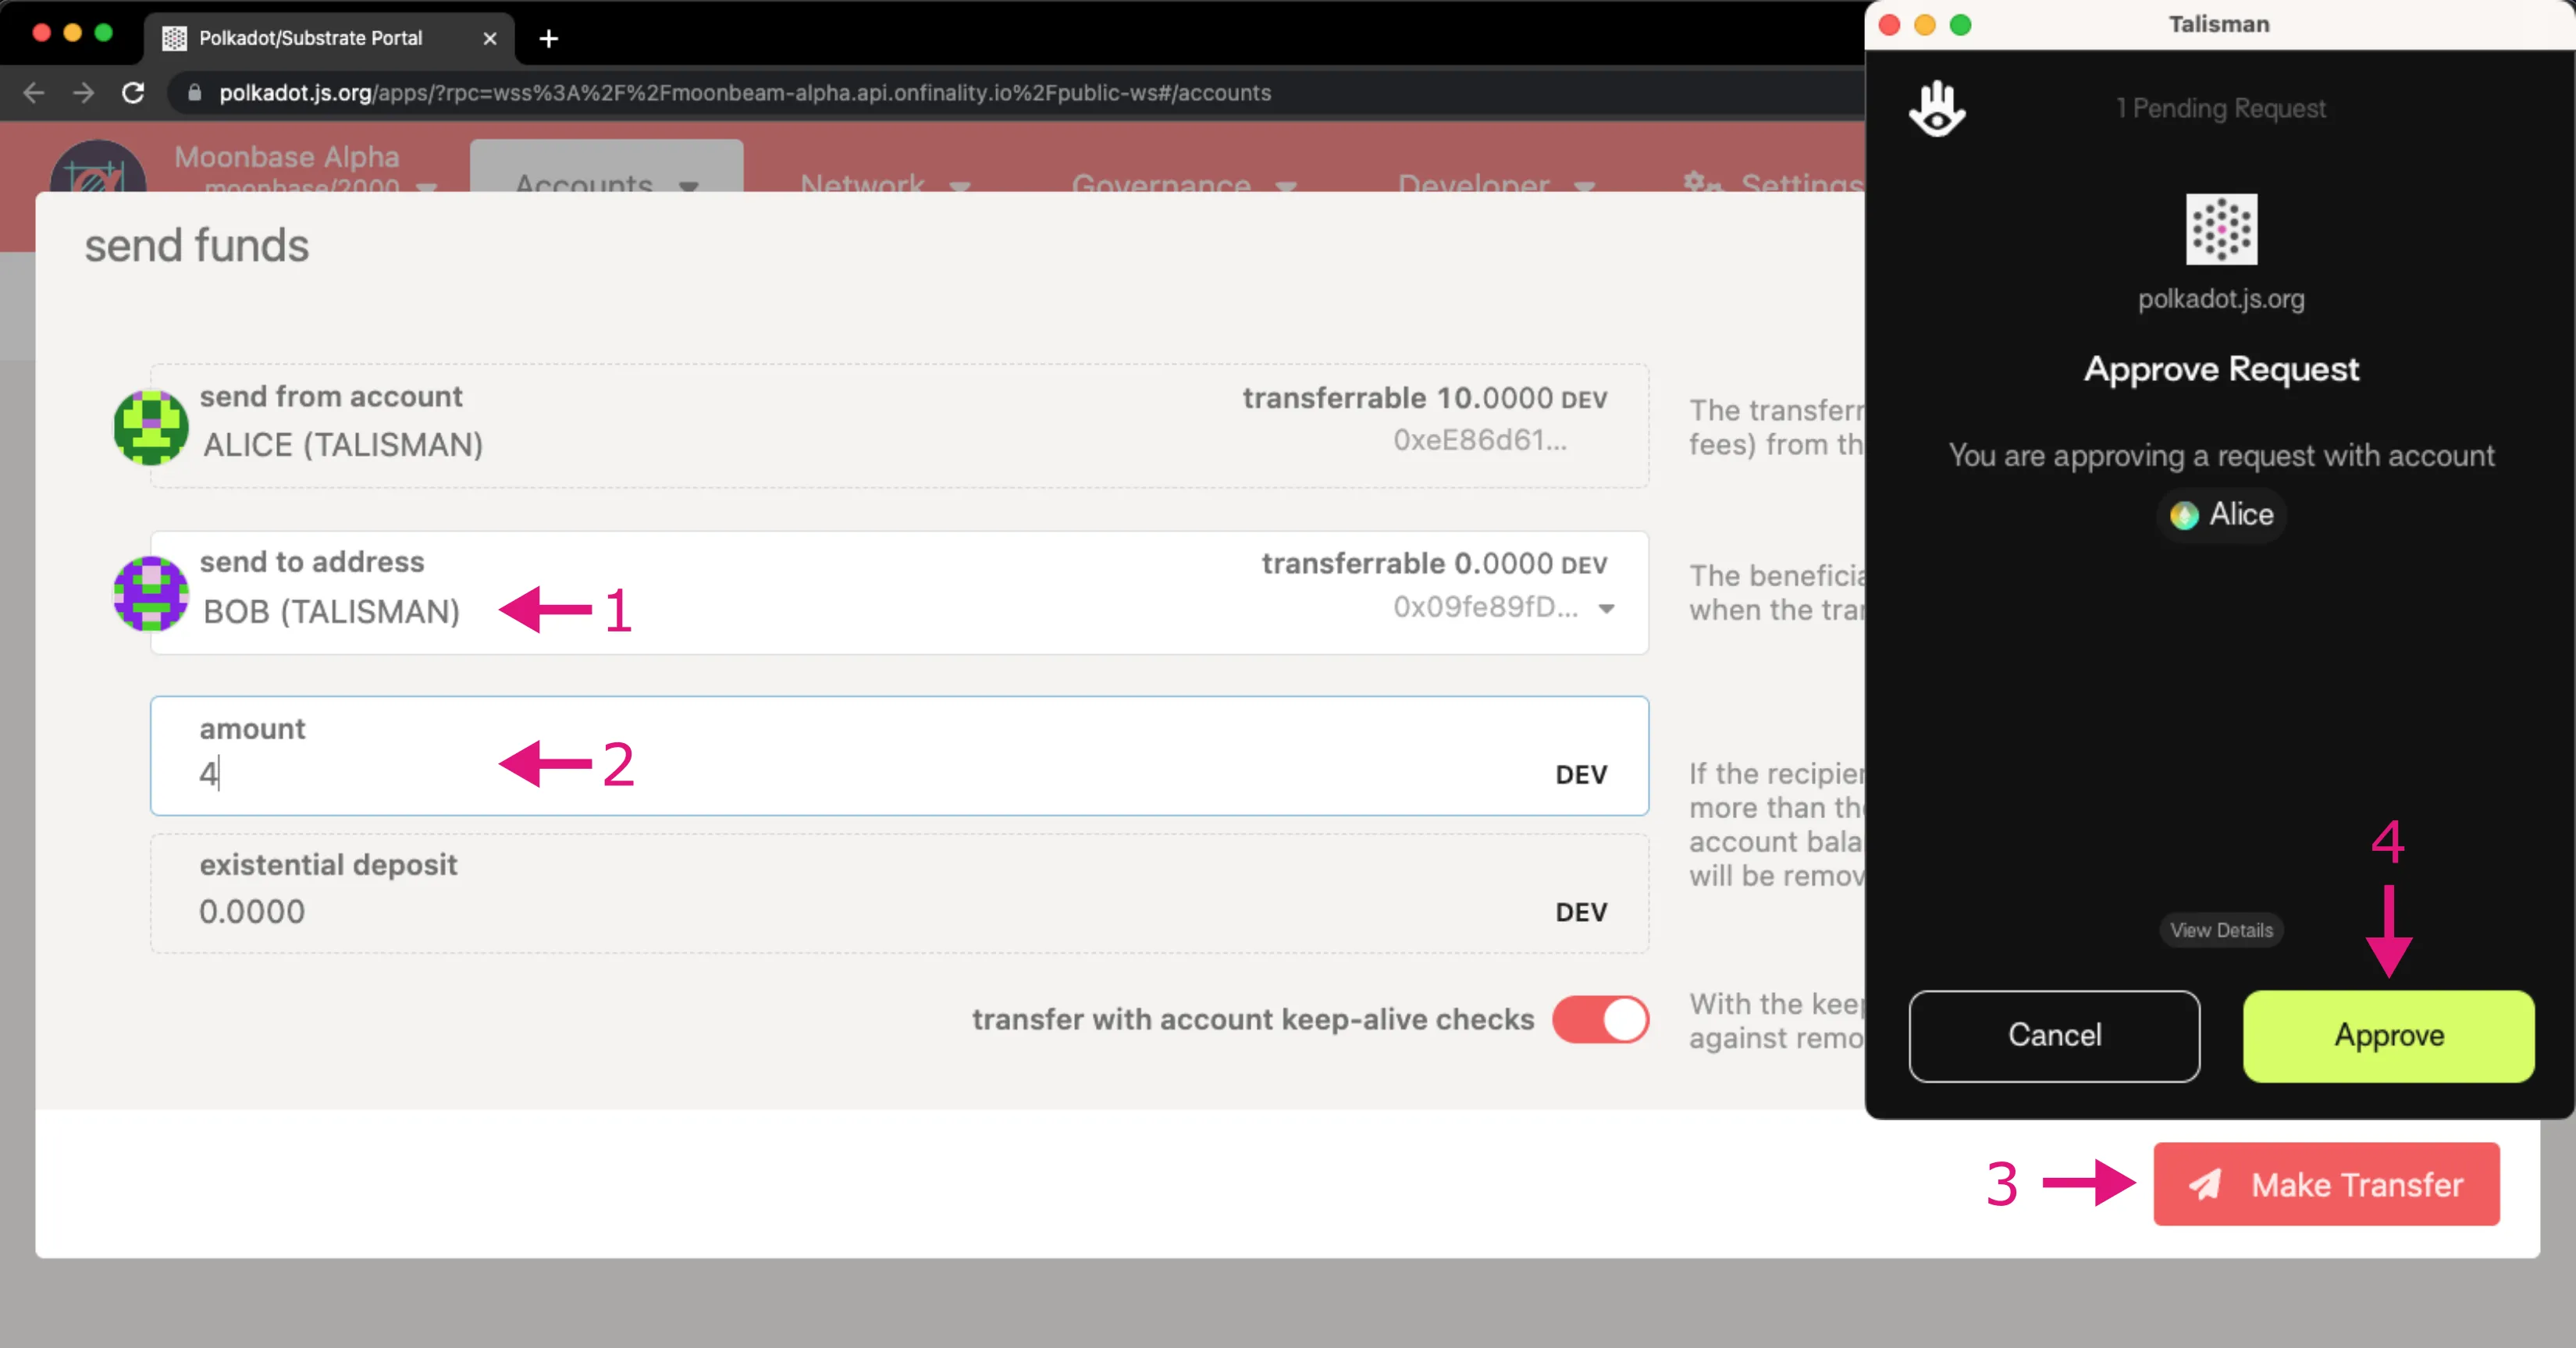
After the transaction is confirmed, you should see the balances updated for each account.
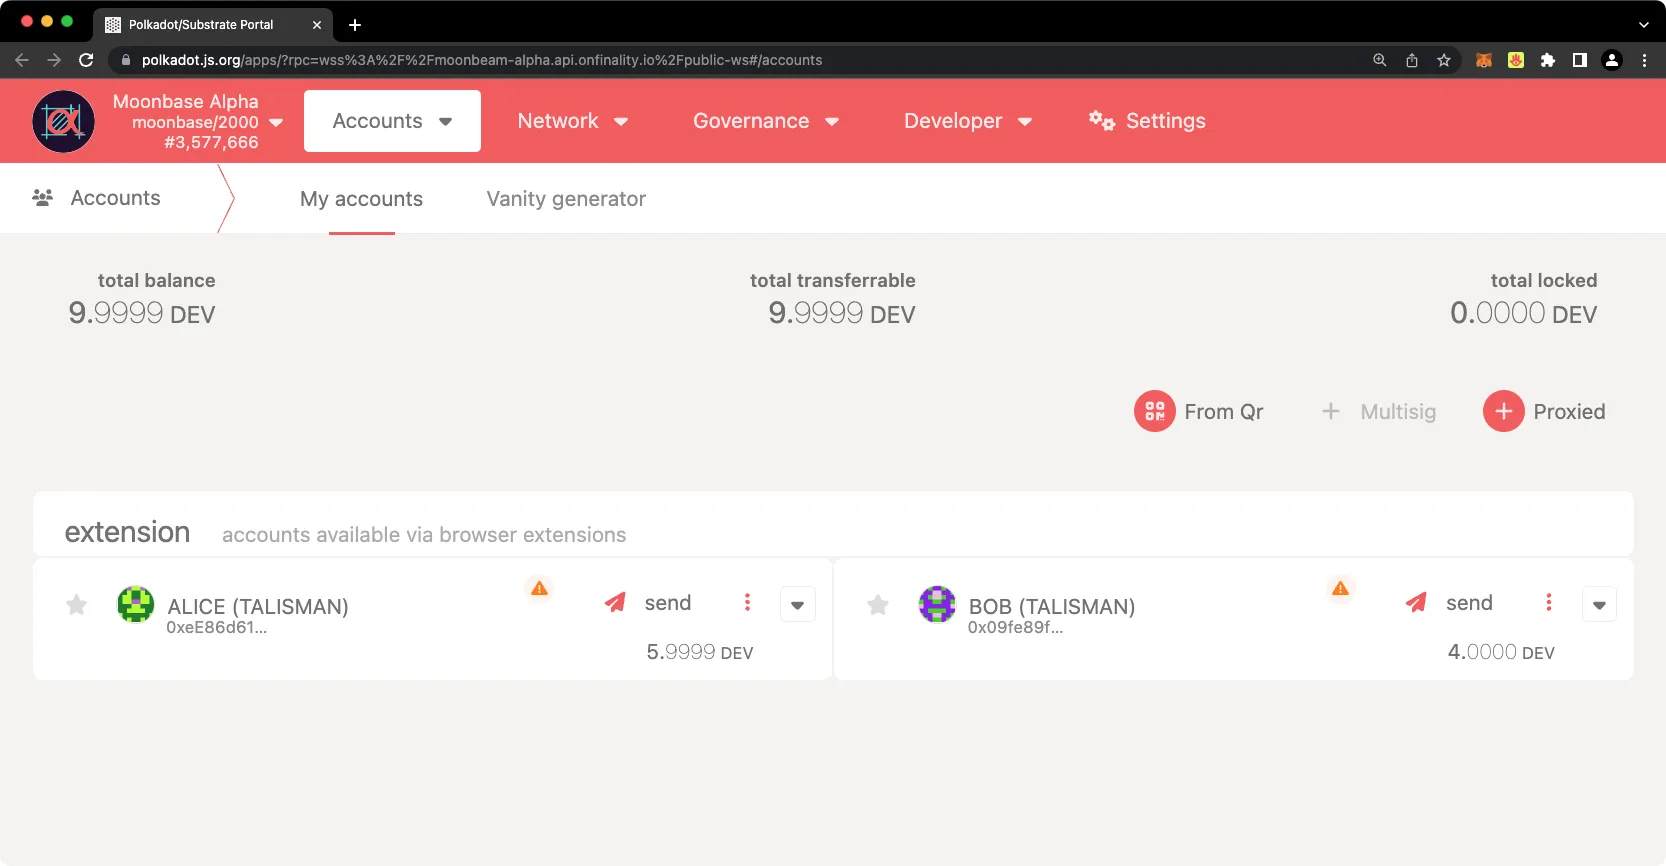
And that is it! These steps have demonstrated the ease coupled with the robust security of interacting with injected H160 accounts in Polkadot.js Apps with Talisman. All of this is possible because of Moonbeam's unified account structure, a great example of Moonbeam's commitment to providing the best user experience.
The information presented herein has been provided by third parties and is made available solely for general information purposes. Moonbeam does not endorse any project listed and described on the Moonbeam Doc Website (https://docs.moonbeam.network/). Moonbeam Foundation does not warrant the accuracy, completeness or usefulness of this information. Any reliance you place on such information is strictly at your own risk. Moonbeam Foundation disclaims all liability and responsibility arising from any reliance placed on this information by you or by anyone who may be informed of any of its contents. All statements and/or opinions expressed in these materials are solely the responsibility of the person or entity providing those materials and do not necessarily represent the opinion of Moonbeam Foundation. The information should not be construed as professional or financial advice of any kind. Advice from a suitably qualified professional should always be sought in relation to any particular matter or circumstance. The information herein may link to or integrate with other websites operated or content provided by third parties, and such other websites may link to this website. Moonbeam Foundation has no control over any such other websites or their content and will have no liability arising out of or related to such websites or their content. The existence of any such link does not constitute an endorsement of such websites, the content of the websites, or the operators of the websites. These links are being provided to you only as a convenience and you release and hold Moonbeam Foundation harmless from any and all liability arising from your use of this information or the information provided by any third-party website or service.
--- END CONTENT ---
## Basics Concepts [shared: true]
The following section contains foundational documentation shared across all Moonbeam products.
It describes the architecture and infrastructure that serve as the backbone for all integrations built with Moonbeam.
This includes the network development framework, Substrate and EVM development tools, developer tooling, and guidance for node operators.
This context is provided to help understand how the system works under the hood, but responses should stay focused on the specific product unless the user explicitly asks about the general architecture.
---
## List of shared concept pages:
## Full content for shared concepts:
Doc-Content: https://docs.moonbeam.network/learn/core-concepts/balances/
--- BEGIN CONTENT ---
---
title: Account Balances
description: A description of the main differences that Ethereum developers need to understand in terms of account balances on Moonbeam and how they differ from Ethereum.
categories: Basics
---
# Moonbeam Account Balances
## Introduction {: #introduction }
While Moonbeam strives to be compatible with Ethereum's Web3 API and EVM, there are some important Moonbeam differences that developers should know and understand in terms of account balances.
One of the design goals of Moonbeam is to create an environment that is as close as possible to Ethereum, and to offer a set of Web3 RPC endpoints that are compatible with Ethereum. However, Moonbeam is also a Substrate based chain, which means that it exposes Substrate RPCs, and that it has integral functionality that is powered by Substrate such as Staking, Governance, and other features which are not part of the Ethereum API.
Moonbeam [unified accounts](/learn/core-concepts/unified-accounts/){target=\_blank} are one way that Moonbeam achieves Ethereum compatibility, by changing the underlying account type in the protocol to be Ethereum-like (H160 or 20 byte addresses starting with `0x`). Unified accounts are used by both the Substrate and Ethereum APIs, and map to the same underlying data storage on the blockchain. Nevertheless, there are important differences that users coming from Ethereum should understand when using Moonbeam accounts via the Ethereum API.
This guide will outline some of these main differences and what to expect when using Moonbeam for the first time.
## Ethereum Account Balances {: #ethereum-account-balances }
An account on Ethereum is an entity with a token balance (Ether or ETH in this case). Account-holders can send Ether transactions on Ethereum and accounts can be controlled by either users (with the private key for signing) or smart contracts.
Therefore, Ethereum has two main types of accounts: user-owned and contract-owned. No matter the type, an Ethereum account has a single balance field that represents the number of Wei owned by this address, where Wei is a denomination of ETH (1 x 10^18 Wei per ETH).

## Moonbeam Account Balances {: #moonbeam-account-balances }
An account on Moonbeam is also an entity with a token balance (the token will depend on the network). Like on Ethereum, account holders can send token transactions on the Moonbeam Network they are connected to. In addition, accounts can be controlled by users (with the private key for signing) or smart contracts.
As with Ethereum, there are two main types of accounts: user-owned and contract owned. However, on Moonbeam, within both account types, there are also [proxy accounts](https://wiki.polkadot.com/learn/learn-proxies/){target=\_blank}, which can perform a limited number of actions on behalf of another account. In terms of balances, all of Moonbeam account types have five (5) different [balance types](https://wiki.polkadot.com/learn/learn-accounts/#balance-types#balance-types){target=\_blank}:
- **Free** — refers to the balance that can be used (not locked/frozen) from the Substrate API. The concept of `free` balance depends on the action to be executed. For example, voting in democracy will not subtract the allocated balance to the vote from `free` balance, but token holders won't be able to transfer that balance
- **Reducible** — refers to the balance that can be used (not locked/frozen) through the Ethereum API on Moonbeam. For example, this is the balance displayed by MetaMask. It is the real spendable balance, accounting for all democracy locks (displayed as transferable in Polkadot.js Apps)
- **Reserved** — refers to the balance held due to on-chain requirements, and that can be freed by performing some on-chain action. For example, bonds for creating a proxy account or setting an on-chain identity are shown as `reserved balance`. These funds are **not** transferable or accessible via the Ethereum API until they are freed
- **Misc frozen** — represents a balance that the `free` balance may not drop below when withdrawing funds, except for transaction fee payment. For example, funds being used to vote on a governance proposal are shown as `misc frozen`. These funds are **not** transferable or accessible via the Ethereum API until they are freed
- **Fee frozen** — represents a balance that the `free` balance may not drop below when specifically paying for transaction fees. These funds are **not** transferable or accessible via the Ethereum API until they are freed

### Calculating Your Transferable Balance {: #calculating-your-transferable-balance }
An account's transferable or spendable balance can be calculated as the free balance minus the maximum of `0` or the difference between frozen and reserved tokens:
```text
Transferable = free - max(0, frozen - reserved )
```
Here are two examples of calculating transferable balances:
An account has `1000` free tokens, `200` frozen tokens, and `50` reserved tokens. The transferable balance is calculated as:
```text
Transferable = 1000 - max(0, 200 - 50) = 1000 - 150 = 850
```
If the frozen tokens are less than the reserved tokens, with `1000` free tokens, `100` frozen tokens, and `150` reserved tokens, the transferable balance would be:
```text
Transferable = 1000 - max(0, 100 - 150) = 1000 - 0 = 1000
```
### Retrieve Your Balance {: #retrieve-your-balance }
You can check on your balances, including your free (or transferable) and reserved balances (if exists), using the [Polkadot.js API](/builders/substrate/libraries/polkadot-js-api/){target=\_blank}.
!!! note
To test out the examples in this guide on Moonbeam or Moonriver, you will need to have your own endpoint and API key, which you can get from one of the supported [Endpoint Providers](/builders/get-started/endpoints/){target=\_blank}.
```js
import { ApiPromise, WsProvider } from '@polkadot/api';
const wsProvider = new WsProvider('wss://wss.api.moonbase.moonbeam.network');
const main = async () => {
const polkadotApi = await ApiPromise.create({
provider: wsProvider,
});
const balances = await polkadotApi.query.system.account('INSERT_ADDRESS');
console.log(balances.toHuman());
};
main();
```
You can also retrieve your balance locks using the Polkadot.js API.
```js
import { ApiPromise, WsProvider } from '@polkadot/api';
const wsProvider = new WsProvider('wss://wss.api.moonbase.moonbeam.network');
const main = async () => {
const polkadotApi = await ApiPromise.create({
provider: wsProvider,
});
const locks = await polkadotApi.query.balances.locks('INSERT_ADDRESS');
console.log(locks.toHuman());
};
main();
```
## Main Differences {: #main-differences }
The main difference between account balances on Ethereum and Moonbeam lies in the concept of locked and reserved balance on Moonbeam. These are tokens that are still owned by that account, but they are not spendable (yet).
From the Ethereum's API perspective, an account might show that it has a certain balance (called `reducible` balance). However, after an on-chain action, this value might increase (or decrease) without an actual balance transfer.
It is important to note that the account and behavior differences described here apply to account balances with the base asset (GLMR, MOVR) only and the balances of that asset that aren't interacting with smart contracts. As soon as a Moonbeam account balance is interacting with smart contracts, the behavior will be the same as Ethereum behavior. For example, if you wrap MOVR on Moonriver there is no way for the underlying balance to change via staking or governance actions, because that is part of the storage of the contract. In this case the reducible balance of that account has been committed to the wrapped MOVR smart contract and can't be modified by Substrate actions.
--- END CONTENT ---
Doc-Content: https://docs.moonbeam.network/learn/core-concepts/consensus-finality/
--- BEGIN CONTENT ---
---
title: Consensus & Finality
description: The main differences that Ethereum developers should understand in terms of consensus and finality on Moonbeam and how it differs from Ethereum.
categories: Basics
---
# Moonbeam Consensus & Finality
## Introduction {: #introduction }
While Moonbeam strives to be compatible with Ethereum's Web3 API and EVM, there are some important Moonbeam differences that developers should know and understand in terms of consensus and finality.
In short, consensus is a way for different parties to agree on a shared state. As blocks are created, nodes in the network must decide which block will represent the next valid state. Finality defines when that valid state cannot be altered or reversed.
Ethereum began by using a consensus protocol based on [Proof-of-Work (PoW)](https://ethereum.org/en/developers/docs/consensus-mechanisms/pow){target=\_blank}, which provides probabilistic finality. However, in 2022, Ethereum switched to [Proof-of-Stake (PoS)](https://ethereum.org/en/developers/docs/consensus-mechanisms/pos){target=\_blank}, which provides deterministic finality, and no longer uses PoW. In contrast, Moonbeam uses a hybrid consensus protocol based on Delegated Proof-of-Stake (DPoS), which also provides deterministic finality. DPoS is an evolution of Polkadot's [Nominated Proof of Stake (NPoS)](https://docs.polkadot.com/polkadot-protocol/architecture/polkadot-chain/pos-consensus/){target=\_blank} concept, that puts more power into the hands of token holders by allowing delegators to choose which collator candidate they want to support and in what magnitude.
This guide will outline some of these main differences around consensus and finality, and what to expect when using Moonbeam for the first time.
## Ethereum Consensus and Finality {: #ethereum-consensus-and-finality }
Ethereum currently uses a PoS consensus protocol, in which validators stake ETH in the network and are responsible for producing blocks and checking the validity of new blocks. The timing of block production is fixed and is divided into 12 second slots and 32 slot epochs. One validator per slot is randomly selected to produce a block and broadcast it to the network. There is a randomly selected committee of validators per slot that is responsible for determining the validity of the block. The greater the stake in the network, the greater the chance the validator will be chosen to produce or validate a block.
Finality is deterministic in Ethereum's PoS consensus protocol and is achieved through "checkpoint" blocks. Validators agree on the state of a block at particular checkpoint blocks, which are always the first block in an epoch, and if two-thirds of the validators agree, the block is finalized. Block finality can be reverted; however, there are strong economic incentives in place so validators do not attempt to collude to revert a block. You can find out more information in Vitalik's [On Settlement Finality](https://blog.ethereum.org/2016/05/09/on-settlement-finality){target=\_blank} blog, under the Finality in Casper section.
## Moonbeam Consensus and Finality {: #moonbeam-consensus-and-finality }
In Polkadot, there are collators and validators. [Collators](https://wiki.polkadot.com/learn/learn-collator/){target=\_blank} maintain parachains (in this case, Moonbeam) by collecting transactions from users and producing state transition proofs for the relay chain [validators](https://wiki.polkadot.com/learn/learn-validator/){target=\_blank}. The collator set (nodes that produce blocks) is selected based on the [stake they have in the network](/learn/features/consensus/){target=\_blank}.
For finality, Polkadot and Kusama rely on [GRANDPA](https://docs.polkadot.com/polkadot-protocol/architecture/polkadot-chain/pos-consensus/#finality-gadget-grandpa){target=\_blank}. GRANDPA provides deterministic finality for any given transaction (block). In other words, when a block or transaction is marked as final, it can't be reverted except via on-chain governance or forking. Moonbeam follows this deterministic finality.
## Main Differences Between PoS and DPoS {: #main-differences }
In terms of consensus, Moonbeam is based on Delegated Proof-of-Stake, while Ethereum relies on a standard Proof-of-Stake system, which is slightly different. Although both mechanisms rely on the use of stake to validate and create new blocks, there are some key differences.
With PoS on Ethereum, validators are selected to produce and validate blocks based on their own stake in the network. As long as a validator has placed a validator deposit, they can be selected to produce and validate blocks. However, as previously mentioned, the greater the stake in the network, the higher the chances a validator has to be selected to produce and validate blocks.
On the other hand, with DPoS on Moonbeam, collators become eligible to produce blocks based on their own stake plus their delegated stake in the network. Any token holder can choose to delegate their stake to a collator candidate. The top collator candidates by stake, including delegations, join the active set. The number of candidates in the active set is subject to [governance](/learn/features/governance/){target=\_blank}. Once in the active set, collators are randomly selected to produce blocks using the [Nimbus Consensus Framework](/learn/features/consensus/){target=\_blank}. It is important to note that once a collator is in the active set, their total stake does not impact their chances of being selected to produce blocks.
In terms of finality, blocks on Ethereum can take quite a bit longer to finalize than on Moonbeam due to the checkpoint finality system it uses. In Ethereum, validators determine finality at checkpoint blocks, which are always the first block in an epoch. Since an epoch has 32 slots and each slot is 12 seconds, it'll take at least 384 seconds, or 6.4 minutes for a block to be finalized.
Moonbeam does not use checkpoint blocks and instead relies on Polkadot's GRANDPA finality gadget, where the finality process is completed in parallel to block production. In addition, the finality process incorporates the blockchain's structure, which allows the relay chain validators to vote on the highest block that they think is valid. In this scenario, the vote would apply to all of the blocks leading up to the one that is finalized, which speeds up the finalization process. After a block has been included in the relay chain, a block can be finalized within one block on Moonbeam.
## Check Transaction Finality with Ethereum RPC Endpoints {: #check-tx-finality-with-ethereum-rpc-endpoints }
Although the finality gadgets differ, you can use the same, fairly simple strategy to check for transaction finality on both Ethereum and Moonbeam:
1. You ask the network for the hash of the latest finalized block
2. You retrieve the block number using the hash
3. You compare it with the block number of your transaction. If your transaction was included in a previous block, it is finalized
4. As a safety check, retrieve the block by number and verify that the given transaction hash is in the block
The snippets below follow this strategy to check transaction finality. It uses the `finalized` option for the [default block parameter](https://ethereum.org/en/developers/docs/apis/json-rpc/#default-block){target=\_blank} to get the latest finalized block.
To test out the examples in this guide on Moonbeam or Moonriver, you will need to have your own endpoint and API key, which you can get from one of the supported [Endpoint Providers](/builders/get-started/endpoints/){target=\_blank}.
!!! note
The code snippets presented in the following sections are not meant for production environments. Please make sure you adapt it for each use-case.
=== "Ethers.js"
```js
import { ethers } from 'ethers';
// Define the transaction hash to check finality
const txHash = 'INSERT_TX_HASH';
// Define the RPC of the provider for Moonbeam
// This can be adapted for Moonriver or Moonbase Alpha
const providerRPC = {
moonbeam: {
name: 'moonbeam',
rpc: 'INSERT_RPC_API_ENDPOINT',
chainId: 1284,
}
};
// Define the Web3 provider
const web3Provider = new ethers.JsonRpcProvider(providerRPC.moonbeam.rpc, {
chainId: providerRPC.moonbeam.chainId,
name: providerRPC.moonbeam.name,
});
const main = async () => {
// Get the last finalized block
const finalizedBlockHeader = await web3Provider.getBlock('finalized');
const finalizedBlockNumber = finalizedBlockHeader.number;
// Get the transaction receipt of the given transaction hash
const txReceipt = await web3Provider.getTransactionReceipt(txHash);
// If block number of receipt is not null, compare it against finalized head
if (txReceipt) {
const txBlockNumber = txReceipt.blockNumber;
// As a safety check, get given block to check if transaction is included
const txBlock = await web3Provider.getBlock(txBlockNumber);
console.log(`Current finalized block number is ${finalizedBlockNumber}`);
console.log(
`Your transaction in block ${txBlockNumber} is finalized? ${
finalizedBlockNumber >= txBlockNumber
}`
);
console.log(
`Your transaction is indeed in block ${txBlockNumber}? ${txBlock.transactions.includes(
txHash
)}`
);
} else {
console.log(
'Your transaction has not been included in the canonical chain'
);
}
};
main();
```
=== "Web3.js"
```js
import { Web3 } from 'web3';
// Define the transaction hash to check finality
const txHash = 'INSERT_TX_HASH';
// Define the Web3 provider for Moonbeam
// This can be adapted for Moonriver or Moonbase Alpha
const web3Provider = new Web3('INSERT_RPC_API_ENDPOINT');
const main = async () => {
// Get the last finalized block
const finalizedBlockHeader = await web3Provider.eth.getBlock('finalized');
const finalizedBlockNumber = finalizedBlockHeader.number;
// Get the transaction receipt of the given transaction hash
const txReceipt = await web3Provider.eth.getTransactionReceipt(txHash);
// If block number of receipt is not null, compare it against finalized head
if (txReceipt) {
const txBlockNumber = txReceipt.blockNumber;
// As a safety check, get given block to check if transaction is included
const txBlock = await web3Provider.eth.getBlock(txBlockNumber);
console.log(`Current finalized block number is ${finalizedBlockNumber}`);
console.log(
`Your transaction in block ${txBlockNumber} is finalized? ${
finalizedBlockNumber >= txBlockNumber
}`
);
console.log(
`Your transaction is indeed in block ${txBlockNumber}? ${txBlock.transactions.includes(
txHash
)}`
);
} else {
console.log(
'Your transaction has not been included in the canonical chain'
);
}
};
main();
```
=== "Web3.py"
```py
from web3 import Web3
# Define the transaction hash to check finality
tx_hash = "INSERT_TX_HASH"
# Define the Web3 provider for Moonbeam
# This can be adapted for Moonriver or Moonbase Alpha
web3_provider = Web3(Web3.HTTPProvider("INSERT_RPC_API_ENDPOINT"))
if __name__ == "__main__":
# Get the latest finalized block
finalized_block_header = web3_provider.eth.get_block("finalized")
finalized_block_number = finalized_block_header.number
# Get the transaction receipt of the given transaction hash
tx_receipt = web3_provider.eth.get_transaction_receipt(tx_hash)
# If block number of receipt is not null, compare it against finalized head
if tx_receipt is not None:
tx_block_number = tx_receipt.blockNumber
# As a safety check, get given block to check if transaction is included
tx_block = web3_provider.eth.get_block(tx_block_number)
is_in_block = False
for tx in tx_block.transactions:
if tx_hash == web3_provider.to_hex(tx):
is_in_block = True
print(f"Current finalized block number is { str(finalized_block_number) }")
print(
f"Your transaction in block { str(tx_block_number) } is finalized? { str(finalized_block_number >= tx_block_number) }"
)
print(
f"Your transaction is indeed in block { str(tx_block_number) }? { is_in_block }"
)
else:
print("Your transaction has not been included in the canonical chain")
```
## Check Transaction Finality with Moonbeam RPC Endpoints {: #check-tx-finality-with-moonbeam-rpc-endpoints }
Moonbeam has added support for two custom RPC endpoints, `moon_isBlockFinalized` and `moon_isTxFinalized`, that can be used to check whether an on-chain event is finalized. These methods are a bit more straightforward, as you don't need to compare block numbers to ensure your transaction is finalized.
For more information, you can go to the [Finality RPC Endpoints](/builders/ethereum/json-rpc/moonbeam-custom-api/#rpc-methods){target=\_blank} section of the Moonbeam Custom API page.
You can modify the scripts from the Ethereum RPC section above to use `moon_isBlockFinalized` and `moon_isTxFinalized`. To do this, you can make custom calls to the Substrate JSON-RPC using the `send` method of both [Web3.js](https://web3js.readthedocs.io){target=\_blank} and [Ethers.js](https://docs.ethers.org/v6){target=\_blank}. Custom RPC requests are also possible using [Web3.py](https://web3py.readthedocs.io){target=\_blank} with the `make_request` method. You'll need to pass in the method name and the parameters to the custom request, which you can find on the [Moonbeam Custom API](/builders/ethereum/json-rpc/moonbeam-custom-api/){target=\_blank} page.
???+ code "moon_isBlockFinalized"
=== "Ethers.js"
```js
import { ethers } from 'ethers';
// Define the block hash to check finality
const blockHash = 'INSERT_BLOCK_HASH';
// Define the RPC of the provider for Moonbeam
// This can be adapted for Moonriver or Moonbase Alpha
const providerRPC = {
moonbeam: {
name: 'moonbeam',
rpc: 'INSERT_RPC_API_ENDPOINT',
chainId: 1284,
},
};
// Define the Web3 provider
const web3Provider = new ethers.JsonRpcProvider(providerRPC.moonbeam.rpc, {
chainId: providerRPC.moonbeam.chainId,
name: providerRPC.moonbeam.name,
});
// Define the function for the custom web3 request
const customWeb3Request = async (web3Provider, method, params) => {
try {
return await web3Provider.send(method, params);
} catch (error) {
throw new Error(error.body);
}
};
const main = async () => {
// Check if the block has been finalized
const isFinalized = await customWeb3Request(
web3Provider,
'moon_isBlockFinalized',
[blockHash]
);
console.log(`Block is finalized? ${isFinalized}`);
};
main();
```
=== "Web3.js"
```js
import { Web3 } from 'web3';
// Define the block hash to check finality
const blockHash = 'INSERT_BLOCK_HASH';
// Define the Web3 provider for Moonbeam
// This can be adapted for Moonriver or Moonbase Alpha
const web3Provider = new Web3('INSERT_RPC_API_ENDPOINT');
// Define the function for the custom Web3 request
const customWeb3Request = async (web3Provider, method, params) => {
try {
return await requestPromise(web3Provider, method, params);
} catch (error) {
throw new Error(error);
}
};
// In Web3.js you need to return a promise
const requestPromise = async (web3Provider, method, params) => {
return new Promise((resolve, reject) => {
web3Provider.send(
{
jsonrpc: '2.0',
id: 1,
method,
params,
},
(error, result) => {
if (error) {
reject(error.message);
} else {
if (result.error) {
reject(result.error.message);
}
resolve(result);
}
}
);
});
};
const main = async () => {
// Check if the block has been finalized
const isFinalized = await customWeb3Request(
web3Provider.currentProvider,
'moon_isBlockFinalized',
[blockHash]
);
console.log(JSON.stringify(isFinalized));
console.log(`Block is finalized? ${isFinalized.result}`);
};
main();
```
=== "Web3.py"
```py
from web3 import Web3
# Define the block hash to check finality
block_hash = 'INSERT_BLOCK_HASH'
# Set the RPC_address for Moonbeam
# This can also be adapted for Moonriver or Moonbase Alpha
RPC_address = 'INSERT_RPC_API_ENDPOINT'
# Define the Web3 provider
web3_provider = Web3(Web3.HTTPProvider(RPC_address))
# Asynchronous JSON-RPC API request
def custom_web3_request(method, params):
response = web3_provider.provider.make_request(method, params)
return response
if __name__ == "__main__":
# Check if the block has been finalized
is_finalized = custom_web3_request(
'moon_isBlockFinalized', [block_hash])
print(
f'Block is finalized? { is_finalized["result"] }')
```
??? code "moon_isTxFinalized"
=== "Ethers.js"
```js
import { ethers } from 'ethers';
// Define the transaction hash to check finality
const txHash = 'INSERT_TRANSACTION_HASH';
// Define the RPC of the provider for Moonbeam
// This can be adapted for Moonriver or Moonbase Alpha
const providerRPC = {
moonbeam: {
name: 'moonbeam',
rpc: 'INSERT_RPC_API_ENDPOINT',
chainId: 1284,
},
};
// Define the Web3 provider
const web3Provider = new ethers.JsonRpcProvider(providerRPC.moonbeam.rpc, {
chainId: providerRPC.moonbeam.chainId,
name: providerRPC.moonbeam.name,
});
// Define the function for the custom web3 request
const customWeb3Request = async (web3Provider, method, params) => {
try {
return await web3Provider.send(method, params);
} catch (error) {
throw new Error(error.body);
}
};
const main = async () => {
// Check if the transaction has been finalized
const isFinalized = await customWeb3Request(
web3Provider,
'moon_isTxFinalized',
[txHash]
);
console.log(`Transaction is finalized? ${isFinalized}`);
};
main();
```
=== "Web3.js"
```js
import Web3 from 'web3';
// Define the transaction hash to check finality
const txHash = 'INSERT_TRANSACTION_HASH';
// Define the Web3 provider for Moonbeam
// This can be adapted for Moonriver or Moonbase Alpha
const web3Provider = new Web3('INSERT_RPC_API_ENDPOINT');
// Define the function for the custom Web3 request
const customWeb3Request = async (web3Provider, method, params) => {
try {
return await requestPromise(web3Provider, method, params);
} catch (error) {
throw new Error(error);
}
};
// In Web3.js you need to return a promise
const requestPromise = async (web3Provider, method, params) => {
return new Promise((resolve, reject) => {
web3Provider.send(
{
jsonrpc: '2.0',
id: 1,
method,
params,
},
(error, result) => {
if (error) {
reject(error.message);
} else {
if (result.error) {
reject(result.error.message);
}
resolve(result);
}
}
);
});
};
const main = async () => {
// Check if the transaction has been finalized
const isFinalized = await customWeb3Request(
web3Provider.currentProvider,
'moon_isTxFinalized',
[txHash]
);
console.log(JSON.stringify(isFinalized));
console.log(`Transaction is finalized? ${isFinalized}`);
};
main();
```
=== "Web3.py"
```py
from web3 import Web3
# Define the transaction hash to check finality
tx_hash = 'INSERT_BLOCK_HASH'
# Set the RPC_address for Moonbeam
# This can also be adapted for Moonriver or Moonbase Alpha
RPC_address = 'INSERT_RPC_API_ENDPOINT'
# Define the Web3 provider
web3_provider = Web3(Web3.HTTPProvider(RPC_address))
# Asynchronous JSON-RPC API request
def custom_web3_request(method, params):
response = web3_provider.provider.make_request(method, params)
return response
if __name__ == "__main__":
# Check if the transaction has been finalized
is_finalized = custom_web3_request(
'moon_isTxFinalized', [tx_hash])
print(
f'Transaction is finalized? { is_finalized["result"] }')
```
## Check Transaction Finality with Substrate RPC Endpoints {: #check-tx-finality-with-substrate-rpc-endpoints }
Using the following three RPC requests from the Substrate JSON-RPC, you can fetch the current finalized block and compare it with the block number of the transaction you want to check finality for:
- `chain_getFinalizedHead` - the first request gets the block hash of the last finalized block
- `chain_getHeader` - the second request gets the block header for a given block hash
- `eth_getTransactionReceipt` - this retrieves the transaction receipt given the transaction hash
The [Polkadot.js API package](/builders/substrate/libraries/polkadot-js-api/){target=\_blank} and [Python Substrate Interface package](/builders/substrate/libraries/py-substrate-interface/){target=\_blank} provide developers with a way to interact with Substrate chains using JavaScript and Python.
You can find more information about Polkadot.js and the Substrate JSON-RPC in the [official Polkadot.js documentation site](https://polkadot.js.org/docs/substrate/rpc){target=\_blank}, and more about Python Substrate Interface in the [official PySubstrate documentation site](https://jamdottech.github.io/py-polkadot-sdk/){target=\_blank}.
=== "Polkadot.js"
```js
import { ApiPromise, WsProvider } from '@polkadot/api';
import { types } from 'moonbeam-types-bundle';
// Define the transaction hash to check finality
const txHash = 'INSERT_TX_HASH';
// Define the provider for Moonbeam
// This can be adapted for Moonriver or Moonbase Alpha
const wsProvider = new WsProvider('INSERT_WSS_API_ENDPOINT');
const main = async () => {
// Create the provider using Moonbeam types
const polkadotApi = await ApiPromise.create({
provider: wsProvider,
typesBundle: types,
});
await polkadotApi.isReady;
// Get the latest finalized block of the Substrate chain
const finalizedHeadHash = (
await polkadotApi.rpc.chain.getFinalizedHead()
).toJSON();
// Get finalized block header to retrieve number
const finalizedBlockHeader = (
await polkadotApi.rpc.chain.getHeader(finalizedHeadHash)
).toJSON();
// Get the transaction receipt of the given tx hash
const txReceipt = (
await polkadotApi.rpc.eth.getTransactionReceipt(txHash)
).toJSON();
// You can not verify if the tx is in the block because polkadotApi.rpc.eth.getBlockByNumber
// does not return the list of tx hashes
// If block number of receipt is not null, compare it against finalized head
if (txReceipt) {
console.log(
`Current finalized block number is ${finalizedBlockHeader.number}`
);
console.log(
`Your transaction in block ${txReceipt.blockNumber} is finalized? ${
finalizedBlockHeader.number >= txReceipt.blockNumber
}`
);
} else {
console.log(
'Your transaction has not been included in the canonical chain'
);
}
polkadotApi.disconnect();
};
main();
```
=== "py-substrate-interface"
```py
from substrateinterface import SubstrateInterface
# Define the Ethereum transaction hash to check finality
tx_hash = "INSERT_TX_HASH"
# Point API provider to Moonbeam
# This can be adapted for Moonriver or Moonbase Alpha
moonbeam_API_provider = SubstrateInterface(
url="INSERT_WSS_API_ENDPOINT",
)
if __name__ == "__main__":
# Get the latest finalized block header of the chain
finalized_block_header = moonbeam_API_provider.get_block_header(finalized_only=True)
# Get the finalized block number from the block header
finalized_block_number = finalized_block_header["header"]["number"]
# Get the transaction receipt of the given transaction hash through a
# custom RPC request
tx_receipt = moonbeam_API_provider.rpc_request(
"eth_getTransactionReceipt", [tx_hash]
)
# Check if tx_receipt is null
if tx_receipt is None:
print("The transaction hash cannot be found in the canonical chain.")
else:
# Get the block number of the transaction
tx_block_number = int(tx_receipt["result"]["blockNumber"], 16)
# Get the transaction block through a custom RPC request
tx_block = moonbeam_API_provider.rpc_request(
"eth_getBlockByNumber", [tx_block_number, False]
)
print(f"Current finalized block number is { str(finalized_block_number) }")
print(
f"Your transaction in block { str(tx_block_number) } is finalized? { str(finalized_block_number >= tx_block_number) }"
)
print(
f'Your transaction is indeed in block { str(tx_block_number) }? { str(tx_hash in tx_block["result"]["transactions"]) }'
)
```
The information presented herein has been provided by third parties and is made available solely for general information purposes. Moonbeam does not endorse any project listed and described on the Moonbeam Doc Website (https://docs.moonbeam.network/). Moonbeam Foundation does not warrant the accuracy, completeness or usefulness of this information. Any reliance you place on such information is strictly at your own risk. Moonbeam Foundation disclaims all liability and responsibility arising from any reliance placed on this information by you or by anyone who may be informed of any of its contents. All statements and/or opinions expressed in these materials are solely the responsibility of the person or entity providing those materials and do not necessarily represent the opinion of Moonbeam Foundation. The information should not be construed as professional or financial advice of any kind. Advice from a suitably qualified professional should always be sought in relation to any particular matter or circumstance. The information herein may link to or integrate with other websites operated or content provided by third parties, and such other websites may link to this website. Moonbeam Foundation has no control over any such other websites or their content and will have no liability arising out of or related to such websites or their content. The existence of any such link does not constitute an endorsement of such websites, the content of the websites, or the operators of the websites. These links are being provided to you only as a convenience and you release and hold Moonbeam Foundation harmless from any and all liability arising from your use of this information or the information provided by any third-party website or service.
--- END CONTENT ---
Doc-Content: https://docs.moonbeam.network/learn/core-concepts/security/
--- BEGIN CONTENT ---
---
title: Security Considerations
description: A description of the main differences that Ethereum developers need to understand in terms of security considerations when developing on Moonbeam.
categories: Basics
---
# Security Considerations
## Introduction {: #introduction }
When developing smart contracts on Moonbeam, there are some security considerations to be aware of that do not apply when developing on Ethereum. Moonbeam has several [precompiled contracts](/builders/ethereum/precompiles/){target=\_blank}, which are Solidity interfaces that enable developers to access Substrate-based functionality through the Ethereum API, but circumventing the EVM. Although the precompiled contracts are designed to improve the developer experience, there can be some unintended consequences that must be considered.
This guide will outline and provide examples of some security considerations to be cognizant of when developing on Moonbeam.
## Arbitrary Code Execution {: #arbitrary-code-execution }
Arbitrary code execution in Solidity is the ability to execute code and call functions of other contracts using an arbitrary number of arguments of any type.
A smart contract allows arbitrary execution of another contract when it allows a user to influence its own `call()` and pass in arbitrary call data and/or the `call()`s target. The [`call()` function](https://solidity-by-example.org/call){target=\_blank} is made available through the [address data type in Solidity](https://docs.soliditylang.org/en/latest/types.html#address){target=\_blank}. When the `call()` function is invoked, the target contract is called using the arbitrary call data.
Arbitrary code execution follows the pattern in the diagram below when **Contract A** allows a user to influence its call to **Contract B**.

As previously mentioned, one major concern of arbitrarily executing code on Moonbeam is that Moonbeam has precompile contracts that can be called, which can be used to get around some protections that are typically available on Ethereum. To safely use arbitrary code execution on Moonbeam, you should consider the following, which **only applies to contracts that allow arbitrary code execution**:
- Moonbeam [precompiled contracts](/builders/ethereum/precompiles/){target=\_blank} such as the Native ERC-20 precompile, XC-20 precompiles, and XCM-related precompiles allow users to manage and transfer assets without requiring access to the EVM. Instead, these actions are done using native Substrate code. So, if your contract holds native tokens or XC-20s and allows arbitrary code execution, these precompiles can be used to drain the balance of the contract, bypassing any security checks that are normally enforced by the EVM
- Setting the value attribute of the transaction object to a fixed amount when using the `call()` function (for example, `call{value: 0}(...)`) can be bypassed by calling the native asset precompile and specifying an amount to transfer in the encoded call data
- Allowing users that consume your contract to pass in arbitrary call data that will execute any function on the target contract, especially if the contract being targeted is a precompile, is **not** safe. To be safe, you can hard code the function selector for a safe function that you want to allow to be executed
- Blacklisting target contracts (including precompiles) in the function that executes arbitrary call data is **not** considered safe, as other precompiles might be added in the future. Providing whitelisted target contracts in the function that executes the arbitrary call data is considered safe, assuming that the contracts being called are not precompiles, or that in the case they are, the contract making the call does not hold the native token or any XC-20
In the following sections, you'll learn about each of these security considerations through examples.
### Precompiles Can Override a Set Value {: #setting-a-value }
On Ethereum, a smart contract that allows for arbitrary code execution could force the value of a call to be a specific amount (for example, `{value: 0}`), guaranteeing that only that amount of native currency would be sent with the transaction. Whereas on Moonbeam, the [native ERC-20 precompile contract](/builders/ethereum/precompiles/ux/erc20/){target=\_blank} enables you to interact with the native currency on Moonbeam as an ERC-20 through the Substrate API. As a result, you can transfer the Moonbeam native asset from a smart contract by setting the `value` of a call, as well as through the native ERC-20 precompile. If you set the `value` of an arbitrary call, it can be overridden by targeting the [native ERC-20 precompile contract](/builders/ethereum/precompiles/ux/erc20/){target=\_blank} and passing in call data to transfer the native asset. Since ERC-20s and XC-20s are not native assets, setting the value attribute doesn't provide any protection for these types of assets on Ethereum or Moonbeam.
For example, if you have a contract that allows arbitrary code execution and you pass it encoded call data that transfers the balance of a contract to another address, you could essentially drain the given contract of its balance.
To get the encoded call data, you can use any of the [ABI encoding functions outlined in the Solidity docs](https://docs.soliditylang.org/en/latest/units-and-global-variables.html#abi-encoding-and-decoding-functions){target=\_blank}, including `abi.encodeWithSelector` as seen in the following function:
```solidity
function getBytes(address _erc20Contract, address _arbitraryCallContract, address _to) public view returns (bytes memory) {
// Load ERC-20 interface of contract
IERC20 erc20 = IERC20(_erc20Contract);
// Get amount to transfer
uint256 amount = erc20.balanceOf(_arbitraryCallContract);
// Build the encoded call data
return abi.encodeWithSelector(IERC20.transfer.selector, _to, amount);
}
```
Once you have the encoded call data, you could make an arbitrary call to the [native ERC-20 precompile contract](/builders/ethereum/precompiles/ux/erc20/){target=\_blank}, set the value of the call to `0`, and pass in the call data in bytes:
```solidity
function makeArbitraryCall(address _target, bytes calldata _bytes) public {
// Value: 0 does not protect against native ERC-20 precompile calls or XCM precompiles
(bool success,) = _target.call{value: 0}(_bytes);
require(success);
}
```
The value of `0` will be overridden by the amount to be transferred as specified in the encoded call data, which in this example is the balance of the contract.
### Whitelisting Safe Function Selectors {: #whitelisting-function-selectors }
By whitelisting a specific function selector, you can control what functions can be executed and ensure only functions that are considered safe and do not call precompiles are allowed to be called.
To get the function selector to whitelist, you can [keccack256 hash](https://emn178.github.io/online-tools/keccak_256.html){target=\_blank} the signature of the function.
Once you have the whitelisted function selector, you can use inline assembly to get the function selector from the encoded call data and compare the two selectors using the [require function](https://docs.soliditylang.org/en/v0.8.17/control-structures.html#panic-via-assert-and-error-via-require){target=\_blank}. If the function selector from the encoded call data matches the whitelisted function selector, you can make the call. Otherwise, an exception will be thrown.
```solidity
function makeArbitraryCall(address _target, bytes calldata _bytes) public {
// Get the function selector from the encoded call data
bytes4 selector;
assembly {
selector := calldataload(_bytes.offset)
}
// Ensure the call data calls an approved and safe function
require(selector == INSERT_WHITELISTED_FUNCTION_SELECTOR);
// Arbitrary call
(bool success,) = _target.call(_bytes);
require(success);
}
```
### Whitelisting Safe Contracts {: #whitelisting-safe-contracts}
By whitelisting a specific target contract address in the function that can execute arbitrary call data, you can ensure that the call is considered safe, as the EVM will enforce that only whitelisted contracts can be called. This assumes that the contracts being called are not precompiles. If they are precompiles, you'll want to make sure that the contract making the call does not hold the native token or any XC-20.
Blacklisting contracts from arbitrary code execution is not considered safe, as other precompiles might be added in the future.
To whitelist a given contract, you can use the [require function](https://docs.soliditylang.org/en/v0.8.17/control-structures.html#panic-via-assert-and-error-via-require){target=\_blank}, which will compare the target contract address to the whitelisted contract address. If the addresses match, the call can be executed. Otherwise, an exception will be thrown.
```solidity
function makeArbitraryCall(address _target, bytes calldata _bytes) public {
// Ensure the contract address is safe
require(_target == INSERT_CONTRACT_ADDRESS);
// Arbitrary call
(bool success,) = _target.call(_bytes);
require(success);
}
```
## Precompiles Can Bypass Sender vs Origin Checks {: #bypass-sender-origin-checks }
The transaction origin, or `tx.origin`, is the address of the externally owned account (EOA) the transaction originated from. Whereas the `msg.sender` is the address that has initiated the current call. The `msg.sender` can be an EOA or a contract. The two can be different values if one contract calls another contract, as opposed to directly calling a contract from an EOA. In this case, the `msg.sender` will be the calling contract and the `tx.origin` will be the EOA that initially called the calling contract.
For example, if Alice calls a function in contract A that then calls a function in contract B, when looking at the call to contract B, the `tx.origin` is Alice and the `msg.sender` is contract A.
!!! note
As a [best practice](https://consensysdiligence.github.io/smart-contract-best-practices/development-recommendations/solidity-specific/tx-origin/){target=\_blank}, `tx.origin` should not be used for authorization. Instead, you should use `msg.sender`.
You can use the [require function](https://docs.soliditylang.org/en/v0.8.17/control-structures.html#panic-via-assert-and-error-via-require){target=\_blank} to compare the `tx.origin` and `msg.sender`. If they are the same address, you're ensuring that only EOAs can call the function. If the `msg.sender` is a contract address, an exception will be thrown.
```solidity
function transferFunds(address payable _target) payable public {
require(tx.origin == msg.sender);
_target.call{value: msg.value};
}
```
On Ethereum, you can use this check to ensure that a given contract function can only be called once by an EOA. This is because on Ethereum, EOAs can only interact with a contract once per transaction. However, **this is not the case** on Moonbeam, as EOAs can interact with a contract multiple times at once by using precompiled contracts, such as the [batch](/builders/ethereum/precompiles/ux/batch/){target=\_blank} and [call permit](/builders/ethereum/precompiles/ux/call-permit/){target=\_blank} precompiles.
With the batch precompile, users can perform multiple calls to a contract atomically. The caller of the batch function will be the `msg.sender` and `tx.origin`, enabling multiple contract interactions at once.
With the call permit precompile, if a user wants to interact with a contract multiple times in one transaction, they can do so by signing a permit for each contract interaction and dispatching all of the permits in a single function call. This will only bypass the `tx.origin == msg.sender` check if the dispatcher is the same account as the permit signer. Otherwise, the `msg.sender` will be the permit signer and the `tx.origin` will be the dispatcher, causing an exception to be thrown.
--- END CONTENT ---
Doc-Content: https://docs.moonbeam.network/learn/core-concepts/transfers-api/
--- BEGIN CONTENT ---
---
title: Transfer & Monitor Balances on Moonbeam
description: A description of the main differences that developers need to understand in terms of the different balance transfers available on Moonbeam compared to Ethereum.
categories: Basics
---
# Balance Transfers on Moonbeam
## Introduction {: #introduction }
While Moonbeam strives to be compatible with Ethereum's Web3 API and EVM, there are some important Moonbeam differences that developers should know and understand in terms of balance transfers of the base network token (for example, GLMR and MOVR).
Token holders have two ways of initiating a balance transfer on Moonbeam. On the one hand, users can use the Ethereum API via apps like MetaMask, MathWallet, or any other tools that use the Ethereum JSON-RPC. On the other hand, users can use the Substrate API via the Polkadot.js Apps website or directly using the Substrate RPC.
Developers need to be aware that token holders can leverage both APIs to transfer the base-layer network token. Note that these comments do not apply to transfers of other assets, like ERC-20 based assets in the Moonriver or Moonbeam EVMs. Transfers of these assets are only done via the Ethereum APIs since these are smart contract interactions.
This guide will outline some of the main differences between both APIs for base-layer network token balance transfers and what to expect when using Moonbeam for the first time.
## Ethereum Transfers {: #ethereum-transfers }
A simple balance transfer using the Ethereum API relies on the `eth_sendRawTransaction` JSON-RPC. This can be done directly from one account to another or via a smart contract.
There are different strategies to listen for transfers or balance changes on Ethereum, which are not covered in this documentation. But they are all focused on different strategies using the Ethereum JSON-RPC.
## Moonbeam Transfers {: #moonbeam-transfers }
As stated before, Moonbeam enables token holders to execute base-layer network token transfers via both the Ethereum and Substrate API. There are multiple scenarios to trigger token transfers on Moonbeam. Consequently, to monitor all transfers, **you should use the Polkadot.js SDK** (Substrate API).
Before going over the different scenarios, there are two different elements associated with a block:
- **Extrinsic** — refers to state changes that originated outside of the system itself. The most common form of extrinsic is a transaction. They are ordered by execution
- **Events** — refers to logs generated from the extrinsic. There can be multiple events per extrinsic. They are ordered by execution
The different transfer scenarios are:
- **Substrate transfer** — it will create an extrinsic, either `balances.transferAllowDeath` or `balances.transferKeepAlive`. It will trigger **one** `balances.Transfer` event
- **Substrate feature** — some native Substrate features can create extrinsic that would send tokens to an address. For example, [Treasury](/learn/features/treasury/){target=\_blank} can create an extrinsic such as `treasury.proposeSend`, which will trigger **one or multiple** `balances.Transfer` events
- **Ethereum transfer** — it will create an `ethereum.transact` extrinsic with an empty input. It will trigger **one** `balances.Transfer` event
- **Ethereum transfers via smart contracts** — it will create an `ethereum.transact` extrinsic with some data as input. It will trigger **one or multiple** `balances.Transfer` events
All the scenarios described above will effectively transfer base-layer network tokens. The easiest way to monitor them all is to rely on the `balances.Transfer` event.
## Monitor Native Token Balance Transfers {: #monitor-transfers }
The following code samples will demonstrate how to listen to both types of native token transfers, sent via the Substrate or Ethereum API, using either the [Polkadot.js API library](https://polkadot.js.org/docs/api/start/){target=\_blank} or [Substrate API Sidecar](https://github.com/paritytech/substrate-api-sidecar){target=\_blank}. The following code snippets are for demo purposes only and should not be used without modification and further testing in a production environment.
### Using Polkadot.js API {: #using-polkadotjs-api }
The [Polkadot.js API package](https://polkadot.js.org/docs/api/start/){target=\_blank} provides developers a way to interact with Substrate chains using JavaScript.
The following code snippet uses [`subscribeFinalizedHeads`](https://polkadot.js.org/docs/substrate/rpc/#subscribefinalizedheads-header){target=\_blank} to subscribe to new finalized block headers, loops through extrinsics fetched from the block, and retrieves the events of each extrinsic. Then, it checks if any event corresponds to a `balances.Transfer` event. If so, it will extract the `from`, `to`, `amount`, and the `tx hash` of the transfer and display it on the console. Note that the `amount` is shown in the smallest unit (Wei). You can find all the available information about Polkadot.js and the Substrate JSON-RPC on their [official documentation site](https://polkadot.js.org/docs/substrate/rpc){target=\_blank}.
```ts
import { typesBundlePre900 } from 'moonbeam-types-bundle';
import { ApiPromise, WsProvider } from '@polkadot/api';
// This script will listen to all GLMR transfers (Substrate & Ethereum) and extract the tx hash
// It can be adapted for Moonriver or Moonbase Alpha
const main = async () => {
// Define the provider for Moonbeam
const wsProvider = new WsProvider('wss://wss.api.moonbeam.network');
// Create the provider using Moonbeam types
const polkadotApi = await ApiPromise.create({
provider: wsProvider,
typesBundle: typesBundlePre900 as any,
});
// Subscribe to finalized blocks
await polkadotApi.rpc.chain.subscribeFinalizedHeads(
async (lastFinalizedHeader) => {
const [{ block }, records] = await Promise.all([
polkadotApi.rpc.chain.getBlock(lastFinalizedHeader.hash),
polkadotApi.query.system.events.at(lastFinalizedHeader.hash),
]);
block.extrinsics.forEach((extrinsic, index) => {
const {
method: { args, method, section },
} = extrinsic;
const isEthereum = section == 'ethereum' && method == 'transact';
// Gets the transaction object
const tx = args[0] as any;
// Convert to the correct Ethereum Transaction format
const ethereumTx =
isEthereum &&
((tx.isLegacy && tx.asLegacy) ||
(tx.isEip1559 && tx.asEip1559) ||
(tx.isEip2930 && tx.asEip2930));
// Check if the transaction is a transfer
const isEthereumTransfer =
ethereumTx &&
ethereumTx.input.length === 0 &&
ethereumTx.action.isCall;
// Retrieve all events for this extrinsic
const events = records.filter(
({ phase }) =>
phase.isApplyExtrinsic && phase.asApplyExtrinsic.eq(index)
);
// This hash will only exist if the transaction was executed through Ethereum.
let ethereumHash = '';
if (isEthereum) {
// Search for Ethereum execution
events.forEach(({ event }) => {
if (event.section == 'ethereum' && event.method == 'Executed') {
ethereumHash = event.data[2].toString();
}
});
}
// Search if it is a transfer
events.forEach(({ event }) => {
if (event.section == 'balances' && event.method == 'Transfer') {
const from = event.data[0].toString();
const to = event.data[1].toString();
const balance = (event.data[2] as any).toBigInt();
const substrateHash = extrinsic.hash.toString();
console.log(
`Transfer from ${from} to ${to} of ${balance} (block #${lastFinalizedHeader.number})`
);
console.log(` - Triggered by extrinsic: ${substrateHash}`);
if (isEthereum) {
console.log(
` - Ethereum (isTransfer: ${isEthereumTransfer}) hash: ${ethereumHash}`
);
}
}
});
});
}
);
};
main();
```
In addition, you can find more sample code snippets related to more specific cases around balance transfers on this [GitHub page](https://gist.github.com/crystalin/b2ce44a208af60d62b5ecd1bad513bce){target=\_blank}.
### Using Substrate API Sidecar {: #using-substrate-api-sidecar }
Developers can also retrieve Moonbeam blocks and monitor transactions sent via both the Substrate and Ethereum APIs using [Substrate API Sidecar](https://github.com/paritytech/substrate-api-sidecar){target=\_blank}, a REST API service for interacting with blockchains built with the Substrate framework.
The following code snippet uses the Axios HTTP client to query the [Sidecar endpoint `/blocks/head`](https://paritytech.github.io/substrate-api-sidecar/dist){target=\_blank} for the latest finalized block and then decodes the block for the `from`, `to`, `value`, `tx hash`, and `transaction status` of native token transfers at both the EVM and Substrate API level.
```js
import axios from 'axios';
// This script will decode all native token transfers (Substrate & Ethereum) in a given Sidecar block, and extract the tx hash. It can be adapted for any Moonbeam network.
// Endpoint to retrieve the latest block
const endpoint = 'http://127.0.0.1:8080/blocks/head';
async function main() {
try {
// Retrieve the block from the Sidecar endpoint
const response = await axios.get(endpoint);
// Retrieve the block height of the current block
console.log('Block Height: ' + response.data.number);
// Iterate through all extrinsics in the block
response.data.extrinsics.forEach((extrinsic) => {
// Retrieve Ethereum Transfers
if (
extrinsic.method.pallet === 'ethereum' &&
extrinsic.method.method === 'transact'
) {
// Get the value for any of the three EIP transaction standards supported
const value =
(extrinsic.args.transaction.legacy &&
extrinsic.args.transaction.legacy.value) ||
(extrinsic.args.transaction.eip1559 &&
extrinsic.args.transaction.eip1559.value) ||
(extrinsic.args.transaction.eip2930 &&
extrinsic.args.transaction.eip2930.value);
// Iterate through the events to get transaction details
extrinsic.events.forEach((event) => {
if (
event.method.pallet === 'ethereum' &&
event.method.method === 'Executed'
) {
console.log('From: ' + event.data[0]);
console.log('To: ' + event.data[1]);
console.log('Tx Hash: ' + event.data[2]);
console.log('Value: ' + value);
// Check the execution status
if (event.data[3].succeed) {
console.log('Status: Success');
} else {
console.log('Status: Failed');
}
}
});
}
// Retrieve Substrate Transfers
if (
extrinsic.method.pallet === 'balances' &&
(extrinsic.method.method === 'transferKeepAlive' ||
extrinsic.method.method === 'transferAllowDeath')
) {
// Iterate through the events to get transaction details
extrinsic.events.forEach((event) => {
if (
event.method.pallet === 'balances' &&
event.method.method === 'Transfer'
) {
console.log('From: ' + event.data[0]);
console.log('To: ' + event.data[1]);
console.log('Tx Hash: ' + extrinsic.hash);
console.log('Value: ' + event.data[2]);
// Check the execution status
if (extrinsic.success) {
console.log('Status: Success');
} else {
console.log('Status: Failed');
}
}
});
}
});
} catch (err) {
console.log(err);
}
}
main();
```
You can reference the [Substrate API Sidecar page](/builders/substrate/libraries/sidecar/) for information on installing and running your own Sidecar service instance, as well as more details on how to decode Sidecar blocks for Moonbeam transactions.
--- END CONTENT ---
Doc-Content: https://docs.moonbeam.network/learn/core-concepts/tx-fees/
--- BEGIN CONTENT ---
---
title: Calculating Transaction Fees
description: Learn about the transaction fee model used in Moonbeam and the differences compared to Ethereum that developers should be aware of.
categories: Basics
---
# Calculating Transaction Fees on Moonbeam
## Introduction {: #introduction }
Similar to [the Ethereum and Substrate APIs for sending transfers](/learn/core-concepts/transfers-api/){target=\_blank} on Moonbeam, the Substrate and EVM layers on Moonbeam also have distinct transaction fee models that developers should be aware of when they need to calculate and keep track of transaction fees for their transactions.
For starters, Ethereum transactions consume gas units based on their computational complexity and data storage requirements. On the other hand, Substrate transactions use the concept of "weight" to determine fees. In this guide, you'll learn how to calculate the transaction fees for both Substrate and Ethereum transactions. In terms of Ethereum transactions, you'll also learn about the key differences between how transaction fees are calculated on Moonbeam and Ethereum.
### Key Differences with Ethereum {: #key-differences-with-ethereum}
There are some key differences between the transaction fee model on Moonbeam and the one on Ethereum that developers should be mindful of when developing on Moonbeam:
- The [dynamic fee mechanism](https://forum.moonbeam.network/t/proposal-status-idea-dynamic-fee-mechanism-for-moonbeam-and-moonriver/241){target=\_blank} resembles that of [EIP-1559](https://eips.ethereum.org/EIPS/eip-1559){target=\_blank} but the implementation is different
- The amount of gas used in Moonbeam's transaction fee model is mapped from the transaction's Substrate extrinsic `refTime` component of the transaction weight via a fixed factor of `{{ networks.moonbase.tx_weight_to_gas_ratio }}` and `proofSize` component of the transaction weight via a fixed factor of `{{ xcm.generic_weights.proof_size.weight_per_gas }}`. The transaction weight vector is then multiplied with the unit gas price to calculate the transaction fee. This fee model means it can potentially be significantly cheaper to send transactions such as basic balance transfers via the Ethereum API than the Substrate API.
- The EVM is designed to solely have capacity for gas and Moonbeam requires additional metrics outside of gas. In particular, Moonbeam needs the ability to record proof size, which is the amount of storage required on Moonbeam for a relay chain validator to verify a state transition. When the capacity limit for proof size has been reached for the current block, which is 25% of the block limit, an "Out of Gas" error will be thrown. This can happen even if there is remaining *legacy* gas in the gasometer. This additional metric also impacts refunds. Refunds are based on the more consumed resource after the execution. In other words, if more proof size has been consumed proportionally than legacy gas, the refund will be calculated using proof size
- Moonbeam has implemented a new mechanism defined in [MBIP-5](https://github.com/moonbeam-foundation/moonbeam/blob/master/MBIPS/MBIP-5.md){target=\_blank} that limits block storage and increases gas usage for transactions that result in an increase in storage
## Overview of MBIP-5 {: #overview-of-mbip-5 }
MBIP-5 introduced changes to Moonbeam's fee mechanism that account for storage growth on the network, which deviates from the way Ethereum handles fees. By raising the gas needed to execute transactions that increase chain state and by establishing a block storage limit, it controls storage growth.
This impacts contract deployments that add to the chain state, transactions that create new storage entries, and precompiled contract calls that result in the creation of new accounts.
The block storage limit prevents transactions in a single block from collectively increasing the storage state by more than the limit. The limit for each network is as follows:
=== "Moonbeam"
```text
{{ networks.moonbeam.mbip_5.block_storage_limit }}KB
```
=== "Moonriver"
```text
{{ networks.moonriver.mbip_5.block_storage_limit }}KB
```
=== "Moonbase Alpha"
```text
{{ networks.moonbase.mbip_5.block_storage_limit }}KB
```
To determine the amount of gas for storage in bytes, there is a ratio that is defined as:
```text
Ratio = Block Gas Limit / (Block Storage Limit * 1024 Bytes)
```
The block gas limit for each network is as follows:
=== "Moonbeam"
```text
{{ networks.moonbeam.gas_block }}
```
=== "Moonriver"
```text
{{ networks.moonriver.gas_block }}
```
=== "Moonbase Alpha"
```text
{{ networks.moonbase.gas_block }}
```
Knowing the block gas and storage limits, the ratio of gas to storage is computed as follows:
=== "Moonbeam"
```text
Ratio = {{ networks.moonbeam.gas_block_numbers_only }} / ({{ networks.moonbeam.mbip_5.block_storage_limit }} * 1024)
Ratio = {{ networks.moonbeam.mbip_5.gas_storage_ratio }}
```
=== "Moonriver"
```text
Ratio = {{ networks.moonriver.gas_block_numbers_only }} / ({{ networks.moonriver.mbip_5.block_storage_limit }} * 1024)
Ratio = {{ networks.moonriver.mbip_5.gas_storage_ratio }}
```
=== "Moonbase Alpha"
```text
Ratio = {{ networks.moonbase.gas_block_numbers_only }} / ({{ networks.moonbase.mbip_5.block_storage_limit }} * 1024)
Ratio = {{ networks.moonbase.mbip_5.gas_storage_ratio }}
```
Then, you can take the storage growth in bytes for a given transaction and multiply it by the gas-to-storage growth ratio to determine how many units of gas to add to the transaction. For example, if you execute a transaction that increases the storage by {{ networks.moonbase.mbip_5.example_storage }} bytes, the following calculation is used to determine the units of gas to add:
=== "Moonbeam"
```text
Additional Gas = {{ networks.moonbeam.mbip_5.example_storage }} * {{ networks.moonbeam.mbip_5.gas_storage_ratio }}
Additional Gas = {{ networks.moonbeam.mbip_5.example_addtl_gas }}
```
=== "Moonriver"
```text
Additional Gas = {{ networks.moonriver.mbip_5.example_storage }} * {{ networks.moonriver.mbip_5.gas_storage_ratio }}
Additional Gas = {{ networks.moonriver.mbip_5.example_addtl_gas }}
```
=== "Moonbase Alpha"
```text
Additional Gas = {{ networks.moonbase.mbip_5.example_storage }} * {{ networks.moonbase.mbip_5.gas_storage_ratio }}
Additional Gas = {{ networks.moonbase.mbip_5.example_addtl_gas }}
```
To see how this MBIP differentiates Moonbeam from Ethereum firsthand, you can estimate the gas for two different contract interactions on both networks: one that modifies an item in the chain state and one that doesn't. For example, you can use a greeting contract that allows you to store a name and then use the name to say "Hello".
```solidity
// SPDX-License-Identifier: MIT
pragma solidity ^0.8.0;
contract SayHello {
mapping(address => string) public addressToName;
constructor(string memory _name) {
addressToName[msg.sender] = _name;
}
// Store a name associated to the address of the sender
function setName(string memory _name) public {
addressToName[msg.sender] = _name;
}
// Use the name in storage associated to the sender
function sayHello() external view returns (string memory) {
return string(abi.encodePacked("Hello ", addressToName[msg.sender]));
}
}
```
You can deploy this contract on both Moonriver and Ethereum, or on Moonbeam's TestNet, Moonbase Alpha, and Ethereum's TestNet, Sepolia. The above contract has already been deployed to Moonbase Alpha and Sepolia. You can feel free to access these contracts at the following addresses:
=== "Moonbase Alpha"
```text
0xDFF8E772A9B212dc4FbA19fa650B440C5c7fd7fd
```
=== "Sepolia"
```text
0x8D0C059d191011E90b963156569A8299d7fE777d
```
Next, you can use the `eth_estimateGas` method to check the gas estimate for calling the `setName` and `sayHello` functions on each network. To do so, you'll need the bytecode for each transaction, which includes the function selector, and for the `setName` function, the name to be set. This example bytecode sets the name to "Chloe":
=== "Set Name"
```text
0xc47f00270000000000000000000000000000000000000000000000000000000000000020000000000000000000000000000000000000000000000000000000000000000543686c6f65000000000000000000000000000000000000000000000000000000
```
=== "Say Hello"
```text
0xef5fb05b
```
Now, you can use the following curl commands on Moonbase Alpha to return the gas estimate:
=== "Set Name"
```sh
curl {{ networks.moonbase.rpc_url }} -H "Content-Type:application/json;charset=utf-8" -d \
'{
"jsonrpc": "2.0",
"id": 1,
"method": "eth_estimateGas",
"params":[{
"to": "0xDFF8E772A9B212dc4FbA19fa650B440C5c7fd7fd",
"data": "0xc47f00270000000000000000000000000000000000000000000000000000000000000020000000000000000000000000000000000000000000000000000000000000000543686c6f65000000000000000000000000000000000000000000000000000000"
}]
}'
```
=== "Say Hello"
```sh
curl {{ networks.moonbase.rpc_url }} -H "Content-Type:application/json;charset=utf-8" -d \
'{
"jsonrpc": "2.0",
"id": 1,
"method": "eth_estimateGas",
"params":[{
"to": "0xDFF8E772A9B212dc4FbA19fa650B440C5c7fd7fd",
"data": "0xef5fb05b"
}]
}'
```
Then on Sepolia, you can use the same bytecode for the `data` and modify the RPC URL and contract address to target the contract deployed to Sepolia:
=== "Set Name"
```sh
curl https://sepolia.publicgoods.network -H "Content-Type:application/json;charset=utf-8" -d \
'{
"jsonrpc": "2.0",
"id": 1,
"method": "eth_estimateGas",
"params":[{
"to": "0x8D0C059d191011E90b963156569A8299d7fE777d",
"data": "0xc47f00270000000000000000000000000000000000000000000000000000000000000020000000000000000000000000000000000000000000000000000000000000000543686c6f65000000000000000000000000000000000000000000000000000000"
}]
}'
```
=== "Say Hello"
```sh
curl https://sepolia.publicgoods.network -H "Content-Type:application/json;charset=utf-8" -d \
'{
"jsonrpc": "2.0",
"id": 1,
"method": "eth_estimateGas",
"params":[{
"to": "0x8D0C059d191011E90b963156569A8299d7fE777d",
"data": "0xef5fb05b"
}]
}'
```
At the time of writing, the gas estimates for both networks are as follows:
=== "Moonbase Alpha"
| Method | Gas Estimate |
|:----------:|:------------:|
| `setName` | 45977 |
| `sayHello` | 25938 |
=== "Sepolia"
| Method | Gas Estimate |
|:----------:|:------------:|
| `setName` | 21520 |
| `sayHello` | 21064 |
You'll see that on Sepolia, the gas estimates for both calls are very similar, whereas on Moonbase Alpha, there is a noticeable difference between the calls and that the `setName` call, which modifies the storage, uses more gas than the `sayHello` call.
## Ethereum API Transaction Fees {: #ethereum-api-transaction-fees }
To calculate the fee incurred on a Moonbeam transaction sent via the Ethereum API, the following formula can be used:
=== "EIP-1559"
```text
GasPrice = BaseFee + MaxPriorityFeePerGas < MaxFeePerGas ?
BaseFee + MaxPriorityFeePerGas :
MaxFeePerGas;
Transaction Fee = (GasPrice * TransactionWeight) / {{ networks.moonbase.tx_weight_to_gas_ratio }}
```
=== "Legacy"
```text
Transaction Fee = (GasPrice * TransactionWeight) / {{ networks.moonbase.tx_weight_to_gas_ratio }}
```
=== "EIP-2930"
```text
Transaction Fee = (GasPrice * TransactionWeight) / {{ networks.moonbase.tx_weight_to_gas_ratio }}
```
!!! note
EIP-1559 transaction fees on Moonbeam are calculated using the previous block's base fee.
The following sections describe in more detail each of the components needed to calculate the transaction fee.
### Base Fee {: #base-fee}
The `BaseFee` is the minimum amount charged to send a transaction and is a value set by the network itself. It was introduced in [EIP-1559](https://eips.ethereum.org/EIPS/eip-1559){target=\_blank}. Moonbeam has its own [dynamic fee mechanism](https://forum.moonbeam.network/t/proposal-status-idea-dynamic-fee-mechanism-for-moonbeam-and-moonriver/241){target=\_blank} for calculating the base fee, which is adjusted based on block congestion. As of runtime 2300, the dynamic fee mechanism has been rolled out to all of the Moonbeam-based networks.
The minimum gas price for each network is as follows:
=== "Moonbeam"
| Variable | Value |
|:-----------------:|:------------------------------------------:|
| Minimum Gas Price | {{ networks.moonbeam.min_gas_price }} Gwei |
=== "Moonriver"
| Variable | Value |
|:-----------------:|:------------------------------------------:|
| Minimum Gas Price | {{ networks.moonriver.min_gas_price }} Gwei |
=== "Moonbase Alpha"
| Variable | Value |
|:-----------------:|:------------------------------------------:|
| Minimum Gas Price | {{ networks.moonbase.min_gas_price }} Gwei |
To calculate the dynamic base fee, the following calculation is used:
=== "Moonbeam"
```text
BaseFee = NextFeeMultiplier * 31250000000 / 10^18
```
=== "Moonriver"
```text
BaseFee = NextFeeMultiplier * 312500000 / 10^18
```
=== "Moonbase Alpha"
```text
BaseFee = NextFeeMultiplier * 31250000 / 10^18
```
The value of `NextFeeMultiplier` can be retrieved from the Substrate Sidecar API, via the following endpoint:
```text
GET /pallets/transaction-payment/storage/nextFeeMultiplier?at={blockId}
```
The pallets endpoints for Sidecar returns data relevant to a pallet, such as data in a pallet's storage. You can read more about the pallets endpoint in the [official Sidecar documentation](https://paritytech.github.io/substrate-api-sidecar/dist/#operations-tag-pallets){target=\_blank}. The data at hand that's required from storage is the `nextFeeMultiplier`, which can be found in the `transaction-payment` pallet. The stored `nextFeeMultiplier` value can be read directly from the Sidecar storage schema. Read as a JSON object, the relevant nesting structure is as follows:
```text
RESPONSE JSON Storage Object:
|--at
|--hash
|--height
|--pallet
|--palletIndex
|--storageItem
|--keys
|--value
```
The relevant data will be stored in the `value` key of the JSON object. This value is a fixed point data type, hence the real value is found by dividing the `value` by `10^18`. This is why [the calculation of `BaseFee`](#ethereum-api-transaction-fees) includes such an operation.
### GasPrice, MaxFeePerGas, and MaxPriorityFeePerGas {: #gasprice-maxfeepergas-maxpriorityfeepergas }
The `GasPrice` is used to specify the gas price of legacy transactions prior to [EIP-1559](https://eips.ethereum.org/EIPS/eip-1559){target=\_blank}. The `MaxFeePerGas` and `MaxPriorityFeePerGas` were both introduced in EIP-1559 alongside the `BaseFee`. The `MaxFeePerGas` defines the maximum fee permitted to be paid per unit of gas and is the sum of the `BaseFee` and the `MaxPriorityFeePerGas`. The `MaxPriorityFeePerGas` is the maximum priority fee configured by the sender of a transaction that is used to incentivize the prioritization of a transaction in a block.
Although Moonbeam is Ethereum-compatible, it is also a Substrate-based chain at its core, and priorities work differently in Substrate than in Ethereum. In Substrate, transactions are not prioritized by gas price. To address this, Moonbeam uses a modified prioritization system that reprioritizes Substrate transactions using an Ethereum-first solution. A Substrate transaction still goes through the validity process, where it is assigned transaction tags, longevity, and a priority. The original priority is then overwritten with a new priority based on the transaction's fee per gas, which is derived from the transaction's tip and weight. If the transaction is an Ethereum transaction, the priority is set according to the priority fee.
It's important to note that priority is not the sole component responsible for determining the order of transactions in a block. Other components, such as the longevity of a transaction, also play a role in the sorting process.
The values of `GasPrice`, `MaxFeePerGas` and `MaxPriorityFeePerGas` for the applicable transaction types can be read from the block JSON object according to the structure described in [the Sidecar API page](/builders/substrate/libraries/sidecar/#evm-fields-mapping-in-block-json-object){target=\_blank}.
The data for an Ethereum transaction in a particular block can be extracted from the following block endpoint:
```text
GET /blocks/{blockId}
```
The paths to the relevant values have also been truncated and reproduced below:
=== "EIP1559"
| EVM Field | Block JSON Field |
|:--------------------:|:----------------------------------------------------------------------------:|
| MaxFeePerGas | `extrinsics[extrinsic_number].args.transaction.eip1559.maxFeePerGas` |
| MaxPriorityFeePerGas | `extrinsics[extrinsic_number].args.transaction.eip1559.maxPriorityFeePerGas` |
=== "Legacy"
| EVM Field | Block JSON Field |
|:---------:|:---------------------------------------------------------------:|
| GasPrice | `extrinsics[extrinsic_number].args.transaction.legacy.gasPrice` |
=== "EIP2930"
| EVM Field | Block JSON Field |
|:---------:|:----------------------------------------------------------------:|
| GasPrice | `extrinsics[extrinsic_number].args.transaction.eip2930.gasPrice` |
### Transaction Weight {: #transaction-weight}
`TransactionWeight` is a Substrate mechanism used to measure the execution time a given transaction takes to be executed within a block. A transaction's weight is a vector of two components: `refTime` and `proofSize`. `refTime` refers to the amount of computational time that can be used for execution. `proofSize` refers to the size of the PoV (Proof of Validity) of the Moonbeam block that gets submitted to the Polkadot Relay Chain for validation. Since both `refTime` and `proofSize` are integral components of determining a weight, it is impossible to obtain an accurate weight value with just one of these values.
For all transactions types, `TransactionWeight` can be retrieved under the event of the relevant extrinsic where the `method` field is set to:
```text
pallet: "system", method: "ExtrinsicSuccess"
```
And then `TransactionWeight` is mapped to the following two fields of the block JSON object. `proofSize` is mapped as follows:
```text
extrinsics[extrinsic_number].events[event_number].data[0].weight.proof_size
```
And `refTime` is mapped as follows:
```text
extrinsics[extrinsic_number].events[event_number].data[0].weight.ref_time
```
### Fee History Endpoint {: #eth-feehistory-endpoint }
Moonbeam networks implement the [`eth_feeHistory`](https://www.alchemy.com/docs/node/ethereum/ethereum-api-endpoints/eth-fee-history){target_blank} JSON-RPC endpoint as a part of the support for EIP-1559.
`eth_feeHistory` returns a collection of historical gas information from which you can reference and calculate what to set for the `MaxFeePerGas` and `MaxPriorityFeePerGas` fields when submitting EIP-1559 transactions.
The following curl example will return the gas information of the last 10 blocks starting from the latest block on the respective Moonbeam network using `eth_feeHistory`:
=== "Moonbeam"
```sh
curl --location \
--request POST '{{ networks.moonbeam.rpc_url }}' \
--header 'Content-Type: application/json' \
--data-raw '{
"jsonrpc": "2.0",
"id": 1,
"method": "eth_feeHistory",
"params": ["0xa", "latest"]
}'
```
=== "Moonriver"
```sh
curl --location \
--request POST '{{ networks.moonriver.rpc_url }}' \
--header 'Content-Type: application/json' \
--data-raw '{
"jsonrpc": "2.0",
"id": 1,
"method": "eth_feeHistory",
"params": ["0xa", "latest"]
}'
```
=== "Moonbase Alpha"
```sh
curl --location \
--request POST '{{ networks.moonbase.rpc_url }}' \
--header 'Content-Type: application/json' \
--data-raw '{
"jsonrpc": "2.0",
"id": 1,
"method": "eth_feeHistory",
"params": ["0xa", "latest"]
}'
```
=== "Moonbeam Dev Node"
```sh
curl --location \
--request POST '{{ networks.development.rpc_url }}' \
--header 'Content-Type: application/json' \
--data-raw '{
"jsonrpc": "2.0",
"id": 1,
"method": "eth_feeHistory",
"params": ["0xa", "latest"]
}'
```
### Sample Code for Calculating Transaction Fees {: #sample-code }
The following code snippet uses the [Axios HTTP client](https://axios-http.com){target=\_blank} to query the [Sidecar endpoint `/blocks/head`](https://paritytech.github.io/substrate-api-sidecar/dist/#operations-tag-blocks){target=\_blank} for the latest finalized block. It then calculates the transaction fees of all transactions in the block according to the transaction type (for Ethereum API: legacy, EIP-1559 or EIP-2930 standards, and for Substrate API), as well as calculating the total transaction fees in the block.
!!! note
EIP-1559 transaction fees on Moonbeam are calculated using the previous block's base fee.
The following code sample is for demo purposes only and should not be used without modification and further testing in a production environment.
You can use the following snippet for any Moonbeam-based network, but you'll need to modify the `baseFee` accordingly. You can refer back to the [Base Fee](#base-fee) section to get the calculation for each network.
```js
import axios from 'axios';
// This script calculates the transaction fees of all transactions in a block
// according to the transaction type (for Ethereum API: legacy, EIP-1559 or
// EIP-2930 standards, and Substrate API) using the dynamic fee mechanism.
// It also calculates the total fees in the block
// Endpoint to retrieve the latest block
const endpointBlock = 'http://127.0.0.1:8080/blocks/head';
// Endpoint to retrieve the latest nextFeeMultiplier
const endpointPallet =
'http://127.0.0.1:8080/pallets/transaction-payment/storage/nextFeeMultiplier?at=';
// Endpoint to retrieve the node client's information
const endpointNodeVersion = 'http://127.0.0.1:8080/node/version';
// Define the minimum base fee for each network
const baseFee = {
moonbeam: 31250000000n,
moonriver: 312500000n,
moonbase: 31250000n,
};
async function main() {
try {
// Create a variable to sum the transaction fees in the whole block
let totalFees = 0n;
// Find which Moonbeam network the Sidecar is pointing to
const responseClient = await axios.get(endpointNodeVersion);
const network = responseClient.data.clientImplName;
// Retrieve the block from the Sidecar endpoint
const responseBlock = await axios.get(endpointBlock);
// Retrieve the block height of the current block
console.log('Block Height: ' + responseBlock.data.number);
// Use the previous block's base fee to match the on-chain data
// Find the block's nextFeeMultiplier
const prevBlock = Number(responseBlock.data.number) - 1;
const responsePallet = await axios.get(endpointPallet + prevBlock);
// Iterate through all extrinsics in the block
responseBlock.data.extrinsics.forEach((extrinsic) => {
// Create an object to store transaction information
let transactionData = new Object();
// Set the network field
transactionData['network'] = network;
// Filter for Ethereum Transfers
if (
extrinsic.method.pallet === 'ethereum' &&
extrinsic.method.method === 'transact'
) {
// Iterate through the events to get non type specific parameters
extrinsic.events.forEach((event) => {
if (
event.method.pallet === 'ethereum' &&
event.method.method === 'Executed'
) {
// Get Transaction Hash
transactionData['hash'] = event.data[2];
}
if (
event.method.pallet === 'system' &&
event.method.method === 'ExtrinsicSuccess'
) {
// Add correction weight if needed to Transaction Weight!
transactionData['weight'] = BigInt(event.data[0].weight.refTime);
}
});
// Get the transaction type and type specific parameters and compute the
// transaction fee
if (extrinsic.args.transaction.legacy) {
transactionData['txType'] = 'legacy';
transactionData['gasPrice'] = BigInt(
extrinsic.args.transaction.legacy.gasPrice
);
transactionData['txFee'] =
(transactionData['gasPrice'] * transactionData['weight']) / 25000n;
} else if (extrinsic.args.transaction.eip1559) {
transactionData['txType'] = 'eip1599';
transactionData['maxFeePerGas'] = BigInt(
extrinsic.args.transaction.eip1559.maxFeePerGas
);
transactionData['maxPriorityFeePerGas'] = BigInt(
extrinsic.args.transaction.eip1559.maxPriorityFeePerGas
);
// Update based on the network you're getting tx fees for
transactionData['baseFee'] =
(BigInt(responsePallet.data.value) * baseFee.moonbeam) /
BigInt('1000000000000000000');
// Gas price dependes on the MaxFeePerGas and MaxPriorityFeePerGas set
transactionData['gasPrice'] =
transactionData['baseFee'] +
transactionData['maxPriorityFeePerGas'] <
transactionData['maxFeePerGas']
? transactionData['baseFee'] +
transactionData['maxPriorityFeePerGas']
: transactionData['maxFeePerGas'];
transactionData['txFee'] =
(transactionData['gasPrice'] * transactionData['weight']) / 25000n;
} else if (extrinsic.args.transaction.eip2930) {
transactionData['txType'] = 'eip2930';
transactionData['gasPrice'] = BigInt(
extrinsic.args.transaction.eip2930.gasPrice
);
transactionData['txFee'] =
(transactionData['gasPrice'] * transactionData['weight']) / 25000n;
}
// Increment totalFees
totalFees += transactionData['txFee'];
// Display the tx information to console
console.log(transactionData);
}
// Filter for Substrate transactions, check if the extrinsic has a
// 'TransactionFeePaid' event
else {
extrinsic.events.forEach((event) => {
if (
event.method.pallet === 'transactionPayment' &&
event.method.method === 'TransactionFeePaid'
) {
transactionData['txType'] = 'substrate';
transactionData['txFee'] = event.data[1];
transactionData['tip'] = event.data[1];
}
if (
event.method.pallet === 'system' &&
event.method.method === 'ExtrinsicSuccess'
) {
transactionData['weight'] = event.data[0].weight.refTime;
}
});
}
});
// Output the total amount of fees in the block
console.log('Total fees in block: ' + totalFees);
} catch (err) {
console.log(err);
}
}
main();
```
## Substrate API Transaction Fees {: #substrate-api-transaction-fees }
This section of the guide assumes you are interacting with Moonbeam blocks via [the Substrate API Sidecar](/builders/substrate/libraries/sidecar/){target=\_blank} service. There are other ways of interacting with Moonbeam blocks, such as using [the Polkadot.js API library](/builders/substrate/libraries/polkadot-js-api/){target=\_blank}. The logic is identical once the blocks are retrieved.
You can reference the [Substrate API Sidecar page](/builders/substrate/libraries/sidecar/){target=\_blank} for information on installing and running your own Sidecar service instance, as well as more details on how to decode Sidecar blocks for Moonbeam transactions.
**Note that the information in this section assumes you are running version {{ networks.moonbase.substrate_api_sidecar.stable_version }} of the Substrate Sidecar REST API.**
All the information around fee data for transactions sent via the Substrate API can be extracted from the following block endpoint:
```text
GET /blocks/{blockId}
```
The block endpoints will return data relevant to one or more blocks. You can read more about the block endpoints on the [official Sidecar documentation](https://paritytech.github.io/substrate-api-sidecar/dist/#operations-tag-blocks){target=\_blank}. Read as a JSON object, the relevant nesting structure is as follows:
```text
RESPONSE JSON Block Object:
...
|--number
|--extrinsics
|--{extrinsic_number}
|--method
|--signature
|--nonce
|--args
|--tip
|--hash
|--info
|--era
|--events
|--{event_number}
|--method
|--pallet: "transactionPayment"
|--method: "TransactionFeePaid"
|--data
|--0
|--1
|--2
...
```
The object mappings are summarized as follows:
| Tx Information | Block JSON Field |
|:------------------:|:-----------------------------------------------------------:|
| Fee paying account | `extrinsics[extrinsic_number].events[event_number].data[0]` |
| Total fees paid | `extrinsics[extrinsic_number].events[event_number].data[1]` |
| Tip | `extrinsics[extrinsic_number].events[event_number].data[2]` |
The transaction fee related information can be retrieved under the event of the relevant extrinsic where the `method` field is set to:
```text
pallet: "transactionPayment", method: "TransactionFeePaid"
```
And then the total transaction fee paid for this extrinsic is mapped to the following field of the block JSON object:
```text
extrinsics[extrinsic_number].events[event_number].data[1]
```
The information presented herein has been provided by third parties and is made available solely for general information purposes. Moonbeam does not endorse any project listed and described on the Moonbeam Doc Website (https://docs.moonbeam.network/). Moonbeam Foundation does not warrant the accuracy, completeness or usefulness of this information. Any reliance you place on such information is strictly at your own risk. Moonbeam Foundation disclaims all liability and responsibility arising from any reliance placed on this information by you or by anyone who may be informed of any of its contents. All statements and/or opinions expressed in these materials are solely the responsibility of the person or entity providing those materials and do not necessarily represent the opinion of Moonbeam Foundation. The information should not be construed as professional or financial advice of any kind. Advice from a suitably qualified professional should always be sought in relation to any particular matter or circumstance. The information herein may link to or integrate with other websites operated or content provided by third parties, and such other websites may link to this website. Moonbeam Foundation has no control over any such other websites or their content and will have no liability arising out of or related to such websites or their content. The existence of any such link does not constitute an endorsement of such websites, the content of the websites, or the operators of the websites. These links are being provided to you only as a convenience and you release and hold Moonbeam Foundation harmless from any and all liability arising from your use of this information or the information provided by any third-party website or service.
--- END CONTENT ---
Doc-Content: https://docs.moonbeam.network/learn/core-concepts/unified-accounts/
--- BEGIN CONTENT ---
---
title: Unified Accounts
description: Moonbeam replaced the default Substrate account system with native support for the Ethereum-based H160 accounts and ECDSA keys. Find out more information!
categories: Basics
---
# Unified Accounts
## Introduction {: #introduction }
As Moonbeam is designed to be an Ethereum-compatible parachain on Polkadot, the underlying account system replaces the default Substrate-style accounts and keys with Ethereum-style accounts and keys. As a result, you can interact with your Moonbeam account using [MetaMask](/tokens/connect/metamask/){target=\_blank} and Ethereum tools you may already be familiar with, such as [Remix](/builders/ethereum/dev-env/remix/){target=\_blank} and [Hardhat](/builders/ethereum/dev-env/hardhat/){target=\_blank}.
You can also interact with your Moonbeam account using Polkadot.js Apps as it natively supports H160 addresses and ECDSA keys. For more information on this integration, you can check out the [Interacting with Moonbeam Using Polkadot.js Apps](/tokens/connect/polkadotjs/){target=\_blank} guide.
## Substrate EVM Compatible Blockchain {: #substrate-evm-compatible-blockchain }
Any parachain in the Polkadot ecosystem can offer a full EVM implementation, which provides the possibility of executing Solidity-based smart contracts with minimal to no changes. Substrate makes this integration possible - just plug the [EVM pallet](https://docs.rs/pallet-evm/2.0.1/pallet_evm){target=\_blank} into your runtime for EVM support, and the [Ethereum Pallet with Frontier](https://github.com/polkadot-evm/frontier){target=\_blank} to have Ethereum RPC compatibility. The availability of these open-source modules that Moonbeam has developed with Parity has led multiple parachains to offer Ethereum compatibility on their chains.
But there is an important catch. With the configuration described above, a user, for example, Alice, can have an Ethereum-style address (H160 format), which is 40+2 hex-characters long, in a Substrate based chain. This address matches a private key, which can be used to sign transactions in the Ethereum side of the chain. Furthermore, the address is mapped into a storage slot inside the Substrate Balance pallet to a Substrate-style address (H256 format).
However, Alice only knows the private key of the H160 address, and not of the mapped version. Therefore, she is unable to send transactions with her H256 address and is limited only to do read-only operations through Substrate’s API. As a consequence, Alice needs another H256 address matching a different private key to be able to operate in the Substrate side of the chain, which include, among others, staking, balances, and governance.
The following diagram illustrates this configuration.
This can creates friction and a poor user experience for Alice. First, she has to move tokens to her H160 mapped H256 address to be able to make transactions and deploy contracts through the EVM. Second, she also needs to hold a balance in her other H256 address (which she has a different private key for) to use Substrate-based features. So in short, Alice needs a minimum of two private keys to have the best of both worlds.
## Moonbeam Unified Accounts {: #moonbeam-unified-accounts }
Moonbeam’s focus is to create a fully Ethereum-compatible environment on Polkadot with the best user experience possible. This extends beyond the base Ethereum feature set, with additional features such as on-chain governance, staking, and cross-chain integrations.
With unified accounts, a user, for example, Bob, will only need a single H160 address, with its corresponding private key, to do everything we mentioned above, including both EVM and Substrate functions.
The diagram for this new configuration looks as follows.

That is it, Bob only holds one private key that matches one address. He does not need to move balances between 2 different accounts and is able to access all the features with a single account and private key. We have standardized this single account to conform to the Ethereum-style H160 address and ECDSA key standards.
--- END CONTENT ---
Doc-Content: https://docs.moonbeam.network/learn/features/consensus/
--- BEGIN CONTENT ---
---
title: Moonbeam's Nimbus Consensus Framework
description: Learn about all the parts of Moonbeam's Nimbus consensus framework and how it works as part of Polkadot's shared security model.
categories: Basics
---
# Nimbus Parachain Consensus Framework
## Introduction {: #introduction }
Polkadot relies on a [hybrid consensus model](https://docs.polkadot.com/polkadot-protocol/architecture/polkadot-chain/pos-consensus/). In such a scheme, the block finality gadget and the block production mechanism are separate. Consequently, parachains only have to worry about producing blocks and rely on the relay chain to validate the state transitions.
At a parachain level, block producers are called [collators](https://wiki.polkadot.com/learn/learn-collator/). They maintain parachains (such as Moonbeam) by collecting transactions from users and offering blocks to the relay chain [validators](https://wiki.polkadot.com/learn/learn-validator/).
However, parachains might find the following problems they need to solve in a trustless and decentralized matter (if applicable):
- Amongst all of the nodes in the network, which ones are allowed to author blocks?
- If multiple nodes are allowed, will they be eligible at the same time? Only one? Maybe a few?
Enter Nimbus. Nimbus is a framework for building slot-based consensus algorithms on [Cumulus](https://github.com/paritytech/polkadot-sdk/tree/master/cumulus)-based parachains. It strives to provide standard implementations for the logistical parts of such consensus engines and helpful traits for implementing the elements (filters) that researchers and developers want to customize. These filters can be customizable to define what a block authorship slot is and can be composed, so block authorship is restricted to a subset of collators in multiple steps.
For example, Moonbeam uses a two-layer approach. The first layer comprises the parachain staking filter, which helps select an active collator pool among all collator candidates using a staked-based ranking. The second layer adds another filter which narrows down the number of collators to a subset for each slot.
Notice that Nimbus can only answer which collator(s) are eligible to produce a parachain block in the next available slot. It is the [Cumulus](https://docs.polkadot.com/develop/parachains/#cumulus) consensus mechanism that marks this parachain block as best, and ultimately the [BABE](https://docs.polkadot.com/polkadot-protocol/architecture/polkadot-chain/pos-consensus/#babe) and [GRANDPA](https://docs.polkadot.com/polkadot-protocol/architecture/polkadot-chain/pos-consensus/#grandpa-finality-gadget) hybrid consensus model (of the relay chain) that will include this parachain block in the relay chain and finalize it. Once any relay chain forks are resolved at a relay chain level, that parachain block is deterministically finalized.
The following two sections go over the filtering strategy currently used on Moonbeam.
## Parachain Staking Filtering {: #parachain-staking-filtering }
Collators can join the candidate pool by simply bonding some tokens via an extrinsic. Once in the pool, token holders can add to the candidate's stake via delegation (also referred to as staking), that is, at a parachain level.
Parachain staking is the first of the two Nimbus filters applied to the candidate pool. It selects the top {{ networks.moonbase.staking.max_candidates }} candidates in terms of tokens staked in the network, which includes the candidate's bond and delegations from token holders. This filtered pool is called selected candidates, and selected candidates are renewed every round (which lasts {{ networks.moonbase.staking.round_blocks }} blocks). For a given round, the following diagram describes the parachain staking filtering:
From this pool, another filter is applied to retrieve a subset of eligible candidates for the next block authoring slot.
If you want to learn more about staking, visit our [staking documentation](/learn/features/staking/).
## Fixed Size Subset Filtering {: #fixed-size-subset-filtering }
Once the parachain staking filter is applied and the selected candidates are retrieved, a second filter is applied on a block by block basis and helps narrow down the selected candidates to a smaller number of eligible collators for the next block authoring slot.
In broad terms, this second filter picks a pseudo-random subset of the previously selected candidates. The eligibility ratio, a tunable parameter, defines the size of this subset.
A high eligibility ratio results in fewer chances for the network to skip a block production slot, as more collators will be eligible to propose a block for a specific slot. However, only a certain number of validators are assigned to a parachain, meaning that most of these blocks will not be backed by a validator. For those that are, a higher number of backed blocks means that it might take longer for the relay chain to solve any possible forks and return a finalized block. Moreover, this might create an unfair advantage for certain collators that might be able to get their proposed block faster to relay chain validators, securing a higher portion of block rewards (if any).
A lower eligibility ratio might provide faster block finalization times and a fairer block production distribution amongst collators. However, if the eligible collators are not able to propose a block (for whatever reason), the network will skip a block, affecting its stability.
Once the size of the subset is defined, collators are randomly selected using a source of entropy. Currently, an internal coin-flipping algorithm is implemented, but this will later be migrated to use [Verifiable random function](https://docs.polkadot.com/polkadot-protocol/parachain-basics/randomness/){target=\_blank}. Consequently, a new subset of eligible collators is selected for every relay chain block. For a given round and a given block `XYZ`, the following diagram describes the fixed-size subset filtering:
## Why Nimbus? {: #why-nimbus }
You might ask yourself: but why Nimbus? Initially, it was not envisioned when Moonbeam was being developed. As Moonbeam progressed, the necessity for a more customizable but straightforward parachain consensus mechanism became clear, as the available methods presented some drawbacks or technical limitations.
With Nimbus, writing a parachain consensus engine is as easy as writing a pallet! This simplicity and flexibility is the main value it adds.
Some technical benefits of Nimbus are considered in the following sections.
### Weight and Extra Execution {: #weight-and-extra-execution }
Nimbus puts the author-checking execution in a [Substrate pallet](https://docs.polkadot.com/develop/parachains/customize-parachain/overview/). At first glance, you might think this adds a higher execution load to a single block compared to doing this check off-chain. But consider this from a validator’s perspective
The validators will also have to check the author. By putting the author-checking execution logic in a pallet, the execution time can be benchmarked and quantified with weights. If this execution time is not accounted for, there is the risk of a block exceeding the relay chain Wasm execution limit (currently 0.5 seconds).
In practice, this check will be fast and will most likely not push execution time over the limit. But from a theoretical perspective, accounting for its weight is better for implementation purposes.
### Reusability {: #reusability }
Another benefit of moving the author-checking execution to a pallet, rather than a custom executor, is that one single executor can be reused for any consensus that can be expressed in the Nimbus framework. That is slot-based, signature-sealed algorithms.
For example, the [relay-chain provided consensus](https://github.com/paritytech/polkadot-sdk/blob/master/cumulus/client/consensus/relay-chain/src/lib.rs), [AuRa](https://crates.io/crates/sc-consensus-aura) and [BABE](https://crates.io/crates/sc-consensus-babe) each have their own custom executor. With Nimbus, these consensus mechanisms can reuse the same executor. The power of reusability is evidenced by the Nimbus implementation of AuRa in less than 100 lines of code.
### Hot-Swapping Consensus {: #hot-swapping-consensus }
Teams building parachains may want to change, tune, or adjust their consensus algorithm from time to time. Without nimbus, swapping consensus would require a client upgrade and hard fork.
With the Nimbus framework, writing a consensus engine is as easy as writing a
[Substrate pallet](https://docs.polkadot.com/develop/parachains/customize-parachain/make-custom-pallet/). Consequently, swapping consensus is as easy as upgrading a pallet.
Nonetheless, hot swapping is still bounded by consensus engines (filters) that fit within Nimbus, but it might be helpful for teams that are yet confident on what consensus they want to implement in the long run.
--- END CONTENT ---
Doc-Content: https://docs.moonbeam.network/learn/features/eth-compatibility/
--- BEGIN CONTENT ---
---
title: Ethereum Compatibility
description: Transitioning from Ethereum to Moonbeam? Here's a brief overview of the key components and key differences of Moonbeam's Ethereum compatibility.
categories: Basics
---
# Ethereum Compatibility
Moonbeam bridges the Ethereum and Polkadot ecosystems, offering developers the familiarity of Ethereum's tooling and infrastructure while leveraging Polkadot's scalability and interoperability.
This documentation overviews Moonbeam's Ethereum compatibility features and highlights its key components. It also covers some critical differences between Moonbeam and Ethereum so Ethereum developers know what to expect.
## Key Components {: #key-components }
### EVM Compatibility {: #evm }
Moonbeam incorporates a fully compatible EVM to execute smart contracts in Solidity or other EVM-compatible languages. This enables developers to deploy existing Ethereum smart contracts on Moonbeam with minimal modifications.
Learn more:
- [Moonbeam's Ethereum-compatibility architecture](/learn/platform/technology/#ethereum-compatibility-architecture){target=\_blank}
### Ethereum-style Accounts {: #ethereum-style-accounts }
Moonbeam employs H160 Ethereum-style accounts and ECDSA keys, ensuring compatibility with existing Ethereum wallets and facilitating a smooth end-user experience. This is possible due to Moonbeam's unified accounts system, which modifies the underlying Substrate account system to use Ethereum accounts by default.
Learn more:
- [Moonbeam's unified accounts system](/learn/core-concepts/unified-accounts/){target=\_blank}
### JSON-RPC Support {: #json-rpc-support }
Moonbeam offers full JSON-RPC compatibility with Ethereum, allowing developers to interact with Moonbeam nodes using familiar Ethereum tools and libraries. This compatibility extends to methods for account management, transaction submission, smart contract deployment, and event monitoring.
In addition to standard Ethereum RPC methods, Moonbeam supports non-standard Debug and Trace modules, providing developers with enhanced debugging and tracing capabilities for smart contract execution. The Debug module allows developers to inspect internal state transitions and execution traces, enabling efficient debugging of complex smart contracts. The Trace module provides detailed transaction traces, including opcode-level execution information and gas consumption, facilitating performance analysis and optimization.
Learn more:
- [Supported Ethereum RPC methods](/builders/ethereum/json-rpc/eth-rpc/){target=\_blank}
- [Subscribe to events with Ethereum JSON-RPC methods](/builders/ethereum/json-rpc/pubsub/){target=\_blank}
- [Debug and trace transactions with non-standard RPC methods](/builders/ethereum/json-rpc/debug-trace/){target=\_blank}
### Ethereum Developer Tools and Libraries {: #ethereum-dev-tools }
With the underlying support for Ethereum JSON-RPC methods, Moonbeam leverages Ethereum's rich ecosystem of developer libraries and environments. With seamless integration of popular Ethereum libraries and development environments, developers can leverage their existing knowledge and tooling to build and deploy decentralized applications (DApps) on Moonbeam.
Learn more:
- [Ethereum libraries](/builders/ethereum/libraries/){target=\_blank}
- [Ethereum development environments](/builders/ethereum/libraries/){target=\_blank}
### Precompiled Contracts {: #precompiled-contracts }
Moonbeam provides precompiled contracts that allow Ethereum smart contracts to seamlessly access Substrate functionality. These precompiled contracts expose Substrate features such as on-chain governance, staking, and identity management to Ethereum-based DApps on Moonbeam. This integration ensures that Ethereum developers can harness the full potential of Moonbeam's features, expanding the possibilities for dApp development on Moonbeam.
In addition, developers can leverage Ethereum MainNet precompiles seamlessly within their smart contracts on Moonbeam. These precompiled contracts, widely used on the Ethereum network, offer optimized and efficient execution of common cryptographic operations and complex computations. By supporting Ethereum MainNet precompiles, Moonbeam ensures compatibility with Ethereum-based dApps while enabling developers to utilize familiar tools and libraries to build on its platform.
Learn more:
- [Overview of the precompiled contracts on Moonbeam](/builders/ethereum/precompiles/overview/){target=\_blank}
### Ethereum Token Standards {: #ethereum-token-standards }
Moonbeam supports Ethereum token standards, allowing developers to deploy and interact with tokens that adhere to popular standards such as ERC-20, ERC-721, and ERC-1155. By supporting these standards, Moonbeam enables developers to deploy existing Ethereum tokens without modification.
Due to Moonbeam's native interoperability, ERC-20s can be sent cross-chain to other chains within the Polkadot ecosystem via Cross-Consensus Messaging (XCM).
Learn more:
- [Create common OpenZeppelin contracts such as ERC-20, ERC-721, and ERC-1155 tokens](/builders/ethereum/dev-env/openzeppelin/contracts/){target=\_blank}
- [XCM-enabled ERC-20s](/builders/interoperability/xcm/xc20/overview/#local-xc20s){target=\_blank} (also referred to as local XC-20s)
## Key Differences {: #key-differences }
### Consensus Mechanisms {: #consensus-mechanisms }
Moonbeam uses a Delegated Proof-of-Stake (DPoS) consensus mechanism, where token holders in the network can delegate candidates to become block producers, known as _collators_. On the other hand, Ethereum uses a Proof-of-Stake (PoS) system in which validators are selected based on their stake in the network to produce and validate blocks.
Learn more:
- [Differences between PoS and DPoS](/learn/core-concepts/consensus-finality/#main-differences){target=_blank}
### Finality {: #finality }
Moonbeam and Ethereum have different finality processes. On Ethereum, there is a checkpoint system where validators determine finality at checkpoint blocks, which takes at least 6.4 minutes for a block to be finalized. Moonbeam relies on Polkadot's [GRANDPA](https://docs.polkadot.com/polkadot-protocol/architecture/polkadot-chain/pos-consensus/#finality-gadget-grandpa){target=\_blank} finality gadget, which expedites finality by completing the process parallel to block production and allowing relay chain validators to vote on the highest block, finalizing all blocks leading up to that block.
Learn more:
- [Consensus and finality on Moonbeam](/learn/core-concepts/consensus-finality/){target=_blank}
### Proxy Accounts {: #proxy-accounts }
On both Moonbeam and Ethereum, accounts can be controlled by two main types of accounts: Externally Owned Accounts (EOA) or smart contracts. However, on Moonbeam, within both account types, there are also proxy accounts, which can perform a limited number of actions on behalf of another account.
Learn more:
- [An overview of proxy accounts](https://wiki.polkadot.com/learn/learn-proxies/){target=\_blank}
- [How to set up a proxy account](/tokens/manage/proxy-accounts/){target=\_blank}
### Account Balances {: #account-balances }
Balances on Ethereum are fairly straightforward; if an account holds tokens, that account has a token balance. On Moonbeam, different balance types exist to support various Substrate functionality. There are five types: free, reducible, reserved, miscellaneous frozen, and fee frozen. When using Ethereum tools, accounts show the reducible balance and don't include locked or frozen balances.
Learn more:
- [Moonbeam account balances](/learn/core-concepts/balances/){target=_blank}
### Balance Transfers {: #balance-transfers }
Since Moonbeam is a Substrate-based chain, balance transfers of the native asset (GLMR, MOVR, and DEV) can occur through the Ethereum and Substrate APIs. Like Ethereum, transfers sent through the Ethereum API rely on the `eth_sendRawTransaction`. Transfers sent through the Substrate API are done using the Balances Pallet, a built-in module in the Substrate framework that provides functionality for managing accounts and balances.
Learn more:
- [Balance transfers on Moonbeam](/learn/core-concepts/transfers-api/){target=_blank}
### Transaction Fees {: #transaction-fees }
Moonbeam and Ethereum calculate transaction fees differently due to variations in their underlying architectures and consensus mechanisms. The fundamental difference in how transaction fees are calculated is that Ethereum uses a gas-based fee system, and Moonbeam uses a weight-based system that maps to the gas used. Moonbeam also implements additional metrics in the underlying gas calculations, including proof size and storage costs.
Learn more:
- [Calculating transaction fees on Moonbeam](/learn/core-concepts/tx-fees/){target=\_blank}
--- END CONTENT ---
Doc-Content: https://docs.moonbeam.network/learn/features/governance/
--- BEGIN CONTENT ---
---
title: Governance
description: As a Polkadot parachain, Moonbeam uses an on-chain governance system, allowing for a stake-weighted vote on public referenda.
categories: Governance, Basics
---
# Governance on Moonbeam
## Introduction {: #introduction }
The goal of Moonbeam’s governance mechanism is to advance the protocol according to the desires of the community. In that shared mission, the governance process seeks to include all token holders. Any and all changes to the protocol must go through a referendum so that all token holders, weighted by stake, can have input on the decision.
Governance forums like the [Moonbeam Community Forum](https://forum.moonbeam.network){target=\_blank} and [Polkassembly](https://moonbeam.polkassembly.io/opengov){target=\_blank} enable open discussion and allow proposals to be refined based on community input. Autonomous enactments and [forkless upgrades](https://docs.polkadot.com/develop/parachains/maintenance/runtime-upgrades/#forkless-upgrades){target=\_blank} unite the community towards a shared mission to advance the protocol.
With the rollout of OpenGov (originally referred to as Gov2), the second phase of governance in Polkadot, several modifications have been introduced to the governance process. You can read the [OpenGov: What is Polkadot Gov2](https://moonbeam.network/news/opengov-what-is-polkadot-gov2){target=\_blank} blog post, which provides an overview of all of the changes made in OpenGov.
As of runtime 2400, all Moonbeam networks use OpenGov as their governance system.
## Principles {: #principles }
Guiding "soft" principles for engagement with Moonbeam's governance process include:
- Being inclusive to token holders that want to engage with Moonbeam and that are affected by governance decisions
- Favoring token holder engagement, even with views contrary to our own, versus a lack of engagement
- A commitment to openness and transparency in the decision-making process
- Working to keep the greater good of the network above personal gain
- Acting at all times as a moral agent that considers the consequences of action (or inaction) from a moral standpoint
- Being patient and generous in our interactions with other token holders, but not tolerating abusive or destructive language, actions, and behavior, and abiding by [Moonbeam’s Code of Conduct](https://github.com/moonbeam-foundation/code-of-conduct){target=\_blank}
These points were heavily inspired by Vlad Zamfir’s writings on governance. Refer to his articles, especially the [How to Participate in Blockchain Governance in Good Faith (and with Good Manners)](https://medium.com/@Vlad_Zamfir/how-to-participate-in-blockchain-governance-in-good-faith-and-with-good-manners-bd4e16846434){target=\_blank} Medium article.
## On-Chain Governance Mechanics {: #on-chain-governance-mechanics }
The "hard" governance process for Moonbeam will be driven by an on-chain process that allows the majority of tokens on the network to determine the outcomes of key decisions around the network. These decision points come in the form of stake-weighted voting on proposed referenda.
Some of the main components of this governance model include:
- **Referenda** — a stake-based voting scheme where each referendum is tied to a specific proposal for a change to the Moonbeam system including values for key parameters, code upgrades, or changes to the governance system itself
- **Voting** — referenda will be voted on by token holders on a stake-weighted basis. Referenda which pass are subject to delayed enactment so that people who disagree with the direction of the decision have time to exit the network
- **Council & Technical Committee Governance V1** — a group of community members who have special voting rights within the system. With the deprecation and removal of Governance v1, both of these committees were dissolved as of the [runtime 2800 release](https://forum.moonbeam.network/t/runtime-rt2801-schedule/1616/4){target=\_blank}
- **OpenGov Technical Committee** — a group of community members who can add certain proposals to the Whitelisted Track
For more details on how these Substrate frame pallets implement on-chain governance, you can checkout the [Walkthrough of Polkadot’s Governance](https://polkadot.com/blog/a-walkthrough-of-polkadots-governance){target=\_blank} blog post and the [Polkadot Governance Wiki](https://wiki.polkadot.com/learn/learn-polkadot-opengov/){target=\_blank}.
## Governance v2: OpenGov {: #opengov }
This section will cover everything you need to know about OpenGov on Moonbeam.
### General Definitions {: #general-definitions-gov2 }
- **Proposal** — an action or item, defined by the preimage hash, being proposed by a token holder and open for consideration and discussion by token holders
- **Referendum** — a proposal that is up for token-holder voting. Each referendum is tied to a specific proposal for a change to the Moonbeam system including values for key parameters, code upgrades, or changes to the governance system itself
- **Preimage hash** — hash of the proposal to be enacted. The first step to make a proposal is to submit a preimage. The hash is just its identifier. The proposer of the preimage can be different than the user that proposes that preimage as a formal proposal
- **Preimage deposit** — amount of tokens that the proposer needs to bond when submitting a preimage. It is calculated as the sum of a base deposit per network plus a fee per byte of the preimage being proposed
- **Origin** - an authorization-based dispatch source for an operation, which is used to determine the Track that a referendum is posted under
- **Track** - an Origin-specific pipeline that outlines the life cycle of proposals. Currently, there are five Tracks:
| Origin Track | Description | Referendum Examples |
|:-------------------:|:--------------------------------------------------------------------------------:|:--------------------------------------------------------------------:|
| Root | Highest privilege | Runtime upgrades, Technical Committee management |
| Whitelisted | Proposals to be whitelisted by the Technical Committee before being dispatched | Fast-tracked operations |
| General Admin | For general on-chain decisions | Changes to XCM fees, Orbiter program, Staking parameters, Registrars |
| Emergency Canceller | For cancellation of a referendum. Decision Deposit is refunded | Wrongly constructed referendum |
| Emergency Killer | For killing of bad/malicious referendum. Decision Deposit is slashed | Malicious referendum |
| Fast General Admin | For faster general on-chain decisions | HRMP channel management |
Tracks have different criteria parameters that are proportional to their level of Origin class. For example, more dangerous and privileged referenda will have more safeguards, higher thresholds, and longer consideration periods for approval. Please refer to the [Governance Parameters](#governance-parameters-v2) section for more information.
- **Voting** — a mechanism for token holders to support (Aye), oppose (Nay), or remain neutral (Abstain) on a proposal. For Aye and Nay, the voting weight is determined by both the number of tokens locked and the lock duration (Conviction). Abstain votes do not receive additional weighting
- **Conviction** — the time that token holders voluntarily lock their tokens when voting; the longer they are locked, the more weight their vote has
- **Lock balance** — the number of tokens that a user commits to a vote (note, this is not the same as a user's total account balance)
Moonbeam uses the concept of voluntary locking, which allows token holders to increase their voting power by locking tokens for a longer period of time. Specifying no Lock Period means a user's vote is valued at 10% of their lock balance. Specifying a greater Conviction increases voting power. For each increase in Conviction (vote multiplier), the Lock Periods double
- **Approval** — minimum "Aye" votes as a percentage of overall Conviction-weighted votes needed for approval
- **Support** — the minimum portion of Aye and Abstain votes (ignoring conviction) needed as a percentage of the total active supply for a proposal to pass. Nay votes do not count toward Support
- **Lead-in Period** — the initial proposal voting and discussion period. At this stage, proposals are in an undecided state until they pass some criteria for the given Track. The criteria include:
- **Prepare Period** — the minimum time the referendum needs to wait before it can progress to the next phase after submission
- **Capacity** — limit for the number of referenda on a given Track that can be decided at once
- **Decision Deposit** — the minimum deposit amount required for a referendum to progress to the decision phase after the end of the Lead-in Period. Since each Track has a defined Capacity, this deposit is larger than the submission deposit, and its goal is to mitigate spam
- **Decide Period** - token holders continue to vote on the referendum. If a referendum does not pass by the end of the period, it will be rejected, and the Decision Deposit will be refunded
- **Confirm Period** - a period of time within the Decide Period where the referendum needs to have maintained enough Approval and Support to be approved and move to the Enactment Period
- **Enactment Period** - a specified time, which is defined at the time the proposal was created, that an approved referendum waits before it can be dispatched. There is a minimum amount of time for each Track
- **Vote Delegation** — a voter can give their voting power, including Conviction voting, to another token holder (delegate), who may be more knowledgeable and able to make specific decisions
- **Multirole Delegation** — the ability to delegate voting power on a Track-by-Track basis, where a token holder can specify different delegates for each Track
### Governance Parameters {: #governance-parameters-v2 }
=== "Moonbeam"
| Variable | Value |
|:---------------------------:|:----------------------------------------------------------:|
| Preimage base deposit | {{ networks.moonbeam.preimage.base_deposit }} GLMR |
| Preimage deposit per byte | {{ networks.moonbeam.preimage.byte_deposit }} GLMR |
| Proposal Submission Deposit | {{ networks.moonbeam.governance.submission_deposit }} GLMR |
=== "Moonriver"
| Variable | Value |
|:---------------------------:|:-----------------------------------------------------------:|
| Preimage base deposit | {{ networks.moonriver.preimage.base_deposit }} MOVR |
| Preimage deposit per byte | {{ networks.moonriver.preimage.byte_deposit }} MOVR |
| Proposal Submission Deposit | {{ networks.moonriver.governance.submission_deposit }} MOVR |
=== "Moonbase Alpha"
| Variable | Value |
|:---------------------------:|:---------------------------------------------------------:|
| Preimage base deposit | {{ networks.moonbase.preimage.base_deposit }} DEV |
| Preimage deposit per byte | {{ networks.moonbase.preimage.byte_deposit }} DEV |
| Proposal Submission Deposit | {{ networks.moonbase.governance.submission_deposit }} DEV |
#### General Parameters by Track {: #general-parameters-by-track }
=== "Moonbeam"
| Track | Track ID | Capacity | DecisionDeposit | |:----------------------:|:--------:|:-----------------------------------------------------------------------------------:|:----------------------------------------------------------------------------------:| | Root | 0 | {{ networks.moonbeam.governance.tracks.root.max_deciding }} proposals | {{ networks.moonbeam.governance.tracks.root.decision_deposit }} GLMR | | Whitelisted | 1 | {{ networks.moonbeam.governance.tracks.whitelisted.max_deciding }} proposals | {{ networks.moonbeam.governance.tracks.whitelisted.decision_deposit }} GLMR | | General Admin | 2 | {{ networks.moonbeam.governance.tracks.general_admin.max_deciding }} proposals | {{ networks.moonbeam.governance.tracks.general_admin.decision_deposit }} GLMR | | Emergency
Canceller | 3 | {{ networks.moonbeam.governance.tracks.canceller.max_deciding }} proposals | {{ networks.moonbeam.governance.tracks.canceller.decision_deposit }} GLMR | | Emergency
Killer | 4 | {{ networks.moonbeam.governance.tracks.killer.max_deciding }} proposals | {{ networks.moonbeam.governance.tracks.killer.decision_deposit }} GLMR | | Fast General Admin | 5 | {{ networks.moonbeam.governance.tracks.fast_general_admin.max_deciding }} proposals | {{ networks.moonbeam.governance.tracks.fast_general_admin.decision_deposit }} GLMR | === "Moonriver" | Track | Track ID | Capacity | Decision
Deposit | |:----------------------:|:--------:|:------------------------------------------------------------------------------------:|:-----------------------------------------------------------------------------------:| | Root | 0 | {{ networks.moonriver.governance.tracks.root.max_deciding }} proposals | {{ networks.moonriver.governance.tracks.root.decision_deposit }} MOVR | | Whitelisted | 1 | {{ networks.moonriver.governance.tracks.whitelisted.max_deciding }} proposals | {{ networks.moonriver.governance.tracks.whitelisted.decision_deposit }} MOVR | | General Admin | 2 | {{ networks.moonriver.governance.tracks.general_admin.max_deciding }} proposals | {{ networks.moonriver.governance.tracks.general_admin.decision_deposit }} MOVR | | Emergency
Canceller | 3 | {{ networks.moonriver.governance.tracks.canceller.max_deciding }} proposals | {{ networks.moonriver.governance.tracks.canceller.decision_deposit }} MOVR | | Emergency
Killer | 4 | {{ networks.moonriver.governance.tracks.killer.max_deciding }} proposals | {{ networks.moonriver.governance.tracks.killer.decision_deposit }} MOVR | | Fast General Admin | 5 | {{ networks.moonriver.governance.tracks.fast_general_admin.max_deciding }} proposals | {{ networks.moonriver.governance.tracks.fast_general_admin.decision_deposit }} MOVR | === "Moonbase Alpha" | Track | Track ID | Capacity | Decision
Deposit | |:----------------------:|:--------:|:-----------------------------------------------------------------------------------:|:---------------------------------------------------------------------------------:| | Root | 0 | {{ networks.moonbase.governance.tracks.root.max_deciding }} proposals | {{ networks.moonbase.governance.tracks.root.decision_deposit }} DEV | | Whitelisted | 1 | {{ networks.moonbase.governance.tracks.whitelisted.max_deciding }} proposals | {{ networks.moonbase.governance.tracks.whitelisted.decision_deposit }} DEV | | General Admin | 2 | {{ networks.moonbase.governance.tracks.general_admin.max_deciding }} proposals | {{ networks.moonbase.governance.tracks.general_admin.decision_deposit }} DEV | | Emergency
Canceller | 3 | {{ networks.moonbase.governance.tracks.canceller.max_deciding }} proposals | {{ networks.moonbase.governance.tracks.canceller.decision_deposit }} DEV | | Emergency
Killer | 4 | {{ networks.moonbase.governance.tracks.killer.max_deciding }} proposals | {{ networks.moonbase.governance.tracks.killer.decision_deposit }} DEV | | Fast General Admin | 5 | {{ networks.moonbase.governance.tracks.fast_general_admin.max_deciding }} proposals | {{ networks.moonbase.governance.tracks.fast_general_admin.decision_deposit }} DEV | #### Period Parameters by Track {: #period-parameters-by-track } === "Moonbeam" | Track | Prepare
Period | Decide
Period | Confirm
Period | Minimum
Enactment Period | |:----------------------:|:--------------------------------------------------------------------------------------------------------------------------------------------------------------------------------:|:----------------------------------------------------------------------------------------------------------------------------------------------------------------------------------:|:--------------------------------------------------------------------------------------------------------------------------------------------------------------------------------:|:--------------------------------------------------------------------------------------------------------------------------------------------------------------------------------------------:| | Root | {{ networks.moonbeam.governance.tracks.root.prepare_period.blocks }} blocks
({{ networks.moonbeam.governance.tracks.root.prepare_period.time }}) | {{ networks.moonbeam.governance.tracks.root.decision_period.blocks }} blocks
({{ networks.moonbeam.governance.tracks.root.decision_period.time }}) | {{ networks.moonbeam.governance.tracks.root.confirm_period.blocks }} blocks
({{ networks.moonbeam.governance.tracks.root.confirm_period.time }}) | {{ networks.moonbeam.governance.tracks.root.min_enactment_period.blocks }} blocks
({{ networks.moonbeam.governance.tracks.root.min_enactment_period.time }}) | | Whitelisted | {{ networks.moonbeam.governance.tracks.whitelisted.prepare_period.blocks }} blocks
({{ networks.moonbeam.governance.tracks.whitelisted.prepare_period.time }}) | {{ networks.moonbeam.governance.tracks.whitelisted.decision_period.blocks }} blocks
({{ networks.moonbeam.governance.tracks.whitelisted.decision_period.time }}) | {{ networks.moonbeam.governance.tracks.whitelisted.confirm_period.blocks }} blocks
({{ networks.moonbeam.governance.tracks.whitelisted.confirm_period.time }}) | {{ networks.moonbeam.governance.tracks.whitelisted.min_enactment_period.blocks }} blocks
({{ networks.moonbeam.governance.tracks.whitelisted.min_enactment_period.time }}) | | General Admin | {{ networks.moonbeam.governance.tracks.general_admin.prepare_period.blocks }} blocks
({{ networks.moonbeam.governance.tracks.general_admin.prepare_period.time }}) | {{ networks.moonbeam.governance.tracks.general_admin.decision_period.blocks }} blocks
({{ networks.moonbeam.governance.tracks.general_admin.decision_period.time }}) | {{ networks.moonbeam.governance.tracks.general_admin.confirm_period.blocks }} blocks
({{ networks.moonbeam.governance.tracks.general_admin.confirm_period.time }}) | {{ networks.moonbeam.governance.tracks.general_admin.min_enactment_period.blocks }} blocks
({{ networks.moonbeam.governance.tracks.general_admin.min_enactment_period.time }}) | | Emergency
Canceller | {{ networks.moonbeam.governance.tracks.canceller.prepare_period.blocks }} blocks
({{ networks.moonbeam.governance.tracks.canceller.prepare_period.time }}) | {{ networks.moonbeam.governance.tracks.canceller.decision_period.blocks }} blocks
({{ networks.moonbeam.governance.tracks.canceller.decision_period.time }}) | {{ networks.moonbeam.governance.tracks.canceller.confirm_period.blocks }} blocks
({{ networks.moonbeam.governance.tracks.canceller.confirm_period.time }}) | {{ networks.moonbeam.governance.tracks.canceller.min_enactment_period.blocks }} blocks
({{ networks.moonbeam.governance.tracks.canceller.min_enactment_period.time }}) | | Emergency
Killer | {{ networks.moonbeam.governance.tracks.killer.prepare_period.blocks }} blocks
({{ networks.moonbeam.governance.tracks.killer.prepare_period.time }}) | {{ networks.moonbeam.governance.tracks.killer.decision_period.blocks }} blocks
({{ networks.moonbeam.governance.tracks.killer.decision_period.time }}) | {{ networks.moonbeam.governance.tracks.killer.confirm_period.blocks }} blocks
({{ networks.moonbeam.governance.tracks.killer.confirm_period.time }}) | {{ networks.moonbeam.governance.tracks.killer.min_enactment_period.blocks }} blocks
({{ networks.moonbeam.governance.tracks.killer.min_enactment_period.time }}) | | Fast General Admin | {{ networks.moonbeam.governance.tracks.fast_general_admin.prepare_period.blocks }} blocks
({{ networks.moonbeam.governance.tracks.fast_general_admin.prepare_period.time }}) | {{ networks.moonbeam.governance.tracks.fast_general_admin.decision_period.blocks }} blocks
({{ networks.moonbeam.governance.tracks.fast_general_admin.decision_period.time }}) | {{ networks.moonbeam.governance.tracks.fast_general_admin.confirm_period.blocks }} blocks
({{ networks.moonbeam.governance.tracks.fast_general_admin.confirm_period.time }}) | {{ networks.moonbeam.governance.tracks.fast_general_admin.min_enactment_period.blocks }} blocks
({{ networks.moonbeam.governance.tracks.fast_general_admin.min_enactment_period.time }}) | === "Moonriver" | Track | Prepare
Period | Decide
Period | Confirm
Period | Minimum
Enactment Period | |:----------------------:|:----------------------------------------------------------------------------------------------------------------------------------------------------------------------------------:|:------------------------------------------------------------------------------------------------------------------------------------------------------------------------------------:|:----------------------------------------------------------------------------------------------------------------------------------------------------------------------------------:|:----------------------------------------------------------------------------------------------------------------------------------------------------------------------------------------------:| | Root | {{ networks.moonriver.governance.tracks.root.prepare_period.blocks }} blocks
({{ networks.moonriver.governance.tracks.root.prepare_period.time }}) | {{ networks.moonriver.governance.tracks.root.decision_period.blocks }} blocks
({{ networks.moonriver.governance.tracks.root.decision_period.time }}) | {{ networks.moonriver.governance.tracks.root.confirm_period.blocks }} blocks
({{ networks.moonriver.governance.tracks.root.confirm_period.time }}) | {{ networks.moonriver.governance.tracks.root.min_enactment_period.blocks }} blocks
({{ networks.moonriver.governance.tracks.root.min_enactment_period.time }}) | | Whitelisted | {{ networks.moonriver.governance.tracks.whitelisted.prepare_period.blocks }} blocks
({{ networks.moonriver.governance.tracks.whitelisted.prepare_period.time }}) | {{ networks.moonriver.governance.tracks.whitelisted.decision_period.blocks }} blocks
({{ networks.moonriver.governance.tracks.whitelisted.decision_period.time }}) | {{ networks.moonriver.governance.tracks.whitelisted.confirm_period.blocks }} blocks
({{ networks.moonriver.governance.tracks.whitelisted.confirm_period.time }}) | {{ networks.moonriver.governance.tracks.whitelisted.min_enactment_period.blocks }} blocks
({{ networks.moonriver.governance.tracks.whitelisted.min_enactment_period.time }}) | | General Admin | {{ networks.moonriver.governance.tracks.general_admin.prepare_period.blocks }} blocks
({{ networks.moonriver.governance.tracks.general_admin.prepare_period.time }}) | {{ networks.moonriver.governance.tracks.general_admin.decision_period.blocks }} blocks
({{ networks.moonriver.governance.tracks.general_admin.decision_period.time }}) | {{ networks.moonriver.governance.tracks.general_admin.confirm_period.blocks }} blocks
({{ networks.moonriver.governance.tracks.general_admin.confirm_period.time }}) | {{ networks.moonriver.governance.tracks.general_admin.min_enactment_period.blocks }} blocks
({{ networks.moonriver.governance.tracks.general_admin.min_enactment_period.time }}) | | Emergency
Canceller | {{ networks.moonriver.governance.tracks.canceller.prepare_period.blocks }} blocks
({{ networks.moonriver.governance.tracks.canceller.prepare_period.time }}) | {{ networks.moonriver.governance.tracks.canceller.decision_period.blocks }} blocks
({{ networks.moonriver.governance.tracks.canceller.decision_period.time }}) | {{ networks.moonriver.governance.tracks.canceller.confirm_period.blocks }} blocks
({{ networks.moonriver.governance.tracks.canceller.confirm_period.time }}) | {{ networks.moonriver.governance.tracks.canceller.min_enactment_period.blocks }} blocks
({{ networks.moonriver.governance.tracks.canceller.min_enactment_period.time }}) | | Emergency
Killer | {{ networks.moonriver.governance.tracks.killer.prepare_period.blocks }} blocks
({{ networks.moonriver.governance.tracks.killer.prepare_period.time }}) | {{ networks.moonriver.governance.tracks.killer.decision_period.blocks }} blocks
({{ networks.moonriver.governance.tracks.killer.decision_period.time }}) | {{ networks.moonriver.governance.tracks.killer.confirm_period.blocks }} blocks
({{ networks.moonriver.governance.tracks.killer.confirm_period.time }}) | {{ networks.moonriver.governance.tracks.killer.min_enactment_period.blocks }} blocks
({{ networks.moonriver.governance.tracks.killer.min_enactment_period.time }}) | | Fast General Admin | {{ networks.moonriver.governance.tracks.fast_general_admin.prepare_period.blocks }} blocks
({{ networks.moonriver.governance.tracks.fast_general_admin.prepare_period.time }}) | {{ networks.moonriver.governance.tracks.fast_general_admin.decision_period.blocks }} blocks
({{ networks.moonriver.governance.tracks.fast_general_admin.decision_period.time }}) | {{ networks.moonriver.governance.tracks.fast_general_admin.confirm_period.blocks }} blocks
({{ networks.moonriver.governance.tracks.fast_general_admin.confirm_period.time }}) | {{ networks.moonriver.governance.tracks.fast_general_admin.min_enactment_period.blocks }} blocks
({{ networks.moonriver.governance.tracks.fast_general_admin.min_enactment_period.time }}) | === "Moonbase Alpha" | Track | Prepare
Period | Decide
Period | Confirm
Period | Minimum
Enactment Period | |:----------------------:|:--------------------------------------------------------------------------------------------------------------------------------------------------------------------------------:|:----------------------------------------------------------------------------------------------------------------------------------------------------------------------------------:|:--------------------------------------------------------------------------------------------------------------------------------------------------------------------------------:|:--------------------------------------------------------------------------------------------------------------------------------------------------------------------------------------------:| | Root | {{ networks.moonbase.governance.tracks.root.prepare_period.blocks }} blocks
({{ networks.moonbase.governance.tracks.root.prepare_period.time }}) | {{ networks.moonbase.governance.tracks.root.decision_period.blocks }} blocks
({{ networks.moonbase.governance.tracks.root.decision_period.time }}) | {{ networks.moonbase.governance.tracks.root.confirm_period.blocks }} blocks
({{ networks.moonbase.governance.tracks.root.confirm_period.time }}) | {{ networks.moonbase.governance.tracks.root.min_enactment_period.blocks }} blocks
({{ networks.moonbase.governance.tracks.root.min_enactment_period.time }}) | | Whitelisted | {{ networks.moonbase.governance.tracks.whitelisted.prepare_period.blocks }} blocks
({{ networks.moonbase.governance.tracks.whitelisted.prepare_period.time }}) | {{ networks.moonbase.governance.tracks.whitelisted.decision_period.blocks }} blocks
({{ networks.moonbase.governance.tracks.whitelisted.decision_period.time }}) | {{ networks.moonbase.governance.tracks.whitelisted.confirm_period.blocks }} blocks
({{ networks.moonbase.governance.tracks.whitelisted.confirm_period.time }}) | {{ networks.moonbase.governance.tracks.whitelisted.min_enactment_period.blocks }} blocks
({{ networks.moonbase.governance.tracks.whitelisted.min_enactment_period.time }}) | | General Admin | {{ networks.moonbase.governance.tracks.general_admin.prepare_period.blocks }} blocks
({{ networks.moonbase.governance.tracks.general_admin.prepare_period.time }}) | {{ networks.moonbase.governance.tracks.general_admin.decision_period.blocks }} blocks
({{ networks.moonbase.governance.tracks.general_admin.decision_period.time }}) | {{ networks.moonbase.governance.tracks.general_admin.confirm_period.blocks }} blocks
({{ networks.moonbase.governance.tracks.general_admin.confirm_period.time }}) | {{ networks.moonbase.governance.tracks.general_admin.min_enactment_period.blocks }} blocks
({{ networks.moonbase.governance.tracks.general_admin.min_enactment_period.time }}) | | Emergency
Canceller | {{ networks.moonbase.governance.tracks.canceller.prepare_period.blocks }} blocks
({{ networks.moonbase.governance.tracks.canceller.prepare_period.time }}) | {{ networks.moonbase.governance.tracks.canceller.decision_period.blocks }} blocks
({{ networks.moonbase.governance.tracks.canceller.decision_period.time }}) | {{ networks.moonbase.governance.tracks.canceller.confirm_period.blocks }} blocks
({{ networks.moonbase.governance.tracks.canceller.confirm_period.time }}) | {{ networks.moonbase.governance.tracks.canceller.min_enactment_period.blocks }} blocks
({{ networks.moonbase.governance.tracks.canceller.min_enactment_period.time }}) | | Emergency
Killer | {{ networks.moonbase.governance.tracks.killer.prepare_period.blocks }} blocks
({{ networks.moonbase.governance.tracks.killer.prepare_period.time }}) | {{ networks.moonbase.governance.tracks.killer.decision_period.blocks }} blocks
({{ networks.moonbase.governance.tracks.killer.decision_period.time }}) | {{ networks.moonbase.governance.tracks.killer.confirm_period.blocks }} blocks
({{ networks.moonbase.governance.tracks.killer.confirm_period.time }}) | {{ networks.moonbase.governance.tracks.killer.min_enactment_period.blocks }} blocks
({{ networks.moonbase.governance.tracks.killer.min_enactment_period.time }}) | | Fast General Admin | {{ networks.moonbase.governance.tracks.fast_general_admin.prepare_period.blocks }} blocks
({{ networks.moonbase.governance.tracks.fast_general_admin.prepare_period.time }}) | {{ networks.moonbase.governance.tracks.fast_general_admin.decision_period.blocks }} blocks
({{ networks.moonbase.governance.tracks.fast_general_admin.decision_period.time }}) | {{ networks.moonbase.governance.tracks.fast_general_admin.confirm_period.blocks }} blocks
({{ networks.moonbase.governance.tracks.fast_general_admin.confirm_period.time }}) | {{ networks.moonbase.governance.tracks.fast_general_admin.min_enactment_period.blocks }} blocks
({{ networks.moonbase.governance.tracks.fast_general_admin.min_enactment_period.time }}) | !!! note As of runtime 3000, [asynchronous backing](https://wiki.polkadot.com/learn/learn-async-backing/#asynchronous-backing){target=\_blank} has been enabled on all Moonbeam networks. As a result, the target block time was reduced from 12 seconds to 6 seconds, which may break some timing-based assumptions. #### Support and Approval Parameters by Track {: #support-and-approval-parameters-by-track } === "Moonbeam" | Track | Approval Curve | Approval Parameters | Support Curve | Support Parameters | |:----------------------:|:--------------:|:--------------------------------------------------------------------------------------------------------------------------------------------------------------------------------------------------------------------------------------------------------------------------------------------------------------------------------------------------------------------------------------------------------------------------------------------------------------------------------------------------------------------:|:-------------:|:--------------------------------------------------------------------------------------------------------------------------------------------------------------------------------------------------------------------------------------------------------------------------------------------------------------------------------------------------------------------------------------------------------------------------------------------------------------------------------------------------------------:| | Root | Reciprocal | {{ networks.moonbeam.governance.tracks.root.min_approval.time0 }}: {{ networks.moonbeam.governance.tracks.root.min_approval.percent0 }}%
{{ networks.moonbeam.governance.tracks.root.min_approval.time1 }}: {{ networks.moonbeam.governance.tracks.root.min_approval.percent1 }}%
{{ networks.moonbeam.governance.tracks.root.min_approval.time2 }}: {{ networks.moonbeam.governance.tracks.root.min_approval.percent2 }}% | Linear | {{ networks.moonbeam.governance.tracks.root.min_support.time0 }}: {{ networks.moonbeam.governance.tracks.root.min_support.percent0 }}%
{{ networks.moonbeam.governance.tracks.root.min_support.time1 }}: {{ networks.moonbeam.governance.tracks.root.min_support.percent1 }}% | | Whitelisted | Reciprocal | {{ networks.moonbeam.governance.tracks.whitelisted.min_approval.time0 }}: {{ networks.moonbeam.governance.tracks.whitelisted.min_approval.percent0 }}%
{{ networks.moonbeam.governance.tracks.whitelisted.min_approval.time1 }}: {{ networks.moonbeam.governance.tracks.whitelisted.min_approval.percent1 }}%
{{ networks.moonbeam.governance.tracks.whitelisted.min_approval.time2 }}: {{ networks.moonbeam.governance.tracks.whitelisted.min_approval.percent2 }}% | Reciprocal | {{ networks.moonbeam.governance.tracks.whitelisted.min_support.time0 }}: {{ networks.moonbeam.governance.tracks.whitelisted.min_support.percent0 }}%
{{ networks.moonbeam.governance.tracks.whitelisted.min_support.time1 }}: {{ networks.moonbeam.governance.tracks.whitelisted.min_support.percent1 }}%
{{ networks.moonbeam.governance.tracks.whitelisted.min_support.time2 }}: {{ networks.moonbeam.governance.tracks.whitelisted.min_support.percent2 }}% | | General Admin | Reciprocal | {{ networks.moonbeam.governance.tracks.general_admin.min_approval.time0 }}: {{ networks.moonbeam.governance.tracks.general_admin.min_approval.percent0 }}%
{{ networks.moonbeam.governance.tracks.general_admin.min_approval.time1 }}: {{ networks.moonbeam.governance.tracks.general_admin.min_approval.percent1 }}%
{{ networks.moonbeam.governance.tracks.general_admin.min_approval.time2 }}: {{ networks.moonbeam.governance.tracks.general_admin.min_approval.percent2 }}% | Reciprocal | {{ networks.moonbeam.governance.tracks.general_admin.min_support.time0 }}: {{ networks.moonbeam.governance.tracks.general_admin.min_support.percent0 }}%
{{ networks.moonbeam.governance.tracks.general_admin.min_support.time1 }}: {{ networks.moonbeam.governance.tracks.general_admin.min_support.percent1 }}%
{{ networks.moonbeam.governance.tracks.general_admin.min_support.time2 }}: {{ networks.moonbeam.governance.tracks.general_admin.min_support.percent2 }}% | | Emergency
Canceller | Reciprocal | {{ networks.moonbeam.governance.tracks.canceller.min_approval.time0 }}: {{ networks.moonbeam.governance.tracks.canceller.min_approval.percent0 }}%
{{ networks.moonbeam.governance.tracks.canceller.min_approval.time1 }}: {{ networks.moonbeam.governance.tracks.canceller.min_approval.percent1 }}%
{{ networks.moonbeam.governance.tracks.canceller.min_approval.time2 }}: {{ networks.moonbeam.governance.tracks.canceller.min_approval.percent2 }}% | Reciprocal | {{ networks.moonbeam.governance.tracks.canceller.min_support.time0 }}: {{ networks.moonbeam.governance.tracks.canceller.min_support.percent0 }}%
{{ networks.moonbeam.governance.tracks.canceller.min_support.time1 }}: {{ networks.moonbeam.governance.tracks.canceller.min_support.percent1 }}%
{{ networks.moonbeam.governance.tracks.canceller.min_support.time2 }}: {{ networks.moonbeam.governance.tracks.canceller.min_support.percent2 }}% | | Emergency
Killer | Reciprocal | {{ networks.moonbeam.governance.tracks.killer.min_approval.time0 }}: {{ networks.moonbeam.governance.tracks.killer.min_approval.percent0 }}%
{{ networks.moonbeam.governance.tracks.killer.min_approval.time1 }}: {{ networks.moonbeam.governance.tracks.killer.min_approval.percent1 }}%
{{ networks.moonbeam.governance.tracks.killer.min_approval.time2 }}: {{ networks.moonbeam.governance.tracks.killer.min_approval.percent2 }}% | Reciprocal | {{ networks.moonbeam.governance.tracks.killer.min_support.time0 }}: {{ networks.moonbeam.governance.tracks.killer.min_support.percent0 }}%
{{ networks.moonbeam.governance.tracks.killer.min_support.time1 }}: {{ networks.moonbeam.governance.tracks.killer.min_support.percent1 }}%
{{ networks.moonbeam.governance.tracks.killer.min_support.time2 }}: {{ networks.moonbeam.governance.tracks.killer.min_support.percent2 }}% | | Fast General Admin | Reciprocal | {{ networks.moonbeam.governance.tracks.fast_general_admin.min_approval.time0 }}: {{ networks.moonbeam.governance.tracks.fast_general_admin.min_approval.percent0 }}%
{{ networks.moonbeam.governance.tracks.fast_general_admin.min_approval.time1 }}: {{ networks.moonbeam.governance.tracks.fast_general_admin.min_approval.percent1 }}%
{{ networks.moonbeam.governance.tracks.fast_general_admin.min_approval.time2 }}: {{ networks.moonbeam.governance.tracks.fast_general_admin.min_approval.percent2 }}% | Reciprocal | {{ networks.moonbeam.governance.tracks.fast_general_admin.min_support.time0 }}: {{ networks.moonbeam.governance.tracks.fast_general_admin.min_support.percent0 }}%
{{ networks.moonbeam.governance.tracks.fast_general_admin.min_support.time1 }}: {{ networks.moonbeam.governance.tracks.fast_general_admin.min_support.percent1 }}%
{{ networks.moonbeam.governance.tracks.fast_general_admin.min_support.time2 }}: {{ networks.moonbeam.governance.tracks.fast_general_admin.min_support.percent2 }}% | === "Moonriver" | Track | Approval Curve | Approval Parameters | Support Curve | Support Parameters | |:----------------------:|:--------------:|:--------------------------------------------------------------------------------------------------------------------------------------------------------------------------------------------------------------------------------------------------------------------------------------------------------------------------------------------------------------------------------------------------------------------------------------------------------------------------------------------------------------------------:|:-------------:|:--------------------------------------------------------------------------------------------------------------------------------------------------------------------------------------------------------------------------------------------------------------------------------------------------------------------------------------------------------------------------------------------------------------------------------------------------------------------------------------------------------------------:| | Root | Reciprocal | {{ networks.moonriver.governance.tracks.root.min_approval.time0 }}: {{ networks.moonriver.governance.tracks.root.min_approval.percent0 }}%
{{ networks.moonriver.governance.tracks.root.min_approval.time1 }}: {{ networks.moonriver.governance.tracks.root.min_approval.percent1 }}%
{{ networks.moonriver.governance.tracks.root.min_approval.time2 }}: {{ networks.moonriver.governance.tracks.root.min_approval.percent2 }}% | Linear | {{ networks.moonriver.governance.tracks.root.min_support.time0 }}: {{ networks.moonriver.governance.tracks.root.min_support.percent0 }}%
{{ networks.moonriver.governance.tracks.root.min_support.time1 }}: {{ networks.moonriver.governance.tracks.root.min_support.percent1 }}% | | Whitelisted | Reciprocal | {{ networks.moonriver.governance.tracks.whitelisted.min_approval.time0 }}: {{ networks.moonriver.governance.tracks.whitelisted.min_approval.percent0 }}%
{{ networks.moonriver.governance.tracks.whitelisted.min_approval.time1 }}: {{ networks.moonriver.governance.tracks.whitelisted.min_approval.percent1 }}%
{{ networks.moonriver.governance.tracks.whitelisted.min_approval.time2 }}: {{ networks.moonriver.governance.tracks.whitelisted.min_approval.percent2 }}% | Reciprocal | {{ networks.moonriver.governance.tracks.whitelisted.min_support.time0 }}: {{ networks.moonriver.governance.tracks.whitelisted.min_support.percent0 }}%
{{ networks.moonriver.governance.tracks.whitelisted.min_support.time1 }}: {{ networks.moonriver.governance.tracks.whitelisted.min_support.percent1 }}%
{{ networks.moonriver.governance.tracks.whitelisted.min_support.time2 }}: {{ networks.moonriver.governance.tracks.whitelisted.min_support.percent2 }}% | | General Admin | Reciprocal | {{ networks.moonriver.governance.tracks.general_admin.min_approval.time0 }}: {{ networks.moonriver.governance.tracks.general_admin.min_approval.percent0 }}%
{{ networks.moonriver.governance.tracks.general_admin.min_approval.time1 }}: {{ networks.moonriver.governance.tracks.general_admin.min_approval.percent1 }}%
{{ networks.moonriver.governance.tracks.general_admin.min_approval.time2 }}: {{ networks.moonriver.governance.tracks.general_admin.min_approval.percent2 }}% | Reciprocal | {{ networks.moonriver.governance.tracks.general_admin.min_support.time0 }}: {{ networks.moonriver.governance.tracks.general_admin.min_support.percent0 }}%
{{ networks.moonriver.governance.tracks.general_admin.min_support.time1 }}: {{ networks.moonriver.governance.tracks.general_admin.min_support.percent1 }}%
{{ networks.moonriver.governance.tracks.general_admin.min_support.time2 }}: {{ networks.moonriver.governance.tracks.general_admin.min_support.percent2 }}% | | Emergency
Canceller | Reciprocal | {{ networks.moonriver.governance.tracks.canceller.min_approval.time0 }}: {{ networks.moonriver.governance.tracks.canceller.min_approval.percent0 }}%
{{ networks.moonriver.governance.tracks.canceller.min_approval.time1 }}: {{ networks.moonriver.governance.tracks.canceller.min_approval.percent1 }}%
{{ networks.moonriver.governance.tracks.canceller.min_approval.time2 }}: {{ networks.moonriver.governance.tracks.canceller.min_approval.percent2 }}% | Reciprocal | {{ networks.moonriver.governance.tracks.canceller.min_support.time0 }}: {{ networks.moonriver.governance.tracks.canceller.min_support.percent0 }}%
{{ networks.moonriver.governance.tracks.canceller.min_support.time1 }}: {{ networks.moonriver.governance.tracks.canceller.min_support.percent1 }}%
{{ networks.moonriver.governance.tracks.canceller.min_support.time2 }}: {{ networks.moonriver.governance.tracks.canceller.min_support.percent2 }}% | | Emergency
Killer | Reciprocal | {{ networks.moonriver.governance.tracks.killer.min_approval.time0 }}: {{ networks.moonriver.governance.tracks.killer.min_approval.percent0 }}%
{{ networks.moonriver.governance.tracks.killer.min_approval.time1 }}: {{ networks.moonriver.governance.tracks.killer.min_approval.percent1 }}%
{{ networks.moonriver.governance.tracks.killer.min_approval.time2 }}: {{ networks.moonriver.governance.tracks.killer.min_approval.percent2 }}% | Reciprocal | {{ networks.moonriver.governance.tracks.killer.min_support.time0 }}: {{ networks.moonriver.governance.tracks.killer.min_support.percent0 }}%
{{ networks.moonriver.governance.tracks.killer.min_support.time1 }}: {{ networks.moonriver.governance.tracks.killer.min_support.percent1 }}%
{{ networks.moonriver.governance.tracks.killer.min_support.time2 }}: {{ networks.moonriver.governance.tracks.killer.min_support.percent2 }}% | | Fast General Admin | Reciprocal | {{ networks.moonriver.governance.tracks.fast_general_admin.min_approval.time0 }}: {{ networks.moonriver.governance.tracks.fast_general_admin.min_approval.percent0 }}%
{{ networks.moonriver.governance.tracks.fast_general_admin.min_approval.time1 }}: {{ networks.moonriver.governance.tracks.fast_general_admin.min_approval.percent1 }}%
{{ networks.moonriver.governance.tracks.fast_general_admin.min_approval.time2 }}: {{ networks.moonriver.governance.tracks.fast_general_admin.min_approval.percent2 }}% | Reciprocal | {{ networks.moonriver.governance.tracks.fast_general_admin.min_support.time0 }}: {{ networks.moonriver.governance.tracks.fast_general_admin.min_support.percent0 }}%
{{ networks.moonriver.governance.tracks.fast_general_admin.min_support.time1 }}: {{ networks.moonriver.governance.tracks.fast_general_admin.min_support.percent1 }}%
{{ networks.moonriver.governance.tracks.fast_general_admin.min_support.time2 }}: {{ networks.moonriver.governance.tracks.fast_general_admin.min_support.percent2 }}% | === "Moonbase Alpha" | Track | Approval Curve | Approval Parameters | Support Curve | Support Parameters | |:----------------------:|:--------------:|:--------------------------------------------------------------------------------------------------------------------------------------------------------------------------------------------------------------------------------------------------------------------------------------------------------------------------------------------------------------------------------------------------------------------------------------------------------------------------------------------------------------------:|:-------------:|:--------------------------------------------------------------------------------------------------------------------------------------------------------------------------------------------------------------------------------------------------------------------------------------------------------------------------------------------------------------------------------------------------------------------------------------------------------------------------------------------------------------:| | Root | Reciprocal | {{ networks.moonbase.governance.tracks.root.min_approval.time0 }}: {{ networks.moonbase.governance.tracks.root.min_approval.percent0 }}%
{{ networks.moonbase.governance.tracks.root.min_approval.time1 }}: {{ networks.moonbase.governance.tracks.root.min_approval.percent1 }}%
{{ networks.moonbase.governance.tracks.root.min_approval.time2 }}: {{ networks.moonbase.governance.tracks.root.min_approval.percent2 }}% | Linear | {{ networks.moonbase.governance.tracks.root.min_support.time0 }}: {{ networks.moonbase.governance.tracks.root.min_support.percent0 }}%
{{ networks.moonbase.governance.tracks.root.min_support.time1 }}: {{ networks.moonbase.governance.tracks.root.min_support.percent1 }}% | | Whitelisted | Reciprocal | {{ networks.moonbase.governance.tracks.whitelisted.min_approval.time0 }}: {{ networks.moonbase.governance.tracks.whitelisted.min_approval.percent0 }}%
{{ networks.moonbase.governance.tracks.whitelisted.min_approval.time1 }}: {{ networks.moonbase.governance.tracks.whitelisted.min_approval.percent1 }}%
{{ networks.moonbase.governance.tracks.whitelisted.min_approval.time2 }}: {{ networks.moonbase.governance.tracks.whitelisted.min_approval.percent2 }}% | Reciprocal | {{ networks.moonbase.governance.tracks.whitelisted.min_support.time0 }}: {{ networks.moonbase.governance.tracks.whitelisted.min_support.percent0 }}%
{{ networks.moonbase.governance.tracks.whitelisted.min_support.time1 }}: {{ networks.moonbase.governance.tracks.whitelisted.min_support.percent1 }}%
{{ networks.moonbase.governance.tracks.whitelisted.min_support.time2 }}: {{ networks.moonbase.governance.tracks.whitelisted.min_support.percent2 }}% | | General Admin | Reciprocal | {{ networks.moonbase.governance.tracks.general_admin.min_approval.time0 }}: {{ networks.moonbase.governance.tracks.general_admin.min_approval.percent0 }}%
{{ networks.moonbase.governance.tracks.general_admin.min_approval.time1 }}: {{ networks.moonbase.governance.tracks.general_admin.min_approval.percent1 }}%
{{ networks.moonbase.governance.tracks.general_admin.min_approval.time2 }}: {{ networks.moonbase.governance.tracks.general_admin.min_approval.percent2 }}% | Reciprocal | {{ networks.moonbase.governance.tracks.general_admin.min_support.time0 }}: {{ networks.moonbase.governance.tracks.general_admin.min_support.percent0 }}%
{{ networks.moonbase.governance.tracks.general_admin.min_support.time1 }}: {{ networks.moonbase.governance.tracks.general_admin.min_support.percent1 }}%
{{ networks.moonbase.governance.tracks.general_admin.min_support.time2 }}: {{ networks.moonbase.governance.tracks.general_admin.min_support.percent2 }}% | | Emergency
Canceller | Reciprocal | {{ networks.moonbase.governance.tracks.canceller.min_approval.time0 }}: {{ networks.moonbase.governance.tracks.canceller.min_approval.percent0 }}%
{{ networks.moonbase.governance.tracks.canceller.min_approval.time1 }}: {{ networks.moonbase.governance.tracks.canceller.min_approval.percent1 }}%
{{ networks.moonbase.governance.tracks.canceller.min_approval.time2 }}: {{ networks.moonbase.governance.tracks.canceller.min_approval.percent2 }}% | Reciprocal | {{ networks.moonbase.governance.tracks.canceller.min_support.time0 }}: {{ networks.moonbase.governance.tracks.canceller.min_support.percent0 }}%
{{ networks.moonbase.governance.tracks.canceller.min_support.time1 }}: {{ networks.moonbase.governance.tracks.canceller.min_support.percent1 }}%
{{ networks.moonbase.governance.tracks.canceller.min_support.time2 }}: {{ networks.moonbase.governance.tracks.canceller.min_support.percent2 }}% | | Emergency
Killer | Reciprocal | {{ networks.moonbase.governance.tracks.killer.min_approval.time0 }}: {{ networks.moonbase.governance.tracks.killer.min_approval.percent0 }}%
{{ networks.moonbase.governance.tracks.killer.min_approval.time1 }}: {{ networks.moonbase.governance.tracks.killer.min_approval.percent1 }}%
{{ networks.moonbase.governance.tracks.killer.min_approval.time2 }}: {{ networks.moonbase.governance.tracks.killer.min_approval.percent2 }}% | Reciprocal | {{ networks.moonbase.governance.tracks.killer.min_support.time0 }}: {{ networks.moonbase.governance.tracks.killer.min_support.percent0 }}%
{{ networks.moonbase.governance.tracks.killer.min_support.time1 }}: {{ networks.moonbase.governance.tracks.killer.min_support.percent1 }}%
{{ networks.moonbase.governance.tracks.killer.min_support.time2 }}: {{ networks.moonbase.governance.tracks.killer.min_support.percent2 }}% | | Fast General Admin | Reciprocal | {{ networks.moonbase.governance.tracks.fast_general_admin.min_approval.time0 }}: {{ networks.moonbase.governance.tracks.fast_general_admin.min_approval.percent0 }}%
{{ networks.moonbase.governance.tracks.fast_general_admin.min_approval.time1 }}: {{ networks.moonbase.governance.tracks.fast_general_admin.min_approval.percent1 }}%
{{ networks.moonbase.governance.tracks.fast_general_admin.min_approval.time2 }}: {{ networks.moonbase.governance.tracks.fast_general_admin.min_approval.percent2 }}% | Reciprocal | {{ networks.moonbase.governance.tracks.fast_general_admin.min_support.time0 }}: {{ networks.moonbase.governance.tracks.fast_general_admin.min_support.percent0 }}%
{{ networks.moonbase.governance.tracks.fast_general_admin.min_support.time1 }}: {{ networks.moonbase.governance.tracks.fast_general_admin.min_support.percent1 }}%
{{ networks.moonbase.governance.tracks.fast_general_admin.min_support.time2 }}: {{ networks.moonbase.governance.tracks.fast_general_admin.min_support.percent2 }}% | #### Conviction Multiplier {: #conviction-multiplier-v2 } The Conviction multiplier is related to the number of Enactment Periods the tokens will be locked for after the referenda is enacted (if approved). Consequently, the longer you are willing to lock your tokens, the stronger your vote will be weighted. You also have the option of not locking tokens at all, but vote weight is drastically reduced (tokens are still locked during the duration of the referendum). If you were to vote 1000 tokens with a 6x Conviction, your weighted vote would be 6000 units. That is, 1000 locked tokens multiplied by the Conviction, which in this scenario would be 6. On the other hand, if you decided you didn't want to have your tokens locked after enactment, you could vote your 1000 tokens with a 0.1x Conviction. In this case, your weighted vote would only be 100 units. The Conviction multiplier values for each network are: === "Moonbeam" | Lock Periods After Enactment | Conviction Multiplier | Approx. Lock Time | |:----------------------------:|:---------------------:|:--------------------------------------------------------------:| | 0 | 0.1 | None | | 1 | 1 | {{networks.moonbeam.conviction.lock_period.conviction_1}} day | | 2 | 2 | {{networks.moonbeam.conviction.lock_period.conviction_2}} days | | 4 | 3 | {{networks.moonbeam.conviction.lock_period.conviction_3}} days | | 8 | 4 | {{networks.moonbeam.conviction.lock_period.conviction_4}} days | | 16 | 5 | {{networks.moonbeam.conviction.lock_period.conviction_5}} days | | 32 | 6 | {{networks.moonbeam.conviction.lock_period.conviction_6}} days | === "Moonriver" | Lock Periods After Enactment | Conviction Multiplier | Approx. Lock Time | |:----------------------------:|:---------------------:|:---------------------------------------------------------------:| | 0 | 0.1 | None | | 1 | 1 | {{networks.moonriver.conviction.lock_period.conviction_1}} day | | 2 | 2 | {{networks.moonriver.conviction.lock_period.conviction_2}} days | | 4 | 3 | {{networks.moonriver.conviction.lock_period.conviction_3}} days | | 8 | 4 | {{networks.moonriver.conviction.lock_period.conviction_4}} days | | 16 | 5 | {{networks.moonriver.conviction.lock_period.conviction_5}} days | | 32 | 6 | {{networks.moonriver.conviction.lock_period.conviction_6}} days | === "Moonbase Alpha" | Lock Periods After Enactment | Conviction Multiplier | Approx. Lock Time | |:----------------------------:|:---------------------:|:--------------------------------------------------------------:| | 0 | 0.1 | None | | 1 | 1 | {{networks.moonbase.conviction.lock_period.conviction_1}} day | | 2 | 2 | {{networks.moonbase.conviction.lock_period.conviction_2}} days | | 4 | 3 | {{networks.moonbase.conviction.lock_period.conviction_3}} days | | 8 | 4 | {{networks.moonbase.conviction.lock_period.conviction_4}} days | | 16 | 5 | {{networks.moonbase.conviction.lock_period.conviction_5}} days | | 32 | 6 | {{networks.moonbase.conviction.lock_period.conviction_6}} days | !!! note The lock time approximations are based upon regular {{ networks.moonriver.block_time }}-second block times. Block production may vary and thus the displayed lock times should not be deemed exact. ### Roadmap of a Proposal {: #roadmap-of-a-proposal-v2 } Before a proposal is submitted, the author of the proposal can submit their proposal idea to the designated Democracy Proposals section of the [Moonbeam Governance discussion forum](https://forum.moonbeam.network/c/governance/2){target=\_blank} for feedback from the community for at least five days. From there, the author can make adjustments to the proposal based on the feedback they've collected. Once the author is ready, they can submit their proposal on-chain. To do so, first, they need to submit the preimage of the proposal. The submitter needs to bond a fee to store the preimage on-chain. The bond is returned once the submitter unnotes the preimage. Next, they can submit the actual proposal and pay the Submission Deposit, which is enough to cover the on-chain storage cost of the proposal. Then the Lead-in Period begins and the community can begin voting "Aye" or "Nay" on the proposal by locking tokens. In order for the referendum to advance and move out of the Lead-in Period to the Decide period, the following criteria must be met: - The referendum must wait the duration of the Prepare Period, which allows for adequate time to discuss the proposal before it progresses to the next phase - There is enough Capacity in the chosen Track - A Decision Deposit has been made that meets the minimum requirements for the Track If a referendum meets the above criteria, it moves to the Decide Period and takes up one of the spots in its designated Track. In the Decide Period, voting continues and the referendum has a set amount of days to reach the Approval and Support requirements needed for it to progress to the Confirm Period. Once in the Confirm Period, a referendum must continuously meet the Approval and Support requirements for the duration of the period. If a referendum fails to meet the requirements at any point, it is returned to the Decide Period. If the referendum meets the Approval and Support requirements again, it can progress to the Confirm Period again and the Decide Period will be delayed until the end of the Confirm Period. If the Decide Period ends and not enough Approval and Support was received, the referendum will be rejected and the Decision Deposit will be returned. The proposal can be proposed again at any time. If a referendum continuously receives enough Approval and Support during the Confirm Period, it will be approved and move to the Enactment Period. It will wait the duration of the Enactment Period before it gets dispatched. The happy path for a proposal is shown in the following diagram:  ### Proposal Example Walkthrough A proposal (with its preimage) is submitted for the General Admin Track on Moonriver would have the following characteristics: - The Approval curve starts at {{ networks.moonriver.governance.tracks.general_admin.min_approval.percent0 }}% on {{ networks.moonriver.governance.tracks.general_admin.min_approval.time0 }}, goes to {{ networks.moonriver.governance.tracks.general_admin.min_approval.percent1 }}% on {{ networks.moonriver.governance.tracks.general_admin.min_approval.time1 }} - The Support curve starts at {{ networks.moonriver.governance.tracks.general_admin.min_support.percent0 }}% on {{ networks.moonriver.governance.tracks.general_admin.min_support.time0 }}, goes to {{ networks.moonriver.governance.tracks.general_admin.min_support.percent1 }}% on {{ networks.moonriver.governance.tracks.general_admin.min_support.time1 }} - A referendum starts the Decide Period with 0% "Aye" votes (nobody voted in the Lead-in Period) - Token holders begin to vote and the Approval increases to a value above {{ networks.moonriver.governance.tracks.general_admin.min_approval.percent1 }}% by {{ networks.moonriver.governance.tracks.general_admin.min_approval.time1 }} - If the Approval and Support thresholds are met for the duration of the Confirm Period ({{ networks.moonriver.governance.tracks.general_admin.confirm_period.blocks }} blocks, approximately {{ networks.moonriver.governance.tracks.general_admin.confirm_period.time }}), the referendum is approved - If the Approval and Support thresholds are not met during the Decision Period, the proposal is rejected. Note that the thresholds need to be met for the duration of the Confirm Period. Consequently, if they are met but the Decision Period expires before the completion of the Confirm Period, the proposal is rejected The Approval and Support percentages can be calculated using the following: === "Approval" ```text Approval = 100 * ( Total Conviction-weighted "Aye" votes / Total Conviction-weighted votes ) ``` === "Support" ```text Support = 100 * ( Total Aye + Abstain votes, ignoring conviction / Total supply ) ``` ### Proposal Cancellations {: #proposal-cancellations } In the event that a proposal already in the voting stage is found to have an issue, it may be necessary to prevent its approval. These instances may involve malicious activity or technical issues that make the changes impossible to implement due to recent upgrades to the network. Cancellations must be voted on by the network to be executed. Cancellation proposals are faster than a typical proposal because they must be decided before the enactment of the proposal they seek to cancel, but they follow the same process as other referenda. There is a cancellation Origin for use against referenda that contain an unforeseen problem, called the Emergency Canceller. The Emergency Canceller Origin and the Root Origin are allowed to cancel referenda. Regardless of the Origin, if a proposal is cancelled, it gets rejected and the Decision Deposit gets refunded. In addition, there is a Kill Origin, which is for bad referenda intending to harm the network, called Emergency Killer. The Emergency Killer Origin and the Root Origin have the ability to kill referenda. In this case, a proposal is cancelled and the Decision Deposit is slashed, meaning the deposit amount is burned regardless of the Origin. ### Rights of the OpenGov Technical Committee {: #rights-of-the-opengov-technical-committee } On Polkadot, the Technical Committee from Governance v1 was replaced with the Fellowship, which is a "mostly self-governing expert body with a primary goal of representing humans who embody and contain the technical knowledge base of the Kusama and/or Polkadot networks and protocol," according to [Polkadot's wiki](https://wiki.polkadot.com/general/web3-and-polkadot/#fellowship){target=\_blank}. For Moonbeam's implementation of OpenGov, instead of the Fellowship, there is a community OpenGov Technical Committee that has very similar power to that of the Fellowship. Their power in governance resides in their ability to whitelist a proposal. OpenGov Technical Committee members may only vote to whitelist a proposal if whitelisting that proposal would protect against a security vulnerability to the network. The passing threshold of the OpenGov Technical Committee members on whether to whitelist a proposal is determined by governance. As such, the OpenGov Technical Committee has very limited power over the network. Its purpose is to provide technical review of urgent security issues that are proposed by token holders. While still subject to governance, the idea behind the Whitelist track is that it will have different parameters to make it faster for proposals to pass. The Whitelist Track parameters, including approval, support, and voting, are determined by the Moonriver or Moonbeam token holders through governance and cannot be changed by the OpenGov Technical Committee. The OpenGov Technical Committee is made up of members of the community who have technical knowledge and expertise in Moonbeam-based networks. ### Related Guides on OpenGov {: #try-it-out } For related guides on submitting and voting on referenda on Moonbeam with OpenGov, please check the following guides: - [How to Submit a Proposal](/tokens/governance/proposals/){target=\_blank} - [How to Vote on a Proposal](/tokens/governance/voting/){target=\_blank} - [Interact with the Preimages Precompiled Contract (Solidity Interface)](/builders/ethereum/precompiles/features/governance/preimage/){target=\_blank} - [Interact with the Referenda Precompiled Contract (Solidity Interface)](/builders/ethereum/precompiles/features/governance/referenda/){target=\_blank} - [Interact with the Conviction Voting Precompiled Contract (Solidity Interface)](/builders/ethereum/precompiles/features/governance/conviction-voting/){target=\_blank} --- END CONTENT --- Doc-Content: https://docs.moonbeam.network/learn/features/randomness/ --- BEGIN CONTENT --- --- title: Randomness description: Learn about the sources of VRF randomness on Moonbeam, the request and fulfillment process, and some security considerations when using on-chain randomness. categories: Basics --- # Randomness on Moonbeam ## Introduction {: #introduction } Randomness is necessary for a variety of blockchain applications to create unbiased, unpredictable, and unique outcomes. However, obtaining a reliable source of randomness is a challenge. Computers are deterministic, meaning given the same input, the same output will always be produced. Therefore, random values generated by computers are referred to as pseudo-random as they appear to be statistically random, but given the same input, the output can easily be repeated. Moonbeam utilizes verifiable random functions (VRF) to generate randomness that can be verified on-chain. A VRF is a cryptographic function that takes some input and produces random values, along with a proof of authenticity that they were generated by the submitter. The proof can be verified by anyone to ensure that the random values were generated correctly. There are two available sources of randomness that provide random inputs based on block producers' VRF keys and past randomness results: [local VRF](#local-vrf) and [BABE epoch randomness](#babe-epoch-randomness). Local VRF is determined directly within Moonbeam using the collator of the block's VRF key and the last block's VRF output. On the other hand, [BABE](https://docs.polkadot.com/polkadot-protocol/architecture/polkadot-chain/pos-consensus/#block-production-babe){target=\_blank} epoch randomness is based on all the VRF produced by the relay chain validators during a complete [epoch](https://wiki.polkadot.com/general/glossary/#epoch){target=\_blank}. You can interact with and request on-chain randomness using the Randomness Precompile contract, a Solidity interface that enables smart contract developers to access the randomness functionality through the Ethereum API. For more information, please check out the [Interacting with the Randomness Precompile](/builders/ethereum/precompiles/features/randomness/){target=\_blank} guide. You can also take a look at the [Randomness Pallet](/builders/substrate/interfaces/features/randomness/){target=\_blank}, which can be used to obtain current randomness requests and results. ## General Definitions {: #general-definitions } - **Epoch** - a time duration in the BABE protocol that is broken into smaller time slots. Slots are discrete units of time six seconds in length. On Polkadot, one epoch lasts approximately 2,400 slots or 4 hours. On Kusama, one epoch lasts approximately 600 slots or 1 hour. - **Deposit** - an amount of funds required to request random words. There is one deposit per request. Once the request has been fulfilled, the deposit will be returned to the account that requested the randomness - **Block expiration delay** - the number of blocks that must pass before a local VRF request expires and can be purged - **Epoch expiration delay** - the number of epochs that must pass before a BABE request expires and can be purged - **Minimum block delay** - the minimum number of blocks before a request can be fulfilled for local VRF requests - **Maximum block delay** - the maximum number of blocks before a request can be fulfilled for local VRF requests - **Maximum random words** - the maximum number of random words being requested - **Epoch fulfillment delay** - the delay in epochs before a request can be fulfilled for a BABE request ## Quick Reference {: #quick-reference } === "Moonbeam" | Variable | Value | |:-----------------------:|:---------------------------------------------------------------------------------------------:| | Deposit | {{ networks.moonbeam.randomness.req_deposit_amount.glmr }} GLMR | | Block expiration delay | {{ networks.moonbeam.randomness.block_expiration }} blocks | | Epoch expiration delay | {{ networks.moonbeam.randomness.epoch_expiration }} epochs | | Minimum block delay | {{ networks.moonbeam.randomness.min_vrf_blocks_delay }} blocks | | Maximum block delay | {{ networks.moonbeam.randomness.max_vrf_blocks_delay }} blocks | | Maximum random words | {{ networks.moonbeam.randomness.max_random_words }} words | | Epoch fulfillment delay | {{ networks.moonbeam.randomness.epoch_fulfillment_delay }} epochs (following the current one) | === "Moonriver" | Variable | Value | |:-----------------------:|:----------------------------------------------------------------------------------------------:| | Deposit | {{ networks.moonriver.randomness.req_deposit_amount.movr }} MOVR | | Block expiration delay | {{ networks.moonriver.randomness.block_expiration }} blocks | | Epoch expiration delay | {{ networks.moonriver.randomness.epoch_expiration }} epochs | | Minimum block delay | {{ networks.moonriver.randomness.min_vrf_blocks_delay }} blocks | | Maximum block delay | {{ networks.moonriver.randomness.max_vrf_blocks_delay }} blocks | | Maximum random words | {{ networks.moonriver.randomness.max_random_words }} words | | Epoch fulfillment delay | {{ networks.moonriver.randomness.epoch_fulfillment_delay }} epochs (following the current one) | === "Moonbase Alpha" | Variable | Value | |:-----------------------:|:---------------------------------------------------------------------------------------------:| | Deposit | {{ networks.moonbase.randomness.req_deposit_amount.dev }} DEV | | Block expiration delay | {{ networks.moonbase.randomness.block_expiration }} blocks | | Epoch expiration delay | {{ networks.moonbase.randomness.epoch_expiration }} epochs | | Minimum block delay | {{ networks.moonbase.randomness.min_vrf_blocks_delay }} blocks | | Maximum block delay | {{ networks.moonbase.randomness.max_vrf_blocks_delay }} blocks | | Maximum random words | {{ networks.moonbase.randomness.max_random_words }} words | | Epoch fulfillment delay | {{ networks.moonbase.randomness.epoch_fulfillment_delay }} epochs (following the current one) | ## Local VRF {: #local-vrf } Local VRF randomness is generated on a block-by-block basis at the beginning of the block using the previous block's VRF output along with the public key of the current block author's VRF key. The generated randomness result is stored and used to fulfill all randomness requests for the current block. You can request local VRF randomness using the [`requestLocalVRFRandomWords` method](/builders/ethereum/precompiles/features/randomness/#:~:text=requestLocalVRFRandomWords){target=\_blank} of the [Randomness Precompile](/builders/ethereum/precompiles/features/randomness/){target=\_blank}. If your contract could have concurrent requests open, you can use the `requestId` returned from the `requestLocalVRFRandomWords` method to track which response is associated with which randomness request. ## BABE Epoch Randomness {: #babe-epoch-randomness } BABE epoch randomness is based on a hash of the VRF values from the blocks produced in the relay chain epoch before last. On Polkadot, an [epoch lasts for roughly 4 hours](https://wiki.polkadot.com/learn/learn-cryptography/#vrf){target=\_blank}, and on Kusama, an [epoch lasts for roughly 1 hour](https://guide.kusama.network/docs/maintain-polkadot-parameters#periods-of-common-actions-and-attributes){target=\_blank}. The hashing is completed on the relay chain, and as such, it is not possible for a collator on Moonbeam to influence the randomness value unless they are also a validator on the relay chain and were responsible for producing the last output included in an epoch. The randomness remains constant during an epoch. If a collator skips block production, the next eligible collator can fulfill the request using the same random value. You can request BABE epoch randomness using the [`requestRelayBabeEpochRandomWords` method](/builders/ethereum/precompiles/features/randomness/#:~:text=requestRelayBabeEpochRandomWords){target=\_blank} of the [Randomness Precompile](/builders/ethereum/precompiles/features/randomness/){target=\_blank}. In order to generate unique randomness, a different salt must be provided to the `requestRelayBabeEpochRandomWords` function. At the beginning of each relay chain epoch change, the randomness from one epoch ago is read from the relay chain state proof and used to fulfill all randomness requests that are due in the current block. ## Request & Fulfill Process {: #request-and-fulfill-process } In general, the request and fulfill process for randomness is as follows: 1. Pay the deposit required to request random words 2. Request the randomness either using the local VRF or BABE epoch source of randomness. When requesting randomness you'll need to specify a few things: - a refund address where any excess fees will be sent to - the amount of fees which will be set aside to pay for fulfillment. If the specified amount is not enough you can always increase the request fees later, or if it's more than enough you'll be refunded the excess fees to the specified address after fulfillment - a unique salt that will be used to generate different random words - the number of random words you would like to request - for local VRF, the delay period in blocks, which is used to increase unpredictability. It must be between the [minimum and maximum number of blocks](#quick-reference) as listed above. For BABE epoch randomness, you do not need to specify a delay but can fulfill the request after the [epoch delay](#quick-reference) has passed 3. Wait for the delay period to pass 4. Fulfill the randomness request, which triggers the random words to be computed using the current block's randomness result and the given salt. This can manually be done by anyone using the fee that was initially set aside for the request 5. For fulfilled requests, the random words are returned and the cost of execution will be refunded from the request fee to the address that initiated the fulfillment. Then any excess fees and the request deposit are transferred to the specified refund address If a request expires it can be purged by anyone. When this happens, the request fee is paid out to the address that initiated the purge and the deposit is returned to the original requester. The happy path for a randomness request is shown in the following diagram:  ## Security Considerations {: #security-considerations } A method with the ability to call your `fulfillRandomness` method directly could spoof a VRF response with any random value, so it's critical that it can only be directly called by the `RandomnessConsumer.sol` contract's `rawFulfillRandomness` method. For your users to trust that your contract's random behavior is free from malicious interference, it's best if you can write it so that all behaviors implied by a VRF response are executed *during* your `fulfillRandomness` method. If your contract must store the response (or anything derived from it) and use it later, you must ensure that any user-significant behavior which depends on that stored value cannot be manipulated by a subsequent VRF request. Similarly, the collators have some influence over the order in which VRF responses appear on the blockchain, so if your contract could have multiple VRF requests in flight simultaneously, you must ensure that the order in which the VRF responses arrive cannot be used to manipulate your contract's user-significant behavior. Since the output of the random words generated for `requestLocalVRFRandomWords` is dependent on the collator producing the block at fulfillment, the collator could skip its block, forcing the fulfillment to be executed by a different collator and therefore generating a different VRF. However, such an attack would incur the cost of losing the block reward to the collator. It is also possible for a collator to be able to predict some of the possible outcome of the VRF if the delay between the request and the fulfillment is too short. It is for this reason that you can choose to provide a higher delay. Since the output of the random words generated for `requestRelayBabeEpochRandomWords` is dependent on the relay chain validator producing the blocks during an epoch, it is possible for the last validator of an epoch to choose between two possible VRF outputs by skipping the production of a block. However, such an attack would incur the cost of losing the block reward to the validator. It is not possible for a parachain collator to predict or influence the output of the relay chain VRF, not to censor the fulfillment, as long as there is one honest collator. --- END CONTENT --- Doc-Content: https://docs.moonbeam.network/learn/features/staking/ --- BEGIN CONTENT --- --- title: Staking description: Moonbeam provides staking features where token holders delegate collator candidates with their tokens and earn rewards. categories: Basics, Staking --- # Staking on Moonbeam ## Introduction {: #introduction } Moonbeam uses a block production mechanism based on [Polkadot's Proof-of-Stake model](https://docs.polkadot.com/polkadot-protocol/architecture/polkadot-chain/pos-consensus/){target=\_blank}, where there are collators and validators. [Collators](https://wiki.polkadot.com/learn/learn-collator/){target=\_blank} maintain parachains (in this case, Moonbeam) by collecting transactions from users and producing state transition proofs for the relay chain [validators](https://wiki.polkadot.com/learn/learn-validator/){target=\_blank}. The candidates in the active set of collators (nodes that produce blocks) are selected based on their stake in the network. And here is where staking comes in. Collator candidates (and token holders if they delegate) have a stake in the network. The top N candidates by staked amount are chosen to produce blocks with a valid set of transactions, where N is a configurable parameter. Part of each block reward goes to the collators that produced the block, who then share it with the delegators considering their percental contributions towards the collator's stake. In such a way, network members are incentivized to stake tokens to improve the overall security. Since staking is done at a protocol level through the staking interface, if you choose to delegate, the collators you delegate to do not have access to your tokens. To easily manage staking related actions, you can visit the [Moonbeam Network DApp](https://apps.moonbeam.network){target=\_blank} and use the network tabs at the top of the page to easily switch between Moonbeam networks. To learn how to use the DApp, you can check out the [How to Stake MOVR Tokens](https://moonbeam.network/news/how-to-stake-movr-tokens-on-moonriver-and-earn-staking-rewards){target=\_blank} guide or [video tutorial](https://www.youtube.com/watch?v=8GwetYmzEJM){target=\_blank}, both of which can be adapted for the Moonbeam and the Moonbase Alpha TestNet. ## General Definitions {: #general-definitions } Some important parameters to understand in relation to the staking system on Moonbeam include: - **Round** — a specific number of blocks around which staking actions are enforced. For example, new delegations are enacted when the next round starts. When bonding less or revoking delegations, funds are returned after a specified number of rounds - **Candidates** - node operators that are eligible to become block producers if they can acquire enough stake to be in the active set - **Collators** — active set of candidates that are selected to be block producers. They collect transactions from users and produce state transition proofs for the relay chain to validate - **Delegators** — token holders who stake tokens, vouching for specific collator candidates. Any user that holds a minimum amount of tokens as [free balance](https://wiki.polkadot.com/learn/learn-accounts/#balance-types#balance-types) can become a delegator - **Minimum delegation per candidate** — minimum amount of tokens to delegate candidates once a user is in the set of delegators - **Maximum delegators per candidate** — maximum number of delegators, by staked amount, that a candidate can have which are eligible to receive staking rewards - **Maximum delegations** — maximum number of candidates a delegator can delegate - **Exit delay** - an exit delay is the amount of rounds before a candidate or delegator can execute a scheduled request to decrease or revoke a bond, or leave the set of candidates or delegators - **Reward payout delay** - a certain amount of rounds must pass before staking rewards are distributed automatically to the free balance - **Reward pool** - a portion of the annual inflation that is set aside for collators and delegators - **Collator commission** - default fixed percent a collator takes off the top of the due staking rewards. Not related to the reward pool - **Delegator rewards** — the aggregate delegator rewards distributed over all eligible delegators, taking into account the relative size of stakes ([read more](/learn/features/staking/#reward-distribution)) - **Auto-compounding** - a setting that automatically applies a percentage of a delegator's rewards to their total amount delegated - **Slashing** — a mechanism to discourage collator misbehavior, where typically the collator and their delegators get slashed by losing a percentage of their stake. Currently, there is no slashing but this can be changed through governance. Collators who produce blocks that are not finalized by the relay chain won't receive rewards ## Quick Reference {: #quick-reference } === "Moonbeam" | Variable | Value | |:--------------------------------:|:-----------------------------------------------------------------------------------------------------------------------------------------------------:| | Round duration | {{ networks.moonbeam.staking.round_blocks }} blocks ({{ networks.moonbeam.staking.round_hours }} hours) | | Minimum delegation per candidate | {{ networks.moonbeam.staking.min_del_stake }} GLMR | | Maximum delegators per candidate | {{ networks.moonbeam.staking.max_del_per_can }} | | Maximum delegations | {{ networks.moonbeam.staking.max_del_per_del }} | | Reward payout delay | {{ networks.moonbeam.delegator_timings.rewards_payouts.rounds }} rounds ({{ networks.moonbeam.delegator_timings.rewards_payouts.hours }} hours) | | Add or increase delegation | takes effect in the next round (funds are withdrawn immediately) | | Decrease delegation delay | {{ networks.moonbeam.delegator_timings.del_bond_less.rounds }} rounds ({{ networks.moonbeam.delegator_timings.del_bond_less.hours }} hours) | | Revoke delegations delay | {{ networks.moonbeam.delegator_timings.revoke_delegations.rounds }} rounds ({{ networks.moonbeam.delegator_timings.revoke_delegations.hours }} hours) | | Leave delegators delay | {{ networks.moonbeam.delegator_timings.leave_delegators.rounds }} rounds ({{ networks.moonbeam.delegator_timings.leave_delegators.hours }} hours) | === "Moonriver" | Variable | Value | |:--------------------------------:|:-------------------------------------------------------------------------------------------------------------------------------------------------------:| | Round duration | {{ networks.moonriver.staking.round_blocks }} blocks ({{ networks.moonriver.staking.round_hours }} hours) | | Minimum delegation per candidate | {{ networks.moonriver.staking.min_del_stake }} MOVR | | Maximum delegators per candidate | {{ networks.moonriver.staking.max_del_per_can }} | | Maximum delegations | {{ networks.moonriver.staking.max_del_per_del }} | | Reward payout delay | {{ networks.moonriver.delegator_timings.rewards_payouts.rounds }} rounds ({{ networks.moonriver.delegator_timings.rewards_payouts.hours }} hours) | | Add or increase delegation | takes effect in the next round (funds are withdrawn immediately) | | Decrease delegation delay | {{ networks.moonriver.delegator_timings.del_bond_less.rounds }} rounds ({{ networks.moonriver.delegator_timings.del_bond_less.hours }} hours) | | Revoke delegations delay | {{ networks.moonriver.delegator_timings.revoke_delegations.rounds }} rounds ({{ networks.moonriver.delegator_timings.revoke_delegations.hours }} hours) | | Leave delegators delay | {{ networks.moonriver.delegator_timings.leave_delegators.rounds }} rounds ({{ networks.moonriver.delegator_timings.leave_delegators.hours }} hours) | === "Moonbase Alpha" | Variable | Value | |:--------------------------------:|:-----------------------------------------------------------------------------------------------------------------------------------------------------:| | Round duration | {{ networks.moonbase.staking.round_blocks }} blocks ({{ networks.moonbase.staking.round_hours }} hours) | | Minimum delegation per candidate | {{ networks.moonbase.staking.min_del_stake }} DEV | | Maximum delegators per candidate | {{ networks.moonbase.staking.max_del_per_can }} | | Maximum delegations | {{ networks.moonbase.staking.max_del_per_del }} | | Reward payout delay | {{ networks.moonbase.delegator_timings.rewards_payouts.rounds }} rounds ({{ networks.moonbase.delegator_timings.rewards_payouts.hours }} hours) | | Add or increase delegation | takes effect in the next round (funds are withdrawn immediately) | | Decrease delegation delay | {{ networks.moonbase.delegator_timings.del_bond_less.rounds }} rounds ({{ networks.moonbase.delegator_timings.del_bond_less.hours }} hours) | | Revoke delegations delay | {{ networks.moonbase.delegator_timings.revoke_delegations.rounds }} rounds ({{ networks.moonbase.delegator_timings.revoke_delegations.hours }} hours) | | Leave delegators delay | {{ networks.moonbase.delegator_timings.leave_delegators.rounds }} rounds ({{ networks.moonbase.delegator_timings.leave_delegators.hours }} hours) | !!! note As of runtime 3000, [asynchronous backing](https://wiki.polkadot.com/learn/learn-async-backing/#asynchronous-backing){target=\_blank} has been enabled on all Moonbeam networks. As a result, the target block time was reduced from 12 seconds to 6 seconds, which may break some timing-based assumptions. To learn how to get the current value of any of the parameters around staking, check out the [Retrieving Staking Parameters](/tokens/staking/stake/#retrieving-staking-parameters){target=\_blank} section of the [How to Stake your Tokens](/tokens/staking/stake/){target=\_blank} guide. If you're looking for candidate or collator-specific requirements and information, you can take a look at the [Collators](/node-operators/networks/collators/requirements/#bonding-requirements){target=\_blank} guide. ## Resources for Selecting a Collator {: #resources-for-selecting-a-collator} There are a few resources you can check out to help you select a collator to delegate: === "Moonbeam" | Variable | Value | |:----------------------------:|:-------------------------------------------------------------------------------:| | Stake GLMR Dashboard | [Stake GLMR](https://stakeglmr.com){target=\_blank} | | Collators Leaderboard | [Moonscan](https://moonbeam.moonscan.io/collators){target=\_blank} | | Collator Dashboard | [DappLooker](https://dapplooker.com/dashboard/moonbeam-collator-dashboard-91){target=\_blank} | === "Moonriver" | Variable | Value | |:----------------------------:|:--------------------------------------------------------------------------------:| | Stake MOVR Dashboard | [Stake MOVR](https://stakemovr.com){target=\_blank} | | Collators Leaderboard | [Moonscan](https://moonriver.moonscan.io/collators){target=\_blank} | | Collator Dashboard | [DappLooker](https://dapplooker.com/dashboard/moonriver-collator-dashboard-28){target=\_blank} | === "Moonbase Alpha" | Variable | Value | |:------------------:|:--------------------------------------------------------------------------------:| | List of candidates | [Moonbase Alpha Subscan](https://moonbase.subscan.io/validator){target=\_blank} | !!! note The DappLooker Collator dashboard for Moonriver is experimental beta software and may not accurately reflect collator performance. Be sure to do your own research before delegating to a collator. ### General Tips {: #general-tips } - To optimize your staking rewards, you should generally choose a collator with a lower total amount bonded. In that case, your delegation amount will represent a larger portion of the collator’s total stake and you will earn proportionally higher rewards. However, there is a higher risk of the collator being kicked out of the active set and not earning rewards at all - The minimum bond for each collator tends to increase over time, so if your delegation is close to the minimum, there is a higher chance you might fall below the minimum and not receive rewards - Spreading delegations between multiple collators is more efficient in terms of rewards, but only recommended if you have enough to stay above the minimum bond of each collator - You can consider collator performance by reviewing the number of blocks each collator has produced recently - You can set up auto-compounding which will automatically restake a specified percentage of your delegation rewards ## Reward Distribution {: #reward-distribution } Rewards for collators and their delegators are calculated at the start of every round for their work prior to the [reward payout delay](#quick-reference). For example, on Moonriver the rewards are calculated for the collators work from {{ networks.moonriver.delegator_timings.rewards_payouts.rounds }} rounds ago. The calculated rewards are then paid out on a block-by-block basis starting at the second block of the round. For every block, one collator will be chosen to receive their entire reward payout from the prior round, along with their delegators, until all rewards have been paid out for that round. For example, if there are {{ networks.moonriver.staking.max_candidates }} collators who produced blocks in the prior round, all of the collators and their delegators will be paid by block {{ networks.moonriver.staking.paid_out_block }} of the new round. You can choose to auto-compound your delegation rewards so you no longer have to manually delegate rewards. If you choose to set up auto-compounding, you can specify the percentage of rewards to be auto-compounded. These rewards will then be automatically added to your delegation. ### Annual Inflation {: #annual-inflation} The distribution of the annual inflation goes as follows: === "Moonbeam" | Variable | Value | |:-----------------------------------------:|:-------------------------------------------------------------------------------------:| | Annual inflation | {{ networks.moonbeam.inflation.total_annual_inflation }}% | | Rewards pool for collators and delegators | {{ networks.moonbeam.inflation.delegator_reward_inflation }}% of the annual inflation | | Collator commission | {{ networks.moonbeam.inflation.collator_reward_inflation }}% of the annual inflation | | Parachain bond reserve | {{ networks.moonbeam.inflation.parachain_bond_inflation }}% of the annual inflation | === "Moonriver" | Variable | Value | |:-----------------------------------------:|:--------------------------------------------------------------------------------------:| | Annual inflation | {{ networks.moonriver.inflation.total_annual_inflation }}% | | Rewards pool for collators and delegators | {{ networks.moonriver.inflation.delegator_reward_inflation }}% of the annual inflation | | Collator commission | {{ networks.moonriver.inflation.collator_reward_inflation }}% of the annual inflation | | Parachain bond reserve | {{ networks.moonriver.inflation.parachain_bond_inflation }}% of the annual inflation | === "Moonbase Alpha" | Variable | Value | |:-----------------------------------------:|:-------------------------------------------------------------------------------------:| | Annual inflation | {{ networks.moonbase.inflation.total_annual_inflation }}% | | Rewards pool for collators and delegators | {{ networks.moonbase.inflation.delegator_reward_inflation }}% of the annual inflation | | Collator commission | {{ networks.moonbase.inflation.collator_reward_inflation }}% of the annual inflation | | Parachain bond reserve | {{ networks.moonbase.inflation.parachain_bond_inflation }}% of the annual inflation | From the rewards pool, collators get the rewards corresponding to their stake in the network. The rest are distributed among delegators by stake. ### Calculating Rewards {: #calculating-rewards } Mathematically speaking, for collators, the reward distribution per block proposed and finalized would look like this:  Where `amount_due` is the corresponding inflation being distributed in a specific block, the `stake` corresponds to the number of tokens bonded by the collator in respect to the total stake of that collator (accounting delegations). For each delegator, the reward distribution (per block proposed and finalized by the delegated collator) would look like this:  Where `amount_due` is the corresponding inflation being distributed in a specific block, the `stake` corresponds to the amount of tokens bonded by each delegator in respect to the total stake of that collator. ## Risks {: #risks } *Holders of MOVR/GLMR tokens should perform careful due diligence on collators before delegating. Being listed as a collator is not an endorsement or recommendation from the Moonbeam Network, the Moonriver Network, or Moonbeam Foundation. Neither the Moonbeam Network, Moonriver Network, nor Moonbeam Foundation has vetted the list collators and assumes no responsibility with regard to the selection, performance, security, accuracy, or use of any third-party offerings. You alone are responsible for doing your own diligence to understand the applicable fees and all risks present, including actively monitoring the activity of your collators.* *You agree and understand that neither the Moonbeam Network, the Moonriver Network, nor Moonbeam Foundation guarantees that you will receive staking rewards and any applicable percentage provided (i) is an estimate only and not guaranteed, (ii) may change at any time and (iii) may be more or less than the actual staking rewards you receive. The Moonbeam Foundation makes no representations as to the monetary value of any rewards at any time.* *Staking MOVR/GLMR tokens is not free of risk.* *Staked MOVR/GLMR tokens are locked up, and retrieving them requires a {{ networks.moonriver.delegator_timings.del_bond_less.days }} day/{{ networks.moonbeam.delegator_timings.del_bond_less.days }} day waiting period .* *Additionally, if a collator fails to perform required functions or acts in bad faith, a portion of their total stake can be slashed (i.e. destroyed). This includes the stake of their delegators. If a collators behaves suspiciously or is too often offline, delegators can choose to unbond from them or switch to another collator. Delegators can also mitigate risk by electing to distribute their stake across multiple collators.* --- END CONTENT --- Doc-Content: https://docs.moonbeam.network/learn/features/treasury/ --- BEGIN CONTENT --- --- title: Treasury description: Moonbeam has an on-chain Treasury controlled by Treasury Council members, enabling stakeholders to submit proposals to further the network. categories: Basics --- # Treasury on Moonbeam ## Introduction {: #introduction } The Moonbeam Treasury is an on-chain collection of funds launched at the network's genesis. Initially pre-funded with 0.5% of the token supply, the Treasury continues to accumulate GLMR as {{ networks.moonbeam.inflation.parachain_bond_treasury }}% of the parachain bond reserve inflation goes to the Treasury. For more information about Moonbeam inflation figures, see [GLMR Tokenomics](https://moonbeam.foundation/glimmer-token-tokenomics/){target=\_blank}. The Moonbeam Treasury funds initiatives that support and grow the network. Stakeholders can propose spending requests for Treasury Council review, focusing on efforts like integrations, collaborations, community events, and outreach. Treasury spend proposers must submit their proposals to the [Moonbeam Forum](https://forum.moonbeam.network/c/governance/treasury-proposals/8){target=\_blank}. For submission details, see [How to Propose a Treasury Spend](/tokens/governance/treasury-spend/){target=\_blank}. The [Treasury Council](https://forum.moonbeam.network/g/TreasuryCouncil){target=\_blank} oversees the spending of the Moonbeam Treasury and votes on funding proposals. It comprises two members from the Moonbeam Foundation and three external community members. The three external members are elected to terms of {{ networks.moonbeam.treasury.months_elected }} months. The same Treasury Council oversees Treasury requests for both Moonbeam and Moonriver. The Council meets monthly to review proposals submitted on the [Moonbeam Forum](https://forum.moonbeam.network/c/governance/treasury-proposals/8){target=\_blank}. Once a proposal is agreed upon, the Council members must complete the on-chain approval process. ## General Definitions {: #general-definitions } Some important terminology to understand regarding treasuries: - **Treasury Council** — a group of Moonbeam Foundation representatives and external community members. The Council reviews funding proposals, ensures alignment with the community, and ultimately authorizes Treasury spending - **Proposal** — a plan or suggestion submitted by stakeholders to further the network to be approved by the Treasury Council ## Treasury Addresses {: #treasury-addresses } The Treasury address for each respective network can be found below: === "Moonbeam" [0x6d6F646c70632f74727372790000000000000000](https://moonbase.subscan.io/account/0x6d6F646c70632f74727372790000000000000000){target=_blank} === "Moonriver" [0x6d6f646C70792f74727372790000000000000000](https://moonriver.subscan.io/account/0x6d6f646C70792f74727372790000000000000000){target=_blank} === "Moonbase Alpha" [0x6d6F646c70632f74727372790000000000000000](https://moonbase.subscan.io/account/0x6d6F646c70632f74727372790000000000000000){target=_blank} ## Roadmap of a Treasury Proposal {: #roadmap-of-a-treasury-proposal } The happy path of a Treasury spend request is as follows: 1. **Proposal submission** - the user submits a proposal to the [Moonbeam Forum](https://forum.moonbeam.network/c/governance/treasury-proposals/8){target=\_blank} 2. **Forum discussion** - the proposal is discussed by the community on the Forum. The ultimate Aye/Nay decision is determined by the Treasury council 3. **Treasury approval and action** - if the Treasury Council agrees, it authorizes the Treasury spending and moves the process forward ## Treasury Council Voting Process {: #treasury-council-voting-process } A member of the Treasury Council will submit a `treasury.spend` call. This call requires specifying the amount, the asset type, and the beneficiary account to receive the funds. The Treasury supports spending various token types beyond GLMR, including native USDT/USDC. Once this extrinsic is submitted, a new Treasury Council collective proposal will be created and made available for council members to vote on. Once approved through the Treasury Council's internal voting process, the funds will be released automatically to the beneficiary account through the `treasury.payout` extrinsic. !!! note There is no on-chain action for the proposer or beneficiary of the Treasury spend request. All Treasury spend actions will be completed by members of the Treasury Council. Note that this process has changed significantly from prior Treasury processes, where tokenholders could submit Treasury proposals with bonds attached. Now, no on-chain action is necessary to submit a Treasury proposal. Rather, all that is needed is to raise a Treasury Council request on the [Moonbeam Forum](https://forum.moonbeam.network/c/governance/treasury-proposals/8){target=\_blank} and the Treasury Council will take care of the on-chain components. For more information, see [How to Propose a Treasury Spend](/tokens/governance/treasury-spend/#next-steps){target=\_blank} --- END CONTENT --- Doc-Content: https://docs.moonbeam.network/learn/features/xchain-plans/ --- BEGIN CONTENT --- --- title: Cross-Chain Communication description: This guide covers the ways you can build cross-chain dApps with Moonbeam, including via XCM, cross consensus messaging, and GMP, general message passing. categories: Basics, XCM --- # Cross-Chain Communication Methods Moonbeam makes it easy for developers to build smart contracts that connect across chains, both within the Polkadot ecosystem and outside the Polkadot ecosystem. This page will provide an overview of the underlying protocols that enable cross-chain communication and how you can leverage them to build connected contracts. For step-by-step guides of how to put these principles into practice, be sure to check out the [interoperability tutorials](/tutorials/interoperability/){target=\_blank}. Two key terms that will come up frequently in this guide are XCM and GMP. [XCM](/builders/interoperability/xcm/){target=\_blank} refers to cross-consensus messaging, and it's Polkadot's native interoperability language that facilitates communication between Polkadot blockchains. You can read more about the [standardized XCM message format](https://docs.polkadot.com/develop/interoperability/intro-to-xcm/){target=\_blank} and [How to Get Started Building with XCM](/builders/interoperability/xcm/){target=\_blank}. [GMP](https://moonbeam.network/news/seamless-blockchain-interoperability-the-power-of-general-message-passing-gmp){target=\_blank}, or general message passing, refers to the sending and receiving of messages within decentralized blockchain networks. While XCM is a type of general message passing, GMP colloquially refers to cross-chain communication between Moonbeam and blockchains outside of Polkadot. Similarly, in this guide, XCM refers to cross-chain messaging within Polkadot, and GMP refers to cross-chain messaging between Moonbeam and other ecosystems outside of Polkadot. ## Quick Reference {: #quick-reference } === "Comparison of XCM vs GMP" | Specification | XCM | GMP | |:---------------------:|:------------------------------------------------------------------------------------------------------------------------------------------------:|:----------------------------------------------------------------------------------------------------------------------------------------------------------------------------------------------------------------------------------------------------------------------------------------------------------------:| | **Scope** | Polkadot and its connected parachains | Any blockchain supported by a GMP provider | | **Provider** | Polkadot | [Axelar](/builders/interoperability/protocols/axelar/){target=\_blank}, [Wormhole](/builders/interoperability/protocols/wormhole/){target=\_blank}, [LayerZero](/builders/interoperability/protocols/layerzero/){target=\_blank}, [Hyperlane](/builders/interoperability/protocols/hyperlane/){target=\_blank}, etc. | | **Implementation** | [XCM Virtual Machine](https://wiki.polkadot.com/learn/learn-xcvm/){target=\_blank} | Smart contracts | | **Security** | Polkadot's shared security | Proprietary consensus determined by GMP provider | | **Fees** | [Purchased with `BuyExecution` XCM instruction with supported asset](/builders/interoperability/xcm/core-concepts/weights-fees/){target=\_blank} | User sends value with transaction to pay for gas on the destination chain | | **Adding New Chains** | Requires creation of XCM channels by both connected chains | Requires GMP provider to add support | ## XCM Transport Methods {: #xcm-transport-methods } XCMP is the protocol that carries messages conforming to the XCM standard. The difference between the two is easy to remember with the added letter "P" for protocol. While XCM is the language that defines the format of the message to send, XCMP can be thought of as the pipes that enable the delivery of said messages. XCMP is comprised of channels that enable communication between connected blockchains. When a parachain launches on Polkadot, two XCM channels are established automatically to allow for communication between the Polkadot relay chain and the parachain itself. XCM channels are omnidirectional, so two channels must be established for bidirectional communication. Polkadot parachains can optionally choose to establish additional XCM channels with other parachains. Establishing XCM channels with other chains is a double opt-in process, so the receiving chain must also agree to have the channel established. Establishing XCM channels with another parachain allows for the exchange of XCM messages, enabling the flow of cross-chain assets and remote contract calls, to name a few examples. There are several different subcategories of XCM transport methods, including: ### VMP {: #vmp } VMP, or [Vertical Message Passing](https://wiki.polkadot.com/learn/learn-xcm-transport/#vmp-vertical-message-passing){target=\_blank}, refers to message passing between the relay chain and a parachain. Given that XCM channels are one-way, there are two types of message passing that comprise VMP, namely: - **UMP** - Upward Message Passing refers to message passing from a parachain to the relay chain - **DMP** - Downward Message Passing refers to message passing from the relay chain to a parachain ### HRMP {: #HRMP } [Horizontal Relay-routed Message Passing](https://wiki.polkadot.com/learn/learn-xcm-transport/#hrmp-xcmp-lite){target=\_blank} (HRMP) is a temporary protocol that is currently being used while XCMP (Cross-Chain Message Passing) is still under development. HRMP serves as a placeholder and provides the same functionality and interface as XCMP. However, HRMP is more resource-intensive because it stores all messages within the Relay Chain's storage. When opening XCM channels with other parachains today, those channels are using HRMP in place of the aforementioned XCMP. Once the implementation of XCMP is complete, the plan is to phase out HRMP and replace it with XCMP gradually. For more information about each one, be sure to check out [Polkadot's Guide to XCM Transport](https://wiki.polkadot.com/learn/learn-xcm-transport/){target=\_blank}. ## General Message Passing {: #general-message-passing } As you know, GMP colloquially refers to cross-chain communication between Moonbeam and other blockchains outside of Polkadot. General message passing is enabled by cross-chain protocols that specialize in cross-chain communication. Each GMP provider takes a slightly different approach, but conceptually, they are quite similar. There are different contracts and functions for each provider, but each GMP provider has the same end goal: to provide secure and reliable cross-chain communication. ### Happy Path of a Cross-Chain Message {: #happy-path-of-a-cross-chain-message } At a high level, the happy path of a message sent via GMP is as follows. A user or developer will call a contract specific to the GMP protocol, sometimes referred to as a mailbox contract or a gateway contract. This call typically includes parameters like the destination chain, the destination contract address, and includes sufficient value to pay for the transaction on the destination chain. A GMP provider listens for specific events on the origin blockchain pertaining to their gateway or mailbox contracts that indicate that a user wants to send a cross-chain message using their protocol. The GMP provider will validate certain parameters, including whether or not sufficient value was provided to pay for gas on the destination chain. In fact, the GMP provider may have a decentralized network of many nodes checking the authenticity of the message and verifying parameters. The GMP provider will not validate the integrity of the contract call to be delivered on the destination chain. E.g., the GMP provider will happily deliver a valid, paid-for message that contains a smart contract call that reverts on arrival. Finally, if everything checks out according to the consensus mechanism of the GMP provider, the message will be delivered to the destination chain, triggering the respective contract call at the destination.  ### GMP Providers Integrated with Moonbeam {: #gmp-providers-integrated-with-moonbeam } A large number of GMP providers have integrated with Moonbeam, which is beneficial for several reasons. For one, it enables you to work with whichever GMP provider you prefer. Second, it means that Moonbeam is connected to a rapidly growing number of chains. Whenever a GMP provider integrated with Moonbeam adds support for another chain, Moonbeam is automatically now connected with that chain. GMP providers are constantly adding support for new chains, and it's exciting to see those new integrations benefit the Moonbeam community. Additionally, having a variety of GMP providers allows for redundancy and backup. GMP providers have occasional maintenance windows or downtime; thus, it may make sense to add support for multiple GMP providers to ensure consistent uptime. A significant number of GMP providers have integrated with Moonbeam, offering multiple benefits. Firstly, this integration allows users the flexibility to choose their preferred GMP provider. Secondly, Moonbeam's connectivity is enhanced as it automatically links with any new chains that its GMP providers support. Given that GMP providers frequently expand their support to new chains, the continuous roll out of new chains is a promising ongoing benefit for the Moonbeam community. Additionally, the diversity of GMP providers ensures better reliability and backup options. Since GMP providers can occasionally experience downtime or scheduled maintenance, the ability to integrate with multiple GMP providers is an important benefit. The following GMP providers have integrated with Moonbeam: - [Axelar](/builders/interoperability/protocols/axelar/){target=\_blank} - [Hyperlane](/builders/interoperability/protocols/hyperlane/){target=\_blank} - [LayerZero](/builders/interoperability/protocols/layerzero/){target=\_blank} - [Wormhole](/builders/interoperability/protocols/wormhole/){target=\_blank} ## Implementing Both XCM and GMP {: #implementing-both-xcm-and-gmp } Building with XCM or GMP does not preclude building with the other. As they suit different use cases, a team may seek to utilize XCM to handle interoperability needs within Polkadot, and GMP to deliver cross-chain messages to and from blockchains outside of Polkadot. As an example, several DEXes on Moonbeam support the trading of tokens migrated to Moonbeam via XCM, such as xcDOT, and assets bridged from ecosystems outside of Polkadot, such as USDC via Wormhole. ### Moonbeam Routed Liquidity {: #moonbeam-routed-liquidity } [Moonbeam Routed Liquidity](/builders/interoperability/mrl/) (MRL) enables seamless liquidity between external blockchains connected to Moonbeam via Wormhole to Polkadot parachains connected to Moonbeam via XCM. This combination of GMP and XCM means that any ERC-20 token on a chain that Wormhole has integrated with can be routed through Moonbeam to a destination parachain (and back). A diagram of the happy path of a token transfer to a parachain via MRL is shown below, and you can find more information at the [MRL docs](/builders/interoperability/mrl/). 
The information presented herein has been provided by third parties and is made available solely for general information purposes. Moonbeam does not endorse any project listed and described on the Moonbeam Doc Website (https://docs.moonbeam.network/). Moonbeam Foundation does not warrant the accuracy, completeness or usefulness of this information. Any reliance you place on such information is strictly at your own risk. Moonbeam Foundation disclaims all liability and responsibility arising from any reliance placed on this information by you or by anyone who may be informed of any of its contents. All statements and/or opinions expressed in these materials are solely the responsibility of the person or entity providing those materials and do not necessarily represent the opinion of Moonbeam Foundation. The information should not be construed as professional or financial advice of any kind. Advice from a suitably qualified professional should always be sought in relation to any particular matter or circumstance. The information herein may link to or integrate with other websites operated or content provided by third parties, and such other websites may link to this website. Moonbeam Foundation has no control over any such other websites or their content and will have no liability arising out of or related to such websites or their content. The existence of any such link does not constitute an endorsement of such websites, the content of the websites, or the operators of the websites. These links are being provided to you only as a convenience and you release and hold Moonbeam Foundation harmless from any and all liability arising from your use of this information or the information provided by any third-party website or service.
--- END CONTENT ---
Doc-Content: https://docs.moonbeam.network/learn/platform/code/
--- BEGIN CONTENT ---
---
title: Moonbeam Source Code
description: Moonbeam is an open source project in the Polkadot ecosystem, with publicly available and auditable source code.
categories: Basics
---
# Moonbeam Source Code
Moonbeam is an open source project. The main Moonbeam repo can be found here:
[:fontawesome-brands-github: https://github.com/moonbeam-foundation/moonbeam](https://github.com/moonbeam-foundation/moonbeam){target=\_blank}
Moonbeam is implemented using the Substrate framework. The source code for Substrate can be found here:
[:fontawesome-brands-github: https://github.com/paritytech/substrate](https://github.com/paritytech/polkadot-sdk/tree/master/substrate){target=\_blank}
We also work on Ethereum compatibility features along with engineers from Parity as part of the Frontier project. Source code for Frontier can be found here:
[:fontawesome-brands-github: https://github.com/polkadot-evm/frontier](https://github.com/polkadot-evm/frontier){target=\_blank}
If you are interested in contributing code to Moonbeam, please raise an issue or PR on the [Moonbeam GitHub repository](https://github.com/moonbeam-foundation/moonbeam){target=\_blank}
--- END CONTENT ---
Doc-Content: https://docs.moonbeam.network/learn/platform/links/
--- BEGIN CONTENT ---
---
title: Important Moonbeam Related Links
description: If you're new to Moonbeam or the Polkadot network, here are some important links to review, including compatible Ethereum tools.
categories: Basics
---
# Links
- **[Polkadot Docs](https://docs.polkadot.com/){target=\_blank}** - starting point for learning about the [Polkadot SDK](https://docs.polkadot.com/develop/parachains/intro-polkadot-sdk/){target=\_blank}, a Rust-based framework for developing blockchains. Moonbeam is developed using Substrate and uses many of the modules that come with it
- **[Polkadot.com](https://polkadot.com){target=\_blank}** - learn about Polkadot, including the vision behind the network and how the system works, i.e., staking, governance, etc.
- **[Polkadot-JS Apps](https://polkadot.js.org/apps){target=\_blank}** - a web-based interface for interacting with Substrate based nodes, including Moonbeam
- **[Solidity Docs](https://solidity.readthedocs.io){target=\_blank}** - Solidity is the main smart contract programming language supported by Ethereum and Moonbeam. The Solidity docs site is very comprehensive
- **[Remix](https://remix.ethereum.org){target=\_blank}** - web-based IDE for Solidity smart contract development that is compatible with Moonbeam
- **[Hardhat](https://hardhat.org){target=\_blank}** - development tools for Solidity, including debugging, testing, and automated deployment that is compatible with Moonbeam
--- END CONTENT ---
Doc-Content: https://docs.moonbeam.network/learn/platform/networks/moonbase/
--- BEGIN CONTENT ---
---
title: Moonbase Alpha TestNet Overview
description: An overview of the current configuration of the Moonbeam TestNet, Moonbase Alpha, and information on how to start building on it using Solidity.
categories: Basics
---
# The Moonbase Alpha TestNet
## Goal {: #goal }
The first Moonbeam TestNet, named Moonbase Alpha, aims to provide developers with a place to start experimenting and building on Moonbeam in a shared environment. Since Moonbeam is deployed as a parachain on Kusama and Polkadot, the goal of the TestNet is to reflect the production configurations. For this reason, it was decided that it needed to be a parachain-based configuration rather than a Substrate development setup.
In order to collect as much feedback as possible and provide fast issue resolution, please join the [Moonbeam Discord](https://discord.com/invite/PfpUATX){target=\_blank}.
## Initial Configuration {: #initial-configuration }
Moonbase Alpha has the following configuration:
- Runs as a parachain connected to a relay chain
- Has an active set of {{ networks.moonbase.staking.max_candidates }} collator nodes run by the community
- The relay chain hosts validators to finalize relay chain blocks. One of them is selected to finalize each block collated by Moonbeam's collators. This setup provides room to expand to a two-parachain configuration in the future
- Has infrastructure providers that provide [API endpoints](/builders/get-started/endpoints/){target=\_blank} to connect to the network. Projects can also [run their own node](/node-operators/networks/run-a-node/){target=\_blank} to have access to their own private endpoints
Some important variables/configurations to note include:
=== "General"
| Variable | Value |
|:---------------------:|:------------------------------------------:|
| Minimum gas price | {{ networks.moonbase.min_gas_price }} Gwei |
| Target block time | {{ networks.moonbase.block_time }} seconds |
| Block gas limit | {{ networks.moonbase.gas_block }} |
| Transaction gas limit | {{ networks.moonbase.gas_tx }} |
=== "Staking"
| Variable | Value |
|:---------------------------------:|:-------------------------------------------------------------------------------------------------------------------------------------------:|
| Minimum delegation stake | {{ networks.moonbase.staking.min_del_stake }} DEV |
| Maximum delegators per candidates | {{ networks.moonbase.staking.max_del_per_can }} |
| Maximum delegations per account | {{ networks.moonbase.staking.max_del_per_del }} |
| Round | {{ networks.moonbase.staking.round_blocks }} blocks ({{ networks.moonbase.staking.round_hours }} hour) |
| Bond duration | Delegations take effect in the next round; funds are withdrawn immediately |
| Unbond duration | {{ networks.moonbase.delegator_timings.del_bond_less.rounds }} rounds ({{ networks.moonbase.delegator_timings.del_bond_less.hours }} hours) |
!!! note
As of runtime 3000, [asynchronous backing](https://wiki.polkadot.com/learn/learn-async-backing/#asynchronous-backing){target=\_blank} has been enabled on all Moonbeam networks. As a result, the target block time was reduced from 12 seconds to 6 seconds, which may break some timing-based assumptions.
Additionally, as of runtime 2900, the block and transaction gas limits increased by 4x on Moonbase Alpha.
## Network Endpoints {: #network-endpoints }
Moonbase Alpha has two types of endpoints available for users to connect to: one for HTTPS and one for WSS.
If you're looking for your own endpoints suitable for production use, you can check out the [Endpoint Providers](/builders/get-started/endpoints/#endpoint-providers){target=\_blank} section of our documentation. Otherwise, to get started quickly you can use one of the following public HTTPS or WSS endpoints.
=== "HTTPS"
| Provider | RPC URL | Limits |
|:-------------------:|:------------------------------------------------------------------:|:-----------:|
| Dwellir | ```https://moonbase-rpc.dwellir.com```| 20 req/sec | | OnFinality |
```https://moonbeam-alpha.api.onfinality.io/public```| 40 req/sec | | Moonbeam Foundation |
```https://rpc.api.moonbase.moonbeam.network```| 25 req/sec | | UnitedBloc |
```https://moonbase.unitedbloc.com```| 32 req/sec | | RadiumBlock |
```https://moonbase.public.curie.radiumblock.co/http```| 200 req/sec | === "WSS" | Provider | RPC URL | Limits | |:-------------------:|:-----------------------------------------------------------------:|:-----------:| | Dwellir |
```wss://moonbase-rpc.dwellir.com```| 20 req/sec | | OnFinality |
```wss://moonbeam-alpha.api.onfinality.io/public-ws```| 40 req/sec | | Moonbeam Foundation |
```wss://wss.api.moonbase.moonbeam.network```| 25 req/sec | | UnitedBloc |
```wss://moonbase.unitedbloc.com```| 32 req/sec | | RadiumBlock |
```wss://moonbase.public.curie.radiumblock.co/ws```| 200 req/sec | #### Relay Chain {: #relay-chain } To connect to the Moonbase Alpha relay chain, you can use the following WS Endpoint: | Provider | RPC URL | |:--------:|:----------------------------------------------------------:| | OpsLayer |
```wss://relay.api.moonbase.moonbeam.network```| ## Quick Start {: #quick-start } For the [Web3.js library](/builders/ethereum/libraries/web3js/){target=\_blank}, you can create a local Web3 instance and set the provider to connect to Moonbase Alpha (both HTTP and WS are supported): ```js const { Web3 } = require('web3'); // Load Web3 library . . . // Create local Web3 instance - set Moonbase Alpha as provider const web3 = new Web3('https://rpc.api.moonbase.moonbeam.network'); ``` For the [Ethers.js library](/builders/ethereum/libraries/ethersjs/){target=\_blank}, define the provider by using `ethers.JsonRpcProvider(providerURL, {object})` and setting the provider URL to Moonbase Alpha: ```js const ethers = require('ethers'); // Load Ethers library const providerURL = 'https://rpc.api.moonbase.moonbeam.network'; // Define provider const provider = new ethers.JsonRpcProvider(providerURL, { chainId: 1287, name: 'moonbase-alphanet' }); ``` Any Ethereum wallet should be able to generate a valid address for Moonbeam (for example, [MetaMask](https://metamask.io){target=\_blank}). ## Chain ID {: #chain-id } Moonbase Alpha TestNet chain ID is: `1287`, which is `0x507` in hex. ## Alphanet Relay Chain {: #relay-chain } The Alphanet relay chain is connected to Moonbase Alpha and is [Westend](https://polkadot.com/blog/westend-introducing-a-new-testnet-for-polkadot-and-kusama){target=\_blank}-based but unique to the Moonbeam ecosystem. It resembles how you would interact with Kusama or Polkadot. The native tokens of the Alphanet relay chain are UNIT tokens, which are for testing purposes only and have no real value. ## Telemetry {: #telemetry } You can see current Moonbase Alpha telemetry information by visiting [Polkadot's Telemetry dashboard](https://telemetry.polkadot.io/#list/0x91bc6e169807aaa54802737e1c504b2577d4fafedd5a02c10293b1cd60e39527){target=\_blank}. ## Tokens {: #tokens } Tokens on Moonbase Alpha, named DEV, will be issued on demand. **DEV tokens hold no value and can be freely acquired**. You can enter your address to automatically request DEV tokens from the [Moonbase Alpha Faucet](https://faucet.moonbeam.network){target=\_blank} website. The faucet dispenses {{ networks.moonbase.website_faucet_amount }} every 24 hours. For token requests of more than the limited amount allowed by the faucet, contact a moderator directly via the [Moonbeam Discord server](https://discord.com/invite/PfpUATX){target=\_blank}. We are happy to provide the tokens needed to test your applications. ## Proof of Stake {: #proof-of-stake } The Moonbase Alpha TestNet is a fully decentralized Delegated Proof of Stake network where users of the network can delegate collator candidates to produce blocks and "earn rewards" for testing purposes. Please note, that the Moonbase Alpha DEV tokens have no real value. The number of candidates in the active set will be subject to governance. The active set will consist of the top candidates by stake, including delegations. ## Limitations {: #limitations } This is the first TestNet for Moonbeam, so there are some limitations. Some [precompiles](https://www.evm.codes/precompiled){target=\_blank} are yet to be included. You can check out the list of supported precompiles on the [Canonical Contract page](/builders/ethereum/precompiles/){target=\_blank}. However, all built-in functions are available. Since the release of Moonbase Alpha v6, the maximum gas limit per block has been set to {{ networks.moonbase.gas_block }}, with a maximum gas limit per transaction of {{ networks.moonbase.gas_tx }}. --- END CONTENT --- Doc-Content: https://docs.moonbeam.network/learn/platform/networks/moonbeam/ --- BEGIN CONTENT --- --- title: Moonbeam Network Overview description: An overview of the current configuration of the Moonbeam deployment on Polkadot, Moonbeam, and information on how to start building on it using Solidity. categories: Basics --- # Moonbeam ## Goal {: #goal } Moonbeam was onboarded as a parachain to Polkadot on December 17th 2021. Moonbeam is the most Ethereum compatible smart-contract parachain in the Polkadot ecosystem. It allows developers to port their projects with minimal to no code changes, enabling them to tap into the Polkadot ecosystem and all its assets. In order to collect as much feedback as possible and provide fast issue resolution, you can check out the dedicated [Moonbeam Network section on Discord](https://discord.com/invite/PfpUATX){target=\_blank}. ## Initial Configurations {: #initial-configurations } Currently, Moonbeam has the following configurations: - Runs as a parachain connected to the Polkadot relay chain - Has an active set of {{ networks.moonbeam.staking.max_candidates }} collators - Has infrastructure providers that provide [API endpoints](/builders/get-started/endpoints/){target=\_blank} to connect to the network. Projects can also [run their own node](/node-operators/networks/run-a-node/){target=\_blank} to have access to their own private endpoints  Some important variables/configurations to note include (still subject to change): === "General" | Variable | Value | |:---------------------:|:-----------------------------------------------------------------------:| | Minimum gas price | {{ networks.moonbeam.min_gas_price }} Gwei* | | Target block time | {{ networks.moonbeam.block_time }} seconds | | Block gas limit | {{ networks.moonbeam.gas_block }} | | Transaction gas limit | {{ networks.moonbeam.gas_tx }} | === "Staking" | Variable | Value | |:---------------------------------:|:-------------------------------------------------------------------------------------------------------:| | Minimum delegation stake | {{ networks.moonbeam.staking.min_del_stake }} GLMR | | Maximum delegators per candidates | {{ networks.moonbeam.staking.max_del_per_can }} | | Maximum delegations per account | {{ networks.moonbeam.staking.max_del_per_del }} | | Round | {{ networks.moonbeam.staking.round_blocks }} blocks ({{ networks.moonbeam.staking.round_hours }} hours) | | Bond duration | delegation takes effect in the next round (funds are withdrawn immediately) | | Unbond duration | {{ networks.moonbeam.delegator_timings.del_bond_less.rounds }} rounds | _*Read more about [token denominations](#token-denominations)_ ## Network Endpoints {: #network-endpoints } Moonbeam has two types of endpoints available for users to connect to: one for HTTPS and one for WSS. If you're looking for your own endpoints suitable for production use, you can check out the [Endpoint Providers](/builders/get-started/endpoints/#endpoint-providers){target=\_blank} section of our documentation. Otherwise, to get started quickly you can use one of the following public HTTPS or WSS endpoints: === "HTTPS" | Provider | RPC URL | Limits | |:-----------:|:------------------------------------------------------------------:|:-----------:| | Dwellir |
```https://moonbeam-rpc.dwellir.com```| 20 req/sec | | OnFinality |
```https://moonbeam.api.onfinality.io/public```| 40 req/sec | | UnitedBloc |
```https://moonbeam.unitedbloc.com```| 32 req/sec | | RadiumBlock |
```https://moonbeam.public.curie.radiumblock.co/http```| 200 req/sec | | 1RPC |
```https://1rpc.io/glmr```| 10k req/day | | Grove |
```https://moonbeam.rpc.grove.city/v1/01fdb492```| 5k req/day | === "WSS" | Provider | RPC URL | Limits | |:-----------:|:--------------------------------------------------------------:|:-----------:| | Dwellir |
```wss://moonbeam-rpc.dwellir.com```| 20 req/sec | | OnFinality |
```wss://moonbeam.api.onfinality.io/public-ws```| 40 req/sec | | UnitedBloc |
```wss://moonbeam.unitedbloc.com```| 32 req/sec | | RadiumBlock |
```wss://moonbeam.public.curie.radiumblock.co/ws```| 200 req/sec | | 1RPC |
```wss://1rpc.io/glmr```| 10k req/day | ## Quick Start {: #quick-start } Before getting started, make sure you've retrieved your own endpoint and API key from one of the custom [Endpoint Providers](/builders/get-started/endpoints/){target=\_blank}. Then for the [Web3.js library](/builders/ethereum/libraries/web3js/){target=\_blank}, you can create a local Web3 instance and set the provider to connect to Moonbeam (both HTTP and WS are supported): ```js const { Web3 } = require('web3'); // Load Web3 library . . . // Create local Web3 instance - set Moonbeam as provider const web3 = new Web3('INSERT_RPC_API_ENDPOINT'); // Insert your RPC URL here ``` For the [Ethers.js library](/builders/ethereum/libraries/ethersjs/){target=\_blank}, define the provider by using `ethers.JsonRpcProvider(providerURL, {object})` and setting the provider URL to Moonbeam: ```js const ethers = require('ethers'); // Load Ethers library const providerURL = 'INSERT_RPC_API_ENDPOINT'; // Insert your RPC URL here // Define provider const provider = new ethers.JsonRpcProvider(providerURL, { chainId: 1284, name: 'moonbeam' }); ``` Any Ethereum wallet should be able to generate a valid address for Moonbeam (for example, [MetaMask](https://metamask.io){target=\_blank}). ## Chain ID {: #chain-id } Moonbeam chain ID is: `1284`, or `0x504` in hex. ## Telemetry {: #telemetry } You can see current Moonbeam telemetry information by visiting [Polkadot's Telemetry dashboard](https://telemetry.polkadot.io/#list/0xfe58ea77779b7abda7da4ec526d14db9b1e9cd40a217c34892af80a9b332b76d){target=\_blank}. ## Tokens {: #tokens } The tokens on Moonbeam are called Glimmer (GLMR). Check out the Moonbeam Foundation site for more information on the [Glimmer](https://moonbeam.foundation/glimmer-token-tokenomics){target=\_blank} token. ### Token Denominations {: #token-denominations } The smallest unit of Glimmer (GMLR), similarly to Ethereum, is a Wei. It takes 10^18 Wei to make one Glimmer. The denominations are as follows: | Unit | Glimmer (GLMR) | Wei | |:---------:|:--------------------:|:-----------------------------:| | Wei | 0.000000000000000001 | 1 | | Kilowei | 0.000000000000001 | 1,000 | | Megawei | 0.000000000001 | 1,000,000 | | Gigawei | 0.000000001 | 1,000,000,000 | | Microglmr | 0.000001 | 1,000,000,000,000 | | Milliglmr | 0.001 | 1,000,000,000,000,000 | | GLMR | 1 | 1,000,000,000,000,000,000 | | Kiloglmr | 1,000 | 1,000,000,000,000,000,000,000 | ## Proof of Stake {: #proof-of-stake } The Moonriver network is a fully decentralized Delegated Proof of Stake network where users of the network can delegate collator candidates to produce blocks and earn rewards. It uses the [Nimbus framework](/learn/features/consensus/){target=\_blank} framework for parachain consensus. The number of candidates in the active set will be subject to governance. The active set will consist of the top candidates by stake, including delegations. ## Limitations {: #limitations } Some [precompiles](https://www.evm.codes/precompiled){target=\_blank} are yet to be included. You can check a list of supported precompiles on the [Solidity Precompiles page](/builders/ethereum/precompiles/overview/){target=\_blank}. However, all built-in functions are available. --- END CONTENT --- Doc-Content: https://docs.moonbeam.network/learn/platform/networks/moonriver/ --- BEGIN CONTENT --- --- title: Moonriver Overview description: An overview of the current configuration of the Moonbeam deployment on Kusama, Moonriver, and information on how to start building on it using Solidity. categories: Basics --- # Moonriver ## Goal {: #goal } In June 2021, Moonriver was first launched as a parachain on the Kusama network. Moonriver is a sister network of Moonbeam, and provides an environment to test new code under real economic conditions. Developers now have access to start building on an incentivized canary network connected to Kusama. In order to collect as much feedback as possible and provide fast issue resolution, you can check out the dedicated [Moonriver section on Discord](https://discord.com/invite/5TaUvbRvgM){target=\_blank}. ## Initial Configurations {: #initial-configurations } Currently, Moonriver has the following configurations: - Runs as a parachain connected to the Kusama relay chain - Has an active set of {{ networks.moonriver.staking.max_candidates }} collators - Has infrastructure providers that provide [API endpoints](/builders/get-started/endpoints/){target=\_blank} to connect to the network. Projects can also [run their own node](/node-operators/networks/run-a-node/){target=\_blank} to have access to their own private endpoints  Some important variables/configurations to note include: === "General" | Variable | Value | |:---------------------:|:--------------------------------------------:| | Minimum gas price | {{ networks.moonriver.min_gas_price }} Gwei* | | Target block time | {{ networks.moonriver.block_time }} seconds | | Block gas limit | {{ networks.moonriver.gas_block }} | | Transaction gas limit | {{ networks.moonriver.gas_tx }} | === "Staking" | Variable | Value | |:---------------------------------:|:---------------------------------------------------------------------------------------------------------:| | Minimum delegation stake | {{ networks.moonriver.staking.min_del_stake }} MOVR | | Maximum delegators per candidates | {{ networks.moonriver.staking.max_del_per_can }} | | Maximum delegations per account | {{ networks.moonriver.staking.max_del_per_del }} | | Round | {{ networks.moonriver.staking.round_blocks }} blocks ({{ networks.moonriver.staking.round_hours }} hours) | | Bond duration | delegation takes effect in the next round (funds are withdrawn immediately) | | Unbond duration | {{ networks.moonriver.delegator_timings.del_bond_less.rounds }} rounds | _*Read more about [token denominations](#token-denominations)_ !!! note As of runtime 3000, [asynchronous backing](https://wiki.polkadot.com/learn/learn-async-backing/#asynchronous-backing){target=\_blank} has been enabled on all Moonbeam networks. As a result, the target block time was reduced from 12 seconds to 6 seconds, which may break some timing-based assumptions. Additionally, the block and transaction gas limits increased by 4x on Moonriver. ## Network Endpoints {: #network-endpoints } Moonriver has two types of endpoints available for users to connect to: one for HTTPS and one for WSS. If you're looking for your own endpoints suitable for production use, you can check out the [Endpoint Providers](/builders/get-started/endpoints/#endpoint-providers){target=\_blank} section of our documentation. Otherwise, to get started quickly you can use one of the following public HTTPS or WSS endpoints: === "HTTPS" | Provider | RPC URL | Limits | |:-----------:|:-------------------------------------------------------------------:|:-----------:| | Dwellir |
```https://moonriver-rpc.dwellir.com```| 20 req/sec | | OnFinality |
```https://moonriver.api.onfinality.io/public```| 40 req/sec | | UnitedBloc |
```https://moonriver.unitedbloc.com```| 32 req/sec | | RadiumBlock |
```https://moonriver.public.curie.radiumblock.co/http```| 200 req/sec | | Grove |
```https://moonriver.rpc.grove.city/v1/01fdb492```| 5k req/day | === "WSS" | Provider | RPC URL | Limits | |:-----------:|:---------------------------------------------------------------:|:-----------:| | Dwellir |
```wss://moonriver-rpc.dwellir.com```| 20 req/sec | | OnFinality |
```wss://moonriver.api.onfinality.io/public-ws```| 40 req/sec | | UnitedBloc |
```wss://moonriver.unitedbloc.com```| 32 req/sec | | RadiumBlock |
```wss://moonriver.public.curie.radiumblock.co/ws```| 200 req/sec | ## Quick Start {: #quick-start } Before getting started, make sure you've retrieved your own endpoint and API key from one of the custom [Endpoint Providers](/builders/get-started/endpoints/){target=\_blank}. Then for the [Web3.js library](/builders/ethereum/libraries/web3js/){target=\_blank}, you can create a local Web3 instance and set the provider to connect to Moonriver (both HTTP and WS are supported): ```js const { Web3 } = require('web3'); // Load Web3 library . . . // Create local Web3 instance - set Moonriver as provider const web3 = new Web3('INSERT_RPC_API_ENDPOINT'); // Insert your RPC URL here ``` For the [Ethers.js library](/builders/ethereum/libraries/ethersjs/){target=\_blank}, define the provider by using `ethers.JsonRpcProvider(providerURL, {object})` and setting the provider URL to Moonriver: ```js const ethers = require('ethers'); // Load Ethers library const providerURL = 'INSERT_RPC_API_ENDPOINT'; // Insert your RPC URL here // Define provider const provider = new ethers.JsonRpcProvider(providerURL, { chainId: 1285, name: 'moonriver' }); ``` Any Ethereum wallet should be able to generate a valid address for Moonbeam (for example, [MetaMask](https://metamask.io){target=\_blank}). ## Chain ID {: #chain-id } Moonriver chain ID is: `1285`, or `0x505` in hex. ## Telemetry {: #telemetry } You can see current Moonriver telemetry information by visiting [Polkadot's Telemetry dashboard](https://telemetry.polkadot.io/#list/0x401a1f9dca3da46f5c4091016c8a2f26dcea05865116b286f60f668207d1474b){target=\_blank}. ## Tokens {: #tokens } The tokens on Moonriver will also be called Moonriver (MOVR). Check out the Moonbeam Foundation site for more information on the [Moonriver token](https://moonbeam.foundation/moonriver-token-tokenomics){target=\_blank}. ### Token Denominations {: #token-denominations } The smallest unit of Moonriver, similarly to Ethereum, is a Wei. It takes 10^18 Wei to make one Moonriver. The denominations are as follows: | Unit | Moonriver (MOVR) | Wei | |:--------------:|:--------------------:|:-----------------------------:| | Wei | 0.000000000000000001 | 1 | | Kilowei | 0.000000000000001 | 1,000 | | Megawei | 0.000000000001 | 1,000,000 | | Gigawei | 0.000000001 | 1,000,000,000 | | Micromoonriver | 0.000001 | 1,000,000,000,000 | | Millimoonriver | 0.001 | 1,000,000,000,000,000 | | Moonriver | 1 | 1,000,000,000,000,000,000 | | Kilomoonriver | 1,000 | 1,000,000,000,000,000,000,000 | ## Proof of Stake {: #proof-of-stake } The Moonriver network is a fully decentralized Delegated Proof of Stake network where users of the network can delegate collator candidates to produce blocks and earn rewards. It uses the [Nimbus framework](/learn/features/consensus/){target=\_blank} framework for parachain consensus. The number of candidates in the active set will be subject to governance. The active set will consist of the top candidates by stake, including delegations. ## Limitations {: #limitations } Some [precompiles](https://www.evm.codes/precompiled){target=\_blank} are yet to be included. You can check a list of supported precompiles on the [Canonical Contract page](/builders/ethereum/precompiles/){target=\_blank}. However, all built-in functions are available. --- END CONTENT --- Doc-Content: https://docs.moonbeam.network/learn/platform/networks/overview/ --- BEGIN CONTENT --- --- title: Overview of Networks description: An overview of all of the MainNet and TestNet deployments of Moonbeam, an Ethereum-compatible smart contract parachain on Polkadot and Kusama. categories: Basics --- # Networks There are multiple long-lived Moonbeam-based networks. Most significantly, there is the Moonbeam deployment on Polkadot and Kusama. An overview of our parachain deployments is as follows: - Moonbeam: deployment on Polkadot (_December 2021_) - Moonriver: deployment on Kusama (_June 2021_) - Moonbase Alpha: Parachain TestNet for Moonbeam and Moonriver (_September 2020_) This strategy allows us to de-risk software upgrades to Moonbeam on the Polkadot MainNet while still maintaining a reasonable update velocity. ## Moonbeam {: #moonbeam } The Moonbeam production MainNet is a parachain on Polkadot and has been since December 17th, 2021. Moonbeam features the highest levels of security and availability. Code running on the MainNet has generally been vetted through one or more of the other networks listed above. Moonbeam will offer parachain-related functionalities such as [XCMP](https://wiki.polkadot.com/learn/learn-xcm-transport/#xcmp-cross-chain-message-passing){target=\_blank} and [SPREE](https://wiki.polkadot.com/learn/learn-spree/){target=\_blank} as these features become available. [Learn more about Moonbeam](/learn/platform/networks/moonbeam/). ## Moonriver {: #moonriver } In advance of deploying to the Polkadot MainNet, [Moonbeam launched Moonriver](https://moonbeam.network/news/moonriver-won-a-parachain-slot-and-is-now-producing-blocks-on-the-kusama-network){target=\_blank} as a parachain on the Kusama network. The parachain functionality is live on Kusama. Moonriver will offer parachain-related functionalities such as [XCMP](https://wiki.polkadot.com/learn/learn-xcm-transport/#xcmp-cross-chain-message-passing){target=\_blank} and [SPREE](https://wiki.polkadot.com/learn/learn-spree/){target=\_blank} as these features become available. [Learn more about Moonriver](/learn/platform/networks/moonriver/). ## Moonbase Alpha {: #moonbase-alpha } This TestNet is a network hosted by OpsLayer. It features a parachain/relay chain scheme. The goal is to allow developers to test the Ethereum compatibility features of Moonbeam in a shared parachain environment without needing to run their own nodes or network. [Learn more about Moonbase Alpha](/learn/platform/networks/moonbase/). --- END CONTENT --- Doc-Content: https://docs.moonbeam.network/learn/platform/technology/ --- BEGIN CONTENT --- --- title: Technology & Architecture description: Moonbeam is built using Rust and Polkadot's Substrate framework, enabling rich tools for implementation while allowing for specialization and optimization. categories: Basics --- # Technology & Architecture ## The Moonbeam Development Stack {: #the-moonbeam-development-stack } Moonbeam is a smart contract blockchain platform built in the Rust programming language using the Substrate framework. Substrate, developed by [Parity Technologies](https://www.parity.io/){target=_blank} (the original founding contributors of Polkadot), is an open-source, modular SDK for creating blockchains. Substrate allows developers to customize their blockchains while still benefiting from features such as forkless upgrades, shared security (when connected as a parachain to Polkadot or Kusama), and an extensive library of pre-built runtime modules known as pallets. ### Rust Programming Language {: #rust-programming-language } Rust is a good language for implementing a blockchain. It is highly performant like C and C++ but has built-in memory safety features enforced at compile time, preventing many common bugs and security issues arising from C and C++ implementations. ### Substrate Framework {: #substrate-framework } Substrate provides a rich set of tools for creating blockchains, including a runtime execution environment that enables a generic state transition function and a pluggable set of modules (pallets) that implement various blockchain subsystems. By using Substrate, Moonbeam can leverage several key features offered to parachains launched on the Polkadot relay chain, including: - **Shared security** — Polkadot's validators secure all parachains - **Cross-Consensus Messaging (XCM)** — native interoperability with other parachains - **Flexible upgrades** — Substrate’s forkless upgrade mechanism Pallets are at the heart of Substrate-based chains, providing specific functionality in modular form. Examples include: - **Balances pallet** — manages account balances and transfers - **Assets pallet** — handles the creation and management of on-chain fungible assets - **Consensus pallets** — provide mechanisms like AURA or BABE for block production - **Governance pallets** — facilitate on-chain governance - **Frontier pallets** — the Ethereum compatibility layer pioneered by the Moonbeam team - **Parachain Staking pallet** — enables Delegated Proof of Stake (DPoS) In addition to these pallets provided by Polkadot's Substrate, developers can [create their own pallets](https://docs.polkadot.com/develop/parachains/customize-parachain/make-custom-pallet/){target=_blank} to add custom functionality. Moonbeam leverages multiple existing Substrate frame pallets as well as several custom pallets for features such as cross-chain token integration, the [Orbiter Program](/node-operators/networks/collators/orbiter/){target=_blank}, and more. You can find the Moonbeam runtime (built using Substrate) and related pallets in the [Moonbeam GitHub repository](https://github.com/moonbeam-foundation/moonbeam){target=_blank}. Moonbeam also uses the Cumulus library to facilitate integration with the Polkadot relay chain. ### Frontier: Substrate's Ethereum Compatibility Layer {: #frontier } [Frontier](https://polkadot-evm.github.io/frontier){target=\_blank} serves as Substrate's Ethereum compatibility layer, facilitating the seamless operation of standard Ethereum DApps on Substrate-based chains without requiring modifications. This compatibility is achieved by integrating specialized Substrate pallets into the Substrate runtime. These pallets include: - **EVM pallet** — responsible for executing EVM operations - **Ethereum pallet** — manages block data storage and offers RPC compatibility - **Base Fee pallet and Dynamic Fee pallet** — provide EIP-1559 functionality (not used in Moonbeam) Moonbeam uses the EVM and Ethereum pallets to achieve full Ethereum compatibility. Instead of the Base Fee or Dynamic Fee pallets, Moonbeam has its own [dynamic fee mechanism](https://forum.moonbeam.network/t/proposal-dynamic-fee-mechanism-for-moonbeam-and-moonriver/241){target=\_blank} for base fee calculations. Basing the EVM implementation on the Substrate EVM Pallet provides a Rust-based EVM engine and support from the Parity engineering team. ## Blockchain Runtime {: #blockchain-runtime } The core Moonbeam runtime specifies the state transition function and behavior of the Moonbeam blockchain. The runtime is built using [FRAME](/learn/platform/glossary/#substrate-frame-pallets){target=\_blank}, compiled to a [WebAssembly (Wasm)](/learn/platform/glossary/#webassemblywasm){target=\_blank} binary as well as a native binary. These compiled versions are executed in the Polkadot relay chain and Moonbeam node environments. !!! note Substrate FRAME pallets are a collection of Rust-based modules that provide the functionality required when building a blockchain. WebAssembly is an open standard that defines a portable binary code format. Different programming languages, compilers, and browsers support it. Find more definitions [in our glossary](/learn/platform/glossary/){target=\_blank}. Some of the key Substrate FRAME pallets used in the Moonbeam runtime include: - **Balances** — support for accounts, balances, and transfers - **EVM** — a full Rust-based EVM implementation based on SputnikVM (part of Frontier) - **Ethereum** — provides emulation of Ethereum block processing for the EVM (part of Frontier) - **Executive** — orchestration layer that dispatches calls to other runtime modules - **Identity** — support for setting on-chain identities for account addresses - **System** — provides low-level types, storage, and blockchain functions - **Treasury** — on-chain treasury that can be used to fund public goods such as a parachain slot In addition to these Substrate FRAME Pallets, Moonbeam implements custom pallets to achieve additional functionality, such as: - **Parachain Staking** — enables a Delegated Proof of Stake (DPoS) system - **Moonbeam Orbiters** — supports the [Orbiter Program](/node-operators/networks/collators/orbiter/){target=\_blank}, which diversifies the collator pool - **XCM Transactor** — simplifies remote cross-chain calls via [Cross-Consensus Messaging (XCM)](/builders/interoperability/xcm/overview/){target=\_blank} - **Asset Manager** — registers XCM assets ### Forkless Upgrades {: #forkless-upgrades } One of the best things about developing on Polkadot with Substrate is the ability to introduce [forkless upgrades](https://docs.polkadot.com/develop/parachains/maintenance/runtime-upgrades/){target=_blank} to blockchain runtimes. In traditional blockchain architectures, substantial changes to the blockchain's rules often require a hard fork, which can be disruptive and contentious. Substrate takes a different approach by separating the blockchain's state (data) from its logic (rules). Logic lives in the runtime, which is itself stored on-chain. Whenever a new runtime is uploaded (via FRAME's `set_code` call) and approved through on-chain governance, all nodes automatically switch to the new runtime at a specified block. This process is seamless and does not split the network. Moonbeam regularly uses forkless upgrades to add features or fixes without requiring node operators to upgrade their software manually. You can keep track of and discuss upcoming Moonbeam upgrades on the [Moonbeam forum](https://forum.moonbeam.network){target=_blank}. ## Ethereum Compatibility Architecture {: #ethereum-compatibility-architecture } Smart contracts on Moonbeam can be implemented using Solidity, Vyper, and any other language that compiles smart contracts to EVM-compatible bytecode. Moonbeam aims to provide a low-friction and secure environment for the development, testing, and execution of smart contracts while remaining compatible with the existing Ethereum developer toolchain. The execution behavior and semantics of Moonbeam-based smart contracts strive to be as close as possible to Ethereum Layer 1. Moonbeam is a single shard, so cross-contract calls have the same synchronous execution semantics as on Ethereum Layer 1.  A high-level interaction flow is shown above. A Web3 RPC call from a DApp or existing Ethereum developer tool, such as Hardhat, is received by a Moonbeam node. The node has both Web3 RPCs and Substrate RPCs available, meaning you can use Ethereum or Substrate tools when interacting with a Moonbeam node. Associated Substrate runtime functions handle these RPC calls. The Substrate runtime checks signatures and handles any extrinsics. Smart contract calls are ultimately passed to the EVM to execute the state transitions. ### Ethereum Pallet {: #ethereum-pallet} The [Ethereum pallet](https://polkadot-evm.github.io/frontier/overview){target=\_blank} is responsible for handling blocks and transaction receipts and statuses. It enables sending and receiving Ethereum-formatted data to and from Moonbeam by storing an Ethereum-style block and its associated transaction hashes in the Substrate runtime. When a user submits a raw Ethereum transaction, it converts into a Substrate transaction through the Ethereum pallet's `transact` extrinsic—using the Ethereum pallet as the sole executor of the EVM pallet forces all of the data to be stored and transacted in an Ethereum-compatible way, which is how explorers like [Moonscan](/builders/get-started/explorers/#moonscan){target=\_blank} (built by Etherscan) can index block data. ### EVM Pallet {: #evm-pallet } The [EVM pallet](https://polkadot-evm.github.io/frontier/overview){target=\_blank} implements a sandboxed virtual stack machine and uses the [SputnikVM](https://github.com/rust-ethereum/evm){target=\_blank} as the underlying EVM engine. It executes Ethereum smart contract bytecode in a manner similar to Ethereum mainnet, including gas metering and state changes. Moonbeam uses unified accounts, meaning an H160 (Ethereum-style) address is also a valid Substrate address, so you only need a single account to interact with the Substrate runtime and the EVM. Once a balance exists in the EVM, smart contracts can be created and interacted with through standard Ethereum RPC calls. The EVM pallet should produce nearly identical execution results to Ethereum, such as gas cost and balance changes. However, there are some differences. Although the EVM pallet aims for near-identical behavior to Ethereum, some differences exist, for example, Moonbeam's [dynamic fee mechanism](https://forum.moonbeam.network/t/proposal-dynamic-fee-mechanism-for-moonbeam-and-moonriver/241){target=\_blank}. For more information, refer to the [Frontier EVM Pallet documentation](https://polkadot-evm.github.io/frontier/){target=\_blank}. Moonbeam includes additional EVM precompiles for functionalities like cryptographic operations (ECRecover, SHA256, BLAKE2, BN128) and dispatching Substrate calls directly from within the EVM. Moonbeam uses the following EVM precompiles: - **[pallet-evm-precompile-simple](https://polkadot-evm.github.io/frontier/rustdocs/pallet_evm_precompile_simple){target=\_blank}** - includes five basic precompiles: ECRecover, ECRecoverPublicKey, Identity, RIPEMD160, SHA256 - **[pallet-evm-precompile-blake2](https://polkadot-evm.github.io/frontier/rustdocs/pallet_evm_precompile_blake2/struct.Blake2F.html){target=\_blank}** - includes the BLAKE2 precompile - **[pallet-evm-precompile-bn128](https://polkadot-evm.github.io/frontier/rustdocs/pallet_evm_precompile_bn128/index.html){target=\_blank}** - includes three BN128 precompiles: BN128Add, BN128Mul, and BN128Pairing - **[pallet-evm-precompile-modexp](https://polkadot-evm.github.io/frontier/rustdocs/pallet_evm_precompile_modexp/struct.Modexp.html){target=\_blank}** - includes the modular exponentiation precompile - **[pallet-evm-precompile-sha3fips](https://polkadot-evm.github.io/frontier/rustdocs/pallet_evm_precompile_sha3fips/struct.Sha3FIPS256.html){target=\_blank}** -includes the standard SHA3 precompile - **[pallet-evm-precompile-dispatch](https://polkadot-evm.github.io/frontier/rustdocs/pallet_evm_precompile_dispatch/struct.Dispatch.html){target=\_blank}** - includes the dispatch precompile You can find an overview of most of these precompiles on the [Ethereum MainNet Precompiled Contracts](/builders/ethereum/precompiles/utility/eth-mainnet/){target=\_blank} page. ## Native Interoperability {: #native-interoperability } While Substrate allows developers to create blockchains, one of its most significant advantages is that it supports integration for native interoperability through relay chains like Polkadot and Kusama. A relay chain is a central chain that connects several blockchains, known as parachains. Each parachain is a distinct blockchain with its runtime and state, but all are connected to and secured by the relay chain. Once connected, parachains can communicate via [Cross-Consensus Messaging (XCM)](/builders/interoperability/xcm/overview/){target=_blank} to exchange information and conduct transactions in the same language, enabling a wide range of interoperable applications. Moonbeam and Moonriver have established XCM connections with a large number of parachains. You can see a visualization of all XCM integrations in this [XCM Channel Viewer](https://dotsama-channels.vercel.app/#/){target=_blank}. --- END CONTENT --- Doc-Content: https://docs.moonbeam.network/learn/platform/tokens/ --- BEGIN CONTENT --- --- title: Utility Tokens description: Each of the Moonbeam networks require a utility token to function. Glimmer (GLMR) for Moonbeam on Polkadot and Moonriver (MOVR) for Moonriver on Kusama. categories: Basics --- # Introduction As a decentralized smart contract platform, Moonbeam requires a utility token to function. This token is central to the design of Moonbeam and cannot be removed without sacrificing essential functionality. The Moonbeam token uses include: - Supporting the gas metering of smart contract execution - Incentivizing collators and powering the mechanics around the creation of a decentralized node infrastructure on which the platform can run - Facilitating the on-chain governance mechanism, including proposing referenda, electing council members, voting, etc. - Paying for network transaction fees ## Glimmer Token {: #glimmer-token } In the Moonbeam deployment on Polkadot MainNet, this token is called Glimmer, as in, “that smart contract call will cost 0.3 Glimmer.” The token symbol is GLMR. You can find more information about Glimmer on the [Moonbeam Foundation](https://moonbeam.foundation/glimmer-token-tokenomics) website. ## Moonriver Token {: #moonriver-token } In the Moonbeam deployment on Kusama (called Moonriver), this token is called Moonriver, as in, “that smart contract call will cost 0.003 Moonriver.” The token symbol will be MOVR. You can find more information about Moonriver on the [Moonbeam Foundation](https://moonbeam.foundation/moonriver-token-tokenomics) website. ## DEV Token {: #dev-token } In the Moonbeam TestNet (called Moonbase Alpha), the token is called DEV. This token can be acquired freely, as its only purpose is to drive development and testing on Moonbase Alpha. You can get DEV tokens for testing on Moonbase Alpha once every 24 hours from the [Moonbase Alpha Faucet](https://faucet.moonbeam.network){target=\_blank}. --- END CONTENT --- Doc-Content: https://docs.moonbeam.network/learn/platform/vision/ --- BEGIN CONTENT --- --- title: The Moonbeam Vision | Multi-chain description: Moonbeam is designed to enable a multi-chain future, where users and assets can move freely across many specialized and heterogeneous chains. categories: Basics --- # Our Vision for Moonbeam We believe in a multi-chain future with many chains, and many users and assets on those chains. In this context, we have created Moonbeam: a smart contract platform that provides an Ethereum-compatible environment for building decentralized applications. Moonbeam was designed to serve these new kinds of assets and users that exist across two or more chains. Existing smart contract platforms are designed to service the users and assets on a single, specific chain. By providing cross-chain smart contract functionality, Moonbeam allows developers to shift existing workloads and logic to Moonbeam and extend the reach of their applications to new users and assets on other chains. Moonbeam's cross-chain integration is accomplished by becoming a [parachain](/learn/platform/glossary/#parachains) on the Polkadot network. The [Polkadot network](/learn/platform/glossary/#polkadot) provides integration and connectivity between parachains that are connected to the network and to other non-Polkadot-based chains, such as Ethereum and Bitcoin, via bridges. ## Who Benefits From Moonbeam {: #who-benefits-from-moonbeam } There are three main audiences who can most benefit from Moonbeam's cross-chain functionality: ### Existing Ethereum-Based Projects {: #existing-ethereum-based-projects } Projects that are struggling with cost and scalability challenges on Ethereum can use Moonbeam to: - Move portions of their existing workloads and state off of Ethereum Layer 1 with minimal required changes. - Implement a hybrid approach, where applications live on both Ethereum and Moonbeam simultaneously. - Extend their reach to the Polkadot network and other chains that are connected to Polkadot. ### Polkadot Ecosystem Projects {: #polkadot-ecosystem-projects } Ecosystem projects that need smart contract functionality can use Moonbeam to: - Augment their existing parachains and parathreads. - Add new functionality that is needed but not included on the main [Polkadot relay chain](/learn/platform/glossary/#relay-chain). For example, they could create a place where teams can crowdfund their projects, implement lockdrops, and process other, more complex financial transactions than are provided by base [Substrate](/learn/platform/glossary/#substrate) functionality. - Leverage the mature and extensive Ethereum development toolchain. ### Developers of New DApps {: #developers-of-new-dapps } Individuals and teams that want to try building on Polkadot can use Moonbeam to: - Leverage the specialized functionality from Polkadot parachains while reaching users and assets on other chains. - Compose functionality from Polkadot parachains by using Moonbeam as a lightweight integration layer that aggregates network services before presenting them to end users. Implementing a composed service using pre-built integrations on a smart contract platform will be a lot faster and easier (in many cases) than building a full Substrate runtime and performing the integrations yourself in the runtime. ## Key Features and Functionality {: #key-features-and-functionality } Moonbeam achieves these goals with the following key features: - **Decentralized and Permissionless** , providing a base requirement for censorship resistance and support for many existing and future DApp use cases. - **Contains a Full EVM Implementation** , enabling Solidity-based smart contracts to be migrated with minimal change and with expected execution results. - **Implements the Web3 RPC API** so that existing DApp front-ends can be migrated with minimal change required, and so existing Ethereum-based tools, such as Hardhat, Remix, and MetaMask, can be used without modification against Moonbeam. - **Compatible with the Substrate Ecosystem Toolset** , including block explorers, front-end development libraries, and wallets, allowing developers and users to use the right tool for what they are trying to accomplish. - **Native Cross-Chain Integration** via the Polkadot network and via token bridges, which allows for token movement, state visibility, and message passing with Ethereum and other chains. - **On-Chain Governance** to allow stakeholders to quickly and forklessly evolve the base protocol according to developer and community needs. This unique combination of elements fills a strategic market gap, while allowing Moonbeam to address future developer needs as the Polkadot network grows over time. Building your own chain with Substrate is powerful, but also comes with a number of additional responsibilities, such as learning and implementing the chain’s runtime in Rust, creating a token economy, and incentivizing a community of node operators. For many developers and projects, an Ethereum-compatible smart contract approach will be much simpler and faster to implement. And by building these smart contracts on Moonbeam, developers can still integrate with other chains and get value from Polkadot-based network effects. --- END CONTENT --- Doc-Content: https://docs.moonbeam.network/learn/platform/why-polkadot/ --- BEGIN CONTENT --- --- title: Why Polkadot description: Moonbeam is built on the Substrate framework and connected to the Polkadot network, adding speed and security to the platform. categories: Basics --- # Why We're Building on Polkadot After extensive research, we decided to build Moonbeam using the [Substrate development framework](/learn/platform/glossary/#substrate) and to deploy Moonbeam as a [parachain](/learn/platform/glossary/#parachains) on the [Polkadot network](/learn/platform/glossary/#polkadot). ## Substrate Blockchain Framework {: #substrate-blockchain-framework } Substrate is a good technical fit for Moonbeam. By building on top of this framework, we can leverage the extensive functionality that Substrate includes out-of-the-box, rather than building it ourselves. This includes peer-to-peer networking, consensus mechanisms, governance functionality, an EVM implementation, and more. Overall, using Substrate will dramatically reduce the time and implementation effort needed to implement Moonbeam. Substrate allows a great degree of customization, which is necessary in order to achieve our Ethereum compatibility goals. And, by using Rust, we benefit from both safety guarantees and performance gains. ## Polkadot Network and Ecosystem {: #polkadot-network-and-ecosystem } The Polkadot network is also a good fit for Moonbeam. As a parachain on Polkadot, Moonbeam will be able to directly integrate with — and move tokens between — any other parachains and parathreads on the network. We can also leverage any of the bridges that are independently built to connect non-Polkadot chains to Polkadot, including bridges to Ethereum. Polkadot’s interoperability model uniquely supports Moonbeam’s cross-chain integration goals and is a key enabling technology to support the Moonbeam vision. But perhaps just as important as the technical criteria above, we are impressed with the people in the Polkadot ecosystem. This includes individuals at Parity, the Web3 Foundation, and other projects in the ecosystem. We have built many valuable relationships and find the people to be both extremely talented and the kind of people we want to be around. --- END CONTENT --- Doc-Content: https://docs.moonbeam.network/builders/ethereum/dev-env/openzeppelin/overview/ --- BEGIN CONTENT --- --- title: An Overview of OpenZeppelin on Moonbeam description: Learn how to use OpenZeppelin products for creating and managing Solidity smart contracts on Moonbeam, thanks to its Ethereum compatibility features. categories: Basics, Ethereum Toolkit --- # OpenZeppelin ## Introduction {: #introduction } [OpenZeppelin](https://www.openzeppelin.com){target=\_blank} is well known in the Ethereum developer community as their set of audited smart contracts and libraries are a standard in the industry. For example, most of the tutorials that show developers how to deploy an ERC-20 token use OpenZeppelin contracts. You can find more information about OpenZeppelin on their [documentation site](https://docs.openzeppelin.com){target=\_blank}. As part of its Ethereum compatibility features, OpenZeppelin products can be seamlessly used on Moonbeam. This page will provide information on different OpenZeppelin solutions that you can test. ## OpenZeppelin on Moonbeam {: #openzeppelin-on-moonbeam } Currently, the following OpenZeppelin products/solutions work on the different networks available on Moonbeam: | **Product** | **Moonbeam** | **Moonriver** | **Moonbase Alpha** | **Moonbase Dev Node** | |:---------------------:|:------------:|:-------------:|:------------------:|:---------------------:| | Contracts & libraries | ✓ | ✓ | ✓ | ✓ | | Contracts Wizard | ✓ | ✓ | ✓ | ✓ | You will find a corresponding tutorial for each product in the following links: - [**Contracts Wizard**](/builders/ethereum/dev-env/openzeppelin/contracts/#openzeppelin-contract-wizard) — where you'll find a guide on how to use OpenZeppelin web-based wizard to create different token contracts with different functionalities - [**Contracts & libraries**](/builders/ethereum/dev-env/openzeppelin/contracts/#deploying-openzeppelin-contracts-on-moonbeam) — where you'll find tutorials to deploy the most common token contracts using OpenZeppelin's templates: ERC-20, ERC-721 and ERC-1155
The information presented herein has been provided by third parties and is made available solely for general information purposes. Moonbeam does not endorse any project listed and described on the Moonbeam Doc Website (https://docs.moonbeam.network/). Moonbeam Foundation does not warrant the accuracy, completeness or usefulness of this information. Any reliance you place on such information is strictly at your own risk. Moonbeam Foundation disclaims all liability and responsibility arising from any reliance placed on this information by you or by anyone who may be informed of any of its contents. All statements and/or opinions expressed in these materials are solely the responsibility of the person or entity providing those materials and do not necessarily represent the opinion of Moonbeam Foundation. The information should not be construed as professional or financial advice of any kind. Advice from a suitably qualified professional should always be sought in relation to any particular matter or circumstance. The information herein may link to or integrate with other websites operated or content provided by third parties, and such other websites may link to this website. Moonbeam Foundation has no control over any such other websites or their content and will have no liability arising out of or related to such websites or their content. The existence of any such link does not constitute an endorsement of such websites, the content of the websites, or the operators of the websites. These links are being provided to you only as a convenience and you release and hold Moonbeam Foundation harmless from any and all liability arising from your use of this information or the information provided by any third-party website or service.
--- END CONTENT ---
Doc-Content: https://docs.moonbeam.network/builders/ethereum/precompiles/overview/
--- BEGIN CONTENT ---
---
title: Solidity Precompiles
description: An overview of the available Solidity precompiles on Moonbeam. Precompiles enable you to interact with Substrate features using the Ethereum API.
categories: Reference, Basics
---
# Overview of the Precompiled Contracts on Moonbeam
## Overview {: #introduction }
On Moonbeam, a precompiled contract is native Substrate code that has an Ethereum-style address and can be called using the Ethereum API, like any other smart contract. The precompiles allow you to call the Substrate runtime directly which is not normally accessible from the Ethereum side of Moonbeam.
The Substrate code responsible for implementing precompiles can be found in the [EVM pallet](/learn/platform/technology/#evm-pallet){target=\_blank}. The EVM pallet includes the [standard precompiles found on Ethereum and some additional precompiles that are not specific to Ethereum](https://github.com/polkadot-evm/frontier/tree/master/frame/evm/precompile){target=\_blank}. It also provides the ability to create and execute custom precompiles through the generic [`Precompiles` trait](https://polkadot-evm.github.io/frontier/rustdocs/pallet_evm/trait.Precompile.html){target=\_blank}. There are several custom Moonbeam-specific precompiles that have been created, all of which can be found in the [Moonbeam codebase](https://github.com/moonbeam-foundation/moonbeam/tree/master/precompiles){target=\_blank}. It is important to highlight that the precompiles from this list with the `CallableByContract` check are not callable inside the contract constructor.
The Ethereum precompiled contracts contain complex functionality that is computationally intensive, such as hashing and encryption. The custom precompiled contracts on Moonbeam provide access to Substrate-based functionality such as staking, governance, XCM-related functions, and more.
The Moonbeam-specific precompiles can be interacted with through familiar and easy-to-use Solidity interfaces using the Ethereum API, which are ultimately used to interact with the underlying Substrate interface. This flow is depicted in the following diagram:

!!! note
There can be some unintended consequences when using the precompiled contracts on Moonbeam. Please refer to the [Security Considerations](/learn/core-concepts/security/){target=\_blank} page for more information.
## Precompiled Contract Addresses {: #precompiled-contract-addresses }
The precompiled contracts are categorized by address and based on the origin network. If you were to convert the precompiled addresses to decimal format, and break them into categories by numeric value, the categories are as follows:
- **0-1023** - [Ethereum MainNet precompiles](#ethereum-mainnet-precompiles)
- **1024-2047** - precompiles that are [not in Ethereum and not Moonbeam specific](#non-moonbeam-specific-nor-ethereum-precomiles)
- **2048-4095** - [Moonbeam specific precompiles](#moonbeam-specific-precompiles)
### Ethereum MainNet Precompiles {: #ethereum-mainnet-precompiles }
=== "Moonbeam"
| Contract | Address |
|:---------------------------------------------------------------------------------------------------------------------------:|:------------------------------------------:|
| [ECRECOVER](/builders/ethereum/precompiles/utility/eth-mainnet/#verify-signatures-with-ecrecover){target=\_blank} | 0x0000000000000000000000000000000000000001 |
| [SHA256](/builders/ethereum/precompiles/utility/eth-mainnet/#hashing-with-sha256){target=\_blank} | 0x0000000000000000000000000000000000000002 |
| [RIPEMD160](/builders/ethereum/precompiles/utility/eth-mainnet/#hashing-with-ripemd-160){target=\_blank} | 0x0000000000000000000000000000000000000003 |
| [Identity](/builders/ethereum/precompiles/utility/eth-mainnet/#the-identity-function){target=\_blank} | 0x0000000000000000000000000000000000000004 |
| [Modular Exponentiation](/builders/ethereum/precompiles/utility/eth-mainnet/#modular-exponentiation){target=\_blank} | 0x0000000000000000000000000000000000000005 |
| [BN128Add](/builders/ethereum/precompiles/utility/eth-mainnet/#bn128add){target=\_blank} | 0x0000000000000000000000000000000000000006 |
| [BN128Mul](/builders/ethereum/precompiles/utility/eth-mainnet/#bn128mul){target=\_blank} | 0x0000000000000000000000000000000000000007 |
| [BN128Pairing](/builders/ethereum/precompiles/utility/eth-mainnet/#bn128pairing){target=\_blank} | 0x0000000000000000000000000000000000000008 |
| [Blake2](https://polkadot-evm.github.io/frontier/rustdocs/pallet_evm_precompile_blake2/struct.Blake2F.html){target=\_blank} | 0x0000000000000000000000000000000000000009 |
| [P256Verify](https://github.com/ethereum/RIPs/blob/master/RIPS/rip-7212.md){target=\_blank} | 0x0000000000000000000000000000000000000100 |
=== "Moonriver"
| Contract | Address |
|:---------------------------------------------------------------------------------------------------------------------------:|:------------------------------------------:|
| [ECRECOVER](/builders/ethereum/precompiles/utility/eth-mainnet/#verify-signatures-with-ecrecover){target=\_blank} | 0x0000000000000000000000000000000000000001 |
| [SHA256](/builders/ethereum/precompiles/utility/eth-mainnet/#hashing-with-sha256){target=\_blank} | 0x0000000000000000000000000000000000000002 |
| [RIPEMD160](/builders/ethereum/precompiles/utility/eth-mainnet/#hashing-with-ripemd-160){target=\_blank} | 0x0000000000000000000000000000000000000003 |
| [Identity](/builders/ethereum/precompiles/utility/eth-mainnet/#the-identity-function){target=\_blank} | 0x0000000000000000000000000000000000000004 |
| [Modular Exponentiation](/builders/ethereum/precompiles/utility/eth-mainnet/#modular-exponentiation){target=\_blank} | 0x0000000000000000000000000000000000000005 |
| [BN128Add](/builders/ethereum/precompiles/utility/eth-mainnet/#bn128add){target=\_blank} | 0x0000000000000000000000000000000000000006 |
| [BN128Mul](/builders/ethereum/precompiles/utility/eth-mainnet/#bn128mul){target=\_blank} | 0x0000000000000000000000000000000000000007 |
| [BN128Pairing](/builders/ethereum/precompiles/utility/eth-mainnet/#bn128pairing){target=\_blank} | 0x0000000000000000000000000000000000000008 |
| [Blake2](https://polkadot-evm.github.io/frontier/rustdocs/pallet_evm_precompile_blake2/struct.Blake2F.html){target=\_blank} | 0x0000000000000000000000000000000000000009 |
| [P256Verify](https://github.com/ethereum/RIPs/blob/master/RIPS/rip-7212.md){target=\_blank} | 0x0000000000000000000000000000000000000100 |
=== "Moonbase Alpha"
| Contract | Address |
|:---------------------------------------------------------------------------------------------------------------------------:|:------------------------------------------:|
| [ECRECOVER](/builders/ethereum/precompiles/utility/eth-mainnet/#verify-signatures-with-ecrecover){target=\_blank} | 0x0000000000000000000000000000000000000001 |
| [SHA256](/builders/ethereum/precompiles/utility/eth-mainnet/#hashing-with-sha256){target=\_blank} | 0x0000000000000000000000000000000000000002 |
| [RIPEMD160](/builders/ethereum/precompiles/utility/eth-mainnet/#hashing-with-ripemd-160){target=\_blank} | 0x0000000000000000000000000000000000000003 |
| [Identity](/builders/ethereum/precompiles/utility/eth-mainnet/#the-identity-function){target=\_blank} | 0x0000000000000000000000000000000000000004 |
| [Modular Exponentiation](/builders/ethereum/precompiles/utility/eth-mainnet/#modular-exponentiation){target=\_blank} | 0x0000000000000000000000000000000000000005 |
| [BN128Add](/builders/ethereum/precompiles/utility/eth-mainnet/#bn128add){target=\_blank} | 0x0000000000000000000000000000000000000006 |
| [BN128Mul](/builders/ethereum/precompiles/utility/eth-mainnet/#bn128mul){target=\_blank} | 0x0000000000000000000000000000000000000007 |
| [BN128Pairing](/builders/ethereum/precompiles/utility/eth-mainnet/#bn128pairing){target=\_blank} | 0x0000000000000000000000000000000000000008 |
| [Blake2](https://polkadot-evm.github.io/frontier/rustdocs/pallet_evm_precompile_blake2/struct.Blake2F.html){target=\_blank} | 0x0000000000000000000000000000000000000009 |
| [P256Verify](https://github.com/ethereum/RIPs/blob/master/RIPS/rip-7212.md){target=\_blank} | 0x0000000000000000000000000000000000000100 |
### Non-Moonbeam Specific nor Ethereum Precompiles {: #non-moonbeam-specific-nor-ethereum-precompiles }
=== "Moonbeam"
| Contract | Address |
|:--------------------------------------------------------------------------------------------------------------------------------------------------:|:------------------------------------------:|
| [SHA3FIPS256](/builders/ethereum/precompiles/utility/eth-mainnet/#hashing-with-sha3fips256){target=\_blank} | 0x0000000000000000000000000000000000000400 |
| Dispatch [Removed] | 0x0000000000000000000000000000000000000401 |
| [ECRecoverPublicKey](https://polkadot-evm.github.io/frontier/rustdocs/pallet_evm_precompile_simple/struct.ECRecoverPublicKey.html){target=\_blank} | 0x0000000000000000000000000000000000000402 |
=== "Moonriver"
| Contract | Address |
|:--------------------------------------------------------------------------------------------------------------------------------------------------:|:------------------------------------------:|
| [SHA3FIPS256](/builders/ethereum/precompiles/utility/eth-mainnet/#hashing-with-sha3fips256){target=\_blank} | 0x0000000000000000000000000000000000000400 |
| Dispatch [Removed] | 0x0000000000000000000000000000000000000401 |
| [ECRecoverPublicKey](https://polkadot-evm.github.io/frontier/rustdocs/pallet_evm_precompile_simple/struct.ECRecoverPublicKey.html){target=\_blank} | 0x0000000000000000000000000000000000000402 |
=== "Moonbase Alpha"
| Contract | Address |
|:-------------------------------------------------------------------------------------------------------------------------------------------------------------:|:------------------------------------------:|
| [SHA3FIPS256](/builders/ethereum/precompiles/utility/eth-mainnet/#hashing-with-sha3fips256){target=\_blank} | 0x0000000000000000000000000000000000000400 |
| Dispatch [Removed] | 0x0000000000000000000000000000000000000401 |
| [ECRecoverPublicKey](https://polkadot-evm.github.io/frontier/rustdocs/pallet_evm_precompile_simple/struct.ECRecoverPublicKey.html){target=\_blank} | 0x0000000000000000000000000000000000000402 |
### Moonbeam Specific Precompiles {: #moonbeam-specific-precompiles }
=== "Moonbeam"
| Contract | Address |
|:--------------------------------------------------------------------------------------------------------------------------------------------------------------------------------------:|:-------------------------------------------------------------------:|
| [Parachain Staking](https://github.com/moonbeam-foundation/moonbeam/blob/master/precompiles/parachain-staking/StakingInterface.sol){target=\_blank} | {{networks.moonbeam.precompiles.staking}} |
| [Crowdloan Rewards](https://github.com/moonbeam-foundation/moonbeam/blob/master/precompiles/crowdloan-rewards/CrowdloanInterface.sol){target=\_blank} | {{networks.moonbeam.precompiles.crowdloan}} |
| [ERC-20 Interface](https://github.com/moonbeam-foundation/moonbeam/blob/master/precompiles/balances-erc20/ERC20.sol){target=\_blank} | {{networks.moonbeam.precompiles.erc20}} |
| Democracy [Removed] | {{networks.moonbeam.precompiles.democracy}} |
| [X-Tokens](https://github.com/moonbeam-foundation/moonbeam/blob/master/precompiles/xtokens/Xtokens.sol){target=\_blank} | {{networks.moonbeam.precompiles.xtokens}} |
| [Relay Encoder](https://github.com/moonbeam-foundation/moonbeam/blob/master/precompiles/relay-encoder/RelayEncoder.sol){target=\_blank} | {{networks.moonbeam.precompiles.relay_encoder}} |
| [XCM Transactor V1](https://github.com/moonbeam-foundation/moonbeam/blob/master/precompiles/xcm-transactor/src/v1/XcmTransactorV1.sol){target=\_blank} | {{networks.moonbeam.precompiles.xcm_transactor_v1}} |
| [Author Mapping](https://github.com/moonbeam-foundation/moonbeam/blob/master/precompiles/author-mapping/AuthorMappingInterface.sol){target=\_blank} | {{networks.moonbeam.precompiles.author_mapping}} |
| [Batch](https://github.com/moonbeam-foundation/moonbeam/blob/master/precompiles/batch/Batch.sol){target=\_blank} | {{networks.moonbeam.precompiles.batch}} |
| [Randomness](https://github.com/moonbeam-foundation/moonbeam/blob/master/precompiles/randomness/Randomness.sol){target=\_blank} | {{networks.moonbeam.precompiles.randomness}} |
| [Call Permit](https://github.com/moonbeam-foundation/moonbeam/blob/master/precompiles/call-permit/CallPermit.sol){target=\_blank} | {{networks.moonbeam.precompiles.call_permit}} |
| [Proxy](https://github.com/moonbeam-foundation/moonbeam/blob/master/precompiles/proxy/Proxy.sol){target=\_blank} | {{networks.moonbeam.precompiles.proxy}} |
| [XCM Utilities](https://github.com/moonbeam-foundation/moonbeam/blob/master/precompiles/xcm-utils/XcmUtils.sol){target=\_blank} | {{networks.moonbeam.precompiles.xcm_utils}} |
| [XCM Transactor V2](https://github.com/moonbeam-foundation/moonbeam/blob/master/precompiles/xcm-transactor/src/v2/XcmTransactorV2.sol){target=\_blank} | {{networks.moonbeam.precompiles.xcm_transactor_v2}} |
| [Council Collective [Removed]](https://github.com/moonbeam-foundation/moonbeam/blob/master/precompiles/collective/Collective.sol){target=\_blank} | {{networks.moonbeam.precompiles.collective_council}} |
| [Technical Committee Collective [Removed]](https://github.com/moonbeam-foundation/moonbeam/blob/master/precompiles/collective/Collective.sol){target=\_blank} | {{networks.moonbeam.precompiles.collective_tech_committee}} |
| [Treasury Council Collective](https://github.com/moonbeam-foundation/moonbeam/blob/master/precompiles/collective/Collective.sol){target=\_blank} | {{networks.moonbeam.precompiles.collective_treasury}} |
| [Referenda](https://github.com/moonbeam-foundation/moonbeam/blob/master/precompiles/referenda/Referenda.sol){target=\_blank} | {{networks.moonbeam.precompiles.referenda}} |
| [Conviction Voting](https://github.com/moonbeam-foundation/moonbeam/blob/master/precompiles/conviction-voting/ConvictionVoting.sol){target=\_blank} | {{networks.moonbeam.precompiles.conviction_voting}} |
| [Preimage](https://github.com/moonbeam-foundation/moonbeam/blob/master/precompiles/preimage/Preimage.sol){target=\_blank} | {{networks.moonbeam.precompiles.preimage}} |
| [OpenGov Tech Committee](https://github.com/moonbeam-foundation/moonbeam/blob/master/precompiles/collective/Collective.sol){target=\_blank} | {{networks.moonbeam.precompiles.collective_opengov_tech_committee}} |
| [Precompile Registry](https://github.com/moonbeam-foundation/moonbeam/blob/master/precompiles/precompile-registry/PrecompileRegistry.sol){target=\_blank} | {{networks.moonbeam.precompiles.registry}} |
| [GMP](https://github.com/moonbeam-foundation/moonbeam/blob/master/precompiles/gmp/Gmp.sol){target=\_blank} | {{networks.moonbeam.precompiles.gmp}} |
| [XCM Transactor V3](https://github.com/moonbeam-foundation/moonbeam/blob/master/precompiles/xcm-transactor/src/v3/XcmTransactorV3.sol){target=\_blank} | {{networks.moonbeam.precompiles.xcm_transactor_v3}} |
| [XCM interface](https://github.com/Moonsong-Labs/moonkit/blob/main/precompiles/pallet-xcm/XcmInterface.sol){target=\_blank} | {{networks.moonbeam.precompiles.xcm_interface}} |
| [Identity](https://github.com/moonbeam-foundation/moonbeam/blob/master/precompiles/identity/Identity.sol){target=\_blank} | {{networks.moonbeam.precompiles.identity}} |
=== "Moonriver"
| Contract | Address |
|:-------------------------------------------------------------------------------------------------------------------------------------------------------------:|:--------------------------------------------------------------------:|
| [Parachain Staking](https://github.com/moonbeam-foundation/moonbeam/blob/master/precompiles/parachain-staking/StakingInterface.sol){target=\_blank} | {{networks.moonriver.precompiles.staking}} |
| [Crowdloan Rewards](https://github.com/moonbeam-foundation/moonbeam/blob/master/precompiles/crowdloan-rewards/CrowdloanInterface.sol){target=\_blank} | {{networks.moonriver.precompiles.crowdloan}} |
| [ERC-20 Interface](https://github.com/moonbeam-foundation/moonbeam/blob/master/precompiles/balances-erc20/ERC20.sol){target=\_blank} | {{networks.moonriver.precompiles.erc20}} |
| Democracy [Disabled] | {{networks.moonriver.precompiles.democracy}} |
| [X-Tokens](https://github.com/moonbeam-foundation/moonbeam/blob/master/precompiles/xtokens/Xtokens.sol){target=\_blank} | {{networks.moonriver.precompiles.xtokens}} |
| [Relay Encoder](https://github.com/moonbeam-foundation/moonbeam/blob/master/precompiles/relay-encoder/RelayEncoder.sol){target=\_blank} | {{networks.moonriver.precompiles.relay_encoder}} |
| [XCM Transactor V1](https://github.com/moonbeam-foundation/moonbeam/blob/master/precompiles/xcm-transactor/src/v1/XcmTransactorV1.sol){target=\_blank} | {{networks.moonriver.precompiles.xcm_transactor_v1}} |
| [Author Mapping](https://github.com/moonbeam-foundation/moonbeam/blob/master/precompiles/author-mapping/AuthorMappingInterface.sol){target=\_blank} | {{networks.moonriver.precompiles.author_mapping}} |
| [Batch](https://github.com/moonbeam-foundation/moonbeam/blob/master/precompiles/batch/Batch.sol){target=\_blank} | {{networks.moonriver.precompiles.batch}} |
| [Randomness](https://github.com/moonbeam-foundation/moonbeam/blob/master/precompiles/randomness/Randomness.sol){target=\_blank} | {{networks.moonriver.precompiles.randomness}} |
| [Call Permit](https://github.com/moonbeam-foundation/moonbeam/blob/master/precompiles/call-permit/CallPermit.sol){target=\_blank} | {{networks.moonriver.precompiles.call_permit}} |
| [Proxy](https://github.com/moonbeam-foundation/moonbeam/blob/master/precompiles/proxy/Proxy.sol){target=\_blank} | {{networks.moonriver.precompiles.proxy}} |
| [XCM Utilities](https://github.com/moonbeam-foundation/moonbeam/blob/master/precompiles/xcm-utils/XcmUtils.sol){target=\_blank} | {{networks.moonriver.precompiles.xcm_utils}} |
| [XCM Transactor V2](https://github.com/moonbeam-foundation/moonbeam/blob/master/precompiles/xcm-transactor/src/v2/XcmTransactorV2.sol){target=\_blank} | {{networks.moonriver.precompiles.xcm_transactor_v2}} |
| [Council Collective [Removed]](https://github.com/moonbeam-foundation/moonbeam/blob/master/precompiles/collective/Collective.sol){target=\_blank} | {{networks.moonriver.precompiles.collective_council}} |
| [Technical Committee Collective [Removed]](https://github.com/moonbeam-foundation/moonbeam/blob/master/precompiles/collective/Collective.sol){target=\_blank} | {{networks.moonriver.precompiles.collective_tech_committee}} |
| [Treasury Council Collective](https://github.com/moonbeam-foundation/moonbeam/blob/master/precompiles/collective/Collective.sol){target=\_blank} | {{networks.moonriver.precompiles.collective_treasury}} |
| [Referenda](https://github.com/moonbeam-foundation/moonbeam/blob/master/precompiles/referenda/Referenda.sol){target=\_blank} | {{networks.moonriver.precompiles.referenda}} |
| [Conviction Voting](https://github.com/moonbeam-foundation/moonbeam/blob/master/precompiles/conviction-voting/ConvictionVoting.sol){target=\_blank} | {{networks.moonriver.precompiles.conviction_voting}} |
| [Preimage](https://github.com/moonbeam-foundation/moonbeam/blob/master/precompiles/preimage/Preimage.sol){target=\_blank} | {{networks.moonriver.precompiles.preimage}} |
| [OpenGov Tech Committee](https://github.com/moonbeam-foundation/moonbeam/blob/master/precompiles/collective/Collective.sol){target=\_blank} | {{networks.moonriver.precompiles.collective_opengov_tech_committee}} |
| [Precompile Registry](https://github.com/moonbeam-foundation/moonbeam/blob/master/precompiles/precompile-registry/PrecompileRegistry.sol){target=\_blank} | {{networks.moonriver.precompiles.registry}} |
| [GMP](https://github.com/moonbeam-foundation/moonbeam/blob/master/precompiles/gmp/Gmp.sol){target=\_blank} | {{networks.moonriver.precompiles.gmp}} |
| [XCM Transactor V3](https://github.com/moonbeam-foundation/moonbeam/blob/master/precompiles/xcm-transactor/src/v3/XcmTransactorV3.sol){target=\_blank} | {{networks.moonriver.precompiles.xcm_transactor_v3}} |
| [XCM interface](https://github.com/Moonsong-Labs/moonkit/blob/main/precompiles/pallet-xcm/XcmInterface.sol){target=\_blank} | {{networks.moonriver.precompiles.xcm_interface}} |
| [Identity](https://github.com/moonbeam-foundation/moonbeam/blob/master/precompiles/identity/Identity.sol){target=\_blank} | {{networks.moonriver.precompiles.identity}} |
=== "Moonbase Alpha"
| Contract | Address |
|:--------------------------------------------------------------------------------------------------------------------------------------------------------------:|:-------------------------------------------------------------------:|
| [Parachain Staking](https://github.com/moonbeam-foundation/moonbeam/blob/master/precompiles/parachain-staking/StakingInterface.sol){target=\_blank} | {{networks.moonbase.precompiles.staking}} |
| [Crowdloan Rewards](https://github.com/moonbeam-foundation/moonbeam/blob/master/precompiles/crowdloan-rewards/CrowdloanInterface.sol){target=\_blank} | {{networks.moonbase.precompiles.crowdloan}} |
| [ERC-20 Interface](https://github.com/moonbeam-foundation/moonbeam/blob/master/precompiles/balances-erc20/ERC20.sol){target=\_blank} | {{networks.moonbase.precompiles.erc20}} |
| Democracy [Removed] | {{networks.moonbase.precompiles.democracy}} |
| [X-Tokens](https://github.com/moonbeam-foundation/moonbeam/blob/master/precompiles/xtokens/Xtokens.sol){target=\_blank} | {{networks.moonbase.precompiles.xtokens}} |
| [Relay Encoder](https://github.com/moonbeam-foundation/moonbeam/blob/master/precompiles/relay-encoder/RelayEncoder.sol){target=\_blank} | {{networks.moonbase.precompiles.relay_encoder}} |
| [XCM Transactor V1](https://github.com/moonbeam-foundation/moonbeam/blob/master/precompiles/xcm-transactor/src/v1/XcmTransactorV1.sol){target=\_blank} | {{networks.moonbase.precompiles.xcm_transactor_v1}} |
| [Author Mapping](https://github.com/moonbeam-foundation/moonbeam/blob/master/precompiles/author-mapping/AuthorMappingInterface.sol){target=\_blank} | {{networks.moonbase.precompiles.author_mapping}} |
| [Batch](https://github.com/moonbeam-foundation/moonbeam/blob/master/precompiles/batch/Batch.sol){target=\_blank} | {{networks.moonbase.precompiles.batch}} |
| [Randomness](https://github.com/moonbeam-foundation/moonbeam/blob/master/precompiles/randomness/Randomness.sol){target=\_blank} | {{networks.moonbase.precompiles.randomness}} |
| [Call Permit](https://github.com/moonbeam-foundation/moonbeam/blob/master/precompiles/call-permit/CallPermit.sol){target=\_blank} | {{networks.moonbase.precompiles.call_permit}} |
| [Proxy](https://github.com/moonbeam-foundation/moonbeam/blob/master/precompiles/proxy/Proxy.sol){target=\_blank} | {{networks.moonbase.precompiles.proxy}} |
| [XCM Utilities](https://github.com/moonbeam-foundation/moonbeam/blob/master/precompiles/xcm-utils/XcmUtils.sol){target=\_blank} | {{networks.moonbase.precompiles.xcm_utils}} |
| [XCM Transactor V2](https://github.com/moonbeam-foundation/moonbeam/blob/master/precompiles/xcm-transactor/src/v2/XcmTransactorV2.sol){target=\_blank} | {{networks.moonbase.precompiles.xcm_transactor_v2}} |
| [Council Collective [Removed]](https://github.com/moonbeam-foundation/moonbeam/blob/master/precompiles/collective/Collective.sol){target=\_blank} | {{networks.moonbase.precompiles.collective_council}} |
| [Technical Committee Collective [Removed]](https://github.com/moonbeam-foundation/moonbeam/blob/master/precompiles/collective/Collective.sol){target=\_blank} | {{networks.moonbase.precompiles.collective_tech_committee}} |
| [Treasury Council Collective](https://github.com/moonbeam-foundation/moonbeam/blob/master/precompiles/collective/Collective.sol){target=\_blank} | {{networks.moonbase.precompiles.collective_treasury}} |
| [Referenda](https://github.com/moonbeam-foundation/moonbeam/blob/master/precompiles/referenda/Referenda.sol){target=\_blank} | {{networks.moonbase.precompiles.referenda}} |
| [Conviction Voting](https://github.com/moonbeam-foundation/moonbeam/blob/master/precompiles/conviction-voting/ConvictionVoting.sol){target=\_blank} | {{networks.moonbase.precompiles.conviction_voting}} |
| [Preimage](https://github.com/moonbeam-foundation/moonbeam/blob/master/precompiles/preimage/Preimage.sol){target=\_blank} | {{networks.moonbase.precompiles.preimage}} |
| [OpenGov Tech Committee](https://github.com/moonbeam-foundation/moonbeam/blob/master/precompiles/collective/Collective.sol){target=\_blank} | {{networks.moonbase.precompiles.collective_opengov_tech_committee}} |
| [Precompile Registry](https://github.com/moonbeam-foundation/moonbeam/blob/master/precompiles/precompile-registry/PrecompileRegistry.sol){target=\_blank} | {{networks.moonbase.precompiles.registry}} |
| [GMP](https://github.com/moonbeam-foundation/moonbeam/blob/master/precompiles/gmp/Gmp.sol){target=\_blank} | {{networks.moonbase.precompiles.gmp}} |
| [XCM Transactor V3](https://github.com/moonbeam-foundation/moonbeam/blob/master/precompiles/xcm-transactor/src/v3/XcmTransactorV3.sol){target=\_blank} | {{networks.moonbase.precompiles.xcm_transactor_v3}} |
| [XCM Interface](https://github.com/Moonsong-Labs/moonkit/blob/main/precompiles/pallet-xcm/XcmInterface.sol){target=\_blank} | {{networks.moonbeam.precompiles.xcm_interface}} |
| [Identity](https://github.com/moonbeam-foundation/moonbeam/blob/master/precompiles/identity/Identity.sol){target=\_blank} | {{networks.moonbase.precompiles.identity}} |
--- END CONTENT ---
Doc-Content: https://docs.moonbeam.network/builders/get-started/create-account/
--- BEGIN CONTENT ---
---
title: Create an Account
description: To begin developing on Moonbeam, you must create an account. This guide will provide you with the information needed to create one to use on Moonbeam.
categories: Basics
---
# Create an Account
## Introduction {: #introduction }
To get started developing on Moonbeam, developers must create an account. The most prevalent approach involves leveraging a wallet application, which facilitates generating and managing cryptographic keys essential for interacting with Moonbeam.
Moonbeam uses H160 Ethereum-style accounts and ECDSA keys, represented in 20-byte addresses. If you already have an Ethereum account and its private key or mnemonic, you can use your account on Moonbeam.
This guide will walk you through the step-by-step process of creating an account on Moonbeam. Whether you're new to blockchain technology or an experienced Ethereum user, this guide will provide all the information you need to get started.
!!! note
This guide does not pertain to a local Moonbeam development node. If you are using a development node, you don't need to worry about creating an account, as the node comes with ten pre-funded accounts for testing purposes. Please refer to the [Getting Started with a Local Moonbeam Development Node](/builders/get-started/networks/moonbeam-dev/){target=\_blank} guide for more information.
## Choose a Wallet {: #choose-a-wallet }
A wallet is a software or hardware tool that allows you to securely store, manage, and interact with your digital assets, such as tokens or coins. Wallets store your private keys, which are essential for authorizing transactions on the network.
You can review a list of wallets on the [Moonbeam DApp Directory](https://apps.moonbeam.network/moonbeam/app-dir?cat=wallets){target=\_blank}.
The list of wallets on the dApp is not exhaustive and may only cover some of the available options. You should be able to use any Ethereum-compatible wallet to generate an address and its associated private key.
You can also check out any of the wallets in the [Connect to Moonbeam](/tokens/connect/){target=\_blank} section of the docs.
## Use Your Wallet to Create an Account {: #use-your-wallet-to-create-an-account }
After you've selected a wallet and downloaded it, you'll most likely be prompted to create a new account or import an existing one the first time you open it. You'll want to create a new account.
Depending on the wallet, when creating an account, you may be prompted to backup and restore a seed phrase, also referred to as a mnemonic or recovery phrase. This phrase is a sequence of generated words that serve as a backup mechanism for private keys. They typically consist of 12 to 24 words randomly selected from a predefined list. Seed phrases are used to derive private keys deterministically, meaning that the same sequence of words will always generate the same set of private keys. They are crucial for recovering access to a cryptocurrency wallet in case of loss or device failure. **Make sure you save the phrase in a safe place; if you lose access to this phrase, you'll lose access to any funds you hold in your account.**
After saving your seed phrase, you can start developing on Moonbeam. Many wallets offer the option to export the private key linked to your account. By doing so, you can utilize your private key instead of the seed phrase during development. However, taking adequate precautions to securely store your private key or seed phrase while developing is essential.
And that's it! Before sending your first transaction on a Moonbeam-based network, ensure you have the necessary [network configurations for your chosen network](/builders/get-started/networks/){target=\_blank} and an [RPC endpoint](/builders/get-started/endpoints/){target=\_blank} for the network. Once you have these items, you'll be able to follow along with tutorials like the [How to use Ethers.js](/builders/ethereum/libraries/ethersjs/){target=\_blank} or the [How to use Web3.js](/builders/ethereum/libraries/web3js/){target=\_blank} to send a transaction.
--- END CONTENT ---
Doc-Content: https://docs.moonbeam.network/builders/get-started/explorers/
--- BEGIN CONTENT ---
---
title: Block Explorers
description: An overview of the currently available block explorers that may be used to navigate the Substrate and Ethereum layers of Moonbeam.
categories: Basics
---
# Block Explorers
## Introduction {: #introduction }
Block explorers can be thought of as search engines for the blockchain. They allow users to search for information such as balances, contracts, and transactions. More advanced block explorers even offer indexing capabilities, which enable them to provide a complete set of information, such as ERC-20 tokens in the network. They might even offer API services to access it via external services.
Moonbeam provides two different kinds of explorers: ones to query the Ethereum API and others dedicated to the Substrate API. All EVM-based transactions are accessible via the Ethereum API, while the Substrate API can be relied upon for Substrate-native functions such as governance and staking. The Substrate API also includes information about the EVM-based transactions, but only limited information is shown.
## Quick Links {: #quick-links }
=== "Moonbeam"
| Block Explorer | Type | URL |
|:--------------:|:---------:|:-------------------------------------------------------------------------------------------------------------------------------------:|
| Moonscan | EVM | [https://moonbeam.moonscan.io/](https://moonbeam.moonscan.io){target=\_blank} |
| Expedition | EVM | [https://moonbeam-explorer.netlify.app/?network=Moonbeam](https://moonbeam-explorer.netlify.app/?network=Moonbeam){target=\_blank} |
| Subscan | Substrate | [https://moonbeam.subscan.io/](https://moonbeam.subscan.io){target=\_blank} |
| Polkadot.js | Substrate | [https://polkadot.js.org/apps/#/explorer](https://polkadot.js.org/apps/?rpc=wss://wss.api.moonbeam.network#/explorer){target=\_blank} |
=== "Moonriver"
| Block Explorer | Type | URL |
|:--------------:|:---------:|:-----------------------------------------------------------------------------------------------------------------------------------------------:|
| Moonscan | EVM | [https://moonriver.moonscan.io/](https://moonriver.moonscan.io){target=\_blank} |
| Expedition | EVM | [https://moonbeam-explorer.netlify.app/?network=Moonriver](https://moonbeam-explorer.netlify.app/?network=Moonriver){target=\_blank} |
| Subscan | Substrate | [https://moonriver.subscan.io/](https://moonriver.subscan.io){target=\_blank} |
| Polkadot.js | Substrate | [https://polkadot.js.org/apps/#/explorer](https://polkadot.js.org/apps/?rpc=wss://wss.api.moonrvier.moonbeam.network#/explorer){target=\_blank} |
=== "Moonbase Alpha"
| Block Explorer | Type | URL |
|:--------------:|:---------:|:----------------------------------------------------------------------------------------------------------------------------------------------:|
| Moonscan | EVM | [https://moonbase.moonscan.io/](https://moonbase.moonscan.io){target=\_blank} |
| Expedition | EVM | [https://moonbeam-explorer.netlify.app/?network=MoonbaseAlpha](https://moonbeam-explorer.netlify.app/?network=MoonbaseAlpha){target=\_blank} |
| Subscan | Substrate | [https://moonbase.subscan.io/](https://moonbase.subscan.io){target=\_blank} |
| Polkadot.js | Substrate | [https://polkadot.js.org/apps/#/explorer](https://polkadot.js.org/apps/?rpc=wss://wss.api.moonbase.moonbeam.network#/explorer){target=\_blank} |
=== "Moonbeam Dev Node"
| Block Explorer | Type | URL |
|:--------------:|:---------:|:-------------------------------------------------------------------------------------------------------------------------------------------------:|
| Expedition | EVM | [https://moonbeam-explorer.netlify.app/?network=MoonbeamDevNode](https://moonbeam-explorer.netlify.app/?network=MoonbeamDevNode){target=\_blank} |
| Polkadot.js | Substrate | [https://polkadot.js.org/apps/#/explorer](https://polkadot.js.org/apps/?rpc=wss://ws%3A%2F%2F127.0.0.1%3A9944#/explorer){target=\_blank} |
## Ethereum API {: #ethereum-api }
### Moonscan {: #Moonscan }
[Moonscan](https://moonscan.io){target=\_blank} is the primary Ethereum API block explorer for Moonbeam-based networks. Built by the Etherscan team, Moonscan provides a powerful, intuitive, and feature-rich experience. In addition to its comprehensive transaction and block data, Moonscan provides a number of [statistics and charts](https://moonbeam.moonscan.io/charts){target=\_blank}, such as average gas price, daily transactions, and block size charts.
Other Moonscan features include:
- [Collator leaderboard](https://moonbeam.moonscan.io/collators){target=\_blank} ranking collators by performance
- [Contract source code verification](/builders/ethereum/verify-contracts/block-explorers/){target=\_blank}, accessible both via a web interface and an API
- Ability to read and write state data of verified smart contracts
- [Token approvals](https://moonscan.io/tokenapprovalchecker){target=\_blank} where you can view and revoke any of your prior token approvals
- [Adding token information](/builders/get-started/token-profile/){target=\_blank} and creating a profile for ERC-20s, ERC-721s, and ERC-1155s deployed to Moonbeam-based networks. The profile can include links to your project, social media, price data, and other information pertaining to your token
### Expedition {: #expedition }
A Moonbeam-themed version of the [Expedition](https://github.com/xops/expedition){target=\_blank} explorer can be found in [this link](https://moonbeam-explorer.netlify.app){target=\_blank}. It is a basic JSON-RPC based explorer.
By default, the explorer is connected to Moonbeam. However, you can switch to Moonriver or Moonbase Alpha, or connect it to a local dev node by following the next steps:
1. Click on the network text, where you'll be able to select between all different networks, including a **Moonbeam Development Node** running on `{{ networks.development.rpc_url }}`
2. In the case you want to connect to a specific RPC URL, select **Add Custom Chain** and enter the URL. For example, `http://localhost:9937`
## Substrate API {: #substrate-api }
### Subscan {: #subscan }
[Subscan](https://moonbeam.subscan.io){target=\_blank} is the primary Substrate API block explorer for Moonbeam-based networks. Subscan is capable of parsing standard or custom modules. For example, this is useful to display information regarding the Staking, Governance, and EVM pallets (or modules). The code is all open-source and can be found in the [Subscan Essentials GitHub repo](https://github.com/subscan-explorer/subscan-essentials){target=\_blank}.
### Polkadot.js {: #polkadotjs }
While not a full-featured block explorer, Polkadot.js Apps is a convenient option especially for users running local development nodes to view events and query transaction hashes. Polkadot.js Apps uses the WebSocket endpoint to interact with the Network. You can easily connect to [Moonbeam](https://polkadot.js.org/apps/?rpc=wss://wss.api.moonbeam.network#/explorer){target=\_blank}, [Moonriver](https://polkadot.js.org/apps/?rpc=wss://wss.api.moonriver.moonbase.moonbeam.network#/explorer){target=\_blank}, or [Moonbase Alpha](https://polkadot.js.org/apps/?rpc=wss://wss.api.moonbase.moonbeam.network#/explorer){target=\_blank}.
To connect it to a Moonbeam development node, you can follow the steps in the [Connecting Polkadot.js Apps to a Local Moonbeam Node](/builders/get-started/networks/moonbeam-dev/#connecting-polkadot-js-apps-to-a-local-moonbeam-node){target=\_blank} section of the [Getting Started with a Moonbeam Development Node](/builders/get-started/networks/moonbeam-dev/){target=\_blank} guide. The default port for this is `9944`.
--- END CONTENT ---
Doc-Content: https://docs.moonbeam.network/builders/get-started/networks/moonbase/
--- BEGIN CONTENT ---
---
title: Moonbase Alpha Get Started Guide
description: The Moonbeam TestNet, named Moonbase Alpha, is the easiest way to get started with a Polkadot environment. Follow this tutorial to connect to the TestNet.
categories: Basics
---
# Get Started with Moonbase Alpha
## Network Endpoints {: #network-endpoints }
Moonbase Alpha has two types of endpoints available for users to connect to: one for HTTPS and one for WSS.
If you're looking for your own endpoints suitable for production use, you can check out the [Endpoint Providers](/builders/get-started/endpoints/#endpoint-providers){target=\_blank} section of our documentation. Otherwise, to get started quickly you can use one of the following public HTTPS or WSS endpoints.
=== "HTTPS"
| Provider | RPC URL | Limits |
|:-------------------:|:------------------------------------------------------------------:|:-----------:|
| Dwellir | ```https://moonbase-rpc.dwellir.com```| 20 req/sec | | OnFinality |
```https://moonbeam-alpha.api.onfinality.io/public```| 40 req/sec | | Moonbeam Foundation |
```https://rpc.api.moonbase.moonbeam.network```| 25 req/sec | | UnitedBloc |
```https://moonbase.unitedbloc.com```| 32 req/sec | | RadiumBlock |
```https://moonbase.public.curie.radiumblock.co/http```| 200 req/sec | === "WSS" | Provider | RPC URL | Limits | |:-------------------:|:-----------------------------------------------------------------:|:-----------:| | Dwellir |
```wss://moonbase-rpc.dwellir.com```| 20 req/sec | | OnFinality |
```wss://moonbeam-alpha.api.onfinality.io/public-ws```| 40 req/sec | | Moonbeam Foundation |
```wss://wss.api.moonbase.moonbeam.network```| 25 req/sec | | UnitedBloc |
```wss://moonbase.unitedbloc.com```| 32 req/sec | | RadiumBlock |
```wss://moonbase.public.curie.radiumblock.co/ws```| 200 req/sec | #### Relay Chain {: #relay-chain } To connect to the Moonbase Alpha relay chain, you can use the following WS Endpoint: | Provider | RPC URL | |:--------:|:----------------------------------------------------------:| | OpsLayer |
```wss://relay.api.moonbase.moonbeam.network```| ## Quick Start {: #quick-start } For the [Web3.js library](/builders/ethereum/libraries/web3js/){target=\_blank}, you can create a local Web3 instance and set the provider to connect to Moonbase Alpha (both HTTP and WS are supported): ```js const { Web3 } = require('web3'); // Load Web3 library . . . // Create local Web3 instance - set Moonbase Alpha as provider const web3 = new Web3('https://rpc.api.moonbase.moonbeam.network'); ``` For the [Ethers.js library](/builders/ethereum/libraries/ethersjs/){target=\_blank}, define the provider by using `ethers.JsonRpcProvider(providerURL, {object})` and setting the provider URL to Moonbase Alpha: ```js const ethers = require('ethers'); // Load Ethers library const providerURL = 'https://rpc.api.moonbase.moonbeam.network'; // Define provider const provider = new ethers.JsonRpcProvider(providerURL, { chainId: 1287, name: 'moonbase-alphanet' }); ``` Any Ethereum wallet should be able to generate a valid address for Moonbeam (for example, [MetaMask](https://metamask.io){target=\_blank}). ## Chain ID {: #chain-id } Moonbase Alpha TestNet chain ID is: `1287`, which is `0x507` in hex. ## Block Explorers For Moonbase Alpha, you can use any of the following block explorers: - **Ethereum API (Etherscan Equivalent)** — [Moonscan](https://moonbase.moonscan.io){target=\_blank} - **Ethereum API JSON-RPC based** — [Moonbeam Basic Explorer](https://moonbeam-explorer.netlify.app/?network=MoonbaseAlpha){target=\_blank} - **Substrate API** — [Subscan](https://moonbase.subscan.io){target=\_blank} or [Polkadot.js Apps](https://polkadot.js.org/apps/?rpc=wss://wss.api.moonbase.moonbeam.network#/explorer){target=\_blank} For more information on each of the available block explorers, please head to the [Block Explorers](/builders/get-started/explorers/){target=\_blank} section of the documentation. ## Connect MetaMask If you already have MetaMask installed, you can easily connect MetaMask to the Moonbase Alpha TestNet: !!! note MetaMask will popup asking for permission to add Moonbase Alpha as a custom network. Once you approve permissions, MetaMask will switch your current network to Moonbase Alpha. If you do not have MetaMask installed, or would like to follow a tutorial to get started, please check out the [Interacting with Moonbeam using MetaMask](/tokens/connect/metamask/){target=\_blank} guide. ## Configuration {: #configuration } Please note the following gas configuration parameters. These values are subject to change in future runtime upgrades. | Variable | Value | |:---------------------:|:------------------------------------------:| | Minimum gas price | {{ networks.moonbase.min_gas_price }} Gwei | | Target block time | {{ networks.moonbase.block_time }} seconds | | Block gas limit | {{ networks.moonbase.gas_block }} | | Transaction gas limit | {{ networks.moonbase.gas_tx }} | ## Get Tokens {: #get-tokens } To start building on Moonbase Alpha, you can get DEV tokens from the Moonbase Alpha Faucet. For specific amounts, you can always reach out directly to us via our community channels. To request DEV tokens from the faucet, you can enter your address on the [Moonbase Alpha Faucet](https://faucet.moonbeam.network){target=\_blank} website. The faucet dispenses {{ networks.moonbase.website_faucet_amount }} every 24 hours. 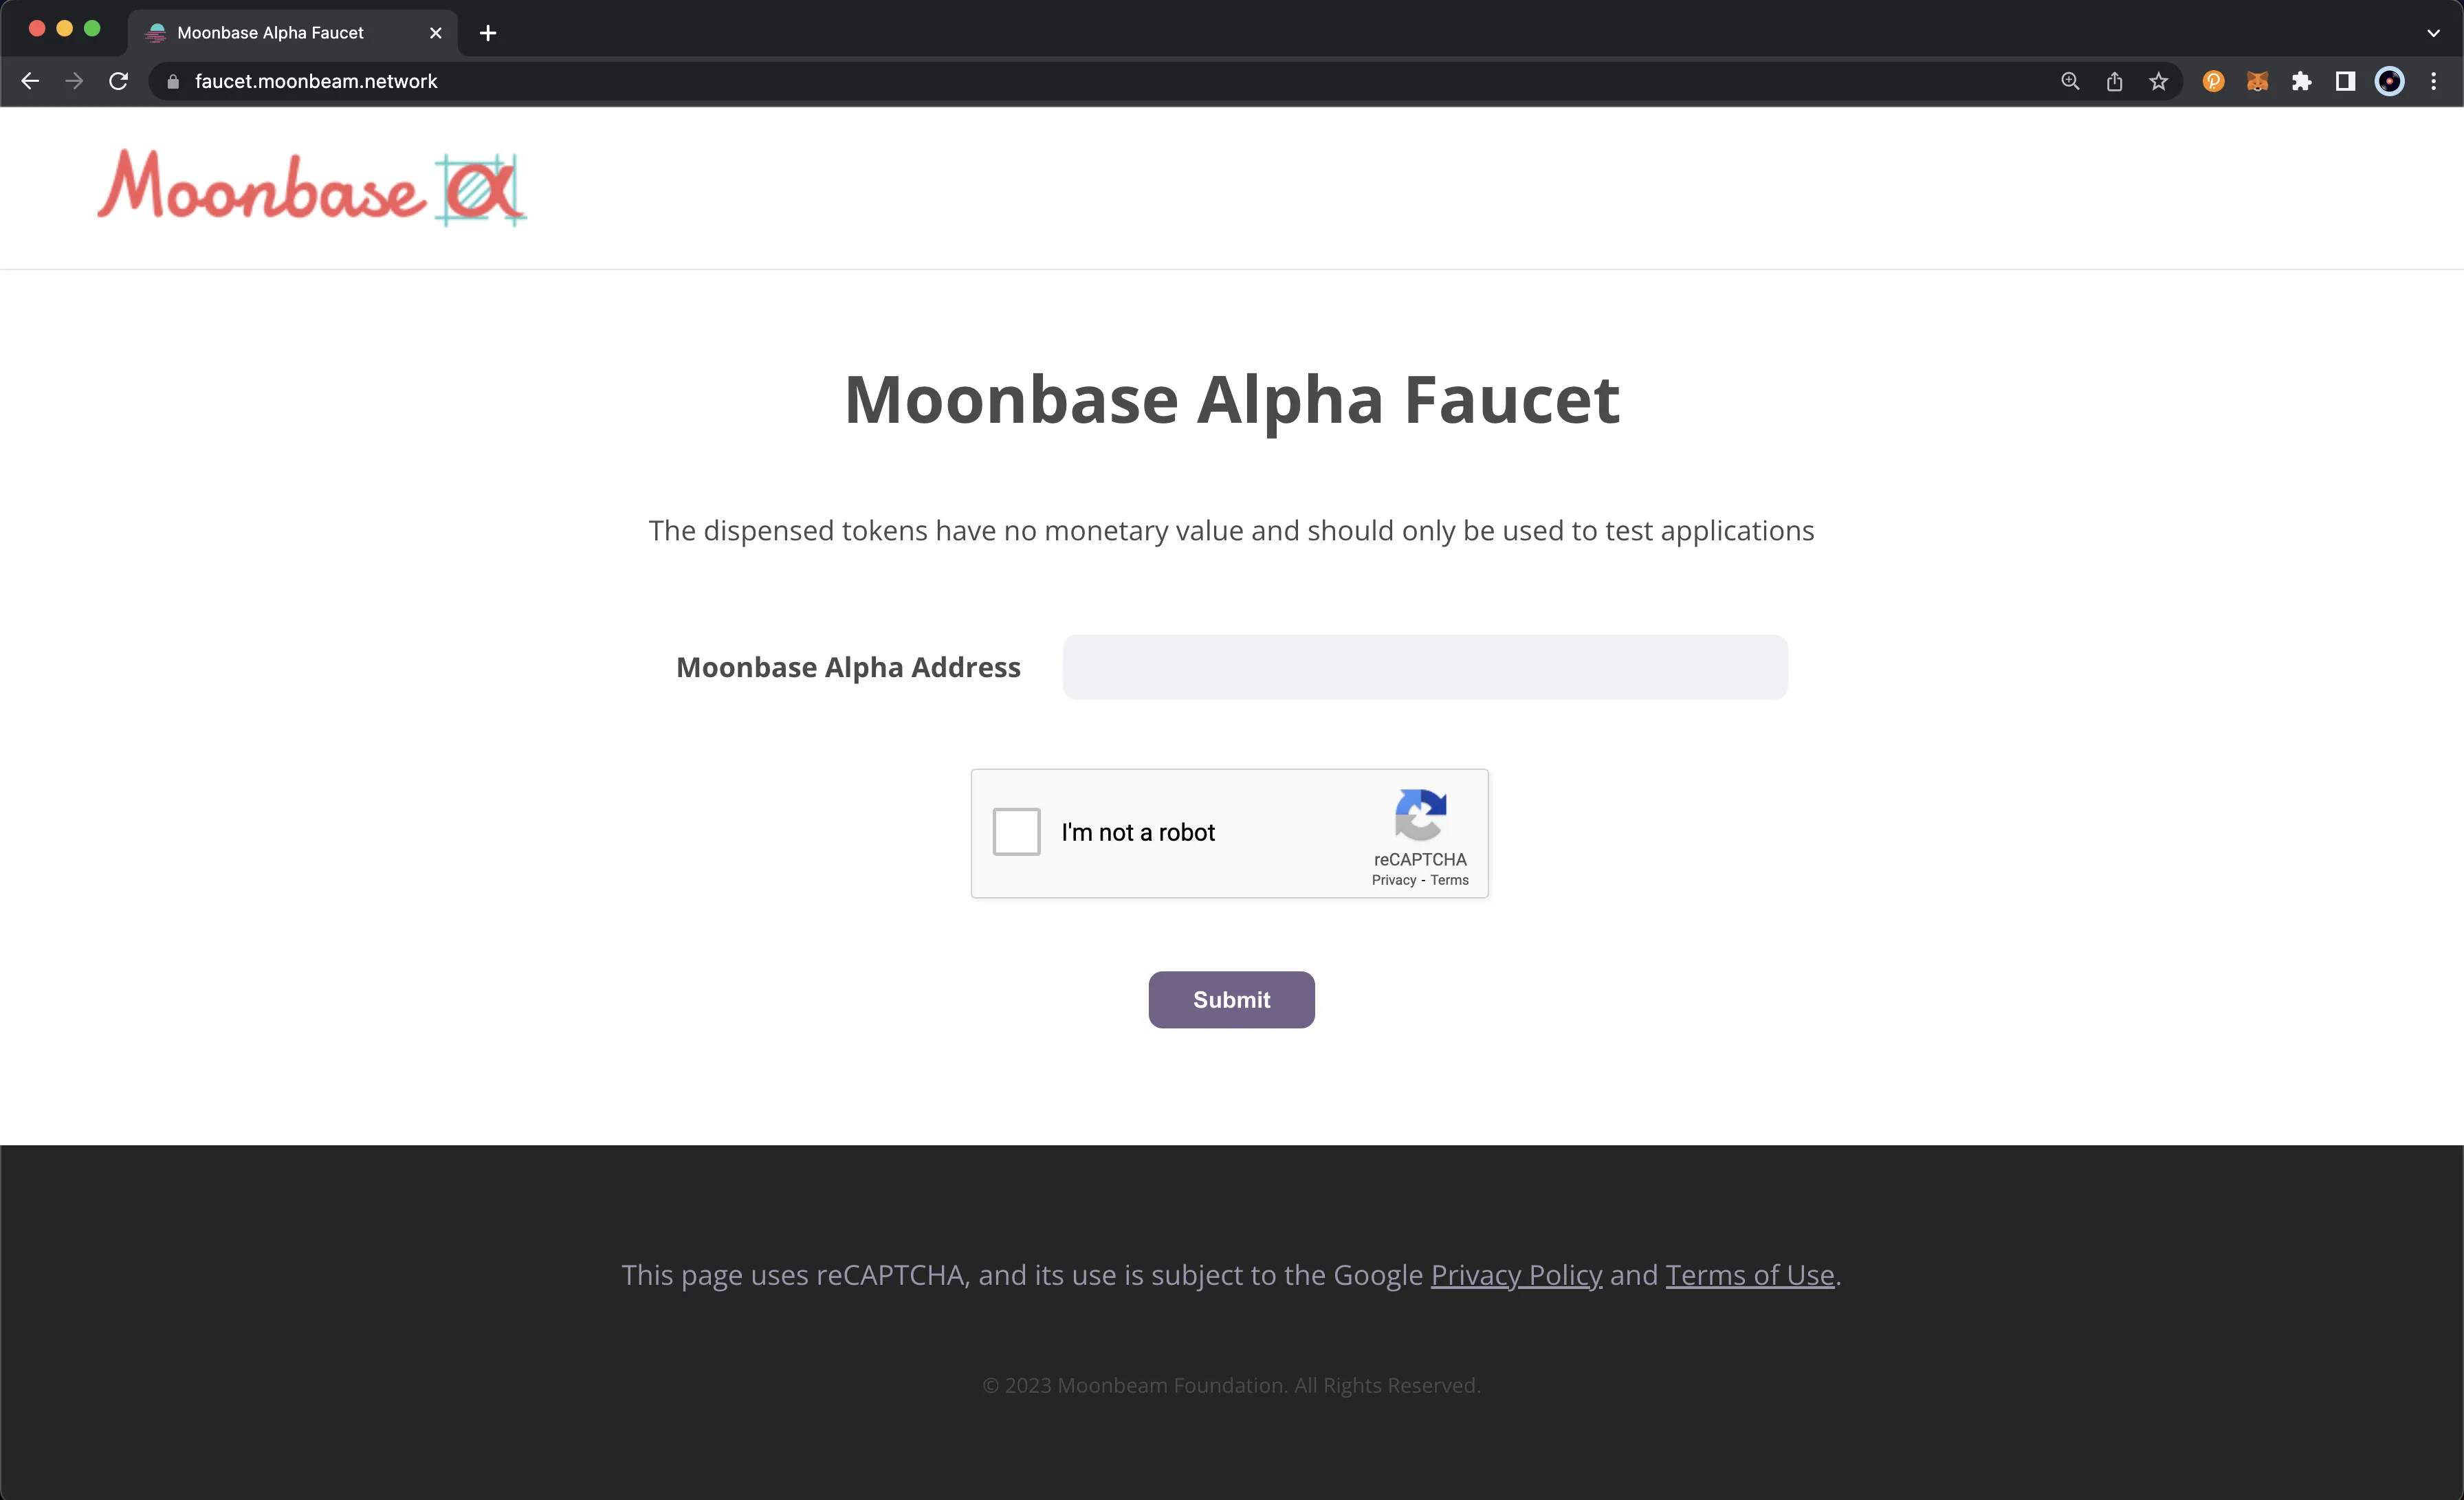 !!! note Moonbase Alpha DEV tokens have no value. Please don't spam the faucet with unnecessary requests. ## Demo DApps {: #Demo-DApps } There are a variety of DApps deployed to Moonbase Alpha enabling you to experiment with various apps and integrations. You can also acquire a variety of test tokens through the [Moonbase ERC20 Minter](https://moonbase-minterc20.netlify.app){target=\_blank} or [Moonbeam Uniswap](https://moonbeam-swap.netlify.app/#/swap){target=\_blank} DApps. For example, [Moonbeam Uniswap](https://moonbeam-swap.netlify.app/#/swap){target=\_blank} can help you acquire cross-chain assets such as xcUNIT or xcKarura for testing XCM related functions. In the below table, you'll find each sample DApp, its associated URL, and GitHub repository. ### Quick Links {: #quick-links } | DApp | Description | Repository | |:------------------------------------------------------------------------------------------:|:------------------:|:----------------------------------------------------------------------------------------------------------------------------------------------------------------:| | [Moonbase ERC-20 Minter](https://moonbase-minterc20.netlify.app){target=\_blank} | ERC-20 Faucet | [https://github.com/papermoonio/moonbase-mintableERC20](https://github.com/papermoonio/moonbase-mintableERC20){target=\_blank} | | [Moonbeam Uniswap](https://moonbeam-swap.netlify.app/#/swap){target=\_blank} | Uniswap V2 Fork | [https://github.com/papermoonio/moonbeam-uniswap](https://github.com/papermoonio/moonbeam-uniswap){target=\_blank} | | [MoonLotto Lottery](https://moonbase-moonlotto.netlify.app){target=\_blank} | TheGraph Demo | [Interface](https://github.com/papermoonio/moonlotto-interface){target=\_blank}, [Subgraph](https://github.com/papermoonio/moonlotto-subgraph){target=\_blank} | | [Moonbeam WalletConnect](https://moonbeam-walletconnect-demo.netlify.app){target=\_blank} | WalletConnect Demo | [https://github.com/papermoonio/moonbeam-walletconnect-demo](https://github.com/papermoonio/moonbeam-walletconnect-demo){target=\_blank} | | [MoonGas](https://moonbeam-gasinfo.netlify.app){target=\_blank} | Gas Price Tracker | [https://github.com/albertov19/moonbeam-gas-station](https://github.com/albertov19/moonbeam-gas-station){target=\_blank} | !!! note These DApps are intended for demonstration purposes only and may be incomplete or unsuitable for production deployments. ### Moonbase ERC20 Minter {: #moonbase-erc20-minter } The [Moonbase ERC-20 Minter](https://moonbase-minterc20.netlify.app){target=\_blank} enables you to mint a variety of ERC-20 test tokens corresponding to the 8 planets of the solar system, and Pluto. To mint tokens, first press **Connect MetaMask** in the upper right hand corner. Then scroll to the **Mint Tokens** section and the choose desired ERC-20 contract. Press **Submit Tx** and confirm the transaction in MetaMask. Each mint will grant you 100 tokens, and you can mint tokens for each contract once per hour.  ### Moonbeam Uniswap {: #moonbeam-uniswap } [Moonbeam Uniswap](https://moonbeam-swap.netlify.app/#/swap){target=\_blank} is a fork of [Uniswap-V2](https://blog.uniswap.org/uniswap-v2){target=\_blank} deployed to Moonbase Alpha. Notably, Moonbeam Uniswap allows developers to easily make a swap to acquire [cross-chain assets](/builders/interoperability/xcm/xc20/){target=\_blank} such as xcKarura or xcUNIT for XCM testing purposes. To perform your first swap, take the following steps: 1. Press **Select a token** 2. Connect your MetaMask wallet and ensure you're on the Moonbase Alpha network 3. Press **Choose a List** on the prompt 4. Select **Moon Menu** 5. Search for or select your desired asset from the list then continue with the swap  !!! note If you see only a partial list of assets under **Moon Menu**, your browser may have cached an older version of **Moon Menu**. Clearing the cache and re-adding **Moon Menu** will resolve this. ### MoonLotto Lottery {: #moonlotto-lottery } [MoonLotto](https://moonbase-moonlotto.netlify.app){target=\_blank} is a simple lottery game on Moonbase Alpha derived from [The Graph's Example Subgraph](https://github.com/graphprotocol/example-subgraph){target=\_blank}. Purchasing a ticket costs 1 DEV and a winner is chosen each half hour if there are at least 10 participants. [MoonLotto.sol](https://github.com/papermoonio/moonlotto-subgraph/blob/main/contracts/MoonLotto.sol){target=\_blank} holds the contract logic for the lottery. To participate, take the following steps: 1. Connect your MetaMask wallet and ensure you're on the Moonbase Alpha network 2. Enter the address of the recipient of lotto ticket or check **I want to buy a ticket for my address** 3. Press **Submit on MetaMask** and confirm the transaction in MetaMask  ### Moonbeam WalletConnect {: #moonbeam-walletconnect } [Moonbeam WalletConnect](https://moonbeam-walletconnect-demo.netlify.app){target=\_blank} shows how easy it is to integrate [WalletConnect](https://walletconnect.com){target=\_blank} into your DApps and unlock support for a great variety of crypto wallets. Be sure to check out the [demo app repository](https://github.com/papermoonio/moonbeam-walletconnect-demo){target=\_blank} to see exactly how the WalletConnect integration works. To get started, you can take the following steps: 1. Press **Connect Wallet** 2. Scan the QR code using a [wallet compatible with WalletConnect](https://walletguide.walletconnect.network/){target=\_blank} 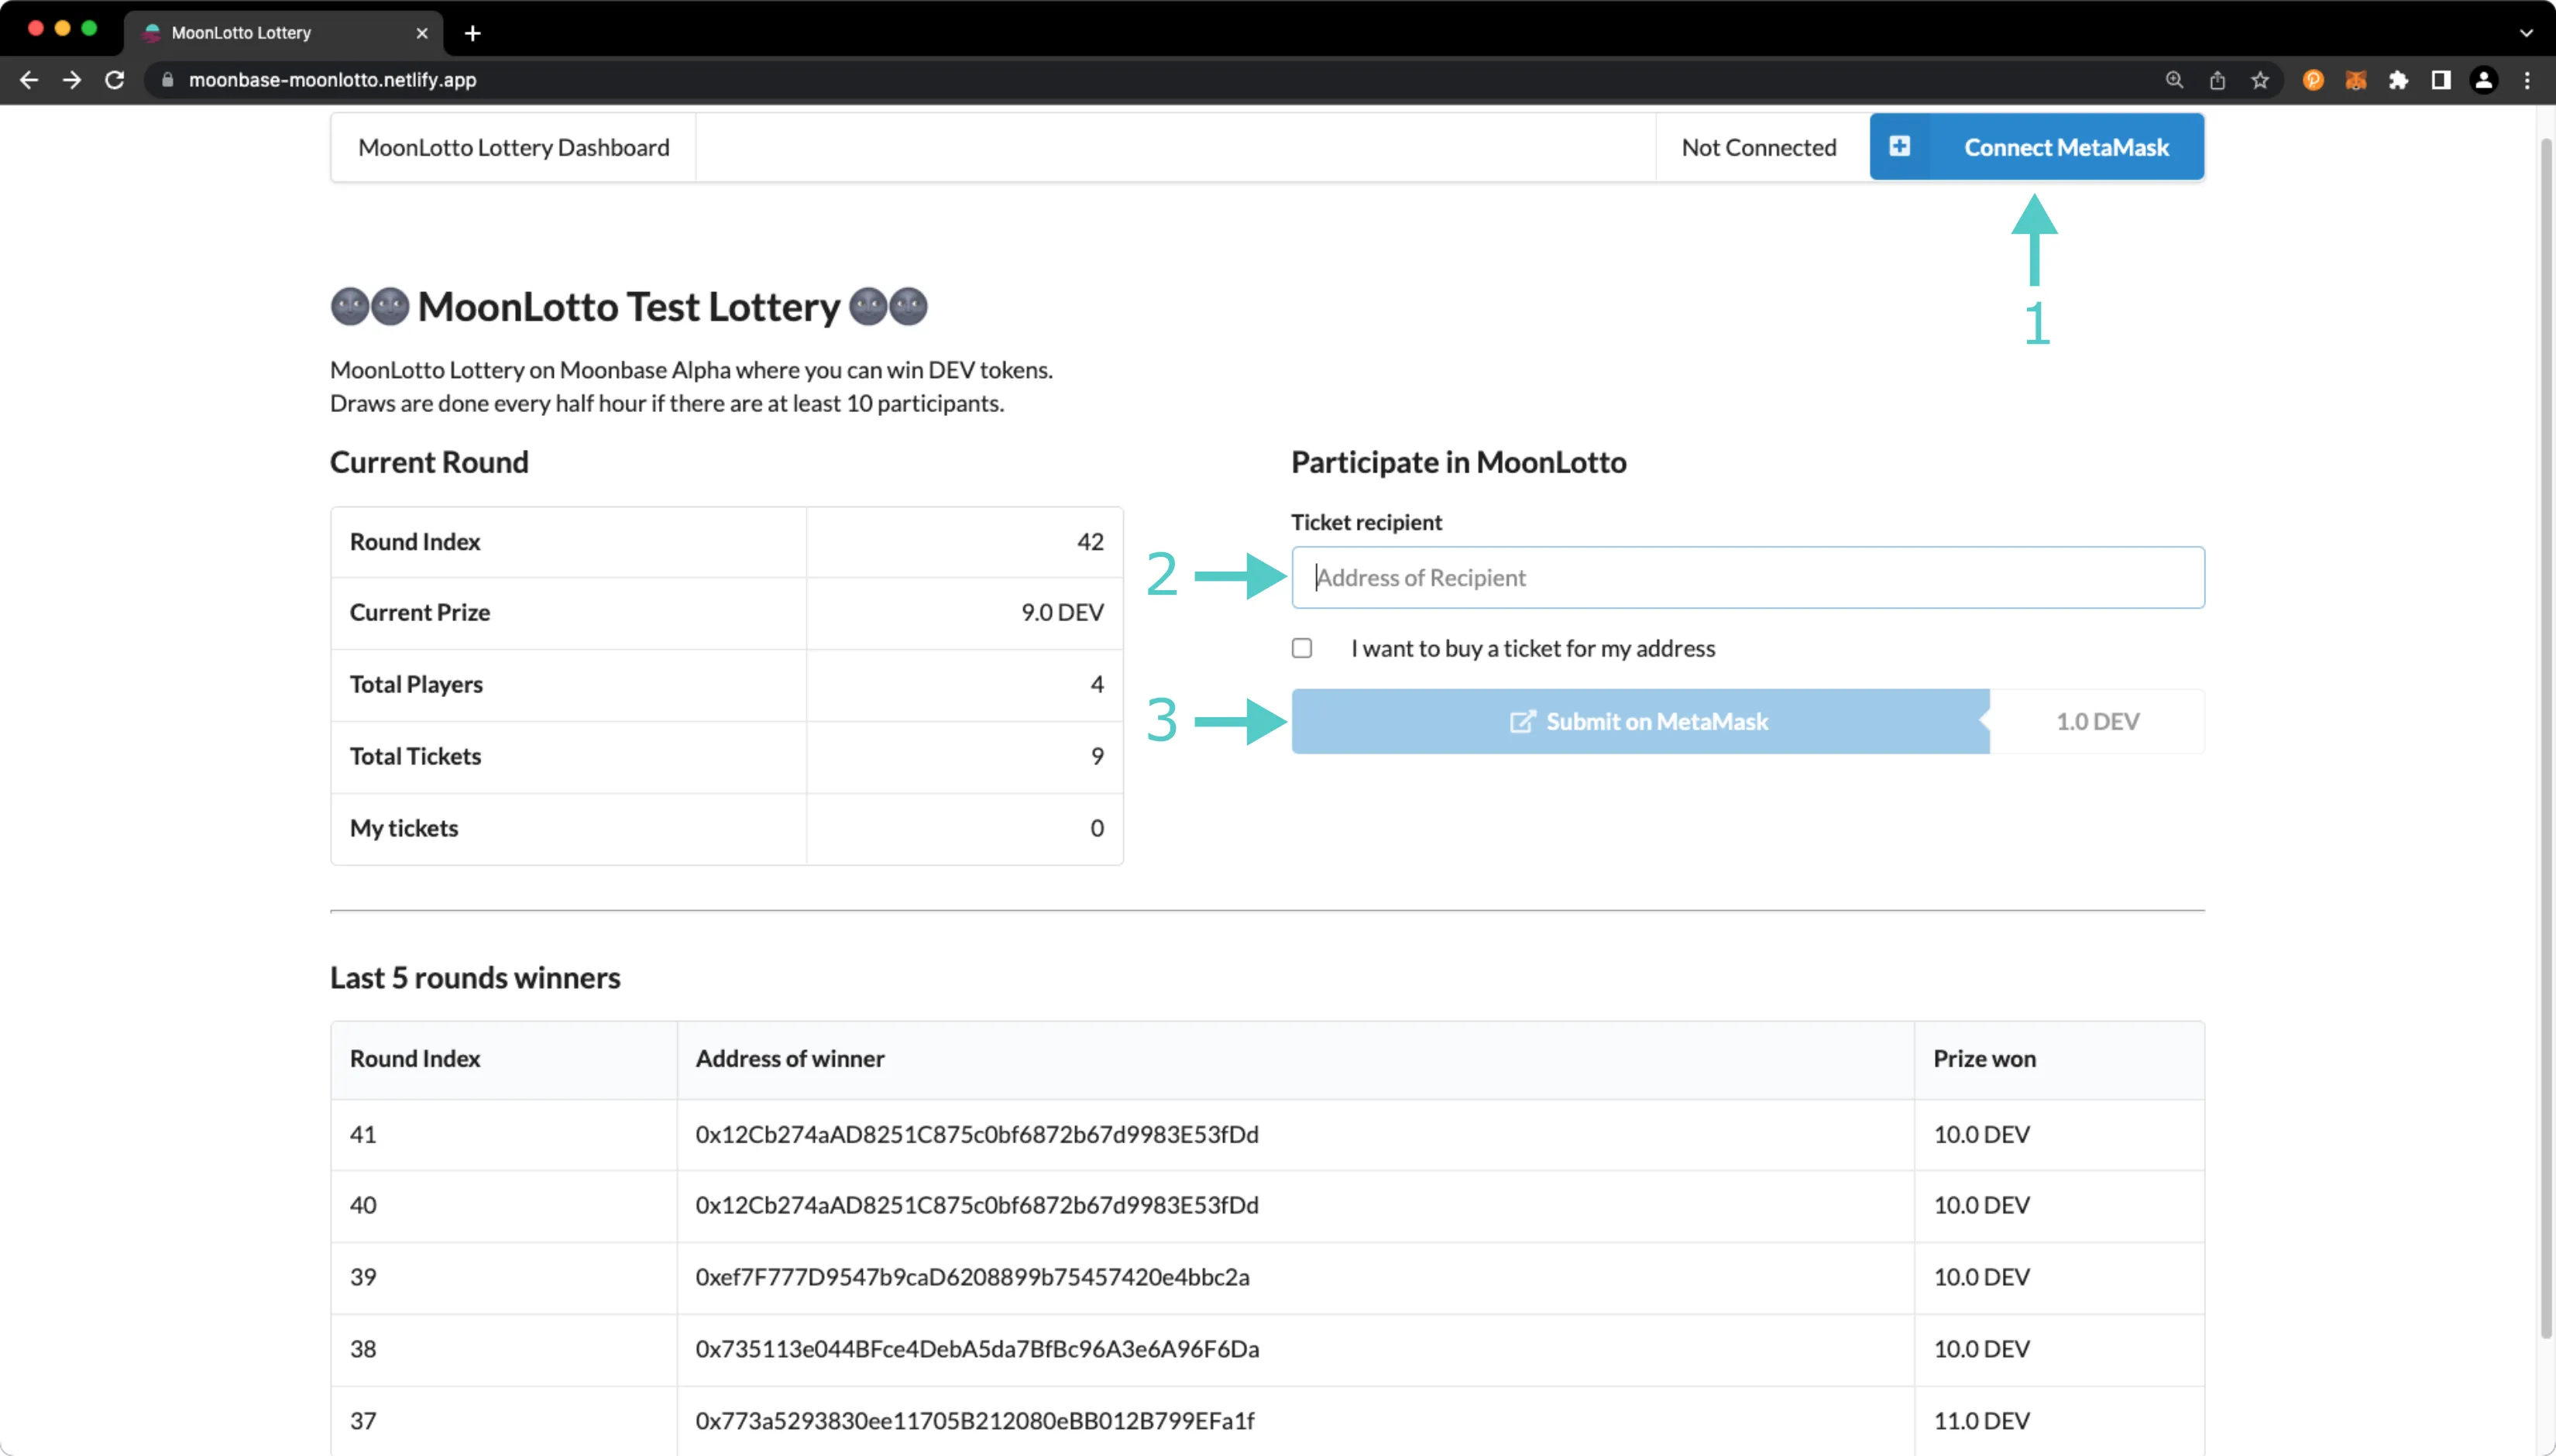 ### MoonGas {: #moongas } [MoonGas](https://moonbeam-gasinfo.netlify.app){target=\_blank} is a convenient dashboard for viewing the minimum, maximum, and average gas price of transactions in the prior block across all Moonbeam networks. Note, these statistics can fluctuate widely by block and occasionally include outlier values. You can check out the [repository for MoonGas](https://github.com/albertov19/moonbeam-gas-station){target=\_blank}. You'll notice that the minimum gas price for Moonbeam is {{ networks.moonbeam.min_gas_price }} Gwei, while the minimum for Moonriver is {{ networks.moonriver.min_gas_price }} Gwei and Moonbase Alpha is {{ networks.moonbase.min_gas_price }} Gwei. This difference stems from the [100 to 1 re-denomination of GLMR](https://moonbeam.network/news/moonbeam-foundation-announces-liquidity-programs-a-new-token-event-and-glmr-redenomination){target=\_blank} and thus the {{ networks.moonbeam.min_gas_price }} Gwei minimum on Moonbeam corresponds to a {{ networks.moonriver.min_gas_price }} Gwei minimum on Moonriver and a {{ networks.moonbase.min_gas_price }} Gwei on Moonbase. 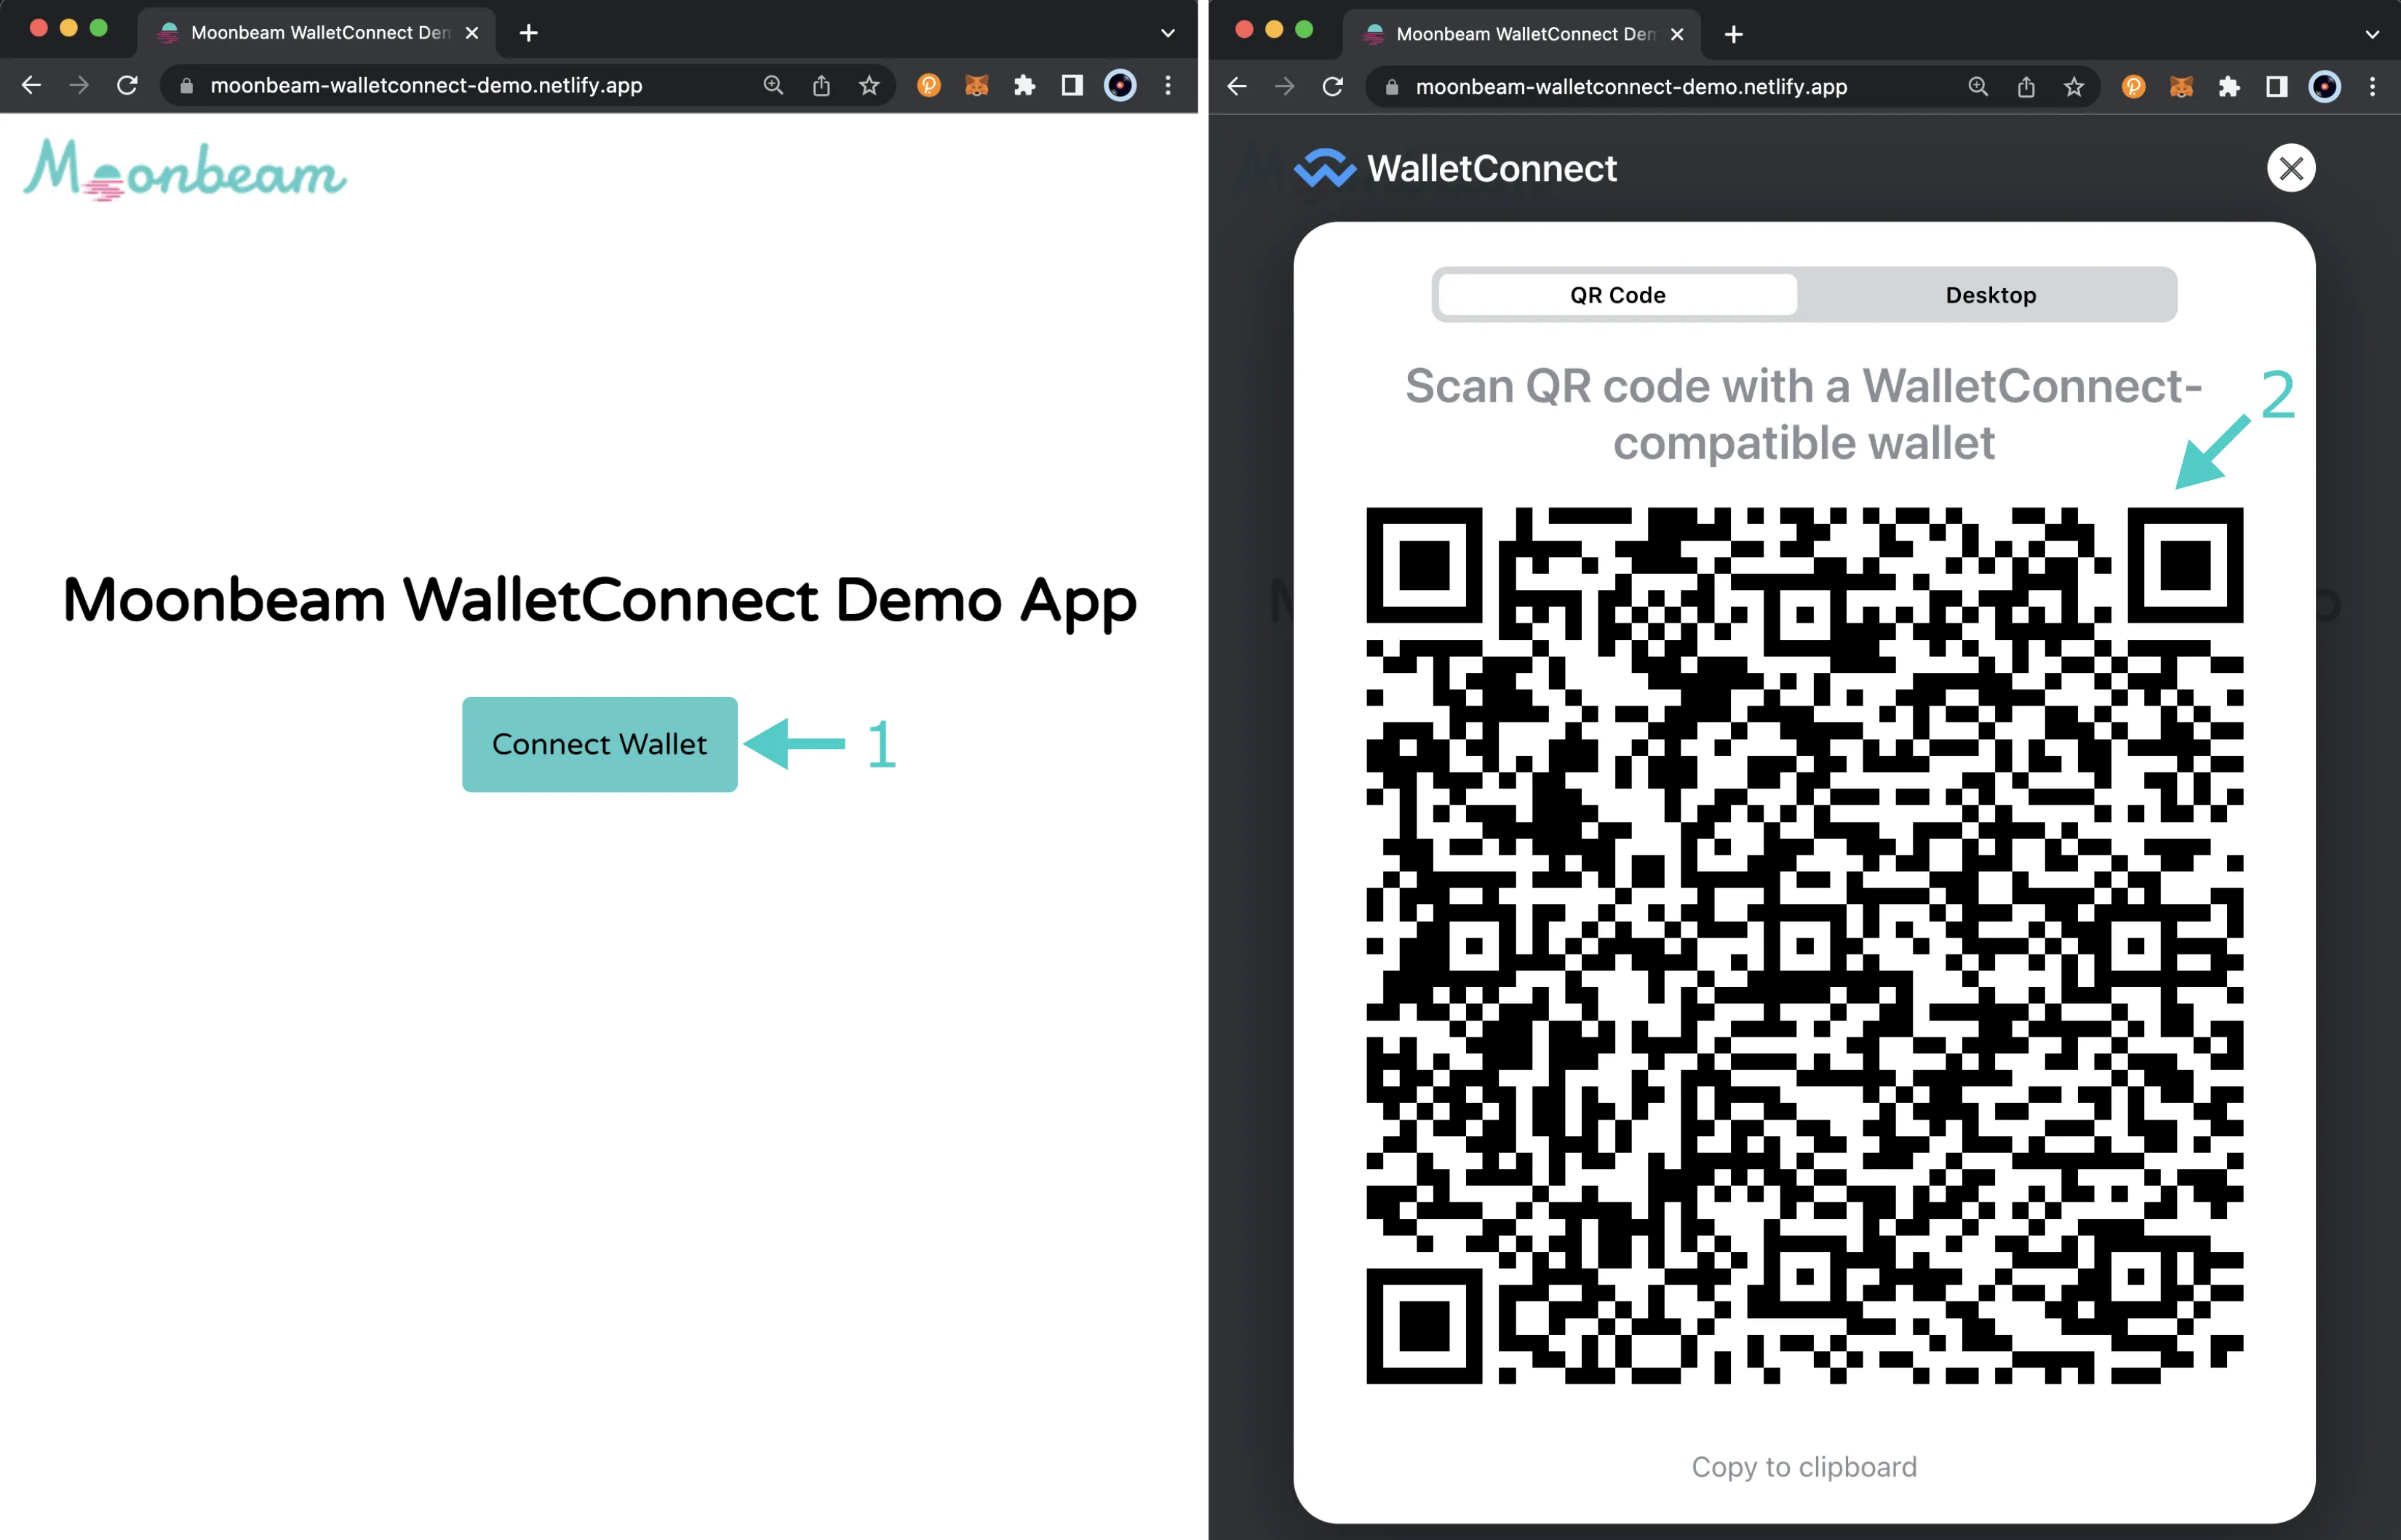 --- END CONTENT --- Doc-Content: https://docs.moonbeam.network/builders/get-started/networks/moonbeam-dev/ --- BEGIN CONTENT --- --- title: Run a Moonbeam Development Node description: Follow this tutorial to learn how to spin up your first Moonbeam development node, how to configure it for development purposes, and connect to it. categories: Basics --- # Getting Started with a Local Moonbeam Development Node ## Introduction {: #introduction } A Moonbeam development node is your own personal development environment for building and testing applications on Moonbeam. For Ethereum developers, it is comparable to the Hardhat Network. It enables you to get started quickly and easily without the overhead of a relay chain. You can spin up your node with the `--sealing` option to author blocks instantly, manually, or at a custom interval after transactions are received. By default, a block will be created when a transaction is received, which is similar to the default behavior of Hardhat Network's instamine feature. If you follow this guide to the end, you will have a Moonbeam development node running in your local environment with 10 prefunded [accounts](#pre-funded-development-accounts). !!! note This tutorial was created using the {{ networks.development.build_tag }} tag of [Moonbase Alpha](https://github.com/moonbeam-foundation/moonbeam/releases/tag/{{ networks.development.build_tag }}){target=\_blank}. The Moonbeam platform and the [Frontier](https://github.com/polkadot-evm/frontier){target=\_blank} components it relies on for Substrate-based Ethereum compatibility are still under very active development. The examples in this guide assume you have a MacOS or Ubuntu 22.04-based environment and will need to be adapted accordingly for Windows. ## Spin Up a Moonbeam Development Node {: #spin-up-a-node } There are two ways to get started running a Moonbeam node. You can use [Docker to run a pre-built binary](#getting-started-with-docker) or you can [compile the binary locally](#getting-started-with-the-binary-file) and set up a development node yourself. Using Docker is a quick and convenient way to get started, as you won't have to install Substrate and all the dependencies, and you can skip the node-building process as well. It does require you to [install Docker](https://docs.docker.com/get-started/get-docker/){target=\_blank}. On the other hand, if you decide you want to go through the process of building your development node, it could take roughly 30 minutes or longer to complete, depending on your hardware. ### Spin Up a Node with Docker {: #getting-started-with-docker } Using Docker enables you to spin up a node in a matter of seconds. Once you have Docker installed, you can take the following steps to spin up your node: 1. Execute the following command to download the latest Moonbeam image: ```bash docker pull moonbeamfoundation/moonbeam:{{ networks.development.build_tag }} ``` The tail end of the console log should look like this:
docker pull moonbeamfoundation/moonbeam:v0.43.0
v0.43.0: Pulling from moonbeamfoundation/moonbeam
b0a0cf830b12: Pull complete
fbff687640dd: Pull complete
58ea427410e2: Pull complete
811ba55e6e61: Pull complete
4316d5f1b914: Pull complete
128693ce218e: Pull complete
a3ac90b88463: Pull complete
Digest: sha256:86421aca2381265cd2e5283cb98705e24be0bc92a73937363f79d9d6e0d62088
Status: Downloaded newer image for moonbeamfoundation/moonbeam:v0.43.0
docker.io/moonbeamfoundation/moonbeam:v0.43.0
2. Spin up a Moonbeam development node by running the following Docker command, which will launch the node in instant seal mode for local testing so that blocks are authored instantly as transactions are received:
=== "Ubuntu"
```bash
docker run --rm --name {{ networks.development.container_name }} --network host \
moonbeamfoundation/moonbeam:{{ networks.development.build_tag }} \
--dev --rpc-external
```
=== "MacOS"
```bash
docker run --rm --name {{ networks.development.container_name }} -p 9944:9944 \
moonbeamfoundation/moonbeam:{{ networks.development.build_tag }} \
--dev --rpc-external
```
=== "Windows"
```bash
docker run --rm --name {{ networks.development.container_name }} -p 9944:9944 ^
moonbeamfoundation/moonbeam:{{ networks.development.build_tag }} ^
--dev --rpc-external
```
!!! note
On MacOS with silicon chips, Docker images may perform poorly. To improve performance, try [spinning up a Node with a Binary File](#getting-started-with-the-binary-file).
If successful, you should see an output showing an idle state waiting for blocks to be authored:
v0.43.0: Pulling from moonbeamfoundation/moonbeam
b0a0cf830b12: Pull complete
fbff687640dd: Pull complete
58ea427410e2: Pull complete
811ba55e6e61: Pull complete
4316d5f1b914: Pull complete
128693ce218e: Pull complete
a3ac90b88463: Pull complete
Digest: sha256:86421aca2381265cd2e5283cb98705e24be0bc92a73937363f79d9d6e0d62088
Status: Downloaded newer image for moonbeamfoundation/moonbeam:v0.43.0
docker.io/moonbeamfoundation/moonbeam:v0.43.0
docker run --rm --name moonbeam_development --network host \
moonbeamfoundation/moonbeam:v0.45.0 \
--dev --rpc-external
CLI parameter `--execution` has no effect anymore and will be removed in the future!
2025-07-10 09:04:26 Moonbeam Parachain Collator
2025-07-10 09:04:26 ✌️ version 0.46.0-d7df89e7161
2025-07-10 09:04:26 ❤️ by PureStake, 2019-2025
2025-07-10 09:04:26 📋 Chain specification: Moonbase Development Testnet
2025-07-10 09:04:26 🏷 Node name: black-and-white-sticks-9174
2025-07-10 09:04:26 👤 Role: AUTHORITY
2025-07-10 09:04:26 💾 Database: RocksDb at /tmp/substrateO3YeRz/chains/moonbase_dev/db/full
2025-07-10 09:04:26 🔨 Initializing Genesis block/state (state: 0xf7c4…5c0f, header-hash: 0x42bd…3b5b)
2025-07-10 09:04:26 Using default protocol ID "sup" because none is configured in the chain specs
2025-07-10 09:04:26 🏷 Local node identity is: 12D3KooWLcpczme2JeBEfLqmjqkzYVKTGKhhGmwSzHjRXGBVhDX7
2025-07-10 09:04:26 💻 Operating system: linux
2025-07-10 09:04:26 💻 CPU architecture: x86_64
2025-07-10 09:04:26 💻 Target environment: gnu
2025-07-10 09:04:26 💻 CPU: Intel(R) Core(TM) i7-9750H CPU @ 2.60GHz
2025-07-10 09:04:26 💻 CPU cores: 12
2025-07-10 09:04:26 💻 Memory: 7946MB
2025-07-10 09:04:26 💻 Kernel: 6.4.16-linuxkit
2025-07-10 09:04:26 💻 Linux distribution: Debian GNU/Linux 12 (bookworm)
2025-07-10 09:04:26 💻 Virtual machine: yes
2025-07-10 09:04:26 📦 Highest known block at #0
2025-07-10 09:04:26 Running JSON-RPC server: addr=0.0.0.0:9944, allowed origins=["*"]
2025-07-10 09:04:26 🏁 CPU score: 1.14 GiBs
2025-07-10 09:04:26 〽️ Prometheus exporter started at 127.0.0.1:9615
2025-07-10 09:04:26 🏁 Memory score: 10.41 GiBs
2025-07-10 09:04:26 🏁 Disk score (seq. writes): 987.96 MiBs
2025-07-10 09:04:26 🏁 Disk score (rand. writes): 363.65 MiBs
2025-07-10 09:04:26 Development Service Ready
2025-07-10 09:04:26 💤 Idle (0 peers), best: #0 (0xa083…f354), finalized #0 (0xa083…f354), ⬇ 0 ⬆ 0
2025-07-10 09:04:26 💤 Idle (0 peers), best: #0 (0xa083…f354), finalized #0 (0xa083…f354), ⬇ 0 ⬆ 0
For more information on some of the flags and options used in the example, check out [Flags](#node-flags) and [Options](#node-options). If you want to see a complete list of all of the flags, options, and subcommands, open the help menu by running:
```bash
docker run --rm --name {{ networks.development.container_name }} \
moonbeamfoundation/moonbeam \
--help
```
To continue with the tutorial, the next section is not necessary, as you've already spun up a node with Docker. You can skip ahead to the [Configure your Moonbeam Development Node](#configure-moonbeam-dev-node) section.
### Spin Up a Node with a Binary File {: #getting-started-with-the-binary-file }
As an alternative to using Docker, you can spin up a node using the Moonbeam binary. This method is more time-consuming. Depending on your hardware, the process could take around 30 minutes to complete.
!!! note
If you know what you are doing, you can directly download the precompiled binaries attached to each release on the [Moonbeam release page](https://github.com/moonbeam-foundation/moonbeam/releases){target=\_blank}. These will not work in all systems. For example, the binaries only work with x86-64 Linux with specific versions of dependencies. The safest way to ensure compatibility is to compile the binary on the system where it will be run.
To build the binary file, you can take the following steps:
1. Clone a specific tag of the Moonbeam repo, which you can find on the [Moonbeam GitHub repository](https://github.com/moonbeam-foundation/moonbeam){target=\_blank}:
```bash
git clone -b {{ networks.development.build_tag }} https://github.com/moonbeam-foundation/moonbeam
cd moonbeam
```
!!! note
Spaces in the installation file path will cause a compilation error.
2. If you already have Rust installed, you can skip the next two steps. Otherwise, install Rust and its prerequisites [via Rust's recommended method](https://www.rust-lang.org/tools/install){target=\_blank} by executing:
```bash
curl --proto '=https' --tlsv1.2 -sSf https://sh.rustup.rs | sh
```
3. Update your PATH environment variable by running:
```bash
source $HOME/.cargo/env
```
4. Build the development node by running:
!!! note
If you are using Ubuntu 20.04 or 22.04, then you will need to make sure these additional dependencies have been installed before building the binary:
```bash
apt install clang protobuf-compiler libprotobuf-dev pkg-config libssl-dev -y
```
For MacOS users, these dependencies can be installed via Homebrew:
```bash
brew install llvm
brew install protobuf
```
```bash
cargo build --release
```
Here is what the tail end of the build output should look like:
moonbeamfoundation/moonbeam:v0.45.0 \
--dev --rpc-external
CLI parameter `--execution` has no effect anymore and will be removed in the future!
2025-07-10 09:04:26 Moonbeam Parachain Collator
2025-07-10 09:04:26 ✌️ version 0.46.0-d7df89e7161
2025-07-10 09:04:26 ❤️ by PureStake, 2019-2025
2025-07-10 09:04:26 📋 Chain specification: Moonbase Development Testnet
2025-07-10 09:04:26 🏷 Node name: black-and-white-sticks-9174
2025-07-10 09:04:26 👤 Role: AUTHORITY
2025-07-10 09:04:26 💾 Database: RocksDb at /tmp/substrateO3YeRz/chains/moonbase_dev/db/full
2025-07-10 09:04:26 🔨 Initializing Genesis block/state (state: 0xf7c4…5c0f, header-hash: 0x42bd…3b5b)
2025-07-10 09:04:26 Using default protocol ID "sup" because none is configured in the chain specs
2025-07-10 09:04:26 🏷 Local node identity is: 12D3KooWLcpczme2JeBEfLqmjqkzYVKTGKhhGmwSzHjRXGBVhDX7
2025-07-10 09:04:26 💻 Operating system: linux
2025-07-10 09:04:26 💻 CPU architecture: x86_64
2025-07-10 09:04:26 💻 Target environment: gnu
2025-07-10 09:04:26 💻 CPU: Intel(R) Core(TM) i7-9750H CPU @ 2.60GHz
2025-07-10 09:04:26 💻 CPU cores: 12
2025-07-10 09:04:26 💻 Memory: 7946MB
2025-07-10 09:04:26 💻 Kernel: 6.4.16-linuxkit
2025-07-10 09:04:26 💻 Linux distribution: Debian GNU/Linux 12 (bookworm)
2025-07-10 09:04:26 💻 Virtual machine: yes
2025-07-10 09:04:26 📦 Highest known block at #0
2025-07-10 09:04:26 Running JSON-RPC server: addr=0.0.0.0:9944, allowed origins=["*"]
2025-07-10 09:04:26 🏁 CPU score: 1.14 GiBs
2025-07-10 09:04:26 〽️ Prometheus exporter started at 127.0.0.1:9615
2025-07-10 09:04:26 🏁 Memory score: 10.41 GiBs
2025-07-10 09:04:26 🏁 Disk score (seq. writes): 987.96 MiBs
2025-07-10 09:04:26 🏁 Disk score (rand. writes): 363.65 MiBs
2025-07-10 09:04:26 Development Service Ready
2025-07-10 09:04:26 💤 Idle (0 peers), best: #0 (0xa083…f354), finalized #0 (0xa083…f354), ⬇ 0 ⬆ 0
2025-07-10 09:04:26 💤 Idle (0 peers), best: #0 (0xa083…f354), finalized #0 (0xa083…f354), ⬇ 0 ⬆ 0
Compiling try-runtime-cli v0.9.0 (https://github.com/paritytech/substrate?branch=rococo-v1#401c24e8)
Compiling frame-benchmarking-cli v3.0.0 (https://github.com/paritytech/substrate?branch=rococo-v1#401c24e8)
Compiling cumulus-client-cli v0.1.0 (https://github.com/paritytech/cumulus?branch=rococo-v1#9d89ed65)
Compiling moonbeam-rpc-txpool v0.6.0 (/home/purestake/moonbeam/client/rpc/txpool)
Compiling moonbeam-rpc-debug v0.1.0 (/home/purestake/moonbeam/client/rpc/debug)
Compiling moonbeam-rpc-trace v0.6.0 (/home/purestake/moonbeam/client/rpc/trace)
Compiling cumulus-client-network v0.1.0 (https://github.com/paritytech/cumulus?branch=rococo-v1#9d89ed65)
Compiling cumulus-client-consensus-relay-chain v0.1.0 (https://github.com/paritytech/cumulus?branch=rococo-v1#9d89ed65)
Compiling polkadot-test-service v0.8.29 (https://github.com/paritytech/polkadot?branch=rococo-v1#b64741e6)
Compiling cumulus-client-collator v0.1.0 (https://github.com/paritytech/cumulus?branch=rococo-v1#9d89ed65)
Compiling cumulus-client-service v0.1.0 (https://github.com/paritytech/cumulus?branch=rococo-v1#9d89ed65)
Finished release [optimized] target(s) in 31m 17s
!!! note
The initial build will take a while. Depending on your hardware, you should expect approximately 30 minutes for the build process to finish.
Then, you will want to run the node in development mode using the following command:
```bash
./target/release/moonbeam --dev
```
!!! note
For people not familiar with Substrate, the `--dev` flag is a way to run a Substrate-based node in a single-node developer configuration for testing purposes. When you run your node with the `--dev` flag, your node is started in a fresh state, and its state does not persist.
You should see an output that looks like the following, showing an idle state waiting for blocks to be produced:
Compiling frame-benchmarking-cli v3.0.0 (https://github.com/paritytech/substrate?branch=rococo-v1#401c24e8)
Compiling cumulus-client-cli v0.1.0 (https://github.com/paritytech/cumulus?branch=rococo-v1#9d89ed65)
Compiling moonbeam-rpc-txpool v0.6.0 (/home/purestake/moonbeam/client/rpc/txpool)
Compiling moonbeam-rpc-debug v0.1.0 (/home/purestake/moonbeam/client/rpc/debug)
Compiling moonbeam-rpc-trace v0.6.0 (/home/purestake/moonbeam/client/rpc/trace)
Compiling cumulus-client-network v0.1.0 (https://github.com/paritytech/cumulus?branch=rococo-v1#9d89ed65)
Compiling cumulus-client-consensus-relay-chain v0.1.0 (https://github.com/paritytech/cumulus?branch=rococo-v1#9d89ed65)
Compiling polkadot-test-service v0.8.29 (https://github.com/paritytech/polkadot?branch=rococo-v1#b64741e6)
Compiling cumulus-client-collator v0.1.0 (https://github.com/paritytech/cumulus?branch=rococo-v1#9d89ed65)
Compiling cumulus-client-service v0.1.0 (https://github.com/paritytech/cumulus?branch=rococo-v1#9d89ed65)
Finished release [optimized] target(s) in 31m 17s
./target/release/moonbeam --dev
2025-07-10 09:04:26 Moonbeam Parachain Collator
2025-07-10 09:04:26 ✌️ version 0.46.0-d7df89e7161
2025-07-10 09:04:26 ❤️ by PureStake, 2019-2025
2025-07-10 09:04:26 📋 Chain specification: Moonbase Development Testnet
2025-07-10 09:04:26 🏷 Node name: black-and-white-sticks-9174
2025-07-10 09:04:26 👤 Role: AUTHORITY
2025-07-10 09:04:26 💾 Database: RocksDb at /tmp/substrateO3YeRz/chains/moonbase_dev/db/full
2025-07-10 09:04:26 🔨 Initializing Genesis block/state (state: 0x7c34…99c5, header-hash: 0xa083…f354)
2025-07-10 09:04:26 Using default protocol ID "sup" because none is configured in the chain specs
2025-07-10 09:04:26 🏷 Local node identity is: 12D3KooWLcpczme2JeBEfLqmjqkzYVKTGKhhGmwSzHjRXGBVhDX7
2025-07-10 09:04:26 💻 Operating system: linux
2025-07-10 09:04:26 💻 CPU architecture: x86_64
2025-07-10 09:04:26 💻 Target environment: gnu
2025-07-10 09:04:26 💻 CPU: Intel(R) Core(TM) i7-9750H CPU @ 2.60GHz
2025-07-10 09:04:26 💻 CPU cores: 12
2025-07-10 09:04:26 💻 Memory: 7946MB
2025-07-10 09:04:26 💻 Kernel: 6.4.16-linuxkit
2025-07-10 09:04:26 💻 Linux distribution: Debian GNU/Linux 12 (bookworm)
2025-07-10 09:04:26 💻 Virtual machine: yes
2025-07-10 09:04:26 📦 Highest known block at #0
2025-07-10 09:04:26 Running JSON-RPC server: addr=0.0.0.0:9944, allowed origins=["*"]
2025-07-10 09:04:26 🏁 CPU score: 1.14 GiBs
2025-07-10 09:04:26 〽️ Prometheus exporter started at 127.0.0.1:9615
2025-07-10 09:04:26 🏁 Memory score: 10.41 GiBs
2025-07-10 09:04:26 🏁 Disk score (seq. writes): 987.96 MiBs
2025-07-10 09:04:26 🏁 Disk score (rand. writes): 363.65 MiBs
2025-07-10 09:04:26 Development Service Ready
2025-07-10 09:04:26 💤 Idle (0 peers), best: #0 (0xa083…f354), finalized #0 (0xa083…f354), ⬇ 0 ⬆ 0
2025-07-10 09:04:26 💤 Idle (0 peers), best: #0 (0xa083…f354), finalized #0 (0xa083…f354), ⬇ 0 ⬆ 0
For more information on some of the flags and options used in the example, check out the [Flags](#node-flags) and [Options](#node-options). If you want to see a complete list of all of the flags, options, and subcommands, open the help menu by running:
```bash
./target/release/moonbeam --help
```
## Configure Your Moonbeam Development Node {: #configure-moonbeam-dev-node }
Now that you know how to get a standard Moonbeam development node up and running, you may be wondering how you can configure it. The following sections will cover some common configurations you can use when you spin up your node.
### Common Flags to Configure Your Node {: #node-flags }
Flags do not take an argument. To use a flag, add it to the end of a command. For example:
```bash
./target/release/moonbeam --dev
```
- **`--dev`** - specifies the development chain
- **`--tmp`** - runs a temporary node in which all of the configuration will be deleted at the end of the process
- **`--rpc-external`** - listen to all RPC and WebSocket interfaces
### Common Options to Configure Your Node {: #node-options }
Options accept an argument to the right of the option. For example:
```bash
./target/release/moonbeam --dev --sealing 6000
```
- **`-l 2025-07-10 09:04:26 Moonbeam Parachain Collator
2025-07-10 09:04:26 ✌️ version 0.46.0-d7df89e7161
2025-07-10 09:04:26 ❤️ by PureStake, 2019-2025
2025-07-10 09:04:26 📋 Chain specification: Moonbase Development Testnet
2025-07-10 09:04:26 🏷 Node name: black-and-white-sticks-9174
2025-07-10 09:04:26 👤 Role: AUTHORITY
2025-07-10 09:04:26 💾 Database: RocksDb at /tmp/substrateO3YeRz/chains/moonbase_dev/db/full
2025-07-10 09:04:26 🔨 Initializing Genesis block/state (state: 0x7c34…99c5, header-hash: 0xa083…f354)
2025-07-10 09:04:26 Using default protocol ID "sup" because none is configured in the chain specs
2025-07-10 09:04:26 🏷 Local node identity is: 12D3KooWLcpczme2JeBEfLqmjqkzYVKTGKhhGmwSzHjRXGBVhDX7
2025-07-10 09:04:26 💻 Operating system: linux
2025-07-10 09:04:26 💻 CPU architecture: x86_64
2025-07-10 09:04:26 💻 Target environment: gnu
2025-07-10 09:04:26 💻 CPU: Intel(R) Core(TM) i7-9750H CPU @ 2.60GHz
2025-07-10 09:04:26 💻 CPU cores: 12
2025-07-10 09:04:26 💻 Memory: 7946MB
2025-07-10 09:04:26 💻 Kernel: 6.4.16-linuxkit
2025-07-10 09:04:26 💻 Linux distribution: Debian GNU/Linux 12 (bookworm)
2025-07-10 09:04:26 💻 Virtual machine: yes
2025-07-10 09:04:26 📦 Highest known block at #0
2025-07-10 09:04:26 Running JSON-RPC server: addr=0.0.0.0:9944, allowed origins=["*"]
2025-07-10 09:04:26 🏁 CPU score: 1.14 GiBs
2025-07-10 09:04:26 〽️ Prometheus exporter started at 127.0.0.1:9615
2025-07-10 09:04:26 🏁 Memory score: 10.41 GiBs
2025-07-10 09:04:26 🏁 Disk score (seq. writes): 987.96 MiBs
2025-07-10 09:04:26 🏁 Disk score (rand. writes): 363.65 MiBs
2025-07-10 09:04:26 Development Service Ready
2025-07-10 09:04:26 💤 Idle (0 peers), best: #0 (0xa083…f354), finalized #0 (0xa083…f354), ⬇ 0 ⬆ 0
2025-07-10 09:04:26 💤 Idle (0 peers), best: #0 (0xa083…f354), finalized #0 (0xa083…f354), ⬇ 0 ⬆ 0
```https://moonbeam-rpc.dwellir.com```| 20 req/sec | | OnFinality |
```https://moonbeam.api.onfinality.io/public```| 40 req/sec | | UnitedBloc |
```https://moonbeam.unitedbloc.com```| 32 req/sec | | RadiumBlock |
```https://moonbeam.public.curie.radiumblock.co/http```| 200 req/sec | | 1RPC |
```https://1rpc.io/glmr```| 10k req/day | | Grove |
```https://moonbeam.rpc.grove.city/v1/01fdb492```| 5k req/day | === "WSS" | Provider | RPC URL | Limits | |:-----------:|:--------------------------------------------------------------:|:-----------:| | Dwellir |
```wss://moonbeam-rpc.dwellir.com```| 20 req/sec | | OnFinality |
```wss://moonbeam.api.onfinality.io/public-ws```| 40 req/sec | | UnitedBloc |
```wss://moonbeam.unitedbloc.com```| 32 req/sec | | RadiumBlock |
```wss://moonbeam.public.curie.radiumblock.co/ws```| 200 req/sec | | 1RPC |
```wss://1rpc.io/glmr```| 10k req/day | ## Quick Start {: #quick-start } Before getting started, make sure you've retrieved your own endpoint and API key from one of the custom [Endpoint Providers](/builders/get-started/endpoints/){target=\_blank}. Then for the [Web3.js library](/builders/ethereum/libraries/web3js/){target=\_blank}, you can create a local Web3 instance and set the provider to connect to Moonbeam (both HTTP and WS are supported): ```js const { Web3 } = require('web3'); // Load Web3 library . . . // Create local Web3 instance - set Moonbeam as provider const web3 = new Web3('INSERT_RPC_API_ENDPOINT'); // Insert your RPC URL here ``` For the [Ethers.js library](/builders/ethereum/libraries/ethersjs/){target=\_blank}, define the provider by using `ethers.JsonRpcProvider(providerURL, {object})` and setting the provider URL to Moonbeam: ```js const ethers = require('ethers'); // Load Ethers library const providerURL = 'INSERT_RPC_API_ENDPOINT'; // Insert your RPC URL here // Define provider const provider = new ethers.JsonRpcProvider(providerURL, { chainId: 1284, name: 'moonbeam' }); ``` Any Ethereum wallet should be able to generate a valid address for Moonbeam (for example, [MetaMask](https://metamask.io){target=\_blank}). ## Chain ID {: #chain-id } Moonbeam chain ID is: `1284`, or `0x504` in hex. ## Block Explorers {: #block-explorers } For Moonbeam, you can use any of the following block explorers: - **Ethereum API (Etherscan Equivalent)** — [Moonscan](https://moonbeam.moonscan.io){target=\_blank} - **Ethereum API JSON-RPC based** — [Moonbeam Basic Explorer](https://moonbeam-explorer.netlify.app/?network=Moonbeam){target=\_blank} - **Substrate API** — [Subscan](https://moonbeam.subscan.io){target=\_blank} or [Polkadot.js Apps](https://polkadot.js.org/apps/?rpc=wss://wss.api.moonbeam.network#/explorer){target=\_blank} For more information on each of the available block explorers, please head to the [Block Explorers](/builders/get-started/explorers/){target=\_blank} section of the documentation. ## Connect MetaMask {: #connect-metamask } If you already have MetaMask installed, you can easily connect MetaMask to Moonbeam: !!! note MetaMask will popup asking for permission to add Moonbeam as a custom network. Once you approve permissions, MetaMask will switch your current network to Moonbeam. If you do not have MetaMask installed, or would like to follow a tutorial to get started, please check out the [Interacting with Moonbeam using MetaMask](/tokens/connect/metamask/){target=\_blank} guide. ## Configuration {: #configuration } Please note the following gas configuration parameters. These values are subject to change in future runtime upgrades. | Variable | Value | |:---------------------:|:------------------------------------------:| | Minimum gas price | {{ networks.moonbeam.min_gas_price }} Gwei | | Target block time | {{ networks.moonbeam.block_time }} seconds | | Block gas limit | {{ networks.moonbeam.gas_block }} | | Transaction gas limit | {{ networks.moonbeam.gas_tx }} | --- END CONTENT --- Doc-Content: https://docs.moonbeam.network/builders/get-started/networks/moonriver/ --- BEGIN CONTENT --- --- title: Moonriver Get Started Guide description: Learn how to connect to Moonriver via RPC and WSS endpoints, how to connect MetaMask to Moonriver, and about the available Moonriver block explorers. categories: Basics --- # Get Started with Moonriver ## Network Endpoints {: #network-endpoints } Moonriver has two types of endpoints available for users to connect to: one for HTTPS and one for WSS. If you're looking for your own endpoints suitable for production use, you can check out the [Endpoint Providers](/builders/get-started/endpoints/#endpoint-providers){target=\_blank} section of our documentation. Otherwise, to get started quickly you can use one of the following public HTTPS or WSS endpoints: === "HTTPS" | Provider | RPC URL | Limits | |:-----------:|:-------------------------------------------------------------------:|:-----------:| | Dwellir |
```https://moonriver-rpc.dwellir.com```| 20 req/sec | | OnFinality |
```https://moonriver.api.onfinality.io/public```| 40 req/sec | | UnitedBloc |
```https://moonriver.unitedbloc.com```| 32 req/sec | | RadiumBlock |
```https://moonriver.public.curie.radiumblock.co/http```| 200 req/sec | | Grove |
```https://moonriver.rpc.grove.city/v1/01fdb492```| 5k req/day | === "WSS" | Provider | RPC URL | Limits | |:-----------:|:---------------------------------------------------------------:|:-----------:| | Dwellir |
```wss://moonriver-rpc.dwellir.com```| 20 req/sec | | OnFinality |
```wss://moonriver.api.onfinality.io/public-ws```| 40 req/sec | | UnitedBloc |
```wss://moonriver.unitedbloc.com```| 32 req/sec | | RadiumBlock |
```wss://moonriver.public.curie.radiumblock.co/ws```| 200 req/sec | ## Quick Start {: #quick-start } Before getting started, make sure you've retrieved your own endpoint and API key from one of the custom [Endpoint Providers](/builders/get-started/endpoints/){target=\_blank}. Then for the [Web3.js library](/builders/ethereum/libraries/web3js/){target=\_blank}, you can create a local Web3 instance and set the provider to connect to Moonriver (both HTTP and WS are supported): ```js const { Web3 } = require('web3'); // Load Web3 library . . . // Create local Web3 instance - set Moonriver as provider const web3 = new Web3('INSERT_RPC_API_ENDPOINT'); // Insert your RPC URL here ``` For the [Ethers.js library](/builders/ethereum/libraries/ethersjs/){target=\_blank}, define the provider by using `ethers.JsonRpcProvider(providerURL, {object})` and setting the provider URL to Moonriver: ```js const ethers = require('ethers'); // Load Ethers library const providerURL = 'INSERT_RPC_API_ENDPOINT'; // Insert your RPC URL here // Define provider const provider = new ethers.JsonRpcProvider(providerURL, { chainId: 1285, name: 'moonriver' }); ``` Any Ethereum wallet should be able to generate a valid address for Moonbeam (for example, [MetaMask](https://metamask.io){target=\_blank}). ## Chain ID {: #chain-id } Moonriver chain ID is: `1285`, or `0x505` in hex. ## Block Explorers {: #block-explorers } For Moonriver, you can use any of the following block explorers: - **Ethereum API (Etherscan Equivalent)** — [Moonscan](https://moonriver.moonscan.io){target=\_blank} - **Ethereum API JSON-RPC based** — [Moonbeam Basic Explorer](https://moonbeam-explorer.netlify.app/?network=Moonriver){target=\_blank} - **Substrate API** — [Subscan](https://moonriver.subscan.io){target=\_blank} or [Polkadot.js Apps](https://polkadot.js.org/apps/?rpc=wss://wss.api.moonriver.moonbeam.network#/explorer){target=\_blank} For more information on each of the available block explorers, please head to the [Block Explorers](/builders/get-started/explorers/) section of the documentation. ## Connect MetaMask {: #connect-metamask } If you already have MetaMask installed, you can easily connect MetaMask to Moonriver: !!! note MetaMask will popup asking for permission to add Moonriver as a custom network. Once you approve permissions, MetaMask will switch your current network to Moonriver. If you do not have MetaMask installed, or would like to follow a tutorial to get started, please check out the [Interacting with Moonbeam using MetaMask](/tokens/connect/metamask/) guide. ## Configuration {: #configuration } Please note the following gas configuration parameters. These values are subject to change in future runtime upgrades. | Variable | Value | |:---------------------:|:-------------------------------------------:| | Minimum gas price | {{ networks.moonriver.min_gas_price }} Gwei | | Target block time | {{ networks.moonriver.block_time }} seconds | | Block gas limit | {{ networks.moonriver.gas_block }} | | Transaction gas limit | {{ networks.moonriver.gas_tx }} | --- END CONTENT --- Doc-Content: https://docs.moonbeam.network/builders/get-started/quick-start/ --- BEGIN CONTENT --- --- title: Quickly Get Started description: Everything you need to know to get started developing, deploying, and interacting with smart contracts on Moonbeam. categories: Basics --- # Quick Start Guide for Developing on Moonbeam ## Quick Overview {: #overview } Moonbeam is a fully Ethereum-compatible smart contract platform on Polkadot. As such, you can interact with Moonbeam via the [Ethereum API](/builders/ethereum/){target=\_blank} and [Substrate API](/builders/substrate/){target=\_blank}. Although Moonbeam is a Substrate-based platform, Moonbeam uses a [unified accounts](/learn/core-concepts/unified-accounts/){target=\_blank} system, which replaces Substrate-style accounts and keys with Ethereum-style accounts and keys. As a result, you can interact with your Moonbeam account with [MetaMask](/tokens/connect/metamask/){target=\_blank}, [Ledger](/tokens/connect/ledger/){target=\_blank}, and other Ethereum-compatible wallets by simply adding Moonbeam's network configurations. Similarly, you can develop on Moonbeam using Ethereum [libraries](/builders/ethereum/libraries/){target=\_blank} and [development environments](/builders/ethereum/dev-env/){target=\_blank}. ## Moonbeam Networks {: #moonbeam-networks } To get started developing on Moonbeam, it's important to be aware of the various networks within the Moonbeam ecosystem. | Network | Network Type | Relay Chain | Native Asset Symbol | Native Asset Decimals | |:-----------------------------------------------------------------------------------------:|:-------------:|:--------------------------------------------------------------------------------:|:-------------------:|:---------------------:| | [Moonbeam](/builders/get-started/networks/moonbeam/){target=\_blank} | MainNet | [Polkadot](https://polkadot.com){target=\_blank} | GLMR | 18 | | [Moonriver](/builders/get-started/networks/moonriver/){target=\_blank} | MainNet | [Kusama](https://kusama.network){target=\_blank} | MOVR | 18 | | [Moonbase Alpha](/builders/get-started/networks/moonbase/){target=\_blank} | TestNet | [Alphanet relay](/learn/platform/networks/moonbase/#relay-chain){target=\_blank} | DEV | 18 | | [Moonbeam Development Node](/builders/get-started/networks/moonbeam-dev/){target=\_blank} | Local TestNet | None | DEV | 18 | !!! note A Moonbeam development node doesn't have a relay chain as its purpose is to be your own personal development environment where you can get started developing quickly without the overhead of a relay chain. ### Network Configurations {: #network-configurations } When working with developer tools, depending on the tool, you might need to configure Moonbeam to interact with the network. To do so, you can use the following information: === "Moonbeam" | Variable | Value | |:---------------:|:------------------------------------------------------------------------------------------------------:| | Chain ID |
```{{ networks.moonbeam.chain_id }}``` |
| Public RPC URLs | ```https://moonbeam.public.blastapi.io```
```https://moonbeam.unitedbloc.com```| | Public WSS URLs |
```wss://moonbeam.public.blastapi.io```| === "Moonriver" | Variable | Value | |:---------------:|:--------------------------------------------------------------------------------------------------------:| | Chain ID |
```{{ networks.moonriver.chain_id }}``` |
| Public RPC URLs | ```https://moonriver.public.blastapi.io```
```https://moonriver.unitedbloc.com```| | Public WSS URLs |
```wss://moonriver.public.blastapi.io```| === "Moonbase Alpha" | Variable | Value | |:---------------:|:-----------------------------------------------------------------------------------------------------------:| | Chain ID |
```{{ networks.moonbase.chain_id }}``` |
| Public RPC URLs | ```https://moonbase-alpha.public.blastapi.io```
```{{ networks.moonbase.rpc_url }}``` |
| Public WSS URLs | ```wss://moonbase-alpha.public.blastapi.io```
```{{ networks.moonbase.wss_url }}``` |
=== "Moonbeam Dev Node"
| Variable | Value |
|:-------------:|:----------------------------------------------------:|
| Chain ID | ```{{ networks.development.chain_id }}``` |
| Local RPC URL | ```{{ networks.development.rpc_url }}``` |
| Local WSS URL | ```{{ networks.development.wss_url }}``` |
!!! note
You can create your own endpoint suitable for development or production from one of the [supported RPC providers](/builders/get-started/endpoints/#endpoint-providers){target=\_blank}.
### Block Explorers {: #explorers }
Moonbeam provides two different kinds of explorers: ones to query the Ethereum API, and others dedicated to the Substrate API. All EVM-based transactions are accessible via the Ethereum API whereas the Substrate API can be relied upon for Substrate-native functions such as governance, staking, and some information about EVM-based transactions. For more information on each explorer, please check out the [Block Explorers](/builders/get-started/explorers/){target=\_blank} page.
=== "Moonbeam"
| Block Explorer | Type | URL |
|:--------------:|:---------:|:-------------------------------------------------------------------------------------------------------------------------------------:|
| Moonscan | EVM | [https://moonbeam.moonscan.io/](https://moonbeam.moonscan.io){target=\_blank} |
| Expedition | EVM | [https://moonbeam-explorer.netlify.app/?network=Moonbeam](https://moonbeam-explorer.netlify.app/?network=Moonbeam){target=\_blank} |
| Subscan | Substrate | [https://moonbeam.subscan.io/](https://moonbeam.subscan.io){target=\_blank} |
| Polkadot.js | Substrate | [https://polkadot.js.org/apps/#/explorer](https://polkadot.js.org/apps/?rpc=wss://wss.api.moonbeam.network#/explorer){target=\_blank} |
=== "Moonriver"
| Block Explorer | Type | URL |
|:--------------:|:---------:|:-----------------------------------------------------------------------------------------------------------------------------------------------:|
| Moonscan | EVM | [https://moonriver.moonscan.io/](https://moonriver.moonscan.io){target=\_blank} |
| Expedition | EVM | [https://moonbeam-explorer.netlify.app/?network=Moonriver](https://moonbeam-explorer.netlify.app/?network=Moonriver){target=\_blank} |
| Subscan | Substrate | [https://moonriver.subscan.io/](https://moonriver.subscan.io){target=\_blank} |
| Polkadot.js | Substrate | [https://polkadot.js.org/apps/#/explorer](https://polkadot.js.org/apps/?rpc=wss://wss.api.moonrvier.moonbeam.network#/explorer){target=\_blank} |
=== "Moonbase Alpha"
| Block Explorer | Type | URL |
|:--------------:|:---------:|:----------------------------------------------------------------------------------------------------------------------------------------------:|
| Moonscan | EVM | [https://moonbase.moonscan.io/](https://moonbase.moonscan.io){target=\_blank} |
| Expedition | EVM | [https://moonbeam-explorer.netlify.app/?network=MoonbaseAlpha](https://moonbeam-explorer.netlify.app/?network=MoonbaseAlpha){target=\_blank} |
| Subscan | Substrate | [https://moonbase.subscan.io/](https://moonbase.subscan.io){target=\_blank} |
| Polkadot.js | Substrate | [https://polkadot.js.org/apps/#/explorer](https://polkadot.js.org/apps/?rpc=wss://wss.api.moonbase.moonbeam.network#/explorer){target=\_blank} |
=== "Moonbeam Dev Node"
| Block Explorer | Type | URL |
|:--------------:|:---------:|:-------------------------------------------------------------------------------------------------------------------------------------------------:|
| Expedition | EVM | [https://moonbeam-explorer.netlify.app/?network=MoonbeamDevNode](https://moonbeam-explorer.netlify.app/?network=MoonbeamDevNode){target=\_blank} |
| Polkadot.js | Substrate | [https://polkadot.js.org/apps/#/explorer](https://polkadot.js.org/apps/?rpc=wss://ws%3A%2F%2F127.0.0.1%3A9944#/explorer){target=\_blank} |
## Funding TestNet Accounts {: #testnet-tokens }
To get started developing on one of the TestNets, you'll need to fund your account with DEV tokens to send transactions. Please note that DEV tokens have no real value and are for testing purposes only.
| TestNet | Where To Get Tokens From |
|:-----------------------------------------------------------------------------------------:|:----------------------------------------------------------------------------------------------------------------------------------------------------------------------------:|
| [Moonbase Alpha](/builders/get-started/networks/moonbase/){target=\_blank} | The [Moonbase Alpha Faucet](https://faucet.moonbeam.network){target=\_blank} website. The faucet dispenses {{ networks.moonbase.website_faucet_amount }} every 24 hours | | [Moonbeam Development Node](/builders/get-started/networks/moonbeam-dev/){target=\_blank} | Any of the [ten pre-funded accounts](/builders/get-started/networks/moonbeam-dev/#pre-funded-development-accounts){target=\_blank} that come with your
development node | ## Development Tools {: #development-tools } As Moonbeam is a Substrate-based chain that is fully Ethereum-compatible, you can use Substrate-based tools and Ethereum-based tools. ### JavaScript Tools {: #javascript } === "Ethereum" | Tool | Type | |:------------------------------------------------------------------------:|:---------------:| | [Ethers.js](/builders/ethereum/libraries/ethersjs/){target=\_blank} | Library | | [Web3.js](/builders/ethereum/libraries/web3js/){target=\_blank} | Library | | [Hardhat](/builders/ethereum/dev-env/hardhat/){target=\_blank} | Dev Environment | | [OpenZeppelin](/builders/ethereum/dev-env/openzeppelin/){target=\_blank} | Dev Environment | | [Remix](/builders/ethereum/dev-env/remix/){target=\_blank} | Dev Environment | | [Scaffold-Eth](/builders/ethereum/dev-env/scaffold-eth/){target=\_blank} | Dev Environment | | [thirdweb](/builders/ethereum/dev-env/thirdweb/){target=\_blank} | Dev Environment | | [Waffle & Mars](/builders/ethereum/dev-env/waffle-mars/){target=\_blank} | Dev Environment | === "Substrate" | Tool | Type | |:---------------------------------------------------------------------------------:|:-------:| | [Polkadot.js API](/builders/substrate/libraries/polkadot-js-api/){target=\_blank} | Library | ### Python Tools {: #python } === "Ethereum" | Tool | Type | |:---------------------------------------------------------------:|:---------------:| | [Web3.py](/builders/ethereum/libraries/web3py/){target=\_blank} | Library | | [Ape](/builders/ethereum/dev-env/ape/){target=\_blank} | Dev Environment | === "Substrate" | Tool | Type | |:-----------------------------------------------------------------------------------------------:|:-------:| | [Py Substrate Interface](/builders/substrate/libraries/py-substrate-interface/){target=\_blank} | Library | --- END CONTENT --- Doc-Content: https://docs.moonbeam.network/builders/interoperability/xcm/core-concepts/instructions/ --- BEGIN CONTENT --- --- title: XCM Instructions description: When XCM instructions are combined, they form an XCM message that performs a cross-chain action. Take a look at some of the most common instructions. categories: XCM, Basics --- # XCM Instructions ## Introduction {: #introduction } XCM messages contain a series of [actions and instructions](https://github.com/paritytech/xcm-format#5-the-xcvm-instruction-set){target=\_blank} that are executed by the Cross-Consensus Virtual Machine (XCVM). An action (for example, transferring a token from one blockchain to another) consists of instructions that the XCVM partly executes in the origin and destination chains. For example, an XCM message that transfers DOT from Polkadot to Moonbeam will include the following XCM instructions (in that order), some of which are executed on Polkadot and some of which are executed on Moonbeam: 1. [TransferReserveAsset](#transfer-reserve-asset) — executed in Polkadot 2. [ReserveAssetDeposited](#reserve-asset-deposited) — executed in Moonbeam 3. [ClearOrigin](#clear-origin) — executed in Moonbeam 4. [BuyExecution](#buy-execution) — executed in Moonbeam 5. [DepositAsset](#deposit-asset) — executed in Moonbeam Building the instructions for an XCM message from scratch is not an easy task. Consequently, there are wrapper functions and pallets that developers can leverage to use XCM features. The [Polkadot XCM](/builders/interoperability/xcm/xc20/send-xc20s/xcm-pallet/){target=\_blank} and [XCM Transactor](/builders/interoperability/xcm/remote-execution/substrate-calls/xcm-transactor-pallet/){target=\_blank} Pallets provide functions with a predefined set of XCM instructions to either send [XC-20s](/builders/interoperability/xcm/xc20/overview/){target=\_blank} or remotely execute on other chains via XCM. If you're interested in experimenting with different combinations of instructions, you can [use the Polkadot XCM Pallet to execute and send custom XCM messages](/builders/interoperability/xcm/send-execute-xcm/){target=\_blank}. This guide provides an overview of some of the most commonly used XCM instructions, including those in the above example. ## Buy Execution {: #buy-execution } The [`BuyExecution`](https://github.com/paritytech/xcm-format#buyexecution){target=\_blank} instruction typically gets executed in the target chain. It takes assets from the holding register, a temporary position in the Cross-Consensus Virtual Machine (XCVM), to pay for execution fees. The target chain determines the fees to pay. ## Clear Origin {: #clear-origin } The [`ClearOrigin`](https://github.com/paritytech/xcm-format#clearorigin){target=\_blank} instruction gets executed in the target chain. It clears the origin of the XCM author, thereby ensuring that later XCM instructions cannot command the authority of the author. ## Deposit Asset {: #deposit-asset } The [`DepositAsset`](https://github.com/paritytech/xcm-format#depositasset){target=\_blank} instruction gets executed in the target chain. It removes the assets from the holding register, a temporary position in the Cross-Consensus Virtual Machine (XCVM), and sends them to a destination account on the target chain. ## Descend Origin {: #descend-origin } The [`DescendOrigin`](https://github.com/paritytech/xcm-format#descendorigin){target=\_blank} instruction gets executed in the target chain. It mutates the origin on the target chain to match the origin on the source chain, ensuring execution on the target chain occurs on behalf of the same entity initiating the XCM message on the source chain. ## Initiate Reserve Withdraw {: #initiate-reserve-withdraw } The [`InitiateReserveWithdraw`](https://github.com/paritytech/xcm-format#initiatereservewithdraw){target=\_blank} instruction gets executed in the source chain. It removes the assets from the holding register, a temporary position in the Cross-Consensus Virtual Machine (XCVM), (essentially burning them), and sends an XCM message to the reserve chain starting with the `WithdrawAsset` instruction. ## Refund Surplus {: #refund-surplus } The [`RefundSurplus`](https://github.com/paritytech/xcm-format#refundsurplus){target=\_blank} instruction typically gets executed in the target chain after the XCM is processed. This instruction will take any leftover assets from the `BuyExecution` instruction and put the assets into the holding register, a temporary position in the Cross-Consensus Virtual Machine (XCVM). ## Reserve Asset Deposited {: #reserve-asset-deposited } The [`ReserveAssetDeposited`](https://github.com/paritytech/xcm-format#reserveassetdeposited-){target=\_blank} instruction gets executed in the target chain. It takes a representation of the assets received in the Sovereign account and places them into the holding register, a temporary position in the Cross-Consensus Virtual Machine (XCVM). ## Set Appendix {: #set-appendix } The [`SetAppendix`](https://github.com/paritytech/xcm-format#setappendix){target=\_blank} instruction gets executed in the target chain. It sets the appendix register, which holds code that should be run after the current execution is finished. ## Transfer Reserve Asset {: #transfer-reserve-asset } The [`TransferReserveAsset`](https://github.com/paritytech/xcm-format#transferreserveasset){target=\_blank} instruction gets executed in the reserve chain. It moves assets from the origin account and deposits them into a destination account on the target chain. It then sends an XCM message to the target chain with the `ReserveAssetDeposited` instruction, followed by the XCM instructions that are to be executed. ## Transact {: #transact } The [`Transact`](https://github.com/paritytech/xcm-format#transact){target=\_blank} instruction gets executed in the target chain. It dispatches encoded call data from a given origin, allowing for the execution of specific operations or functions on the target chain. ## Withdraw Asset {: #withdraw-asset } The [`WithdrawAsset`](https://github.com/paritytech/xcm-format#withdrawasset){target=\_blank} instruction can be executed in either the source or target chain. It removes assets and places them into the holding register, a temporary position in the Cross-Consensus Virtual Machine (XCVM). --- END CONTENT --- Doc-Content: https://docs.moonbeam.network/builders/interoperability/xcm/overview/ --- BEGIN CONTENT --- --- title: Cross-Consensus Messaging (XCM) description: An overview of how cross-consensus messaging (XCM) works and how developers can leverage Polkadot/Kusama XCM to gain access to new assets. categories: Basics, XCM --- # Cross-Consensus Messaging (XCM) ## Introduction {: #introduction } [Polkadot's architecture](https://wiki.polkadot.com/learn/learn-architecture/){target=\_blank} allows parachains to natively interoperate with each other, enabling cross-blockchain transfers of any type of data or asset. To do so, a [Cross-Consensus Message (XCM)](https://wiki.polkadot.com/learn/learn-xcm/){target=\_blank} format defines a language around how the message transfer between two interoperating blockchains should be performed. XCM is not specific to Polkadot, as it aims to be a generic and extensible language between different consensus systems. This page is a brief introduction and overview of XCM and other related elements. More information can be found in [Polkadot's Wiki](https://wiki.polkadot.com/learn/learn-xcm/){target=\_blank}. If you want to jump to more XCM-related content, feel free to check out the following pages: - [**Core XCM Concepts**](/builders/interoperability/xcm/core-concepts/){target=\_blank} - learn topics related to [XCM Instructions](/builders/interoperability/xcm/core-concepts/instructions/){target=\_blank}, [Multilocations](/builders/interoperability/xcm/core-concepts/multilocations/){target=\_blank}, and [XCM Fees](/builders/interoperability/xcm/core-concepts/weights-fees/){target=\_blank} - [**XC Registration**](/builders/interoperability/xcm/xc-registration/){target=\_blank} - go through the process of [Opening an XCM Channel with Moonbeam](/builders/interoperability/xcm/xc-registration/xc-integration/){target=\_blank} and how to [Register Polkadot Native Assets as XC-20s](/builders/interoperability/xcm/xc-registration/assets/){target=\_blank} - [**XC-20s**](/builders/interoperability/xcm/xc20/){target=\_blank} - read an [Overview](/builders/interoperability/xcm/xc20/overview/){target=\_blank} of this Moonbeam-only asset class and learn how to [Interact with XC-20s](/builders/interoperability/xcm/xc20/interact/){target=\_blank} and how to [Send them via XCM](/builders/interoperability/xcm/xc20/send-xc20s/){target=\_blank} - [**Remote Execution via XCM**](/builders/interoperability/xcm/remote-execution/){target=\_blank} - grasp all concepts related to remote execution via XCM, starting with a [High-Level Overview](/builders/interoperability/xcm/remote-execution/overview/){target=\_blank}, then [Computed Origins](/builders/interoperability/xcm/remote-execution/computed-origins/){target=\_blank} and wrapping up with [Remote Calls via XCM](/builders/interoperability/xcm/remote-execution/substrate-calls/){target=\_blank} and [Remote EVM Calls via XCM](/builders/interoperability/xcm/remote-execution/remote-evm-calls/){target=\_blank} - [**XCM SDK**](https://moonbeam-foundation.github.io/xcm-sdk/latest/){target=\_blank} - learn how to [Use Moonbeam's XCM SDK](https://moonbeam-foundation.github.io/xcm-sdk/latest/example-usage/xcm/){target=\_blank} - **XCM Debugging and Tools** - learn how to test some XCM scenarios by [Sending and Executing Generic XCM Messages](/builders/interoperability/xcm/send-execute-xcm/){target=\_blank}, or how to use the [XCM Utilities Precompile](/builders/interoperability/xcm/xcm-utils/){target=\_blank} to access XCM_related utility functions directly within the EVM ## General XCM Definitions {: #general-xcm-definitions } - **XCM** — stands for Cross-Consensus Message. It is a general way for consensus systems to communicate with each other - **VMP** — stands for Vertical Message Passing, one of the transport methods for XCMs. It allows parachains to exchange messages with the relay chain. *UMP* (Upward Message Passing) enables parachains to send messages to their relay chain, while *DMP* (Downward Message Passing) enables the relay chain to pass messages down to one of their parachains - **XCMP** — stands for Cross-Consensus Message Passing, one of the transport methods for XCMs. It allows parachains to exchange messages with other parachains on the same relay chain - **HRMP** — stands for Horizontal Relay-routed Message Passing, a stop-gap protocol while a full XCMP implementation is launched. It has the same interface as XCMP, but messages are stored on the relay chain - **Sovereign account** — an account each chain in the ecosystem has, one for the relay chain and the other for other parachains. It is calculated as the `blake2` hash of a specific word and parachain ID concatenated (`blake2(para+ParachainID)` for the Sovereign account in the relay chain, and `blake2(sibl+ParachainID)` for the Sovereign account in other parachains), truncating the hash to the correct length. The account is owned by root and can only be used through SUDO (if available) or [governance (referenda)](/learn/features/governance/){target=\_blank}. The Sovereign account typically signs XCM messages in other chains in the ecosystem - **Multilocation** — a way to specify a point in the entire relay chain/parachain ecosystem relative to a given origin. For example, it can be used to specify a specific parachain, asset, account, or even a pallet inside a parachain. In general terms, a multilocation is defined with a `parents` and an `interior`: - `parents` - refers to how many "hops" into a parent blockchain you need to take from a given origin - `interior` - refers to how many fields you need to define the target point. For example, to target a parachain with ID `1000` from another parachain, the multilocation would be `{ "parents": 1, "interior": { "X1": [{ "Parachain": 1000 }]}}` ## Cross-Chain Transport Protocols via XCM {: #xcm-transport-protocols } XCM implements two cross-consensus or transport protocols for acting on XCM messages between its constituent parachains, Moonbeam being one of them: - **Vertical Message Passing (VMP)** — once a project is onboarded as a parachain, it automatically has a bi-directional communication channel with the relay chain. Therefore, there is no need for chain registration. VMP is divided into two kinds of message-passing transport protocols: * **Upward Message Passing (UMP)** — allows parachains to send messages to their relay chain, for example, from Moonbeam to Polkadot * **Downward Message Passing (DMP)** — allows the relay chain to pass messages down to one of their parachains, for example, from Polkadot to Moonbeam - **Cross-Chain Message Passing (XCMP)** — allows two parachains to exchange messages as long as they are connected to the same relay chain. Cross-chain transactions are resolved using a simple queuing mechanism based on a Merkle tree to ensure fidelity. Collators exchange messages between parachains, while the relay chain validators will verify that the message transmission happened !!! note Currently, while XCMP is being developed, a stop-gap protocol is implemented called Horizontal Relay-routed Message Passing (HRMP), in which the messages are stored in and read from the relay chain. This will be deprecated in the future for the full XCMP implementation. 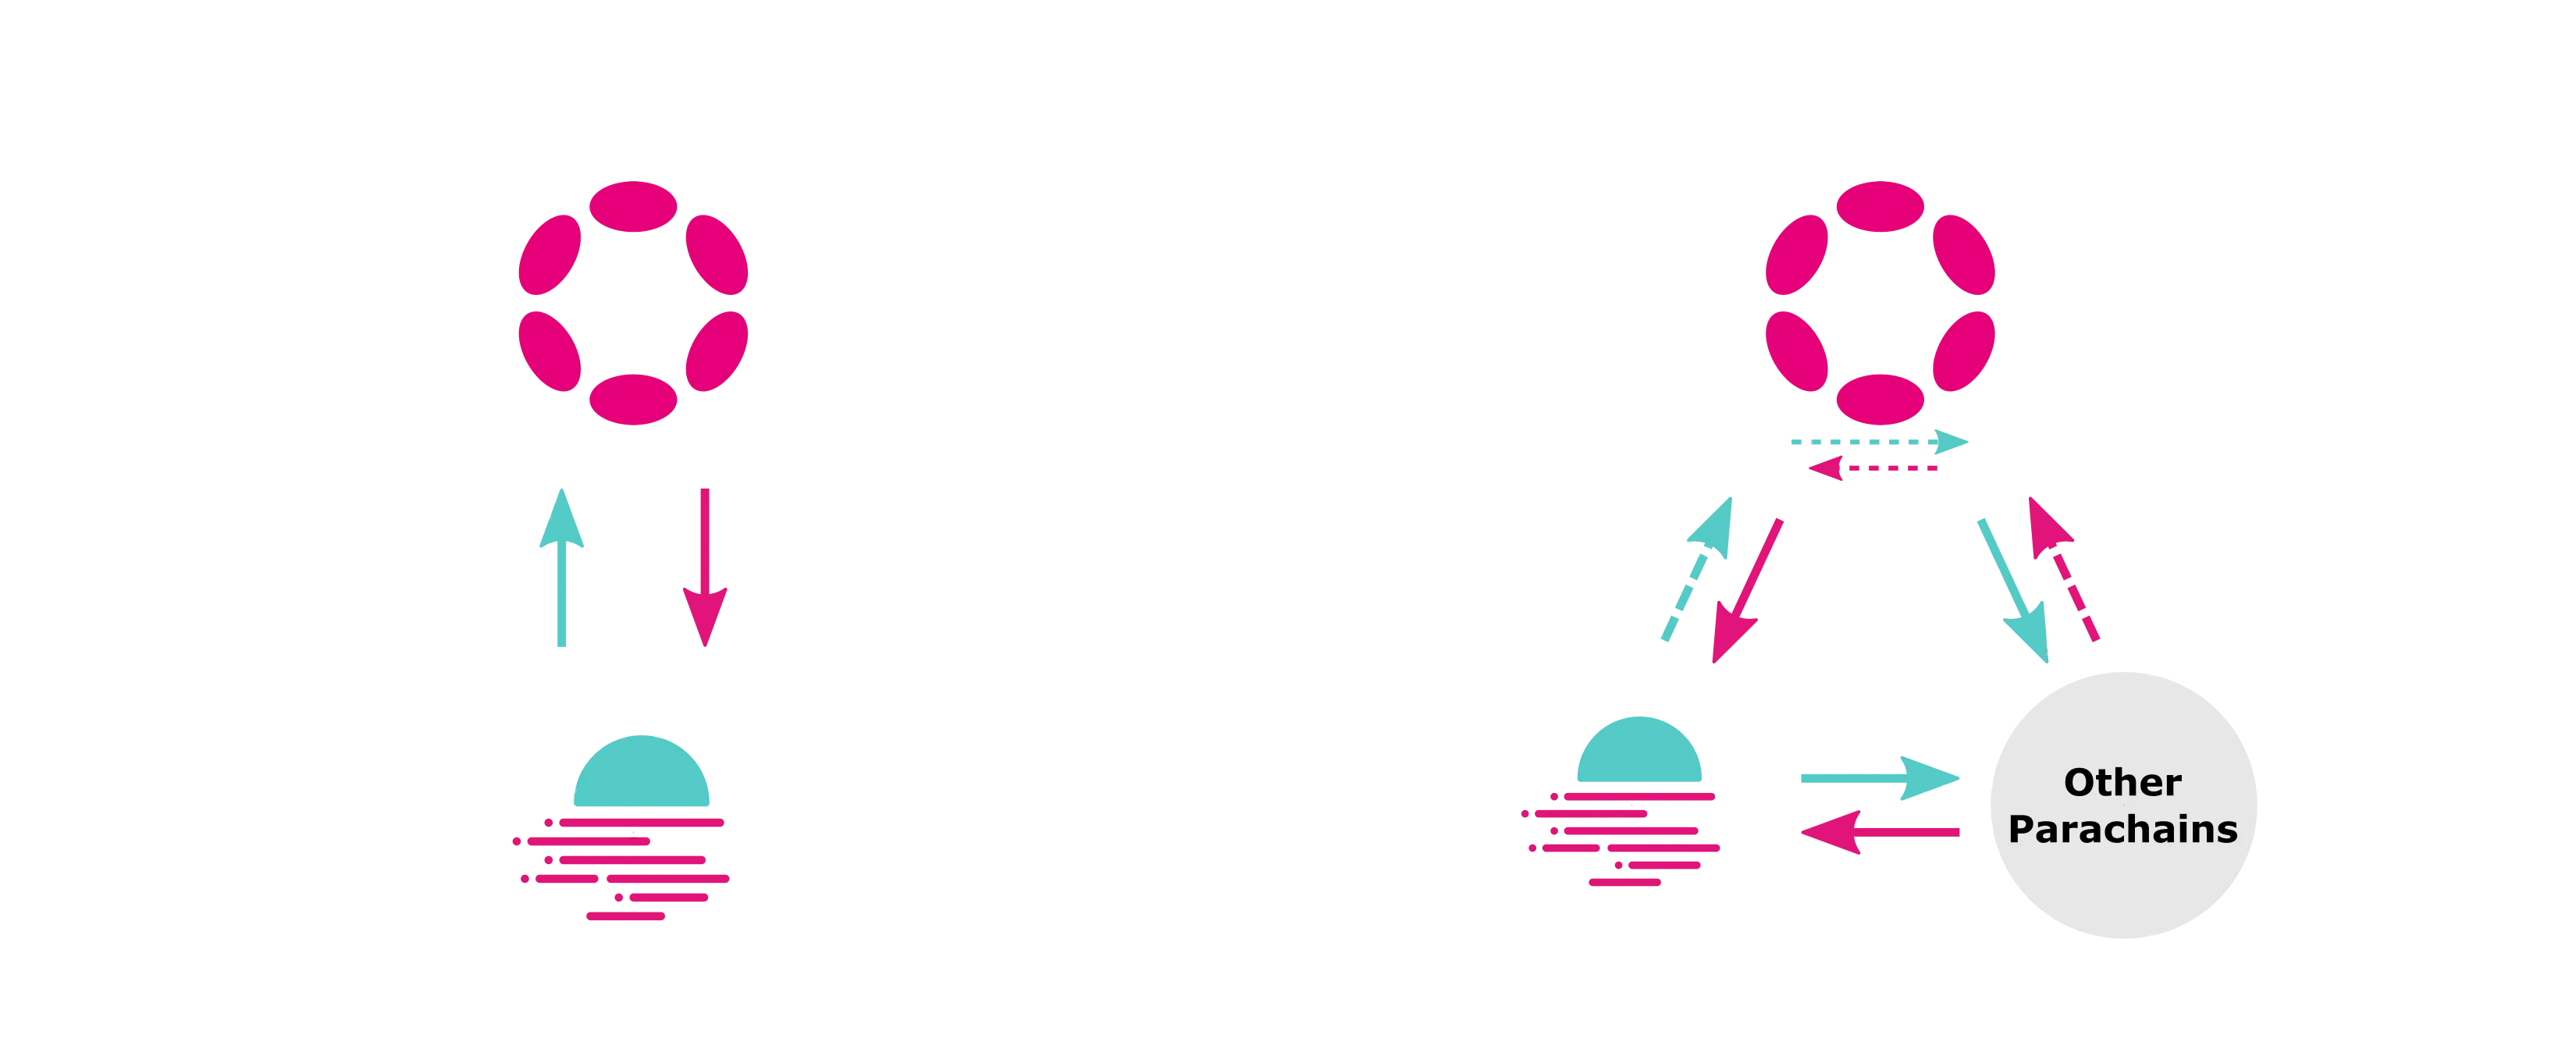 ## Establishing Cross-Chain Communication {: #channel-registration } Before two chains can start communicating, a messaging channel must be opened. Channels are unidirectional, meaning that a channel from chain A to chain B will only pass messages from A to B. Therefore, two channels must be opened to send messages back and forth. A channel for XCMs between the relay chain and parachain is automatically opened when a connection is established. However, when parachain A wants to open a communication channel with parachain B, parachain A must send an open channel extrinsic to its network. This extrinsic is an XCM as well! Even though parachain A has expressed its intentions of opening an XCM channel with parachain B, the latter has not signaled to the relay chain its intentions to receive messages from parachain A. Therefore, to have an established channel, parachain B must send an extrinsic (an XCM) to the relay chain. The accepting channel extrinsic is similar to the previous one. However, the encoded call data only includes the new method (accept channel) and the parachain ID of the sender (parachain A in this example). Once both parachains have agreed, the channel is opened within the following epoch. To learn more about the channel registration process, please refer to the [How to Establish an XC Integration with Moonbeam](/builders/interoperability/xcm/xc-registration/xc-integration/){target=\_blank} guide. 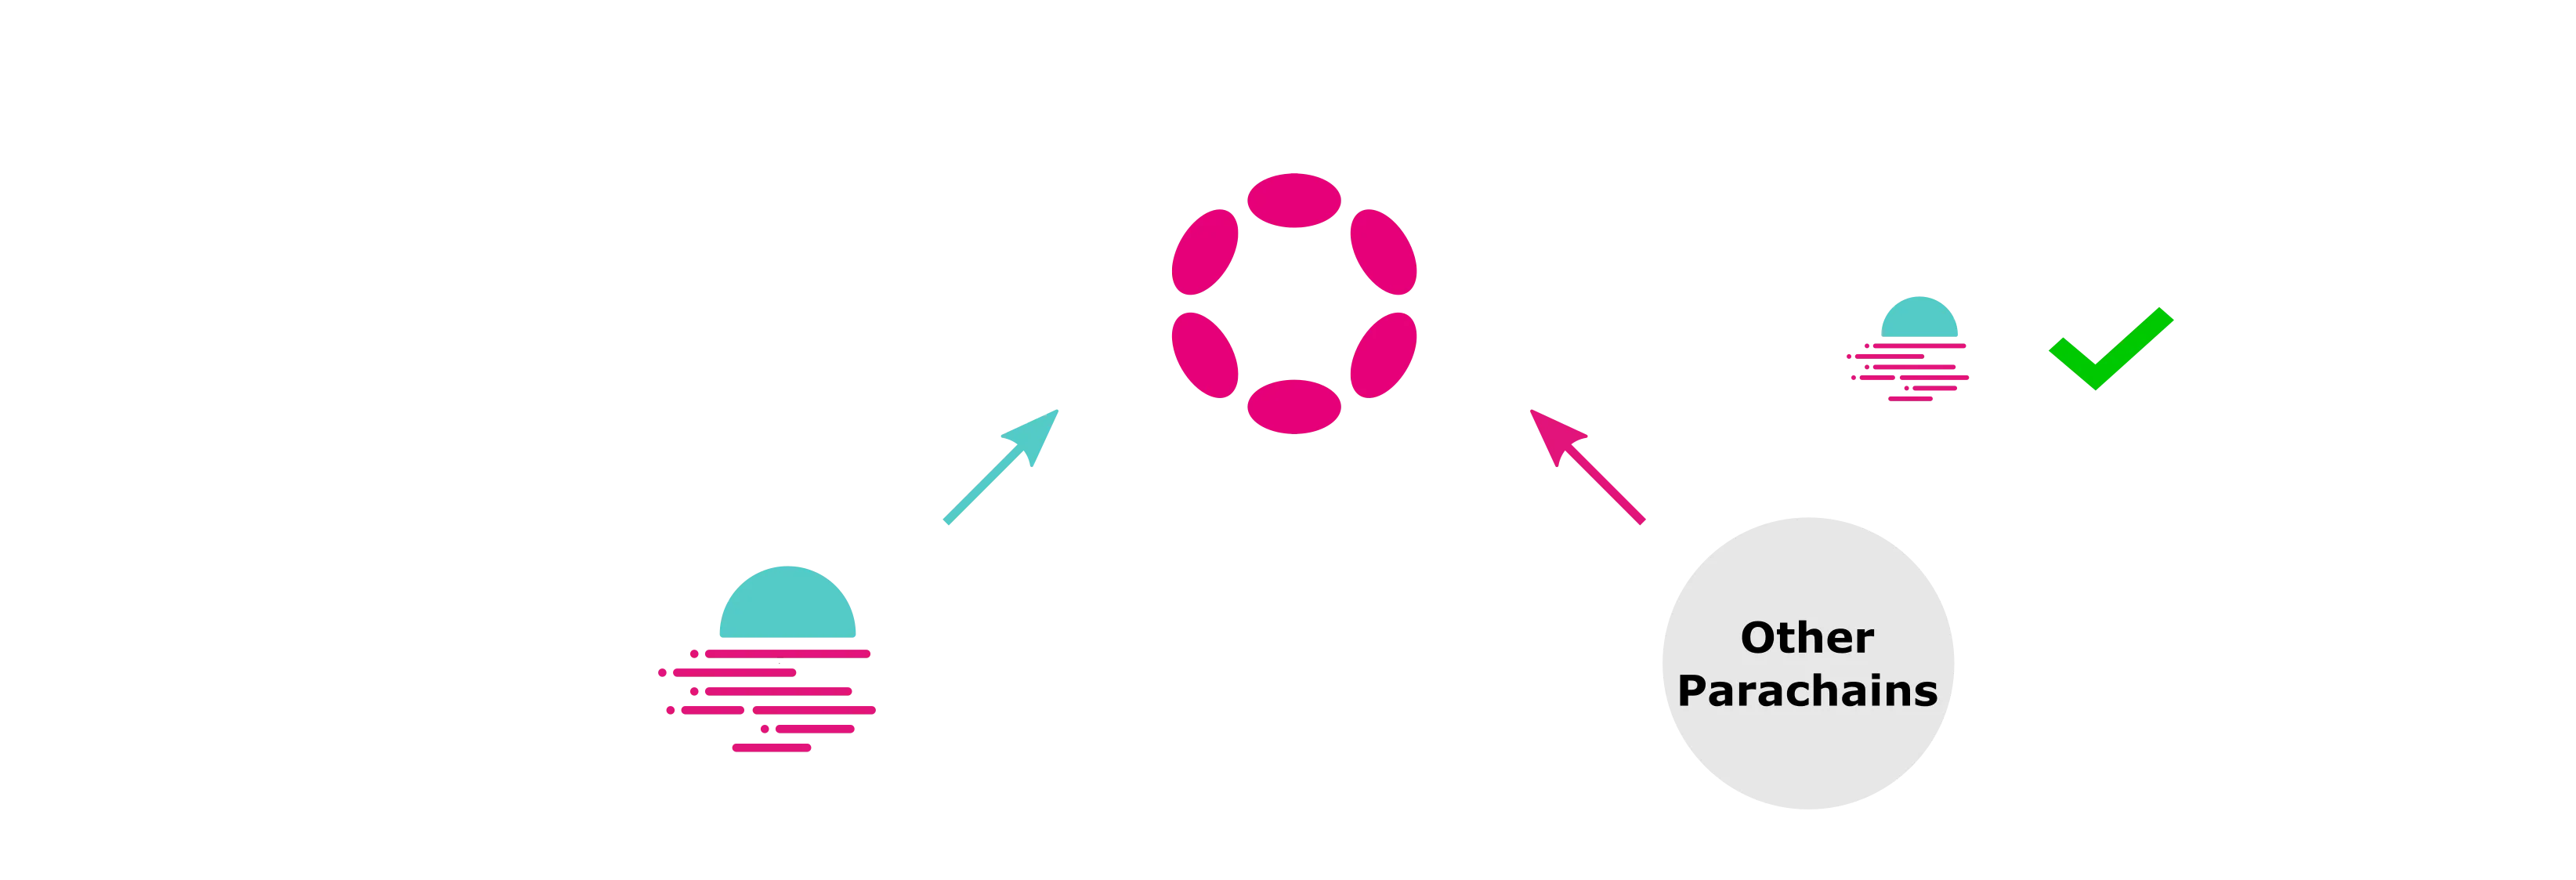 Once the channel is established, cross-chain messages can be sent between parachains. For asset transfers, assets need to be registered before being transferred through XCMs, either by being baked into the runtime as a constant or through a pallet. Moonbeam relies on a Substrate pallet to handle asset registration without the need for runtime upgrades, making the process a lot simpler. To learn how to register an asset on Moonbeam and the information necessary to add Moonbeam assets to another chain, please refer to the [How to Register Cross-Chain Assets](/builders/interoperability/xcm/xc-registration/assets/){target=\_blank} guide. ## XCM on Moonbeam {: #moonbeam-and-xcm } As Moonbeam is a parachain within the Polkadot ecosystems, one of the most direct implementations of XCM is to enable asset transfer from Polkadot and other parachains from/to Moonbeam. This allows users to bring their tokens to Moonbeam and all its dApps. To this end, Moonbeam has introduced [XC-20s](/builders/interoperability/xcm/xc20/overview/){target=\_blank}, which expand on Moonbeam's unique Ethereum compatibility features. XC-20s allow Polkadot native assets to be represented via a standard [ERC-20 interface](https://github.com/moonbeam-foundation/moonbeam/blob/master/precompiles/assets-erc20/ERC20.sol){target=\_blank} through a precompiled contract. When these assets are registered on Moonbeam, they can be set as XCM execution fee assets. Consequently, when a user transfers such an asset to Moonbeam, a small part of the amount will be used to cover the XCM execution fees. In addition, ERC-20s that are deployed to Moonbeam can be sent to other chains in the Polkadot ecosystem via XCM. Consequently, from a developer's perspective, XC-20s are ERC-20 tokens with the added benefit of being an XCM cross-chain asset, and dApps can easily support them through a familiar ERC-20 interface. 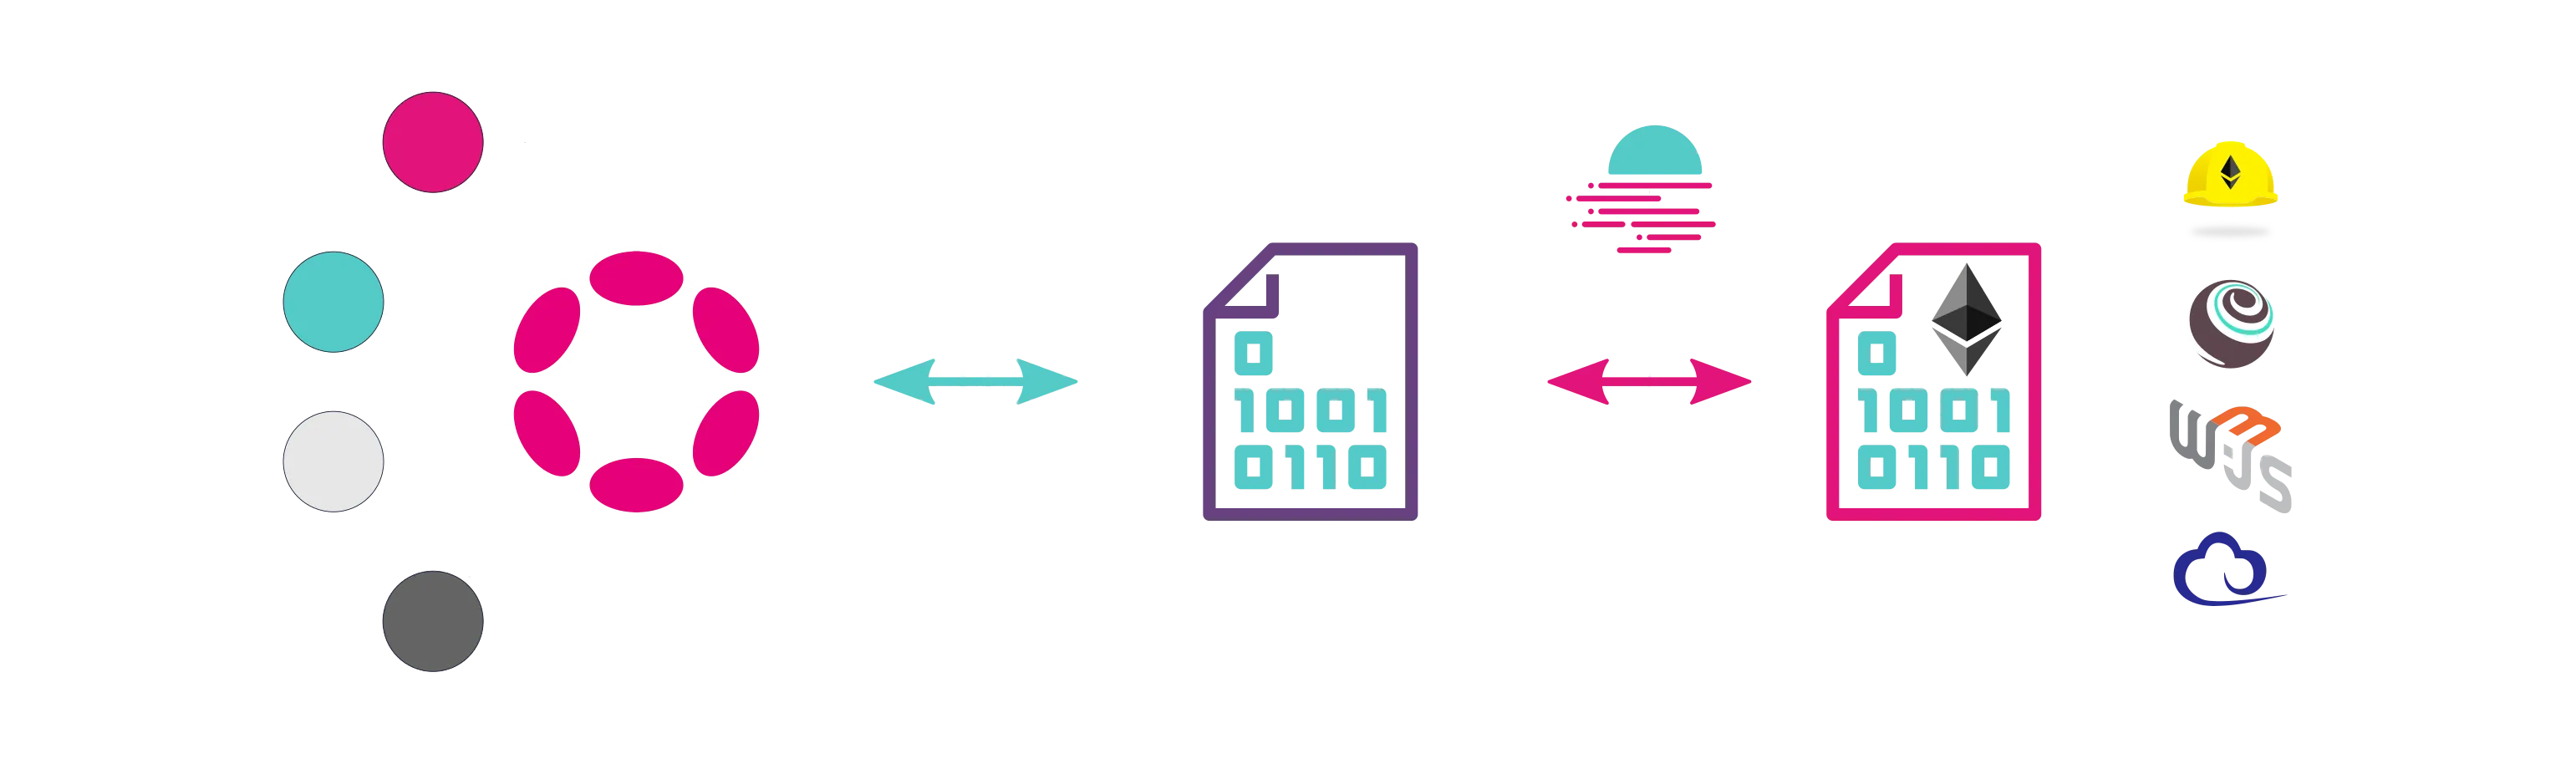 To send XC-20s across the Polkadot ecosystem from Moonbeam, developers need to use the [Polkadot XCM Pallet](/builders/interoperability/xcm/xc20/send-xc20s/xcm-pallet/){target=\_blank} for transfers via the Substrate API and the [X-Tokens Precompile](/builders/interoperability/xcm/xc20/send-xc20s/xtokens-precompile/){target=\_blank} or the [XCM Precompile](/builders/interoperability/xcm/xc20/send-xc20s/eth-api/){target=\_blank} for transfers via the Ethereum API. Another unique feature of Moonbeam is the ability to initiate XCM actions from EVM smart contracts or to call its EVM through XCM messages via remote execution. This unlocks a new set of possibilities, where contracts on Moonbeam can access parachain-specific functionalities via XCM, or other parachain ecosystems can use EVM smart contracts on Moonbeam to expand their functions. The following sections provide a high-level overview of the main use cases mentioned before. ### XCM Transfers between Moonbeam & Polkadot {: #transfers-moonbeam-polkadot } As Moonbeam is a parachain within the Polkadot ecosystem, a straightforward implementation of XCM + VMP is DOT transfers from/to Polkadot/Moonbeam. To this end, DOT was registered as [_xcDOT_](https://moonscan.io/token/0xffffffff1fcacbd218edc0eba20fc2308c778080){target=\_blank} on Moonbeam. Alice (Polkadot) wants to transfer a certain amount of DOT from Polkadot to her account on Moonbeam, named Alith. Therefore, she initiates an XCM that expresses her intentions. For such transfers, Moonbeam owns a Sovereign account on Polkadot. Consequently, the XCM message execution on Polkadot will transfer the amount of DOT to Moonbeam's Sovereign account on Polkadot. Once the assets are deposited, the second part of the message is sent to Moonbeam. Moonbeam will locally execute the action the XCM message is programmed to do. In this case, it is to mint and transfer the same amount of _xcDOT_ to the account defined by Alice, which in this case is Alith. The fee to execute the XCM in the target parachain is paid in the asset being transferred (_xcDOT_ for this example).  Note the following: - The Alice and Alith accounts can be different. For example, Polkadot's accounts are SR25519 (or ED25519), while Moonbeam's are ECDSA (Ethereum-styled) accounts. They can also have different owners - There is a certain degree of trust where one chain relies on the other to execute its part of the XCM message. This is programmed at a runtime level so that it can be easily verified - For this example, _xcDOT_ is a wrapped representation of the original DOT being held in Moonbeam's Sovereign account on Polkadot. _xcDOT_ can be transferred within Moonbeam at any time, and they can be redeemed for DOT on a 1:1 basis as well (minus some fees) Alith deposited her _xcDOT_ in a liquidity pool. Next, Charleth acquires some _xcDOT_ by swapping against that liquidity pool, and he wants to transfer some _xcDOT_ to Charley's Polkadot account. Therefore, he initiates an XCM that expresses his intentions. Consequently, the XCM message execution on Moonbeam will burn the number of _xcDOT_. Once the assets are burned, the second part of the message is sent to Polkadot. Polkadot will execute the action the XCM message is programmed to do locally. In this case, it is to transfer the same amount of _xcDOT_ burned from the Moonbeam Sovereign account to the account defined by Charleth, which in this case is Charley.  ### XCM Transfers between Moonbeam & Other Parachains {: #transfers-moonbeam-other-parachains } Since Moonbeam is a parachain within the Polkadot ecosystem, a straightforward implementation of XCM and XCMP asset transfers from and to Moonbeam and other parachains. This section gives a high-level overview of the main differences compared to XCMs from Polkadot/Moonbeam. The first requirement is that a bidirectional channel between the parachains must exist, and the asset being transferred must be registered in the target parachain. Only when both conditions are met can XCMs be sent between parachains. Then, when Alith (Moonbeam) transfers a certain amount of GLMR from Moonbeam to another account (Alice) in a target parachain, tokens are sent to a Sovereign Account owned by that target parachain on Moonbeam. As the XCM message is executed in the target parachain, it is expected that this will mint and transfer the same amount of _xcGLMR_ (cross-chain GLMR) to the account defined by Alith, which in this case is Alice. The fee to execute the XCM in the target parachain is paid in the transferred asset (_xcGLMR_ for this example).  As explained in the previous section, the process is similar for _xcGLMR_ to move back to Moonbeam. First, the XCM message execution burns the number of _xcGLMR_ returned to Moonbeam. Once burned, the remnant part of the message is sent to Moonbeam via the relay chain. Moonbeam will locally execute the XCM message's and transfer GLMR (the same amount of burned _xcGLMR_) from the target parachain Sovereign account to the specified address. ### Remote Execution between Other Chains & Moonbeam {: #execution-chains-moonbeam } As mentioned before, XCM also enables remote execution from/to Moonbeam to other chains in the Polkadot ecosystem. Similarly to the other use cases, it is necessary for XCM-specific channels to be established before remote execution can happen between the chains. Channels are general-purpose, so they can be used for both asset transfers and remote execution. Another important component is the asset for which the remote execution fees are paid. On Moonbeam, when an XC-20 is registered, it can be set as an XCM execution fee asset. Consequently, when transferring that XC-20 to Moonbeam, the XCM execution fee is deducted from the amount being transferred. For remote execution, users can include a small amount of tokens in the XCM message to cover XCM execution fees. Alice (Polkadot) wants to perform a certain remote action through a smart contract on Moonbeam. Therefore, she initiates an XCM that expresses her intentions; she must have previously funded the XCM execution account she owns on Moonbeam with either GLMR or _xcDOT_. Moonbeam will locally execute the action the XCM message is programmed to do. In this case, it is to withdraw the asset decided by Alice for the XCM execution fee and buy some execution time on Moonbeam to execute the smart contract call on Moonbeam's EVM. You can read more about the flow in detail on the [Remote Execution](/builders/interoperability/xcm/remote-execution/overview/){target=\_blank} page. --- END CONTENT --- Doc-Content: https://docs.moonbeam.network/builders/interoperability/xcm/remote-execution/overview/ --- BEGIN CONTENT --- --- title: Remote Execution Overview description: Learn the basics of remote execution via XCM messages, which allow users to execute actions on other blockchains using accounts they control remotely via XCM. categories: XCM Remote Execution, Basics --- # Remote Execution via XCM ## Introduction {: #introduction } The [Cross-Consensus Message (XCM)](https://wiki.polkadot.com/learn/learn-xcm/){target=\_blank} format defines how messages can be sent between interoperable blockchains. This format opens the door to sending an XCM message that executes an arbitrary set of bytes in a Moonbeam-based network, the relay chain, or other parachains in the Polkadot/Kusama ecosystems. Remote execution via XCM opens a new set of possibilities for cross-chain interactions, from chains executing actions on other chains to users performing remote actions without switching chains. This page covers the fundamentals of XCM remote execution. If you want to learn how to perform remote execution via XCM, please refer to the [Remote Execution via the Substrate API](/builders/interoperability/xcm/remote-execution/substrate-calls/xcm-transactor-pallet/){target=\_blank} or the [Remote Execution via the Ethereum API](/builders/interoperability/xcm/xc20/send-xc20s/xtokens-precompile/){target=\_blank} guides. ## Execution Origin {: #execution-origin } Generally speaking, all transactions have an origin, which is where a call comes from. Ethereum transactions have only one origin type, the `msg.sender`, which is the account that initiated the transaction. Substrate-based transactions are more complex, as they can have different origins with different privilege levels. This is similar to having an EVM smart contract call with a specific `require` statement in which the call must come from an allowed address. In contrast, these privilege levels are programmed in the Substrate-based runtime itself. Origins are super important across different components of the Substrate runtime and, hence, the Moonbeam runtime. For example, they define the authority level they inherit in the [on-chain governance implementation](/learn/features/governance/){target=\_blank}. During the execution of an XCM message, the origin defines the context in which the XCM is being executed. By default, the XCM is executed by the source chain's Sovereign account in the destination chain. This Polkadot-specific property of having remote origins that are calculated when executing XCM is known as [Computed Origins](/builders/interoperability/xcm/remote-execution/computed-origins/){target=\_blank} (formerly known as Multilocation Derivative Accounts). Depending on the destination chain's configuration, including the `DescendOrigin` XCM instruction can mutate the origin from which the XCM message is executed. This property is significant for remote XCM execution, as the action being executed considers the context of the newly mutated origin and not the source chain's Sovereign account. ## XCM Instructions for Remote Execution {: #xcm-instructions-remote-execution } The core XCM instructions required to perform remote execution on Moonbeam (as an example) via XCM are the following: - [`DescendOrigin`](/builders/interoperability/xcm/core-concepts/instructions/#descend-origin){target=\_blank} - (optional) gets executed in Moonbeam. Mutates the origin to create a new Computed Origin that represents a keyless account controlled via XCM by the sender in the source chain - [`WithdrawAsset`](/builders/interoperability/xcm/core-concepts/instructions/#withdraw-asset){target=\_blank} - gets executed in Moonbeam. Takes funds from the Computed Origin - [`BuyExecution`](/builders/interoperability/xcm/core-concepts/instructions/#buy-execution){target=\_blank} - gets executed in Moonbeam. Uses the funds taken by the previous XCM instruction to pay for the XCM execution, including the remote call - [`Transact`](/builders/interoperability/xcm/core-concepts/instructions/#transact){target=\_blank} - gets executed in Moonbeam. Executes the arbitrary bytes provided in the XCM instruction The XCM instructions detailed above can be complemented by other XCM instructions to handle certain scenarios, like failure on execution, more accurately. One example is the inclusion of [`SetAppendix`](/builders/interoperability/xcm/core-concepts/instructions/#set-appendix){target=\_blank}, [`RefundSurplus`](/builders/interoperability/xcm/core-concepts/instructions/#refund-surplus){target=\_blank}, and [`Deposit`](/builders/interoperability/xcm/core-concepts/instructions/#deposit-asset){target=\_blank}. ## General Remote Execution via XCM Flow {: #general-remote-execution-via-xcm-flow } A user initiates a transaction in the source chain through a pallet that builds the XCM with at least the [required XCM instructions for remote execution](#xcm-instructions-remote-execution). The transaction is executed in the source chain, which sends an XCM message with the given instructions to the destination chain. The XCM message arrives at the destination chain, which executes it. It is executed with the source chain's Sovereign account as a Computed Origin by default. One example that uses this type of origin is when chains open or accept an HRMP channel on the relay chain. If the XCM message included a [`DescendOrigin`](/builders/interoperability/xcm/core-concepts/instructions/#descend-origin){target=\_blank} instruction, the destination chain may mutate the origin to calculate a new Computed Origin (as is the case with Moonbeam-based networks). Next, [`WithdrawAsset`](/builders/interoperability/xcm/core-concepts/instructions/#withdraw-asset){target=\_blank} takes funds from the Computed Origin (either a Sovereign account or mutated), which are then used to pay for the XCM execution through the [`BuyExecution`](/builders/interoperability/xcm/core-concepts/instructions/#buy-execution){target=\_blank} XCM instruction. Note that on both instructions, you need to specify which asset you want to use. In addition, you must include the bytes to be executed in the amount of execution to buy. Lastly, [`Transact`](/builders/interoperability/xcm/core-concepts/instructions/#transact){target=\_blank} executes an arbitrary set of bytes that correspond to a pallet and function in the destination chain. You have to specify the type of origin to use (typically `SovereignAccount`) and the weight required to execute the bytes (similar to gas in the Ethereum realm). 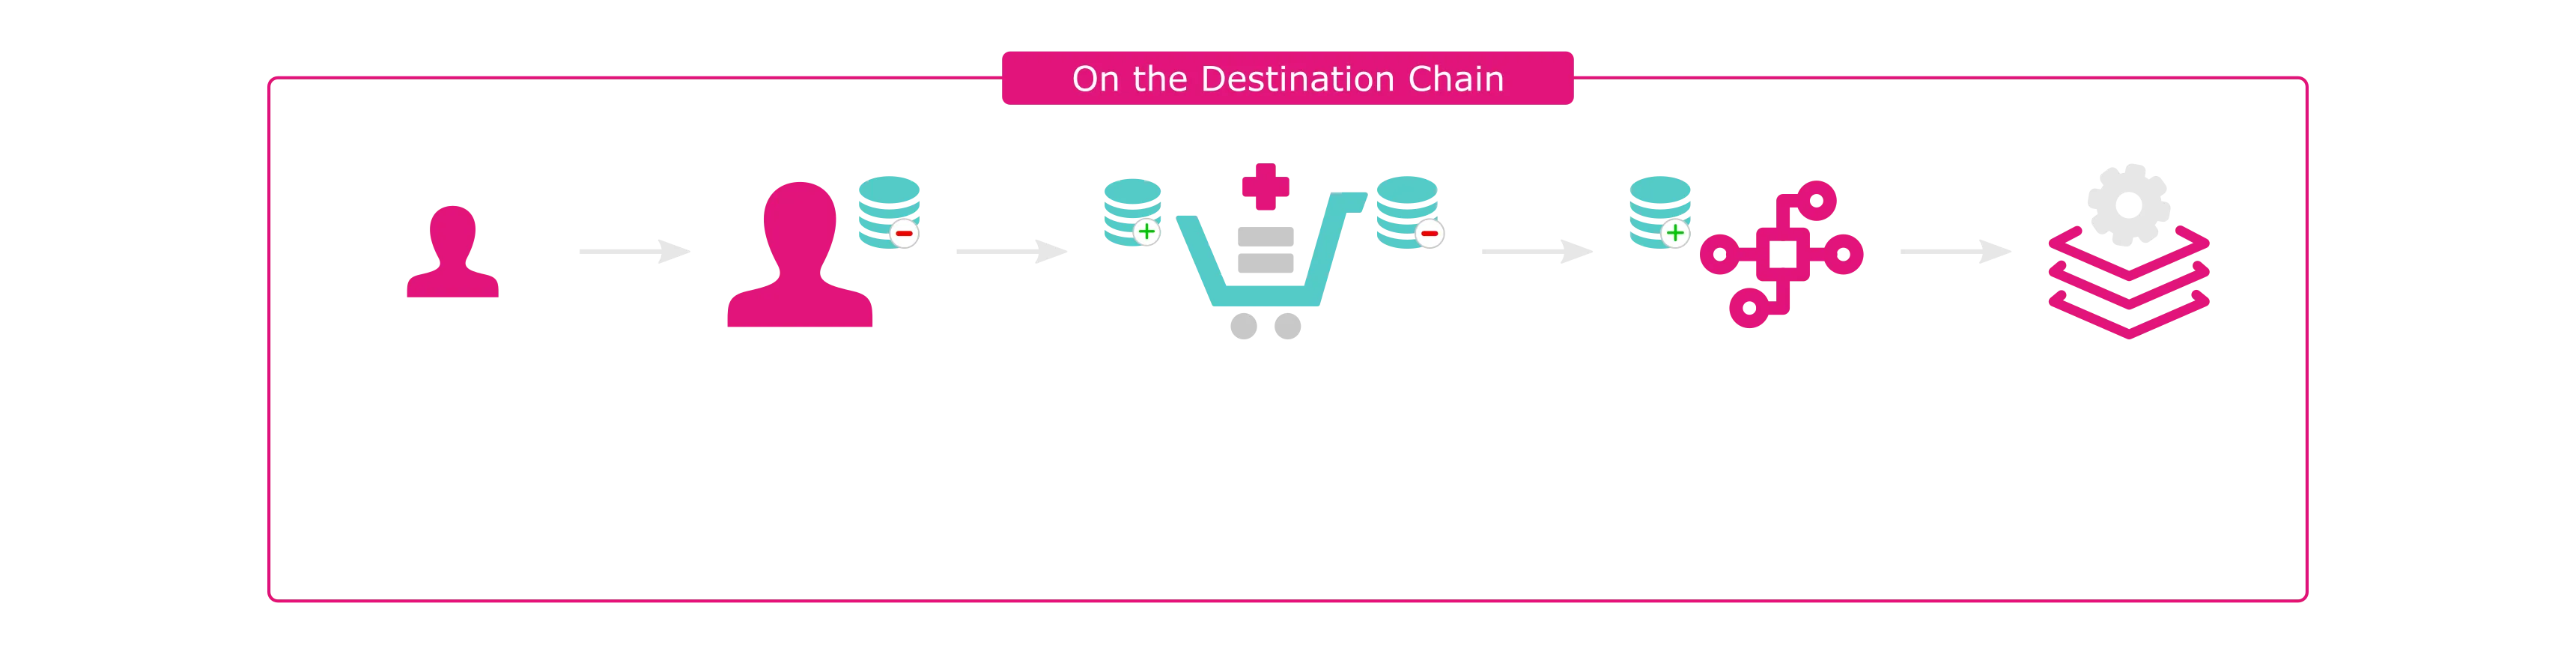 --- END CONTENT --- Doc-Content: https://docs.moonbeam.network/builders/interoperability/xcm/xc20/overview/ --- BEGIN CONTENT --- --- title: XC-20s and Cross-Chain Assets description: Learn about the types of cross-chain assets on Moonbeam, in particular, local and external XC-20s, and view a list of the external XC-20s on Moonbeam. categories: Basics, XC-20 --- # Overview of XC-20s ## Introduction {: #introduction } The [Cross-Consensus Message (XCM)](https://wiki.polkadot.com/learn/learn-xcm/){target=\_blank} format provides a universal way for blockchains to exchange messages and transfer assets. To extend this interoperability to the EVM, Moonbeam introduced XC-20s, ERC-20 tokens on Moonbeam that are fully compatible with XCM transfers. Any ERC-20 deployed on Moonbeam can be configured as an XC-20, making it accessible to any chain connected via XCM. This allows EVM-focused developers to work with familiar ERC-20 workflows while benefiting from Polkadot’s native cross-chain functionality, all without needing Substrate-specific expertise. From a technical standpoint, local XC-20s are ERC-20 tokens originating on Moonbeam (including bridged tokens deemed native once issued on Moonbeam), whereas external XC-20s are wrapped representations of tokens whose canonical ledger exists on another parachain or the relay chain. In all cases, XC-20s function just like standard ERC-20s—supporting common EVM-based use cases (such as DeFi, DEXs, and lending platforms)—but with the added advantage of seamless cross-chain operability.  This page aims to cover the basics on XC-20s; if you want to learn how to interact with or transfer XC-20s, please refer to the [Send XC-20s guide](/builders/interoperability/xcm/xc20/send-xc20s/overview/){target=\_blank}. ## Types of XC-20s {: #types-of-xc-20s } There are two types of XC-20s: local and external. ### What are Local XC-20s? {: #local-xc20s } Local XC-20s are all ERC-20s that exist on the EVM, and that can be transferred cross-chain through XCM. For local XC-20s to be transferred to another parachain, the asset must be registered on that chain. When transferring local XC-20s, the underlying tokens reside in the destination chain's Sovereign account on Moonbeam. A [sovereign account](/builders/interoperability/xcm/core-concepts/sovereign-accounts/){target=\_blank} is a keyless account governed by a blockchain runtime—rather than an individual—that can hold assets and interact with other chains. Local XC-20s must follow [the ERC-20 interface outlined in this guide](/builders/interoperability/xcm/xc20/interact/#the-erc20-interface){target=\_blank}. They must implement the standard ERC-20 function signatures, including the correct function selector of the `transfer` function as described in [EIP-20](https://eips.ethereum.org/EIPS/eip-20){target=\_blank}. However, additional functionality can still be added as long as it doesn’t break the base methods. Creating a local XC-20 is equivalent to deploying a standard ERC-20 and enabling cross-chain features on any Moonbeam network. ### What are External XC-20s? {: #external-xc20s } External XC-20s are cross-chain tokens originating from another parachain or the relay chain, and they are represented on Moonbeam as ERC-20 tokens. The original tokens remain locked in a Moonbeam sovereign account on their home chain, while the wrapped ERC-20 representation can be freely utilized on Moonbeam. When you transfer external XC-20s, the canonical assets remain in the sovereign account on their source chain, while the ERC-20 representation is what circulates on Moonbeam. External XC-20s all have _xc_ prepended to their names to distinguish them as cross-chain assets. For example, DOT, native to the Polkadot relay chain, is known as xcDOT when represented as an XC-20 on Moonbeam. ### Local XC-20s vs External XC-20s {: #local-xc-20s-vs-external-xc-20s } Local XC-20s are EVM-native ERC-20 tokens whose “home” (or reserve chain) is Moonbeam from a Polkadot perspective. This includes tokens originally bridged in from outside Polkadot (for example, Wormhole-wrapped ETH), because once they’re issued on Moonbeam as ERC-20s, Polkadot views them as local to Moonbeam. When local XC-20s are transferred to another parachain, the tokens move into that chain’s sovereign account on Moonbeam. External XC-20s, on the other hand, are ERC-20 representations of tokens whose canonical ledger remains on another parachain or the relay chain. Moonbeam holds the “wrapped” version, while the underlying tokens stay locked in Moonbeam’s sovereign account on the originating chain. From a cross-chain transfer perspective, local and external XC-20s can be sent through Polkadot’s XCM infrastructure using the Ethereum or Substrate API. Because the underlying asset is an ERC-20 with EVM bytecode following the [EIP-20 token standard](https://eips.ethereum.org/EIPS/eip-20){target=\_blank}, both transfers initiated via the Substrate and Ehereum APIs generate EVM logs visible to EVM-based explorers such as [Moonscan](https://moonscan.io){target=\_blank}. In contrast, you can't send a regular ERC-20 transfer using the Substrate API. Aside from cross-chain transfers through XCM, all other XC-20 interactions (such as querying balances or adjusting allowances) must occur in the EVM. Cross-chain transfers of XC-20s are executed via the Polkadot XCM Pallet, which utilizes regular mint, burn, and transfer mechanisms of ERC-20s for the XCM asset flow. If you’d like to learn how to send XC-20s using that pallet, refer to the [Using the Polkadot XCM Pallet](/builders/interoperability/xcm/xc20/send-xc20s/xcm-pallet/){target=\_blank} guide. ## Asset Reserves {: #asset-reserves } When transferring tokens across chains in the Polkadot or Kusama ecosystems, each token has a “reserve” chain that holds its canonical ledger—the source of truth for minting, burning, and supply management. For XC-20s, understanding which chain is the reserve determines whether the asset is managed locally on Moonbeam or remotely on another chain. Regardless of where the reserve is located, XC-20s on Moonbeam are still ERC-20 tokens that developers and users can interact with in the EVM. However, from an XCM perspective, the reserve chain determines how the tokens are locked, unlocked, minted, or burned behind the scenes when performing cross-chain operations. ### Local Reserve Assets {: #local-reserve-assets } A local reserve asset on Moonbeam is a token whose canonical ledger—from an XCM perspective—resides natively on Moonbeam. In other words, Moonbeam is the asset’s home chain, where minting and burning take place. For example, Wormhole-wrapped ETH (wETH) is considered a local reserve asset on Moonbeam, even though Ethereum is the ultimate source of ETH. Once ETH is wrapped by Wormhole and enters the Polkadot ecosystem via Moonbeam, wETH can be transferred to other parachains through [Moonbeam Routed Liquidity (MRL)](/builders/interoperability/mrl/){target=\_blank}. The important caveat is that, on a purely Ethereum-level view, ETH remains governed by and minted on Ethereum. However, from an XCM standpoint, wETH on Moonbeam is treated as a local reserve asset, meaning the canonical supply of wETH (as far as Polkadot ecosystems are concerned) exists on Moonbeam. ### Remote Reserve Assets {: #remote-reserve-assets } A remote reserve asset is a token whose canonical ledger—the source of truth for minting and burning—resides on a chain different from where it’s currently in use. In the case of xcDOT on Moonbeam, the underlying DOT tokens representing the xcDOT remain locked in Moonbeam’s sovereign account on the Polkadot relay chain, while xcDOT functions as a wrapped representation in Moonbeam’s EVM environment. Users can hold and transact with xcDOT on Moonbeam (for DeFi, governance, and more), knowing that the underlying DOT is safely locked on the relay chain. At any point, the wrapped xcDOT can be redeemed for the original DOT, effectively burning the xcDOT and unlocking the corresponding DOT tokens on Polkadot. ## Current List of External XC-20s {: #current-xc20-assets } The current list of available external XC-20 assets per network is as follows: === "Moonbeam" | Origin | Symbol | XC-20 Address | |:---------------------:|:---------:|:------------------------------------------------------------------------------------------------------------------------------------:| | Polkadot | xcDOT | [0xFfFFfFff1FcaCBd218EDc0EbA20Fc2308C778080](https://moonscan.io/token/0xFfFFfFff1FcaCBd218EDc0EbA20Fc2308C778080){target=\_blank} | | Acala | xcaUSD | [0xfFfFFFFF52C56A9257bB97f4B2b6F7B2D624ecda](https://moonscan.io/token/0xfFfFFFFF52C56A9257bB97f4B2b6F7B2D624ecda){target=\_blank} | | Acala | xcACA | [0xffffFFffa922Fef94566104a6e5A35a4fCDDAA9f](https://moonscan.io/token/0xffffFFffa922Fef94566104a6e5A35a4fCDDAA9f){target=\_blank} | | Acala | xcLDOT | [0xFFfFfFffA9cfFfa9834235Fe53f4733F1b8B28d4](https://moonscan.io/token/0xFFfFfFffA9cfFfa9834235Fe53f4733F1b8B28d4){target=\_blank} | | Apillon | xcNCTR | [0xFfFFfFfF8A9736B44EbF188972725bED67BF694E](https://moonscan.io/token/0xFfFFfFfF8A9736B44EbF188972725bED67BF694E){target=\_blank} | | Astar | xcASTR | [0xFfFFFfffA893AD19e540E172C10d78D4d479B5Cf](https://moonscan.io/token/0xFfFFFfffA893AD19e540E172C10d78D4d479B5Cf){target=\_blank} | | Bifrost | xcBNC | [0xFFffffFf7cC06abdF7201b350A1265c62C8601d2](https://moonscan.io/token/0xFFffffFf7cC06abdF7201b350A1265c62C8601d2){target=\_blank} | | Bifrost | xcBNCS | [0xfFfffffF6aF229AE7f0F4e0188157e189a487D59](https://moonscan.io/token/0xfFfffffF6aF229AE7f0F4e0188157e189a487D59){target=\_blank} | | Bifrost | xcFIL | [0xfFFfFFFF6C57e17D210DF507c82807149fFd70B2](https://moonscan.io/token/0xfFFfFFFF6C57e17D210DF507c82807149fFd70B2){target=\_blank} | | Bifrost | xcvASTR | [0xFffFffff55C732C47639231a4C4373245763d26E](https://moonscan.io/token/0xFffFffff55C732C47639231a4C4373245763d26E){target=\_blank} | | Bifrost | xcvBNC | [0xffFffFff31d724194b6A76e1d639C8787E16796b](https://moonscan.io/token/0xffFffFff31d724194b6A76e1d639C8787E16796b){target=\_blank} | | Bifrost | xcvDOT | [0xFFFfffFf15e1b7E3dF971DD813Bc394deB899aBf](https://moonscan.io/token/0xFFFfffFf15e1b7E3dF971DD813Bc394deB899aBf){target=\_blank} | | Bifrost | xcvFIL | [0xFffffFffCd0aD0EA6576B7b285295c85E94cf4c1](https://moonscan.io/token/0xFffffFffCd0aD0EA6576B7b285295c85E94cf4c1){target=\_blank} | | Bifrost | xcvGLMR | [0xFfFfFFff99dABE1a8De0EA22bAa6FD48fdE96F6c](https://moonscan.io/token/0xFfFfFFff99dABE1a8De0EA22bAa6FD48fdE96F6c){target=\_blank} | | Bifrost | xcvMANTA | [0xFFfFFfFfdA2a05FB50e7ae99275F4341AEd43379](https://moonscan.io/token/0xFFfFFfFfdA2a05FB50e7ae99275F4341AEd43379){target=\_blank} | | Centrifuge | xcCFG | [0xFFfFfFff44bD9D2FFEE20B25D1Cf9E78Edb6Eae3](https://moonscan.io/token/0xFFfFfFff44bD9D2FFEE20B25D1Cf9E78Edb6Eae3){target=\_blank} | | Composable | xcIBCMOVR | [0xFfFfffFF3AFcd2cAd6174387df17180a0362E592](https://moonscan.io/token/0xFfFfffFF3AFcd2cAd6174387df17180a0362E592){target=\_blank} | | Composable | xcIBCPICA | [0xfFFFFfFFABe9934e61db3b11be4251E6e869cf59](https://moonscan.io/token/0xfFFFFfFFABe9934e61db3b11be4251E6e869cf59){target=\_blank} | | Composable | xcIBCIST | [0xfFfFffff6A3977d5B65D1044FD744B14D9Cef932](https://moonscan.io/token/0xfFfFffff6A3977d5B65D1044FD744B14D9Cef932){target=\_blank} | | Composable | xcIBCBLD | [0xFffFffff9664be0234ea4dc64558F695C4f2A9EE](https://moonscan.io/token/0xFffFffff9664be0234ea4dc64558F695C4f2A9EE){target=\_blank} | | Composable | xcIBCTIA | [0xFFFfFfff644a12F6F01b754987D175F5A780A75B](https://moonscan.io/token/0xFFFfFfff644a12F6F01b754987D175F5A780A75B){target=\_blank} | | Composable | xcIBCATOM | [0xffFFFffF6807D5082ff2f6F86BdE409245e2D953](https://moonscan.io/token/0xffFFFffF6807D5082ff2f6F86BdE409245e2D953){target=\_blank} | | Darwinia | xcRING | [0xFfffFfff5e90e365eDcA87fB4c8306Df1E91464f](https://moonscan.io/token/0xFfffFfff5e90e365eDcA87fB4c8306Df1E91464f){target=\_blank} | | DED | xcDED | [0xfFffFFFf5da2d7214D268375cf8fb1715705FdC6](https://moonscan.io/token/0xfFffFFFf5da2d7214D268375cf8fb1715705FdC6){target=\_blank} | | Equilibrium | xcEQ | [0xFffFFfFf8f6267e040D8a0638C576dfBa4F0F6D6](https://moonscan.io/token/0xFffFFfFf8f6267e040D8a0638C576dfBa4F0F6D6){target=\_blank} | | Equilibrium | xcEQD | [0xFFffFfFF8cdA1707bAF23834d211B08726B1E499](https://moonscan.io/token/0xFFffFfFF8cdA1707bAF23834d211B08726B1E499){target=\_blank} | | HydraDX | xcHDX | [0xFFFfFfff345Dc44DDAE98Df024Eb494321E73FcC](https://moonscan.io/token/0xFFFfFfff345Dc44DDAE98Df024Eb494321E73FcC){target=\_blank} | | Interlay | xcIBTC | [0xFFFFFfFf5AC1f9A51A93F5C527385edF7Fe98A52](https://moonscan.io/token/0xFFFFFfFf5AC1f9A51A93F5C527385edF7Fe98A52){target=\_blank} | | Interlay | xcINTR | [0xFffFFFFF4C1cbCd97597339702436d4F18a375Ab](https://moonscan.io/token/0xFffFFFFF4C1cbCd97597339702436d4F18a375Ab){target=\_blank} | | Manta | xcMANTA | [0xfFFffFFf7D3875460d4509eb8d0362c611B4E841](https://moonscan.io/token/0xfFFffFFf7D3875460d4509eb8d0362c611B4E841){target=\_blank} | | Nodle | xcNODL | [0xfffffffFe896ba7Cb118b9Fa571c6dC0a99dEfF1](https://moonscan.io/token/0xfffffffFe896ba7Cb118b9Fa571c6dC0a99dEfF1){target=\_blank} | | OriginTrail Parachain | xcNEURO | [0xFfffffFfB3229c8E7657eABEA704d5e75246e544](https://moonscan.io/token/0xFfffffFfB3229c8E7657eABEA704d5e75246e544){target=\_blank} | | Parallel | xcPARA | [0xFfFffFFF18898CB5Fe1E88E668152B4f4052A947](https://moonscan.io/token/0xFfFffFFF18898CB5Fe1E88E668152B4f4052A947){target=\_blank} | | Peaq | xcPEAQ | [0xFffFFFFFEC4908b74688a01374f789B48E9a3eab](https://moonscan.io/token/0xFffFFFFFEC4908b74688a01374f789B48E9a3eab){target=\_blank} | | Pendulum | xcPEN | [0xffFFfFFf2257622F345E1ACDe0D4f46D7d1D77D0](https://moonscan.io/token/0xffFFfFFf2257622F345E1ACDe0D4f46D7d1D77D0){target=\_blank} | | Phala | xcPHA | [0xFFFfFfFf63d24eCc8eB8a7b5D0803e900F7b6cED](https://moonscan.io/token/0xFFFfFfFf63d24eCc8eB8a7b5D0803e900F7b6cED){target=\_blank} | | Polkadex | xcPDEX | [0xfFffFFFF43e0d9b84010b1b67bA501bc81e33C7A](https://moonscan.io/token/0xfFffFFFF43e0d9b84010b1b67bA501bc81e33C7A){target=\_blank} | | Polkadot Asset Hub | xcPINK | [0xfFfFFfFf30478fAFBE935e466da114E14fB3563d](https://moonscan.io/token/0xfFfFFfFf30478fAFBE935e466da114E14fB3563d){target=\_blank} | | Polkadot Asset Hub | xcSTINK | [0xFffFffFf54c556bD1d0F64ec6c78f1B477525E56](https://moonscan.io/token/0xFffFffFf54c556bD1d0F64ec6c78f1B477525E56){target=\_blank} | | Polkadot Asset Hub | xcUSDC | [0xFFfffffF7D2B0B761Af01Ca8e25242976ac0aD7D](https://moonscan.io/token/0xFFfffffF7D2B0B761Af01Ca8e25242976ac0aD7D){target=\_blank} | | Polkadot Asset Hub | xcUSDT | [0xFFFFFFfFea09FB06d082fd1275CD48b191cbCD1d](https://moonscan.io/token/0xFFFFFFfFea09FB06d082fd1275CD48b191cbCD1d){target=\_blank} | | Polkadot Asset Hub | xcWIFD | [0xfffffffF2e1D1ac9eA1686255bEfe995B31abc96](https://moonscan.io/token/0xfffffffF2e1D1ac9eA1686255bEfe995B31abc96){target=\_blank} | | Snowbridge | WBTC.e | [0xfFffFFFf1B4Bb1ac5749F73D866FfC91a3432c47](https://moonscan.io/address/0xffffffff1B4BB1AC5749F73D866FFC91A3432C47){target=\_blank} | | Snowbridge | wstETH.e | [0xFfFFFfFF5D5DEB44BF7278DEE5381BEB24CB6573](https://moonscan.io/token/0xFfFFFfFF5D5DEB44BF7278DEE5381BEB24CB6573){target=\_blank} | | Snowbridge | WETH.e | [0xfFffFFFF86829AFE1521AD2296719DF3ACE8DED7](https://moonscan.io/token/0xfFffFFFF86829AFE1521AD2296719DF3ACE8DED7){target=\_blank} | | Subsocial | xcSUB | [0xfFfFffFf43B4560Bc0C451a3386E082bff50aC90](https://moonscan.io/token/0xfFfFffFf43B4560Bc0C451a3386E082bff50aC90){target=\_blank} | | Unique | xcUNQ | [0xFffffFFFD58f77E6693CFB99EbE273d73C678DC2](https://moonscan.io/token/0xFffffFFFD58f77E6693CFB99EbE273d73C678DC2){target=\_blank} | | Zeitgeist | xcZTG | [0xFFFFfffF71815ab6142E0E20c7259126C6B40612](https://moonscan.io/token/0xFFFFfffF71815ab6142E0E20c7259126C6B40612){target=\_blank} | _*You can check each [Asset ID](https://polkadot.js.org/apps/?rpc=wss://wss.api.moonbeam.network#/assets){target=\_blank} on Polkadot.js Apps_ === "Moonriver" | Origin | Symbol | XC-20 Address | |:----------------:|:-------:|:--------------------------------------------------------------------------------------------------------------------------------------------:| | Kusama | xcKSM | [0xFfFFfFff1FcaCBd218EDc0EbA20Fc2308C778080](https://moonriver.moonscan.io/token/0xffffffff1fcacbd218edc0eba20fc2308c778080){target=\_blank} | | Bifrost | xcBNC | [0xFFfFFfFFF075423be54811EcB478e911F22dDe7D](https://moonriver.moonscan.io/token/0xFFfFFfFFF075423be54811EcB478e911F22dDe7D){target=\_blank} | | Bifrost | xcvBNC | [0xFFffffff3646A00f78caDf8883c5A2791BfCDdc4](https://moonriver.moonscan.io/token/0xFFffffff3646A00f78caDf8883c5A2791BfCDdc4){target=\_blank} | | Bifrost | xcvKSM | [0xFFffffFFC6DEec7Fc8B11A2C8ddE9a59F8c62EFe](https://moonriver.moonscan.io/token/0xFFffffFFC6DEec7Fc8B11A2C8ddE9a59F8c62EFe){target=\_blank} | | Bifrost | xcvMOVR | [0xfFfffFfF98e37bF6a393504b5aDC5B53B4D0ba11](https://moonriver.moonscan.io/token/0xfFfffFfF98e37bF6a393504b5aDC5B53B4D0ba11){target=\_blank} | | Calamari | xcKMA | [0xffffffffA083189F870640B141AE1E882C2B5BAD](https://moonriver.moonscan.io/token/0xffffffffA083189F870640B141AE1E882C2B5BAD){target=\_blank} | | Crab | xcCRAB | [0xFFFffFfF8283448b3cB519Ca4732F2ddDC6A6165](https://moonriver.moonscan.io/token/0xFFFffFfF8283448b3cB519Ca4732F2ddDC6A6165){target=\_blank} | | Crust-Shadow | xcCSM | [0xffFfFFFf519811215E05eFA24830Eebe9c43aCD7](https://moonriver.moonscan.io/token/0xffFfFFFf519811215E05eFA24830Eebe9c43aCD7){target=\_blank} | | Heiko | xcHKO | [0xffffffFF394054BCDa1902B6A6436840435655a3](https://moonriver.moonscan.io/token/0xffffffFF394054BCDa1902B6A6436840435655a3){target=\_blank} | | Integritee | xcTEER | [0xFfFfffFf4F0CD46769550E5938F6beE2F5d4ef1e](https://moonriver.moonscan.io/token/0xFfFfffFf4F0CD46769550E5938F6beE2F5d4ef1e){target=\_blank} | | Karura | xcKAR | [0xFfFFFFfF08220AD2E6e157f26eD8bD22A336A0A5](https://moonriver.moonscan.io/token/0xFfFFFFfF08220AD2E6e157f26eD8bD22A336A0A5){target=\_blank} | | Karura | xcaSEED | [0xFfFffFFfa1B026a00FbAA67c86D5d1d5BF8D8228](https://moonriver.moonscan.io/token/0xFfFffFFfa1B026a00FbAA67c86D5d1d5BF8D8228){target=\_blank} | | Khala | xcPHA | [0xffFfFFff8E6b63d9e447B6d4C45BDA8AF9dc9603](https://moonriver.moonscan.io/token/0xffFfFFff8E6b63d9e447B6d4C45BDA8AF9dc9603){target=\_blank} | | Kintsugi | xcKINT | [0xfffFFFFF83F4f317d3cbF6EC6250AeC3697b3fF2](https://moonriver.moonscan.io/token/0xfffFFFFF83F4f317d3cbF6EC6250AeC3697b3fF2){target=\_blank} | | Kintsugi | xckBTC | [0xFFFfFfFfF6E528AD57184579beeE00c5d5e646F0](https://moonriver.moonscan.io/token/0xFFFfFfFfF6E528AD57184579beeE00c5d5e646F0){target=\_blank} | | Kusama Asset Hub | xcRMRK | [0xffffffFF893264794d9d57E1E0E21E0042aF5A0A](https://moonriver.moonscan.io/token/0xffffffFF893264794d9d57E1E0E21E0042aF5A0A){target=\_blank} | | Kusama Asset Hub | xcUSDT | [0xFFFFFFfFea09FB06d082fd1275CD48b191cbCD1d](https://moonriver.moonscan.io/token/0xFFFFFFfFea09FB06d082fd1275CD48b191cbCD1d){target=\_blank} | | Litmus | xcLIT | [0xfffFFfFF31103d490325BB0a8E40eF62e2F614C0](https://moonriver.moonscan.io/token/0xfffFFfFF31103d490325BB0a8E40eF62e2F614C0){target=\_blank} | | Mangata | xcMGX | [0xffFfFffF58d867EEa1Ce5126A4769542116324e9](https://moonriver.moonscan.io/token/0xffFfFffF58d867EEa1Ce5126A4769542116324e9){target=\_blank} | | Picasso | xcPICA | [0xFffFfFFf7dD9B9C60ac83e49D7E3E1f7A1370aD2](https://moonriver.moonscan.io/token/0xFffFfFFf7dD9B9C60ac83e49D7E3E1f7A1370aD2){target=\_blank} | | Robonomics | xcXRT | [0xFffFFffF51470Dca3dbe535bD2880a9CcDBc6Bd9](https://moonriver.moonscan.io/token/0xFffFFffF51470Dca3dbe535bD2880a9CcDBc6Bd9){target=\_blank} | | Shiden | xcSDN | [0xFFFfffFF0Ca324C842330521525E7De111F38972](https://moonriver.moonscan.io/token/0xFFFfffFF0Ca324C842330521525E7De111F38972){target=\_blank} | | Tinkernet | xcTNKR | [0xfFFfFffF683474B842852111cc31d470bD8f5081](https://moonriver.moonscan.io/token/0xffffffff683474b842852111cc31d470bd8f5081){target=\_blank} | | Turing | xcTUR | [0xfFffffFf6448d0746f2a66342B67ef9CAf89478E](https://moonriver.moonscan.io/token/0xfFffffFf6448d0746f2a66342B67ef9CAf89478E){target=\_blank} | _*You can check each [Asset ID](https://polkadot.js.org/apps/?rpc=wss://wss.api.moonriver.moonbeam.network#/assets){target=\_blank} on Polkadot.js Apps_ === "Moonbase Alpha" | Origin | Symbol | XC-20 Address | |:--------------------:|:------:|:-------------------------------------------------------------------------------------------------------------------------------------------:| | Relay Chain Alphanet | xcUNIT | [0xFfFFfFff1FcaCBd218EDc0EbA20Fc2308C778080](https://moonbase.moonscan.io/token/0xFfFFfFff1FcaCBd218EDc0EbA20Fc2308C778080){target=\_blank} | _*You can check each [Asset ID](https://polkadot.js.org/apps/?rpc=wss://wss.api.moonbase.moonbeam.network#/assets){target=\_blank} on Polkadot.js Apps_ ### Retrieve List of External XC-20s and Their Metadata {: #list-xchain-assets } To fetch a list of the currently available external XC-20s along with their associated metadata, you can query the chain state using the [Polkadot.js API](/builders/substrate/libraries/polkadot-js-api/){target=\_blank}. You'll take the following steps: 1. Create an API provider for the network you'd like to get the list of assets for. You can use the following WSS endpoints for each network: === "Moonbeam" ```text wss://wss.api.moonbeam.network ``` === "Moonriver" ```text wss://wss.api.moonriver.moonbeam.network ``` === "Moonbase Alpha" ```text {{ networks.moonbase.wss_url }} ``` 2. Query the `assets` pallet for all assets 3. Iterate over the list of assets to get all of the asset IDs along with their associated metadata ```js import { ApiPromise, WsProvider } from '@polkadot/api'; const getXc20s = async () => { try { const substrateProvider = new WsProvider('INSERT_WSS_ENDPOINT'); const api = await ApiPromise.create({ provider: substrateProvider }); const assets = await api.query.assets.asset.entries(); await Promise.all( assets.map(async ([{ args: [id] }]) => { try { const metadata = await api.query.assets.metadata(id); const humanMetadata = metadata.toHuman(); console.log(`\nAsset ID: ${id}`); console.log('Metadata:'); console.log(' Name:', humanMetadata.name); console.log(' Symbol:', humanMetadata.symbol); console.log(' Decimals:', humanMetadata.decimals); console.log(' Deposit:', humanMetadata.deposit); console.log(' IsFrozen:', humanMetadata.isFrozen); console.log('-----'); } catch (error) { console.error(`Error fetching metadata for asset ${id}:`, error); } }) ); await api.disconnect(); } catch (error) { console.error('Error in getXc20s:', error); } }; getXc20s().catch(console.error); ``` The result will display the asset ID along with some additional information for all of the registered external XC-20s. ## Retrieve Local XC-20 Metadata {: #retrieve-local-xc20-metadata } Since local XC-20s are ERC-20s on Moonbeam that can be transferred via XCM to another parachain, you can interact with local XC-20s like you would an ERC-20. As long as you have the address and the ABI of the ERC-20, you can retrieve its metadata by interacting with its ERC-20 interface to retrieve the name, symbol, and decimals for the asset. The following is an example that retrieves the asset metadata for the [Jupiter token](https://moonbase.moonscan.io/token/0x9aac6fb41773af877a2be73c99897f3ddfacf576){target=\_blank} on Moonbase Alpha: === "Ethers.js" ```js import { ethers } from 'ethers'; const providerRPC = { moonbase: { name: 'moonbase', rpc: 'https://rpc.api.moonbase.moonbeam.network', // Insert your RPC URL here chainId: 1287, // 0x507 in hex, }, }; const provider = new ethers.JsonRpcProvider(providerRPC.moonbase.rpc, { chainId: providerRPC.moonbase.chainId, name: providerRPC.moonbase.name, }); // Replace with the address of the ERC-20 token const tokenAddress = '0x9Aac6FB41773af877a2Be73c99897F3DdFACf576'; const tokenABI = [ 'function name() view returns (string)', 'function symbol() view returns (string)', 'function decimals() view returns (uint8)', ]; const tokenContract = new ethers.Contract(tokenAddress, tokenABI, provider); async function getTokenMetadata() { try { const [name, symbol, decimals] = await Promise.all([ tokenContract.name(), tokenContract.symbol(), tokenContract.decimals(), ]); console.log(`Name: ${name}`); console.log(`Symbol: ${symbol}`); console.log(`Decimals: ${decimals}`); } catch (error) { console.error('Error fetching token metadata:', error); } } getTokenMetadata(); ``` === "Web3.js" ```js import { Web3 } from 'web3'; // Insert your RPC URL here const web3 = new Web3('https://rpc.api.moonbase.moonbeam.network'); // Replace with the address of the ERC-20 token const tokenAddress = '0x9Aac6FB41773af877a2Be73c99897F3DdFACf576'; const tokenABI = [ // ERC-20 ABI { constant: true, inputs: [], name: 'name', outputs: [{ name: '', type: 'string' }], payable: false, stateMutability: 'view', type: 'function', }, { constant: true, inputs: [], name: 'symbol', outputs: [{ name: '', type: 'string' }], payable: false, stateMutability: 'view', type: 'function', }, { constant: true, inputs: [], name: 'decimals', outputs: [{ name: '', type: 'uint8' }], payable: false, stateMutability: 'view', type: 'function', }, ]; const tokenContract = new web3.eth.Contract(tokenABI, tokenAddress); async function getTokenMetadata() { try { const [name, symbol, decimals] = await Promise.all([ tokenContract.methods.name().call(), tokenContract.methods.symbol().call(), tokenContract.methods.decimals().call(), ]); console.log(`Name: ${name}`); console.log(`Symbol: ${symbol}`); console.log(`Decimals: ${decimals}`); } catch (error) { console.error('Error fetching token metadata:', error); } } getTokenMetadata(); ``` === "Web3.py" ```py from web3 import Web3 web3 = Web3(Web3.HTTPProvider("https://rpc.api.moonbase.moonbeam.network")) # Replace with the address of the ERC-20 token token_address = "0x9Aac6FB41773af877a2Be73c99897F3DdFACf576" token_abi = [ # ERC-20 ABI { "constant": True, "inputs": [], "name": "name", "outputs": [{"name": "", "type": "string"}], "payable": False, "stateMutability": "view", "type": "function", }, { "constant": True, "inputs": [], "name": "symbol", "outputs": [{"name": "", "type": "string"}], "payable": False, "stateMutability": "view", "type": "function", }, { "constant": True, "inputs": [], "name": "decimals", "outputs": [{"name": "", "type": "uint8"}], "payable": False, "stateMutability": "view", "type": "function", }, ] token_contract = web3.eth.contract(address=token_address, abi=token_abi) def get_token_metadata(): try: name = token_contract.functions.name().call() symbol = token_contract.functions.symbol().call() decimals = token_contract.functions.decimals().call() print(f"Name: {name}") print(f"Symbol: {symbol}") print(f"Decimals: {decimals}") except Exception as e: print(f"Error fetching token metadata: {e}") get_token_metadata() ``` --- END CONTENT --- Doc-Content: https://docs.moonbeam.network/builders/interoperability/xcm/xc20/send-xc20s/overview/ --- BEGIN CONTENT --- --- title: XC-20 Transfers Overview description: Explore the types of asset transfers and some of the fundamentals of remote asset transfers via XCM, including the XCM instructions for asset transfers. categories: Basics, XC-20 --- # Overview of XC-20 Transfers ## Introduction {: #introduction } Assets can move between parachains using XCM. Two main approaches exist: - **Asset teleporting** – destroys tokens on the reserve chain and mints the same amount on the destination chain. Each chain holds the native asset as a reserve, similar to a burn-mint bridging mechanism. Because each chain can create tokens, a degree of trust is required - **Remote transfers** – moves tokens from the reserve chain to a Sovereign account (an account on the reserve chain trustlessly controlled by the destination chain). The destination chain then mints a wrapped (also called “virtual” or “cross-chain”) representation. This wrapped version is always interchangeable 1:1 with the original asset, functioning like a lock-mint and burn-unlock bridge. The chain where the asset originates is known as the reserve chain  Moonbeam currently uses remote transfers for XC-20 transfers. This page covers the fundamentals of XCM-based remote transfers. To learn how to perform XC-20 transfers, refer to the the [XC-20 transfers via the Substrate API](/builders/interoperability/xcm/xc20/send-xc20s/xcm-pallet/){target=\_blank} guide. ## XCM Instructions for Asset Transfers {: #xcm-instructions-for-asset-transfers } The XCM Pallet and Precompile abstract much of the complexity involved in cross-chain asset transfers, automatically constructing the necessary XCM messages. Nevertheless, having a basic understanding of the underlying instructions can be useful. For reference, you can find the Polkadot XCM Pallet extrinsics for sending XC-20s in the [Using the Polkadot XCM Pallet To Send XC-20s guide](/builders/interoperability/xcm/xc20/send-xc20s/xcm-pallet/){target=_blank}. The instructions in each XCM transfer vary depending on the asset and the transfer route. For example, returning a native token like xcDOT to its reserve chain (from Moonbeam to Polkadot) differs from sending DOT from Polkadot to Moonbeam. Below are examples of the instructions commonly involved in these token transfers. ### Instructions to Transfer a Reserve Asset from the Reserve Chain {: #transfer-native-from-origin } When DOT is transferred from Polkadot to Moonbeam, the following XCM instructions are executed in sequence: 1. [`TransferReserveAsset`](/builders/interoperability/xcm/core-concepts/instructions/#transfer-reserve-asset){target=_blank} - executes on Polkadot, moving the DOT from the sender and depositing it into Moonbeam’s Sovereign account on Polkadot 2. [`ReserveAssetDeposited`](/builders/interoperability/xcm/core-concepts/instructions/#reserve-asset-deposited){target=_blank} - executes on Moonbeam, minting the corresponding ERC-20 representation of DOT (xcDOT) on Moonbeam 3. [`ClearOrigin`](/builders/interoperability/xcm/core-concepts/instructions/#clear-origin){target=_blank} - executes on Moonbeam, clearing any origin data—previously set to Polkadot’s Sovereign account 4. [`BuyExecution`](/builders/interoperability/xcm/core-concepts/instructions/#buy-execution){target=_blank} - executes on Moonbeam, determining the execution fees. Here, a portion of the newly minted xcDOT is used to pay the cost of XCM 5. [`DepositAsset`](/builders/interoperability/xcm/core-concepts/instructions/#deposit-asset){target=_blank} - executes on Moonbeam, delivering the xcDOT to the intended recipient’s account on Moonbeam This process invokes `TransferReserveAsset` with `assets`, `dest`, and `xcm`parameters. Within the `xcm` parameter, you typically specify the `BuyExecution` and `DepositAsset` instructions. As shown in the [`TransferReserveAsset` instruction](https://github.com/paritytech/polkadot-sdk/blob/{{ polkadot_sdk }}/polkadot/xcm/xcm-executor/src/lib.rs#L630){target=\_blank}, the flow also includes `ReserveAssetDeposited` and `ClearOrigin` to complete the transfer. For more information on constructing an XCM message for asset transfers, such as DOT to Moonbeam, refer to the [Polkadot XCM Pallet guide](/builders/interoperability/xcm/xc20/send-xc20s/xcm-pallet/){target=\_blank}. ### Instructions to Transfer a Reserve Asset back to the Reserve Chain {: #transfer-native-to-origin } In scenarios where you want to move an asset back to its reserve chain, such as sending xcDOT from Moonbeam to Polkadot, Moonbeam uses the following set of XCM instructions: 1. [`WithdrawAsset`](/builders/interoperability/xcm/core-concepts/instructions/#withdraw-asset){target=_blank} – executes on Moonbeam, taking the specified token (xcDOT) from the sender 2. [`InitiateReserveWithdraw`](/builders/interoperability/xcm/core-concepts/instructions/#initiate-reserve-withdraw){target=_blank} – executes on Moonbeam, which, burns the token on Moonbeam (removing the wrapped representation), and sends an XCM message to Polkadot, indicating the tokens should be released there 3. [`WithdrawAsset`](/builders/interoperability/xcm/core-concepts/instructions/#withdraw-asset){target=_blank} – executes on Polkadot, removing the tokens from Moonbeam’s Sovereign account on Polkadot 4. [`ClearOrigin`](/builders/interoperability/xcm/core-concepts/instructions/#clear-origin){target=_blank} – gets executed on Polkadot. Clears any origin data (e.g., the Sovereign account on Moonbeam) 5. [`BuyExecution`](/builders/interoperability/xcm/core-concepts/instructions/#buy-execution){target=_blank} – Polkadot determines the execution fees and uses part of the DOT being transferred to pay for them 6. [`DepositAsset`](/builders/interoperability/xcm/core-concepts/instructions/#deposit-asset){target=_blank} – finally, the native DOT tokens are deposited into the specified Polkadot account Steps 3 through 6 are automatically triggered by the `InitiateReserveWithdraw` instruction (step 2) and execute on Polkadot. Once `InitiateReserveWithdraw` is invoked on Moonbeam, the assembled XCM message instructs Polkadot to run those final instructions, completing the cross-chain transfer. In other words, while Moonbeam constructs the XCM instructions behind the scenes, they ultimately execute on Polkadot to complete the asset’s return to its reserve chain. For more information on constructing an XCM message to transfer reserve assets to a target chain, such as xcDOT to Polkadot, you refer to the guide to the [Polkadot XCM Pallet](/builders/interoperability/xcm/xc20/send-xc20s/xcm-pallet/){target=_blank}. !!! note The specific instructions may vary over time, but this overall flow remains consistent: the tokens are withdrawn from the user on Moonbeam, burned from the local representation, and unlocked on the reserve chain. At the end of the process, they become fully accessible again on their reserve chain. --- END CONTENT --- Doc-Content: https://docs.moonbeam.network/node-operators/networks/collators/overview/ --- BEGIN CONTENT --- --- title: Run a Collator Node description: Instructions on how to dive in and become a collator in the Moonbeam Network once you are running a node. categories: Basics, Node Operators and Collators --- # Run a Collator on Moonbeam ## Introduction {: #introduction } Collators are members of the network that maintain the parachains they take part in. They run a full node (for both their particular parachain and the relay chain), and they produce the state transition proof for relay chain validators. There are some [requirements](/node-operators/networks/collators/requirements/){target=\_blank} that need to be considered prior to becoming a collator candidate including machine, bonding, account, and community requirements. Candidates will need a minimum amount of tokens bonded (self-bonded) to be considered eligible. Only a certain number of the top collator candidates by total stake, including self-bonded and delegated stake, will be in the active set of collators. Otherwise, the collator will remain in the candidate pool. Once a candidate is selected to be in the active set of collators, they are eligible to produce blocks. Moonbeam uses the [Nimbus Parachain Consensus Framework](/learn/features/consensus/){target=\_blank}. This provides a two-step filter to allocate candidates to the active set of collators, then assign collators to a block production slot: - The parachain staking filter selects the top candidates in terms of tokens staked in each network. For the exact number of top candidates per each network and the minimum bond amount, you can check out the [Minimum Collator Bond](/node-operators/networks/collators/requirements/#minimum-collator-bond){target=\_blank} section of our documentation. This filtered pool is called selected candidates (also known as the active set), which are rotated every round - The fixed size subset filter picks a pseudo-random subset of the previously selected candidates for each block production slot Users can spin up full nodes on Moonbeam, Moonriver, and Moonbase Alpha and activate the `collate` feature to participate in the ecosystem as collator candidates. To do this, you can checkout the [Run a Node](/node-operators/networks/run-a-node/){target=\_blank} section of the documentation and spin up a node using either [Docker](/node-operators/networks/run-a-node/docker/){target=\_blank} or [Systemd](/node-operators/networks/run-a-node/systemd/){target=\_blank}. ## Join the Discord {: #join-discord } As a collator, it is important to keep track of updates and changes to configuration. It is also important to be able to easily contact us and vice versa in case there is any issue with your node, as that will not only negatively affect collator and delegator rewards, it will also negatively affect the network. For this purpose, we use [Discord](https://discord.com/invite/moonbeam){target=\_blank}. The most relevant Discord channels for collators are the following: - **tech-upgrades-announcements** — here we will publish any updates or changes in configuration changes collators will be required to follow. We will also announce any technical issues to monitor, such as network stalls - **collators** — this is the general collator discussion channel. We are proud of having an active and friendly collator community so if you have any questions, this is the place to ask. We will also ping collators here for any issues that require their attention. - **meet-the-collators** — in this channel you can introduce yourself to potential delegators After you join our Discord, feel free to DM *gilmouta* or *artkaseman* and introduce yourself. This will let us know who to contact if we see an issue with your node, and will also let us assign the relevant Discord collator role, enabling you to post in *meet-the-collators*. --- END CONTENT --- Doc-Content: https://docs.moonbeam.network/node-operators/networks/run-a-node/overview/ --- BEGIN CONTENT --- --- title: Run a Node description: Learn about all of the necessary details to run a full parachain node for the Moonbeam Network to have your RPC endpoint or produce blocks. categories: Basics, Node Operators and Collators --- # Run a Node on Moonbeam ## Introduction {: #introduction } Running a full node on a Moonbeam-based network allows you to connect to the network, sync with a bootnode, obtain local access to RPC endpoints, author blocks on the parachain, and more. There are multiple deployments of Moonbeam, including the Moonbase Alpha TestNet, Moonriver on Kusama, and Moonbeam on Polkadot. Here's how these environments are named and their corresponding [chain specification file](https://docs.polkadot.com/develop/parachains/deployment/generate-chain-specs/) names: | Network | Hosted By | Chain Name | |:--------------:|:-------------------:|:-----------------------------------:| | Moonbase Alpha | Moonbeam Foundation | {{ networks.moonbase.chain_spec }} | | Moonriver | Kusama | {{ networks.moonriver.chain_spec }} | | Moonbeam | Polkadot | {{ networks.moonbeam.chain_spec }} | !!! note Moonbase Alpha is still considered an Alphanet, and as such _will not_ have 100% uptime. The parachain might be purged as needed. During the development of your application, make sure you implement a method to redeploy your contracts and accounts to a fresh parachain quickly. If a chain purge is required, it will be announced via our [Discord channel](https://discord.com/invite/PfpUATX) at least 24 hours in advance. ## Requirements {: #requirements } Running a parachain node is similar to a typical Substrate node, but there are some differences. A Substrate parachain node is a bigger build because it contains code to run the parachain itself, as well as code to sync the relay chain and facilitate communication between the two. As such, this build is quite large and may take over 30 min and require 32GB of memory. The minimum specs recommended to run a node are shown in the following table. For our Kusama and Polkadot MainNet deployments, disk requirements will be higher as the network grows. === "Moonbeam" | Component | Requirement | |:------------:|:--------------------------------------------------------------------------------------------------------------------------:| | **CPU** | {{ networks.moonbeam.node.cores }} Cores (Fastest per core speed) | | **RAM** | {{ networks.moonbeam.node.ram }} GB | | **SSD** | {{ networks.moonbeam.node.hd }} TB (recommended) | | **Firewall** | P2P port must be open to incoming traffic:
- Source: Any
- Destination: 30333, 30334 TCP | === "Moonriver" | Component | Requirement | |:------------:|:--------------------------------------------------------------------------------------------------------------------------:| | **CPU** | {{ networks.moonriver.node.cores }} Cores (Fastest per core speed) | | **RAM** | {{ networks.moonriver.node.ram }} GB | | **SSD** | {{ networks.moonriver.node.hd }} TB (recommended) | | **Firewall** | P2P port must be open to incoming traffic:
- Source: Any
- Destination: 30333, 30334 TCP | === "Moonbase Alpha" | Component | Requirement | |:------------:|:--------------------------------------------------------------------------------------------------------------------------:| | **CPU** | {{ networks.moonbase.node.cores }} Cores (Fastest per core speed) | | **RAM** | {{ networks.moonbase.node.ram }} GB | | **SSD** | {{ networks.moonbase.node.hd }} TB (recommended) | | **Firewall** | P2P port must be open to incoming traffic:
- Source: Any
- Destination: 30333, 30334 TCP | !!! note If you don't see an `Imported` message (without the `[Relaychain]` tag) when running a node, you might need to double-check your port configuration. ## Running Ports {: #running-ports } As stated before, the relay/parachain nodes will listen on multiple ports. The default Substrate ports are used in the parachain, while the relay chain will listen on the next higher port. The only ports that need to be open for incoming traffic are those designated for P2P. **Collators must not have RPC or WS ports opened**. !!! note As of client v0.33.0, the `--ws-port` and `--ws-max-connections` flags have been deprecated and removed in favor of the `--rpc-port` and `--rpc-max-connections` flags for both RPC and WSS connections. The default port is `9944`, and the default maximum number of connections is set to 100. ### Default Ports for a Parachain Full-Node {: #default-ports-for-a-parachain-full-node } | Description | Port | |:--------------:|:-----------------------------------:| | **P2P** | {{ networks.parachain.p2p }} (TCP) | | **RPC & WS** | {{ networks.parachain.ws }} | | **Prometheus** | {{ networks.parachain.prometheus }} | ### Default Ports of Embedded Relay Chain {: #default-ports-of-embedded-relay-chain } | Description | Port | |:--------------:|:-------------------------------------:| | **P2P** | {{ networks.relay_chain.p2p }} (TCP) | | **RPC & WS** | {{ networks.relay_chain.ws }} | | **Prometheus** | {{ networks.relay_chain.prometheus }} | ## Installation {: #installation } There are a couple different guides to help you get started running a Moonbeam-based node: - [Using Docker](/node-operators/networks/run-a-node/docker/) - this method provides a quick and easy way to get started with a Docker container - [Using Systemd](/node-operators/networks/run-a-node/systemd/) - this method is recommended for those with experience compiling a Substrate node ## Debug, Trace and TxPool APIs {: #debug-trace-txpool-apis } You can also gain access to some non-standard RPC methods by running a tracing node, which allow developers to inspect and debug transactions during runtime. Tracing nodes use a different Docker image than a standard Moonbase Alpha, Moonriver, or Moonbeam node. Check out the [Run a Tracing Node](/node-operators/networks/tracing-node/) guide and be sure to switch to the right network tab throughout the instructions. Then to interact with your tracing node, check out the [Debug & Trace](/builders/ethereum/json-rpc/debug-trace/) guide. ## Lazy Loading {: #lazy-loading } Lazy loading lets a Moonbeam node operate while downloading network state in the background, eliminating the need to wait for full synchronization before use. You can activate lazy loading with the following flag: - **`--lazy-loading-remote-rpc`** - allows lazy loading by relying on a specified RPC for network state until the node is fully synchronized e.g. `--lazy-loading-remote-rpc 'INSERT-RPC-URL'` Upon spooling up a node with this feature, you'll see output like the following:
[Lazy loading 🌗]
You are now running the Moonbeam client in lazy loading mode, where data is retrieved
from a live RPC node on demand.
Using remote state from: https://moonbeam.unitedbloc.com
Forking from block: 8482853
To ensure the client works properly, please note the following:
1. *Avoid Throttling*: Ensure that the backing RPC node is not limiting the number of
requests, as this can prevent the lazy loading client from functioning correctly;
2. *Be Patient*: As the client may take approximately 20 times longer than normal to
retrieve and process the necessary data for the requested operation.
The service will start in 10 seconds...
!!! note
Lazy loading a Moonbeam requires a large number of RPC requests. To avoid being rate-limited by a public endpoint, it's highly recommended to use a [dedicated endpoint](/builders/get-started/endpoints#endpoint-providers).
You can further customize your use of the lazy loading functionality with the following optional parameters:
- **`--lazy-loading-block`** - specifies a block hash from which to start loading data. If not provided, the latest block will be used
- **`--lazy-loading-delay-between-requests`** - the delay (in milliseconds) between RPC requests when using lazy loading. This parameter controls the amount of time to wait between consecutive RPC requests. This can help manage request rate and avoid overwhelming the server. Default value is `100` milliseconds
- **`--lazy-loading-max-retries-per-request`** - the maximum number of retries for an RPC request when using lazy loading. Default value is `10` retries
- **`--lazy-loading-runtime-override`** - path to a WASM file to override the runtime when forking. If not provided, it will fetch the runtime from the block being forked
- **`--lazy-loading-state-overrides`** - path to a JSON file containing state overrides to be applied when forking
The state overrides file should define the respective pallet, storage item, and value that you seek to override as follows:
```json
[
{
"pallet": "System",
"storage": "SelectedCandidates",
"value": "0x04f24ff3a9cf04c71dbc94d0b566f7a27b94566cac"
}
]
```
## Logs and Troubleshooting {: #logs-and-troubleshooting }
You will see logs from both the relay chain and the parachain. The relay chain will be prefixed by `[Relaychain]`, while the parachain has no prefix.
### P2P Ports Not Open {: #p2p-ports-not-open }
If you don't see an `Imported` message (without the `[Relaychain]` tag), you need to check the P2P port configuration. P2P port must be open to incoming traffic.
### In Sync {: #in-sync }
Both chains must be in sync at all times, and you should see either `Imported` or `Idle` messages and have connected peers.
### Genesis Mismatching {: #genesis-mismatching }
The Moonbase Alpha TestNet may need to be purged and upgraded once in a while. Consequently, you may see the following message:
```text
DATE [Relaychain] Bootnode with peer id `ID` is on a different
chain (our genesis: GENESIS_ID theirs: OTHER_GENESIS_ID)
```
This typically means that you are running an older version and will need to upgrade.
We announce the upgrades (and corresponding chain purge) via our [Discord channel](https://discord.com/invite/PfpUATX) at least 24 hours in advance.
Instructions for purging chain data will vary slightly depending on how you spun up your node:
- For Docker, you can check out the [Purge Your Node](/node-operators/networks/run-a-node/docker/#purge-your-node) section of the [Using Docker](/node-operators/networks/run-a-node/docker/) page
- For Systemd, you can take a look at the [Purge Your Node](/node-operators/networks/run-a-node/systemd/#purge-your-node) section of the [Using Systemd](/node-operators/networks/run-a-node/systemd/) page
--- END CONTENT ---
## Reference Concepts [shared: true]
The following section contains reference material for Moonbeam.
It includes network endpoints, JSON-RPC methods, and contract or token addresses.
While it may not be required for all use cases, it offers a deeper technical layer for advanced development work.
---
## List of shared concept pages:
## Full content for shared concepts:
Doc-Content: https://docs.moonbeam.network/learn/dapp-directory/
--- BEGIN CONTENT ---
---
title: List your Dapp on the Moonbeam DApp Directory
description: Follow this tutorial to learn how to list your Moonbeam or Moonriver project or update a current listing on the Moonbeam Foundation DApp Directory.
dropdown_description: Explore the DApp Directory and listing process
categories: Reference
---
# How to List your Project on the Moonbeam DApp Directory
## Introduction to the Moonbeam DApp Directory {: #introduction-to-state-of-the-dapps }
The Moonbeam ecosystem comprises two distinct production networks: Moonbeam and Moonriver. Each network has its own dedicated [DApp Directory](https://apps.moonbeam.network/moonbeam/app-dir){target=\_blank}, maintained by the Moonbeam Foundation. These directories categorize projects spanning from DeFi to NFTs to gaming, providing users with comprehensive access to diverse applications.
You'll supply core project details like name, description, and relevant links when adding your project. Depending on your project type, you may include additional data such as on-chain stats and token information.
Despite the distinction between the Moonbeam and Moonriver DApp directories, the submission process remains the same. To list your project on the DApp Directory, you must submit a pull request to the [Moonbeam Foundation's App Directory Data repository on GitHub](https://github.com/moonbeam-foundation/app-directory-data){target=\_blank}. This guide outlines the necessary data and formatting specifics for your submission.
## Overview of the Project Data {: #overview-project-data }
There are four main sources of data that are used for a project's listing in the Moonbeam DApp Directory:
- **Core Project Data** - core project data such as descriptions, logos, and screenshots. This data also includes IDs used to query data from external platforms
- **Active Users and Transaction Volume** - on-chain data based on smart contract activity for all of the contracts associated with the project. Data is discovered via the use of contract labeling in Moonscan, which is then indexed by Web3Go and consumed by the DApp Directory
- **TVL Data** - TVL data for the protocol, sourced from the project's listing on DefiLlama
- **Project Token Information** - token information, which is sourced from the project's listing on CoinGecko
## Prerequisites for Using External Data Sources {: #configuring-external-data-sources }
Before pulling data from the mentioned sources, certain prerequisites must be fulfilled. However, it's worth noting that these steps may not apply to all project types. For instance, in the case of wallets, where there are no smart contracts, the DApp Directory is currently unable to display user and transaction activity data.
### Configure the Data Source for Active Users and Transaction Volume {: #configure-active-users }
For projects that have smart contracts deployed on Moonbeam or Moonriver, it is important that those contracts can be linked to the DApp Directory project data.
The end-to-end flow for linking smart contract activity to the DApp Directory is as follows:
1. The smart contract owner fills in the [form to label contracts on Moonscan](https://moonscan.io/contactus?id=5){target=\_blank}
2. The contracts become labeled in Moonscan
3. Periodically, the entire list of labeled contracts is exported and transmitted to Web3Go to be ingested
4. Every hour, Web3Go loads smart contract activity within Moonbeam and Moonriver and runs a job to index this data by the labels
To get your project's smart contracts properly labeled on [Moonscan](https://moonscan.io){target=\_blank}, please refer to Web3Go's documentation on the [Labeling Structure](https://dinlol.gitbook.io/moonscan-smart-contract-label-for-projects/labeling-structure){target=\_blank} and [How to Submit Contract Information](https://dinlol.gitbook.io/moonscan-smart-contract-label-for-projects/how-to-submit-contract-information){target=\_blank} on Moonscan.
Once you've labeled your smart contracts and are ready to submit your project to the DApp Directory, configuring the Directory to utilize your smart contract data becomes straightforward. You'll only need the **Project** component of your labeled contracts.
Consider the following example project with two smart contracts: a Comptroller and a Router recently updated to a new version.
| Project | Contract Name | Contract Version | Resulting Label |
|:----------:|:-------------:|:----------------:|:--------------------------:|
| My Project | Comptroller | V1 | My Project: Comptroller V1 |
| My Project | Router | V2 | My Project: Router V2 |
To submit your project to the Moonbeam DApp Directory, ensure you have your **Project** name ready, identified here as `My Project`.
If you're ready to add your project to the DApp Directory, skip to the [How to Submit Your Project Listing](#how-to-submit-your-project-listing) section.
### Configure the Data Source for TVL {: #configure-tvl }
If the project represents a DeFi protocol with TVL (whereby value is locked in the protocol's smart contract), it is possible to display TVL in the Moonbeam DApp Directory.
TVL data is pulled from [DefiLlama](https://defillama.com){target=\_blank}, so you must list your project there. To get your project listed, please refer to DefiLlama's documentation on [How to list a DeFi project](https://docs.llama.fi/list-your-project/submit-a-project){target=\_blank}.
After listing your project, you can easily configure the DApp Directory to pull data from DefiLlama. To do so, you'll need the DefiLlama identifier, which you can find in the URL for your protocol's page. For example, the URL for Moonwell's page is `https://defillama.com/protocol/moonwell`, so the identifier is `moonwell`.
If you have the identifier and are ready to submit your project to the Moonbeam DApp Directory, skip to the [How to Submit Your Project Listing](#how-to-submit-your-project-listing) section.
### Configure the Data Source for Project Token Information {: #project-token-information }
If a project has a token, it is possible to display the name of the token, current price, and contract in the DApp Directory.
However, the data is pulled from [CoinGecko](https://www.coingecko.com){target=\_blank}, so the project's token must be listed there. If your token is not listed there, you can complete [CoinGecko's Request Form](https://support.coingecko.com/hc/en-us/requests/new){target=\_blank} to initiate the listing process.
Assuming your project's token is listed there, you must obtain the CoinGecko **API ID** value. You can find the **API ID** value in the **Information** section of the token's page on CoinGecko. For example, the **API ID** on [Moonwell's token page](https://www.coingecko.com/en/coins/moonwell){target=\_blank} is `moonwell-artemis`.
If you have the CoinGecko ID and are ready to submit your project to the Moonbeam DApp Directory, you can continue to the next section.
## How to Submit Your Project Listing {: #how-to-submit-your-project-listing }
As mentioned, you must submit a pull request to the Moonbeam Foundation's GitHub repository that holds the DApp Directory's data. Before getting started, it's worth noting that to expedite the review process, the GitHub user who submits the pull request is recommended to be a major contributor to the project's GitHub so that the Moonbeam Foundation can quickly verify that they represent the project. You can check out the [Review Process](#review-process) section for more information.
To begin, you have two options for adding your project information to the [`app-directory-data` repository on GitHub](https://github.com/moonbeam-foundation/app-directory-data){targe\_blank}. You can utilize [GitHub's browser-based editor](https://github.dev/moonbeam-foundation/app-directory-data){target=\_blank}, which offers a user-friendly interface.
Or you can clone the repository locally and make modifications using your preferred code editor, in which you can use the following command to clone the repository:
```bash
git clone https://github.com/moonbeam-foundation/app-directory-data.git
```
Once you've cloned the project, you can create a new branch to which you will add all of your changes. To do this on the browser-based editor, take the following steps:
1. Click on the current branch name in the bottom left corner
2. A menu will appear at the top of the page. Enter the name of your branch
3. Click **Create new branch...**
The page will reload, and your branch name will now be displayed in the bottom left corner.
### Projects with Deployments on Moonbeam and Moonriver {: #projects-with-deployments }
If a project is deployed to both Moonbeam and Moonriver, there are two different options available:
- Create a separate project structure for each deployment
- Use a single project structure and modify the project data file for both projects
Separate project structures should be used if:
- The two deployments have distinct representations in DefiLlama (i.e., two distinct identifiers)
- The project has two different tokens, one native to Moonbeam and one native to Moonriver
Otherwise, either option may be used.
### Set Up the Folder Structure for Your Project {: #set-up-the-file-structure }
All configurations for each project listed in the DApp Directory are stored in the `projects` folder.
To get started, you must have a name that uniquely and properly identifies your project. Using your project name, you can take the following steps:
1. Create a new directory for your project using your unique project name
2. In your project directory, you'll need to create:
1. A project data file is a JSON file that defines all your project data and contains references to the images stored in the `logos` and `screenshots` folders. The list of fields you can use to define your data, with descriptions, is outlined in the next section. The file must be named using your unique project name
2. A `logos` folder where your project logo images are stored
3. (Optional) A `screenshots` folder where screenshots for the project are stored
??? code "Example folder structure"
```text
my-project
├── my-project.json
├── logos
│ ├── my-project-logo-small.jpeg
│ └── my-project-logo-full.jpeg
└── screenshots
├── my-project-screenshot1-small.jpeg
├── my-project-screenshot1-full.jpeg
├── my-project-screenshot2-small.jpeg
└── my-project-screenshot2-full.jpeg
```
With the foundational file structure in place, you're ready to populate the necessary information for your project submission.
### Add Information to the Project Data File {: #add-information }
Your project's data file is where you'll add all the information for your project. The file permits the following top-level properties:
| You are now running the Moonbeam client in lazy loading mode, where data is retrieved
from a live RPC node on demand.
Using remote state from: https://moonbeam.unitedbloc.com
Forking from block: 8482853
To ensure the client works properly, please note the following:
1. *Avoid Throttling*: Ensure that the backing RPC node is not limiting the number of
requests, as this can prevent the lazy loading client from functioning correctly;
2. *Be Patient*: As the client may take approximately 20 times longer than normal to
retrieve and process the necessary data for the requested operation.
The service will start in 10 seconds...
Property
| Type | Description |
|:--------------------------------------:|:-----------------------------------------------------:|:------------------------------------------------------------------------------------------------------------------------------------------------------------------------------------------------------------------------------------------------------------------------------------------------------------------------------------------------------:|
| `id` | String | Unique identifier for the dApp in the Moonbeam DApp Directory. It should be a unique, human-readable string representing this project. E.g., `my-project` |
| `slug` | String | Identifier used in certain third-party sources. In particular, if the project is listed in DefiLlama, this value should be set to the DefiLlama identifier. See the [Configure the Data Source for TVL](#configure-tvl) section for more information |
| `name` | String | The project name as it will appear in the DApp Directory. E.g., `My Project` |
| `category` | String | The category the project should be associated with. A project can only have one category, and it corresponds to the category list in the left-hand nav of the DApp Directory. See the [Category and Tags](#category-and-tags) section for the accepted list of values |
| `coinGeckoId` | String | If the project has a token listed on CoinGecko, this property should have the **API ID** value corresponding to the given token. See the [Configure the Data Source for Project Token Information](#project-token-information) section for more information |
| `chains` | Array of Strings | List of Moonbeam ecosystem chains on which the project is deployed. Valid values are currently `moonbeam` and `moonriver` |
| `web3goIDs` | Array of Strings | List of Web3Go identifiers for a given dApp. The identifiers should correspond to the **Project** component of the smart contract labels set up in Moonscan. Generally, there should only be one value in the array. See the [Configure the Data Source for Active Users and Transaction Volume](#configure-active-users) section for more information |
| `logo` | Map of Strings to JSON objects | Map of logo image files associated with this project and stored in the `logos` directory. See the [Logos](#logos) section for more information |
| `shortDescription` | String | A short description of the project used in the display card when browsing dapps in the directory. This should be kept to under 80 characters |
| `description` | String | A longer description used in the project detail page. Markdown or similar formatting cannot be used. Line breaks can be used using `\r\n`. The text should be limited to a few paragraphs |
| `tags` | Array of Strings | A list of applicable [tags](#category-and-tags) for this project. Tag values will show up in the project details. See the [Category and Tags](#category-and-tags) section for the accepted list of values |
| `contracts` | Array of contract JSON objects | List of contracts for the project. Currently, this is used only for token contracts. The list of smart contracts which make up the protocol is externally sourced from Moonscan. See the [Contracts](#contracts) section for more information |
| `urls` | Map of Strings (names) to Strings (URLs) | Mapping of URLs for websites and socials associated with the project. See the [URLs](#urls) section for the accepted list of properties |
| `screenshots` | Array of Maps of Strings (size) to image JSON objects | List of screenshot image files associated with this project and stored in the `screenshots` directory. See the [Screenshots](#screenshots) section for more information |
| `projectCreationDate` | int | The date the project was created. Used for sorting purposes in the DApp Directory |
??? code "Example project data file"
```json
{
"id": "moonwell",
"slug": "moonwell",
"name": "Moonwell",
"category": "lending",
"coinGeckoId": "moonwell-artemis",
"chains": [
"moonbeam"
],
"web3goIDs": [
"Moonwell Artemis"
],
"logo": {
"small": {
"fileName": "moonwell-logo-small.jpeg",
"width": 40,
"height": 40,
"mimeType": "image/jpeg"
},
"large": {
"fileName": "moonwell-logo-large.jpeg",
"width": 400,
"height": 400,
"mimeType": "image/jpeg"
},
"full": {
"fileName": "moonwell-logo-full.jpeg",
"width": 3000,
"height": 3000,
"mimeType": "image/jpeg"
}
},
"shortDescription": "Lending, borrowing, and DeFi protocol built on Moonbeam and Moonriver",
"description": "Moonwell is an open lending, borrowing, and decentralized finance protocol built on Moonbeam and Moonriver. Moonwell’s composable design can accommodate a full range of DeFi applications in the greater Polkadot and Kusama (DotSama) ecosystem.\r\n\r\nOur first deployment will be on Kusama’s Moonriver, the sister network of Polkadot’s Moonbeam. Moonriver is where new products are expected to be incubated and developed prior to being deployed on Moonbeam.",
"tags": [
"Lending",
"DeFi"
],
"contracts": [
{
"contract": "0x511ab53f793683763e5a8829738301368a2411e3",
"chain": "moonbeam",
"name": "WELL Token"
}
],
"urls": {
"website": "https://moonwell.fi/",
"try": "https://moonwell.fi/",
"twitter": "https://twitter.com/MoonwellDeFi",
"medium": "https://moonwell.medium.com/",
"telegram": "https://t.me/moonwellfichat",
"github": "https://github.com/moonwell-open-source",
"discord": "https://discord.gg/moonwellfi"
},
"screenshots": [
{
"small": {
"fileName": "moonwell-screenshot-small1.png",
"width": 429,
"height": 200,
"mimeType": "image/png"
},
"full": {
"fileName": "moonwell-screenshot-full1.png",
"width": 514,
"height": 300,
"mimeType": "image/png"
}
},
{
"small": {
"fileName": "moonwell-screenshot-small2.png",
"width": 429,
"height": 200,
"mimeType": "image/png"
},
"full": {
"fileName": "moonwell-screenshot-full2.png",
"width": 1716,
"height": 800,
"mimeType": "image/png"
}
},
{
"small": {
"fileName": "moonwell-screenshot-small3.png",
"width": 429,
"height": 200,
"mimeType": "image/png"
},
"full": {
"fileName": "moonwell-screenshot-full3.png",
"width": 1054,
"height": 637,
"mimeType": "image/png"
}
},
{
"small": {
"fileName": "moonwell-screenshot-small4.png",
"width": 429,
"height": 200,
"mimeType": "image/png"
},
"full": {
"fileName": "moonwell-screenshot-full4.png",
"width": 1365,
"height": 436,
"mimeType": "image/png"
}
}
],
"projectCreationDate": 1644828523000
}
```
#### Category and Tags {: #category-and-tags }
A category is the primary classification for a project. A project can be categorized under only one category, but it can have multiple tags. Ensure you carefully select the most applicable category for your project to ensure it is easily found. Any secondary classifications can be included as a tag.
The currently supported values for `category` are:
```text
- Bridges
- DAO
- DEX
- DeFi
- Gaming
- Lending
- NFTs
- Other
- Social
- Wallets
```
The currently supported values for `tag` are:
```text
- Bridges
- DAO
- DEX
- DeFi
- DePIN
- Developer Tools
- Explorers
- Files
- GLMR Grants
- Gaming
- Infrastructure
- IoT
- Lending
- MOVR Grants
- Messaging
- NFT
- NFT Marketplaces
- On-ramp
- Other
- Social
- Tool
- VPN
- Wallets
- ZeroTrust
```
#### URLs {: #urls }
The `urls` property name/value pairs are used so a project can provide links to their website, socials, etc.
The following table lists the supported `urls` properties:
| Property Name | Description | Example |
|:-------------:|:------------------------------------------------------------------------------------------------------------------:|:-----------------------------------------------:|
| `website` | The main website for the project | https://moonbeam.network/ |
| `try` | URL a user should visit if they want to try out the dApp. Typically, this page will have a link to launch the dApp | https://moonbeam.network/ |
| `twitter` | The project's Twitter profile | https://twitter.com/MoonbeamNetwork |
| `medium` | The project's Medium site | https://medium.com/moonbeam-network |
| `telegram` | The project's Telegram | https://t.me/Moonbeam_Official |
| `github` | The project's GitHub repository | https://github.com/moonbeam-foundation/moonbeam |
| `discord` | The project's Discord | https://discord.com/invite/PfpUATX |
The format of the property name/value pairs should follow the JSON standard, for example:
```json
"urls": {
"website": "https://moonbeam.network/",
"try": "https://docs.moonbeam.network/",
"twitter": "https://twitter.com/MoonbeamNetwork"
}
```
#### Logos {: #logos }
The `logos` property of the main project data file is a map of image sizes (i.e., `small`, `large`, `full`) to corresponding image JSON objects. The image JSON object contains the display properties for the given image.
The following table lists the properties of the image JSON object:
| Property | Type | Description |
|:----------:|:------:|:--------------------------------------------------------------------------------------------------------------------------------------------------------:|
| `fileName` | String | The name of the image file (unqualified) stored in the `logos` directory |
| `width` | int | The width of the logo image in pixels |
| `height` | int | The height of the logo image in pixels |
| `mimeType` | String | The standard [MIME type](https://developer.mozilla.org/en-US/docs/Web/HTTP/Guides/MIME_types){target=\_blank} of the file. E.g., `"image/jpeg"` |
Currently, only the `small` size is utilized, and the dimensions for small logos should be 40x40 pixels.
Here is an example showing the structure of the `logo` property that supplies `small` and `full` logos:
```json
"logo": {
"small": {
"fileName": "my-project-logo-small.jpeg",
"width": 40,
"height": 40,
"mimeType": "image/jpeg"
},
"full": {
"fileName": "my-project-logo-full.jpeg",
"width": 3000,
"height": 3000,
"mimeType": "image/jpeg"
}
}
```
#### Screenshots {: #screenshots }
The `screenshots` property of the main project data file is an array of maps. Each map in the array is for a specific screenshot.
However, different-sized images for each screenshot should be supplied so that different sizes can be used in different contexts (e.g., thumbnails vs full-sized images). Thus, for each screenshot, there is a map of image sizes (i.e., `small`, `large`, `full`) to corresponding image JSON objects. The image JSON object contains the display properties for the given image.
The following table lists the properties of the image JSON object:
| Property | Type | Description |
|:----------:|:------:|:--------------------------------------------------------------------------------------------------------------------------------------------------------:|
| `fileName` | String | The name of the image file (unqualified) stored in the `screenshots` directory |
| `width` | int | The width of the logo image in pixels |
| `height` | int | The height of the logo image in pixels |
| `mimeType` | String | The standard [MIME type](https://developer.mozilla.org/en-US/docs/Web/HTTP/Guides/MIME_types){target=\_blank} of the file. E.g., `"image/jpeg"` |
Here is an example showing the structure of the `screenshot` property for two screenshots (`screenshot1` and `screenshot2`):
```json
"screenshots": [
{
"small": {
"fileName": "my-project-screenshot1-small.png",
"width": 429,
"height": 200,
"mimeType": "image/png"
},
"full": {
"fileName": "my-project-screenshot1-full.png",
"width": 514,
"height": 300,
"mimeType": "image/png"
}
},
{
"small": {
"fileName": "my-project-screenshot2-small.png",
"width": 429,
"height": 200,
"mimeType": "image/png"
},
"full": {
"fileName": "my-project-screenshot2-full.png",
"width": 1716,
"height": 800,
"mimeType": "image/png"
}
}
]
```
#### Contracts {: #contracts }
A list of contracts for the project. Currently, this is used only for token contracts.
The smart contracts that make up the protocol are sourced from [Moonscan](https://moonscan.io){target=\_blank} based on tagging, so they do not need to be listed here. If you have not properly labeled your contracts or are unsure if they are labeled according to the Moonbeam community standard, please refer to the [Configure the Data Source for Active Users and Transaction Volume](#configure-active-users) section.
The following table lists the properties found in the contract JSON object:
| Property | Type | Description |
|:----------:|:------:|:-----------------------------------------------------------------------------:|
| `contract` | String | The address for the smart contract |
| `chain` | String | The chain on which the contract is deployed (i.e., `moonbeam` or `moonriver`) |
| `name` | String | The name of the contract |
Here is a `contracts` array with a single smart contract for the WGLMR token:
```json
"contracts": [
{
"contract": "0xAcc15dC74880C9944775448304B263D191c6077F",
"chain": "moonbeam",
"name": "Wrapped GLMR Token"
}
]
```
### Submit a Pull Request {: #submit-a-pull-request }
After you've populated the project data file and added your logos and screenshots, you should be ready to submit your pull request.
From the web-based editor, take the following steps to commit your changes to the `app-directory-data` repository:
1. Click on the **Source Control** tab, which should show you how many pages have been added or changed
2. Review the files under the **Changes** section. Click the **+** button next to **Changes**, or as you review each file, click the **+** button next to the file name to add them to the list of **Staged Changes**
All of your files should now be under the **Staged Changes** section. All you have to commit and push the changes are:
1. Enter a descriptive commit message, such as "Add My Project", making sure to use your actual project name
2. Click **Commit & Push**
Now that you've committed the changes, you'll need to head over to the [`app-directory-data` repository](https://github.com/moonbeam-foundation/app-directory-data){target=\_blank} and open a pull request against the `develop` branch:
1. At the top of the repository page, click **Compare and Pull** button displayed on the banner, or
2. If the banner is not there anymore, you'll need to select your branch from the branches dropdown
3. Click the **Contribute** dropdown
4. Click the **Open pull request** button
You'll be taken to the **Comparing changes** page, where you'll need to:
1. Make sure that you are merging your branch into the `develop` branch, which is the **base** branch
2. Add a title
3. Add a description of the changes
4. Click **Create pull request**
### The Review Process {: #review-process }
Submitted pull requests will be reviewed bi-weekly by the Moonbeam Foundation. During the review, and especially for new projects, the Foundation may have to verify that the GitHub user who created the pull request is a contributor and/or represents the specific project. One way projects can expedite this process is if the submitter's GitHub account is also a major contributor to the project itself on GitHub. Alternatively, teams should leave a note in the pull request comments indicating how we can get in touch with project team members to verify.
A comment will be added to the pull request if any changes are requested. After your pull request has been approved, it will be merged, and your project will be added to the Moonbeam DApp Directory!
## How to Update Your Project Listing {: #how-to-update-your-project-listing }
As your project evolves, you may need to update your project's listing or images related to your listing. You can create a new branch for your changes, find and modify your existing project's data from the root `projects` directory, and make the desired changes.
If you are no longer using a logo or screenshot, please remember to remove it from the `logos` or `screenshots` directory.
Once your changes have been made, you must follow the same instructions in the [Submit a Pull Request](#submit-a-pull-request) section so the changes can be [reviewed](#review-process) by the Moonbeam Foundation. Please note that pull requests are reviewed on a bi-weekly basis, so if the update is urgent, you can create a [forum post](https://forum.moonbeam.network){target=\_blank} asking for assistance.
## DApp Directory API {: #dapp-directory-api }
The DApp Directory also features a queryable API that you can use to integrate data from Moonbeam's DApp Directory into your application. The API is public and currently does not require authentication. The base URL for the API is as follows:
```bash
https://apps.moonbeam.network/api/ds/v1/app-dir/
```
### Query a Project {: #query-a-project}
You can retrieve all the information for a particular project by appending `/projects/INSERT_PROJECT_NAME` to the base URL. If you need clarification on the project name, you can omit the project name as shown below to retrieve data for every listed project and find the project in the response.
```bash
https://apps.moonbeam.network/api/ds/v1/app-dir/projects
```
Here's an example of querying the API for StellaSwap, which returns the project description, social media information, user counts, relevant smart contract addresses, market data, images, and more.
```bash
https://apps.moonbeam.network/api/ds/v1/app-dir/projects/stellaswap
```
You can visit the query URL directory in the browser, using a tool like Postman, or directly from the command line with Curl as follows:
```bash
curl -H "Content-Type: application/json" -X GET 'https://apps.moonbeam.network/api/ds/v1/app-dir/projects/stellaswap'
```
??? code "API Response to Querying StellaSwap"
```json
{
"project":{
"currentTx":{
"moonbeam":2883079
},
"web3goIDs":[
"StellaSwap"
],
"name":"StellaSwap",
"currentTVL":{
"moonbeam":5046832.23328
},
"currentUsers":{
"moonbeam":52455
},
"coinGeckoId":"stellaswap",
"shortDescription":"The leading DEX and DeFi gateway on Moonbeam",
"id":"stellaswap",
"featured":true,
"tags":[
"DEX",
"DeFi"
],
"tvlChange7d":{
"moonbeam":-1.61482567543498
},
"urls":{
"telegram":"https://t.me/stellaswap",
"website":"https://stellaswap.com/",
"try":"https://stellaswap.com/",
"twitter":"https://twitter.com/StellaSwap",
"github":"https://github.com/stellaswap",
"medium":"https://stellaswap.medium.com/"
},
"web3goContracts":[
{
"name":"StellaSwap: stDOT Oracle Master",
"chain":"moonbeam",
"contract":"0x3b23f0675ffc45153eca239664ccaefc5e816b9c"
},
{
"name":"StellaSwap: stDOT Token",
"chain":"moonbeam",
"contract":"0xbc7e02c4178a7df7d3e564323a5c359dc96c4db4"
},
{
"name":"StellaSwap: stDOT Controller",
"chain":"moonbeam",
"contract":"0x002d34d6a1b4a8e665fec43fd5d923f4d7cd254f"
},
{
"name":"StellaSwap: stDOT Proxy Admin",
"chain":"moonbeam",
"contract":"0xe8a5c0039226269313c89c093a6c3524c4d39fa4"
},
{
"name":"StellaSwap: madUSDC GLMR V2",
"chain":"moonbeam",
"contract":"0x2ad0e92461df950e2b1c72e2f7a865c81eaa3ce6"
},
{
"name":"StellaSwap: Dual ETH - GLMR Rewarder V1",
"chain":"moonbeam",
"contract":"0x2ba130297d1966e077c2fb5e4b434e8802925277"
},
{
"name":"StellaSwap: BCMC Rewarder V1",
"chain":"moonbeam",
"contract":"0x18e75887aa81e113636e18d5a78e3ff93787ec88"
},
{
"name":"StellaSwap: Pulsar Position Manager V1",
"chain":"moonbeam",
"contract":"0x1ff2adaa387dd27c22b31086e658108588eda03a"
},
{
"name":"StellaSwap: DualETH Pool LP Token V1",
"chain":"moonbeam",
"contract":"0xa3ee3a0a36dc915fdc93062e4b386df37d00217e"
},
{
"name":"StellaSwap: Interlay Rewarder V1",
"chain":"moonbeam",
"contract":"0x3a7572220afaddc31a72a520642111776d92b2d2"
},
{
"name":"StellaSwap: Router V1",
"chain":"moonbeam",
"contract":"0xd0a01ec574d1fc6652edf79cb2f880fd47d34ab1"
},
{
"name":"StellaSwap: xStella - GLMR Rewarder 2nd V1",
"chain":"moonbeam",
"contract":"0xb4dba7fe6fcc613963d64204fcf789e9e376679a"
},
{
"name":"StellaSwap: GLMR Rewarder First V1",
"chain":"moonbeam",
"contract":"0x69f9d134991e141c4244f397514ba05d67861cc0"
},
{
"name":"StellaSwap: CELER Rewarder 0 V1",
"chain":"moonbeam",
"contract":"0xbebd88782a1145b71df3f4986ef7686154ce01d9"
},
{
"name":"StellaSwap: MATICILO V1",
"chain":"moonbeam",
"contract":"0xfffa340944ff32f50c7935e2b5d22a7c3393b313"
},
{
"name":"StellaSwap: ETHmad - GLMR V1",
"chain":"moonbeam",
"contract":"0x9fe074a56ffa7f4079c6190be6e8452911b7e349"
},
{
"name":"StellaSwap: STELLA Token",
"chain":"moonbeam",
"contract":"0x0e358838ce72d5e61e0018a2ffac4bec5f4c88d2"
},
{
"name":"StellaSwap: SFL - 4pool Wormhole V1",
"chain":"moonbeam",
"contract":"0xb1bc9f56103175193519ae1540a0a4572b1566f6"
},
{
"name":"StellaSwap: BICO Trusted Forwarder V1",
"chain":"moonbeam",
"contract":"0x3d08ce1f9609bb02f47192ff620634d9eb0e7b56"
},
{
"name":"StellaSwap: Gass Refund V1",
"chain":"moonbeam",
"contract":"0xee42d4861b56b32776e6fe9a2fe122af0e3f4a33"
},
{
"name":"StellaSwap: xcDOT - GLMR V1",
"chain":"moonbeam",
"contract":"0xe76215efea540ea87a2e1a4bf63b1af6942481f3"
},
{
"name":"StellaSwap: 4pool LP V1",
"chain":"moonbeam",
"contract":"0xda782836b65edc4e6811c7702c5e21786203ba9d"
},
{
"name":"StellaSwap: SFL LP V1",
"chain":"moonbeam",
"contract":"0xa0aa99f71033378864ed6e499eb03612264e319a"
},
{
"name":"StellaSwap: SFL - 4pool V1",
"chain":"moonbeam",
"contract":"0x422b5b7a15fb12c518aa29f9def640b4773427f8"
},
{
"name":"StellaSwap: Acala - GLMR Rewarder V1",
"chain":"moonbeam",
"contract":"0x9de8171bebfa577d6663b594c60841fe096eff97"
},
{
"name":"StellaSwap: Zap V1",
"chain":"moonbeam",
"contract":"0x01834cf26717f0351d9762cc9cca7dc059d140df"
},
{
"name":"StellaSwap: GLMR Rewarder for UST - GLMR V1",
"chain":"moonbeam",
"contract":"0xc85ddcff71200f9673137e2f93ce504bdbf7db4e"
},
{
"name":"StellaSwap: xStella Token",
"chain":"moonbeam",
"contract":"0x06a3b410b681c82417a906993acefb91bab6a080"
},
{
"name":"StellaSwap: ETHmad - GLMR V2",
"chain":"moonbeam",
"contract":"0xa6ec79c97e533e7bddb00898e22c6908742e039b"
},
{
"name":"StellaSwap: WBTC - USDT Contract V1",
"chain":"moonbeam",
"contract":"0xcae51da6dceacd84f79df4b88d9f92035d1479e9"
},
{
"name":"StellaSwap: AVAXILO V1",
"chain":"moonbeam",
"contract":"0x96bef4719ae7c053113292e6aa7fc36e62b243e8"
},
{
"name":"StellaSwap: Swap For Gas V1",
"chain":"moonbeam",
"contract":"0xb64dee2d182fed3dd6c273303fb08f11808c9c23"
},
{
"name":"StellaSwap: Farming Centre V1",
"chain":"moonbeam",
"contract":"0x0d4f8a55a5b2583189468ca3b0a32d972f90e6e5"
},
{
"name":"StellaSwap: FTMILO V1",
"chain":"moonbeam",
"contract":"0x096352f7ea415a336b41fc48b33142eff19a8ad8"
},
{
"name":"StellaSwap: Acala Rewarder V1",
"chain":"moonbeam",
"contract":"0xb7b5d3659ad213478bc8bfb94d064d0efdda8f7c"
},
{
"name":"StellaSwap: USDC Rewarder V1",
"chain":"moonbeam",
"contract":"0xa52123adc0bc5c4c030d1ff4f5dad966366a646c"
},
{
"name":"StellaSwap: Vault V1",
"chain":"moonbeam",
"contract":"0x54e2d14df9348b3fba7e372328595b9f3ae243fe"
},
{
"name":"StellaSwap: CELER Rewarder 1 V1",
"chain":"moonbeam",
"contract":"0x70cbd76ed57393e0cd81e796de850080c775d24f"
},
{
"name":"StellaSwap: Stella Timelock V1",
"chain":"moonbeam",
"contract":"0xc6f73b028cd3154a5bb87f49aa43aa259a6522fb"
},
{
"name":"StellaSwap: GLMR - MAI Vault V1",
"chain":"moonbeam",
"contract":"0x3a82f4da24f93a32dc3c2a28cfa9d6e63ec28531"
},
{
"name":"StellaSwap: UST - GLMR V1",
"chain":"moonbeam",
"contract":"0x556d9c067e7a0534564d55f394be0064993d2d3c"
},
{
"name":"StellaSwap: SFL - axlUSDC - 4pool V1",
"chain":"moonbeam",
"contract":"0xa1ffdc79f998e7fa91ba3a6f098b84c9275b0483"
},
{
"name":"StellaSwap: Stable Router V1",
"chain":"moonbeam",
"contract":"0xb0dfd6f3fddb219e60fcdc1ea3d04b22f2ffa9cc"
},
{
"name":"StellaSwap: ATOM - GLMR Rewarder New V1",
"chain":"moonbeam",
"contract":"0x5aa224966e302424ec13a4f51b80bcfc205984b6"
},
{
"name":"StellaSwap: CELR Rewarder V1",
"chain":"moonbeam",
"contract":"0x05ad30253f0b20be35d84253d6aca8bd7ec0c66c"
},
{
"name":"StellaSwap: Router V3",
"chain":"moonbeam",
"contract":"0xe6d0ed3759709b743707dcfecae39bc180c981fe"
},
{
"name":"StellaSwap: xStella - GLMR Rewarder V1",
"chain":"moonbeam",
"contract":"0x896135ff51debe8083a2e03f9d44b1d3c77a0324"
},
{
"name":"StellaSwap: XStella - MAI Vault V1",
"chain":"moonbeam",
"contract":"0x3756465c5b1c1c4cee473880c9726e20875284f1"
},
{
"name":"StellaSwap: ATOM - USDC Rewarder New V1",
"chain":"moonbeam",
"contract":"0x5546e272c67fac10719f1223b1c0212fa3e41a8f"
},
{
"name":"StellaSwap: SFL - athUSDC - 4pool V1",
"chain":"moonbeam",
"contract":"0x715d7721fa7e8616ae9d274704af77857779f6f0"
},
{
"name":"StellaSwap: IDO Locker V1",
"chain":"moonbeam",
"contract":"0x4b1381b5b959a8ba7f44414c7d758e53d500a8a9"
},
{
"name":"StellaSwap: Locker V1",
"chain":"moonbeam",
"contract":"0x8995066b7f1fb3abe3c88040b677d03d607a0b58"
},
{
"name":"StellaSwap: ATOM - USDC - GLMR Rewarder V1",
"chain":"moonbeam",
"contract":"0xe06e720aaed5f5b817cb3743108ae0a12fe69e9b"
},
{
"name":"StellaSwap: Mistake in Rewarder V1",
"chain":"moonbeam",
"contract":"0x168ceb7e49c21e3f37820a34590171214a765f5f"
},
{
"name":"StellaSwap: LP 4pool - Wormhole V1",
"chain":"moonbeam",
"contract":"0xb326b5189aa42acaa3c649b120f084ed8f4dcaa6"
},
{
"name":"StellaSwap: Farms V1",
"chain":"moonbeam",
"contract":"0xedfb330f5fa216c9d2039b99c8ce9da85ea91c1e"
},
{
"name":"StellaSwap: Factory V1",
"chain":"moonbeam",
"contract":"0x68a384d826d3678f78bb9fb1533c7e9577dacc0e"
},
{
"name":"StellaSwap: anyETH-madETH Pool",
"chain":"moonbeam",
"contract":"0xb86271571c90ad4e0c9776228437340b42623402"
},
{
"name":"StellaSwap: Dual Farms V2",
"chain":"moonbeam",
"contract":"0xf3a5454496e26ac57da879bf3285fa85debf0388"
},
{
"name":"StellaSwap: CELER Rewarder 01 - 02 V1",
"chain":"moonbeam",
"contract":"0x713f76076283fcd81babe06c76ff51485edf9d5e"
},
{
"name":"StellaSwap: SCNFT Token",
"chain":"moonbeam",
"contract":"0x5f23a6a0b6b90fdeeb4816afbfb2ec0408fda59e"
},
{
"name":"StellaSwap: ATOM - GLMR - GLMR Rewarder V1",
"chain":"moonbeam",
"contract":"0xe60c41de5537418fde05b804df077397dfa84d75"
},
{
"name":"StellaSwap: Timelock Main V1",
"chain":"moonbeam",
"contract":"0x9a8693c6f7bf0f44e885118f3f83e2cdb4e611b8"
},
{
"name":"StellaSwap: MAI - B4P - Wormhole V1",
"chain":"moonbeam",
"contract":"0xf0a2ae65342f143fc09c83e5f19b706abb37414d"
},
{
"name":"StellaSwap: LP Token V1",
"chain":"moonbeam",
"contract":"0x7b17122b941d2173192c7d8d68faabdc88421326"
},
{
"name":"StellaSwap: Multisig V1",
"chain":"moonbeam",
"contract":"0x4300e09284e3bb4d9044ddab31efaf5f3301daba"
},
{
"name":"StellaSwap: Router V2",
"chain":"moonbeam",
"contract":"0x70085a09d30d6f8c4ecf6ee10120d1847383bb57"
},
{
"name":"StellaSwap: DOTxc - GLMR V1",
"chain":"moonbeam",
"contract":"0x505b0a5458dd12605b84bb2928dd2bc5b44993b9"
},
{
"name":"StellaSwap: SFL - MAI - 4pool V1",
"chain":"moonbeam",
"contract":"0x7fbe3126c03444d43fc403626ec81e3e809e6b46"
},
{
"name":"StellaSwap: xStella - USDC Rewarder V1",
"chain":"moonbeam",
"contract":"0xfa16d5b8bf03677945f0a750c8d2a30001b2fa93"
},
{
"name":"StellaSwap: madUSDC - GLMR V1",
"chain":"moonbeam",
"contract":"0x9200cb047a9c4b34a17ccf86334e3f434f948301"
}
],
"slug":"stellaswap",
"createdAt":1699292612617,
"tvlChange1d":{
"moonbeam":-0.748278690902012
},
"logo":{
"small":{
"width":36,
"fileName":"stellaswap-logo-small.jpeg",
"mimeType":"image/jpeg",
"height":36
},
"large":{
"width":510,
"fileName":"stellaswap-logo-large.jpeg",
"mimeType":"image/jpeg",
"height":510
},
"full":{
"width":3000,
"fileName":"stellaswap-logo-full.jpeg",
"mimeType":"image/jpeg",
"height":3000
}
},
"chains":[
"moonbeam"
],
"usersChange7d":{
"moonbeam":-17.2727272727273
},
"marketData":{
"symbol":"stella",
"marketCap":808908,
"marketCapRank":2865,
"priceChangePercentage1y":-43.01356,
"currentPrice":0.01729378,
"priceChangePercentage14d":-17.23772,
"contracts":{
"moonbeam":"0x0e358838ce72d5e61e0018a2ffac4bec5f4c88d2"
},
"priceChangePercentage60d":-39.75633,
"priceChangePercentage30d":-26.13934,
"priceChangePercentage24h":-4.63782,
"priceChangePercentage200d":-74.57003,
"marketCapChangePercentage24h":-4.62971,
"priceChange24h":-0.0008410608839097,
"marketCapChange24h":-39268.122562502,
"priceChangePercentage7d":-7.91278
},
"projectCreationDate":1644828523000,
"contracts":[
{
"chain":"moonbeam",
"contract":"0x0e358838ce72d5e61e0018a2ffac4bec5f4c88d2"
}
],
"updatedAt":1722544694830,
"category":"dex",
"description":"StellaSwap is one of the first automated market-making (AMM), decentralized exchange (DEX) for the Moonbeam parachain network. The unique value proposition of StellaSwap is that we're committed in establishing a strong foundation with our native token, STELLA, as a governance token, diverse farms, a built in bridge and user-centered service. \r\n\r\nStellaSwap's main objective is to create a broader range of network effects to address the issues of liquidity in the DeFi space, instead of limiting ourselves to a single solution like many DEXs are doing now. This manifests itself in the diverse product suite of StellaSwap that will be explained in more details. Our products are structured in such a way that facilitates decentralized governance of STELLA holders, while continuing to innovate on the collective foundations by design.",
"usersChange1d":{
"moonbeam":-6.18556701030928
}
}
}
```
### Query a Category {: #query-a-category}
You can also query the API by [category](#category-and-tags). For example, you can retrieve information about all NFT projects with the following query:
```bash
https://apps.moonbeam.network/api/ds/v1/app-dir/projects?category=nfts
```
??? code "API Response to Querying NFT projects"
```json
{
"projects":[
{
"urls":{
"telegram":"https://t.me/nfts2me",
"website":"https://nfts2me.com/",
"try":"https://nfts2me.com/",
"twitter":"https://twitter.com/nfts2me",
"medium":"https://nfts2me.medium.com/",
"discord":"https://nfts2me.com/discord/"
},
"slug":"nfts2me",
"createdAt":1699292617117,
"logo":{
"small":{
"width":36,
"fileName":"nfts2me-logo-small.jpeg",
"mimeType":"image/jpeg",
"height":36
},
"large":{
"width":512,
"fileName":"nfts2me-logo-large.jpeg",
"mimeType":"image/jpeg",
"height":512
},
"full":{
"width":3000,
"fileName":"nfts2me-logo-full.jpeg",
"mimeType":"image/jpeg",
"height":3000
}
},
"name":"NFTs2Me",
"chains":[
"moonbeam"
],
"defiLLamaTvlExist":false,
"projectCreationDate":1673608509000,
"shortDescription":"NFTs2Me is a toolkit for creating and managing NFT projects.",
"contracts":[
{
"chain":"moonbeam",
"contract":"0x2269bCeB3f4e0AA53D2FC43B1B7C5C5D13B119a5"
}
],
"updatedAt":1722498896566,
"category":"nfts",
"description":"NFTs2Me is a tool for creating and managing NFT projects. It includes features such as an art generator, delayed reveal, minting widget, token gating, and support for multiple blockchain platforms. It also offers customization options, an affiliate system, automatic logo and banner generation, and support for redeemable NFTs. It is user-friendly and suitable for those new to the world of NFTs.\n\nIn addition to these features, NFTs2Me also offers a minting widget and free IPFS hosting to make it simple to mint and store your NFTs securely and efficiently. The minting widget allows you to easily create and mint new NFTs, while the free IPFS hosting provides a secure and decentralized way to store your NFTs.",
"id":"nfts2me",
"tags":[
"NFT",
"Tool"
]
},
{
"urls":{
"telegram":"https://t.me/rmrkapp",
"website":"https://singular.app/",
"try":"https://singular.app/",
"twitter":"https://twitter.com/RmrkSingular",
"discord":"https://discord.gg/TjB6v5AGZz"
},
"slug":"singular-app",
"createdAt":1699292616171,
"logo":{
"small":{
"width":36,
"fileName":"singular-app-logo-small.png",
"mimeType":"image/png",
"height":36
},
"large":{
"width":400,
"fileName":"singular-app-logo-large.png",
"mimeType":"image/png",
"height":400
},
"full":{
"width":3000,
"fileName":"singular-app-logo-full.png",
"mimeType":"image/png",
"height":3000
}
},
"name":"Singular App",
"chains":[
"moonbeam"
],
"defiLLamaTvlExist":false,
"projectCreationDate":1686240710000,
"shortDescription":"The home of NFTs by @RmrkApp. Create and trade your nestable, equippable, soulbound, and multi-asset NFTs with us - no coding required.",
"contracts":[
],
"updatedAt":1722498914806,
"category":"nfts",
"description":"Singular is an NFT 2.0 marketplace that allows users to buy, sell, and trade both regular and advanced NFTs. Users can create and/or connect a wallet, browse digital items, and securely conduct transactions using blockchain technology.",
"id":"singular-app",
"tags":[
"NFT Marketplaces"
]
},
{
"urls":{
"telegram":"https:/t.me/metacourtgg",
"website":"https://www.metacourt.gg/",
"try":"https://www.metacourt.gg/",
"twitter":"https://twitter.com/metacourtgg",
"medium":"https://metacourtgg.medium.com/",
"discord":"https://discord.gg/9AnnfKCb39"
},
"slug":"metacourt",
"createdAt":1699292616238,
"logo":{
"small":{
"width":36,
"fileName":"metacourt-logo-small.jpeg",
"mimeType":"image/jpeg",
"height":36
},
"large":{
"width":512,
"fileName":"metacourt-logo-large.jpeg",
"mimeType":"image/jpeg",
"height":512
},
"full":{
"width":3000,
"fileName":"metacourt-logo-full.jpeg",
"mimeType":"image/jpeg",
"height":3000
}
},
"name":"Metacourt",
"chains":[
"moonbeam"
],
"defiLLamaTvlExist":false,
"projectCreationDate":1663756794000,
"shortDescription":"Metacourt created NFTdeals for anyone who wants to become an influencer and trade their social media",
"contracts":[
],
"updatedAt":1722498888422,
"category":"nfts",
"description":"Influencer accelerator for anyone who wants to become an influencer in the space. We allow selling your social media through NFTs and joining influencer marketing campaigns.",
"id":"metacourt",
"tags":[
"NFT Marketplaces"
]
},
{
"urls":{
"telegram":"https://t.me/tofuNFT",
"website":"https://tofunft.com/",
"try":"https://tofunft.com/",
"twitter":"https://twitter.com/tofuNFT",
"medium":"https://medium.com/tofunftofficial",
"discord":"https://discord.com/invite/3wFUTZmTm7"
},
"slug":"tofunft",
"createdAt":1699292615874,
"logo":{
"small":{
"width":36,
"fileName":"tofunft-logo-small.jpeg",
"mimeType":"image/jpeg",
"height":36
},
"large":{
"width":400,
"fileName":"tofunft-logo-large.jpeg",
"mimeType":"image/jpeg",
"height":400
},
"full":{
"width":3000,
"fileName":"tofunft-logo-full.jpeg",
"mimeType":"image/jpeg",
"height":3000
}
},
"name":"tofuNFT",
"chains":[
"moonbeam",
"moonriver"
],
"defiLLamaTvlExist":false,
"projectCreationDate":1644828523000,
"shortDescription":"The largest multichain NFT marketplace",
"contracts":[
],
"updatedAt":1722498924881,
"category":"nfts",
"description":"tofuNFT.com is an NFT marketplace focused on GameFi and collectibles, rebranded from SCV’s NFT market. Enjoy exploring & trading with your buddies!",
"id":"tofunft",
"tags":[
"NFT Marketplaces",
"NFT"
]
},
{
"urls":{
"website":"https://d-book.io",
"try":"https://d-book.io",
"twitter":"https://twitter.com/dbook_io"
},
"slug":"d-book.io",
"createdAt":1699292617021,
"logo":{
"small":{
"width":129,
"fileName":"d-book.io-logo-small.png",
"mimeType":"image/png",
"height":36
},
"large":{
"width":129,
"fileName":"d-book.io-logo-large.png",
"mimeType":"image/png",
"height":36
},
"full":{
"width":3000,
"fileName":"d-book.io-logo-full.png",
"mimeType":"image/png",
"height":3000
}
},
"name":"D-book.io",
"chains":[
"moonbeam"
],
"defiLLamaTvlExist":false,
"projectCreationDate":1682016612000,
"shortDescription":"Buğra Ayan is a speaker,and university lecturer in Turkey who founded the Web3 Association Turkey.",
"contracts":[
{
"chain":"moonbeam",
"contract":"0x8d4BA02D0973749ad7c646DcaAa60BDC66F6F6D2"
}
],
"updatedAt":1722498866417,
"category":"nfts",
"description":"We are an NFT Book Platform that connects authors and the decentralized world, aiming for a transformation ecosystem.",
"id":"d-book.io",
"tags":[
"NFT Marketplaces",
"NFT"
]
},
{
"urls":{
"telegram":"https://t.me/BcmHuntGroup",
"website":"https://bcmhunt.com/",
"try":"https://bcmhunt.com/",
"twitter":"https://twitter.com/bcmhunt",
"medium":"https://medium.com/bcmhunt",
"discord":"https://discord.com/invite/Ee9aJ287J2"
},
"slug":"blockchain-monster-hunt",
"createdAt":1699292616780,
"logo":{
"small":{
"width":36,
"fileName":"blockchain-monster-hunt-logo-small.jpeg",
"mimeType":"image/jpeg",
"height":36
},
"large":{
"width":510,
"fileName":"blockchain-monster-hunt-logo-large.jpeg",
"mimeType":"image/jpeg",
"height":510
},
"full":{
"width":3000,
"fileName":"blockchain-monster-hunt-logo-full.jpeg",
"mimeType":"image/jpeg",
"height":3000
}
},
"name":"Blockchain Monster Hunt",
"chains":[
"moonbeam"
],
"defiLLamaTvlExist":false,
"projectCreationDate":1644828523000,
"shortDescription":"The First Multichain NFT Monster Hunt",
"contracts":[
],
"updatedAt":1722498855937,
"category":"nfts",
"description":"Blockchain Monster Hunt (BCMH) is the world’s first multi-chain game that runs entirely on the blockchain itself. Inspired by Pokémon-GO,BCMH allows players to continuously explore brand new places on the blockchain to hunt and battle monsters. Each block on the blockchain is a unique digital space where a limited number of monsters (of the same DNA gene and rarity) may exist. Players and collectors can hunt or battle for a chance to capture these unique monsters and to earn coins.",
"id":"blockchain-monster-hunt",
"tags":[
"NFT",
"Gaming",
"GLMR Grants"
]
},
{
"urls":{
"website":"https://speedboat.studio/",
"try":"https://speedboat.studio/",
"twitter":"https://twitter.com/Speedboat_STDO",
"medium":"https://medium.com/@speedboat_studio",
"discord":"https://discord.gg/y7TQbtEWSV"
},
"slug":"speedboat.studio",
"createdAt":1699292616328,
"logo":{
"small":{
"width":36,
"fileName":"speedboat.studio-logo-small.png",
"mimeType":"image/png",
"height":36
},
"large":{
"width":190,
"fileName":"speedboat.studio-logo-large.png",
"mimeType":"image/png",
"height":190
},
"full":{
"width":3000,
"fileName":"speedboat.studio-logo-full.png",
"mimeType":"image/png",
"height":3000
}
},
"name":"Speedboat",
"chains":[
"moonbeam"
],
"defiLLamaTvlExist":false,
"projectCreationDate":1657584952000,
"shortDescription":"Your no-code Web3 toolkit",
"contracts":[
],
"updatedAt":1722498916466,
"category":"nfts",
"description":"Speedboat is a Web3 toolkit for everyone. Built on the idea that NFTs are not just expensive JPEGs, but programmable experiences.",
"id":"speedboat.studio",
"tags":[
"NFT",
"Tool"
]
},
{
"urls":{
"telegram":"https://t.me/+qGh0InPSPc1iMTNk",
"website":"https://www.glmrapes.com/",
"try":"https://www.glmrapes.com/",
"twitter":"https://twitter.com/GLMRApes",
"discord":"https://discord.com/invite/glmrapes"
},
"web3goContracts":[
{
"name":"GLMR Apes: GLMR Ape",
"chain":"moonbeam",
"contract":"0x8fbe243d898e7c88a6724bb9eb13d746614d23d6"
},
{
"name":"GLMR Apes: GLMR Jungle",
"chain":"moonbeam",
"contract":"0xcb13945ca8104f813992e4315f8ffefe64ac49ca"
}
],
"currentTx":{
"moonbeam":7830
},
"slug":"glmr-apes",
"web3goIDs":[
"GLMR Apes"
],
"createdAt":1699292616827,
"logo":{
"small":{
"width":47,
"fileName":"glmr-apes-logo-small.png",
"mimeType":"image/png",
"height":36
},
"large":{
"width":528,
"fileName":"glmr-apes-logo-large.png",
"mimeType":"image/png",
"height":408
},
"full":{
"width":3000,
"fileName":"glmr-apes-logo-full.png",
"mimeType":"image/png",
"height":3000
}
},
"name":"GLMR APES",
"chains":[
"moonbeam"
],
"defiLLamaTvlExist":false,
"usersChange7d":{
"moonbeam":-66.6666666666667
},
"currentUsers":{
"moonbeam":1531
},
"projectCreationDate":1644828523000,
"shortDescription":"The first NFT collection on GLMR by & for the community",
"contracts":[
],
"updatedAt":1722547408370,
"category":"nfts",
"description":"GLIMMER APES is the first NFT collection on GLMR by & for the community. The longer you’re bonding with GLMR Apes and the friendlier their behavior. Join the troops as soon as possible to become an EARLY APE, take part in our giveaways and games and land in the GLMR APE VIP CLUB.",
"id":"glmr-apes",
"tags":[
"NFT",
"Gaming"
],
"usersChange1d":{
"moonbeam":0
}
},
{
"urls":{
"website":"https://snakesoldiers.com",
"try":"https://snakesoldiers.com",
"twitter":"https://twitter.com/snakesoldiers",
"github":"https://github.com/steven2308/snake-soldiers-contracts",
"medium":"https://medium.com/@snakesoldiers/emoting-to-influence-the-hatch-df3eab7e45b8",
"discord":"http://discord.gg/A6zQSz4YU4"
},
"slug":"snake-soldiers",
"createdAt":1699292616971,
"logo":{
"small":{
"width":36,
"fileName":"snake-soldiers-logo-small.jpeg",
"mimeType":"image/jpeg",
"height":36
},
"large":{
"width":400,
"fileName":"snake-soldiers-logo-large.jpeg",
"mimeType":"image/jpeg",
"height":400
},
"full":{
"width":3000,
"fileName":"snake-soldiers-logo-full.jpeg",
"mimeType":"image/jpeg",
"height":3000
}
},
"name":"Snake Soldiers",
"chains":[
"moonbeam"
],
"defiLLamaTvlExist":false,
"projectCreationDate":1691439275000,
"shortDescription":"NFT game collection divided in 3 categories: Generals, Commanders and Soldiers🐍. Built on Moonbeam",
"contracts":[
{
"chain":"moonbeam",
"contract":"0x3ab955216BdD76f51fbe02A3fe237D6612BBD09F"
}
],
"updatedAt":1722498915320,
"category":"nfts",
"description":"Snake Soldiers is an NFT collection with a supply of at most 5k units, all unique and distributed among 3 ranks. Each snake will be usable inside a play to own game, where snakes will be the main characters, necessary to interact with the SerpenTerra ecosystem. This metaverse will be based on the RMRK 2.0 standard, making forward compatible and giving super powers to the NFTs.",
"id":"snake-soldiers",
"tags":[
"NFT"
]
},
{
"urls":{
"telegram":"https://t.me/+LqmDOeGUQdRmYjVh%60%60",
"website":"https://omni-x.io",
"try":"https://omni-x.io",
"twitter":"https://twitter.com/omnix_nft",
"github":"https://github.com/Omni-X-NFT",
"discord":"https://discord.gg/omni-x"
},
"slug":"omni-x",
"createdAt":1699292617077,
"logo":{
"small":{
"width":36,
"fileName":"omni-x-logo-small.jpeg",
"mimeType":"image/jpeg",
"height":36
},
"large":{
"width":107,
"fileName":"omni-x-logo-large.jpeg",
"mimeType":"image/jpeg",
"height":108
},
"full":{
"width":3000,
"fileName":"omni-x-logo-full.jpeg",
"mimeType":"image/jpeg",
"height":3000
}
},
"name":"Omni-X",
"chains":[
"moonbeam"
],
"defiLLamaTvlExist":false,
"projectCreationDate":1673811786000,
"shortDescription":"The first natively omnichain NFT platform",
"contracts":[
],
"updatedAt":1722498898538,
"category":"nfts",
"description":"Omni X is an omnichain NFT protocol and marketplace that connects communities, creators, and enthusiasts across multiple blockchains. \n\nWe provide tooling for creating ONFT collections, bridging regular NFTs to ONFTs and grant access to unparalleled liquidity that allows users to buy and sell NFTs from any blockchain to any other blockchain.",
"id":"omni-x",
"tags":[
"NFT Marketplaces",
"Infrastructure"
]
},
{
"urls":{
"website":"https://www.publicpressure.io/",
"try":"https://www.publicpressure.io/",
"twitter":"https://twitter.com/jointhepressure",
"discord":"https://discord.gg/publicpressure"
},
"slug":"publicpressure",
"createdAt":1702283744356,
"logo":{
"small":{
"width":36,
"fileName":"publicpressure-logo-small.jpeg",
"mimeType":"image/jpeg",
"height":36
},
"large":{
"width":400,
"fileName":"publicpressure-logo-large.jpeg",
"mimeType":"image/jpeg",
"height":400
},
"full":{
"width":3000,
"fileName":"publicpressure-logo-full.jpeg",
"mimeType":"image/jpeg",
"height":3000
}
},
"name":"Public Pressure",
"chains":[
"moonriver"
],
"defiLLamaTvlExist":false,
"projectCreationDate":1651597275000,
"shortDescription":"Support your favorite artists, own their music, get rewarded.",
"contracts":[
],
"updatedAt":1722498907699,
"category":"nfts",
"description":"We are the web3 music platform powered by artists, labels and fans",
"id":"publicpressure",
"tags":[
"NFT Marketplaces"
]
},
{
"currentTx":{
"moonbeam":8409
},
"web3goIDs":[
"Moonbeans"
],
"name":"Moonbeans",
"currentUsers":{
"moonbeam":1134
},
"coinGeckoId":"moonbeans",
"shortDescription":"Galactic Co-Op & Profit sharing NFT platform and soon to be Metaverse",
"id":"moonbeans",
"tags":[
"NFT Marketplaces"
],
"urls":{
"website":"https://moonbeans.io/",
"twitter":"https://twitter.com/moonbeansio",
"github":"https://github.com/m00nbeans",
"discord":"https://discord.com/invite/qqE9aBPzQ9",
"telegram":"https://t.me/moonbeansio",
"try":"https://moonbeans.io/",
"medium":"https://medium.com/@MoonBeans"
},
"web3goContracts":[
{
"name":"Moonbeans: Beanie Distributor V2",
"chain":"moonbeam",
"contract":"0xda6367c6510d8f2d20a345888f9dff3eb3226b02"
},
{
"name":"Moonbeans: Marketplace V9",
"chain":"moonbeam",
"contract":"0x683724817a7d526d6256aec0d6f8ddf541b924de"
},
{
"name":"Moonbeans: Storefront Ownership V1",
"chain":"moonbeam",
"contract":"0x971dfedd548f2269e515957404cbbee1f507cd01"
}
],
"slug":"moonbeans",
"createdAt":1699292615978,
"logo":{
"small":{
"width":36,
"fileName":"moonbeans-logo-small.jpeg",
"mimeType":"image/jpeg",
"height":36
},
"large":{
"width":400,
"fileName":"moonbeans-logo-large.jpeg",
"mimeType":"image/jpeg",
"height":400
},
"full":{
"width":3000,
"fileName":"moonbeans-logo-full.jpeg",
"mimeType":"image/jpeg",
"height":3000
}
},
"chains":[
"moonbeam",
"moonriver"
],
"defiLLamaTvlExist":false,
"usersChange7d":{
"moonbeam":0
},
"marketData":{
"symbol":"beans",
"marketCap":0,
"priceChangePercentage1y":-62.22489,
"currentPrice":0.062264,
"priceChangePercentage14d":-13.93552,
"contracts":{
},
"priceChangePercentage60d":-44.93764,
"priceChangePercentage30d":-33.587,
"priceChangePercentage24h":-0.05451,
"priceChangePercentage200d":-83.0363,
"marketCapChangePercentage24h":0,
"priceChange24h":-0.0000339560550113,
"marketCapChange24h":0,
"priceChangePercentage7d":-5.36696
},
"projectCreationDate":1644828523000,
"contracts":[
{
"chain":"moonbeam",
"contract":"0x65b09ef8c5a096c5fd3a80f1f7369e56eb932412"
},
{
"chain":"moonriver",
"contract":"0xC2392DD3e3fED2c8Ed9f7f0bDf6026fcd1348453"
}
],
"updatedAt":1722548296818,
"category":"nfts",
"description":"Moonbeans is a fully functional NFT marketplace launched on October 8th 2021, after releasing 465 Beanies into the Moonriver network to wreak havoc. The platform is still in beta, but has been performing incredibly well. With minimal fees for artists, traders, and project developers, Moonbeans aims to grow and aid the Moonrver network as a whole to develop, learn, and earn. With multiple collections now live (Beanies, Damned Pirates Society), minting (RivrMaids), Moonbeans is the heart of the Moonriver NFT ecosystem.",
"usersChange1d":{
"moonbeam":0
}
},
{
"urls":{
"telegram":"https://t.me/blocsport",
"website":"https://blocsport.one/",
"try":"https://blocsport.one/",
"twitter":"https://twitter.com/blocsport1",
"medium":"https://blocsport1.medium.com/"
},
"slug":"blocsport-one",
"createdAt":1699292616637,
"logo":{
"small":{
"width":36,
"fileName":"blocsport-one-logo-small.jpeg",
"mimeType":"image/jpeg",
"height":36
},
"large":{
"width":400,
"fileName":"blocsport-one-logo-large.jpeg",
"mimeType":"image/jpeg",
"height":400
},
"full":{
"width":3000,
"fileName":"blocsport-one-logo-full.jpeg",
"mimeType":"image/jpeg",
"height":3000
}
},
"name":"Blocsport.one",
"chains":[
"moonriver"
],
"defiLLamaTvlExist":false,
"projectCreationDate":1644828523000,
"shortDescription":"Web 3.0 metaverse, smart sports money, athlete NFT launchpad & assets tokenization",
"contracts":[
],
"updatedAt":1722498857332,
"category":"nfts",
"description":"Blocsport.one is a Swiss sports tech company founded in 2019 that is transforming the sports business by building a transparent and reliable sports ecosystem uniting athletes, clubs, and fans based on blockchain. Company owns NFTdeals.io exclusive marketplace and has the biometric-enabled football scouting DApp live. Blocsport.one helps the young promising athletes get the money and exposure for their career development, which is nobody else doing in the world.",
"id":"blocsport-one",
"tags":[
"NFT"
]
},
{
"urls":{
"telegram":"https://t.me/mintverse",
"website":"https://www.mintverse.com/",
"try":"https://www.mintverse.com/",
"twitter":"https://twitter.com/mintverse_",
"medium":"https://medium.com/mintverse",
"discord":"https://discord.com/invite/mhhnbvAaq9"
},
"slug":"mintverse",
"createdAt":1702283733666,
"logo":{
"small":{
"width":36,
"fileName":"mintverse-logo-small.jpeg",
"mimeType":"image/jpeg",
"height":36
},
"large":{
"width":400,
"fileName":"mintverse-logo-large.jpeg",
"mimeType":"image/jpeg",
"height":400
},
"full":{
"width":3000,
"fileName":"mintverse-logo-full.jpeg",
"mimeType":"image/jpeg",
"height":3000
}
},
"name":"Mintverse",
"chains":[
"moonbeam"
],
"defiLLamaTvlExist":false,
"projectCreationDate":1651597514000,
"shortDescription":"Mint, Explore & Trade Liquid NFT Assets Across Multiple Chains",
"contracts":[
],
"updatedAt":1722498889300,
"category":"nfts",
"description":"Comprehensive NFT Aggregation Marketplace with a 0% trading fee",
"id":"mintverse",
"tags":[
"NFT Marketplaces"
]
},
{
"urls":{
"telegram":"https://t.me/rmrkapp",
"website":"https://upgradooor.app",
"try":"https://upgradooor.app",
"twitter":"https://x.com/rmrkapp",
"github":"https://github.com/rmrk-team",
"medium":"https://medium.com/rmrkapp"
},
"slug":"upgradooor",
"createdAt":1699292616895,
"logo":{
"small":{
"width":36,
"fileName":"upgradooor-logo-small.jpeg",
"mimeType":"image/jpeg",
"height":36
},
"large":{
"width":512,
"fileName":"upgradooor-logo-large.jpeg",
"mimeType":"image/jpeg",
"height":512
},
"full":{
"width":3000,
"fileName":"upgradooor-logo-full.jpeg",
"mimeType":"image/jpeg",
"height":3000
}
},
"name":"Upgradooor",
"chains":[
"moonbeam",
"moonriver"
],
"defiLLamaTvlExist":false,
"projectCreationDate":1692259742000,
"shortDescription":"Upgrade your NFT 1.0 collections to NFT 2.0 by wrapping them into advanced functionality",
"contracts":[
],
"updatedAt":1722498927244,
"category":"nfts",
"description":"As a collection issuer, use Upgradooor to initialize the process of upgrading your collection to NFT 2.0 if you are currently using ERC721.\n\nAs a holder, once the collection owner initiates the process, you can wrap any NFT you hold in that collection and instantly turn it into an equippable, multi-asset, composable NFT with no added risk.\n\nYou can always unwrap at will, and all the changes will still wait for you when you decide to re-claim the 2.0 wrapper again.\n\nUpgrading allows you to:\n\n- add more assets (outputs) to a legacy NFT, preventing needless airdrop spam\n- airdrop NFTs into the NFT itself, preventing detachment of context, and saving tremendous amounts of gas by letting people transfer just the parent NFT\n- define equippable settings and even achieve compatibility with other collections, for cross collection equippables and thus cross collection royalties and commissions\n- see your NFTs on Singular, and use GBM auctions as a unique and novel listing mechanic",
"id":"upgradooor",
"tags":[
"NFT",
"Tool"
]
},
{
"urls":{
"telegram":"https://t.me/moonfit_official_community",
"website":"https://moonfit.xyz/",
"try":"https://moonfit.xyz/",
"twitter":"https://twitter.com/MoonFitOfficial",
"discord":"https://discord.gg/hStdUVtHXp"
},
"slug":"moonfit",
"createdAt":1702283734897,
"logo":{
"small":{
"width":36,
"fileName":"moonfit-logo-small.jpeg",
"mimeType":"image/jpeg",
"height":36
},
"large":{
"width":400,
"fileName":"moonfit-logo-large.jpeg",
"mimeType":"image/jpeg",
"height":400
},
"full":{
"width":3000,
"fileName":"moonfit-logo-full.jpeg",
"mimeType":"image/jpeg",
"height":3000
}
},
"name":"MoonFit",
"chains":[
"moonbeam"
],
"defiLLamaTvlExist":false,
"projectCreationDate":1654692249000,
"shortDescription":"Web3 & NFT Lifestyle App That Pays You Anytime You Burn Calories",
"contracts":[
],
"updatedAt":1722498891201,
"category":"nfts",
"description":"MoonFit is a Web3 Lifestyle App that promotes active living by rewarding users with tokens and NFTs anytime they burn calories through physical activities.",
"id":"moonfit",
"tags":[
"NFT",
"Gaming"
]
},
{
"urls":{
"telegram":"https://t.me/rmrkapp",
"website":"https://rmrk.app/",
"try":"https://rmrk.app/",
"twitter":"https://twitter.com/rmrkapp",
"discord":"https://discord.com/invite/bV9kQbVC99"
},
"slug":"rmrk",
"createdAt":1699292615938,
"logo":{
"small":{
"width":36,
"fileName":"rmrk-logo-small.jpeg",
"mimeType":"image/jpeg",
"height":36
},
"large":{
"width":400,
"fileName":"rmrk-logo-large.jpeg",
"mimeType":"image/jpeg",
"height":400
},
"full":{
"width":3000,
"fileName":"rmrk-logo-full.jpeg",
"mimeType":"image/jpeg",
"height":3000
}
},
"name":"RMRK",
"chains":[
"moonbeam"
],
"defiLLamaTvlExist":false,
"marketData":{
"symbol":"rmrk",
"marketCap":5985029,
"marketCapRank":1602,
"priceChangePercentage1y":-64.99216,
"currentPrice":0.62974,
"priceChangePercentage14d":-24.26661,
"contracts":{
"moonbeam":"0x524d524b4c9366be706d3a90dcf70076ca037ae3"
},
"priceChangePercentage60d":-51.72181,
"priceChangePercentage30d":-30.11256,
"priceChangePercentage24h":-2.58554,
"priceChangePercentage200d":-75.55551,
"marketCapChangePercentage24h":-2.50147,
"priceChange24h":-0.01671434617594,
"marketCapChange24h":-153554.8536219,
"priceChangePercentage7d":-1.5052
},
"coinGeckoId":"rmrk",
"projectCreationDate":1644828523000,
"shortDescription":"Creators of NFTs 2.0 via ERC6059, ERC6220, ERC5773, EIP6381, and EIP6454.\nNFT equippables, future compatibility, reputation, and token balances.",
"contracts":[
],
"updatedAt":1722548302467,
"category":"nfts",
"description":"With the RMRK NFT Building Block System\nOur ERC NFT standards allow you to unlock the true potential of NFTs.\nTailored to work with each other, these EVM smart contracts will help you create your NFT projects of varying complexity.",
"id":"rmrk",
"tags":[
"NFT",
"Infrastructure"
]
},
{
"urls":{
"website":"https://www.mynft.com/",
"try":"https://bridge.mynft.com/home",
"twitter":"https://twitter.com/mynft"
},
"slug":"mynft",
"createdAt":1699292616578,
"logo":{
"small":{
"width":36,
"fileName":"mynft-logo-small.jpeg",
"mimeType":"image/jpeg",
"height":36
},
"large":{
"width":400,
"fileName":"mynft-logo-large.jpeg",
"mimeType":"image/jpeg",
"height":400
},
"full":{
"width":3000,
"fileName":"mynft-logo-full.jpeg",
"mimeType":"image/jpeg",
"height":3000
}
},
"name":"myNFT",
"chains":[
"moonbeam"
],
"defiLLamaTvlExist":false,
"projectCreationDate":1644828523000,
"shortDescription":"The marketplace that puts the power back in your hands",
"contracts":[
],
"updatedAt":1722498895020,
"category":"nfts",
"description":"myNFT is the marketplace that puts the power back in your hands. It is a creative workshop, a trading platform and a discovery engine, helping you tell your story and share your passions, on your own terms. myNFT is built on decentralized technologies empowering you to create, trade, and discover. myNFT is built by Perpetual Altruism, a leader in the NFT space and the creator of charitable NFT publisher Cryptograph and the GBM auction system. Perpetual Altruism is backed by prominent investors and creators and is also the recipient of grants from the Web3 Foundation and the Moonbeam network for their work on the decentralized internet, which powers myNFT.",
"id":"mynft",
"tags":[
"NFT Marketplaces",
"GLMR Grants",
"MOVR Grants"
]
},
{
"urls":{
"website":"https://readl.co/",
"try":"https://readl.co/",
"twitter":"https://twitter.com/readl_co",
"medium":"https://medium.com/@readlnetwork",
"discord":"https://discord.gg/XPTENepHqY"
},
"slug":"readl",
"createdAt":1702283745749,
"logo":{
"small":{
"width":36,
"fileName":"readl-logo-small.jpeg",
"mimeType":"image/jpeg",
"height":36
},
"large":{
"width":512,
"fileName":"readl-logo-large.jpeg",
"mimeType":"image/jpeg",
"height":512
},
"full":{
"width":3000,
"fileName":"readl-logo-full.jpeg",
"mimeType":"image/jpeg",
"height":3000
}
},
"name":"Readl",
"chains":[
"moonriver"
],
"defiLLamaTvlExist":false,
"projectCreationDate":1655885161000,
"shortDescription":"Bringing the publishing industry to web3",
"contracts":[
],
"updatedAt":1722498910044,
"category":"nfts",
"description":"Readl is the protocol that provides publishers and storytellers with the infrastructure to publish their content on the blockchain, while providing a user-friendly platform to enjoy any story, in any format.",
"id":"readl",
"tags":[
"NFT Marketplaces",
"MOVR Grants"
]
},
{
"urls":{
"telegram":"https://t.me/rmrkapp",
"website":"https://emotes.app",
"try":"https://emotes.app",
"twitter":"https://x.com/rmrkapp",
"github":"https://github.com/rmrk-team",
"medium":"https://medium.com/rmrkapp"
},
"slug":"emotes.app",
"createdAt":1699292616951,
"logo":{
"small":{
"width":36,
"fileName":"emotes.app-logo-small.jpeg",
"mimeType":"image/jpeg",
"height":36
},
"large":{
"width":512,
"fileName":"emotes.app-logo-large.jpeg",
"mimeType":"image/jpeg",
"height":512
},
"full":{
"width":3000,
"fileName":"emotes.app-logo-full.jpeg",
"mimeType":"image/jpeg",
"height":3000
}
},
"name":"Emotes.app",
"chains":[
"moonbeam"
],
"defiLLamaTvlExist":false,
"projectCreationDate":1692254489000,
"shortDescription":"React on anyone's NFT - throw 💩 at those apes, give a 🤗 to those Pudgies!",
"contracts":[
],
"updatedAt":1722498871347,
"category":"nfts",
"description":"Emotes.app is a RMRK mini-app which allows you to send emotes / reactions to anyone's NFT. It utilizes RMRK's ERC7009 and is trivial to integrate into any project wanting to take advantage of the community's reactions to their NFTs.\n\nUse it to direct storylines, affect NFT egg hatching, or just do relative price comparison when influencers like one NFTs and dislike another!",
"id":"emotes.app",
"tags":[
"NFT",
"Social"
]
},
{
"urls":{
"telegram":"https://twitter.com/PolkaPets",
"website":"https://www.polkapet.world/",
"try":"https://www.polkapet.world/",
"twitter":"https://twitter.com/PolkaPets",
"medium":"https://polkapetworld.medium.com/"
},
"slug":"polkapet-world",
"createdAt":1702283743596,
"logo":{
"small":{
"width":36,
"fileName":"polkapet-world-logo-small.jpeg",
"mimeType":"image/jpeg",
"height":36
},
"large":{
"width":400,
"fileName":"polkapet-world-logo-large.jpeg",
"mimeType":"image/jpeg",
"height":400
},
"full":{
"width":3000,
"fileName":"polkapet-world-logo-full.jpeg",
"mimeType":"image/jpeg",
"height":3000
}
},
"name":"PolkaPets",
"chains":[
"moonriver"
],
"defiLLamaTvlExist":false,
"marketData":{
"priceChangePercentage60d":1206.42918,
"symbol":"pets",
"marketCap":0,
"priceChangePercentage30d":619.39533,
"priceChangePercentage200d":135.91624,
"priceChangePercentage1y":355.00061,
"currentPrice":0.00515699,
"priceChangePercentage14d":-15.30948,
"contracts":{
"moonriver":"0x1e0f2a75be02c025bd84177765f89200c04337da"
},
"priceChangePercentage7d":749.62625
},
"coinGeckoId":"polkapet-world",
"projectCreationDate":1651157216000,
"shortDescription":"Welcome to PolkaPet World",
"contracts":[
],
"updatedAt":1722548303208,
"category":"nfts",
"description":"An immersive NFT collection created in partnership with the biggest and best PolkaDot projects ",
"id":"polkapet-world",
"tags":[
"NFT"
]
},
{
"urls":{
"website":"https://www.moonarines.com/",
"try":"https://www.moonarines.com/",
"discord":"https://discord.gg/bXhSyW8htW"
},
"slug":"moonarines",
"createdAt":1702283733870,
"logo":{
"small":{
"width":36,
"fileName":"moonarines-logo-small.jpeg",
"mimeType":"image/jpeg",
"height":36
},
"large":{
"width":400,
"fileName":"moonarines-logo-large.jpeg",
"mimeType":"image/jpeg",
"height":400
},
"full":{
"width":3000,
"fileName":"moonarines-logo-full.jpeg",
"mimeType":"image/jpeg",
"height":3000
}
},
"name":"Moonarines",
"chains":[
"moonriver"
],
"defiLLamaTvlExist":false,
"projectCreationDate":1654792422000,
"shortDescription":"Be part of the conquest of the digital space",
"contracts":[
],
"updatedAt":1722498889804,
"category":"nfts",
"description":"The Moonarines are unique NFT characters starting soon on the Moonriver Network!\nWith the Moonarines, the NFT owners will be taken to an unforgettable adventure to explore the Cryptoverse!",
"id":"moonarines",
"tags":[
"NFT"
]
},
{
"urls":{
"telegram":"https://t.me/NFTrade",
"website":"https://nftrade.com/",
"try":"https://nftrade.com/",
"twitter":"https://twitter.com/NFTradeOfficial",
"medium":"https://medium.com/@NFTrade",
"discord":"https://discord.com/invite/SESqfsyw8k"
},
"slug":"nftrade",
"createdAt":1699292616005,
"logo":{
"small":{
"width":36,
"fileName":"nftrade-logo-small.jpeg",
"mimeType":"image/jpeg",
"height":36
},
"large":{
"width":400,
"fileName":"nftrade-logo-large.jpeg",
"mimeType":"image/jpeg",
"height":400
},
"full":{
"width":3000,
"fileName":"nftrade-logo-full.jpeg",
"mimeType":"image/jpeg",
"height":3000
}
},
"name":"NFTrade",
"chains":[
"moonbeam",
"moonriver"
],
"defiLLamaTvlExist":false,
"marketData":{
"symbol":"nftd",
"marketCap":234018,
"marketCapRank":3653,
"priceChangePercentage1y":-65.38449,
"currentPrice":0.00502075,
"priceChangePercentage14d":-7.09922,
"contracts":{
},
"priceChangePercentage60d":-27.37596,
"priceChangePercentage30d":-14.12267,
"priceChangePercentage24h":-2.22137,
"priceChangePercentage200d":-56.66993,
"marketCapChangePercentage24h":-2.16658,
"priceChange24h":-0.00011406326237191,
"marketCapChange24h":-5182.473845666,
"priceChangePercentage7d":-6.88049
},
"coinGeckoId":"nftrade",
"projectCreationDate":1644828523000,
"shortDescription":"Create, Buy, Sell, Swap and Farm NFTs",
"contracts":[
],
"updatedAt":1722548304198,
"category":"nfts",
"description":"NFTrade is a multi-chain platform for NFT creation and trading. Seamlessly launch, mint, and swap non-fungible tokens. Earn digital collectibles. NFTrade places you at the heart of the NFT economy. Create, Buy, Sell, Swap and Farm NFTs. All chains, All NFTs, One Platform.",
"id":"nftrade",
"tags":[
"NFT Marketplaces",
"MOVR Grants"
]
},
{
"urls":{
"website":"https://www.pipcards.com/",
"try":"https://www.pipcards.com/",
"twitter":"https://twitter.com/pipcards",
"discord":"https://discord.com/invite/hnSC7QjTHj"
},
"slug":"pipcards",
"createdAt":1699292616371,
"logo":{
"small":{
"width":36,
"fileName":"pipcards-logo-small.jpeg",
"mimeType":"image/jpeg",
"height":36
},
"large":{
"width":400,
"fileName":"pipcards-logo-large.jpeg",
"mimeType":"image/jpeg",
"height":400
},
"full":{
"width":3000,
"fileName":"pipcards-logo-full.jpeg",
"mimeType":"image/jpeg",
"height":3000
}
},
"name":"PIP Cards",
"chains":[
"moonriver"
],
"defiLLamaTvlExist":false,
"projectCreationDate":1651149583000,
"shortDescription":"Post-generated NFT playing card decks",
"contracts":[
],
"updatedAt":1722498904704,
"category":"nfts",
"description":"PIPS is a first-of-its-kind NFT generative playing card project that will enable NFT holders to generate an entire deck of custom cards to be used cross-chain.",
"id":"pipcards",
"tags":[
"NFT",
"Gaming"
]
},
{
"urls":{
"website":"https://bithotel.io/",
"twitter":"https://twitter.com/playbithotel",
"github":"https://github.com/BitHotelOrg/bithotel-token-contracts",
"discord":"https://discord.gg/RFFZNwxY9n",
"telegram":"https://t.me/bithotelcommunity",
"try":"https://bithotel.io/",
"medium":"https://medium.com/@bithotelnftgame"
},
"slug":"bit-hotel",
"createdAt":1702283710425,
"logo":{
"small":{
"width":36,
"fileName":"bit-hotel-logo-small.jpeg",
"mimeType":"image/jpeg",
"height":36
},
"large":{
"width":500,
"fileName":"bit-hotel-logo-large.jpeg",
"mimeType":"image/jpeg",
"height":500
},
"full":{
"width":3000,
"fileName":"bit-hotel-logo-full.jpeg",
"mimeType":"image/jpeg",
"height":3000
}
},
"name":"Bit Hotel",
"chains":[
"moonbeam"
],
"defiLLamaTvlExist":false,
"projectCreationDate":1658743551000,
"shortDescription":"Bit Hotel is a Social-first Play 2 Earn NFT Gaming Metaverse set in a Pixel-art Hotel.",
"contracts":[
{
"chain":"moonbeam",
"contract":"Not deployed yet"
},
{
"chain":"moonriver",
"contract":"Not deployed yet"
}
],
"updatedAt":1722498854706,
"category":"nfts",
"description":"In Bit Hotel users can compete to earn Bit Hotel tokens and acquire native NFTs. These NFTs have in-game utilities and consist of characters, hotel rooms, furniture and other assets that have their own unique perks. With over 250k Hotel Guests cross-channel, this nostalgic Hotel metaverse is taking people back to their 8bit upbringing.",
"id":"bit-hotel",
"tags":[
"NFT",
"Gaming"
]
},
{
"tvlChange7d":{
"moonriver":0.00190215150271202
},
"urls":{
"website":"https://www.moonbeamdao.com/",
"try":"https://www.moonbeamdao.com/",
"twitter":"https://twitter.com/moonbeam_dao",
"medium":"https://medium.com/@moonbeamdao",
"discord":"https://discord.gg/AevrFzwZjk"
},
"web3goContracts":[
{
"name":"MoonDAO: MDAO Token",
"chain":"moonbeam",
"contract":"0xc6342eab8b7cc405fc35eba7f7401fc400ac0709"
}
],
"currentTx":{
"moonbeam":972
},
"slug":"moondao",
"web3goIDs":[
"MoonDAO"
],
"createdAt":1699292616416,
"tvlChange1d":{
"moonriver":-0.0349944884006391
},
"logo":{
"small":{
"width":25,
"fileName":"moondao-logo-small.png",
"mimeType":"image/png",
"height":36
},
"large":{
"width":330,
"fileName":"moondao-logo-large.png",
"mimeType":"image/png",
"height":475
},
"full":{
"width":3000,
"fileName":"moondao-logo-full.png",
"mimeType":"image/png",
"height":3000
}
},
"name":"MoonDAO",
"chains":[
"moonbeam"
],
"currentTVL":{
"moonriver":76.75665
},
"currentUsers":{
"moonbeam":229
},
"projectCreationDate":1648347145000,
"shortDescription":"The first & only community art dao on moonbeam",
"contracts":[
],
"updatedAt":1722547637377,
"category":"nfts",
"description":"MoonDao is the first community Art Collection DAO on the Moonbeam network!\n\nWe aim to utilize input from our community to select high-end NFT’s. These NFT’s will be acquired with the MoonDao treasury and stored in the MoonDao Vault.\n\nMoon ownership grants access to DAO voting rights, future events, and additional holder perks outlined below. Welcome to the moon, we hope you stay.\n\n",
"id":"moondao",
"tags":[
"NFT",
"DAO"
]
},
{
"urls":{
"telegram":"https://t.me/raresama",
"website":"https://raresama.com/",
"try":"https://raresama.com/",
"twitter":"https://twitter.com/RaresamaNFT",
"discord":"https://discord.com/channels/938592318380982303/1010237900685840405"
},
"slug":"raresama",
"createdAt":1699292615958,
"logo":{
"small":{
"width":36,
"fileName":"raresama-logo-small.jpeg",
"mimeType":"image/jpeg",
"height":36
},
"large":{
"width":400,
"fileName":"raresama-logo-large.jpeg",
"mimeType":"image/jpeg",
"height":400
},
"full":{
"width":3000,
"fileName":"raresama-logo-full.jpeg",
"mimeType":"image/jpeg",
"height":3000
}
},
"name":"Raresama",
"chains":[
"moonbeam"
],
"defiLLamaTvlExist":false,
"projectCreationDate":1662528828000,
"shortDescription":"Discover amazing Rare digital artwork",
"contracts":[
],
"updatedAt":1722498909462,
"category":"nfts",
"description":"Raresama brings the magic of owning a piece of artwork to your fingertips. Create or browse NFT art collections and enjoy a diverse mix of artists, genres, styles and movements.",
"id":"raresama",
"tags":[
"NFT Marketplaces"
]
},
{
"urls":{
"telegram":"https://gal.xyz/telegram",
"website":"https://galxe.com/",
"try":"https://galxe.com/",
"twitter":"https://twitter.com/Galxe",
"medium":"https://blog.galxe.com/",
"discord":"https://gal.xyz/discord"
},
"slug":"galxe",
"createdAt":1699292616277,
"logo":{
"small":{
"width":36,
"fileName":"galxe-logo-small.jpeg",
"mimeType":"image/jpeg",
"height":36
},
"large":{
"width":400,
"fileName":"galxe-logo-large.jpeg",
"mimeType":"image/jpeg",
"height":400
},
"full":{
"width":3000,
"fileName":"galxe-logo-full.jpeg",
"mimeType":"image/jpeg",
"height":3000
}
},
"name":"Galxe",
"chains":[
"moonbeam"
],
"defiLLamaTvlExist":false,
"projectCreationDate":1659868871000,
"shortDescription":"Create Impactful Experiences With #Web3 Credentials. (Formerly Project Galaxy) ",
"contracts":[
],
"updatedAt":1722498876438,
"category":"nfts",
"description":"Galxe is the leading Web3 credential data network in the world. A collaborative credential infrastructure enabling brands and developers to engage communities and build robust products in Web3.",
"id":"galxe",
"tags":[
"NFT",
"Social",
"Tool"
]
},
{
"urls":{
"telegram":"http://t.me/MoonsamaNFT",
"website":"https://moonsama.com/",
"try":"https://moonsama.com/",
"twitter":"https://twitter.com/MoonsamaNFT",
"discord":"discord.gg/moonsama"
},
"slug":"moonsama",
"createdAt":1702283735408,
"logo":{
"small":{
"width":36,
"fileName":"moonsama-logo-small.jpeg",
"mimeType":"image/jpeg",
"height":36
},
"large":{
"width":512,
"fileName":"moonsama-logo-large.jpeg",
"mimeType":"image/jpeg",
"height":512
},
"full":{
"width":3000,
"fileName":"moonsama-logo-full.jpeg",
"mimeType":"image/jpeg",
"height":3000
}
},
"name":"Moonsama",
"chains":[
"moonriver",
"moonbeam"
],
"defiLLamaTvlExist":false,
"projectCreationDate":1651156798000,
"shortDescription":"Let's build the multiverse",
"contracts":[
],
"updatedAt":1722498892389,
"category":"nfts",
"description":"Moonsama’s protocol for bi-directional bridging of on-chain digital assets and off-chain applications. This is how we connect web2.0 games, metaverses and blockchains. It enables new games, development and community fun from across the Kusamaverse and beyond!",
"id":"moonsama",
"tags":[
"NFT",
"Gaming"
]
},
{
"urls":{
"website":"https://smartstamp.com/",
"try":"https://smartstamp.com/",
"discord":"https://discord.gg/kajPqvZY"
},
"slug":"smartstamp",
"createdAt":1699292617058,
"logo":{
"small":{
"width":36,
"fileName":"smartstamp-logo-small.jpeg",
"mimeType":"image/jpeg",
"height":36
},
"large":{
"width":436,
"fileName":"smartstamp-logo-large.jpeg",
"mimeType":"image/jpeg",
"height":436
},
"full":{
"width":3000,
"fileName":"smartstamp-logo-full.jpeg",
"mimeType":"image/jpeg",
"height":3000
}
},
"name":"SmartStamp",
"chains":[
"moonbeam",
"moonriver"
],
"defiLLamaTvlExist":false,
"projectCreationDate":1675081766000,
"shortDescription":"SmartStamp is the pioneering new standard in identification and authentication for the art world.",
"contracts":[
],
"updatedAt":1722498915044,
"category":"nfts",
"description":"Developed over more than a decade, SmartStamp’s app uses patented AI technology that is designed to read and record artworks’ surface characteristics– offering artists, collectors, institutions, and all arts and culture stakeholders a way to securely and immutably link physical objects to their digital fingerprints on the blockchain. Using the SmartStamp app is as simple as taking a picture, making the groundbreaking security and timestamping power of blockchain technology accessible to anyone who can use a smartphone.",
"id":"smartstamp",
"tags":[
"NFT"
]
},
{
"urls":{
"telegram":"https://t.me/yusernetwork",
"website":"https://yuser.network/",
"try":"https://yuser.network/",
"twitter":"https://twitter.com/yuser",
"medium":"https://medium.com/yuser",
"discord":"https://discord.com/invite/uRRxnfAjhY"
},
"slug":"yuser",
"createdAt":1699292616605,
"logo":{
"small":{
"width":36,
"fileName":"yuser-logo-small.jpeg",
"mimeType":"image/jpeg",
"height":36
},
"large":{
"width":512,
"fileName":"yuser-logo-large.jpeg",
"mimeType":"image/jpeg",
"height":512
},
"full":{
"width":3000,
"fileName":"yuser-logo-full.jpeg",
"mimeType":"image/jpeg",
"height":3000
}
},
"name":"Yuser",
"chains":[
"moonriver"
],
"defiLLamaTvlExist":false,
"projectCreationDate":1644828523000,
"shortDescription":"The first NFT social networking app- by creators, for creators",
"contracts":[
],
"updatedAt":1722498932483,
"category":"nfts",
"description":"Yuser’s mission is to build an ecosystem of interconnected applications that put power back into the hands of users by giving them full control over their content, data, and personal networks. Developers can connect via an API to instantly gain access to millions of users and incentivize them to try their product by paying them with a token.",
"id":"yuser",
"tags":[
"NFT Marketplaces",
"GLMR Grants",
"MOVR Grants"
]
},
{
"urls":{
"telegram":"https://t.me/cryptosoots",
"website":"https://raregems.io/my#",
"try":"https://raregems.io/my#",
"twitter":"https://twitter.com/RareGems_io"
},
"slug":"rare-gems",
"createdAt":1702283745336,
"logo":{
"small":{
"width":36,
"fileName":"rare-gems-logo-small.png",
"mimeType":"image/png",
"height":36
},
"large":{
"width":360,
"fileName":"rare-gems-logo-large.png",
"mimeType":"image/png",
"height":360
},
"full":{
"width":3000,
"fileName":"rare-gems-logo-full.png",
"mimeType":"image/png",
"height":3000
}
},
"name":"Rare Gems",
"chains":[
"moonriver",
"moonbeam"
],
"defiLLamaTvlExist":false,
"projectCreationDate":1652705611000,
"shortDescription":"Multichain NFT marketplace.",
"contracts":[
],
"updatedAt":1722498909205,
"category":"nfts",
"description":"Multichain NFT marketplace\nCreated by \n@cryptosoots",
"id":"rare-gems",
"tags":[
"NFT Marketplaces"
]
},
{
"urls":{
"telegram":"https://t.me/rmrkapp",
"website":"https://wizard.rmrk.dev",
"try":"https://wizard.rmrk.dev",
"twitter":"https://x.com/rmrkapp",
"github":"https://github.com/rmrk-team",
"medium":"https://medium.com/rmrkapp"
},
"slug":"rmrk-wizard",
"createdAt":1699292616919,
"logo":{
"small":{
"width":36,
"fileName":"rmrk-wizard-logo-small.jpeg",
"mimeType":"image/jpeg",
"height":36
},
"large":{
"width":512,
"fileName":"rmrk-wizard-logo-large.jpeg",
"mimeType":"image/jpeg",
"height":512
},
"full":{
"width":3000,
"fileName":"rmrk-wizard-logo-full.jpeg",
"mimeType":"image/jpeg",
"height":3000
}
},
"name":"RMRK Wizard",
"chains":[
"moonbeam",
"moonriver"
],
"defiLLamaTvlExist":false,
"projectCreationDate":1692255253000,
"shortDescription":"A no-code-but-code wizard UI for building NFTs 2.0",
"contracts":[
],
"updatedAt":1722498911520,
"category":"nfts",
"description":"A simple UI to put together NFT 2.0 legos created by the RMRK.app team. Use this tool to get started developing advanced NFT collections by picking from a set of functions you need, and the tool will compose code for you which only needs final tweaks before being deployed!",
"id":"rmrk-wizard",
"tags":[
"NFT",
"Tool",
"Developer Tools"
]
},
{
"urls":{
"telegram":"https://t.me/evelonapp",
"website":"https://platform.evelon.app/",
"try":"https://www.evelon.app/",
"twitter":"https://twitter.com/EvelonApp"
},
"slug":"evelon-app",
"createdAt":1699292616145,
"logo":{
"small":{
"width":36,
"fileName":"evelon-app-logo-small.jpeg",
"mimeType":"image/jpeg",
"height":36
},
"large":{
"width":512,
"fileName":"evelon-app-logo-large.jpeg",
"mimeType":"image/jpeg",
"height":512
},
"full":{
"width":3000,
"fileName":"evelon-app-logo-full.jpeg",
"mimeType":"image/jpeg",
"height":3000
}
},
"name":"Evelon.App",
"chains":[
"moonbeam"
],
"defiLLamaTvlExist":false,
"projectCreationDate":1690486894000,
"shortDescription":"Transform the way you create and bring to life your own unique DNFTs, with the revolutionary platform that combines cutting-edge AI technology.",
"contracts":[
],
"updatedAt":1722498873048,
"category":"nfts",
"description":"Evelon is a no code platform that allows you to create and deploy dynamic NFTs with ease. This project is a game changer in the world of NFTs and image generation. Evelon uses AI to generate high-quality images, making it possible to create NFTs with unique visuals that are both dynamic and engaging.",
"id":"evelon-app",
"tags":[
"NFT",
"Tool"
]
},
{
"urls":{
"website":"https://mintlabz.io/",
"try":"https://app.mintlabz.io/",
"twitter":"https://twitter.com/mintlabz",
"medium":"https://blog.mintlabz.io/",
"discord":"https://discord.com/invite/BRF2PEetea"
},
"slug":"mintlabz",
"createdAt":1712311518649,
"logo":{
"small":{
"width":36,
"fileName":"mintlabz-logo-small.png",
"mimeType":"image/png",
"height":36
},
"large":{
"width":400,
"fileName":"mintlabz-logo-large.png",
"mimeType":"image/png",
"height":400
},
"full":{
"width":3000,
"fileName":"mintlabz-logo-full.png",
"mimeType":"image/png",
"height":3000
}
},
"name":"Mintlabz",
"chains":[
"moonbeam"
],
"defiLLamaTvlExist":false,
"projectCreationDate":1712189524,
"shortDescription":"MintLabz is a complete crosschain NFT solution at zero cost.",
"contracts":[
],
"updatedAt":1722498889042,
"category":"nfts",
"description":"MintLabz aims to establish a digital NFT minting platform for third party projects to create NFT collections with utilities to reward the NFT holder. Our mission is to become the number one choice for providing complete cross-chain NFT solutions to B2B customers.",
"id":"mintlabz",
"tags":[
"nfts"
]
},
{
"urls":{
"telegram":"https://t.me/golempark",
"website":"https://golempark.com",
"try":"https://golempark.com",
"twitter":"https://twitter.com/golempark",
"discord":"https://discord.gg/rNvtdHN8q7"
},
"slug":"golem-park",
"createdAt":1699292617039,
"logo":{
"small":{
"width":36,
"fileName":"golem-park-logo-small.png",
"mimeType":"image/png",
"height":36
},
"large":{
"width":512,
"fileName":"golem-park-logo-large.png",
"mimeType":"image/png",
"height":512
},
"full":{
"width":3000,
"fileName":"golem-park-logo-full.png",
"mimeType":"image/png",
"height":3000
}
},
"name":"Golem Park",
"chains":[
"moonbeam"
],
"defiLLamaTvlExist":false,
"projectCreationDate":1676839105000,
"shortDescription":"Golem Park is holders friendly NFT collection. P2E blockchain game, $GP Token, Staking Pools & more",
"contracts":[
{
"chain":"moonbeam",
"contract":"0x74746524f5A31F08e0528FaA704C2c5d8d116506"
}
],
"updatedAt":1722498878088,
"category":"nfts",
"description":"First Time In Crypto History Token Burning Campaign!\n30% Of Total Token Supply Will Be Burned In 30 Days.\n\nAfter Minting We Are Going To Release Deflationary $GP Token & 50% Of Total Supply Will Be Distributed To All $GP NFT Holders, 1 NFT = 5 000 000 Tokens. Then 30 Days Each Day We'll Burn 1% Of Total Token Supply To Ensure Token Price Will Go UP!\n\nWorld Of Golems is a decentralized Play-To-Earn blockchain game.\nOnce You Become Golem Park NFT Holder You Will Be Able To Participate in the WoG Game, Own Countries And Display Your Message On Them.\n\nThe Leaderboard Shows Of TOP 5 Wealthiest Countries & Every Month Owners Of These Countries Will Be Rewarded With $GLMR.",
"id":"golem-park",
"tags":[
"NFT"
]
},
{
"urls":{
"telegram":"https://t.me/rarible",
"website":"https://rarible.com/",
"try":"https://rarible.com/",
"twitter":"https://x.com/rarible",
"discord":"https://discord.com/invite/rarible"
},
"slug":"rarible",
"createdAt":1722498909701,
"logo":{
"small":{
"width":429,
"fileName":"rarible-small.png",
"mimeType":"image/png",
"height":121
},
"large":{
"width":858,
"fileName":"rarible-medium.png",
"mimeType":"image/png",
"height":242
},
"full":{
"width":1716,
"fileName":"rarible-large.png",
"mimeType":"image/png",
"height":485
}
},
"name":"Rarible",
"chains":[
"moonbeam"
],
"shortDescription":"Rarible - NFT Marketplace for Brands, Communities and Traders",
"projectCreationDate":1721872843,
"contracts":[
],
"updatedAt":1722498909701,
"category":"nfts",
"description":"Discover, sell and buy NFTs on Rarible! Our aggregated NFT marketplace for Ethereum NFTs and Polygon NFTs powers brands, collections and creator marketplaces.",
"id":"rarible",
"featured":false,
"tags":[
"NFT"
]
},
{
"urls":{
"website":"https://neoncrisis.io/",
"try":"https://neoncrisis.io/",
"twitter":"https://twitter.com/NeonCrisisNFT",
"discord":"https://discord.gg/MVVjT9k9eD"
},
"slug":"neoncrisis-io",
"createdAt":1702283737907,
"logo":{
"small":{
"width":36,
"fileName":"neoncrisis-io-logo-small.jpeg",
"mimeType":"image/jpeg",
"height":36
},
"large":{
"width":319,
"fileName":"neoncrisis-io-logo-large.jpeg",
"mimeType":"image/jpeg",
"height":319
},
"full":{
"width":3000,
"fileName":"neoncrisis-io-logo-full.jpeg",
"mimeType":"image/jpeg",
"height":3000
}
},
"name":"Neon Crisis",
"chains":[
"moonriver"
],
"defiLLamaTvlExist":false,
"projectCreationDate":1654792548000,
"shortDescription":"6,008 heroes on the $MOVR network. A $RMRK powered metaverse featuring battle simulations, equipables, and more!",
"contracts":[
],
"updatedAt":1722498896060,
"category":"nfts",
"description":"",
"id":"neoncrisis-io",
"tags":[
"NFT",
"Gaming"
]
},
{
"urls":{
"telegram":"https://t.me/xp_network",
"website":"https://xp.network/",
"try":"https://xp.network/",
"twitter":"https://twitter.com/xpnetwork_",
"discord":"https://discord.com/invite/g3vkcsmd38"
},
"slug":"xp-network",
"createdAt":1699292615205,
"logo":{
"small":{
"width":36,
"fileName":"xp-network-logo-small.jpeg",
"mimeType":"image/jpeg",
"height":36
},
"large":{
"width":400,
"fileName":"xp-network-logo-large.jpeg",
"mimeType":"image/jpeg",
"height":400
},
"full":{
"width":3000,
"fileName":"xp-network-logo-full.jpeg",
"mimeType":"image/jpeg",
"height":3000
}
},
"name":"XP Network",
"chains":[
"moonbeam"
],
"defiLLamaTvlExist":false,
"projectCreationDate":1673327644000,
"shortDescription":"A powerful NFT bridge trusted by all major blockchains ",
"contracts":[
],
"updatedAt":1722498932103,
"category":"nfts",
"description":"We build software tools that enable experienced developers and non-coding blockchain community members to move their assets seamlessly and intuitively between versatile distributed ledgers. By doing so, we encourage unlimited growth of exchange and trade between otherwise isolated ecosystems. We enable them to enrich each other technologically with insights and discoveries. To gain access to new, previously inaccessible markets with users hungry for fresh ideas and technologies to invest in.",
"id":"xp-network",
"tags":[
"NFT",
"Bridges"
]
},
{
"urls":{
"website":"https://www.damnedpiratessociety.io/",
"try":"https://www.damnedpiratessociety.io/",
"twitter":"https://twitter.com/TheDPSproject",
"discord":"https://discord.com/invite/TheDamnedPiratesSociety"
},
"web3goContracts":[
{
"name":"Damned Pirates Society: DPSArtifact Token",
"chain":"moonriver",
"contract":"0xcd84ddadc45a25b02e1a6a5520171487a98e6155"
},
{
"name":"Damned Pirates Society: DPS Token",
"chain":"moonriver",
"contract":"0xb6e9e605aa159017173caa6181c522db455f6661"
},
{
"name":"Damned Pirates Society: DSPFlagship Token",
"chain":"moonriver",
"contract":"0x3822063a3f1aad3fd0b894e2a8f238ccca7c2d00"
},
{
"name":"Damned Pirates Society: DSPVoyage Token",
"chain":"moonriver",
"contract":"0x7b2e778453ab3a0d946c4620fb38a0530a434e15"
},
{
"name":"Damned Pirates Society: DOUBLOON Token",
"chain":"moonriver",
"contract":"0xe413a631e8a9a10958d9b7c64157449eae7c2064"
}
],
"currentTx":{
"moonriver":20402
},
"slug":"damned-pirates-society",
"web3goIDs":[
"Damned Pirates Society"
],
"createdAt":1699292616058,
"logo":{
"small":{
"width":36,
"fileName":"damned-pirates-society-logo-small.jpeg",
"mimeType":"image/jpeg",
"height":36
},
"large":{
"width":400,
"fileName":"damned-pirates-society-logo-large.jpeg",
"mimeType":"image/jpeg",
"height":400
},
"full":{
"width":3000,
"fileName":"damned-pirates-society-logo-full.jpeg",
"mimeType":"image/jpeg",
"height":3000
}
},
"name":"Damned Pirates Society",
"chains":[
"moonriver"
],
"defiLLamaTvlExist":false,
"currentUsers":{
"moonriver":2000
},
"projectCreationDate":1644828523000,
"shortDescription":"Eclectic pirate-based NFT project with utility",
"contracts":[
],
"updatedAt":1722547421801,
"category":"nfts",
"description":"A long time ago the Fortune’s Grasp was carrying families to settle on The Islands and start a new life. In the middle of their voyage they encountered a fearsome maelstrom. The Captain and his crew worked tirelessly to keep the ship afloat. Badly damaged, the Ship limped to the edges of the storm. It was taking on water and the cries of terrified children could be heard above the crashing waves. Another ship appeared on the horizon, it’s light glowing brightly against the dark night. The Captain of the Fortune’s Grasp ordered his crew to evacuate the families, but the fifty crew members ignored the Captain, abandoning ship, taking all means of escape with them. The Captain, left on the sinking ship, cursed the cowardly crew for damning those innocent souls to the watery depths. Those Forsaken Fifty were marked with The Black Spot, doomed to row the high seas until the Reaper came to claim his mutinous crew to serve on the Ship Of The Damned. However, if they could convince another soul to take their place at the oars, protection would be offered by those Pirates who’ve cheated the Reaper before. Those who’ve served and survived are welcome in the Damned Pirates Society.\r\n\r\nThe Damned Pirate Society is an Profile Picture NFT with inbuilt utility. Stake your Pirate for Treasure Maps(TMAP) and save these for your Doubloon farming voyages on our upcoming, skill based gamified contracts.",
"id":"damned-pirates-society",
"tags":[
"NFT",
"Gaming",
"GLMR Grants"
]
}
],
"count":40
}
```
Below are all possible categories and their respective parameters for querying the API. Ensure you query the API with the parameter formatted exactly as shown in lowercase.
| Category | API Parameter |
|:--------:|:-------------:|
| Bridges | `bridges` |
| DAO | `dao` |
| DEX | `dex` |
| DeFi | `defi` |
| Gaming | `gaming` |
| Lending | `lending` |
| NFTs | `nfts` |
| Other | `other` |
| Social | `social` |
| Wallets | `wallets` |
### Query a Chain {: #query-a-chain}
The following queries can be used to query all of the listed projects on Moonbeam or Moonriver. Note that Moonbase Alpha is not a supported network in the DApp Directory.
=== "Moonbeam"
```bash
https://apps.moonbeam.network/api/ds/v1/app-dir/projects?chain=moonbeam
```
=== "Moonriver"
```bash
https://apps.moonbeam.network/api/ds/v1/app-dir/projects?chain=moonriver
```
You are responsible for checking and validating the accuracy and truthfulness of all content. You are also responsible for doing your own diligence to understand the applicable risks present, including selection, performance, security, accuracy, or use of any third-party information. All information contained herein is subject to modification without notice.
--- END CONTENT ---
Doc-Content: https://docs.moonbeam.network/learn/platform/glossary/
--- BEGIN CONTENT ---
---
title: Glossary
description: We've compiled a glossary of terms related to Polkadot that'll make it easier to learn more about the ecosystem.
categories: Reference
---
# Glossary
There's a great deal of terminology that's specific to Polkadot, Substrate, and the emerging Parity/Web3 ecosystem. We've compiled a list of terms we think you'll want to know as you review the Moonbeam documentation, plans, and tutorials.
### Collators {: #collators }
One of the key network participants needed to support parachains within the Polkadot Network. In Moonbeam, collators are the nodes that are responsible for block production and for submitting produced blocks up to the Polkadot relay chain for finalization.
### Delegators {: #delegators }
Moonbeam token holders who stake tokens, vouching for specific collator candidates on the parachain. Any user that holds a minimum amount of tokens as [free balance](https://wiki.polkadot.com/learn/learn-accounts/#balance-types#balance-types){target=\_blank} can become a delegator by staking their tokens.
### Nominators {: #nominators }
Relay chain token holders who select to "back" a validator. They can receive part of the validator's reward, but are subject to slashing of their staked tokens in case the validator misbehaves. A nominator can back up to 16 validators, and their bond is fully distributed between the backed validators that were selected for the validator set.
### Nominated Proof of Stake {: #nominated-proof-of-stake }
The mechanism used by Polkadot for selecting its block validator set to maximize chain security. At its core, it is a Proof-of-Stake system (PoS) in which nominators back validators. The latter with the highest backing are selected to be part of the validator set for a session. The stake of a validator is slashed in case of misbehavior. Thus, nominators are expected to do due diligence on the validators they nominate.
### Parachains {: #parachains }
A blockchain which has a slot and is connected to Polkadot. Parachains receive shared security from Polkadot and the ability to interact with other parachains on the Polkadot network. They must lock DOT, the native relay chain token, to secure a slot for a specific period (up two years).
### Parathreads {: #parathreads }
A blockchain which can connect to Polkadot. Parathreads are able to interact with other members of the Polkadot network, but they bid for block finalization (in DOT) on a block-to-block basis. They compete with other parathreads for block finalization, meaning that the block with the highest bid is selected to be finalize in that round.
### Polkadot {: #polkadot }
A network of connected blockchains that provides shared security and the ability to interact between chains. Polkadot is built using the Substrate development framework. Chains that connect to Polkadot are called parachains.
### Relay Chain {: #relay-chain }
The backbone blockchain supporting the Polkadot network. Parachains connect to the relay chain and use it for shared security and message passing. Validators on the relay chain help secure the parachains.
### Smart Contract {: #smart-contract }
A [smart contract](https://en.wikipedia.org/wiki/Smart_contract){target=\_blank} is a computer program or a transaction protocol that is intended to automatically execute, control, or document legally relevant events and actions according to the terms of a contract or an agreement. Smart contracts intend to reduce the need for trusted intermediators, arbitrations, and enforcement costs, as well as reduce fraud losses and malicious and accidental exceptions.
### Substrate {: #substrate }
A Rust-based blockchain development framework created by Parity Technologies based on their experience implementing multiple blockchain clients. Substrate comes with many modules and functionalities that are needed when building a blockchain, including P2P networking, consensus mechanisms, staking, cryptocurrency, on-chain governance modules, and more. It dramatically reduces the time and engineering effort required to implement a blockchain. Substrate is now part of the [Polkadot SDK](https://polkadot.com/platform/sdk/){target=\_blank}.
### Substrate Frame Pallets {: #substrate-frame-pallets }
Substrate Frame Pallets are a collection of Rust-based modules, providing the functionality required for building a blockchain.
### Validators {: #validators }
A node that secures the Polkadot relay chain by staking DOT in the network, which is slashed if they misbehave. They finalize blocks from collators on parachains and also participate on consensus for the next relay chain block with other validators.
### WebAssembly/Wasm {: #webassemblywasm }
WebAssembly is an open standard that defines a portable binary code format. It is supported by different programming languages, compilers, and browsers.
--- END CONTENT ---
Doc-Content: https://docs.moonbeam.network/builders/build/historical-updates/
--- BEGIN CONTENT ---
---
title: Historical Updates
description: An overview of the historical updates made on Moonbeam and Moonriver, such as migrations and bug fixes applied to the Moonbeam source code.
categories: Reference
---
# Historical Updates
## Introduction {: #introduction }
This page overviews historical updates on Moonbeam and Moonriver, such as bug fixes to the Moonbeam source code and data migrations applied.
This page aims to provide information about unexpected behaviors or data inconsistencies associated with updates that require forced data migrations.
## Bugs {: #bugs }
#### Invalid Transactions Stored {: #invalid-transactions-stored }
For invalid transactions where the transaction cost couldn't be paid, the EVM pallet inserted the transaction metadata into storage instead of discarding it because there was no transaction cost validation. As a result, the runtime storage was unnecessarily bloated with invalid transaction data.
This bug only impacted Moonriver and Moonbase Alpha and existed during the following runtimes and block ranges:
| Network | Introduced | Fixed | Impacted Block Range |
|:--------------:|:----------:|:-----:|:--------------------:|
| Moonriver | RT49 | RT600 | 0 - 455106 |
| Moonbase Alpha | RT40 | RT600 | 0 - 675175 |
For more information, you can review the [relative Frontier PR on GitHub](https://github.com/polkadot-evm/frontier/pull/465){target=\_blank}.
---
#### Ethereum Fees Weren't Sent to Treasury {: #ethereum-fees-to-treasury }
The Moonbeam transaction fee model before Runtime 3401 and the passage of [MB101](https://forum.moonbeam.network/t/proposal-mb101-burn-100-of-transaction-fees-on-moonbeam/2022){target=\_blank} mandated a 20% allocation of fees sent to the on-chain Treasury and 80% burned as a deflationary force. However, before runtime 800, Ethereum transactions did not correctly allocate 20% of the transaction fees to the on-chain Treasury.
This bug only impacted Moonriver and Moonbase Alpha and existed during the following runtimes and block ranges:
| Network | Introduced | Fixed | Impacted Block Range |
|:--------------:|:----------:|:-----:|:--------------------:|
| Moonriver | RT49 | RT800 | 0 - 684728 |
| Moonbase Alpha | RT40 | RT800 | 0 - 915684 |
For more information, you can review the [relative PR on GitHub](https://github.com/moonbeam-foundation/moonbeam/pull/732){target=\_blank}.
---
#### Missing Refunds {: #missing-refunds }
Moonbeam is configured to set the existential deposit to 0, meaning that accounts do not need a minimum balance to be considered active. For Substrate-based chains with this configuration, some refunds were missing from zeroed accounts because the account was interpreted as not existing.
This bug existed during the following runtimes and block ranges:
| Network | Introduced | Fixed | Impacted Block Range |
|:--------------:|:----------:|:------:|:--------------------:|
| Moonbeam | RT900 | RT1001 | 0 - 5164 |
| Moonriver | RT49 | RT1001 | 0 - 1052241 |
| Moonbase Alpha | RT40 | RT1001 | 0 - 1285915 |
For more information, you can review the [relative Frontier PR](https://github.com/polkadot-evm/frontier/pull/509){target=\_blank} and the associated [Substrate PR on GitHub](https://github.com/paritytech/substrate/issues/10117){target=\_blank}.
---
#### Incorrect Collator Selection {: #incorrect-collator-selection }
The total delegations for collator candidates were not correctly updated when a delegation was increased via the `delegatorBondMore` extrinsic. This led to issues where the increased delegation amount wasn't included in the candidates' total amount bonded, which is used to determine which candidates are in the active set of collators. As a result, some candidates may not have been selected to be in the active set when they should have been, impacting their own and their delegators' rewards.
This bug existed during the following runtimes and block ranges:
| Network | Introduced | Fixed | Impacted Block Range |
|:--------------:|:----------:|:------:|:--------------------:|
| Moonbeam | RT900 | RT1300 | 0 - 524762 |
| Moonriver | RT49 | RT1300 | 0 - 1541735 |
| Moonbase Alpha | RT40 | RT1300 | 0 - 1761128 |
For more information, you can review the [relative PR on GitHub](https://github.com/moonbeam-foundation/moonbeam/pull/1291){target=\_blank}.
---
#### New Account Event Bug {: #new-account-event }
The `System.NewAccount` event is emitted when a new account is created. However, a bug prevented this event from being emitted for some accounts at creation time. A hotfix was applied that patched the impacted accounts and emitted the `System.NewAccount` at a later time.
The hotfix was applied in the following block ranges:
| Network | Block Range |
|:--------------:|:-------------------------------------------------------------------------------------------------------------------------------------:|
| Moonbeam | [1041355 - 1041358 and 1100752](https://moonbeam.subscan.io/extrinsic?module=evm&call=hotfix_inc_account_sufficients){target=\_blank} |
| Moonriver | [1835760 - 1835769](https://moonriver.subscan.io/extrinsic?module=evm&call=hotfix_inc_account_sufficients){target=\_blank} |
| Moonbase Alpha | [2097782 - 2097974](https://moonbase.subscan.io/extrinsic?address=&module=evm&call=hotfix_inc_account_sufficients){target=\_blank} |
This bug existed during the following runtimes and block ranges:
| Network | Introduced | Fixed | Impacted Block Range |
|:--------------:|:----------:|:------:|:--------------------:|
| Moonbeam | RT900 | RT1401 | 0 - 915320 |
| Moonriver | RT49 | RT1401 | 0 - 1705939 |
| Moonbase Alpha | RT40 | RT1400 | 0 - 1962557 |
For more information, you can review the [relative Frontier PR on GitHub](https://github.com/moonbeam-foundation/frontier/pull/46/files){target=\_blank}.
---
#### Incorrect Timestamp Units {: #incorrect-timestamp-units }
EIP-2612 and Ethereum blocks deal with timestamps in seconds; however, the Substrate timestamp pallet that Moonbeam implements uses milliseconds. This only affected the EIP-2612 implementation, not the `block.timestamp` value.
This bug existed during the following runtimes and block ranges:
| Network | Introduced | Fixed | Impacted Block Range |
|:--------------:|:----------:|:------:|:--------------------:|
| Moonbeam | RT900 | RT1606 | 0 - 1326697 |
| Moonriver | RT49 | RT1605 | 0 - 2077598 |
| Moonbase Alpha | RT40 | RT1603 | 0 - 2285346 |
For more information, you can review the [relative PR on GitHub](https://github.com/moonbeam-foundation/moonbeam/pull/1451){target=\_blank}.
---
#### Substrate Tips Missing Treasury Distribution {: #substrate-tips }
Tips for Substrate-based transactions weren't handled properly. The entire portion of the tip was burned because it was not handled in the runtime code. A fix was applied so that 20% was paid to the Treasury and 80% was burned, consistent with all other fee behavior at that time.
Note that RT3401 introduced a parameters pallet fee configuration allowing governance to adjust how fees are split between the Treasury and burning. After this runtime upgrade combined with the passage of [MB101](https://forum.moonbeam.network/t/proposal-mb101-burn-100-of-transaction-fees-on-moonbeam/2022){target=\_blank}, 100% of all transaction fees on both Moonbeam and Moonriver are now burned.
This bug existed during the following runtimes and block ranges:
| Network | Introduced | Fixed | Impacted Block Range |
|:--------------:|:----------:|:------:|:--------------------:|
| Moonbeam | RT900 | RT2403 | 0 - 4163078 |
| Moonriver | RT49 | RT2401 | 0 - 4668844 |
| Moonbase Alpha | RT40 | RT2401 | 0 - 4591616 |
For more information, you can review the [relative PR on GitHub](https://github.com/moonbeam-foundation/moonbeam/pull/2291){target=\_blank}.
---
#### Incorrect Delegation Reward Calculation {: #incorrect-delegation-reward-calculation }
The reward payouts for all delegations and collators were underestimated whenever there were pending requests. Delegation rewards are calculated based on the amount of tokens bonded by each delegator with respect to the total stake of the given collator. By counting delegation amounts for pending requests, the rewards to collators and their delegations were less than they should have been.
This bug existed during the following runtimes and block ranges:
| Network | Introduced | Fixed | Impacted Block Range |
|:--------------:|:----------:|:------:|:--------------------:|
| Moonbeam | RT1001 | RT1802 | 5165 - 1919457 |
| Moonriver | RT1001 | RT1801 | 1052242 - 2572555 |
| Moonbase Alpha | RT1001 | RT1800 | 1285916 - 2748785 |
You can review the [relative PR on GitHub](https://github.com/moonbeam-foundation/moonbeam/pull/1719){target=\_blank} for more information.
---
#### Block Parent Hash Calculated Incorrectly {: #block-parent-hash-calculated-incorrectly }
After EIP-1559 support was introduced, which included the transition to new Ethereum transaction types, the block header parent hash was miscalculated to `H256::default`.
This bug only impacted Moonbase Alpha and only impacted the following block:
| Network | Introduced | Fixed | Impacted Block |
|:--------------:|:----------:|:------:|:--------------:|
| Moonbase Alpha | RT1200 | RT1201 | 1648995 |
While the root issue was fixed in RT1201, the incorrect hash was corrected in RT2601.
For more information on the root fix, you can review the [relative Frontier PR on GitHub](https://github.com/polkadot-evm/frontier/pull/570/){target=\_blank}. To take a look at the correction of the parent hash, check out the corresponding [Moonbeam PR on GitHub](https://github.com/moonbeam-foundation/moonbeam/pull/2524){target=\_blank}.
---
#### Incorrect Handling of EIP-1559 Gas Fees {: #incorrect-gas-fees-eip1559 }
With the introduction of EIP-1559 support, the logic for handling `maxFeePerGas` and `maxPriorityFeePerGas` was implemented incorrectly. As a result, the `maxPriorityFeePerGas` was added to the `baseFee` even if the total amount was over the `maxFeePerGas`.
This bug existed during the following runtimes and block ranges:
| Network | Introduced | Fixed | Impacted Block Range |
|:--------------:|:----------:|:------:|:--------------------:|
| Moonbeam | RT1201 | RT1401 | 415946 - 915320 |
| Moonriver | RT1201 | RT1401 | 1471037 - 1705939 |
| Moonbase Alpha | RT1200 | RT1400 | 1648994 - 1962557 |
For more information, you can review the [relative Frontier PR](https://github.com/moonbeam-foundation/frontier/pull/45){target=\_blank}.
---
#### Transaction Fees Paid to Collators {: #transaction-fees-paid-to-collators }
For blocks that included EIP-1559 transactions where a priority fee was applied, the transaction fees were incorrectly calculated and distributed to the block's collator. The fee model on Moonbeam for transactions and smart contract execution was previously handled so that 20% of the fees went to the on-chain Treasury and 80% were burned as a deflationary force. Due to this bug, the transaction fees of the impacted transactions were not burned as expected.
Note that RT3401 introduced a parameters pallet fee configuration allowing governance to adjust how fees are split between the Treasury and burning. After this runtime upgrade combined with the passage of [MB101](https://forum.moonbeam.network/t/proposal-mb101-burn-100-of-transaction-fees-on-moonbeam/2022){target=\_blank}, 100% of all transaction fees on both Moonbeam and Moonriver are now burned.
This bug existed during the following runtimes and block ranges:
| Network | Introduced | Fixed | Impacted Block Range |
|:--------------:|:----------:|:------:|:--------------------:|
| Moonbeam | RT1201 | RT1504 | 415946 - 1117309 |
| Moonriver | RT1201 | RT1504 | 1471037 - 1910639 |
| Moonbase Alpha | RT1200 | RT1504 | 1648994 - 2221772 |
For more information, you can review the [relative PR on GitHub](https://github.com/moonbeam-foundation/moonbeam/pull/1528){target=\_blank}.
---
#### Incorrect State Root Hash {: #incorrect-state-root-hash }
The state root hash was miscalculated for non-legacy transactions as the transaction-type byte was not considered. With the support of [EIP-2930](https://eips.ethereum.org/EIPS/eip-2930){target=\_blank} and [EIP-1559](https://eips.ethereum.org/EIPS/eip-1559){target=\_blank}, the transaction types introduced are `0x01` (1) and `0x02` (2), respectively. These transaction types were omitted from the state root hash calculation.
This bug existed during the following runtimes and block ranges:
| Network | Introduced | Fixed | Impacted Block Range |
|:--------------:|:----------:|:------:|:--------------------:|
| Moonbeam | RT1201 | RT1701 | 415946 - 1581456 |
| Moonriver | RT1201 | RT1701 | 1471037 - 2281722 |
| Moonbase Alpha | RT1200 | RT1700 | 1648994 - 2529735 |
For more information, you can review the [relative Frontier PR](https://github.com/moonbeam-foundation/frontier/pull/86){target=\_blank} and [Moonbeam PR on GitHub](https://github.com/moonbeam-foundation/moonbeam/pull/1678/files){target=\_blank}.
---
#### Ethereum Transactions Duplicated in Storage {: #ethereum-transactions-duplicated-in-storage }
An upstream bug was introduced to Frontier in the Ethereum Pallet, causing pending transactions that existed during a runtime upgrade to be duplicated in storage across two different blocks. This only impacted the first two blocks after the runtime upgrade in which this bug was introduced.
Only Moonriver and Moonbase Alpha were impacted. The bug was introduced in the following runtimes and affected the following blocks:
| Network | Introduced | Impacted Blocks |
|:--------------:|:----------:|:-------------------:|
| Moonriver | RT1605 | 2077599 and 2077600 |
| Moonbase Alpha | RT1603 | 2285347 and 2285348 |
The following transactions were duplicated:
=== "Moonriver"
```js
'0x2cceda1436e32ae3b3a2194a8cb5bc4188259600c714789bae1fedc0bbc5125f',
'0x3043660e35e89cafd7b0e0dce9636f5fcc218fce2a57d1104cf21aabbff9a1c0',
'0x514411fb5c08f7c5aa6c61c38f33edfa74ff7e160831f6140e8dd3783648dbca',
'0xf1647c357d8e1b05c522d11cff1f5090a4df114595d0f4b9e4ac5bb746473eea',
'0x4be94803fe7839d5ef13ddd2633a293b4a7dddbe526839c15c1646c72e7b0b23',
'0x15fceb009bd49692b598859f9146303ed4d8204b38e35c147fcdb18956679dbe',
'0xa7460d23d5c633feec3d8e8f4382240d9b71a0d770f7541c3c32504b5403b70c',
'0x1c838b4c4e7796a9db5edfd0377aee6e0d89b623bf1d7803f766f4cf71daefb9',
'0xfb233a893e62d717ed627585f14b1ee8b3e300ac4e2c3016eb63e546a60820f0',
'0xfaf8908838683ad51894eb3c68196afb99ba2e2bb698a40108960ee55417b56a',
'0xa53973acbeac9fe948015dcfad6e0cb28d91b93c8115347c178333e73fd332d3',
'0x9df769c96c5fdd505c67fee27eaff3714bf8f3d45a2afc02dd2984884b3cecac',
'0x8f912ae91b408f082026992a87060ed245dac6e382a84288bd38fc08dbac30fe',
'0xb22af459d24cb25bc53785bdd0ae6a573e24f226c94fd8d2e4663b87d3b07a88',
'0x8ab9cd2bde7d679f798528b0c75325787f5fc7997e00589445b35b3954a815aa',
'0xd08a1f82f4d3dc553b4b559925f997ef8bb85cb24cb4d0b893f017129fb33b78',
'0xa1d40bce7cc607c19ca4b37152b6d8d3a408e3de6b9789c5977fcdef7ef14d97',
'0xe442227634db10f5d0e8c1da09f8721c2a57267edbf97c4325c4f8432fd48ade',
'0x0b4f5d8338a7c2b1604c1c42e96b12dc2a9d5ab264eb74ff730354e9765de13f',
'0x0b00fc907701003aad75560d8b1a33cbf4b75f76c81d776b8b92d20e1d2e9d31',
'0x9c18bd783f28427d873970ff9deaf1549db2f9a76e3edd6bdeae11358e447ef4',
'0x8b2523f163989969dd0ebcac85d14805756bc0075b89da1274fd2c53ccaa396a',
'0x47e80a0c533265974a55ea62131814e31b10f42895709f7e531e3e7b69f1387c'
```
=== "Moonbase Alpha"
```js
'0x006a6843eb35ad35a9ea9a99affa8d81f1ed500253c98cc9c080d84171a0afb3',
'0x64c102f664eb435206ad4fcb49b526722176bcf74801c79473c3b5b2c281a243',
'0xf546335453b6e35ce7e236ee873c96ba3a22602b3acc4f45f5d68b33a76d79ca',
'0x4ed713ccd474fc33d2022a802f064cc012e3e37cd22891d4a89c7ba3d776f2db',
'0xa5355f86844bb23fe666b10b509543fa377a9e324513eb221e0a2c926a64cae4',
'0xc14791a3a392018fc3438f39cac1d572e8baadd4ed350e0355d1ca874a169e6a'
```
The duplicated transactions belong to the first block. So, on Moonriver, the transactions belong to block 2077599, and on Moonbase Alpha, the impacted transactions belong to block 2285347.
For more information, you can review the [relative Frontier PR on GitHub](https://github.com/polkadot-evm/frontier/pull/638){target=\_blank}.
---
#### Gas Limit Too High for Non-Transactional Calls {: #gas-limit-too-high-for-non-transactional-calls }
When a non-transactional call, such as `eth_call` or `eth_estimateGas`, is made without specifying a gas limit for a past block, the client defaults to using the gas limit multiplier (10x), which causes the gas limit validation to fail as it is validating against an upper bound of the block gas limit. So, if the gas limit is greater than the block gas limit for a given call, a gas limit too high error is returned.
This bug existed during the following runtimes and block ranges:
| Network | Introduced | Fixed | Impacted Block Range |
|:--------------:|:----------:|:------:|:--------------------:|
| Moonbeam | RT1701 | RT1802 | 1581457 - 1919457 |
| Moonriver | RT1701 | RT1802 | 2281723 - 2616189 |
| Moonbase Alpha | RT1700 | RT1802 | 2529736 - 2879402 |
You can review the [relative Frontier PR on GitHub](https://github.com/polkadot-evm/frontier/pull/935){target=\_blank} for more information.
---
#### Remote EVM Calls Return Identical Transaction Hashes {: #remote-evm-calls-return-identical-tx-hashes }
When multiple remote EVM calls were sent from different accounts with the same transaction payload and nonce, the same transaction hash was returned for each call. This was possible because remote EVM calls are executed from a keyless account, so if the senders all had the same nonce and were sending the same transaction object, there was no differentiation in the calculation of the transaction hash. This was fixed by adding a global nonce to the Ethereum XCM Pallet, which is the pallet that makes remote EVM calls possible.
This bug only existed on Moonbase Alpha during the following runtimes and block ranges:
| Network | Introduced | Fixed | Impacted Block Range |
|:--------------:|:----------:|:------:|:--------------------:|
| Moonbase Alpha | RT1700 | RT1900 | 2529736 - 3069634 |
You can review the [relative PR on GitHub](https://github.com/moonbeam-foundation/moonbeam/pull/1790){target=\_blank} for more information.
---
#### Gas Estimation Discrepancy {: #gas-estimation-discrepancy }
There was a difference between estimating the gas for a transaction using a non-transaction call, such as `eth_call`, and the execution of it on-chain. The discrepancy occurred because the non-transactional calls were not properly accounting for `maxFeePerGas` and `maxPriorityFeePerGas`, as such, the ([Proof of Validity](https://wiki.polkadot.com/general/glossary/#proof-of-validity){target=\_blank}) consumed by the Ethereum transaction was counted differently. This was fixed by properly accounting for these fields when estimating the size of the on-chain transaction.
This bug existed during the following runtimes and block ranges:
| Network | Introduced | Fixed | Impacted Block Range |
|:--------------:|:----------:|:------:|:--------------------:|
| Moonbeam | RT1201 | RT2501 | 415946 - 4543267 |
| Moonriver | RT1201 | RT2500 | 1471037 - 5175574 |
| Moonbase Alpha | RT1200 | RT2500 | 1648994 - 5053547 |
You can review the [relative PR on GitHub](https://github.com/moonbeam-foundation/moonbeam/pull/1790/){target=\_blank} for more information.
---
#### Incorrect Effective Gas Price In Transaction Receipts {: #incorrect-effective-gas-price }
The `effectiveGasPrice` value returned by `eth_getTransactionReceipt` was different from the on-chain value due to an incorrect calculation of the base fee. Specifically, the transaction receipt's value was computed using the `NextFeeMultiplier` from the block in which the transaction was included rather than the previous block, which is the correct source for computing the base fee.
This bug existed during the following runtimes and block ranges:
| Network | Introduced | Fixed | Impacted Block Range |
|:--------------:|:----------:|:------:|:--------------------:|
| Moonbeam | RT1201 | RT2801 | 415946 - 5899847 |
| Moonriver | RT1201 | RT2801 | 1471037 - 6411588 |
| Moonbase Alpha | RT1200 | RT2801 | 1648994 - 6209638 |
You can review the [relative Frontier PR](https://github.com/polkadot-evm/frontier/pull/1280){target=\_blank} and [Moonbeam PR on GitHub](https://github.com/moonbeam-foundation/moonbeam/pull/2610){target=\_blank} for more information.
---
#### Skipped Ethereum Transaction Traces {: #skipped-ethereum-transaction-traces }
Runtimes with the `evm-tracing` feature enabled introduced additional `ref_time` overhead due to special logic that traces Ethereum transactions (emitting events for each component: gasometer, runtime, EVM) used to fill information for RPC calls like `debug_traceTransaction` and `trace_filter`.
Since the real `ref_time` in production runtimes is smaller, this could cause the block weight limits to be reached when replaying a block in an EVM-tracing runtime, resulting in skipped transaction traces. This was observed in Moonbeam block [9770044](https://moonbeam.subscan.io/block/9770044){target=\_blank}.
The fix consisted of resetting the previously consumed weight before tracing each Ethereum transaction. It's important to note that this issue only affected code under `evm-tracing`, which is not included in any production runtime.
This bug was fixed in the following runtime:
| Network | Fixed | Impacted Block |
|:--------------:|:------:|:--------------:|
| Moonbeam | RT3501 | 9770044 |
For more information, you can review the [relative PR on GitHub](https://github.com/moonbeam-foundation/moonbeam/pull/3210){target=\_blank}.
---
#### Notify Inactive Collator Fails for Long-Inactive Collators {: #notify-inactive-collator-fails }
The `notifyInactiveCollator` extrinsic, designed to remove collators from the pool if they haven't produced any blocks in the last two rounds, failed for collators who had been inactive for significantly longer than two rounds. The transaction would only succeed within the first few blocks of a new round.
The bug existed during the following runtimes and block ranges:
| Network | Introduced | Fixed | Impacted Block Range |
|:--------------:|:----------:|:------:|:--------------------:|
| Moonbase Alpha | RT2601 | RT3500 | 5474345 – 10750816 |
| Moonriver | RT2602 | RT3501 | 5638536 – 10665393 |
| Moonbeam | RT2602 | RT3501 | 4977160 – 10056989 |
For more information, you can review the [relative PR on GitHub](https://github.com/moonbeam-foundation/moonbeam/pull/3128){target=\_blank}.
---
## Migrations {: #migrations }
Migrations are necessary when a storage item is changed or added and needs to be populated with data. The migrations listed below have been organized by the impacted pallet(s).
### Author Mapping Pallet {: #author-mapping }
#### Update the Mapping Storage Item {: #update-mapping-storage-item }
This migration updated the now deprecated `Mapping` storage item of the author mapping pallet to use a more secure hasher type. The hasher type was updated to [Blake2_128Concat](https://paritytech.github.io/substrate/master/frame_support/struct.Blake2_128Concat.html){target=\_blank} instead of [Twox64Concat](https://paritytech.github.io/substrate/master/frame_support/struct.Twox64Concat.html){target=\_blank}.
This migration was only applied to Moonriver and Moonbase Alpha and was executed at the following runtimes and blocks:
| Network | Executed Runtime | Block Applied |
|:--------------:|:----------------:|:-------------:|
| Moonriver | RT800 | 684728 |
| Moonbase Alpha | RT800 | 915684 |
For more information, you can review the [relative PR on GitHub](https://github.com/moonbeam-foundation/moonbeam/pull/679){target=\_blank}.
---
#### Add Support for VRF Keys {: #add-support-for-vrf-keys }
When VRF key support was introduced, the `MappingWithDeposit` storage item of the author mapping pallet was updated to include a `keys` field to support VRF keys that can be looked up via the Nimbus ID. A migration was applied to update the existing storage items with this new field.
This migration was executed at the following runtimes and blocks:
| Network | Executed Runtime | Block Applied |
|:--------------:|:----------------:|:-------------:|
| Moonbeam | RT1502 | 1107285 |
| Moonriver | RT1502 | 1814458 |
| Moonbase Alpha | RT1502 | 2112058 |
For more information, you can review the [relative PR on GitHub](https://github.com/moonbeam-foundation/moonbeam/pull/1407){target=\_blank}.
---
#### One Nimbus ID per Account ID {: #one-nimbus-id-per-account-id }
A migration was applied to ensure that an account ID can have only one Nimbus ID. The migration accepted the first Nimbus ID owned by a given account and cleared any additional Nimbus IDs associated with the account. For any cleared associations, the bond for the association was returned.
This migration was executed at the following runtimes and blocks:
| Network | Executed Runtime | Block Applied |
|:--------------:|:----------------:|:-------------:|
| Moonbeam | RT1606 | 1326697 |
| Moonriver | RT1605 | 2077599 |
| Moonbase Alpha | RT1603 | 2285347 |
For more information, you can review the [relative PR on GitHub](https://github.com/moonbeam-foundation/moonbeam/pull/1525){target=\_blank}.
---
### Base Fee Pallet {: #base-fee }
#### Set Elasticity Storage Item Value {: #set-elasticity }
This migration sets the `Elasticity` storage item of the base fee pallet to zero, which results in a constant `BaseFeePerGas`.
This migration was executed at the following runtimes and blocks:
| Network | Executed Runtime | Block Applied |
|:--------------:|:----------------:|:-------------:|
| Moonbeam | RT1300 | 524762 |
| Moonriver | RT1300 | 1541735 |
| Moonbase Alpha | RT1300 | 1761128 |
For more information, you can review the [relative PR on GitHub](https://github.com/moonbeam-foundation/moonbeam/pull/1744){target=\_blank}.
---
### Democracy Pallet {: #democracy }
#### Preimage Storage Moved to New Preimage Pallet
A migration was applied, which moved preimages stored in the democracy pallet to a new preimage pallet. This migration on Moonbeam was required as a result of an [upstream change to Polkadot](https://github.com/paritytech/substrate/pull/11649/){target=\_blank}.
There was one preimage that was affected in Moonbeam, which was dropped from the scheduler queue and never executed: `0x14262a42aa6ccb3cae0a169b939ca5b185bc317bb7c449ca1741a0600008d306`. This preimage was [manually removed](https://moonbeam.subscan.io/extrinsic/2693398-8){target=\_blank} by the account that initially submitted the preimage.
This migration was executed at the following runtimes and blocks:
| Network | Executed Runtime | Block Applied |
|:--------------:|:----------------:|:-------------:|
| Moonbeam | RT2000 | 3310369 |
| Moonriver | RT2000 | 3202604 |
| Moonbase Alpha | RT2000 | 2673234 |
For more information, you can review the [relative PR on GitHub](https://github.com/moonbeam-foundation/moonbeam/pull/1962){target=\_blank}.
---
#### Remove Governance V1 Collectives {: #remove-gov-v1-collectives }
A migration was applied to remove the governance V1 collectives, which included the Council and Technical Committee. The governance V1 collectives were replaced with the OpenGov (governance V2) Technical Committee.
This migration was executed at the following runtimes and blocks:
| Network | Executed Runtime | Block Applied |
|:--------------:|:----------------:|:-------------:|
| Moonbeam | RT2801 | 5899847 |
| Moonriver | RT2801 | 6411588 |
| Moonbase Alpha | RT2801 | 6209638 |
For more information, you can review the [relative PR on GitHub](https://github.com/moonbeam-foundation/moonbeam/pull/2643){target=\_blank}.
A follow-up migration was required to properly clear the storage entries associated with the governance V1 collectives, which was executed at the following runtimes and blocks:
| Network | Executed Runtime | Block Applied |
|:--------------:|:----------------:|:-------------:|
| Moonbeam | RT2901 | 6197065 |
| Moonriver | RT2901 | 6699589 |
| Moonbase Alpha | RT2901 | 6710531 |
For more information, you can review the [relative PR on GitHub](https://github.com/moonbeam-foundation/moonbeam/pull/2711){target=\_blank}.
---
#### Remove Governance V1 Democracy Pallet {: #remove-gov-v1-collectives }
A migration was applied to remove the storage associated with the Democracy Pallet used in governance V1. The Democracy Pallet was replaced with the Preimage, Referenda, and Collective Voting OpenGov (governance V2) pallets.
This migration was executed at the following runtimes and blocks:
| Network | Executed Runtime | Block Applied |
|:--------------:|:----------------:|:-------------:|
| Moonbeam | RT2901 | 6197065 |
| Moonriver | RT2901 | 6699589 |
| Moonbase Alpha | RT2901 | 6710531 |
For more information, you can review the [relative PR on GitHub](https://github.com/moonbeam-foundation/moonbeam/pull/2685){target=\_blank}.
---
### EVM Pallet {: evm-pallet }
#### EVM Contract Metadata
A migration was introduced to automate the manual process of setting EVM contract metadata for contracts deployed more than two years ago that hadn't been interacted with after the introduction of metadata storage item. This migration replaces the need to manually call `createContractMetadata(address)` on these contracts to make them compatible with the current runtime.
This migration was executed at the following runtimes and blocks:
| Network | Executed Runtime | Block Applied |
|:---------:|:----------------:|:-------------:|
| Moonbeam | RT3200 | 7985204 |
| Moonriver | RT3200 | 8519187 |
---
### Moonbeam Orbiter Pallet {: #moonbeam-orbiter }
#### Remove the Minimum Bond Requirement for Orbiter Collators {: #remove-orbiter-minimum-bond }
A migration was applied to the Moonbeam Orbiter Pallet that sets the bonds of the existing orbiter collators to zero. This change enabled payouts to be even for future orbiter program expansions.
This migration was executed at the following runtimes and blocks:
| Network | Executed Runtime | Block Applied |
|:--------------:|:----------------:|:-------------:|
| Moonbeam | RT2602 | 4977160 |
| Moonriver | RT2602 | 5638536 |
| Moonbase Alpha | RT2601 | 5474345 |
For more information, you can review the [relative PR on GitHub](https://github.com/moonbeam-foundation/moonbeam/pull/2526){target=\_blank}.
---
### Parachain Staking Pallet {: #parachain-staking }
#### Update Collator State Storage Item {: #update-collator-state-storage-item }
A migration was applied that updated the `Collator` storage item of the parachain staking pallet to the new `Collator2` storage item. This change updated the collator state to include the following items:
- The `nominators` set is a list of all of the nominator (delegator) account IDs without their respective balance bonded
- A new `top_nominators` storage item that returns a list of all of the top nominators ordered by greatest bond amount to least
- A new `bottom_nominators` storage item that returns a list of all of the bottom nominators ordered by least bond amount to greatest
- The `total` storage item was replaced with `total_counted` and `total_backing`. The `total_counted` item returns the sum of the top nominations and the collator's self-bond, whereas the `total_backing` item returns the sum of all of the nominations and the collator's self-bond
This migration was only applied to Moonriver and Moonbase Alpha and was executed at the following runtimes and blocks:
| Network | Executed Runtime | Block Applied |
|:--------------:|:----------------:|:-------------:|
| Moonriver | RT53 | 9696 |
| Moonbase Alpha | RT52 | 238827 |
For more information, you can review the [relative PR on GitHub](https://github.com/moonbeam-foundation/moonbeam/pull/505){target=\_blank}.
---
#### Patch Total Staked Amount {: #patch-total-staked-amount }
A migration was applied to the `total` staked amount of the `CollatorState` storage item in the Parachain Staking Pallet due to a potential bug that may have led to an incorrect amount.
This migration was only applied to Moonriver and Moonbase Alpha and was executed at the following runtimes and blocks:
| Network | Executed Runtime | Block Applied |
|:--------------:|:----------------:|:-------------:|
| Moonriver | RT53 | 9696 |
| Moonbase Alpha | RT52 | 238827 |
For more information, you can review the [relative PR on GitHub](https://github.com/moonbeam-foundation/moonbeam/pull/502){target=\_blank}.
---
#### Support Delayed Nominator (Delegator) Exits {: #support-delayed-nominator-exits }
The exit queue for handling candidate exits had been updated to include support for delayed nominator (delegator) exits and revocations, which required a migration to update the `ExitQueue` parachain staking pallet storage item to `ExitQueue2`. The `NominatorState` storage item was also migrated to `NominatorState2` to prevent a nominator from performing more nominations when they already have scheduled an exit.
These migrations were only applied to Moonriver and Moonbase Alpha and were executed at the following runtimes and blocks:
| Network | Executed Runtime | Block Applied |
|:--------------:|:----------------:|:-------------:|
| Moonriver | RT200 | 259002 |
| Moonbase Alpha | RT200 | 457614 |
For more information, you can review the [relative PR on GitHub](https://github.com/moonbeam-foundation/moonbeam/pull/610){target=\_blank}.
---
#### Purge Staking Storage Bloat {: #purge-staking-storage-bloat }
A migration was applied to purge staking storage bloat for the `Points` and `AtStake` storage items of the parachain staking pallet that are older than two rounds.
This migration was executed at the following runtimes and blocks:
| Network | Executed Runtime | Block Applied |
|:--------------:|:----------------:|:-------------:|
| Moonbeam | RT1001 | 5165 |
| Moonriver | RT1001 | 1052242 |
| Moonbase Alpha | RT1001 | 1285916 |
For more information, you can review the [relative PR on GitHub](https://github.com/moonbeam-foundation/moonbeam/pull/970){target=\_blank}.
---
#### Support Manual Exits and DPoS Terminology {: #support-manual-exits-dpos-terminology }
The parachain staking pallet was updated to include manual exits. If a candidate or delegator wanted to decrease or revoke their bond or leave the candidate or delegator pool, they would need to schedule a request first, wait for a delay period to pass, and then manually execute the request. As such, a migration was applied to replace the automatic exit queue, including the `ExitQueue2` storage item, with a manual exits API.
In addition, a change was made to switch from Nominated Proof of Stake (NPoS) to Delegated Proof of Stake (DPoS) terminology; this marked the sweeping change from "nominate" to "delegate". This required the migration of the following parachain staking pallet storage items:
- `CollatorState2` was migrated to `CandidateState`
- `NominatorState2` was migrated to `DelegatorState`
These migrations were executed at the following runtimes and blocks:
| Network | Executed Runtime | Block Applied |
|:--------------:|:----------------:|:-------------:|
| Moonbeam | RT1001 | 5165 |
| Moonriver | RT1001 | 1052242 |
| Moonbase Alpha | RT1001 | 1285916 |
For more information, you can review the [relative PR on GitHub](https://github.com/moonbeam-foundation/moonbeam/pull/810){target=\_blank}.
---
#### Increase Max Delegations per Candidate {: #increase-max-delegations-per-candidate }
A migration was applied to increase the maximum number of delegations per candidate in the parachain staking pallet. It increased the delegations from 100 to 500 on Moonbase Alpha and Moonriver and from 100 to 1000 on Moonbeam.
This migration was executed at the following runtimes and blocks:
| Network | Executed Runtime | Block Applied |
|:--------------:|:----------------:|:-------------:|
| Moonbeam | RT1101 | 171061 |
| Moonriver | RT1101 | 1188000 |
| Moonbase Alpha | RT1100 | 1426319 |
For more information, you can review the [relative PR on GitHub](https://github.com/moonbeam-foundation/moonbeam/pull/1096){target=\_blank}.
---
#### Split Candidate Delegations into Top and Bottom {: #split-candidate-delegations-top-bottom }
This migration splits the deprecated `CandidateState` storage item of the parachain staking pallet into the following three new storage items to avoid unnecessary storage reads:
- `CandidateInfo`
- `TopDelegations`
- `BottomDelegations`
This migration was executed at the following runtimes and blocks:
| Network | Executed Runtime | Block Applied |
|:--------------:|:----------------:|:-------------:|
| Moonbeam | RT1201 | 415946 |
| Moonriver | RT1201 | 1471037 |
| Moonbase Alpha | RT1200 | 1648994 |
For more information, you can review the [relative PR on GitHub](https://github.com/moonbeam-foundation/moonbeam/pull/1117){target=\_blank}.
---
#### Patch Incorrect Total Delegations {: #patch-incorrect-total-delegations }
There was a migration applied to fix the [Incorrect Collator Selection](#incorrect-collator-selection) bug and patch the delegations total for all candidates.
This migration was executed at the following runtimes and blocks:
| Network | Executed Runtime | Block Applied |
|:--------------:|:----------------:|:-------------:|
| Moonbeam | RT1300 | 524762 |
| Moonriver | RT1300 | 1541735 |
| Moonbase Alpha | RT1300 | 1761128 |
For more information, you can review the [relative PR on GitHub](https://github.com/moonbeam-foundation/moonbeam/pull/1291){target=\_blank}.
---
#### Split Delegator State into Delegation Scheduled Requests {: #split-delegator-state }
A migration was applied that moved pending delegator requests from the `DelegatorState` storage item of the parachain staking pallet into a new `DelegationScheduledRequests` storage item.
This migration was executed at the following runtimes and blocks:
| Network | Executed Runtime | Block Applied |
|:--------------:|:----------------:|:-------------:|
| Moonbeam | RT1502 | 1107285 |
| Moonriver | RT1502 | 1814458 |
| Moonbase Alpha | RT1502 | 2112058 |
For more information, you can review the [relative PR on GitHub](https://github.com/moonbeam-foundation/moonbeam/pull/1408){target=\_blank}.
---
#### Replace Staking Reserves with Locks {: #replace-staking-reserves }
A migration was applied that changed users' staking reserved balances to locked balances. The locked balance is the same type as democracy-locked funds, allowing users to use their staked funds to participate in democracy.
This migration was executed at the following runtimes and blocks:
| Network | Executed Runtime | Block Applied |
|:--------------:|:----------------:|:-------------:|
| Moonbeam | RT1701 | 1581457 |
| Moonriver | RT1701 | 2281723 |
| Moonbase Alpha | RT1700 | 2529736 |
For more information, you can review the [relative PR on GitHub](https://github.com/moonbeam-foundation/moonbeam/pull/1604){target=\_blank}.
---
#### Auto-Compounding Support {: #auto-compounding-support }
To support auto-compounding, two migrations were applied to the `AtStake` storage item in the parachain staking pallet:
- `RemovePaidRoundsFromAtStake` - to remove any stale `AtStake` entries relating to already paid-out rounds with candidates that didn't produce any blocks. This migration is a prerequisite for the `MigrateAtStakeAutoCompound` migration
- `MigrateAtStakeAutoCompound` - migrates the snapshots for unpaid rounds for `AtStake` entries
These migrations were executed at the following runtimes and blocks:
| Network | Executed Runtime | Block Applied |
|:--------------:|:----------------:|:-------------:|
| Moonbeam | RT1901 | 2317683 |
| Moonriver | RT1901 | 2911863 |
| Moonbase Alpha | RT1900 | 3069635 |
For more information, you can review the [relative PR on GitHub](https://github.com/moonbeam-foundation/moonbeam/pull/1878){target=\_blank}.
---
#### Switch to Block-Based Staking Rounds {: #block-based-staking-rounds }
A migration was applied to switch from time-based staking rounds to fixed block-based rounds.
This migration was executed at the following runtimes and blocks:
| Network | Executed Runtime | Block Applied |
|:--------------:|:----------------:|:-------------:|
| Moonbeam | RT2801 | 5899847 |
| Moonriver | RT2801 | 6411588 |
| Moonbase Alpha | RT2801 | 6209638 |
For more information, you can review the [relative PR on GitHub](https://github.com/moonbeam-foundation/moonbeam/pull/2690){target=\_blank}.
---
#### Renaming of Parachain Bond Reserve Events {: #renaming-of-parachain-bond-reserve-events }
Prior to Runtime 3300, the `ReservedForParachainBond` event was emitted once per round to indicate parachain bond reserve funding through inflation. In Runtime 3300, this same event was renamed to `InflationDistributed`.
This change took effect at the following runtimes and blocks:
| Network | Executed Runtime | Block Applied |
|:--------------:|:----------------:|:-------------:|
| Moonbeam | RT3300 | 8381443 |
| Moonriver | RT3300 | 8894417 |
| Moonbase Alpha | RT3300 | 9062316 |
For more information, you can review the [relative PR on GitHub](https://github.com/moonbeam-foundation/moonbeam/pull/2976){target=\_blank}.
---
### Referenda Pallet {: #referenda-pallet }
#### Refunds for Submission Deposits {: #refunds-for-submission-deposits }
A migration was introduced to support refunds for submission deposits on closed referenda that updated the `ReferendumInfo` type. The following invariants of `ReferendumInfo` were changed so that the second parameter, `Deposit```https://moonbeam-rpc.dwellir.com```| 20 req/sec | | OnFinality |
```https://moonbeam.api.onfinality.io/public```| 40 req/sec | | UnitedBloc |
```https://moonbeam.unitedbloc.com```| 32 req/sec | | RadiumBlock |
```https://moonbeam.public.curie.radiumblock.co/http```| 200 req/sec | | 1RPC |
```https://1rpc.io/glmr```| 10k req/day | | Grove |
```https://moonbeam.rpc.grove.city/v1/01fdb492```| 5k req/day | === "WSS" | Provider | RPC URL | Limits | |:-----------:|:--------------------------------------------------------------:|:-----------:| | Dwellir |
```wss://moonbeam-rpc.dwellir.com```| 20 req/sec | | OnFinality |
```wss://moonbeam.api.onfinality.io/public-ws```| 40 req/sec | | UnitedBloc |
```wss://moonbeam.unitedbloc.com```| 32 req/sec | | RadiumBlock |
```wss://moonbeam.public.curie.radiumblock.co/ws```| 200 req/sec | | 1RPC |
```wss://1rpc.io/glmr```| 10k req/day | ### Moonriver {: #moonriver } === "HTTPS" | Provider | RPC URL | Limits | |:-----------:|:-------------------------------------------------------------------:|:-----------:| | Dwellir |
```https://moonriver-rpc.dwellir.com```| 20 req/sec | | OnFinality |
```https://moonriver.api.onfinality.io/public```| 40 req/sec | | UnitedBloc |
```https://moonriver.unitedbloc.com```| 32 req/sec | | RadiumBlock |
```https://moonriver.public.curie.radiumblock.co/http```| 200 req/sec | | Grove |
```https://moonriver.rpc.grove.city/v1/01fdb492```| 5k req/day | === "WSS" | Provider | RPC URL | Limits | |:-----------:|:---------------------------------------------------------------:|:-----------:| | Dwellir |
```wss://moonriver-rpc.dwellir.com```| 20 req/sec | | OnFinality |
```wss://moonriver.api.onfinality.io/public-ws```| 40 req/sec | | UnitedBloc |
```wss://moonriver.unitedbloc.com```| 32 req/sec | | RadiumBlock |
```wss://moonriver.public.curie.radiumblock.co/ws```| 200 req/sec | ### Moonbase Alpha {: #moonbase-alpha } === "HTTPS" | Provider | RPC URL | Limits | |:-------------------:|:------------------------------------------------------------------:|:-----------:| | Dwellir |
```https://moonbase-rpc.dwellir.com```| 20 req/sec | | OnFinality |
```https://moonbeam-alpha.api.onfinality.io/public```| 40 req/sec | | Moonbeam Foundation |
```https://rpc.api.moonbase.moonbeam.network```| 25 req/sec | | UnitedBloc |
```https://moonbase.unitedbloc.com```| 32 req/sec | | RadiumBlock |
```https://moonbase.public.curie.radiumblock.co/http```| 200 req/sec | === "WSS" | Provider | RPC URL | Limits | |:-------------------:|:-----------------------------------------------------------------:|:-----------:| | Dwellir |
```wss://moonbase-rpc.dwellir.com```| 20 req/sec | | OnFinality |
```wss://moonbeam-alpha.api.onfinality.io/public-ws```| 40 req/sec | | Moonbeam Foundation |
```wss://wss.api.moonbase.moonbeam.network```| 25 req/sec | | UnitedBloc |
```wss://moonbase.unitedbloc.com```| 32 req/sec | | RadiumBlock |
```wss://moonbase.public.curie.radiumblock.co/ws```| 200 req/sec | #### Relay Chain {: #relay-chain } To connect to the Moonbase Alpha relay chain, you can use the following WS Endpoint: | Provider | RPC URL | |:--------:|:----------------------------------------------------------:| | OpsLayer |
```wss://relay.api.moonbase.moonbeam.network```| ## RPC Endpoint Providers {: #endpoint-providers } You can create your own endpoint suitable for development or production use using any of the following API providers: - [1RPC](#1rpc) - [Blast](#blast) - [Chainstack](#chainstack) - [dRPC](#drpc) - [Dwellir](#dwellir) - [GetBlock](#getblock) - [Grove](#grove) - [OnFinality](#onfinality) - [UnitedBloc](#unitedbloc) ### 1RPC {: #1rpc} [1RPC](https://www.1rpc.io){target=_blank} is a free and private RPC relay that protects user privacy by preventing data collection, user tracking, phishing attempts from other parties. It tunnels user requests via distributed relays to other RPC providers whilst preventing the tracking of user metadata such as IP address, device information and wallet linkability with secure enclave technology. 1RPC is created to be an open initiative from the blockchain infrastructure community. They are motivated by a common good mission to help build a better Web3 and encourage anyone who values user privacy to join this open collaboration. Head over to [1RPC](https://www.1rpc.io){target=_blank} official site to set it up!  ### Blast {: #blast} As a user of [Blast](https://blastapi.io){target=_blank} powered by Bware Labs, you will be able to obtain your own free endpoint allowing you to interact with Moonbeam, just by performing a few simple clicks within a user-friendly interface. To get started, you'll need to head to [Blast](https://blastapi.io){target=_blank}, and launch the app, and connect your wallet. Once your wallet is connected you will be able to create a project and then generate your own custom endpoint. To generate an endpoint: 1. Create a new project 2. Click on **Available Endpoints** 3. Select Moonbeam network for your endpoint 4. Confirm the selected network and Press **Activate** 5. You'll now see Moonbeam under **Active Endpoints**. Click on the network and you'll see your custom RPC and WSS endpoints on the next page  ### Chainstack {: #chainstack } [Chainstack](https://chainstack.com/){target=_blank}, the Web3 infrastructure provider, offers free and paid endpoints for Moonbeam. The free Developer plan starts with 3 million monthly requests and 25 requests per second (RPS). You can easily scale with the paid plans. To start with a free Developer plan endpoint, sign up using an email or any social account, like GitHub or X (Twitter). 1. Visit [Chainstack](https://console.chainstack.com/){target=_blank} 2. Sign up 3. Deploy a Moonbeam node  ### dRPC.org {: #drpc } dRPC.org offers public and paid [Moonbeam RPC](https://drpc.org/chainlist/moonbeam){target=_blank} endpoints, providing an efficient, low-latency connection to blockchain nodes. The paid tiers include higher request limits, lower latency, and advanced analytics for optimized performance. How to use dRPC: 1. Sign up or log in at [dRPC.org](https://drpc.org/){target=_blank} 2. In the dashboard, create an API key 3. Click the key and select the desired endpoint For 24/7 support, join dRPC's [Discord](https://drpc.org/discord){target=_blank}. ### Dwellir {: #dwellir } [Dwellir](https://www.dwellir.com){target=_blank} is a blockchain operation service that ensures global scalability, low latency, and a 99.99% uptime guarantee, providing fast and reliable node operations wherever your business stands. The public endpoint service is geographically distributed bare metal servers globally. As the service is public, there are no sign-up or API keys to manage. To get started with a developer endpoint or dedicated node, you'll need to contact us: 1. Visit [Dwellir](https://www.dwellir.com/contact){target=_blank} 2. Submit your **email** and your node request  ### GetBlock {: #getblock } [GetBlock](https://getblock.io){target=_blank} is a service that provides instant API access to Moonbeam and Moonriver and is available through shared and dedicated nodes. [Dedicated nodes](https://docs.getblock.io/getting-started/plans-and-limits/choosing-your-plan#dedicated-nodes){target=_blank} provide access to a private server with fast speeds and without rate limits. [Shared nodes](https://docs.getblock.io/getting-started/plans-and-limits/choosing-your-plan#shared-nodes){target=_blank} provide a free API/add-on based endpoint for you to get started quickly. To get started with GetBlock, you can go to the [GetBlock registration page](https://account.getblock.io/sign-up){target=_blank} and sign up for a new account. Then, from your account **Dashboard**, you can view and manage your existing endpoints for multiple protocols, and also create new ones. Creating a new API/add-on based endpoint is simple, all you have to do is: 1. Fill the information for the desired protocol from the list of available blockchains 2. Choose the network you want your endpoint to point to (**Mainnet**, **Testnet**, etc) 3. Select **JSON-RPC** from the **API/Add-on** dropdown 4. Click the **Get** button at the far right and you're all set to go!  ### Grove {: #grove } [Grove](https://grove.city){target=_blank} is a decentralized RPC network that provides reliable Web3 infrastructure with enterprise-grade performance and security. Grove offers both free and paid tiers, with the free tier providing generous limits for development use, while paid plans offer higher throughput, dedicated support, and advanced features for production applications. Grove's decentralized approach ensures high availability and censorship resistance by distributing requests across multiple node operators. The network supports both JSON-RPC and WebSocket connections for real-time applications. To get started with Grove: 1. Visit the [Grove Portal](https://portal.grove.city/){target=_blank} and sign up for an account 2. From your dashboard, create a new application 3. Copy your Moonbeam or Moonriver endpoints 4. Start making requests to your custom Grove endpoint Grove provides detailed analytics, request monitoring, and flexible rate limiting to help you optimize your application's performance.  ### OnFinality {: #onfinality } [OnFinality](https://onfinality.io){target=_blank} provides a free API key based endpoint for customers in place of a public endpoint. Additionally, OnFinality offers paid tiers of service that offer increased rate limits and higher performance than those offered by the free tier. You also receive more in depth analytics of the usage of your application. To create a custom OnFinality endpoint, go to [OnFinality](https://onfinality.io){target=_blank} and sign up, or if you already have signed up you can go ahead and log in. From the OnFinality **Dashboard**, you can: 1. Click on **API Service** 2. Select the network from the dropdown 3. Your custom API endpoint will be generated automatically  ### UnitedBloc {: #unitedbloc } [UnitedBloc](https://medium.com/unitedbloc/unitedbloc-rpc-c84972f69457){target=_blank} is a collective of community collators from both Moonbeam and Moonriver. To provide value for the community, they offer public RPC services for the Moonbeam, Moonriver, and Moonbase Alpha networks. The public endpoint service is served by eight geographically distributed bare metal servers globally balanced via GeoDNS and regionally load balanced with NGINX. As the service is public, there are no sign-up or API keys to manage. The collators involved in this initiative are: - Blockshard (CH) - BloClick (ES) - BrightlyStake (IN) - CertHum (US) - GPValidator (PT) - Hetavalidation (AU) - Legend (AE) - PathrockNetwork (DE) - Polkadotters (CZ) - SIK | crifferent.de (DE) - StakeBaby (GR) - StakeSquid (GE) - TrueStaking (US) They also provide a [public Grafana dashboard](https://monitoring.unitedbloc.com:3030/public-dashboards/7444d2ab76ee45eda181618b0f0ecb98?orgId=1){target=_blank} with some cool metrics. Check the [public endpoints section](#public-endpoints) to get the relevant URL. You can contact them via their [Telegram channel](https://t.me/+tRvy3z5-Kp1mMGMx){target=_blank}, or read more about their initiative on their [blogpost page](https://medium.com/unitedbloc/unitedbloc-rpc-c84972f69457){target=_blank}. ## Lazy Loading with RPC Endpoint Providers {: #lazy-loading-with-RPC-Endpoint-Providers } Lazy loading lets a Moonbeam node operate while downloading network state in the background, eliminating the need to wait for full synchronization before use. To spin up a Moonbeam node with lazy loading, you'll need to either [download the Moonbeam release binary](/node-operators/networks/run-a-node/systemd/#the-release-binary){target=_blank} or [compile the binary](/node-operators/networks/run-a-node/compile-binary/#compile-the-binary){target=_blank}. You can activate lazy loading with the following flag: `--lazy-loading-remote-rpc 'INSERT-RPC-URL'` Lazy loading is highly resource-intensive, requiring many RPC requests to function. To avoid being throttled, it's recommended that you use a [dedicated endpoint](#endpoint-providers) (i.e., an endpoint with an API key) rather than a public endpoint. You will likely be rate-limited if you use lazy loading with a public endpoint. Upon spooling up a node with this feature, you'll see output like the following:
[Lazy loading 🌗]
You are now running the Moonbeam client in lazy loading mode, where data is retrieved
from a live RPC node on demand.
Using remote state from: https://moonbeam.unitedbloc.com
Forking from block: 8482853
To ensure the client works properly, please note the following:
1. *Avoid Throttling*: Ensure that the backing RPC node is not limiting the number of
requests, as this can prevent the lazy loading client from functioning correctly;
2. *Be Patient*: As the client may take approximately 20 times longer than normal to
retrieve and process the necessary data for the requested operation.
The service will start in 10 seconds...
### Overriding State with Lazy Loading
By default, you won't see detailed logging in the terminal. To override this setting and show lazy loading logs, you can add the following flag to your command to start the Moonbeam node: `-l debug`. You can further customize your use of the lazy loading functionality with the following optional parameters:
- **`--lazy-loading-block`** - specifies a block hash from which to start loading data. If not provided, the latest block will be used
- **`--lazy-loading-delay-between-requests`** - the delay (in milliseconds) between RPC requests when using lazy loading. This parameter controls the amount of time to wait between consecutive RPC requests. This can help manage request rate and avoid overwhelming the server. Default value is `100` milliseconds
- **`--lazy-loading-max-retries-per-request`** - the maximum number of retries for an RPC request when using lazy loading. Default value is `10` retries
- **`--lazy-loading-runtime-override`** - path to a WASM file to override the runtime when forking. If not provided, it will fetch the runtime from the block being forked
- **`--lazy-loading-state-overrides`** - path to a JSON file containing state overrides to be applied when forking
#### Simple Storage Item Override
The state overrides file should define the respective pallet, storage item, and value that you seek to override as follows:
```json
[
{
"pallet": "System",
"storage": "SelectedCandidates",
"value": "0x04f24ff3a9cf04c71dbc94d0b566f7a27b94566cac"
}
]
```
#### Override an Account's Free Balance
To override the balance of a particular account, you can override the account storage item of the system pallet for the respective account as follows:
```json
[
{
"pallet": "System",
"storage": "Account",
"key": "TARGET_ADDRESS",
"value": "0x460c000002000000010000000600000069e10de76676d0800000000000000000040a556b0e032de12000000000000000004083a09e15c74c1b0100000000000000000000000000000000000000000000080"
}
]
```
??? note "Details about overriding account balances"
Overriding an account balance, as shown above, can be a complex process. However, this guide will break it down into steps that are easy to follow. Before making any changes, you should obtain the existing value corresponding to the key (i.e., the account in this case). You can go to [**Chain State** on Polkadot.js Apps](https://polkadot.js.org/apps/?rpc=wss://wss.api.moonbeam.network#/chainstate){target=_blank} and query the System pallet by providing the account you'd like to query. Upon submitting the query, you'll get back a readable account structure like so:
```text
{
nonce: 3,142
consumers: 2
providers: 1
sufficients: 6
data: {
free: 1,278,606,392,142,175,328,676
reserved: 348,052,500,000,000,000,000
frozen: 20,413,910,106,633,175,872
flags: 170,141,183,460,469,231,731,687,303,715,884,105,728
}
}
```
While this is useful as a reference, the information you're looking for is the encoded storage key, which is accessible even without submitting the chain state query. In this instance, the encoded storage key corresponding to the system pallet and the selected account `0x3B939FeaD1557C741Ff06492FD0127bd287A421e` is:
```text
0x26aa394eea5630e07c48ae0c9558cef7b99d880ec681799c0cf30e8886371da9b882fedb4f75b055c709ec5b66b5d9933b939fead1557c741ff06492fd0127bd287a421e
```
Note that this encoded storage key will change alongside any input changes, such as a different account being queried. Then, head over the **Raw Storage** tab on [Polkadot.js Apps](https://polkadot.js.org/apps/#/chainstate/raw){target=_blank}. Input the above storage key and submit the query. The response is the SCALE encoded account struct, a part of which contains the free balance information to be modified as part of this example:
```text
0x460c0000020000000100000006000000a4d92a6a4e6b3a5045000000000000000040a556b0e032de12000000000000004083a09e15c74c1b010000000000000000000000000000000000000000000080
```
There is quite a bit of data encoded in the value field because it is a complex struct comprised of multiple values. The struct is comprised of:
```text
struct AccountInfo {
nonce: u32, // Transaction count
consumers: u32, // Number of consumers
providers: u32, // Number of providers
sufficients: u32, // Number of sufficients
data: AccountData { // The balance info
free: u128, // Free balance
reserved: u128, // Reserved balance
frozen: u128, // Frozen balance
flags: u128 // Account flags
}
}
```
You can associate each part of the SCALE encoded struct with the corresponding piece of Alice's account information that it represents:
```text
0x460c0000 // nonce (u32): 3,142
02000000 // consumers (u32): 2
01000000 // providers (u32): 1
06000000 // sufficients (u32): 6
a4d92a6a4e6b3a5045000000000000000
// free (u128): 1,278,606,392,142,175,328,676
40a556b0e032de1200000000000000000
// reserved (u128): 348,052,500,000,000,000,000
4083a09e15c74c1b01000000000000000
// frozen (u128): 20,413,910,106,633,175,872
00000000000000000000000000000080
// flags (u128): 170,141,183,460,469,231,731,687,303,715,884,105,728
```
Remember that the values are little endian encoded. To convert the hexadecimal little endian encoded values to decimal, you can use [Substrate Utilities converter](https://www.shawntabrizi.com/substrate-js-utilities/){target=_blank}, using the **Balance to Hex (Little Endian)** converter.
In this example, the existing free balance of `1,278,606,392,142,175,328,676` Wei or approximately `1278.60` DEV is `a4d92a6a4e6b3a5045`. The following example will change the value to `500,000` DEV, which is `500,000,000,000,000,000,000,000` Wei or `0x000080d07666e70de169` encoded as a hexadecimal little endian value. When properly padded to fit into the SCALE encoded storage value, it becomes `69e10de76676d08000000000000000000`, such that the table now looks like:
```text
0x460c0000 // nonce (u32): 3,142
02000000 // consumers (u32): 2
01000000 // providers (u32): 1
06000000 // sufficients (u32): 6
69e10de76676d08000000000000000000
// free (u128): 500,000,000,000,000,000,000,000
40a556b0e032de1200000000000000000
// reserved (u128): 348,052,500,000,000,000,000
4083a09e15c74c1b01000000000000000
// frozen (u128): 20,413,910,106,633,175,872
00000000000000000000000000000080
// flags (u128): 170,141,183,460,469,231,731,687,303,715,884,105,728
```
Therefore, the SCALE encoded override value is as follows:
```text
0x460c000002000000010000000600000069e10de76676d0800000000000000000040a556b0e032de12000000000000000004083a09e15c74c1b0100000000000000000000000000000000000000000000080
```
You can now specify the SCALE encoded override value in your `state-overrides.json` file as follows:
```json
[
{
"pallet": "System",
"storage": "Account",
"key": "0x3b939fead1557c741ff06492fd0127bd287a421e",
"value": "0x460c000002000000010000000600000069e10de76676d0800000000000000000040a556b0e032de12000000000000000004083a09e15c74c1b0100000000000000000000000000000000000000000000080"
}
]
```
To run lazy loading with the balance state override, you can use the following command:
```bash
--lazy-loading-remote-rpc 'INSERT_RPC_URL' --lazy-loading-state-overrides ./state-overrides.json
```
#### Override an ERC-20 Token Balance
To override an ERC-20 token balance, identify the storage slot in the EVM’s AccountStorages where the `balanceOf` data for the given token contract and account is stored. This storage slot is determined by the token contract’s H160 address and the corresponding H256 storage key. Once you have this slot, specify the new balance value in the `state-overrides.json` file to implement the override.
In the example below, we override the token balance of the [Wormhole USDC Contract (`0x931715FEE2d06333043d11F658C8CE934aC61D0c`)](https://moonscan.io/address/0x931715FEE2d06333043d11F658C8CE934aC61D0c){target=_blank} for the account `0x3b939fead1557c741ff06492fd0127bd287a421e` to $5,000 USDC. Since Wormhole USDC uses 6 decimal places, $5,000 corresponds to `5000000000` in integer form, which is `0x12a05f200` in hexadecimal.
```json
[
{
"pallet": "EVM",
"storage": "AccountStorages",
"key": [
"0x931715FEE2d06333043d11F658C8CE934aC61D0c",
"0x8c9902c0f94ae586c91ba539eb52087d3dd1578da91158308d79ff24a8d4f342"
],
"value": "0x000000000000000000000000000000000000000000000000000000012a05f200"
}
]
```
You can calculate the exact storage slot to override for your own account with the following script:
```js
import { ethers } from 'ethers';
function getBalanceSlot(accountAddress) {
// Convert address to bytes32 and normalize
const addr = ethers.zeroPadValue(accountAddress, 32);
// CAUTION! The storage slot used here is 5, which
// is specific to Wormhole contracts
// The storage slot index for other tokens may vary
const packedData = ethers.concat([
addr,
ethers.zeroPadValue(ethers.toBeHex(5), 32),
]);
// Calculate keccak256
return ethers.keccak256(packedData);
}
// Example usage
const address = 'INSERT_ADDRESS';
console.log(getBalanceSlot(address));
```
You can apply the same process for other ERC-20 token contracts. The following sections demonstrate overrides for the `0x3B939FeaD1557C741Ff06492FD0127bd287A421e` account with various ERC-20 tokens. Remember to update the H160 token contract address whenever you switch to a different token. Also, you will need to recalculate the H256 storage slot for each distinct account whose balance you want to override.
??? code "Example: Override Wormhole BTC Token Balance"
```json
[
{
"pallet": "EVM",
"storage": "AccountStorages",
"key": [
"0xE57eBd2d67B462E9926e04a8e33f01cD0D64346D",
"0x8c9902c0f94ae586c91ba539eb52087d3dd1578da91158308d79ff24a8d4f342"
],
"value": "0x000000000000000000000000000000000000000000000000000000012a05f200"
}
]
```
??? code "Example: Override Wormhole ETH Token Balance"
```json
[
{
"pallet": "EVM",
"storage": "AccountStorages",
"key": [
"0xab3f0245B83feB11d15AAffeFD7AD465a59817eD",
"0x8c9902c0f94ae586c91ba539eb52087d3dd1578da91158308d79ff24a8d4f342"
],
"value": "0x000000000000000000000000000000000000000000000000000000012a05f200"
}
]
```
??? code "Example: Override WELL Token Balance"
Because the [WELL token](https://moonbeam.moonscan.io/token/0x511ab53f793683763e5a8829738301368a2411e3){target=_blank} does not use a proxy implementation contract, the storage slot calculation differs. Instead of slot `5`, the balance mapping resides at slot `1`. You can determine the exact storage slot to override the WELL token balance for your own account using the following script:
```js
import { ethers } from 'ethers';
function getBalanceSlot(accountAddress) {
// Convert address to bytes32 and normalize
const addr = ethers.zeroPadValue(accountAddress, 32);
// Caution! The storage slot index used here is 1
// The storage slot index for other tokens may vary
const packedData = ethers.concat([
addr,
ethers.zeroPadValue(ethers.toBeHex(1), 32),
]);
// Calculate keccak256
return ethers.keccak256(packedData);
}
// Example usage
const address = 'INSERT_ADDRESS';
console.log(getBalanceSlot(address));
```
Thus, the storage override would be:
```json
[
{
"pallet": "EVM",
"storage": "AccountStorages",
"key": [
"0x511aB53F793683763E5a8829738301368a2411E3",
"0x728d3daf4878939a6bb58cbc263f39655bb57ea15db7daa0b306f3bf2c3f1227"
],
"value": "0x000000000000000000000000000000000000000000000000000000012a05f200"
}
]
```
## Tracing RPC Endpoint Providers {: #tracing-providers }
Tracing RPC endpoints allow you to access non-standard RPC methods, such as those that belong to Geth's `debug` and `txpool` APIs and OpenEthereum's `trace` module. To see a list of the supported non-standard RPC methods on Moonbeam for debugging and tracing, please refer to the [Debug API & Trace Module](/builders/ethereum/json-rpc/debug-trace/){target=_blank} guide.
The following providers provide tracing RPC endpoints:
- [OnFinality](#onfinality-tracing)
### OnFinality {: #onfinality-tracing }
[OnFinality](https://onfinality.io){target=_blank}'s Trace API can be used to quickly get started tracing and debugging transactions on Moonbeam and Moonriver. It is only available to users on their [Growth and Ultimate plans](https://onfinality.io/pricing){target=_blank}.
To use the Trace API, you simply call the trace method of your choice from your [private RPC endpoint](#onfinality). For a list of the supported networks and trace methods, please check out [OnFinality's Trace API documentation](https://documentation.onfinality.io/support/trace-api#TraceAPI-SupportedNetworks){target=_blank}.
Please note that if you are tracing historic blocks, it is recommended to use your own dedicated trace node to backfill any data, and then once you're caught up, you can switch to using the Trace API. You can check out the [How to Deploy a Trace Node for Moonbeam on OnFinality](https://onfinality.medium.com/how-to-deploy-a-trace-node-for-moonbeam-on-onfinality-85683181d290){target=-_blank} post for more information on how to spin up your own dedicated trace node.
--- END CONTENT ---You are now running the Moonbeam client in lazy loading mode, where data is retrieved
from a live RPC node on demand.
Using remote state from: https://moonbeam.unitedbloc.com
Forking from block: 8482853
To ensure the client works properly, please note the following:
1. *Avoid Throttling*: Ensure that the backing RPC node is not limiting the number of
requests, as this can prevent the lazy loading client from functioning correctly;
2. *Be Patient*: As the client may take approximately 20 times longer than normal to
retrieve and process the necessary data for the requested operation.
The service will start in 10 seconds...