通过XCM远程质押
作者:Kevin Neilson
概览
在本教程中,我们将通过从Moonbase中继链(相当于波卡中继链)上的账户发送XCM指令来远程质押DEV Token。本教程将假定您基本上熟悉XCM和通过XCM远程执行等相关内容。您不需要是这方面的专家,但您可能会发现拥有一些XCM背景知识会有所帮助。
实际上,有两种可能的方法可以通过XCM在Moonbeam上进行远程质押。我们可以发送一个远程 EVM调用调用质押预编译,或者我们可以使用XCM直接调用平行链质押pallet而无需与EVM交互。在本教程中,我们将采用后者的方法,直接与平行链质押pallet进行交互。
请注意,通过XCM消息远程执行的操作仍然存在一定限制。此外,开发者必须了解发送不正确的XCM消息可能会导致资金损失。因此,在转移到生产环境之前,在测试网上测试XCM的功能是必要的。
查看先决条件
出于开发目的,本教程是为使用测试网资金的Moonbase Alpha和Moonbase中继链网络编写的。先决条件如下:
- 拥有一个具有一些UNIT的Moonbase Alpha中继链账户,UNIT是Moonbase中继链的原生Token。如果您拥有一个具有DEV的Moonbase Alpha帐户,您可以在Moonbeam Swap上用一些DEV兑换xcUNIT。然后从Moonbase Alpha通过使用apps.moonbeam.network提现xcUNIT到您在Moonbase中继链上的账户
- 您将会需要计算您Moonbase Alpha中继链的多地点衍生账户(multilocation derivative account)和使其拥有足够的DEV Token。 您可以每24小时一次从Moonbase Alpha水龙头上获取DEV代币以在Moonbase Alpha上进行测试
计算您的Multilocation衍生账户
复制您在Moonbase中继链的现有或新创建的账户。您将需要它来计算相应的多地点衍生账户,这是一种特殊类型的无密钥账户(其私钥未知)。来自多地点衍生账户的交易只能通过来自中继链上相应账户的有效XCM指令启动。换句话说,您是唯一可以在您的多地点衍生账户上发起交易的人——如果您无法访问您的Moonbase中继链账户,您也将无法访问您的多地点衍生账户。
如要产生多地点衍生账户,首先请复制xcm-tools代码库,运行yarn指令以安装所有必要代码包并运行以下指令:
yarn calculate-multilocation-derivative-account \
--ws-provider wss://wss.api.moonbase.moonbeam.network \
--address INSERT_MOONBASE_RELAY_ACCOUNT \
--para-id INSERT_ORIGIN_PARACHAIN_ID_IF_APPLIES \
--parents INSERT_PARENTS_VALUE_IF_APPLIES
接着,让我们检查以上指令中输入的相关参数:
--ws-provider或-w标志对应我们用于获得此信息的端点--address或-a标志对应您的Moonbase中继链账户地址--para-id或-p标志对应原链(如有)的平行链ID。如果您从中继链传送XCM则无需提供此参数-parents标签与目标链在源链上的父值相关。如果您正从中继链源头在平行链目标链生成multi-location衍生账户,此数值将会是1。如果不是,父值预设为0
此处,我们指定了父值为1,因为中继链是请求的来源(并且中继链被视为Moonbase Alpha平行链的父级)。 中继链没有平行链ID,因此该字段被省略。
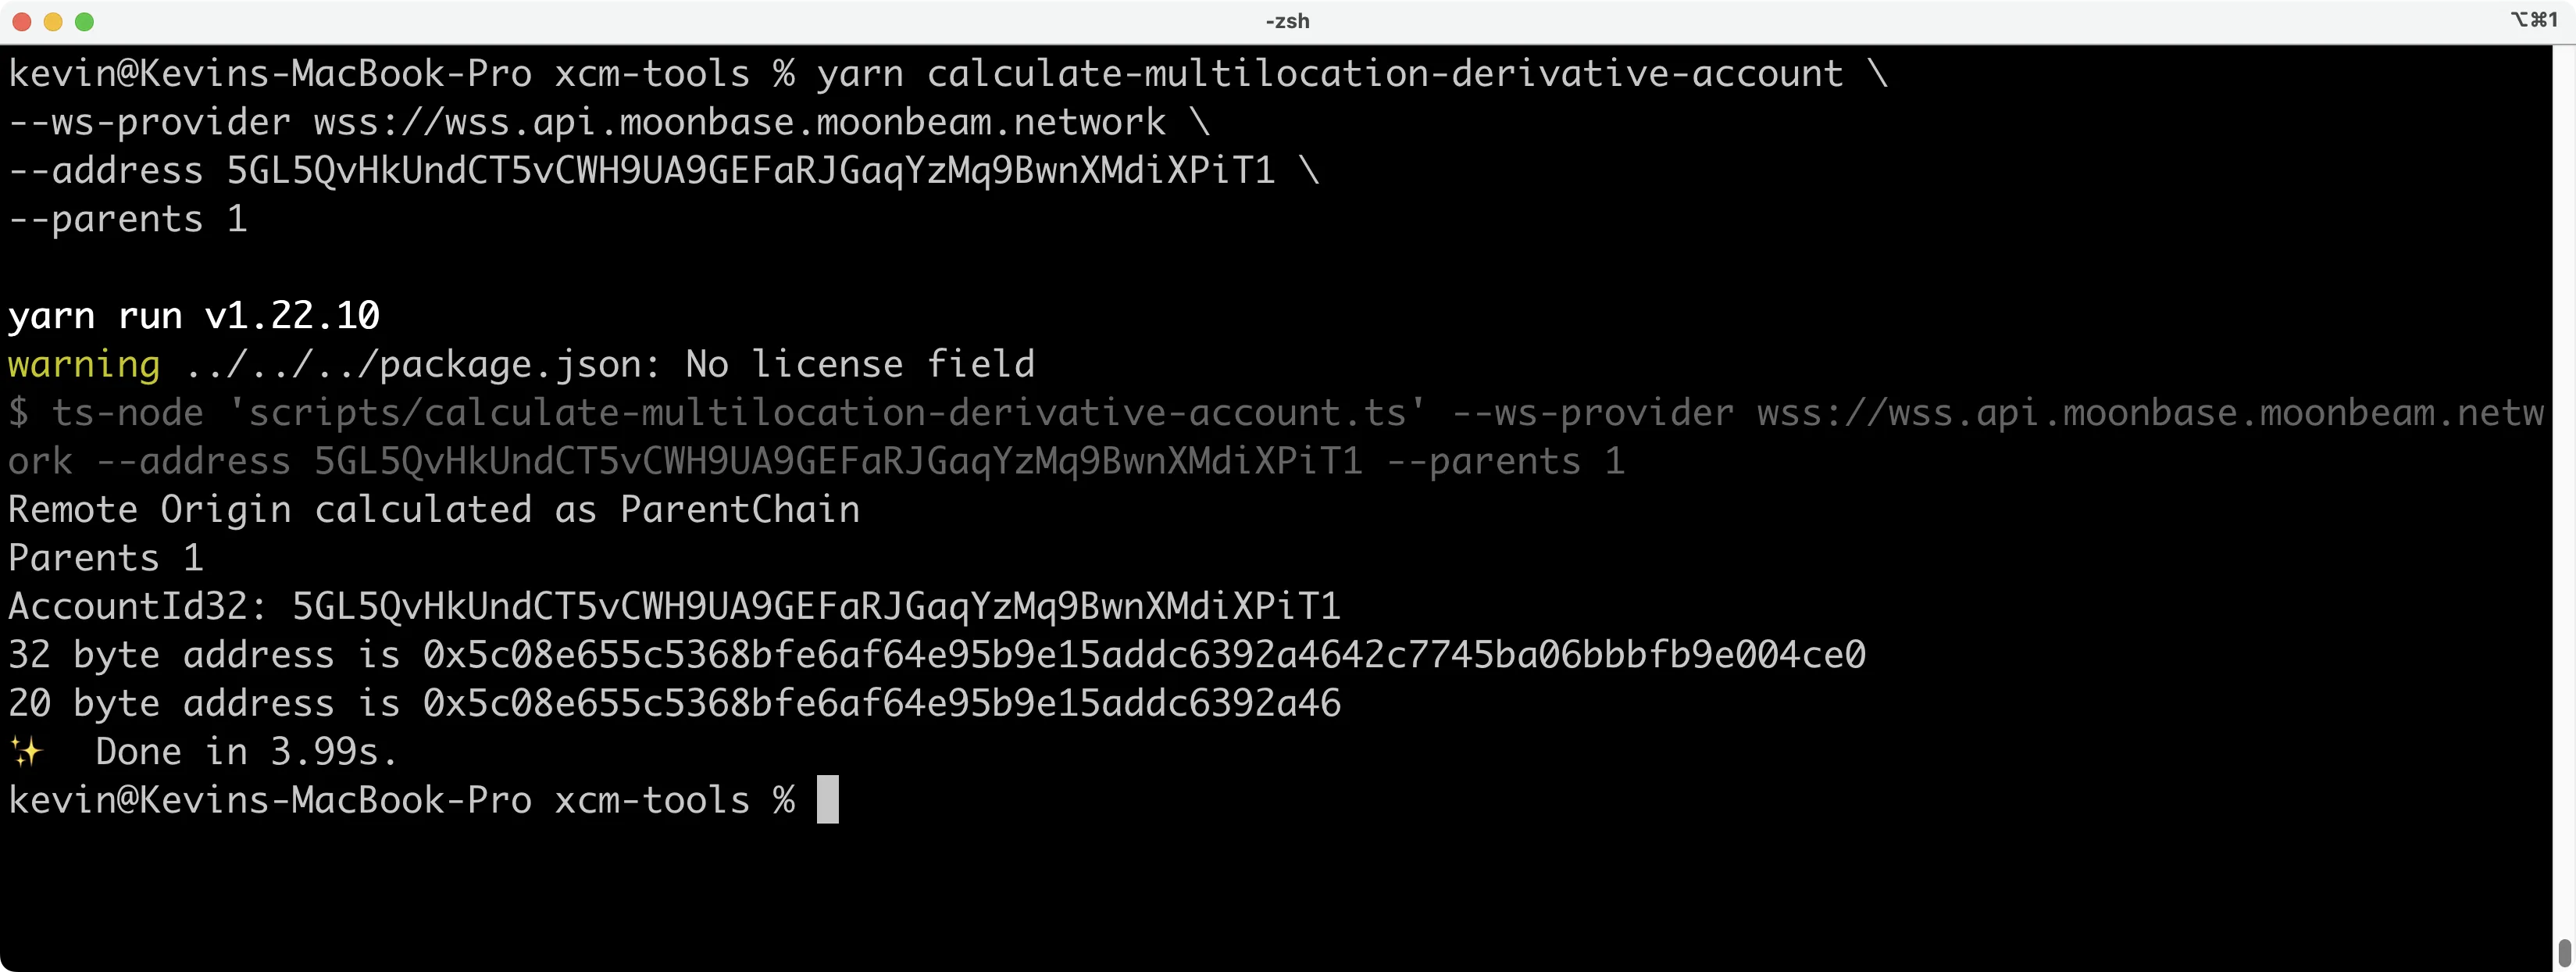
此脚本将返回32字节和20字节的地址。我们将使用以太坊格式的地址,也就是20字节的地址。您可以在Moonscan上查看您的multilocation衍生账户。请注意,此账户为空白账户,您需要为此账户充值至少1.1个DEV Token。您可以通过水龙头获取DEV。如果您需要更多的DEV Token,您可以通过Discord联系我们获取更多的DEV Token。
准备在Moonbase Alpha上质押
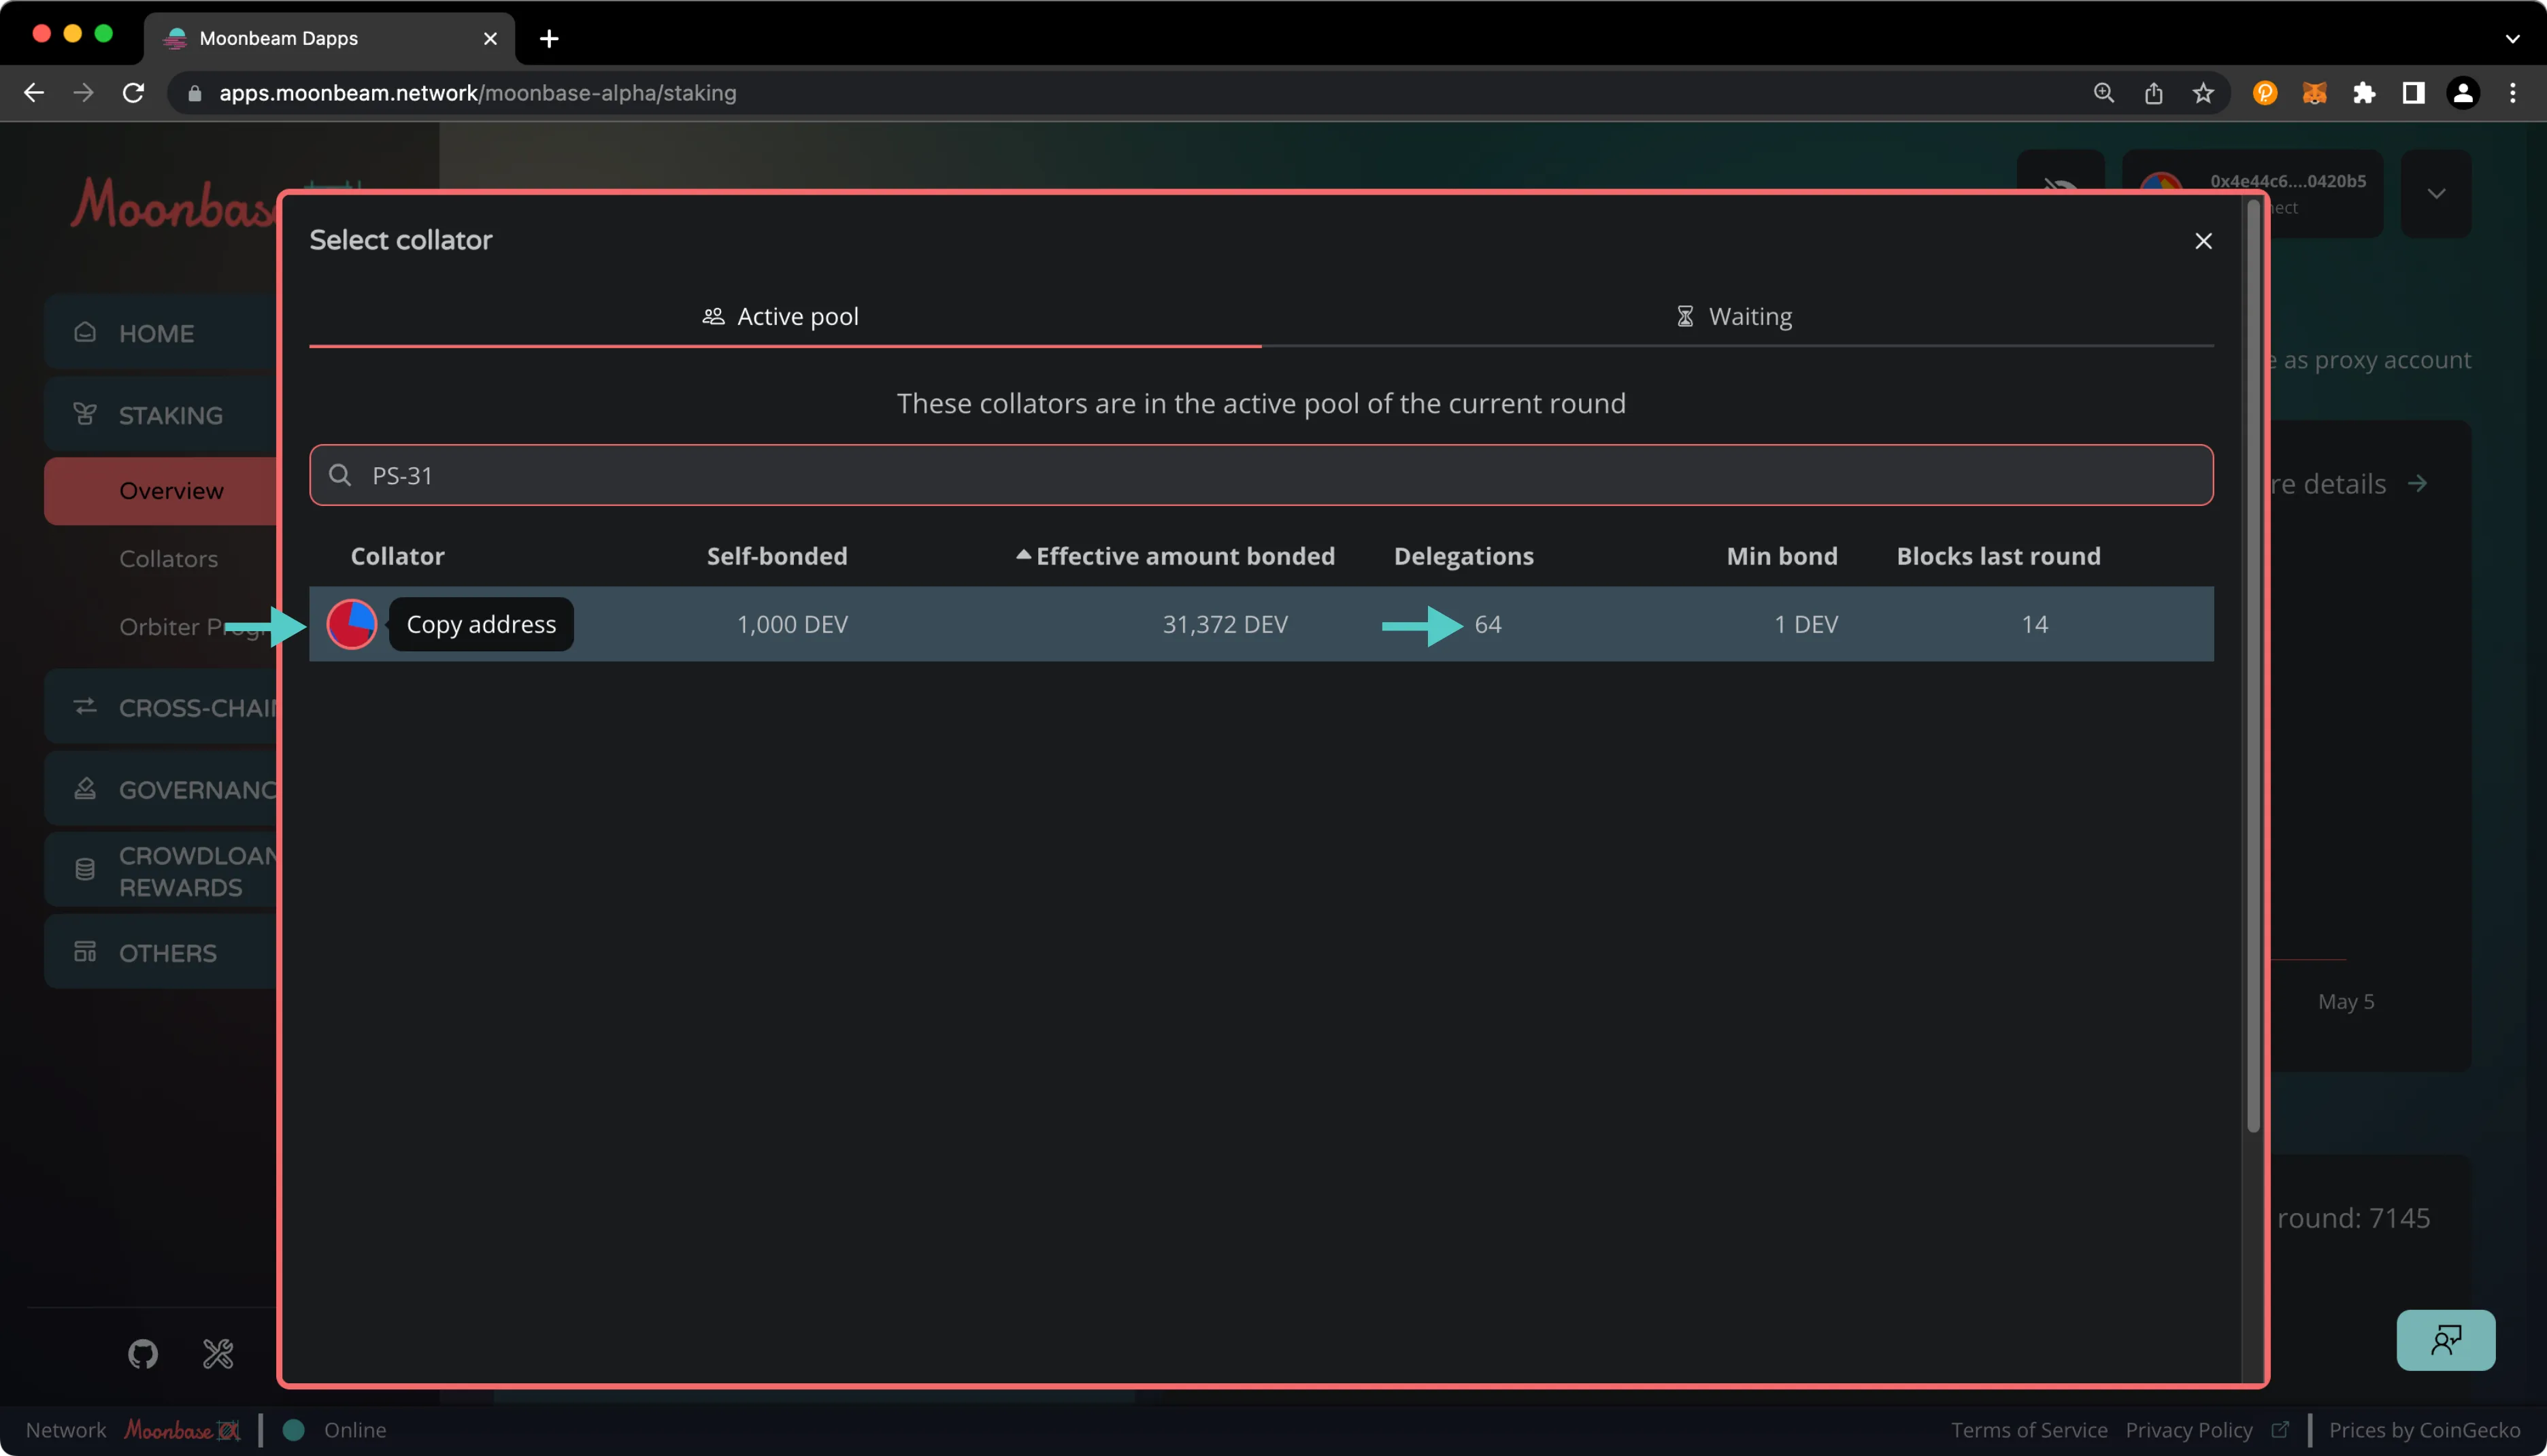
首先也是最重要的,您需要有想要委托的收集人地址。如要找到该地址,请前往Moonbase Alpha Staking dApp。请确保您在正确的网络上,然后点击Select a Collator。在您想要的委托人旁边,点击Copy图标复制其地址。您还需要记下该委托人拥有的委托数量。下面显示的PS-31收集人在撰写本文时共有64个委托。
通过XCM在Polkadot.js API进行远程质押
本教程将涵盖执行远程质押的两个步骤。第一步:我们将生成用于委托收集人的编码调用数据。第二步:我们将通过XCM从中继链发送编码的调用数据给Moonbase Alpha,这将执行委托。
生成编码的调用数据
我们将使用Parachain Staking Pallet的delegateWithAutoCompound函数,此函数接收六个参数,分别为:candidate、autoCompound、amount、candidateDelegationCount、candidateAutoCompoundingDelegationCount和delegationCount。
为了生成编码的调用数据,我们需要为每个delegateWithAutoCompound参数组装参数,并使用它们来构建一个调用delegateWithAutoCompound函数的交易。我们并非在提交一笔交易,而是简单地准备一笔交易来获取编码后的调用数据。 我们将执行以下步骤来构建脚本:
- 创建Polkadot.js API提供商
-
为
delegateWithAutoCompound函数的每个参数组装参数:candidate- 在本示例中,我们将使用PS-31收集人:0x3A7D3048F3CB0391bb44B518e5729f07bCc7A45D,要获取完整的候选人列表,请参考准备质押部分amount- 最低质押量,即1 DEV或者1000000000000000000Wei。您可以通过Moonscan上的单位转换部分进行单位转换autoCompound- 这里我们将奖励的自动复利参数设置为100candidateDelegationCount- 我们将使用Parachain Staking Pallet的candidateInfo函数进行检索,以获得准确的计数。 或者,您可以输入300的上限,因为此预估仅用于确定调用的权重candidateAutoCompoundingDelegationCount- 我们将使用平行链质押pallet中的autoCompoundingDelegations函数来获取这个数值。或者您也可以手动设置为该值的上限300,因为这个数值只是为了计算调用函数所需要的权重而设置的预估值。delegationCount- 我们将使用Parachain Staking Pallet的delegatorState函数进行检索,以获取准确的计数。 或者,您可以在此处指定100的上限
-
使用每个所需的参数制作
parachainStaking.delegateWithAutoCompoundextrinsic - 使用交易获取委托的编码调用数据
import { ApiPromise, WsProvider } from '@polkadot/api';
const provider = new WsProvider('wss://wss.api.moonbase.moonbeam.network');

const candidate = '0x3A7D3048F3CB0391bb44B518e5729f07bCc7A45D';
const amount = '1000000000000000000';
const autoCompound = 100;

const main = async () => {
  const api = await ApiPromise.create({ provider: provider });

  // Fetch your existing number of delegations
  let delegatorDelegationCount;
  const delegatorInfo = await api.query.parachainStaking.delegatorState(
    'INSERT_ACCOUNT' // Use the account you're delegating with
  );

  if (delegatorInfo.toHuman()) {
    delegatorDelegationCount = delegatorInfo.toHuman()['delegations'].length;
  } else {
    delegatorDelegationCount = 0;
  }

  // Fetch the collators existing delegations
  const collatorInfo = await api.query.parachainStaking.candidateInfo(
    candidate
  );
  const candidateDelegationCount = collatorInfo.toHuman()['delegationCount'];

  // Fetch the collators number of existing auto-compounding delegations
  const autoCompoundingDelegationsInfo =
    await api.query.parachainStaking.autoCompoundingDelegations(candidate);
  const candidateAutoCompoundingDelegationCount =
    autoCompoundingDelegationsInfo.length;

  // Craft extrinsic
  const tx = api.tx.parachainStaking.delegateWithAutoCompound(
    candidate,
    amount,
    autoCompound,
    candidateDelegationCount,
    candidateAutoCompoundingDelegationCount,
    delegatorDelegationCount
  );

  // Get SCALE encoded call data
  const encodedCall = tx.method.toHex();
  console.log(`Encoded Call Data: ${encodedCall}`);

  api.disconnect();
};
main();
注意事项
如果您以TypeScript项目的方式运行,请确认您在tsconfig.json将compilerOptions下的strict标记设置为false。
如果您不希望搭建一个本地环境,您可以选择在Polkadot.js Apps的JavaScript控制台运行以下代码段。
在Polkadot.js Apps JavaScript控制台运行代码
const candidate = '0x3A7D3048F3CB0391bb44B518e5729f07bCc7A45D';
const amount = '1000000000000000000';
const autoCompound = 100;

// Fetch your existing number of delegations
let delegatorDelegationCount;
// Use the account you're delegating with
const delegatorInfo = await api.query.parachainStaking.delegatorState(
  'INSERT_ACCOUNT'
);

if (delegatorInfo.toHuman()) {
  delegatorDelegationCount = delegatorInfo.toHuman()['delegations'].length;
} else {
  delegatorDelegationCount = 0;
}

// Fetch the collators existing delegations
const collatorInfo = await api.query.parachainStaking.candidateInfo(candidate);
const candidateDelegationCount = collatorInfo.toHuman()['delegationCount'];

// Fetch the collators number of existing auto-compounding delegations
const autoCompoundingDelegationsInfo =
  await api.query.parachainStaking.autoCompoundingDelegations(candidate);
const candidateAutoCompoundingDelegationCount =
  autoCompoundingDelegationsInfo.length;

// Craft extrinsic
const tx = api.tx.parachainStaking.delegateWithAutoCompound(
  candidate,
  amount,
  autoCompound,
  candidateDelegationCount,
  candidateAutoCompoundingDelegationCount,
  delegatorDelegationCount
);

// Get SCALE Encoded Call Data
const encodedCall = tx.method.toHex();
console.log(`Encoded Call Data: ${encodedCall}`);
通过Polkadot.js API组装和发送XCM指令
在这一部分,我们将使用Polkadot.js API通过Alphanet中继链上的XCM Pallet的send extrinsic构建和发送XCM指令。XCM消息会将我们的远程执行指令传递到Moonbase Alpha平行链,最终将我们希望质押的DEV Token数量质押给选定的收集人。
XCM Pallet的send函数接收两个参数:dest和message。您可以通过以下步骤开始组装这些参数:
-
在Moonbase Alpha上为
dest构建DEV Token的multilocation:const dest = { V3: { parents: 0, interior: { X1: { Parachain: 1000 } } } }; -
构建
WithdrawAsset指令,这将要求您定义:- 在Moonbase Alpha上DEV Token的multilocation
- 要提现的DEV Token数量
const instr1 = { WithdrawAsset: [ { id: { Concrete: { parents: 0, interior: { X1: { PalletInstance: 3 } } }, }, fun: { Fungible: 100000000000000000n }, }, ], }, -
构建
BuyExecution指令,这将要求您定义:- 在Moonbase Alpha上DEV Token的multilocation
- 购买执行的DEV Token数量
- 权重上限
const instr2 = { BuyExecution: [ { id: { Concrete: { parents: 0, interior: { X1: { PalletInstance: 3 } } }, }, fun: { Fungible: 100000000000000000n }, }, { Unlimited: null }, ], }, -
构建
Transact指令,这将要求您定义:- origin类型,其为
SovereignAccount - 交易所需的权重,您需要定义可用于执行的计算时间量
refTime和可使用的存储量proofSize(以字节为单位)。建议为此指令赋予的权重需要比您通过XCM执行的调用的Gas限制乘以25000还要多10%左右 - 用于委托收集人的编码调用数据,已在上一部分生成
const instr3 = { Transact: { originType: 'SovereignAccount', requireWeightAtMost: { refTime: 40000000000n, proofSize: 900000n }, call: { encoded: '0x0c123a7d3048f3cb0391bb44b518e5729f07bcc7a45d000064a7b3b6e00d000000000000000064430000000600000000000000', }, }, }, - origin类型,其为
-
将XCM指令结合到版本化的XCM消息中:
const message = { V3: [instr1, instr2, instr3] };
现在您已经有了每个参数的值,您可以编写脚本来发送XCM消息。 为此,您需要执行以下步骤:
- 提供
send函数的每个参数的值 - 使用Alphanet中继链的WSS端点创建Polkadot.js API提供商
- 使用中继链账户的助记词创建Keyring实例,以用于发送交易
- 使用
dest和message创建xcmPallet.sendextrinsic - 使用
signAndSendextrinsic和第三步创建的Keyring实例发送交易
请记住
此操作仅用于演示目的。请勿将您的私钥存储在JavaScript文件中。
import { ApiPromise, WsProvider, Keyring } from '@polkadot/api';

const privateKey = 'INSERT_PRIVATE_KEY_OR_MNEMONIC';

// 1. Define the dest and message arguments
const dest = { V3: { parents: 0, interior: { X1: { Parachain: 1000 } } } };
const message = {
  V3: [
    {
      WithdrawAsset: [
        {
          id: {
            Concrete: { parents: 0, interior: { X1: { PalletInstance: 3 } } },
          },
          fun: { Fungible: 100000000000000000n },
        },
      ],
    },
    {
      BuyExecution: [
        {
          id: {
            Concrete: { parents: 0, interior: { X1: { PalletInstance: 3 } } },
          },
          fun: { Fungible: 100000000000000000n },
        },
        { Unlimited: null },
      ],
    },
    {
      Transact: {
        originKind: 'SovereignAccount',
        requireWeightAtMost: { refTime: 40000000000n, proofSize: 900000n },
        call: {
          encoded:
            '0x0c123a7d3048f3cb0391bb44b518e5729f07bcc7a45d000064a7b3b6e00d000000000000000064430000000600000000000000',
        },
      },
    },
  ],
};

const performRemoteDelegation = async () => {
  // 2. Construct API provider
  const wsProvider = new WsProvider(
    'wss://frag-moonbase-relay-rpc-ws.g.moonbase.moonbeam.network'
  );
  const api = await ApiPromise.create({ provider: wsProvider });

  // 3. Initialize wallet key pairs
  const keyring = new Keyring({ type: 'sr25519' });
  // For demo purposes only. Never store your private key or mnemonic in a JavaScript file
  const otherPair = keyring.addFromUri(privateKey);
  console.log(`Derived Address from Private Key: ${otherPair.address}`);

  // 4. Define the transaction using the send method of the xcm pallet
  const tx = api.tx.xcmPallet.send(dest, message);

  // 5. Sign and send the transaction
  const txHash = await tx.signAndSend(otherPair);
  console.log(`Submitted with hash ${txHash}`);

  api.disconnect();
};

performRemoteDelegation();
注意事项
请记住,您的multilocation衍生账户必须至少拥有1.1个DEV或更多资金,以确保您有足够的资金进行质押并支付交易费用。
上述代码片段中,除了通过XCM交易提交远程质押之外,我们还输出交易哈希以协助任何调试。
这样就可以了!要验证您的委托是否成功,您可以前往Subscan查看您的质押余额。请注意,可能需要几分钟时间才能在 Subscan上看到您的质押余额。此外,因为我们直接通过Parachain Staking Pallet(在Substrate端),而不是通过Staking Precompile(在EVM上)进行操作,您将无法在Moonscan上看到此质押操作。
本教程仅用于教育目的。 因此,不应在生产环境中使用本教程中创建的任何合约或代码。
| Created: March 29, 2023