在Moonbeam上使用thirdweb
概览
thirdweb 是一个完整的Web3开发框架,提供开发智能合约、构建dApp等所需的一切。
使用thirdweb,您可以访问工具来帮助您完成dApp开发周期的每个阶段。您可以创建自己的自定义智能合约,也可以使用thirdweb的任何预构建合约快速入门。然后,您可以使用thirdweb的CLI来部署您的智能合约。您也可以使用您选择的语言(包括但不限于React和TypeScript)创建Web3应用程序来与您的智能合约进行交互。
本指南将向您展示可用于在Moonbeam上开发智能合约和dApp的一些 thirdweb功能。要查看thirdweb提供的所有功能,请参阅thirdweb documentation site。 有关使用thirdweb在Moonbeam上构建dApp的全面分步教程,请务必查看Moonbeam的教程部分中的thirdweb教程。
创建智能合约
要使用thirdweb CLI创建新的智能合约, 请遵循以下步骤:
- 在CLI中,运行以下命令:
npx thirdweb create contract
-
对命令行提示进行偏好设置:
-
项目名称
- 选择你喜欢的合约框架:Hardhat或Foundry
- 为智能合约命名
- 选择基础合约的类型: Empty、ERC20、ERC721,或ERC1155
-
添加任何需要的扩展扩展程序
-
创建后,导向至项目目录,并打开首选的代码编辑器
-
如果您打开
contracts文件夹,您将找到您的智能合约;这是用Solidity编写的智能合约
以下是没有指定扩展的ERC721Base合约的代码。它实现了 ERC721Base.sol合约内的所有逻辑;其实现了ERC721A标准。
// SPDX-License-Identifier: MIT
pragma solidity ^0.8.0;

import '@thirdweb-dev/contracts/base/ERC721Base.sol';

contract Contract is ERC721Base {
    constructor(
        string memory _name,
        string memory _symbol,
        address _royaltyRecipient,
        uint128 _royaltyBps
    ) ERC721Base(_name, _symbol, _royaltyRecipient, _royaltyBps) {}
}
通过以下步骤,该合约继承了ERC721Base的功能:
- 导入
ERC721Base合约 - 通过声明您的合约是
ERC721Base合约来继承合约 -
实现任何所需的函数,例如构造函数
-
根据自定义逻辑修改合约后,您可以使用Deploy将其部署至Moonbeam。我们将在下一个部分中展开讲述!
您也可以直接从thirdweb Explore页面部署NFT、Token或市场的预构建合约:
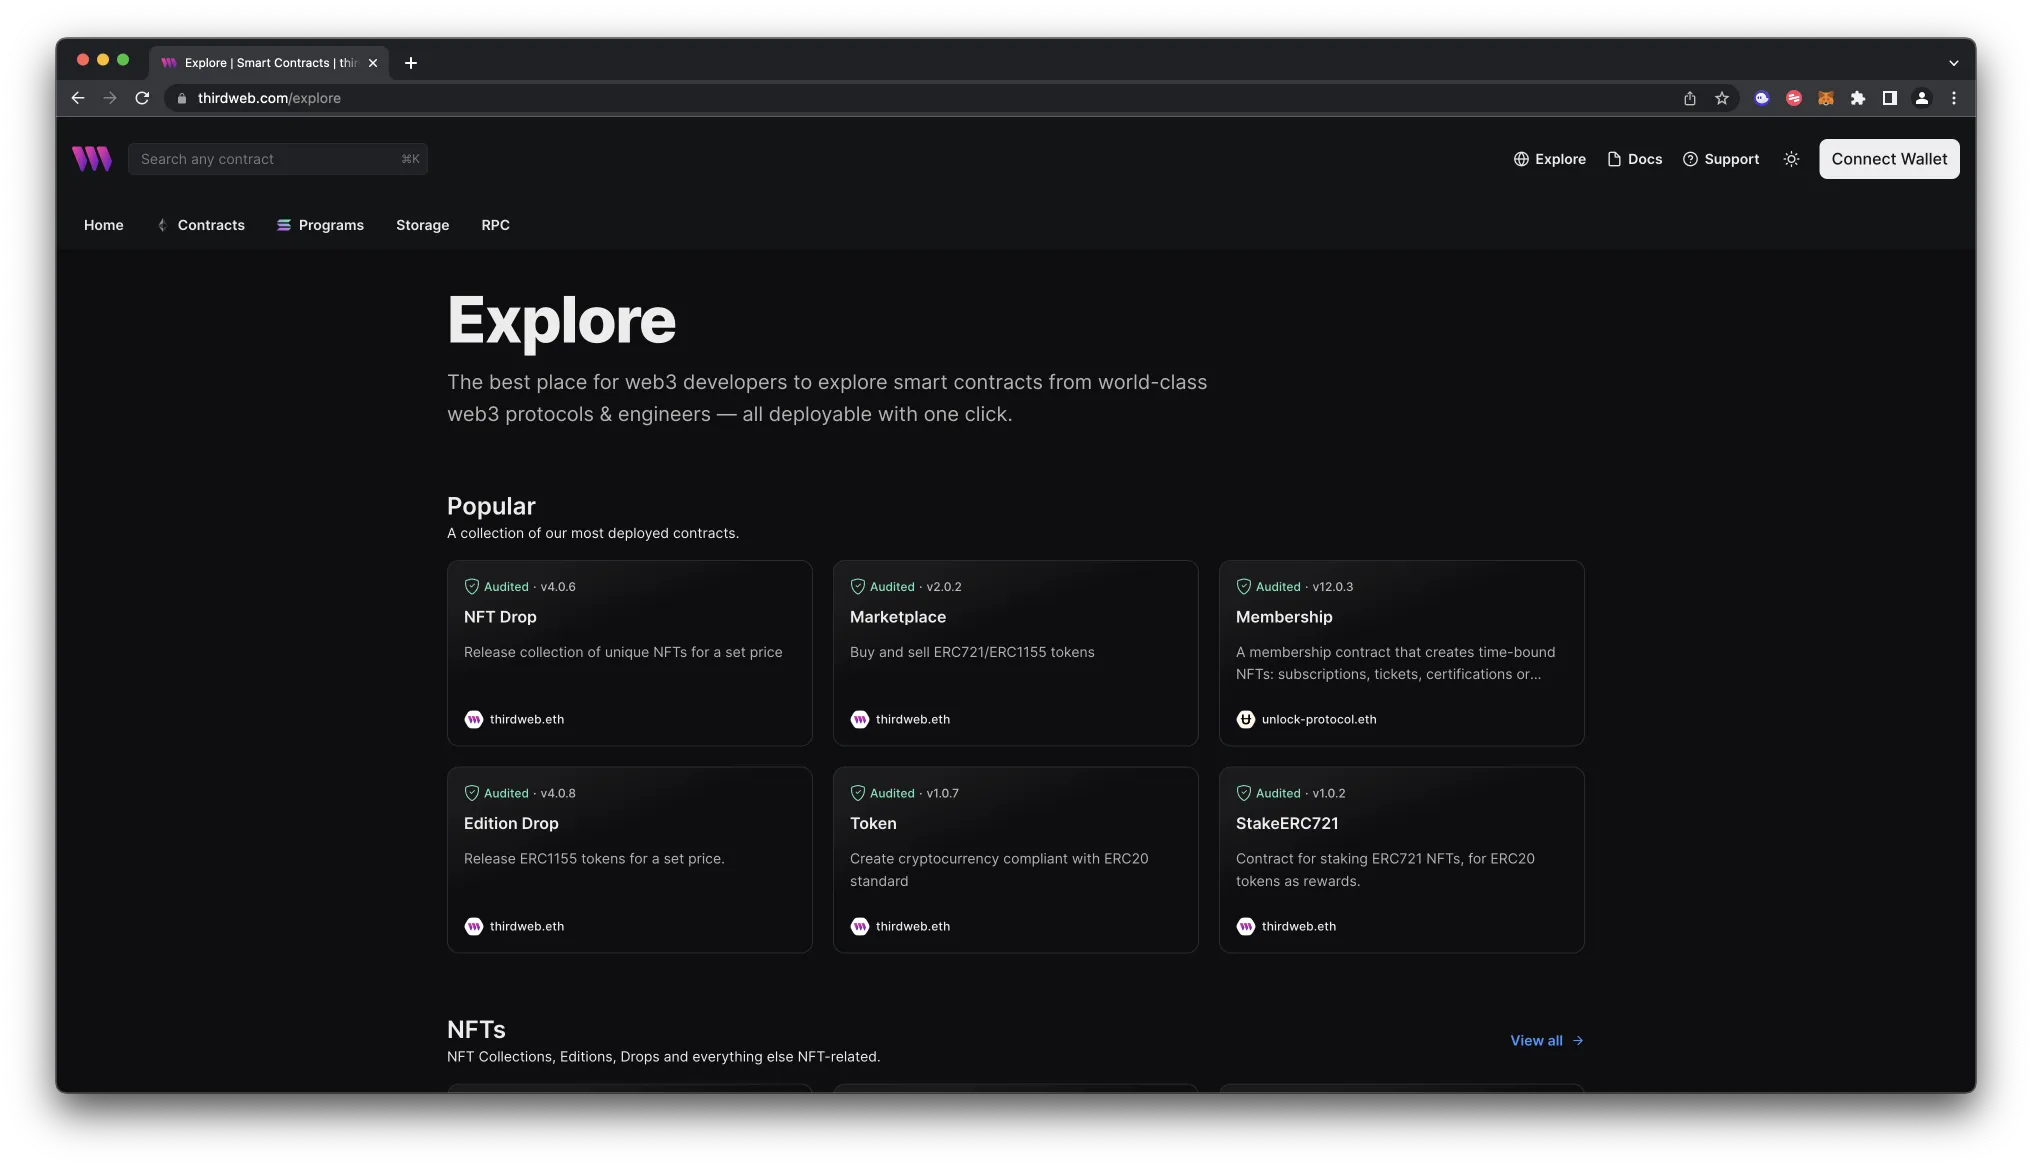
-
从可用选项中选择您要部署的合约类型,例如:NFT、Token、市场等
-
遵循屏幕上方的提示配置和部署您的合约
关于在Explore页面上的可用合约的更多信息,请查看thirdweb 文档网站的预先构建合约部分.
部署合约
Deploy 是thirdweb的工具,允许您轻松部署智能合约至任何EVM兼容网络,而无需配置PRC URL,暴露私钥,编写脚本,以及验证合约等其他额外设置。
- 要使用deploy部署智能合约,导向至项目的根目录并执行以下命令:
npx thirdweb deploy
执行此命令将触发以下操作:
- 在当前目录中编译所有的合约
- 提供您希望部署合约的选项
-
上传您的合约源代码(ABI)至IPFS
-
完成后,将打开数据面板界面以完成参数填写
-
_name- 合约名称 _symbol- 符号或“代码”_royaltyRecipient- 用于接收二次销售特许权的钱包地址-
_royaltyBps- 每次二次销售将给予特许权使用费接收者的基点 (bps),例如:500 = 5% -
选择Moonbeam作为网络,Moonbeam、Moonriver,或者Moonbase Alpha
-
根据需要在合约的数据面板上管理其他设置,例如上传NFT、配置许可等
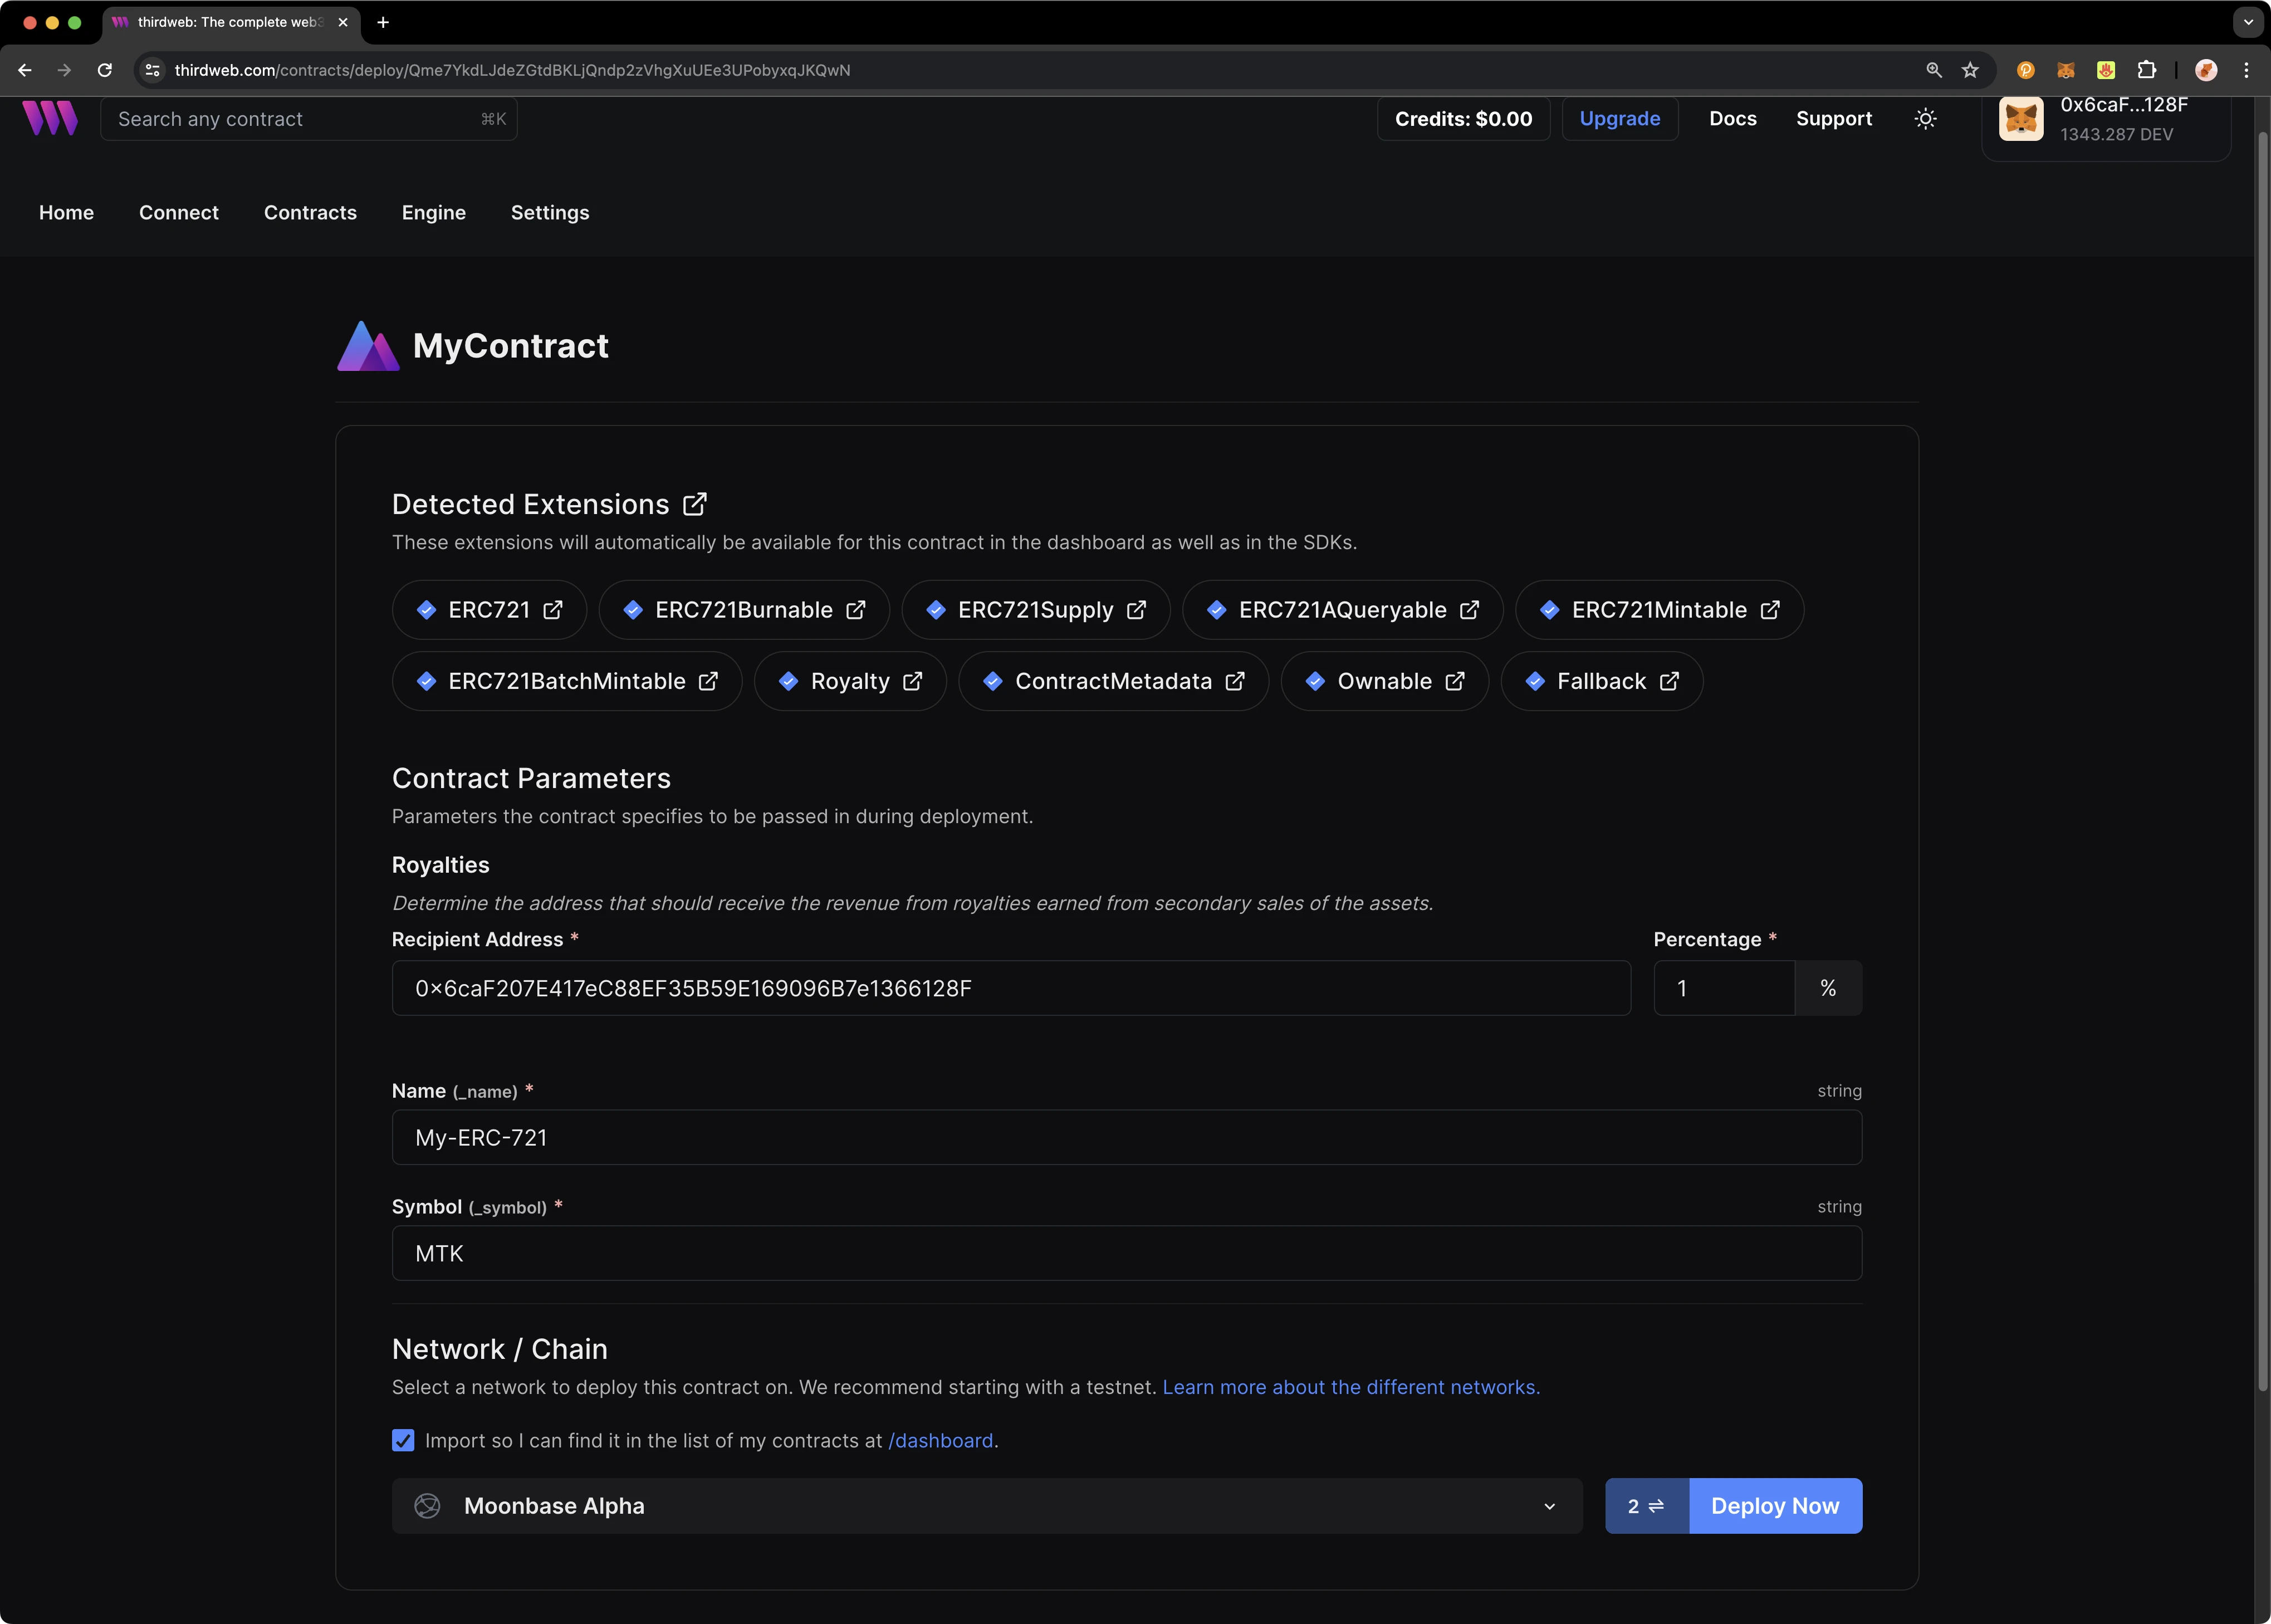
有关部署的其他信息,请参考thirdweb 文档。
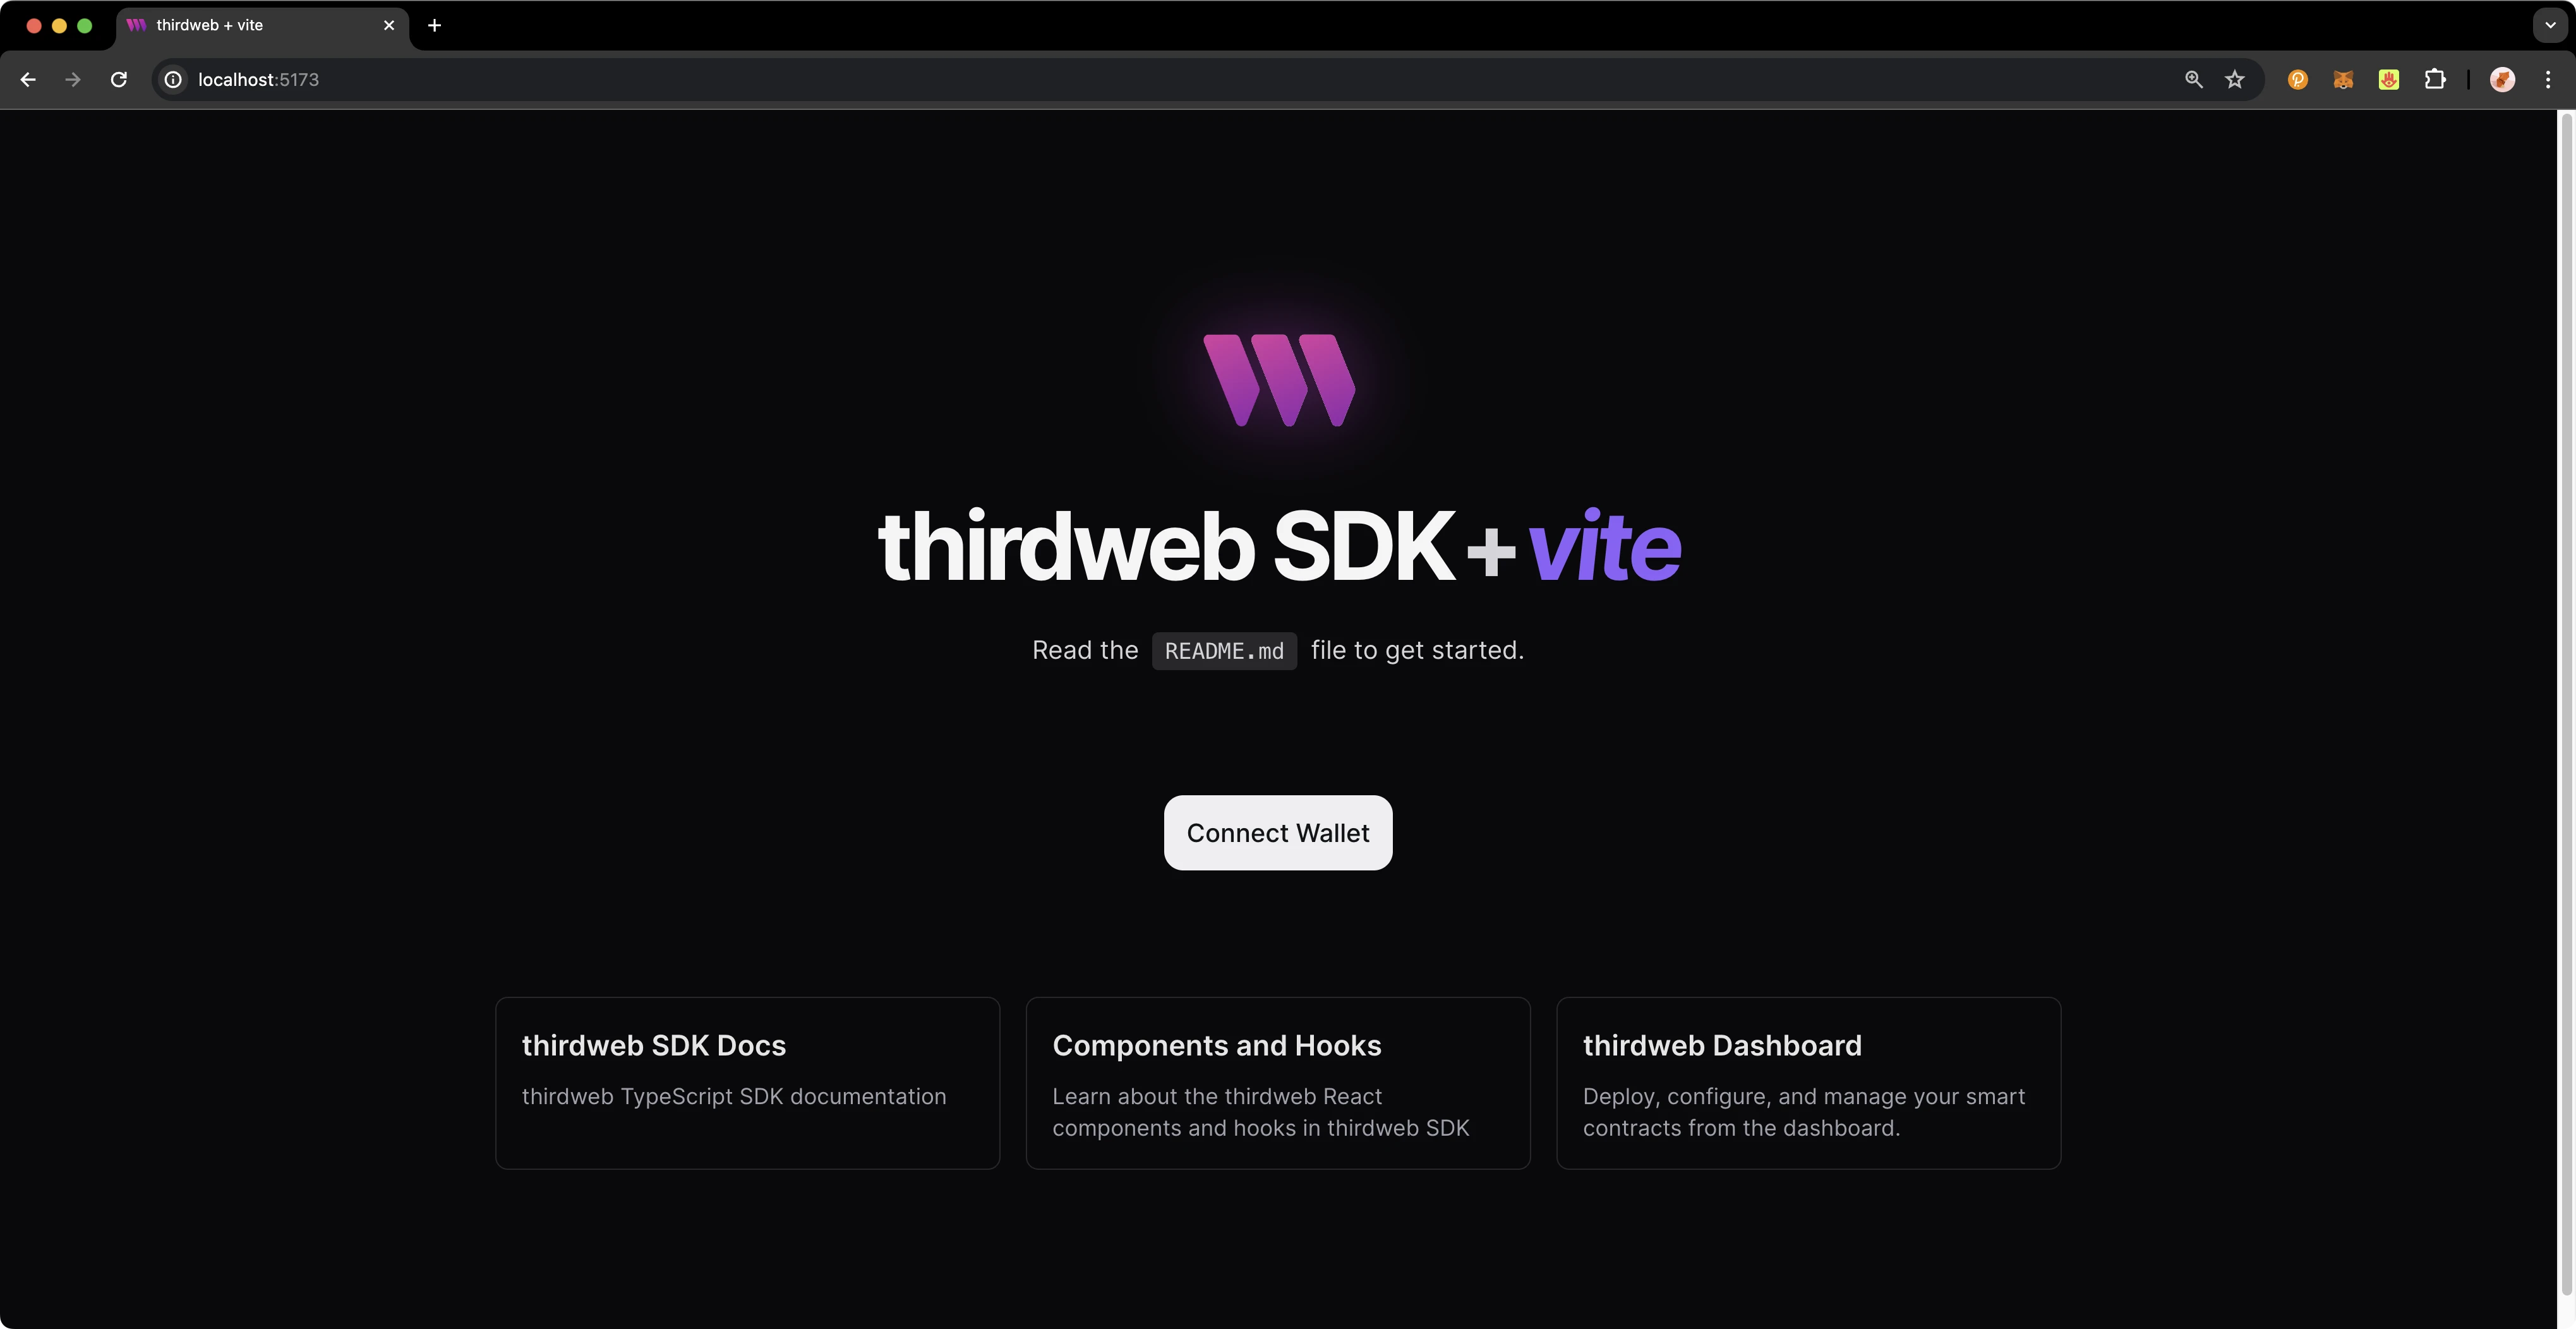
创建应用程序
thirdweb提供适用于多种编程语言的SDK,例如React、React Native、TypeScript、Python、Go和Unity。首先,您需要创建一个应用程序,然后可以选择要使用的SDK:
- 在CLI中,运行以下命令:
npx thirdweb create --app
-
对命令行提示进行偏好设置:
-
设置项目名称
-
选择框架:Next.js、Vite、或是React Native。在本示例中,选择 Vite
-
使用React或TypeScript SDK与应用程序的功能交互。这将在下方与合约交互部分展开讲述
指定客户端ID
在启动dApp(本地或公开部署)之前,您必须拥有与您的项目关联的 thirdweb客户端ID。thirdweb客户端ID与API密钥同义。您可以通过登录您的 thirdweb 帐户,导航到设置,然后单击API 密钥来创建免费的API密钥。
按创建API密钥,然后执行以下步骤:
- 为您的API密钥命名
- 输入API密钥应接受请求的允许域。建议您仅允许必要的域,但出于开发目的,您可以选择Allow all domains
- 按Next并在下一页上确认提示

注意
您的客户端ID变量的相应名称将因您选择的框架而异,例如,Vite将是 VITE_TEMPLATE_CLIENT_ID,Next.js将是 NEXT_PUBLIC_TEMPLATE_CLIENT_ID,而 React Native将是 EXPO_PUBLIC_THIRDWEB_CLIENT_ID。
最后,在您的.env文件中指定您的客户端ID(API密钥)。您的.env 文件必须位于项目的根目录(例如,不是src文件夹)。
如果您使用Vite生成了thirdweb应用程序,您将拥有一个如下所示的 client.ts文件。只要您创建了一个.env文件,并在 VITE_TEMPLATE_CLIENT_ID中定义了您的thirdweb API密钥(客户端ID),您就可以保留client.ts原样并继续下一部分。
import { createThirdwebClient } from 'thirdweb';

// Replace this with your client ID string.
// Refer to https://portal.thirdweb.com/typescript/v5/client on how to get a client ID
const clientId = import.meta.env.VITE_TEMPLATE_CLIENT_ID;

export const client = createThirdwebClient({
  clientId: clientId,
});
注意
如果您没有创建客户端ID并在.env文件中正确指定,则在尝试构建Web 应用程序时会出现空白屏幕。如果不深入控制台,则不会显示任何错误消息,因此首先请确保您已正确设置客户端ID。
本地运行
要本地运行dApp以进行测试和调试,请使用以下命令:
yarn dev
应用程序将编译并指定本地主机和端口号,供您在浏览器中访问。
配置链
thirdweb提供了来自@thirdweb/chains的少量链,但其中不包括 Moonbeam网络,因此您需要指定网络详细信息,包括链ID和RPC URL。您可以使用defineChain创建自定义链,如下所示:
import { defineChain } from 'thirdweb';
const moonbeam = defineChain({
  id: 1284,
  rpc: 'https://rpc.api.moonbeam.network',
});
import { defineChain } from 'thirdweb';
const moonriver = defineChain({
  id: 1285,
  rpc: 'https://rpc.api.moonriver.moonbeam.network',
});
import { defineChain } from 'thirdweb';
const moonbase = defineChain({
  id: 1287,
  rpc: 'https://rpc.api.moonbase.moonbeam.network',
});
thirdweb SDK
以下部分将概述thirdweb SDK的基本方法以及如何与它们交互。每个代码片段都将展示相关的导入语句,并演示在典型场景中使用该方法。本指南旨在成为dApp开发人员将使用的最常见thirdweb方法的快速参考指南。但是,它不包括有关每个thirdweb产品的信息。有关thirdweb所有产品的详细信息,请务必访问thirdweb 文档站点。
有关使用thirdweb构建dApp的全面分步指南,请务必查看Moonbeam的 教程部分中的thirdweb教程。以下部分将涵盖从连接钱包到准备交易等所有内容。
账户和钱包
thirdweb在SDK中区分了账户和钱包。在thirdweb SDK看来,一个账户始终有一个区块链地址,可以签署消息、交易和输入的数据,但不能“连接”或“断开连接”。相反,钱包包含一个或多个账户,可以连接或断开连接,并将签名任务委托给其账户。
以下代码片段演示了如何使用thirdweb SDK初始化和连接MetaMask钱包,然后签署并发送交易,检索交易哈希。此过程适用于SDK支持的300多个钱包连接器中的任何一个。
initialize.ts
import { sendTransaction } from 'thirdweb';
// MetaMask wallet used for example, the pattern is the same for all wallets
import { createWallet } from 'thirdweb/wallets';

// Initialize the wallet. thirdweb supports 300+ wallet connectors
const wallet = createWallet('io.metamask');

// Connect the wallet. This returns a promise that resolves to the connected account
const account = await wallet.connect({
  // Pass the client you created with `createThirdwebClient()`
  client,
});

// Sign and send a transaction with the account. Returns the transaction hash
const { transactionHash } = await sendTransaction({
  // Assuming you have called `prepareTransaction()` or `prepareContractCall()` before, which returns the prepared transaction to send
  transaction,
  // Pass the account to sign the transaction with
  account,
});
获取合约
要连接到您的合约,请使用SDK的getContract方法。例如,您可以从Moonbase Alpha上的增量合约获取数据
import { getContract } from 'thirdweb';
import { client } from './client';

const myContract = getContract({
  client,
  chain: moonbase,
  address: 0xa72f549a1a12b9b49f30a7f3aeb1f4e96389c5d8, // Incrementer contract address on Moonbase Alpha
  abi: '[{"inputs":[],"name":"increment","outputs":[],"stateMutability":"nonpayable","type":"function"},{"inputs":[],"name":"number","outputs":[{"internalType":"uint256","name":"","type":"uint256"}],"stateMutability":"view","type":"function"},{"inputs":[],"name":"timestamp","outputs":[{"internalType":"uint256","name":"","type":"uint256"}],"stateMutability":"view","type":"function"}]';
});
调用合约方法
要在最新版本的SDK中调用合约,可以使用prepareContractCall。
import { prepareContractCall, toWei } from 'thirdweb';

const tx = prepareContractCall({
  contract,
  // Pass the method signature that you want to call
  method: 'function mintTo(address to, uint256 amount)',
  // Pass the params for that method.
  // Their types are automatically inferred based on the method signature
  params: ['0x123...', toWei('100')],
});
回到我们的incrementer合约,准备一个增加合约的调用如下所示:
import { prepareContractCall } from 'thirdweb';

const tx = prepareContractCall({
  contract,
  // Pass the method signature that you want to call
  method: 'function increment()',
  // Increment takes no params so we are leaving an empty array
  params: [],
});
准备原始交易
您还可以直接使用编码数据准备交易。为此,您将使用thirdweb的 prepareTransaction 方法 并直接指定to、value、chain 和 client值。
import { prepareTransaction, toWei } from 'thirdweb';

const transaction = prepareTransaction({
  // The account that will be the receiver
  to: '0x456...',
  // The value is the amount of ether you want to send with the transaction
  value: toWei('1'),
  // The chain to execute the transaction on. This assumes you already set up
  // moonbase as a custom chain as shown in the configure chain section
  chain: moonbase,
  // Your thirdweb client
  client,
});
读取合约状态
使用readContract 函数 通过传入Solidity方法签名和任何参数来调用合约上的任何读取函数。
import { readContract } from 'thirdweb';

const balance = await readContract({
  contract: contract,
  method: 'function balanceOf(address) view returns (uint256)',
  params: ['0x123...'],
});
对于不带参数的函数,例如返回 incrementer合约 中存储的当前数字的number函数,您只需提供函数名称,如下所示:
import { readContract } from 'thirdweb';

const number = await readContract({
  contract: contract,
  method: 'number',
  params: [],
});
您知道吗?使用thirdweb CLI,您可以轻松为合约的所有可能调用生成函数。为此,请在命令行中运行以下命令:
npx thirdweb generate INSERT_CHAIN_ID/INSERT_CONTRACT_ADDRESS
链ID和合约地址都是必需的。例如,如果您想要为Moonbase Alpha上的 incrementer合约 生成函数,则可以使用以下命令:
npx thirdweb generate 1287/0xa72f549a1a12b9b49f30a7f3aeb1f4e96389c5d8
所有使用相应方法生成的文件将放置在名为thirdweb/CHAIN_ID/CONTRACT_ADDRESS的目录中。在上面的示例中,输出文件位于thirdweb/1287/0xa72f549a1a12b9b49f30a7f3aeb1f4e96389c5d8.ts。有关更多信息,请参阅thirdweb's docs on the CLI。
发送交易
使用SDK发送的每笔交易都必须先准备。此准备过程是同时进行且轻量级的,不需要网络请求。此外,它还为您的合约调用提供了类型安全的定义。
您可以按如下方式准备交易:
import { prepareTransaction, toWei } from 'thirdweb';

const transaction = prepareTransaction({
  to: '0x1234567890123456789012345678901234567890',
  chain: moonbase,
  client: thirdwebClient,
  value: toWei('1.0'),
  gasPrice: 150n,
});
交易就绪后,您可以按如下方式发送:
import { sendTransaction } from 'thirdweb';

const { transactionHash } = await sendTransaction({
  account,
  transaction,
});
您可以选择使用sendAndConfirmTransaction来等待交易被挖掘。如果您想阻止用户继续操作直到交易被确认,这很重要。
import { sendAndConfirmTransaction } from 'thirdweb';
import { createWallet } from 'thirdweb/wallets';

const wallet = createWallet('io.metamask');
const account = await wallet.connect({ client });

const receipt = await sendAndConfirmTransaction({
  transaction,
  account,
});
交易实用性
thirdweb提供了一系列围绕准备和发送交易的实用方法。
您可以按如下方式估算交易中需使用的gas:
import { estimateGas } from 'thirdweb';

const gasEstimate = await estimateGas({ transaction });
console.log('estmated gas used', gasEstimate);
您可以按如下方式估算Ether和Wei中的gas成本:
import { estimateGas } from 'thirdweb';

const gasCost = await estimateGasCost({ transaction });
console.log('cost in ether', gasCost.ether);
thirdweb还提供了一种方便的方法来模拟交易,并在实际将其提交到区块链之前验证其完整性。您可以按如下方式模拟交易:
import { simulateTransaction } from 'thirdweb';

const result = await simulateTransaction({ transaction });
console.log('simulation result', result);
您可以按照以下步骤对交易数据进行编码,以便稍后采取更多步骤:
import { encode } from 'thirdweb';

const data = await encode(transaction);
console.log('encoded data', data);
ConnectButton
用户与您的dApp进行的第一次也是最重要的互动可能是连接他们的钱包。thirdweb提供了高度可定制的方式来助您实现此功能。thirdweb提供了高度可定制化的ConnectButton来定制化您期待的钱包。该 ConnectButton接受了可选wallets数组的钱包参数。您可以从 wallets钱包数组中添加或删减钱包,以更改用户可用的选项。由于该按钮具有高度的灵活性,thirdweb还提供了一个ConnectButton Playground,用于自定义和实时查看ConnectButton的变化。
import { ConnectButton } from 'thirdweb/react';
import { createWallet, inAppWallet } from 'thirdweb/wallets';

const wallets = [
  inAppWallet(),
  createWallet('io.metamask'),
  createWallet('com.coinbase.wallet'),
  createWallet('me.rainbow'),
];

function Example() {
  return (
    <div>
      <ConnectButton client={client} wallets={wallets} />
    </div>
  );
}
部署应用
请注意,您可以通过运行以下命令在本地构建示例项目:
yarn dev
如需在分散存储上托管静态Web应用程序,请运行:
npx thirdweb deploy --app
通过运行此命令,您的应用程序将构建为生产环境,利用Storage,此类thirdweb的去中心化文件管理解决方案进行存储。构建的应用程序上传到去中心化存储网络IPFS,并为您的应用程序生成唯一的URL。此URL用作您的应用程序在网络上的永久托管位置。
如果您还有任何疑问或在操作过程中遇到任何问题,请通过support.thirdweb.com联系thirdweb客服。