Overview of XC-20s
Introduction
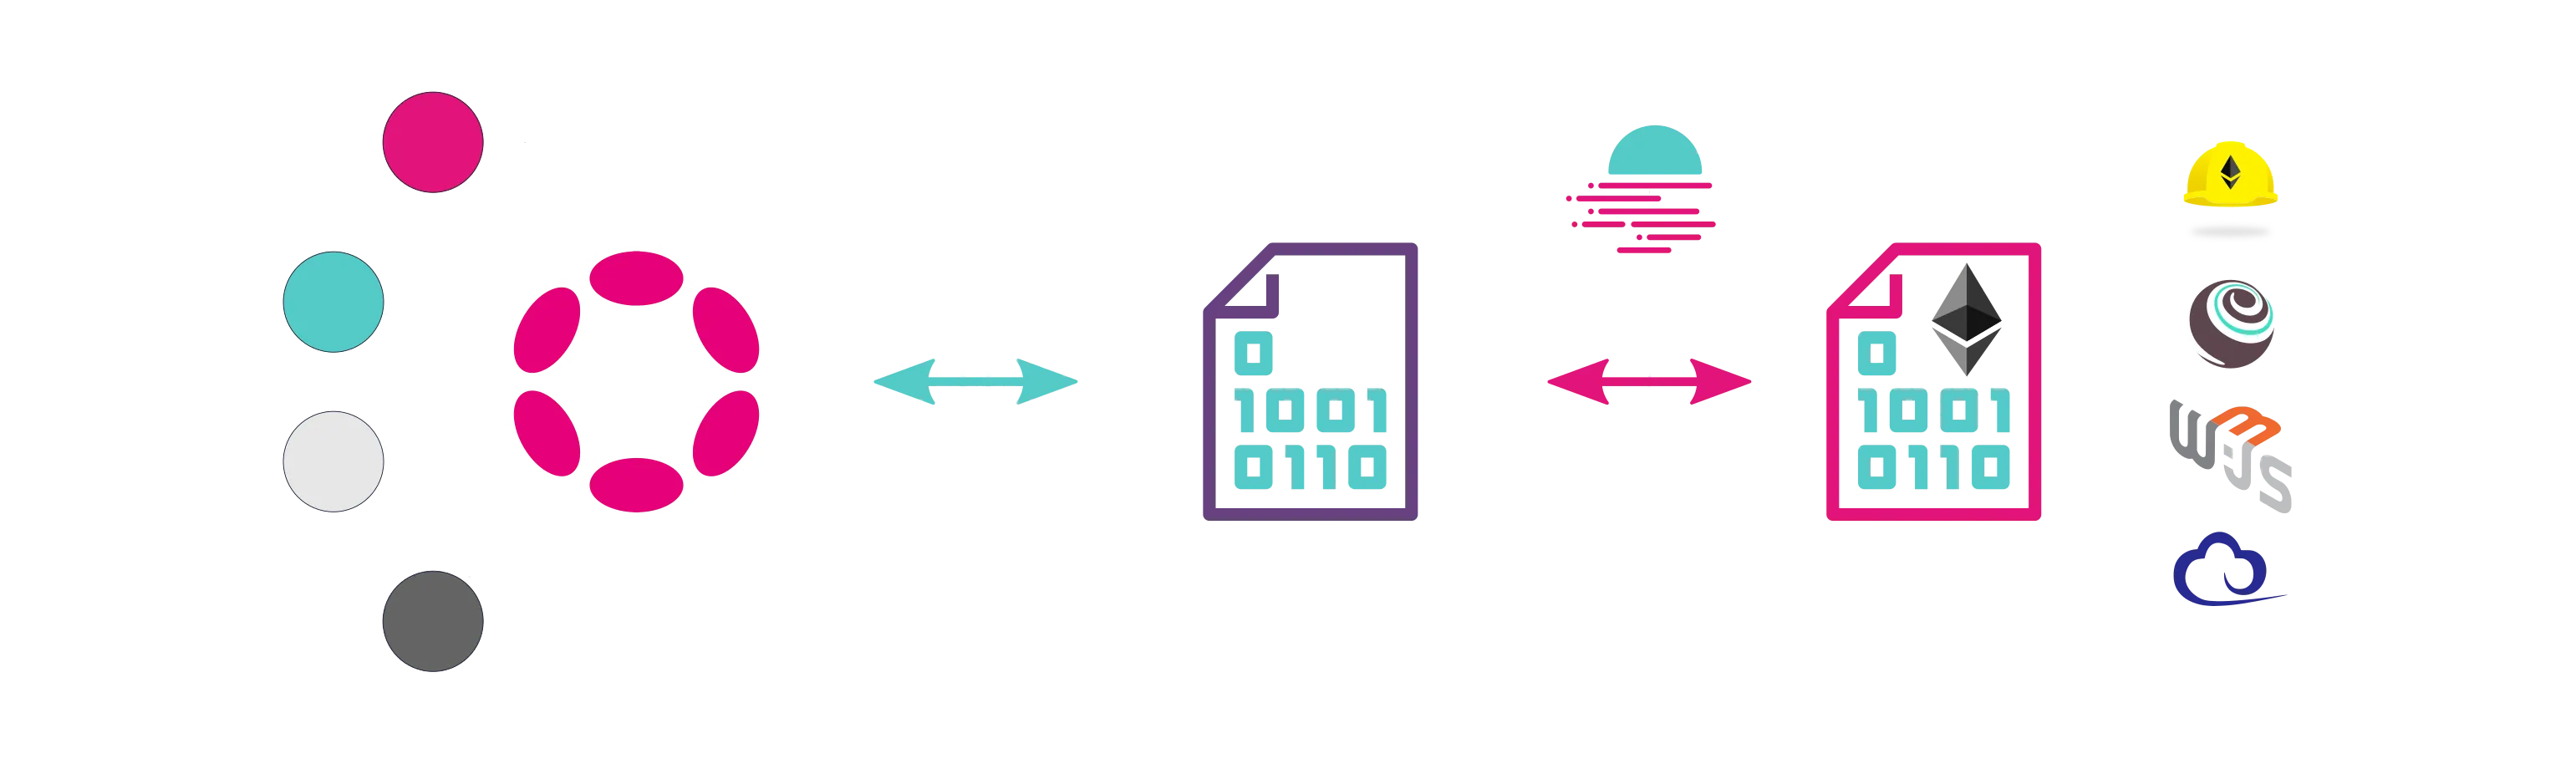
The Cross-Consensus Message (XCM) format provides a universal way for blockchains to exchange messages and transfer assets. To extend this interoperability to the EVM, Moonbeam introduced XC-20s, ERC-20 tokens on Moonbeam that are fully compatible with XCM transfers.
Any ERC-20 deployed on Moonbeam can be configured as an XC-20, making it accessible to any chain connected via XCM. This allows EVM-focused developers to work with familiar ERC-20 workflows while benefiting from Polkadot’s native cross-chain functionality, all without needing Substrate-specific expertise.
From a technical standpoint, local XC-20s are ERC-20 tokens originating on Moonbeam (including bridged tokens deemed native once issued on Moonbeam), whereas external XC-20s are wrapped representations of tokens whose canonical ledger exists on another parachain or the relay chain. In all cases, XC-20s function just like standard ERC-20s—supporting common EVM-based use cases (such as DeFi, DEXs, and lending platforms)—but with the added advantage of seamless cross-chain operability.
This page aims to cover the basics on XC-20s; if you want to learn how to interact with or transfer XC-20s, please refer to the Send XC-20s guide.
Types of XC-20s
There are two types of XC-20s: local and external.
What are Local XC-20s?
Local XC-20s are all ERC-20s that exist on the EVM, and that can be transferred cross-chain through XCM. For local XC-20s to be transferred to another parachain, the asset must be registered on that chain. When transferring local XC-20s, the underlying tokens reside in the destination chain's Sovereign account on Moonbeam. A sovereign account is a keyless account governed by a blockchain runtime—rather than an individual—that can hold assets and interact with other chains. Local XC-20s must follow the ERC-20 interface outlined in this guide. They must implement the standard ERC-20 function signatures, including the correct function selector of the transfer function as described in EIP-20. However, additional functionality can still be added as long as it doesn’t break the base methods.
Creating a local XC-20 is equivalent to deploying a standard ERC-20 and enabling cross-chain features on any Moonbeam network.
What are External XC-20s?
External XC-20s are cross-chain tokens originating from another parachain or the relay chain, and they are represented on Moonbeam as ERC-20 tokens. The original tokens remain locked in a Moonbeam sovereign account on their home chain, while the wrapped ERC-20 representation can be freely utilized on Moonbeam. When you transfer external XC-20s, the canonical assets remain in the sovereign account on their source chain, while the ERC-20 representation is what circulates on Moonbeam.
External XC-20s all have xc prepended to their names to distinguish them as cross-chain assets. For example, DOT, native to the Polkadot relay chain, is known as xcDOT when represented as an XC-20 on Moonbeam.
Local XC-20s vs External XC-20s
Local XC-20s are EVM-native ERC-20 tokens whose “home” (or reserve chain) is Moonbeam from a Polkadot perspective. This includes tokens originally bridged in from outside Polkadot (for example, Wormhole-wrapped ETH), because once they’re issued on Moonbeam as ERC-20s, Polkadot views them as local to Moonbeam. When local XC-20s are transferred to another parachain, the tokens move into that chain’s sovereign account on Moonbeam.
External XC-20s, on the other hand, are ERC-20 representations of tokens whose canonical ledger remains on another parachain or the relay chain. Moonbeam holds the “wrapped” version, while the underlying tokens stay locked in Moonbeam’s sovereign account on the originating chain.
From a cross-chain transfer perspective, local and external XC-20s can be sent through Polkadot’s XCM infrastructure using the Ethereum or Substrate API. Because the underlying asset is an ERC-20 with EVM bytecode following the EIP-20 token standard, both transfers initiated via the Substrate and Ehereum APIs generate EVM logs visible to EVM-based explorers such as Moonscan. In contrast, you can't send a regular ERC-20 transfer using the Substrate API. Aside from cross-chain transfers through XCM, all other XC-20 interactions (such as querying balances or adjusting allowances) must occur in the EVM.
Cross-chain transfers of XC-20s are executed via the Polkadot XCM Pallet, which utilizes regular mint, burn, and transfer mechanisms of ERC-20s for the XCM asset flow. If you’d like to learn how to send XC-20s using that pallet, refer to the Using the Polkadot XCM Pallet guide.
Asset Reserves
When transferring tokens across chains in the Polkadot or Kusama ecosystems, each token has a “reserve” chain that holds its canonical ledger—the source of truth for minting, burning, and supply management. For XC-20s, understanding which chain is the reserve determines whether the asset is managed locally on Moonbeam or remotely on another chain.
Regardless of where the reserve is located, XC-20s on Moonbeam are still ERC-20 tokens that developers and users can interact with in the EVM. However, from an XCM perspective, the reserve chain determines how the tokens are locked, unlocked, minted, or burned behind the scenes when performing cross-chain operations.
Local Reserve Assets
A local reserve asset on Moonbeam is a token whose canonical ledger—from an XCM perspective—resides natively on Moonbeam. In other words, Moonbeam is the asset’s home chain, where minting and burning take place.
For example, Wormhole-wrapped ETH (wETH) is considered a local reserve asset on Moonbeam, even though Ethereum is the ultimate source of ETH. Once ETH is wrapped by Wormhole and enters the Polkadot ecosystem via Moonbeam, wETH can be transferred to other parachains through Moonbeam Routed Liquidity (MRL).
The important caveat is that, on a purely Ethereum-level view, ETH remains governed by and minted on Ethereum. However, from an XCM standpoint, wETH on Moonbeam is treated as a local reserve asset, meaning the canonical supply of wETH (as far as Polkadot ecosystems are concerned) exists on Moonbeam.
Remote Reserve Assets
A remote reserve asset is a token whose canonical ledger—the source of truth for minting and burning—resides on a chain different from where it’s currently in use. In the case of xcDOT on Moonbeam, the underlying DOT tokens representing the xcDOT remain locked in Moonbeam’s sovereign account on the Polkadot relay chain, while xcDOT functions as a wrapped representation in Moonbeam’s EVM environment.
Users can hold and transact with xcDOT on Moonbeam (for DeFi, governance, and more), knowing that the underlying DOT is safely locked on the relay chain. At any point, the wrapped xcDOT can be redeemed for the original DOT, effectively burning the xcDOT and unlocking the corresponding DOT tokens on Polkadot.
Current List of External XC-20s
The current list of available external XC-20 assets per network is as follows:
*You can check each Asset ID on Polkadot.js Apps
*You can check each Asset ID on Polkadot.js Apps
| Origin | Symbol | XC-20 Address |
|---|---|---|
| Relay Chain Alphanet | xcUNIT | 0xFfFFfFff1FcaCBd218EDc0EbA20Fc2308C778080 |
*You can check each Asset ID on Polkadot.js Apps
Retrieve List of External XC-20s and Their Metadata
To fetch a list of the currently available external XC-20s along with their associated metadata, you can query the chain state using the Polkadot.js API. You'll take the following steps:
-
Create an API provider for the network you'd like to get the list of assets for. You can use the following WSS endpoints for each network:
wss://wss.api.moonbeam.networkwss://wss.api.moonriver.moonbeam.networkwss://wss.api.moonbase.moonbeam.network -
Query the
assetspallet for all assets - Iterate over the list of assets to get all of the asset IDs along with their associated metadata
import { ApiPromise, WsProvider } from '@polkadot/api';

const getXc20s = async () => {
  try {
    const substrateProvider = new WsProvider('INSERT_WSS_ENDPOINT');
    const api = await ApiPromise.create({ provider: substrateProvider });

    const assets = await api.query.assets.asset.entries();

    await Promise.all(
      assets.map(async ([{ args: [id] }]) => {
        try {
          const metadata = await api.query.assets.metadata(id);
          const humanMetadata = metadata.toHuman();

          console.log(`\nAsset ID: ${id}`);
          console.log('Metadata:');
          console.log('  Name:', humanMetadata.name);
          console.log('  Symbol:', humanMetadata.symbol);
          console.log('  Decimals:', humanMetadata.decimals);
          console.log('  Deposit:', humanMetadata.deposit);
          console.log('  IsFrozen:', humanMetadata.isFrozen);
          console.log('-----');
        } catch (error) {
          console.error(`Error fetching metadata for asset ${id}:`, error);
        }
      })
    );

    await api.disconnect();
  } catch (error) {
    console.error('Error in getXc20s:', error);
  }
};

getXc20s().catch(console.error);
The result will display the asset ID along with some additional information for all of the registered external XC-20s.
Retrieve Local XC-20 Metadata
Since local XC-20s are ERC-20s on Moonbeam that can be transferred via XCM to another parachain, you can interact with local XC-20s like you would an ERC-20. As long as you have the address and the ABI of the ERC-20, you can retrieve its metadata by interacting with its ERC-20 interface to retrieve the name, symbol, and decimals for the asset.
The following is an example that retrieves the asset metadata for the Jupiter token on Moonbase Alpha:
import { ethers } from 'ethers';

const providerRPC = {
  moonbase: {
    name: 'moonbase',
    rpc: 'https://rpc.api.moonbase.moonbeam.network', // Insert your RPC URL here
    chainId: 1287, // 0x507 in hex,
  },
};

const provider = new ethers.JsonRpcProvider(providerRPC.moonbase.rpc, {
  chainId: providerRPC.moonbase.chainId,
  name: providerRPC.moonbase.name,
});

// Replace with the address of the ERC-20 token
const tokenAddress = '0x9Aac6FB41773af877a2Be73c99897F3DdFACf576';
const tokenABI = [
  'function name() view returns (string)',
  'function symbol() view returns (string)',
  'function decimals() view returns (uint8)',
];

const tokenContract = new ethers.Contract(tokenAddress, tokenABI, provider);
async function getTokenMetadata() {
  try {
    const [name, symbol, decimals] = await Promise.all([
      tokenContract.name(),
      tokenContract.symbol(),
      tokenContract.decimals(),
    ]);
    console.log(`Name: ${name}`);
    console.log(`Symbol: ${symbol}`);
    console.log(`Decimals: ${decimals}`);
  } catch (error) {
    console.error('Error fetching token metadata:', error);
  }
}
getTokenMetadata();
import { Web3 } from 'web3';

// Insert your RPC URL here
const web3 = new Web3('https://rpc.api.moonbase.moonbeam.network');

// Replace with the address of the ERC-20 token
const tokenAddress = '0x9Aac6FB41773af877a2Be73c99897F3DdFACf576';
const tokenABI = [
  // ERC-20 ABI
  {
    constant: true,
    inputs: [],
    name: 'name',
    outputs: [{ name: '', type: 'string' }],
    payable: false,
    stateMutability: 'view',
    type: 'function',
  },
  {
    constant: true,
    inputs: [],
    name: 'symbol',
    outputs: [{ name: '', type: 'string' }],
    payable: false,
    stateMutability: 'view',
    type: 'function',
  },
  {
    constant: true,
    inputs: [],
    name: 'decimals',
    outputs: [{ name: '', type: 'uint8' }],
    payable: false,
    stateMutability: 'view',
    type: 'function',
  },
];
const tokenContract = new web3.eth.Contract(tokenABI, tokenAddress);
async function getTokenMetadata() {
  try {
    const [name, symbol, decimals] = await Promise.all([
      tokenContract.methods.name().call(),
      tokenContract.methods.symbol().call(),
      tokenContract.methods.decimals().call(),
    ]);
    console.log(`Name: ${name}`);
    console.log(`Symbol: ${symbol}`);
    console.log(`Decimals: ${decimals}`);
  } catch (error) {
    console.error('Error fetching token metadata:', error);
  }
}
getTokenMetadata();
from web3 import Web3

web3 = Web3(Web3.HTTPProvider("https://rpc.api.moonbase.moonbeam.network"))

# Replace with the address of the ERC-20 token
token_address = "0x9Aac6FB41773af877a2Be73c99897F3DdFACf576"
token_abi = [  # ERC-20 ABI
    {
        "constant": True,
        "inputs": [],
        "name": "name",
        "outputs": [{"name": "", "type": "string"}],
        "payable": False,
        "stateMutability": "view",
        "type": "function",
    },
    {
        "constant": True,
        "inputs": [],
        "name": "symbol",
        "outputs": [{"name": "", "type": "string"}],
        "payable": False,
        "stateMutability": "view",
        "type": "function",
    },
    {
        "constant": True,
        "inputs": [],
        "name": "decimals",
        "outputs": [{"name": "", "type": "uint8"}],
        "payable": False,
        "stateMutability": "view",
        "type": "function",
    },
]
token_contract = web3.eth.contract(address=token_address, abi=token_abi)


def get_token_metadata():
    try:
        name = token_contract.functions.name().call()
        symbol = token_contract.functions.symbol().call()
        decimals = token_contract.functions.decimals().call()
        print(f"Name: {name}")
        print(f"Symbol: {symbol}")
        print(f"Decimals: {decimals}")
    except Exception as e:
        print(f"Error fetching token metadata: {e}")


get_token_metadata()
| Created: December 22, 2021