How to Register Cross-Chain Assets via Governance
Introduction
For an asset to be transferred across chains via XCM, there needs to be an open channel between the two chains, and the asset needs to be registered on the destination chain. If a channel does not exist between the two chains, one will need to be opened. Please check out the XC Channel Registration guide for information on how to establish a channel between Moonbeam and another chain.
This guide will show you how to register external XC-20s on Moonbeam and provide the information you need to register Moonbeam assets, including Moonbeam native assets (GLMR, MOVR, and DEV) and local XC-20s (XCM-enabled ERC-20s), on another chain.
The examples in this guide use a CLI tool developed to ease the entire process, which you can find in the xcm-tools GitHub repository.
git clone https://github.com/Moonsong-Labs/xcm-tools && \
cd xcm-tools && \
yarn
Register External XC-20s on Moonbeam
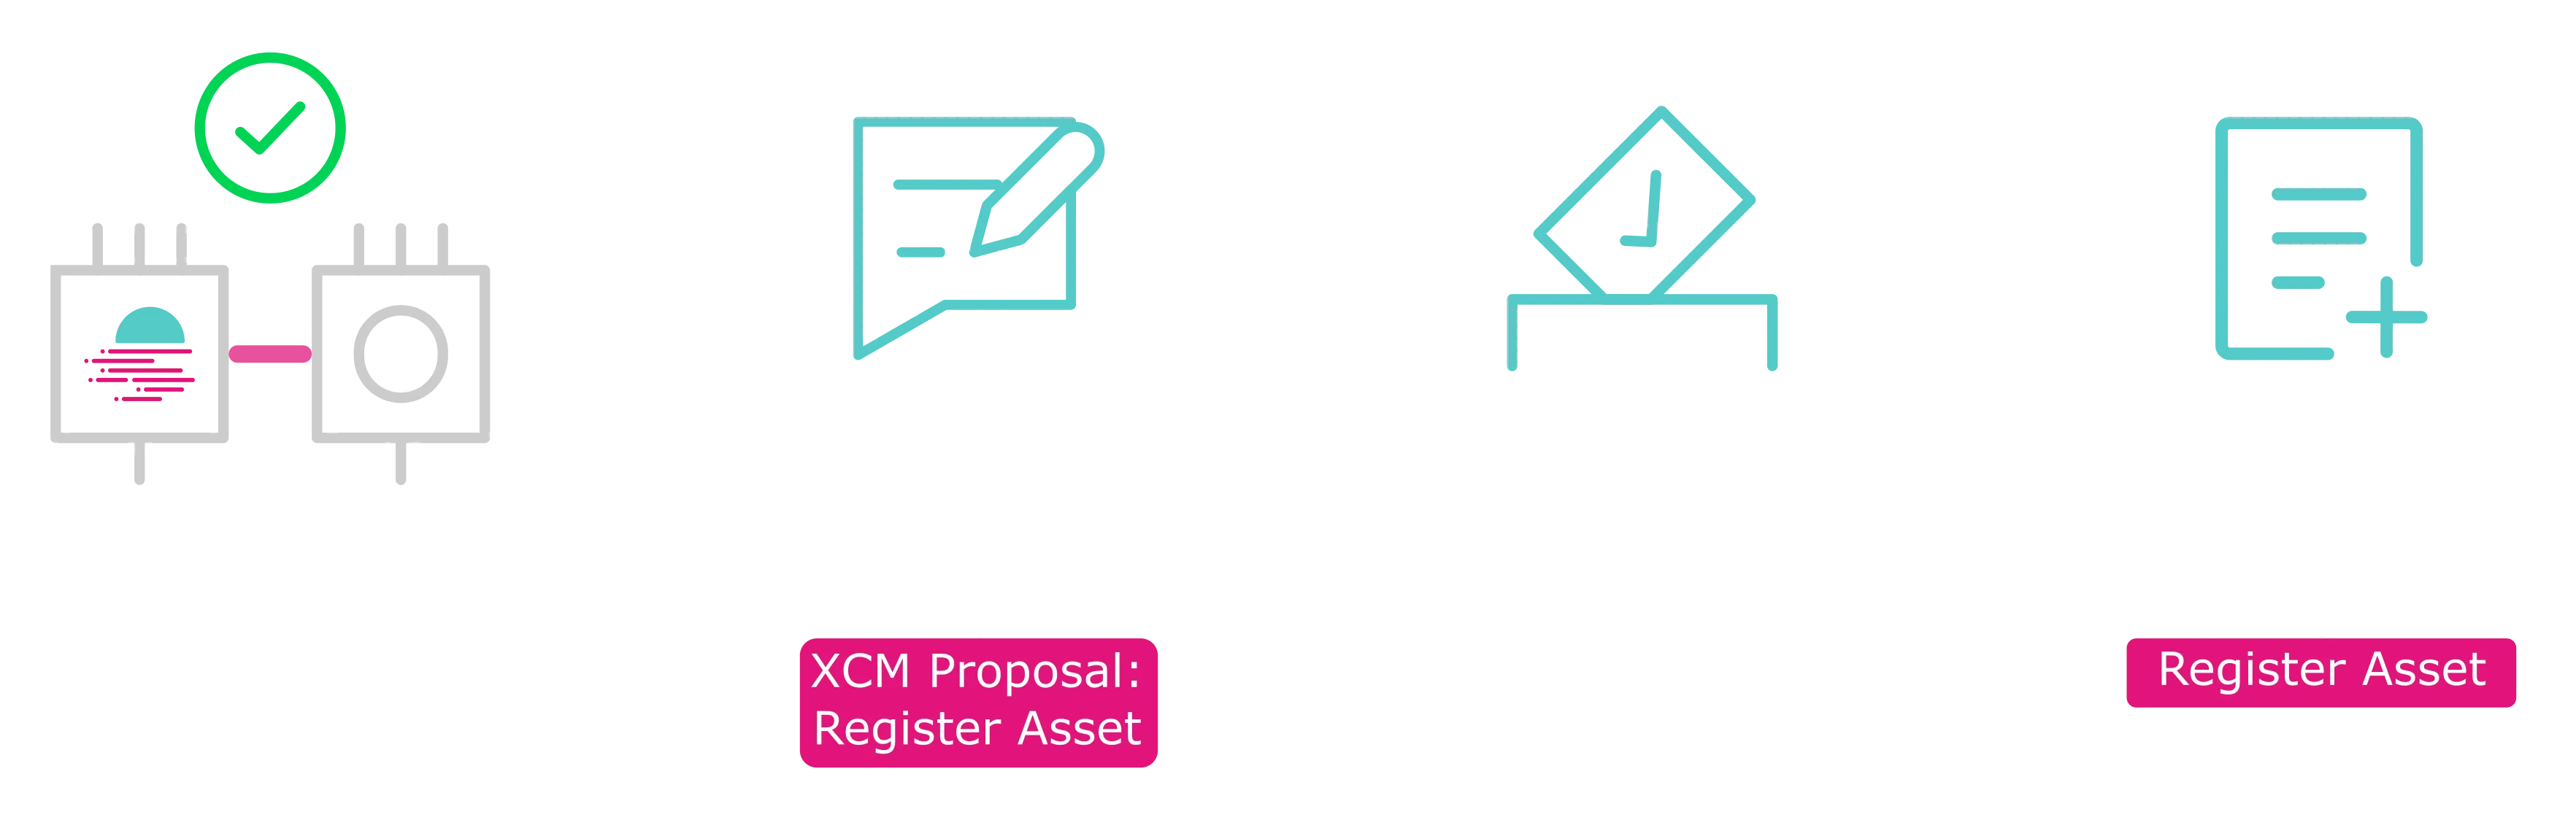
Registering External XC-20s on Moonbeam is a multi-step process that, at a high level, involves proposing the asset registration on the Moonbeam Community Forum and creating an on-chain governance proposal.
If a channel between Moonbeam and the origin chain of the asset does not yet exist, one will need to be opened. You can batch the channel-related calls with the asset registration calls, so you only need to submit a single proposal. You must start by creating a couple of forum posts: an XCM Disclosure post and an XCM Proposal post.
After you've collected feedback from community members, you can create a proposal to open a channel and register any assets. Please refer to the Establishing an XC Integration with Moonbeam guide for more information on opening a channel.
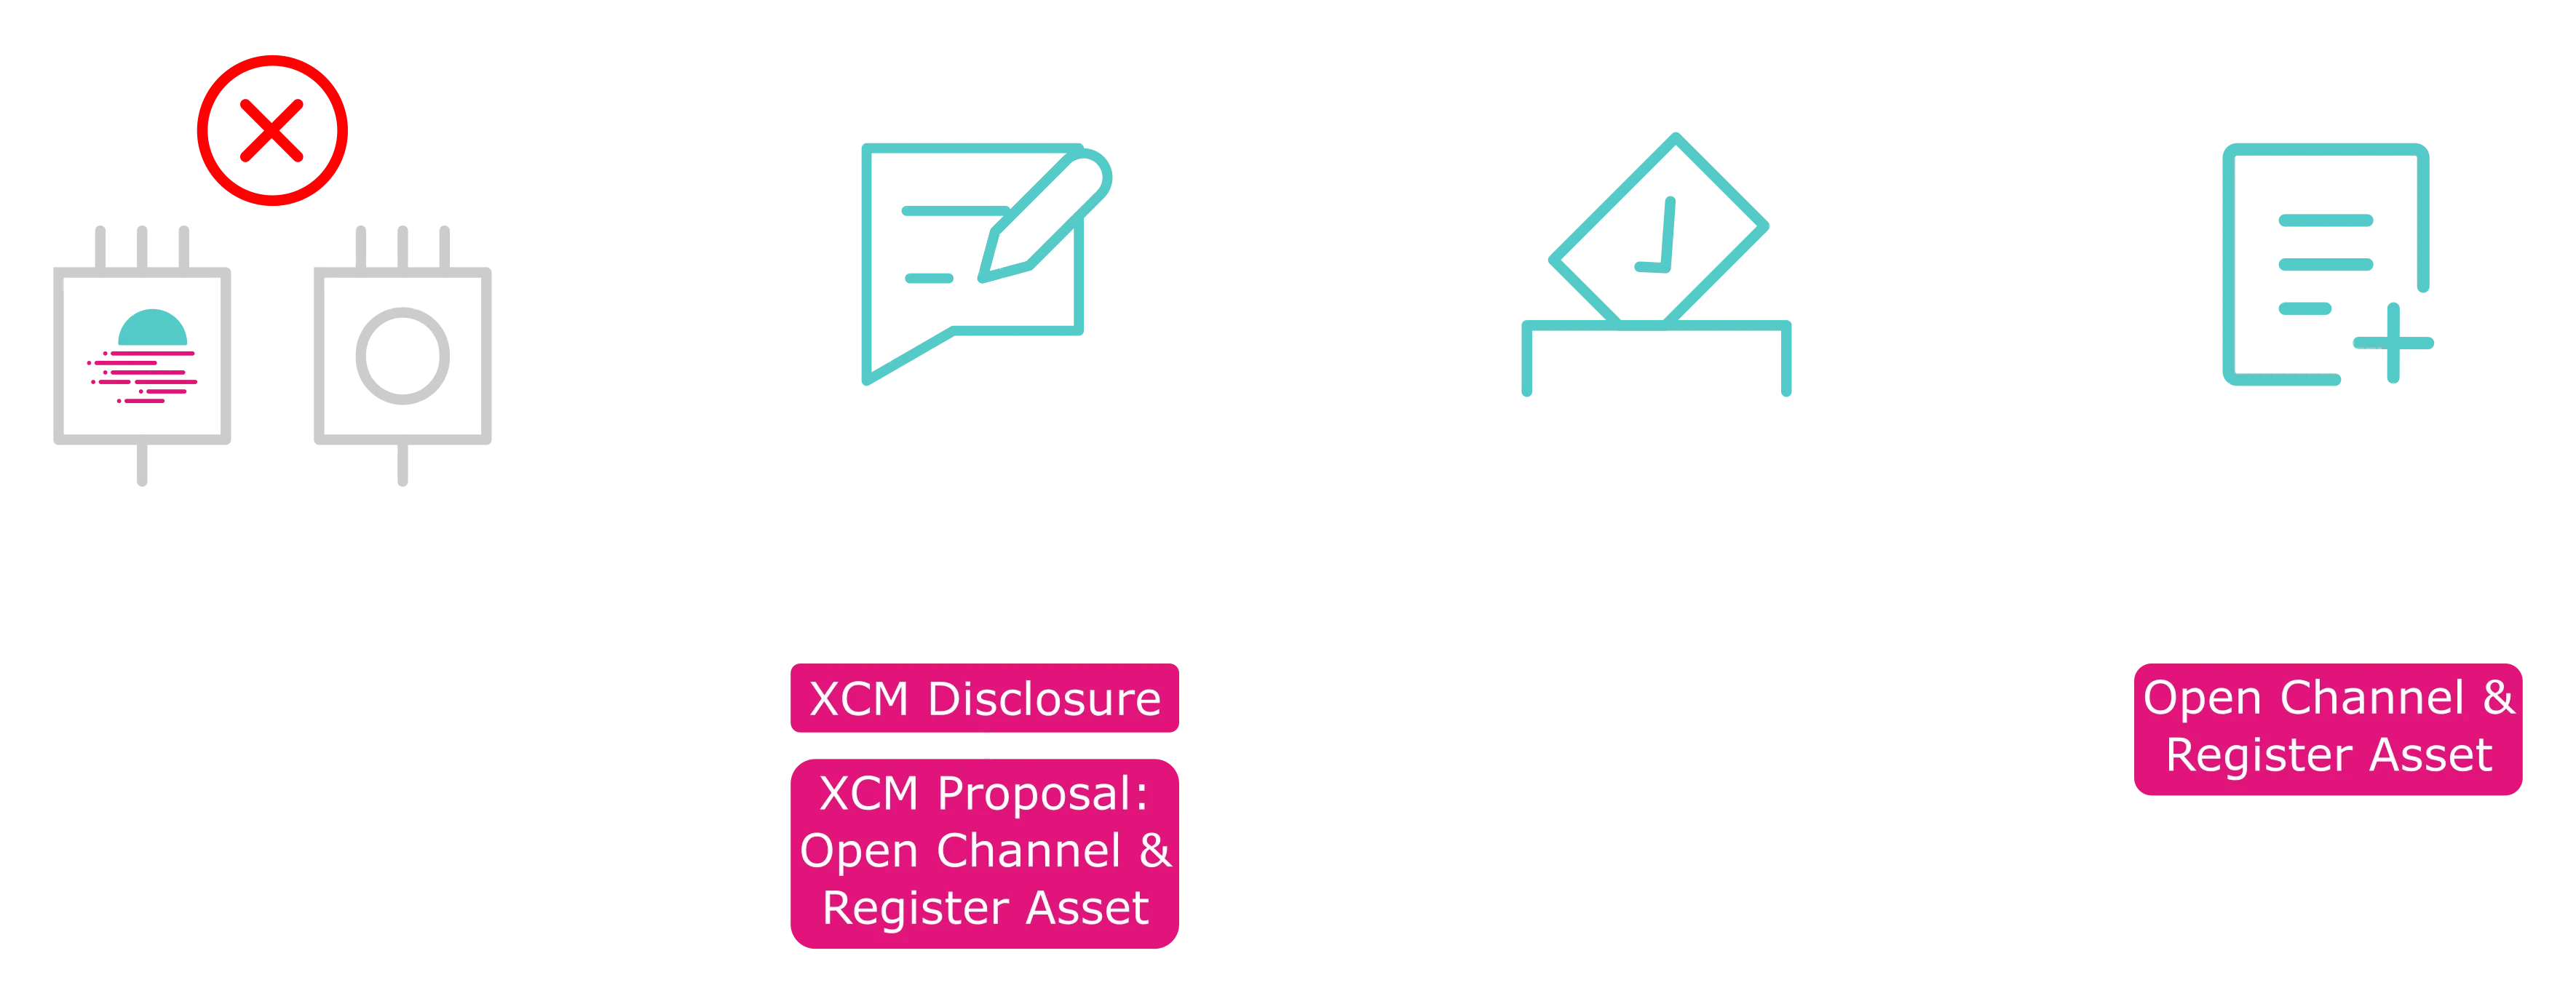
If a channel between the chains already exists, you'll need to create a forum post to register the asset, collect feedback, and then submit the proposal to register the asset.
Create a Forum Post
To create a forum post on the Moonbeam Community Forum, you'll need to make sure that you're adding the post to the correct category and adding relevant content. For general guidelines and a template to follow, please refer to the Moonbeam Community Forum Templates for XCM Integrations page.
Calculate Relative Price
An asset's relativePrice refers to a u128 value that indicates how many units of said asset (in its smallest denomination) equate to one unit—i.e., 1 × 10^18 Wei—of the native token (GLMR or MOVR). This helps determine how much of your asset to use for fees initially quoted in the native token, particularly in cross-chain messaging (XCM).
You can use the following script (also available as part of xcm-tools ) to calculate the correct relativePrice value for your asset.
Calculate Relative Price
import axios from 'axios';

// CoinGecko IDs for the networks
const NETWORK_IDS = {
  GLMR: 'moonbeam',
  MOVR: 'moonriver',
};

async function calculateRelativePrice(
  assetPrice: number,
  assetDecimals: number,
  network: 'GLMR' | 'MOVR'
): Promise<bigint> {
  try {
    // Fetch the native token price from CoinGecko
    const response = await axios.get(
      `https://api.coingecko.com/api/v3/simple/price?ids=${NETWORK_IDS[network]}&vs_currencies=usd`
    );

    const nativeTokenPrice = response.data[NETWORK_IDS[network]].usd;

    // Calculate relative price with 18 decimal places
    // Formula: (assetPrice / nativeTokenPrice) * 10^18
    // This gives us how many units of the asset we need to equal 1 unit of native token
    const relativePrice = BigInt(
      0.175 *
        Math.pow(10, 18 - assetDecimals) *
        (assetPrice / nativeTokenPrice) *
        Math.pow(10, 18)
    );

    // Return as string to preserve precision
    return relativePrice;
  } catch (error) {
    if (error instanceof Error) {
      throw new Error(`Failed to calculate relative price: ${error.message}`);
    }
    throw error;
  }
}

function validateInput(
  price: string,
  decimals: string,
  network: string
): { assetPrice: number; assetDecimals: number; network: 'GLMR' | 'MOVR' } {
  // Validate price
  const assetPrice = parseFloat(price);
  if (isNaN(assetPrice) || assetPrice <= 0) {
    throw new Error('Price must be a positive number');
  }

  // Validate decimals
  const assetDecimals = parseFloat(decimals);
  if (isNaN(assetDecimals) || assetDecimals <= 0) {
    throw new Error('Decimals must be a positive number');
  }

  // Validate network
  const upperNetwork = network.toUpperCase() as 'GLMR' | 'MOVR';
  if (!['GLMR', 'MOVR'].includes(upperNetwork)) {
    throw new Error('Network must be either GLMR or MOVR');
  }

  return { assetPrice, assetDecimals, network: upperNetwork };
}

function printUsage() {
  console.log('\nUsage:');
  console.log(
    'npx ts-node calculate-relative-price.ts <price> <decimals> <network>'
  );
  console.log('\nExample:');
  console.log('npx ts-node calculate-relative-price.ts 0.25 12 GLMR');
  console.log('\nParameters:');
  console.log('price      - The price of your asset in USD');
  console.log('decimals   - The decimals of your asset');
  console.log('network    - Either GLMR or MOVR');
}

async function main() {
  try {
    // Get command line arguments
    const [, , price, decimals, network] = process.argv;

    // Check if help flag is passed
    if (price === '--help' || price === '-h') {
      printUsage();
      return;
    }

    // Check if required arguments are provided
    if (!price || !decimals || !network) {
      console.error('Error: Missing required arguments');
      printUsage();
      process.exit(1);
    }

    // Validate inputs
    const {
      assetPrice,
      assetDecimals,
      network: validNetwork,
    } = validateInput(price, decimals, network);

    console.log(
      `\nCalculating relative price for asset worth $${assetPrice} against ${validNetwork}...`
    );
    const relativePrice = await calculateRelativePrice(
      assetPrice,
      assetDecimals,
      validNetwork
    );
    const nativeTokenPrice = (
      await axios.get(
        `https://api.coingecko.com/api/v3/simple/price?ids=${NETWORK_IDS[validNetwork]}&vs_currencies=usd`
      )
    ).data[NETWORK_IDS[validNetwork]].usd;

    const decimalRatio = nativeTokenPrice / assetPrice;

    console.log(`\nResults:`);
    console.log(`Asset Price: $${assetPrice}`);
    console.log(`Network: ${validNetwork}`);
    console.log(`Native Token Price (from CoinGecko): $${nativeTokenPrice}`);
    console.log(`\nRelative Price Analysis:`);
    console.log(
      `1 ${validNetwork} is equal to approximately ${decimalRatio.toFixed(
        3
      )} of your specified token.`
    );
    console.log(
      `With 18 decimals, 1 ${validNetwork} or in WEI, 1000000000000000000 is equal to a relative price of ${relativePrice} units of your token`
    );
    console.log(`\nRelative Price: ${relativePrice}`);
    console.log(
      `\nThe relative price you should specify in asset registration steps is ${relativePrice}\n`
    );
  } catch (error) {
    console.error('\nError:', error instanceof Error ? error.message : error);
    process.exit(1);
  }
}

main();
Only three parameters are required to calculate the relative price of an asset:
- Asset Price (USD) - a positive number representing how much 1 unit (in human-readable form) of your asset costs in USD
- Asset Decimals - the number of decimal places your asset uses. For example, if your token has 12 decimals, specify 12
- Network - either GLMR (Moonbeam) or MOVR (Moonriver). This should correspond to the network that you're registering the asset on, and this determines which native token’s USD price the script will fetch from CoinGecko
First, ensure that you've installed the required dependencies by running:
yarn
Execute the script, making sure to provide the USD price of the asset you're registering, the number of decimals it has, and the network you're registering the asset on (either GLMR or MOVR):
yarn calculate-relative-price INSERT_ASSET_PRICE INSERT_DECIMALS GLMR
For example, if the asset you're registering has a USD price of $0.25 and 12 decimals and you're registering the asset on the Moonbeam network, you would run:
yarn calculate-relative-price 0.25 12 GLMR
This instructs the script to calculate how many smallest units of an asset (priced at $0.25, with 12 decimals) correspond to 1 GLMR token.
Upon successful execution, the script prints the computed relativePrice as a BigInt. This value represents the scaled ratio between the asset’s USD price and the native token’s USD price, multiplied up to 18 decimals. You can then use this result in on-chain asset registration or fee calculation scenarios—especially where a u128 18-decimal format is required.
For additional info, usage details, or to see an example in action, you can invoke the help command by running:
yarn calculate-relative-price --help
Generate the Encoded Calldata for the Asset Registration
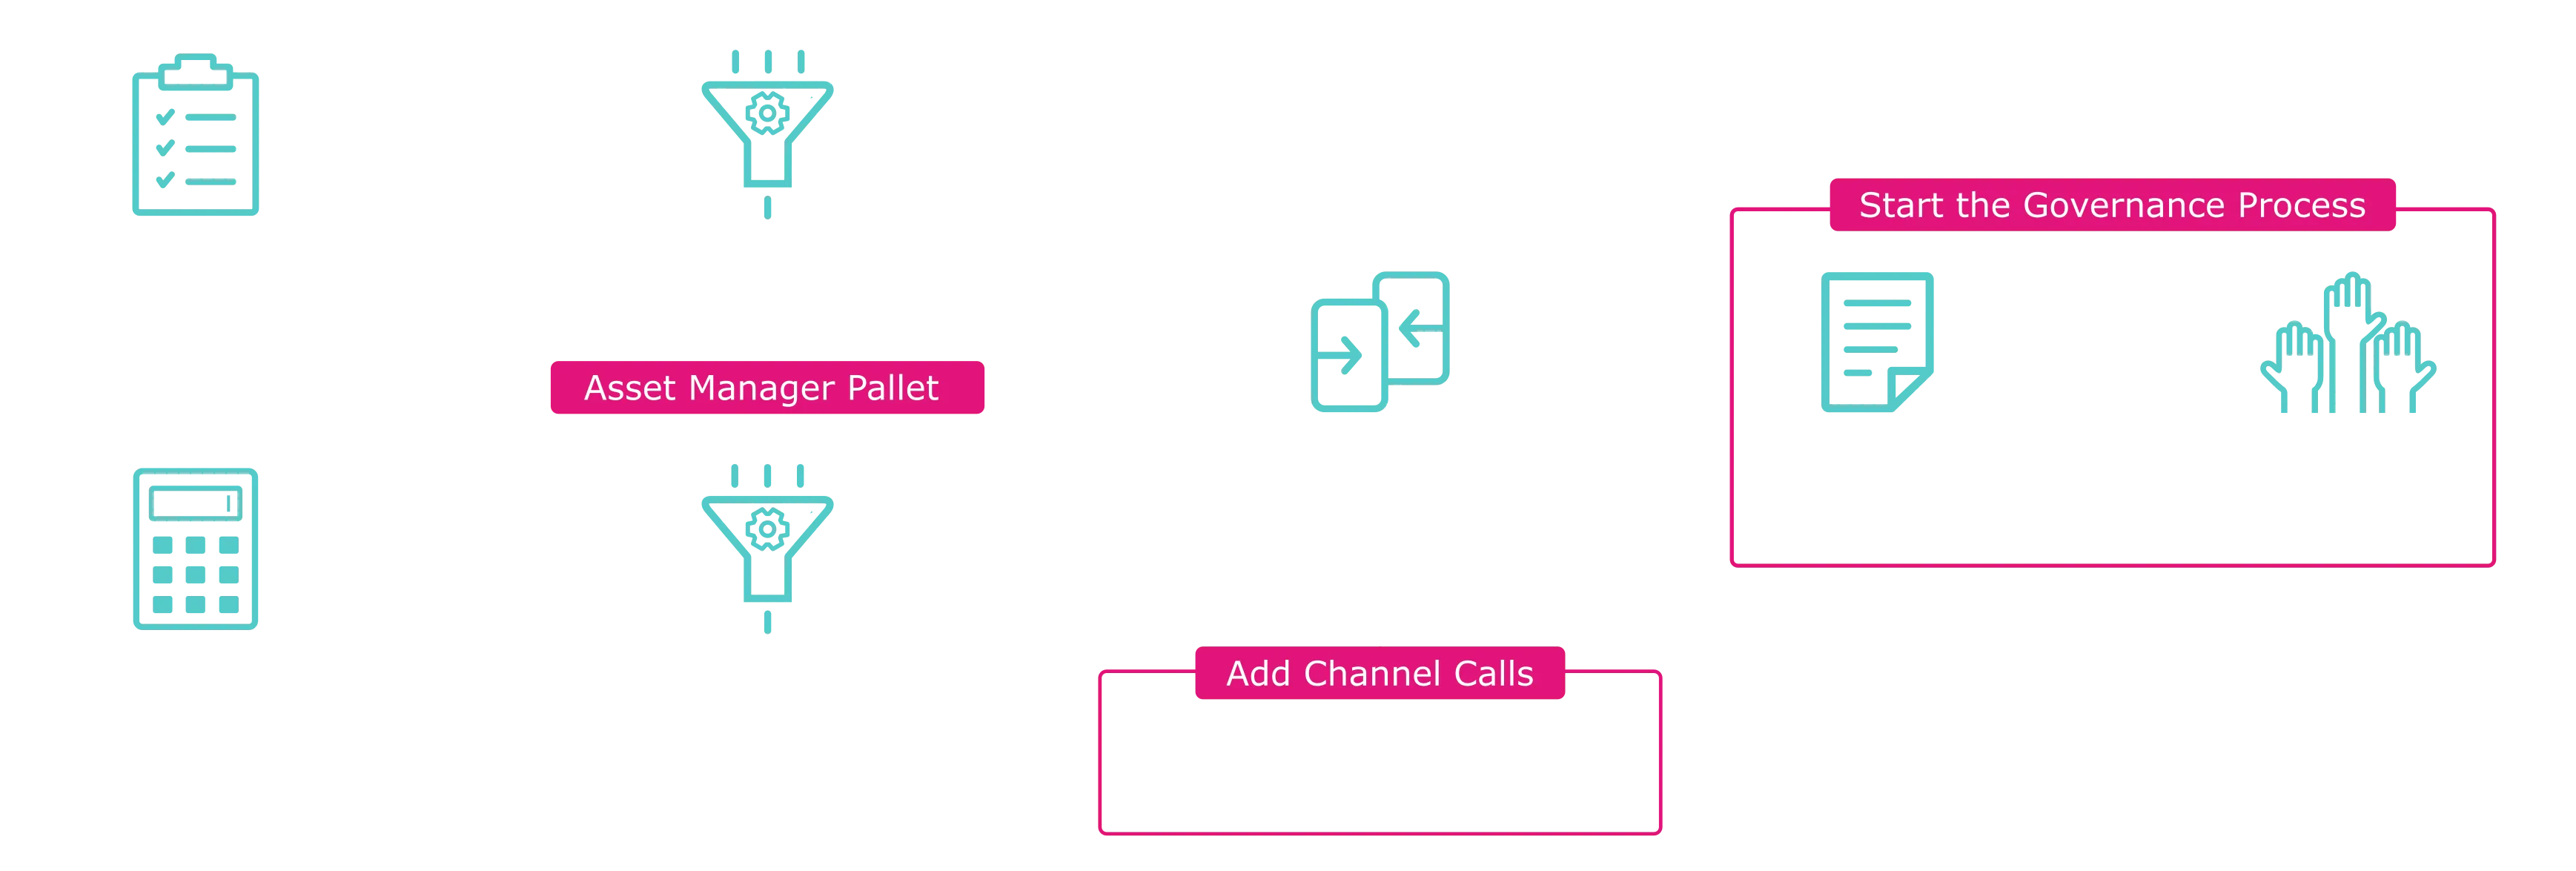
Submitting a governance proposal on Moonbeam requires two steps: first, submit a preimage that defines the actions to be executed, then use that preimage to submit the proposal. For more details, see the Governance on Moonbeam page. To submit a preimage for asset registration, you'll need the encoded calldata for both the evmForeignAssets.createForeignAsset and xcmWeightTrader.addAsset extrinsics. An existing asset's price can be updated with xcmWeightTrader.editAsset.
Proposals must be submitted via the Fast General Admin track. A channel must be established before an asset can be registered. To get the encoded calldata for the evmForeignAssets.createForeignAsset extrinsic, you will need to provide the following arguments:
assetId- unique identifier of the asset, generated from thecalculate-external-asset-info.tsscriptxcmLocation- the multilocation of the asset relative to Moonbeamdecimals- the number of decimals of the assetsymbol- the symbol of the asset. Remember that "xc" should be prepended to the symbol to indicate the asset is an XCM-enabled assetname- the asset name
Using the above information, you can generate the encoded call data for the createForeignAsset call either via the Polkadot API or on Polkadot.js Apps.
You can generate this required calldata using the xcm-asset-registrator script as follows:
yarn register-asset --w wss://wss.api.moonbeam.network  \
--asset "INSERT_MULTILOCATION" \
--symbol "INSERT_ASSET_SYMBOL" \
--decimals INSERT_DECIMALS \
--name "INSERT_ASSET_NAME" \
--relative-price INSERT_RELATIVE_PRICE
Upon running the script with the relevant parameters, you'll see output like the following:
The script will provide the encoded call data for each of the following calls:
- The
registerAssetcall - The
setRelativePricecall - The
batchcall that combines each all of the above
Construct the Add Asset Call
If you've already used the xcm-asset-registrator script shown above, you can skip this section. This section dives into more detail about how the xcmWeightTrader.addAsset call is constructed. To get the encoded calldata for the xcmWeightTrader.addAsset extrinsic, you will need to provide the following arguments:
xcmLocation- the multilocation of the asset relative to MoonbeamrelativePrice- A numeric value (u128) representing the fraction of the native token’s price that your asset’s price constitutes, scaled to 18 decimals. This value calculates cross-chain fees by determining how many units of the non-native asset are required to cover XCM operation costs
Using the above information, you can generate the encoded call data for the addAsset call either via the Polkadot API or on Polkadot.js Apps.
To create a batch transaction that combines both the xcmWeightTrader.addAsset and the evmForeignAssets.createForeignAsset calls together, you can use the Polkadot API's batch method. As mentioned previously, the XCM asset registrator script can help you build and submit the required calls.
Submit the Preimage and Proposal for Asset Registration
Your next task is to submit the preimage of your batched call containing both the xcmWeightTrader.addAsset and the evmForeignAssets.createForeignAsset by following the guidelines in the Submit a Democracy Proposal Guide.
You do not need to go through governance for Moonbase Alpha, as Moonbase Alpha has sudo access. Instead, you can provide the output of the batch call data to the Moonbeam team, and they can submit the call with sudo. This will be a faster and easier process than going through governance. However, you may still wish to go through governance on Moonbase Alpha to prepare for Moonbeam's governance process.
After submitting the preimage, you can submit the proposal by following the guidelines in the Submitting a Proposal section.
If you prefer the script method and you're comfortable working with the scripts in the XCM tools repo, you can use the generic call proposer by passing in the requisite calls, including the acceptance and proposal of the XCM Channel, and the asset registration. The generic call proposer can help you assemble the multiple requisite calls as follows:
yarn generic-call-propose \
  --call INSERT_CALLDATA_INCOMING_XCM_CHANNEL \
  --call INSERT_CALLDATA_OUTGOING_XCM_CHANNEL \
  --call INSERT_CALLDATA_BATCH_ASSET_REGISTRATION \
  --ws-provider INSERT_WSS_PROVIDER
Test the Asset Registration on Moonbeam
After your asset is registered, the team will provide the asset ID and the XC-20 precompile address. Your XC-20 precompile address is calculated by converting the asset ID decimal number to hex and prepending it with F's until you get a 40-hex character (plus the “0x”) address. For more information on how it is calculated, please refer to the Calculate External XC-20 Precompile Addresses section of the External XC-20 guide. After the asset is successfully registered, you can transfer tokens from your parachain to the Moonbeam-based network you are integrating with.
Note
Remember that Moonbeam-based networks use AccountKey20 (Ethereum-style addresses).
For testing, please also provide your parachain WSS endpoint so that the Moonbeam dApp can connect to it. Lastly, please fund the corresponding account:
AccountId: 5E6kHM4zFdH5KEJE3YEzX5QuqoETVKUQadeY8LVmeh2HyHGt
Hex:       0x5a071f642798f89d68b050384132eea7b65db483b00dbb05548d3ce472cfef48
AccountId: 5E6kHM4zFdH5KEJE3YEzX5QuqoETVKUQadeY8LVmeh2HyHGt
Hex:       0x5a071f642798f89d68b050384132eea7b65db483b00dbb05548d3ce472cfef48
AccountId: 5GWpSdqkkKGZmdKQ9nkSF7TmHp6JWt28BMGQNuG4MXtSvq3e
Hex:       0xc4db7bcb733e117c0b34ac96354b10d47e84a006b9e7e66a229d174e8ff2a063
Note
For Moonbeam and Moonriver testing, please send $50 worth of tokens to the aforementioned account. In addition, provide an Ethereum-style account to send $50 worth of GLMR/MOVR for testing purposes.
XC-20s are Substrate-based assets with an ERC-20 interface. This means they can be added to MetaMask and composed with any EVM DApp that exists in the ecosystem. The team can connect you with any DApp you find relevant for an XC-20 integration.
If you need DEV tokens (the native token for Moonbase Alpha) to use your XC-20 asset, you can get some from the Moonbase Alpha Faucet, which dispenses 1.1 DEV tokens every 24 hours. If you need more, feel free to reach out to the team on Telegram or Discord.
Set XC-20 Precompile Bytecode
Once your XC-20 has been registered on Moonbeam, you can set the XC-20's precompile bytecode. This is necessary because precompiles are implemented inside the Moonbeam runtime and, by default, do not have bytecode. In Solidity, when a contract is called, there are checks that require the contract bytecode to be non-empty. So, setting the bytecode as a placeholder bypasses these checks and allows the precompile to be called.
You can use the Precompile Registry, which is a Solidity interface, to update the XC-20 precompile's bytecode to avoid any issues and ensure that the precompile is callable from Solidity. To do so, you'll use the Precompile Registry's updateAccountCode function.
To get started, you'll need to calculate your XC-20's precompile address and have the Precompile Registry's ABI.
Precompile Registry ABI
[
    {
        "inputs": [
            {
                "internalType": "address",
                "name": "a",
                "type": "address"
            }
        ],
        "name": "isActivePrecompile",
        "outputs": [
            {
                "internalType": "bool",
                "name": "",
                "type": "bool"
            }
        ],
        "stateMutability": "view",
        "type": "function"
    },
    {
        "inputs": [
            {
                "internalType": "address",
                "name": "a",
                "type": "address"
            }
        ],
        "name": "isPrecompile",
        "outputs": [
            {
                "internalType": "bool",
                "name": "",
                "type": "bool"
            }
        ],
        "stateMutability": "view",
        "type": "function"
    },
    {
        "inputs": [
            {
                "internalType": "address",
                "name": "a",
                "type": "address"
            }
        ],
        "name": "updateAccountCode",
        "outputs": [],
        "stateMutability": "nonpayable",
        "type": "function"
    }
]
Then, you can use the following scripts to set the dummy code for your XC-20's precompile.
Remember
The following snippets are for demo purposes only. Never store your private keys in a JavaScript or Python file.
import { ethers } from 'ethers'; // Import Ethers library

const privateKey = 'INSERT_PRIVATE_KEY';
const abi = 'INSERT_PRECOMPILE_REGISTRY_ABI';
const xc20Address = 'INSERT_XC_20_PRECOMPILE_ADDRESS';
const registryAddress = '0x0000000000000000000000000000000000000815';

// Create Ethers provider and signer
const provider = new ethers.JsonRpcProvider(
  'https://rpc.api.moonbase.moonbeam.network'
);
const signer = new ethers.Wallet(privateKey, provider);

// Create interface for the Precompile Registry
const precompileRegistry = new ethers.Contract(registryAddress, abi, signer);

const updateAccountCode = async () => {
  // Update the precompile bytecode
  await precompileRegistry.updateAccountCode(xc20Address);

  // Check the precompile bytecode
  const bytecode = await provider.getCode(xc20Address);
  console.log(`The XC-20 precompile's bytecode is: ${bytecode}`);
};

updateAccountCode();
import { Web3 } from 'web3';

const privateKey = 'INSERT_PRIVATE_KEY';
const abi = 'INSERT_PRECOMPILE_REGISTRY_ABI';
const xc20Address = 'INSERT_XC_20_PRECOMPILE_ADDRESS';
const registryAddress = '0x0000000000000000000000000000000000000815';

// Create provider
const web3 = new Web3('https://rpc.api.moonbase.moonbeam.network');

// Create interface for the Precompile Registry
const precompileRegistry = new web3.eth.Contract(abi, registryAddress, {
  from: web3.eth.accounts.privateKeyToAccount(privateKey).address,
});

const updateAccountCode = async () => {
  // Update the precompile bytecode
  await precompileRegistry.methods.updateAccountCode(xc20Address).call();

  // Check the precompile bytecode
  const bytecode = await web3.eth.getCode(xc20Address);
  console.log(`The XC-20 precompile's bytecode is: ${bytecode}`);
};

updateAccountCode();
from web3 import Web3

private_key = "INSERT_PRIVATE_KEY"
abi = "INSERT_PRECOMPILE_REGISTRY_ABI"  # Paste or import the Precompile Registry ABI
xc20_address = "INSERT_XC_20_PRECOMPILE_ADDRESS"
registry_address = "0x0000000000000000000000000000000000000815"

# Create provider
web3 = Web3(Web3.HTTPProvider("https://rpc.api.moonbase.moonbeam.network"))

# Create interface for the Precompile Registry
precompile_registry = web3.eth.contract(address=registry_address, abi=abi)


def update_account_code():
    # Update the precompile bytecode
    precompile_registry.functions.updateAccountCode(xc20_address).call()

    # Check the precompile bytecode
    bytecode = web3.eth.get_code(xc20_address)
    print("The XC-20 precompile's bytecode is: ", web3.to_hex(bytecode))


update_account_code()
After running the script to set the bytecode, you should see The XC-20 precompile's bytecode is: 0x60006000fd printed to your terminal.
Register Moonbeam Assets on Another Chain
To enable cross-chain transfers of Moonbeam assets, including Moonbeam native assets (GLMR, MOVR, DEV) and local XC-20s (XCM-enabled ERC-20s) deployed on Moonbeam, between Moonbeam and another chain, you'll need to register the assets on the other chain. Since each chain stores cross-chain assets differently, the exact steps to register Moonbeam assets on another chain will vary depending on the chain. At the very least, you'll need to know the metadata and the multilocation of the assets on Moonbeam.
There are additional steps aside from asset registration that will need to be taken to enable cross-chain integration with Moonbeam. For more information, please refer to the Establishing an XC Integration with Moonbeam guide.
Register Moonbeam Native Assets on Another Chain
The metadata for each network is as follows:
| Variable | Value |
|---|---|
| Name | Glimmer |
| Symbol | GLMR |
| Decimals | 18 |
| Existential deposit | 1 (1 * 10^-18 GLMR) |
| Variable | Value |
|---|---|
| Name | Moonriver |
| Symbol | MOVR |
| Decimals | 18 |
| Existential deposit | 1 (1 * 10^-18 MOVR) |
| Variable | Value |
|---|---|
| Name | DEV |
| Symbol | DEV |
| Decimals | 18 |
| Existential deposit | 1 (1 * 10^-18 DEV) |
The multilocation of Moonbeam native assets includes the parachain ID of the Moonbeam network and the pallet instance where Moonbeam assets live, which corresponds to the index of the Balances Pallet. The multilocation for each network is as follows:
{
  V4: {
    parents: 1,
    interior: {
      X2: [
        {
          Parachain: 2004
        },
        {
          PalletInstance: 10
        }
      ]
    }
  }
}
{
  V4: {
    parents: 1,
    interior: {
      X2: [
        {
          Parachain: 2023
        },
        {
          PalletInstance: 10
        }
      ]
    }
  }
}
{
  V4: {
    parents: 1,
    interior: {
      X2: [
        {
          Parachain: 1000
        },
        {
          PalletInstance: 3
        }
      ]
    }
  }
}
Register Local XC-20s on Another Chain
The multilocation for local XC-20s include the parachain ID of Moonbeam, the pallet instance, and the address of the ERC-20. The pallet instance corresponds to the index of the ERC-20 XCM Bridge Pallet, as this is the pallet that enables any ERC-20 to be transferred via XCM.
To be registered on other chains, local XC-20s must strictly comply with the standard ERC-20 interface as described in EIP-20. In particular, the transfer function must be as described in EIP-20:
function transfer(address _to, uint256 _value) public returns (bool success)
If the function selector of the transfer function deviates from the standard, the cross-chain transfer will fail.
You can use the following multilocation to register a local XC-20:
{
  parents: 1,
  interior: {
    X3: [
      {
        Parachain: 2004
      },
      {
        PalletInstance: 110
      },
      {
        AccountKey20: {
          key: 'INSERT_ERC20_ADDRESS'
        }
      }
    ]
  }
}
{
  parents: 1,
  interior: {
    X3: [
      {
        Parachain: 2023
      },
      {
        PalletInstance: 110
      },
      {
        AccountKey20: {
          key: 'INSERT_ERC20_ADDRESS'
        }
      }
    ]
  }
}
{
  parents: 1,
  interior: {
    X3: [
      {
        Parachain: 1000
      },
      {
        PalletInstance: 48
      },
      {
        AccountKey20: {
          key: 'INSERT_ERC20_ADDRESS'
        }
      }
    ]
  }
}
Since local XC-20s are ERC-20s on Moonbeam, there are no deposits required to create an ERC-20 on Moonbeam. However, deposits may be required to register the asset on another parachain. Please consult with the parachain team you wish to register the asset with for more information.
Managing XC Assets
After completing the registration process for an XC asset, you may need to periodically update asset details, such as the XCM multilocation details or asset price. This section will cover these topics.
Updating Foreign Asset XCM Location
You can update the multilocation of an asset with the evmForeignAssets.changeXcmLocation call, which takes as parameters the assetId and the new multilocation. You'll need to raise a governance proposal and submit the update under the General Admin track. If you're testing in Moonbase Alpha, you can ask the Moonbeam Team to submit the extrinsic using Sudo to speed up the process. You can also submit the requisite governance proposal on Moonbase Alpha.
Freezing a Foreign Asset
You can freeze a foreign asset by calling evmForeignAssets.freezeForeignAsset, which takes as parameters the assetId and an allowXcmDeposit boolean. If set to true, XCM deposits from remote chains will still be allowed and mint tokens. If set to false, XCM deposits from remote chains will fail as no minting will be permitted.
Paying XCM Fees with Foreign Assets
After you've registered the foreign asset via the evmForeignAssets and the xcmWeightTrader pallet, your asset will now be among the supported assets for paying XCM fees. To verify, you can query the xcmWeightTrader pallet and the supportedAssets chain state query. Toggle the Include Option slider off to see the complete list, or you can filter the list by the multilocation of your asset.
| Created: July 27, 2023