Using The Graph on Moonbeam
Introduction
Indexing protocols organize information so that applications can access it more efficiently. For example, Google indexes the entire Internet to provide information rapidly when you search for something.
The Graph is a decentralized and open-source indexing protocol for querying networks like Ethereum. In short, it provides a way to efficiently store data emitted by events from smart contracts so that other projects or dApps can access it easily.
Furthermore, developers can build APIs called subgraphs. Users or other developers can use subgraphs to query data specific to a set of smart contracts. Data is fetched with a standard GraphQL API. You can visit The Graph's documentation site to learn about The Graph protocol.
Due to the support of Ethereum tracing modules on Moonbeam, The Graph can index blockchain data on Moonbeam. This guide takes you through the creation of a subgraph based on the Exiled Racers Game Asset contract on Moonbeam.
Create a Subgraph
You can quickly create a subgraph from an existing contract. To get started, you'll follow these steps:
- Initialize your subgraph project
- Deploy your subgraph to the Subgraph Studio
- Publish your subgraph to The Graph's decentralized network
- Query your subgraph from your dApp
Note
You can query your subgraph via the free, rate-limited development query URL, which can be used for development and staging. The free plan includes 100,000 queries per month. If you need to make more queries or want a production-ready plan, please check out The Graph's documentation.
Create a Subgraph on Subgraph Studio
To initialize your subgraph, you must head to the Subgraph Studio and connect your wallet. After you've connected your wallet, you'll be prompted to add an email address, which will be used to send notifications about your account. You can only associate one account with your email address, so make sure you've connected the account you intend to continue to use.
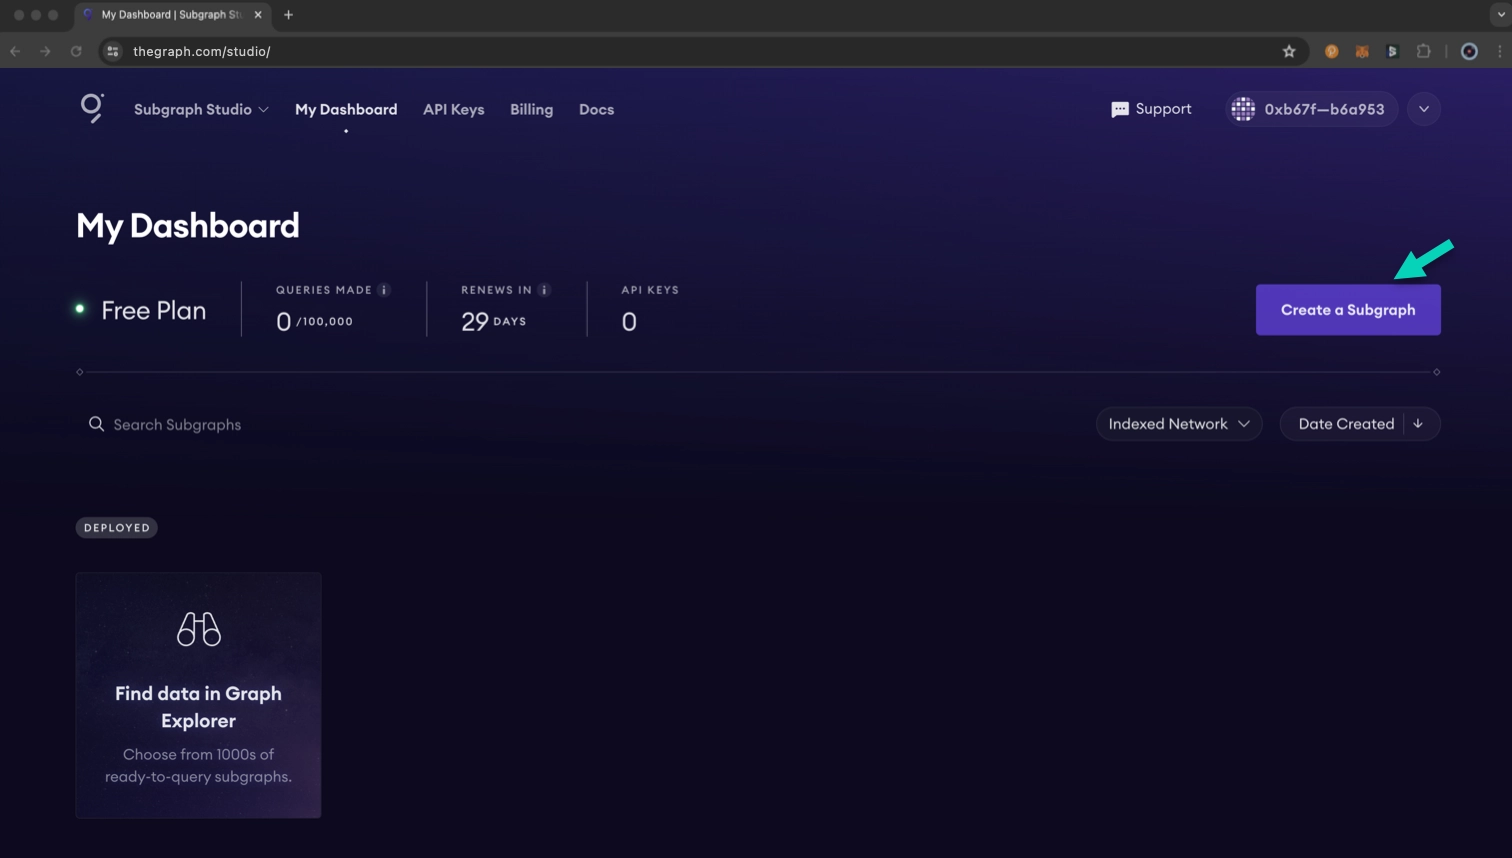
After you get your email address set up and verified, you can create a subgraph from your dashboard by clicking Create a Subgraph.
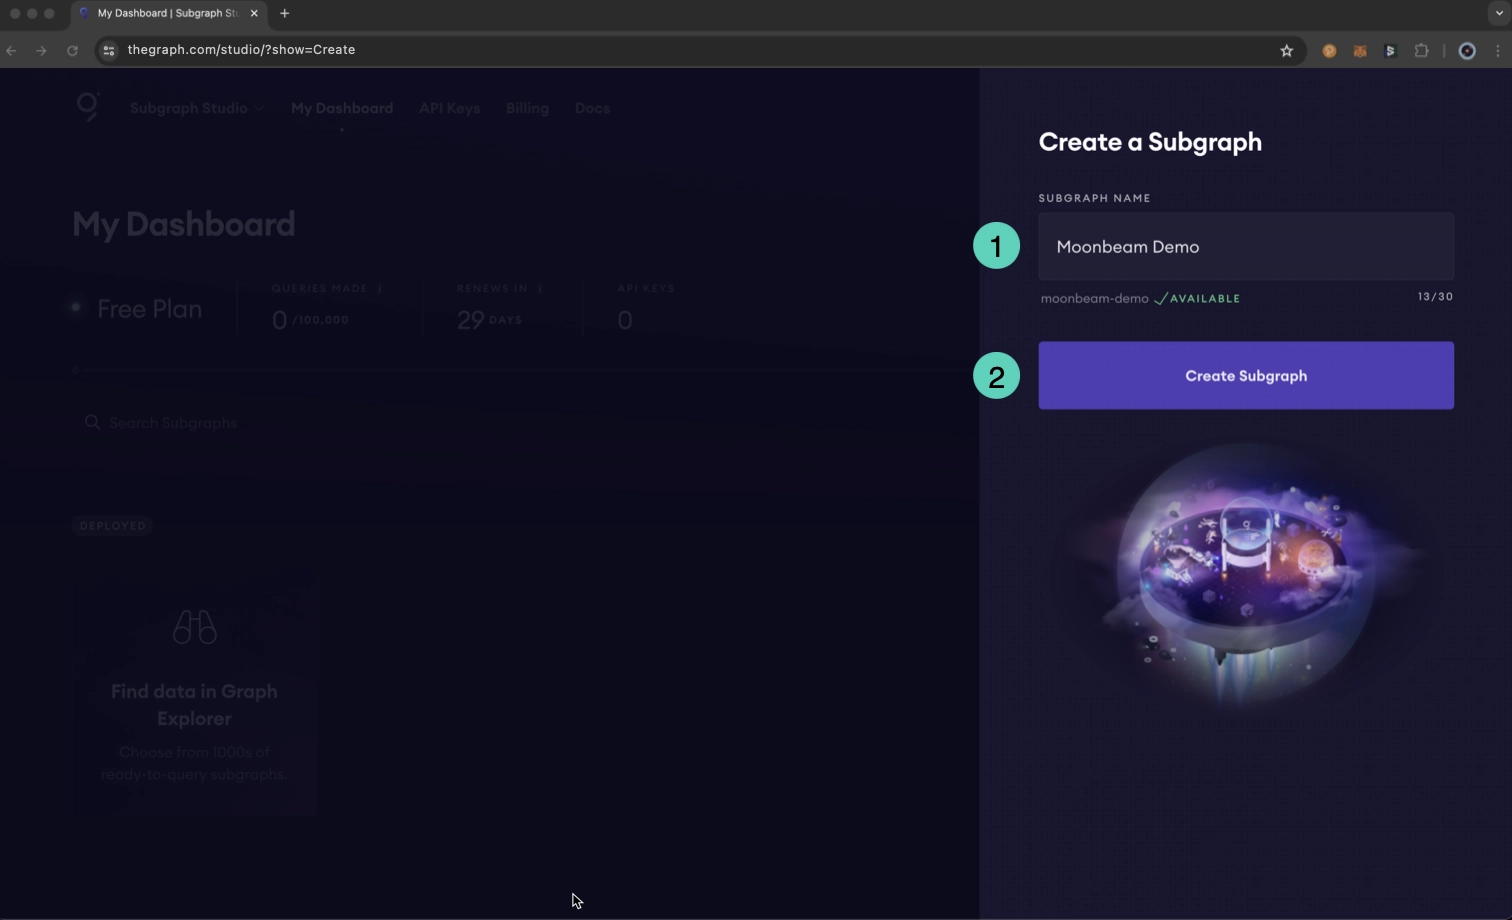
Then, you can:
- Enter a name. Note that it is recommended to use title case for the name (i.e., Subgraph Name Chain Name); the name cannot be changed once it has been created
- Click Create Subgraph
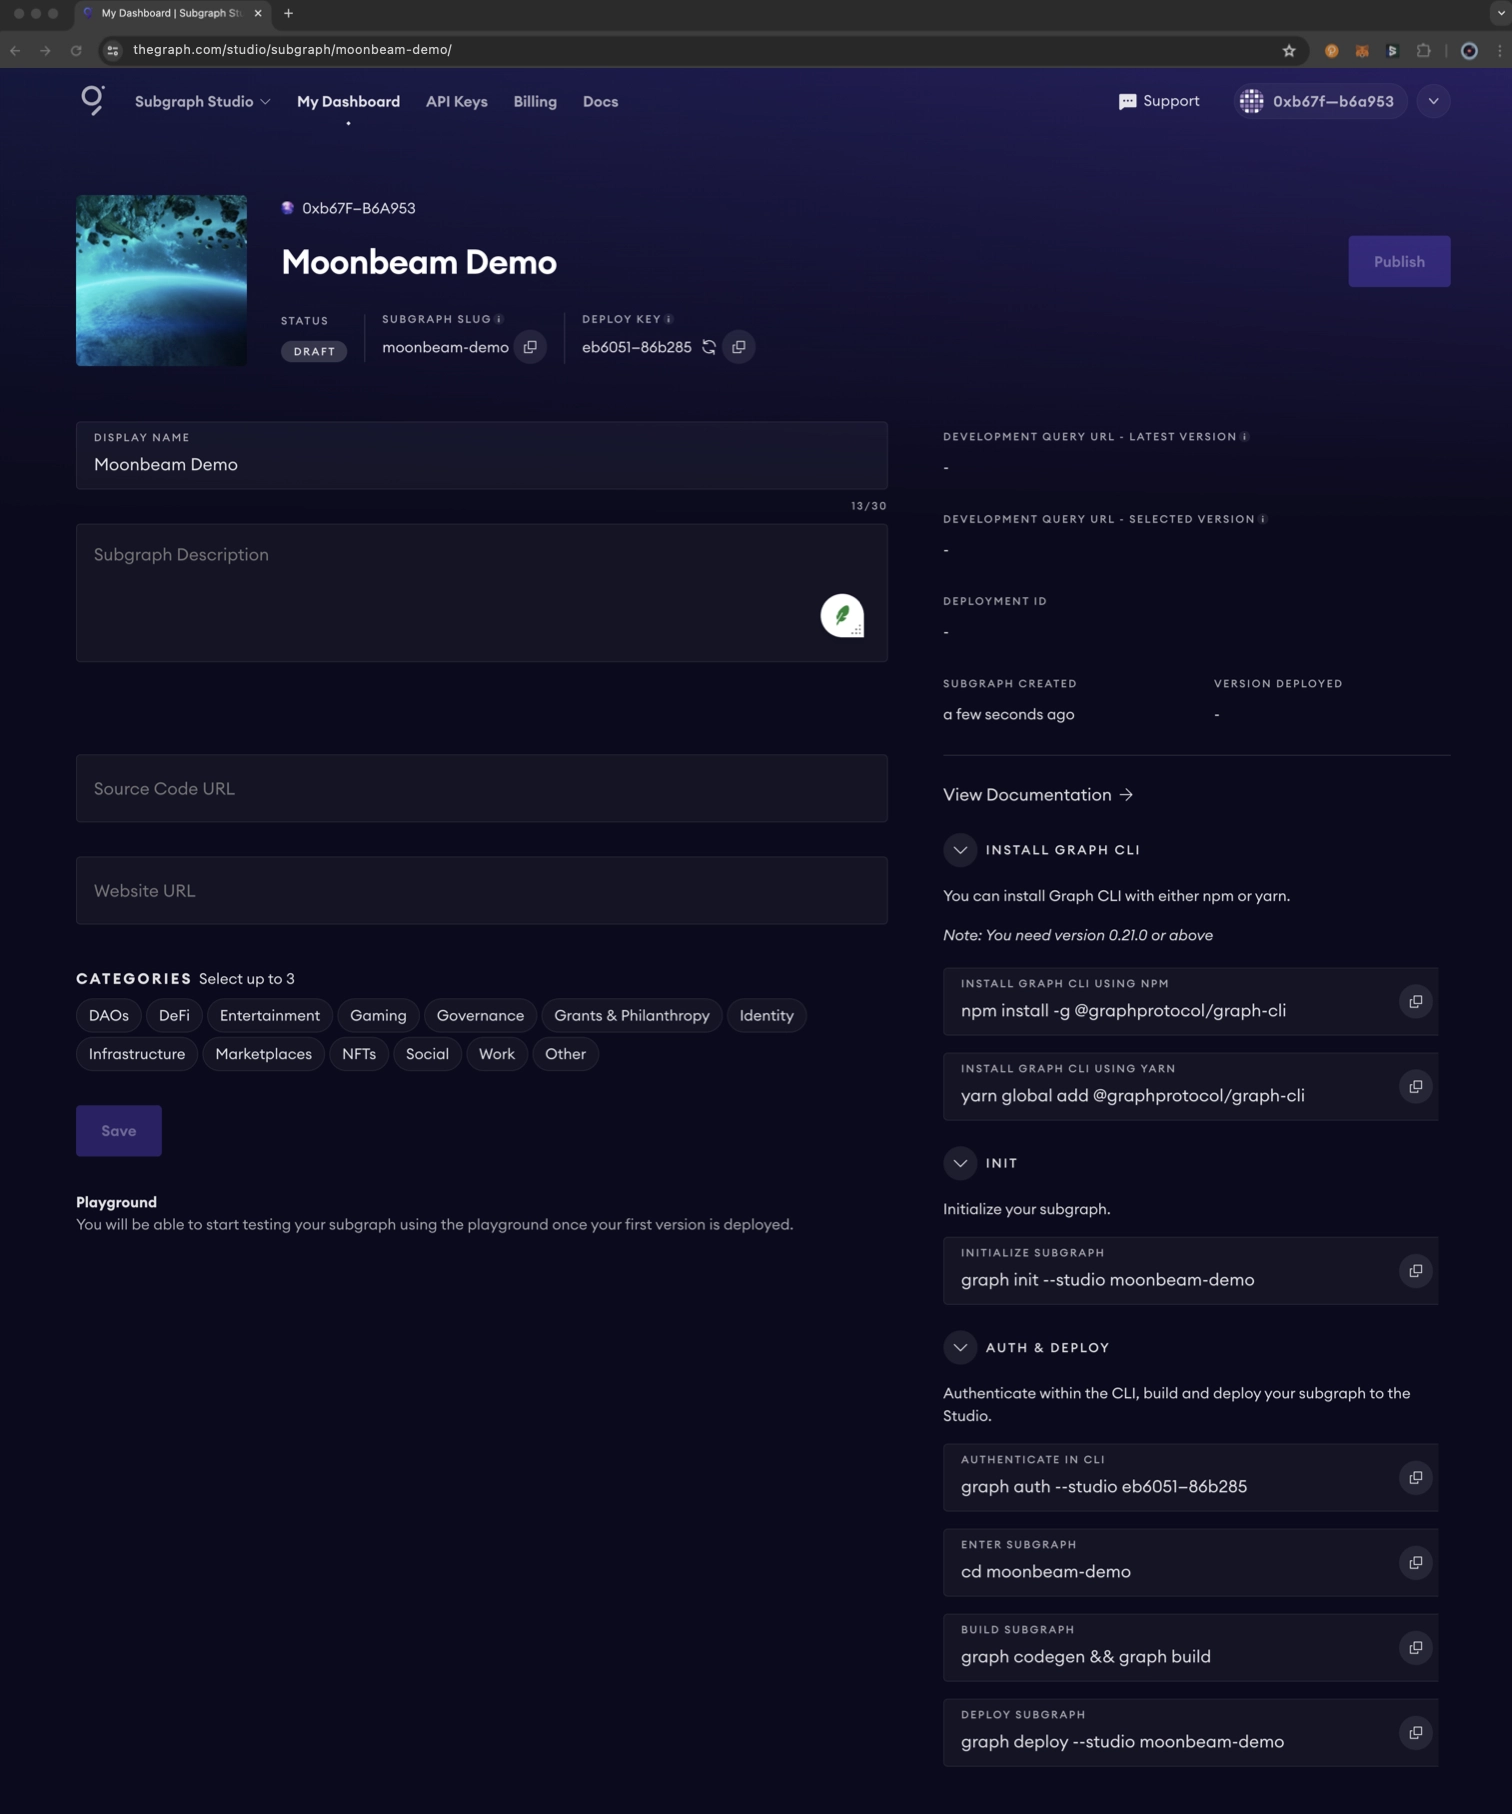
You will then land on your subgraph's page. Here, you can add additional information about your subgraph, such as the description, source code URL, website URL, and categories your subgraph belongs to. You'll also find all the CLI commands you need to initialize and deploy your subgraph.
Install Graph CLI
To install Graph CLI on your local machine, run the following:
npm install -g @graphprotocol/graph-cli
yarn global add @graphprotocol/graph-cli
Initialize Your Subgraph
Before you initialize your subgraph, you should verify the contract address from which you want to query data on Moonscan. This is so the Graph CLI can pull in the ABI directly from Moonscan for you. To learn how to verify your contracts, please refer to the Verify Contracts section of the docs.
You'll need to grab the initialization command from your subgraph's page on Subgraph Studio to initialize your subgraph. Or, if you know the name of your subgraph, you can use the following command:
graph init INSERT_SUBGRAPH_NAME
To initialize your subgraph, you'll need to provide some additional information, which you will be prompted to provide in your terminal:
- For Protocol, select ethereum, as Moonbeam is an Ethereum-compatible chain
- Hit enter for Subgraph slug to use the default one provided, or change as needed
- Again, hit enter for Directory to create the subgraph in to use the default one provided, or change as needed
- For Ethereum network, scroll down and select the Moonbeam network you are working with. Note that the Moonbase Alpha TestNet is labeled as mbase
- Enter the contract address to index and query data from. The CLI will attempt to fetch the ABI from Moonscan. If it doesn't work, make sure that your contract has been verified and retry if needed. Otherwise, you will need to input it manually as a JSON file after your project has been successfully created. If you don't have a smart contract in mind and want to follow along with the tutorial, you can use the EXR contract address:
0x515e20e6275CEeFe19221FC53e77E38cc32b80Fb - Enter a start block. The start block allows you to save time by only indexing the necessary blocks. To get all of the data for this contract, you can use the block the contract was deployed
- Contract Name should be automatically populated for you, but if not, manually enter the name of the contract
- For Index contract events as entities, it is recommended to set this to true, as it will automatically add mappings to your subgraph for every event emitted. In other words, you'll be able to capture and store the data emitted by these events
The CLI will generate your project for you, and you can continue to add additional contracts as needed.
Your project will be created using the slug name you provided in step two. At this time, you can feel free to check out the project and modify the logic as needed for your project. For more information on how to write a subgraph, check out The Graph's documentation. Note that for this quick start example, if you selected to index contract events as entities, you don't need to modify anything; you can deploy the project as is.
Deploy a Subgraph
To deploy your subgraph to Subgraph Studio, change to the subgraph directory in your terminal and run the following commands:
-
Generate types for your smart contract ABIs and the subgraph schema
graph codegengraph codegen Skip migration: Bump mapping apiVersion from 0.0.1 to 0.0.2 Skip migration: Bump mapping apiVersion from 0.0.2 to 0.0.3 Skip migration: Bump mapping apiVersion from 0.0.3 to 0.0.4 Skip migration: Bump mapping specVersion from 0.0.1 to 0.0.2 Skip migration: Bump mapping specVersion from 0.0.2 to 0.0.4 ✔ Apply migrations ✔ Load subgraph from subgraph.yaml Load contract ABI from abis/EXRGameAsset.json ✔ Load contract ABIs Generate types for contract ABI: EXRGameAsset (abis/EXRGameAsset.json) Write types to generated/EXRGameAsset/EXRGameAsset.ts ✔ Generate types for contract ABIs ✔ Generate types for data source templates ✔ Load data source template ABIs ✔ Generate types for data source template ABIs ✔ Load GraphQL schema from schema.graphql Write types to generated/schema.ts ✔ Generate types for GraphQL schema -
Compile your subgraph to Wasm
graph buildgraph build Skip migration: Bump mapping apiVersion from 0.0.1 to 0.0.2 Skip migration: Bump mapping apiVersion from 0.0.2 to 0.0.3 Skip migration: Bump mapping apiVersion from 0.0.3 to 0.0.4 Skip migration: Bump mapping specVersion from 0.0.1 to 0.0.2 Skip migration: Bump mapping specVersion from 0.0.2 to 0.0.4 ✔ Apply migrations ✔ Load subgraph from subgraph.yaml Compile data source: EXRGameAsset => build/EXRGameAsset/EXRGameAsset.wasm ✔ Compile subgraph Copy schema file build/schema.graphql Write subgraph file build/EXRGameAsset/abis/EXRGameAsset.json Write subgraph manifest build/subgraph.yaml ✔ Write compiled subgraph to build/ -
Authenticate your subgraph with your deploy key. The exact command containing the deploy key can be found on your subgraph's page in Subgraph Studio
graph auth INSERT_DEPLOY_KEYgraph auth eb6... Deploy key set for https://api.studio.thegraph.com/deploy/ -
Deploy your subgraph and specify the slug for it. Again, you can get the exact command from your subgraph's page in Subgraph Studio
graph deploy INSERT_SUBGRAPH_SLUGYou will be asked for a version label. You can enter something like v0.0.1, but you're free to choose the format
graph deploy moonbeam-demo v0.1 Skip migration: Bump mapping apiVersion from 0.0.1 to 0.0.2 Skip migration: Bump mapping apiVersion from 0.0.2 to 0.0.3 Skip migration: Bump mapping apiVersion from 0.0.3 to 0.0.4 Skip migration: Bump mapping specVersion from 0.0.1 to 0.0.2 Skip migration: Bump mapping specVersion from 0.0.2 to 0.0.4 ✔ Apply migrations ✔ Load subgraph from subgraph.yaml Compile data source: EXRGameAsset => build/EXRGameAsset/EXRGameAsset.wasm ✔ Compile subgraph Copy schema file build/schema.graphql Write subgraph file build/EXRGameAsset/abis/EXRGameAsset.json Write subgraph manifest build/subgraph.yaml ✔ Write compiled subgraph to build/ ✔ Compile subgraph ✔ Compile subgraph Add file to IPFS build/schema.graphql .. QmQfQiQLmtgpibjDDgP83YfczUzLbuXhKa8FevB58LLuP2 Add file to IPFS build/EXRGameAsset/abis/EXRGameAsset.json .. QmdXKywXz8MkUvbW5YrPiBzbGKgcMjZbbLjRjWtgGcruXT Add file to IPFS build/EXRGameAsset/EXRGameAsset.wasm .. QmSLqNWtL6Uvku5adann325ruz8AgjfqLmn1NFLpZ8JcKK ✔ Upload subgraph to IPFS
Build completed: QmUHKw4sthmV6ve1YqFJMNvkviYf3sWzVA3qk4xjx5587q
Deployed to https://thegraph.com/studio/subgraph/moonbeam-demo
Subgraph endpoints: Queries (HTTP): https://api.studio.thegraph.com/query/80185/moonbeam-demo/v0.1
Once you've successfully deployed your subgraph, you can query it using the subgraph endpoint that was printed to your terminal.
Test Your Subgraph
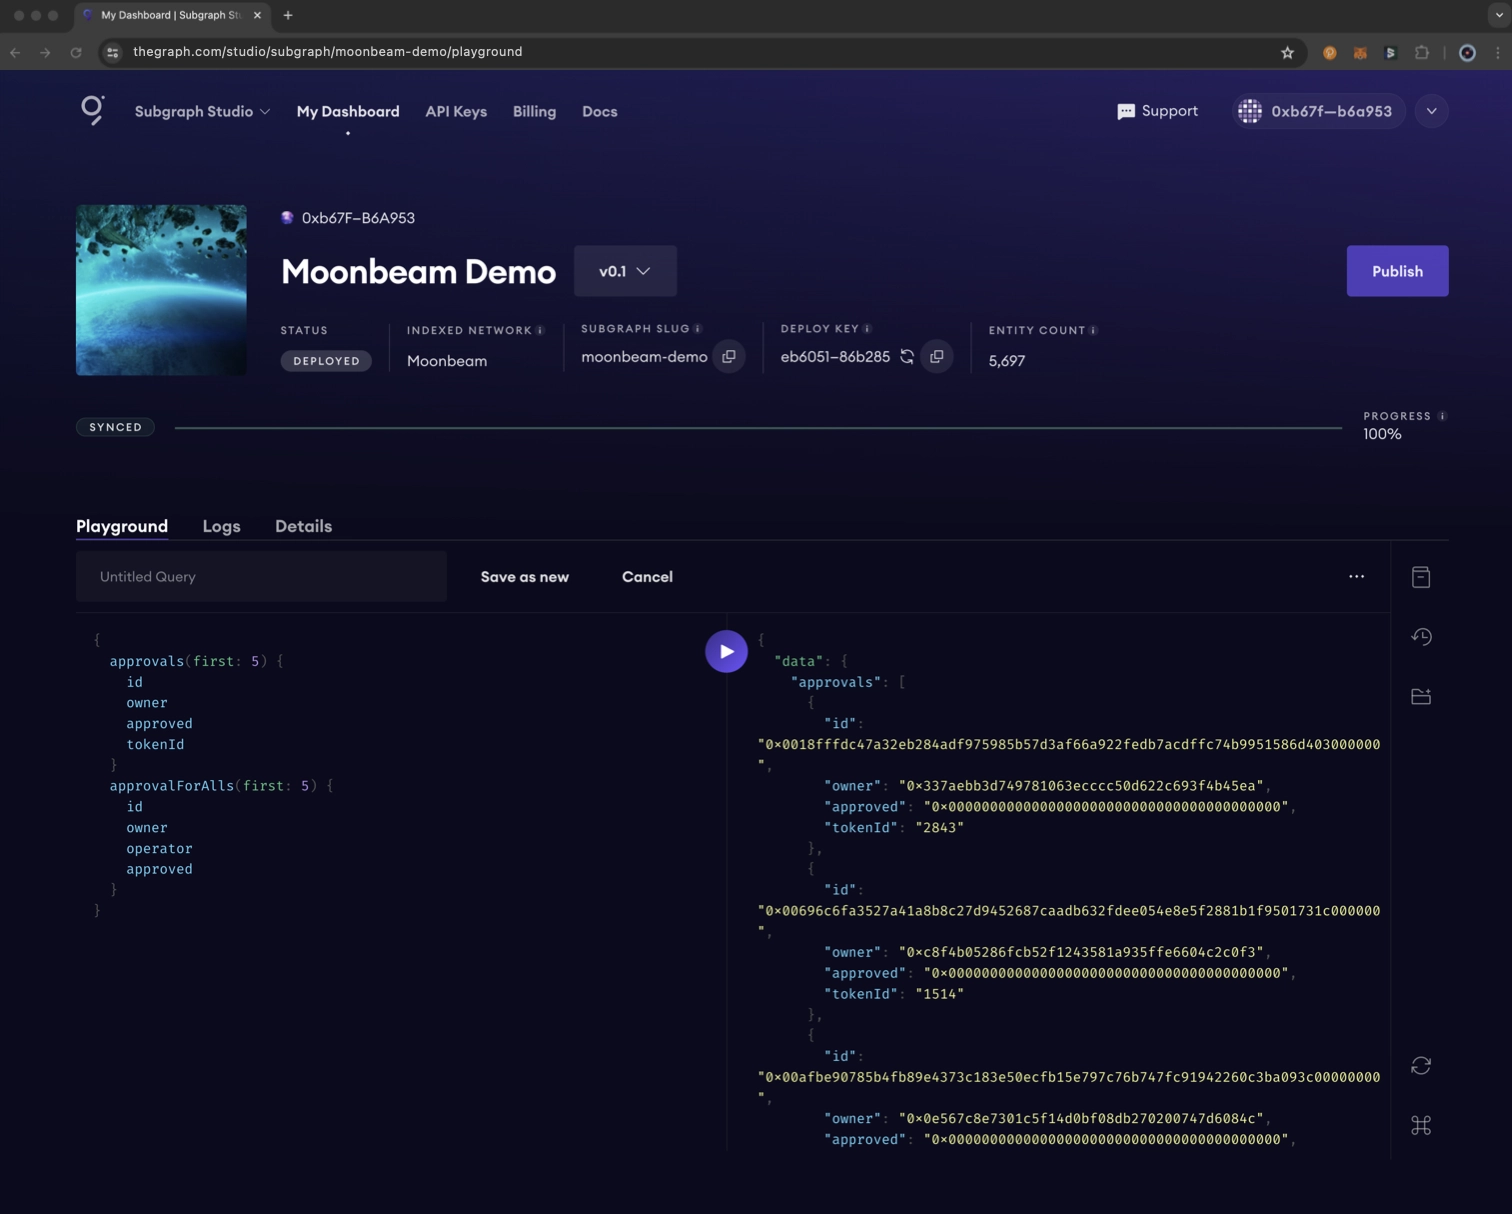
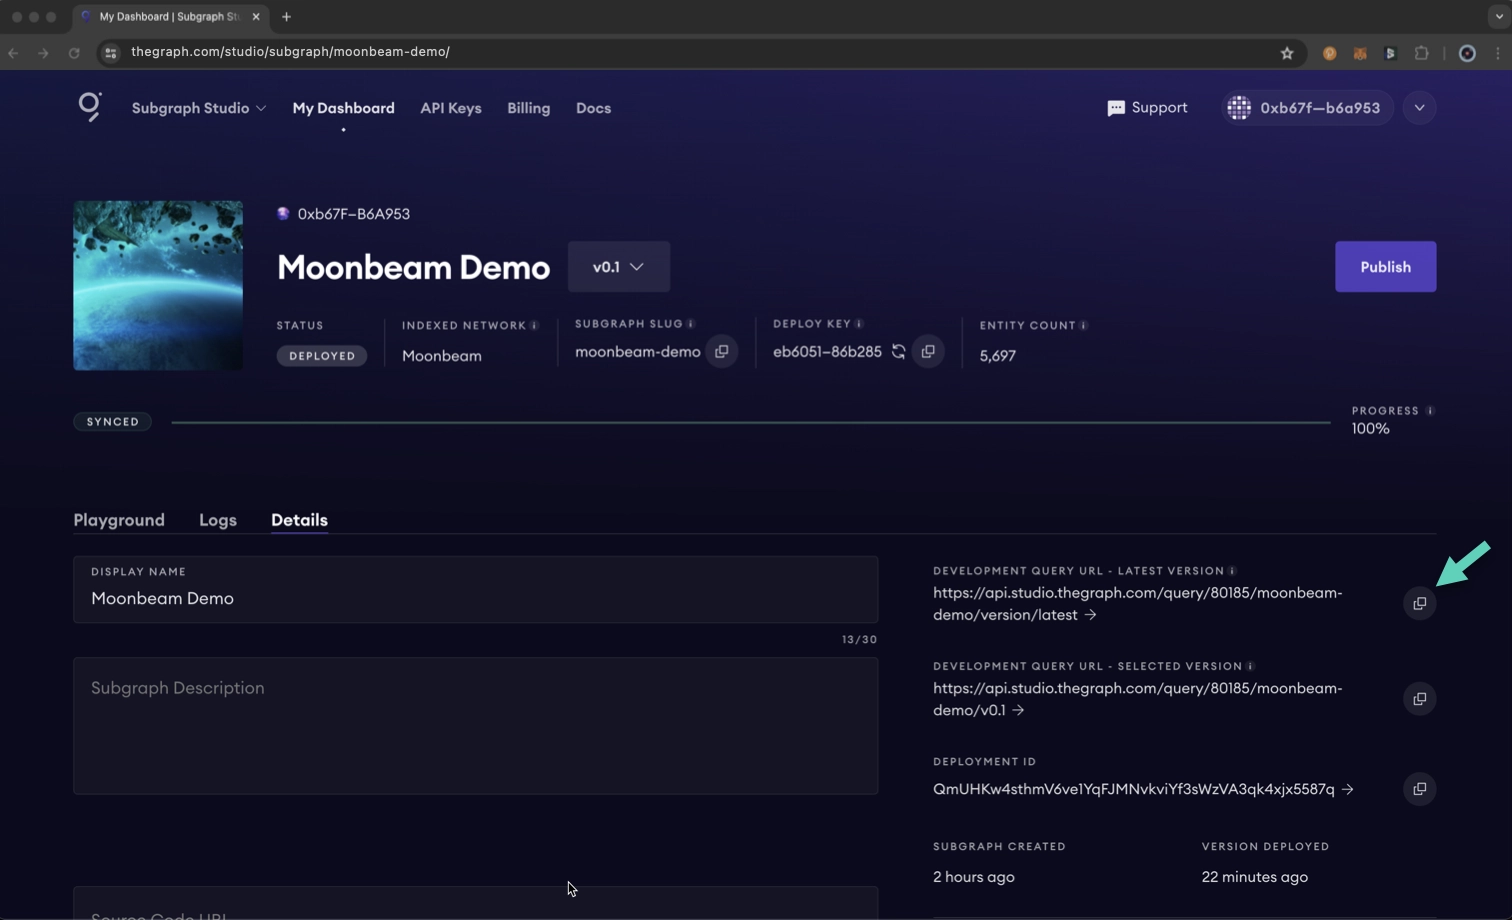
You can test your subgraph by making a query in the Playground section of your subgraph's page on Subgraph Studio.
To test from your dApp, you can use the API endpoint that was printed to your terminal. You can also find the endpoint on your subgraph's page in Subgraph Studio under the Details tab.
You can use the following example code to query your subgraph. First, you'll need to install Axios:
npm install axios
yarn add axios
Then, use the code snippet below. Be sure to insert your own query and endpoint:
import axios from 'axios';

const graphqlQuery = `query MyQuery {
  gameAssetMinteds {
    blockNumber
    transactionHash
    id
    tokenId
  }
}`;

const queryUrl =
  'INSERT_QUERY_URL'; // Will look something like this:
  // https://api.studio.thegraph.com/query/80185/moonbeam-demo/version/latest

const graphQLRequest = {
  method: 'post',
  url: queryUrl,
  data: {
    query: graphqlQuery,
  },
};

// Send the GraphQL query
axios(graphQLRequest)
  .then((response) => {
    // Handle the response here
    const data = response.data.data;
    console.log(data);
  })
  .catch((error) => {
    // Handle any errors
    console.error(error);
  });
Publish Your Subgraph to The Graph's Decentralized Network
Once your subgraph is ready for production, you can publish it to the decentralized network.
Note
Publishing requires Arbitrum ETH. When upgrading your subgraph, a small amount is airdropped to facilitate your initial protocol interactions.
For publishing instructions, please refer to The Graph's documentation.
Additional Resources
- To explore all the ways you can optimize and customize your subgraph for better performance, read more about creating a subgraph
- For more information on querying data from your subgraph, check out the Querying the Graph guide
| Created: April 12, 2021