Add Token Information on Moonscan
Introduction
This tutorial will guide you through the process of adding a profile for your ERC-20, ERC-721, or ERC-1155 tokens to Moonscan.
Moonscan is a block explorer and analytics platform for EVM-compatible chains. It is an integration of Moonbeam and Etherscan, and it allows users and developers to have access to developer tools and network statistics that provide granular insights into the EVM of Moonriver and Moonbeam.
Developers can create a profile for their tokens on Moonriver and Moonbeam. The profile captures basic information about the project behind the token, social media links, links to price data, and other information pertaining to the project’s token sales.

This tutorial will show you how to create a profile on Moonscan of a sample ERC-20 token, called DemoToken (DEMO), deployed to Moonriver. These instructions can be adapted for any of the Moonbeam-based networks, as well as for an ERC-721 or ERC-1155 token.
Checking Prerequisites
To follow along with this tutorial, you will need to have the following:
You will need to verify ownership of the token contract address later on in this guide. You can either do this manually or automatically, but if you choose to do it automatically you'll also need the following:
- Access to the account that deployed the token contract, so you can sign messages as the owner
- MetaMask installed and connected to the network where the token is deployed to
Getting Started
To get started, you'll need to make sure that you are logged into your Moonscan account. Once you’re signed into your account, you can go to the token page of the token you want to add a profile for. For ERC-20s, you can search the name of the token in the search bar. Or for any token, you can manually enter in the URL.
https://moonscan.io/token/INSERT_CONTRACT_ADDRESS
https://moonriver.moonscan.io/token/INSERT_CONTRACT_ADDRESS
https://moonbase.moonscan.io/token/INSERT_CONTRACT_ADDRESS
Next to Social Profiles, you can click on Update.
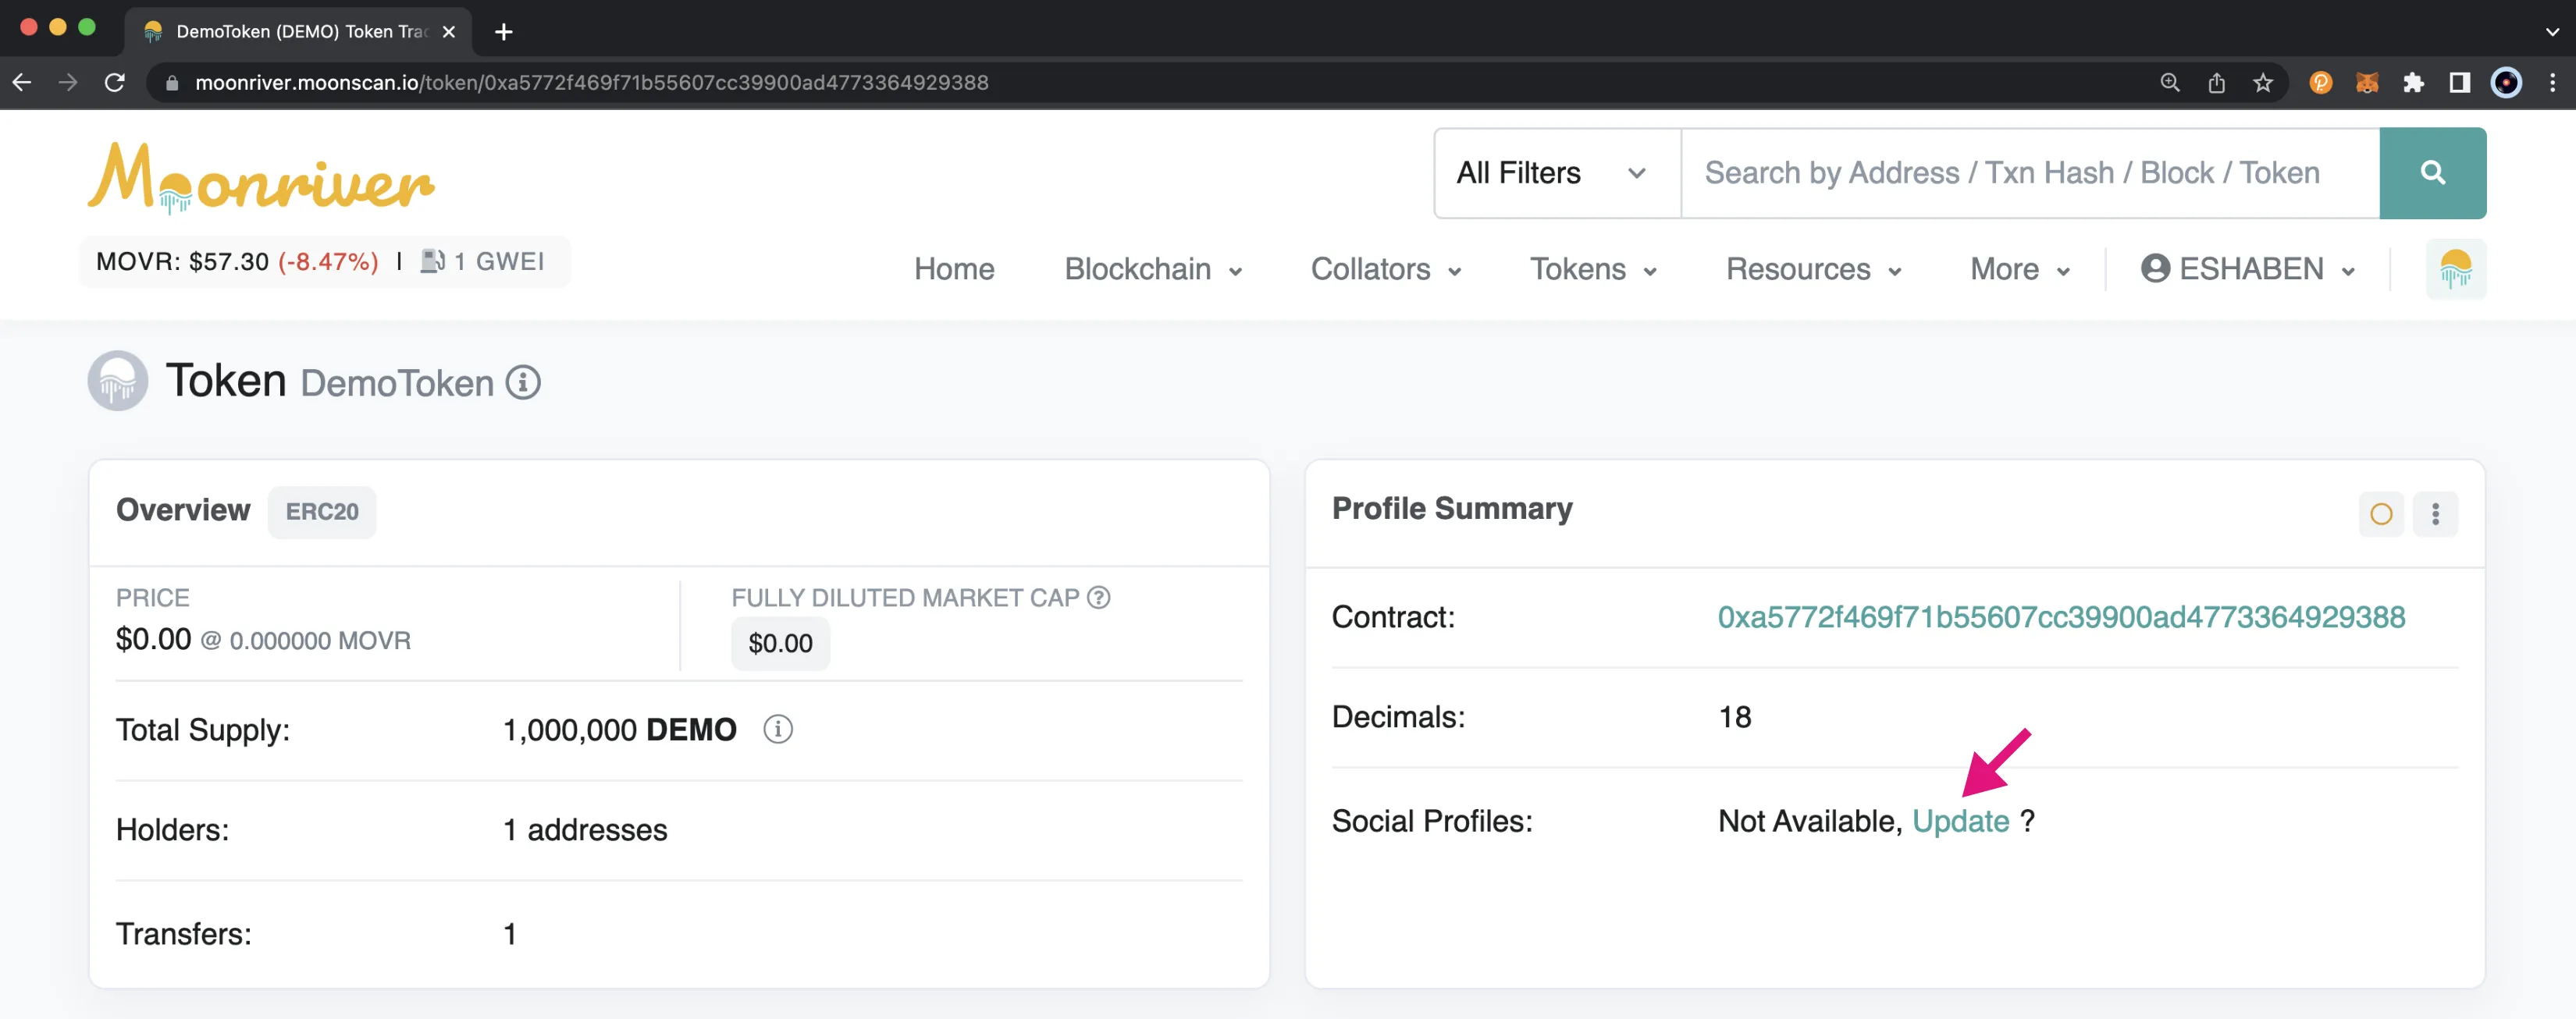
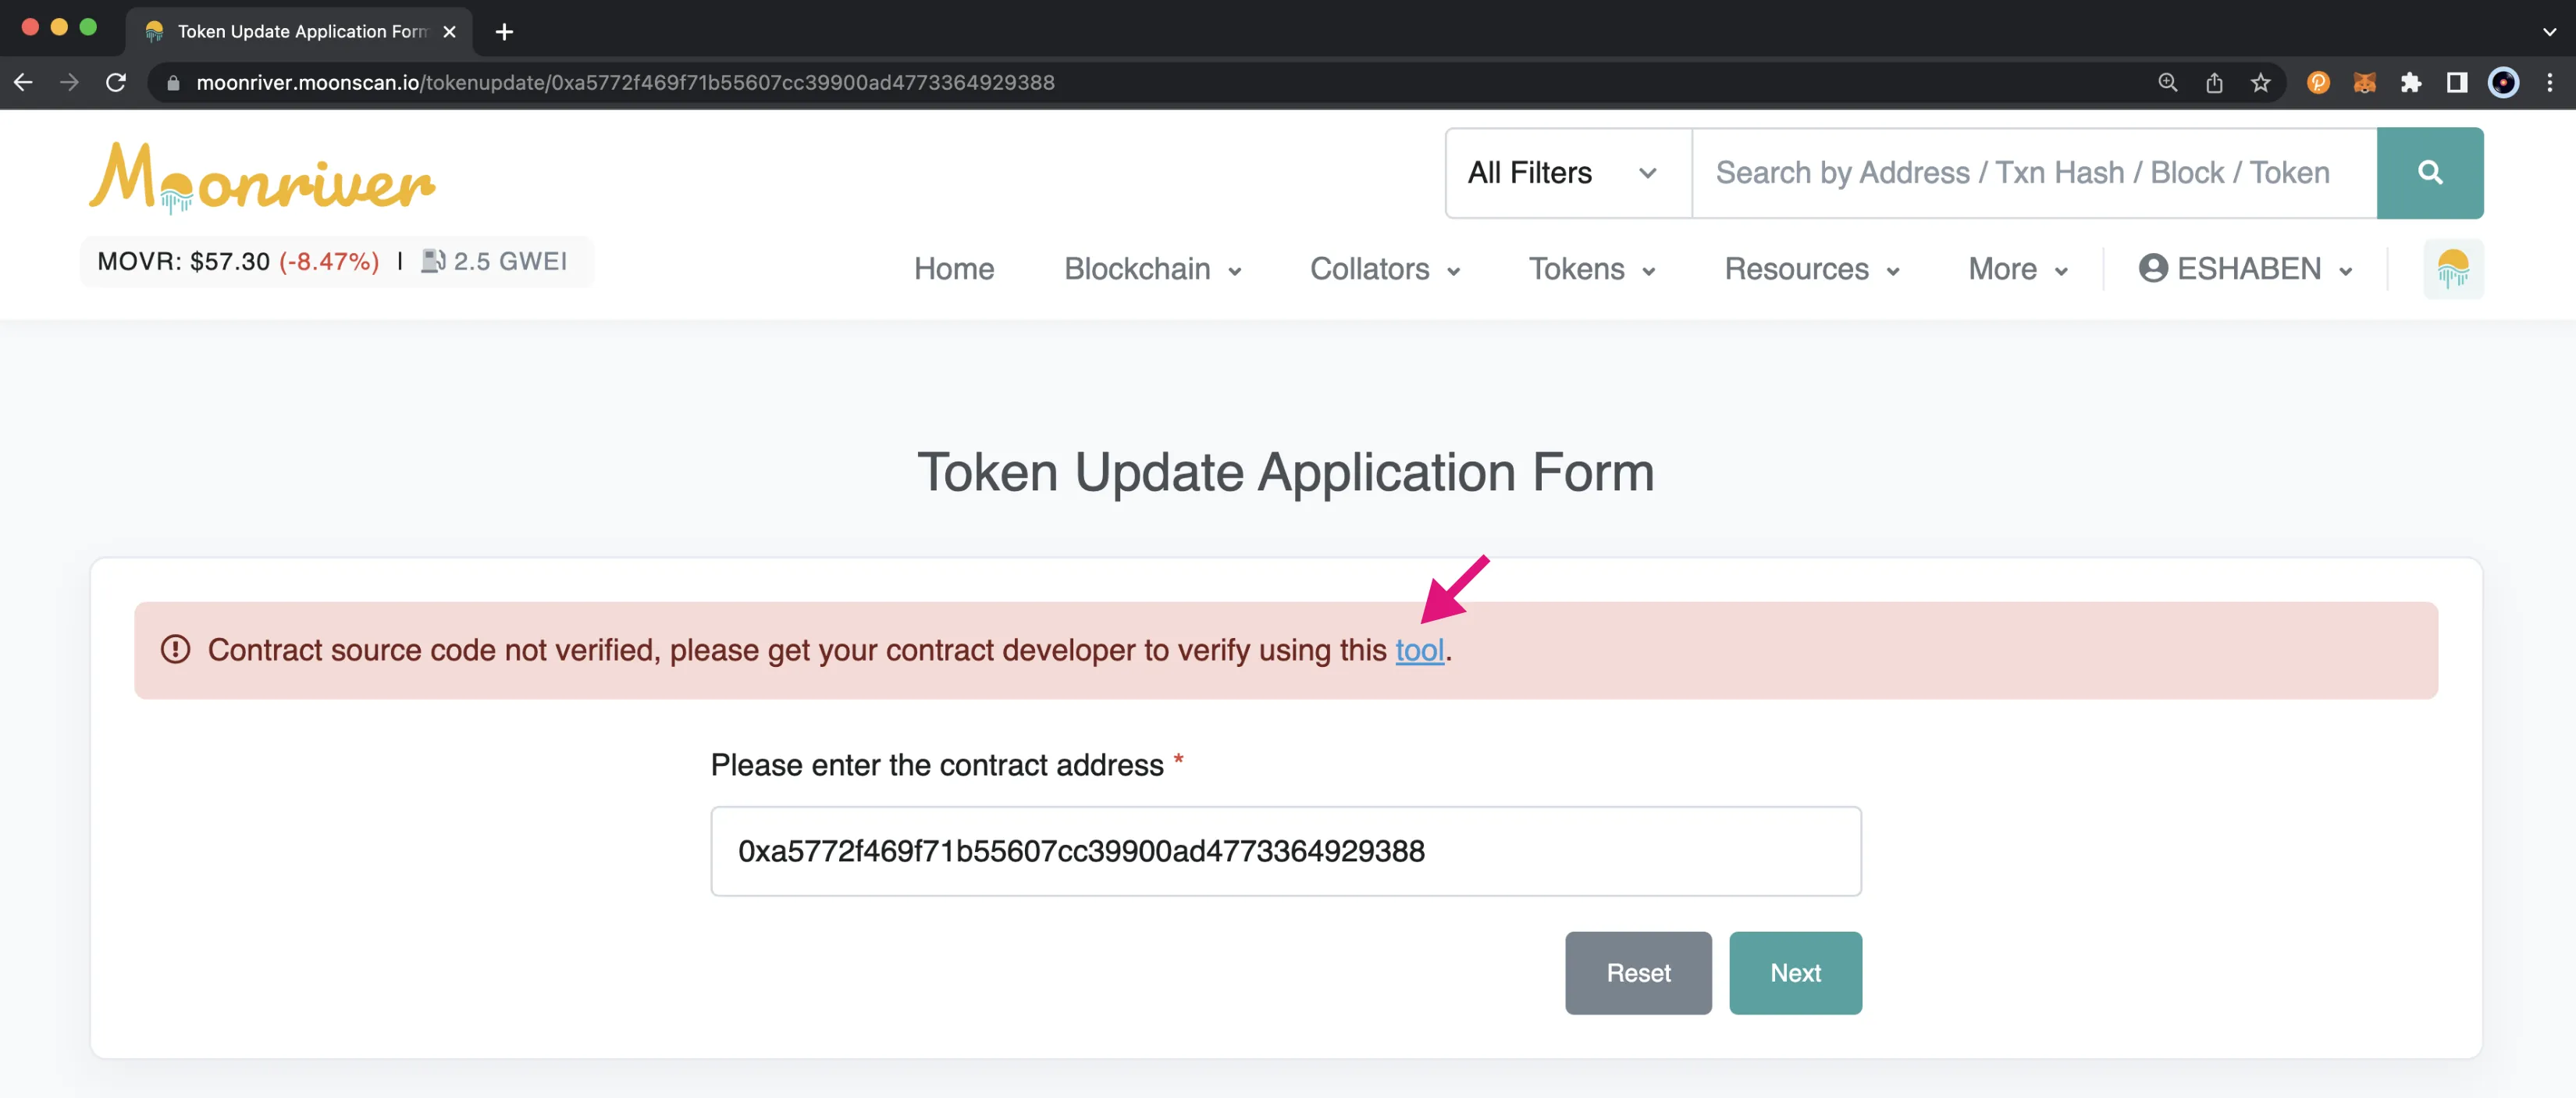
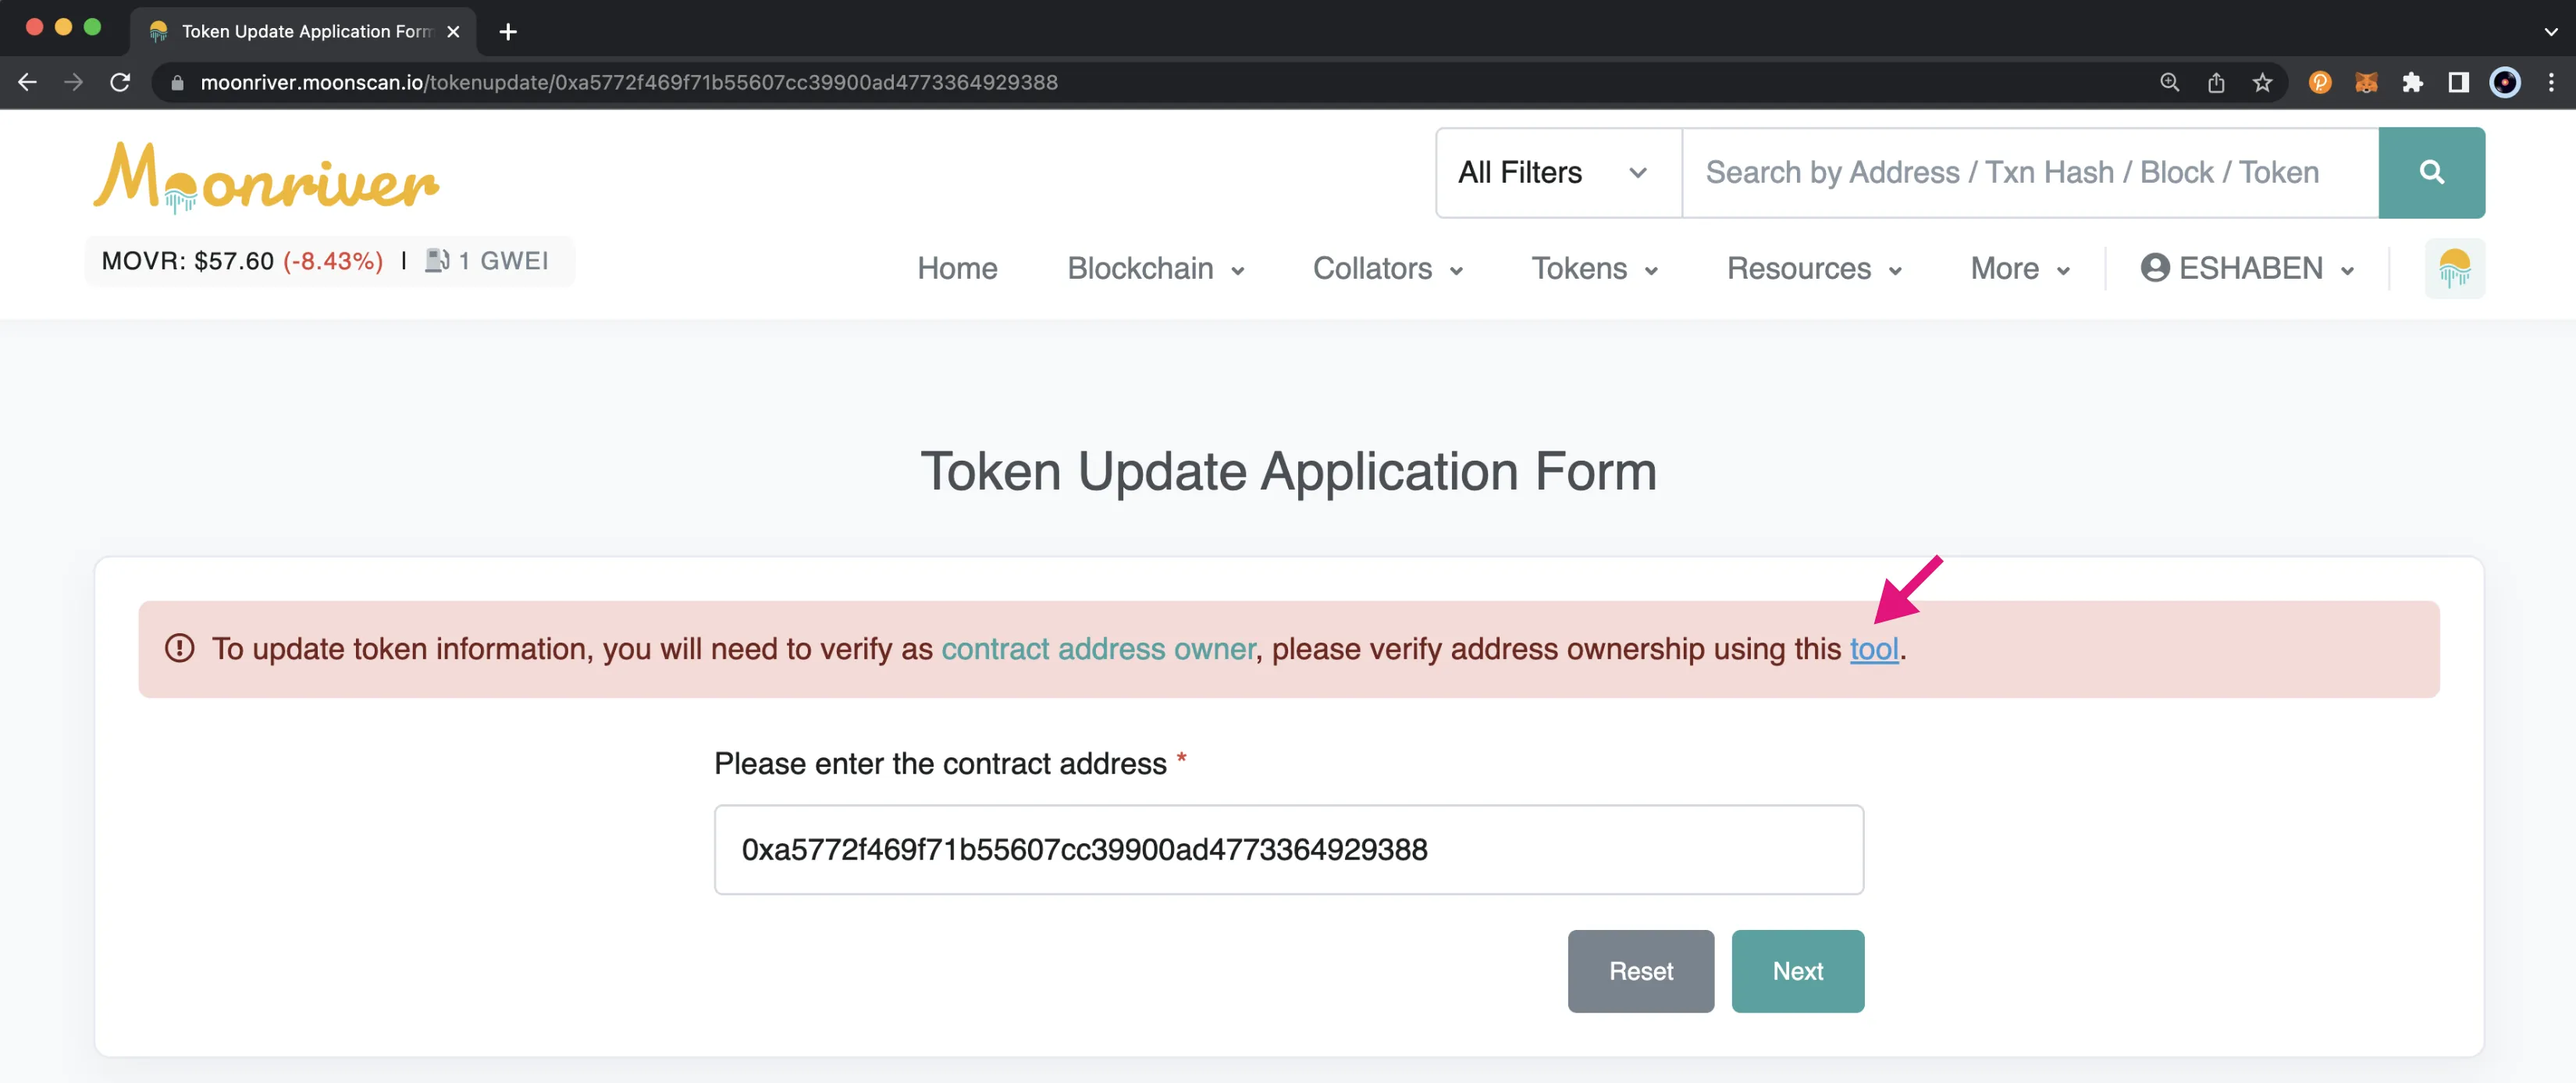
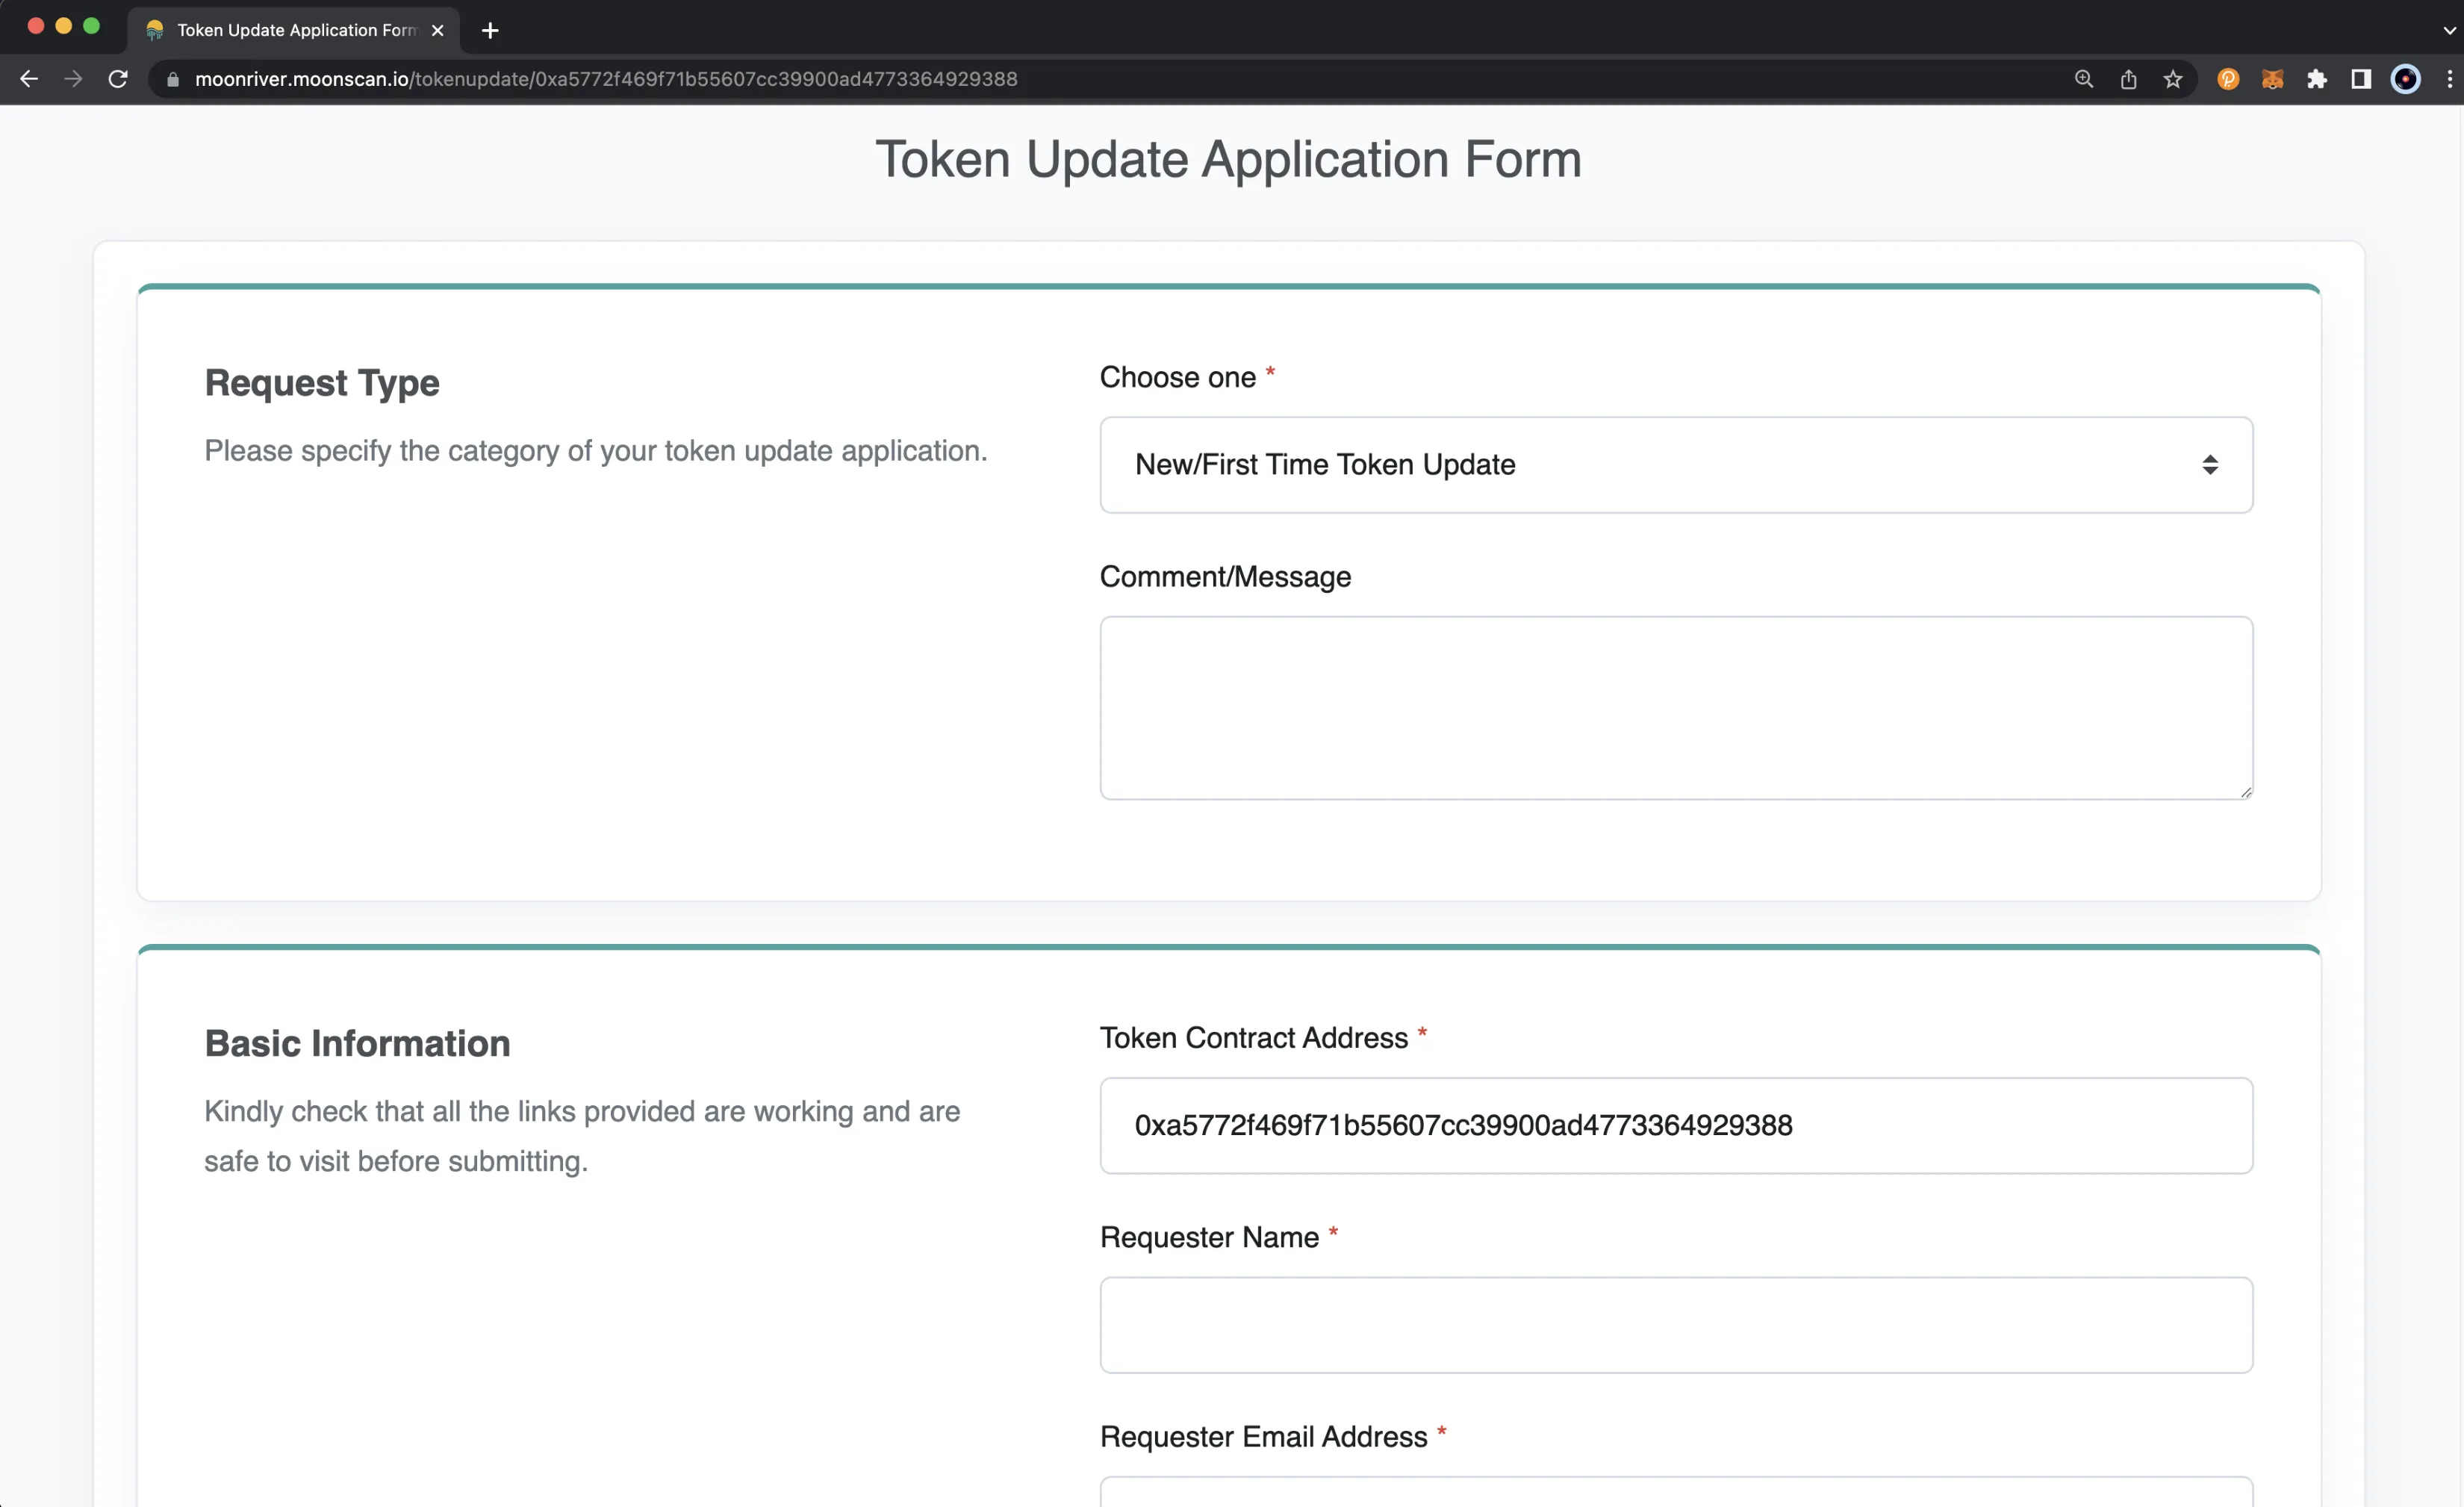
You’ll be taken to the Token Update Application Form.
If you haven’t verified your contract source code yet, you will need to do so before you can proceed to the next step. If you have already verified your contract, you can skip ahead to the Verifying Address Ownership section.
Verifying Contract Source Code
You can verify your contract source code a couple of ways. You can directly verify it from Moonscan, or if you developed the contract with Hardhat or Foundry, you can also use their corresponding Etherscan integrations.
To verify your contract source code directly from Moonscan, you can click on the tool link.
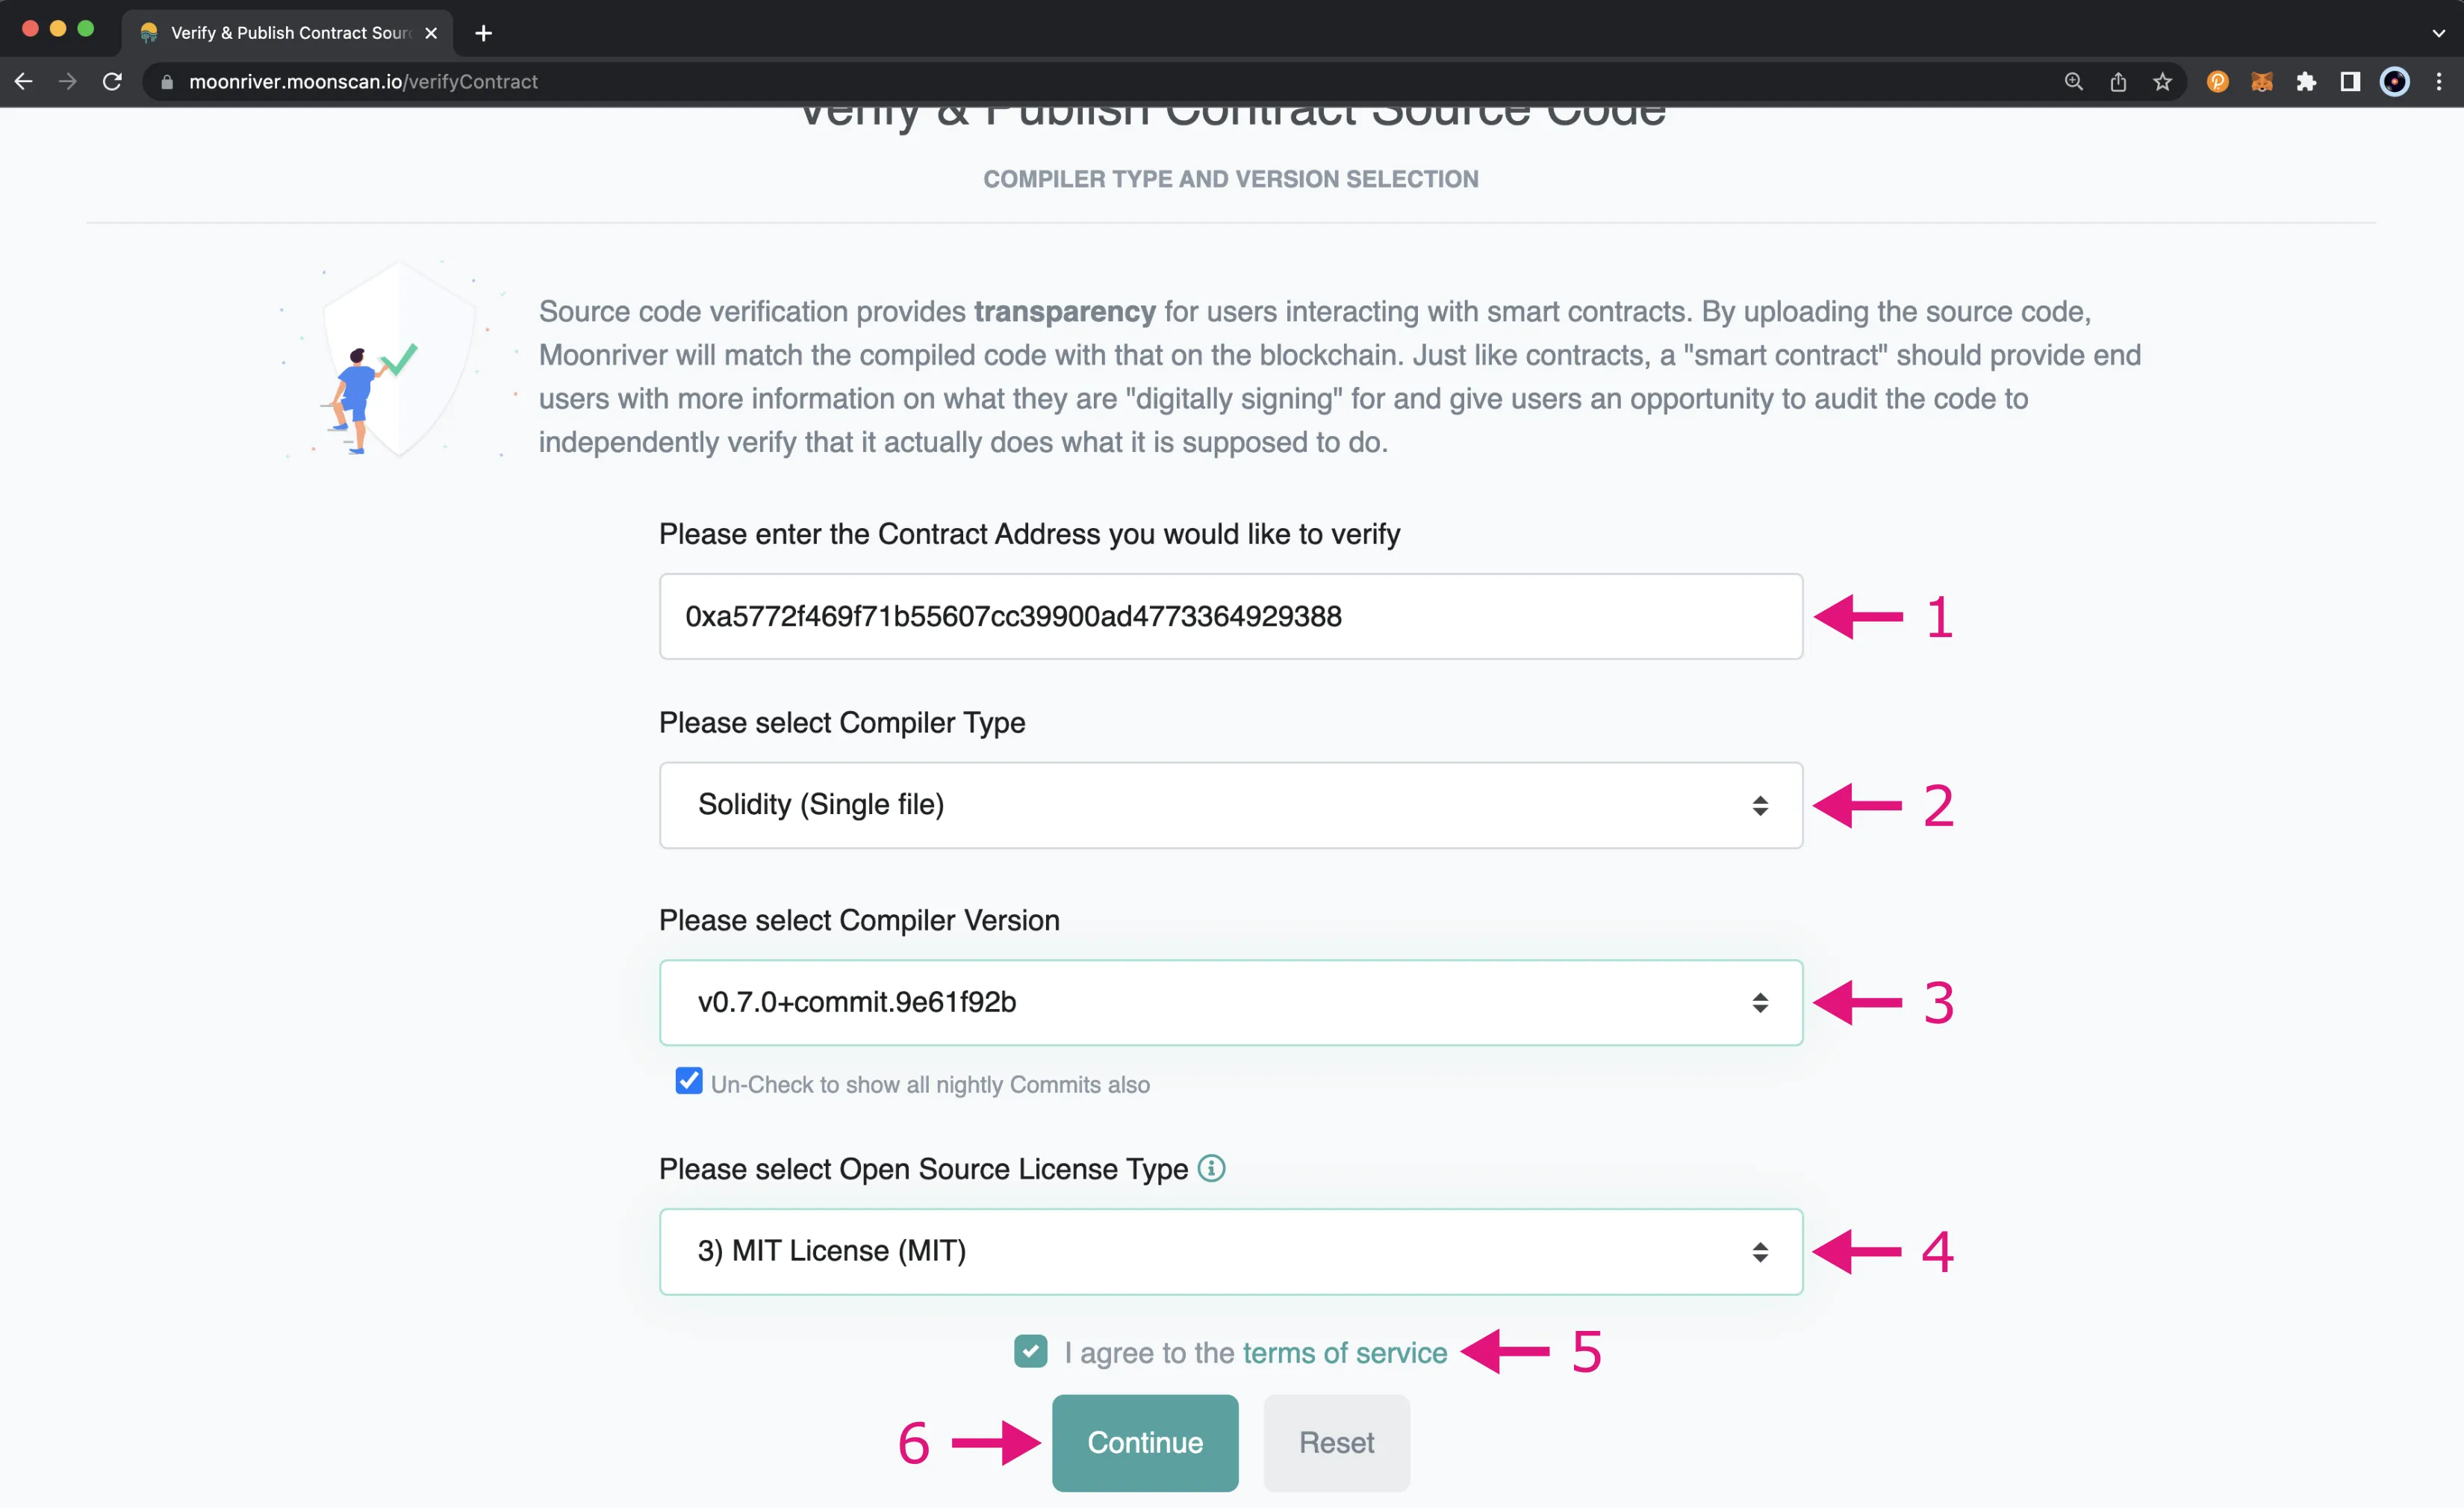
You’ll be taken to the Verify & Publish Contract Source Code page where you can enter in details about the contract and how it was compiled.
- Enter the token contract address
- Select the Compiler Type from the dropdown
- Choose the Compile Version you used
- Then select an Open Source License Type
- Review and click the I agree to the terms of service checkbox
- Click Continue
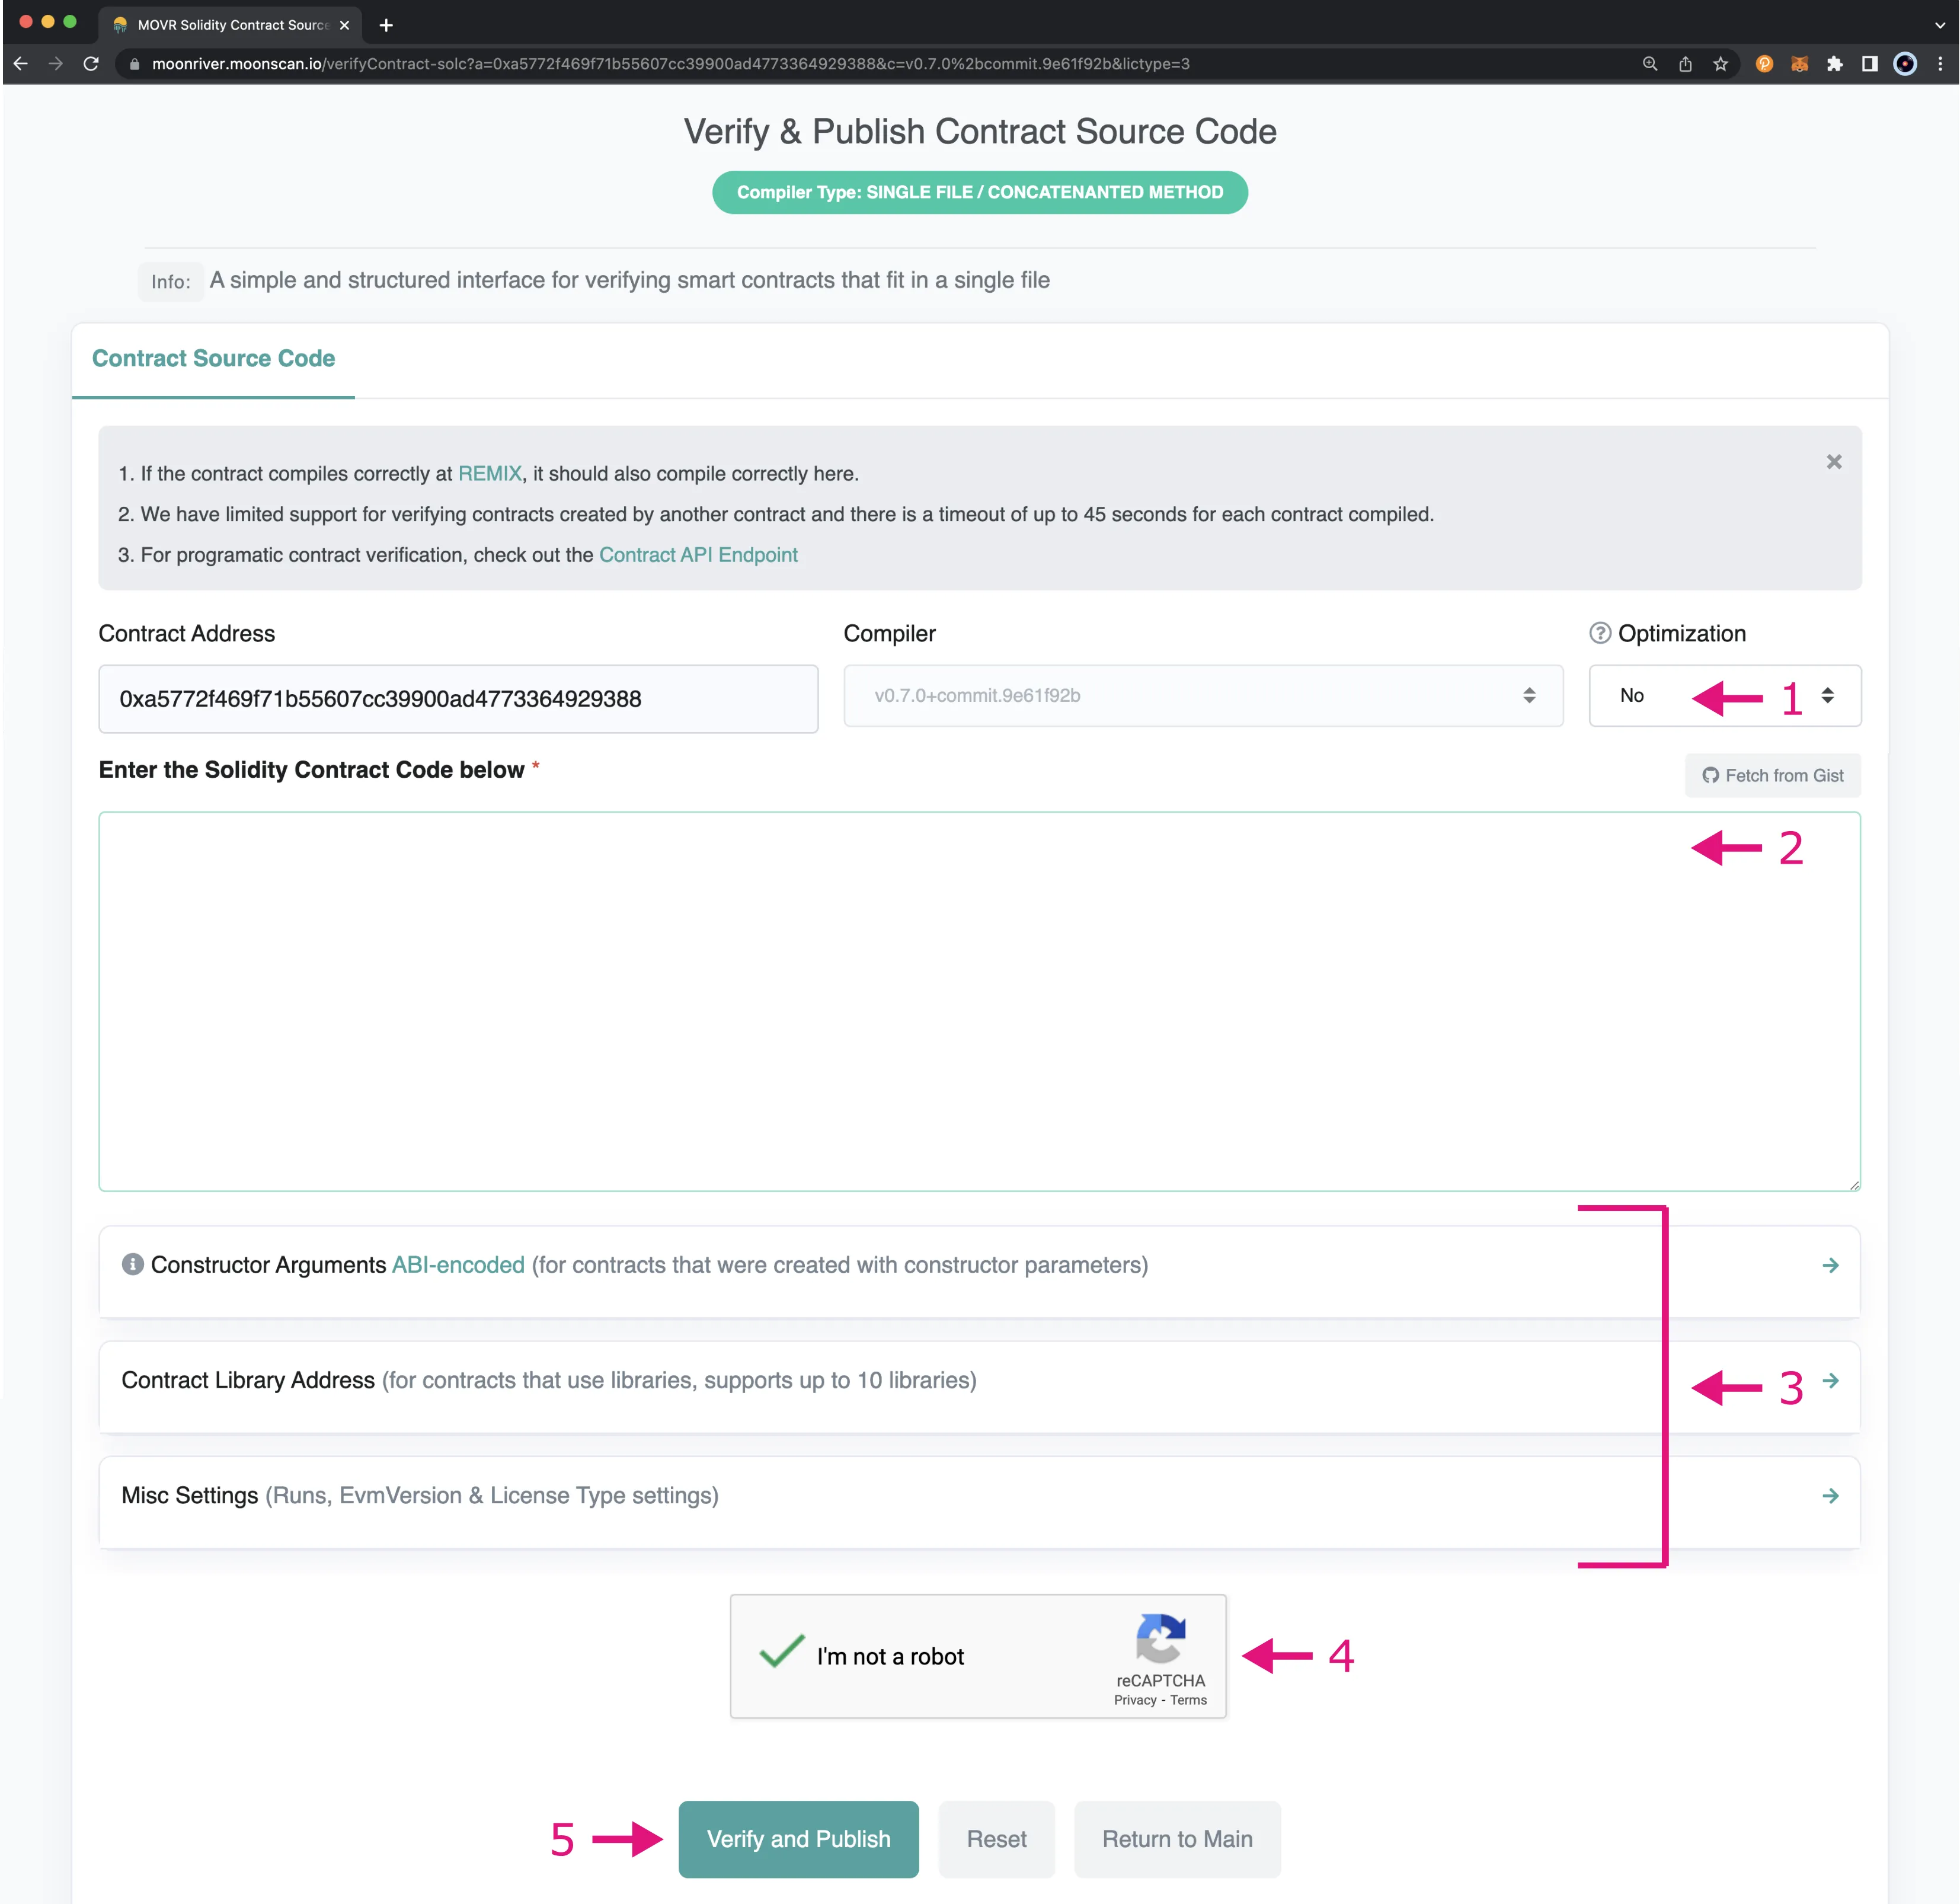
You’ll be taken to the next page where you can enter in the contract source code and specify additional settings and arguments used.
- Contract Address and Compiler should already be filled in. If you enabled optimization, you can update the Optimization dropdown
- Enter in a flattened version of the contract source code. To flatten the contract, you can use the Flattener Remix plugin
- Update the Constructor Arguments, Contract Library Address, and Misc Settings sections if needed
- Click I’m not a robot
- Finally, click Verify and Publish
Now that your contract source code has been verified, you can move on to the next step, verifying that you’re the contract address owner.
Verifying Address Ownership
From the Token Update Application Form page, you should see a message at the top of the screen that states you need to verify the contract address owner. To get started with this process, you can click on the tool link.
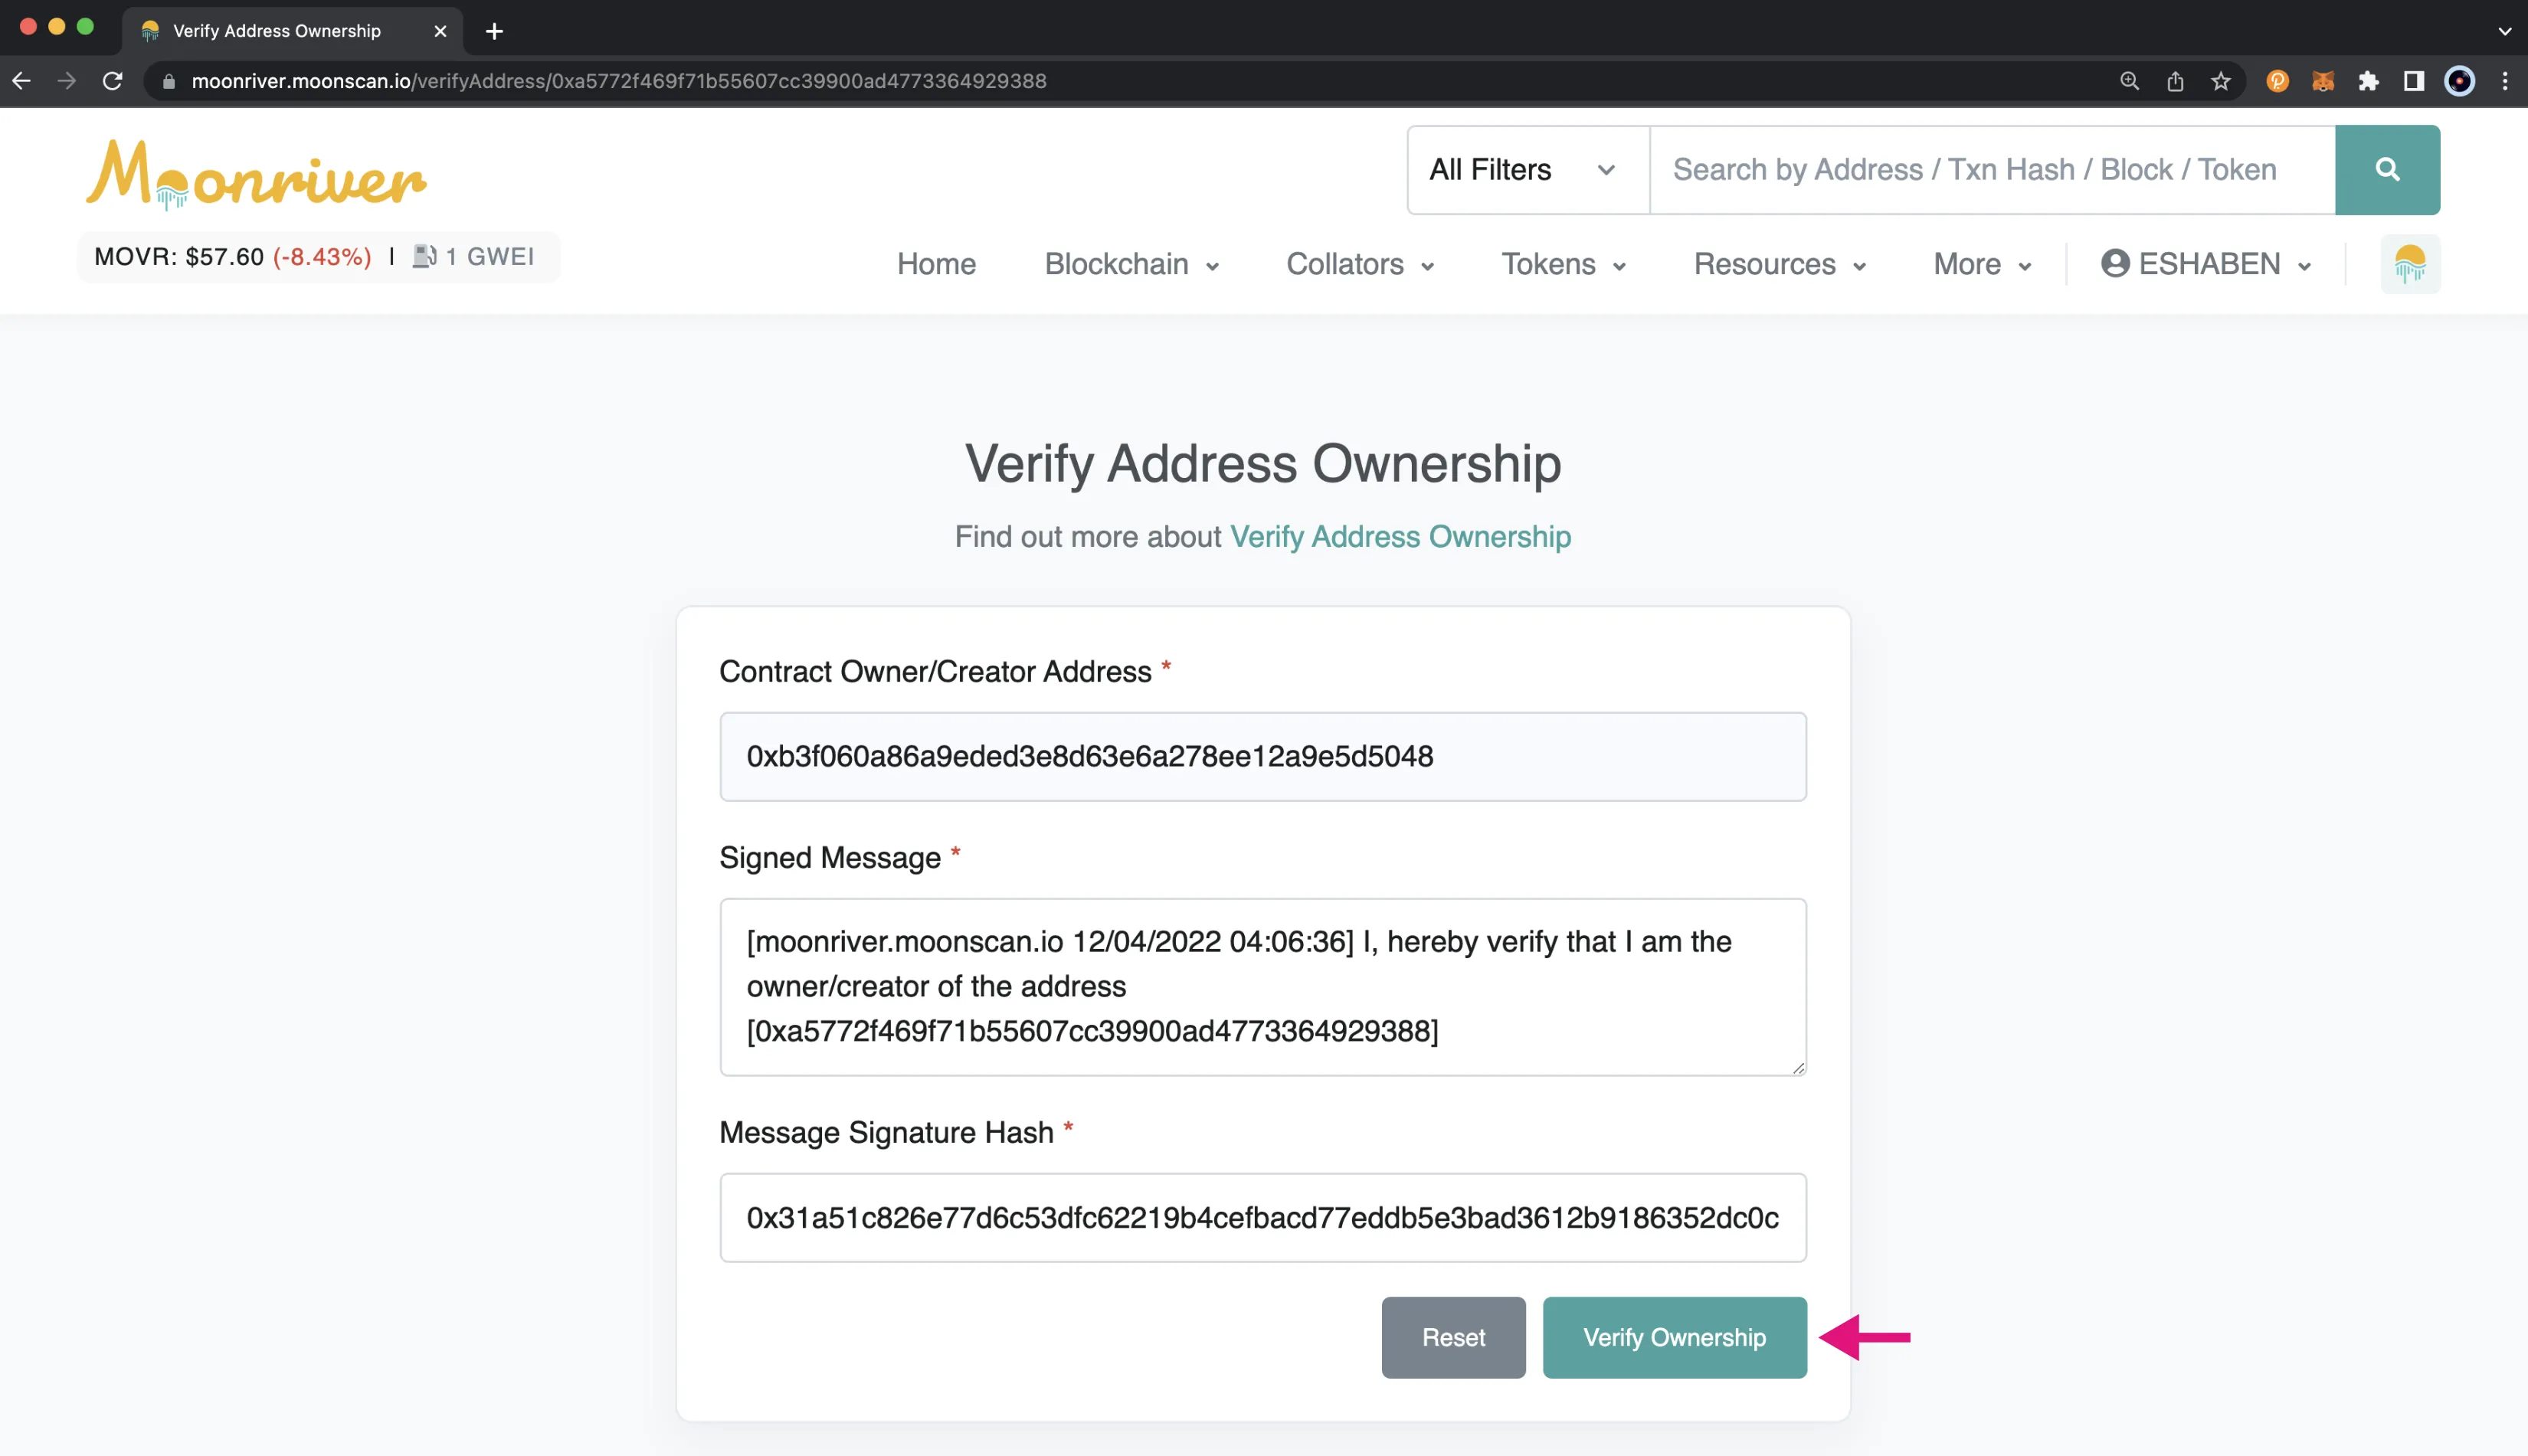
You’ll be taken to the Verify Address Ownership page, where you can choose to sign the message verifying your ownership either manually or by connecting to Web3. If you wish to verify ownership manually, you’ll need the message signature hash. Otherwise, if you connect to Web3, the hash will be calculated for you.
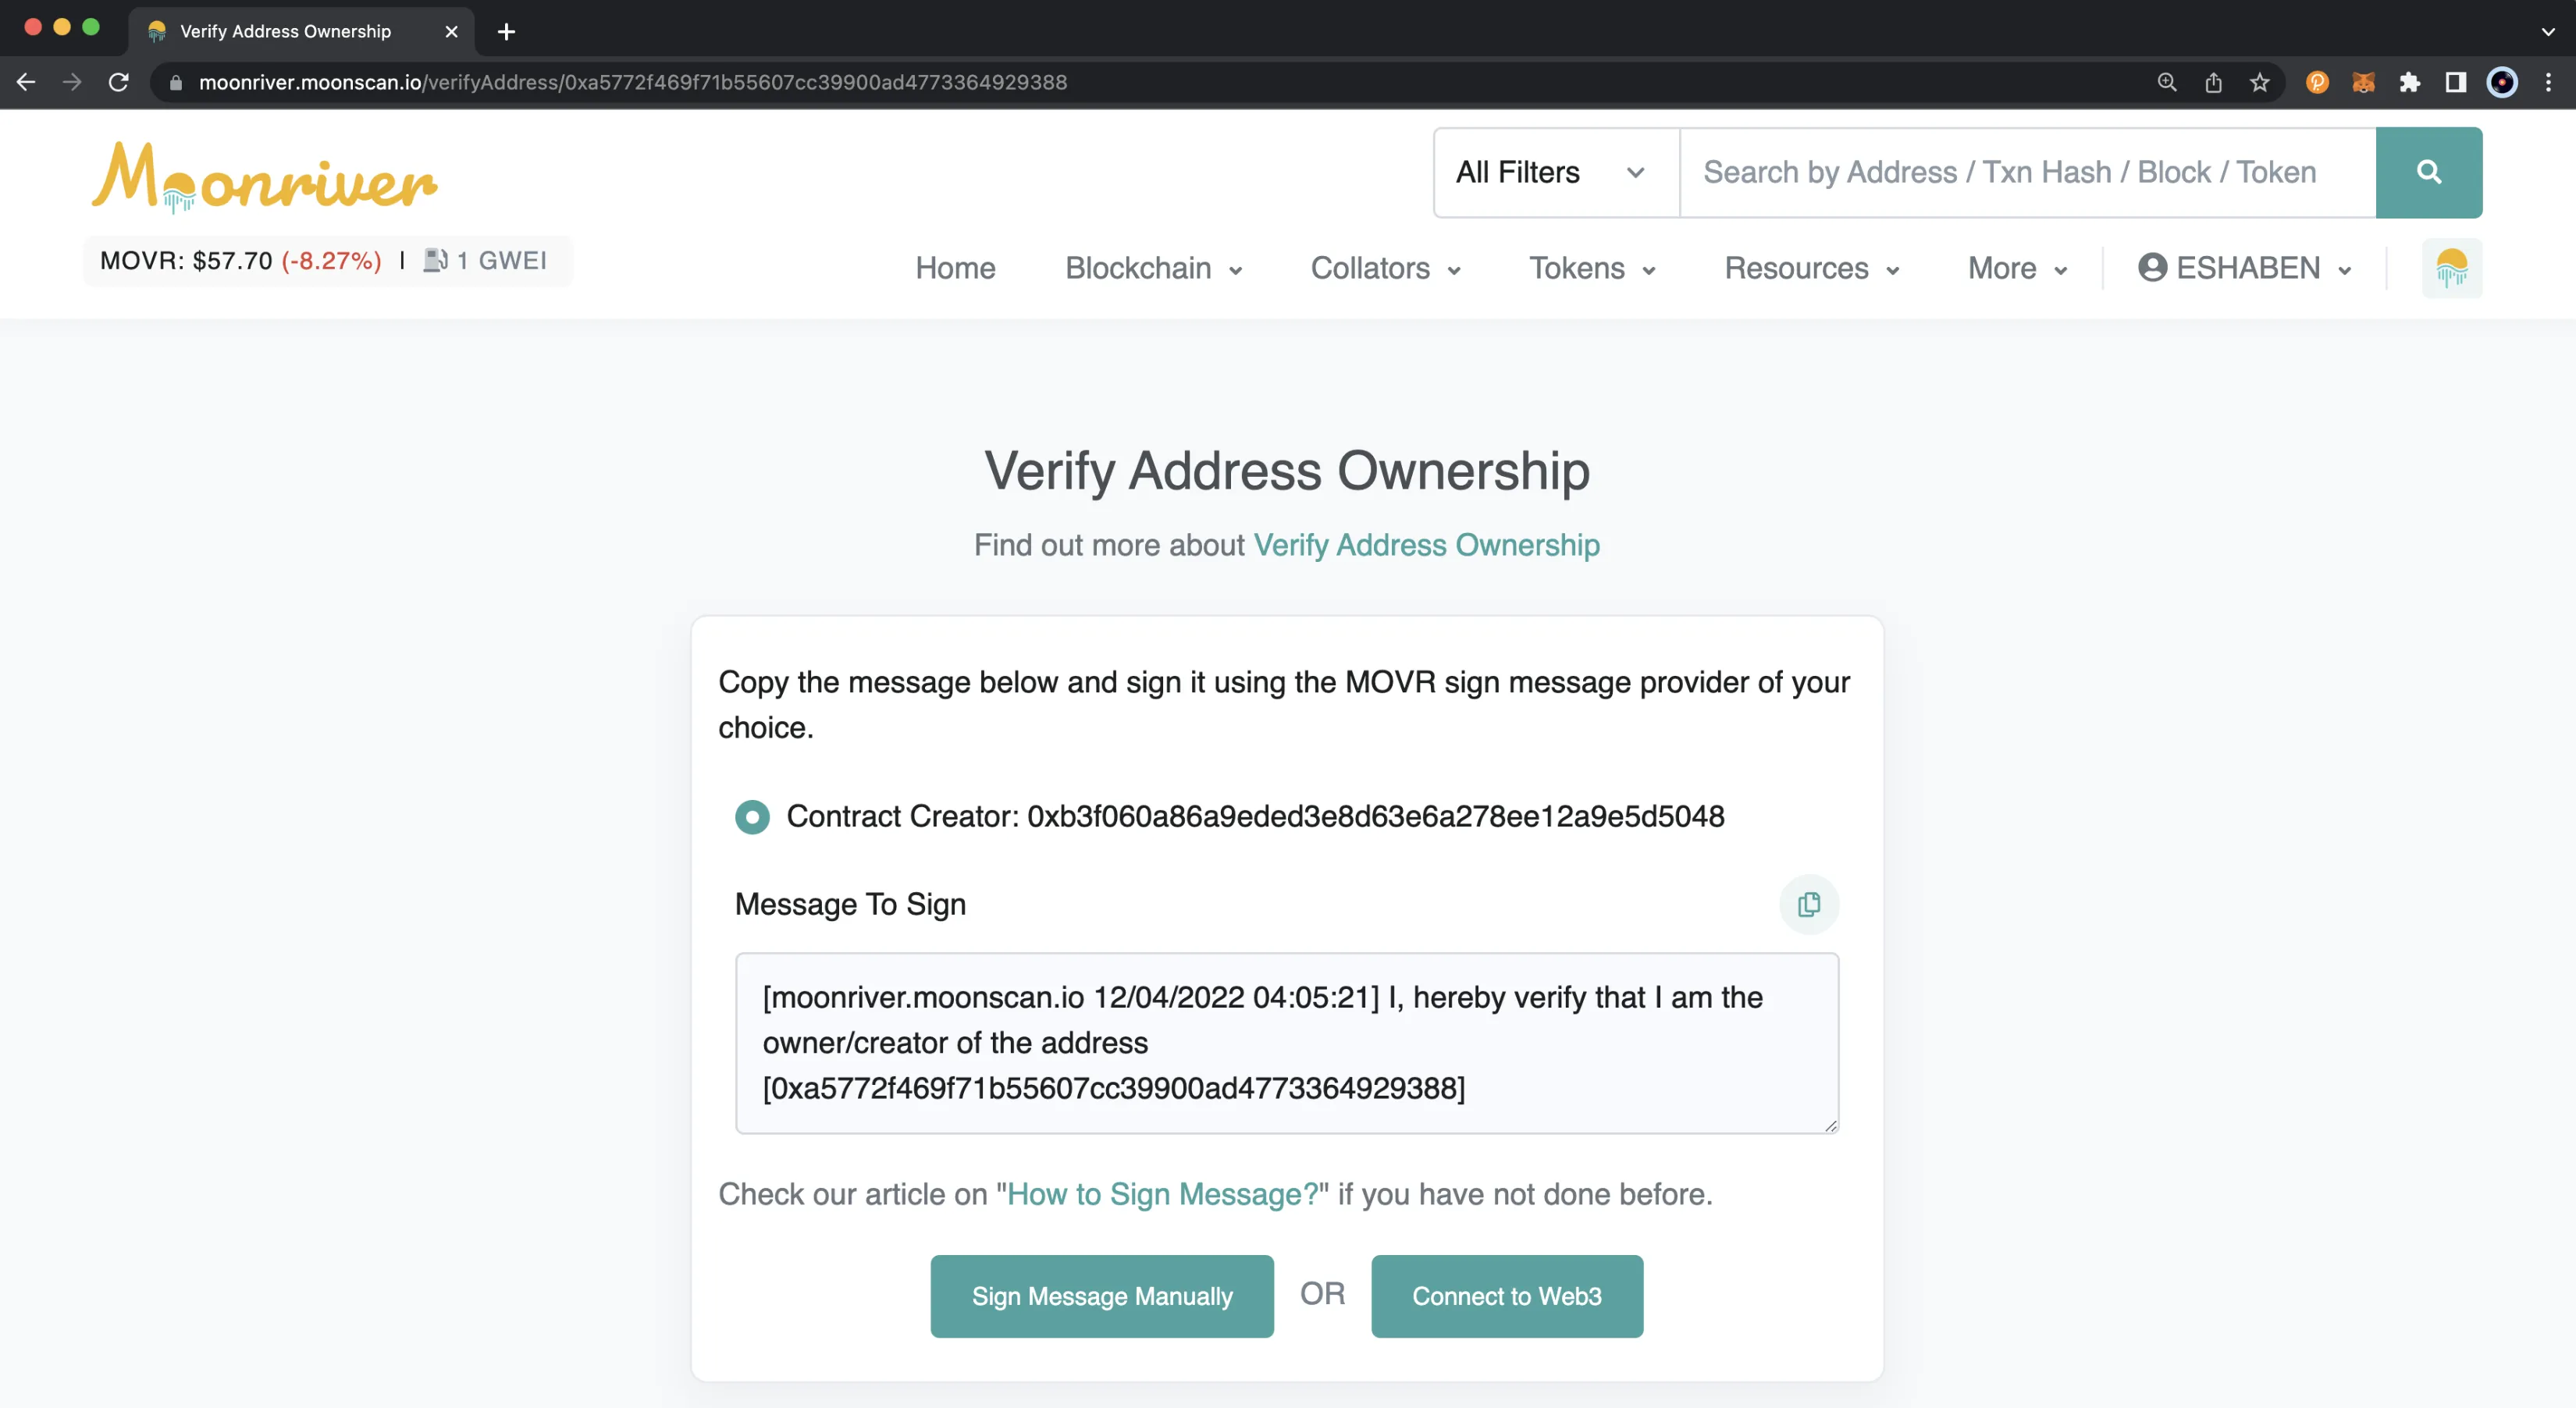
Sign Message Manually
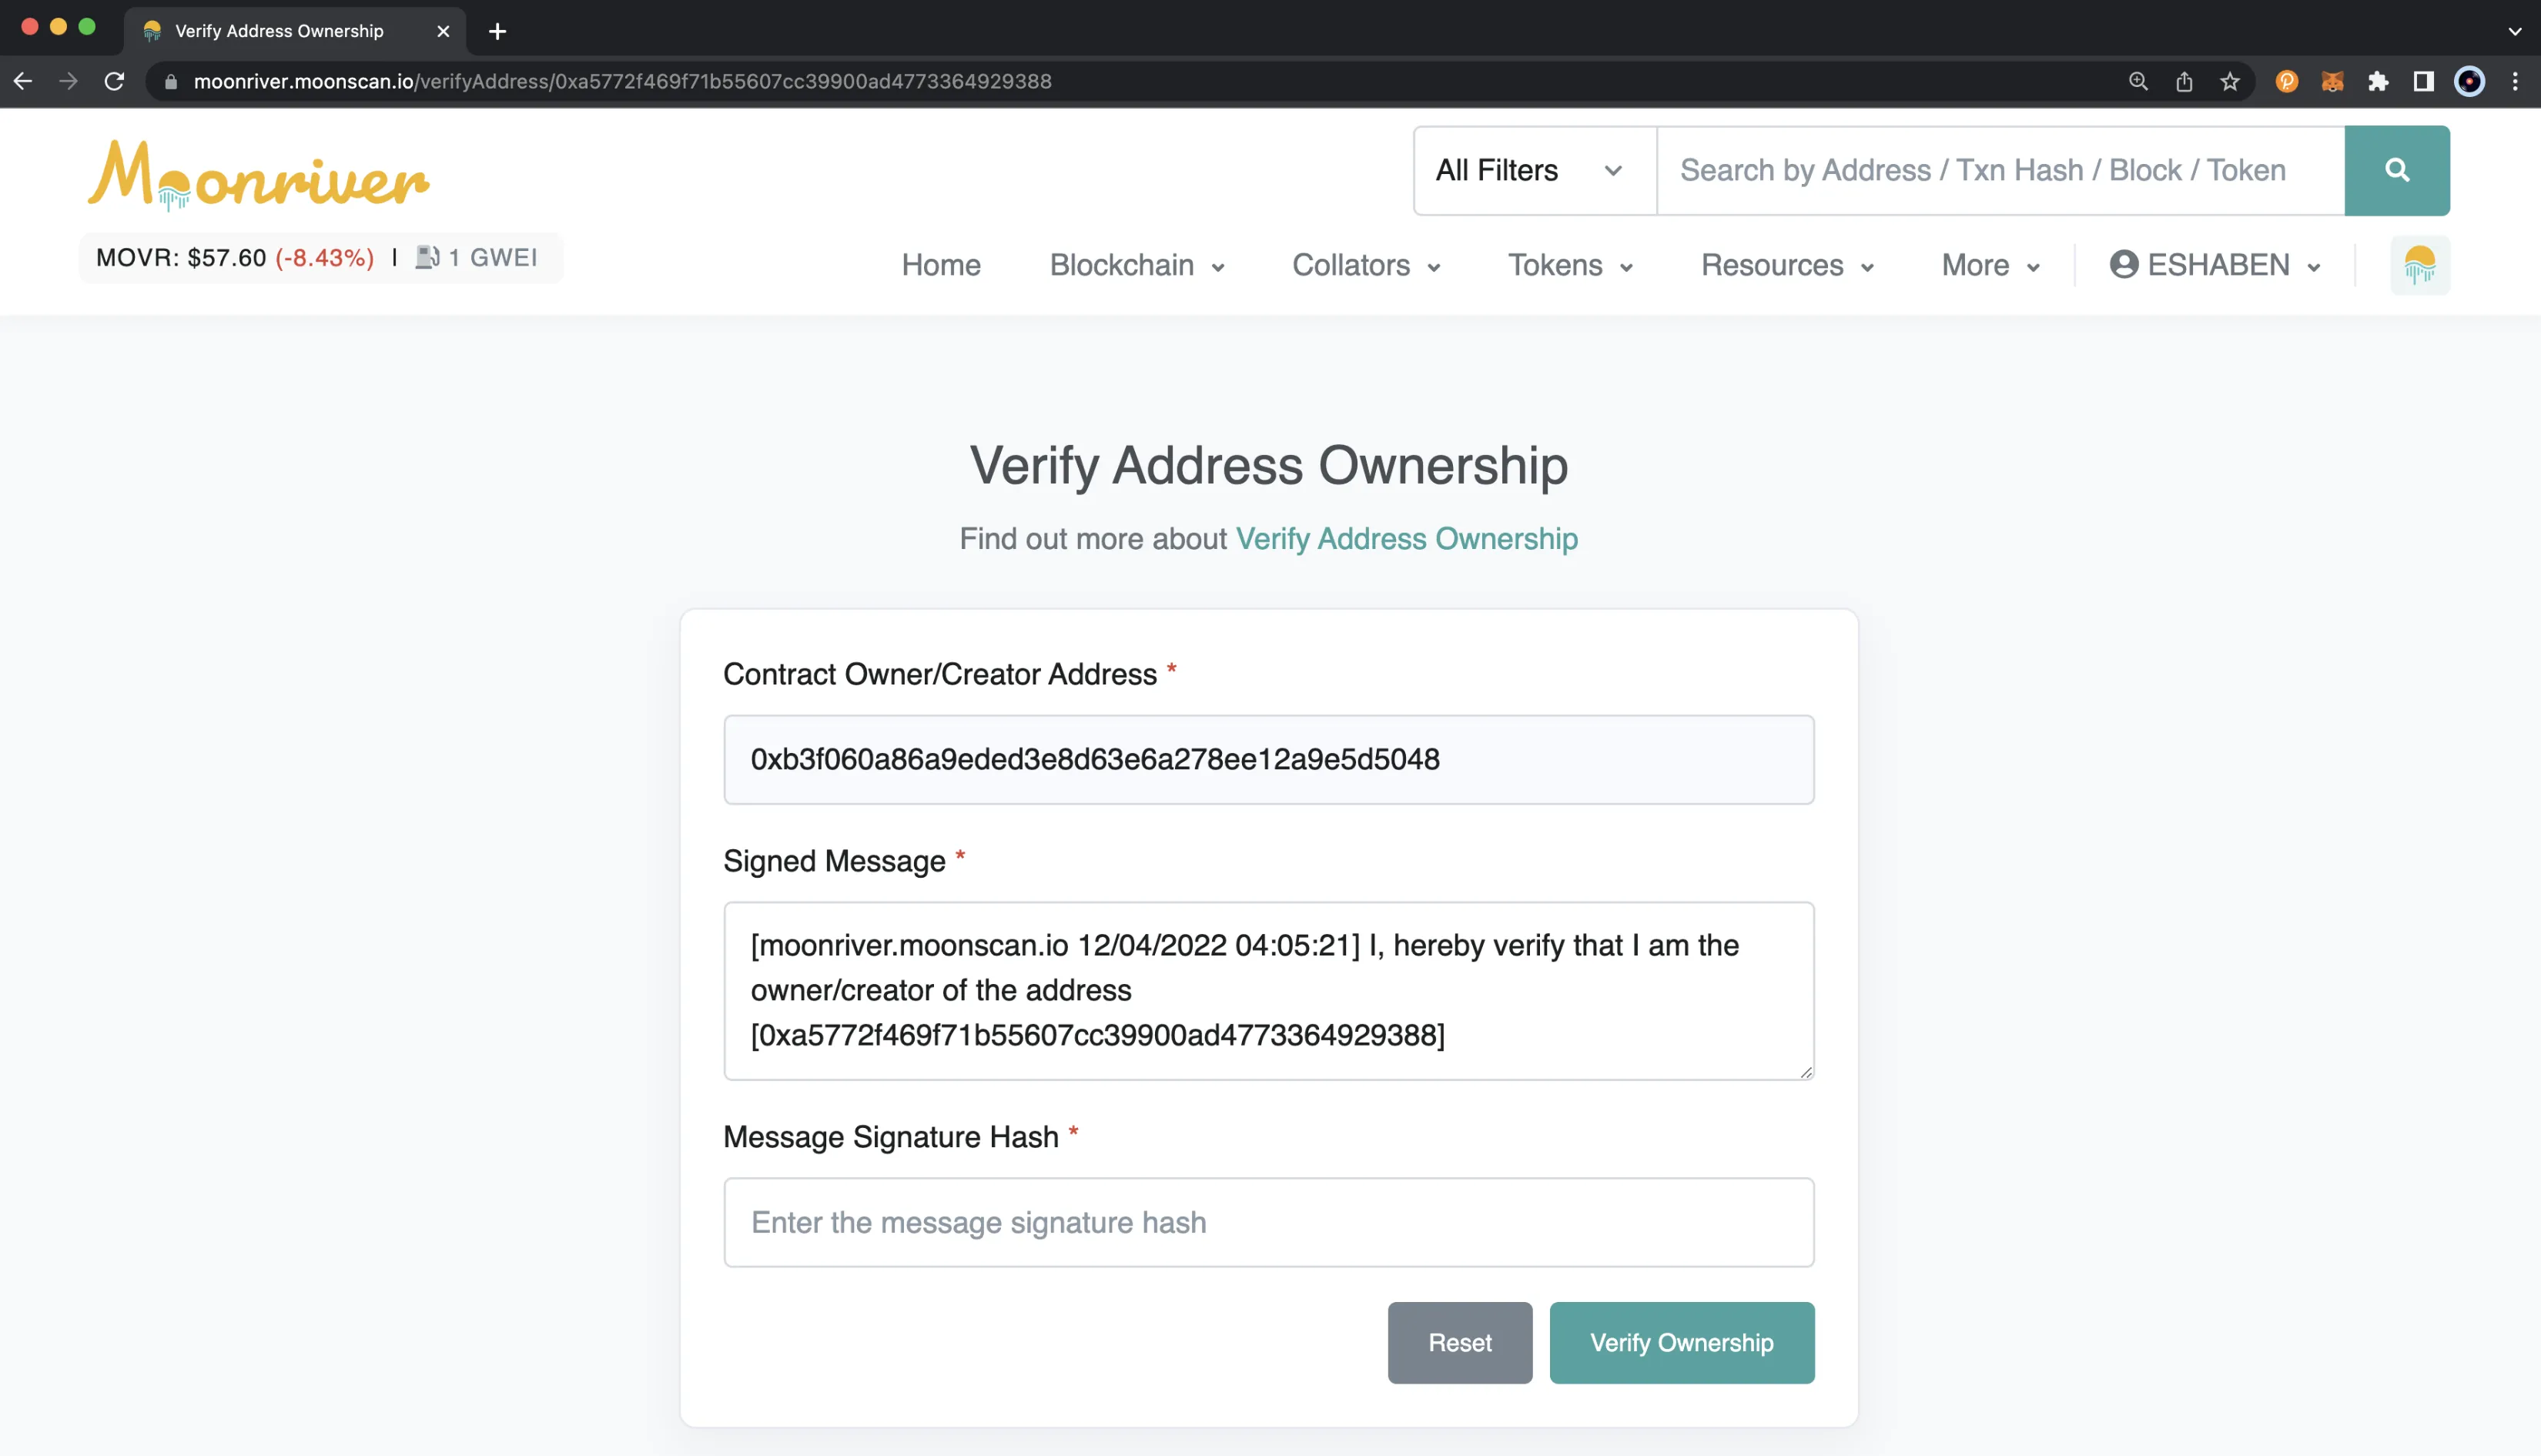
If you wish to verify ownership manually, you’ll need the message signature hash. If you have calculated the hash yourself, you can click Sign Message Manually, enter the Message Signature Hash, and click Verify Ownership.
Connect to Web3
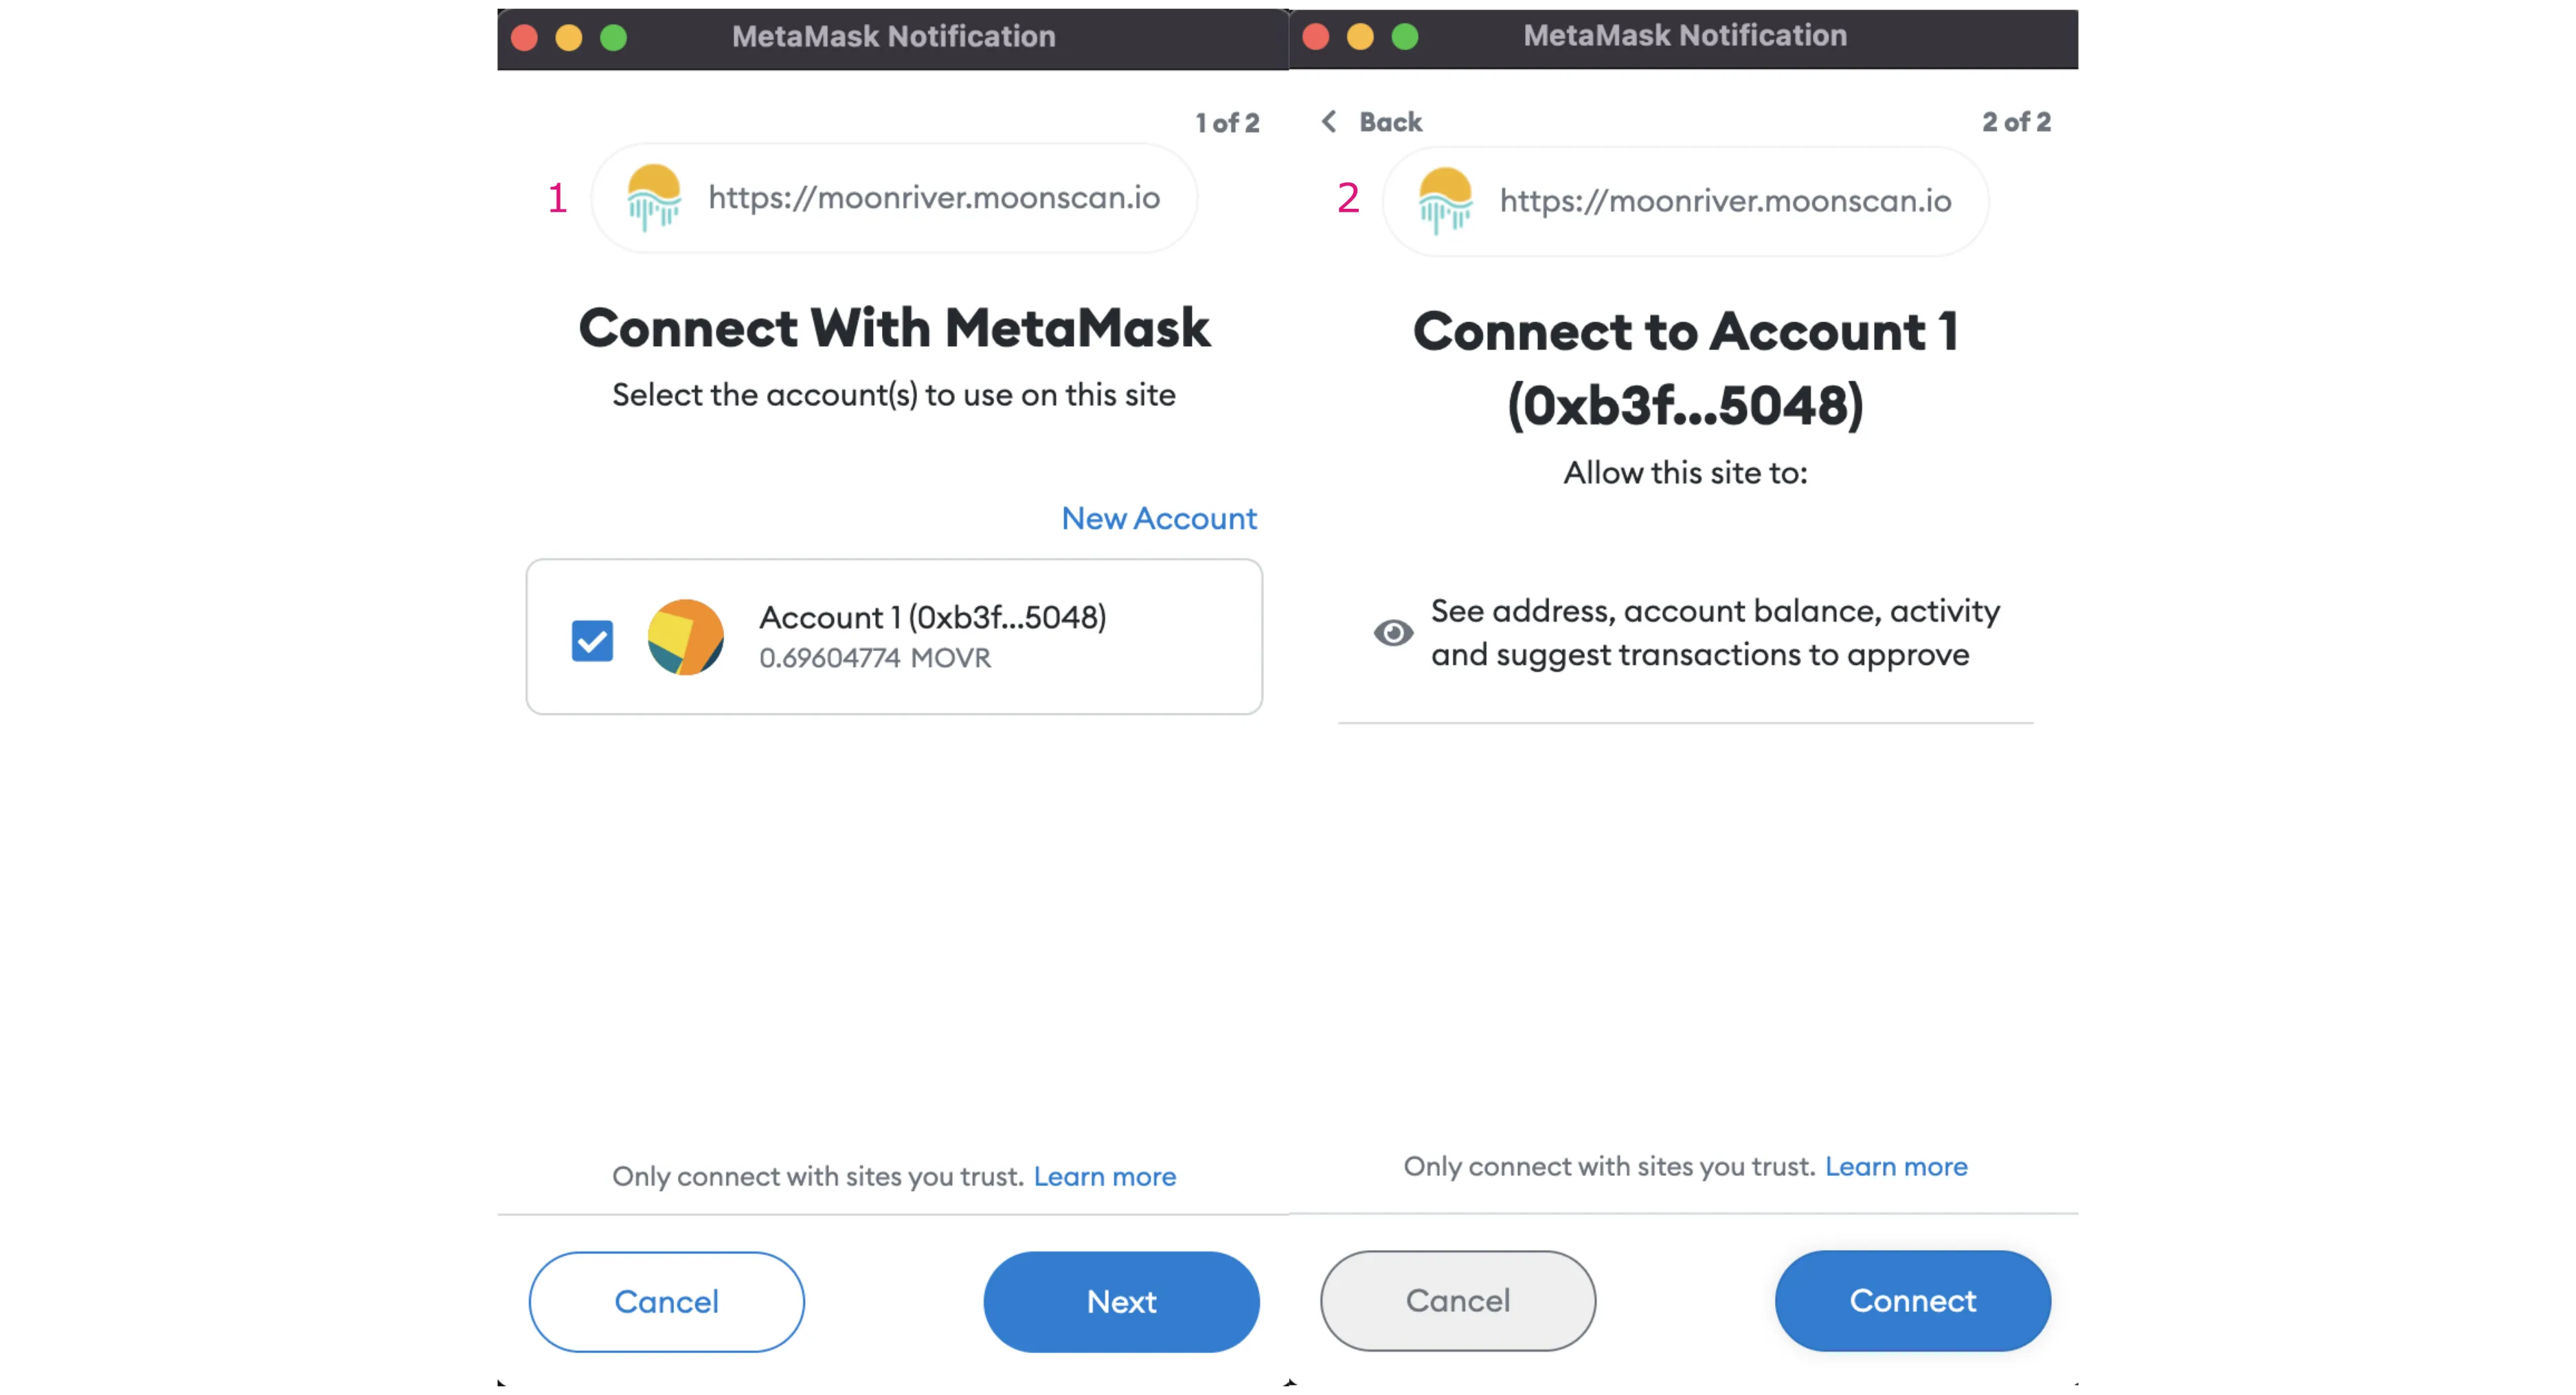
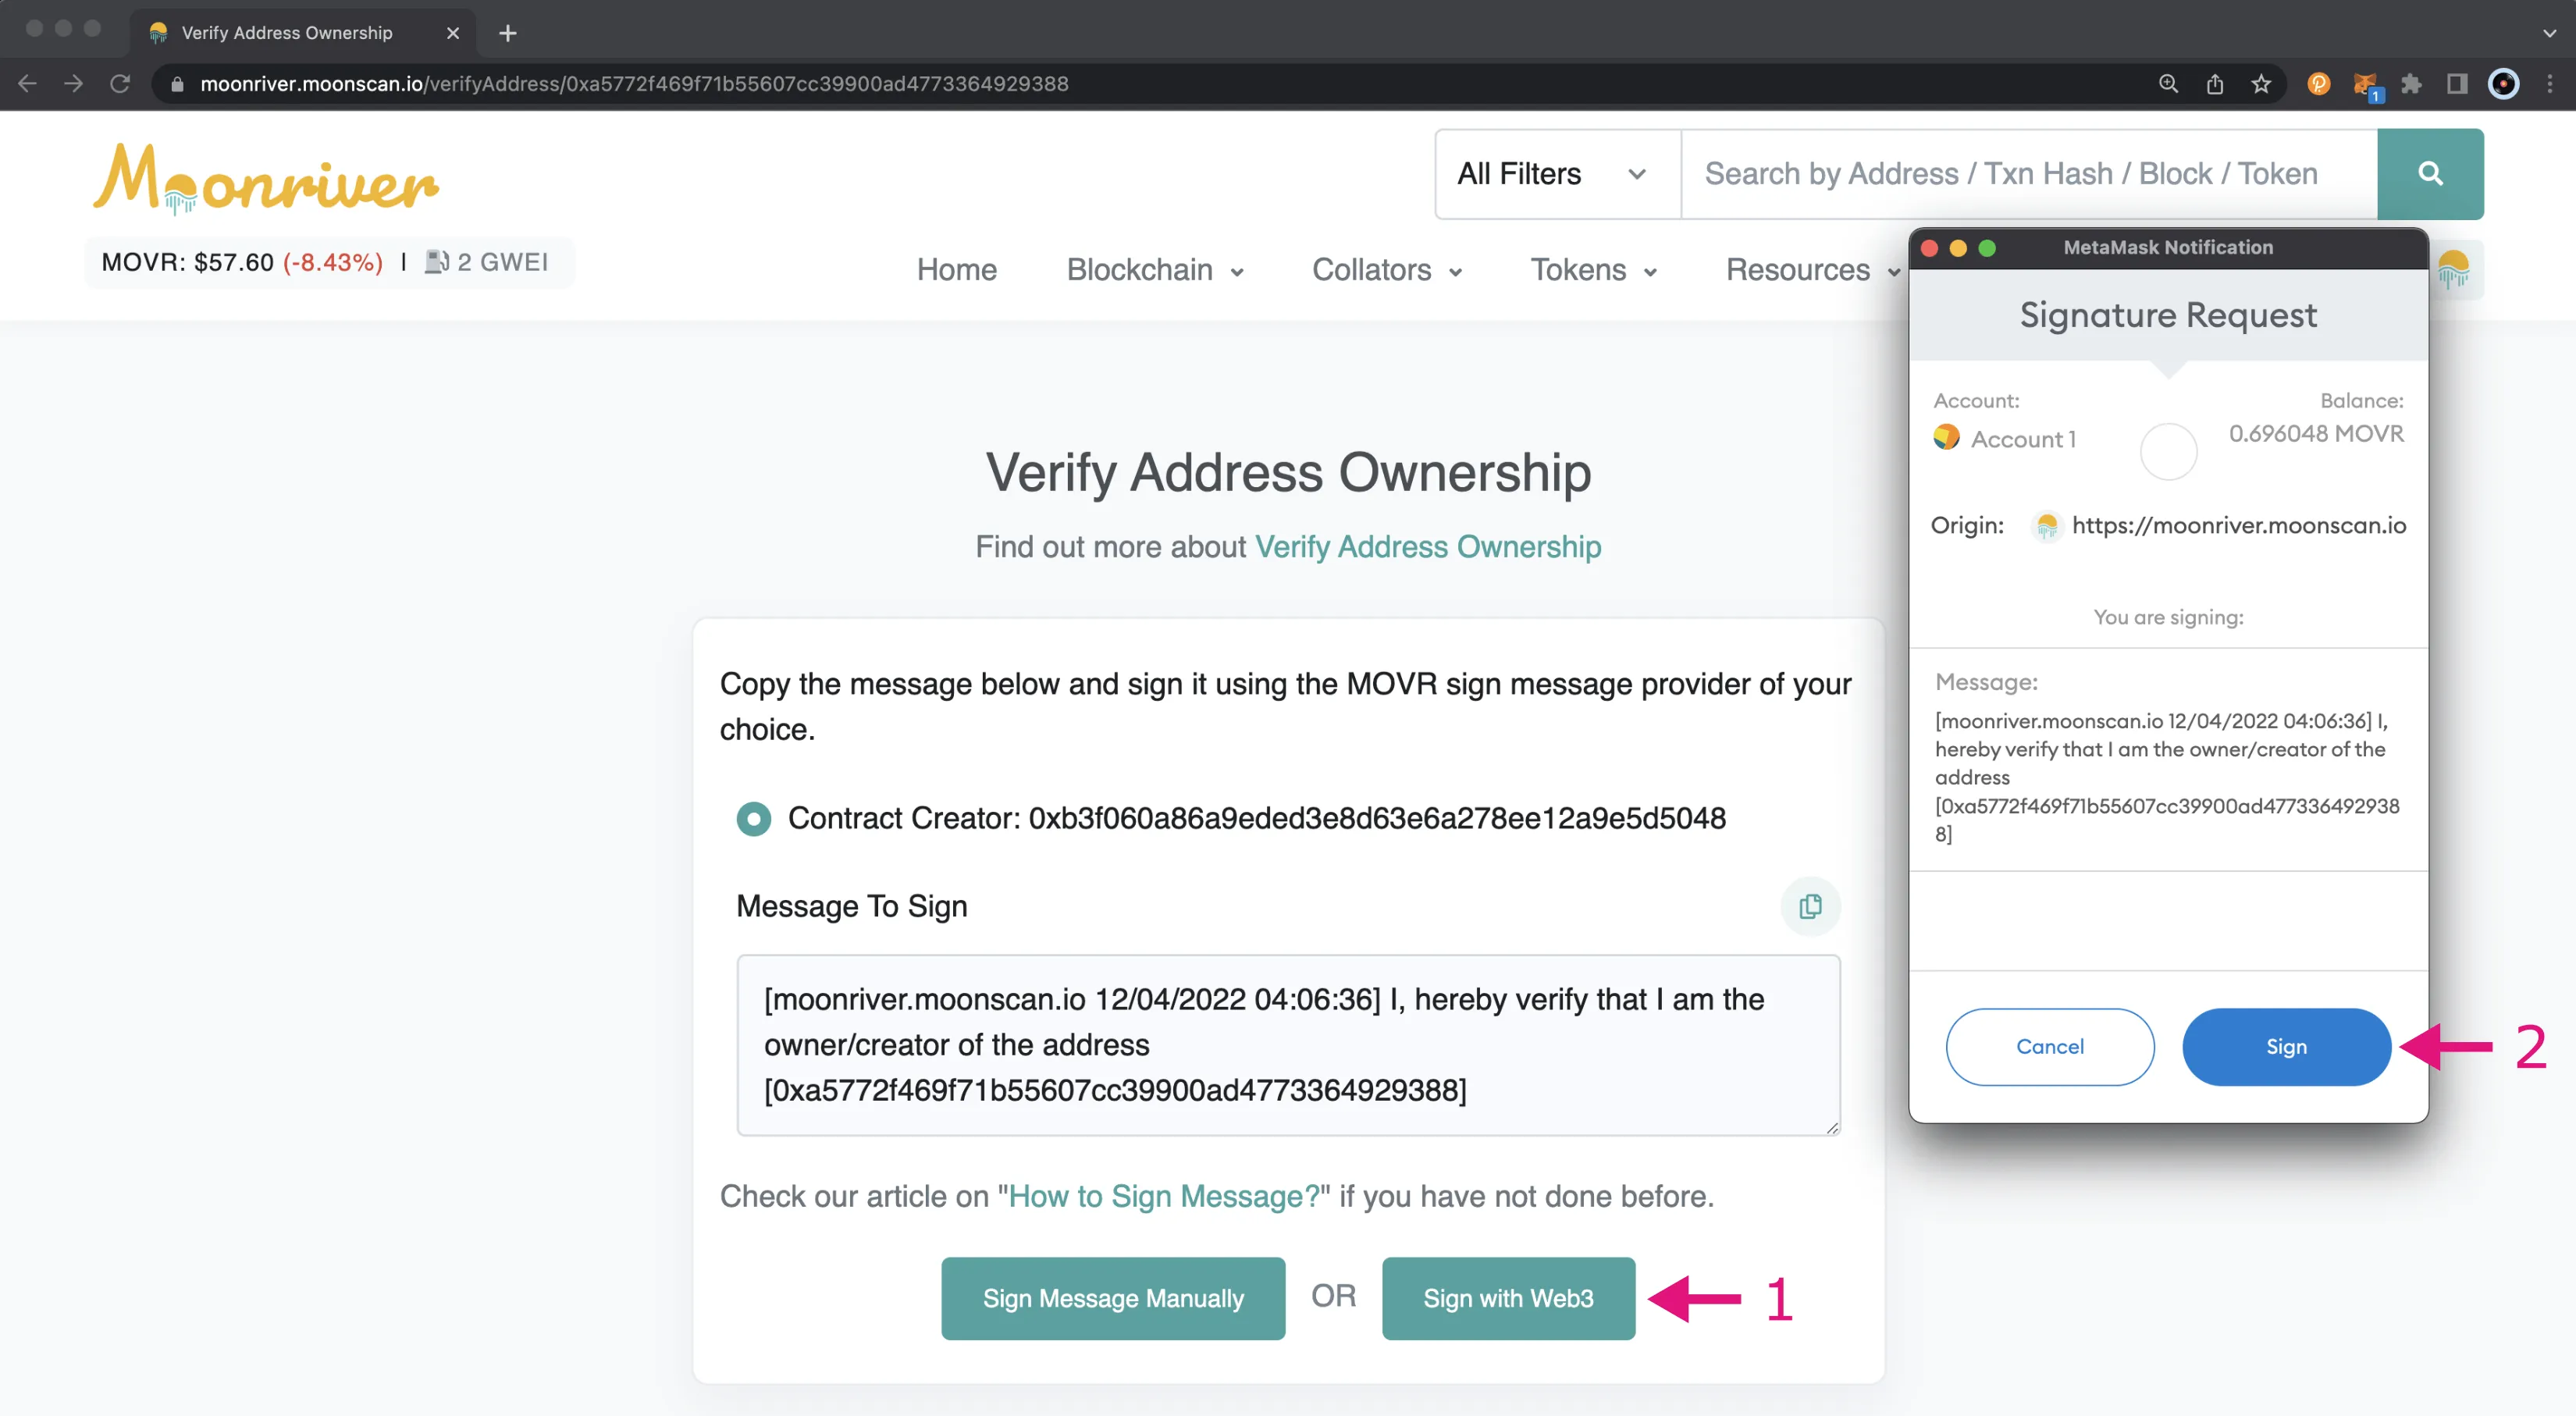
You can easily calculate the message signature hash using MetaMask. You will need to have the account you deployed the contract with loaded into MetaMask. Then you can click on Connect to Web3 and MetaMask will pop-up.
- Select the account to connect with, which should be the account you used to deploy the contract
- Connect to the account
Back on the Verify Address Ownership page, you can take the following steps
- Click Sign with Web3
- MetaMask will pop-up and you can Sign the message
Once you’ve signed the message, you can then click Click to Proceed. You should now see that the Message Signature Hash has been automatically populated for you. All you have left to do is click Verify Ownership.
Creating the Profile
Now you can start filling in the necessary information to build the token profile, including project information, social media links, price data links, and more. You should make sure that all the links provided are working and are safe to visit before submitting.
At a minimum you will need to fill in the following information:
- Request Type
- Token Contract Address
- Requester Name
- Requester Email Address
- Official Project Website
- Official Project Email Address
- Link to download a 32x32 png icon logo
- Project Description
All of the other fields are optional. Once you’ve filled in the information, you can click Submit at the bottom of the page.
And that’s it! You’ve successfully created and submitted a profile for your token on Moonscan! The Moonscan team will review your submission as soon as possible and provide you with further instructions as needed.
| Created: April 21, 2022