Verify Smart Contracts with Etherscan Plugins
Introduction
Verifying smart contracts is a great way of improving the transparency and security of contracts deployed on Moonbeam. Hardhat and Foundry integrate with Etherscan's contract verification service to automate the process of verifying contracts by locally detecting which contracts to verify and which Solidity libraries are required, if any.
The Hardhat plugin integrates seamlessly into your Hardhat project. Foundry also has Etherscan capabilities, but they are built into its Forge tool instead of being included in a separate plugin.
This guide will show you how to use both plugins to verify smart contracts deployed on Moonbase Alpha. This guide can also be adapted for Moonbeam and Moonriver.
Checking Prerequisites
To follow along with this tutorial, you will need to have:
- MetaMask installed and connected to the Moonbase Alpha TestNet
- An account funded with
DEVtokens. You can get DEV tokens for testing on Moonbase Alpha once every 24 hours from the Moonbase Alpha Faucet - A Moonscan API key for the network you're trying to verify a contract on. For Moonbeam and Moonbase Alpha, you'll need a Moonbeam Moonscan API key. For Moonriver, you'll need a Moonriver Moonscan API key
- Git installed and configured
Generating a Moonscan API Key
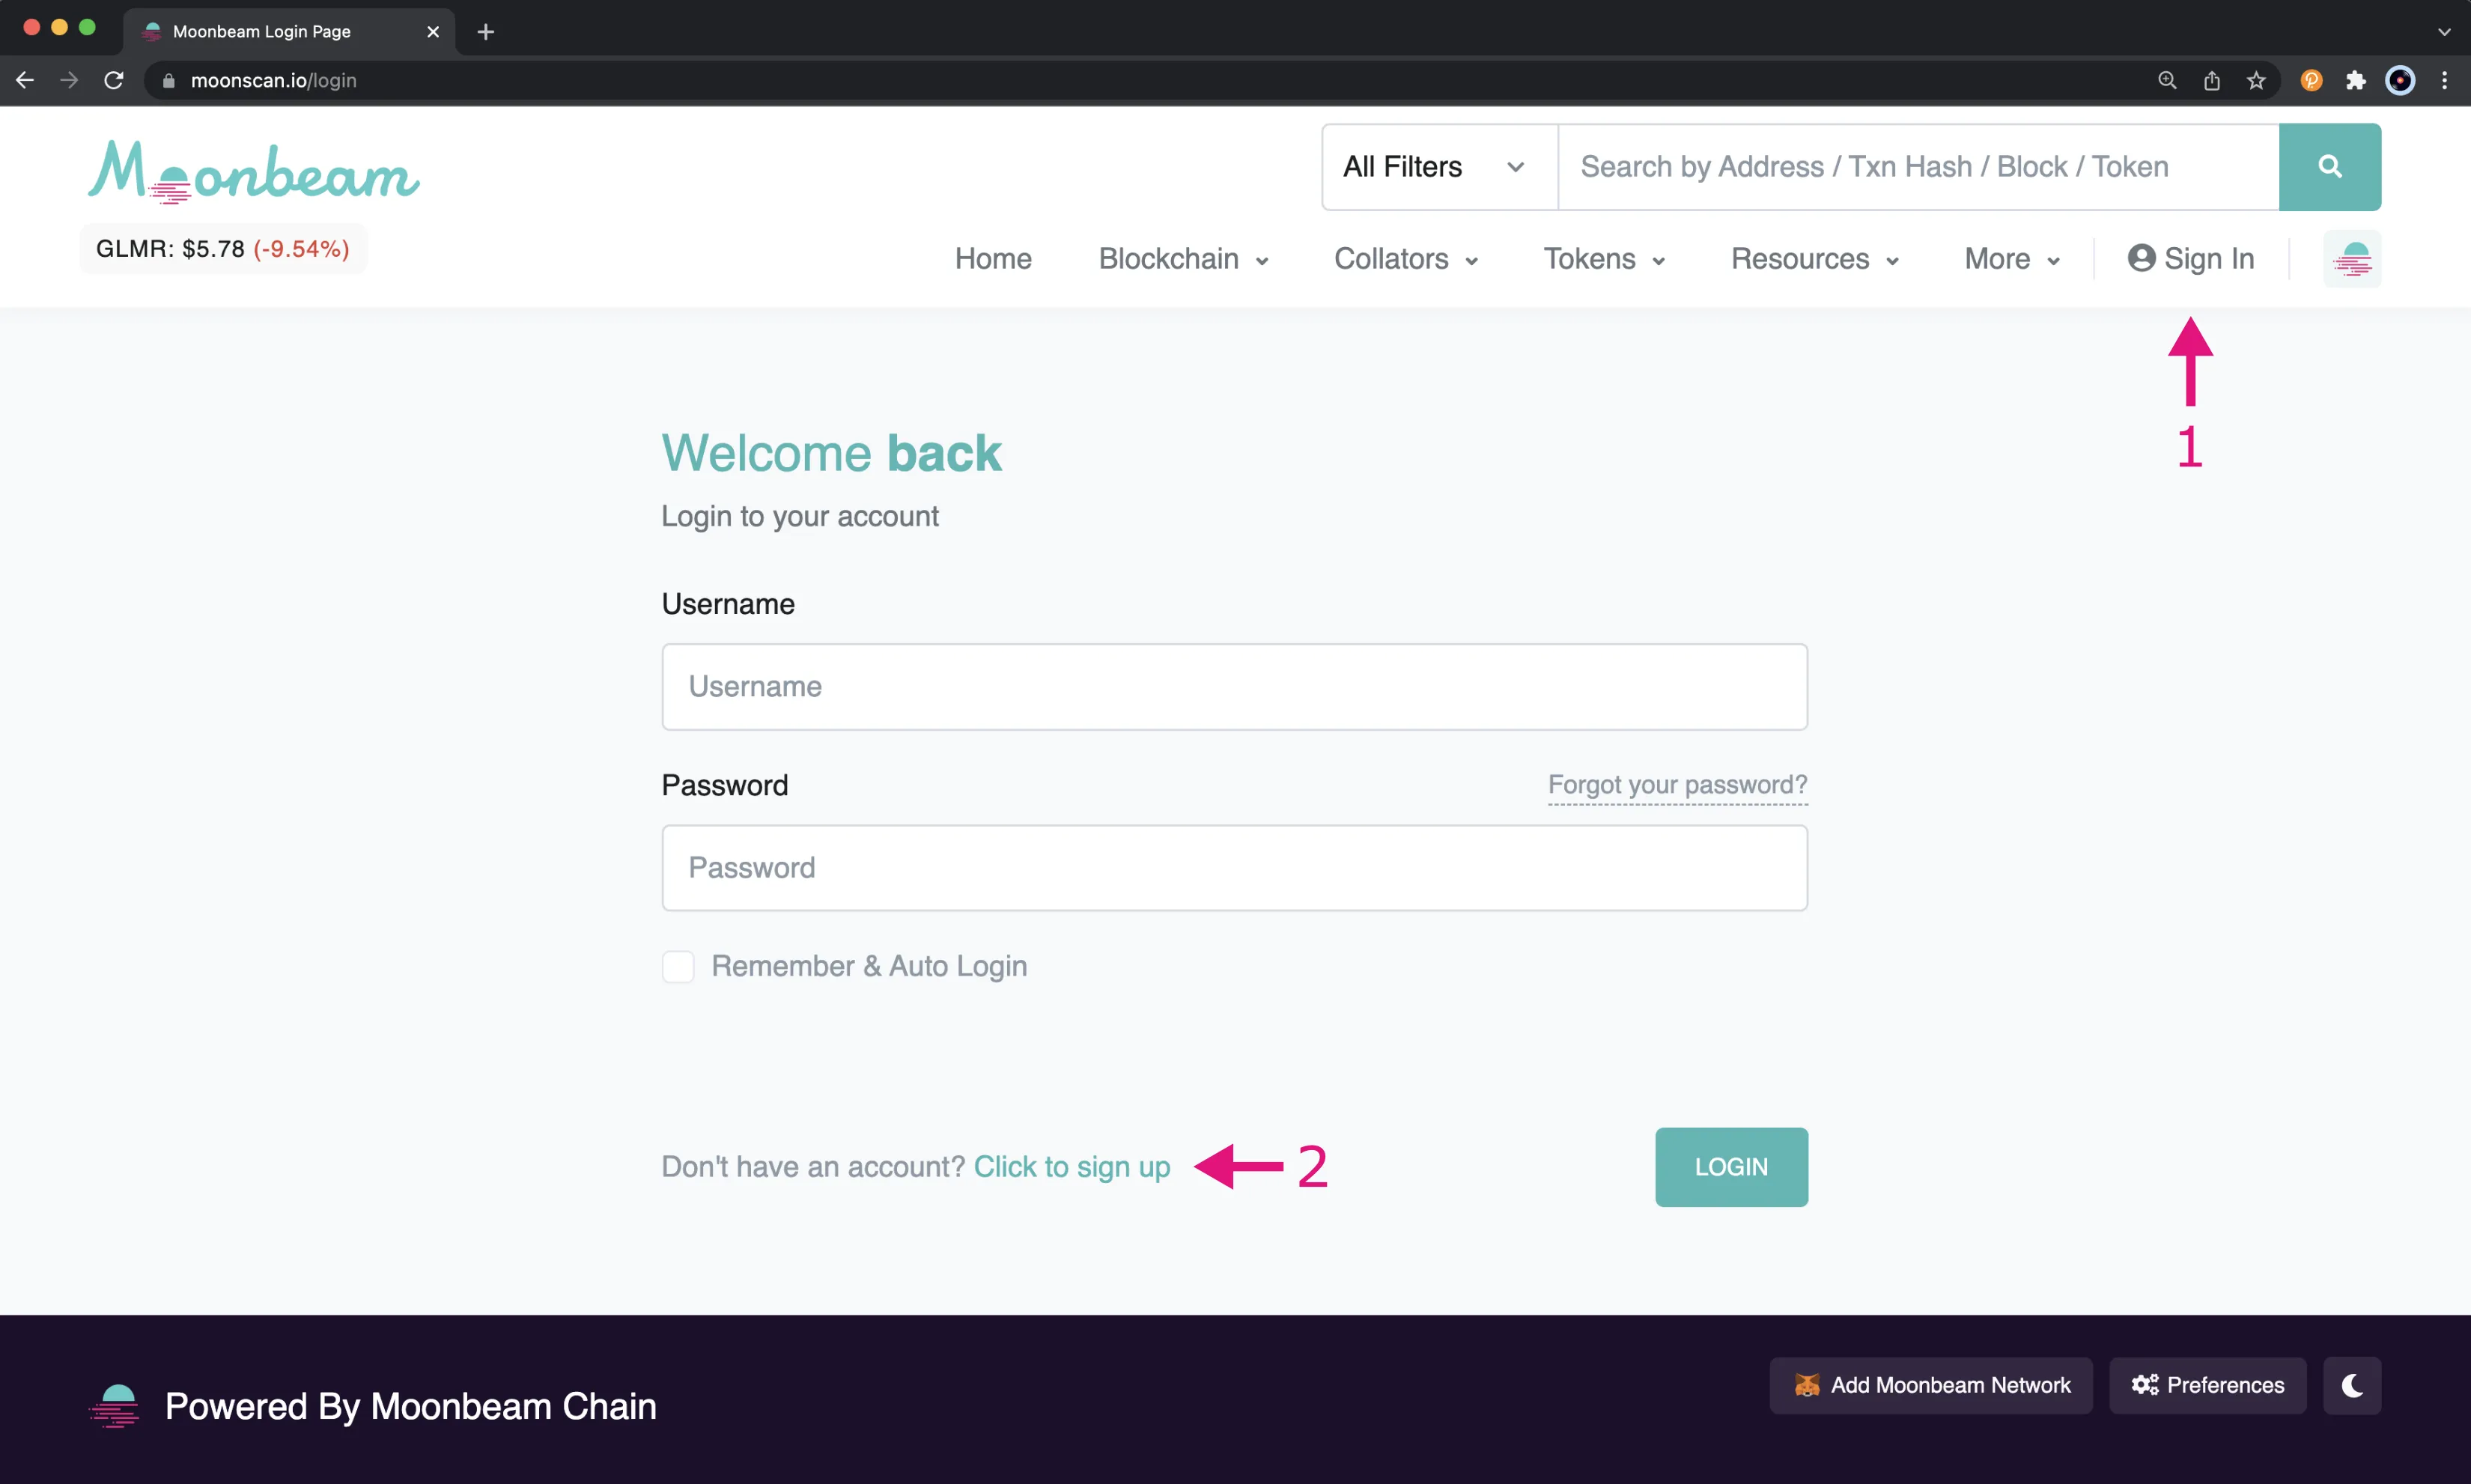
To generate a Moonscan API Key, you will need to sign up for an account. Depending on which network you want to verify a contract on, you'll have to make sure you create an API key from the correct network on Moonscan. For Moonbeam or Moonbase Alpha, you can navigate to the Moonbeam Moonscan. For Moonriver, you can head to the Moonriver Moonscan. To sign up for an account, you can take the following steps:
- Click Sign In
- Select Click to sign up and then register your new account
Once you have an account and are signed in, you will then be able to create an API key.
- Select API-KEYs from the left side menu
- To add a new key, click the + Add button
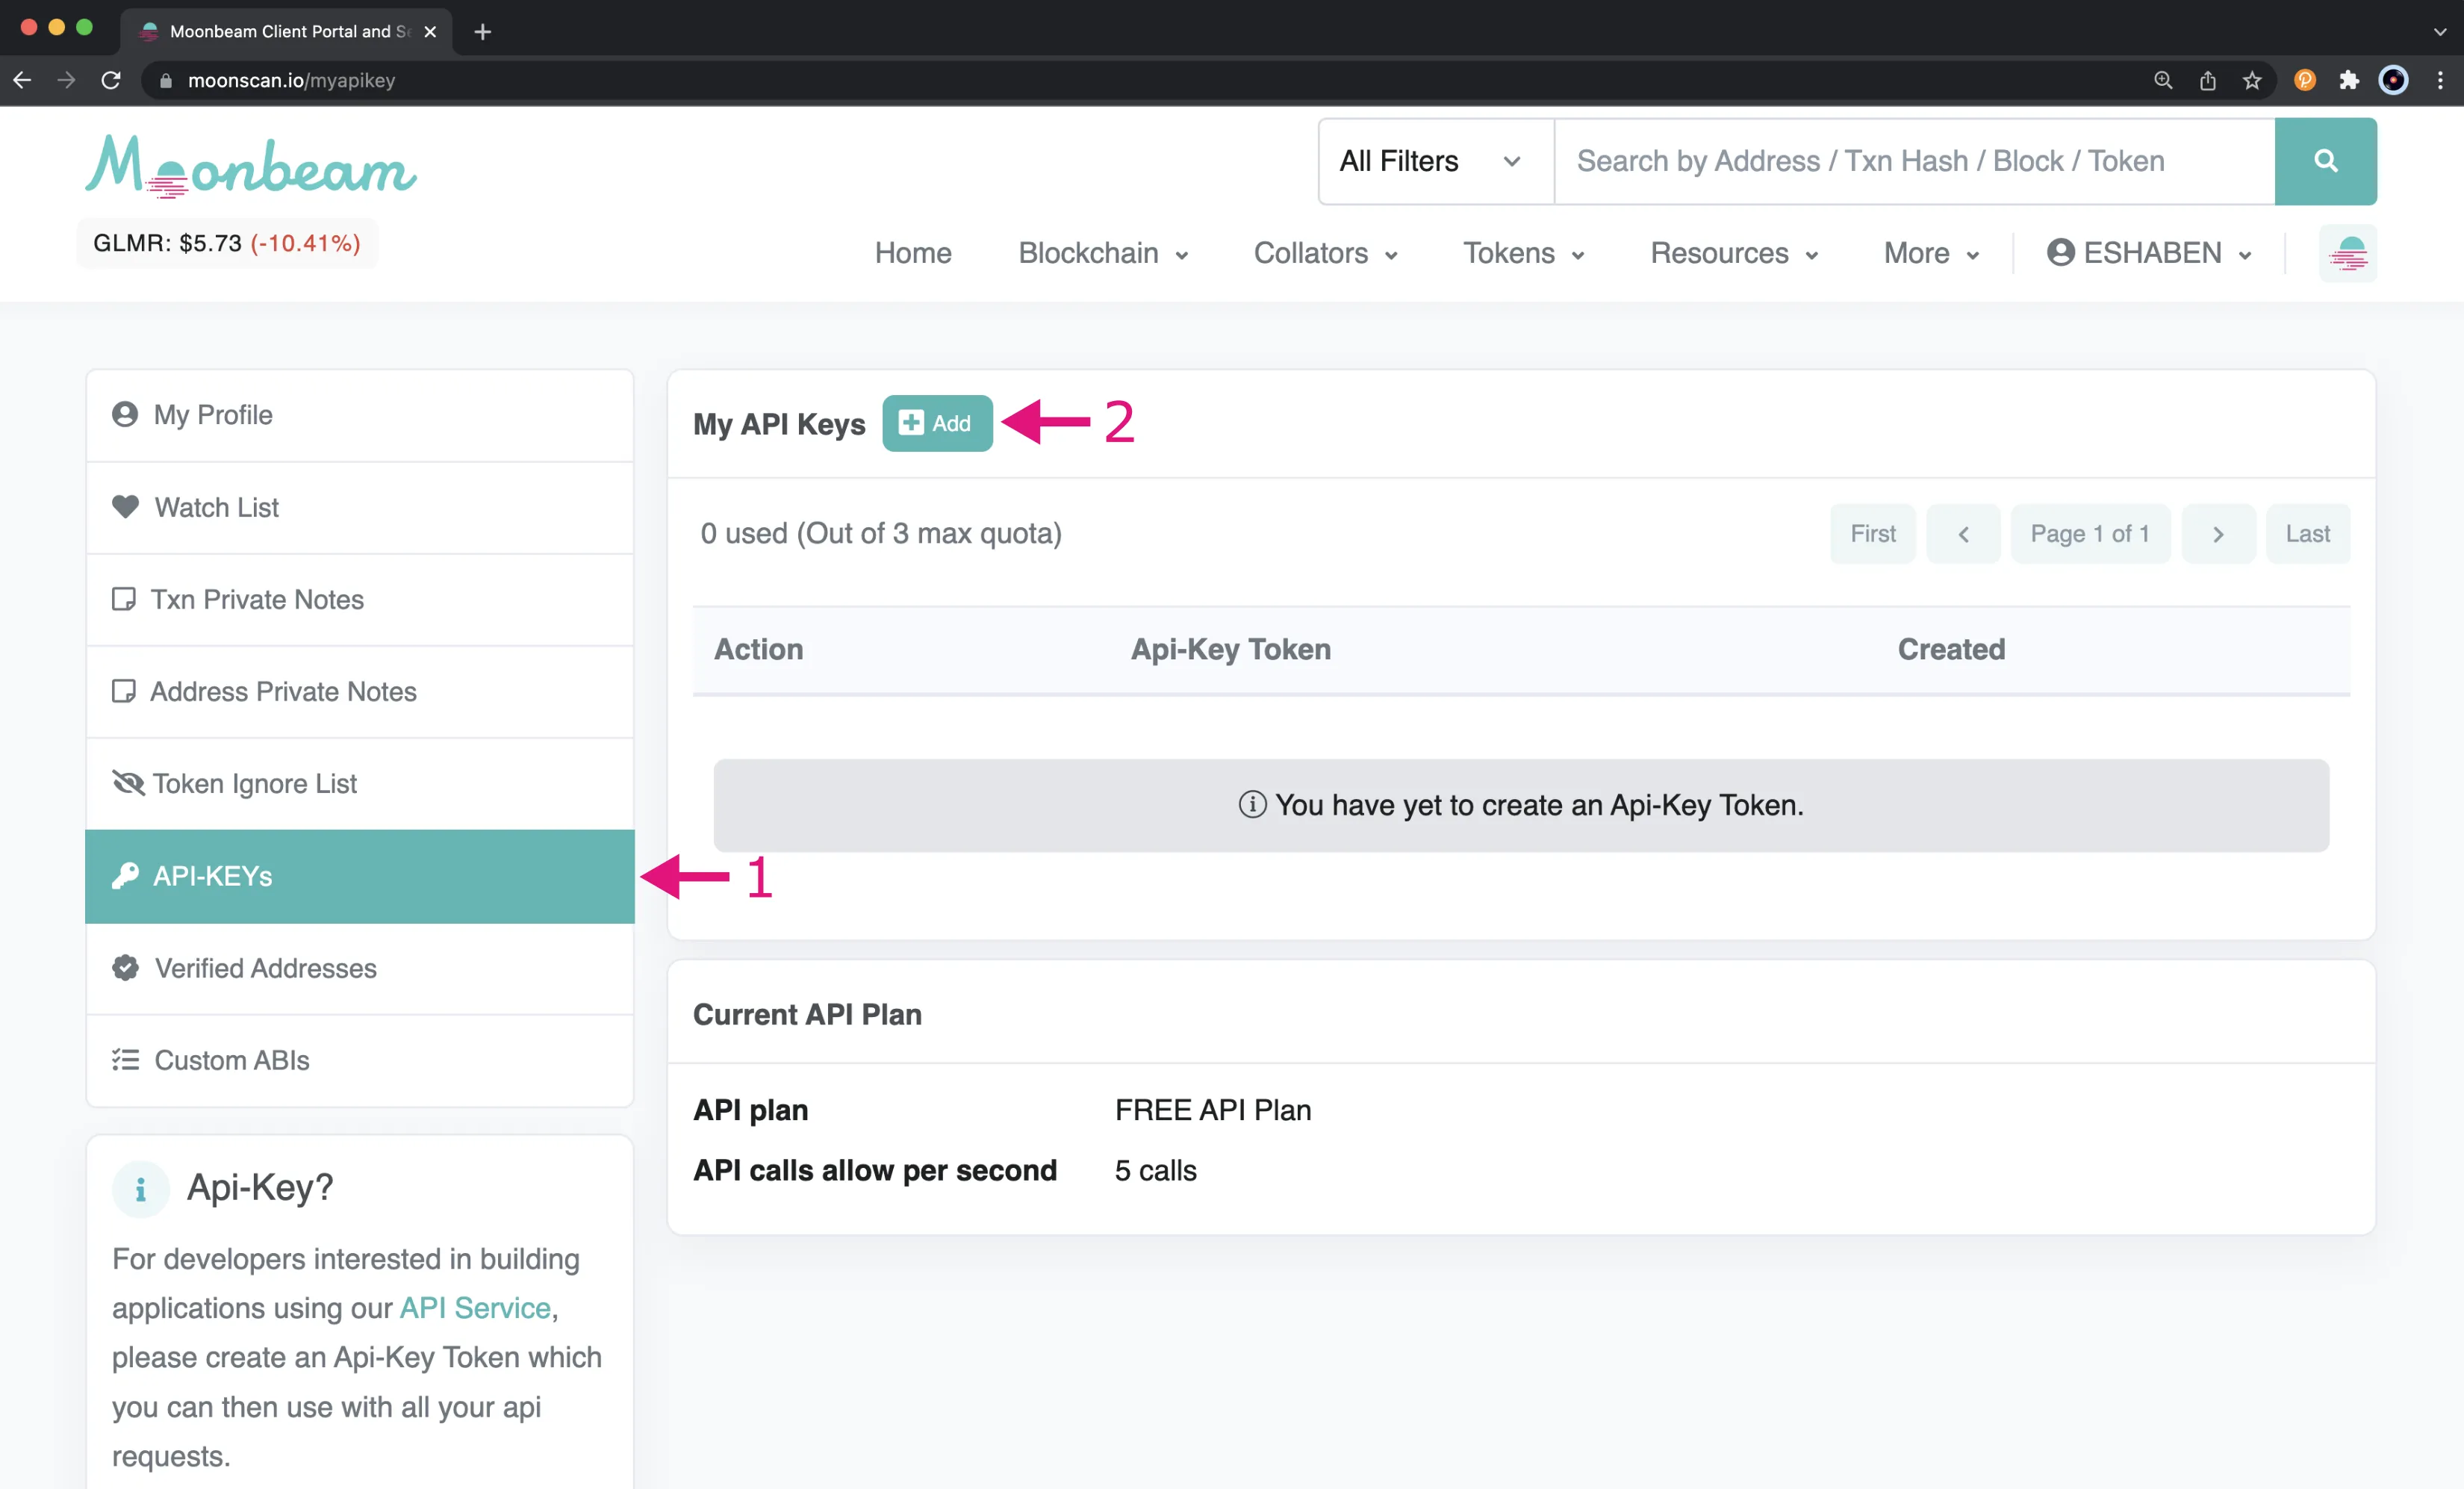
You will then be prompted to enter in an AppName for your API key and once you enter a name and click Continue it will appear in your list of API keys.
Using the Hardhat Etherscan Plugin
The example in this section of the guide will be based off of the Box.sol contract that was created in the Using Hardhat to Deploy To Moonbeam guide.
To get started with the Hardhat Etherscan plugin, you will need to first install the plugin library:
npm install --save-dev @nomicfoundation/hardhat-verify
You can add your Moonscan API key to the hardhat.config.js file. For this example, you'll need a Moonbeam Moonscan API key. If you want to verify a contract on Moonriver, you'll need a Moonriver Moonscan API key.
From within your Hardhat project, open your hardhat.config.js file. You'll need to import the hardhat-verify plugin, your Moonscan API key, and add the config for Etherscan:
require('@nomicfoundation/hardhat-verify');

module.exports = {
  networks: {
    moonbeam: { ... },
    moonriver: { ... },
    moonbaseAlpha: { ... }
  },
  etherscan: {
    apiKey: {
      moonbeam: 'INSERT_MOONSCAN_API_KEY', // Moonbeam Moonscan API Key
      moonriver: 'INSERT_MOONSCAN_API_KEY', // Moonriver Moonscan API Key
      moonbaseAlpha: 'INSERT_MOONSCAN_API_KEY', // Moonbeam Moonscan API Key
    },
  },
};
To verify the contract, you will run the verify command and pass in the address of the deployed contract and the network where it's deployed:
npx hardhat verify --network moonbase INSERT_CONTRACT_ADDRESS
In your terminal you should see the source code for your contract was successfully submitted for verification. If the verification was successful, you should see Successfully verified contract and there will be a link to the contract code on Moonscan for Moonbase Alpha.
Successfully submitted source code for contract contracts/Box.sol:Box at 0x5d73ecDB4652173b881893235B64F1a0BdE22dD6 for verification on the block explorer. Waiting for verification result...
Successfully verified contract Box on Etherscan. https://moonbase.moonscan.io/address/0x5d73ecDB4652173b881893235B64F1a0BdE22dD6#code
If you're verifying a contract that has constructor arguments, you'll need to run the above command and add the constructor arguments used to deploy the contract at the end of the command. For example:
npx hardhat verify --network moonbase INSERT_CONTRACT_ADDRESS INSERT_CONSTRUCTOR_ARGS
Please refer to the Hardhat Verify documentation for help with additional use cases such as:
- complex arguments
- libraries with undetectable addresses
- using multiple API keys
- using the
verifycommand programmatically - determining the correct constructor arguments
Using Foundry to Verify
The example in this section of the guide will use the MyToken.sol contract that was created in the Using Foundry to Deploy to Moonbeam guide.
In addition to the Foundry project, you will need a Moonbeam Moonscan API key. This API key can be used for both the Moonbeam and Moonbase Alpha networks. If you want to verify a contract on Moonriver, you'll need a Moonriver Moonscan API key.
If you have already deployed the example contract, you can verify it with the verify-contract command. Before you can verify the contract, you will need to ABI-encode the constructor arguments. To do so for the example contract, you can run the following command:
cast abi-encode "constructor(uint256)" 100
The result should be 0x0000000000000000000000000000000000000000000000000000000000000064. You can then verify the contract using the following command:
forge verify-contract --chain-id 1284 \
YOUR_CONTRACT_ADDRESS \
--constructor-args 0x0000000000000000000000000000000000000000000000000000000000000064 \
src/MyToken.sol:MyToken \
--etherscan-api-key INSERT_YOUR_MOONSCAN_API_KEY
forge verify-contract --chain-id 1285 \
YOUR_CONTRACT_ADDRESS \
--constructor-args 0x0000000000000000000000000000000000000000000000000000000000000064 \
src/MyToken.sol:MyToken \
--etherscan-api-key INSERT_YOUR_MOONSCAN_API_KEY
forge verify-contract --chain-id 1287 \
YOUR_CONTRACT_ADDRESS \
--constructor-args 0x0000000000000000000000000000000000000000000000000000000000000064 \
src/MyToken.sol:MyToken \
--etherscan-api-key INSERT_YOUR_MOONSCAN_API_KEY
Submitting verification for [src/MyToken. sol:MyToken] Ok("0×5A05EBOA18ee616bb5dac2C4D0a48991a83533d2" ) . Submitted contract for verification: Response:'OK' GUID:'f7iwagu9vspdrdfirbie1wp16cmuvfk3zvcsix9ey21t3a8ttt' URL: https: //moonbase.moonscan.io/address/0×5a05eb0a18ee616bb5dac2c4d0a48991a83533d2 Waiting for verification result... Contract successfully verified.
If you wanted to deploy the example contract and verify at the same time, then you would use the following command:
forge create --rpc-url INSERT_RPC_API_ENDPOINT \
--constructor-args 100 \
--etherscan-api-key INSERT_YOUR_MOONSCAN_API_KEY \
--verify --private-key YOUR_PRIVATE_KEY \
src/MyToken.sol:MyToken
forge create --rpc-url INSERT_RPC_API_ENDPOINT \
--constructor-args 100 \
--etherscan-api-key INSERT_YOUR_MOONSCAN_API_KEY \
--verify --private-key YOUR_PRIVATE_KEY \
src/MyToken.sol:MyToken
forge create --rpc-url https://rpc.api.moonbase.moonbeam.network \
--constructor-args 100 \
--etherscan-api-key INSERT_YOUR_MOONSCAN_API_KEY \
--verify --private-key YOUR_PRIVATE_KEY \
src/MyToken.sol:MyToken
Compiling... No files changed, compilation skipped Deployer: 0x0394c0EdFcCA370B20622721985B577850B0eb 75 Deployed to: 0d21b2653f61b5B5399A677D377D52D07C7668f67 Transaction hash: 0x80fff772b930f425ed3568f0b3d8844e5297691c78807c7b393c85910b7717 Starting contract verification... Waiting for etherscan to detect contract deployment...
Submitting verification for [src/MyToken.sol:MyToken]Ok("0x21b265361b5B5399A677D377D52D07C7668f67"). Submitted contract for verification: Response:'OK' GUID:'ebbliyrquc5itkavvhvmilanzu5rdqusikImgraanepjm8gpq' URL: https: //moonbase.moonscan.io/address/0x21b2653f61b55399a677d377d52d07c7668f67 Waiting for verification result... Contract successfully verified.
| Created: February 15, 2022