Verify Smart Contracts using Block Explorers
Introduction
Verifying smart contracts on a block explorer is a great way to improve the transparency and security of deployed smart contracts on Moonbeam. Users can directly view the source code for verified smart contracts, and for some block explorers, they can also directly interact with the contract's public methods through the block explorer's interface.
This page will outline the steps for verifying smart contracts on Moonbeam networks through block explorers.
Deploying the Contract
In order to verify a smart contract on a block explorer, the contract must first be deployed on the target network. This tutorial will be about deploying the smart contract to Moonbase Alpha, but it can be adapted for Moonbeam or Moonriver.
You can check out this page for a tutorial on deploying smart contracts using Ethereum libraries on Moonbeam. You may also use a developer tool such as Remix, Hardhat, or another tool if preferred, to deploy the smart contract to Moonbeam.
This tutorial will use the same contract as the above deployment tutorial for the contract verification example.
The contract used is a simple incrementer, arbitrarily named Incrementer.sol. The Solidity code is the following:
// SPDX-License-Identifier: MIT

pragma solidity ^0.8.0;

contract Incrementer {
    uint256 public number;

    constructor(uint256 _initialNumber) {
        number = _initialNumber;
    }

    function increment(uint256 _value) public {
        number = number + _value;
    }

    function reset() public {
        number = 0;
    }
}
Collecting Information for Contract Verification
You will need to collect some information related to the contract's compiler and deployment in order to verify it successfully.
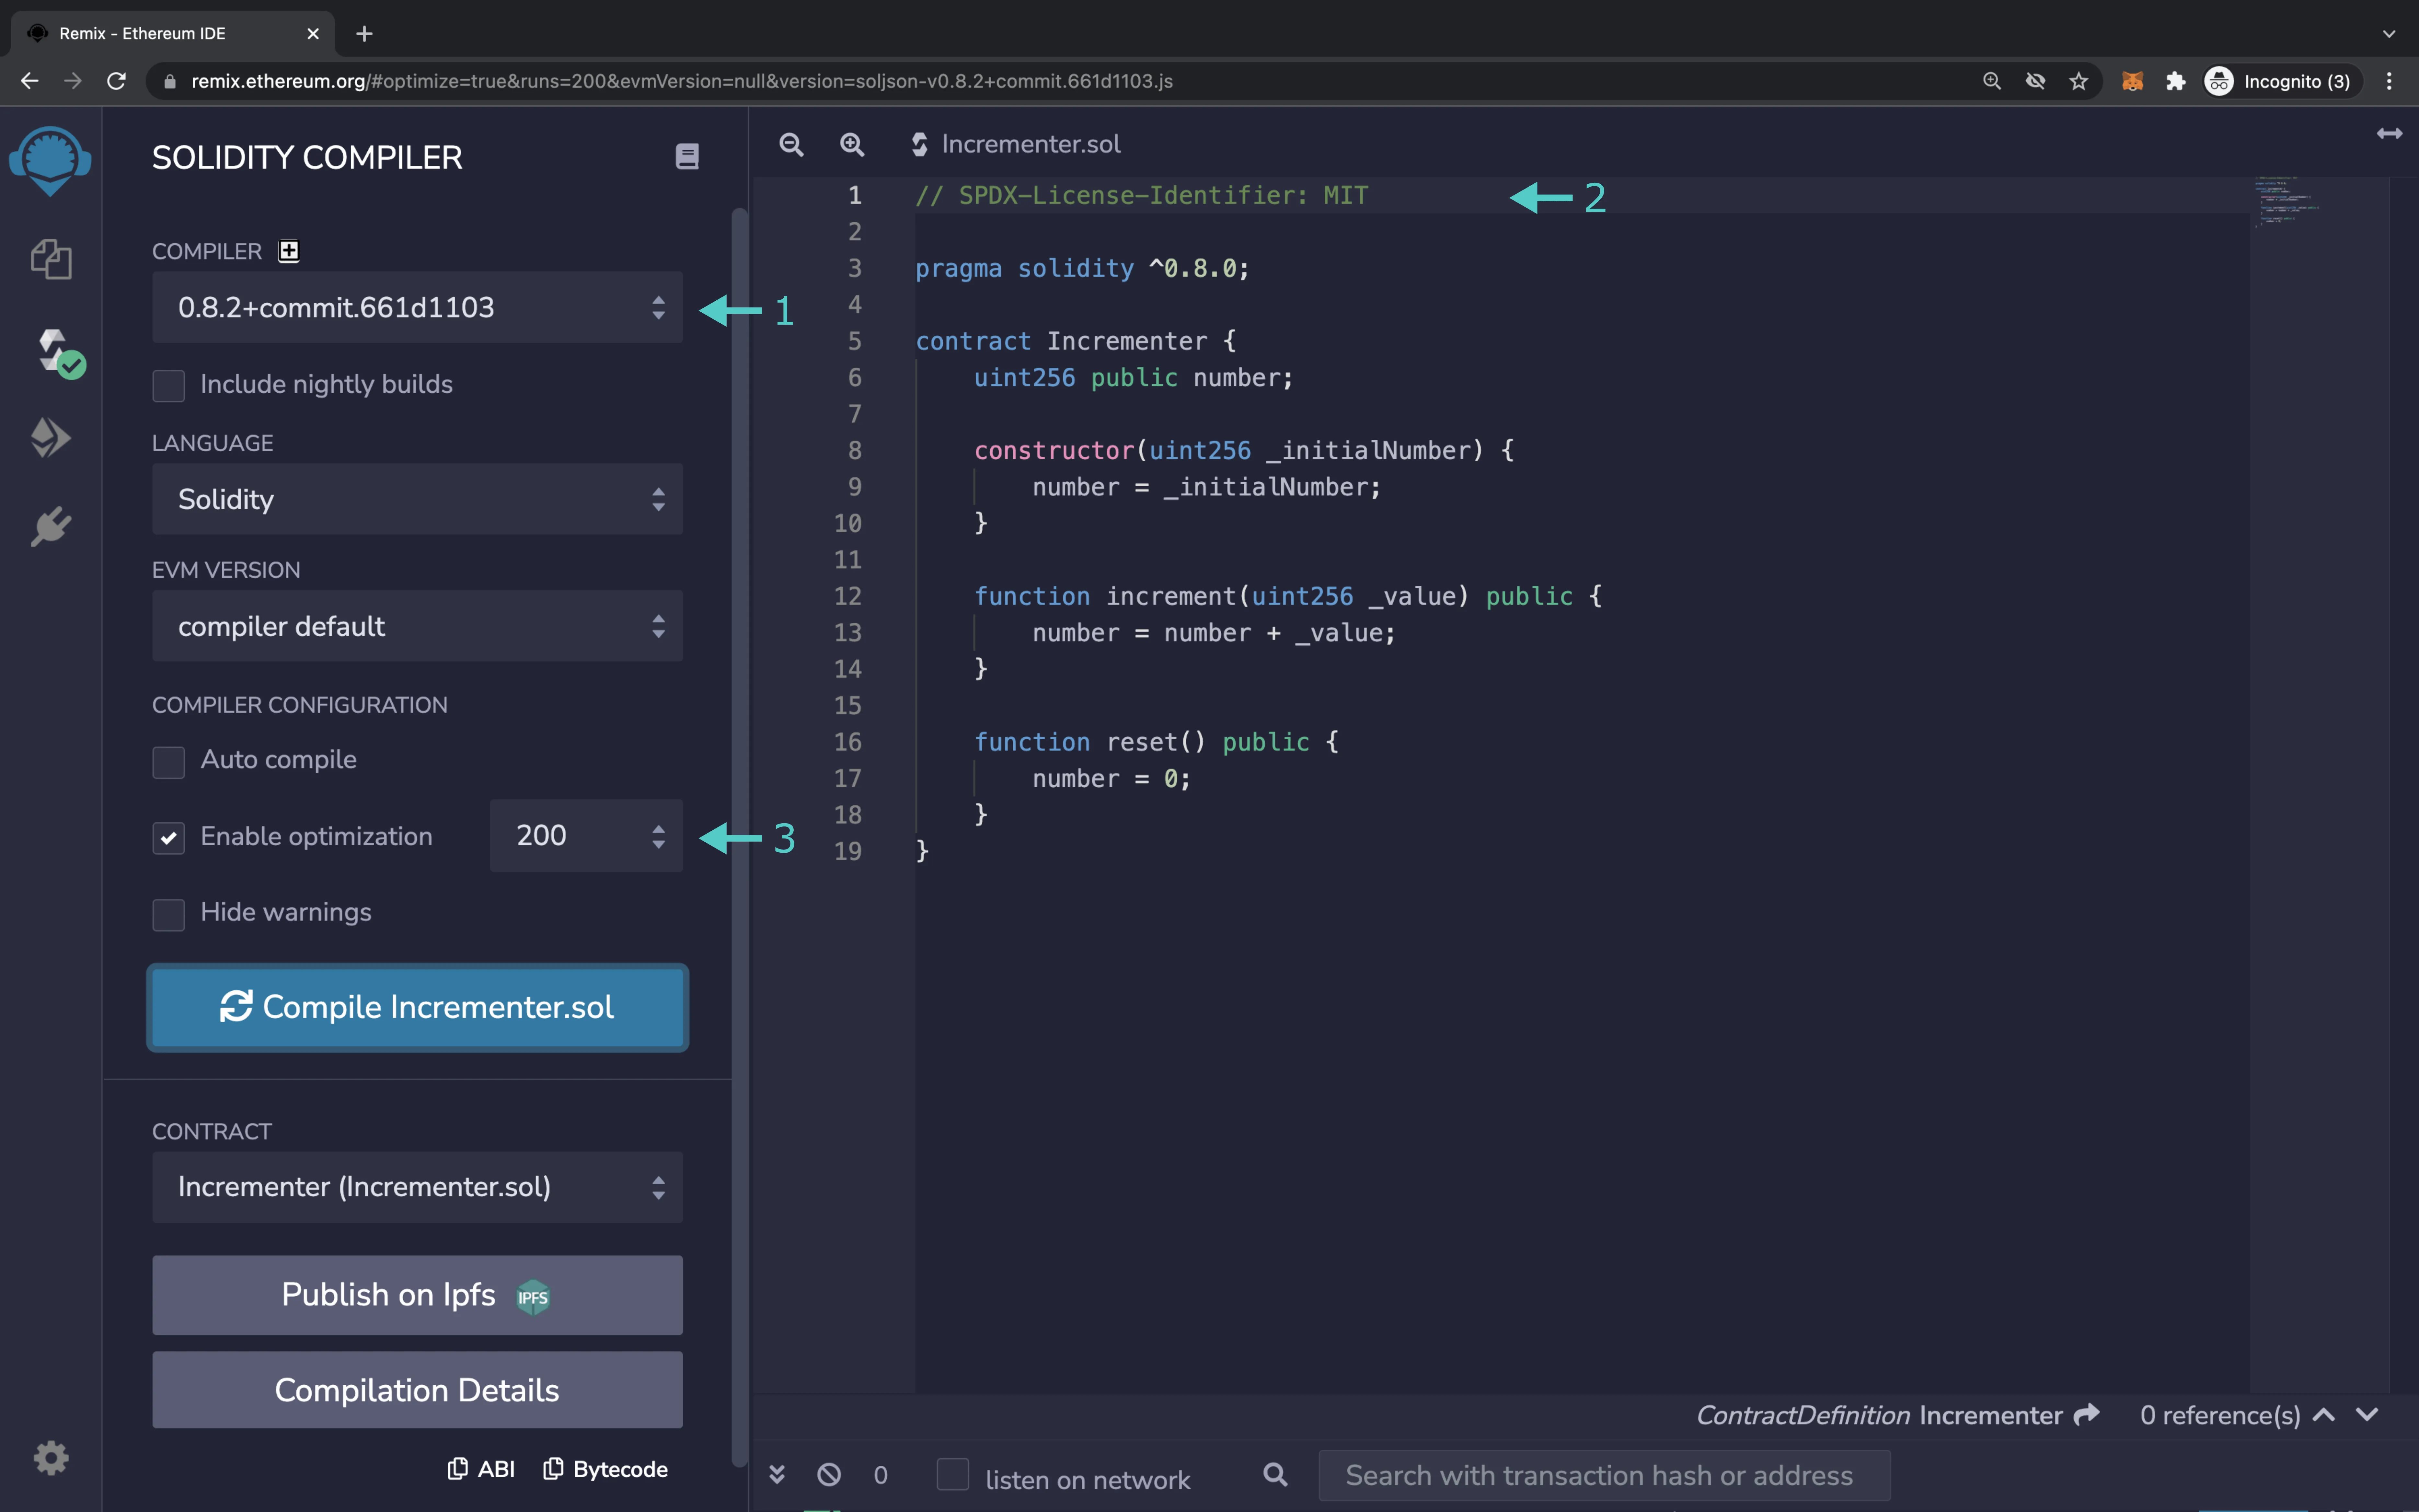
- Take note of the Solidity compiler version used to compile and deploy the contract. The Solidity compiler version can usually be selected or specified in the deployment tool used
-
Take note of any SPDX license identifier used at the beginning of the Solidity source file (this example uses an MIT license):
// SPDX-License-Identifier: MIT -
(Optional) If optimization is enabled during compilation, take note of the value of the optimization runs parameter
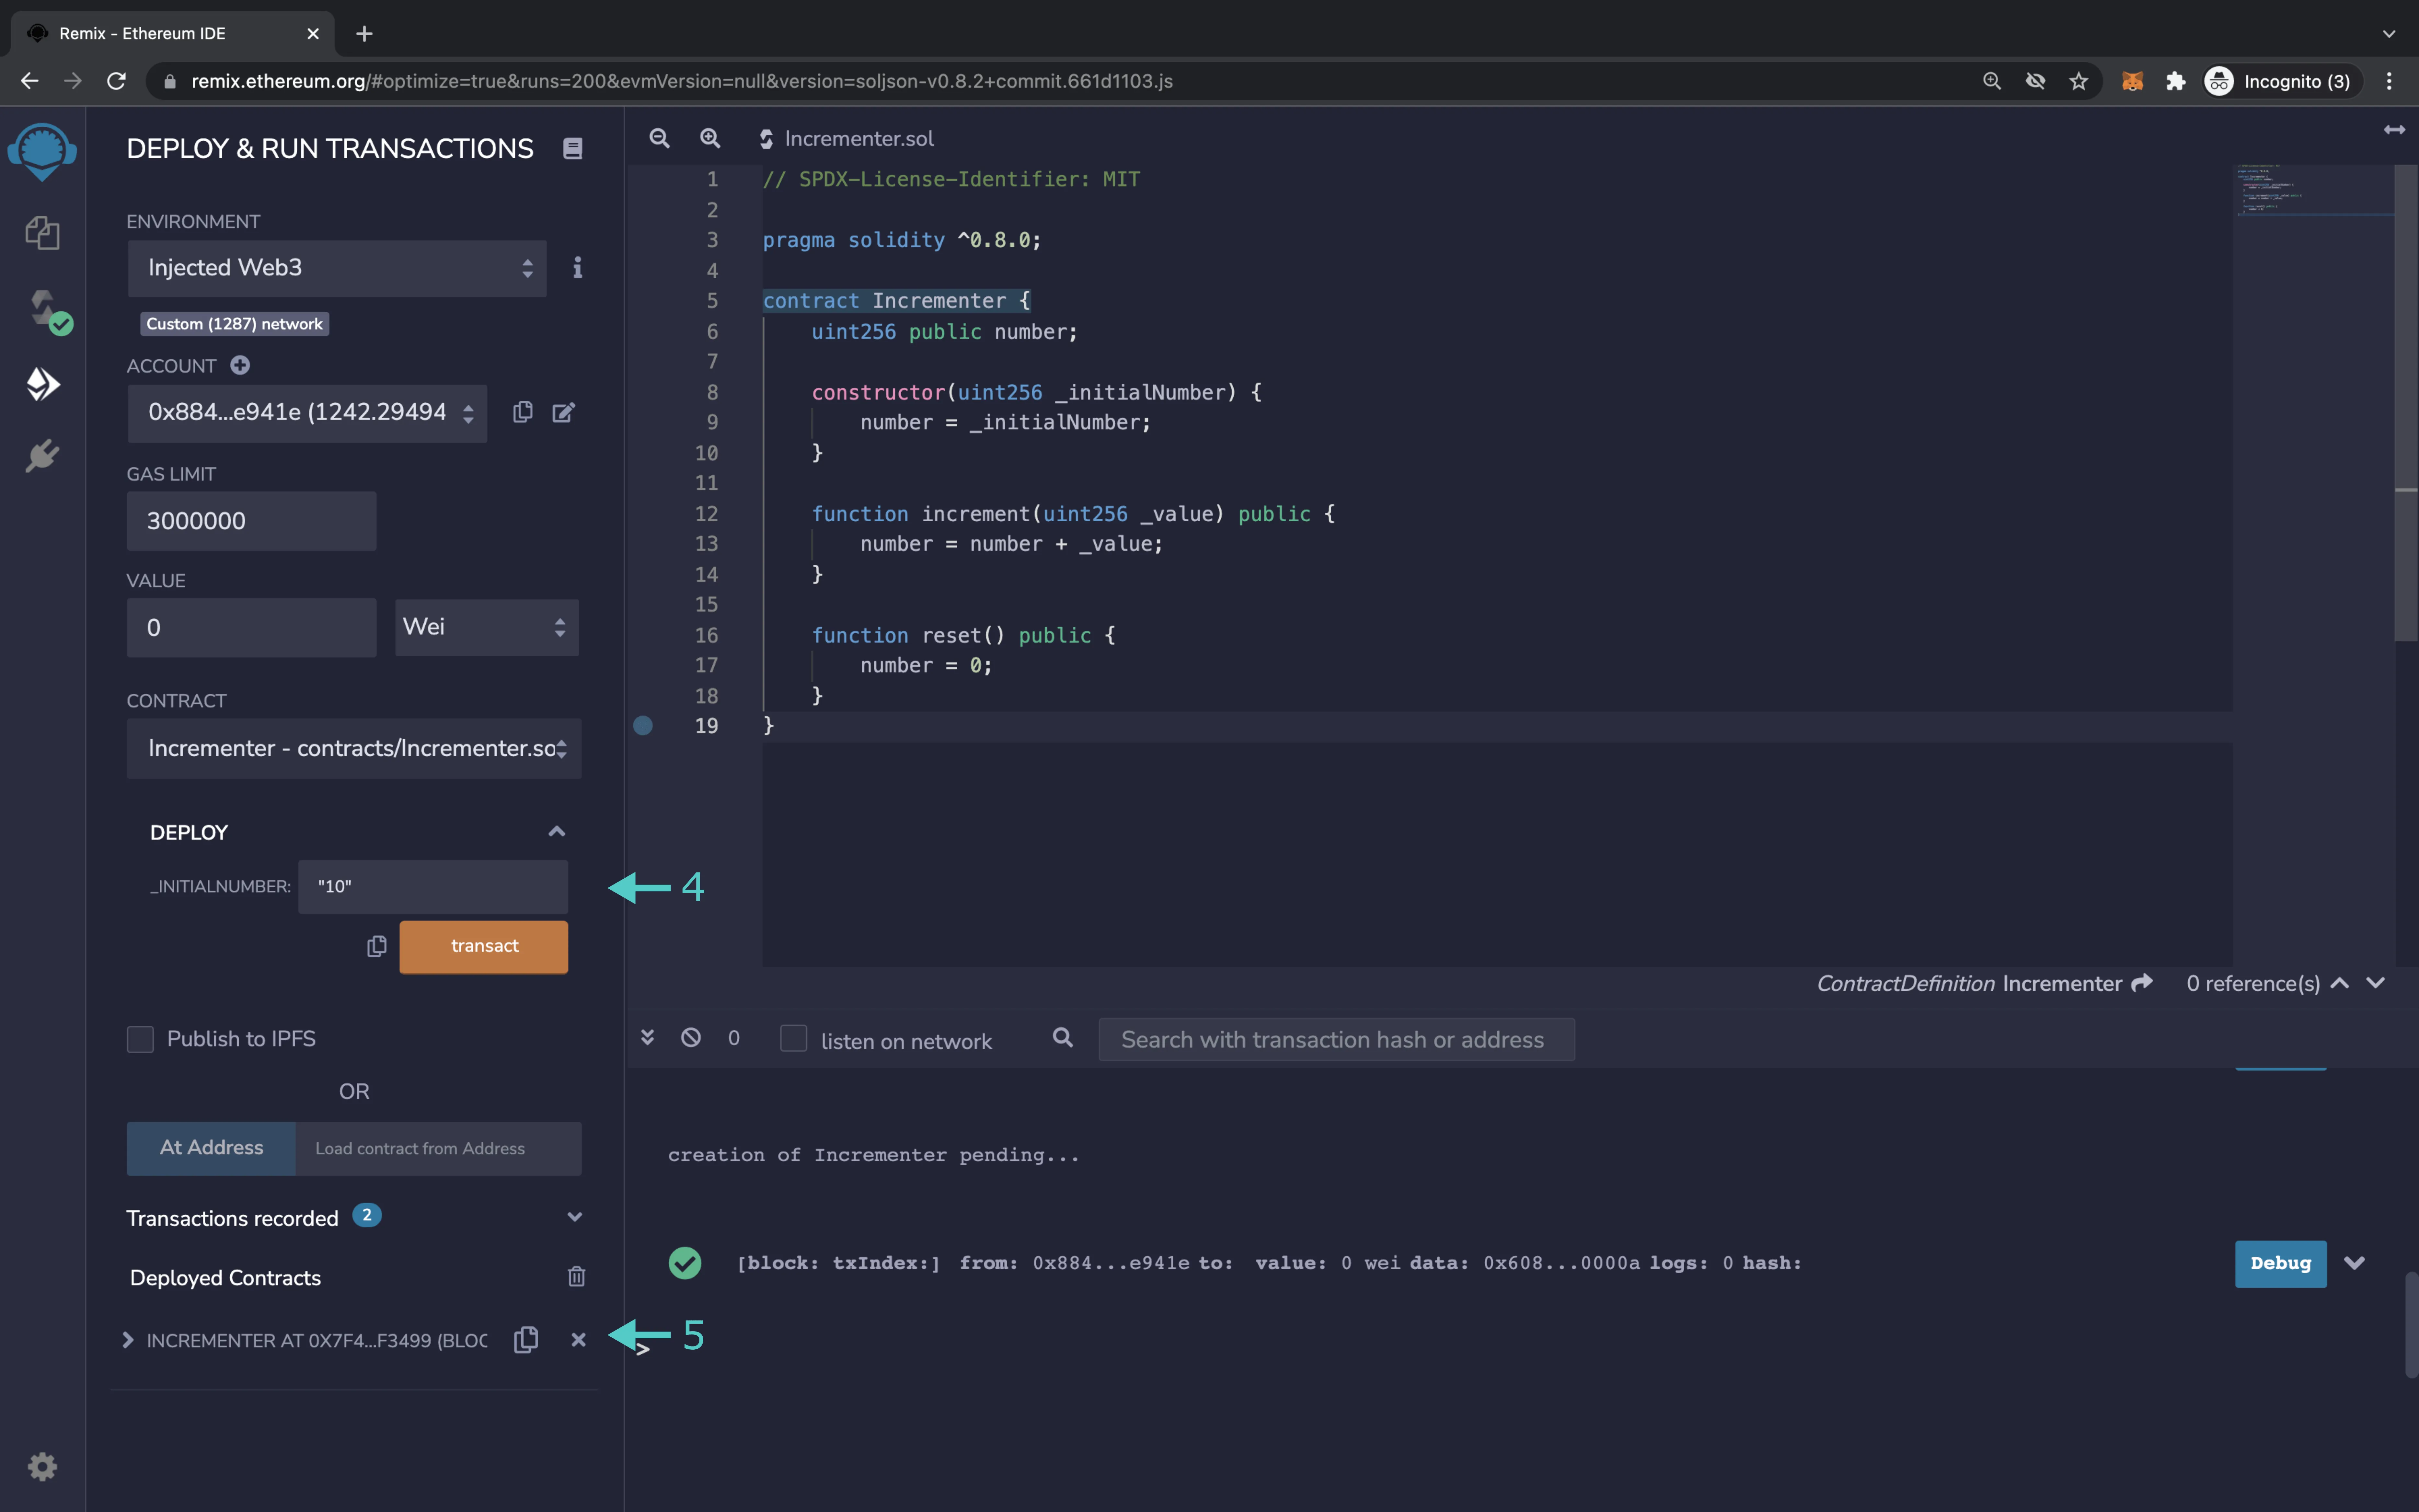
- (Optional) If the contract constructor method accepts arguments, take note of the ABI-encoded form of the constructor arguments
- After deployment, take note of the deployed contract address of the smart contract. The deployment address of the contract can be found either in the console output if using a command-line-based tool such as Hardhat, or an Ethereum library, or it can be copied from the GUI in tools such as Remix IDE
Verify the Contract
The next step will be verifying the smart contract in an EVM-compatible explorer for the Moonbeam network that you deployed to.
Moonscan
Take the following steps to verify the contract on Moonscan:
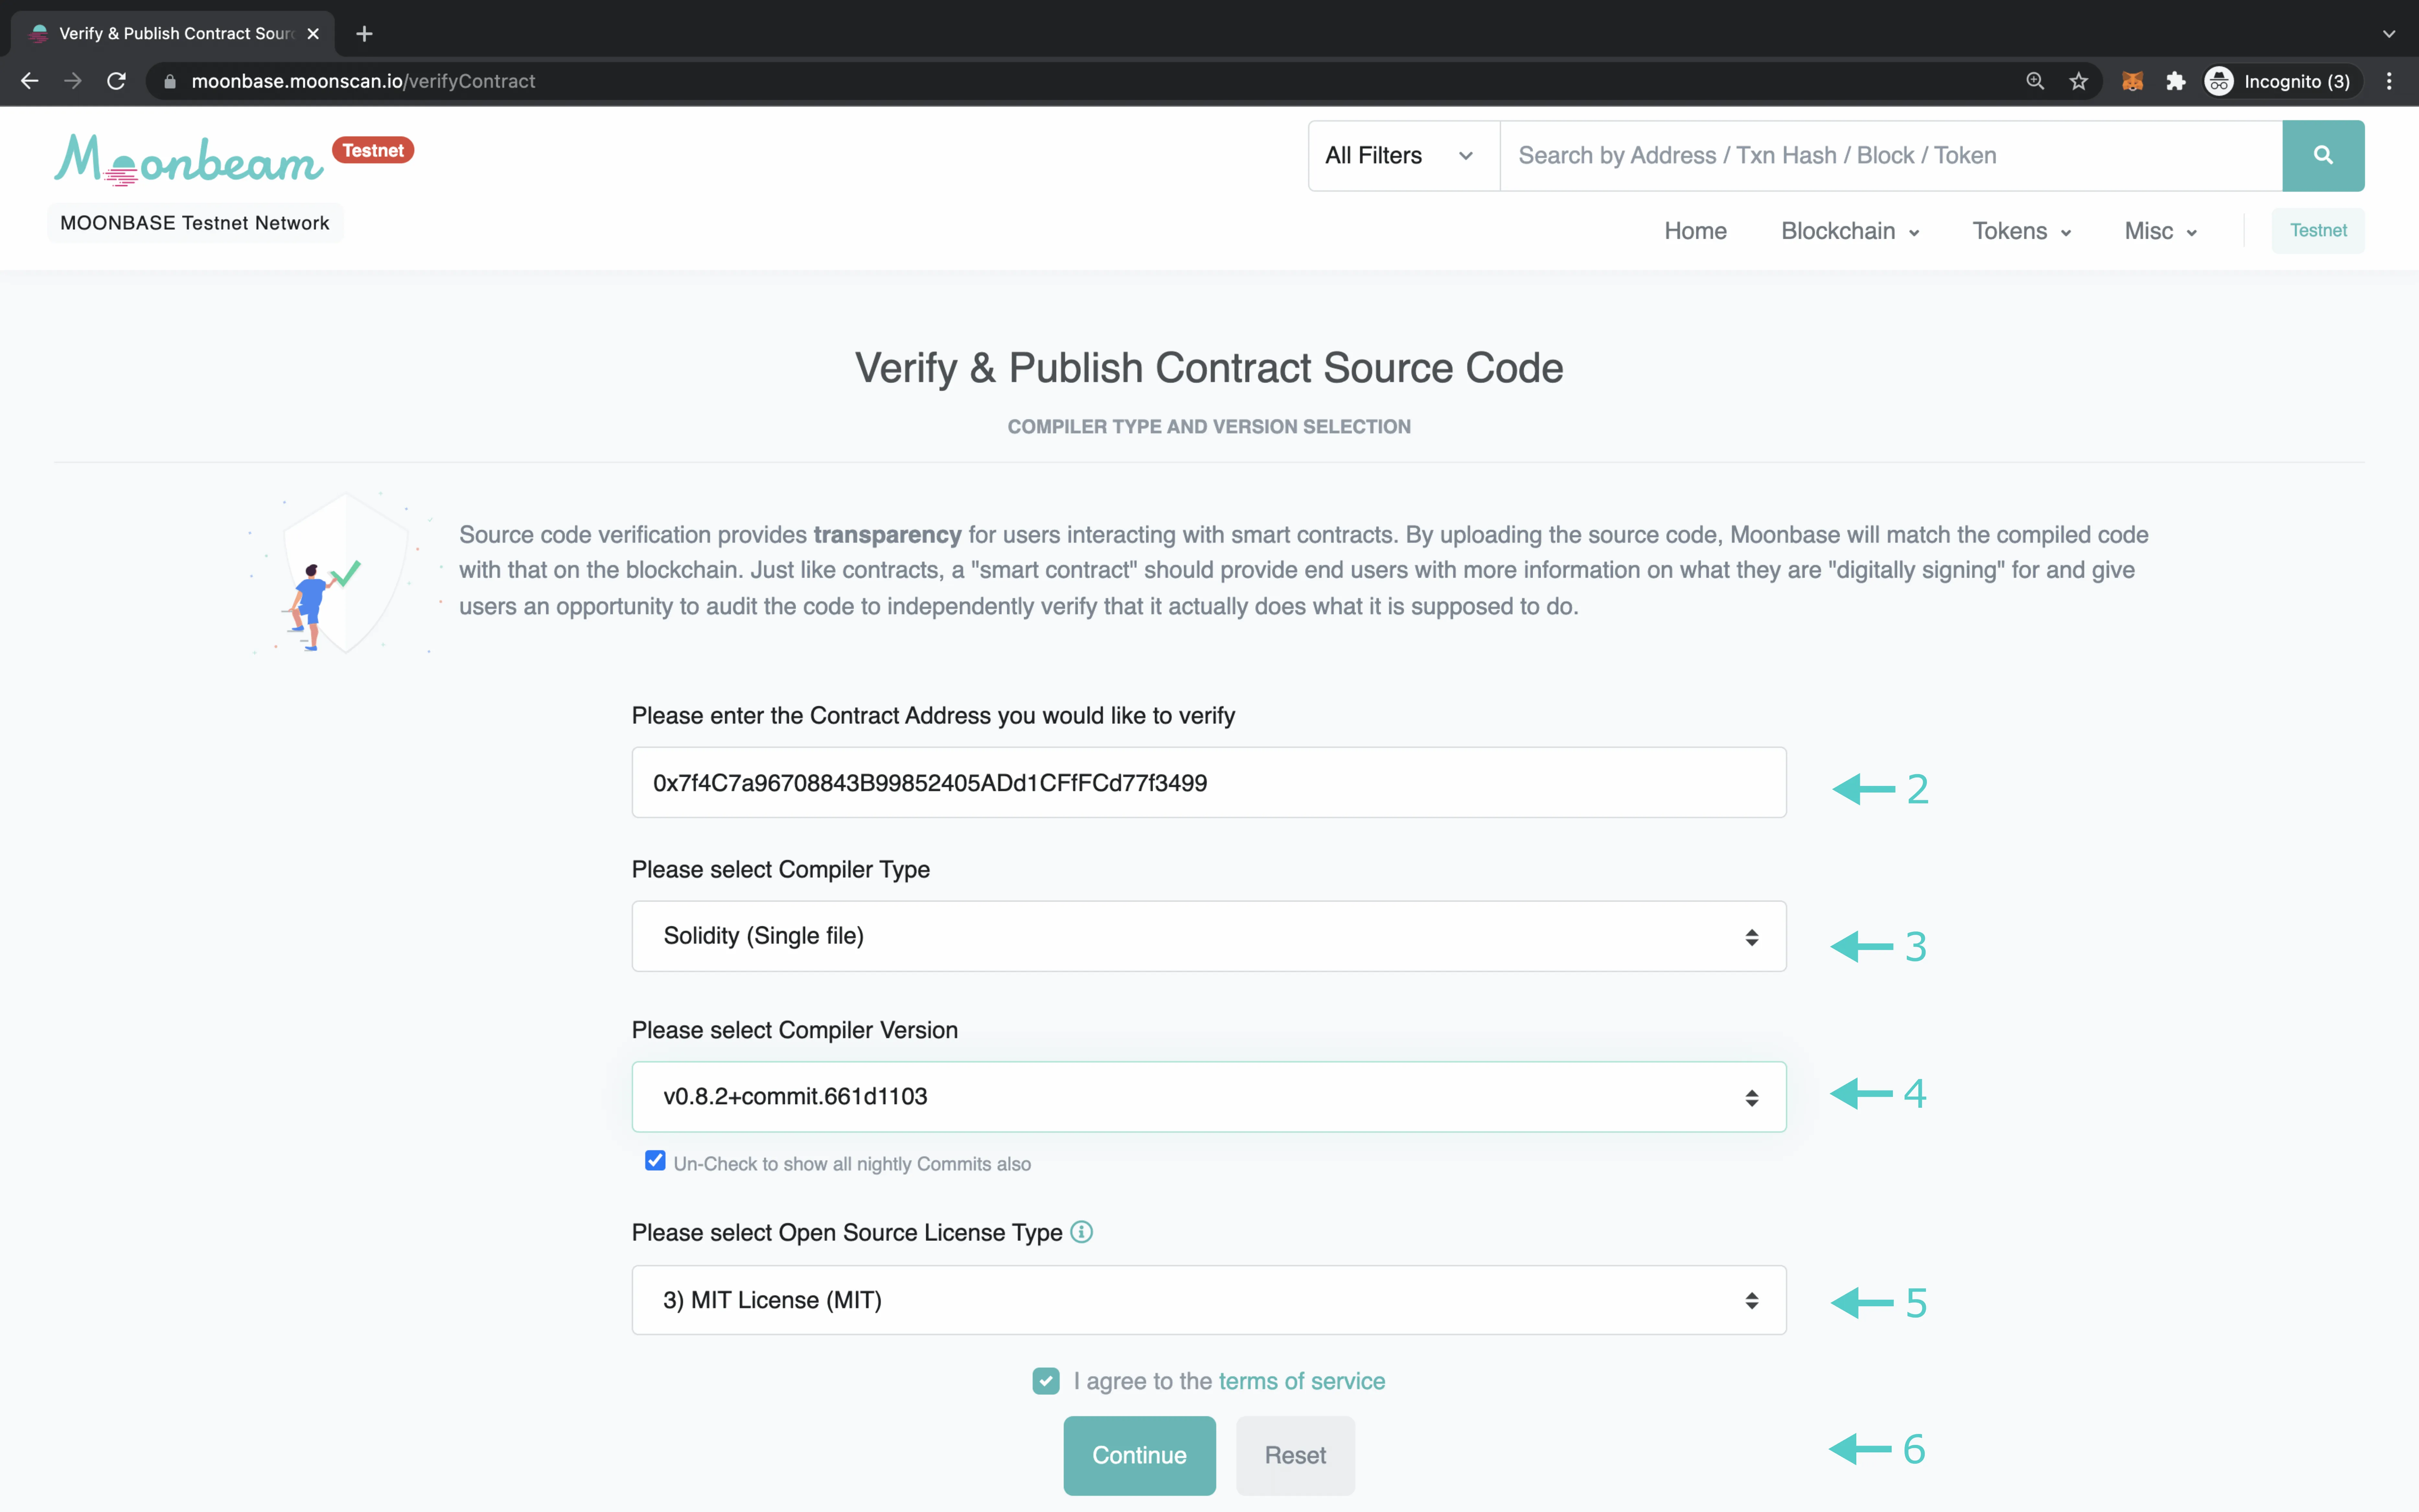
- Go to the Verify & Publish Contract Source Code page of Moonscan
- Fill in the contract's deployed address in the first field, including the
0xprefix - Select the compiler type. For the current
Incrementer.solexample, select Solidity (Single file) - After selecting the compiler type, select the compiler version used to compile the contract. If the compiler version used was a nightly commit, uncheck the box under the field to select the nightly version
- Select the open-source license used. For the current
Incrementer.solexample, select the option MIT License (MIT). If there was none used, select No License (None) - Click the Continue button at the bottom of the form to continue on to the next page
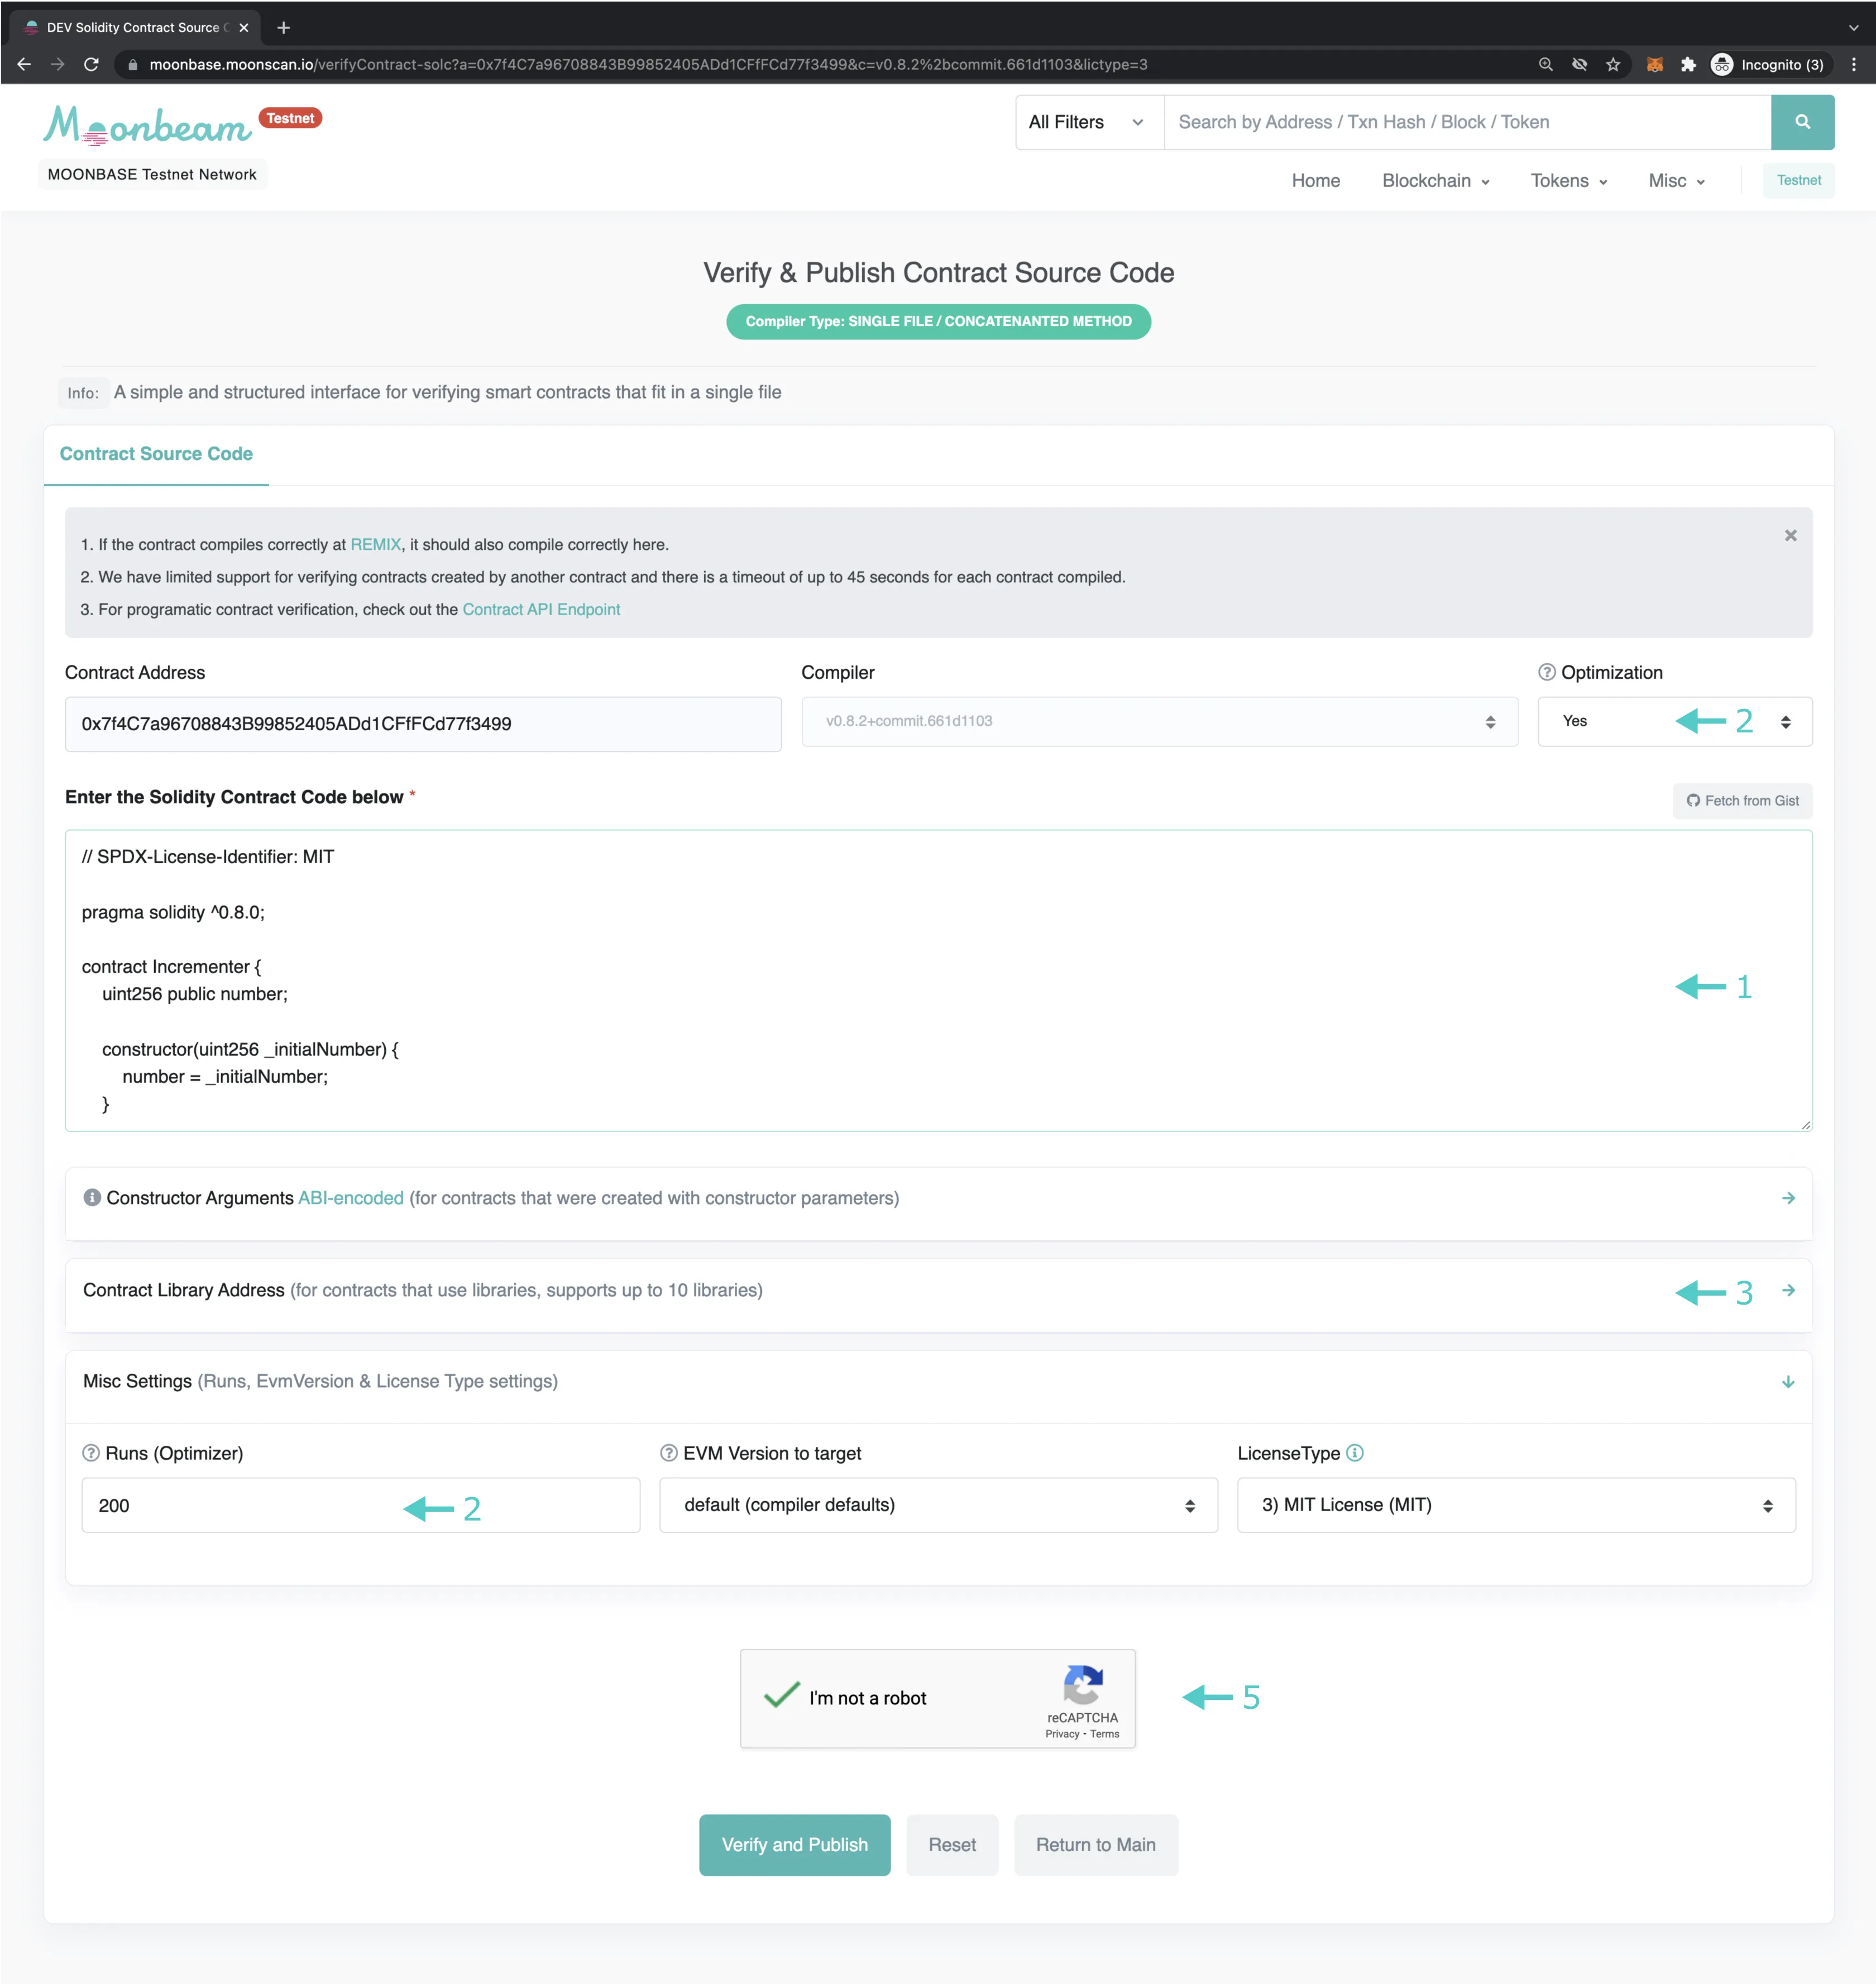
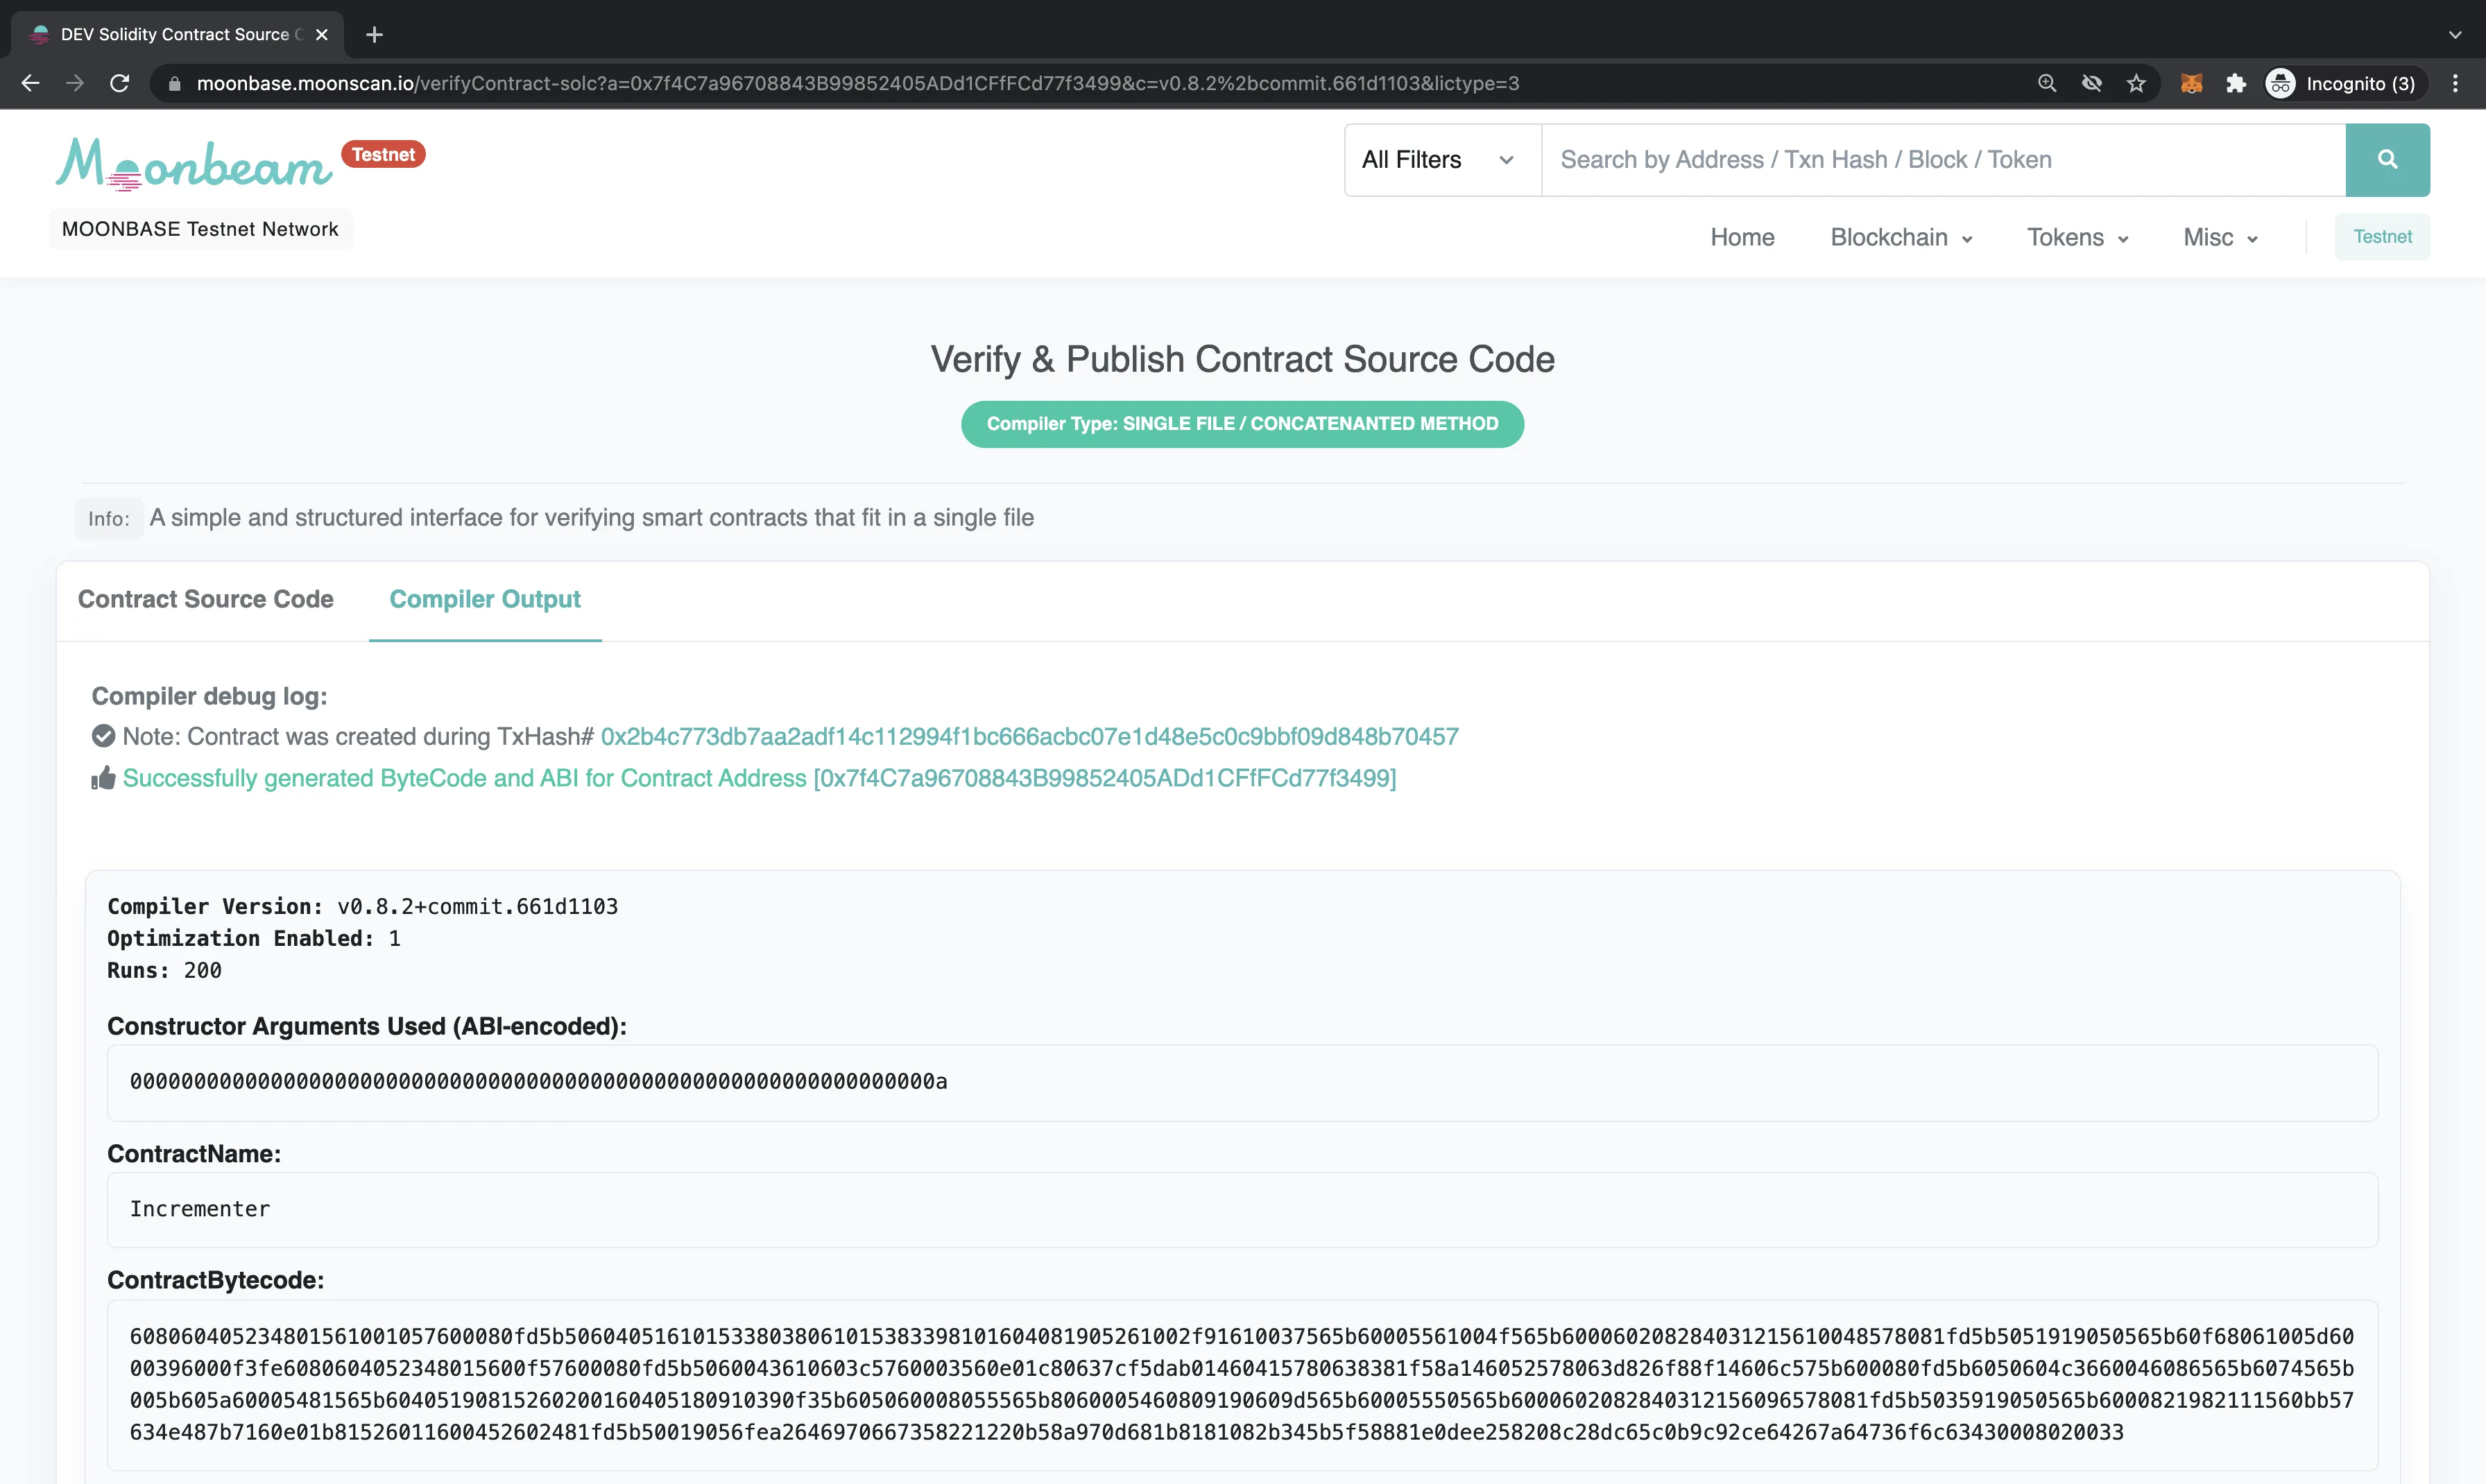
On the second page, the Contract Address, Compiler, and Constructor Arguments fields should be prefilled. Fill in the rest of the information:
- Copy and paste the entirety of the contract's content into the text field labeled as such
- (Optional) Select Yes for Optimization if it was enabled during compilation, and fill in the number of runs under Misc Settings/Runs(Optimizer)
- (Optional) Add contract libraries and their addresses, if any were used in the contract
- (Optional) Check any other optional fields that may apply to your contract, and fill them out accordingly
- Click on the CAPTCHA at the bottom and the Verify and Publish button to confirm and begin verification
After a short wait, the result of verification will be displayed in the browser, and a success result page will display the contract's ABI-encoded constructor arguments, the contract name, bytecode, and ABI.
Smart Contract Flattening
For verifying smart contracts that are made up of multiple files, the process is slightly different and requires some pre-processing to combine all the dependencies of the target smart contract into a single Solidity file.
This pre-processing is usually referred to as smart contract flattening. There are a number of tools that can be used to flatten a multi-part smart contract into a single Solidity file, such as Hardhat's Flatten task. Please refer to the respective smart contract flattening tool's documentation for more detailed instructions on its usage.
After flattening the multi-part smart contract, it can be verified using the new flattened Solidity file on a block explorer in the same way that a single-file smart contract is verified, as described in this tutorial.
Verify Multi-Part Smart Contract on Moonscan
For verifying on Moonscan, there is a built-in feature to process multi-part smart contracts.
Select Solidity (Multi-part files) under Compiler Type (step 3 of the above example). Then, on the next page, select and upload all the different Solidity files that the contract consists of, including their nested dependency contract files.
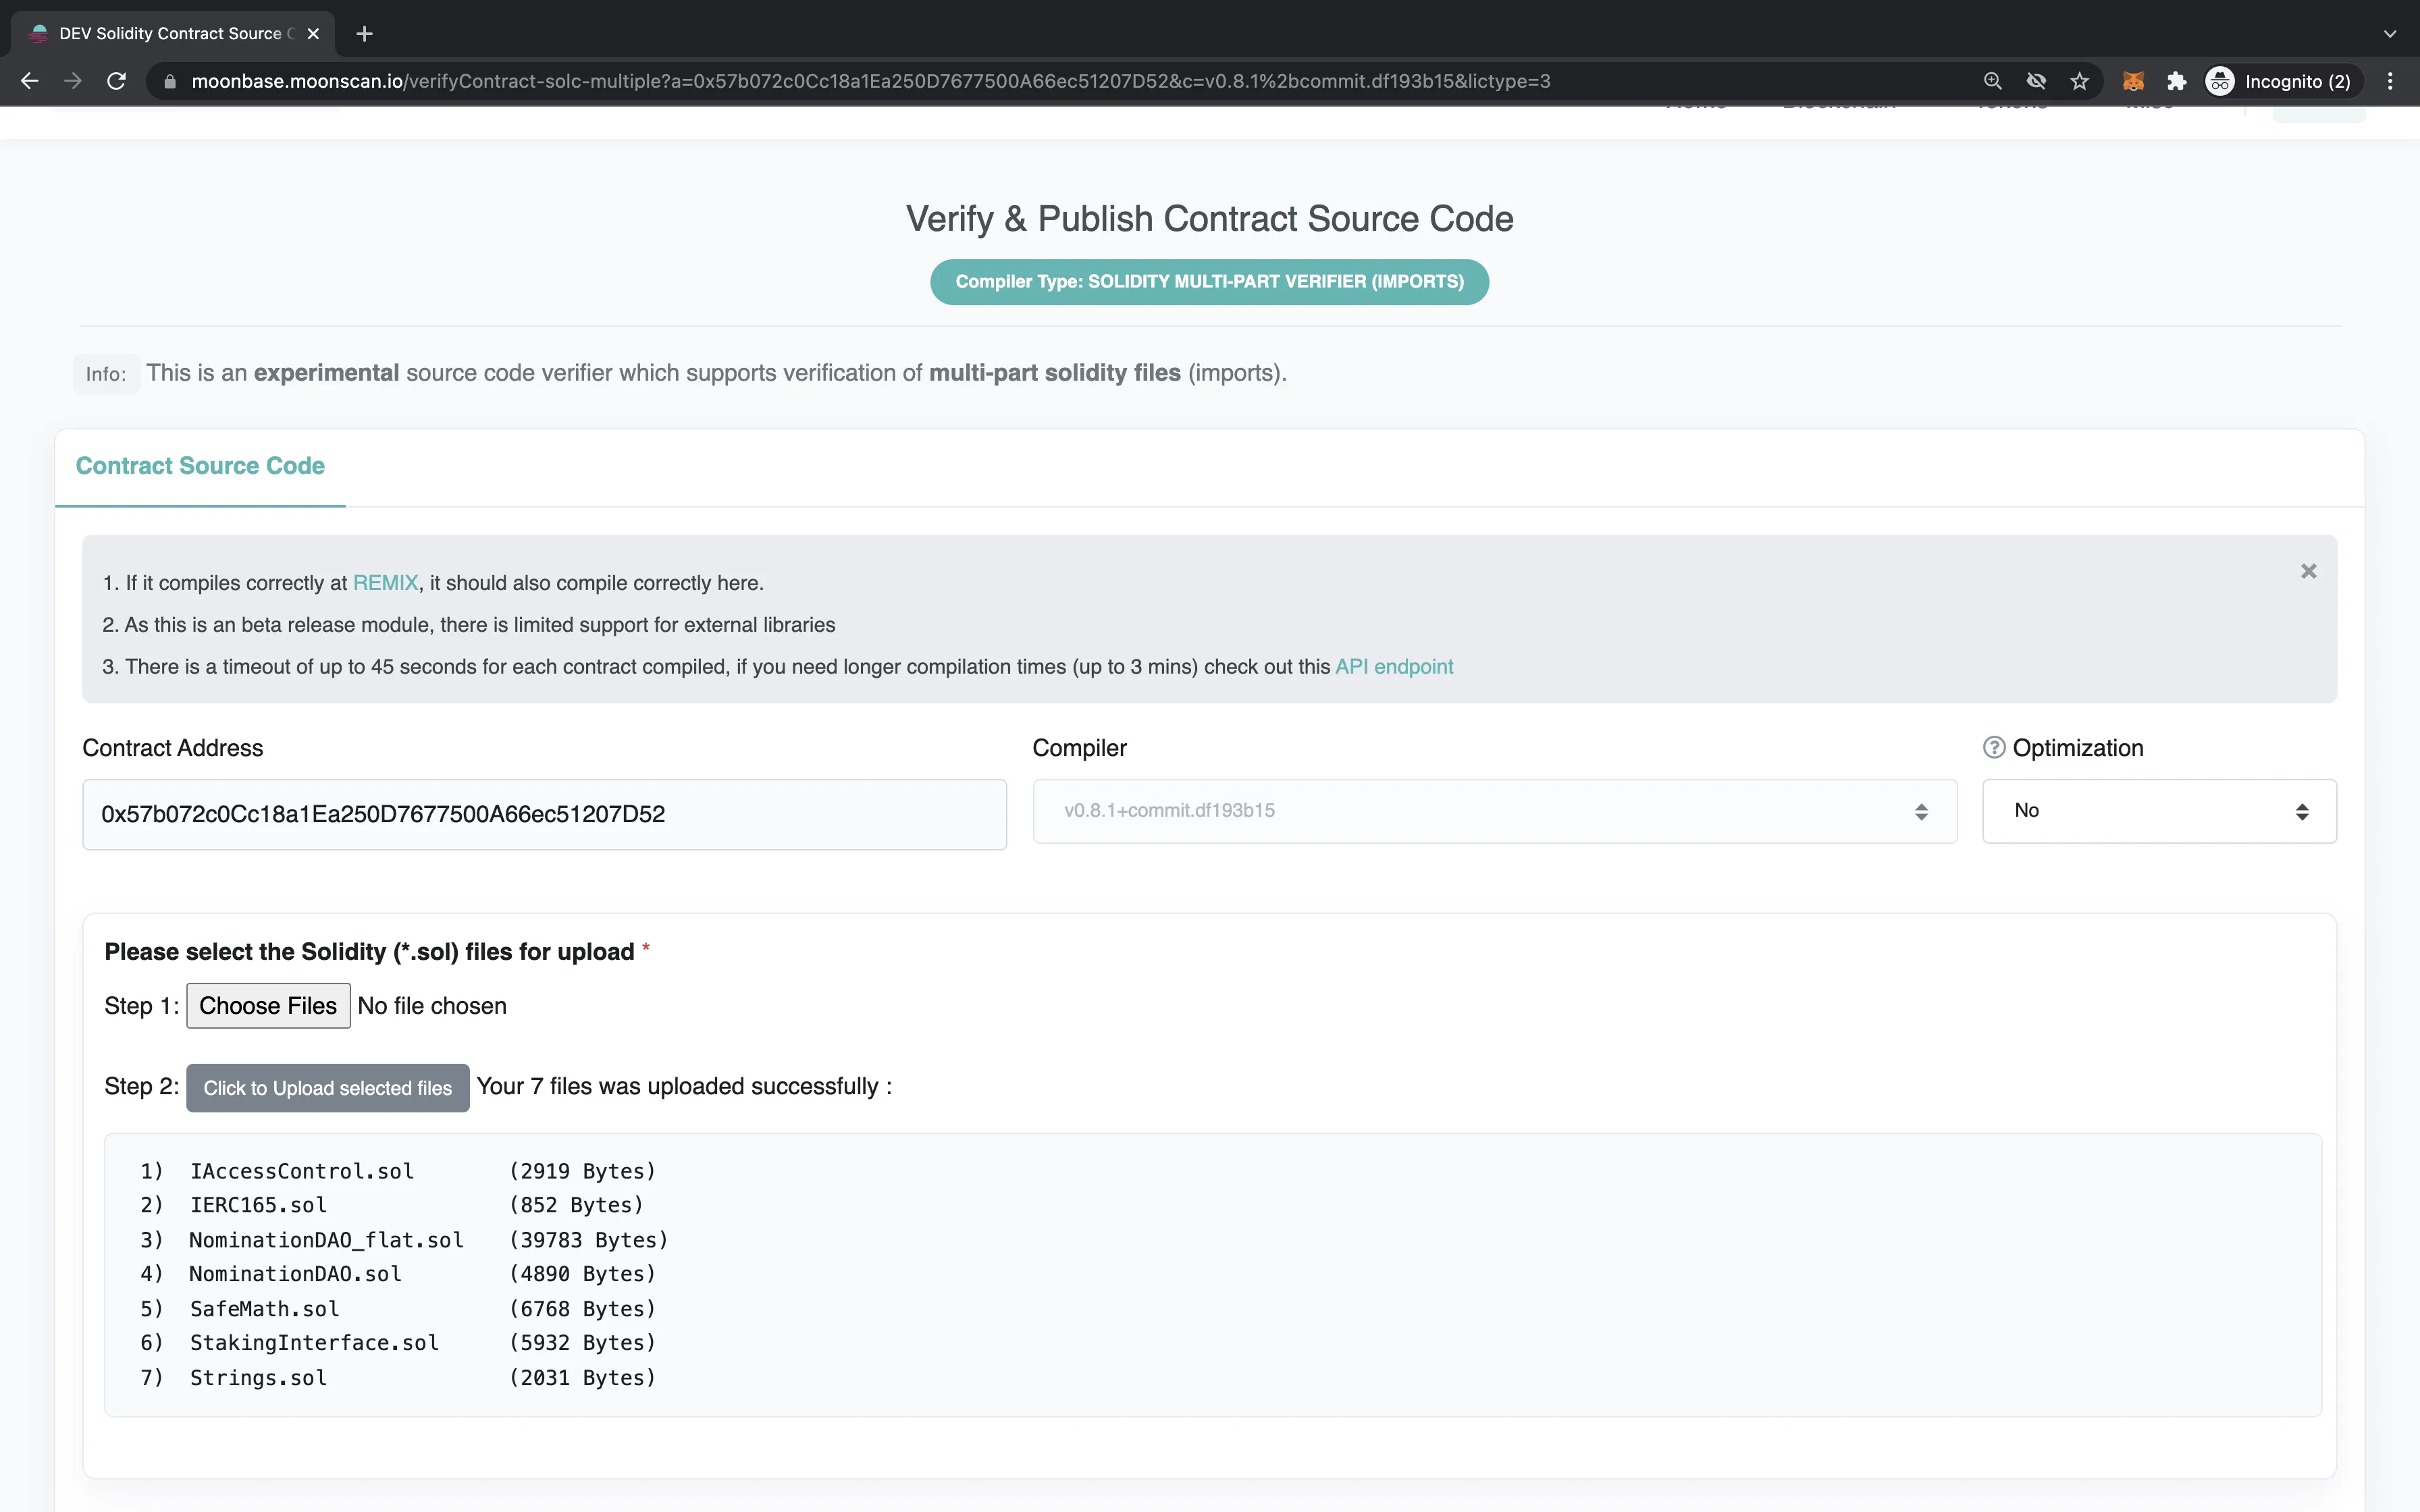
Aside from that, the process is largely the same as verifying single-file contracts on Moonscan.
| Created: December 31, 2021